Deliciously Low FODMAP

Inspire yourself with hundreds of delicious low FODMAP recipes, tips, and tools, and enjoy the abundance that is yours even when you have IBS.
Use the buttons and filters to find something specific or browse the complete collection for inspiration.
Discover a treasure trove of recipes with my FREE recipe club! Get new ideas delivered straight to your inbox every week.
Deliciously Low FODMAP is a trademark of IBS Game Changer, LLC
Filter to find Recipes and Tools
More Filtering Options
- All 827
- Appetizer 56
- BBQ 49
- Bowl 32
- Breakfast 69
- Cocktails 13
- Collection 1 58
- Collection 10 27
- Collection 11 30
- Collection 12 27
- Collection 13 31
- Collection 14 29
- Collection 15 31
- Collection 16 34
- Collection 17 31
- Collection 18 33
- Collection 19 36
- Collection 2 32
- Collection 20 33
- Collection 21 33
- Collection 22 40
- Collection 23 63
- Collection 24 46
- Collection 3 28
- Collection 4 29
- Collection 5 30
- Collection 6 32
- Collection 7 31
- Collection 8 31
- Collection 9 32
- Condiments 6
- Crock Pot 4
- Dessert 119
- Diabetes Game Changer Exception Protocol Contains Alcohol 11
- Diabetes Game Changer Exception Protocol Contains Flour 113
- Diabetes Game Changer Exception Protocol Contains Flour AND Sugar 79
- Diabetes Game Changer Exception Protocol Contains Sugar 52
- Diabetes Game Changer First Four Weeks 405
- Dinner 371
- Drink 8
- Easter 1
- Free Guide 17
- Gluten-free 686
- Gut Microbiome 2
- Guthealth 3
- Holidays 73
- IBS Triggers 4
- Keto Friendly 178
- Lactose-Free 184
- Low Carb 22
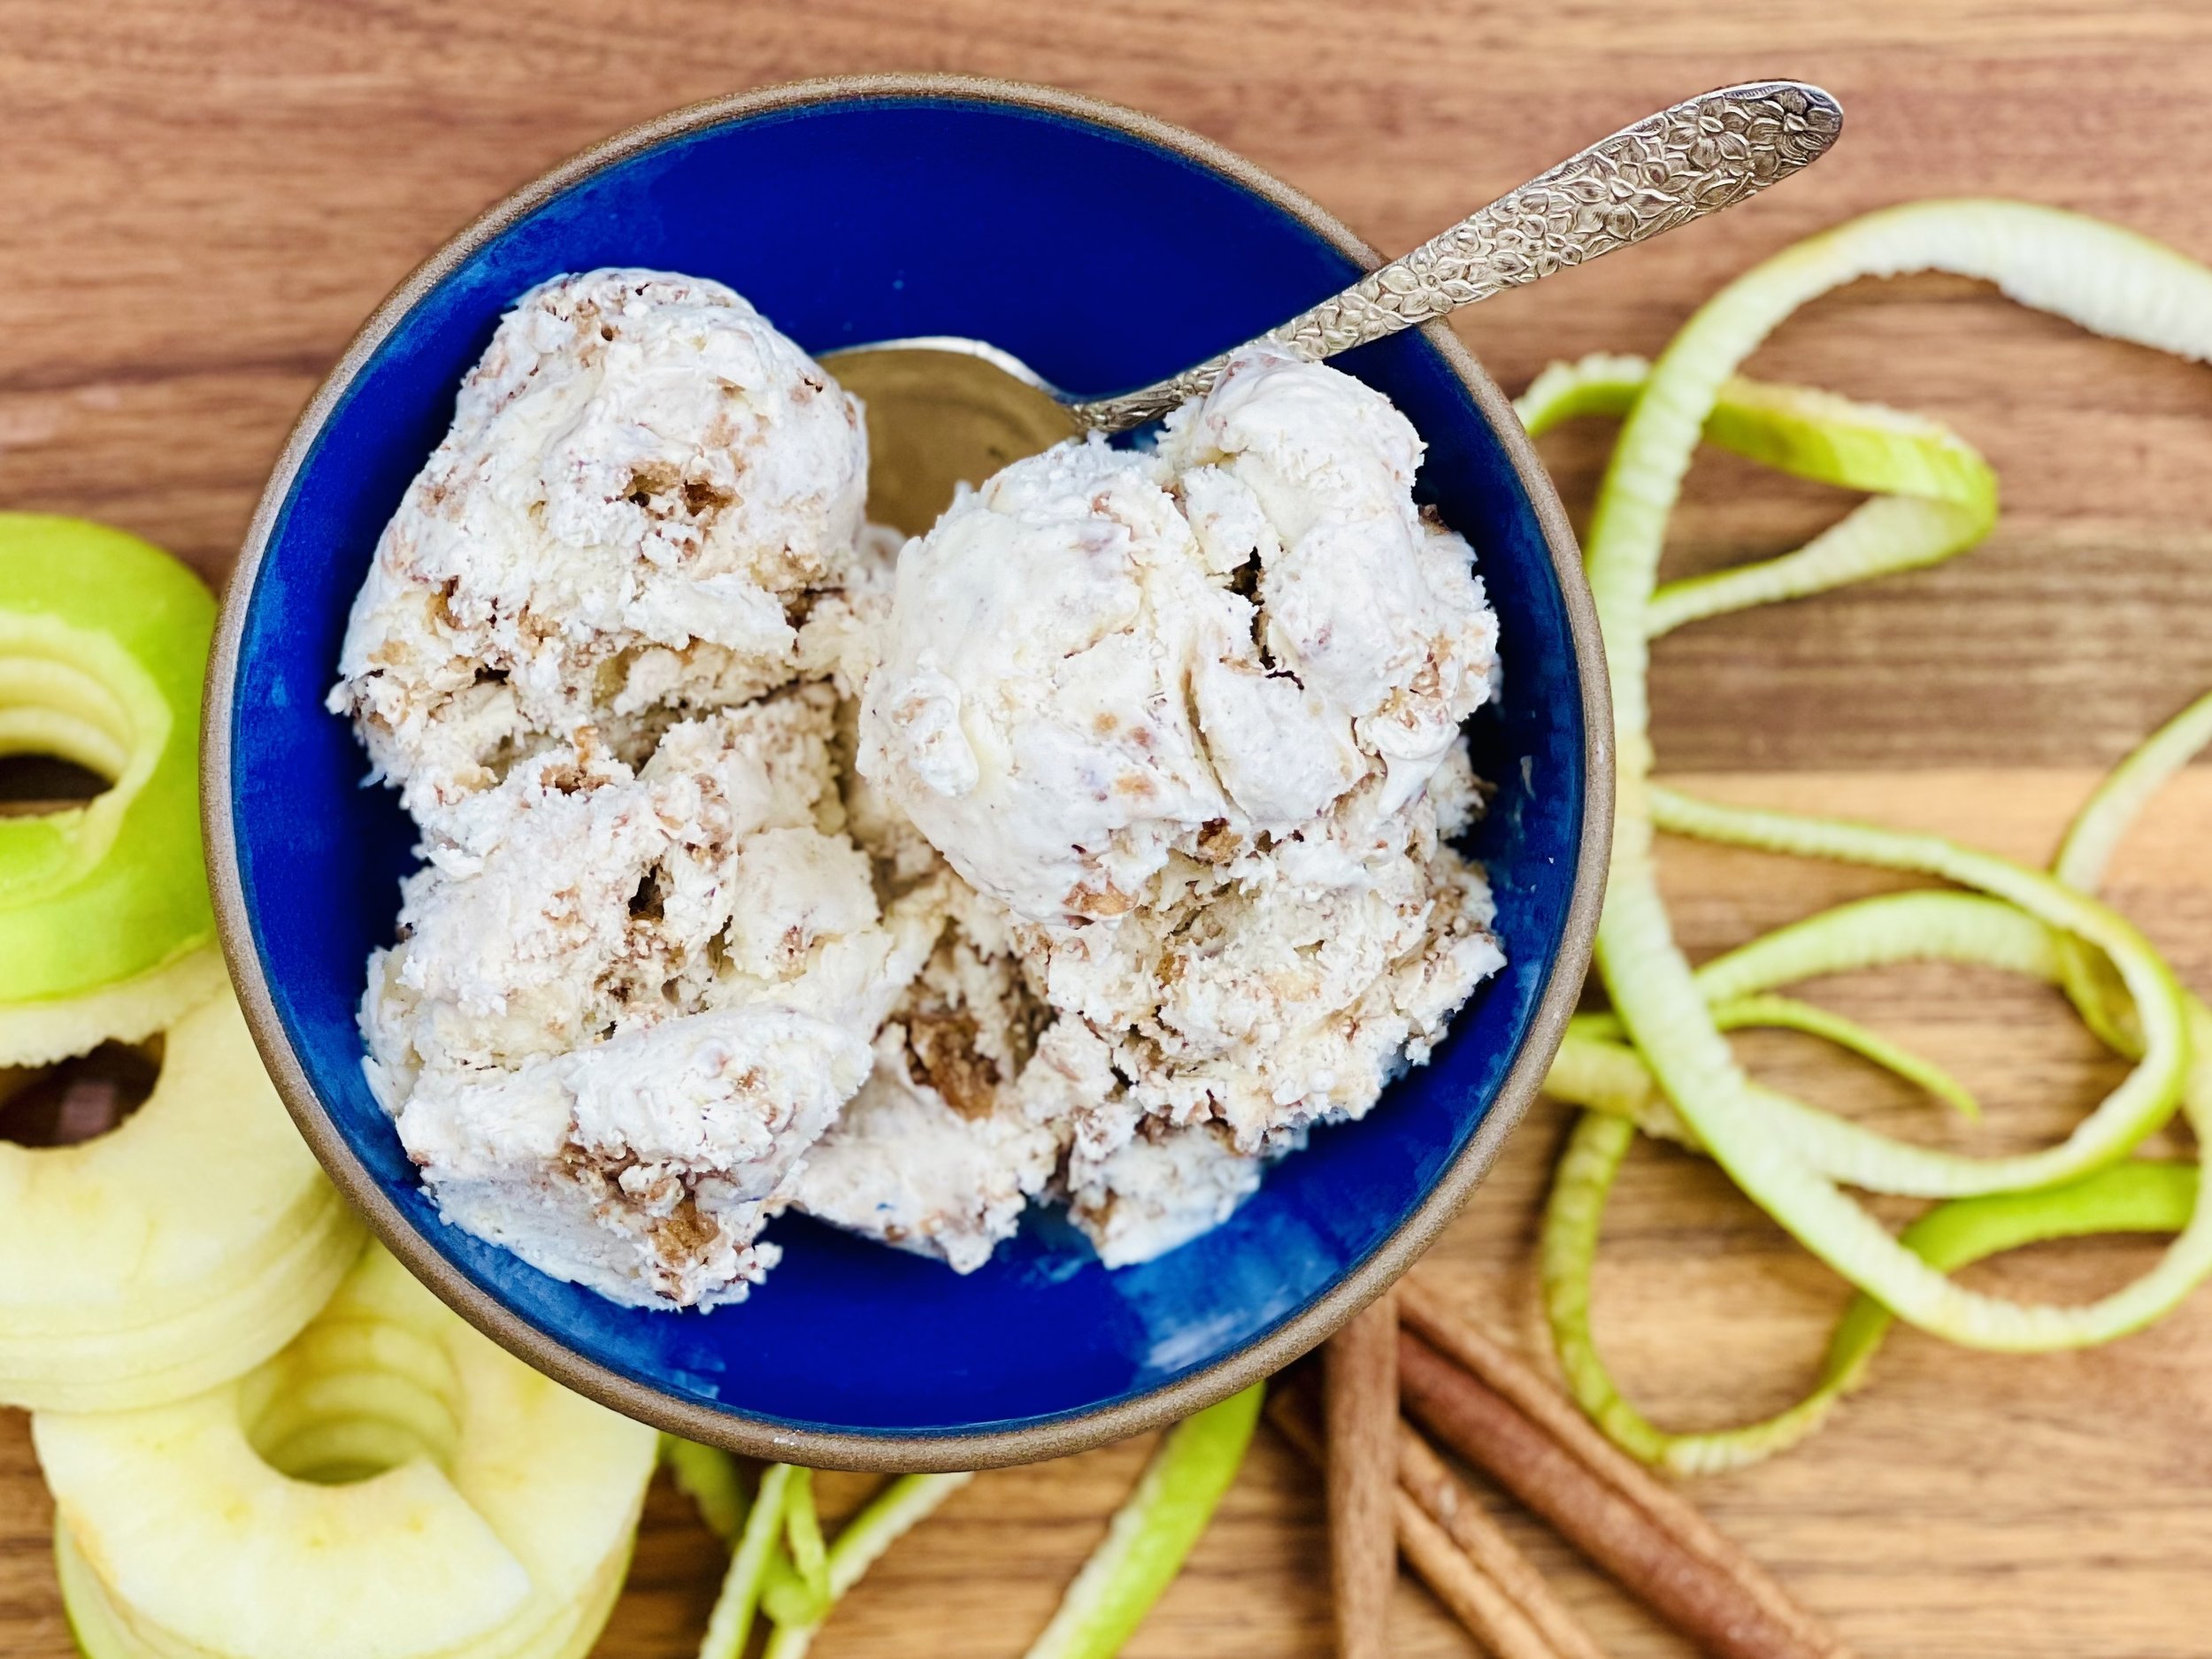
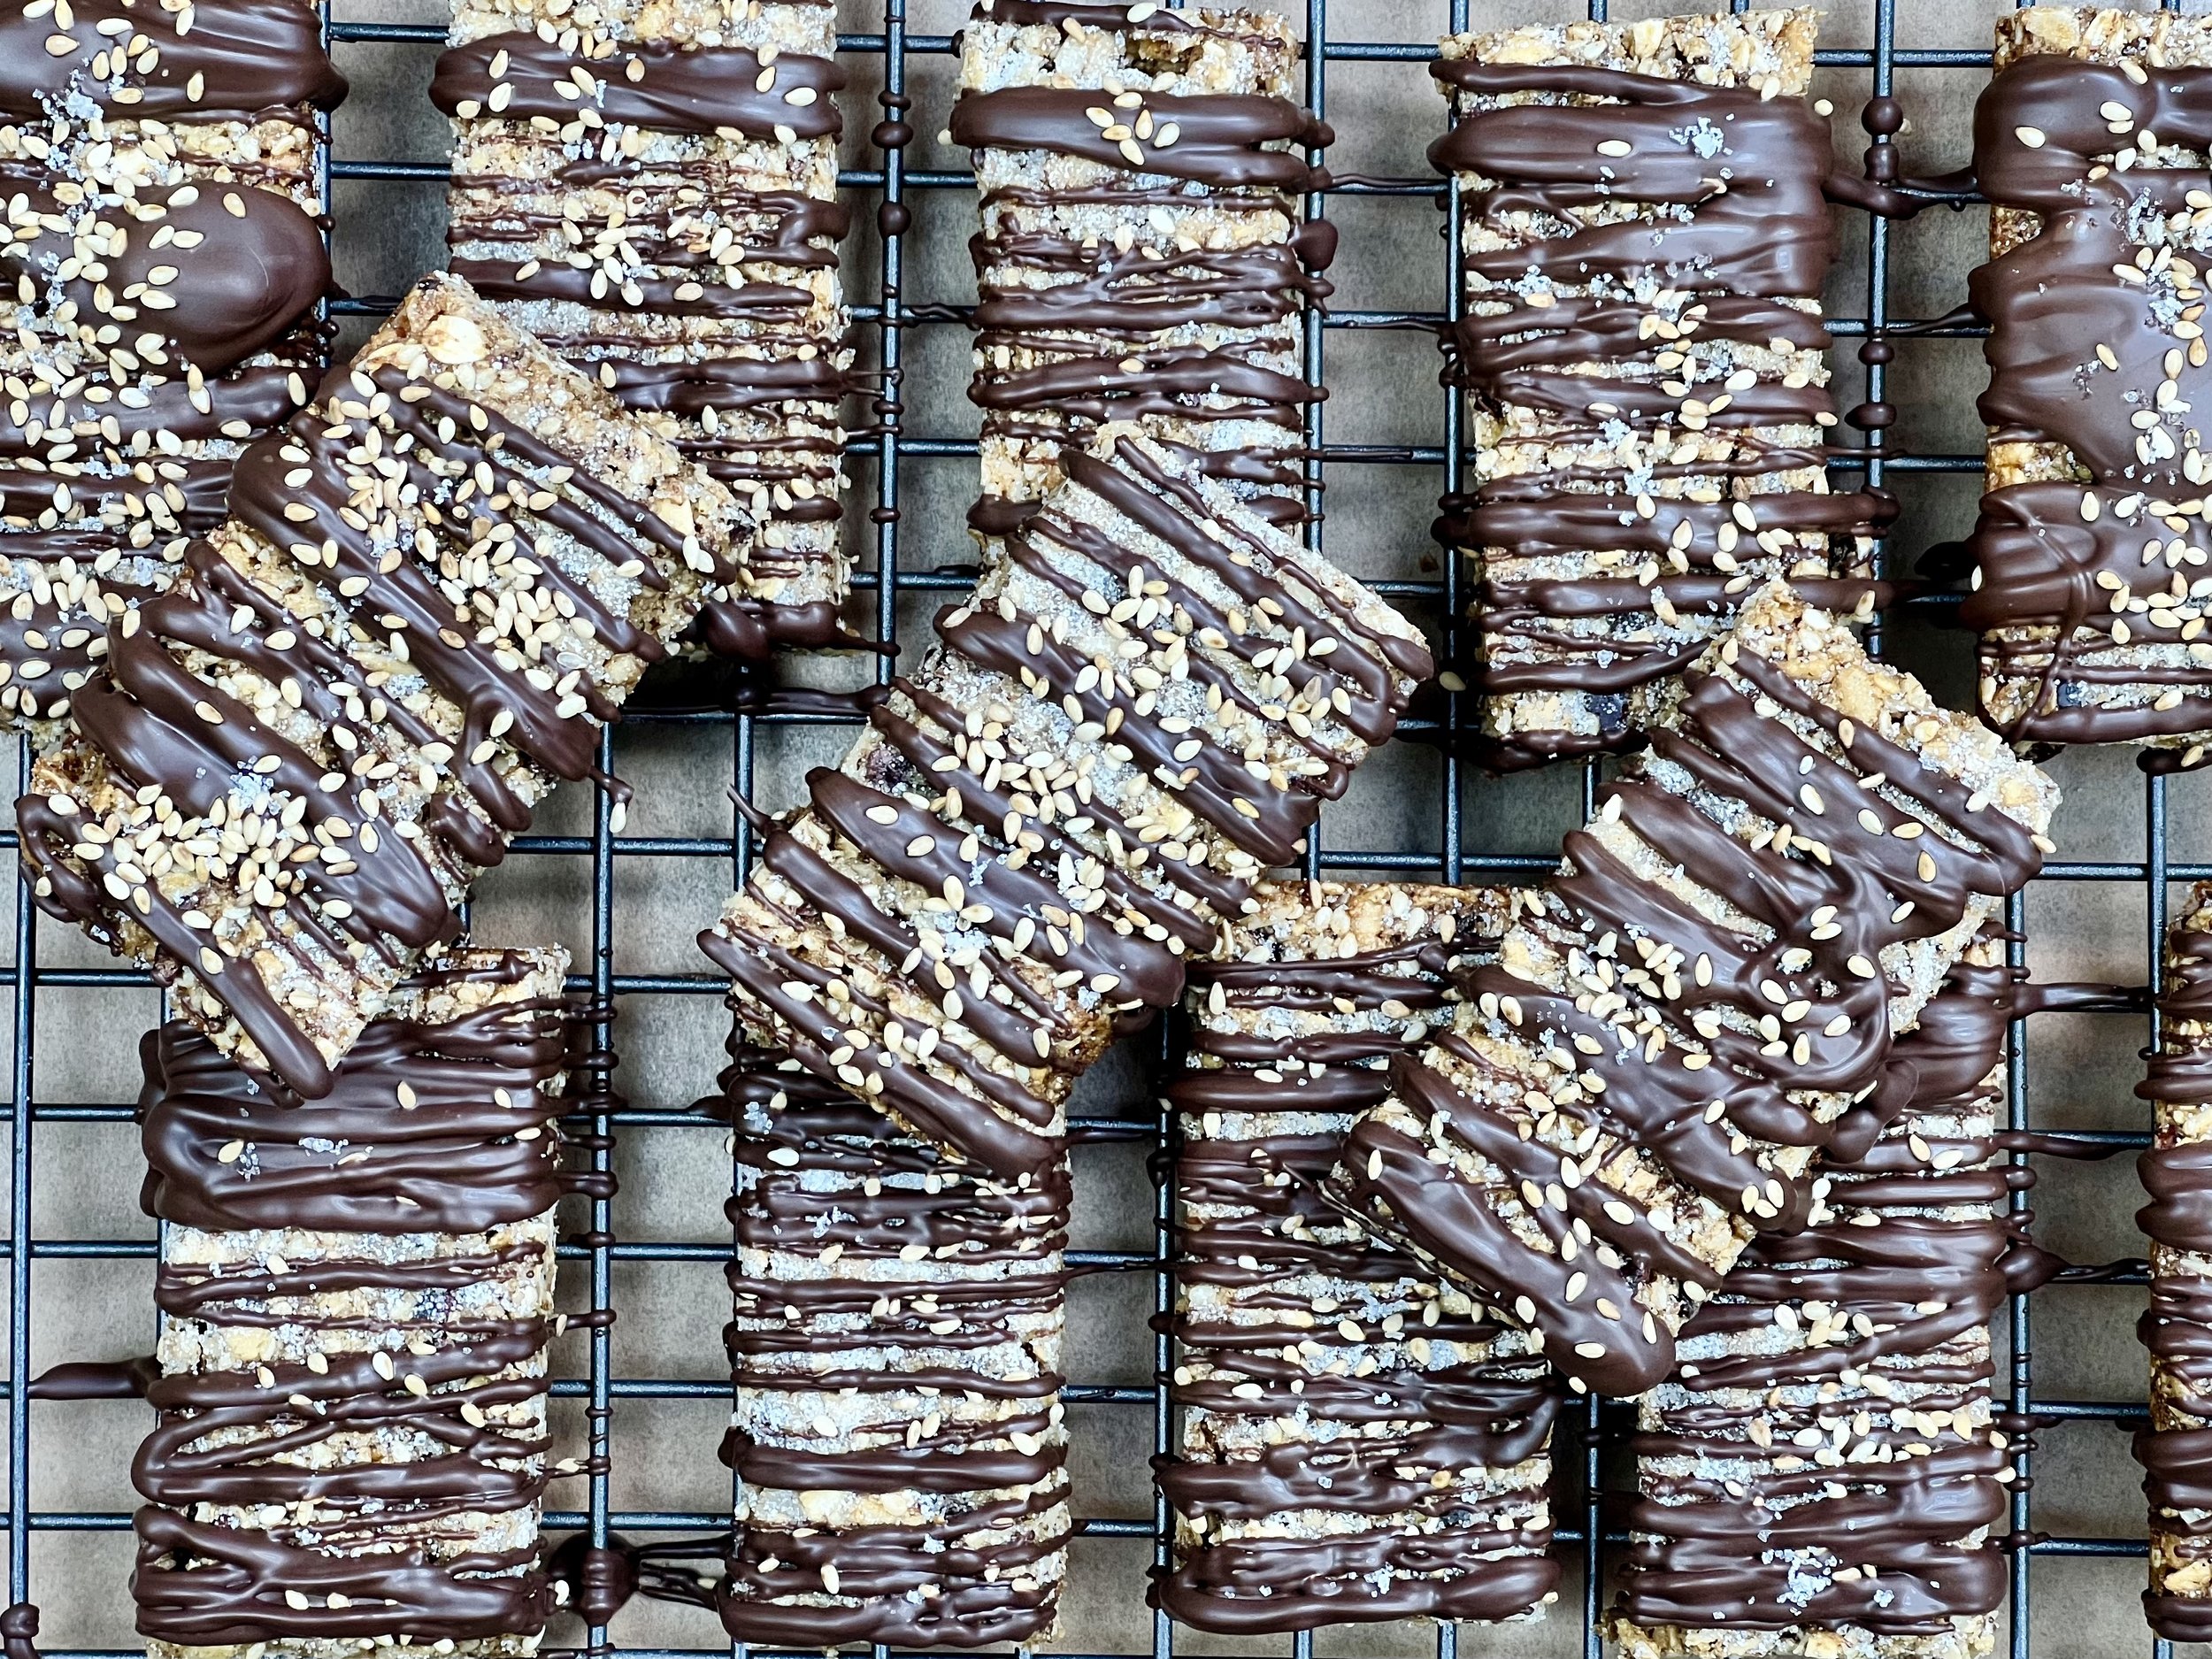
Chewy Oatmeal Chocolate Chip Cookies (Low FODMAP)
25 Minutes prep • 12 Minutes cook • Low FODMAP • Gluten-free • Makes 24
25 Minutes prep • 12 Minutes cook • Low FODMAP • Makes 24 • Ok to make ahead: Steps 1-8
Big, delicious, good old-fashioned, chewy oatmeal cookies are one of my favorites. The chocolate chips are the “icing on the cake” in this recipe. These cookies are simple to make and so good when they are hot out of the oven. They also store well — if you’re lucky enough to have a few left over. Keep them in an airtight container or freeze them and let them thaw at room temperature for about 20 minutes.

This is an exclusive recipe just for recipe club members.
In addition to the two free recipes I create each week I am creating and delivering one very special recipe just for my recipe club members. If you’re not yet a member, I encourage you to join! Membership in the club includes access to the complete archive of recipes with filters so it can become your virtual low FODMAP cookbook plus, I am creating and delivering one special NEW recipe every week ONLY for recipe club members.
Your membership in the club helps me continue creating new, delicious, easy-to-make, low FODMAP recipes just for you.
As always, all recipes will emphasize simple ingredients, easy preparation, and delicious low FODMAP results. Recipes will be for everything from main courses, salads, soups, side dishes, appetizers, desserts, sauces, breakfast and lunch, and even mocktails and cocktails. Everything you need to prepare fantastic low FODMAP meals everyone will love.
Join the club. Let’s keep making delicious Low FODMAP meals together.
More Deliciously Low FODMAP™ dessert recipes


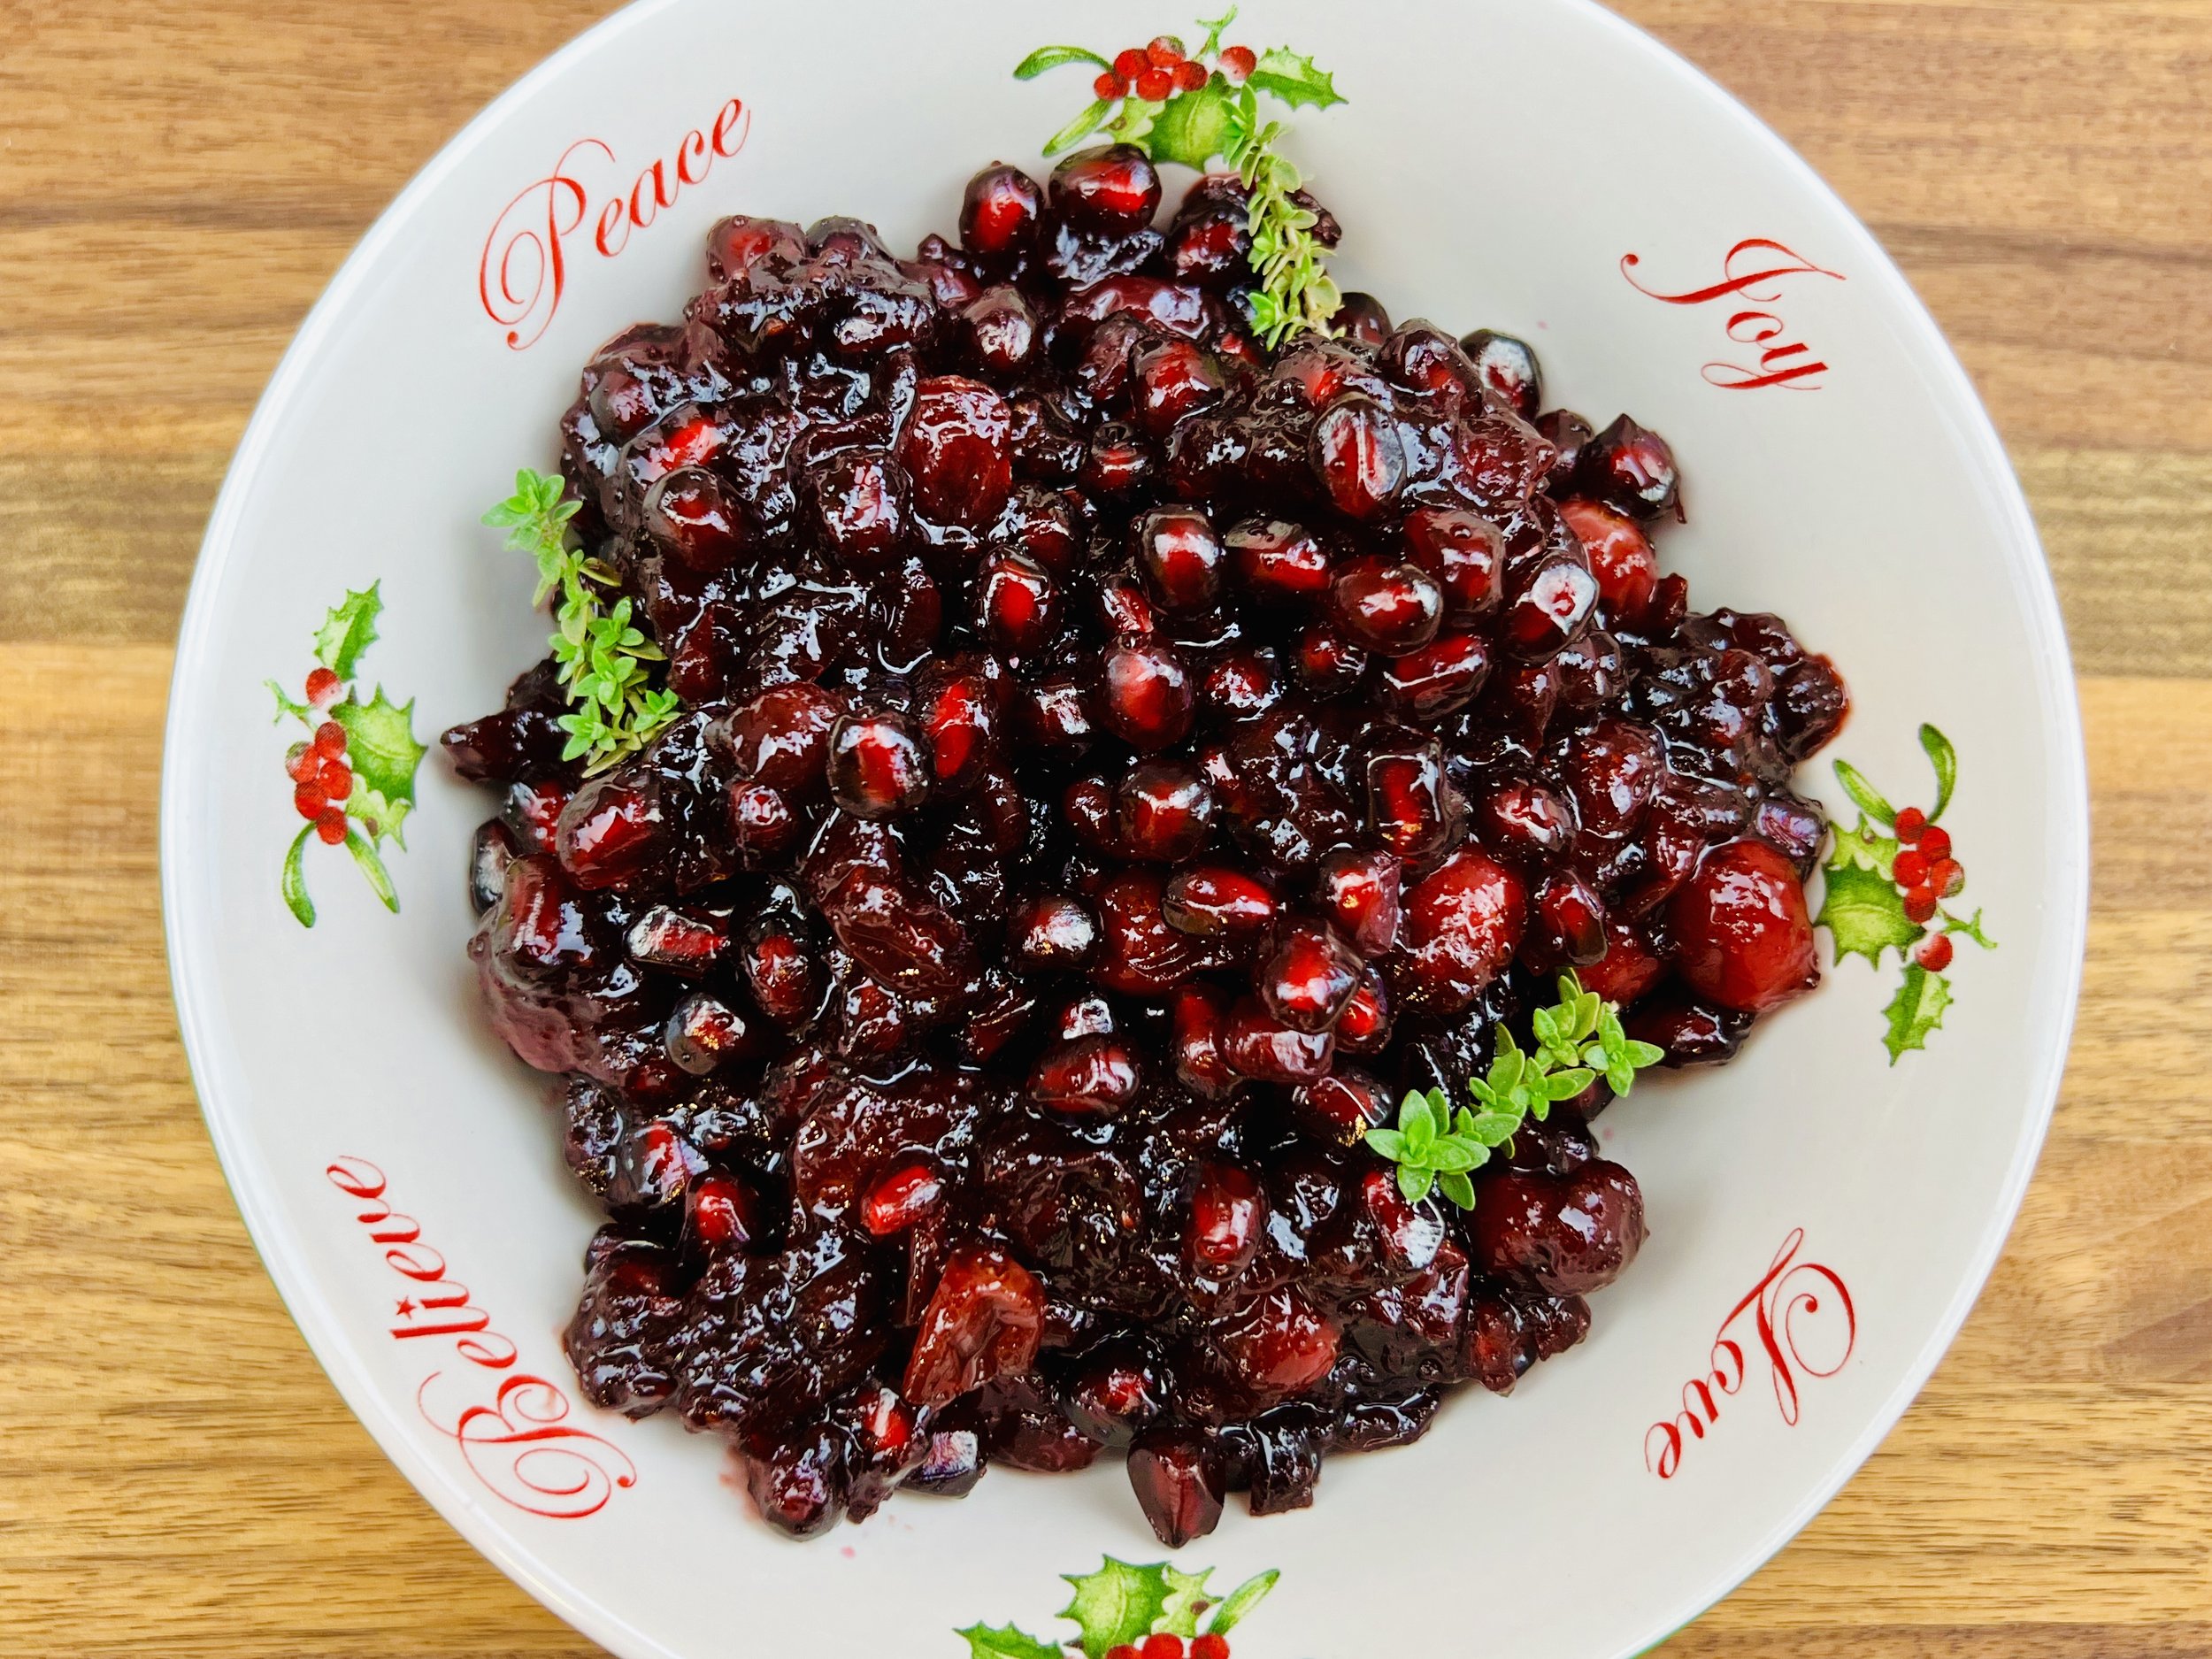
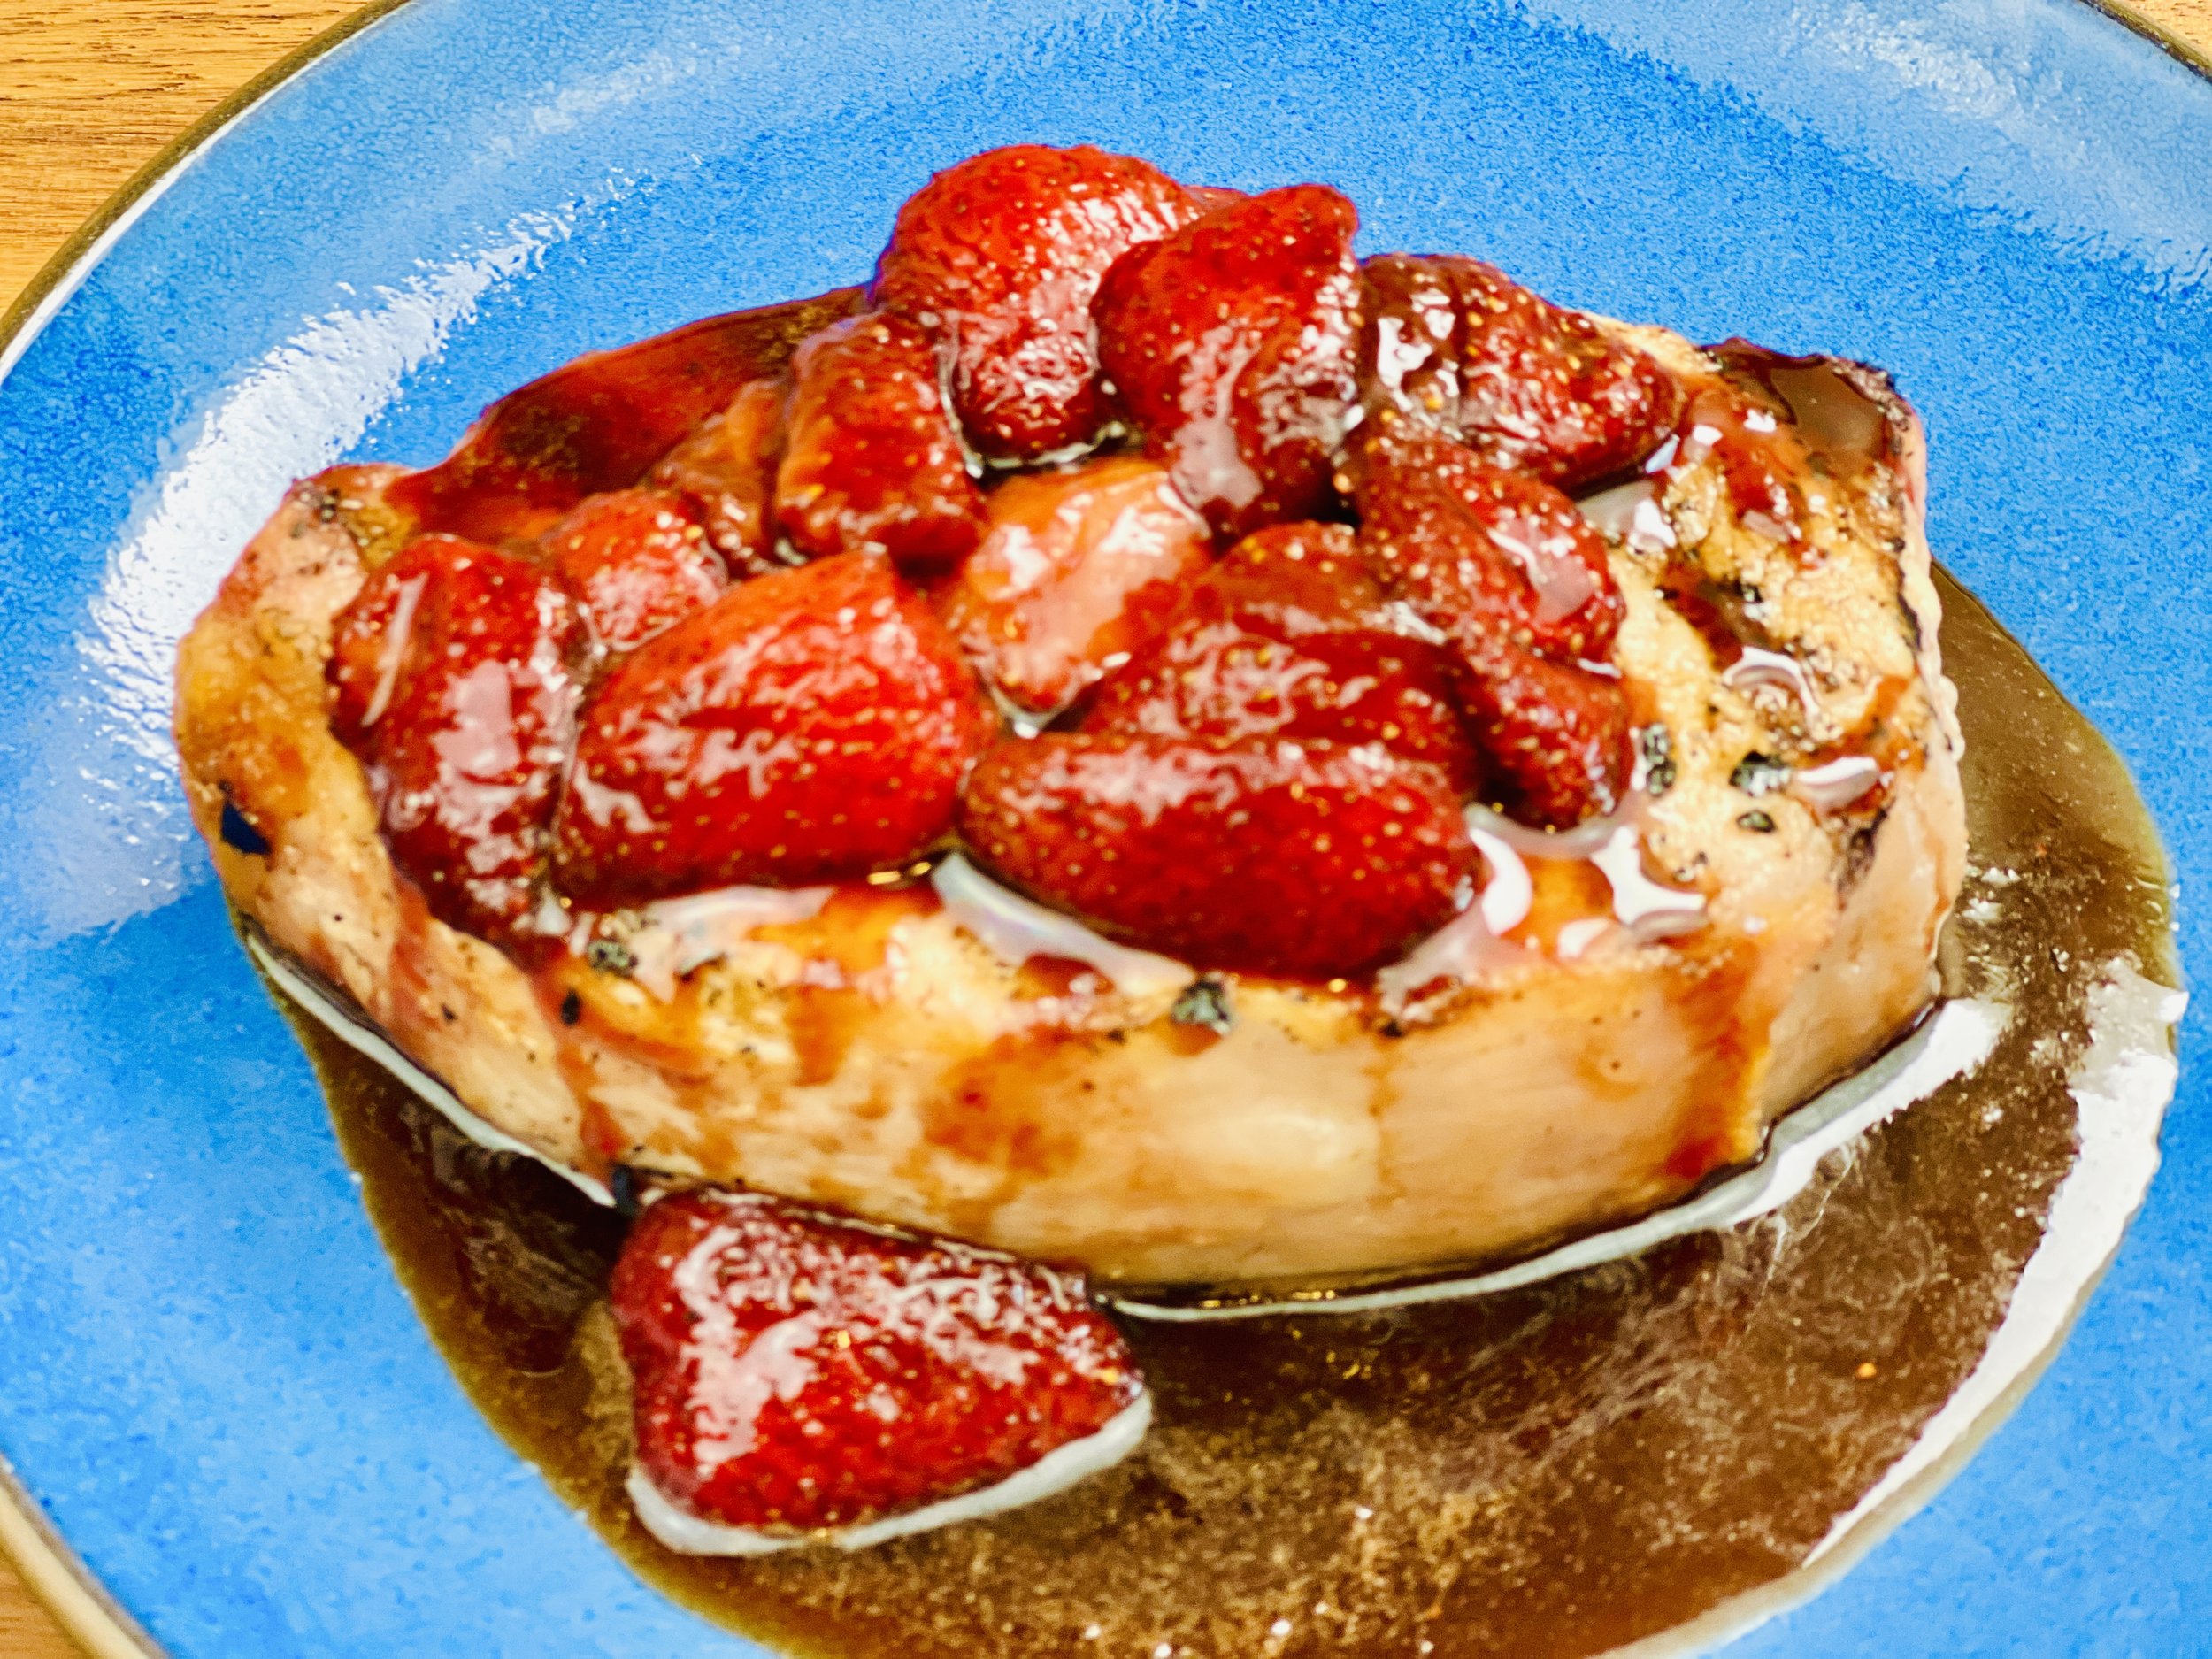
Pork Chops with Strawberry Balsamic Reduction (Low FODMAP)
10 Minutes prep • 15 Minutes cook • Low FODMAP • Gluten-Free • Lactose-free
10 Minutes prep • 15 Minutes cook • Low FODMAP • Gluten-Free • Lactose-free • Serves 4 • Ok to make ahead: Steps 1-2
Pork is wonderful when it’s balanced with sweet fruit, most commonly apples. This recipe combines sweet strawberries and rich balsamic vinegar which turns out to be an excellent combination with pork. If you cook the chops on the stove, then you retain the juice from cooking the meat to incorporate into the sauce—which is delicious! But you can also grill the chops and make the sauce separately. If you have any leftovers, they make a wonderful addition to a salad. Just chop the chilled meat and strawberries and toss them in!
Ingredients: Pork Chops
Four (8-ounce) boneless or bone-in pork chops, about 1 inch thick
1 tablespoon extra-virgin olive oil
1 teaspoon Kosher salt
1/2 teaspoon black pepper
Ingredients: Strawberry Balsamic Reduction
2 cups (about 20 strawberries), hulled and roughly chopped
1/4 cup balsamic vinegar
2 teaspoons firmly packed light or dark brown sugar
1/4 teaspoon freshly ground black pepper
Directions
(1) Prepare the meat: This step is optional but results in more flavorful and tender meat. Remove the pork from the package, and put it in one layer on a rimmed plate or baking dish. Season both sides of each piece lightly with Kosher salt (about 1/4 teaspoon per side). Cover the dish with plastic wrap and refrigerate until ready to use, ideally about 4 hours before cooking or overnight.
(2) Prepare: Season the pork chops on both sides with pepper and salt if you didn’t pre-salt the meat. Chop the strawberries.
(3) Cook the chops: You may grill the chops, or cook them on the stove. For the stove, put a large skillet over medium-high heat. When the pan is hot, add the olive oil. When the oil is heated, add the pork chops in a single layer and cook for 4 minutes. Flip the chops and continue cooking until the second side is browned and the pork is cooked to an internal temperature of 145 degrees F on an instant-read thermometer, about 6 minutes more. (Keep an eye on the temperature as the cooking time will vary depending on the thickness of the chops.) Transfer the chops to a warmed serving plate and cover to keep warm.
For the grill, heat the grill to medium-high. Put the chops directly on the grill. Turn after 4 minutes. Watch the temperature of the meat and remove the chops from the grill as soon as the internal temperature reaches 145 degrees F. Transfer the chops to a warmed serving plate and cover to keep warm.
(3) Make the strawberry balsamic reduction: Return the skillet to medium heat and add the strawberries, balsamic vinegar, and brown sugar. Cook, stirring frequently until the mixture has thickened, 6 to 8 minutes more. Taste and season well with black pepper. If you cooked the chops on the grill, just use a saucepan or frying pan to make the sauce. You won’t have the juices from cooking the meat, but it will still be delicious!
(4) Plate and serve: Pour the strawberry sauce over the chops and serve warm alongside one of my delicious salads.
Eat and enjoy every bite because you can!
Recipe note: I use Diamond Crystal Kosher salt in all my recipes because it has a wonderful flat and crisp flake that tastes delicious. It is also the least salty salt available so you can use it more liberally as a seasoning than you can table salt or sea salt. If you use another type of salt, you may need to reduce the amount so it is not over-salted.
Have a question you’d like to have answered? Email me at hello@ibsgamechanger.com
Link note: This post may contain affiliate links for you to easily purchase items that are linked. I may earn a small commission from qualifying purchases but none of this costs you a thing so feel free to use the links! In addition, for some items, I have provided a special discount code for IBS Game Changers so be sure to use the code when you purchase an item to get the discount that has been arranged just for you.
More Deliciously Low FODMAP™ main course recipes
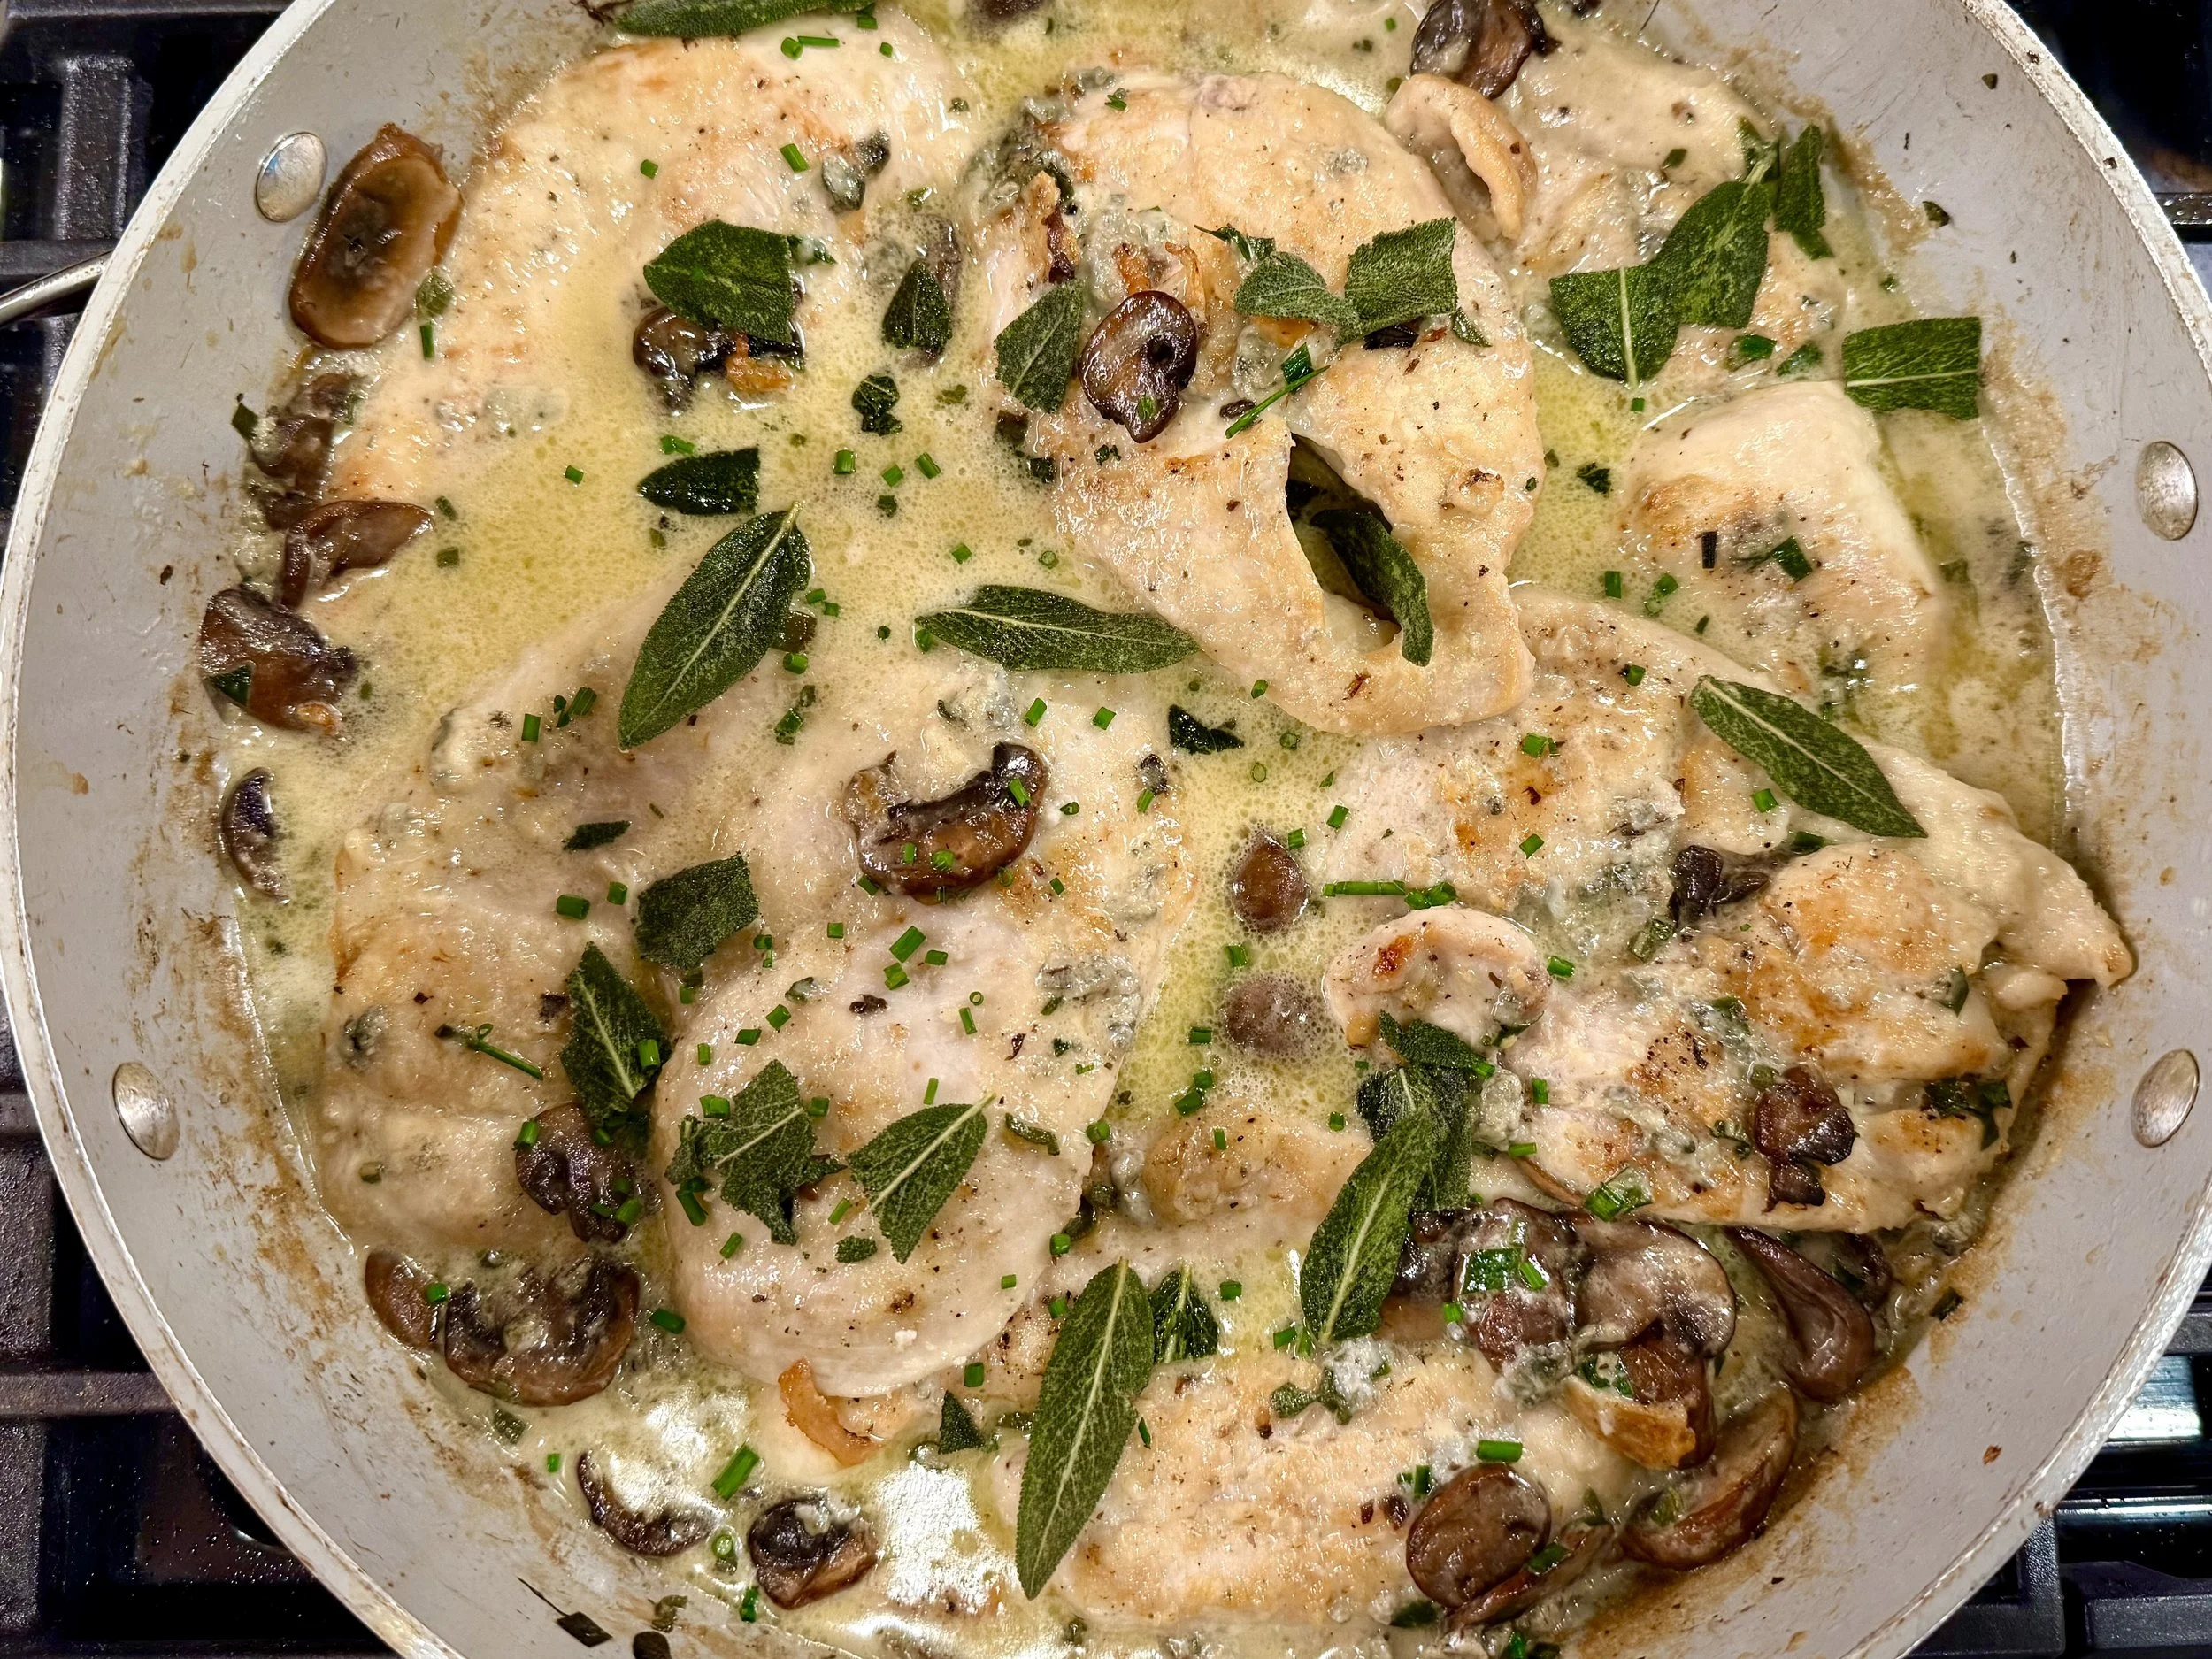
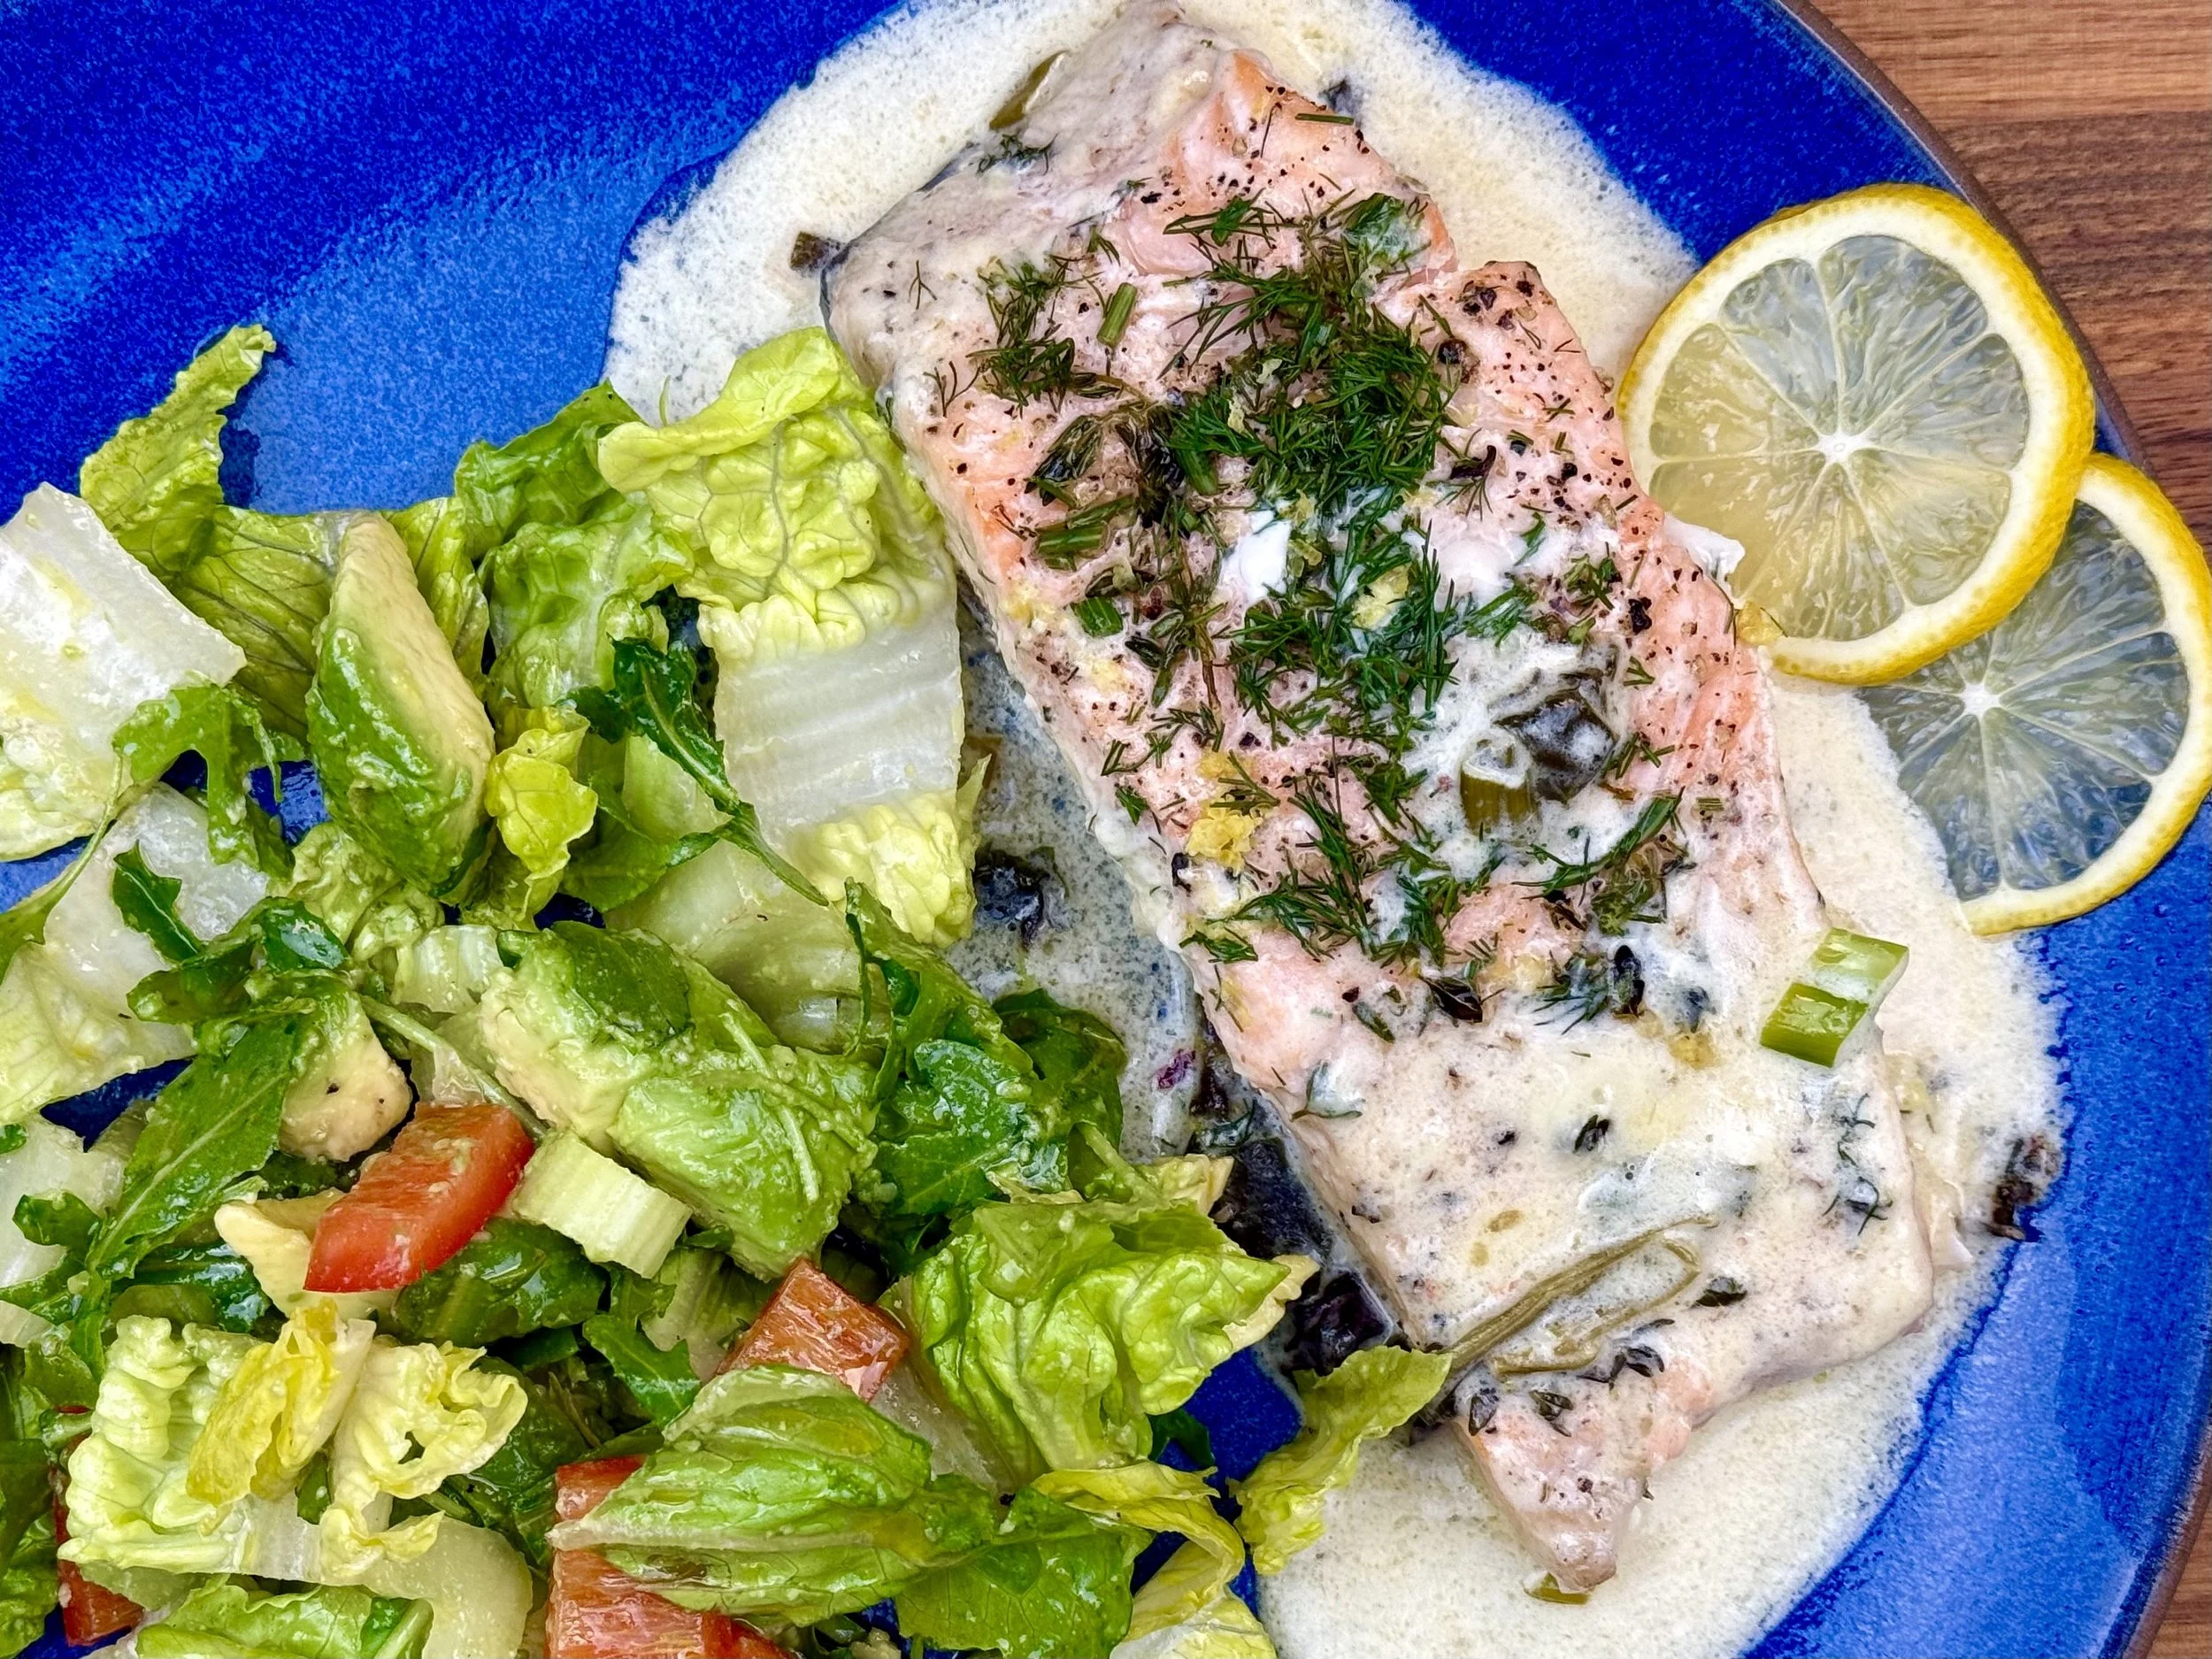


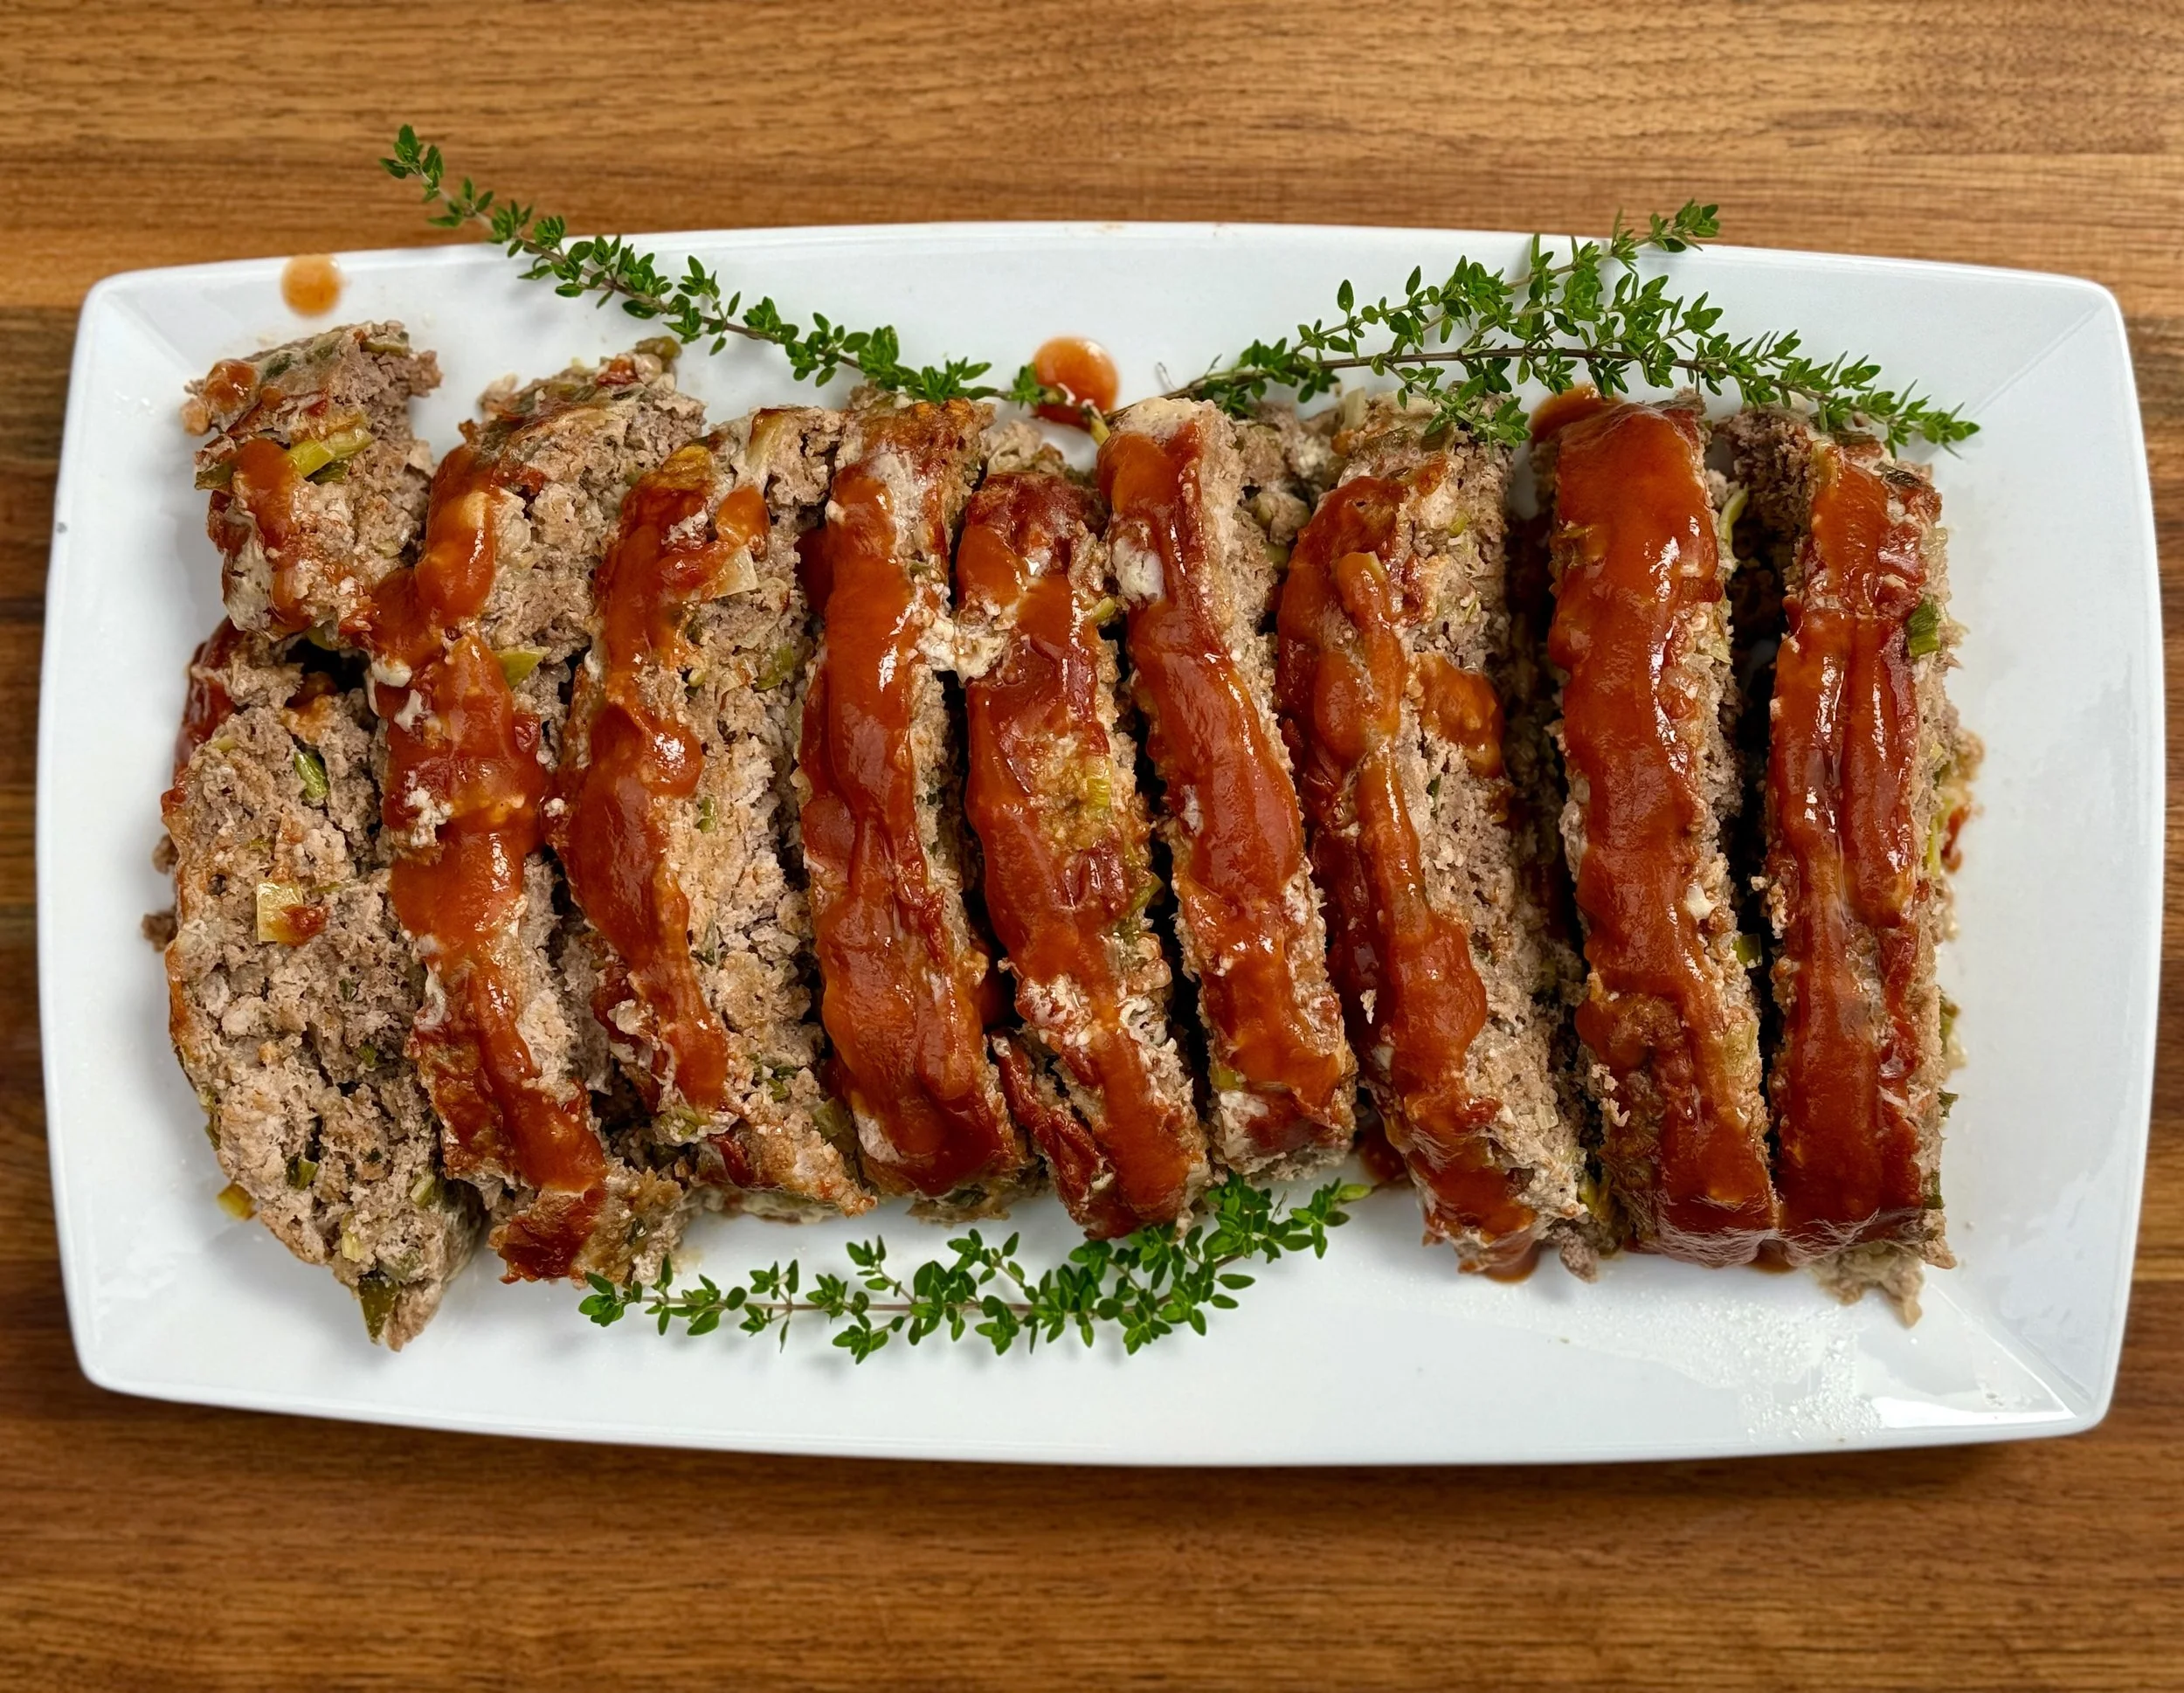


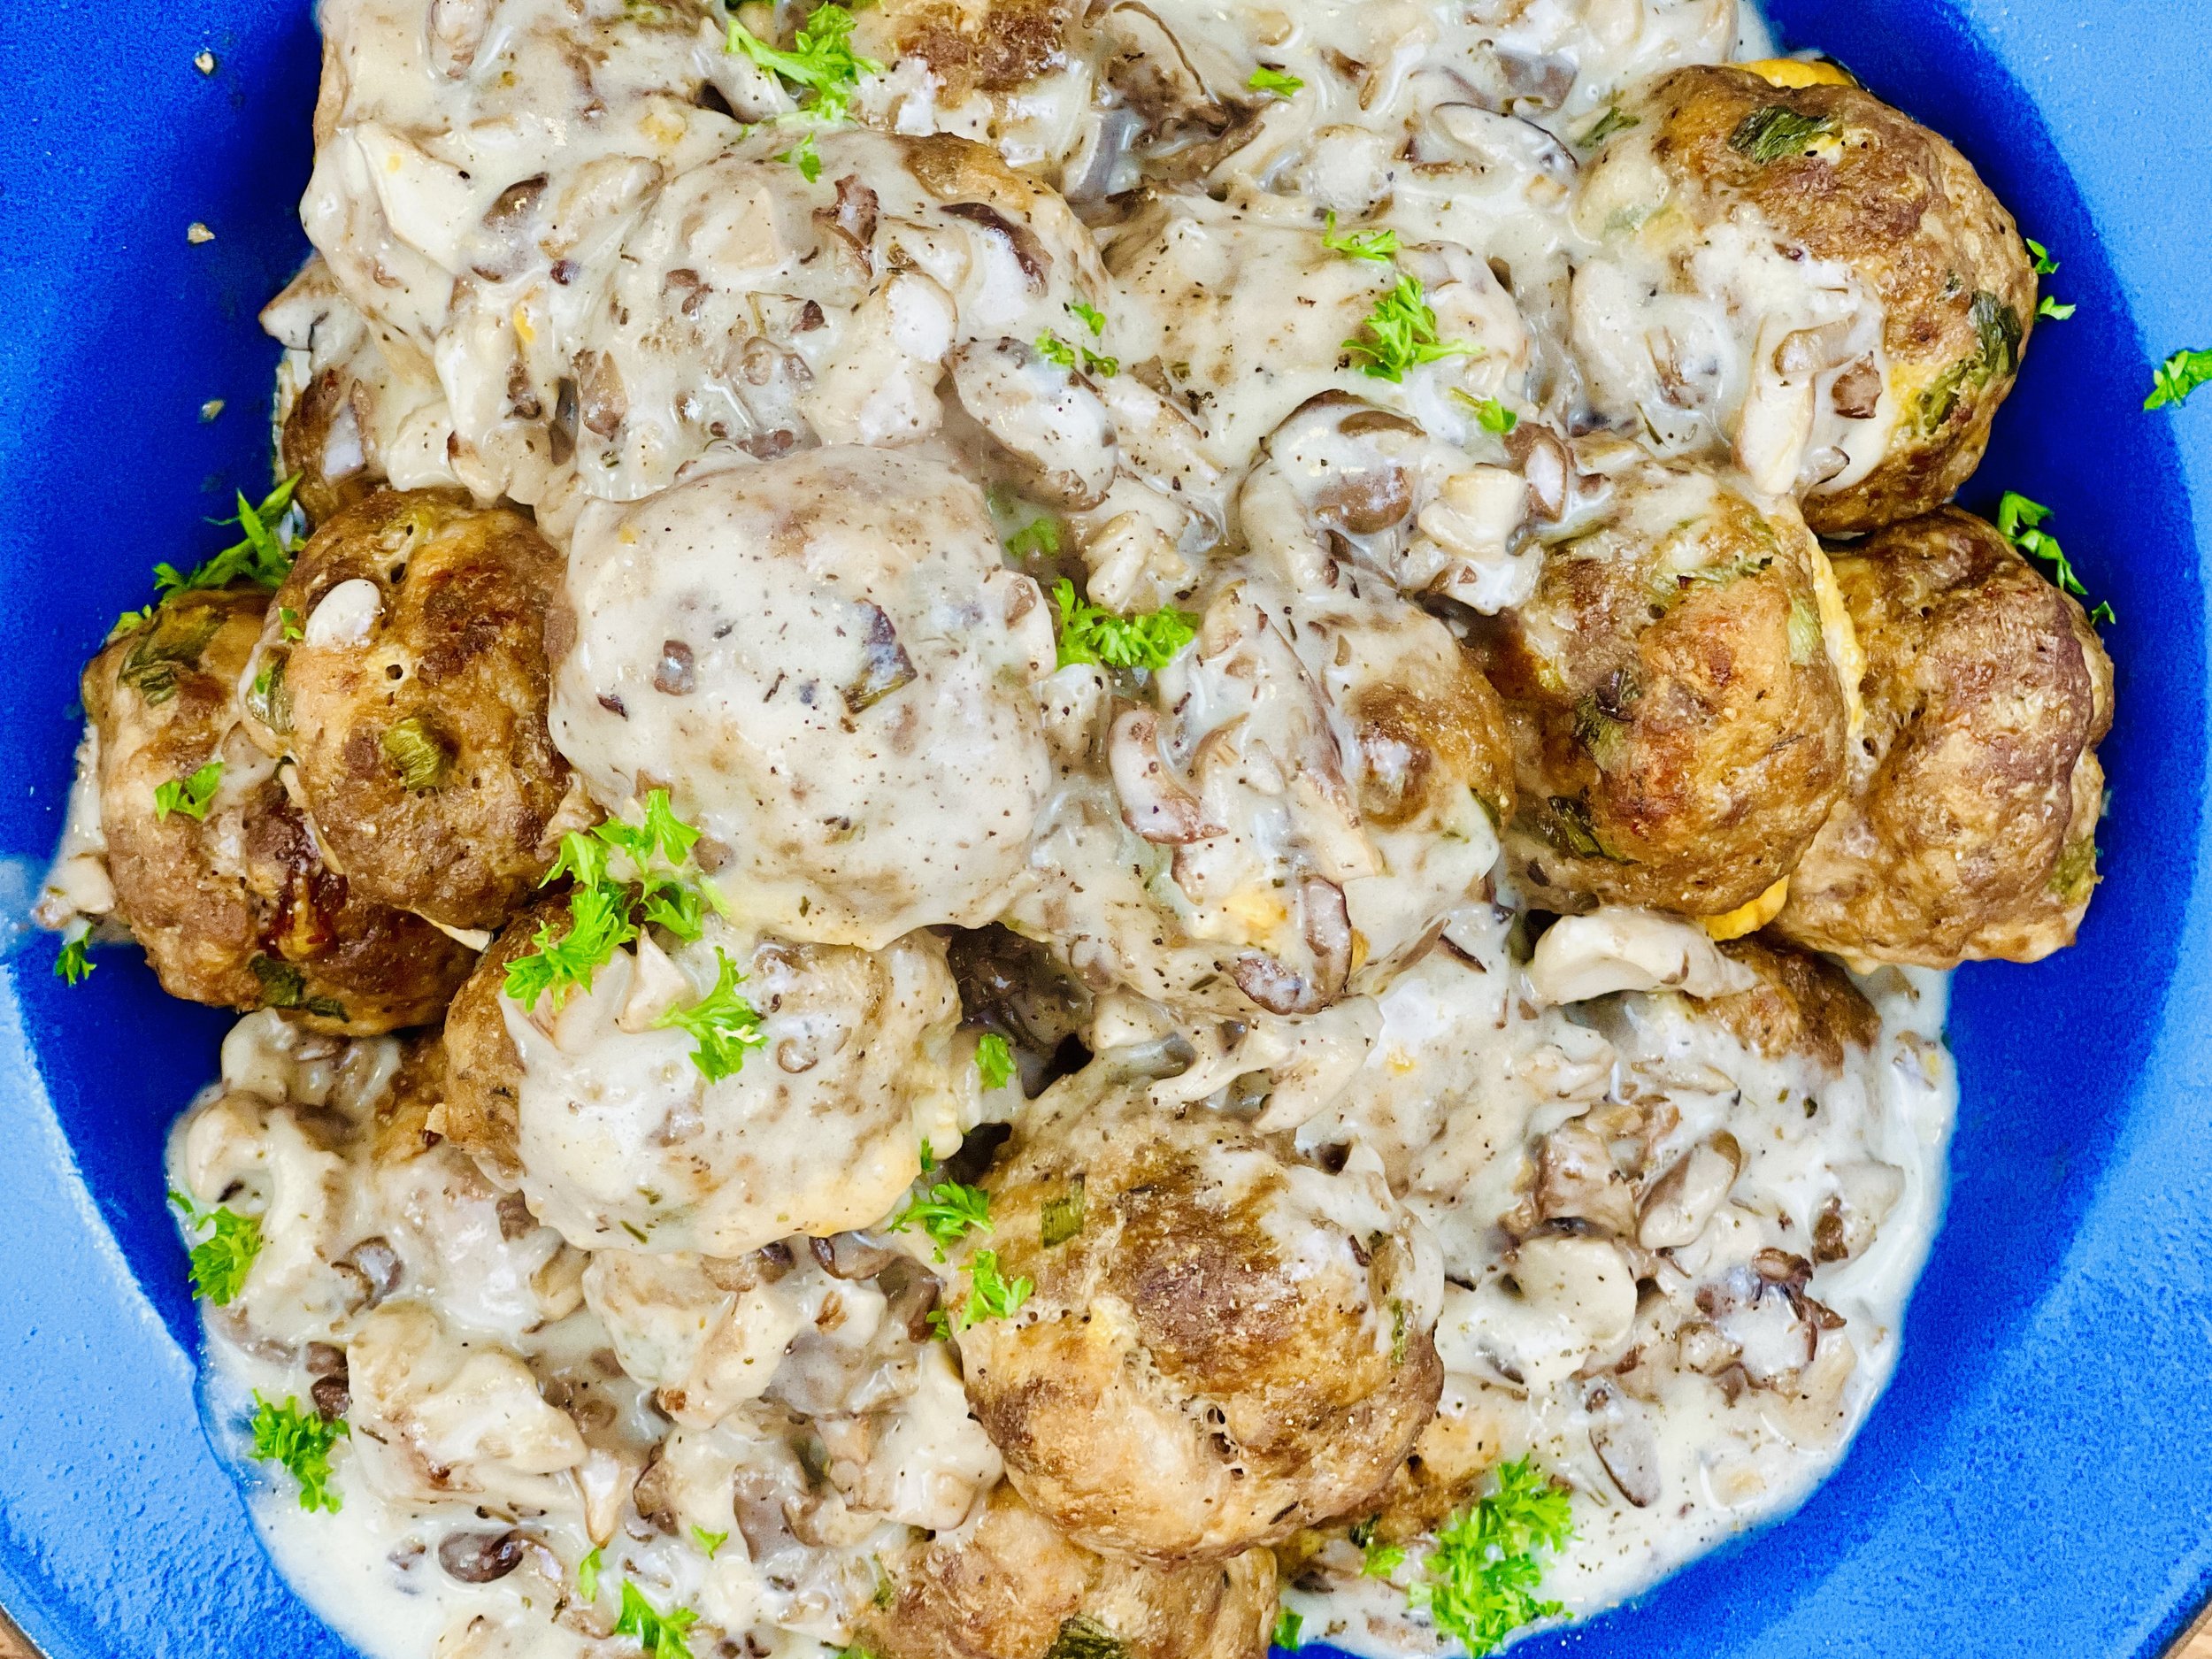
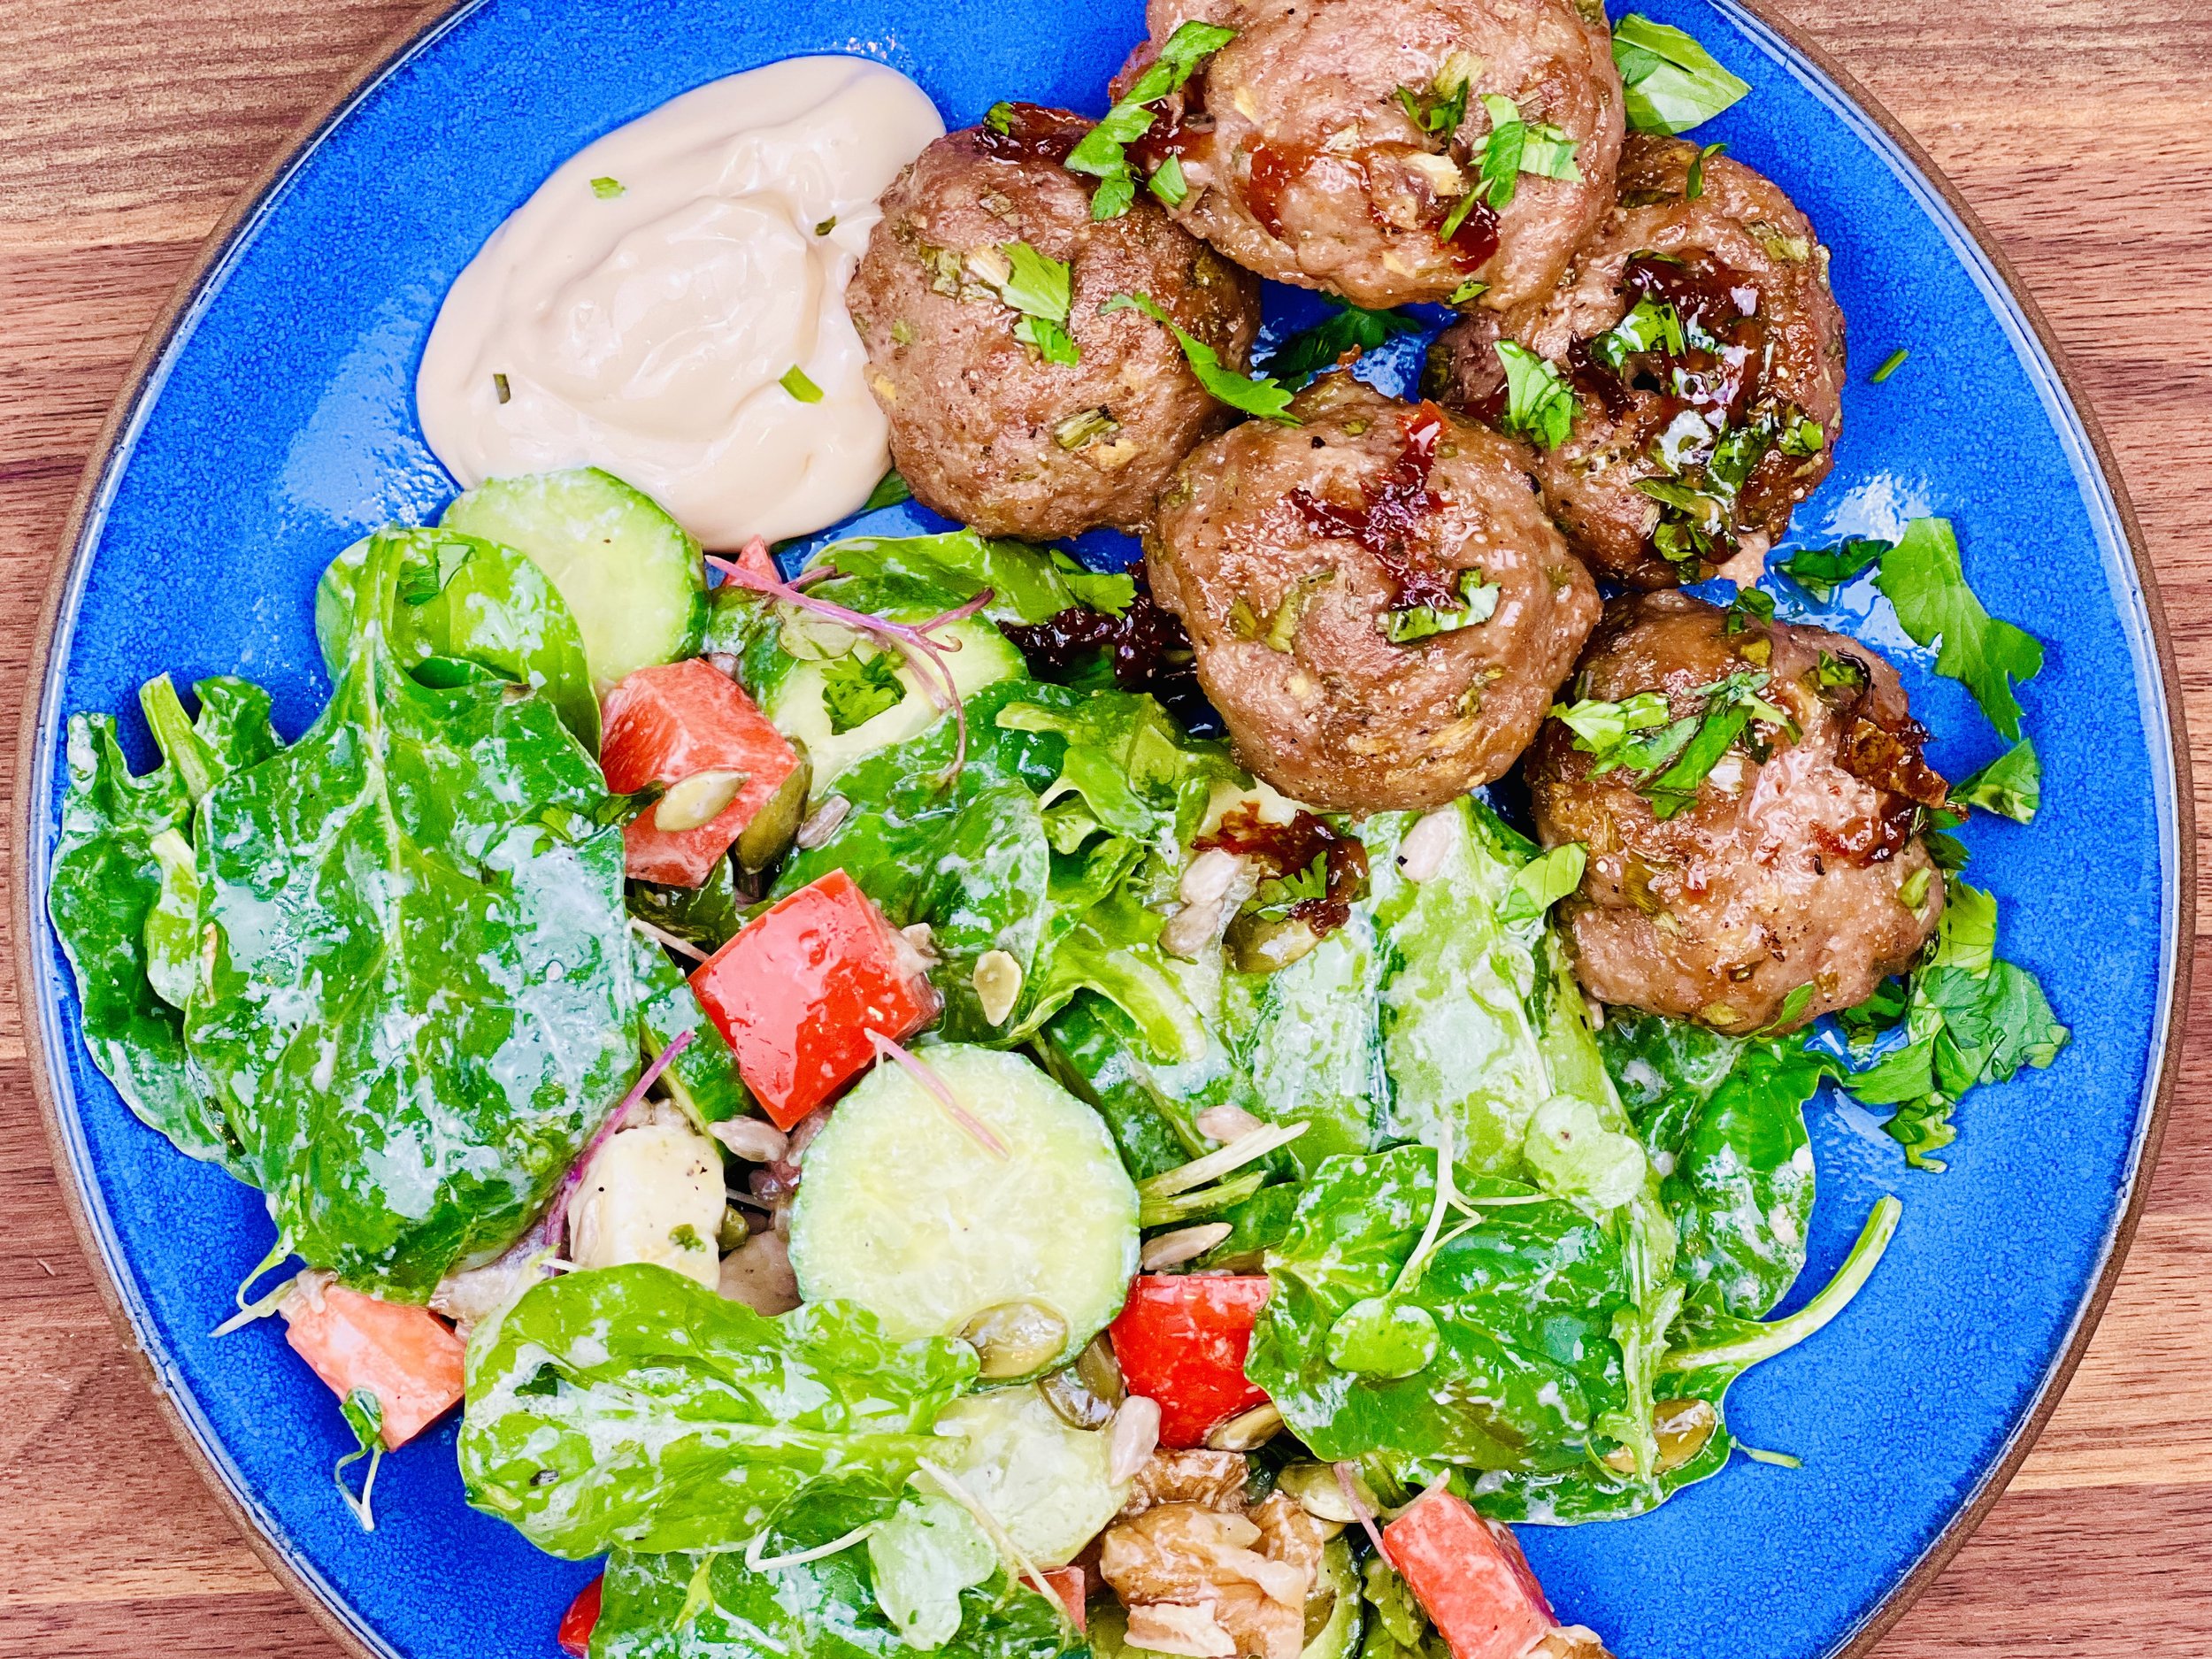
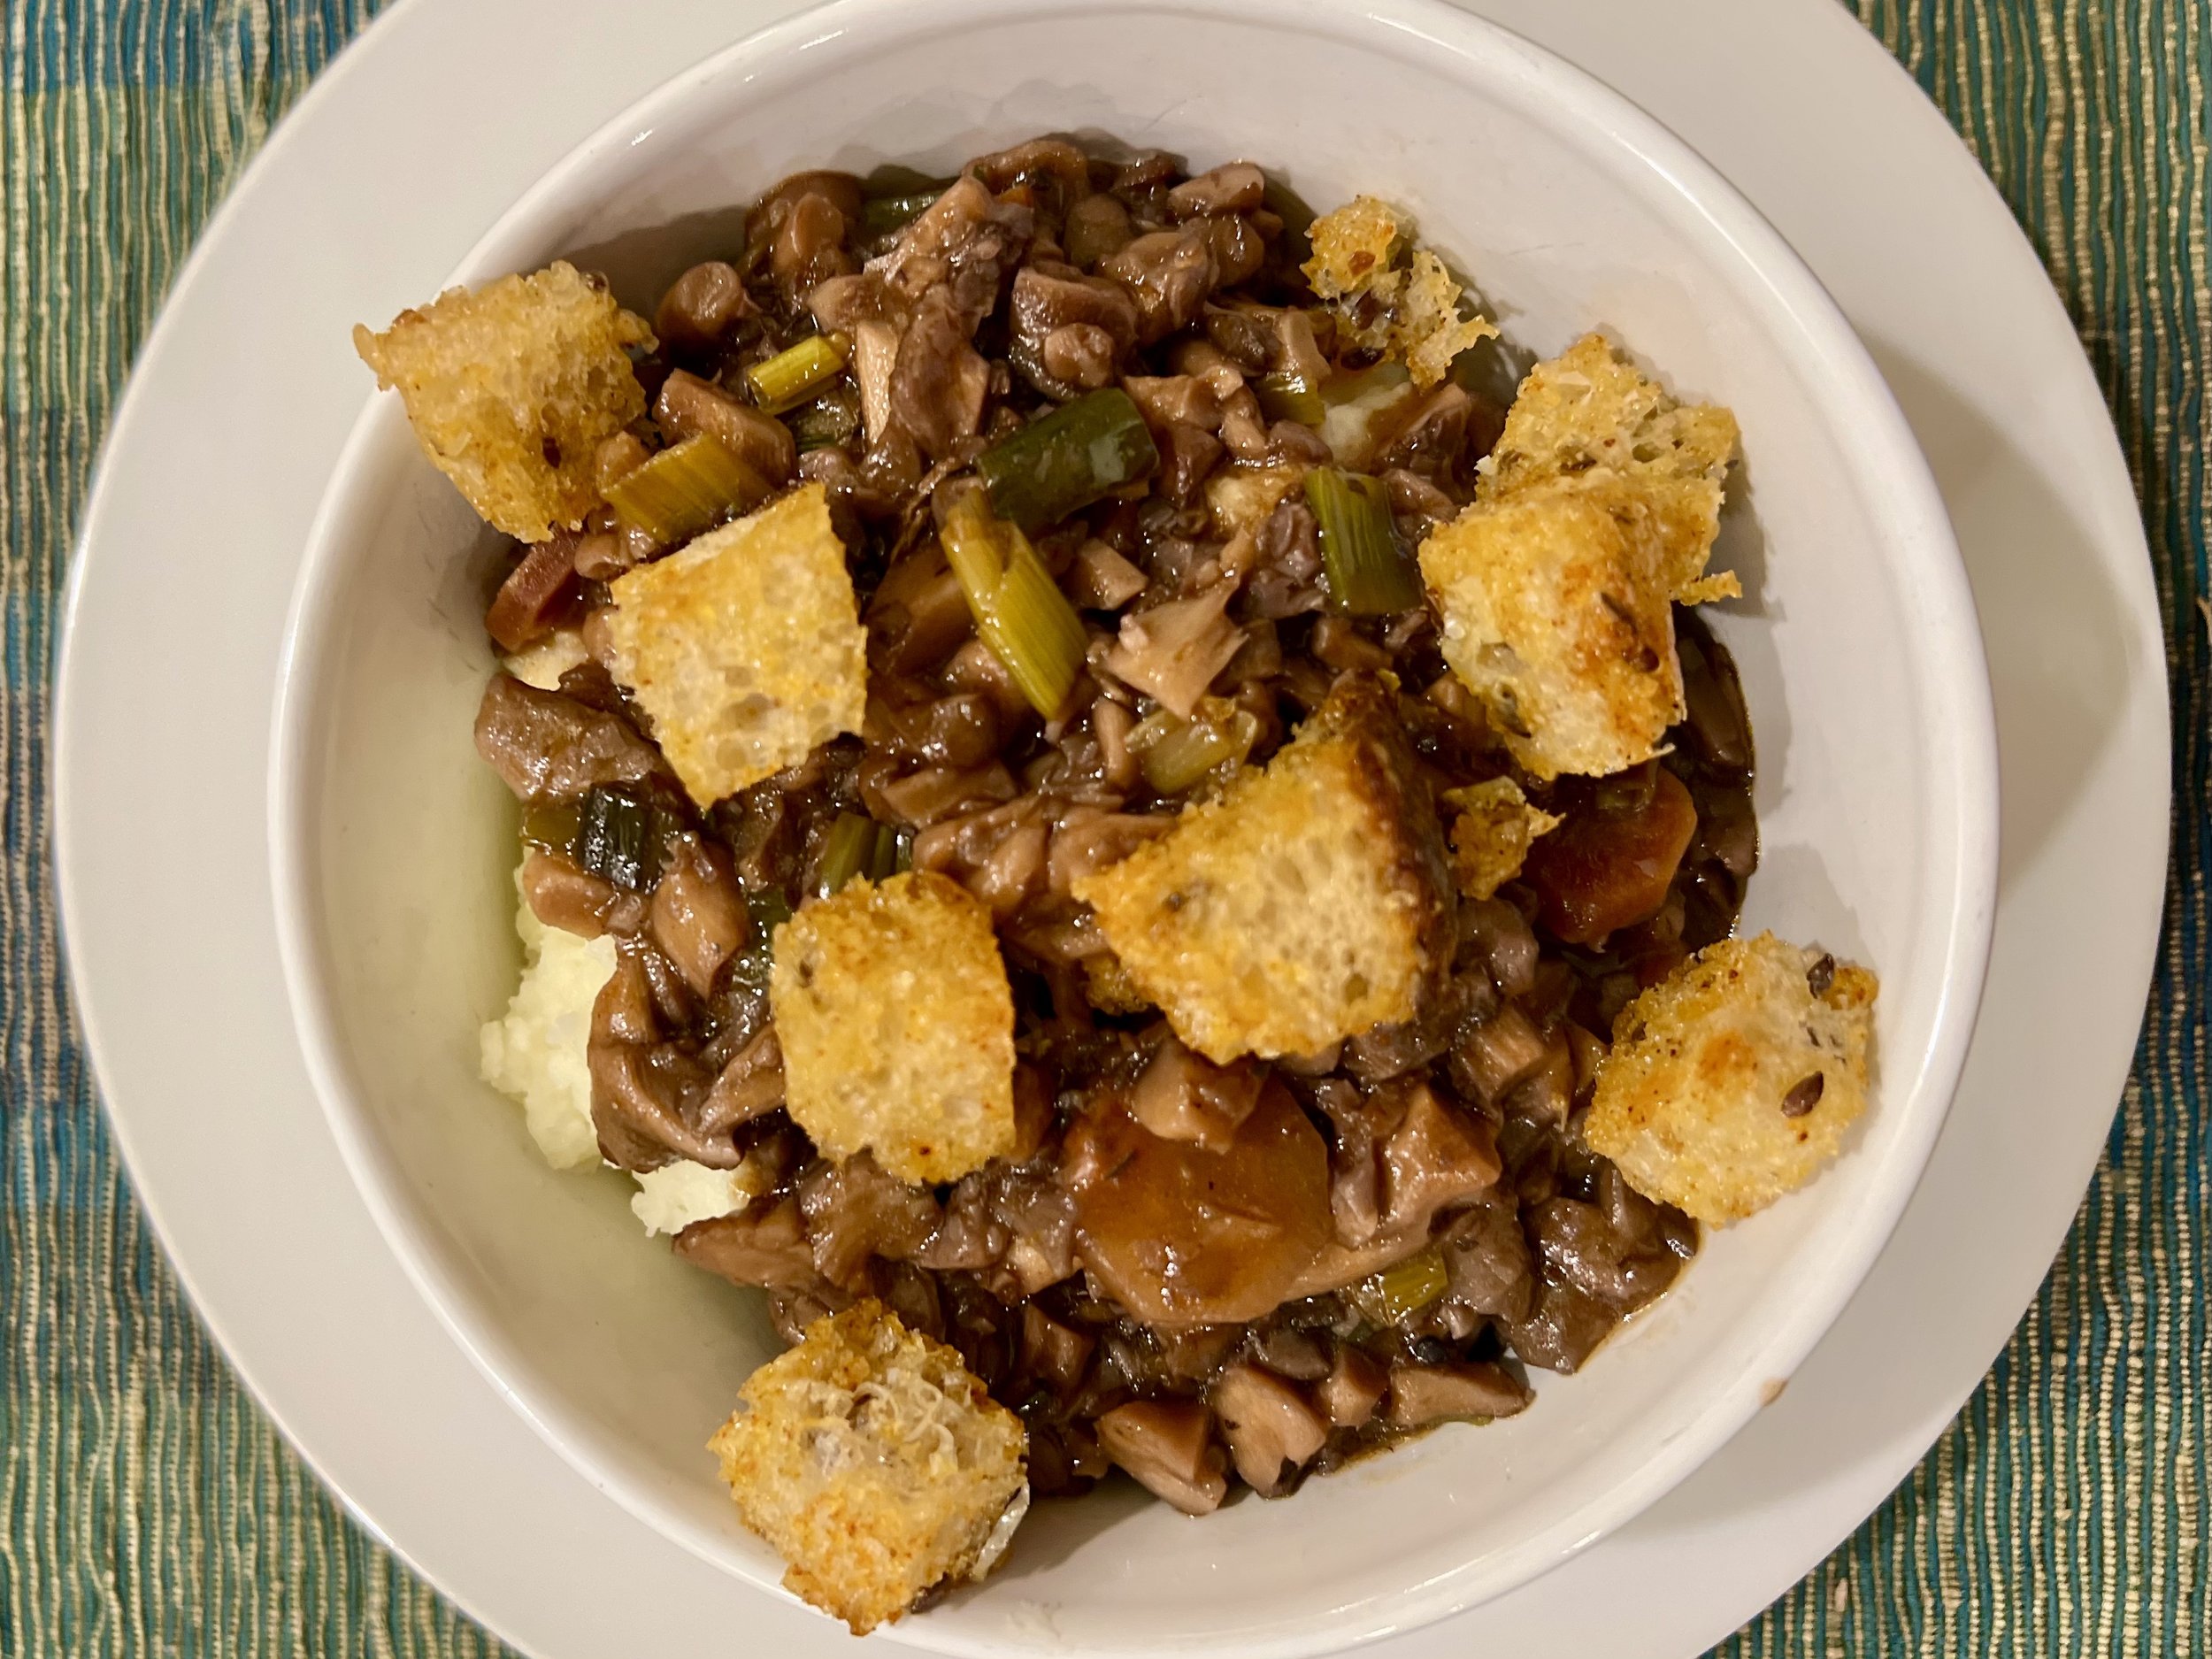
Italian Meatballs with Mushroom Cream Sauce (Low FODMAP)
20 Minutes prep • 30 Minutes cook • Low FODMAP • Gluten-free • Makes 12-24
20 Minutes prep • 30 Minutes cook • Low FODMAP • Gluten-free • Makes 12-24 • Ok to make ahead: Steps 1-3
We often think only of classic spaghetti and meatballs so we pair the meatballs with red sauce and serve them over pasta. This is, of course delicious, but…the combination of creamy white sauce and flavorful meatballs is a great change of pace that I think you will love! I added sauteed mushrooms to the sauce for added flavor, texture, and nutrition. Serve the meatballs on their own as a delicious main course or make bite-size meatballs and serve them as a hot appetizer.
Ingredients: Meatballs
3/4 cup gluten-free panko, gluten-free oats (or use pork panko for a low-carb version)
1 cup parmesan cheese, grated
1 bunch green onions (green part only) chopped
1 large egg (or 2 medium eggs)
2 tablespoons low FODMAP ketchup (I used Smoke N Sanity Ketchup)
2 tablespoons low FODMAP tomato sauce
2 teaspoons gluten-free Worcestershire sauce
2 teaspoons dry thyme
1 teaspoon Kosher salt
1/2 teaspoon black pepper
1 pound ground beef (15% fat, grass-fed, organic preferred)
1 pound ground pork (grass-fed organic preferred)
1 - 2 tablespoons minced fresh parsley, for serving
Ingredients: Cream Sauce
2 tablespoons salted butter
2 tablespoons gluten-free all-purpose flour
1 teaspoon dried thyme
1/2 teaspoon Kosher salt
1/4 teaspoon black pepper to taste
14 ounces low FODMAP chicken broth (I use Whole Foods Organic 365 chicken broth, or Gourmend low FODMAP Organic Chicken Broth - use code IBSGC15 for 15% discount)
1/2 - 3/4 cup dry white wine (such as Sauvignon blanc or chardonnay)
2/3 cup heavy whipping cream
Ingredients: Mushrooms (optional but delicious!)
1 tablespoon extra virgin olive oil
1 tablespoon salted butter
1 teaspoon dry thyme
1 1/2 - 2 cups oyster mushrooms, chopped
1/2 teaspoon Kosher salt
1/4 teaspoon black pepper
Directions: Meatballs
(1) Prepare: Preheat oven to 400 degrees F. Line a large, rimmed baking sheet with parchment paper (for easy cleanup).
(2) Make the meatballs: Combine the panko, parmesan, green onion greens, egg, ketchup, tomato sauce, Worcestershire sauce, thyme, salt, and pepper in a large bowl. Crumble the meat over the mixture and mix well. Shape into 1-1/2-inch balls and place, with a little space in between, on your prepared pan. (If you are making these for an appetizer you can make smaller meatballs and cook them for a shorter period of time.)
(3) Cook the meatballs: Bake for 10 minutes. Check the meatballs and if they are getting overly browned on the bottom, you can turn them over. Otherwise, leave them as is and bake until the meat is no longer pink, about 10 minutes more. Remove from the oven, transfer to a warmed serving dish.
Directions: Sauce
(4) Cook the mushrooms (if using): While the meatballs are cooking, chop the mushrooms. Put a large skillet over medium-high heat. When the pan is hot add 1 tablespoon each olive oil and butter. Add 1 teaspoon dry thyme and let is sizzle in the oil and butter mixture for 30 seconds. Add the chopped mushrooms and cook them, stirring periodically until they turn golden brown. Season with 1/2 teaspoon salt, and 1/4 teaspoon pepper. Remove from heat and set aside.
(5) Make the cream sauce: Melt the butter in a medium saucepan over medium heat. Stir in the flour and cook 1-2 minutes so the flour is cooked in the butter. Add the thyme, salt, and pepper until smooth. While whisking the sauce, gradually add the broth until you have a thick creamy sauce. Next, add the wine, and whisk it into the cream sauce. Finally, add the cream and whisk in. Heat just to a gentle boil, then reduce the heat a bit and cook and stir until thickened about 2 minutes. If you are adding mushrooms, stir them into the cream sauce.
(6) Plate and serve: Drizzle the sauce generously over the meatballs and serve with some extra sauce on the side. Sprinkle the meatballs and sauce with chopped parsley. If you like, serve the meatballs on a bed of pasta or rice.
Eat and enjoy every bite because you can!
Recipe note: I use Diamond Crystal Kosher salt in all my recipes because it has a wonderful flat and crisp flake that tastes delicious. It is also the least salty salt available so you can use it more liberally as a seasoning than you can table salt or sea salt. If you use another type of salt, you may need to reduce the amount so it is not over-salted.
Have a question you’d like to have answered? Email me at hello@ibsgamechanger.com
Link note: This post may contain affiliate links for you to easily purchase items that are linked. I may earn a small commission from qualifying purchases but none of this costs you a thing so feel free to use the links! In addition, for some items, I have provided a special discount code for IBS Game Changers so be sure to use the code when you purchase an item to get the discount that has been arranged just for you.
More Deliciously Low FODMAP™ main course recipes
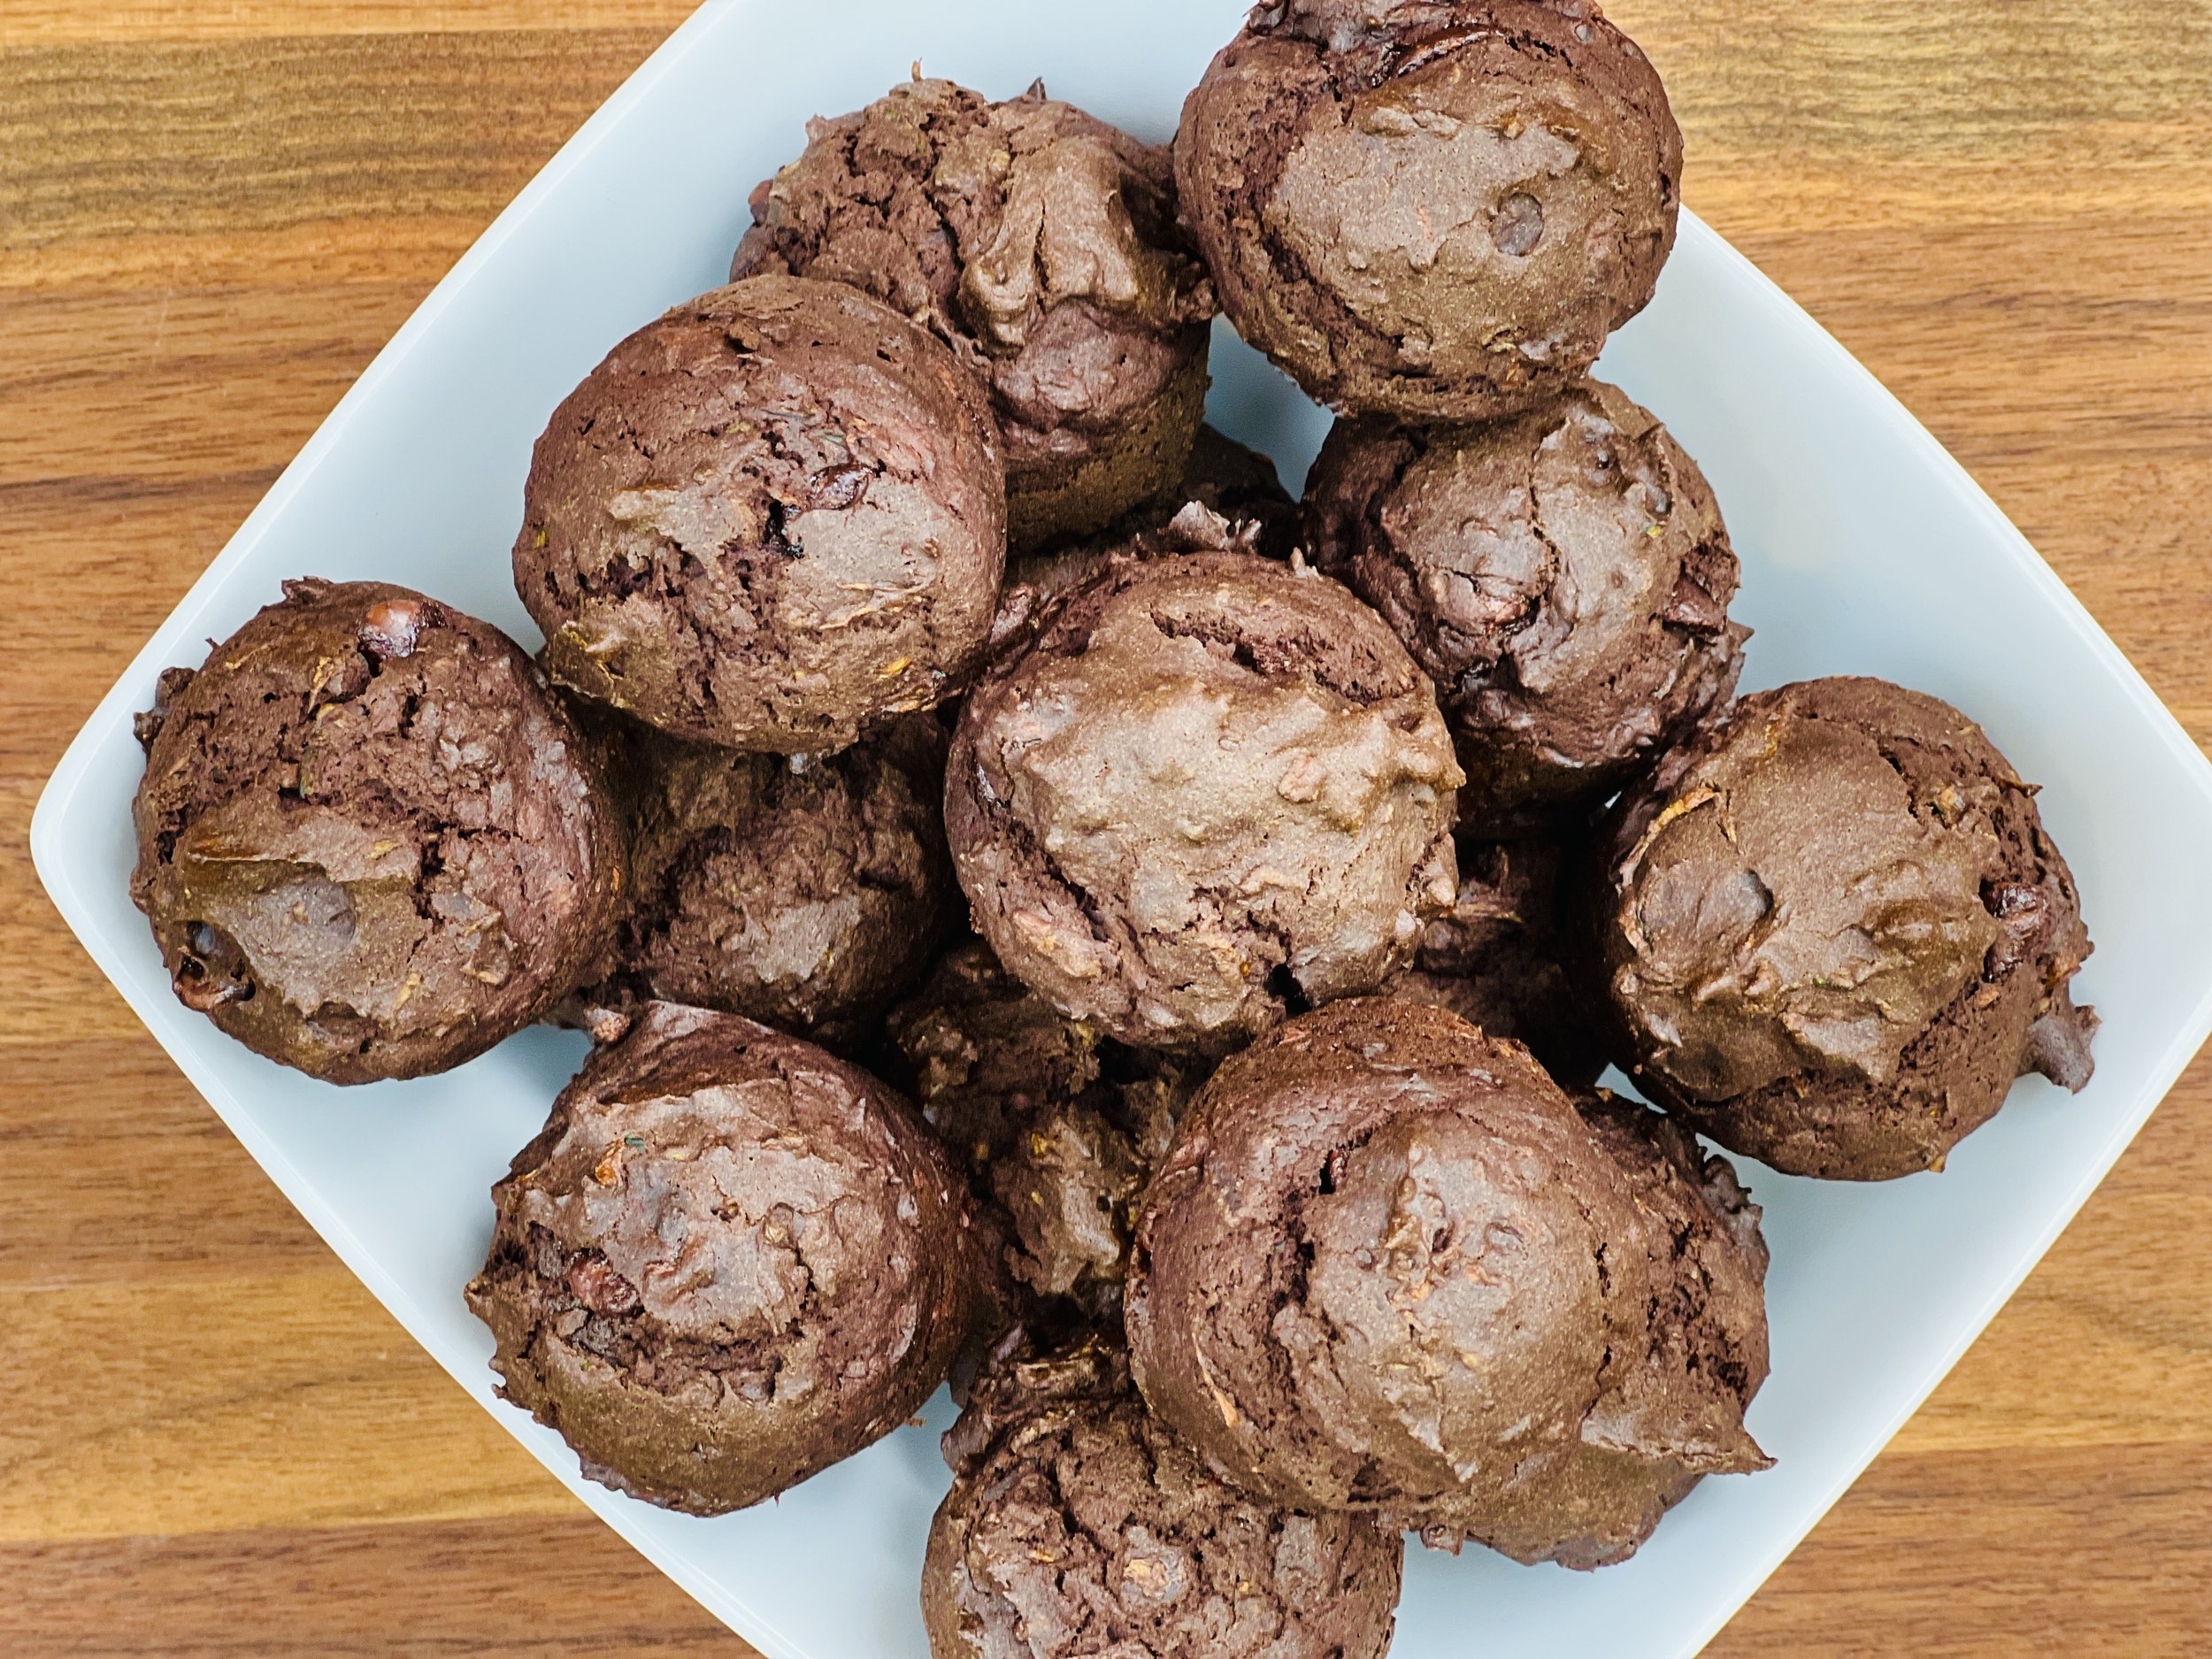
Dark Chocolate, Espresso, and Coconut Mini Muffins (Low FODMAP)
15 Minutes prep • 25 Minutes cook • Low FODMAP • Gluten-free • Lactose-free • Makes 24
15 Minutes prep • 25 Minutes cook • Low FODMAP • Gluten-free • Lactose-free • Makes 24 • Ok to make ahead: Steps 1-5
Deep dark chocolate. A hint of coconut. Rich chocolate chips. And zucchini! These mini muffins are so delicious the whole family will love them. And don’t let the “mini” size fool you, the flavor is intense enough that one mini muffin is the right amount! You make them all in one bowl so clean up is easy. Don’t want to eat them all at once? They freeze beautifully and thaw quickly at room temperature. I used cacao and cacao nibs (along with the chocolate chips) in this recipe for some added gut biome benefit, but you can use regular cocoa with the chocolate chips and they will be equally delicious.
This is an exclusive recipe just for recipe club members.
In addition to the two free recipes I create each week I am creating and delivering one very special recipe just for my recipe club members. If you’re not yet a member, I encourage you to join! Membership in the club includes access to the complete archive of recipes with filters so it can become your virtual low FODMAP cookbook plus, I am creating and delivering one special NEW recipe every week ONLY for recipe club members.
Your membership in the club helps me continue creating new, delicious, easy-to-make, low FODMAP recipes just for you.
As always, all recipes will emphasize simple ingredients, easy preparation, and delicious low FODMAP results. Recipes will be for everything from main courses, salads, soups, side dishes, appetizers, desserts, sauces, breakfast and lunch, and even mocktails and cocktails. Everything you need to prepare fantastic low FODMAP meals everyone will love.
Join the club. Let’s keep making delicious Low FODMAP meals together.
Link note: This post may contain affiliate links for you to easily purchase items that are linked. I may earn a small commission from qualifying purchases but none of this costs you a thing so feel free to use the links! In addition, for some items, I have provided a special discount code for IBS Game Changers so be sure to use the code when you purchase an item to get the discount that has been arranged just for you.
More Deliciously Low FODMAP™ dessert recipes
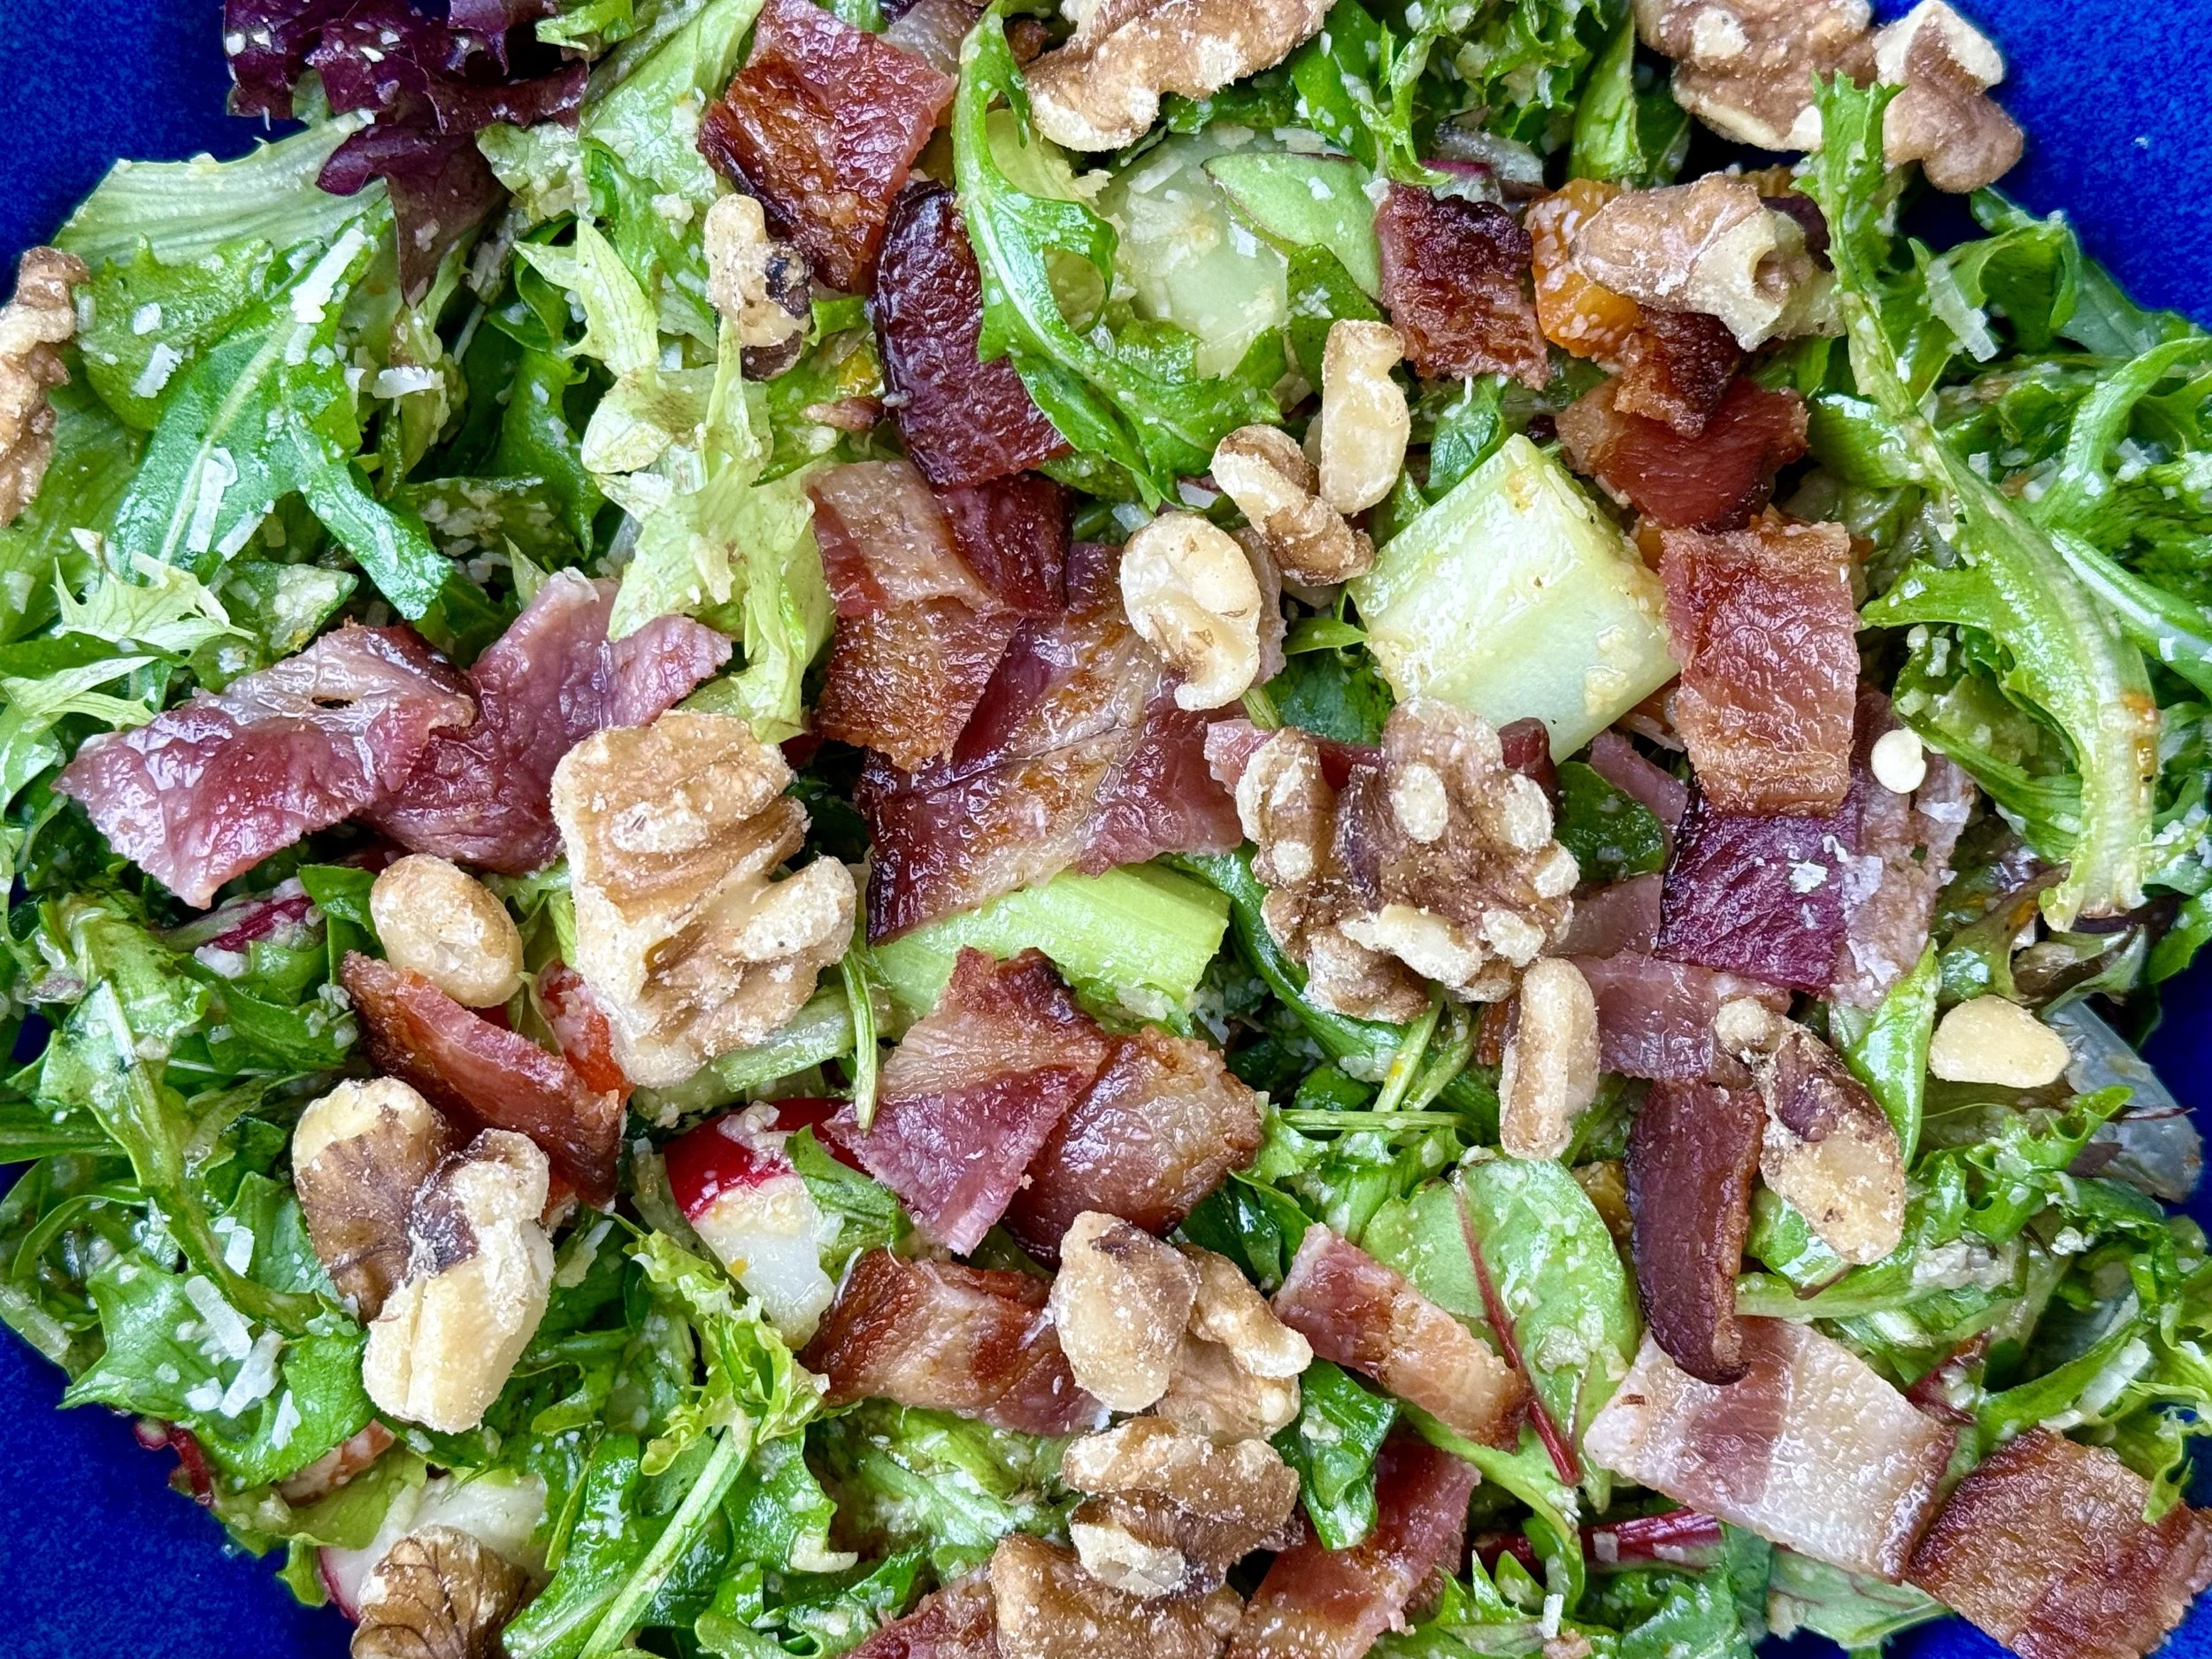
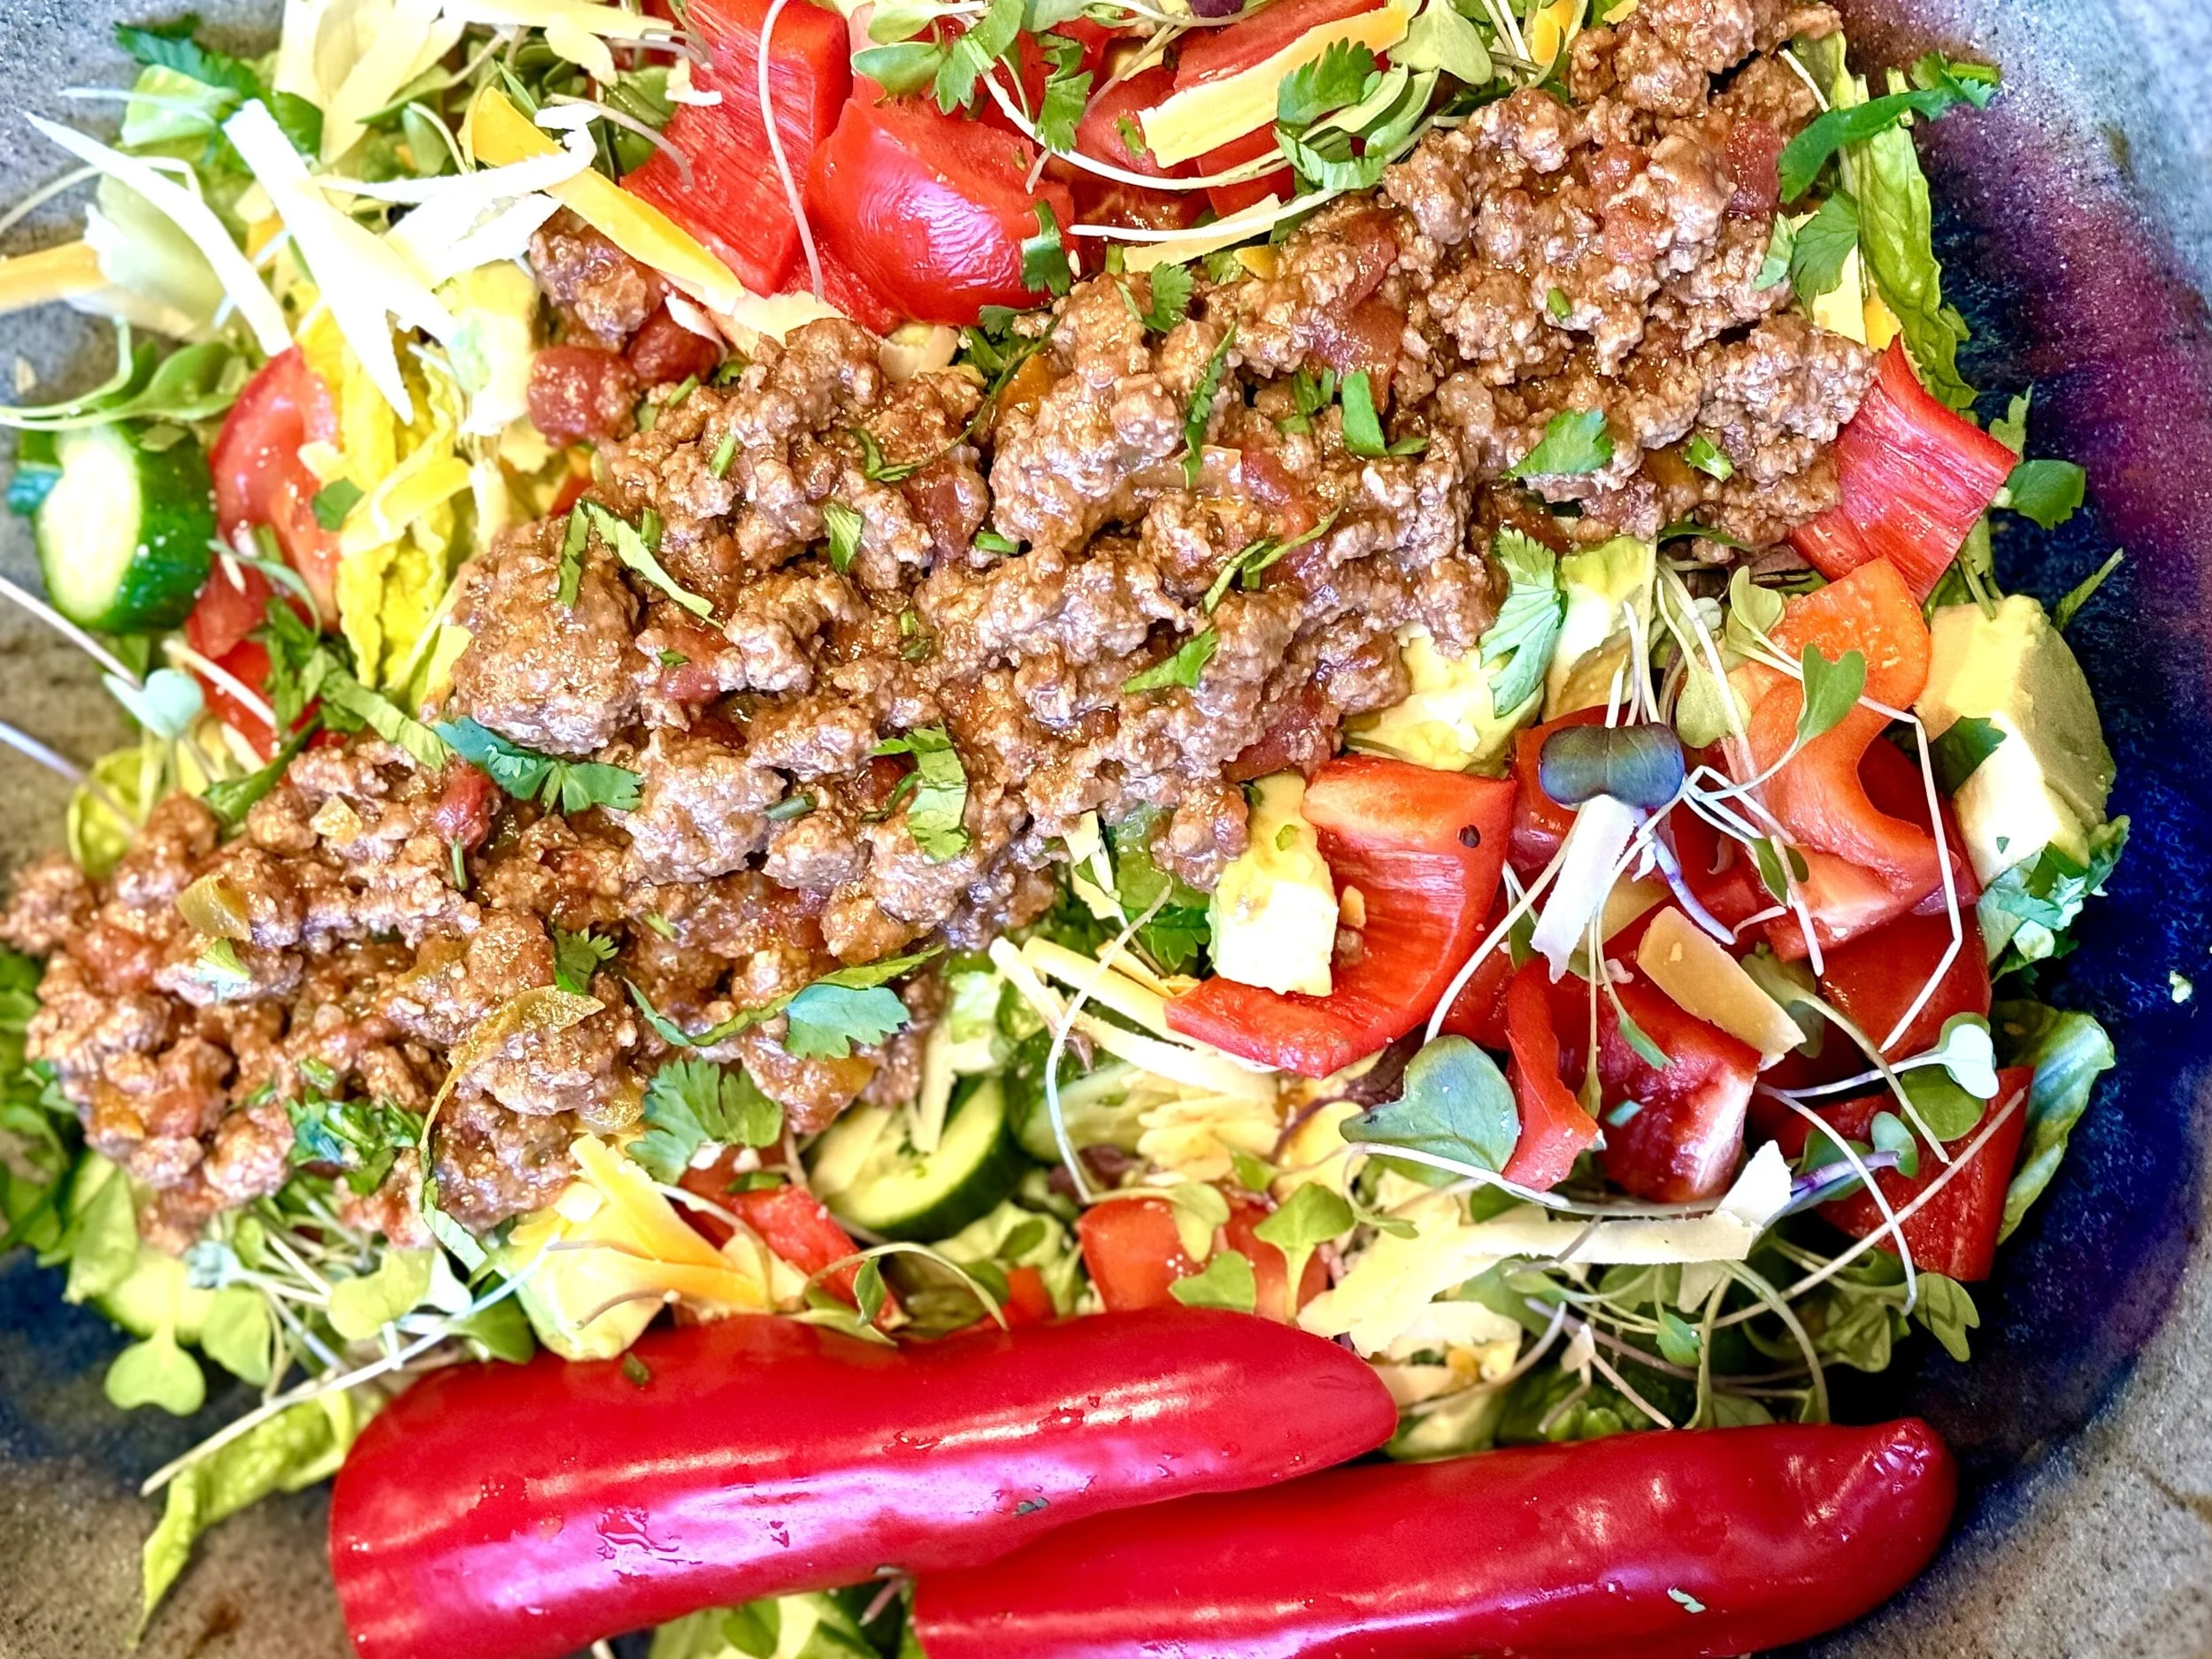
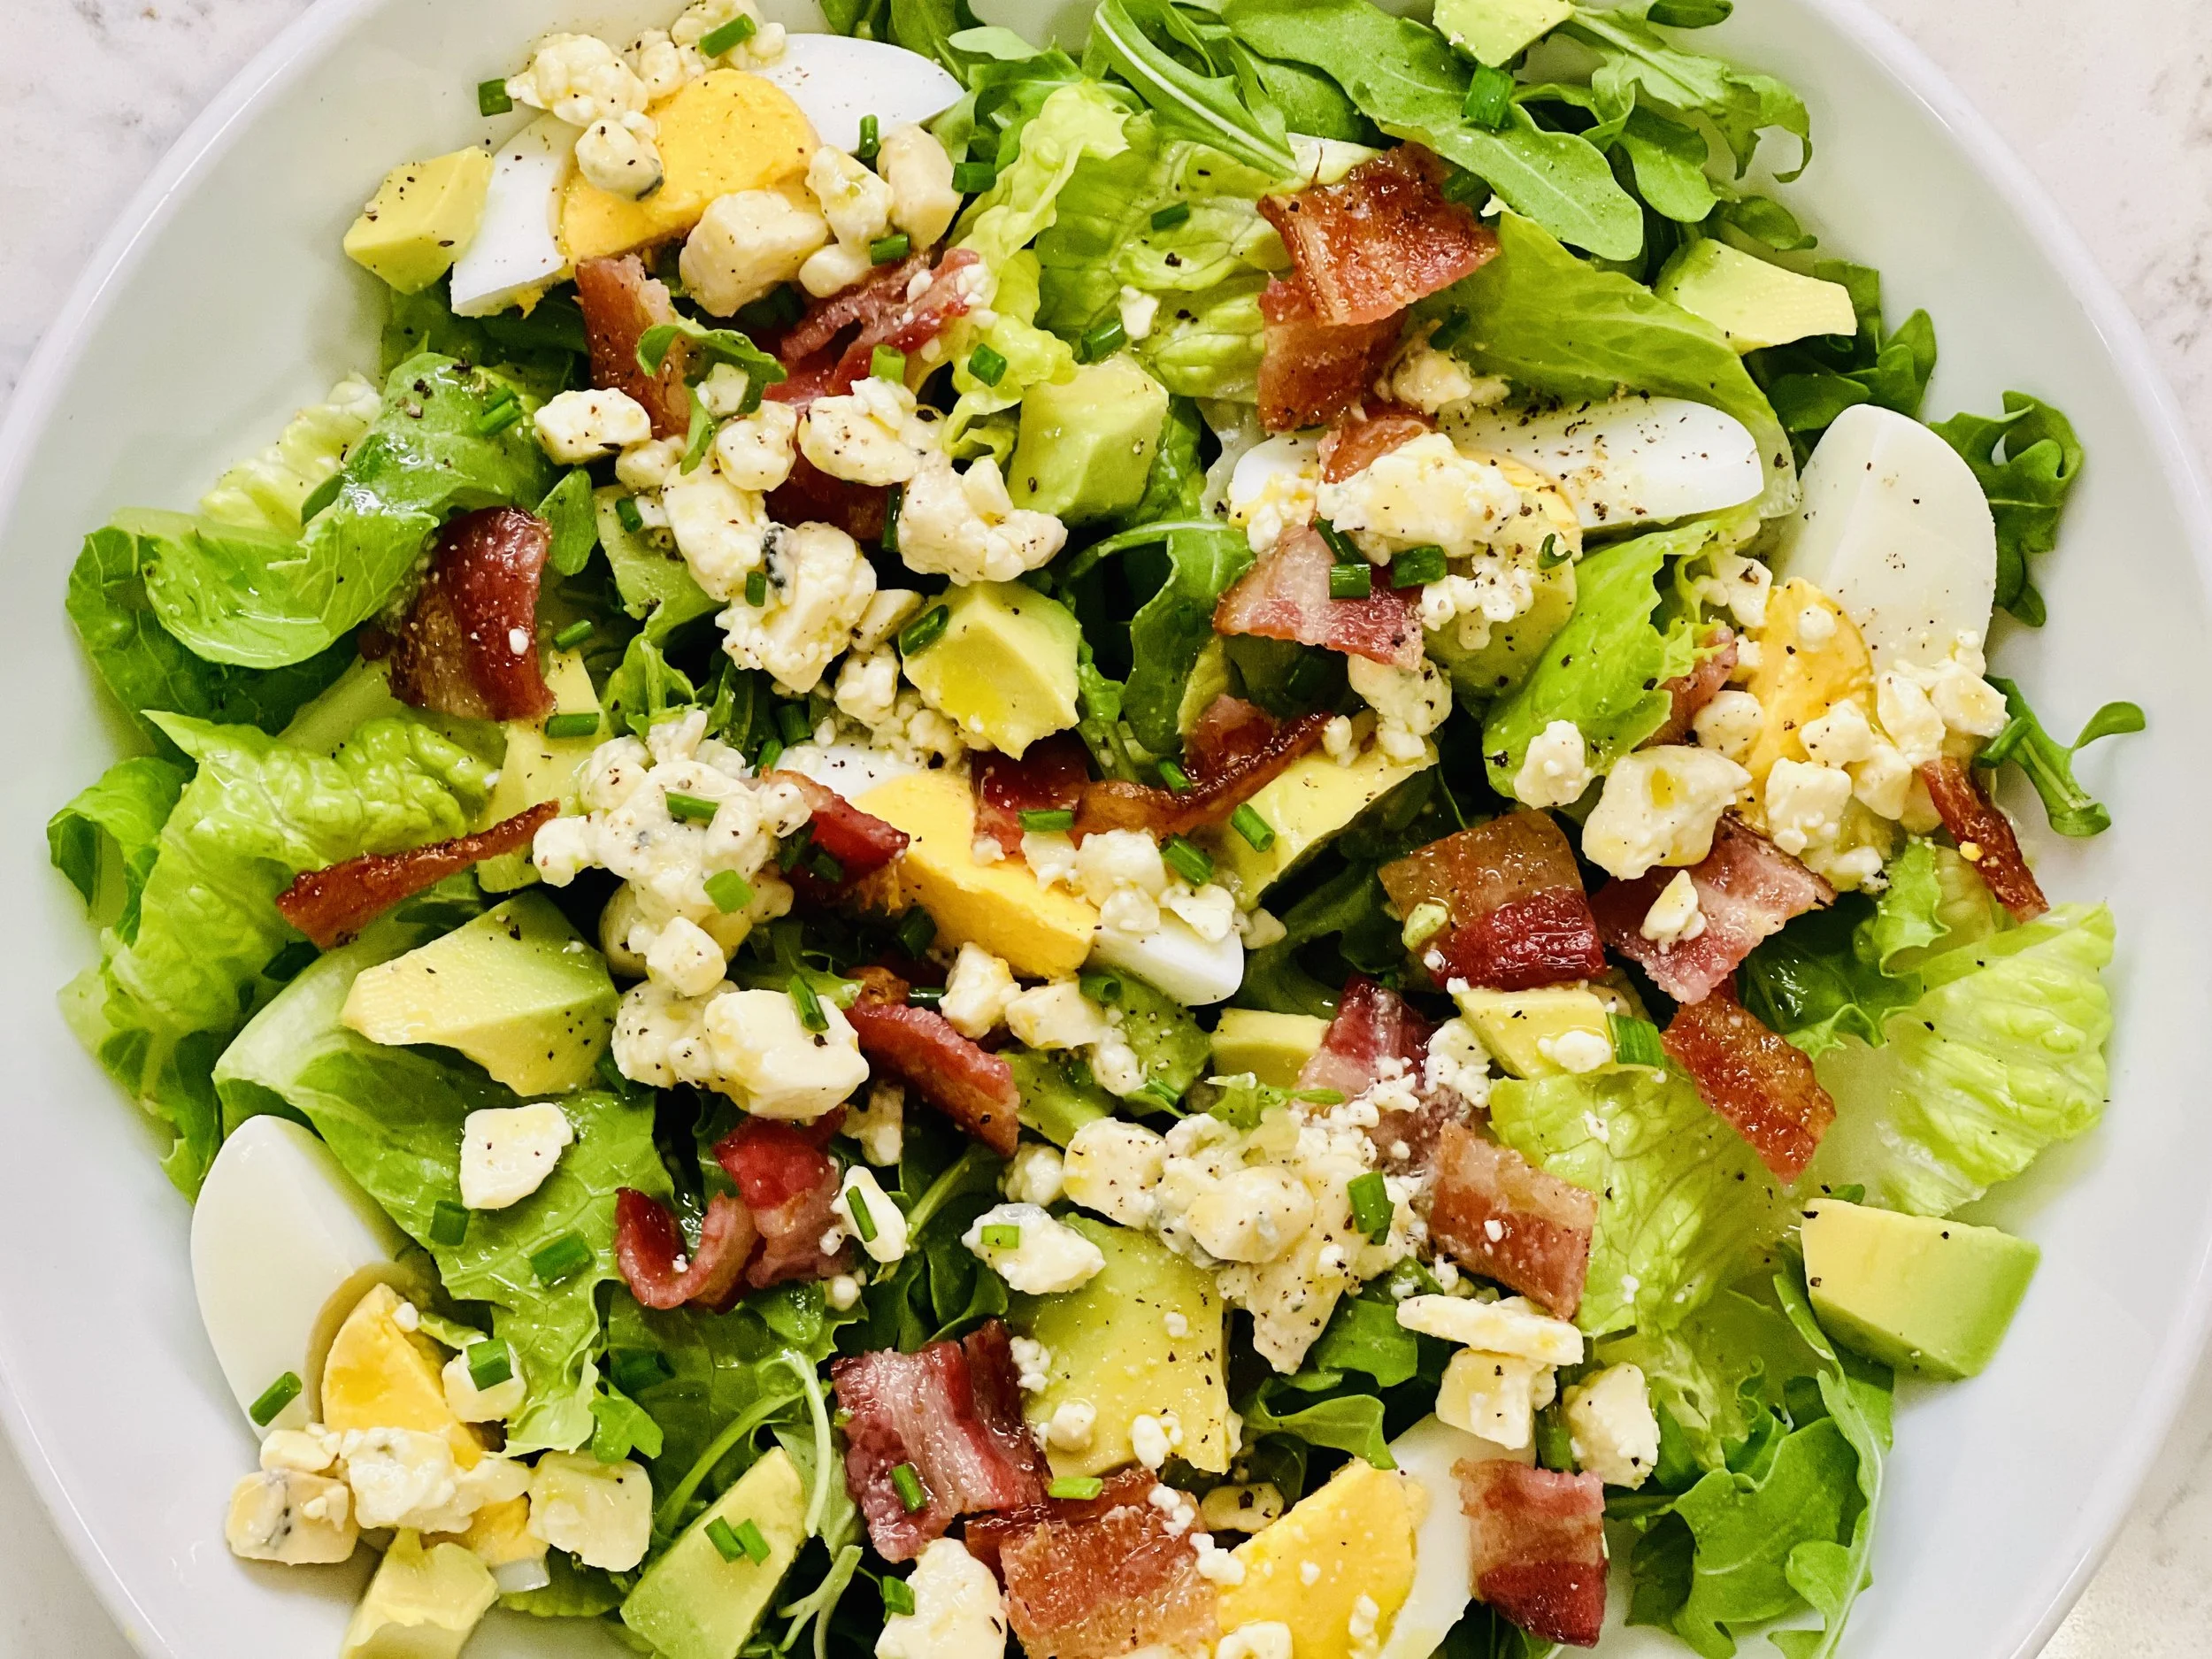
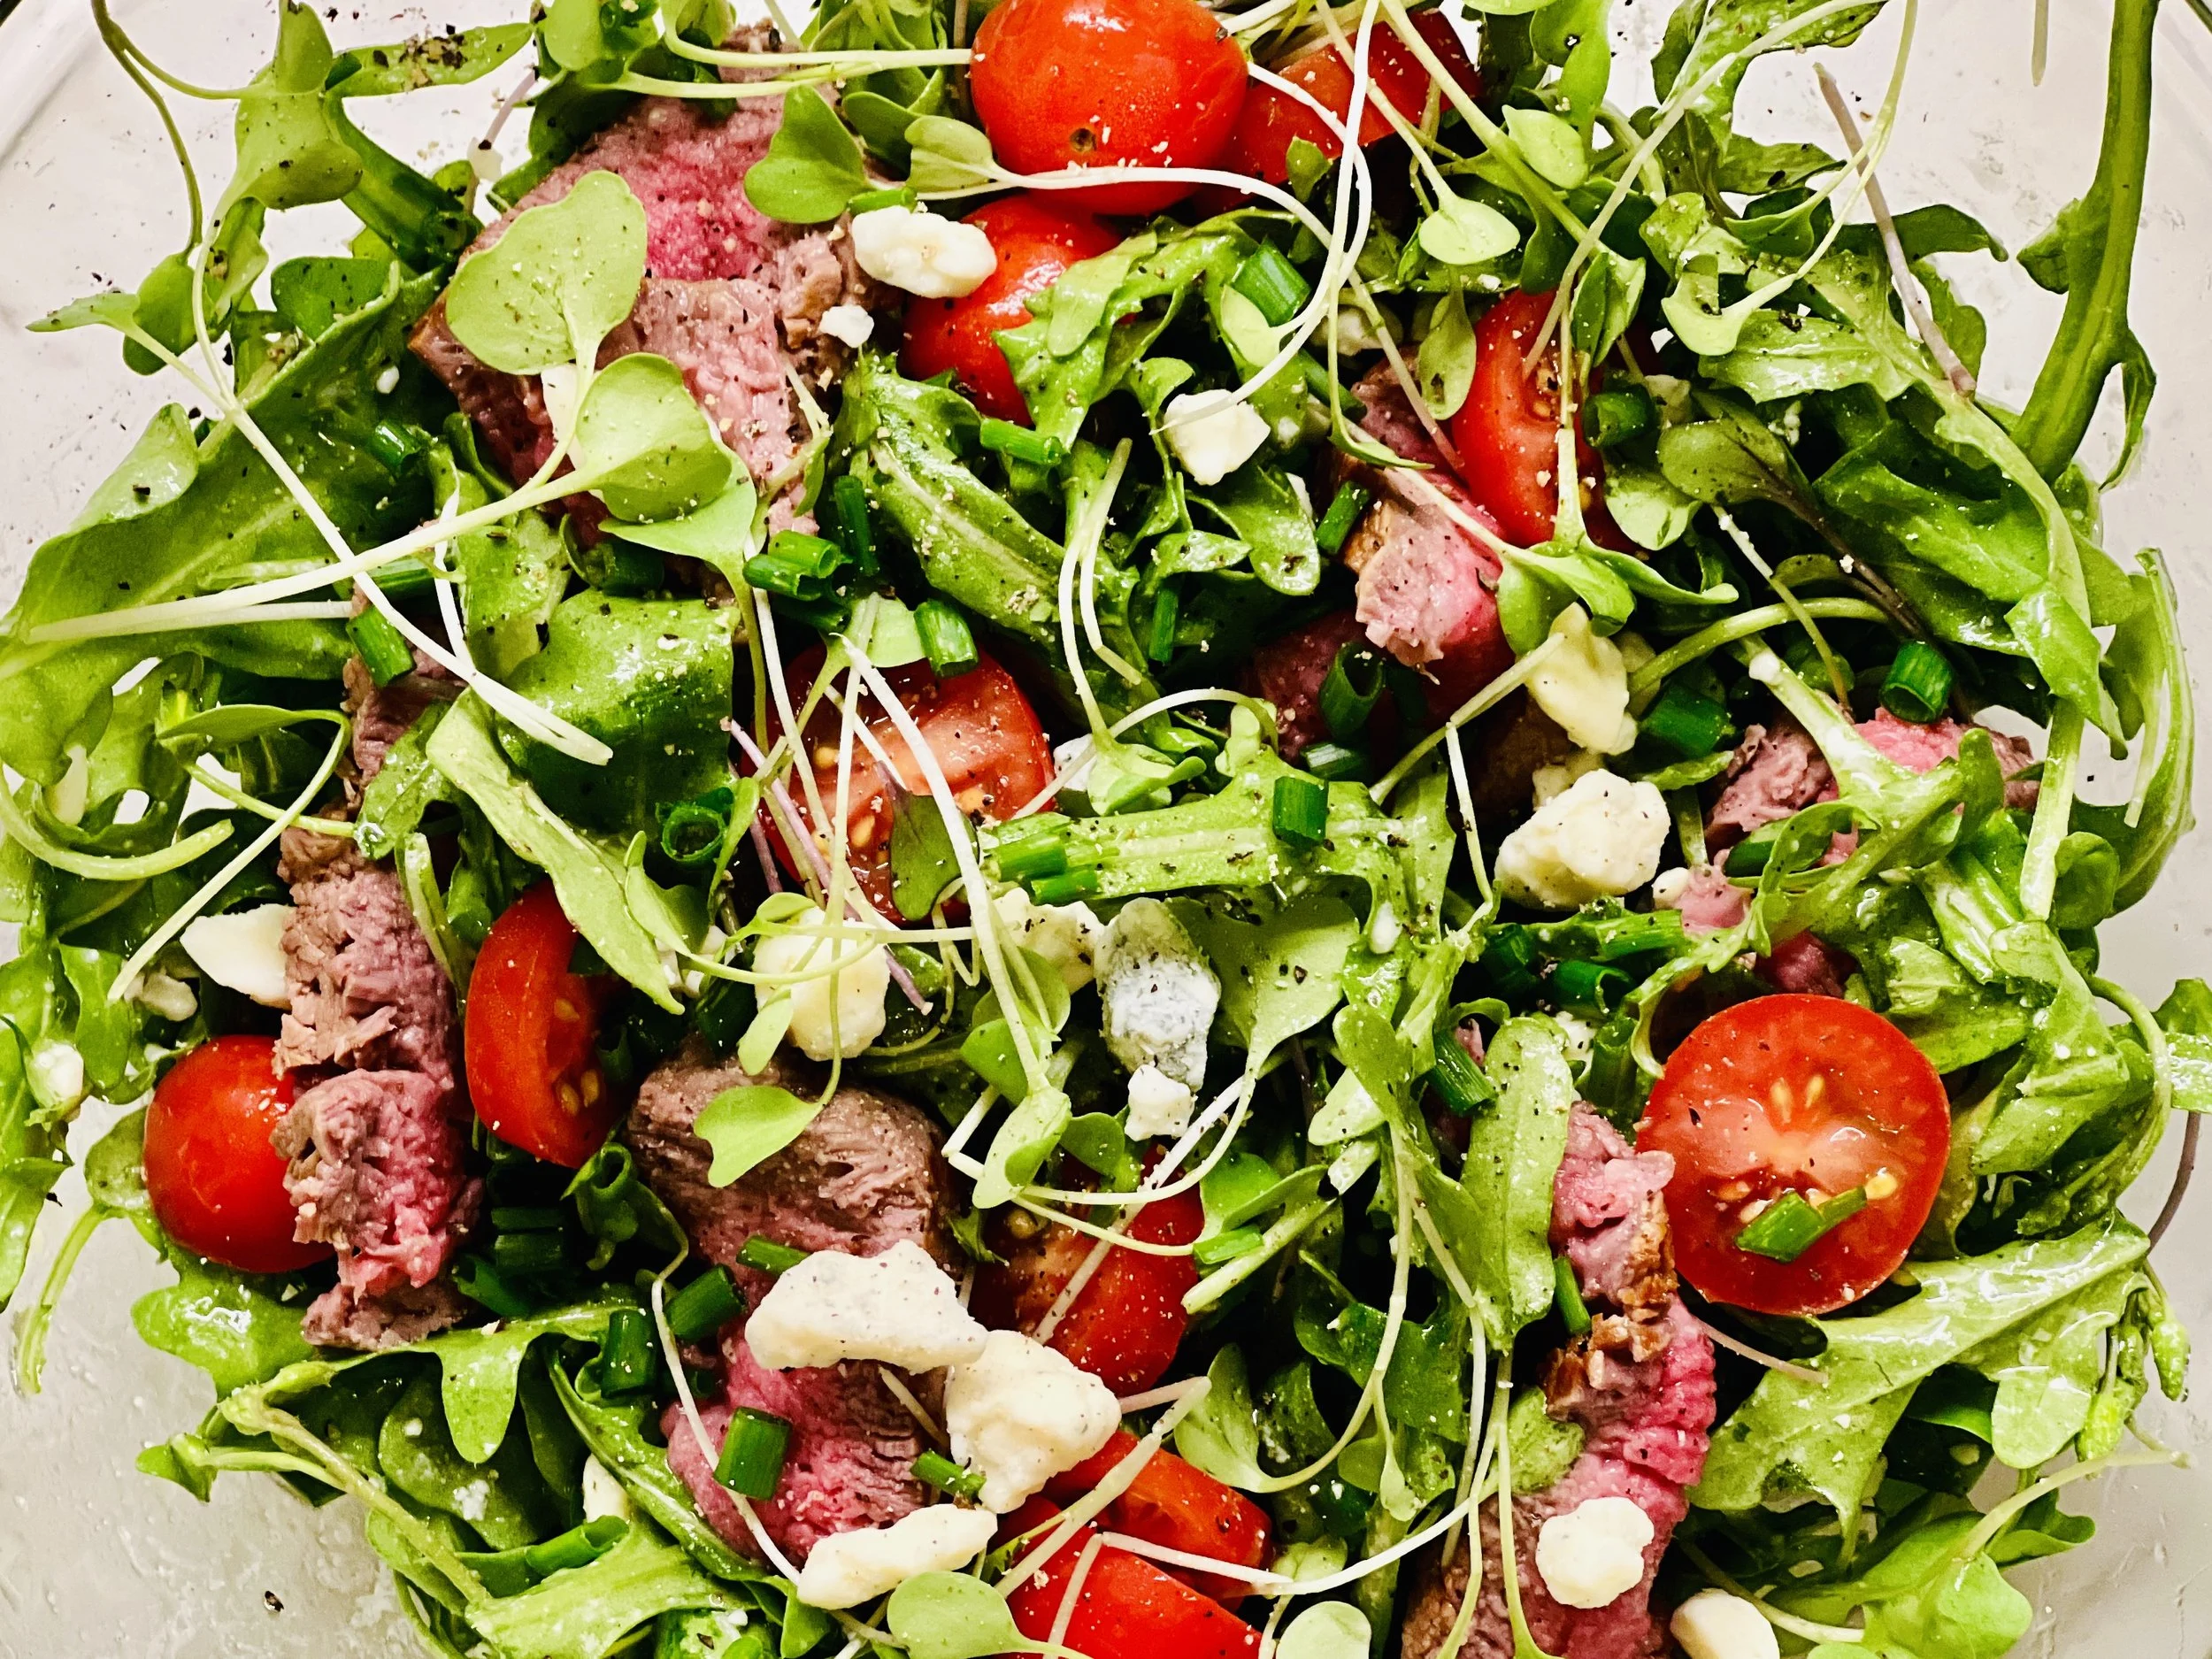
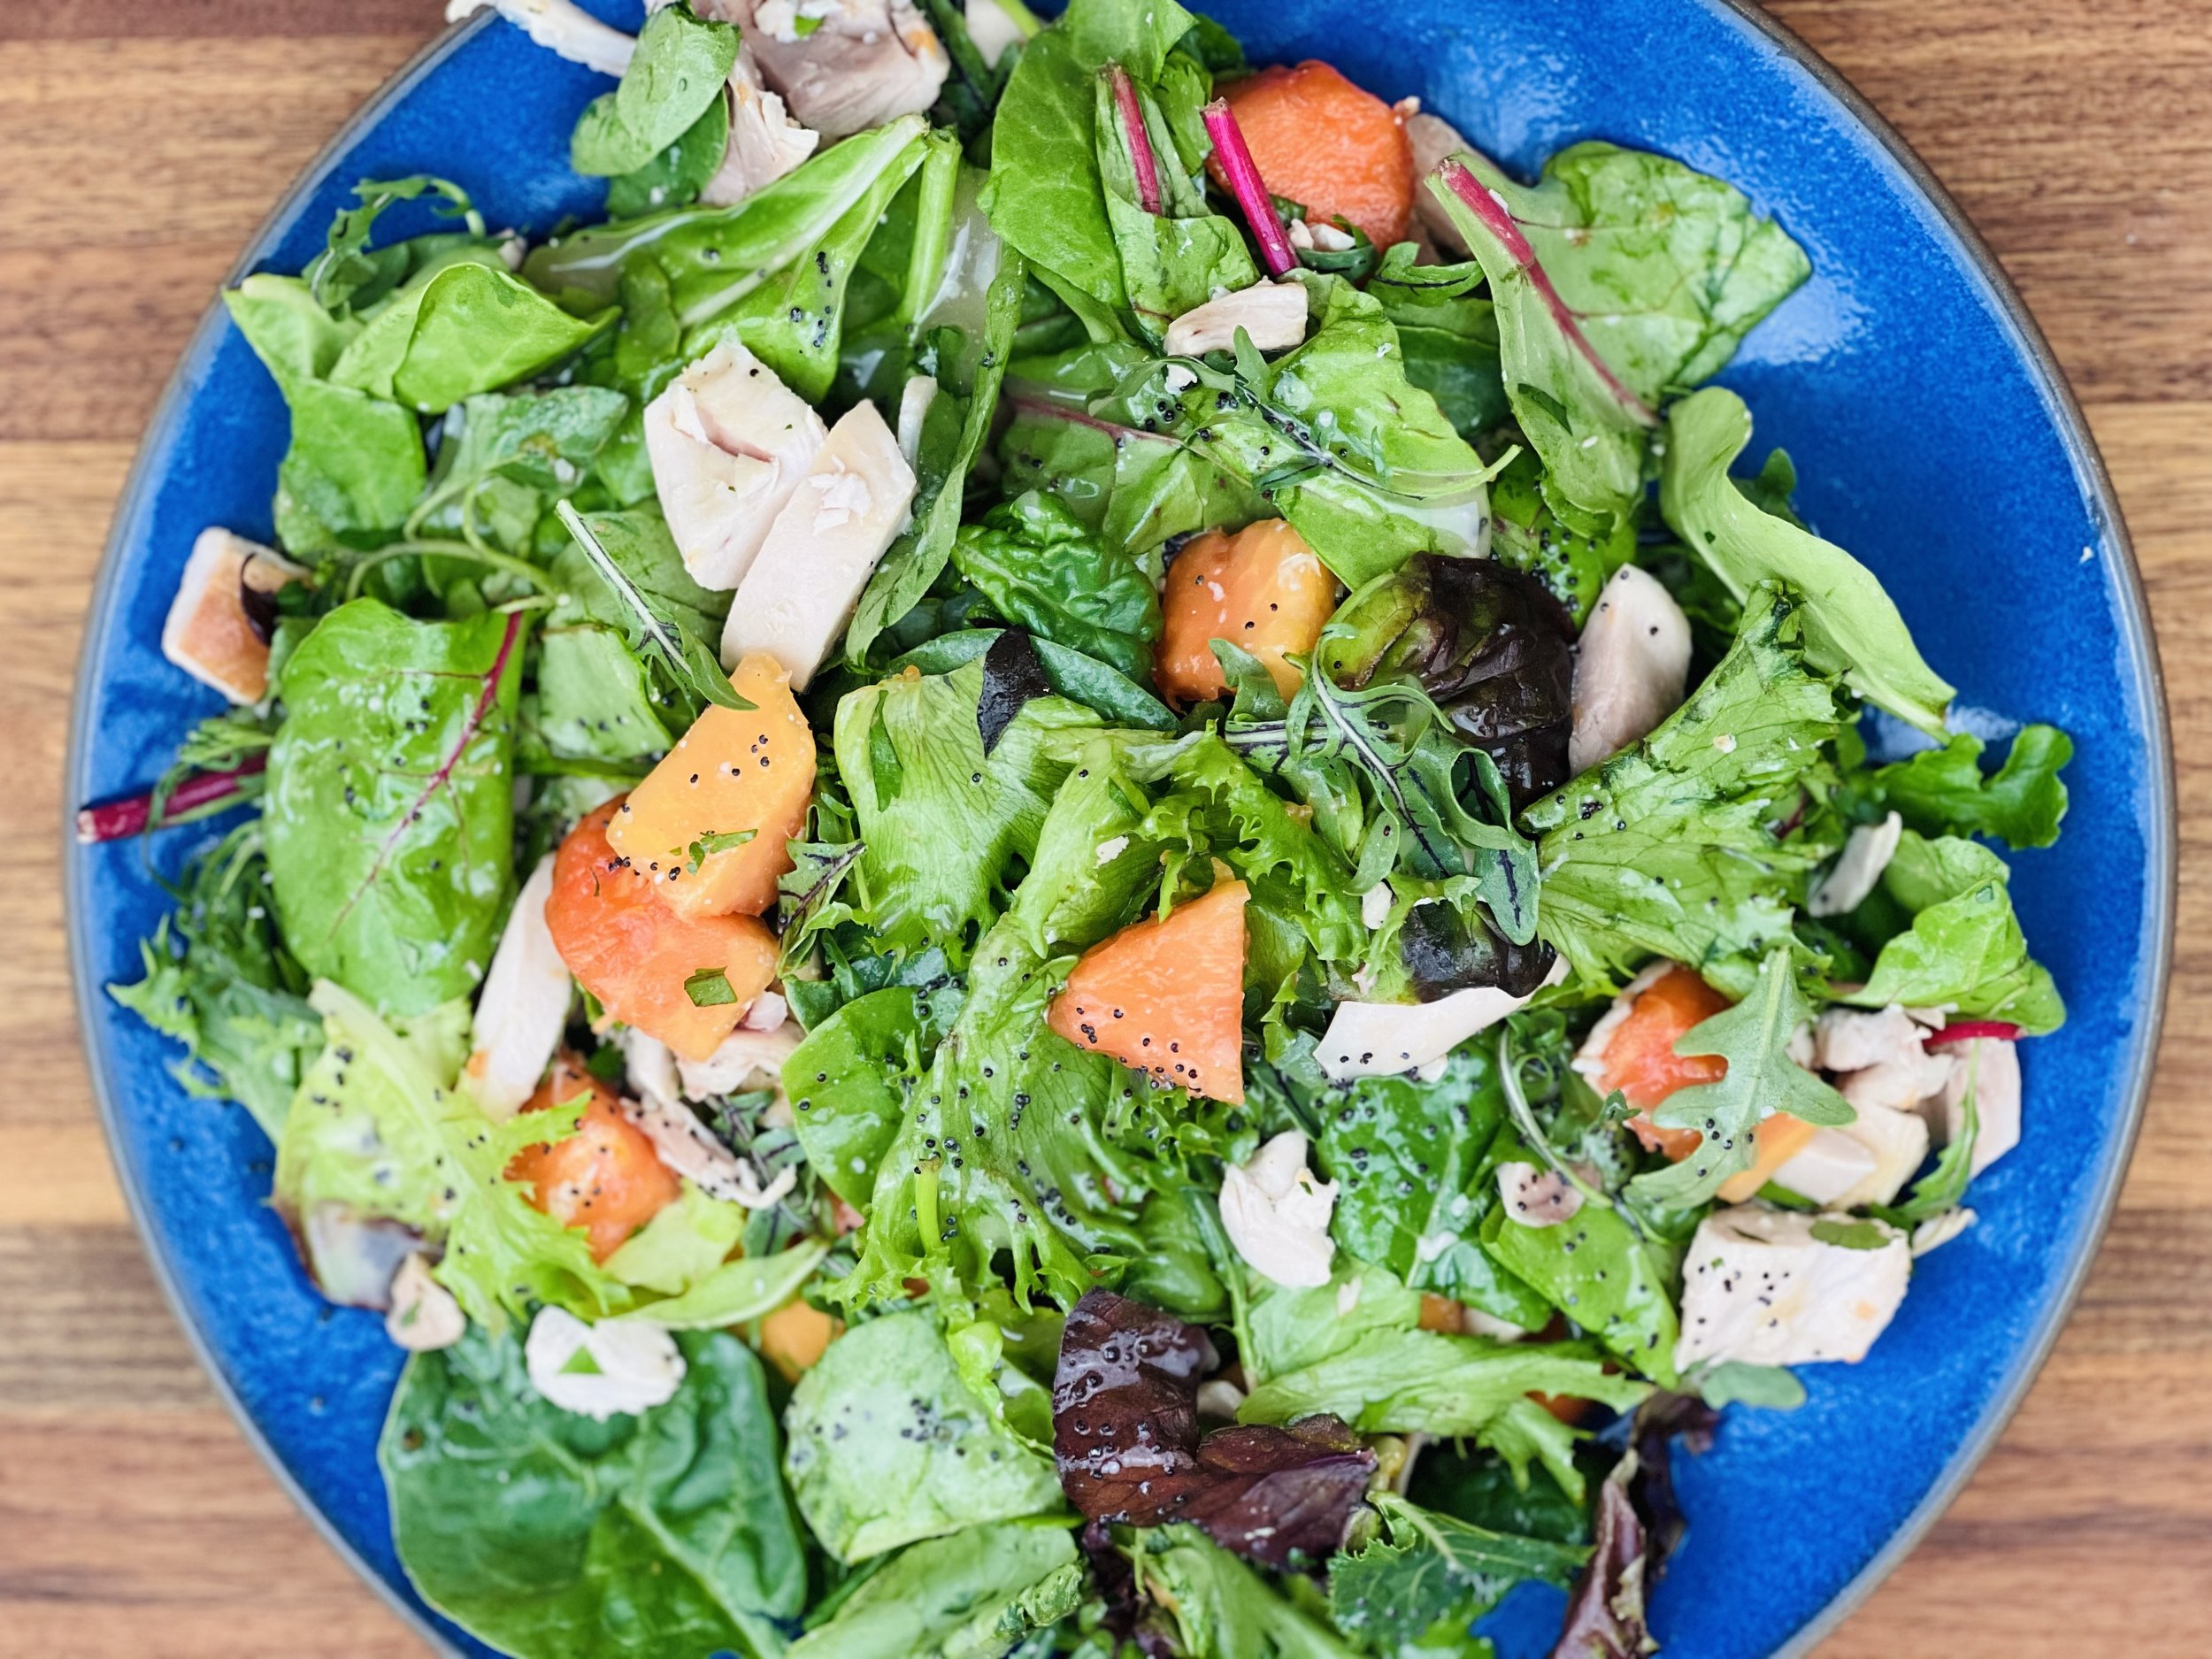
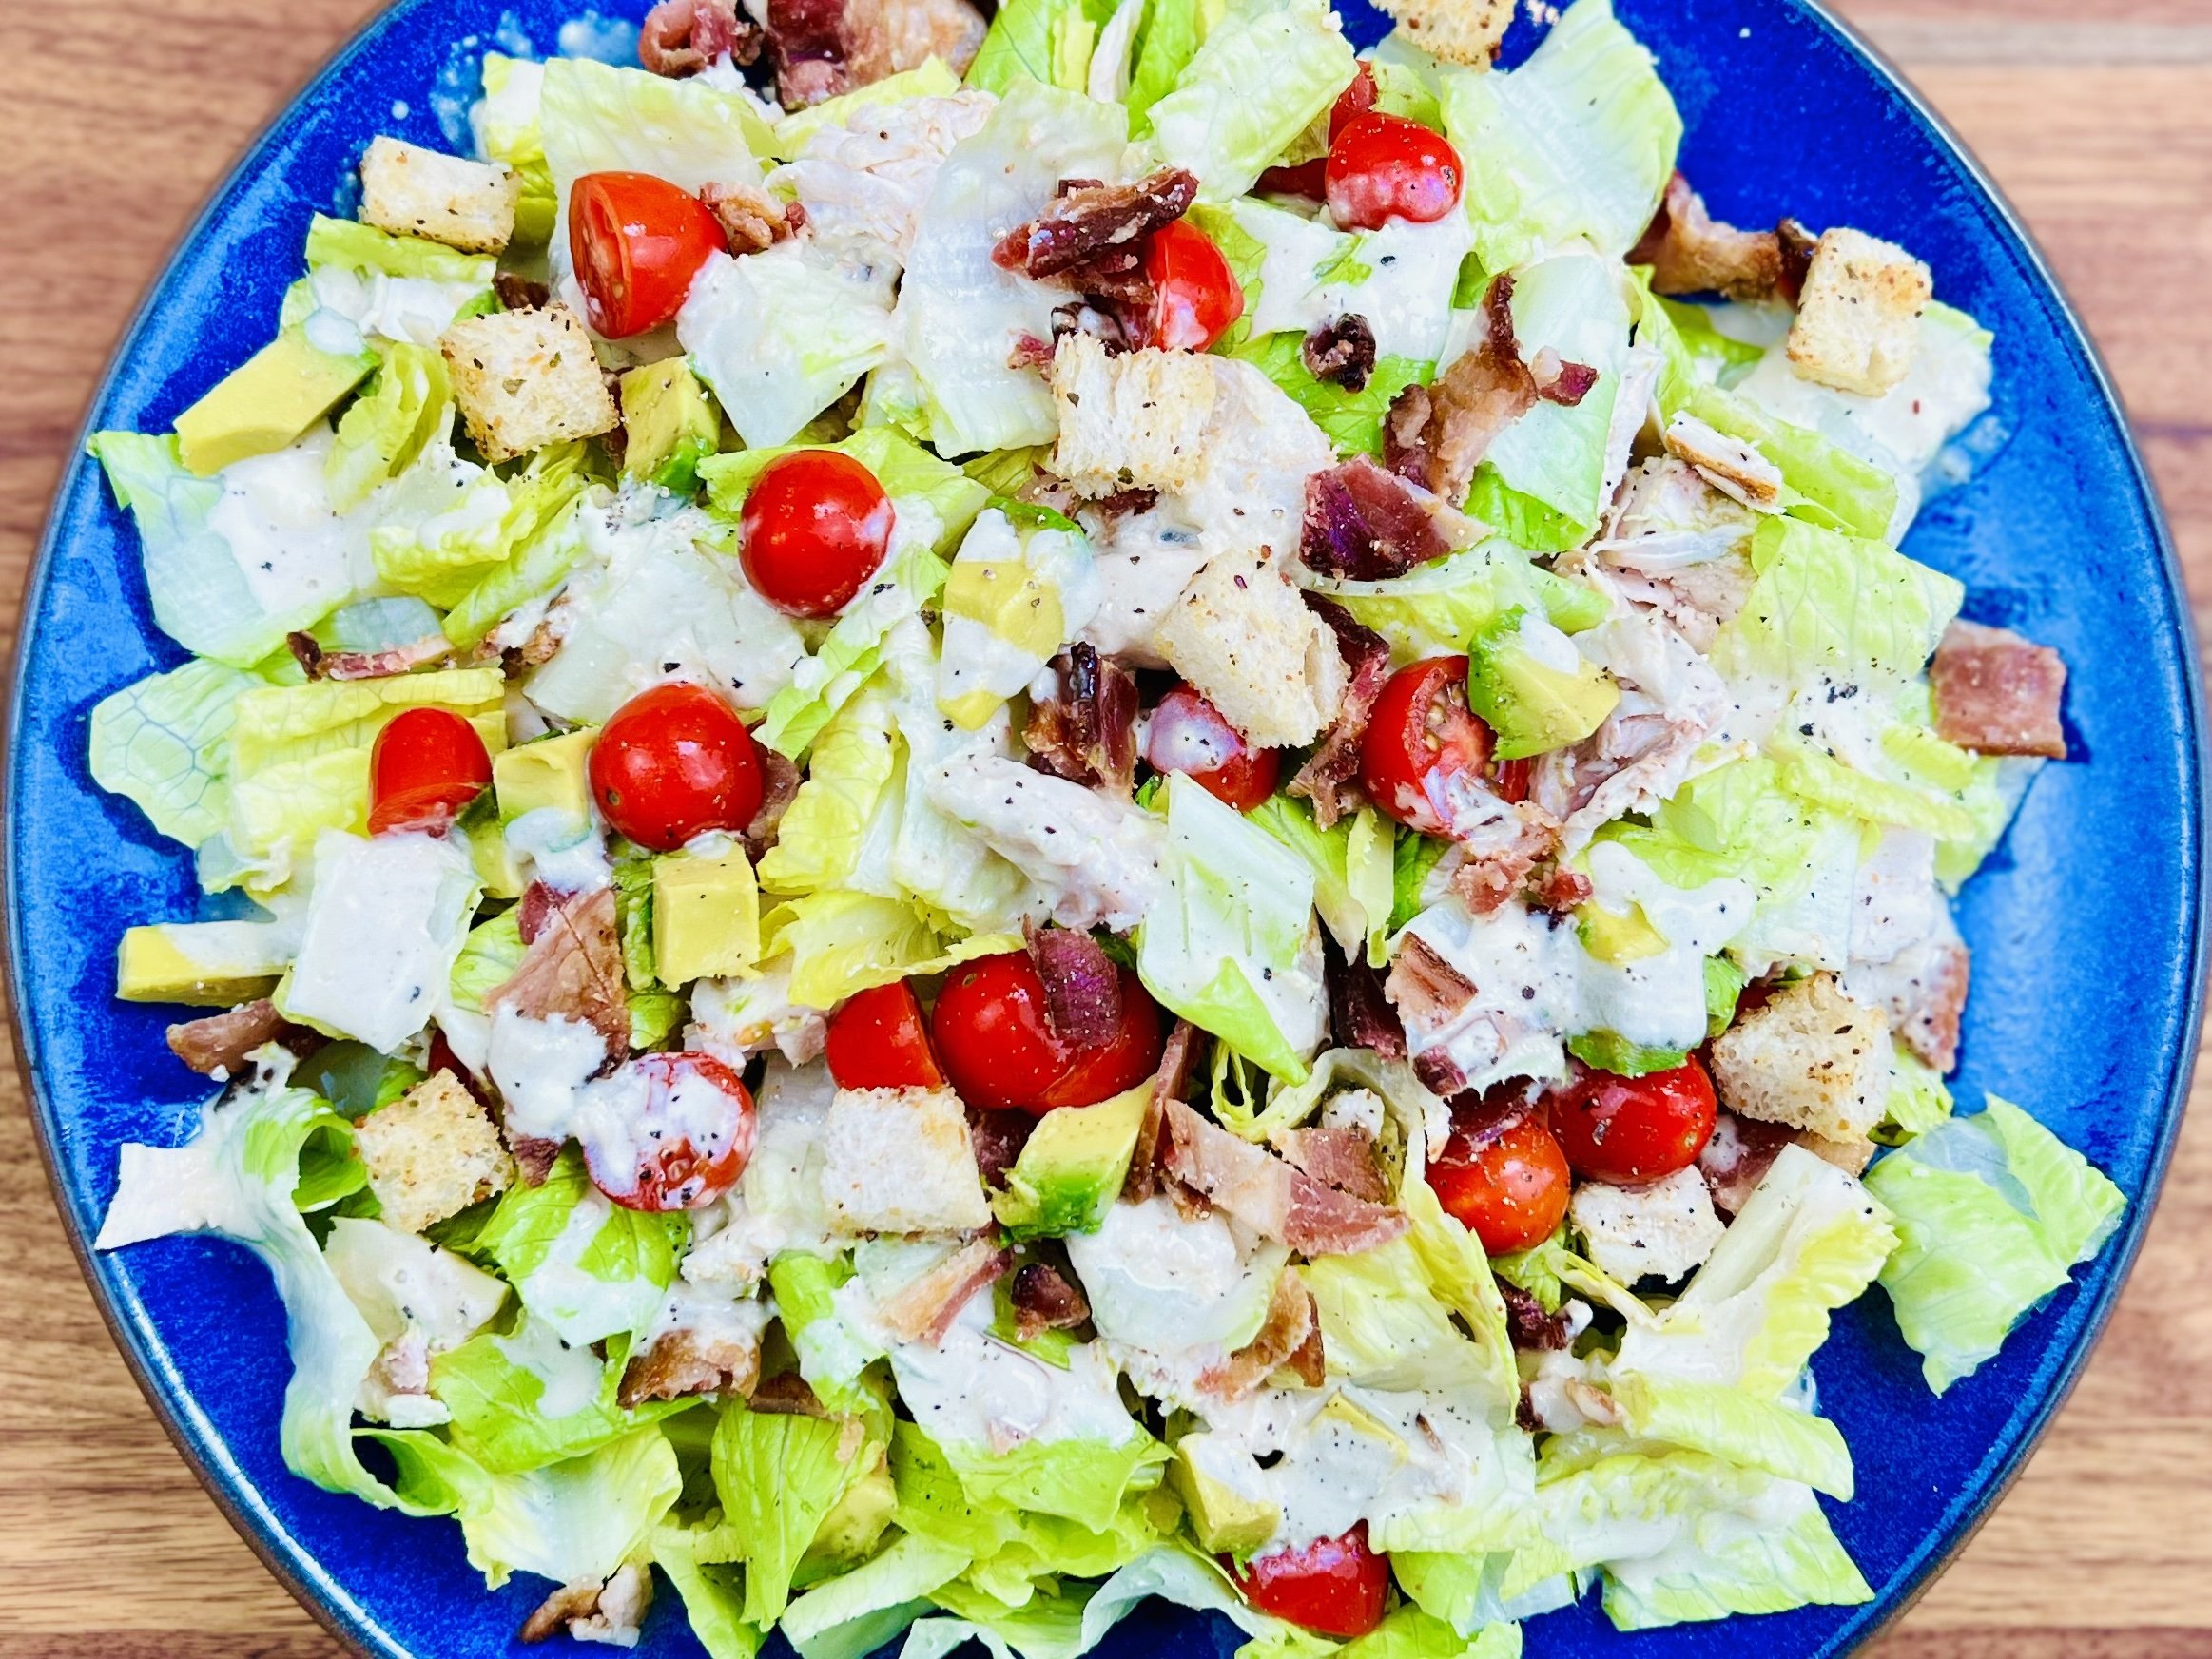
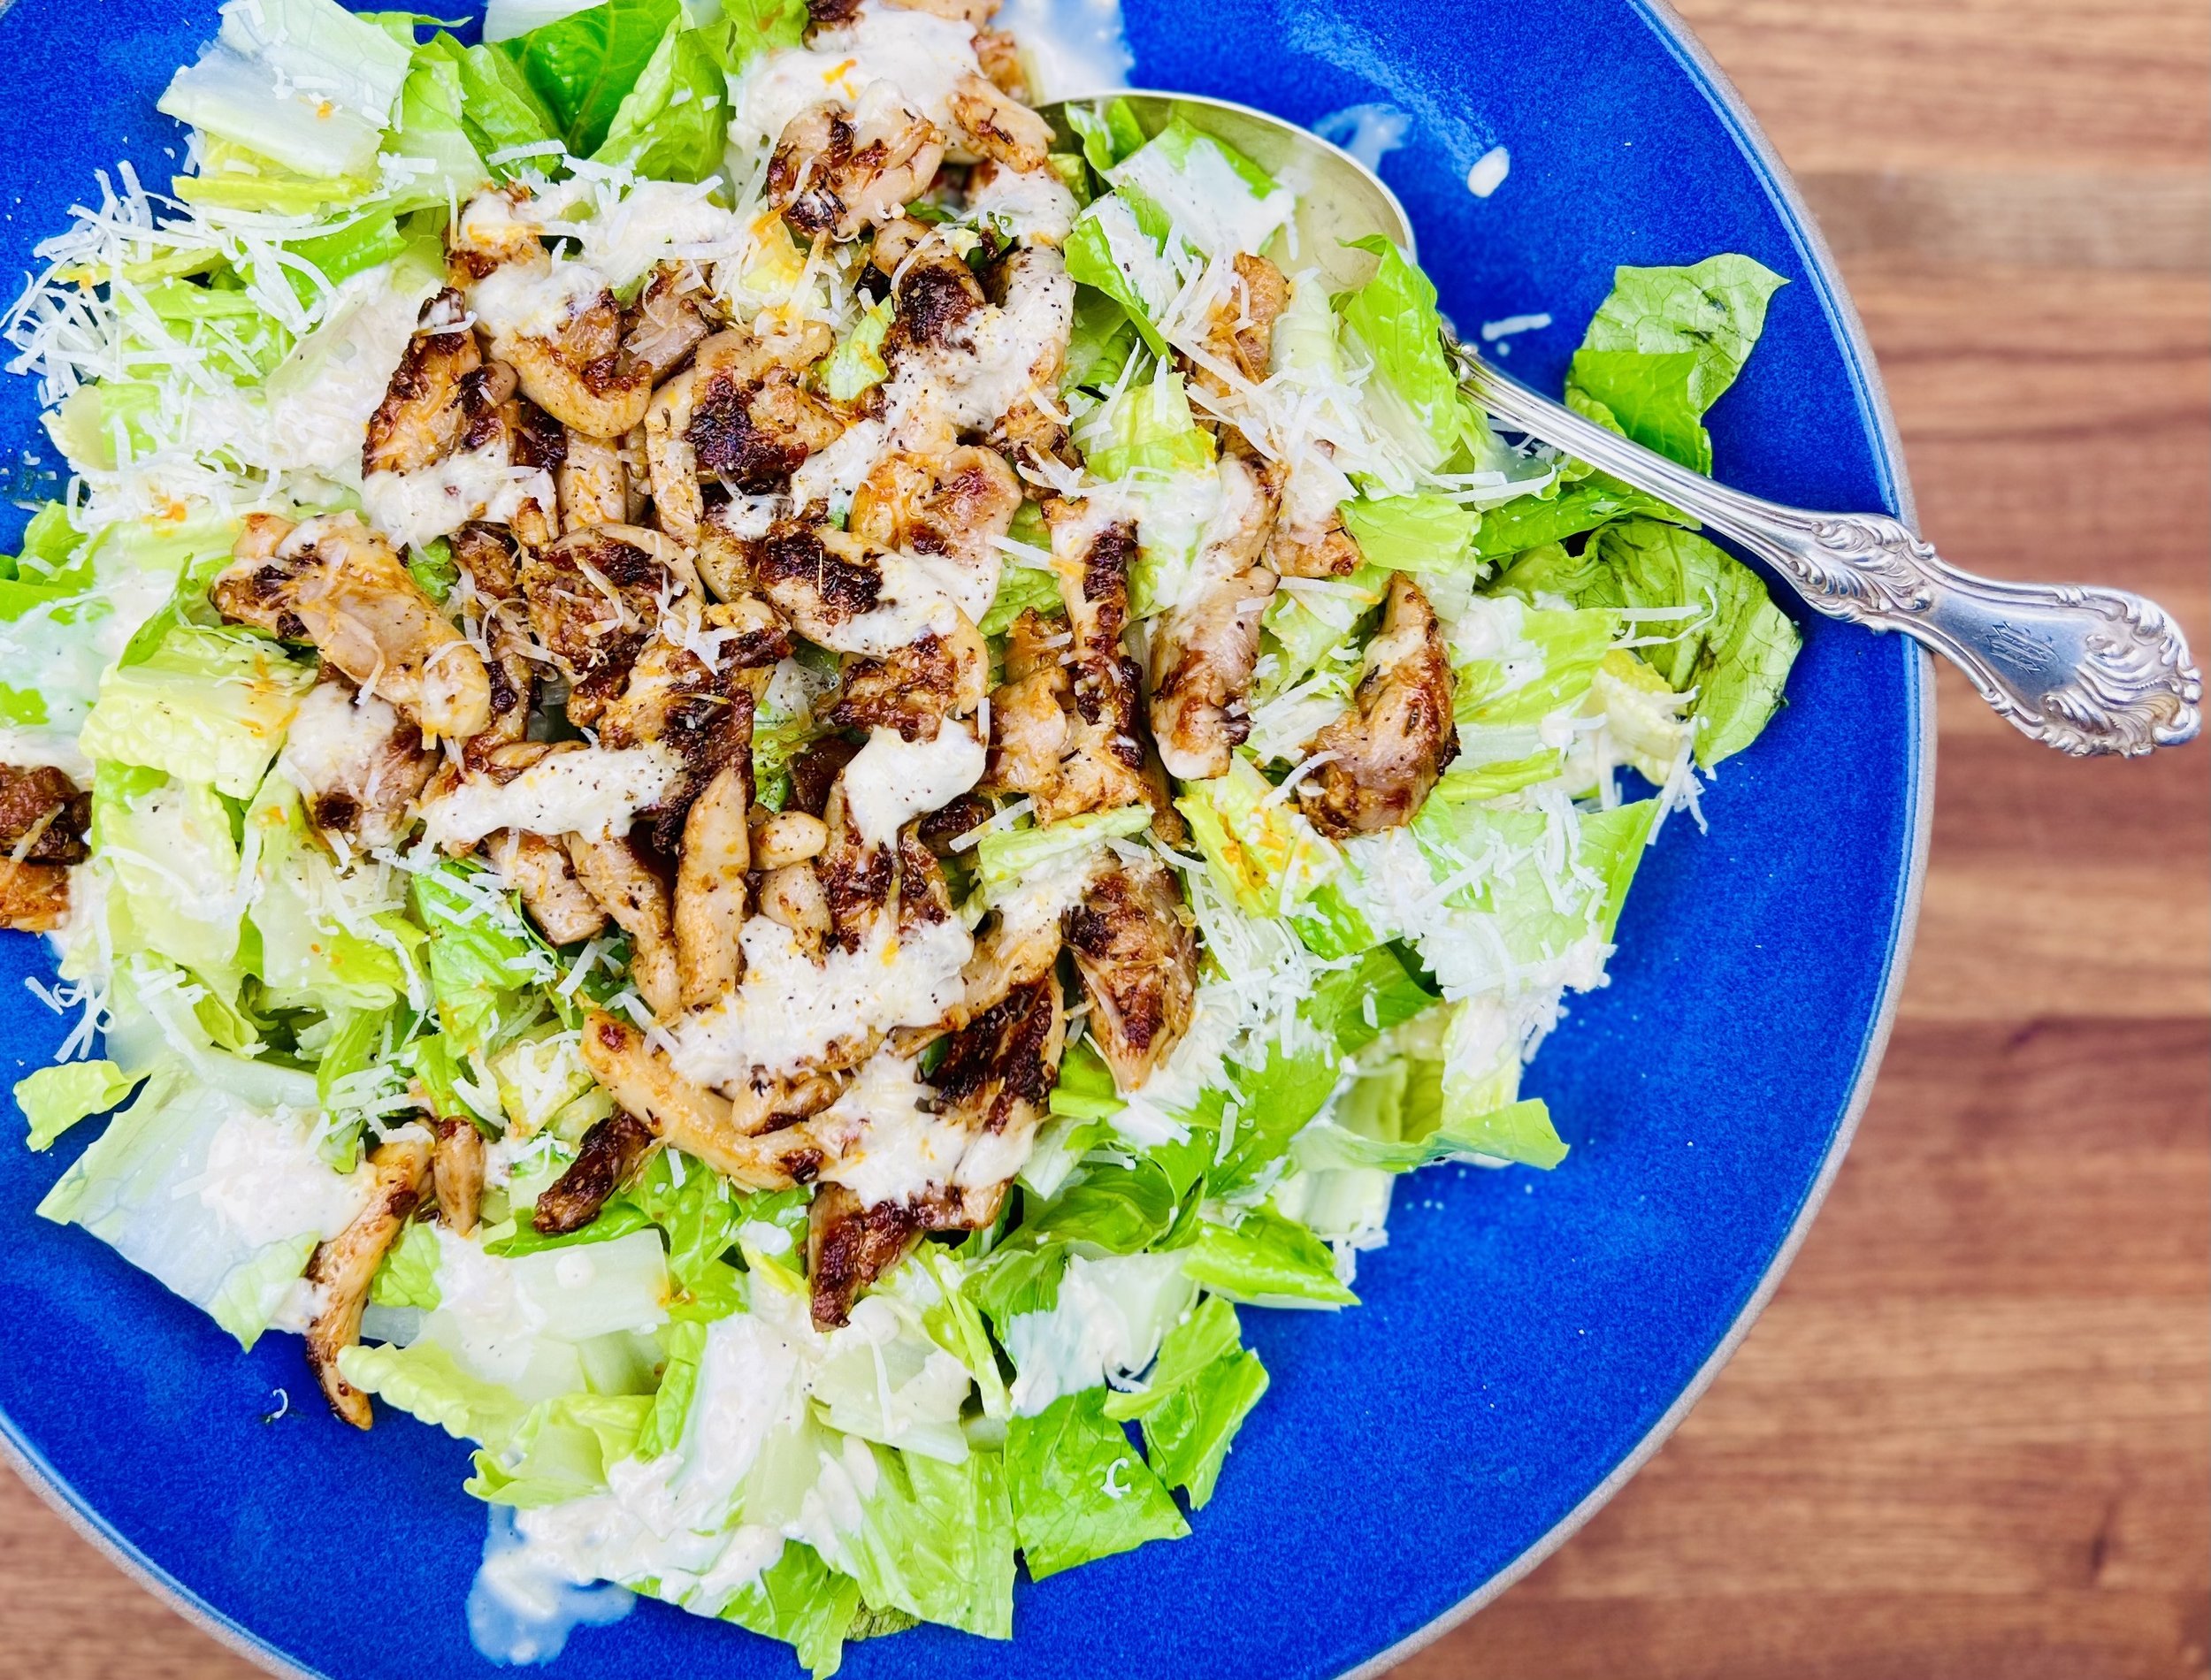
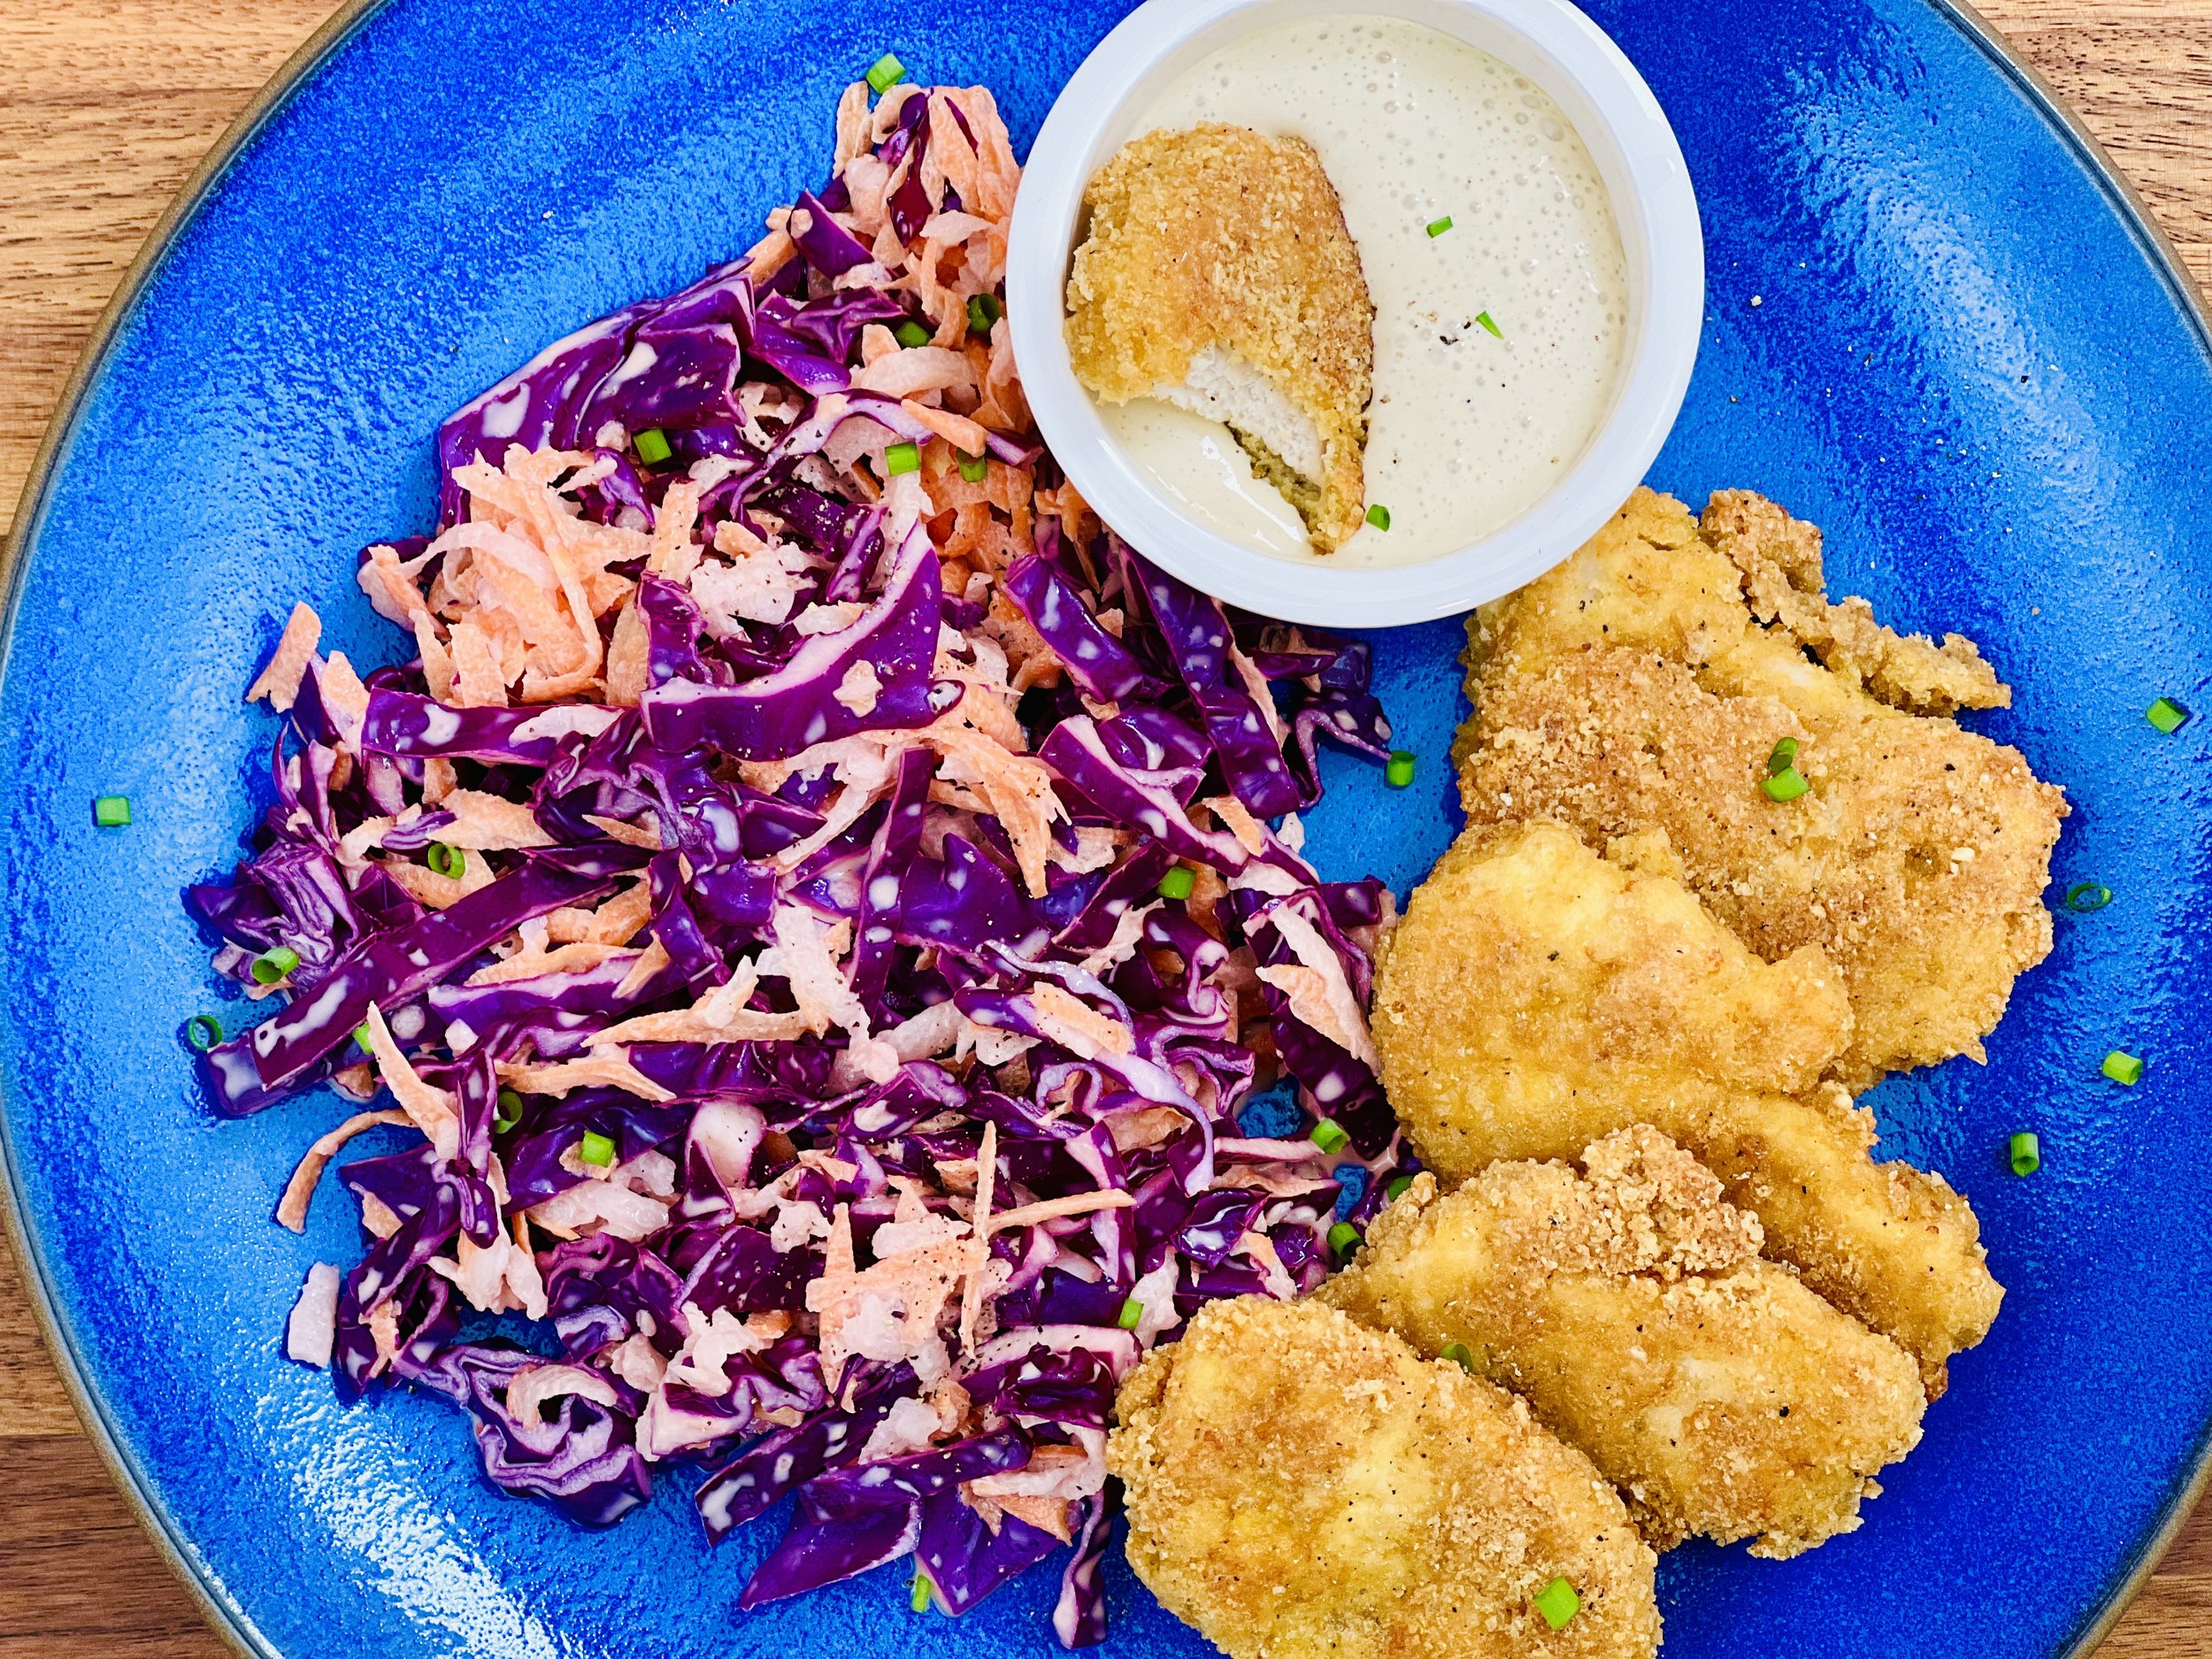
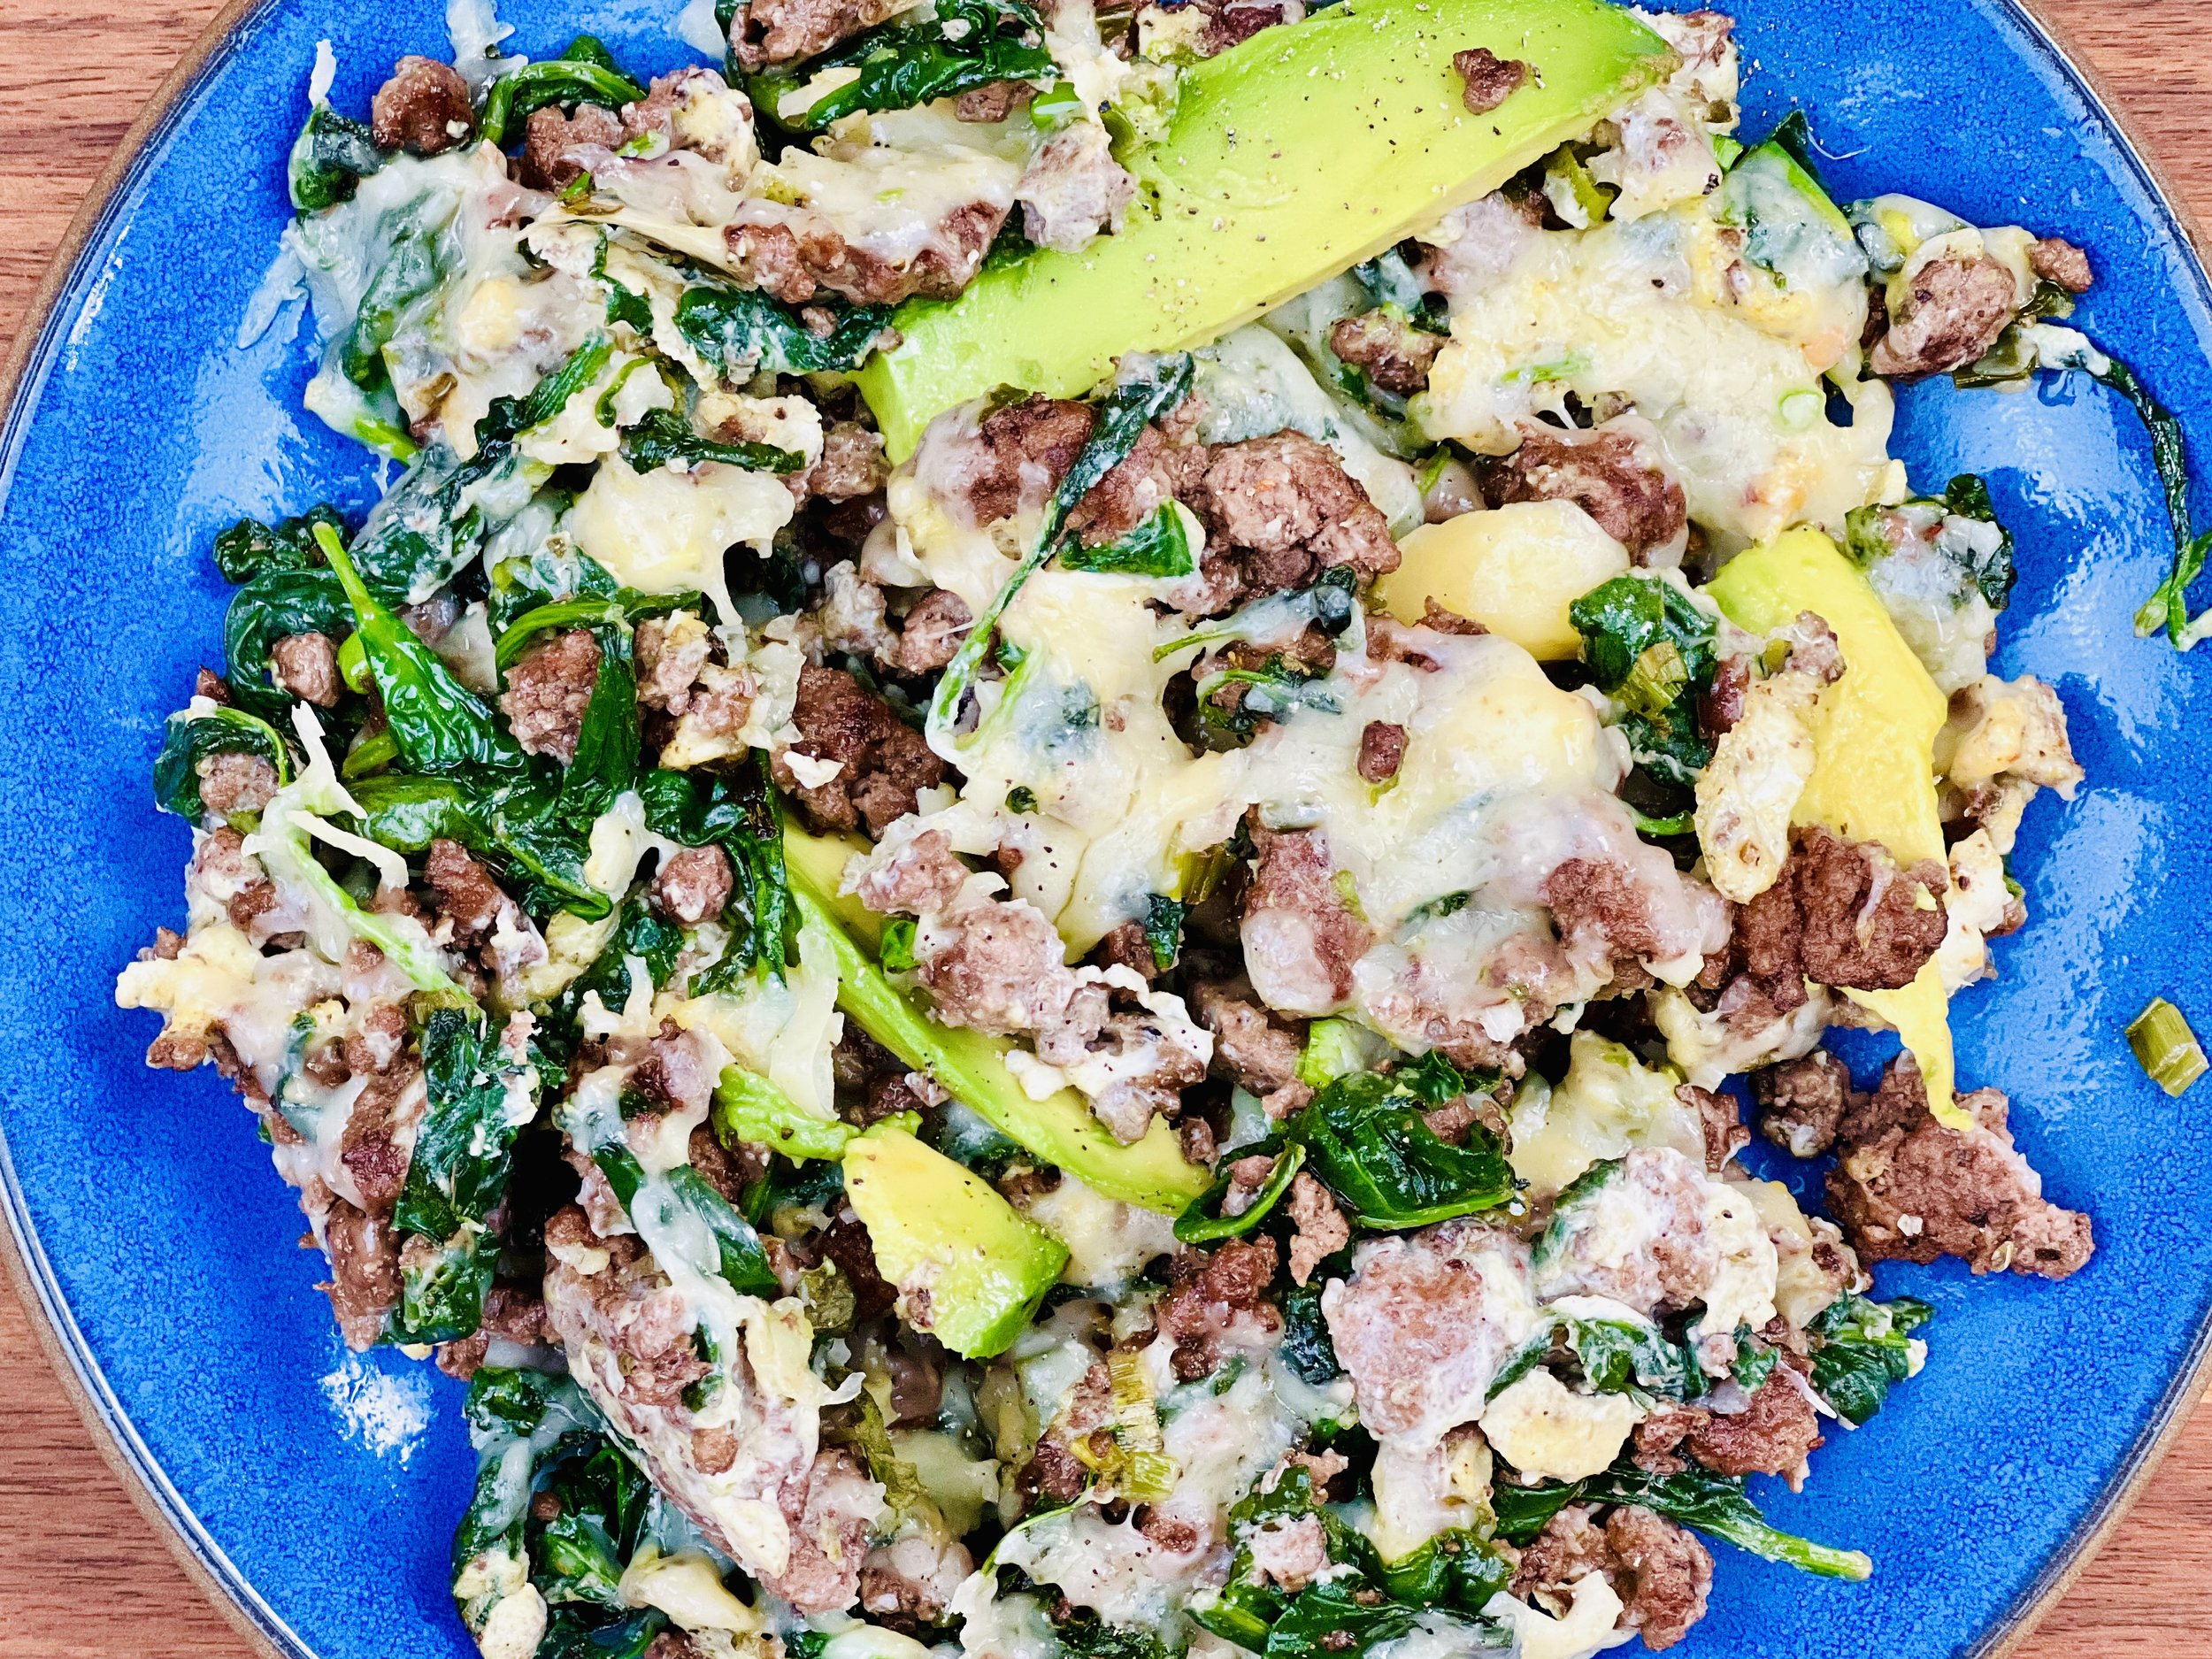
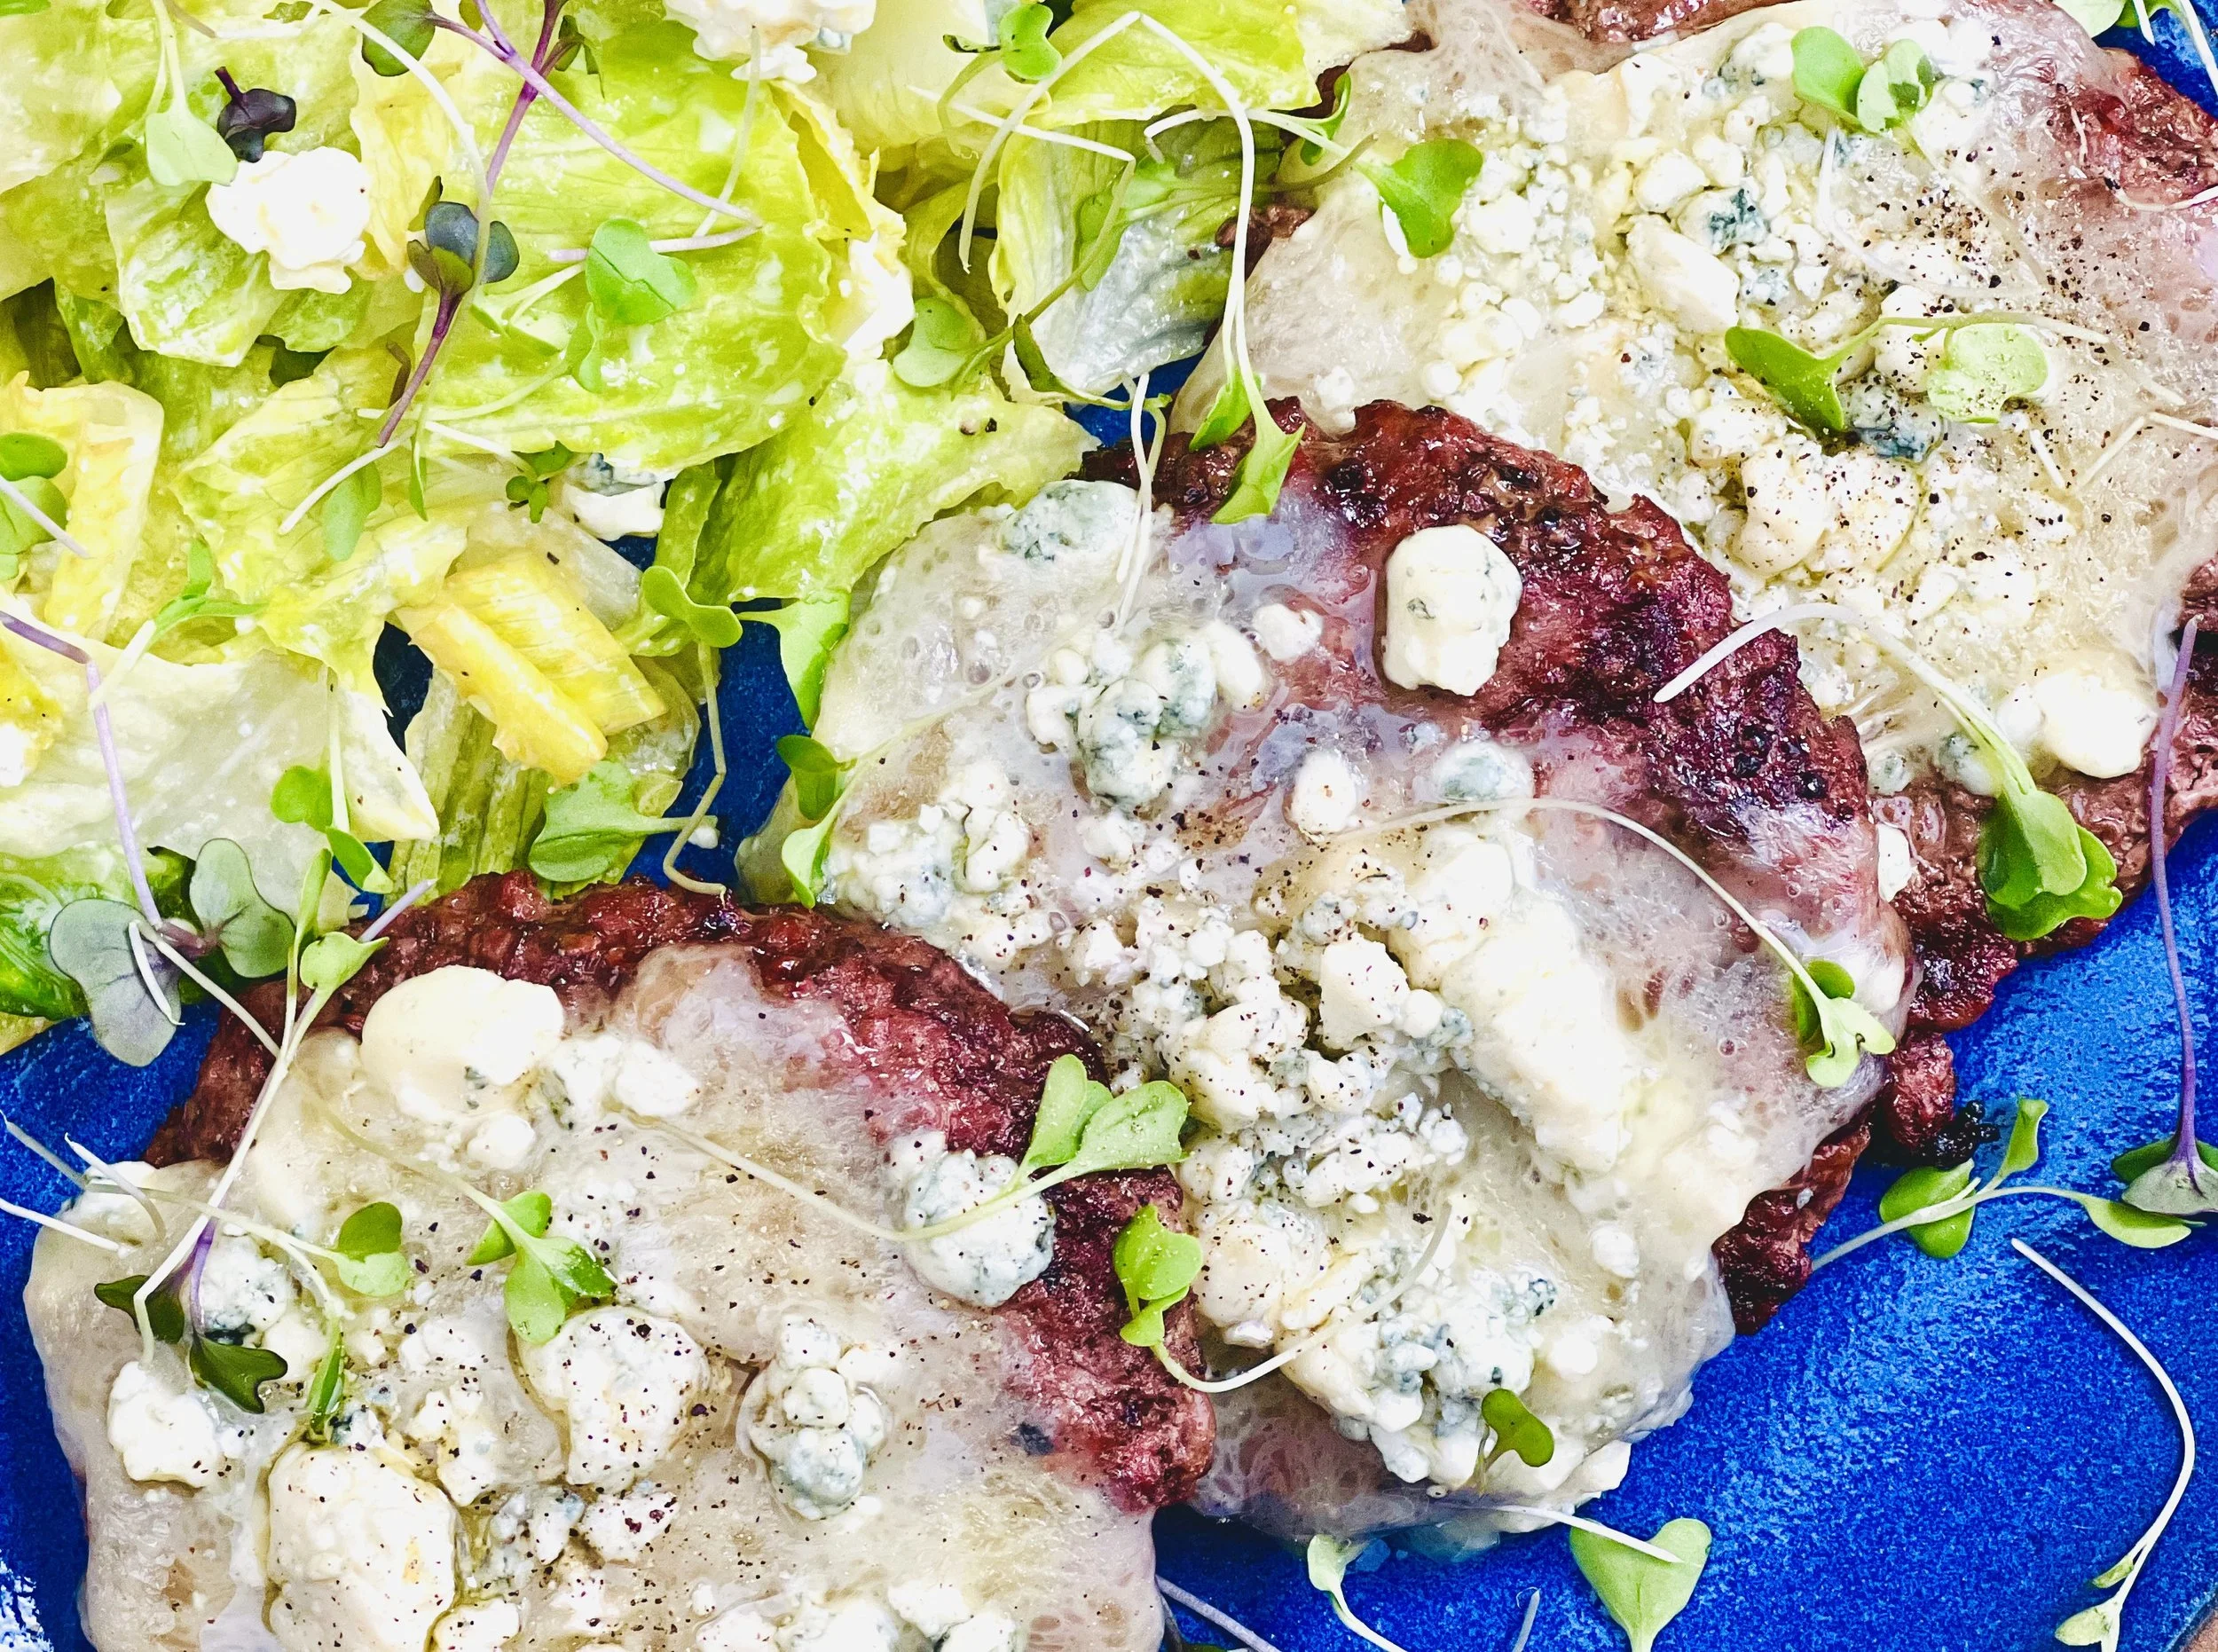
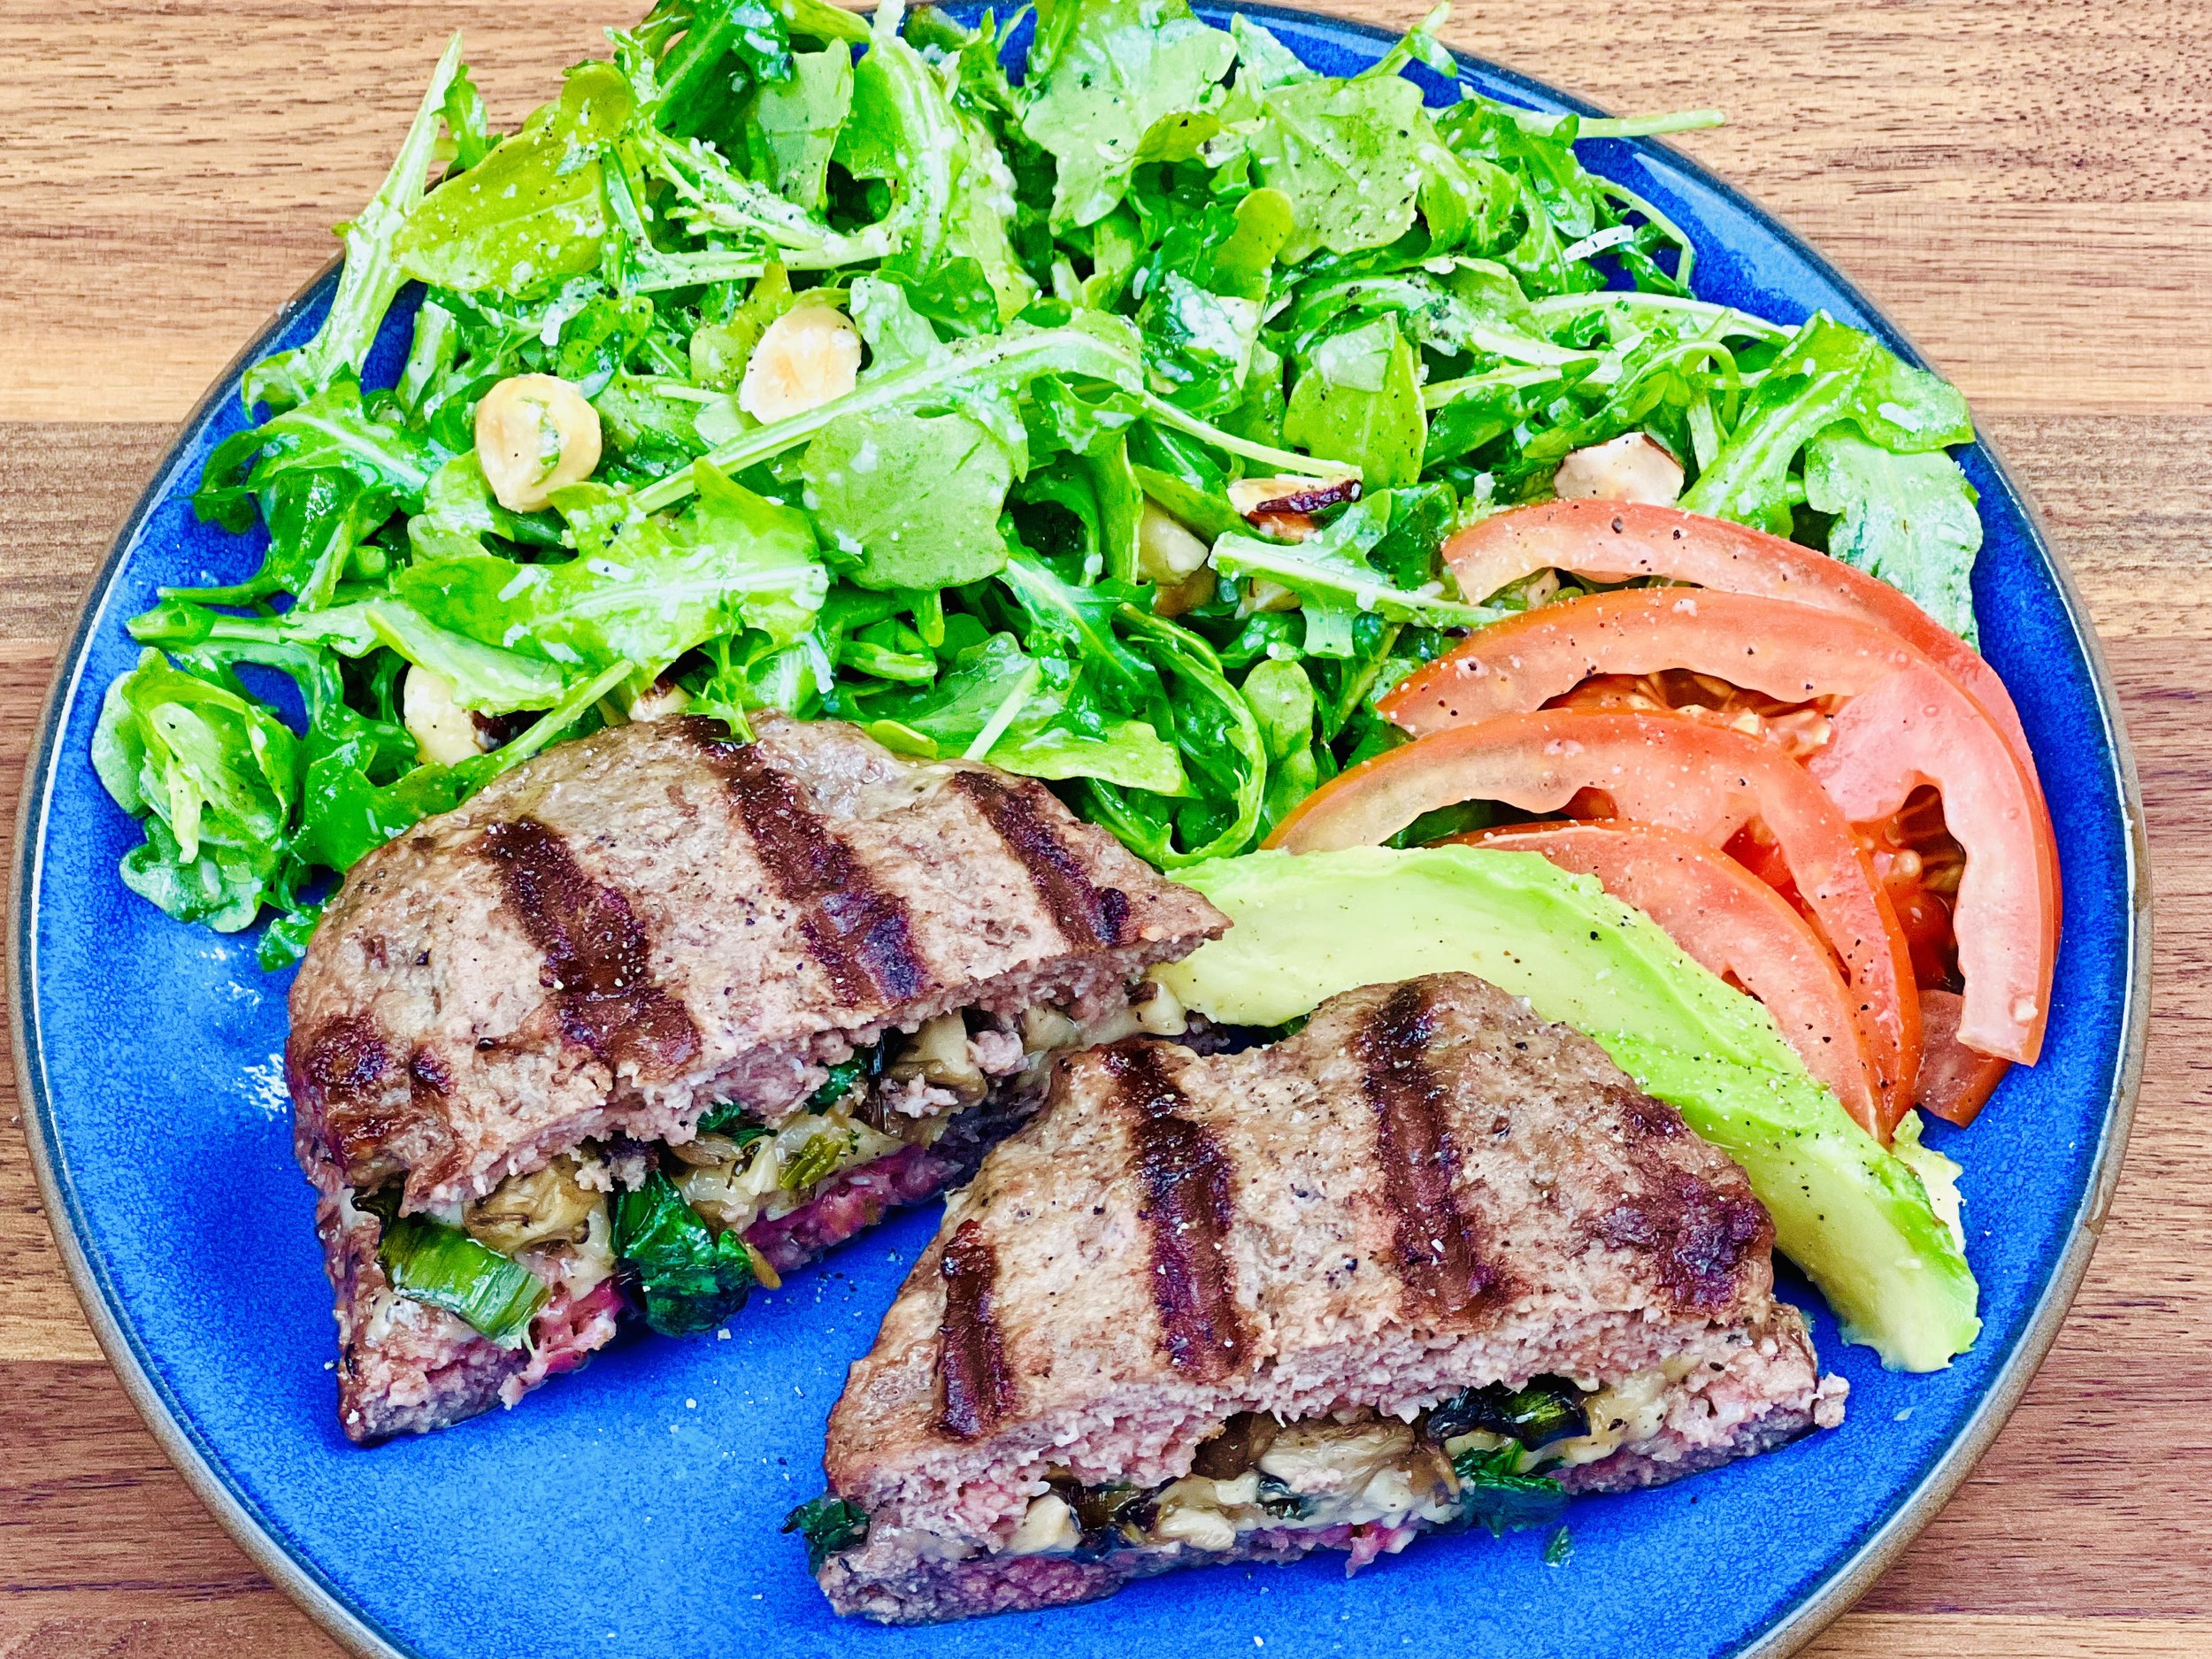
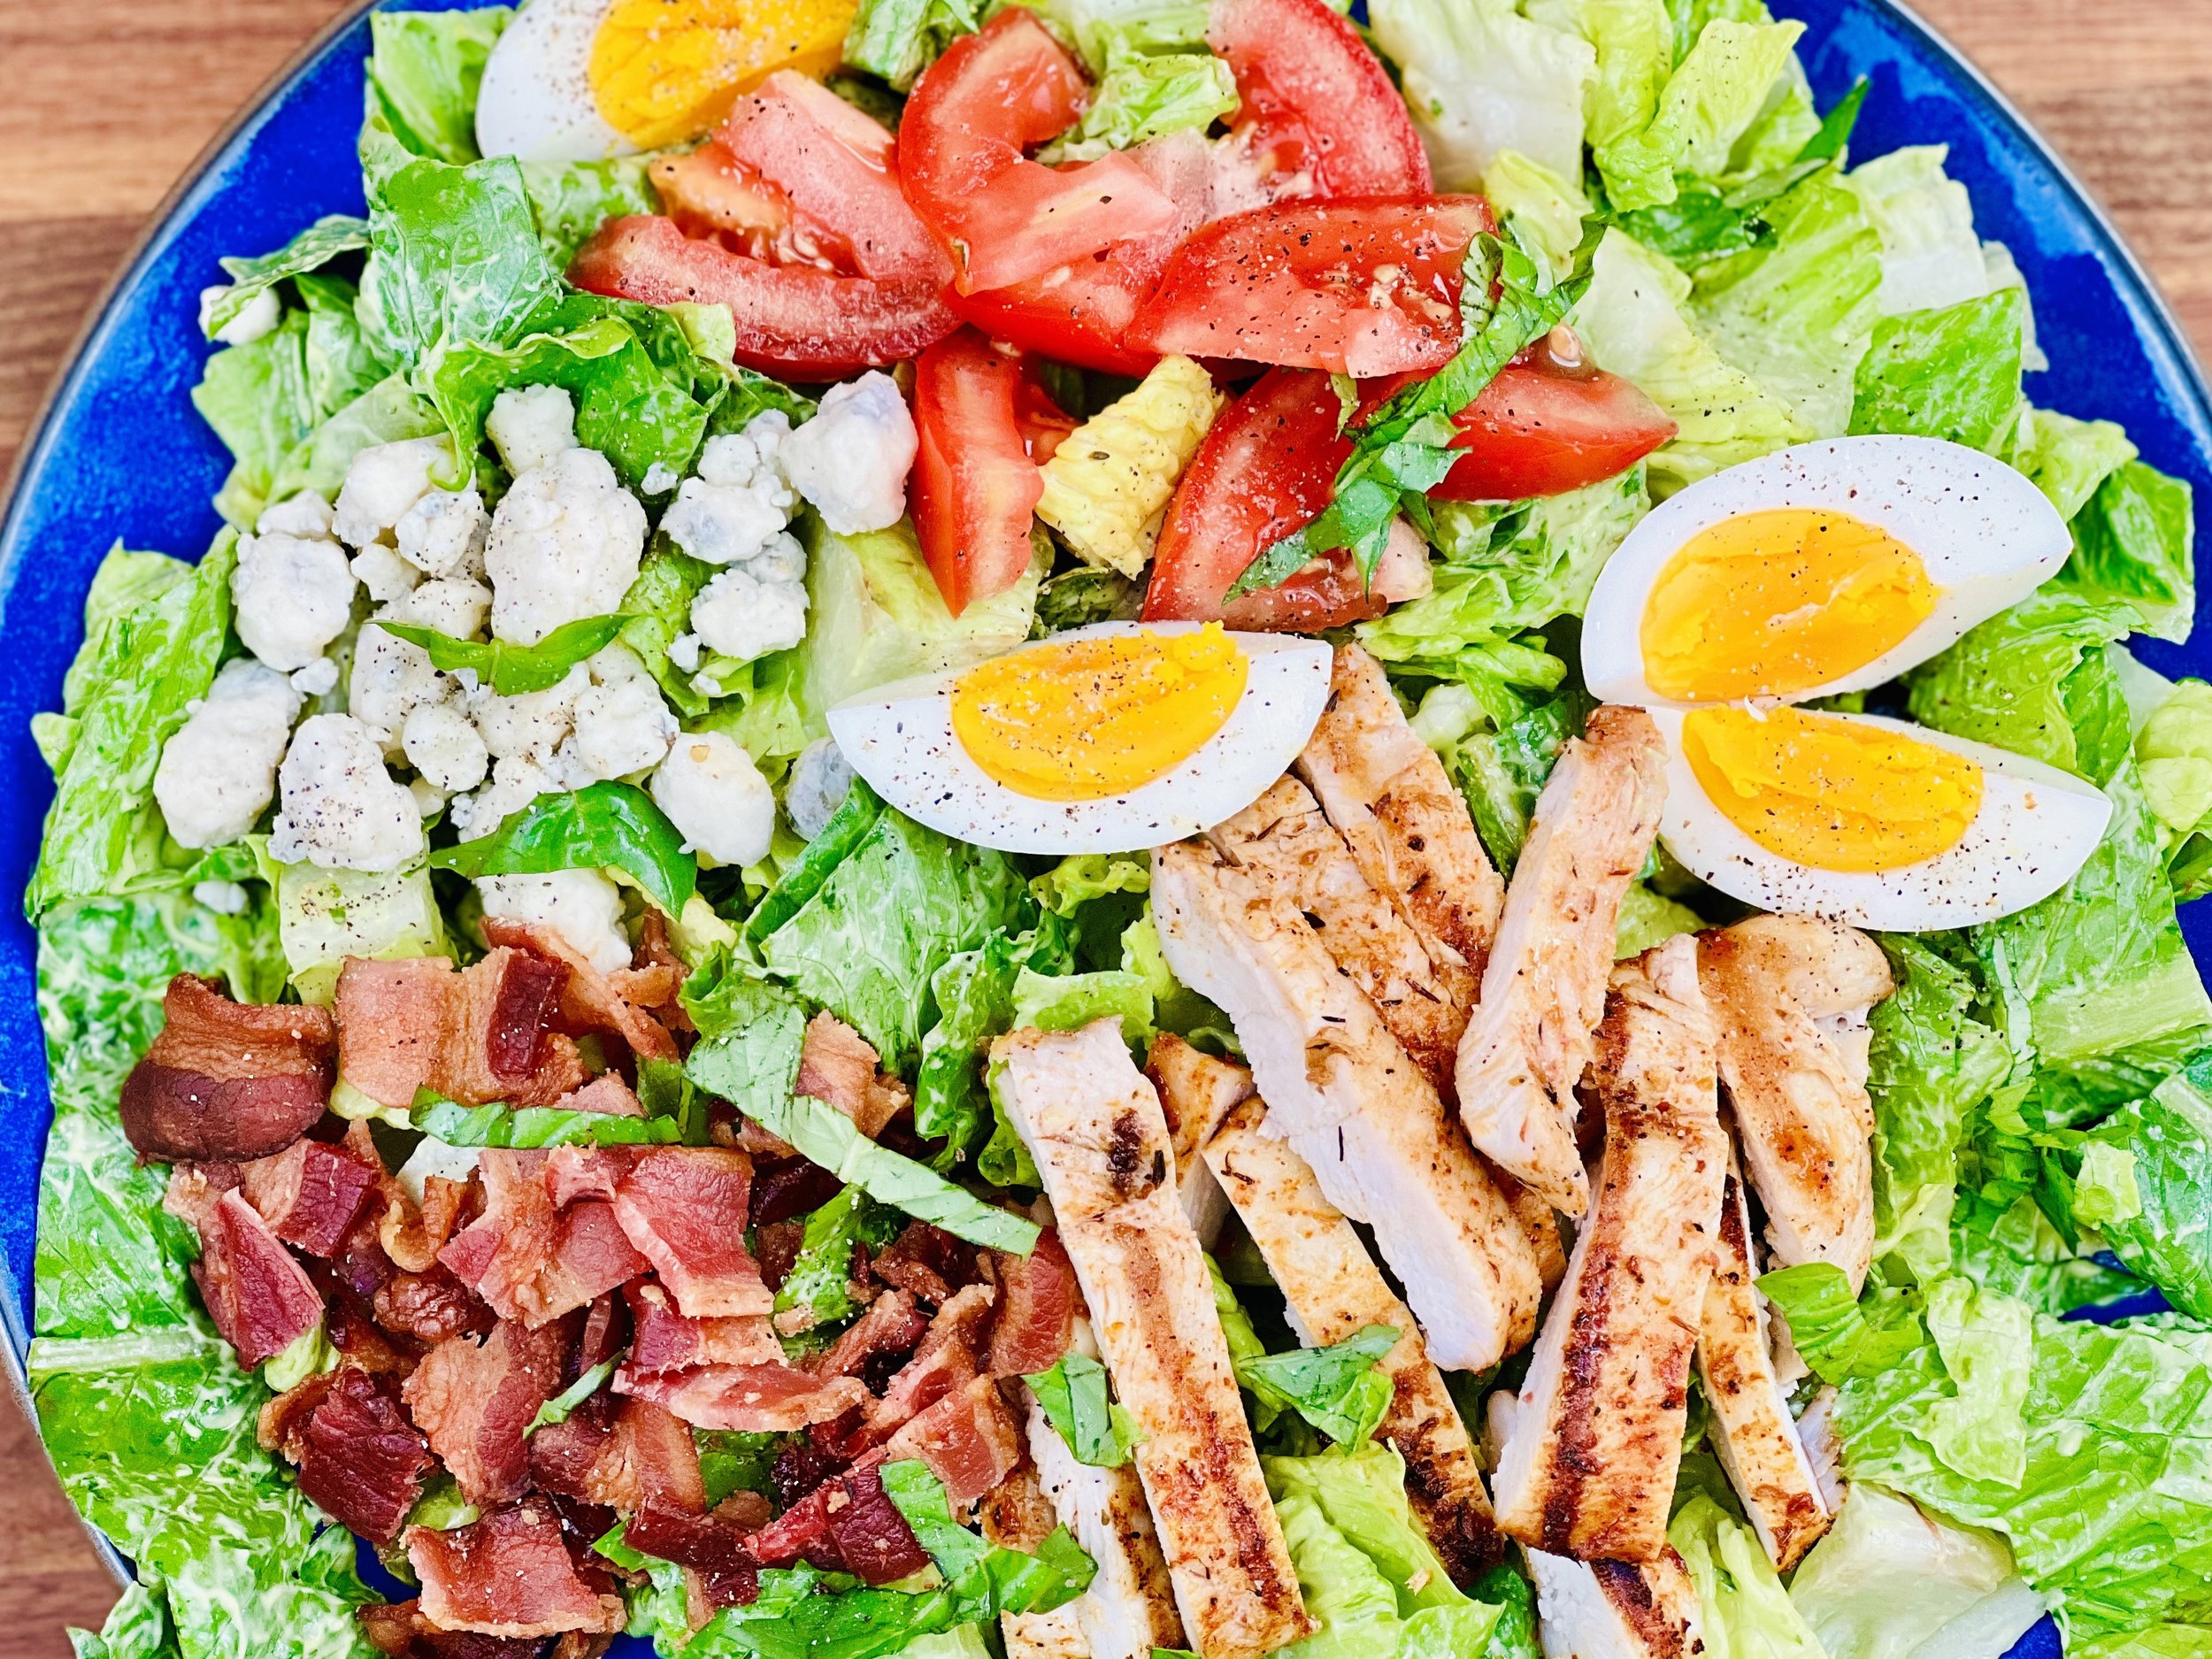
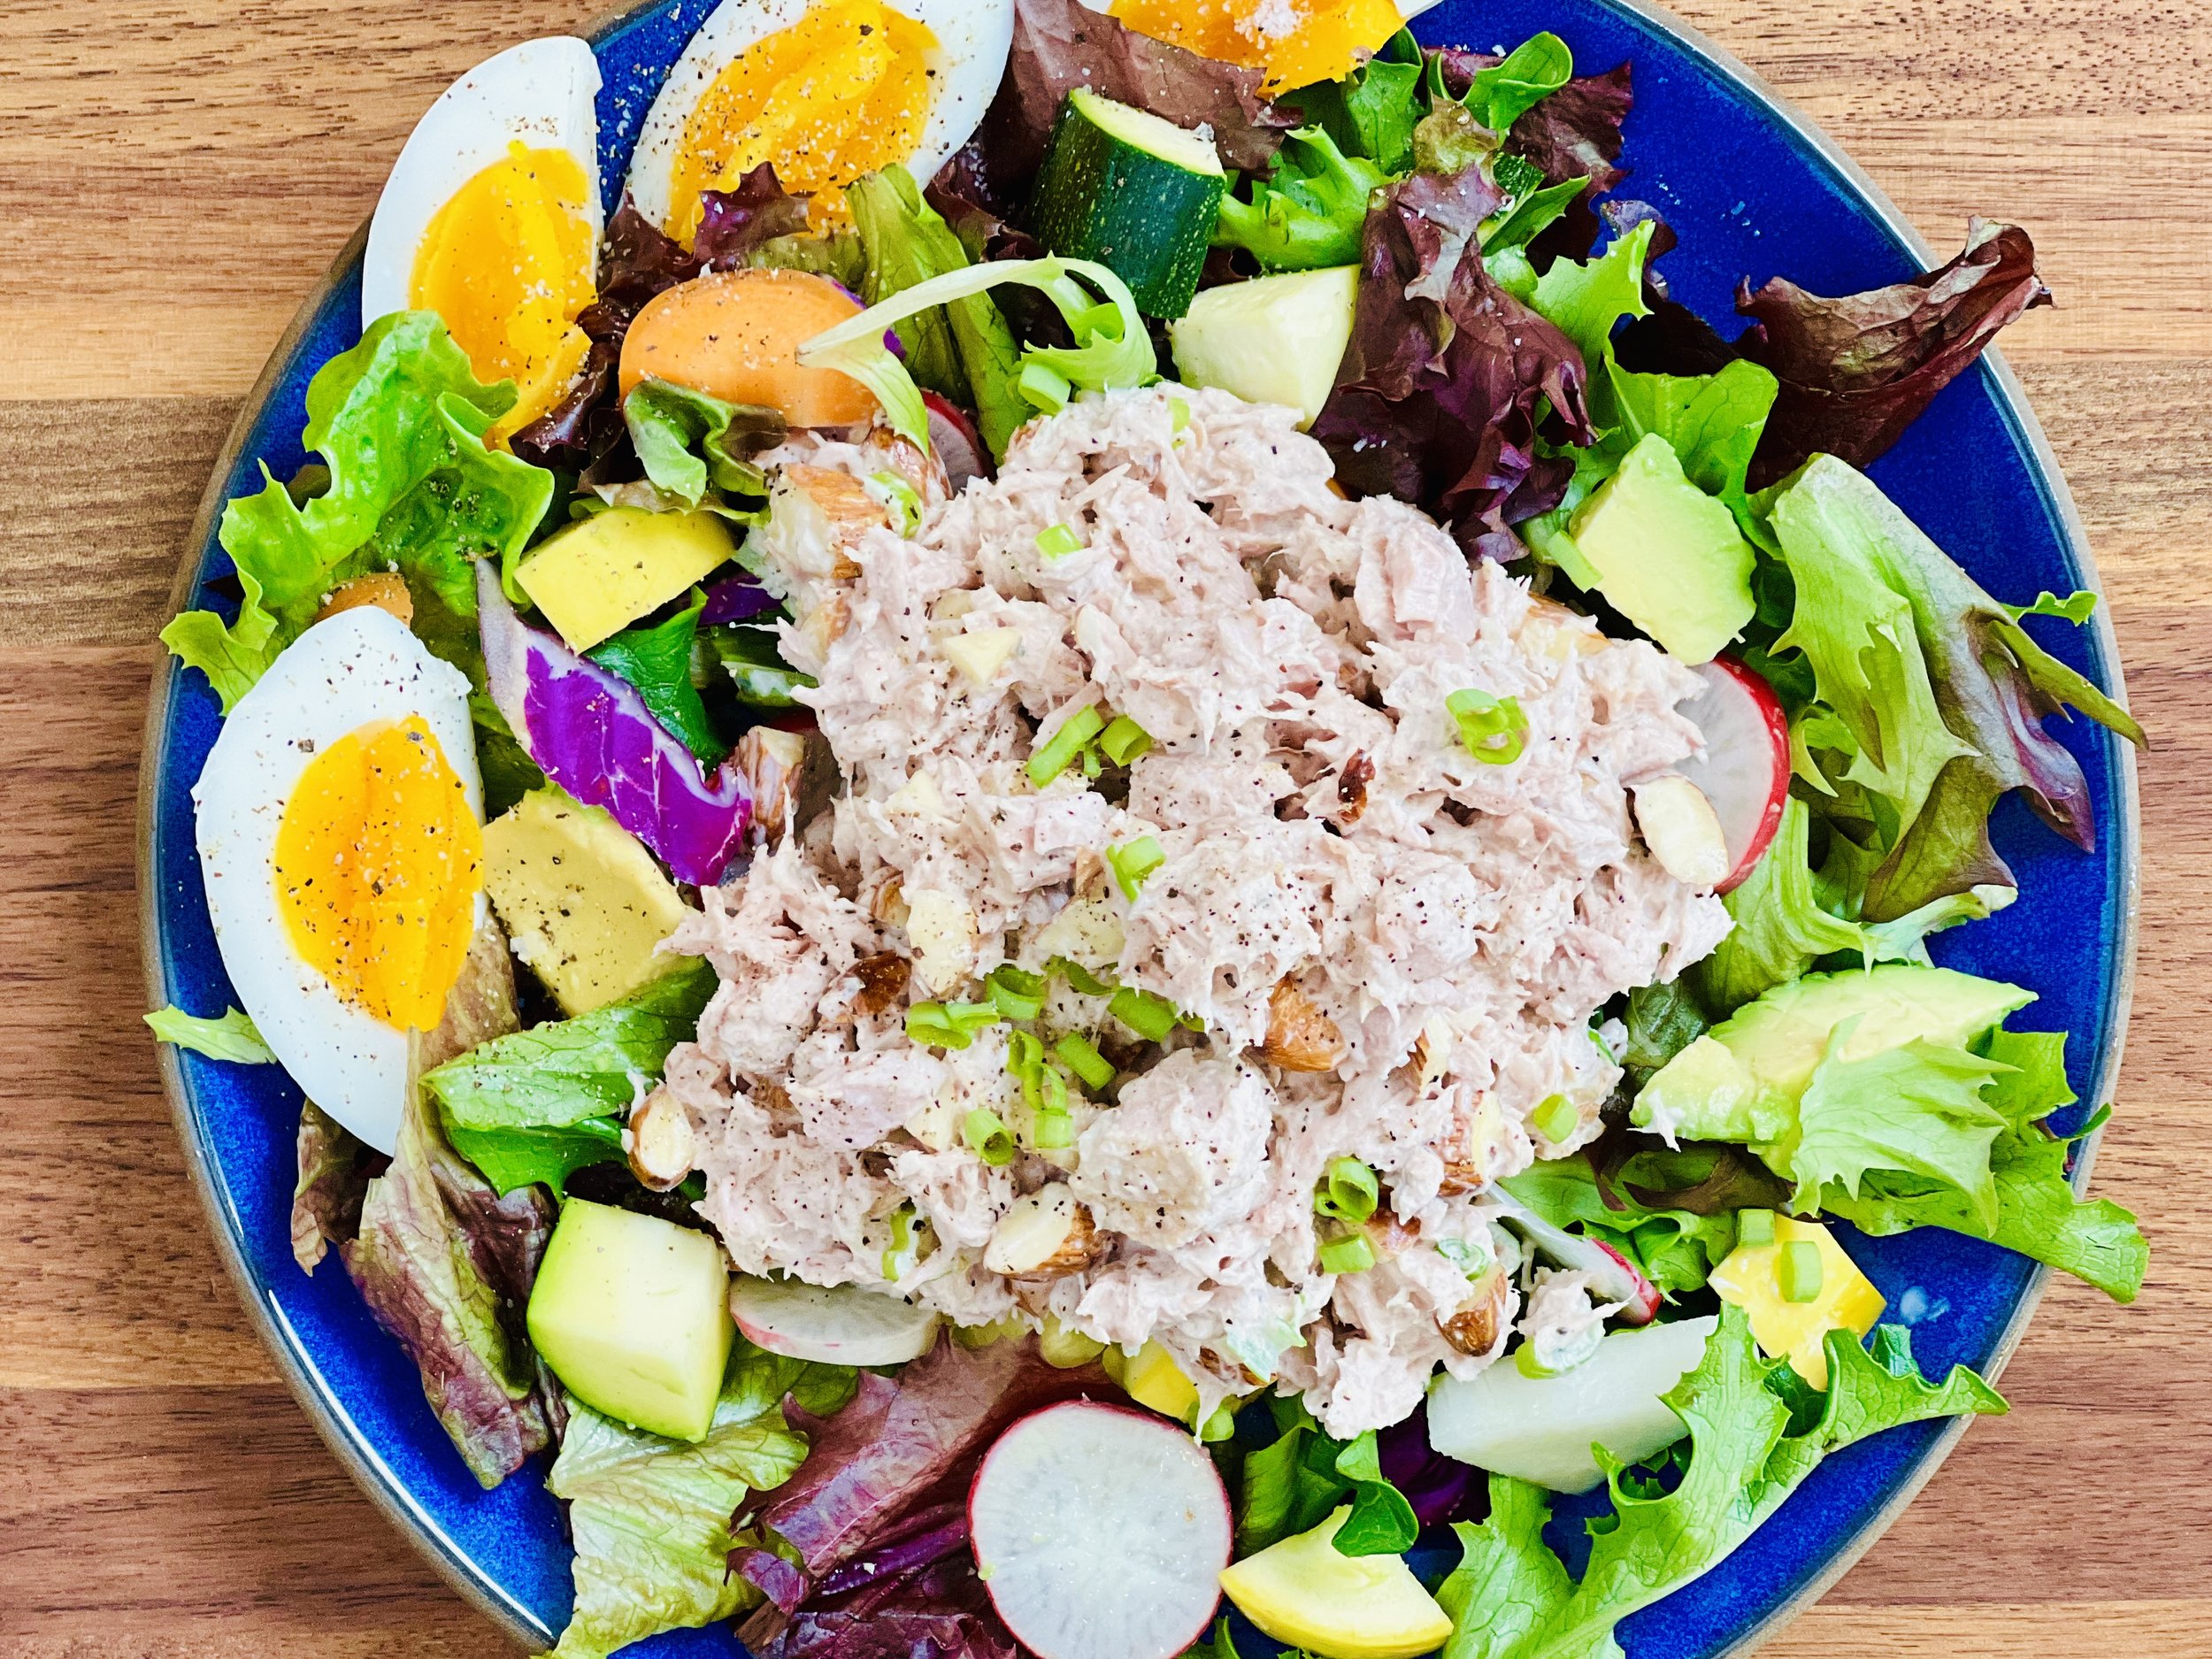
Chicken Cobb Salad with Creamy Avocado Dressing (Low FODMAP)
20 Minutes prep • 10 Minutes cook • Low FODMAP • Gluten-free • Serves 4
20 Minutes prep • 10 Minutes cook • Low FODMAP • Gluten-free • Serves 4 • Ok to make ahead: Steps 1-6
This salad is simple to make, beautiful to look at, and has the most delicious creamy avocado dressing! It’s a perfect main course dinner for a warm summer evening, or a wonderful hearty side for your next barbecue. Make extra Avocado Caesar dressing because it’s so creamy, flavorful, and thick, it makes a great dip for veggies and crackers as well.
Ingredients: Salad
1 pound boneless skinless chicken breasts
2 tablespoons Smoke N Sanity Cajun Creole or Lemon Pepper Seasoning
1 tablespoon extra virgin olive oil
6 cups shredded lettuce
1/2 cup fresh basil leaves
1 cup chopped fresh tomatoes or cherry tomatoes, sliced
1/2 cup crumbled blue cheese
6 strips of bacon, cooked and crumbled
4 hard-boiled eggs, quartered
Ingredients: Avocado Caesar Dressing
1/2 avocado, chopped
3 tablespoons heavy cream, plus more to thin the dressing if needed
3 tablespoons mayonnaise
2 teaspoons lemon juice
1/4 cup fresh basil, chopped, plus more for serving
1/2 teaspoon Smoke N Sanity Essence of Garlic Salt
1/4 teaspoon Kosher salt
1/4 teaspoon black pepper
Directions
(1) Cook the bacon: Preheat the oven to 400 degrees F. Line a rimmed baking sheet with foil and lay out the bacon slices so they aren’t crowded together. Bake 8-10 minutes, until the bacon is crisping, watch closely so it doesn’t burn. Remove from the oven and lay on paper towels to cool. Once cool, chop the bacon and set aside.
(2) Hard boil the eggs: Put the eggs in a saucepan and just cover with cold water. Bring the water to a boil on the stove. Turn the heat off and cover the pan. Let the eggs sit in the pan to cook in the hot water for about 10 minutes (longer if you like a very firm yolk). Pour off the hot water and run cold water over the eggs until they are cooled. The fresher the eggs, the harder they are to peel after boiling so use eggs that you have had for a little while if you can!
(3) Slice the chicken: You can buy “thin cut” chicken, or slice it horizontally yourself. This will help the seasoning reach more of the chicken and it will cook quite fast on the grill.
(4) Marinate and grill the chicken: In a bowl, toss the chicken with olive oil and cajun or lemon pepper seasoning. Set aside until you’re ready to cook. Set your grill, grill pan, or skillet to medium-high. Grill the chicken until lightly charred and cooked through, turning halfway through cooking, about 10 minutes. Remove from the heat and let rest on a cutting board while you make the rest of the salad.
(5) Make the dressing: While the chicken is cooking, combine all ingredients in a blender or in a compact food processor and blend until creamy, adding more cream or lactose-free whole milk to thin the dressing if needed. Taste and adjust the salt and pepper as needed.
(6) Slice the chicken: Cut the chicken into bite-size pieces and chop the bacon into crumbles.
Make-ahead note: At this point, you may set everything aside in the refrigerator until you’re ready to plate and serve.
(7) Finish: In a large bowl, toss the greens and basil with the dressing.
(8) Plate and serve: Put 1/4 of the dressed greens on each plate, then arrange the chicken, tomatoes, cheese, bacon, and eggs on top. Drizzle with additional dressing if you like. Sprinkle with chopped fresh basil and a few grinds of black pepper.
Eat and enjoy every bite because you can!
Recipe note: I use Diamond Crystal Kosher salt in all my recipes because it has a wonderful flat and crisp flake that tastes delicious. It is also the least salty salt available so you can use it more liberally as a seasoning than you can table salt or sea salt. If you use another type of salt, you may need to reduce the amount so it is not over-salted.
Have a question you’d like to have answered? Email me at hello@ibsgamechanger.com
Link note: This post may contain affiliate links for you to easily purchase items that are linked. I may earn a small commission from qualifying purchases but none of this costs you a thing so feel free to use the links! In addition, for some items, I have provided a special discount code for IBS Game Changers so be sure to use the code when you purchase an item to get the discount that has been arranged just for you.
More Deliciously Low FODMAP™ salad recipes
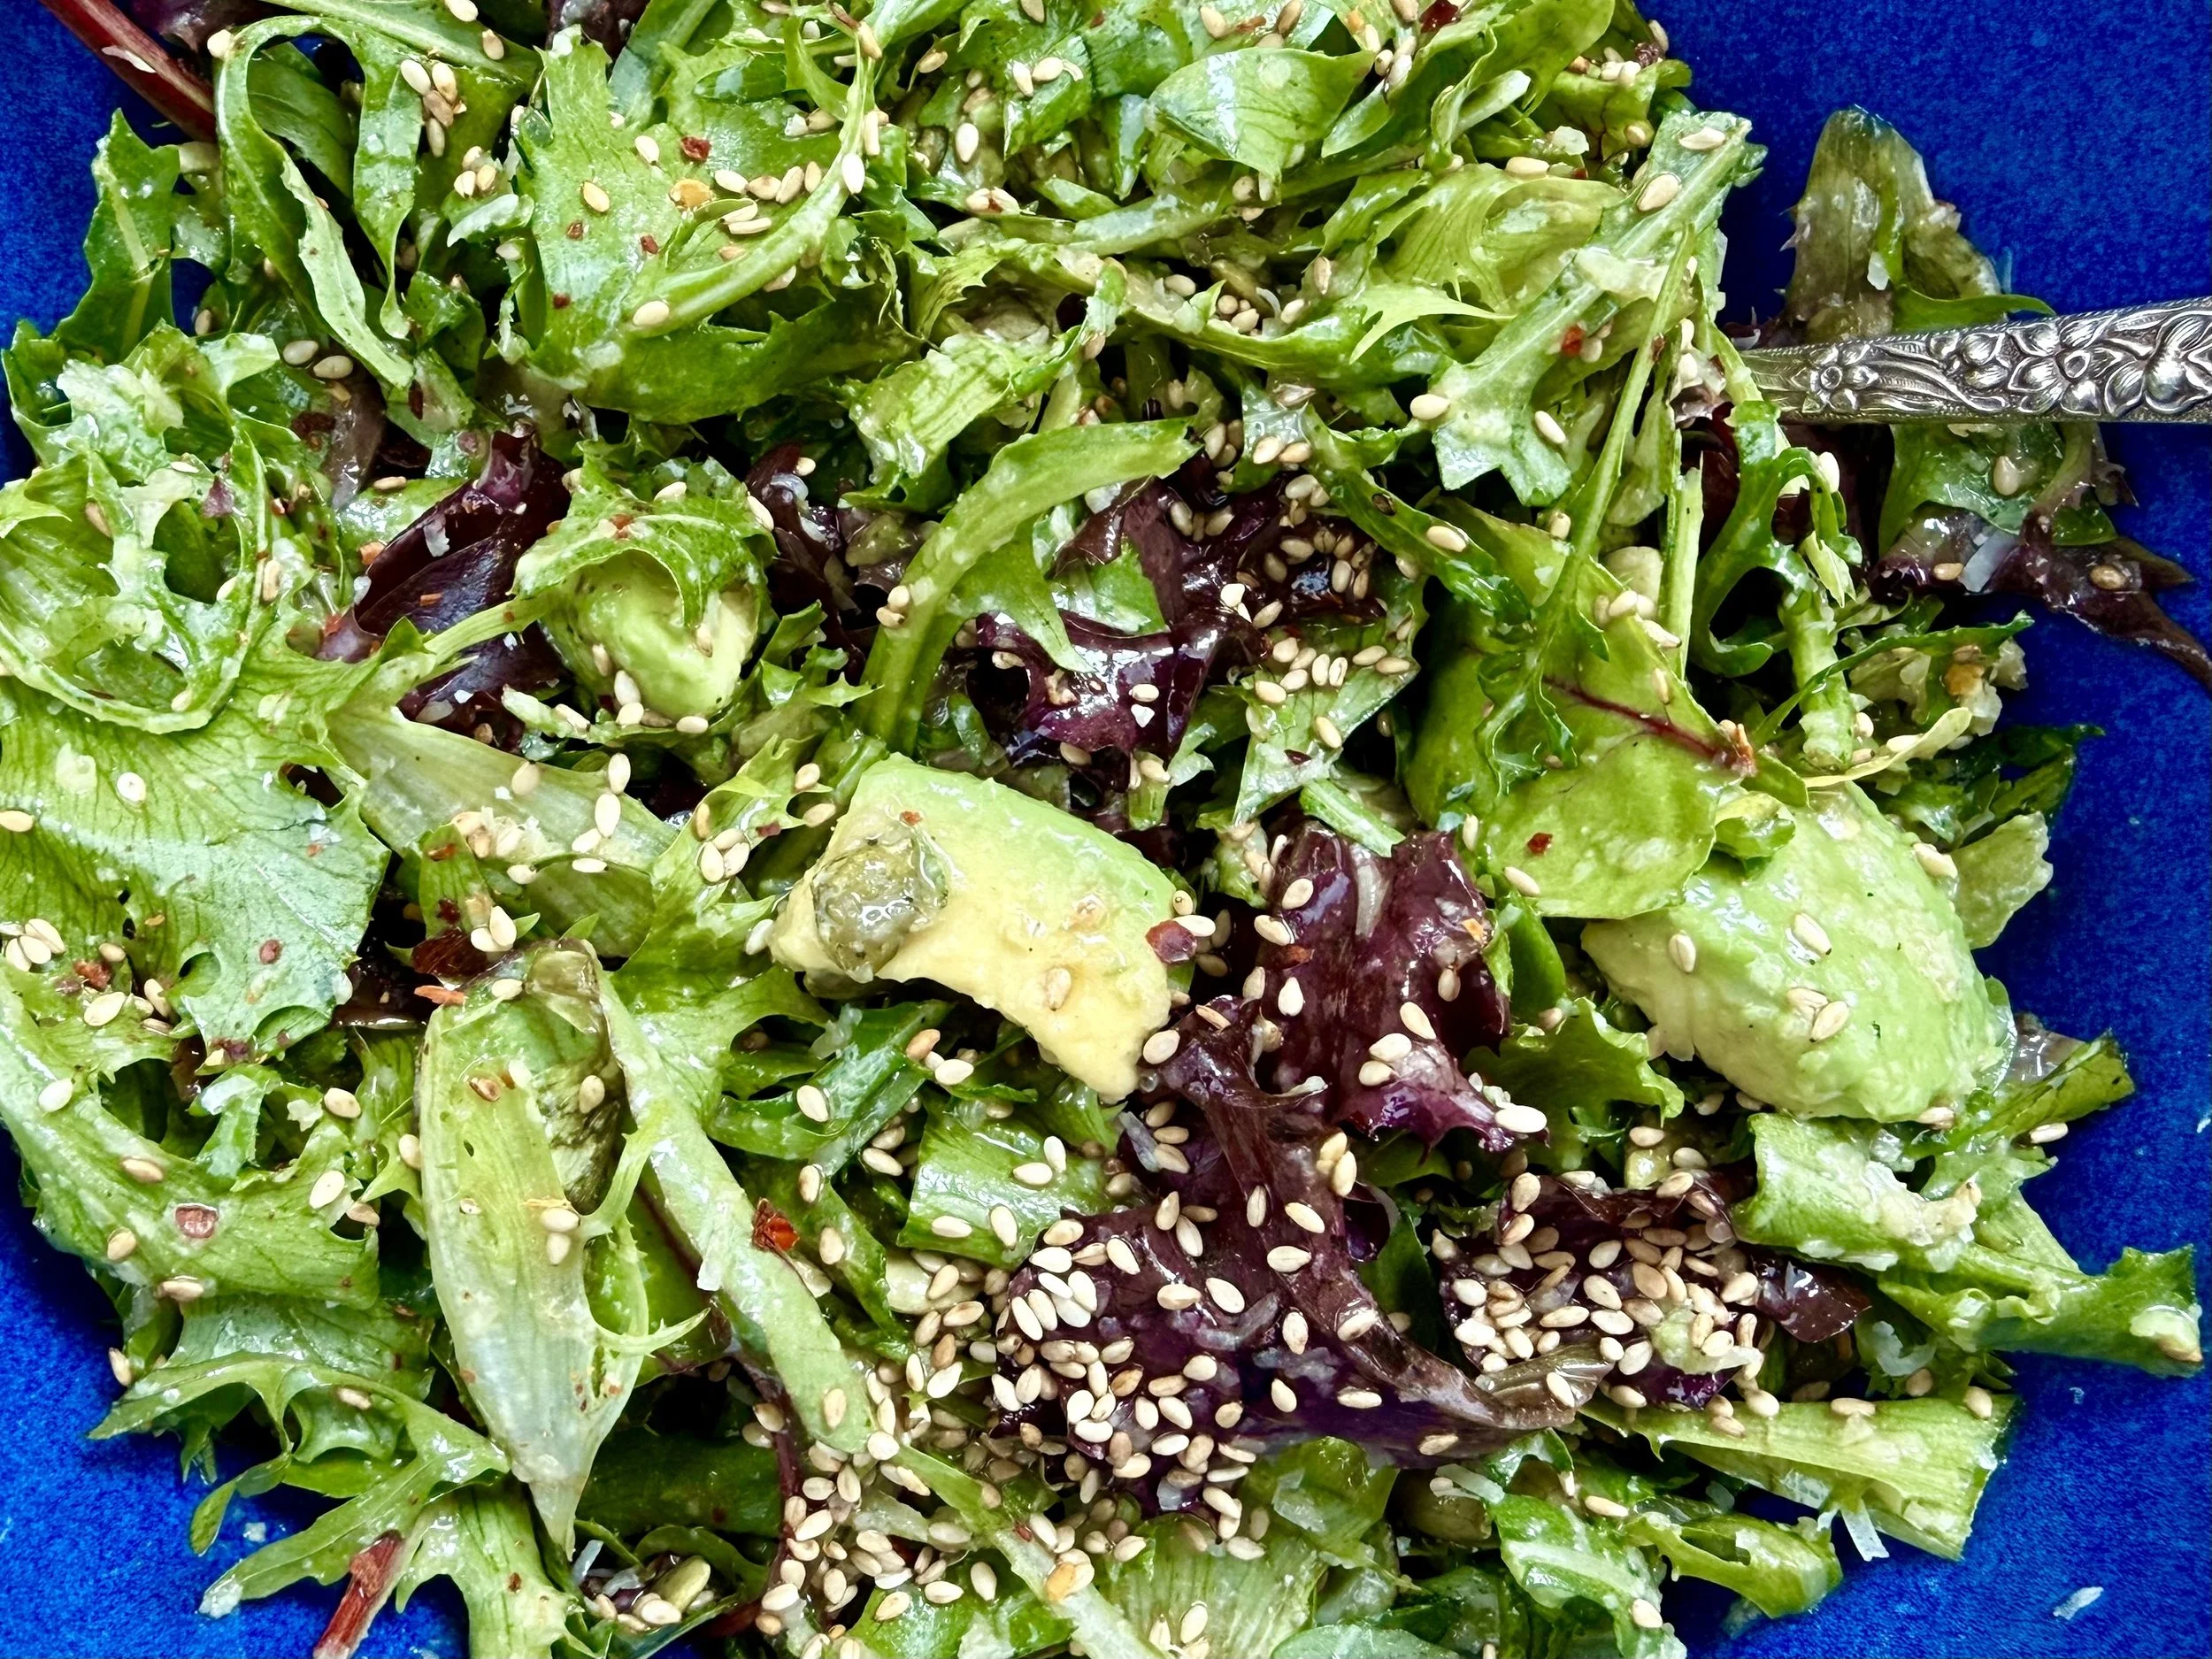


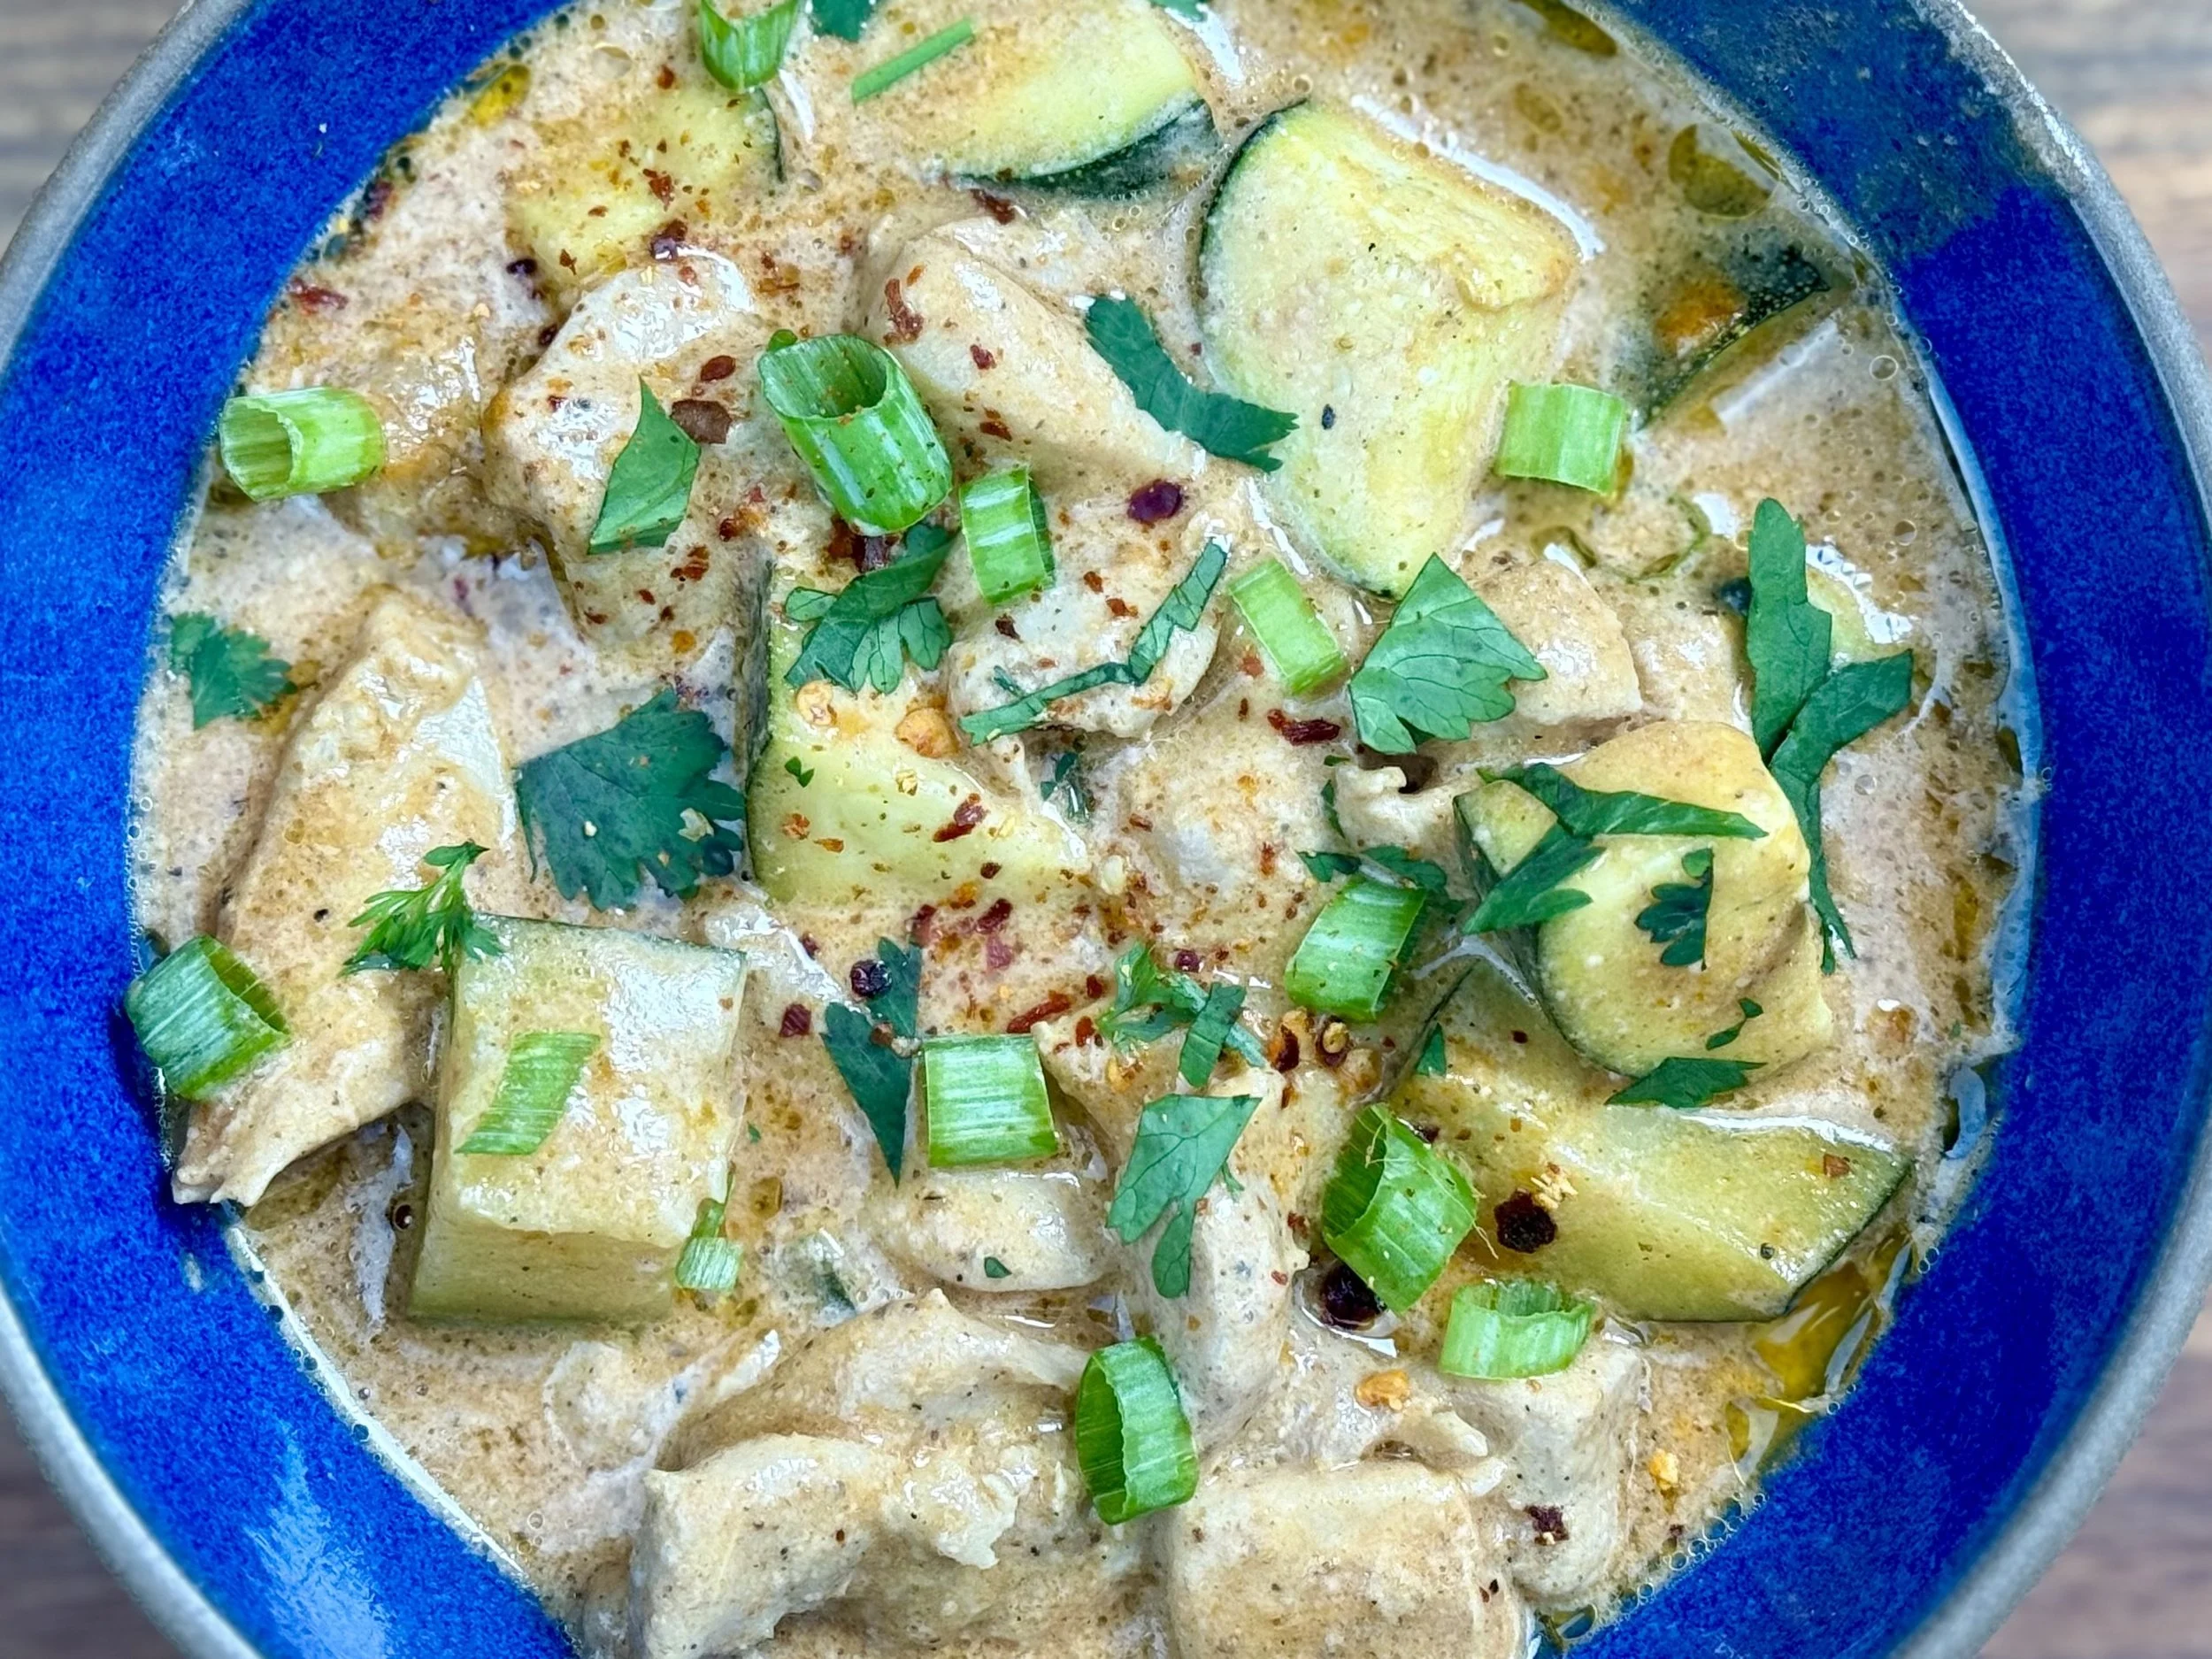
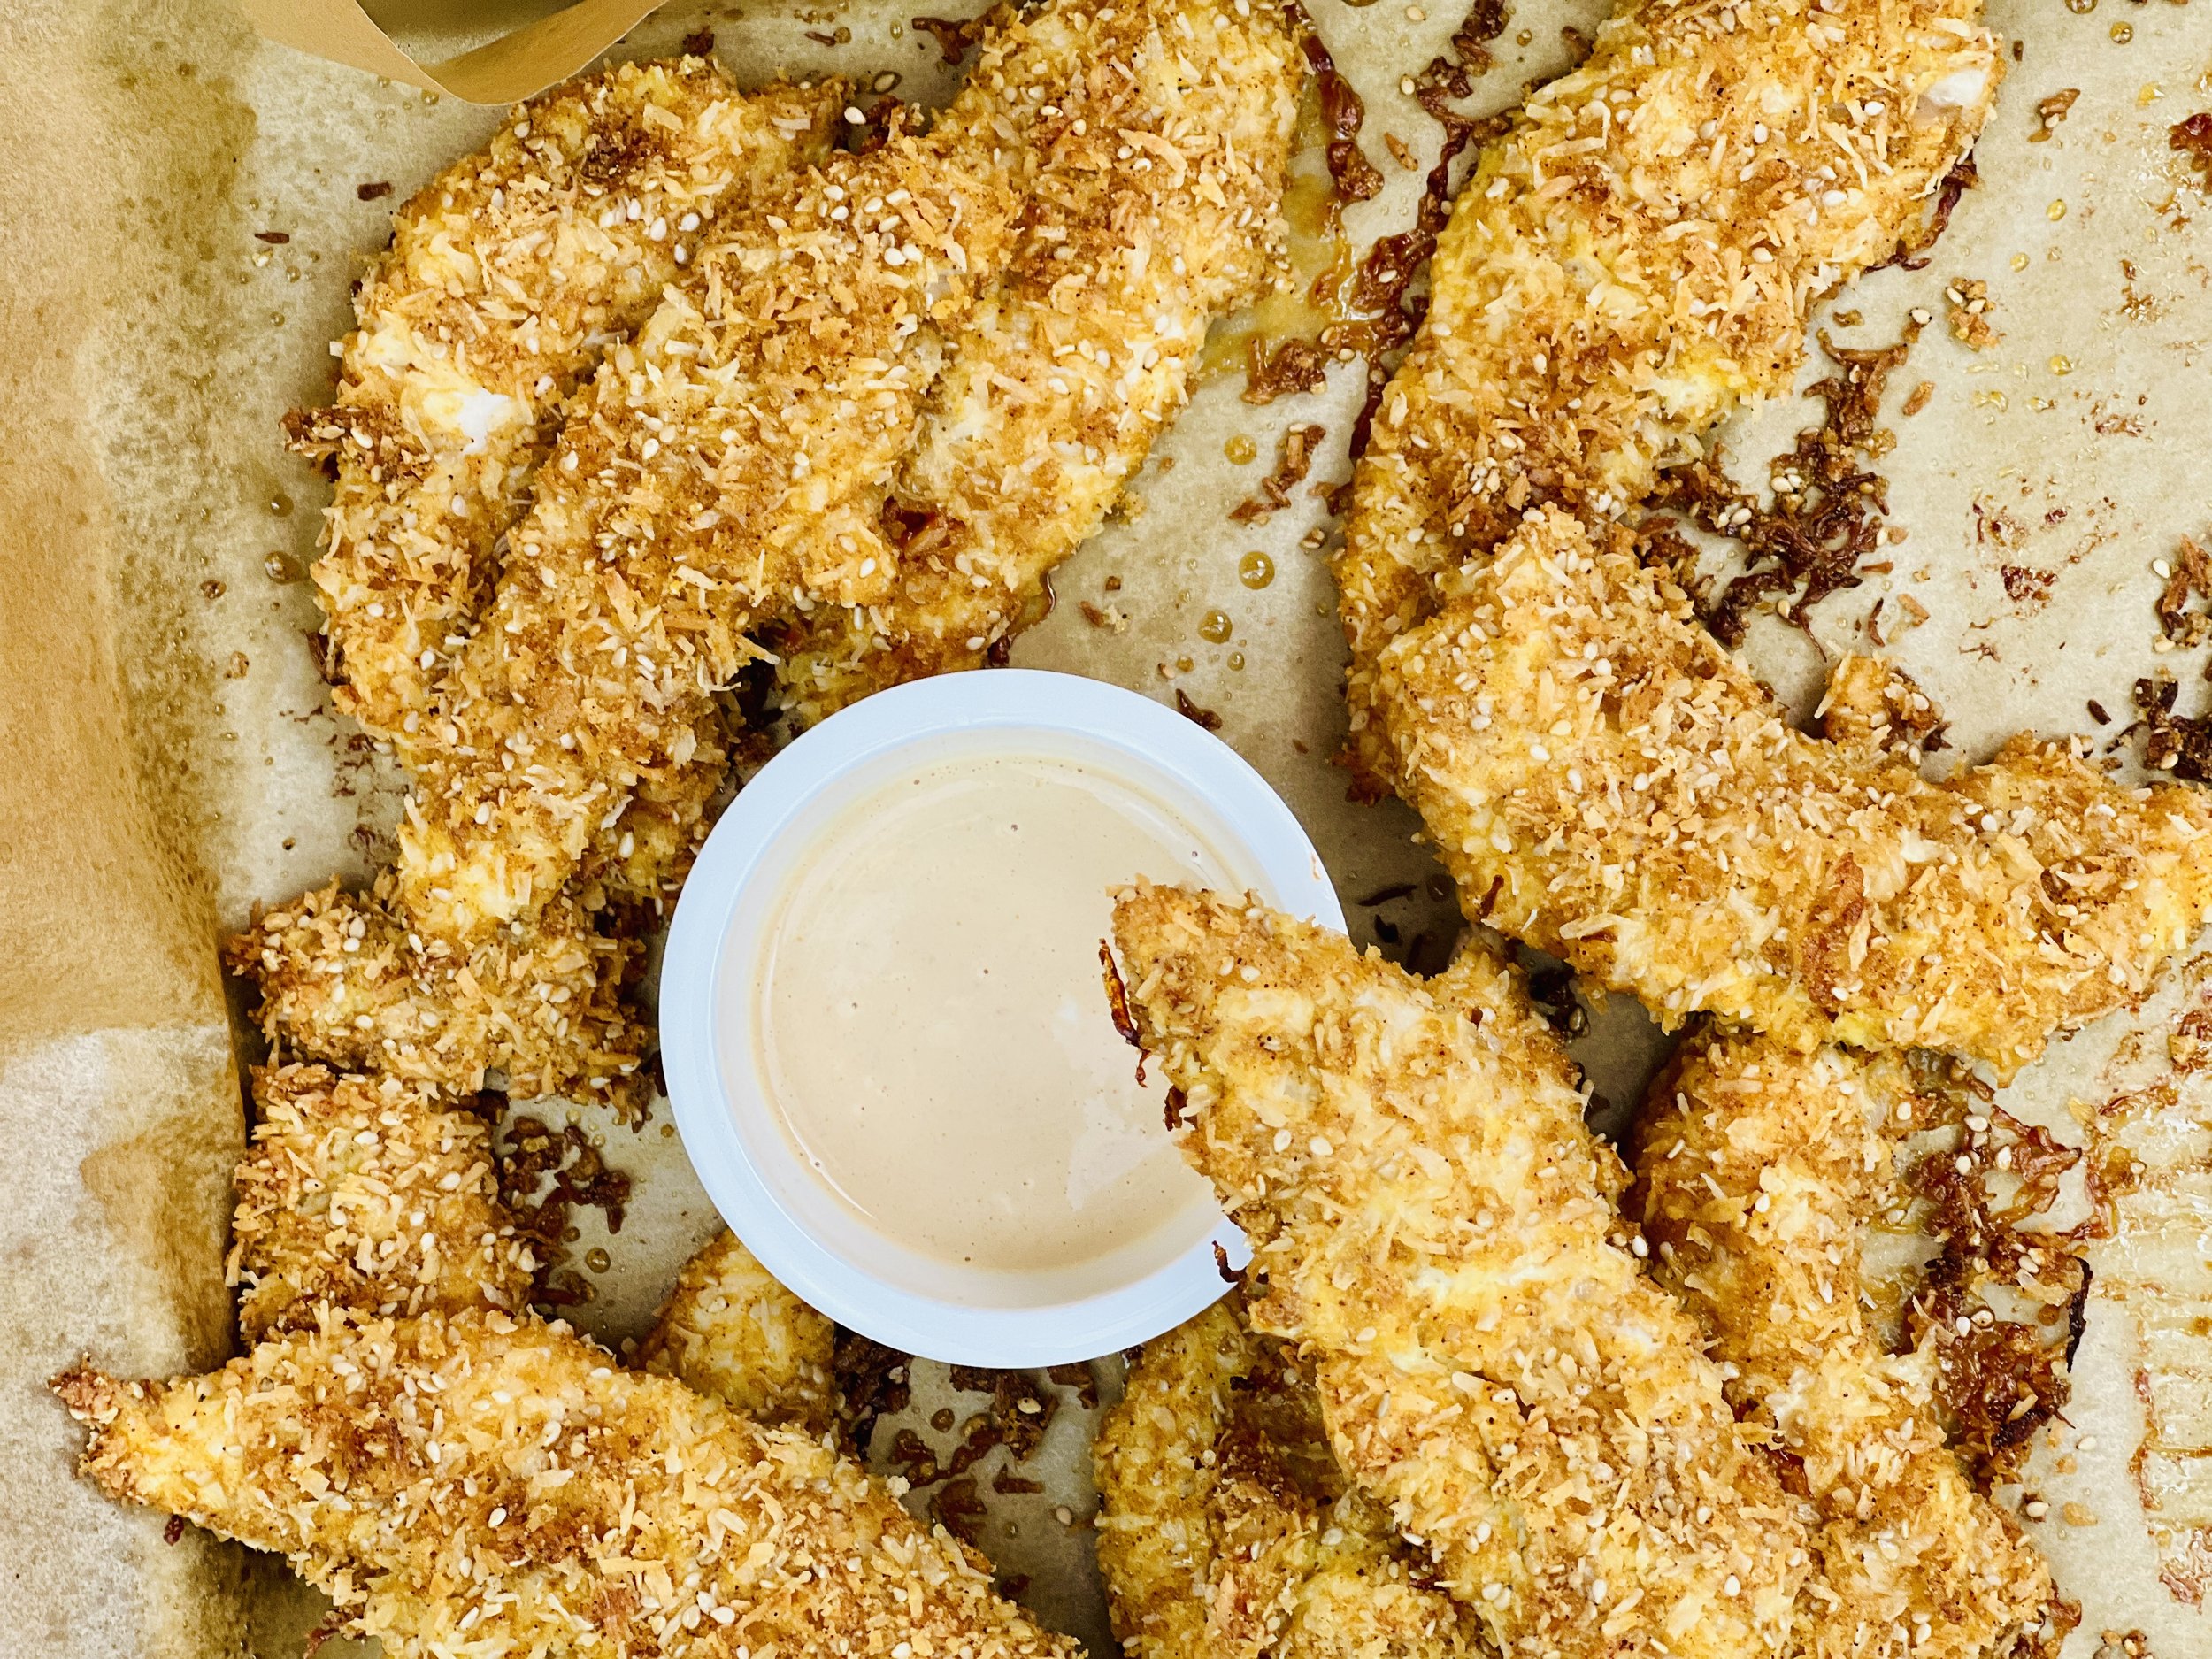
Better Than Takeout Sesame Chicken (Low FODMAP)
15 Minutes prep • 15 Minutes cook • Low FODMAP • Gluten-free • Lactose-free • Serves 4
15 Minutes prep • 15 Minutes cook • Low FODMAP • Gluten-free • Lactose-free • Serves 4 • Ok to make ahead: Steps 1-3
Give Chinese takeout a run for its money with this super simple sesame chicken recipe you can have ready in 30 minutes. The thick sauce is tangy and slightly sweet, without being overwhelming. The peanuts are a nice crunchy complement. Every bite of the chicken is tender and flavorful. You cook it all in one pan and eat it all in one bowl so serving and clean up are easy. All this makes for a perfect weeknight or any night dinner.
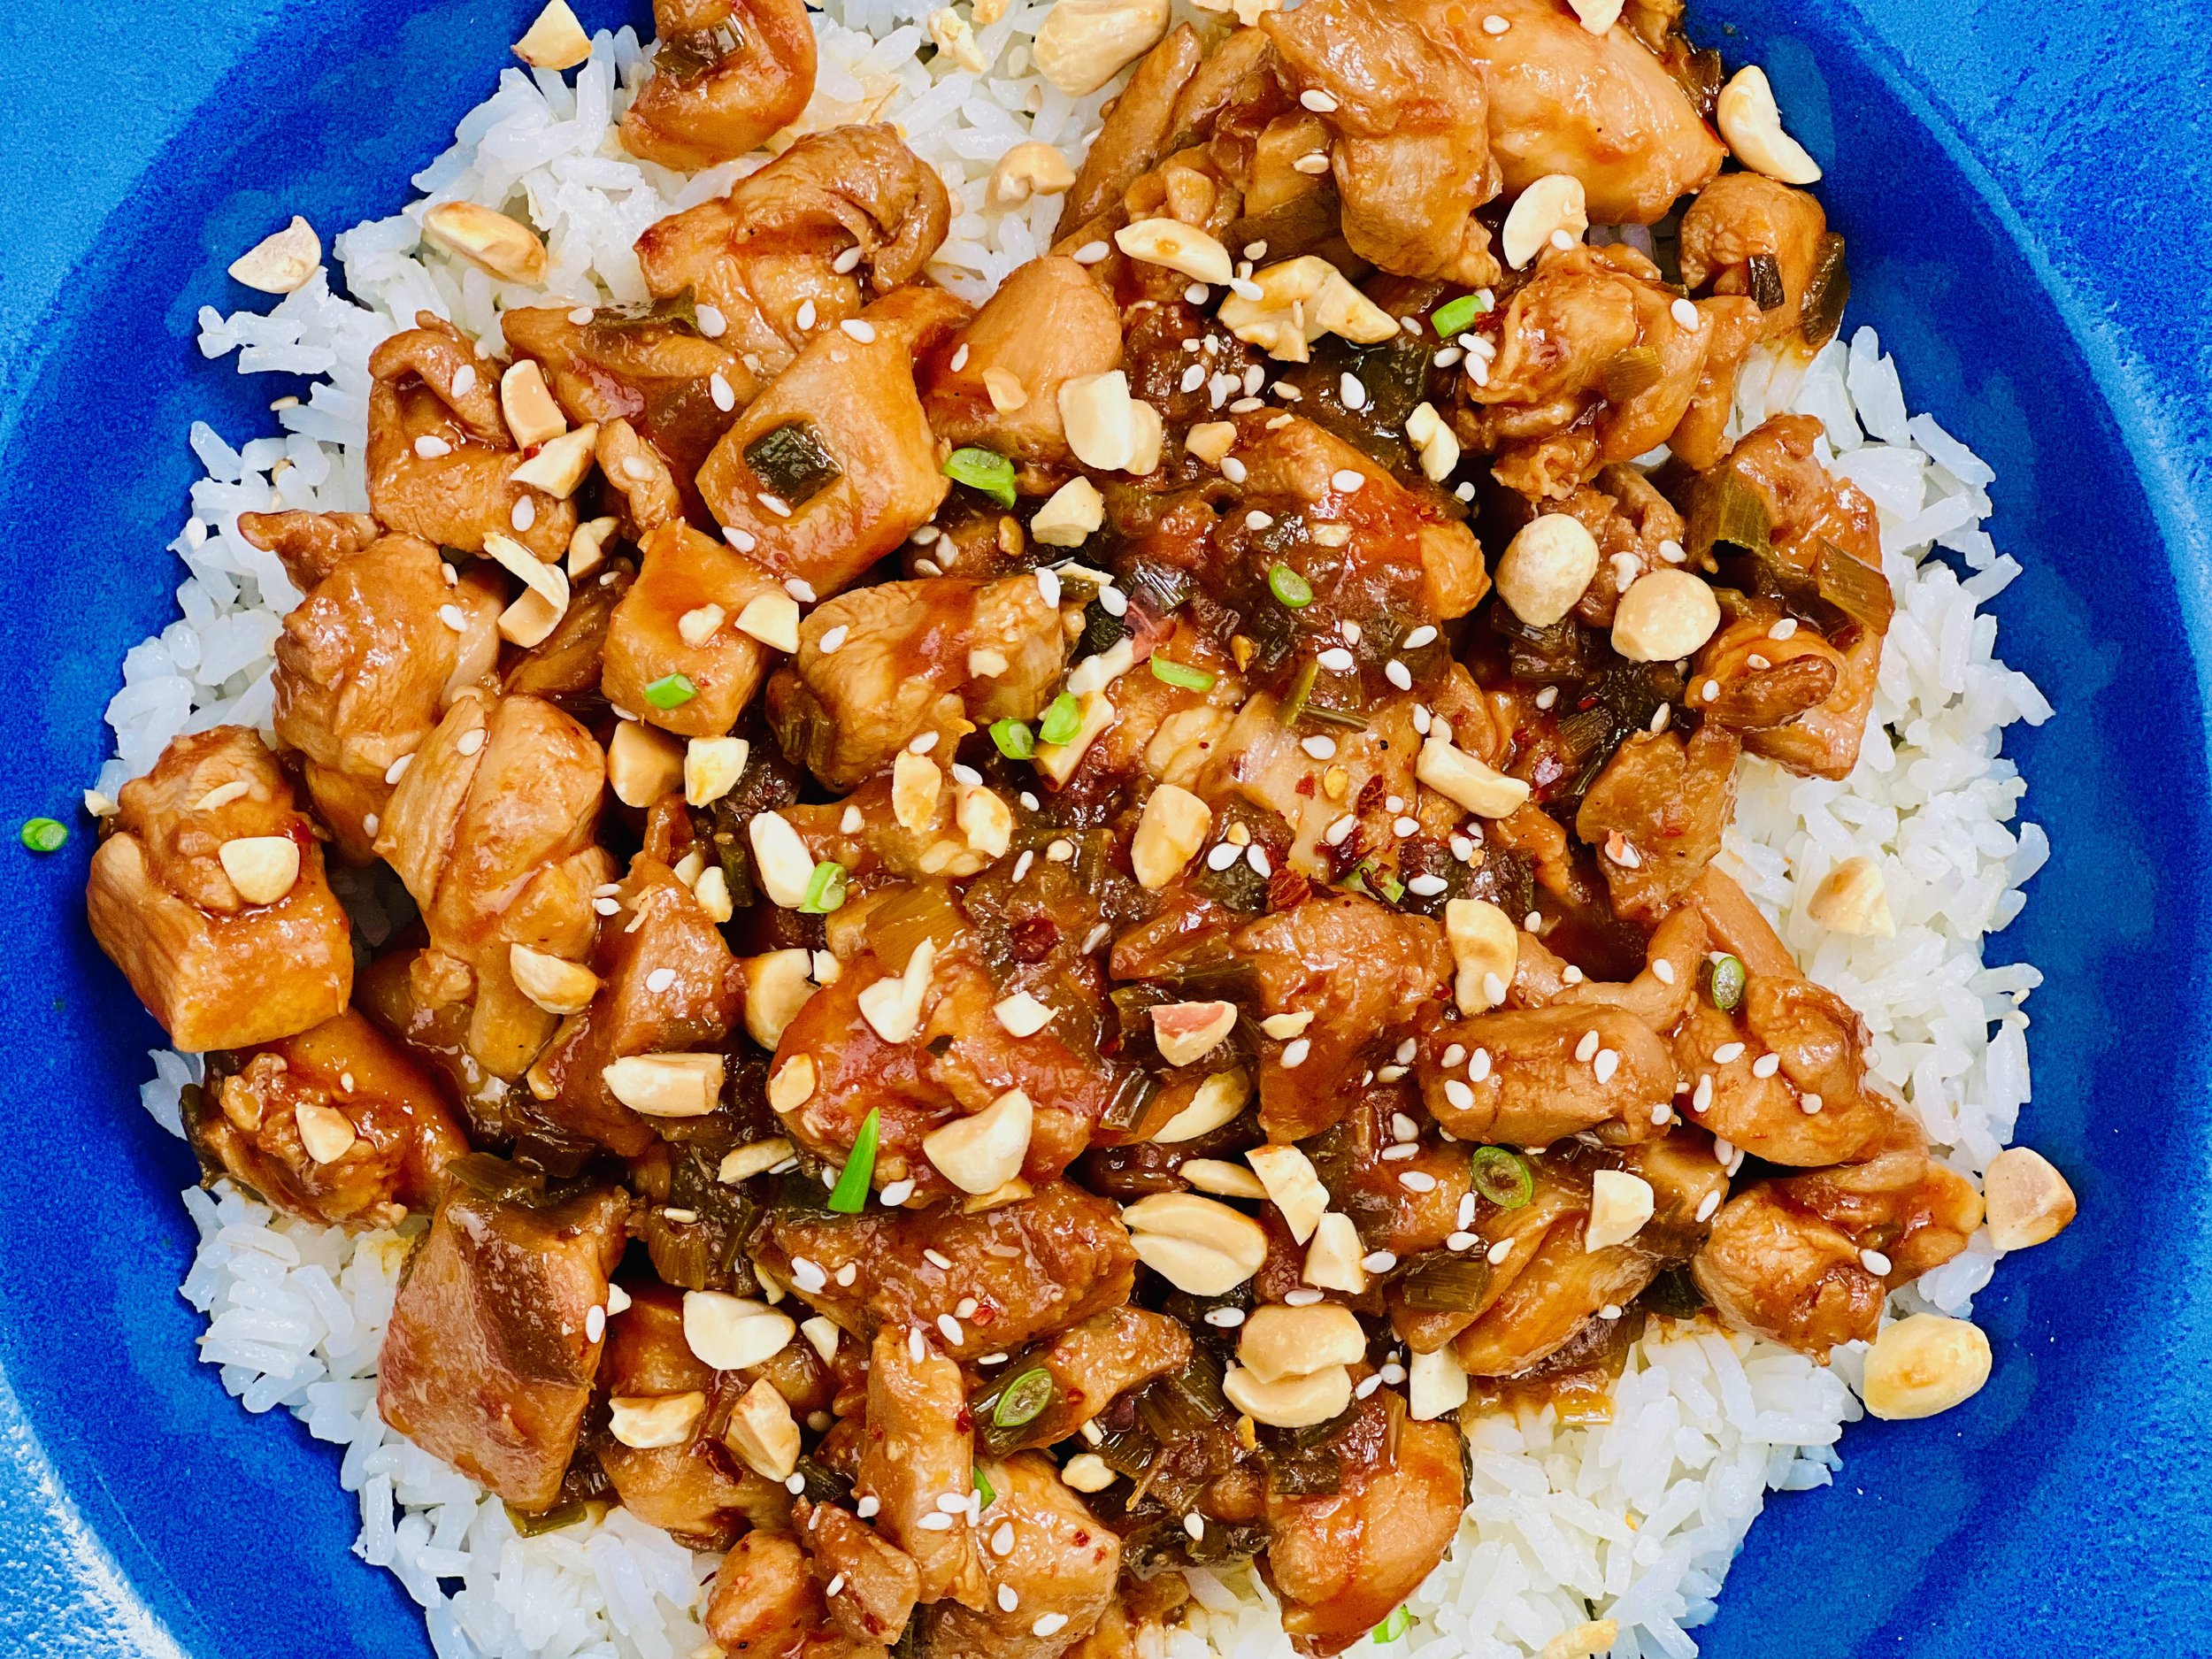
Ingredients
1 1/2 tablespoons toasted sesame oil
1 bunch green onions (green part only), chopped, plus more for serving
1 1/2 pounds boneless skinless chicken breasts or thighs, cut into bite-size pieces
5 tablespoons gluten-free soy sauce
1/4 cup low FODMAP ketchup (I used Smoke N Sanity Ketchup)
1/2 teaspoon Smoke N Sanity Essence of Onion Salt
1 tablespoon toasted sesame oil
1/4 teaspoon red pepper flakes (and here’s a nifty red pepper flake grinder!)
Sesame seeds for serving
1/2 cup peanuts, chopped, optional for serving
Directions
(1) Prepare the chicken: This step is optional but results in a more flavorful and tender chicken. Remove chicken from the package, and put it in one layer on a rimmed plate or baking dish. Season both sides of each piece lightly with Kosher salt (about 1/8 teaspoon per side). Cover the dish with plastic wrap and refrigerate until ready to use, ideally about 4 hours before cooking or overnight.
(2) Make the rice or mushroom pilaf: This chicken is delicious on its own alongside a green salad. If you prefer to serve it on a bed of rice or veggies, make those now. I recommend my Best Coconut Rice or my Mushroom Pilaf.
(3) Make the sauce: In a small mixing bowl, combine the soy sauce, ketchup, Smoke N Sanity Essence of Onion salt, toasted sesame oil, and red pepper flakes. Stir to combine and set aside.
(4) Marinate the chicken: Chop the chicken into bite-size pieces. Add to the bowl with the sauce, stir, and let sit for about 30 minutes.
(5) Cook: Heat a large non-stick skillet over medium-high heat. Add the toasted sesame oil and heat until the oil shimmers. Add the chopped green onion greens to the oil and cook for about a minute. Add the chicken and toss with the green onion greens then spread out in one layer in the pan. Cook for about 3 minutes then stir the chicken around in the pan so that most of the pieces turn over and are coated with the sauce. Cook for another 3 - 5 minutes.
(6) Finish: Turn the heat down to medium-low and let simmer for about 5 minutes until the sauce is thickened and the chicken is cooked through (if using thigh meat, it will take a bit longer to cook.)
(7) Plate and serve: Serve as is alongside one of my green salads, or over my Best Coconut Rice or my Mushroom Pilaf topped with green onion greens, sesame seeds, and/or peanuts for garnish. For the best flavor, heat any leftovers on the stove, not in the microwave.
Eat and enjoy every bite because you can!
Have a question you’d like to have answered? Email me at hello@ibsgamechanger.com
Link note: This post may contain affiliate links for you to easily purchase items that are linked. I may earn a small commission from qualifying purchases but none of this costs you a thing so feel free to use the links! In addition, for some items, I have provided a special discount code for IBS Game Changers so be sure to use the code when you purchase an item to get the discount that has been arranged just for you.
More Deliciously Low FODMAP™ main course recipes
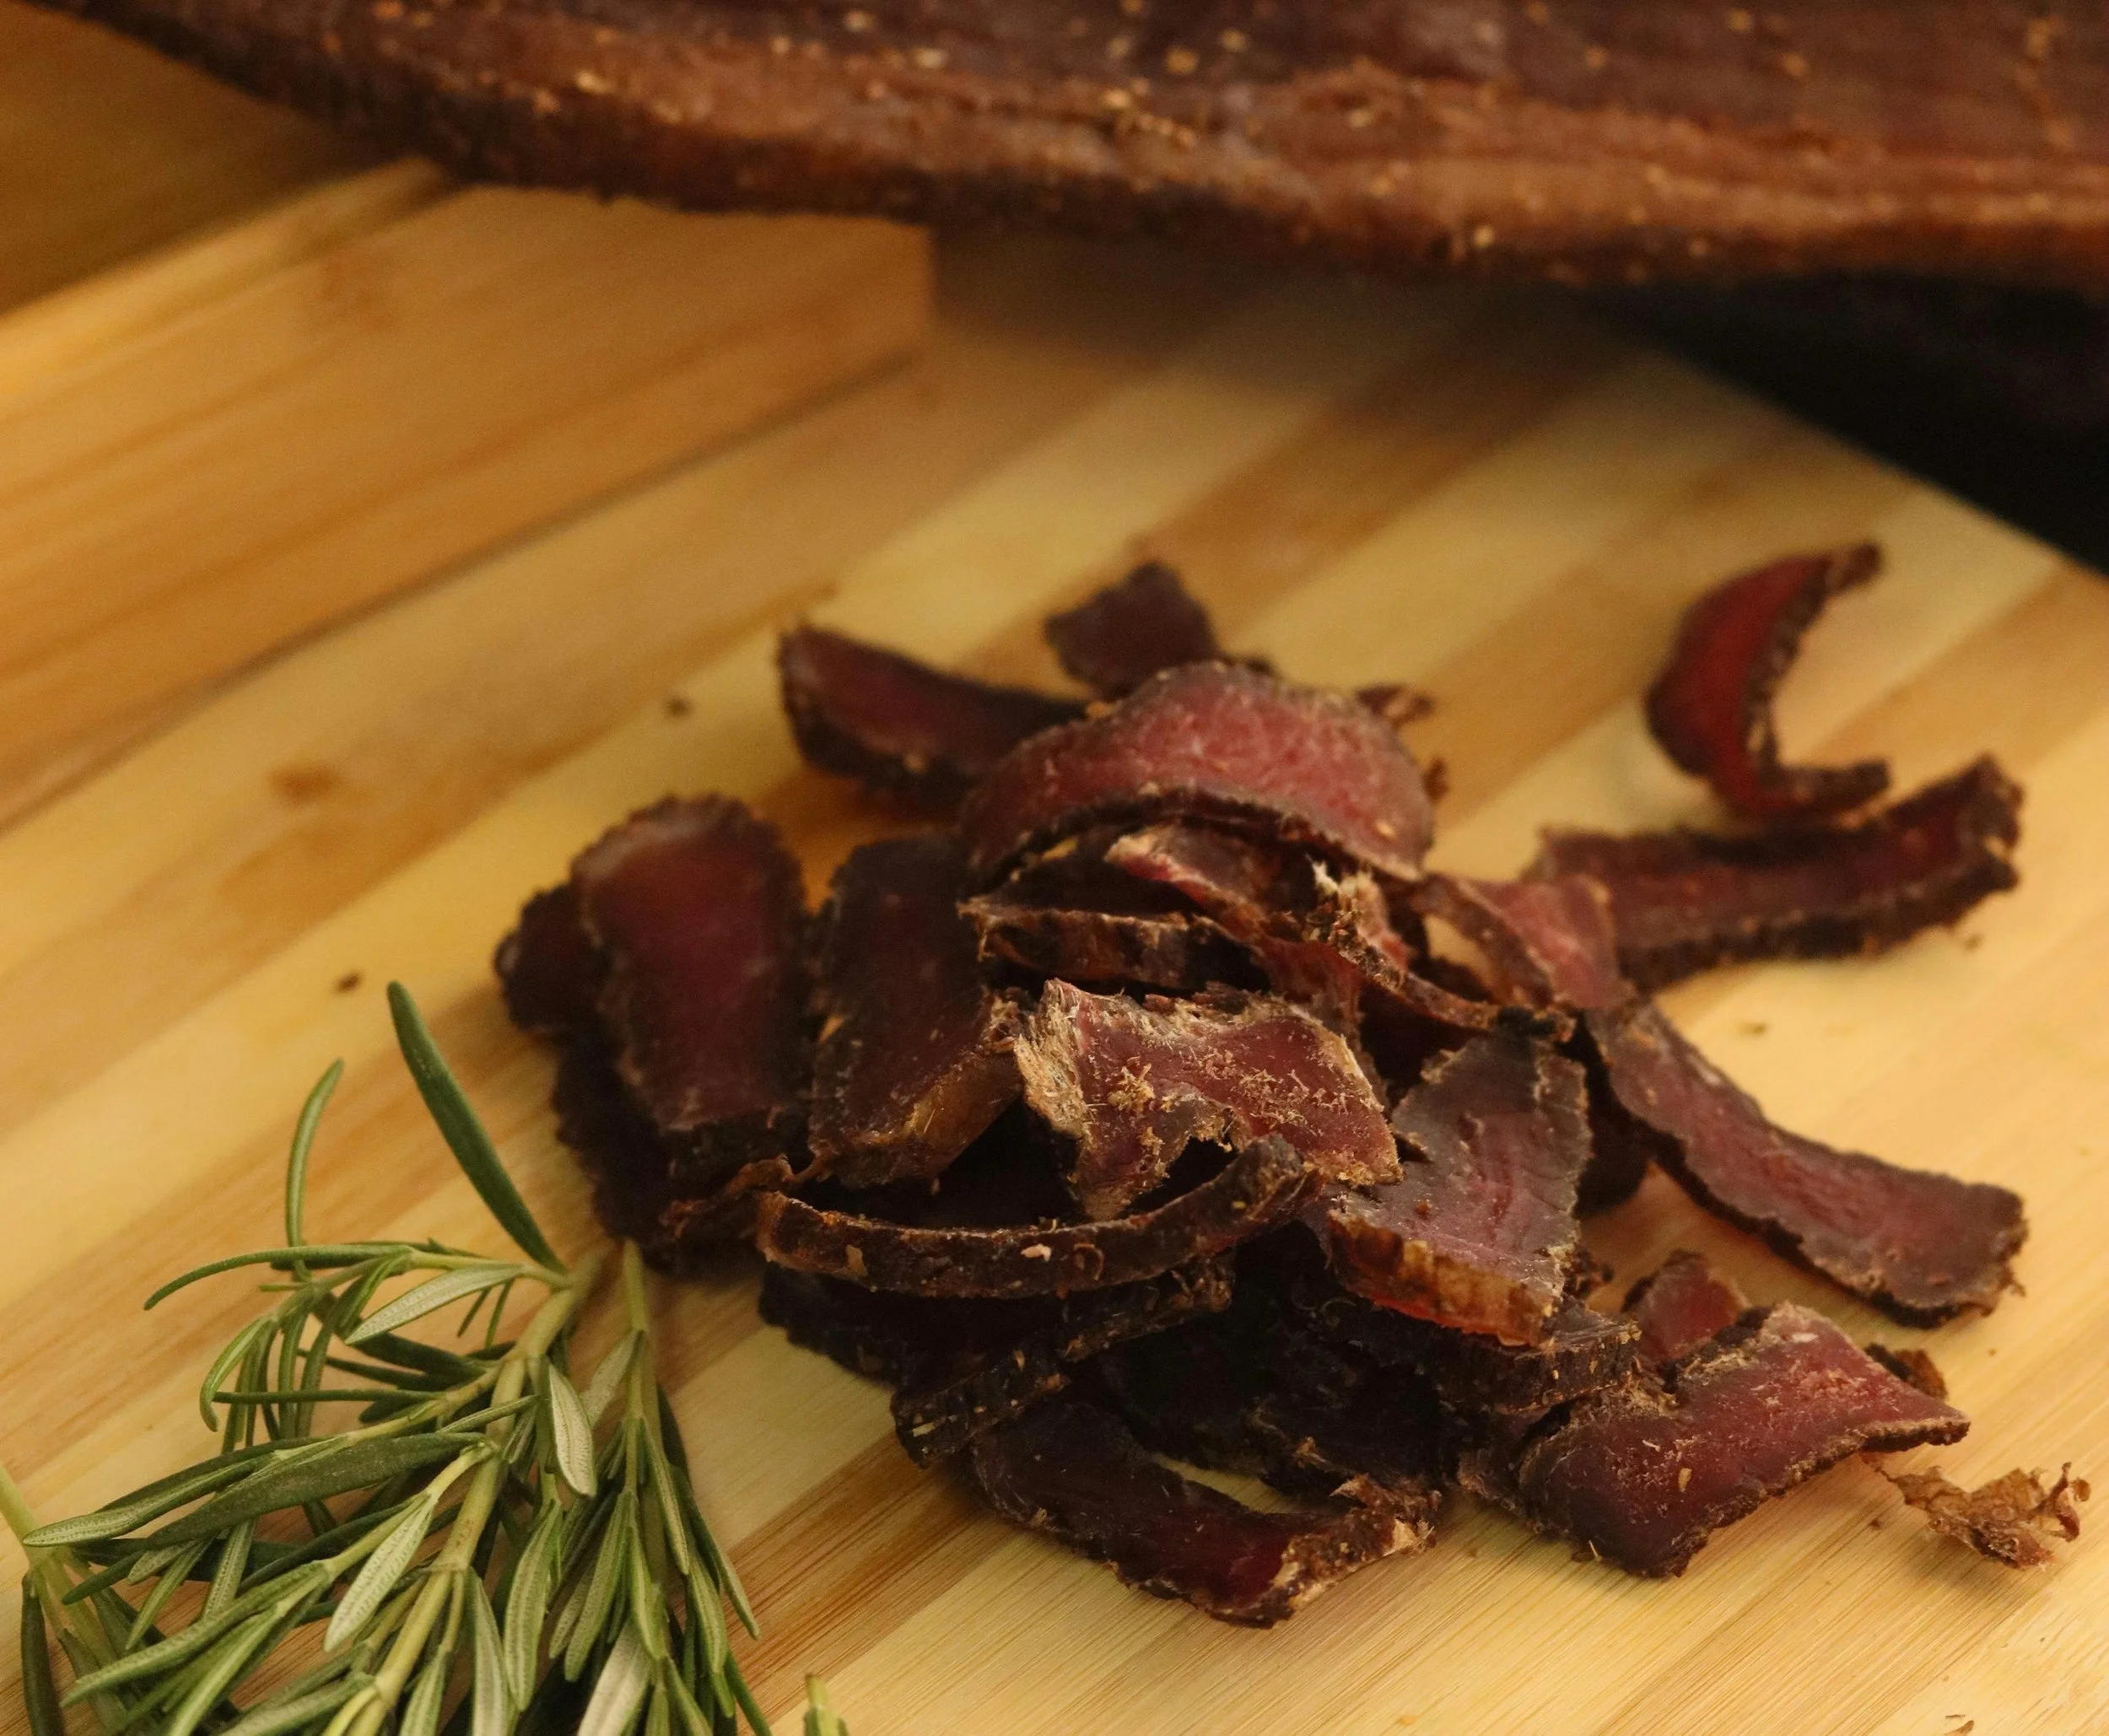
Delicious Low FODMAP Beef Sticks and Jerky from Good Fod Foods
Thanks to our friends at Good Fod Foods you can now have delicious Beef Sticks and Jerky in a variety of flavors that you can keep on hand for a quick snack or light lunch on the go.
When you have Irritable Bowel Syndrome (IBS) sometimes it’s hard to find a good “car snack” or on-the-go food for hiking or backpacking that you can count on for flavor, nutrition, and shelf stability. Or, you’re just trying to get more protein in your everyday low FODMAP diet without adding a bunch of calories. Thanks to our friends at Good Fod Foods you can now have delicious Beef Sticks and Jerky in a variety of flavors that you can keep on hand for a quick snack or light lunch on the go. The beef sticks are tender, flavorful, and easy to chew. The jerky is just that—jerky! Exactly the way you want it to be and all the flavors are delicious. As usual, I have arranged a 15% discount (IBSGC15) just for you. In fact, if you click the image or button below to start shopping, the discount will be automatically applied to your cart at checkout!

The Good Fod Foods family dealt with sensitive stomachs for a while before they tried a low-FODMAP diet. They felt better and they realized it was hard to find nutritious, shelf-stable low-FODMAP snacks. So, they made some to share! I tried them all and I can personally say they are delicious.
Give them a try with the IBS Game Changer 15% Discount.
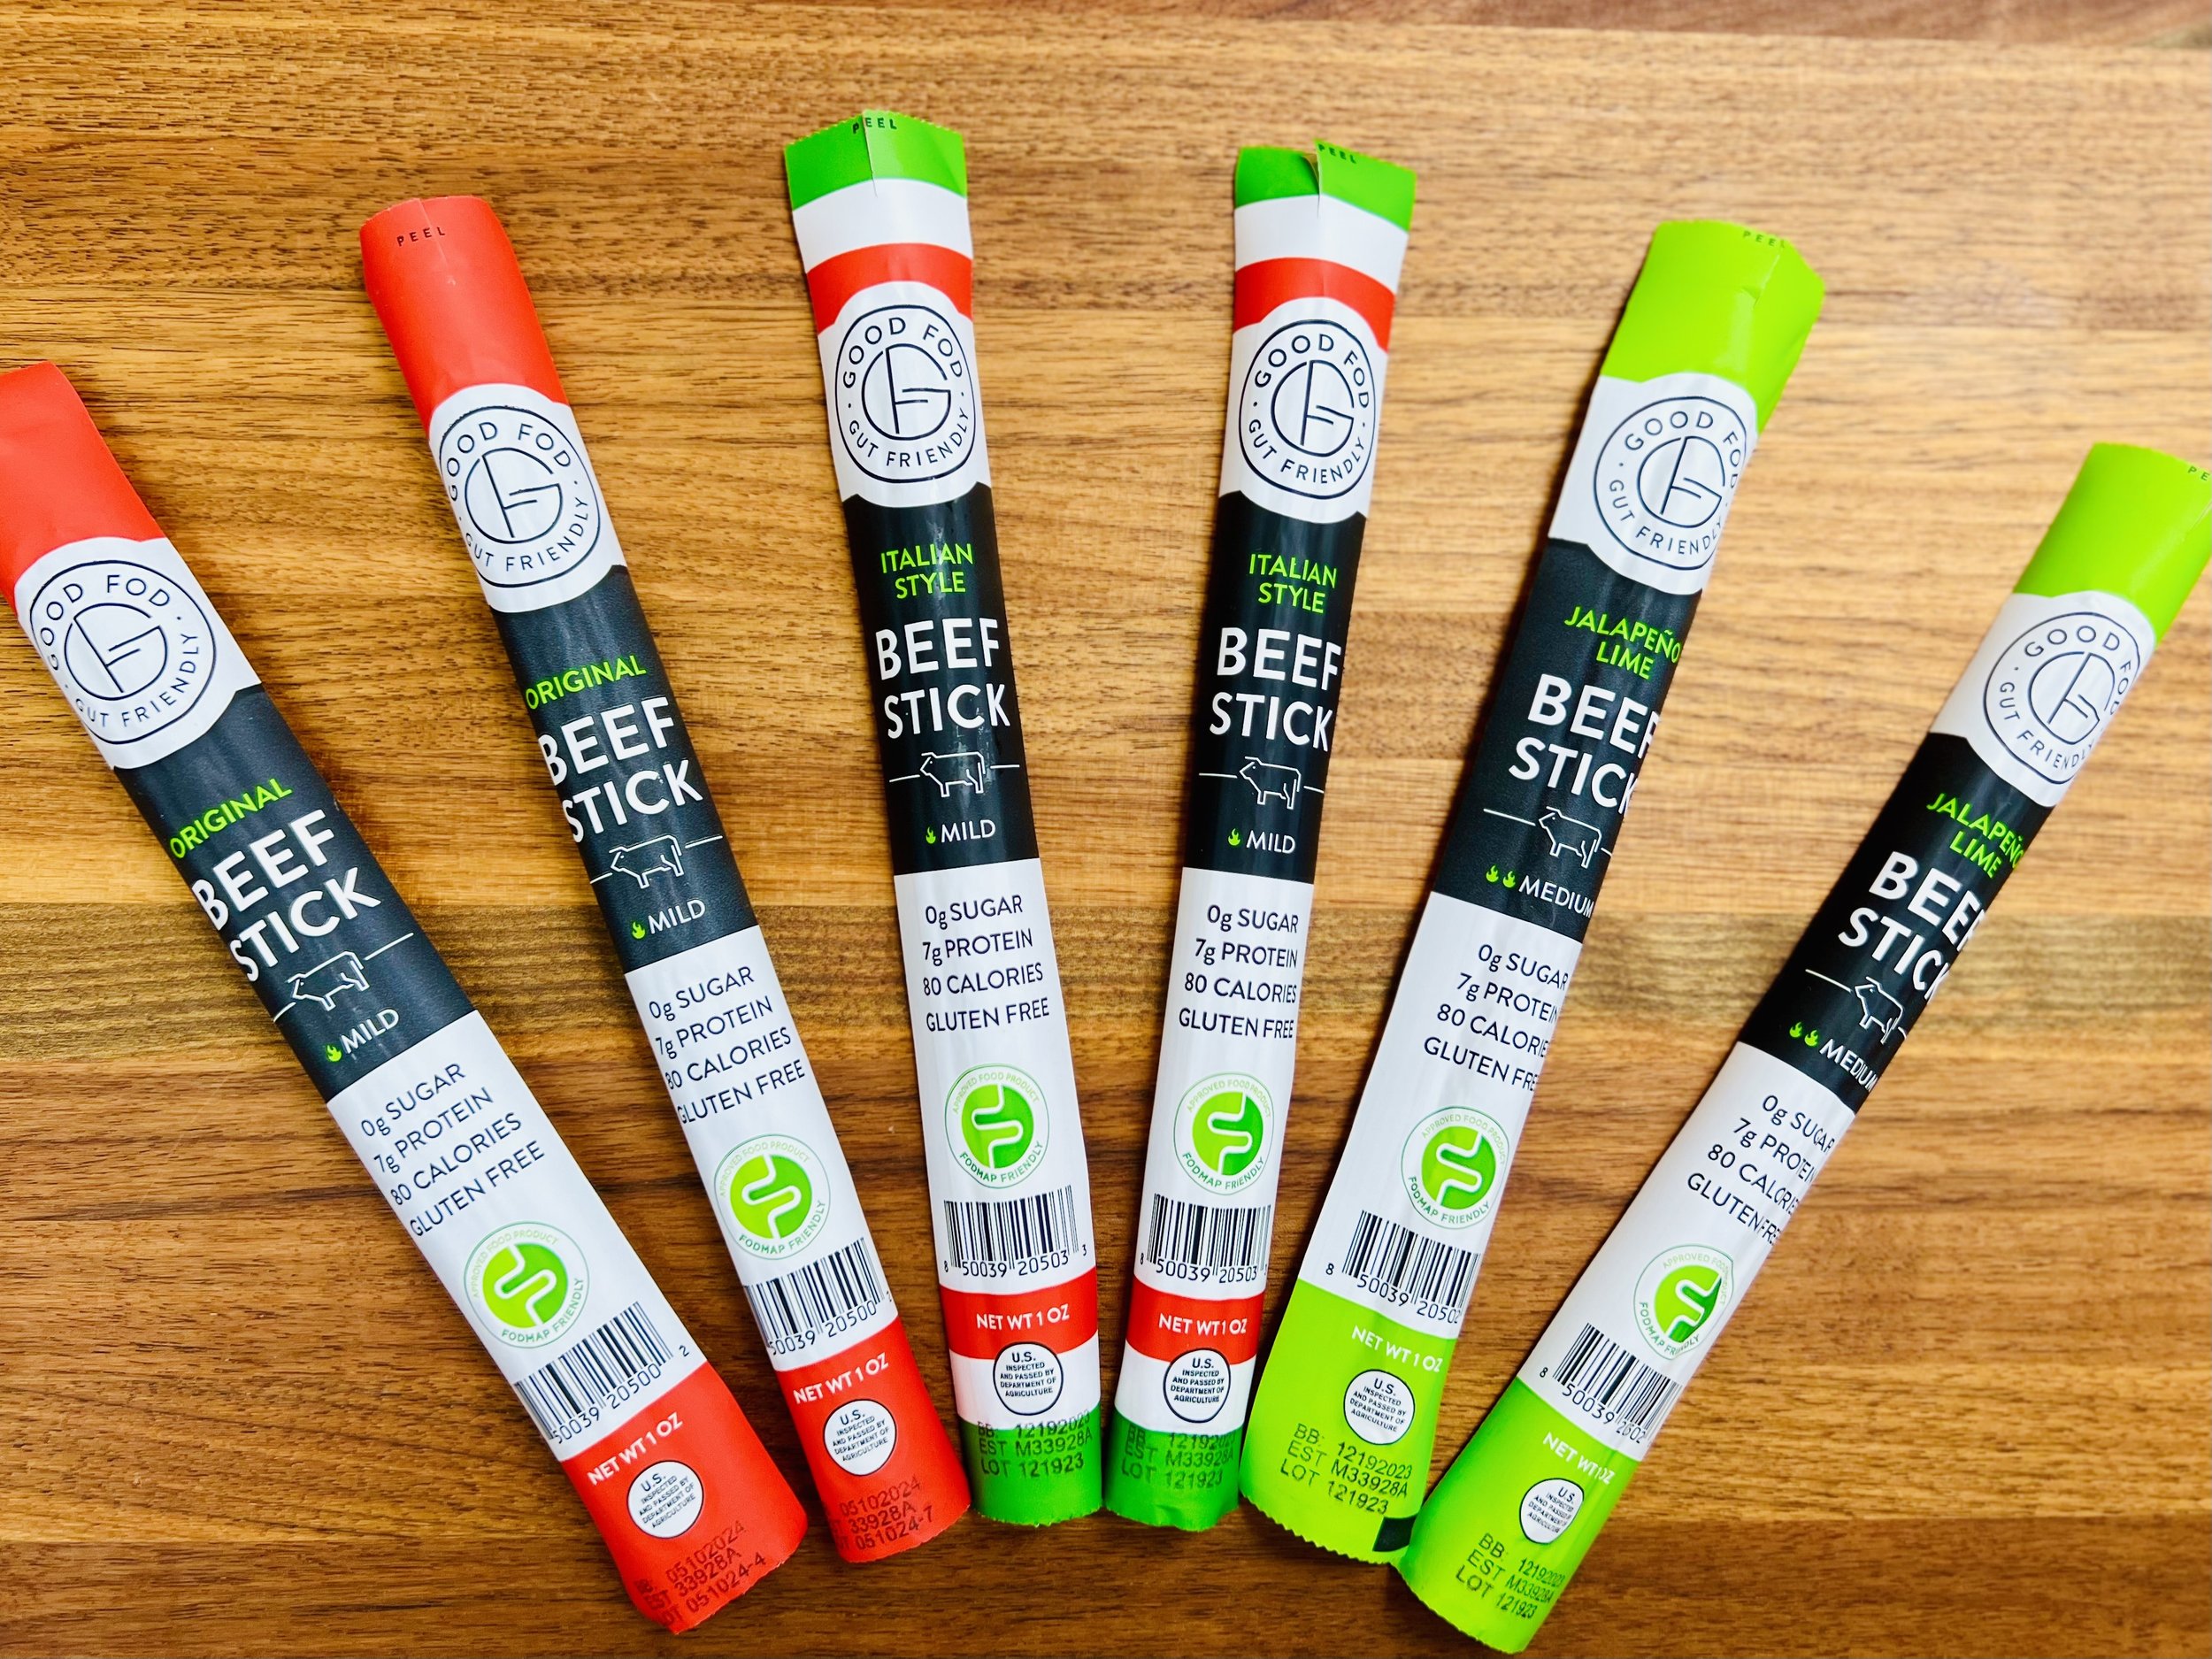
Beef Sticks: 3 Great Flavors/Same Great Stats:
0 Grams Sugar
7 Grams Protein
80 Calories
Gluten-free
Lactose-free

Beef Jerky: 3 Great Flavors/3 Servings/pkg
3 Grams of Carbs
10 Grams Protein
80 Calories
Gluten-free
Lactose-free
More Deliciously Low FODMAP™ tips & tools


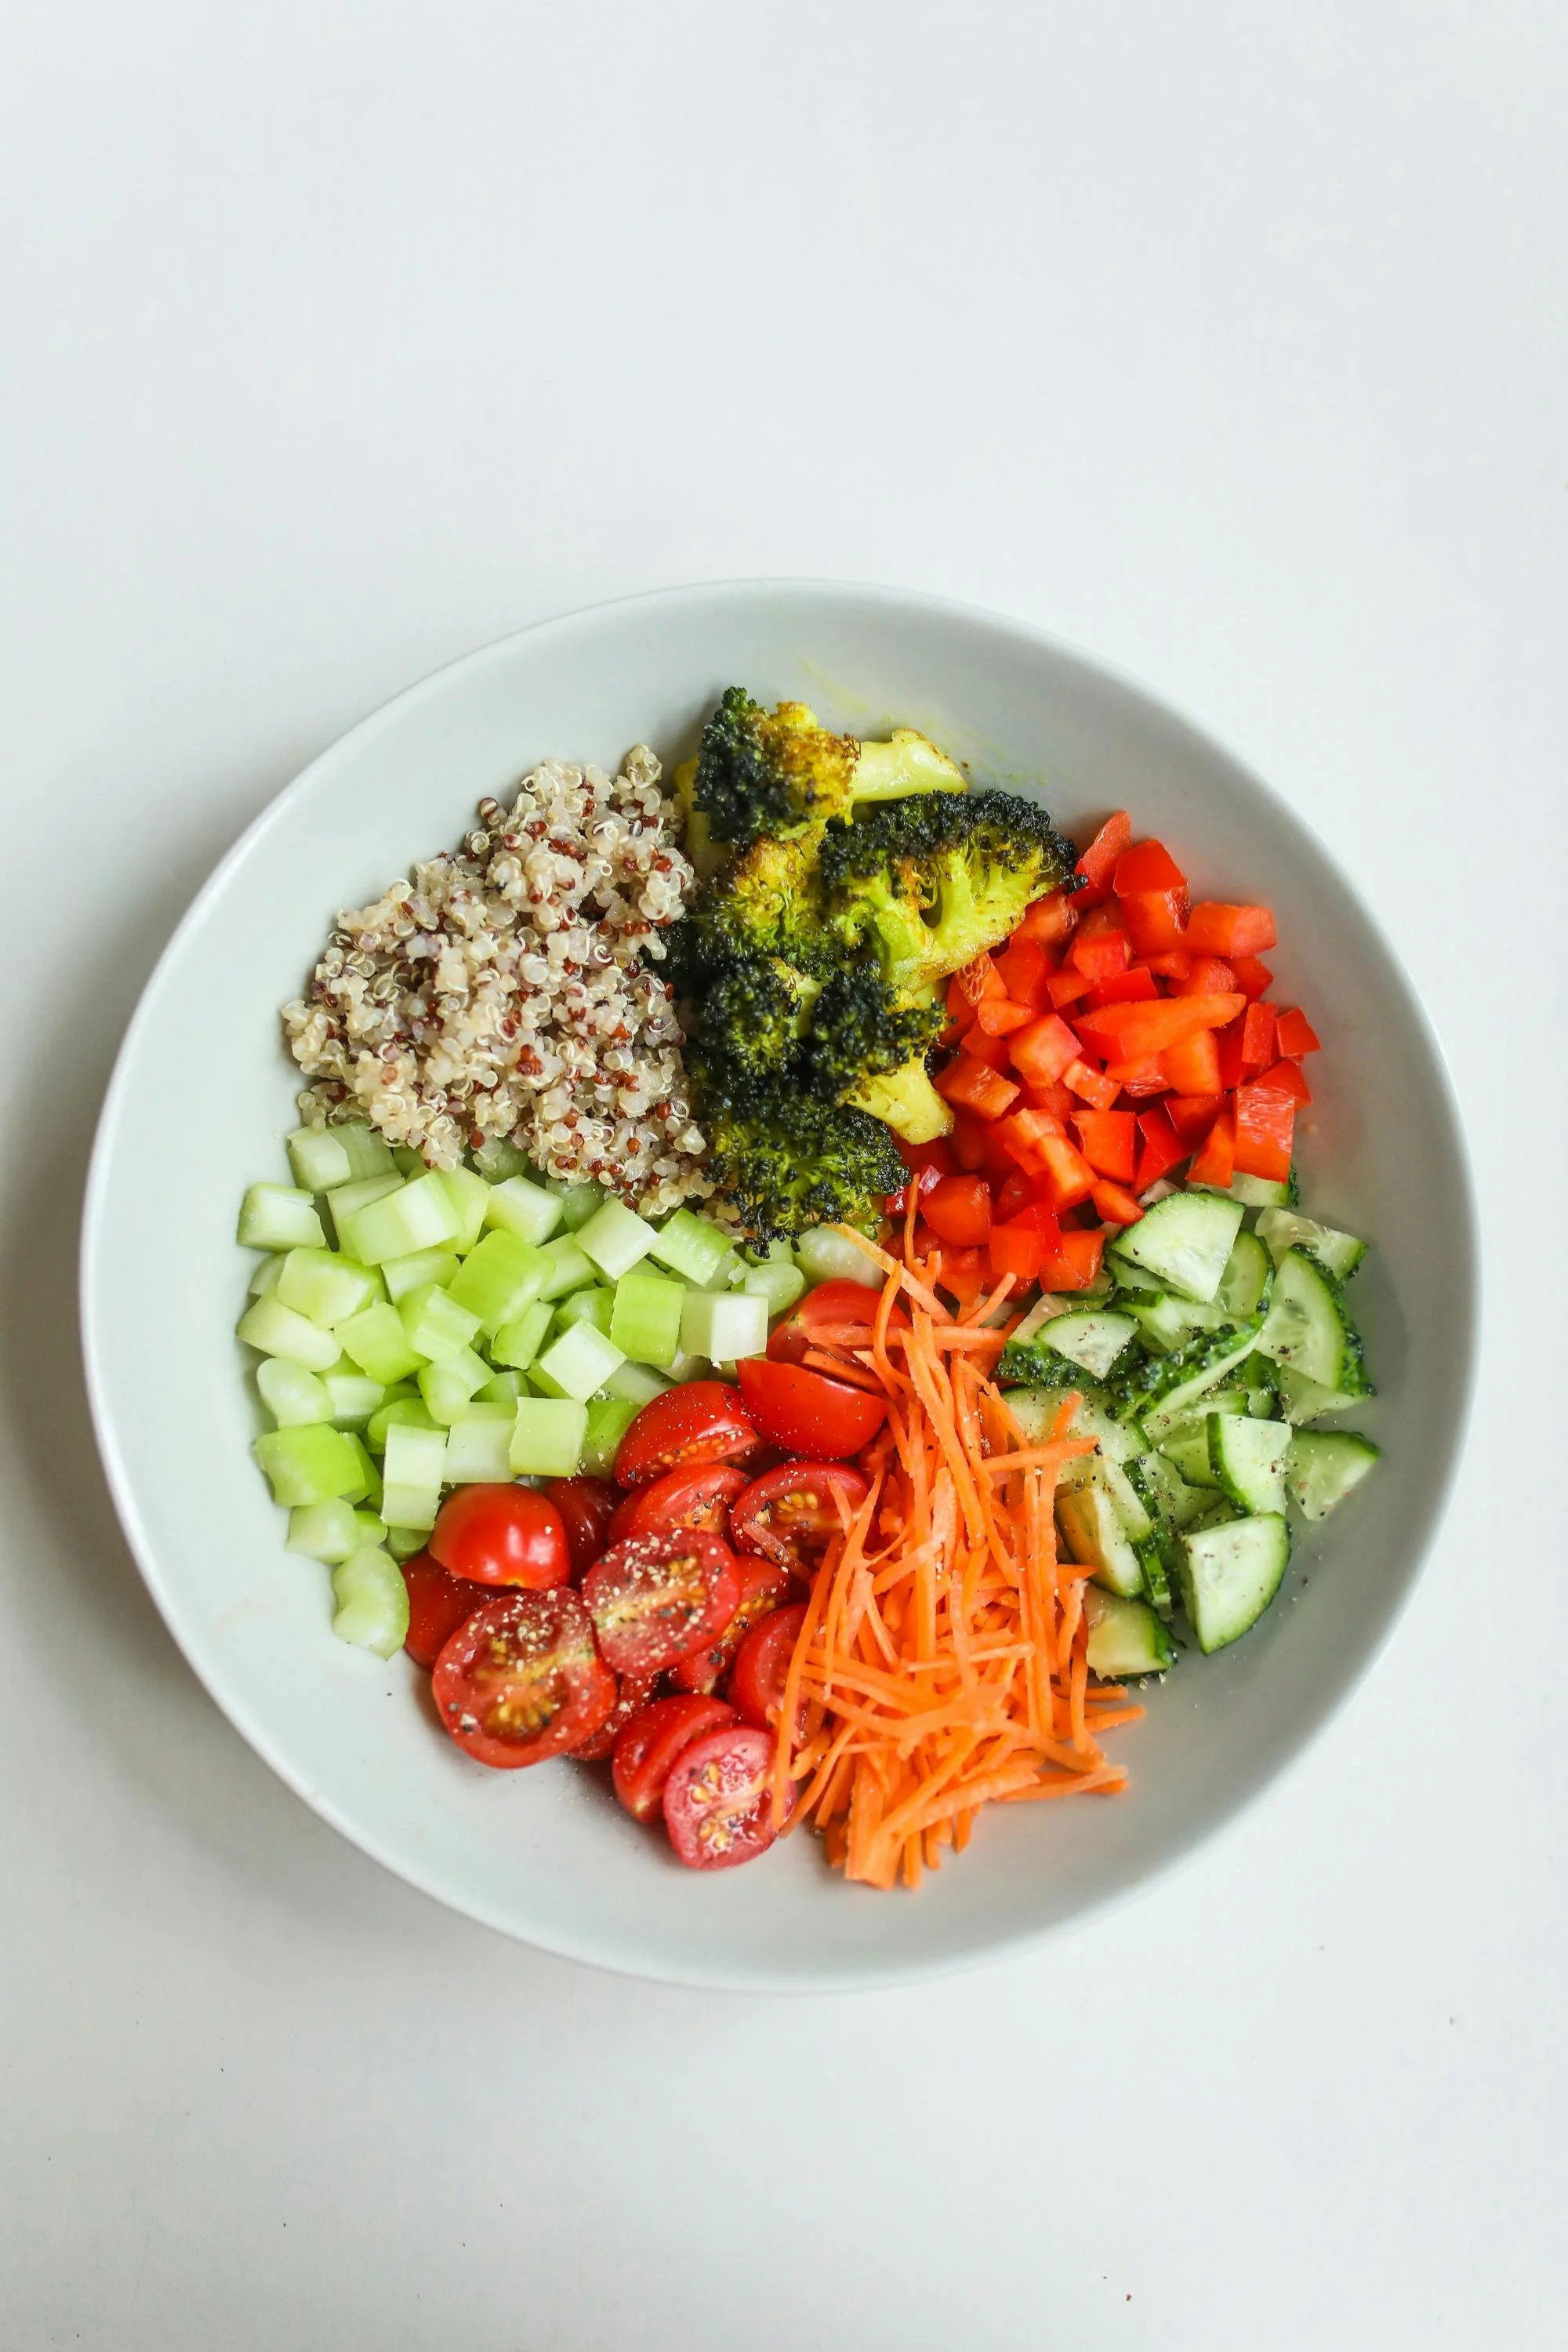


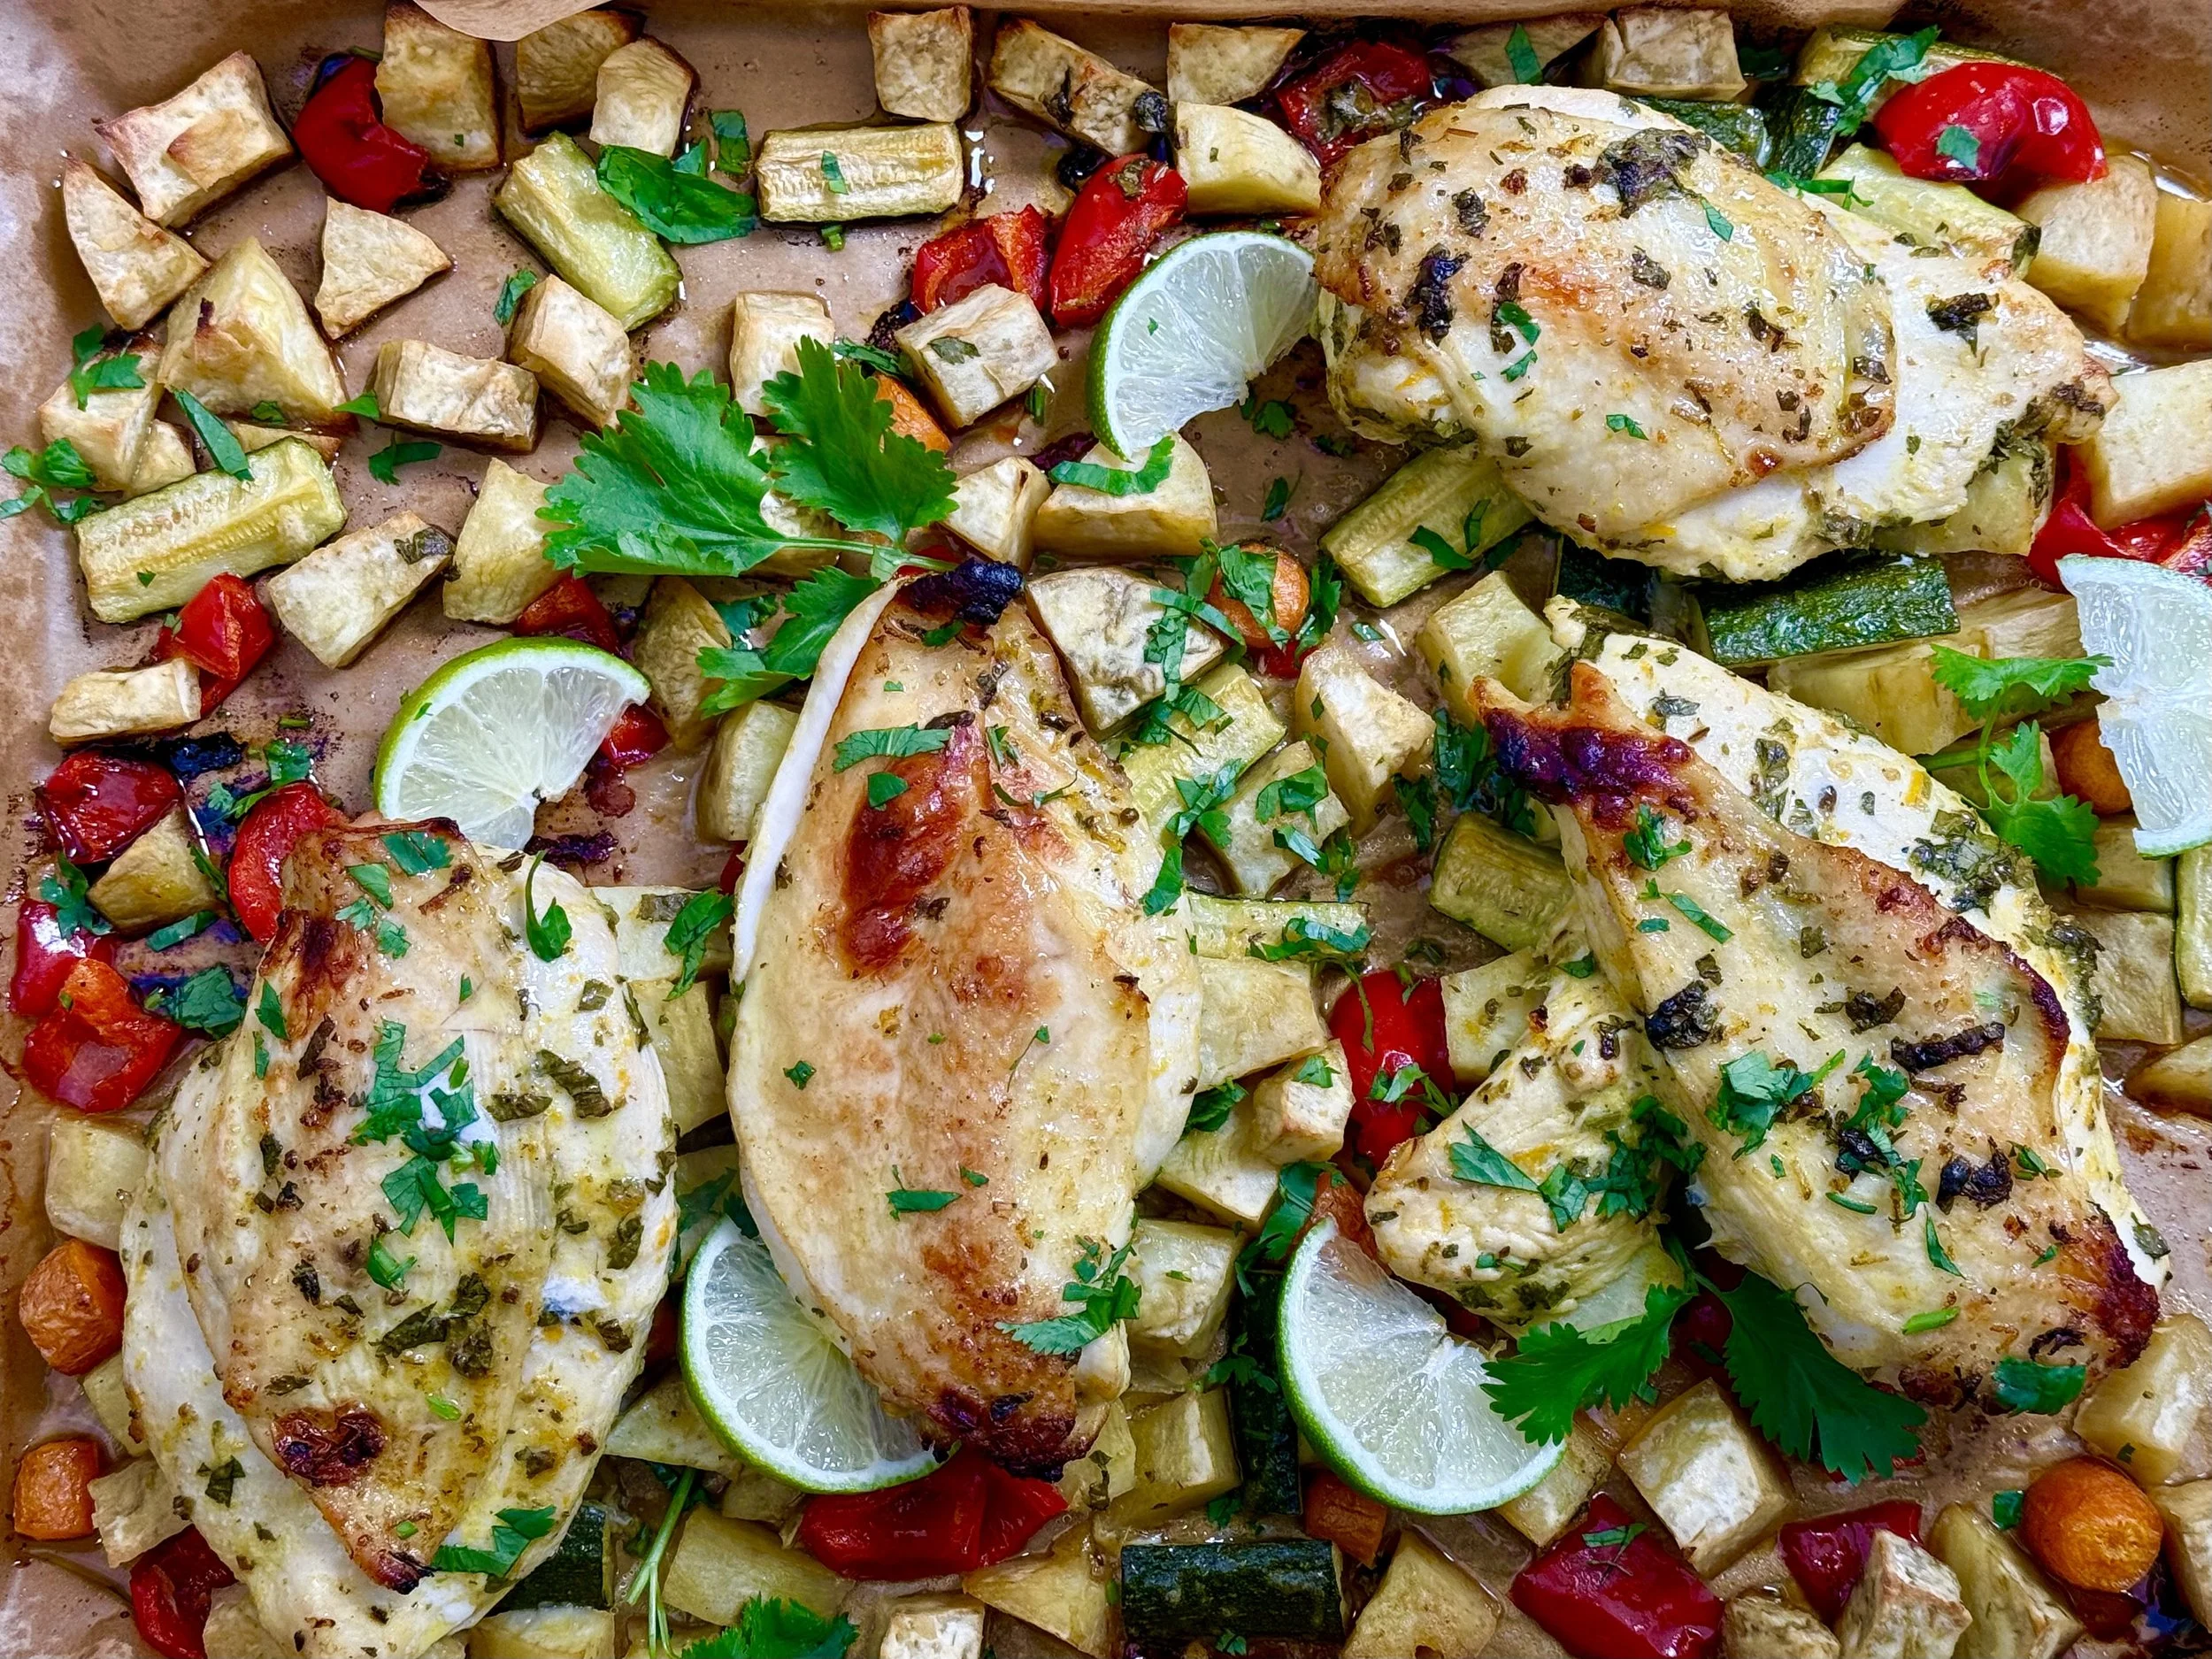
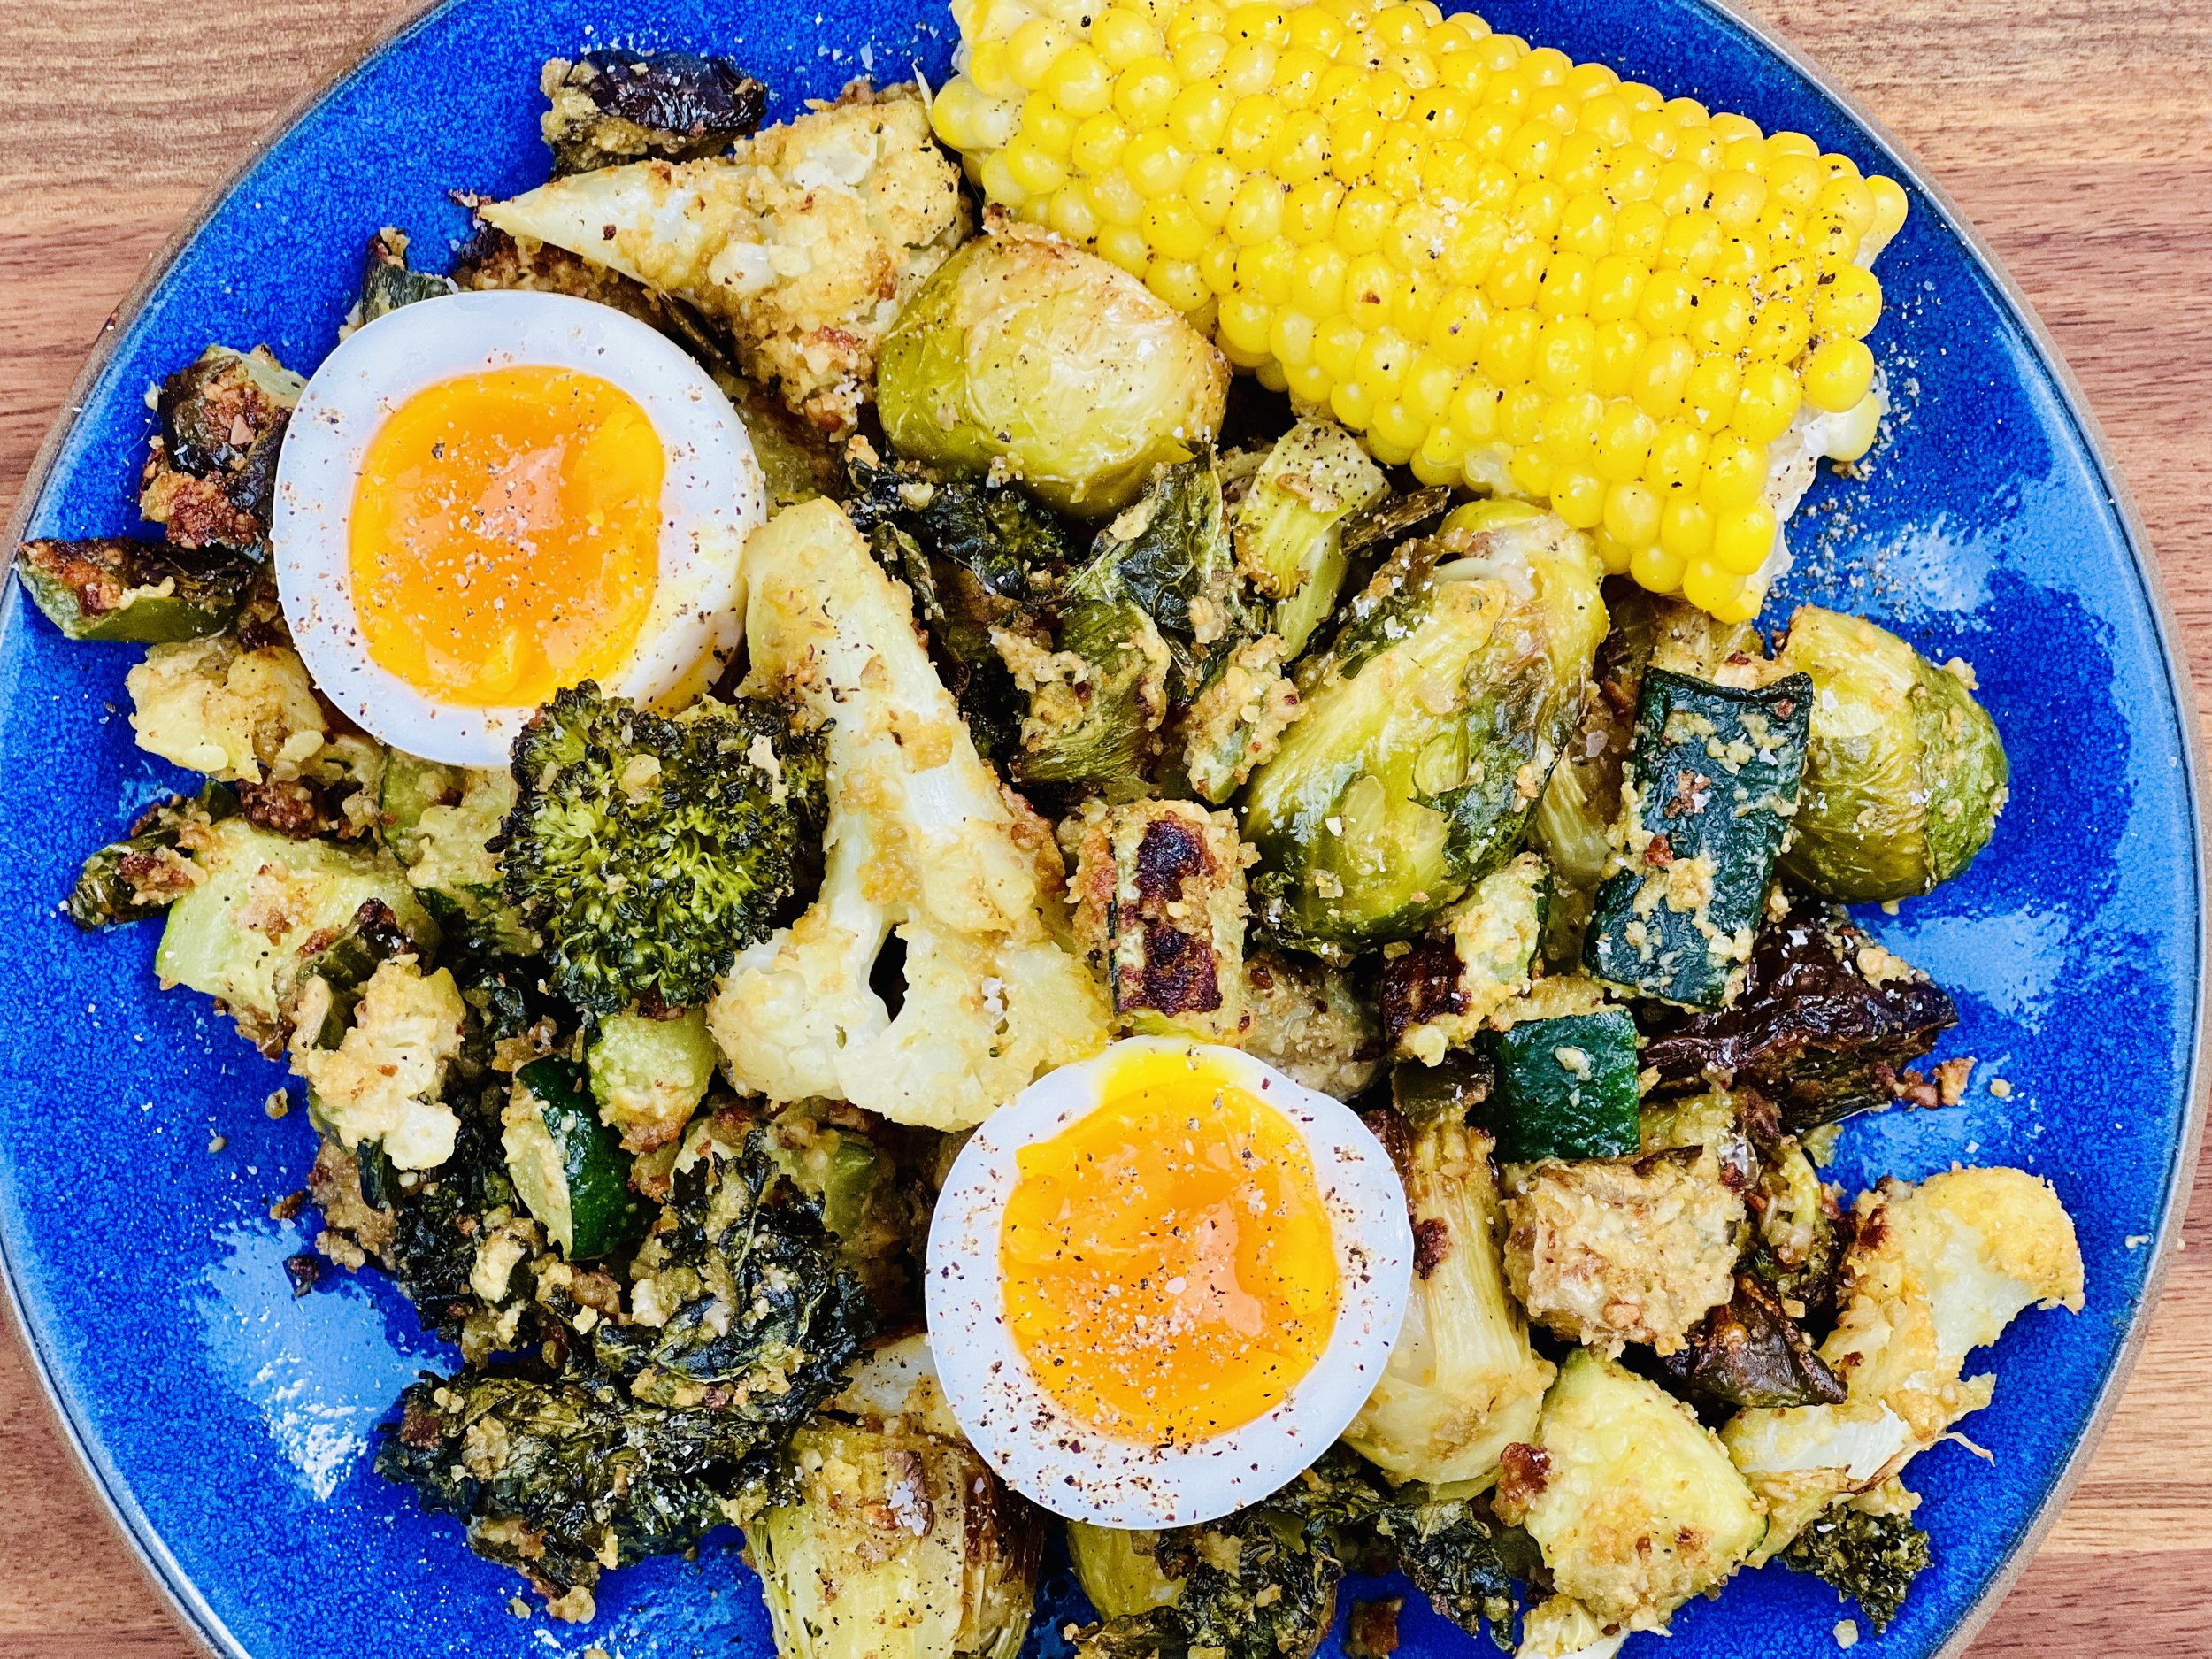
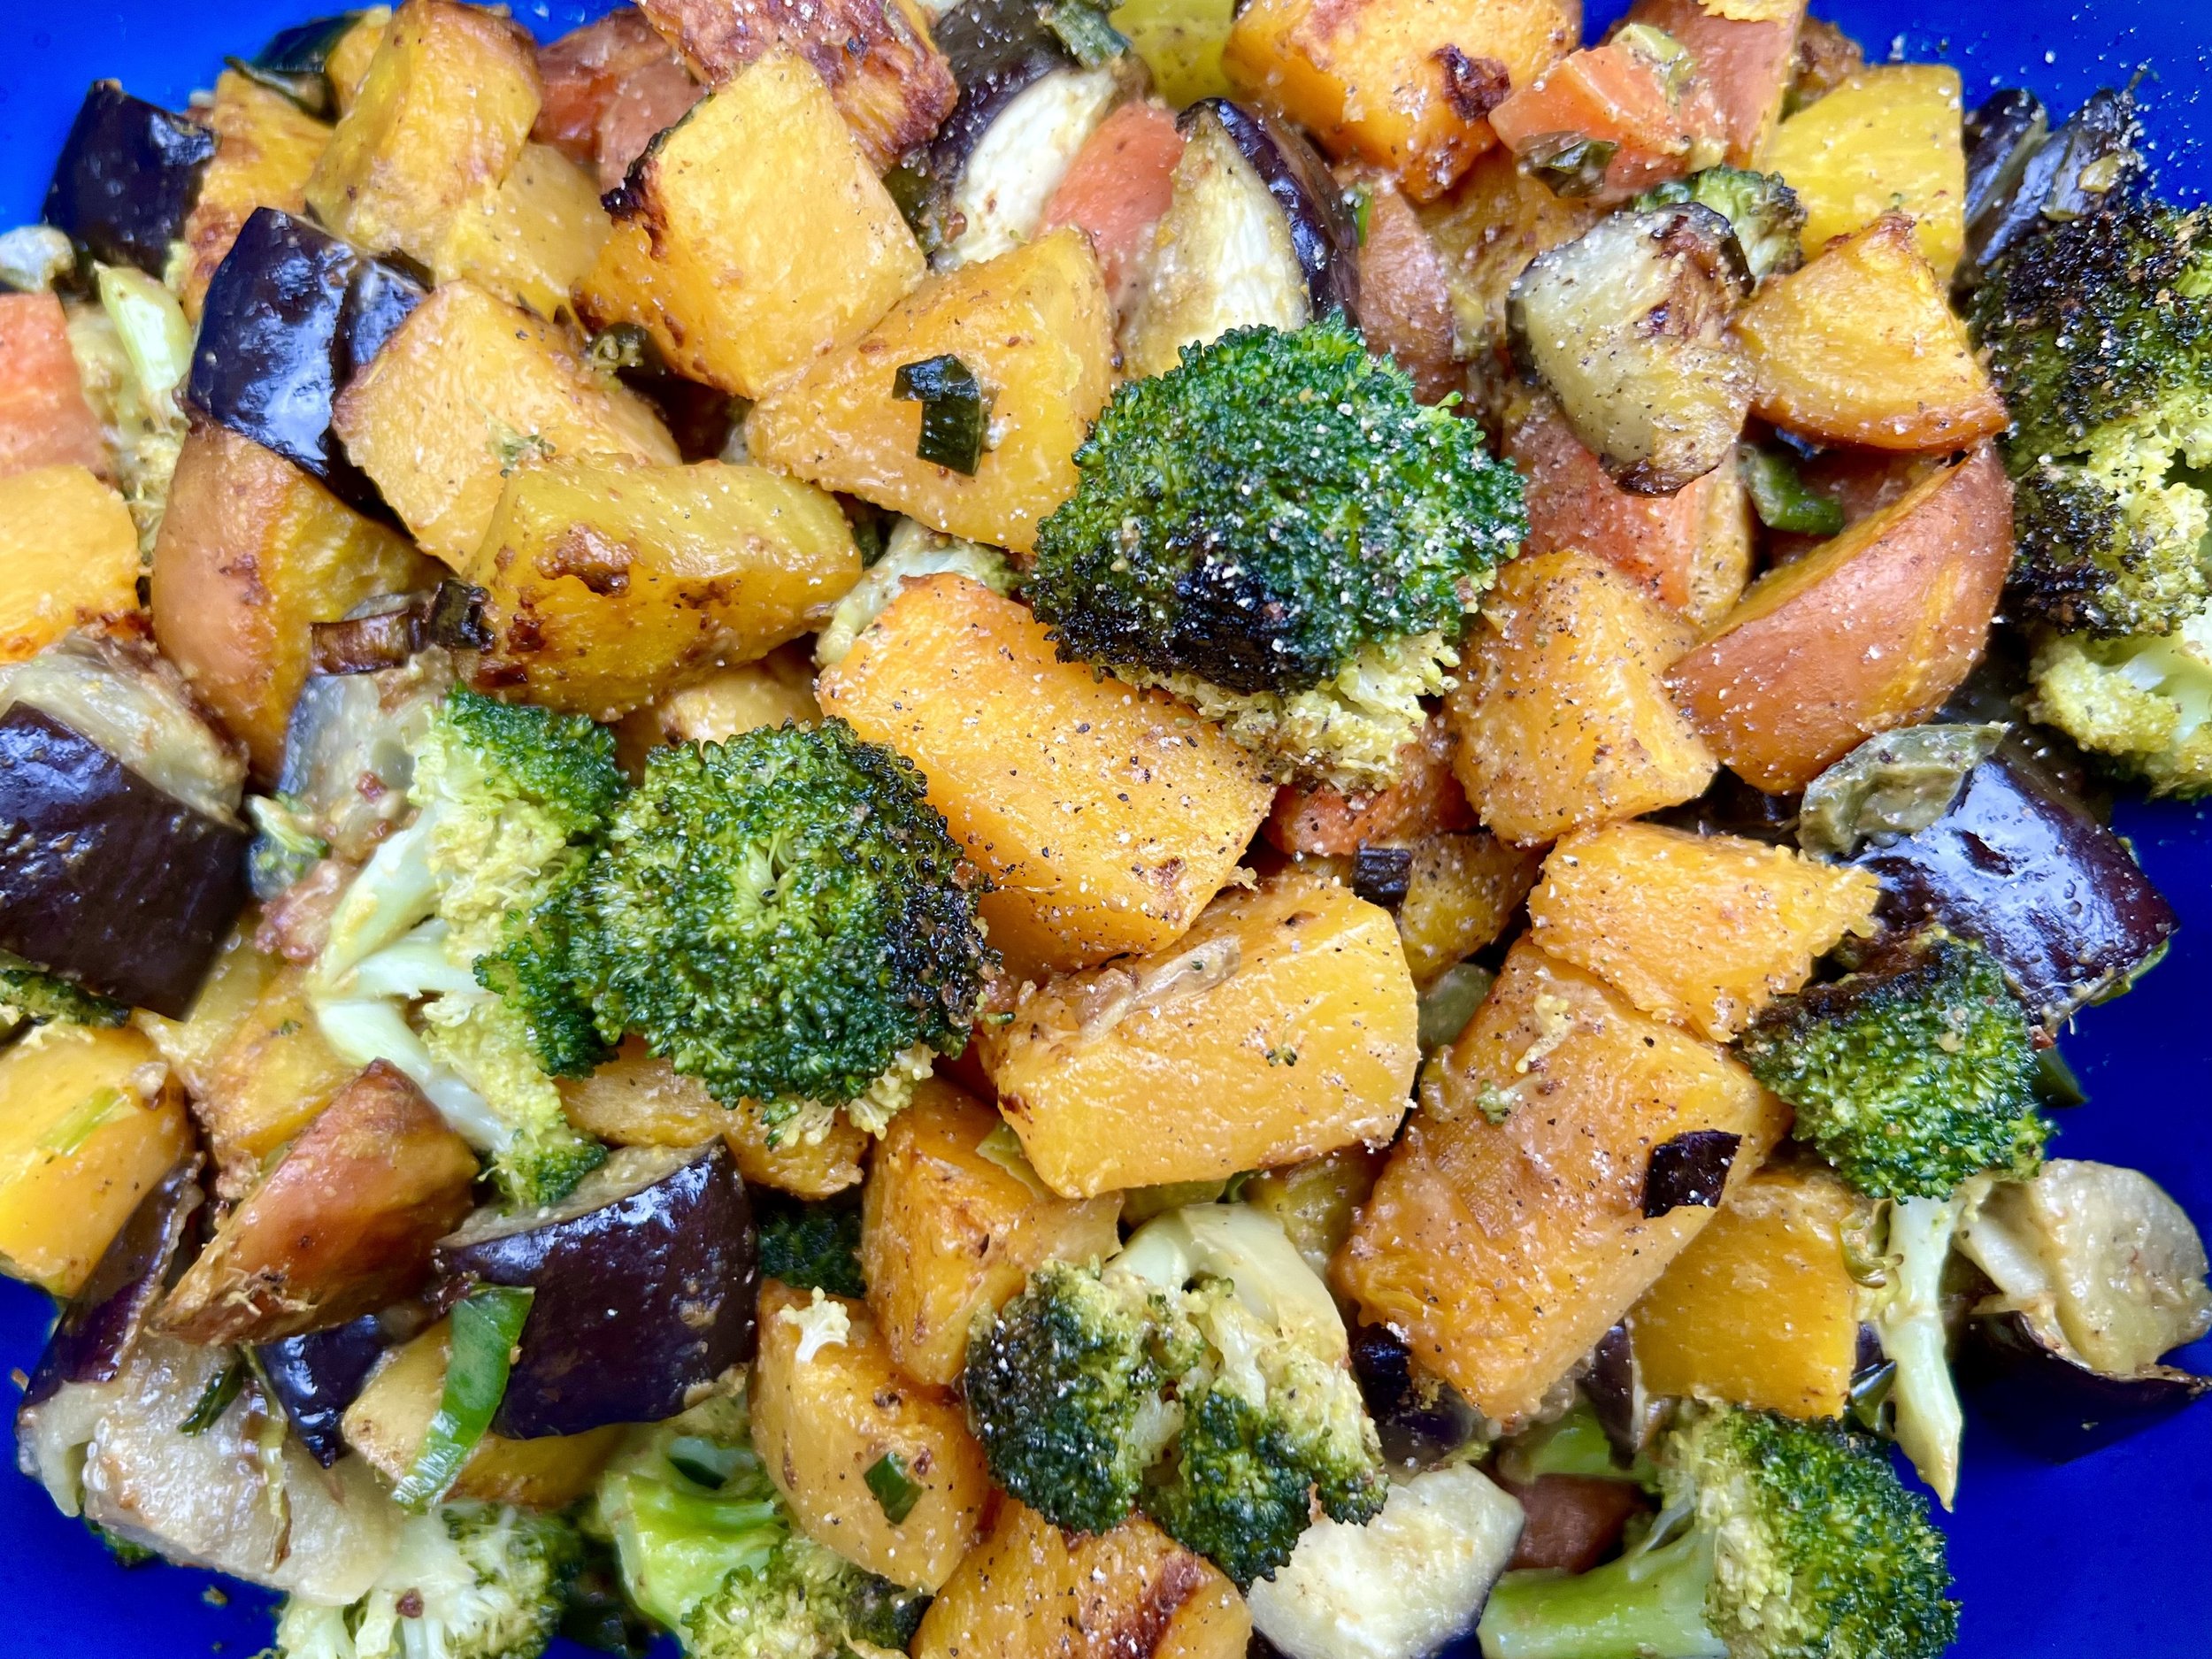
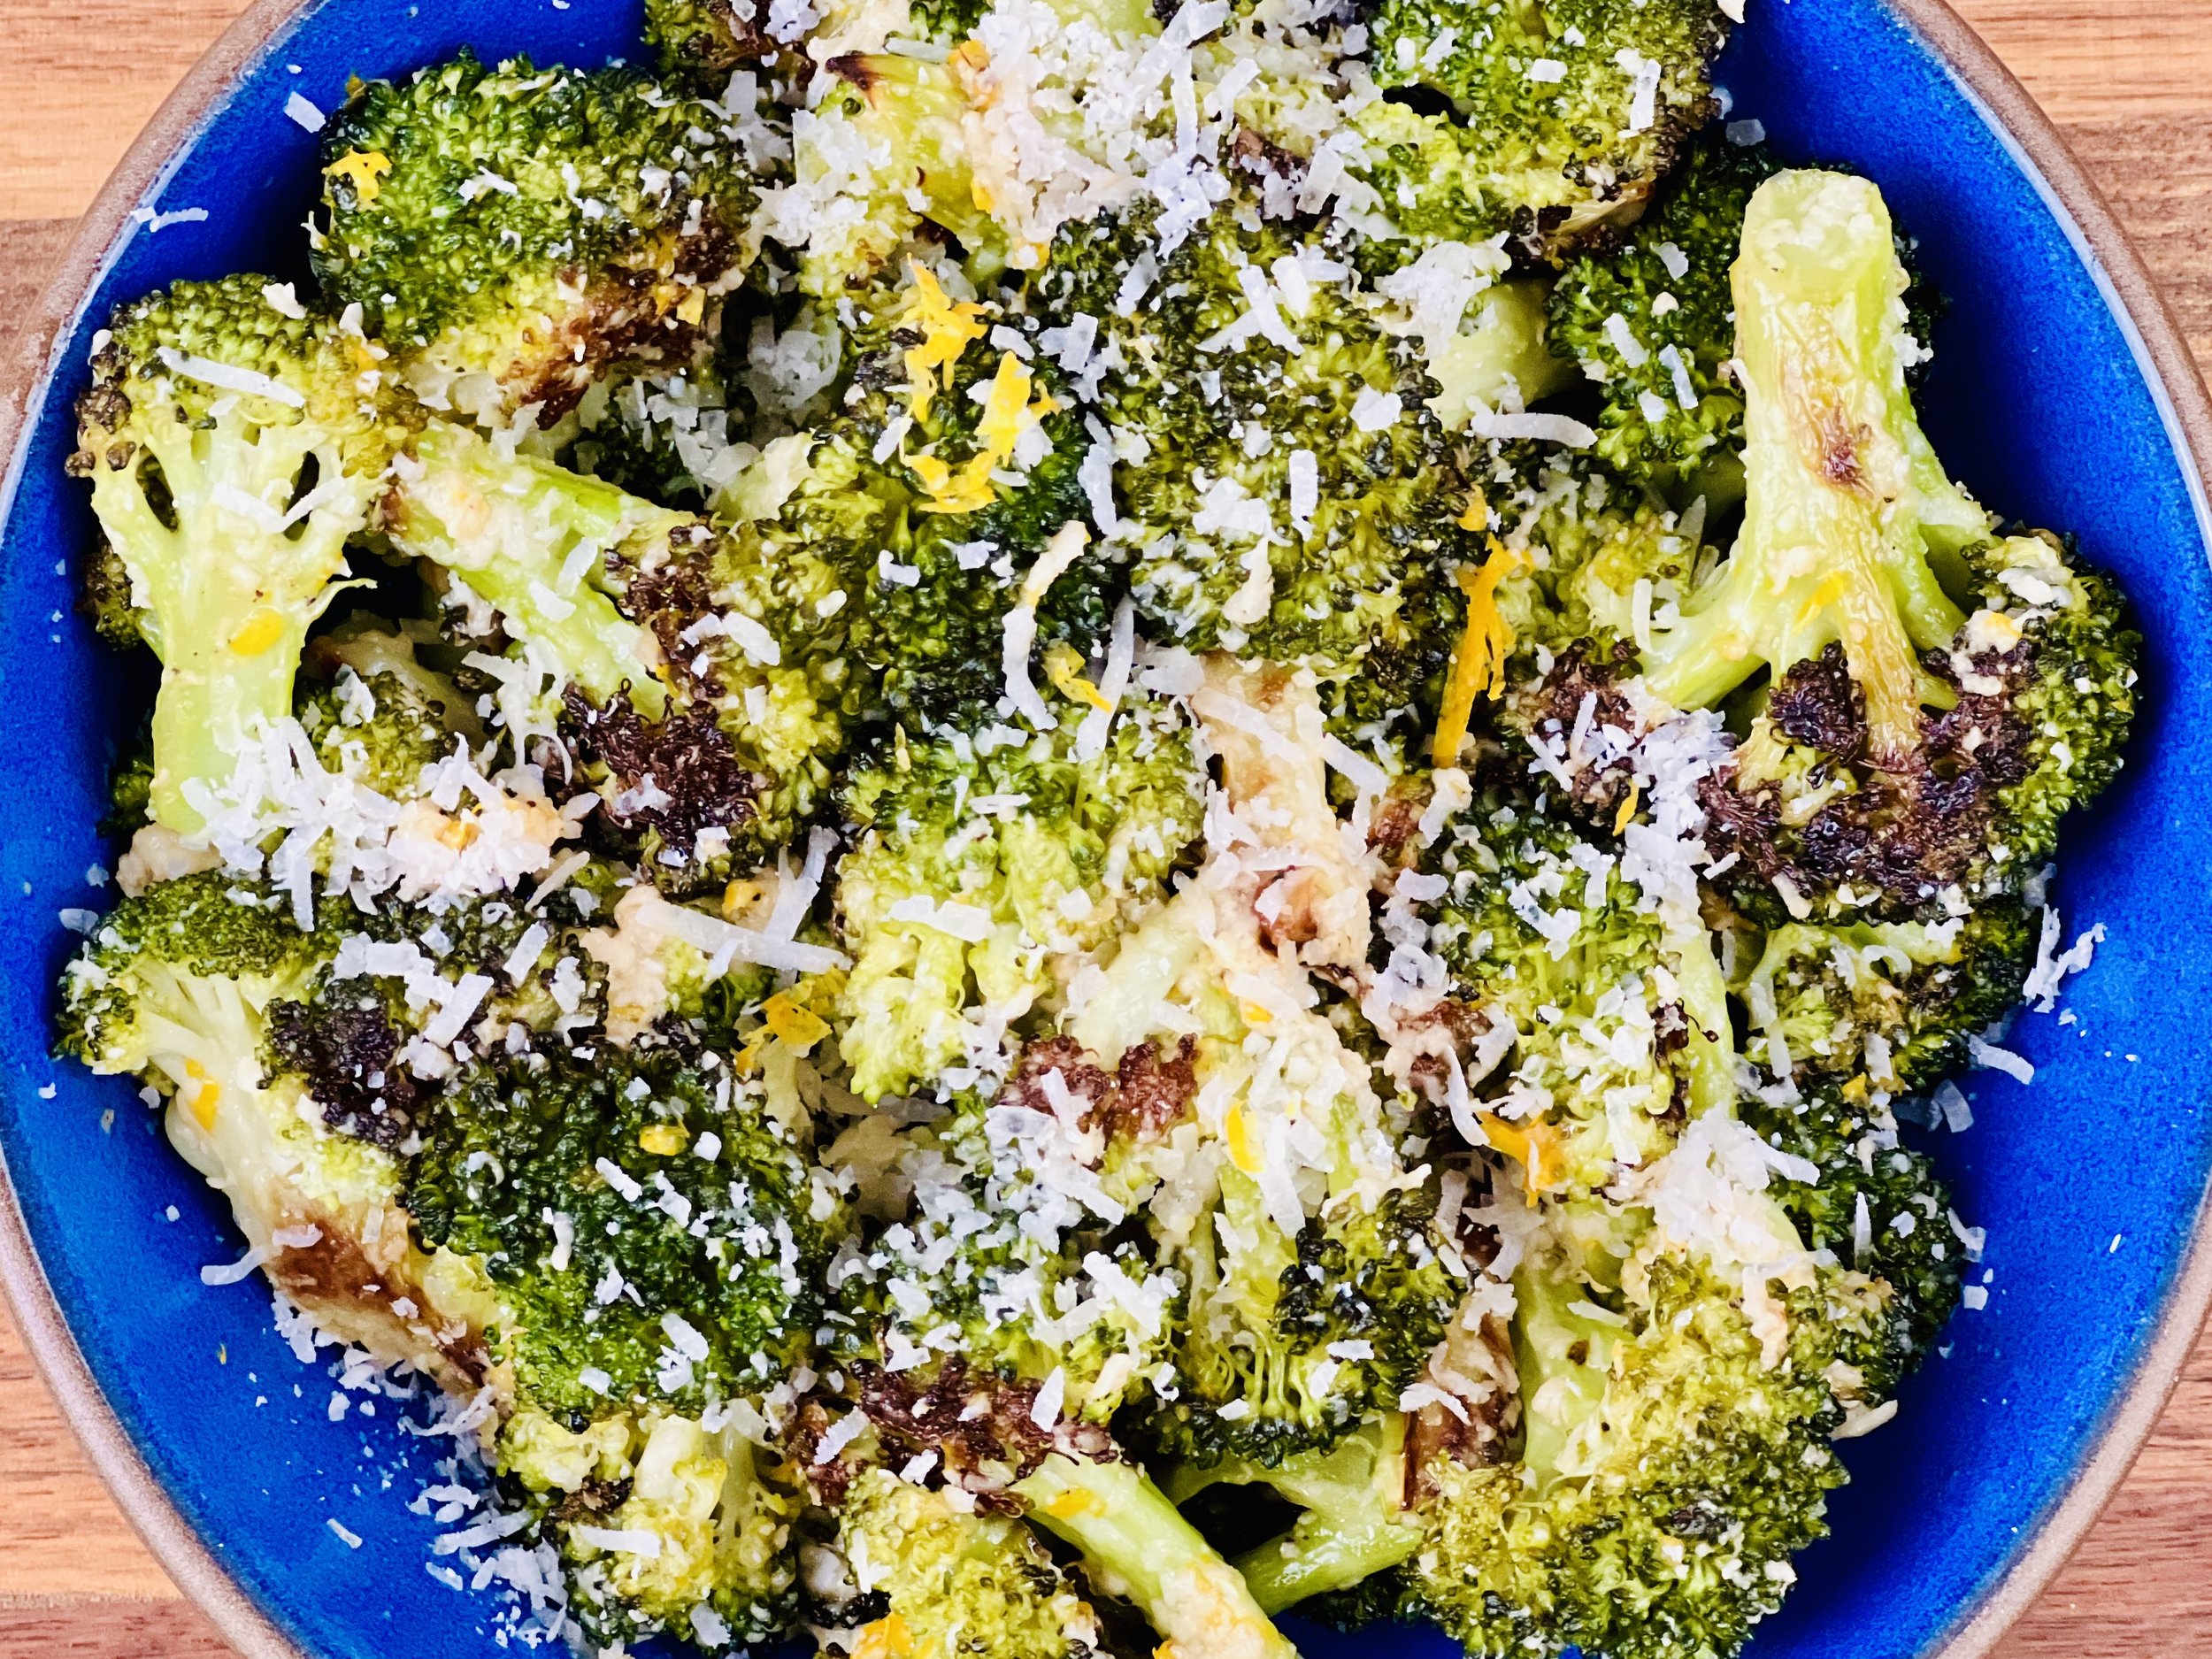
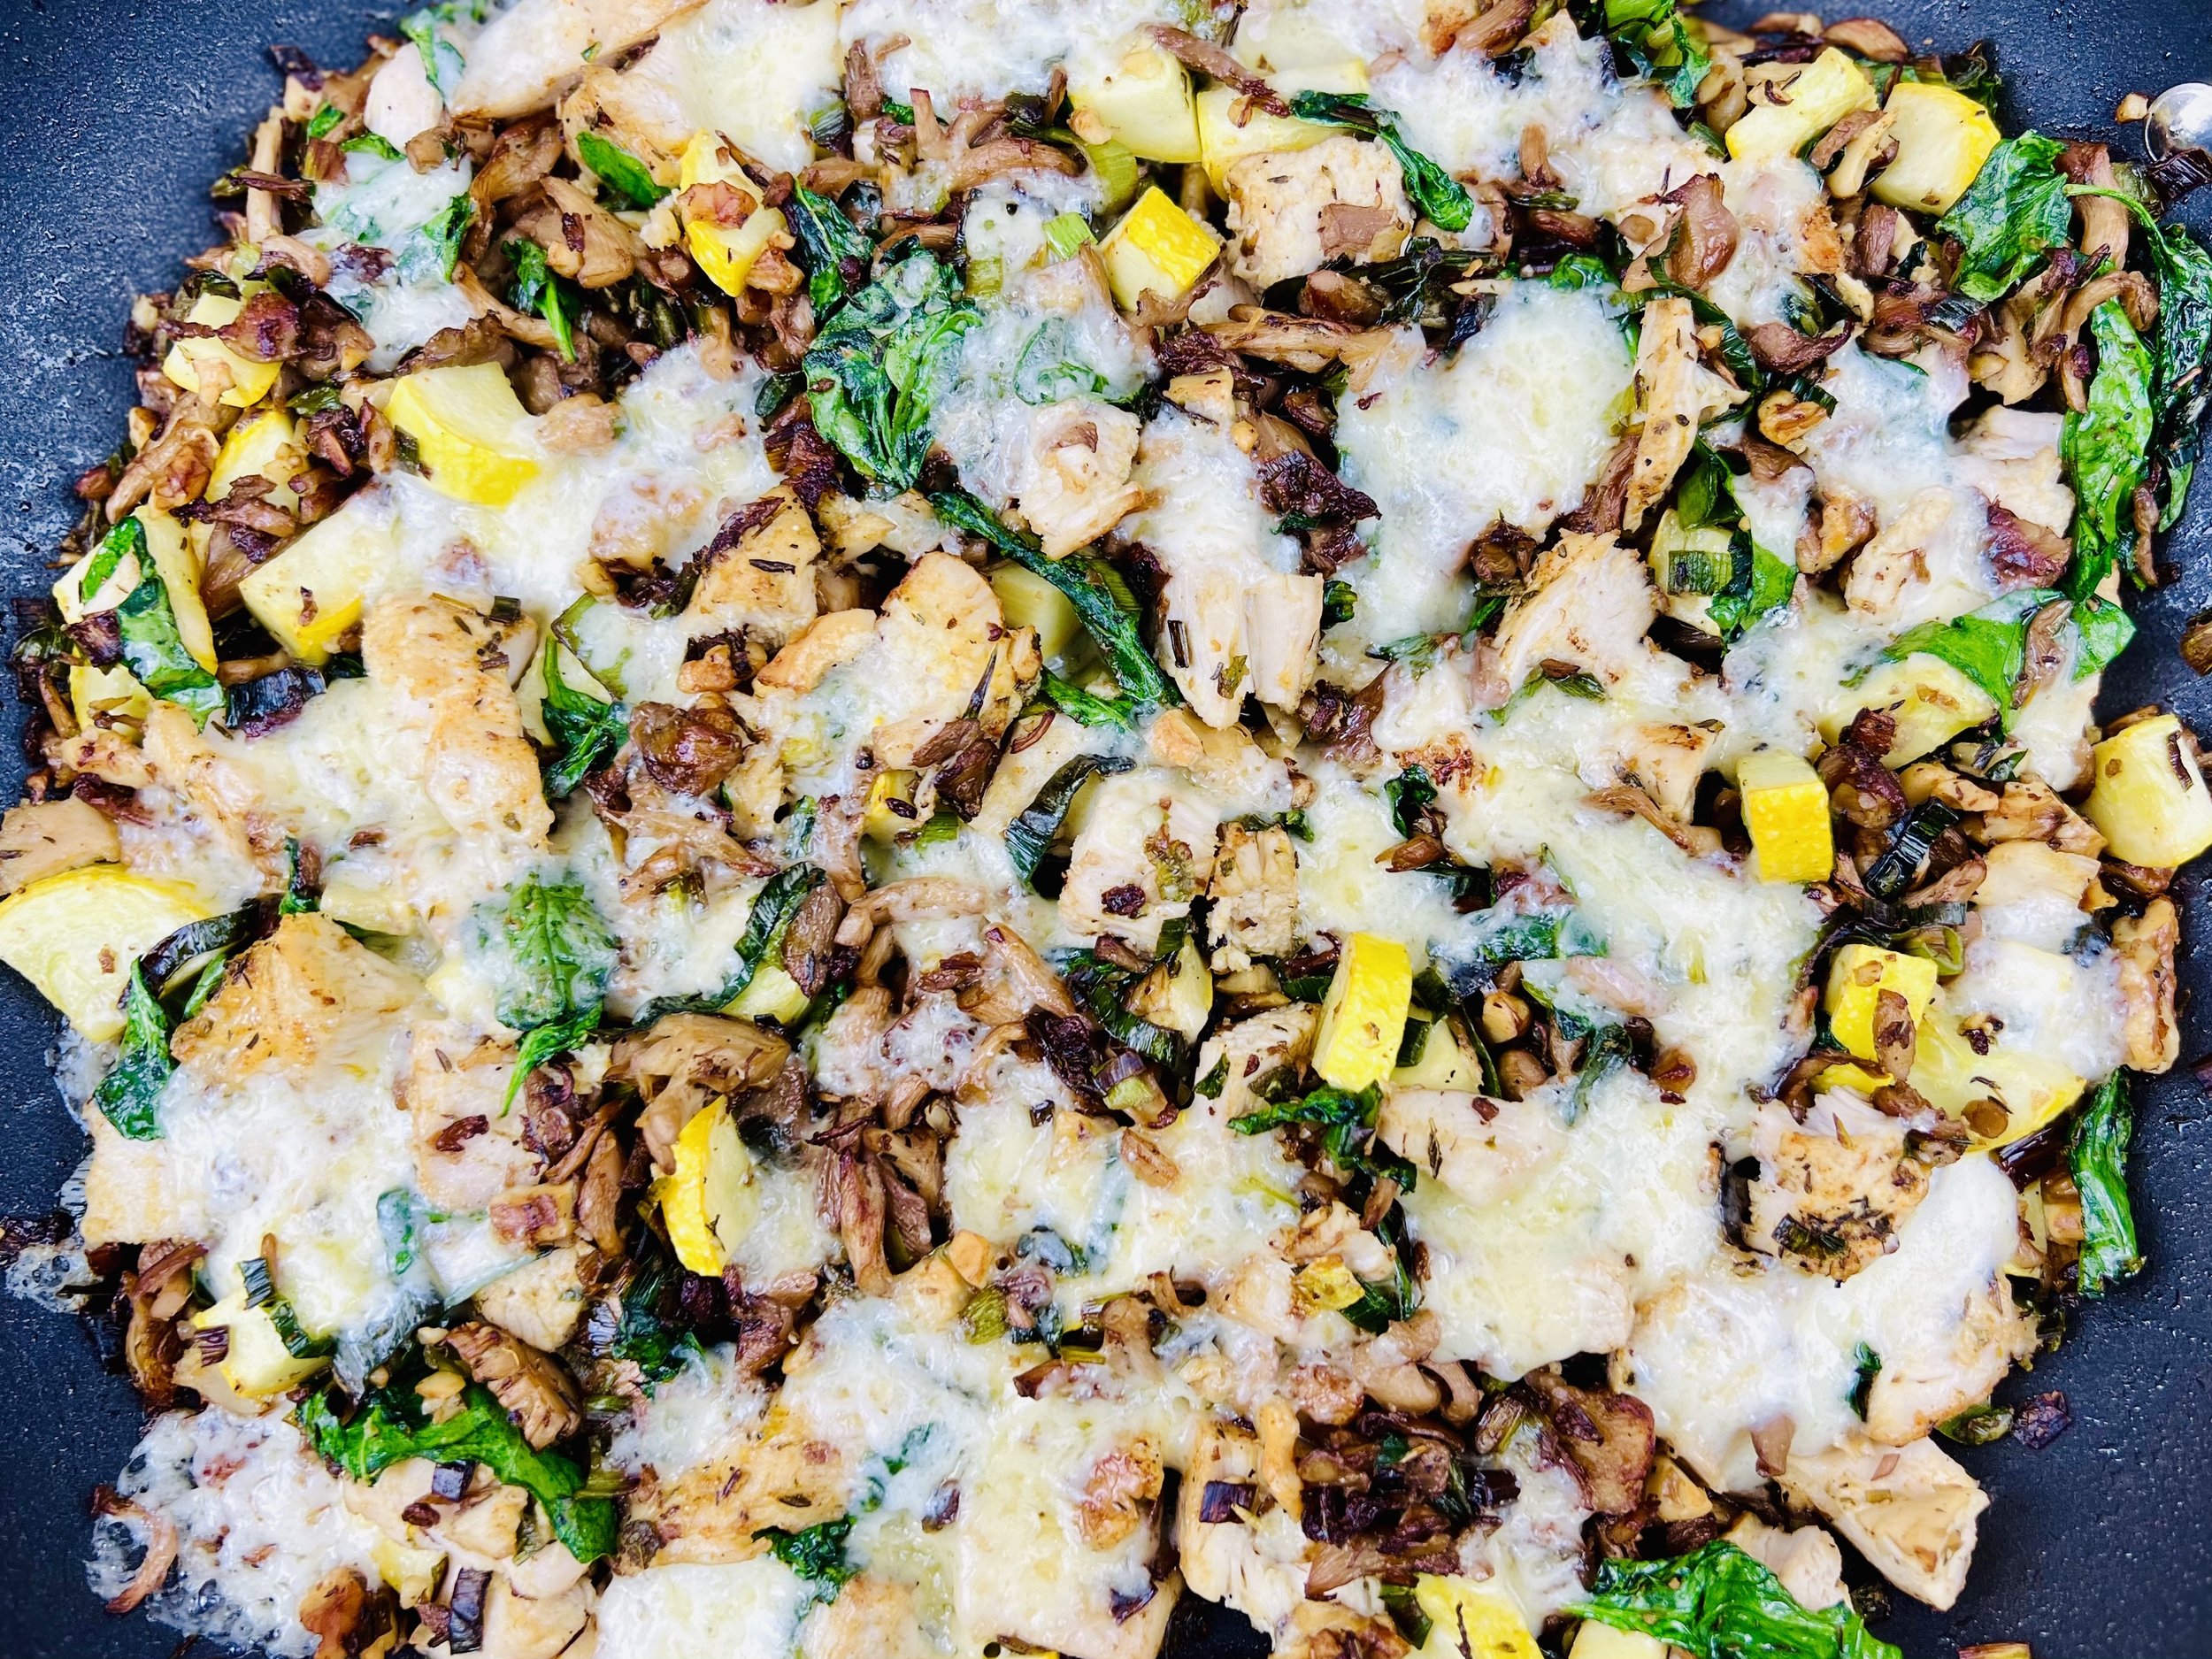
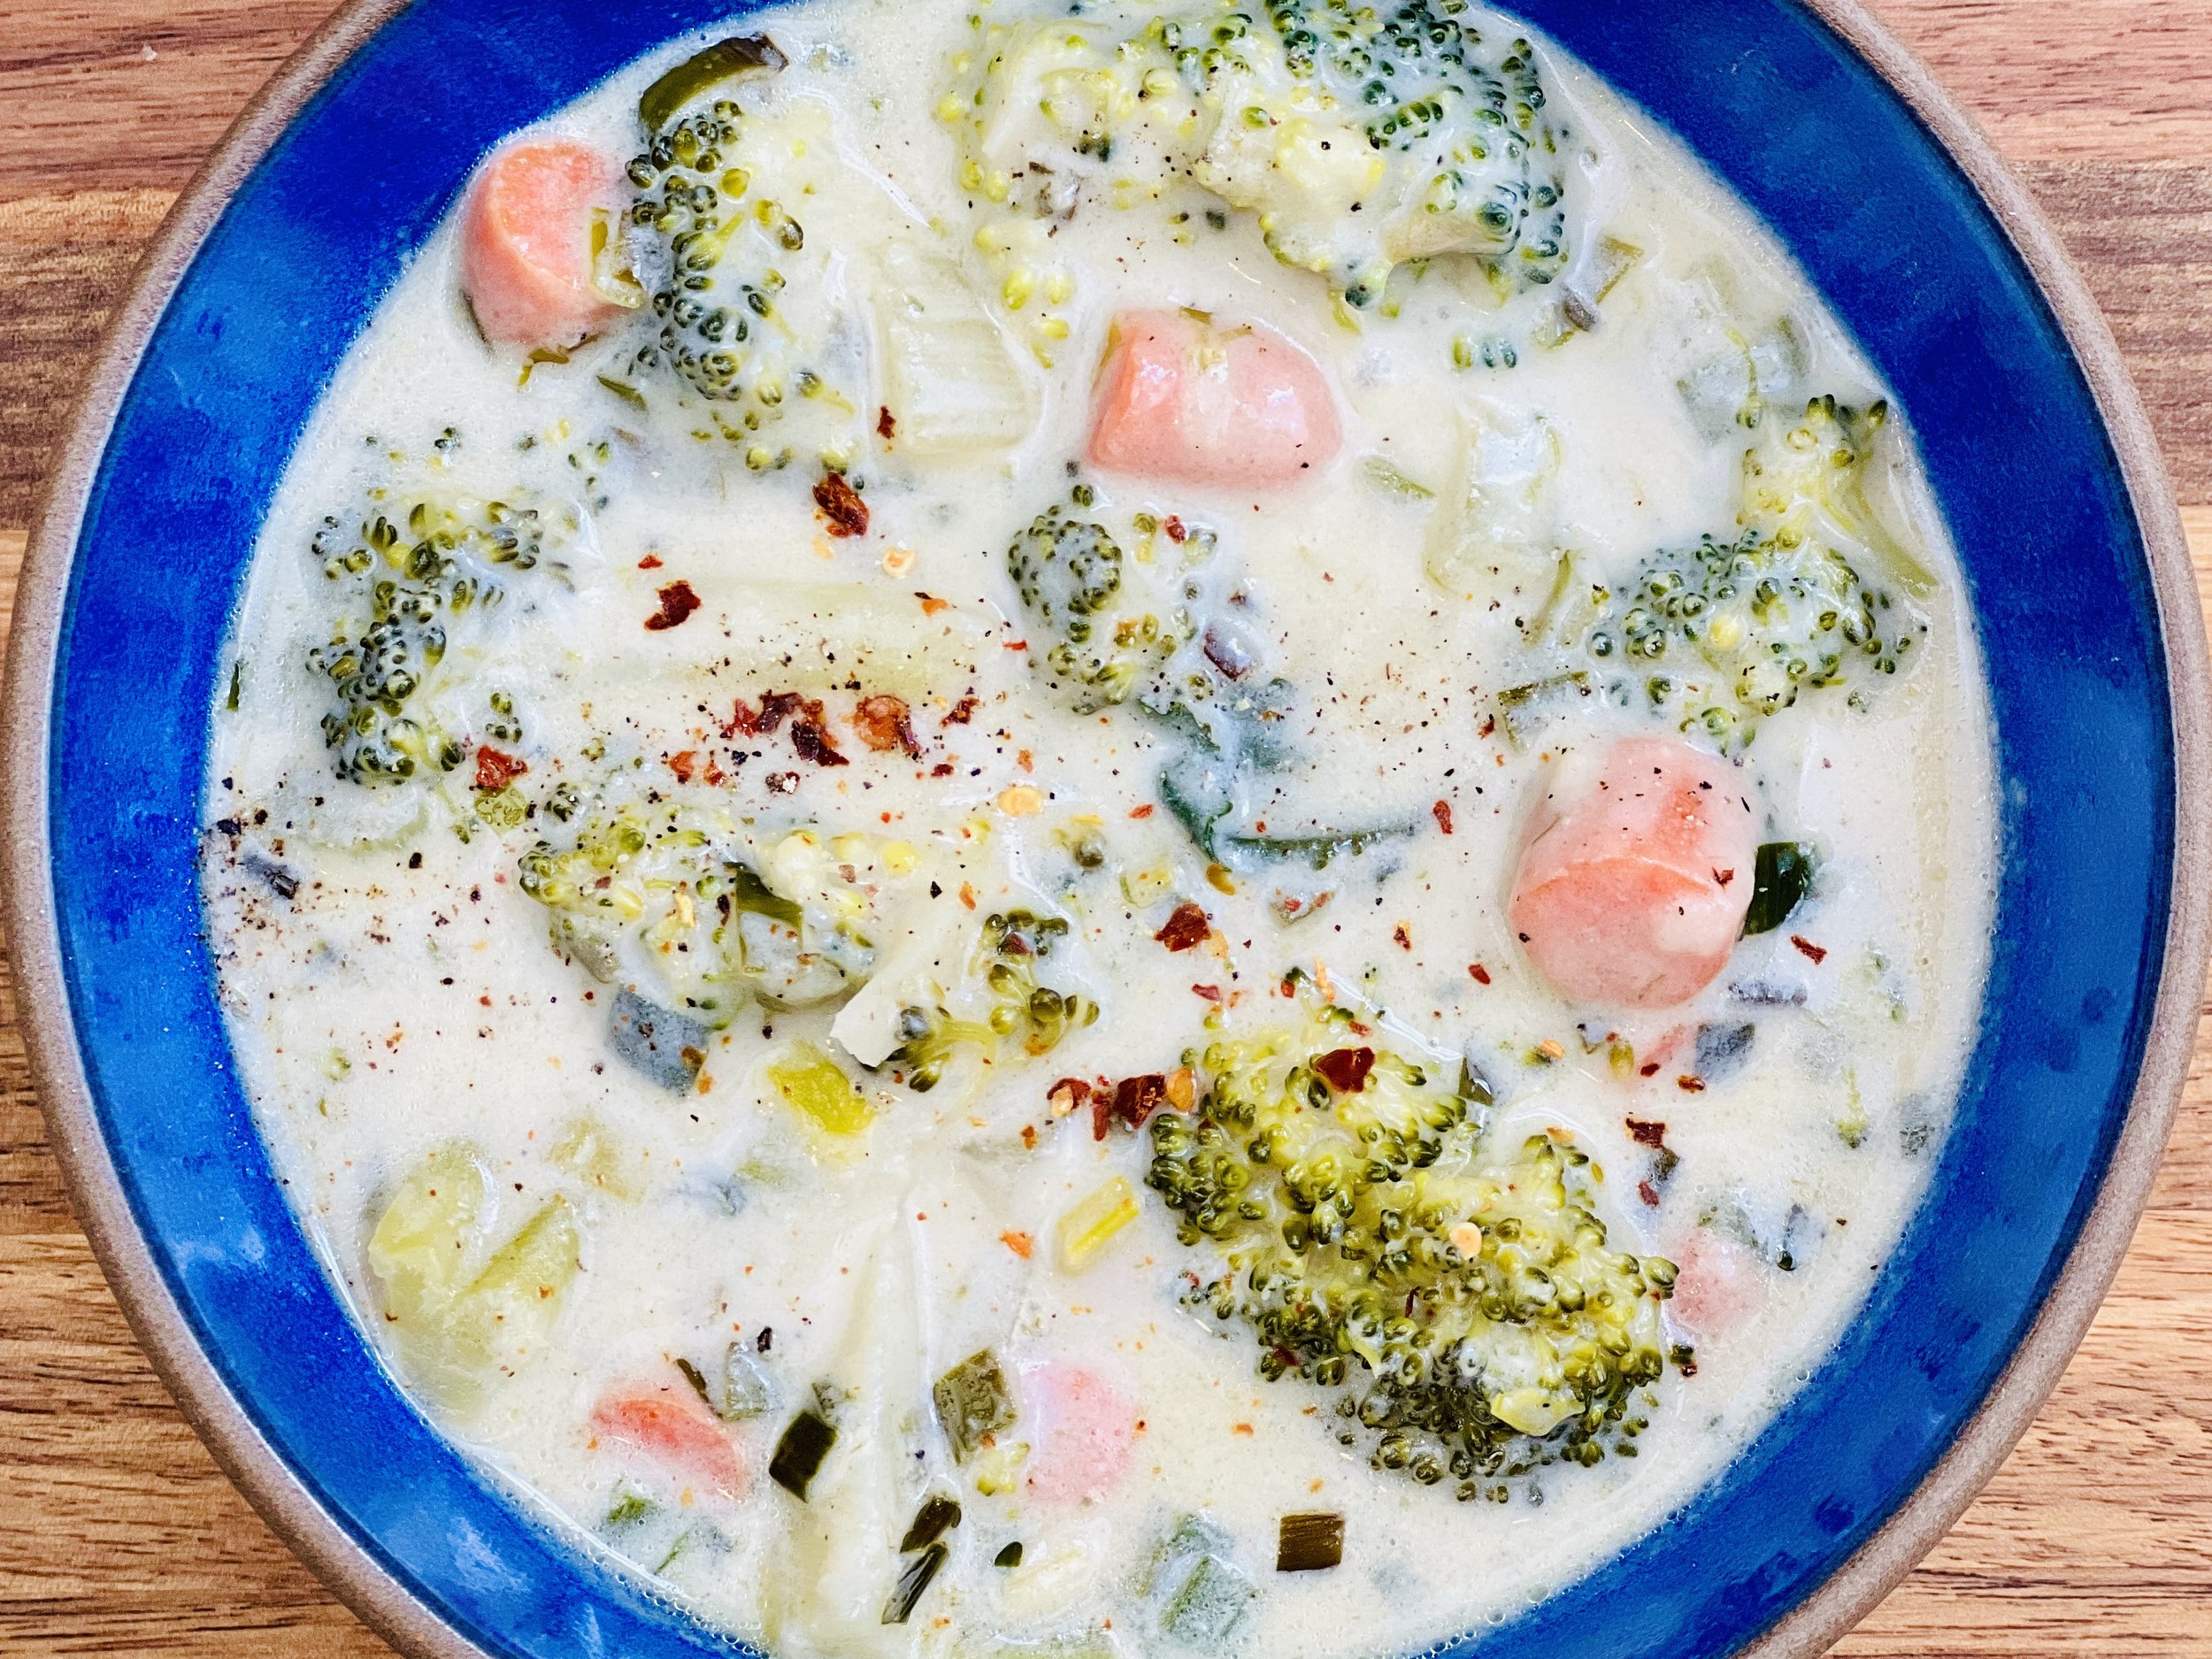
Roasted Vegetable Main Course (Low FODMAP)
20 Minutes prep • 25 Minutes cook • Low FODMAP • Gluten-free • Lactose-free • Vegetarian • Serves 4
20 Minutes prep • 25 Minutes cook • Low FODMAP • Gluten-free • Lactose-free • Vegetarian • Serves 4 • Ok to make ahead: Steps 1-5
Eating a broad variety of plants is important for the health of our gut biome. Roasting a combination of vegetables is a great way to get that variety in a delicious way (this recipe includes 14 different plants!) Roasting vegetables brings out a wonderful nutty sweetness you can’t get any other way. This recipe enhances that nutty flavor with seasoning that is a combination of macadamia nuts, sunflower seeds, and nutritional yeast that deliver an incredibly flavorful, protein-packed vegetarian main course the whole family will love. The combination of vegetables in this recipe is specifically selected to minimize FODMAP stacking (the different vegetables have differing FODMAP profiles). I have included a bit of cauliflower, but if you are sensitive to the FODMAP Mannitol, please sub this out.
Ingredients: Vegetables
2 tablespoons garlic-infused olive oil
1 leek, green part only, chopped
1 bunch green onions, green part only, chopped
2 cups broccoli florets (top part only)
1 cup cauliflower florets or chopped carrots (use cauliflower only if you can tolerate some mannitol)
1 cup Brussels sprouts, cut in half if they are large
2 large leaves kale, central stem removed and roughly chopped
2 small Japanese eggplant, sliced into 1/2-inch rounds
2 jalapeno peppers, seeded and chopped (optional but delicious without being hot)
2 small zucchini, diced
Ingredients: Seasoning
1/2 cup roasted and salted macadamia nuts
1/4 cup raw sunflower seeds
1/2 cup nutritional yeast
1/2 teaspoon Kosher salt
1/2 teaspoon black pepper
1 generous pinch of cayenne pepper (optional but adds a nice kick)
Directions
(1) Prepare: Preheat the oven to 400 degrees F. Cut the leaves from the stems of the kale and discard the stems. Wash and spin dry the leaves. Remove the seeds and chop the jalapeno (removing the seeds removes the heat!) Wash and chop the other vegetables. Note: If you are not including the cauliflower, please add 1 cup of broccoli, Brussels sprouts, and/or chopped carrots instead.
(2) Massage kale: Put kale leaves in a mixing bowl or in the roasting pan and drizzle 1 tablespoon of olive oil over them. Use your hands to massage the kale to soften it up and coat all the leaves with the oil. Add all other vegetables except the zucchini. Set aside.
(3) Prepare the seasoning: In your blender (or mini food processor) combine the macadamia nuts, sunflower seeds, 4 tablespoons of nutritional yeast, salt, pepper, and cayenne pepper. Blend/pulse for about 30 seconds until it turns into a fine meal. Scrape down the sides of the bowl if needed and pulse again to break down all the nuts.
(4) Combine: Sprinkle the seasoning mixture on the vegetables and toss well to distribute as the seasoning as evenly as possible.
(5) Cook: Spread the vegetables out in the roasting pan or rimmed baking sheet and bake for 15 minutes. Remove from the oven and toss the vegetables to ensure even baking. Add the zucchini. Toss again. Return to the oven and bake for 10 - 15 minutes more, or until vegetables are tender and starting to turn deep brown.
Make-ahead note: Once completely cooled, store leftovers in an airtight container for 2-3 days. They heat up very nicely in a 325-degree F oven for 15 minutes or in the microwave.
(6) Plate and serve: Serve as a vegetarian main course or side dish as is or top with a soft-boiled egg for even more protein.
Eat and enjoy every bite because you can!
Recipe note: I use Diamond Crystal Kosher salt in all my recipes because it has a wonderful flat and crisp flake that tastes delicious. It is also the least salty salt available so you can use it more liberally as a seasoning than you can table salt or sea salt. If you use another type of salt, you may need to reduce the amount so it is not over-salted.
Have a question you’d like to have answered? Email me at hello@ibsgamechanger.com
Link note: This post may contain affiliate links for you to easily purchase items that are linked. I may earn a small commission from qualifying purchases but none of this costs you a thing so feel free to use the links! In addition, for some items, I have provided a special discount code for IBS Game Changers so be sure to use the code when you purchase an item to get the discount that has been arranged just for you.
More Deliciously Low FODMAP™ plant forward recipes


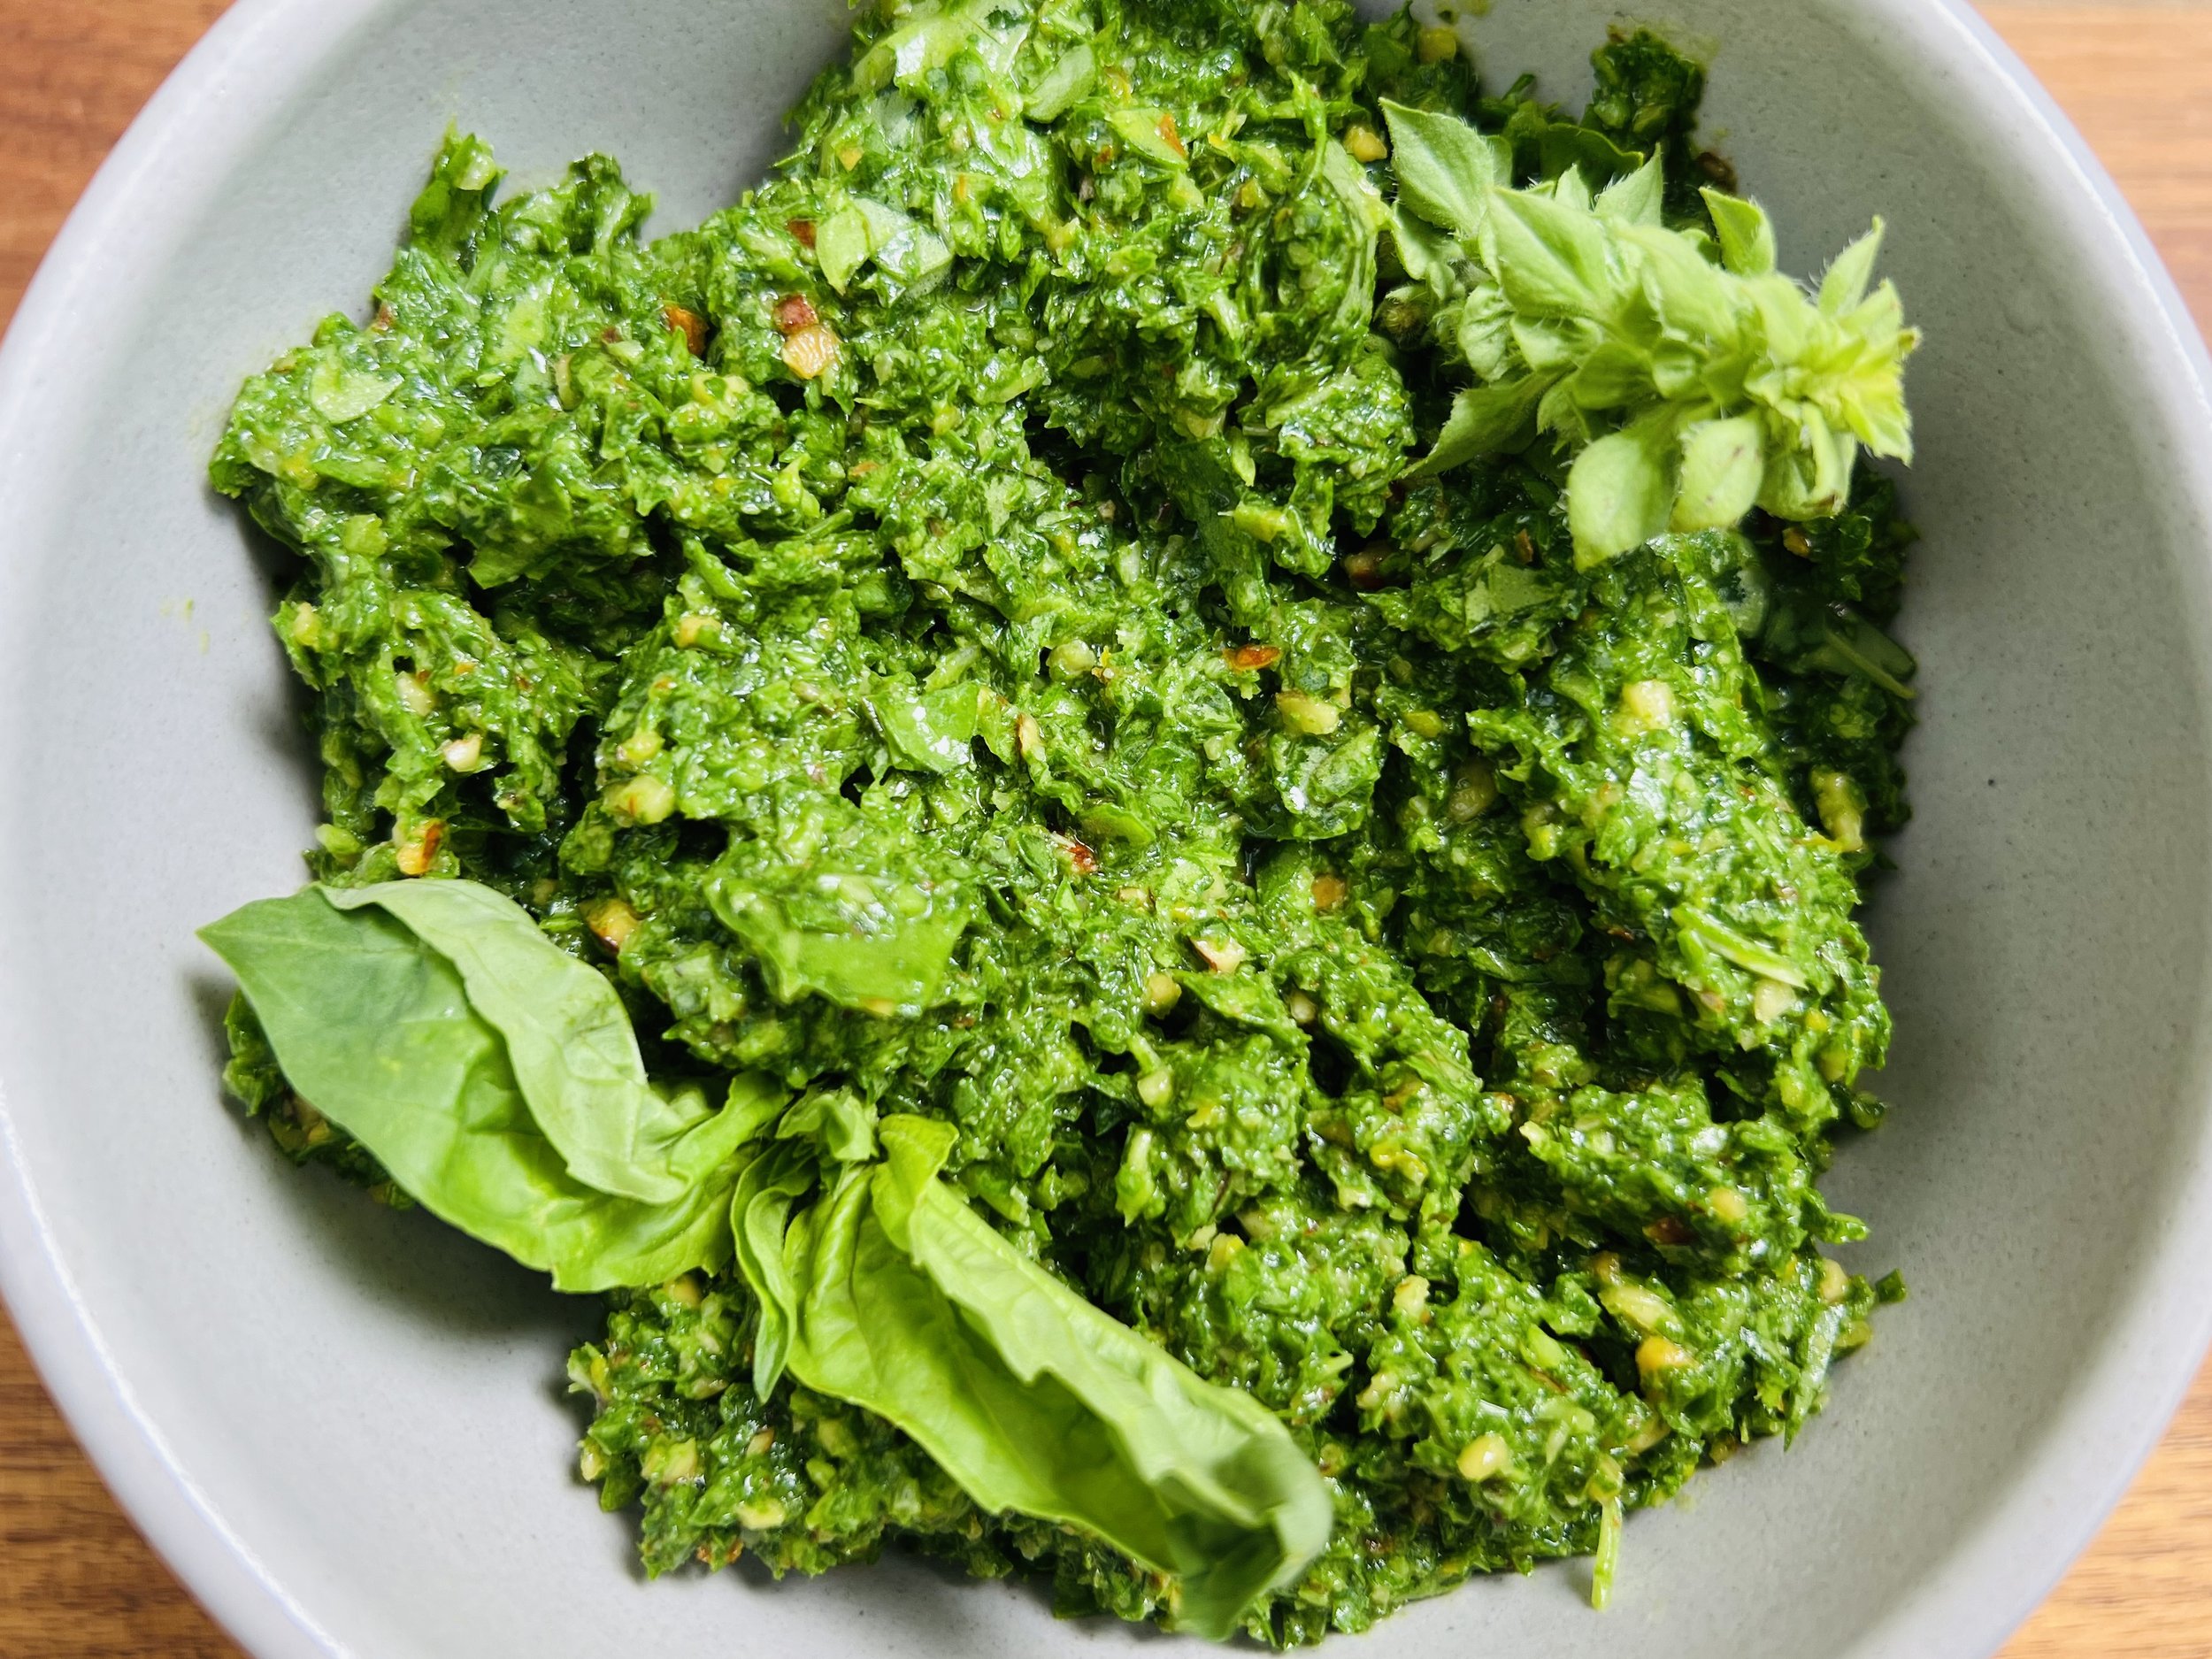

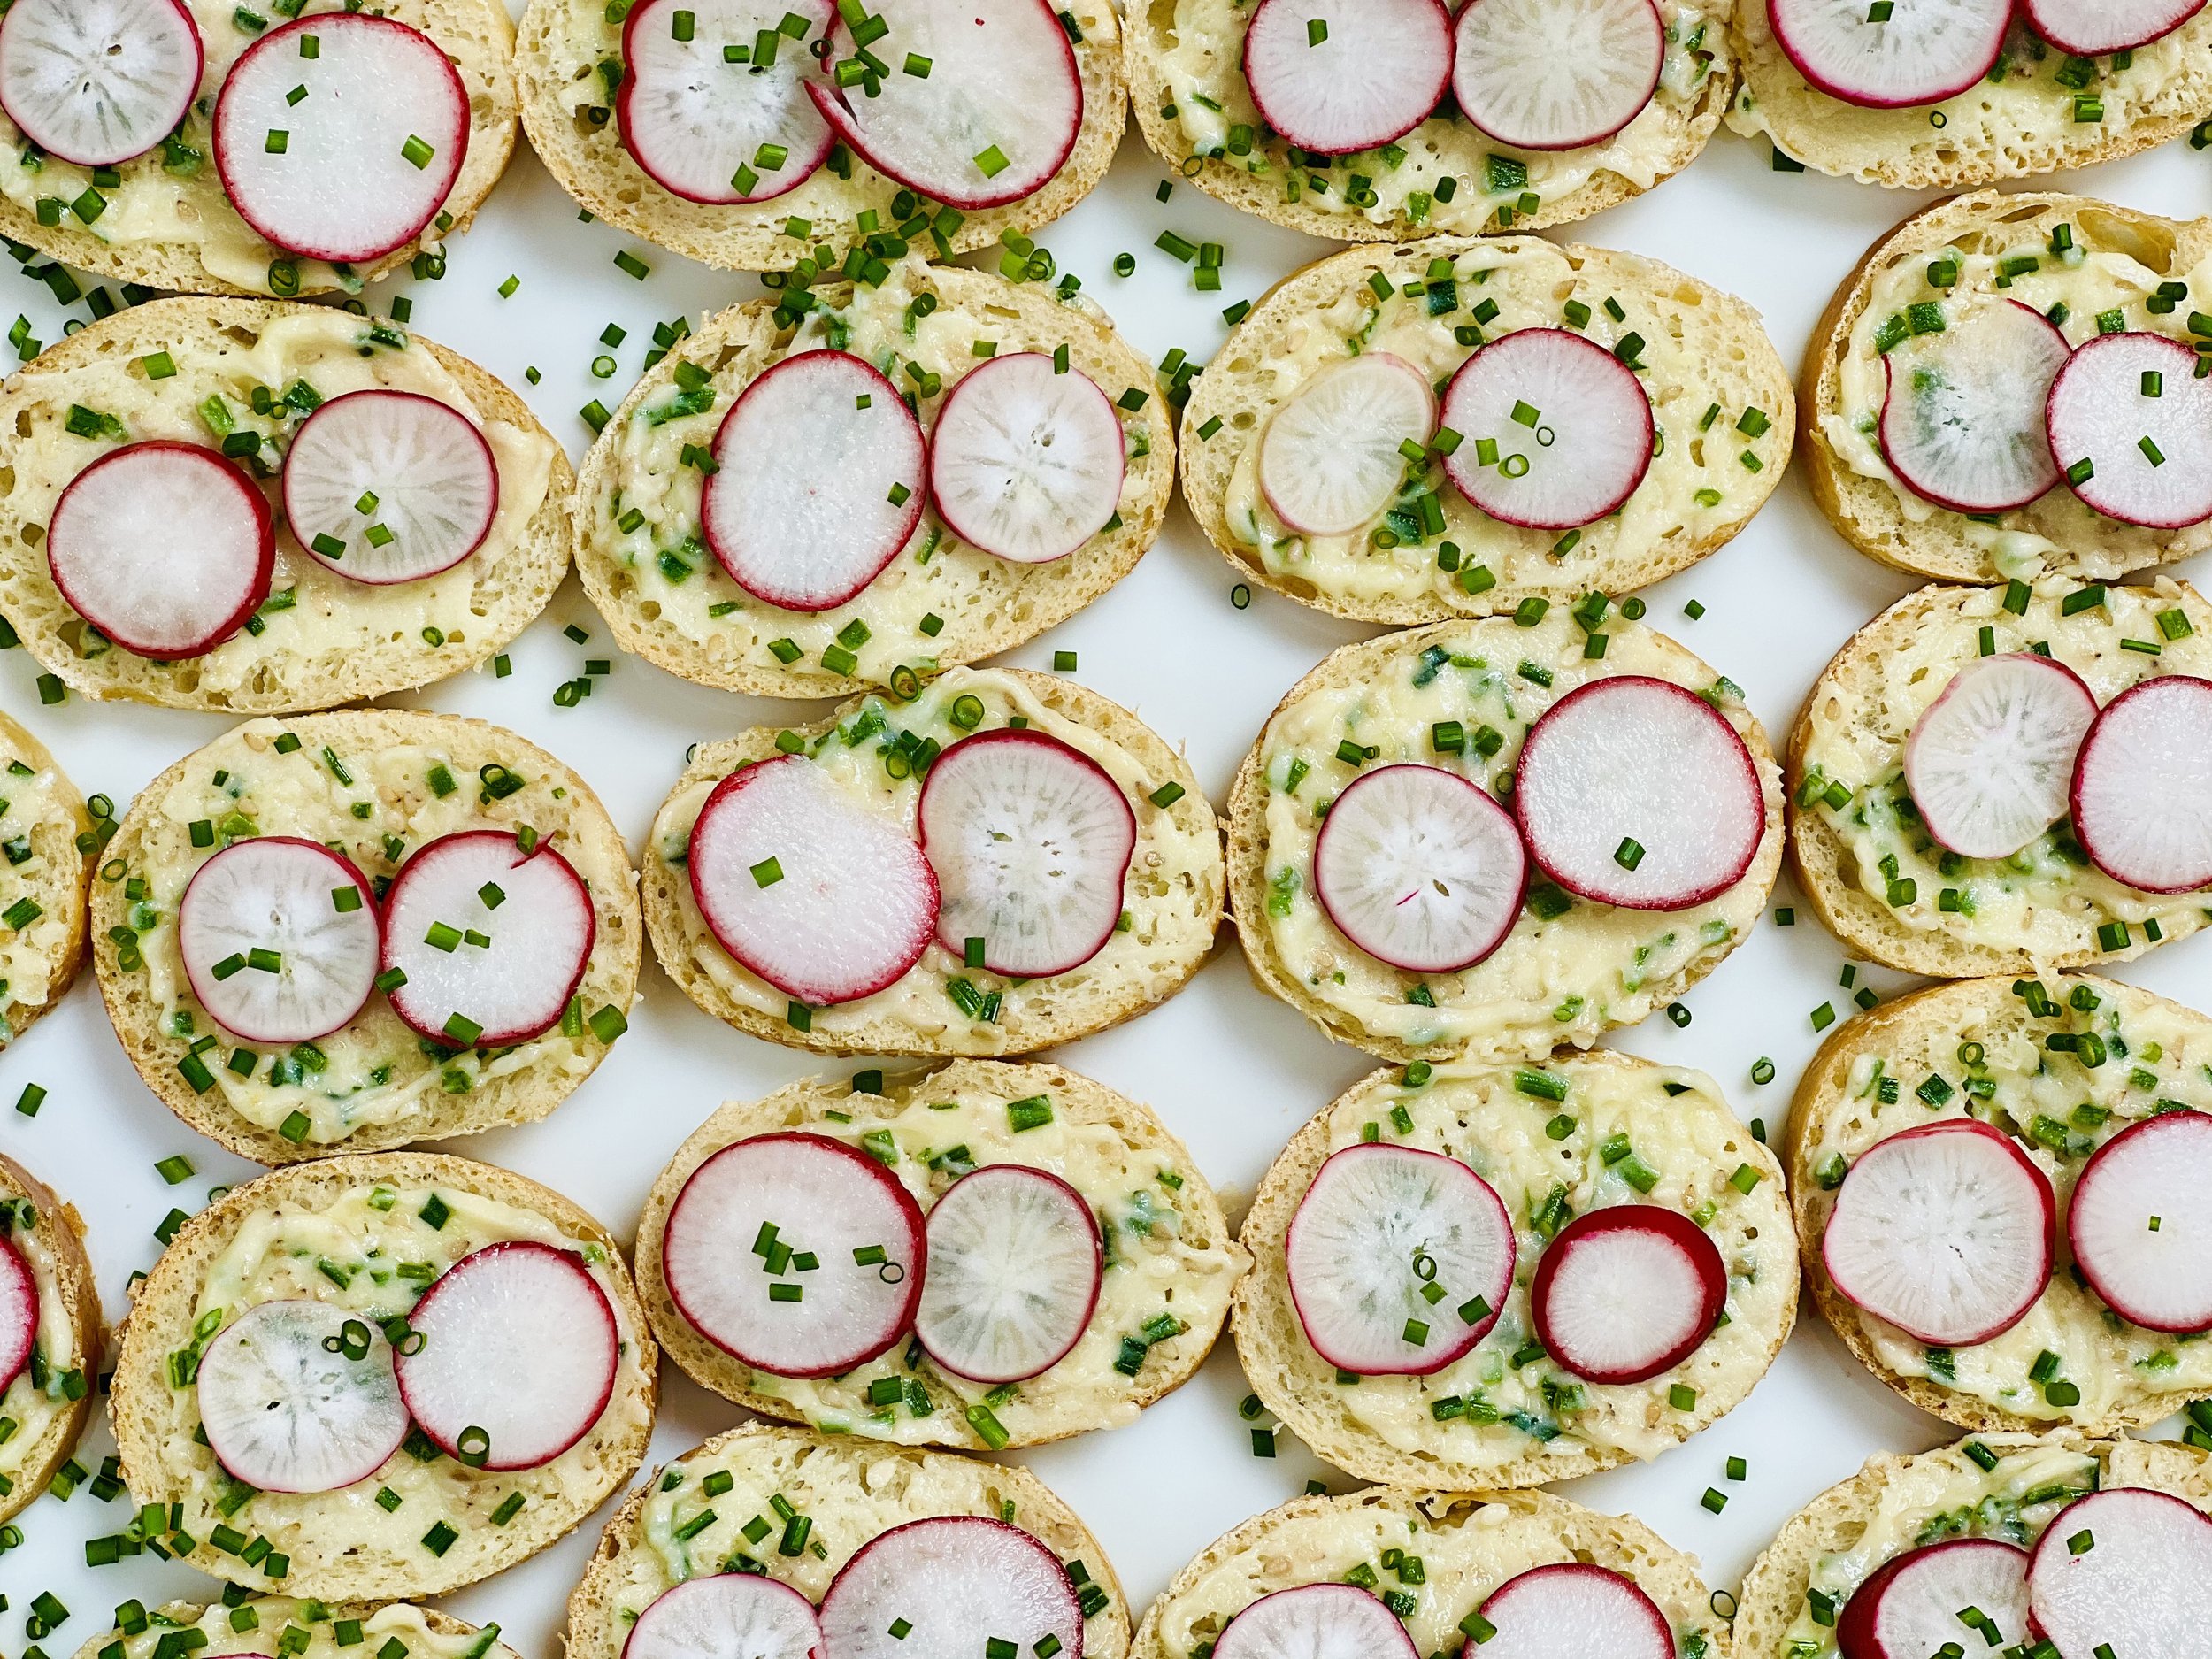
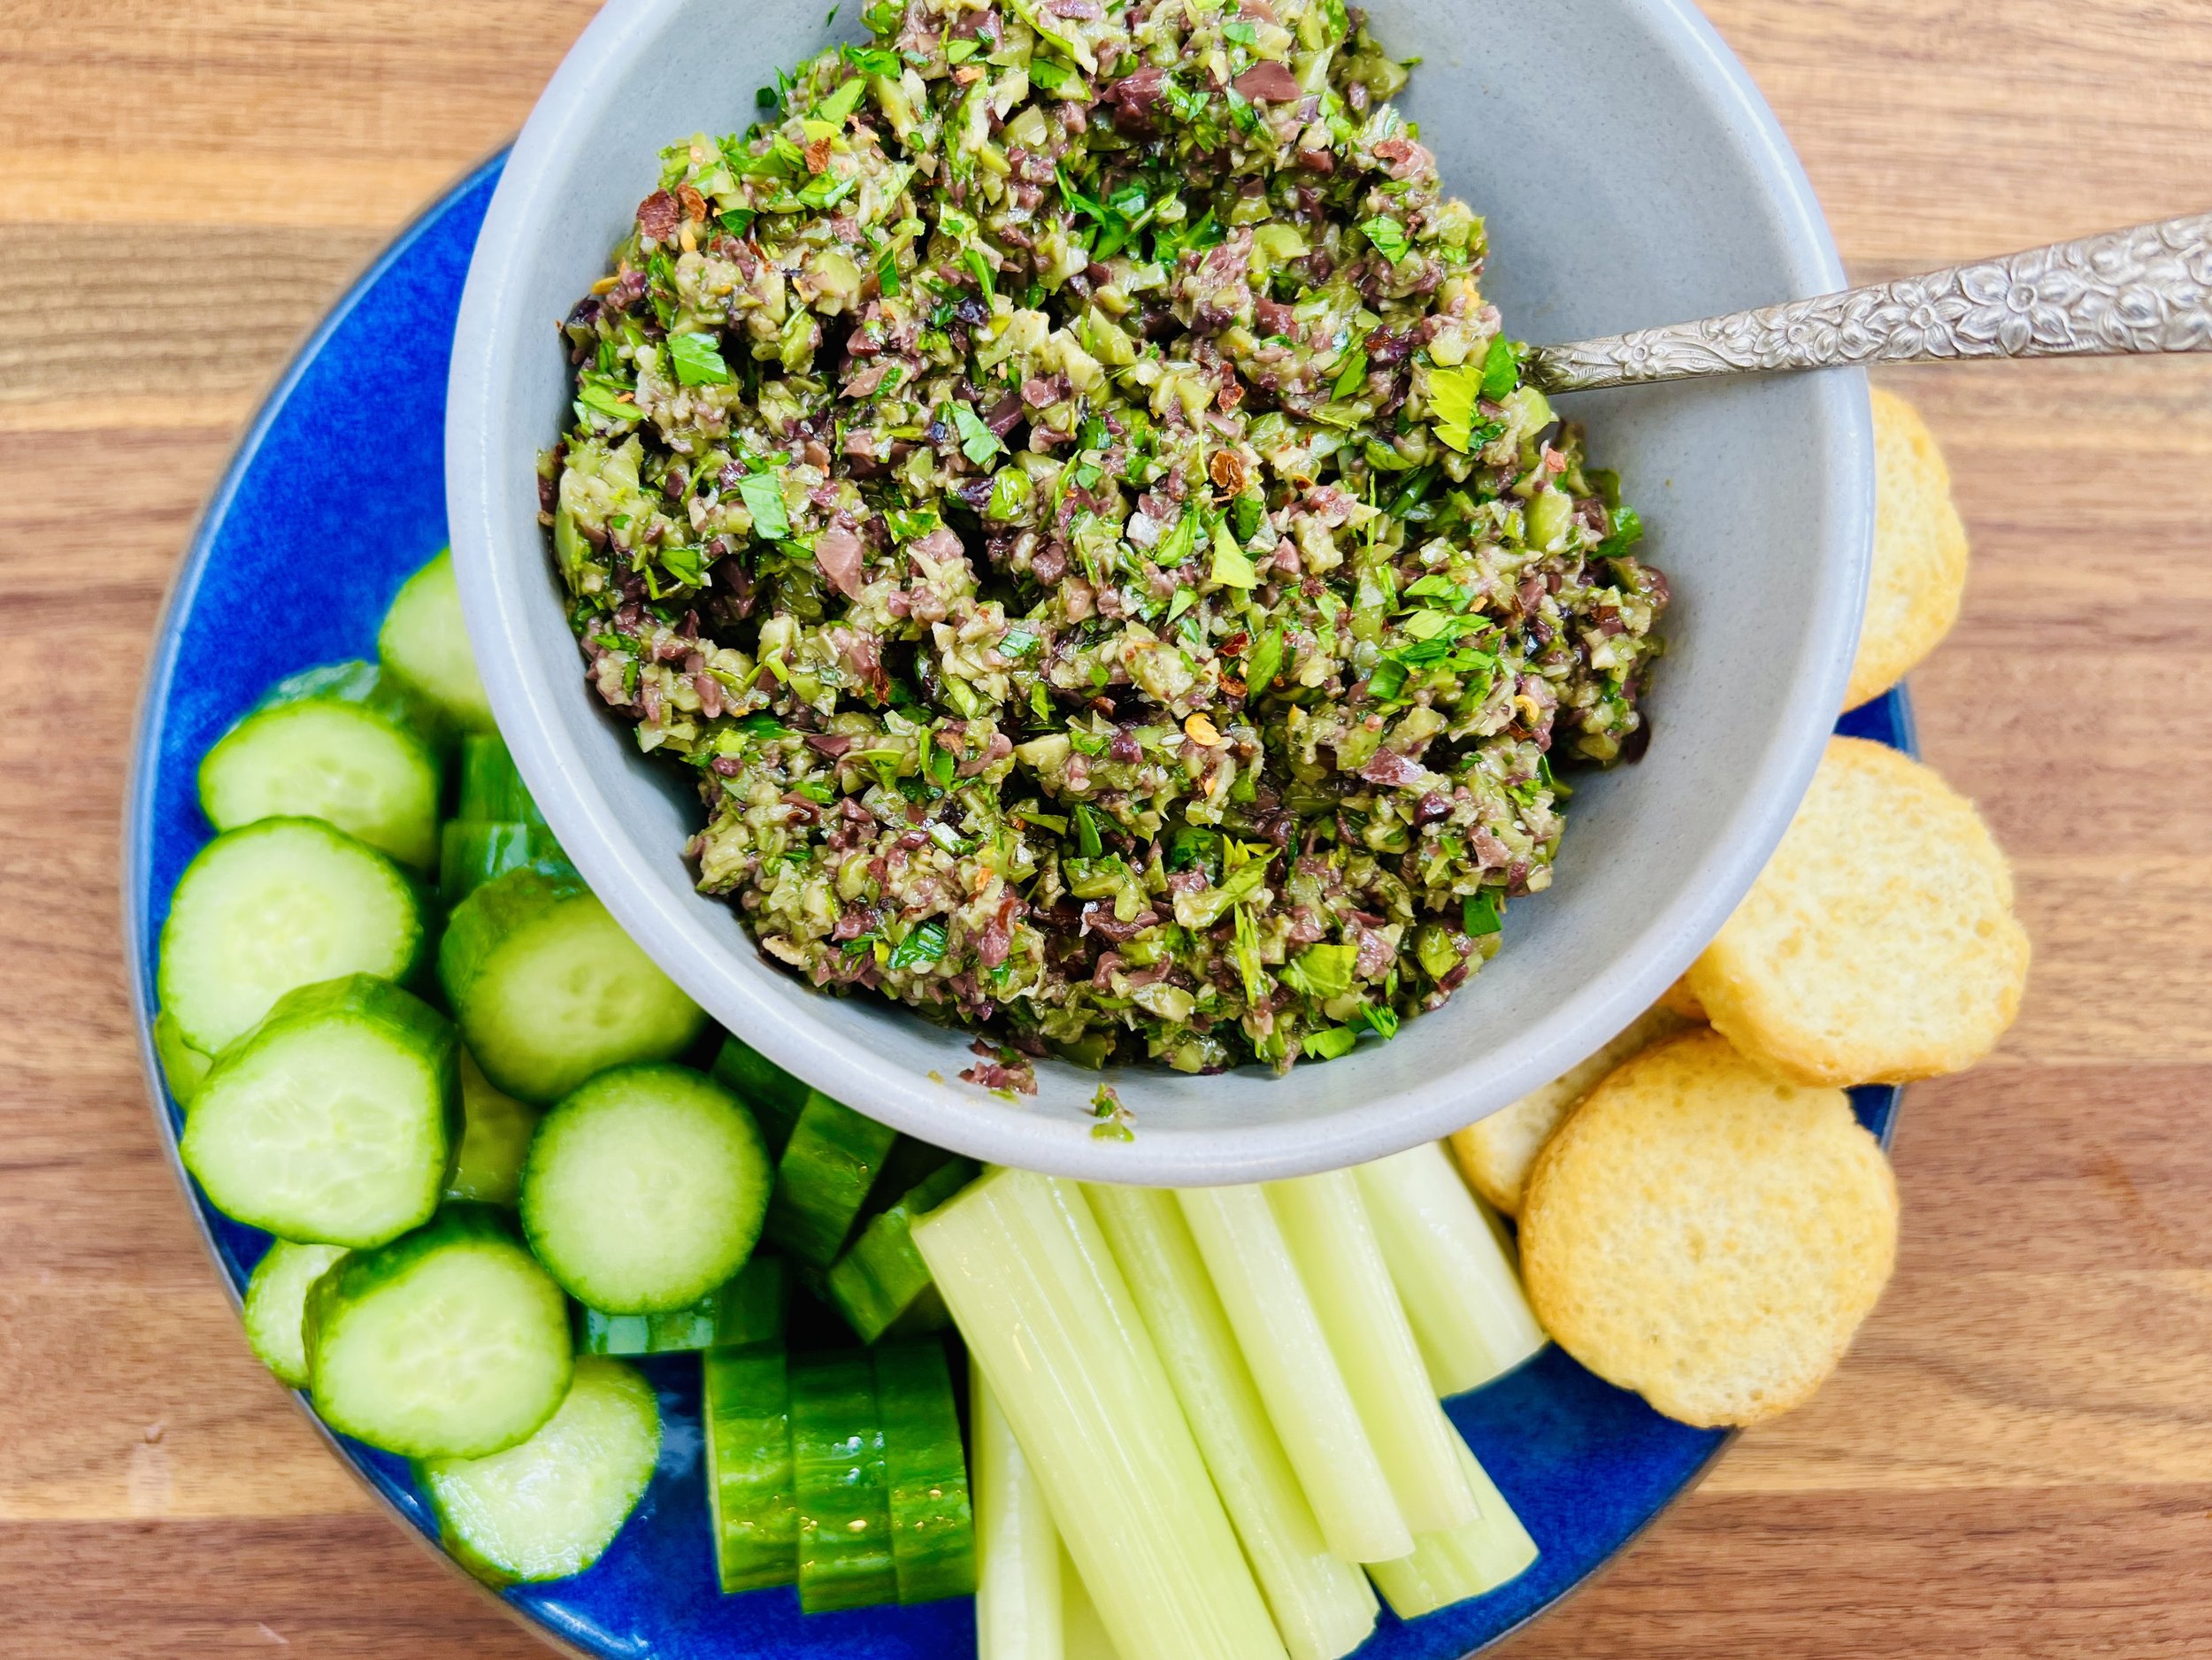
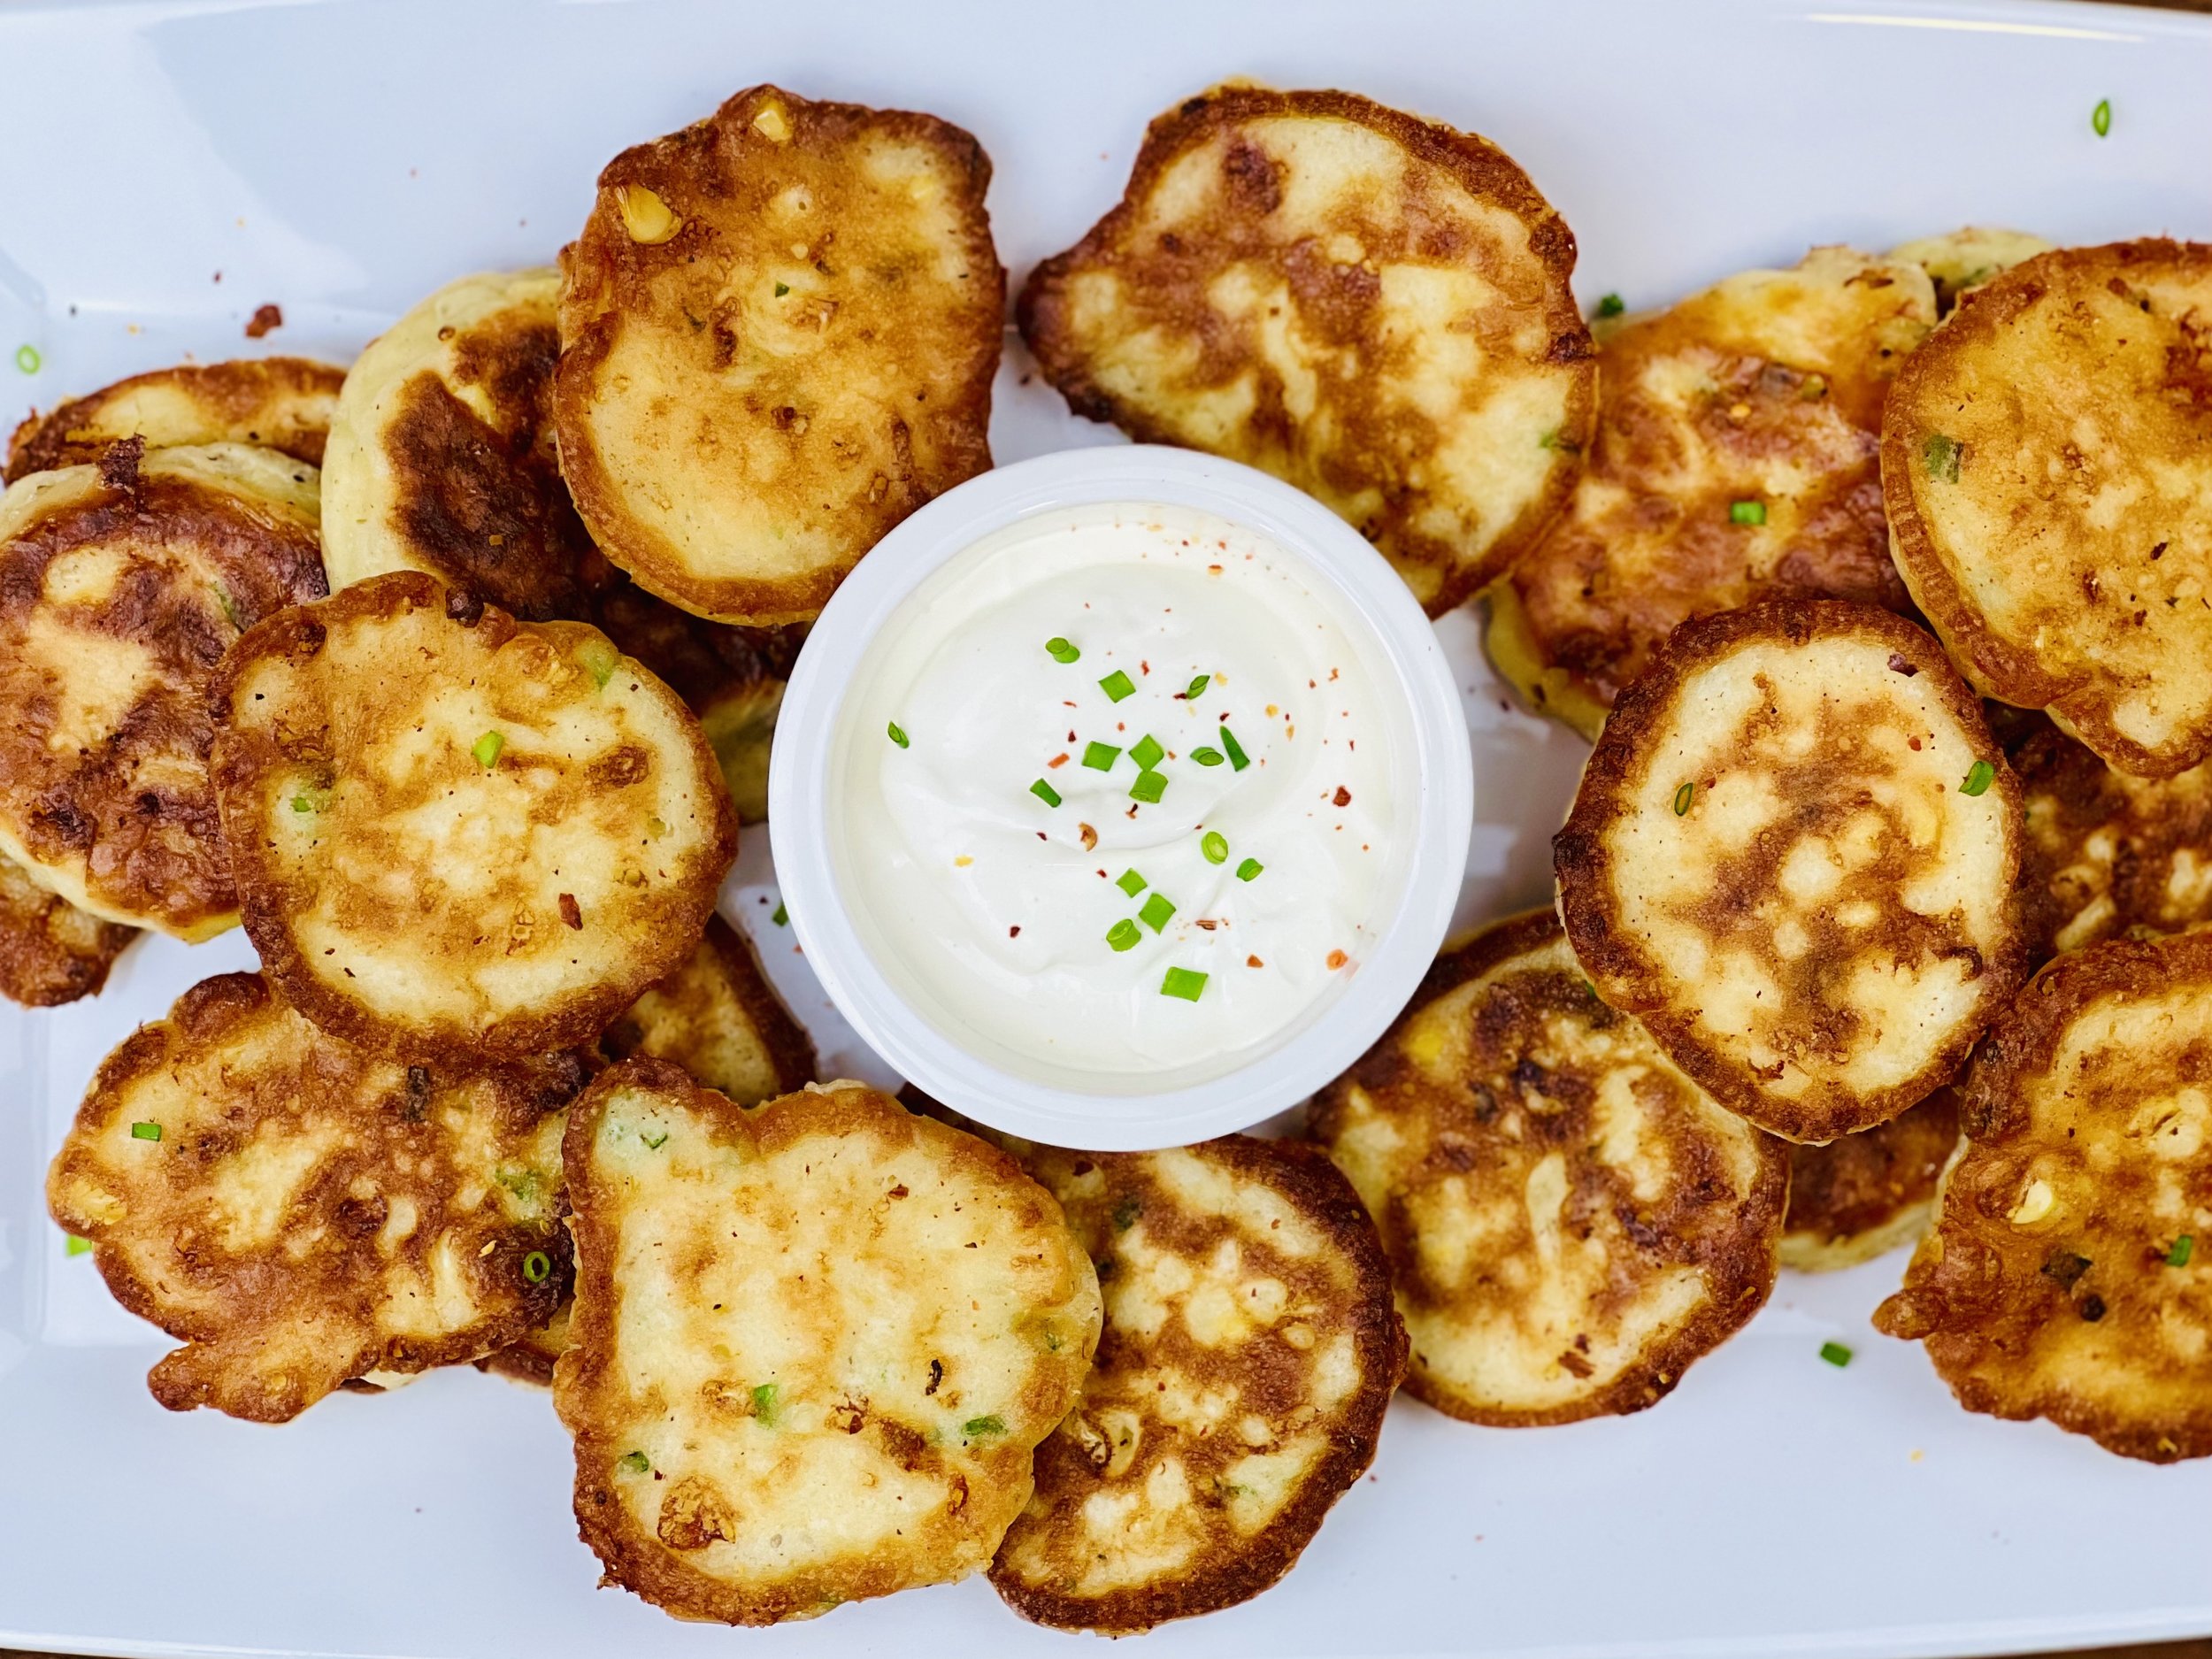
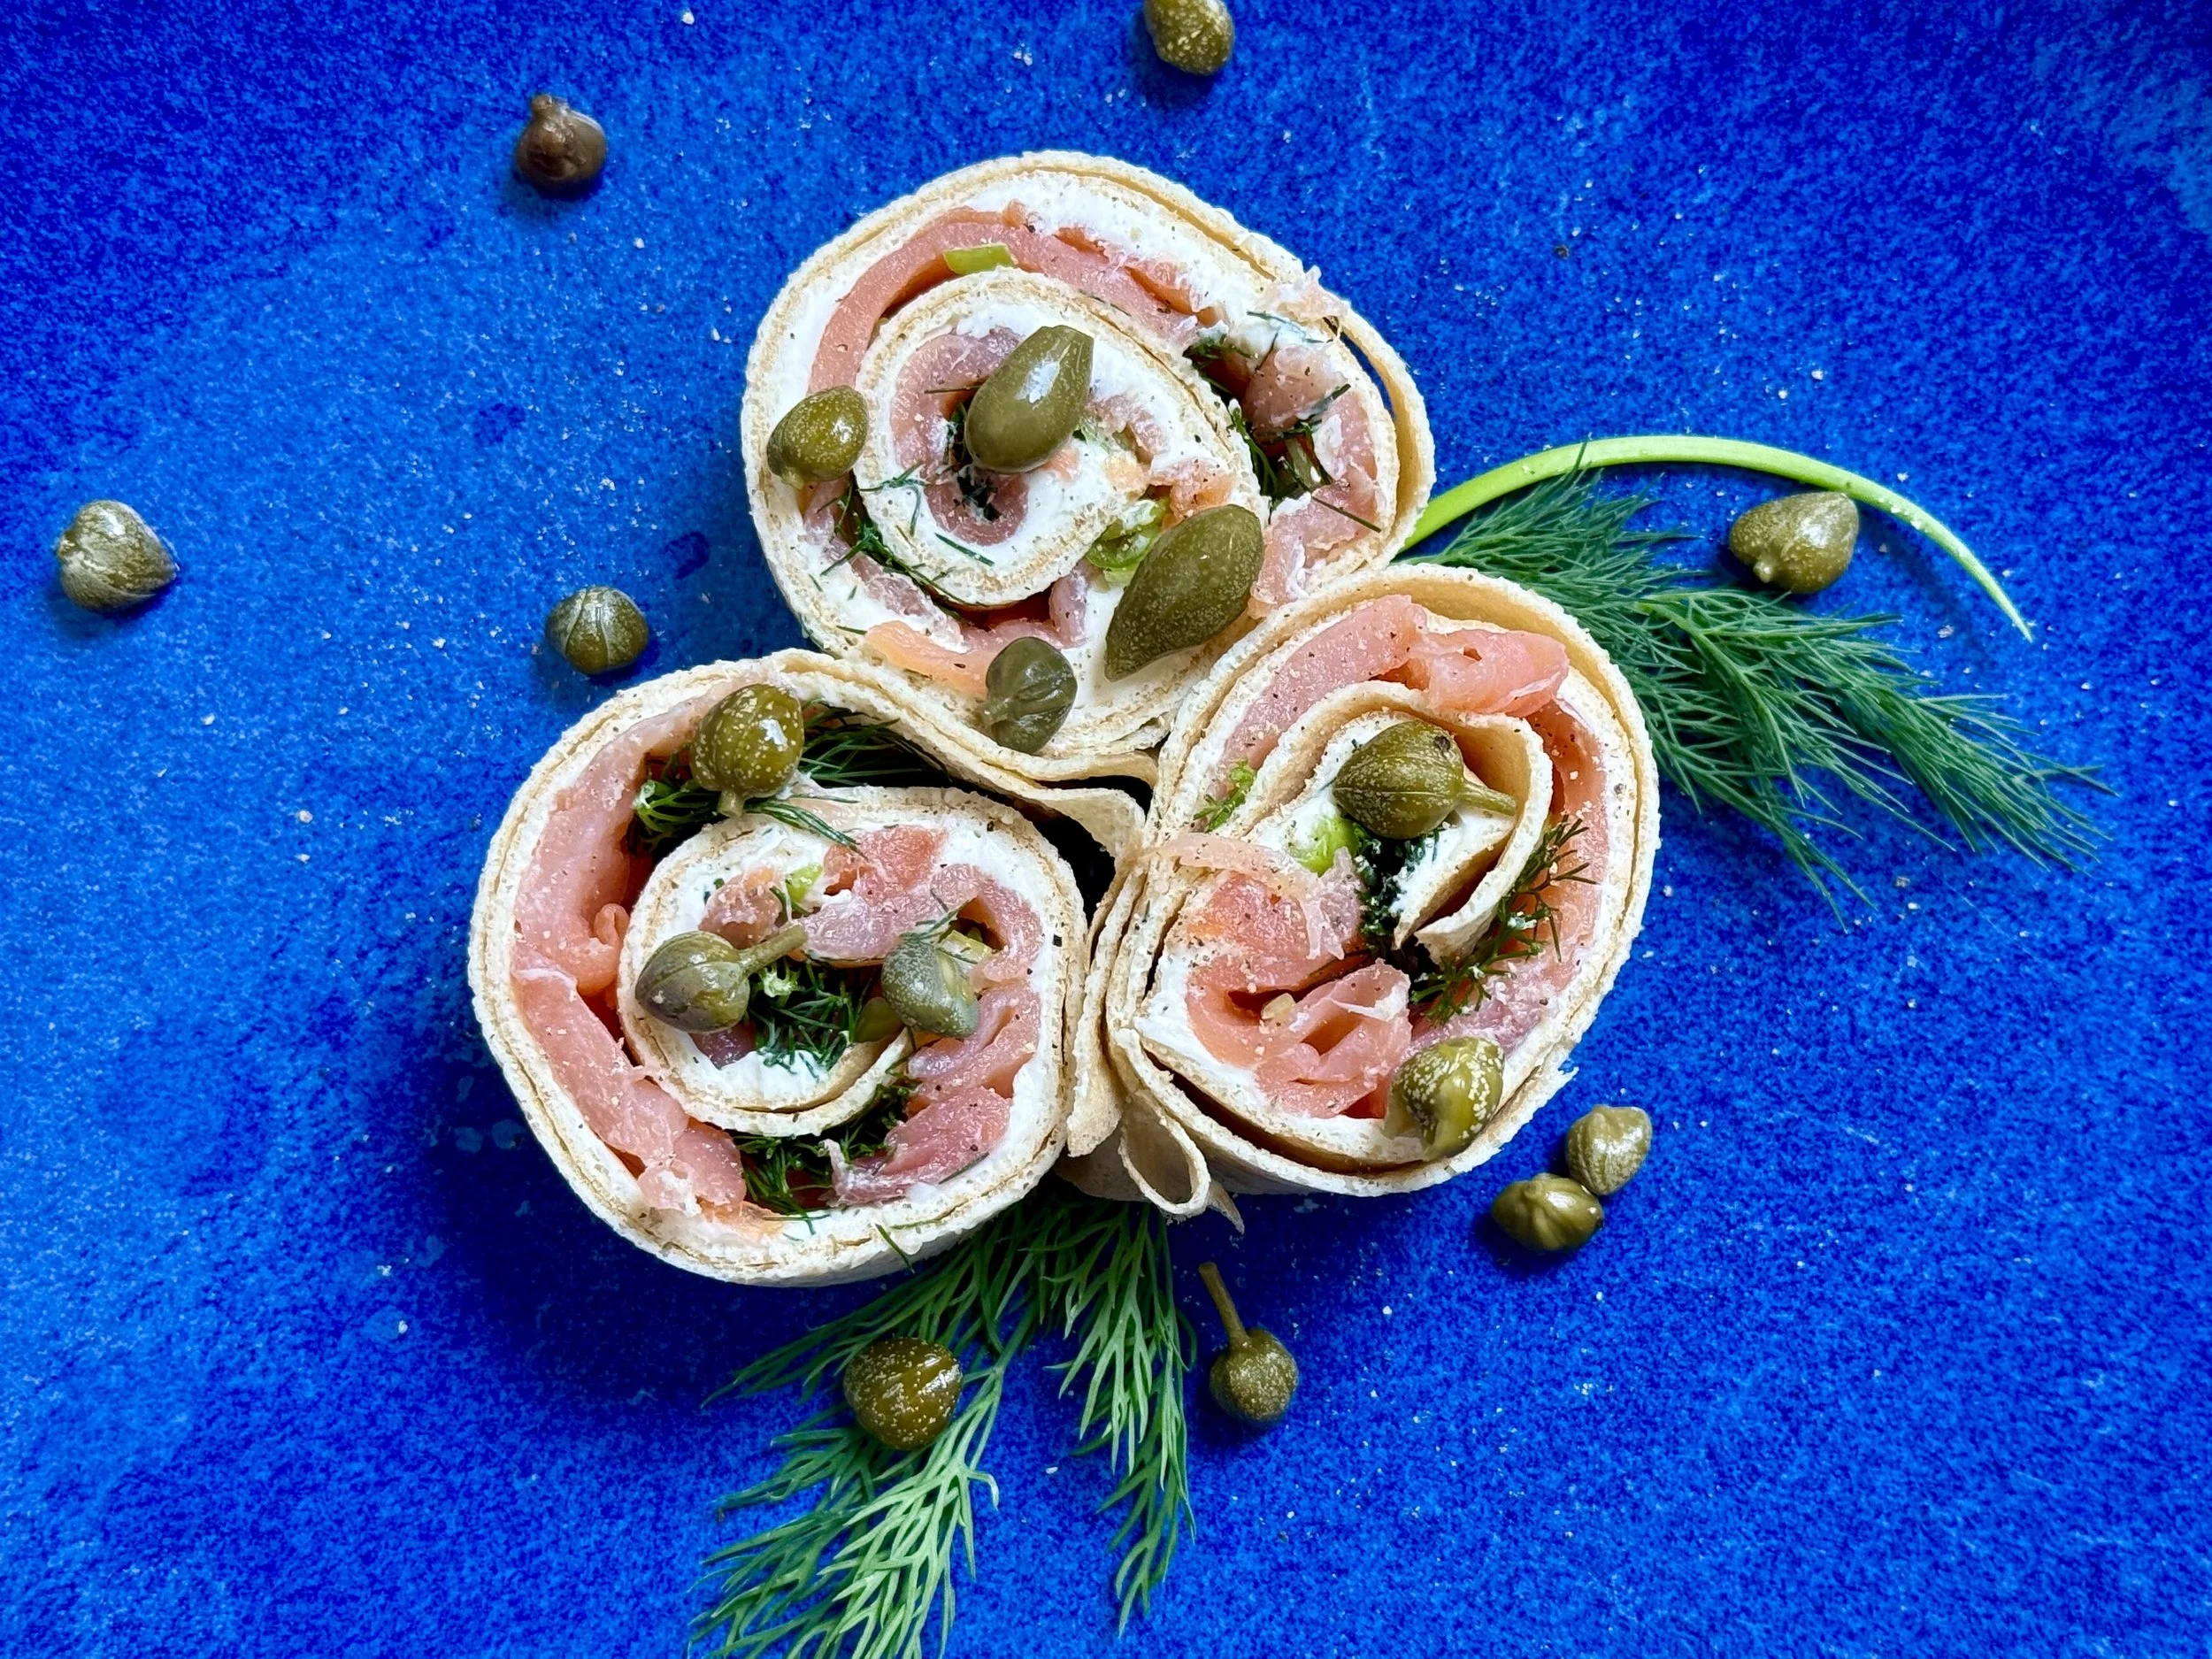
Asian Fusion Radish and Chive Bites (Low FODMAP)
20 Minutes prep • Low FODMAP • Makes 16 - 20 Pieces
20 Minutes prep • Low FODMAP • Makes 16 - 20 Pieces • Ok to make ahead: Steps 1-2
Looking for a different, delicious, low FODMAP, easy-to-make, and fun new appetizer to add to your repertoire? This is it! Inspired by a recipe I found in Bon Appetit over 15 years ago, this Asian-influenced appetizer is perfect for summer barbecues, potlucks, and backyard get-togethers. The sliced sourdough baguette is spread with a wonderful compound butter and layered with crisp radishes. Finished with a sprinkle of salt, these appetizers will delight your guests with their freshness and flavor.
Ingredients
1/4 cup (1/2 stick) salted butter, room temperature
2 tablespoons fresh chives, finely chopped plus more for serving
1 tablespoon toasted sesame seeds
1/4 teaspoon fresh ginger, grated
1/4 teaspoon toasted sesame oil
1/8 teaspoon Kosher salt
1/8 teaspoon black pepper
1 sourdough baguette, cut into 1/4-inch slices
4 radishes, thinly sliced
Fleur de sel or Diamond Crystal Kosher salt
Directions
(1) Prepare: Let the butter come to room temperature (do not melt); chop the chives; grate the ginger; slice the baguette.
(2) Make the compound butter: Combine the butter, 2 tablespoons of chopped chives, sesame seeds, ginger, toasted sesame oil, salt and pepper in a small bowl. Stir well to combine.
Make-ahead note: At this point, you may set everything aside until you’re ready to assemble and serve.
(3) Build: Spread the butter on the bread slices. Top with two or three radish slices, overlapping is fine. Sprinkle with remaining chives and the fleur de sel or Kosher salt.
(4) Plate and serve: Serve in one layer as an appetizer or fun side dish. These are best eaten fresh so don’t worry about storing leftovers.
Eat and enjoy every bite because you can!
Recipe note: I use Diamond Crystal Kosher salt in all my recipes because it has a wonderful flat and crisp flake that tastes delicious. It is also the least salty salt available so you can use it more liberally as a seasoning than you can table salt or sea salt. If you use another type of salt, you may need to reduce the amount so it is not over-salted.
Have a question you’d like to have answered? Email me at hello@ibsgamechanger.com
Link note: This post may contain affiliate links for you to easily purchase items that are linked. I may earn a small commission from qualifying purchases but none of this costs you a thing so feel free to use the links! In addition, for some items, I have provided a special discount code for IBS Game Changers so be sure to use the code when you purchase an item to get the discount that has been arranged just for you.
More Deliciously Low FODMAP™ appetizer recipes


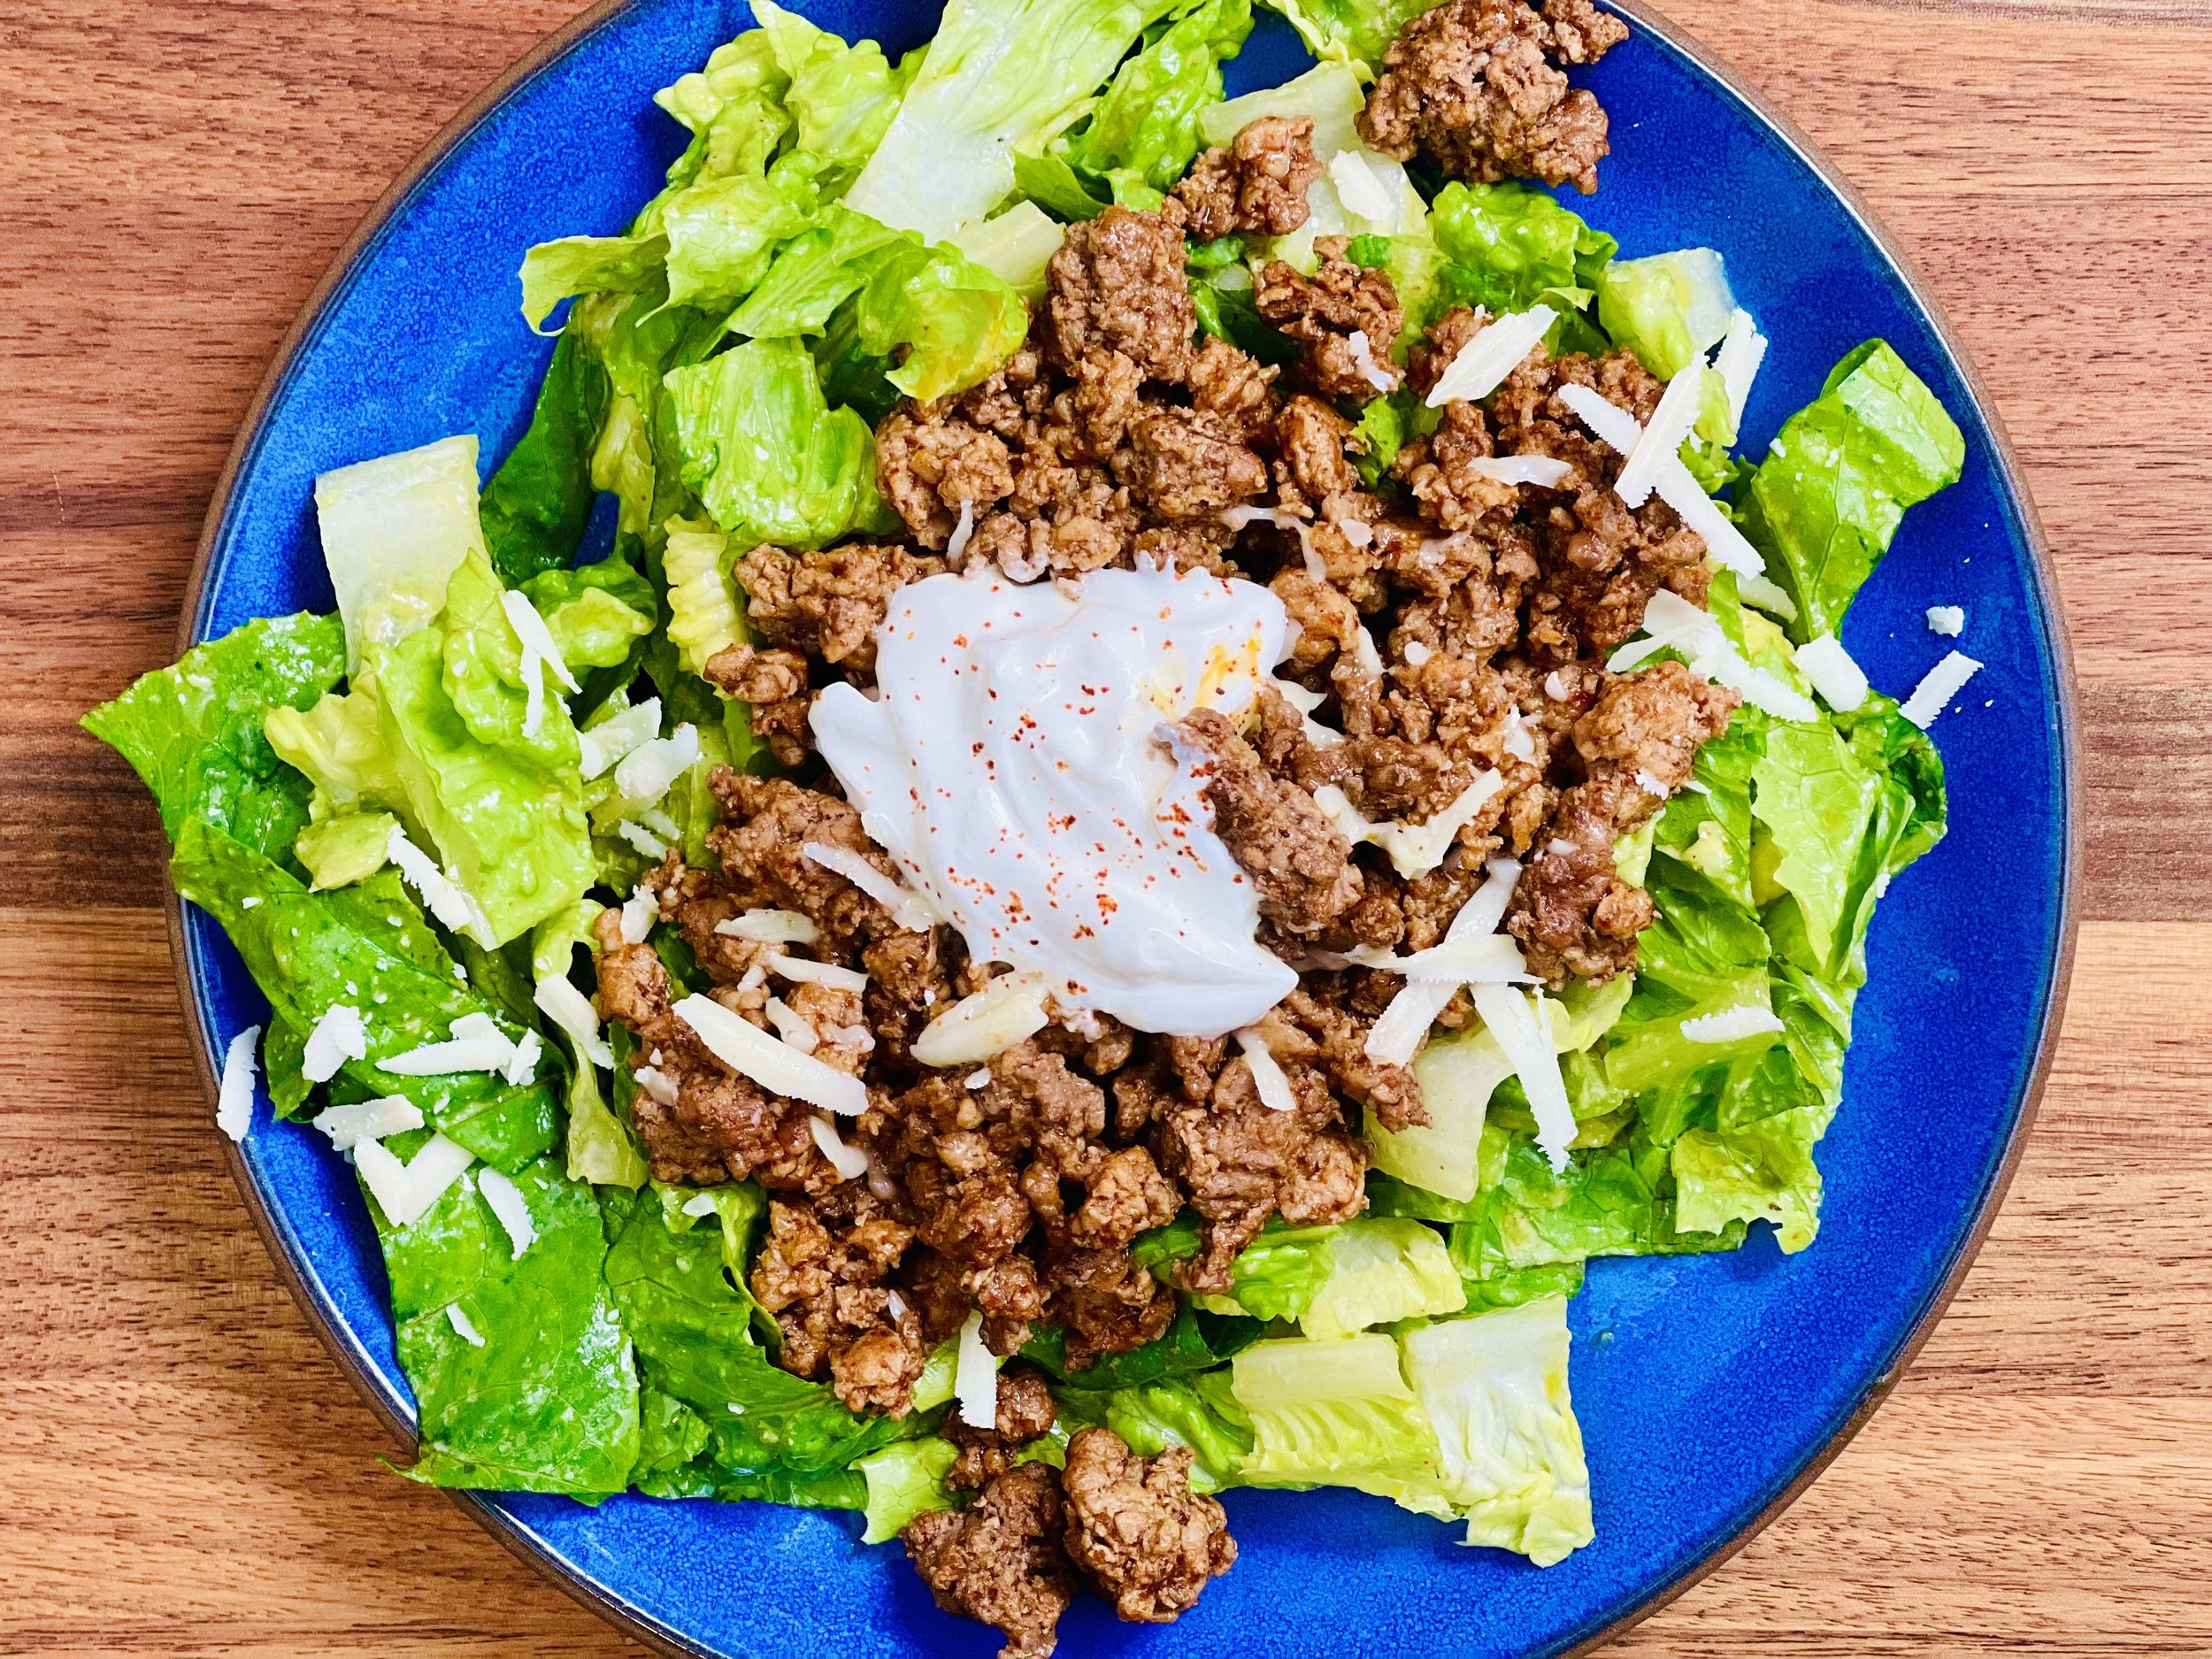
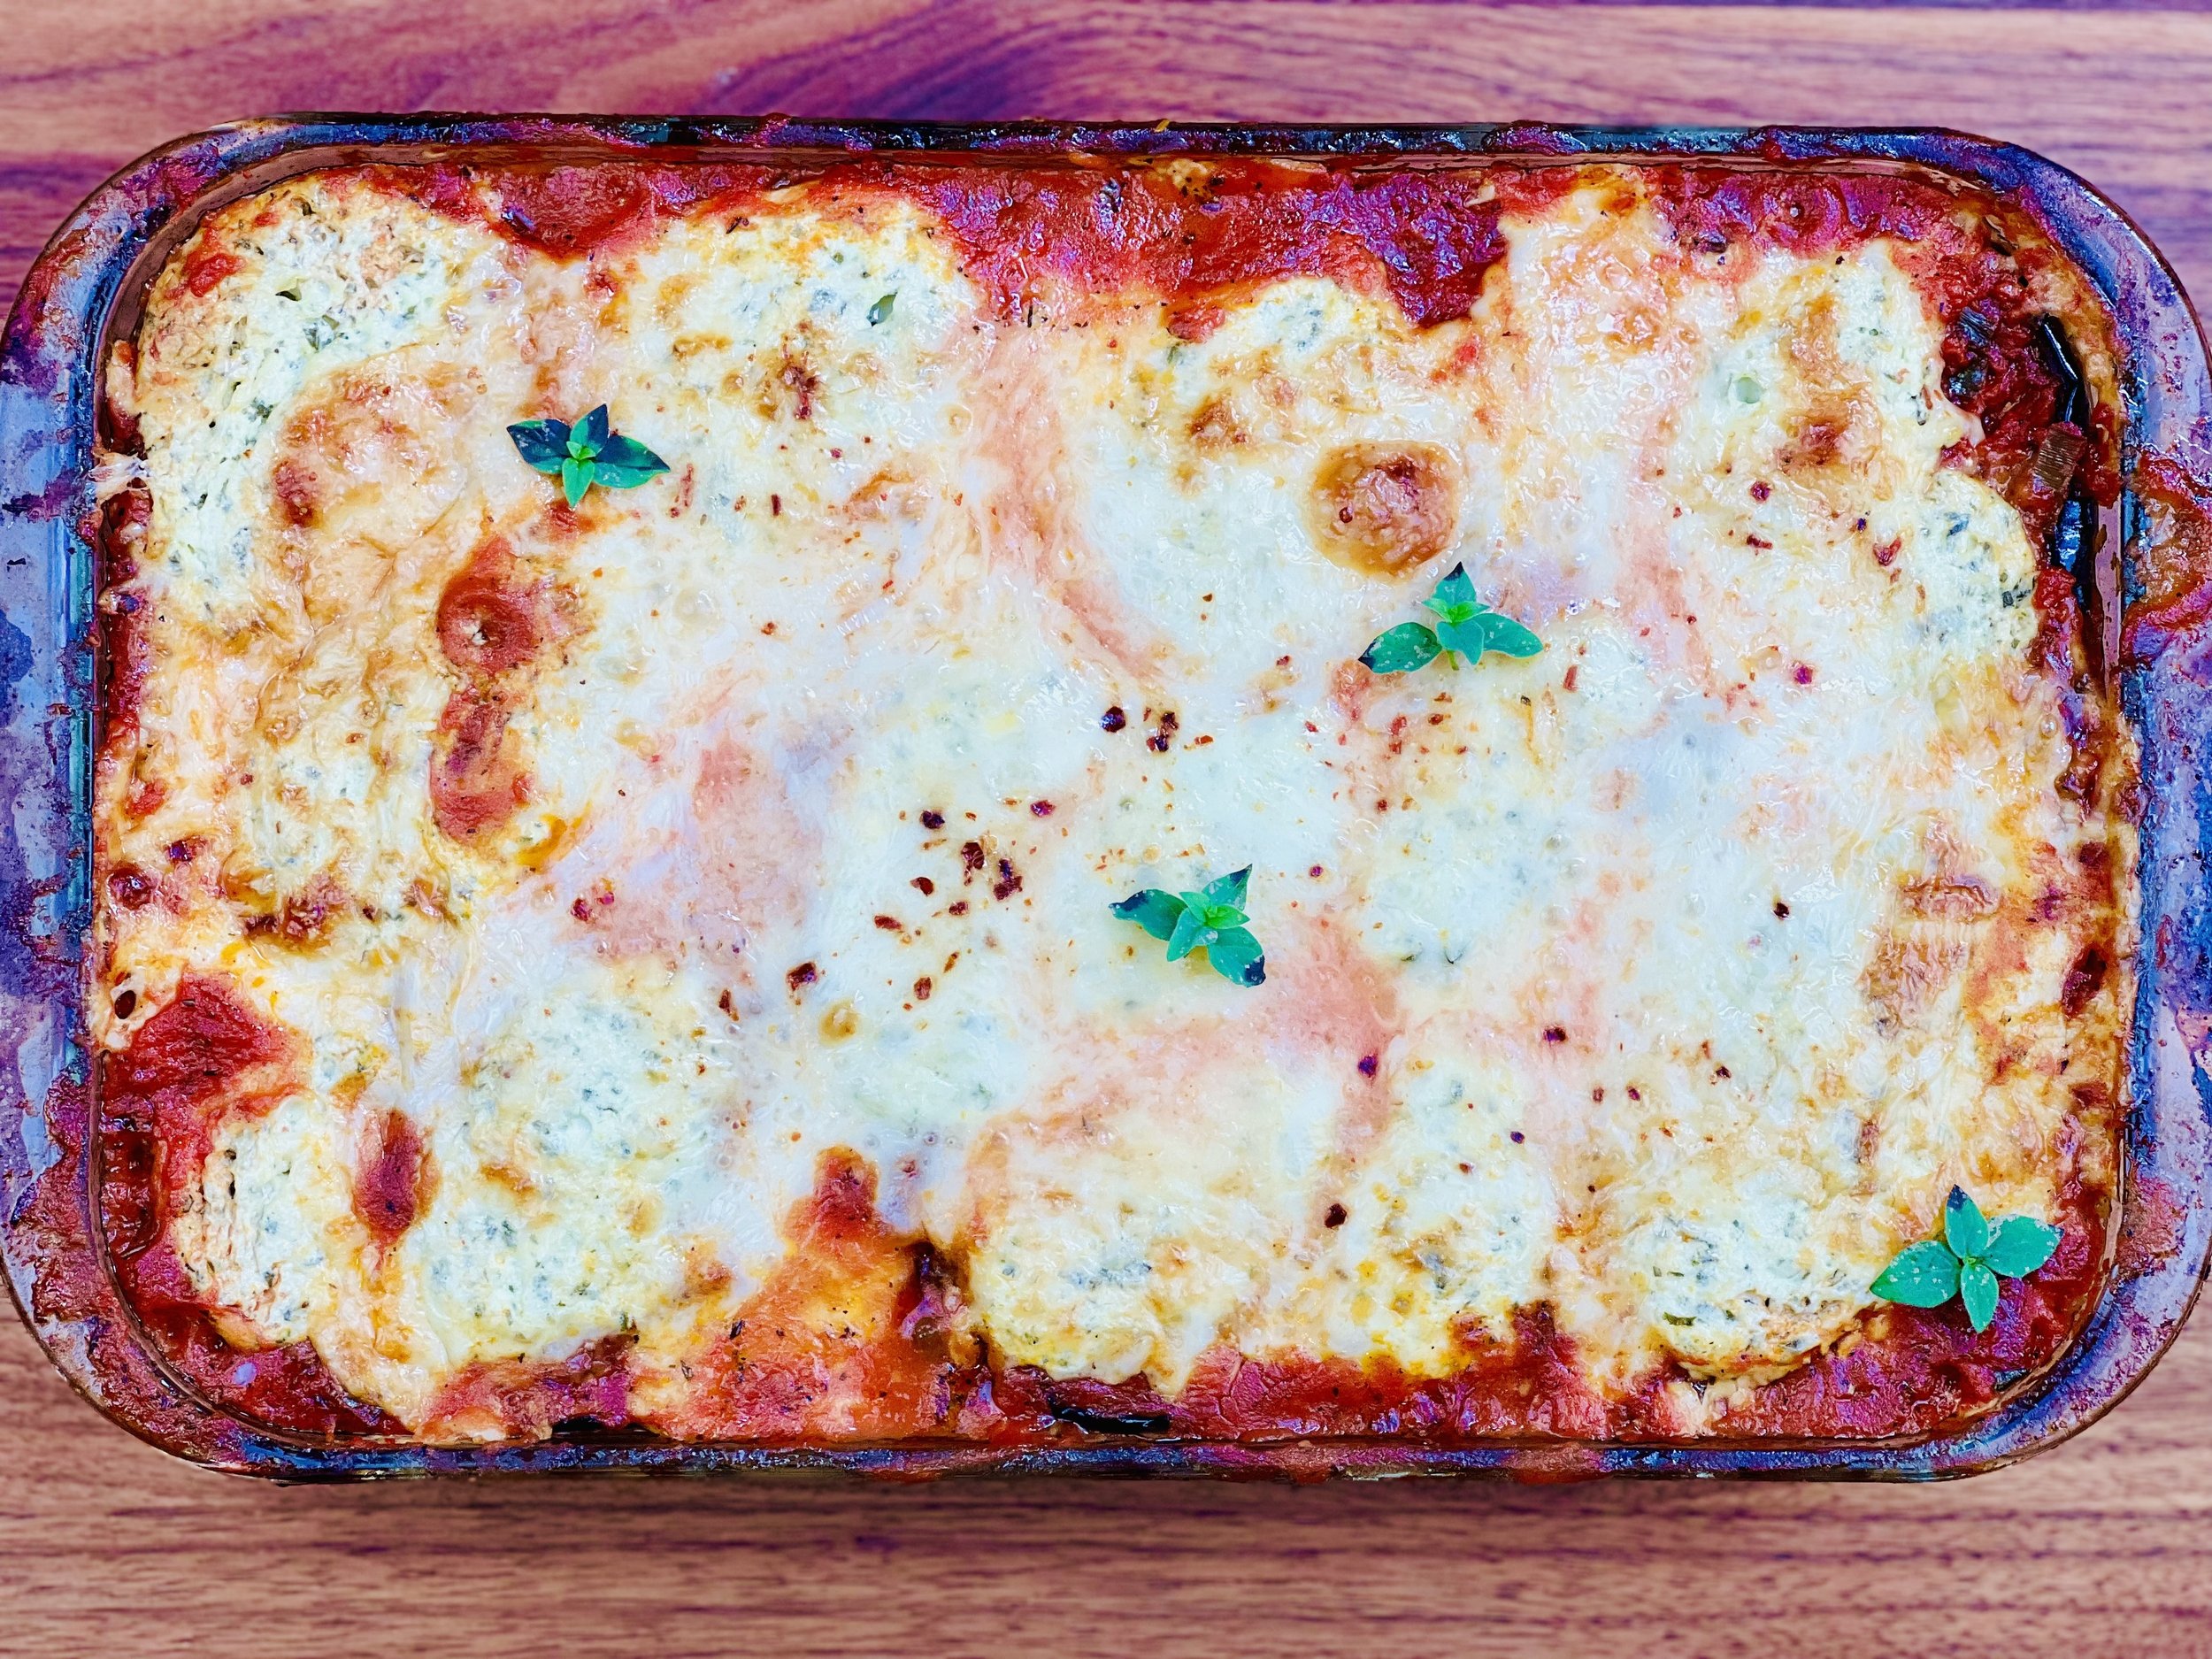
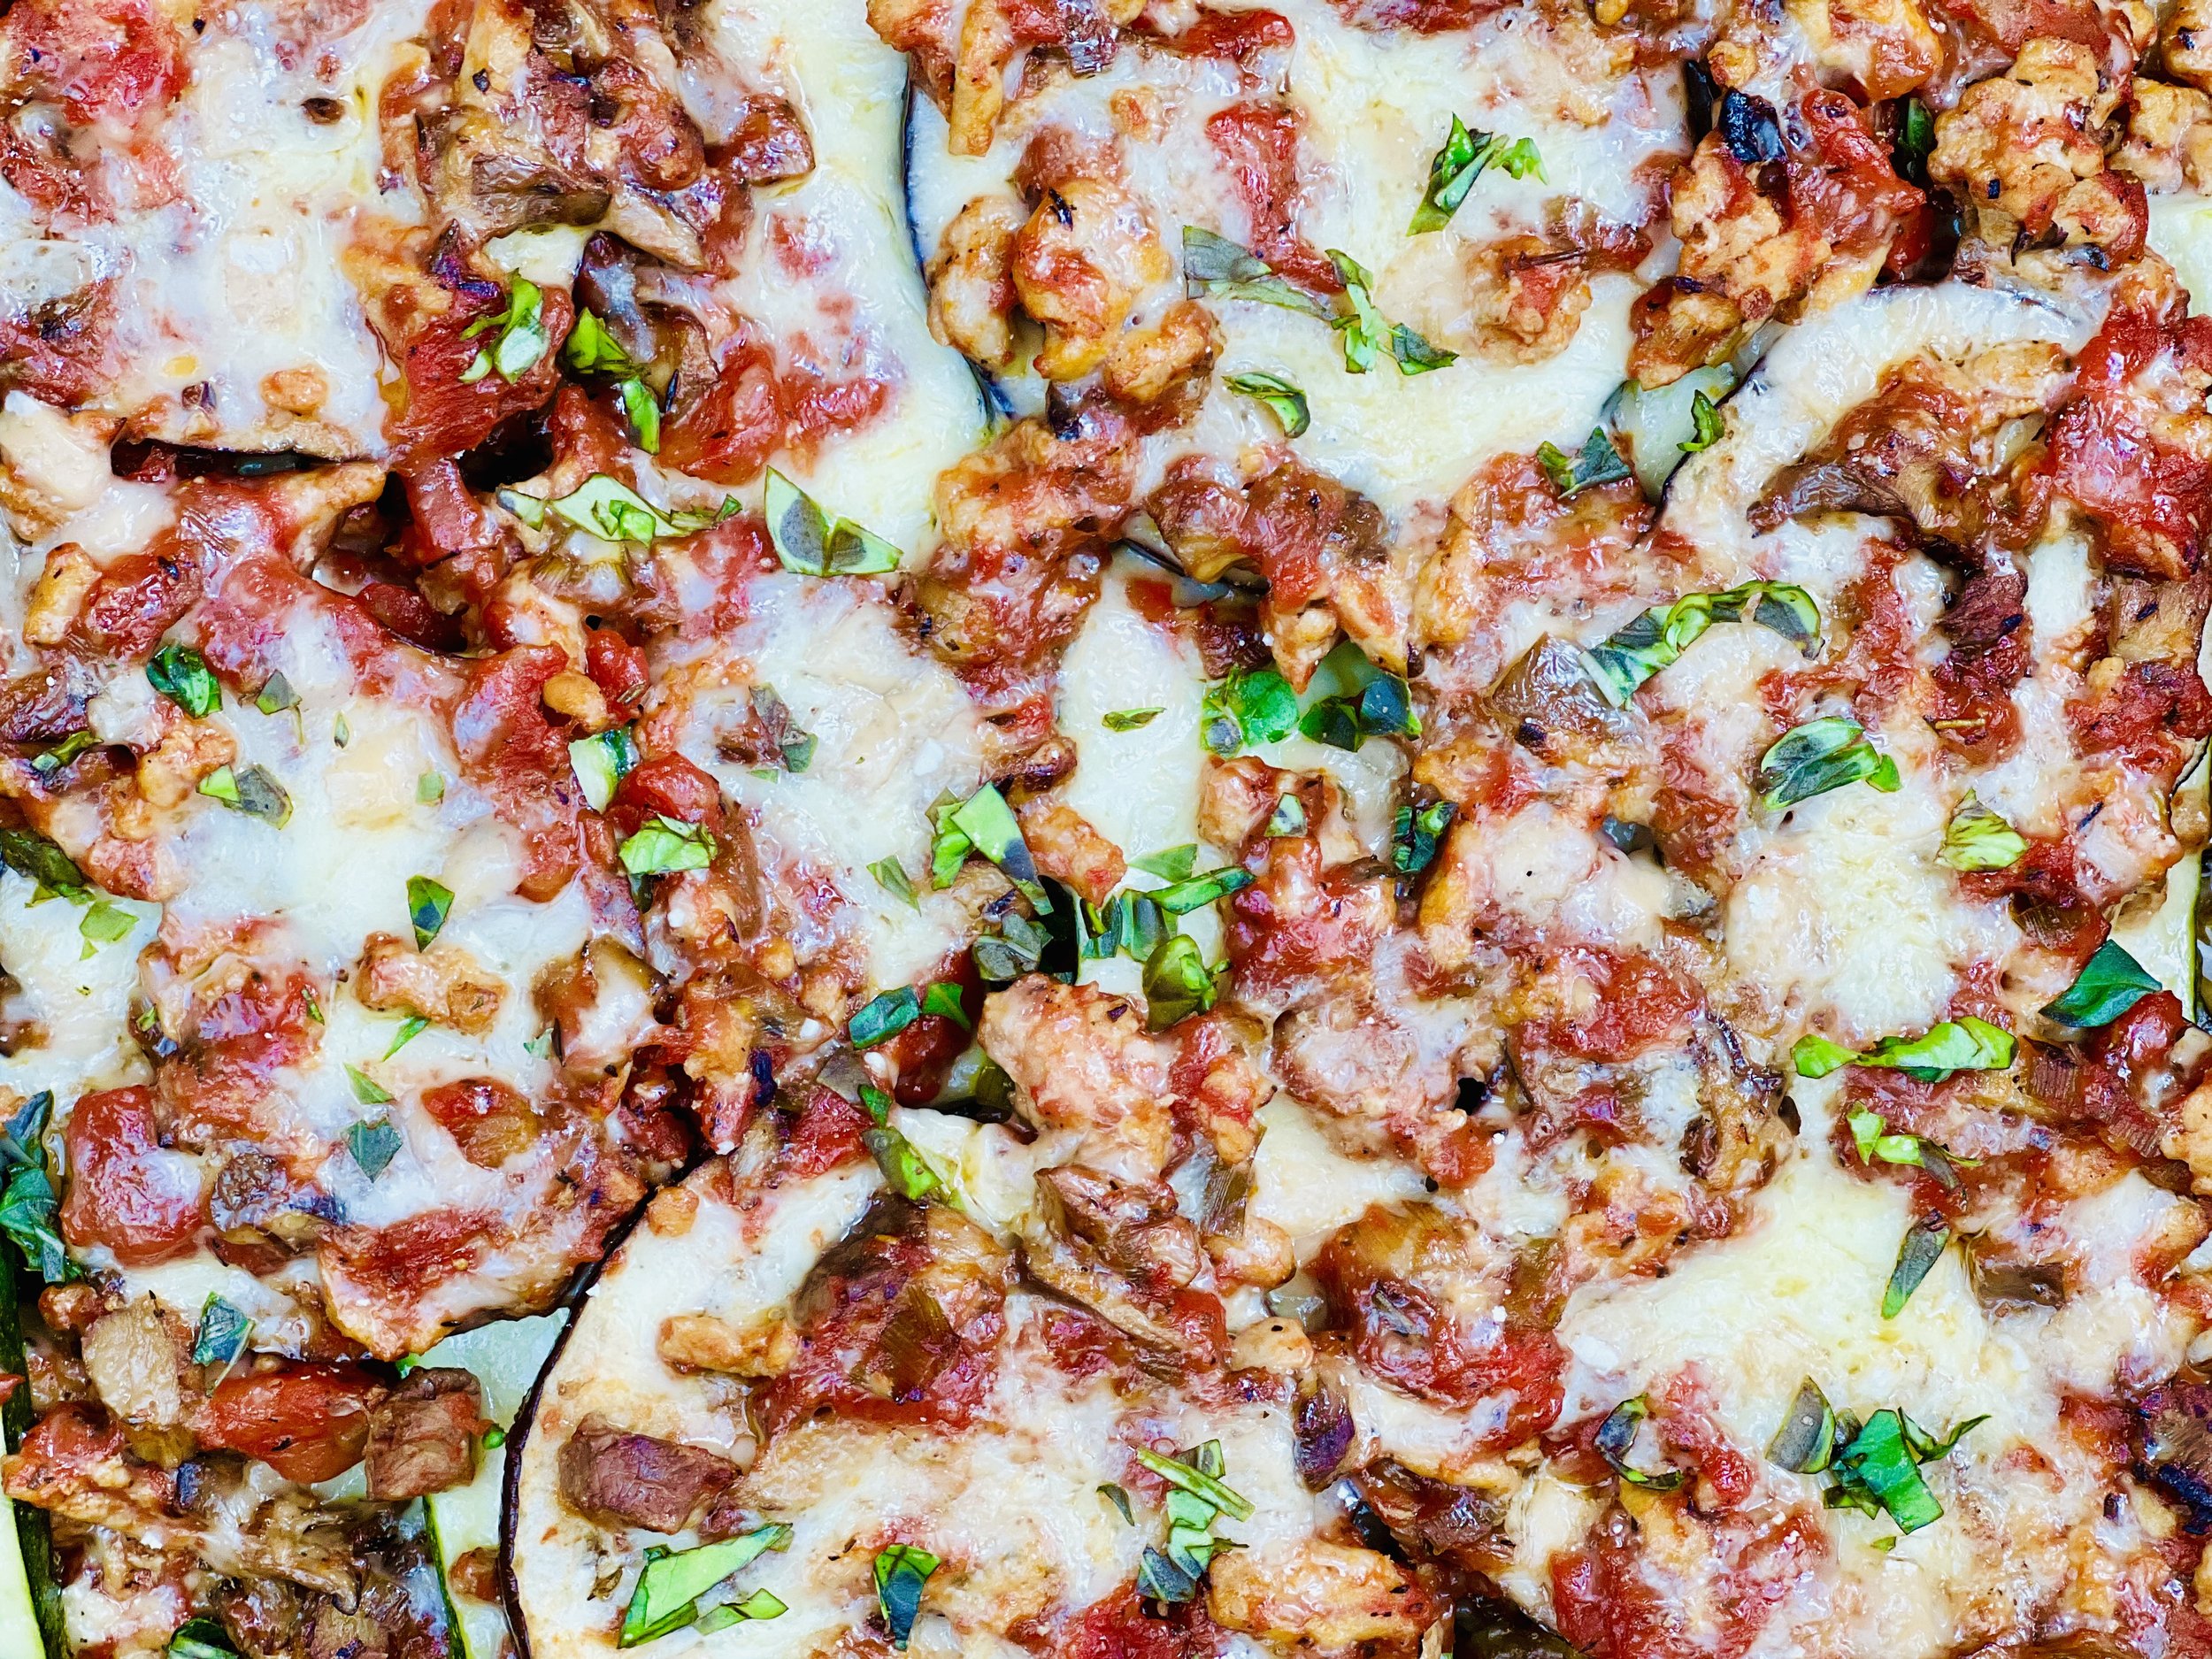
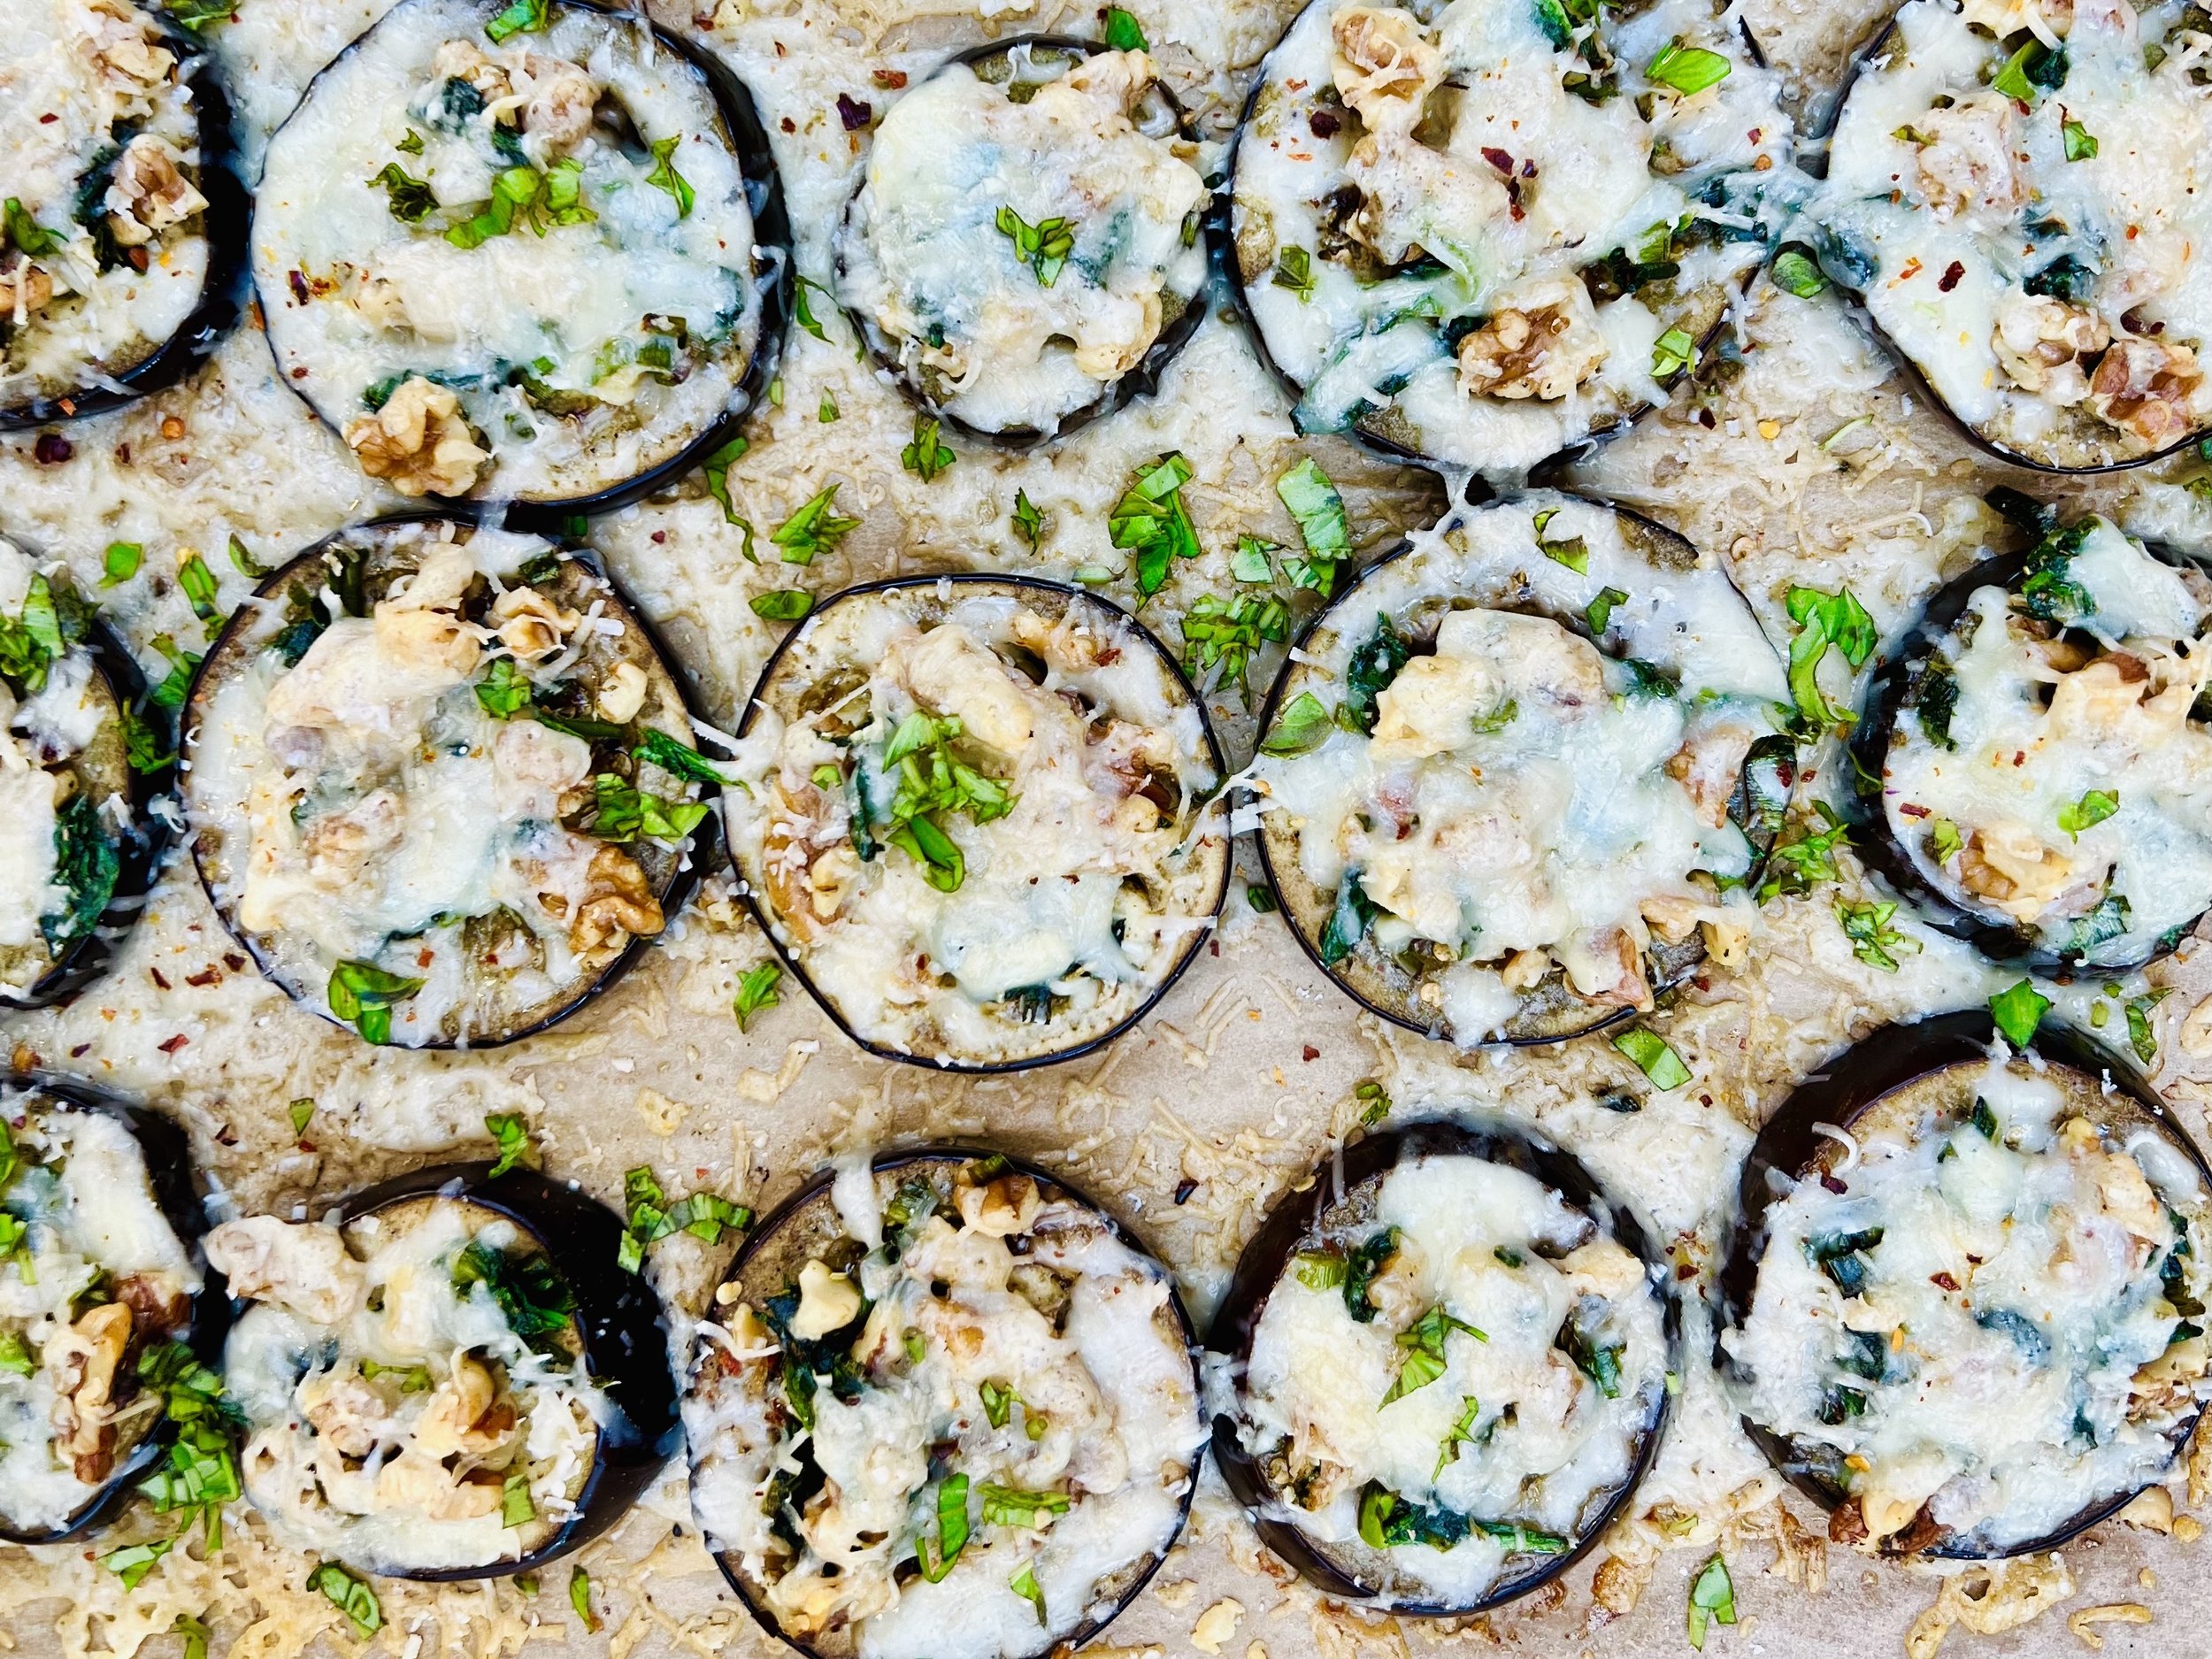
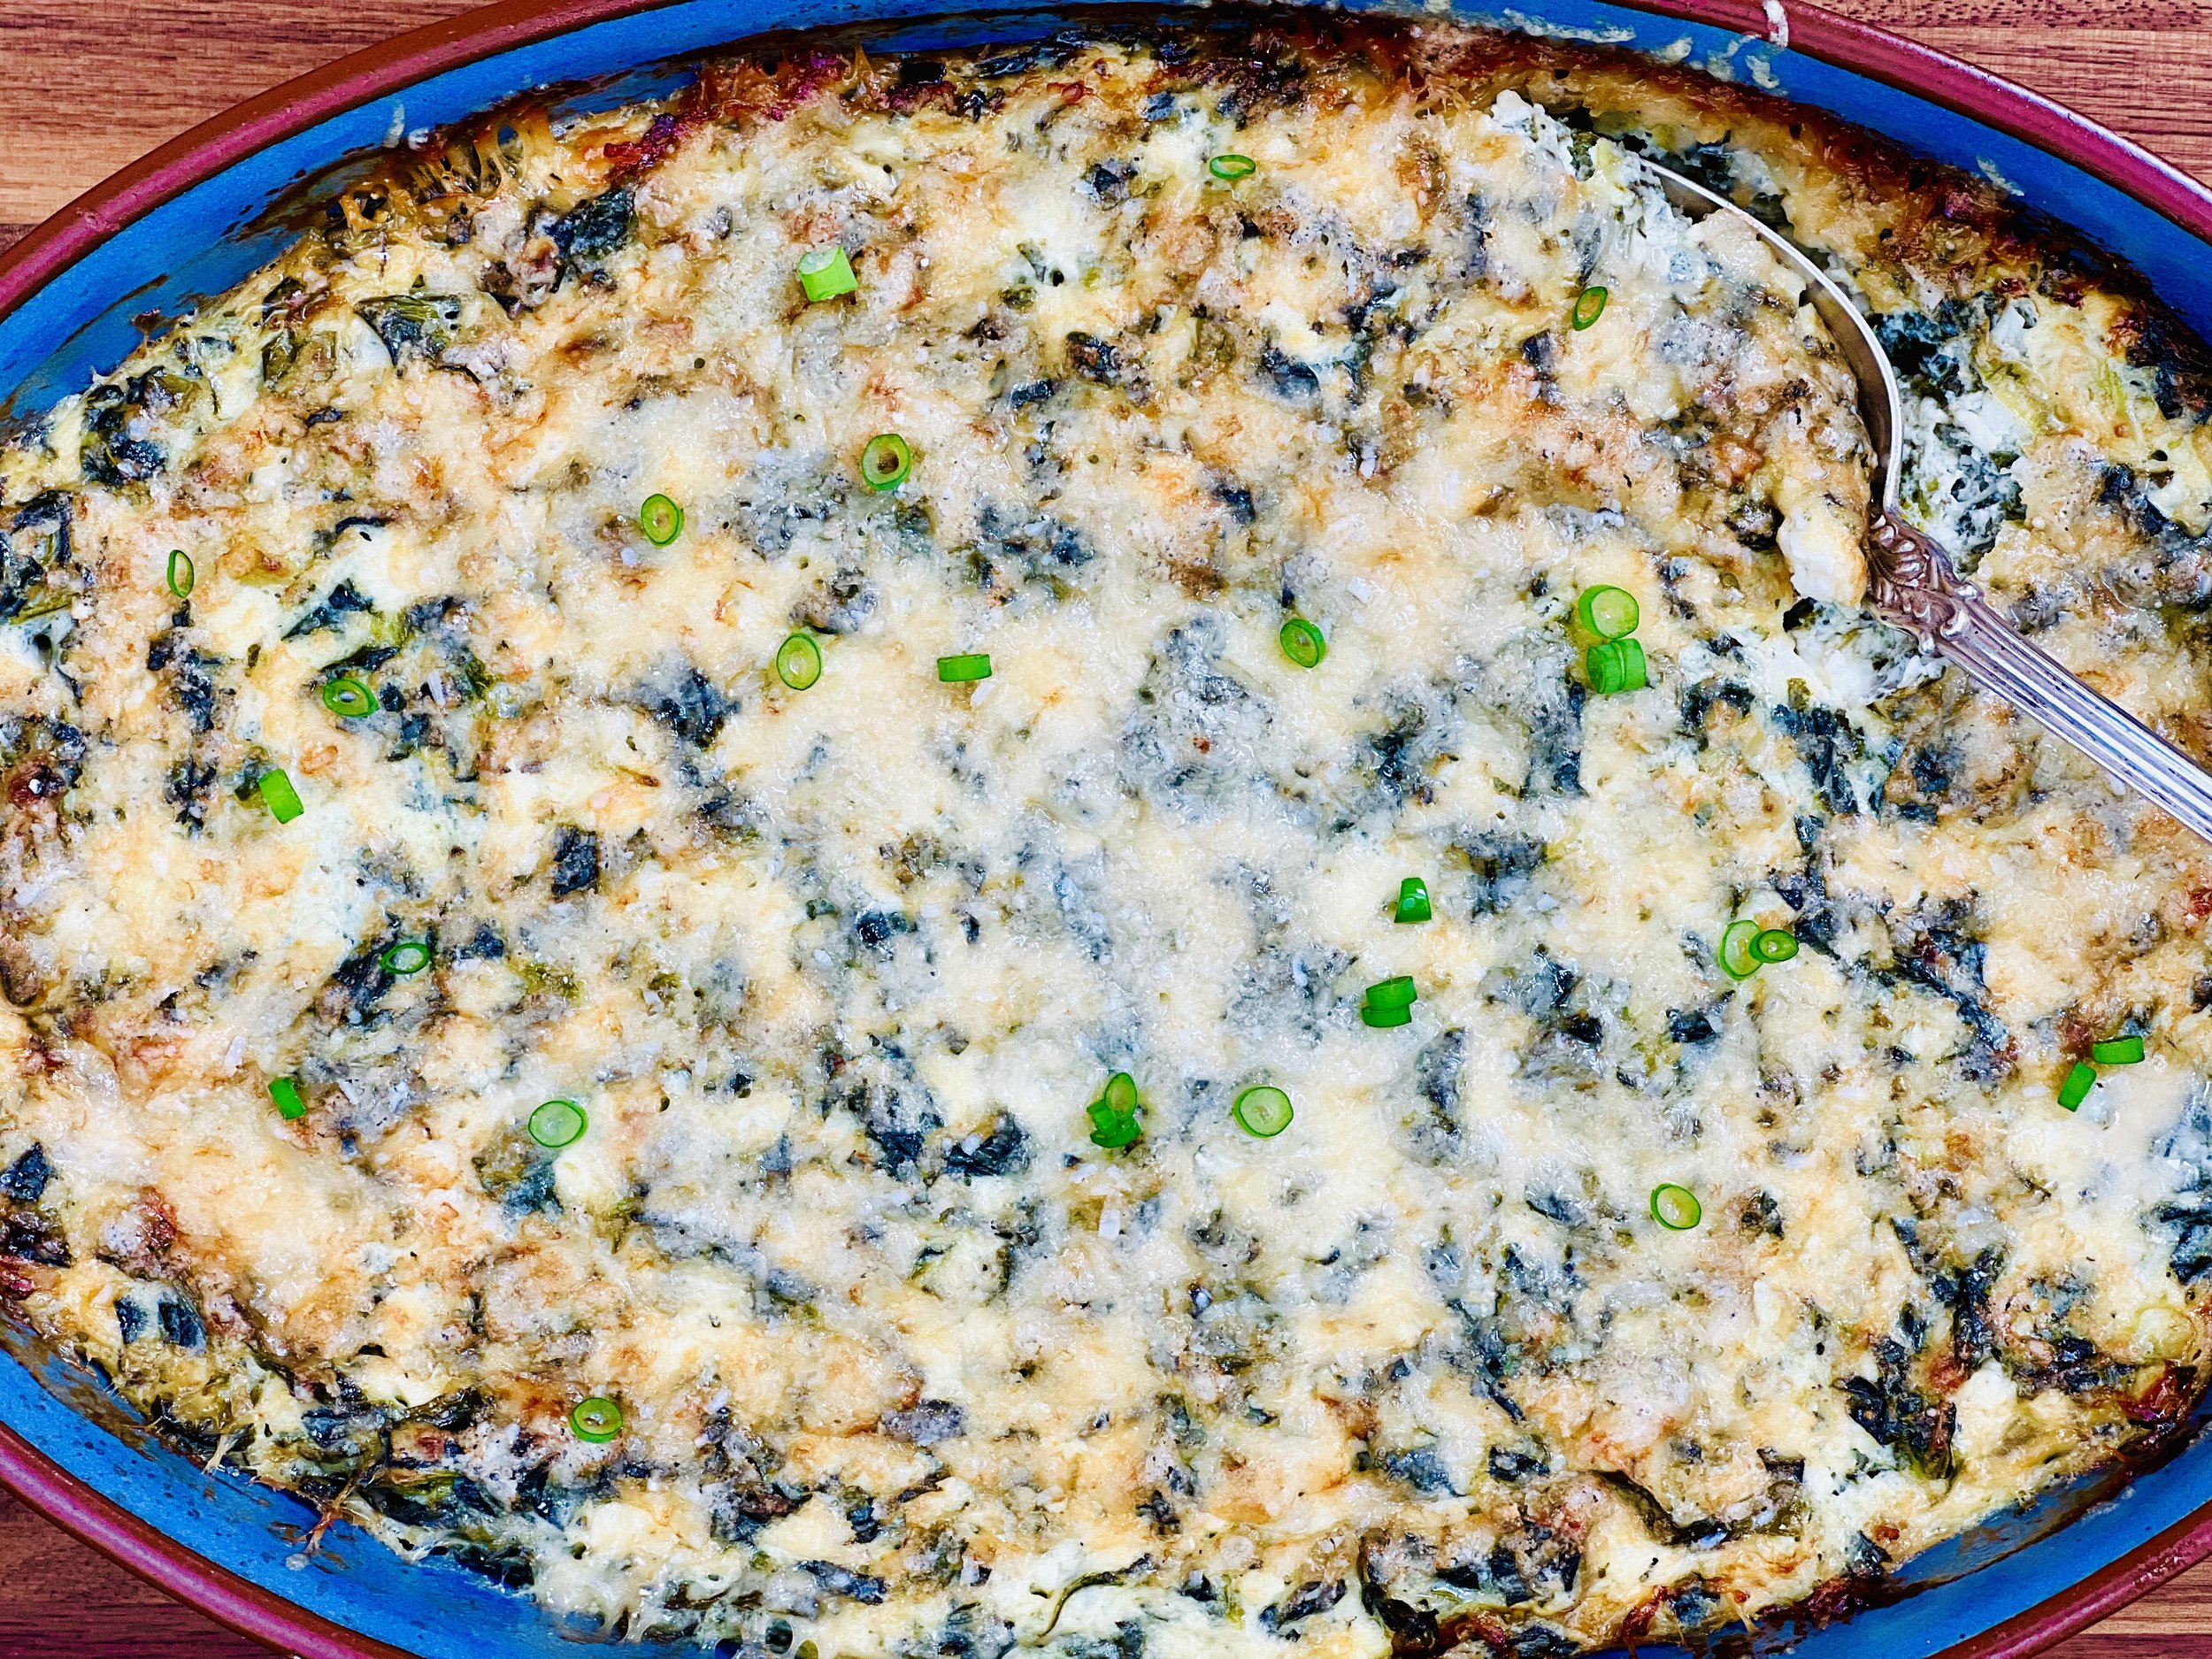
Roasted Vegetable Lasagna (Low FODMAP)
30 Minutes prep • 45 Minutes cook • Low FODMAP • Gluten-free • Vegetarian option • Serves 6
30 Minutes prep • 45 Minutes cook • Low FODMAP • Gluten-free • Vegetarian option • Serves 6 • Ok to make ahead: Steps 1-5
Every bite of this dish is bursting with flavor from the roasted vegetables to the simmered sauce to the sauteed chicken and mushrooms, all topped with delicious cheese. Your kitchen will welcome your family and friends with the amazing aroma of lasagna and you’ll get all the fabulous flavor of classic lasagna without the gluten or the starch! I used ground chicken in this recipe but you can leave the meat out (and substitute more mushrooms) for a vegetarian option, or substitute ground beef if you prefer.
Ingredients
1 tablespoon garlic-infused olive oil
2 teaspoons Smoke N Sanity Italian seasoning (or equal parts dry rosemary, thyme, basil, and oregano)
1 pound ground chicken, turkey, or beef (substitute with an additional 1 pound of oyster mushrooms for vegetarian version)
1/4 teaspoon Kosher salt
1/4 teaspoon black pepper
1 medium-sized zucchini, 1/4 inch slices
1 medium-sized eggplant,1/4 inch slices
1/2 teaspoon Kosher salt
1 (26-ounce) box Pomi chopped tomatoes (or other low FODMAP chopped tomatoes)
1 tablespoon olive oil
1 teaspoon dry thyme
1 pound oyster mushrooms, chopped
1/4 teaspoon Kosher salt
1/4 teaspoon black pepper
1 cup white cheddar cheese, grated
1/2 cup parmesan cheese, grated
1 tablespoon fresh basil, chopped (for serving)
Directions
(1) Prepare: Preheat the oven to 375 degrees F. Chop the mushrooms. Slice the zucchini and eggplant into ¼ inch slices.
(2) Make the sauce: Heat 1 tablespoon garlic-infused olive oil in a large skillet over medium heat. Add the ground meat and cook, stirring to break up until browned. Drain any excess fat. Add the Italian seasoning, 1/4 teaspoon each salt, and pepper to the skillet with the cooked meat. Add the chopped tomatoes and the bay leaves. Turn the heat down to low, stir well and let it simmer, stirring now and then while you prepare the rest of the ingredients.
(3) Prepare the vegetables: While the sauce is simmering, lay the sliced vegetables out in one layer and sprinkle them lightly with salt to draw out some of the moisture. Let them sit for about 10 minutes then pat them dry with a paper towel to remove the moisture.
(4) Cook the mushrooms: While you’re simmering the sauce, heat one tablespoon of olive oil in a medium-sized skillet. Add the dry thyme to the hot oil and let it sizzle for about 30 seconds. Add the chopped mushrooms. Sprinkle with 1/4 teaspoon each salt and black pepper. Cook over medium-high heat until browned and starting to crisp. Remove from the heat and stir into the simmering sauce and remove the bay leaves from the sauce.
(5) Layer the lasagna: In 9x13-inch baking dish, spread a thin layer of the meat sauce on the bottom. Add a layer of zucchini and eggplant slices, followed by another layer of the meat sauce. Sprinkle some of the grated cheddar on top. Repeat the layers until all the ingredients are used, finishing with a layer of vegetables topped with meat sauce and grated cheddar and finally the grated parmesan. You may only have 2 layers depending on the size of your eggplant and zucchini and depending on how thinly you slices them.
Make-ahead note: At this point, you may cover the dish and refrigerate until you’re ready to cook. When ready to cook, remove from the regrigerator and put in the preheated overn. You will need to add 10 minutes to the covered baking time if the lasagna is starting out very cold.
(6) Bake: Cover the baking dish with aluminum foil and bake for 30 minutes. Remove the foil and bake for an additional 15 minutes, or until the cheese is melted and golden.
(7) Finish: Let the lasagna cool for a few minutes, then sprinkle with fresh basil, before slicing and serving.
Eat and enjoy every bite because you can!
Recipe note: I use Diamond Crystal Kosher salt in all my recipes because it has a wonderful flat and crisp flake that tastes delicious. It is also the least salty salt available so you can use it more liberally as a seasoning than you can table salt or sea salt. If you use another type of salt, you may need to reduce the amount so it is not over-salted.
Have a question you’d like to have answered? Email me at hello@ibsgamechanger.com
Link note: This post may contain affiliate links for you to easily purchase items that are linked. I may earn a small commission from qualifying purchases but none of this costs you a thing so feel free to use the links! In addition, for some items, I have provided a special discount code for IBS Game Changers so be sure to use the code when you purchase an item to get the discount that has been arranged just for you.
More Deliciously Low FODMAP™ plant forward recipes

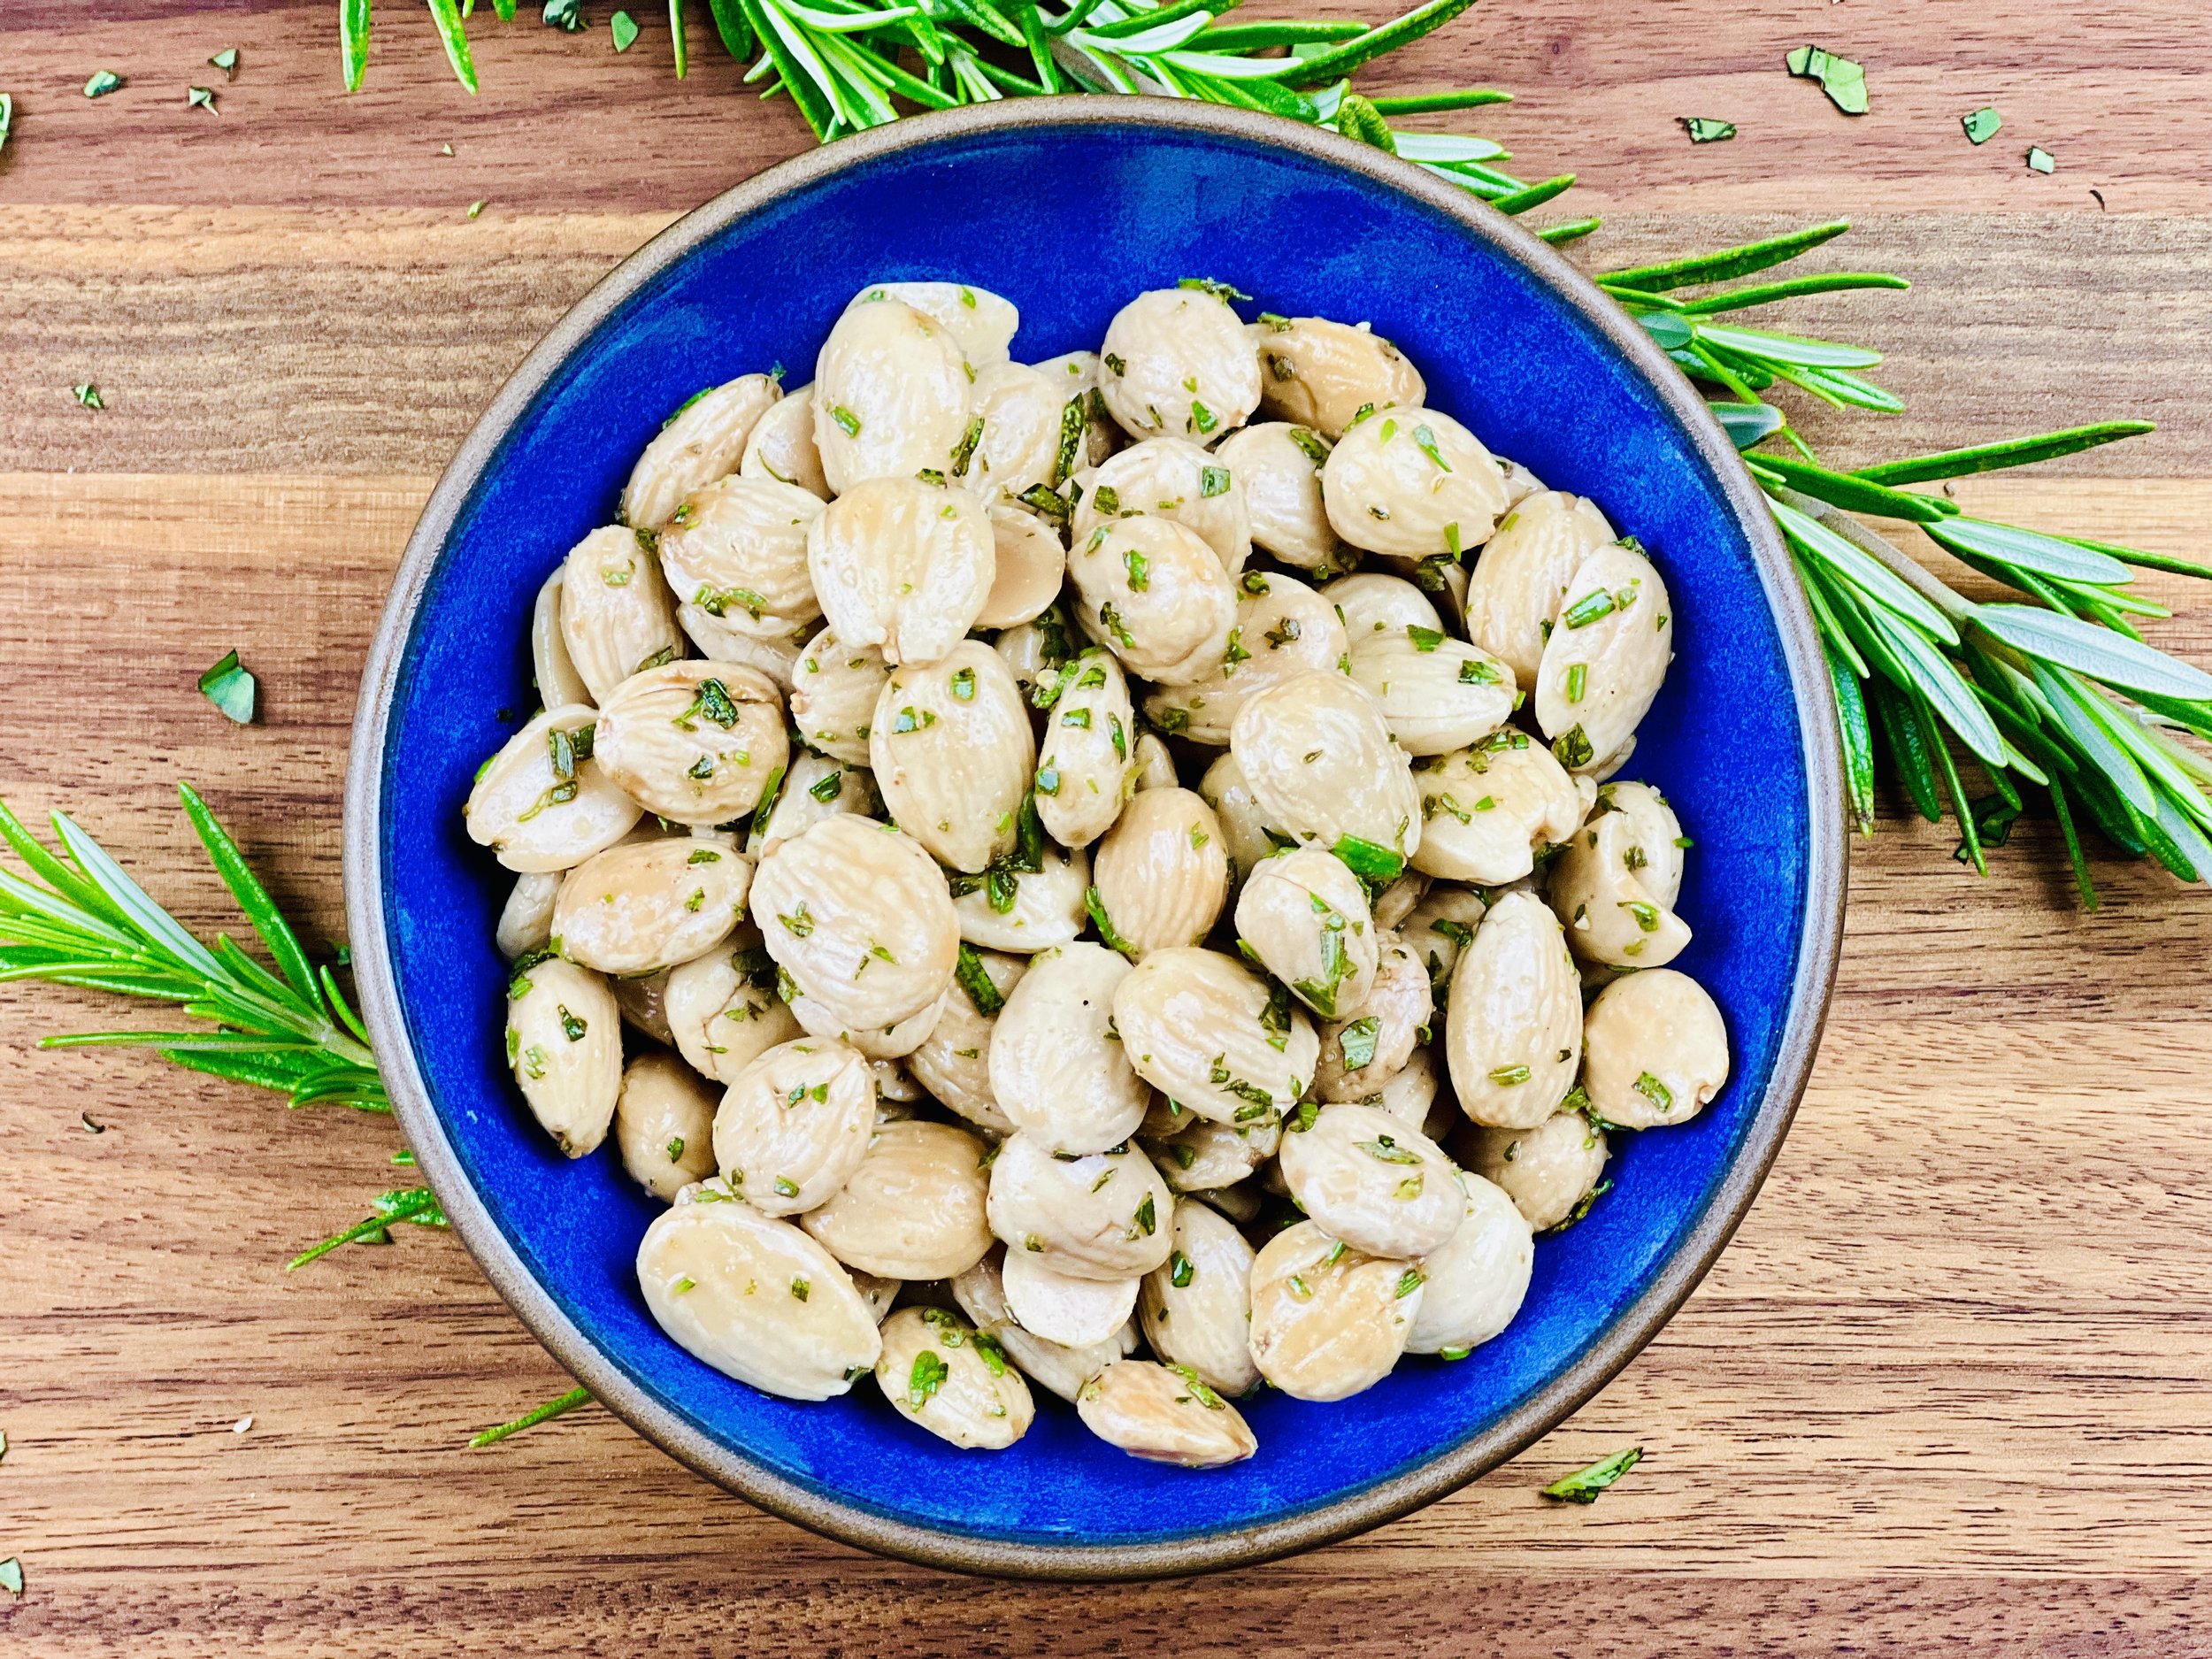
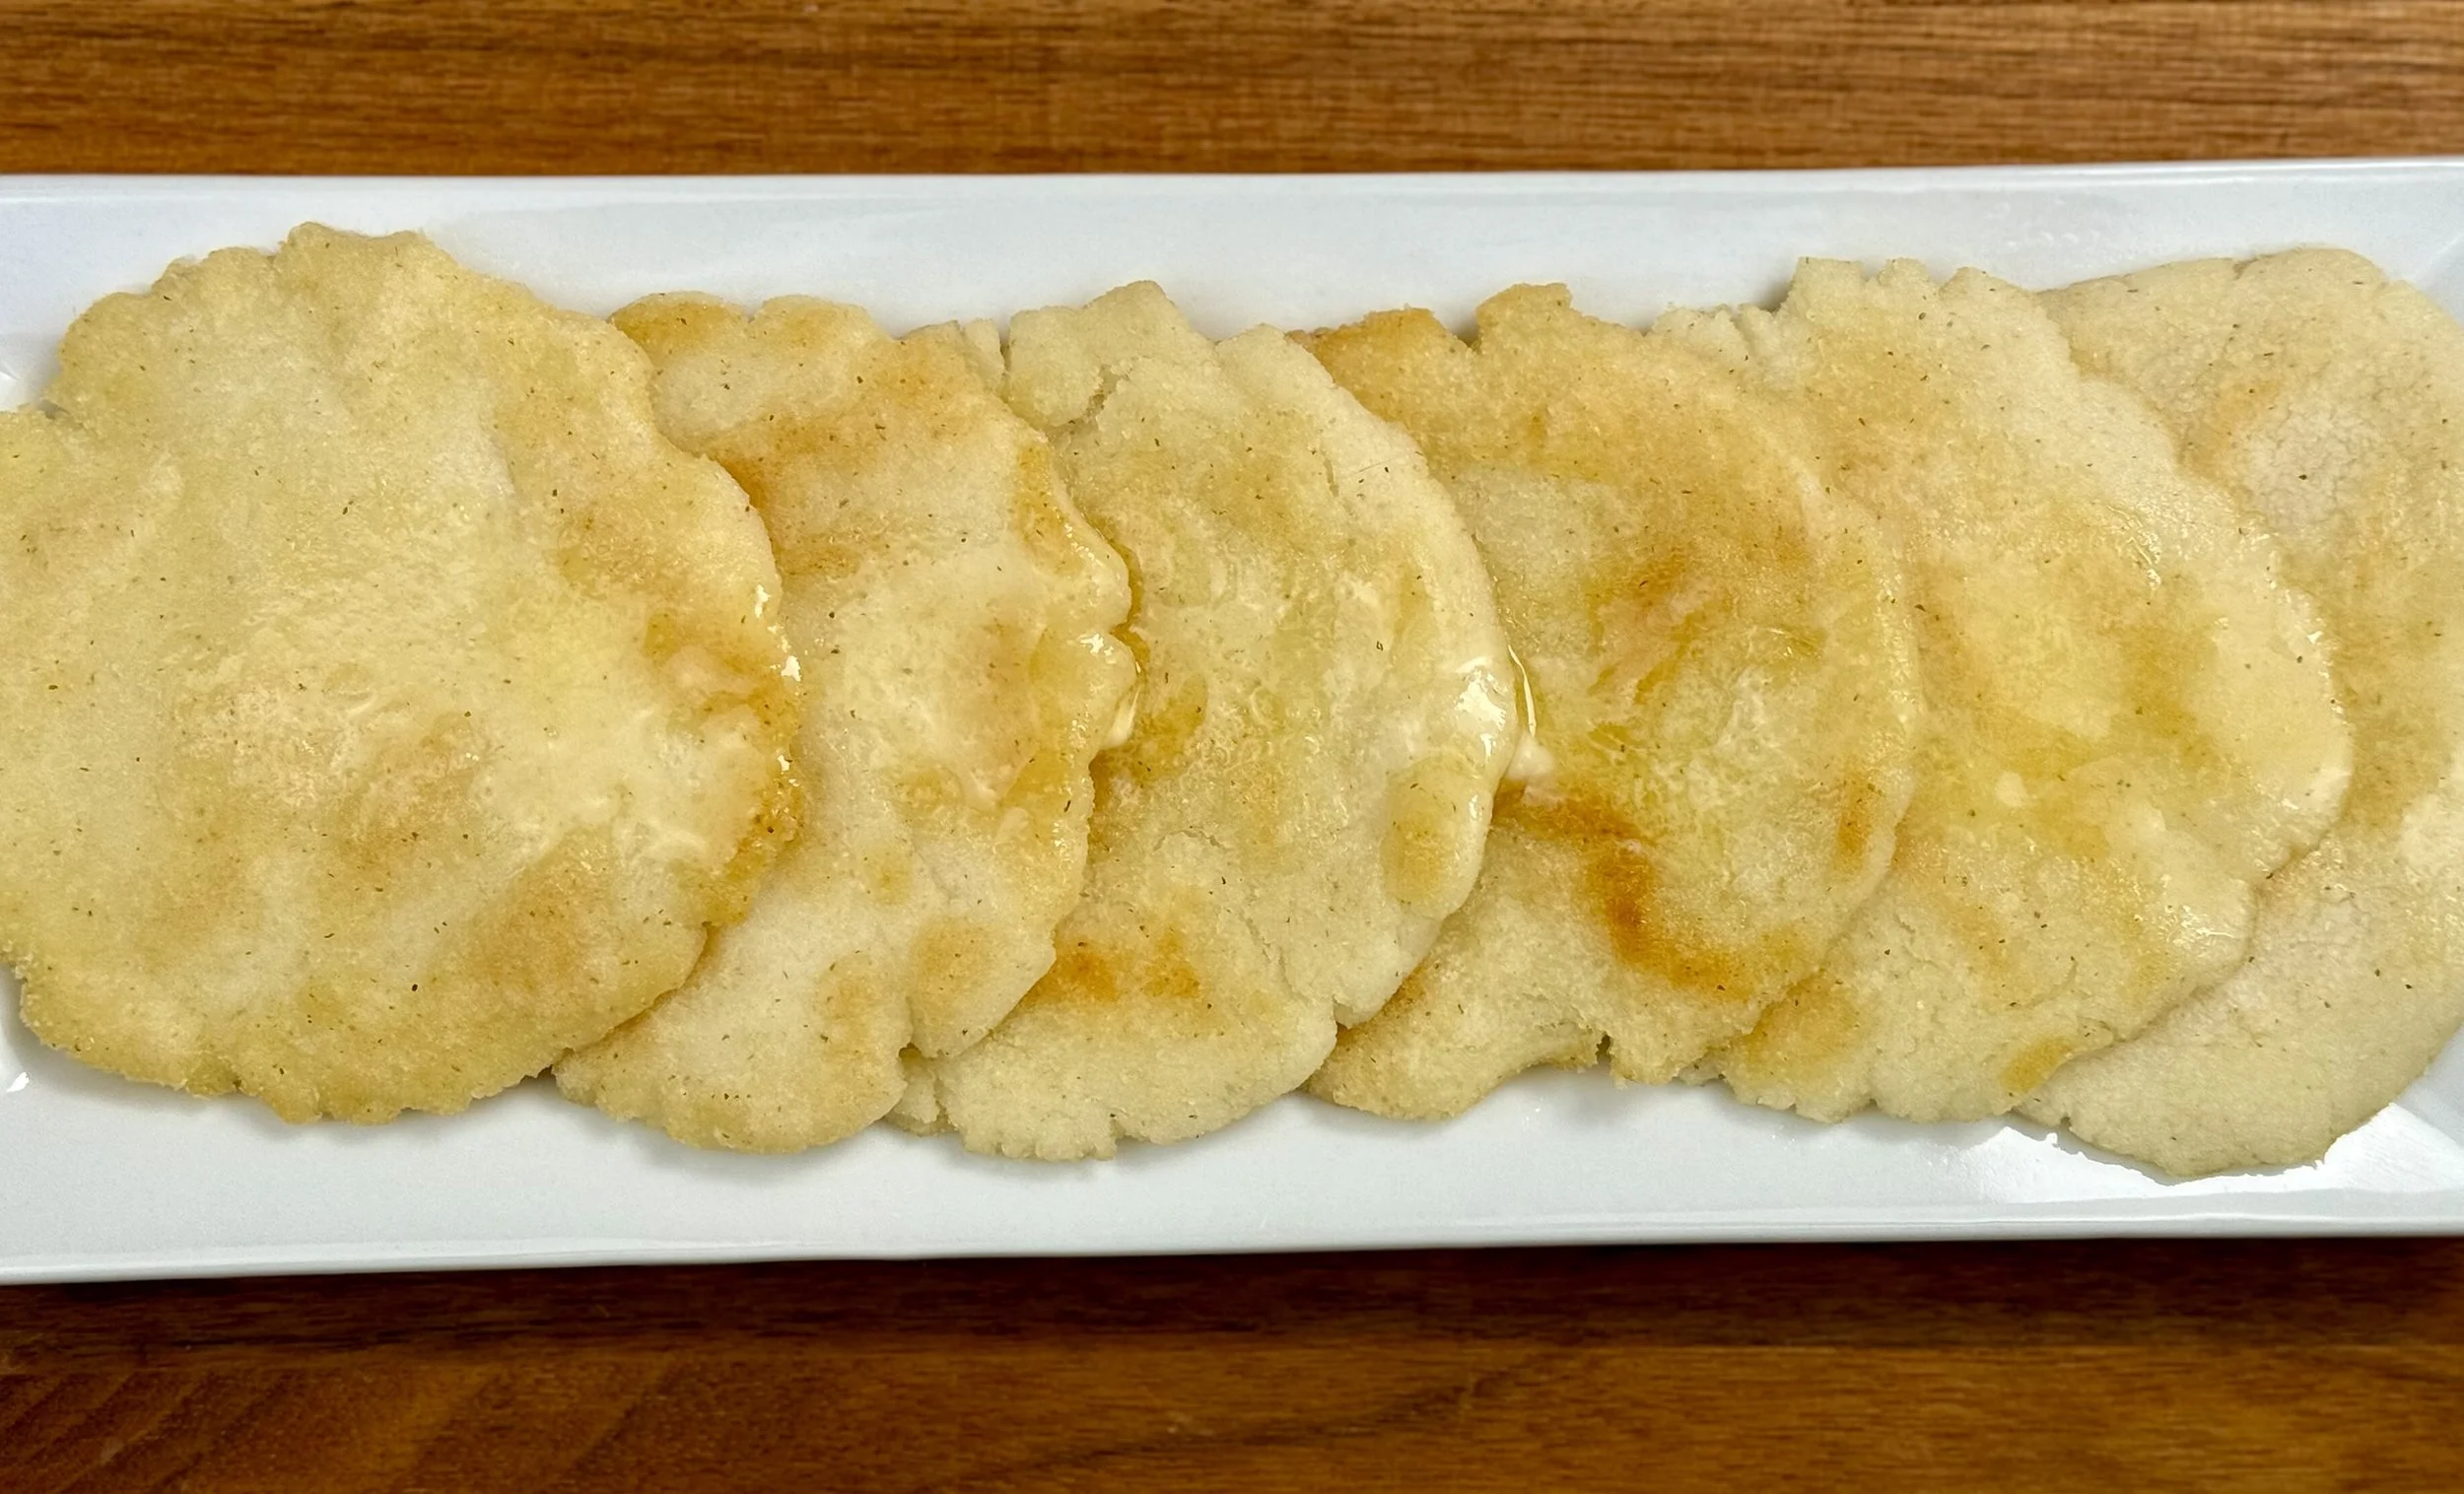
Rosemary Marcona Almonds (Low FODMAP)
5 Minutes prep • 5 Minutes cook • Low FODMAP • Gluten-free • Serves 4 - 6
5 Minutes prep • 5 Minutes cook • Low FODMAP • Gluten-free • Serves 4 - 6 • Ok to make ahead: Steps 1-3
Considering a low FODMAP serving of almonds is only 10 almonds, you want each one you eat to be delicious. These rosemary Marcona almonds will not disappoint you one bit. They aren’t just any almonds. They’re the most delicious almonds you can sink your teeth into. Marcona almonds are imported from Spain and the flavor is buttery, with a texture somewhere between a classic almond and macadamia nut. The higher fat content of the Marcona almonds helps explain the textural difference — tender-crunchy and moist. Combined with fresh rosemary and a bit of salt, they make the perfect addition to any cheese board or appetizer tray.
Ingredients
1 cup raw Marcona almonds
1-2 teaspoons extra virgin olive oil (I used Trader Joe’s)
2 tablespoons fresh rosemary, finely chopped
1/4 teaspoon Diamond Crystal Kosher salt
Directions
(1) Heat the oil: Heat a medium to large-size frying pan over medium-high heat. Add the oil.
(2) Add the rosemary: When the oil is hot, add the chopped rosemary. It will sizzle in the hot oil. Let it cook for about 30 seconds, stirring in the oil.
(3) Add the almonds: Add the almonds and toss and stir for about two minutes. Remove from heat.
(4) Finish: Sprinkle with salt. Stir again and let cool. Store in an airtight container for up to 2 weeks.
Eat and enjoy every bite because you can!
Recipe note: I use Diamond Crystal Kosher salt in all my recipes because it has a wonderful flat and crisp flake that tastes delicious. It is also the least salty salt available so you can use it more liberally as a seasoning than you can table salt or sea salt. If you use another type of salt, you may need to reduce the amount so it is not over-salted.
Have a question you’d like to have answered? Email me at hello@ibsgamechanger.com
Link note: This post may contain affiliate links for you to easily purchase items that are linked. I may earn a small commission from qualifying purchases but none of this costs you a thing so feel free to use the links! In addition, for some items, I have provided a special discount code for IBS Game Changers so be sure to use the code when you purchase an item to get the discount that has been arranged just for you.
More Deliciously Low FODMAP™ appetizer recipes
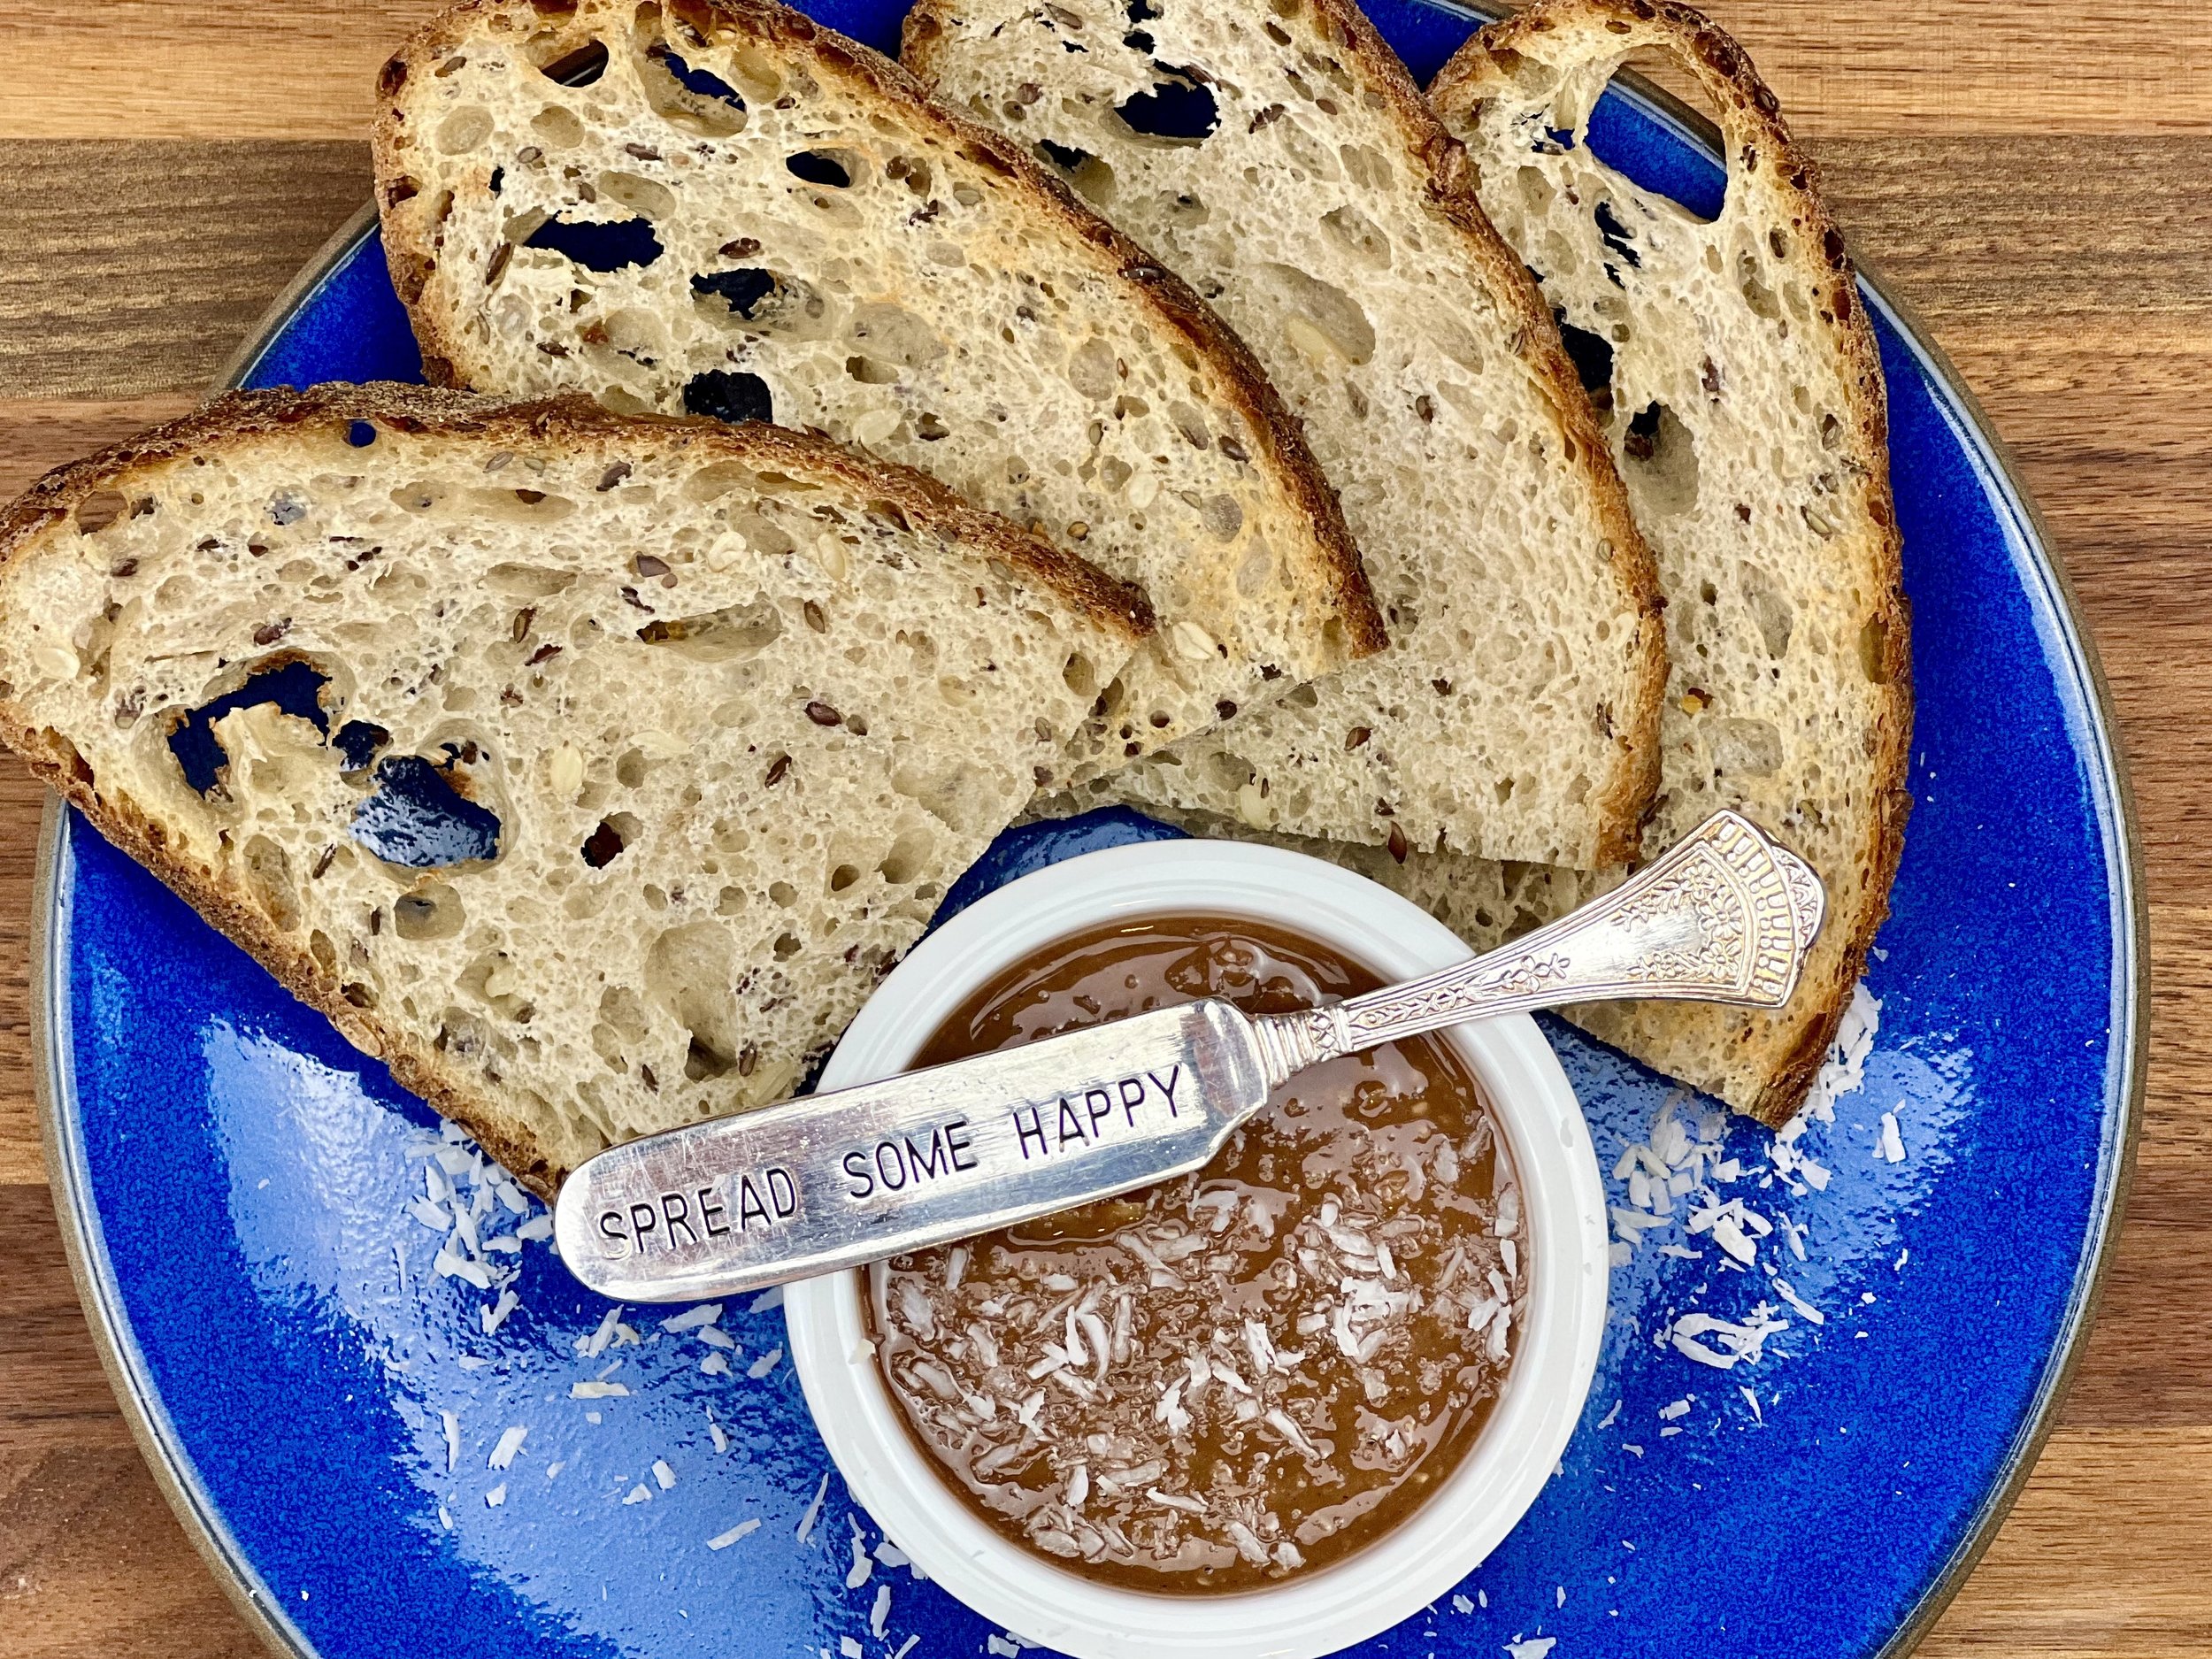
Creamy Chocolate Coconut Nut Butter (Low FODMAP)
10 Minutes prep • 15 Minutes rest • Low FODMAP • Gluten-free • Dairy-free • Serving size 3 tablespoons
10 Minutes prep • 15 Minutes rest • Low FODMAP • Gluten-free • Dairy-free • Serving size 3 tablespoons • Ok to make ahead: Steps 1-3
This creamy and delicious nut butter with cacao and coconut blended together with macadamia nuts and pecans makes a perfect combination of flavor and health benefits! It has the essence of chocolate and coconut without being overly sweet and it’s loaded with protein, fiber, and good stuff for your gut! I tried it on sourdough toast and seed crackers but it was so good, I just wanted to eat it with a spoon! You can use cocoa or cacao but the cacao will likely have more of the beneficial compounds for your gut. It’s delicious without any sweetening at all but you may want to add some maple syrup if you like a sweeter blend.
This is an exclusive recipe just for recipe club members.
In addition to the two free recipes I create each week I am creating and delivering one very special recipe just for my recipe club members. If you’re not yet a member, I encourage you to join! Membership in the club includes access to the complete archive of recipes with filters so it can become your virtual low FODMAP cookbook plus, I am creating and delivering one special NEW recipe every week ONLY for recipe club members.
Your membership in the club helps me continue creating new, delicious, easy-to-make, low FODMAP recipes just for you.
As always, all recipes will emphasize simple ingredients, easy preparation, and delicious low FODMAP results. Recipes will be for everything from main courses, salads, soups, side dishes, appetizers, desserts, sauces, breakfast and lunch, and even mocktails and cocktails. Everything you need to prepare fantastic low FODMAP meals everyone will love.
Join the club. Let’s keep making delicious Low FODMAP meals together.
More Deliciously Low FODMAP™ breakfast recipes


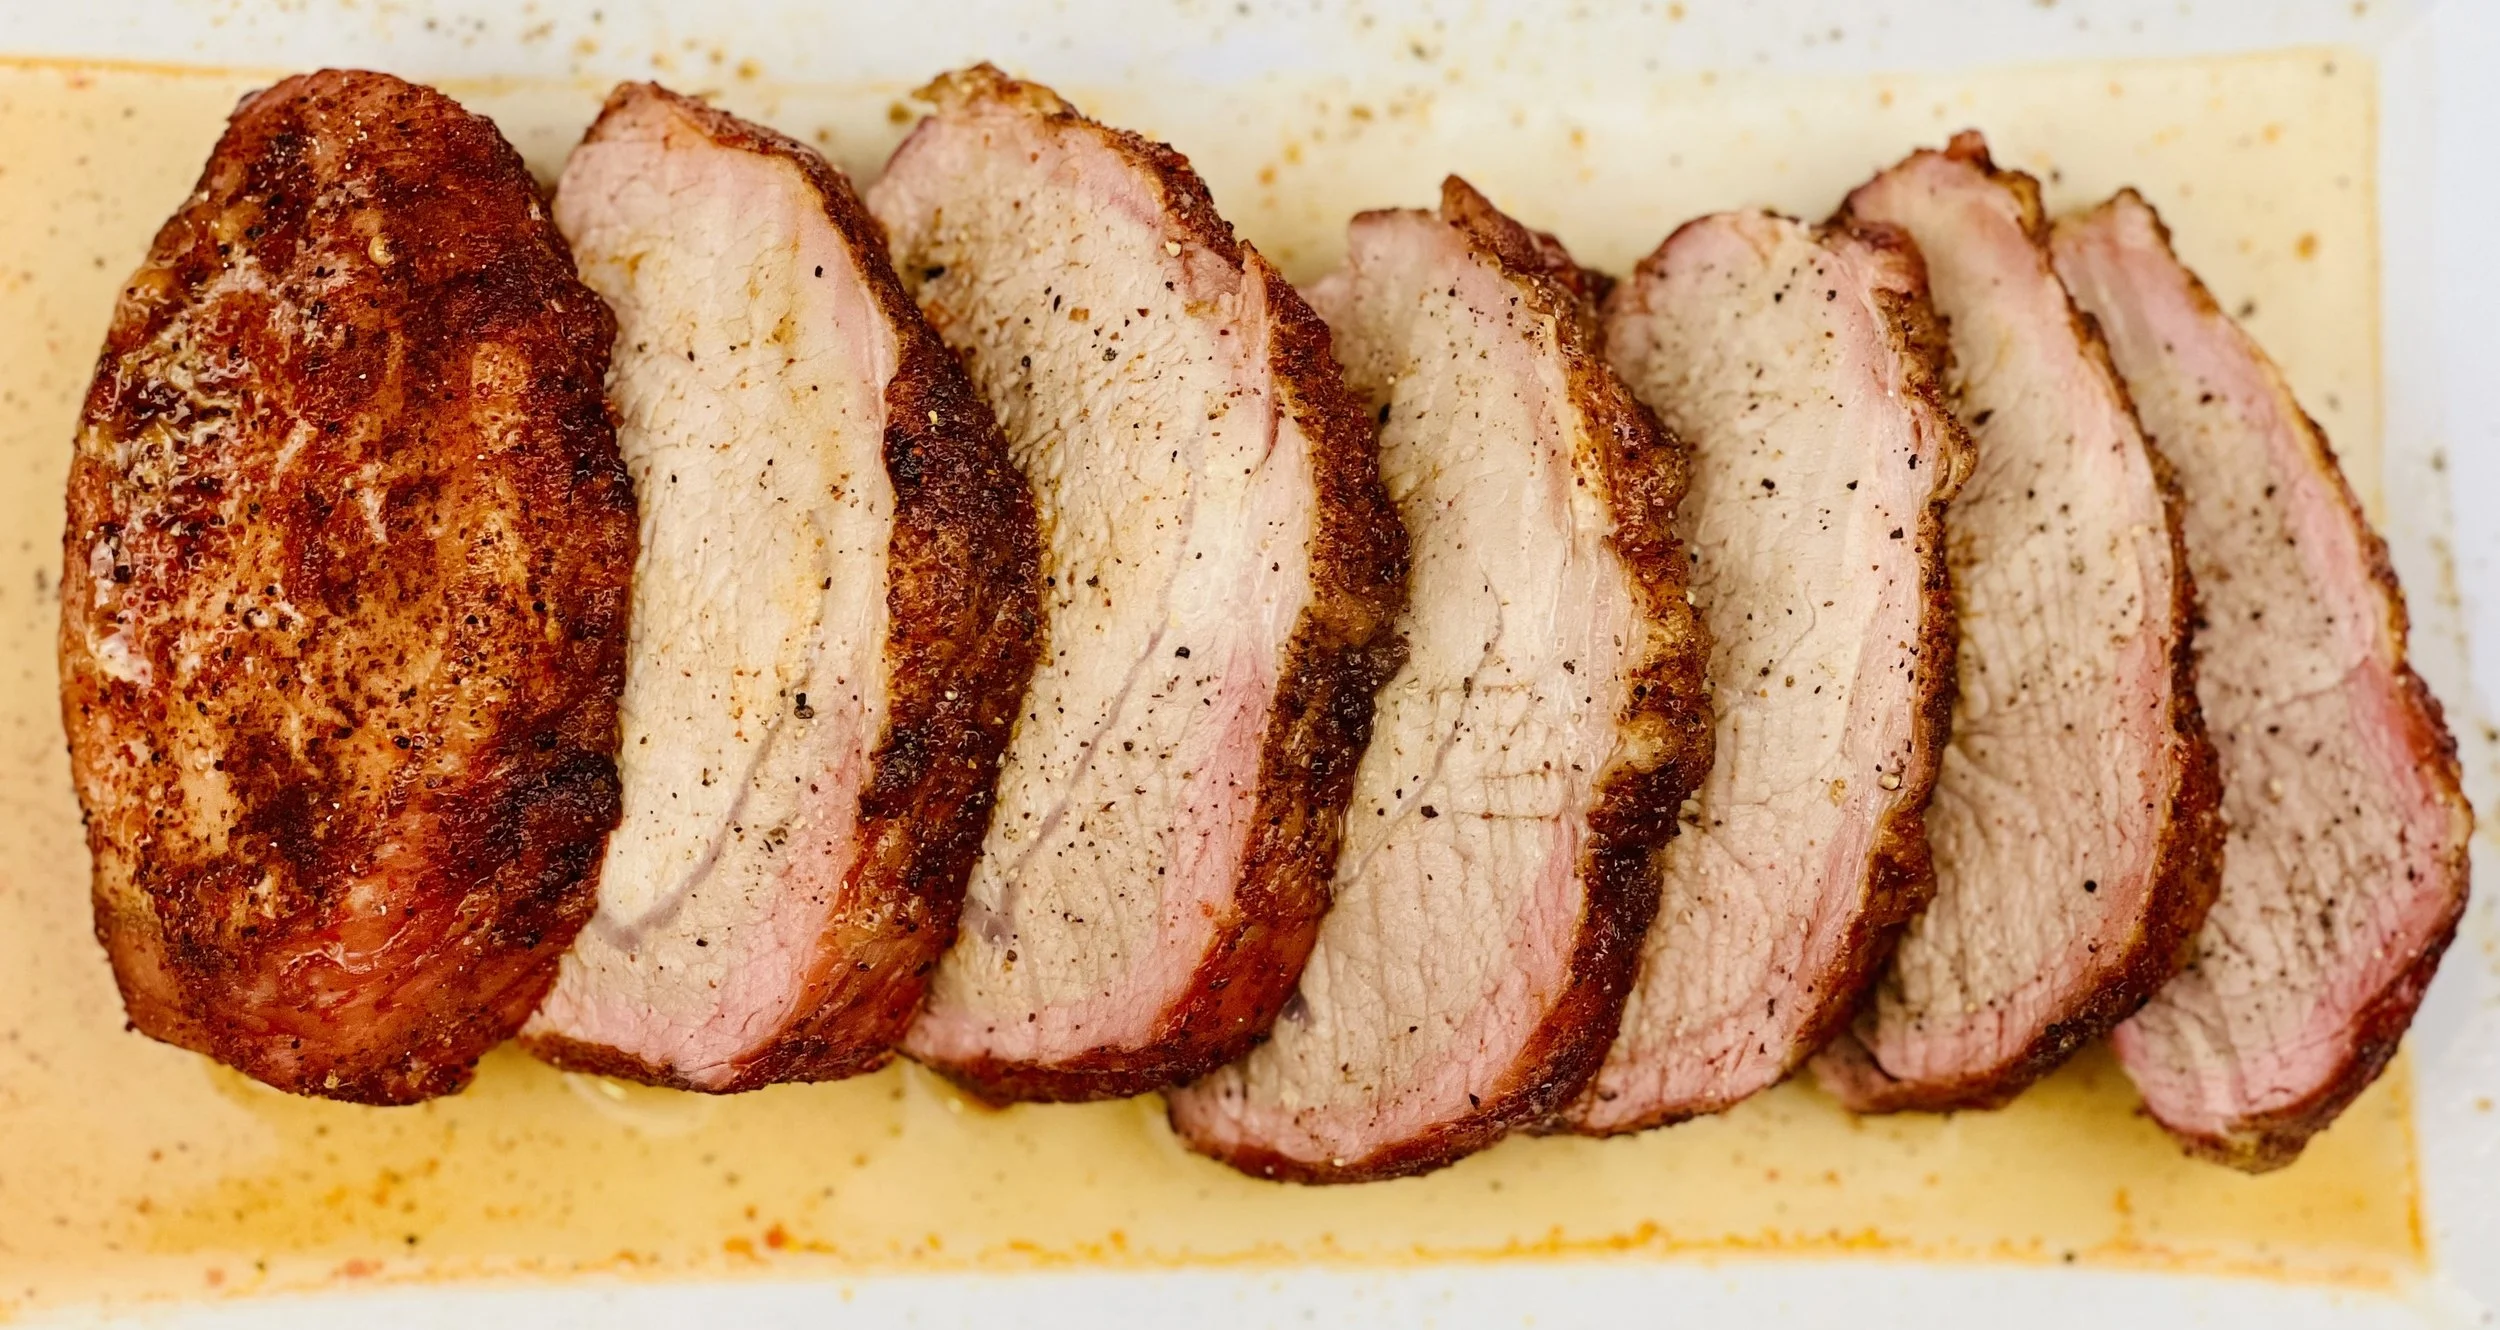
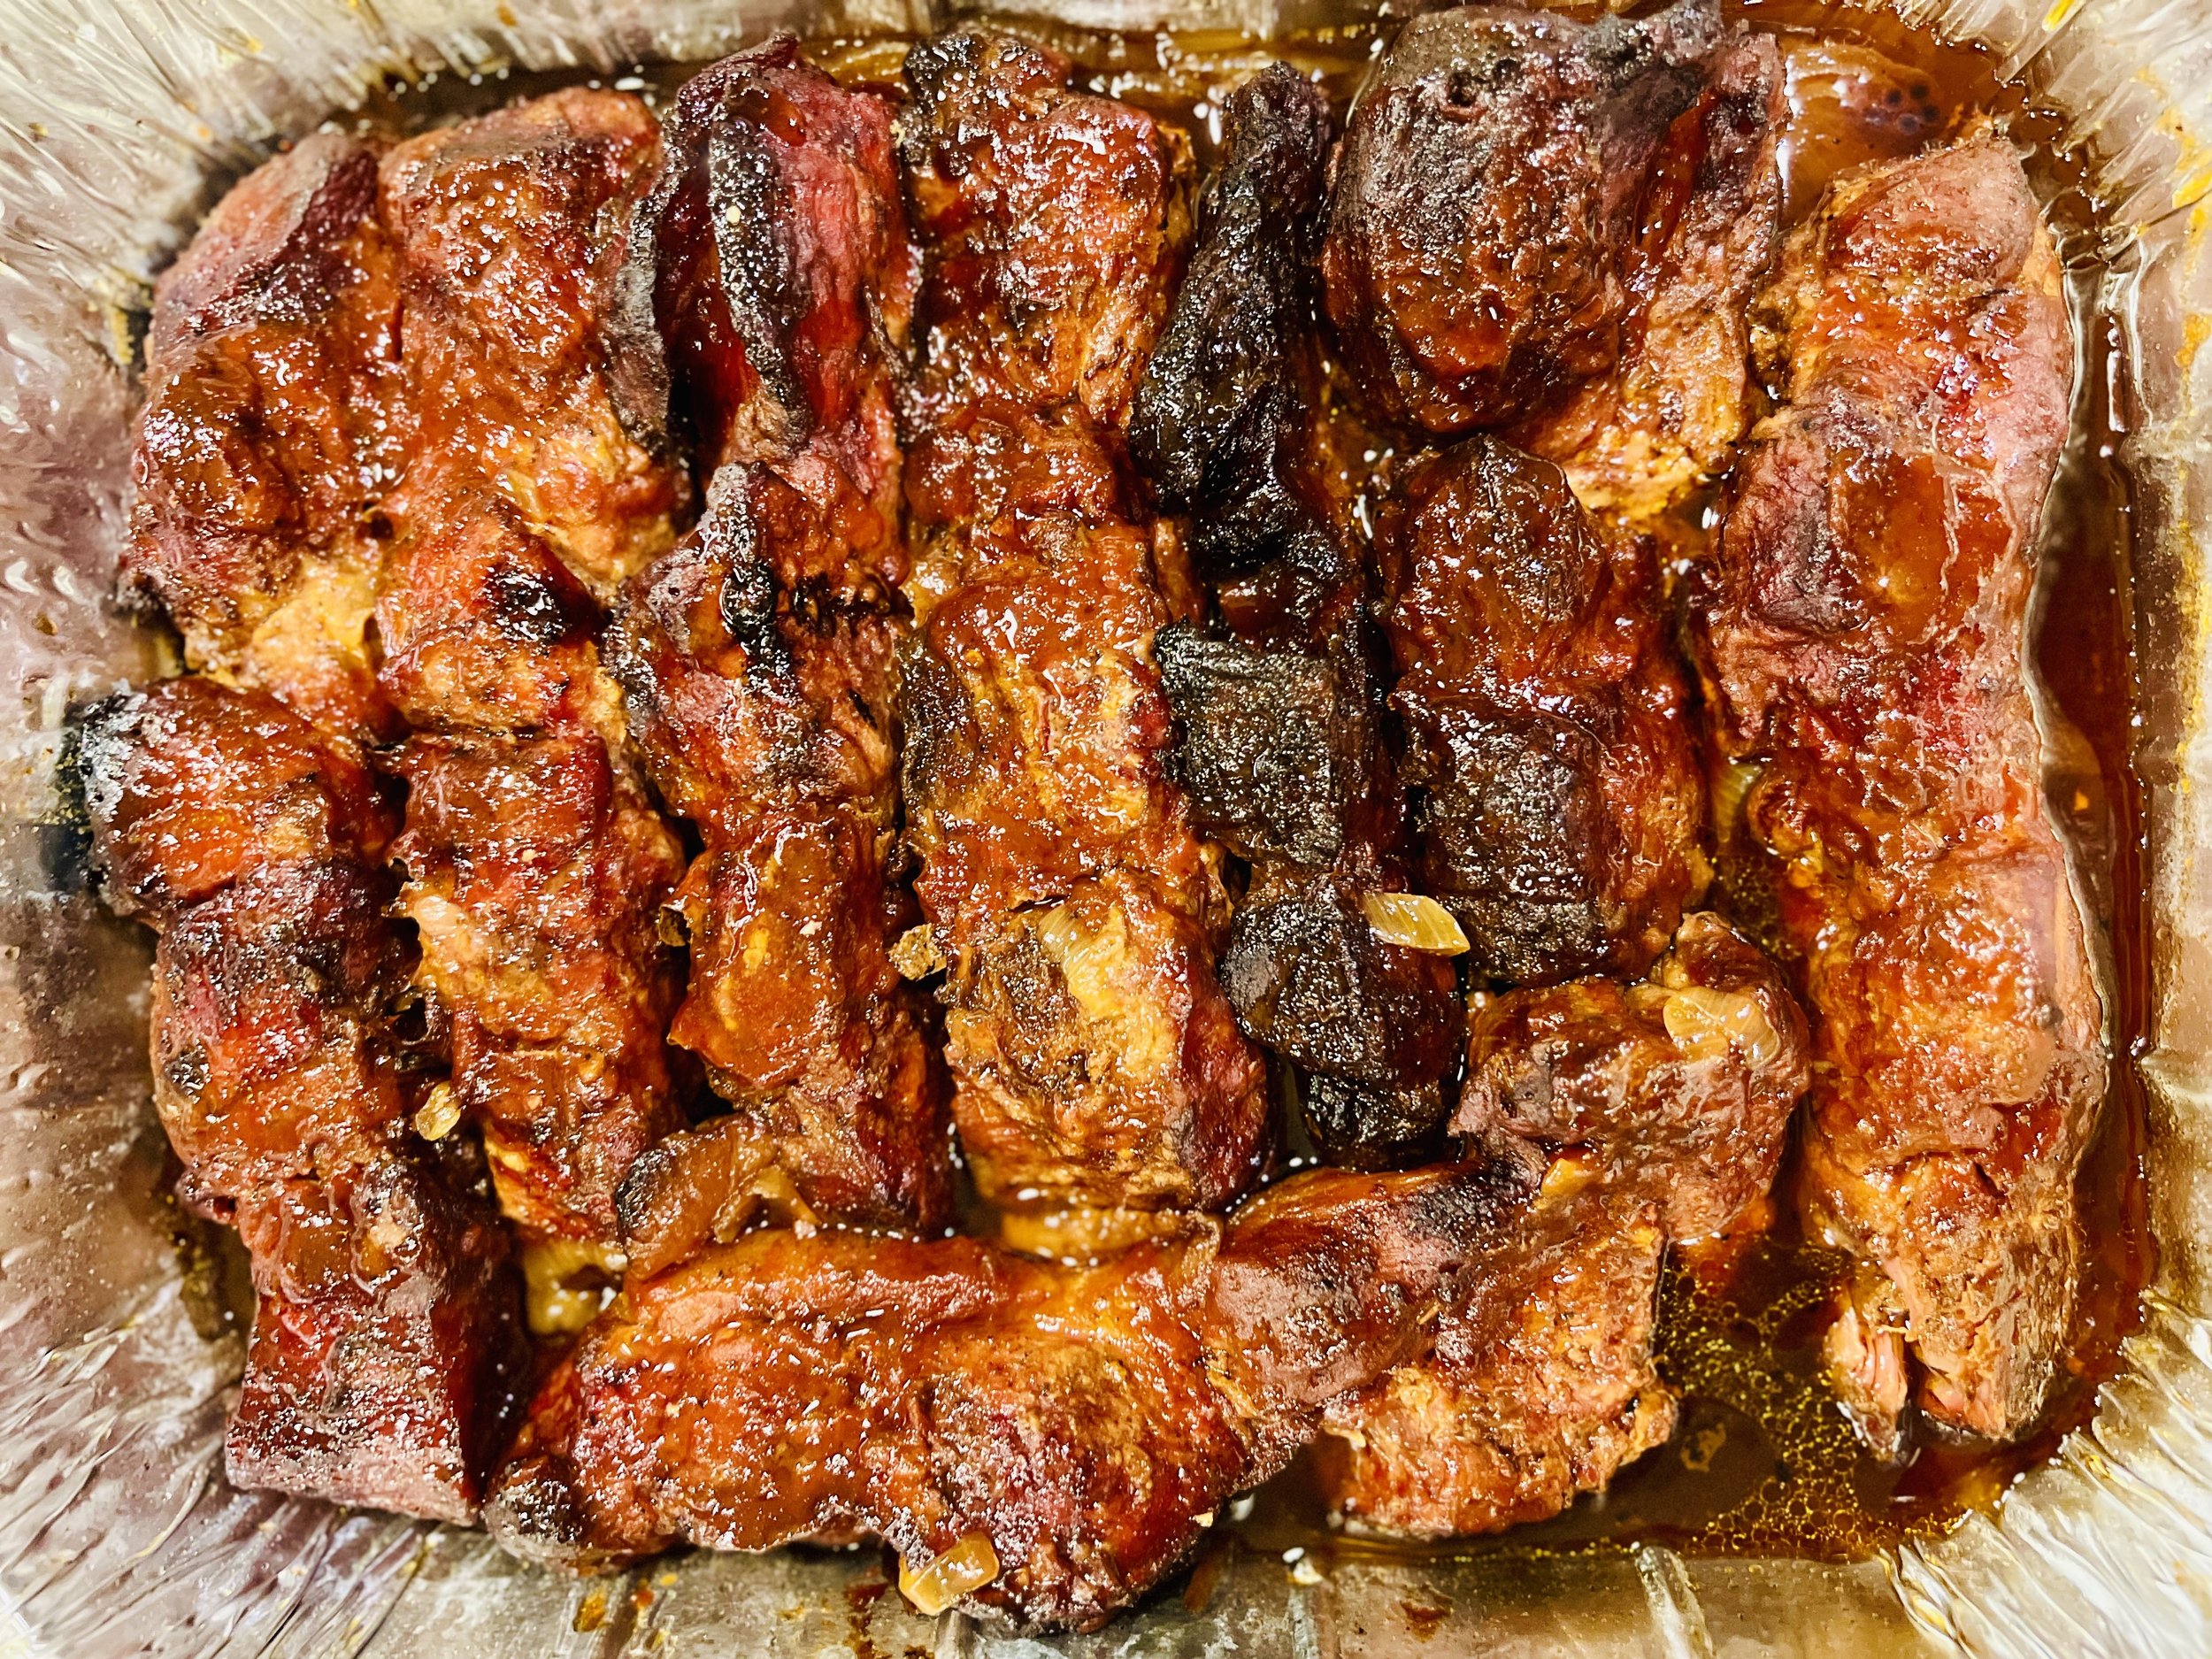
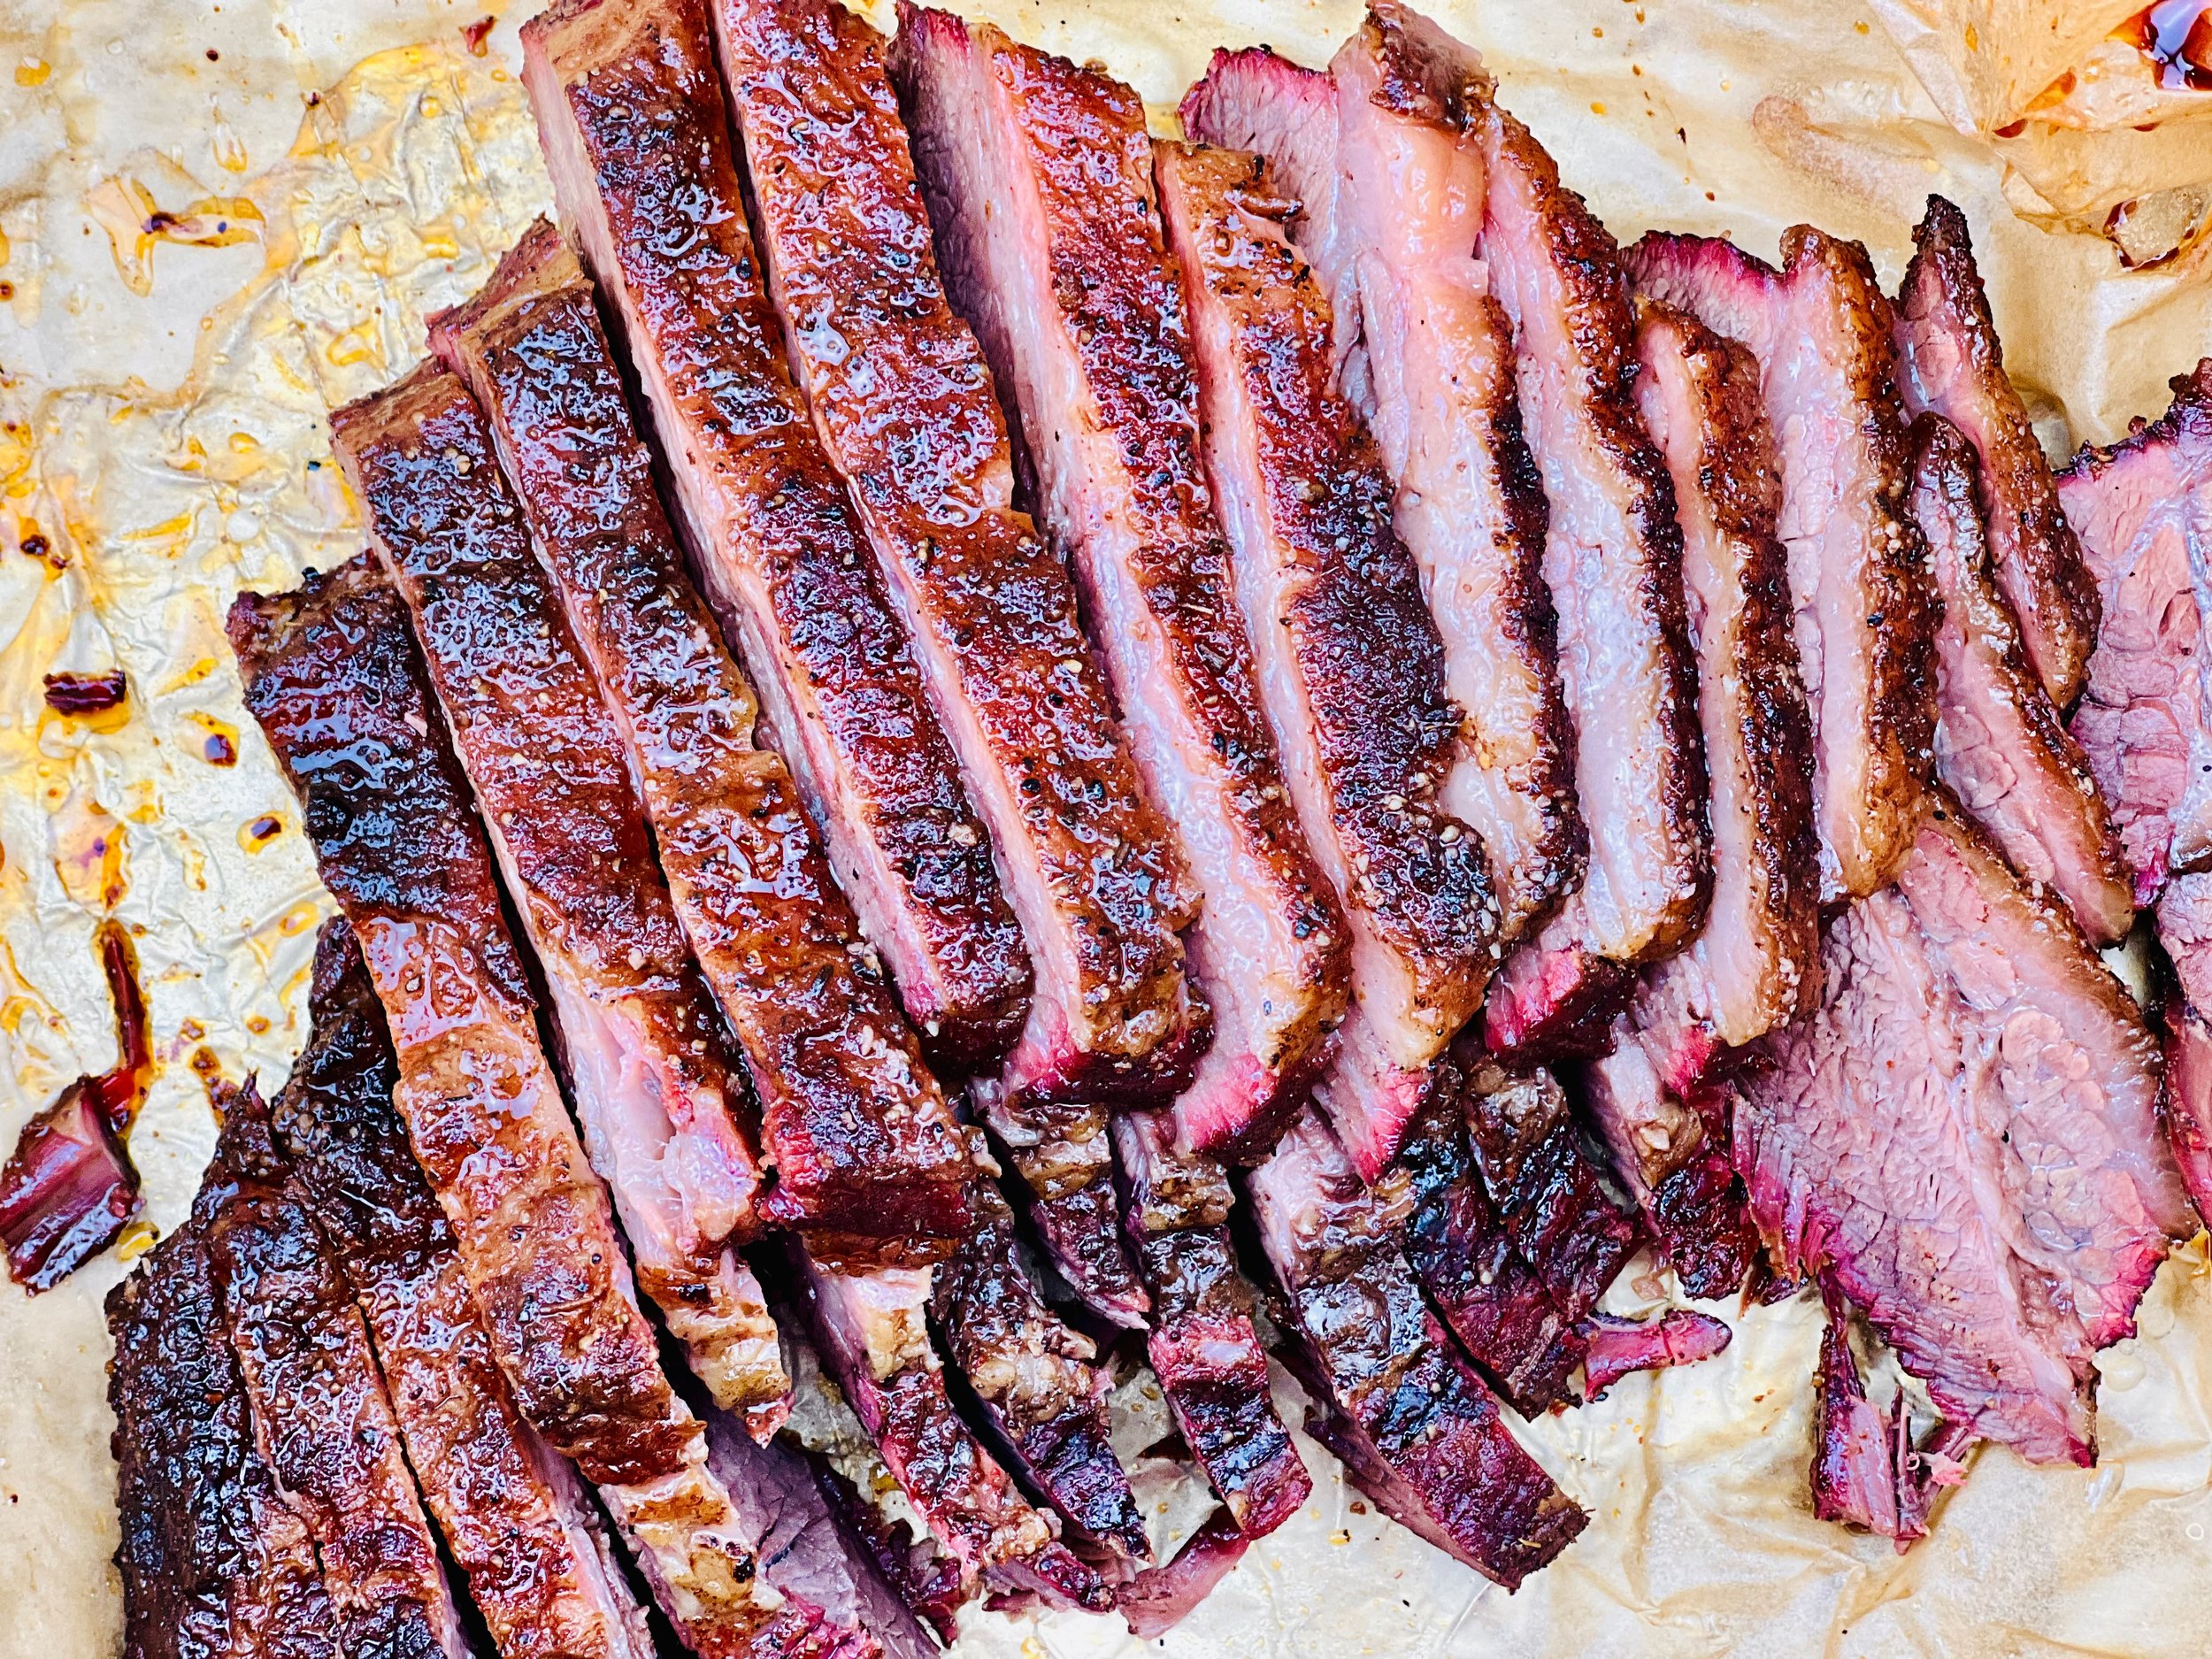
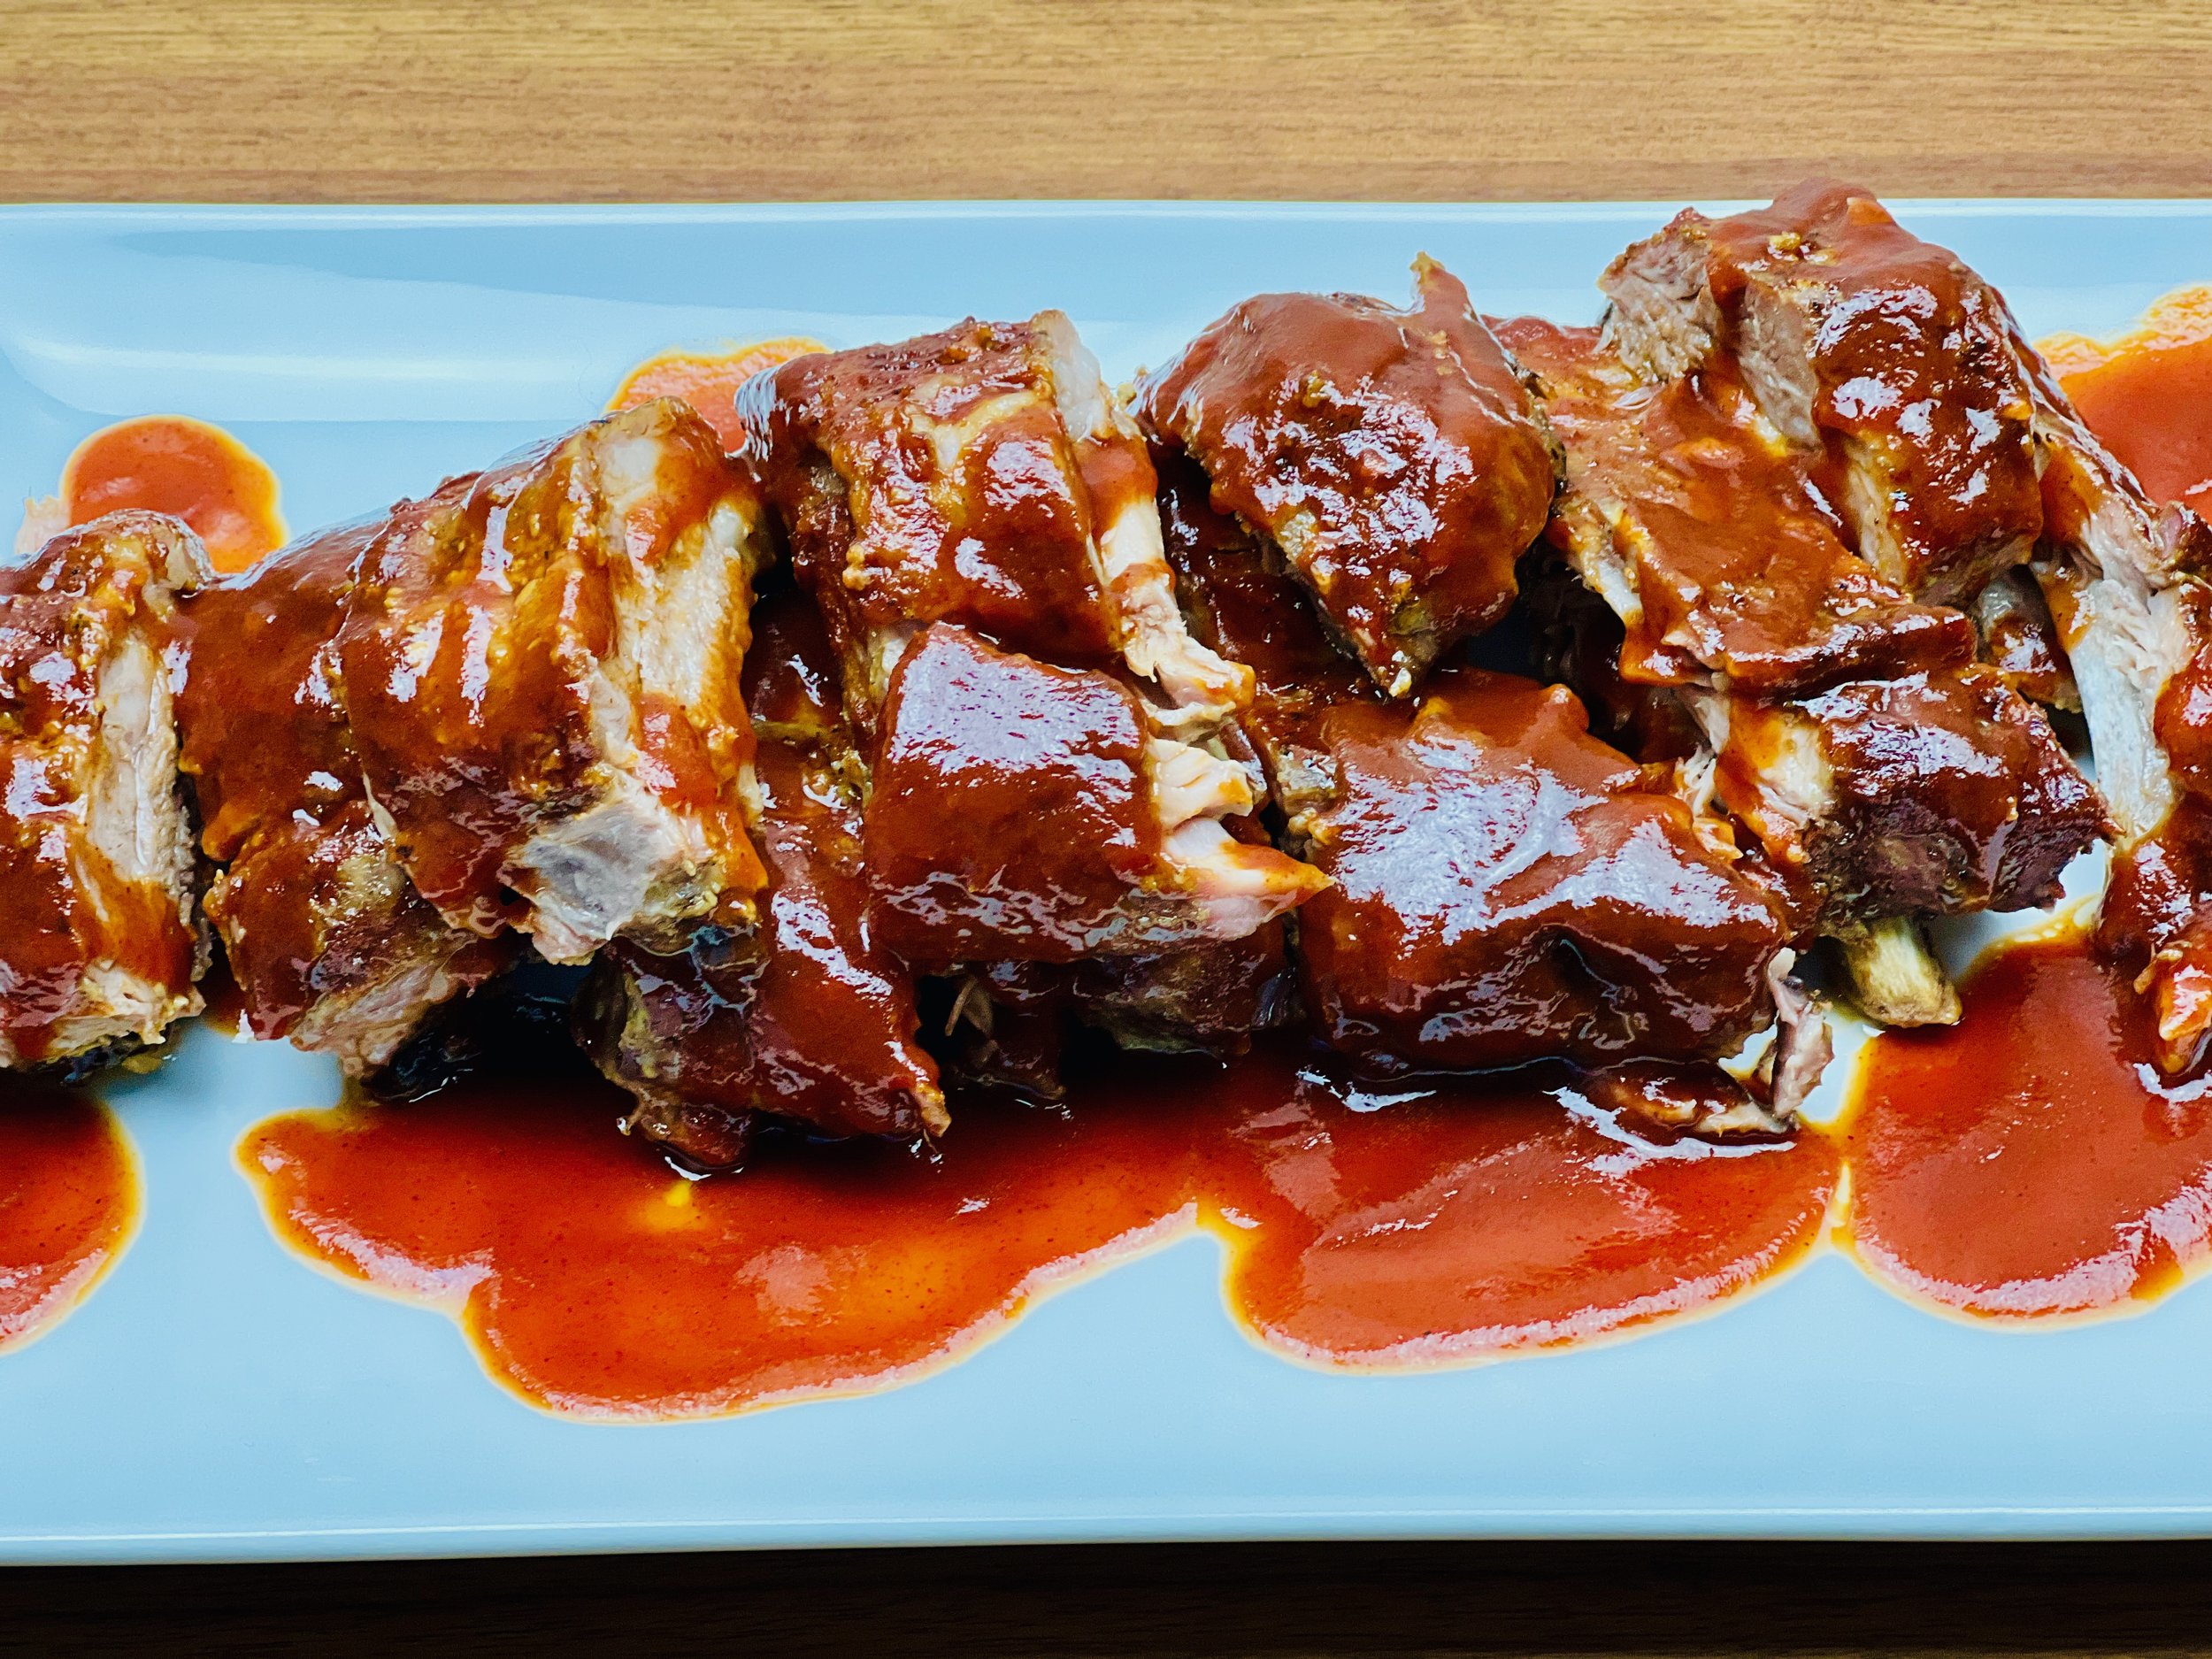
Smoked Country Style Boneless Pork Ribs (Low FODMAP)
15 Minutes prep • 7 hours cook • Low FODMAP • Gluten-free • Lactose-free • Serves 4 - 6
15 Minutes prep • 7 hours cook • Low FODMAP • Gluten-free • Lactose-free • Serves 4 - 6 • Ok to make ahead: Steps 1-6
Country-style ribs can be the most tender and delicious cut of meat if you give them plenty of time to cook. And, because they’re boneless, they’re much easier (and less messy) to eat than traditional ribs. This recipe consists of two parts: The first is the slow cook on the Traeger pellet grill to bring the meat up to temperature and add the smoky flavor, and the second part is the braise to ensure the meat is tender and delicious. It’s worth the time to cook these ribs right! They do reheat beautifully in the oven so consider making these a day ahead and reheat to serve if you don’t have time to cook them on the day you plan to serve them. They pair wonderfully with my Buttery Mashed Yukon Gold Potatoes or Mushroom Pilaf (for a super low-carb option).
Ingredients
One package of country-style pork ribs (about 3 pounds)
2 - 3 tablespoons mustard (I used Dijon)
3 - 4 tablespoons of your favorite BBQ rub (I used Smoke N Sanity Triple S All Purpose Seasoning, use code IBSGC15 for 15% discount)
One cup of beef or chicken broth (I used Whole Foods Organic 365 chicken broth)
1 tablespoon apple cider vinegar
½ - 1 whole yellow onion, sliced (optional if tolerated)
1/2 cup of your favorite low FODMAP bbq sauce (I used: Smoke N Sanity Sweet and Sassy BBQ sauce, use code IBSGC15 for 15% discount)
Directions
(1) Prepare: Preheat your Traeger (or other pellet grill) to 250 degrees F. Remove the country-style pork ribs from the package and pat dry. Rub each of the ribs with mustard. Liberally sprinkle the bbq rub on all sides of each rib section
(2) Smoke the ribs: Place ribs directly on the preheated grill, fat side up if evident, and cook until the internal temp reaches 155 degrees. This takes 3- 4 hours. When the internal temperature is reached, remove the ribs to the braising pan and follow the braising directions (below).
Braising Directions
(3) Prepare the braise: Add the beef or chicken broth and the apple cider vinegar to the bottom of the braising pan. (I used an aluminum foil pan for easy cleanup. Use a pan small enough to be sure the braising liquid surrounds but doesn’t cover the meat completely. It’s ok for the ribs to be touching each other while braising). If you can tolerate a bit of onion, slice up ½ to 1 whole yellow onion and put the onion slices in the pan with the braising liquid (if you can’t tolerate any onion, leave it out, the ribs will still be delicious!)
(4) Braise the ribs: After the ribs reach 155 degrees F, remove them and place them in the braising pan. Pour the BBQ sauce over the ribs and cover the braising pan tightly with foil and place it back on the grill. Cook at 250 degrees for another 2 – 3 hours or until the internal temperature reaches 170 degrees F and the meat is tender and easily pulls apart with a fork.
(5) Finish: Remove from the smoker and allow the meat to rest for 10 - 15 minutes before serving.
(6) Plate and serve: To serve, spoon the pan juices over the ribs and serve the ribs over my Buttery Mashed Yukon Gold Potatoes or Mushroom Pilaf (for a super low-carb option). Add a salad or a cooked veggie side and you’ve got a perfect meal!
(7) Storage: Store leftovers (with the braising juices!) in an airtight container in the refrigerator. Reheat in a 300-degree oven for about 20 – 30 minutes. These reheat beautifully so consider making these a day ahead and reheat to serve.
Eat and enjoy every bite because you can!
Have a question you’d like to have answered? Email me at hello@ibsgamechanger.com
Link note: This post may contain affiliate links for you to easily purchase items that are linked. I may earn a small commission from qualifying purchases but none of this costs you a thing so feel free to use the links! In addition, for some items, I have provided a special discount code for IBS Game Changers so be sure to use the code when you purchase an item to get the discount that has been arranged just for you.
More Deliciously Low FODMAP™ BBQ recipes


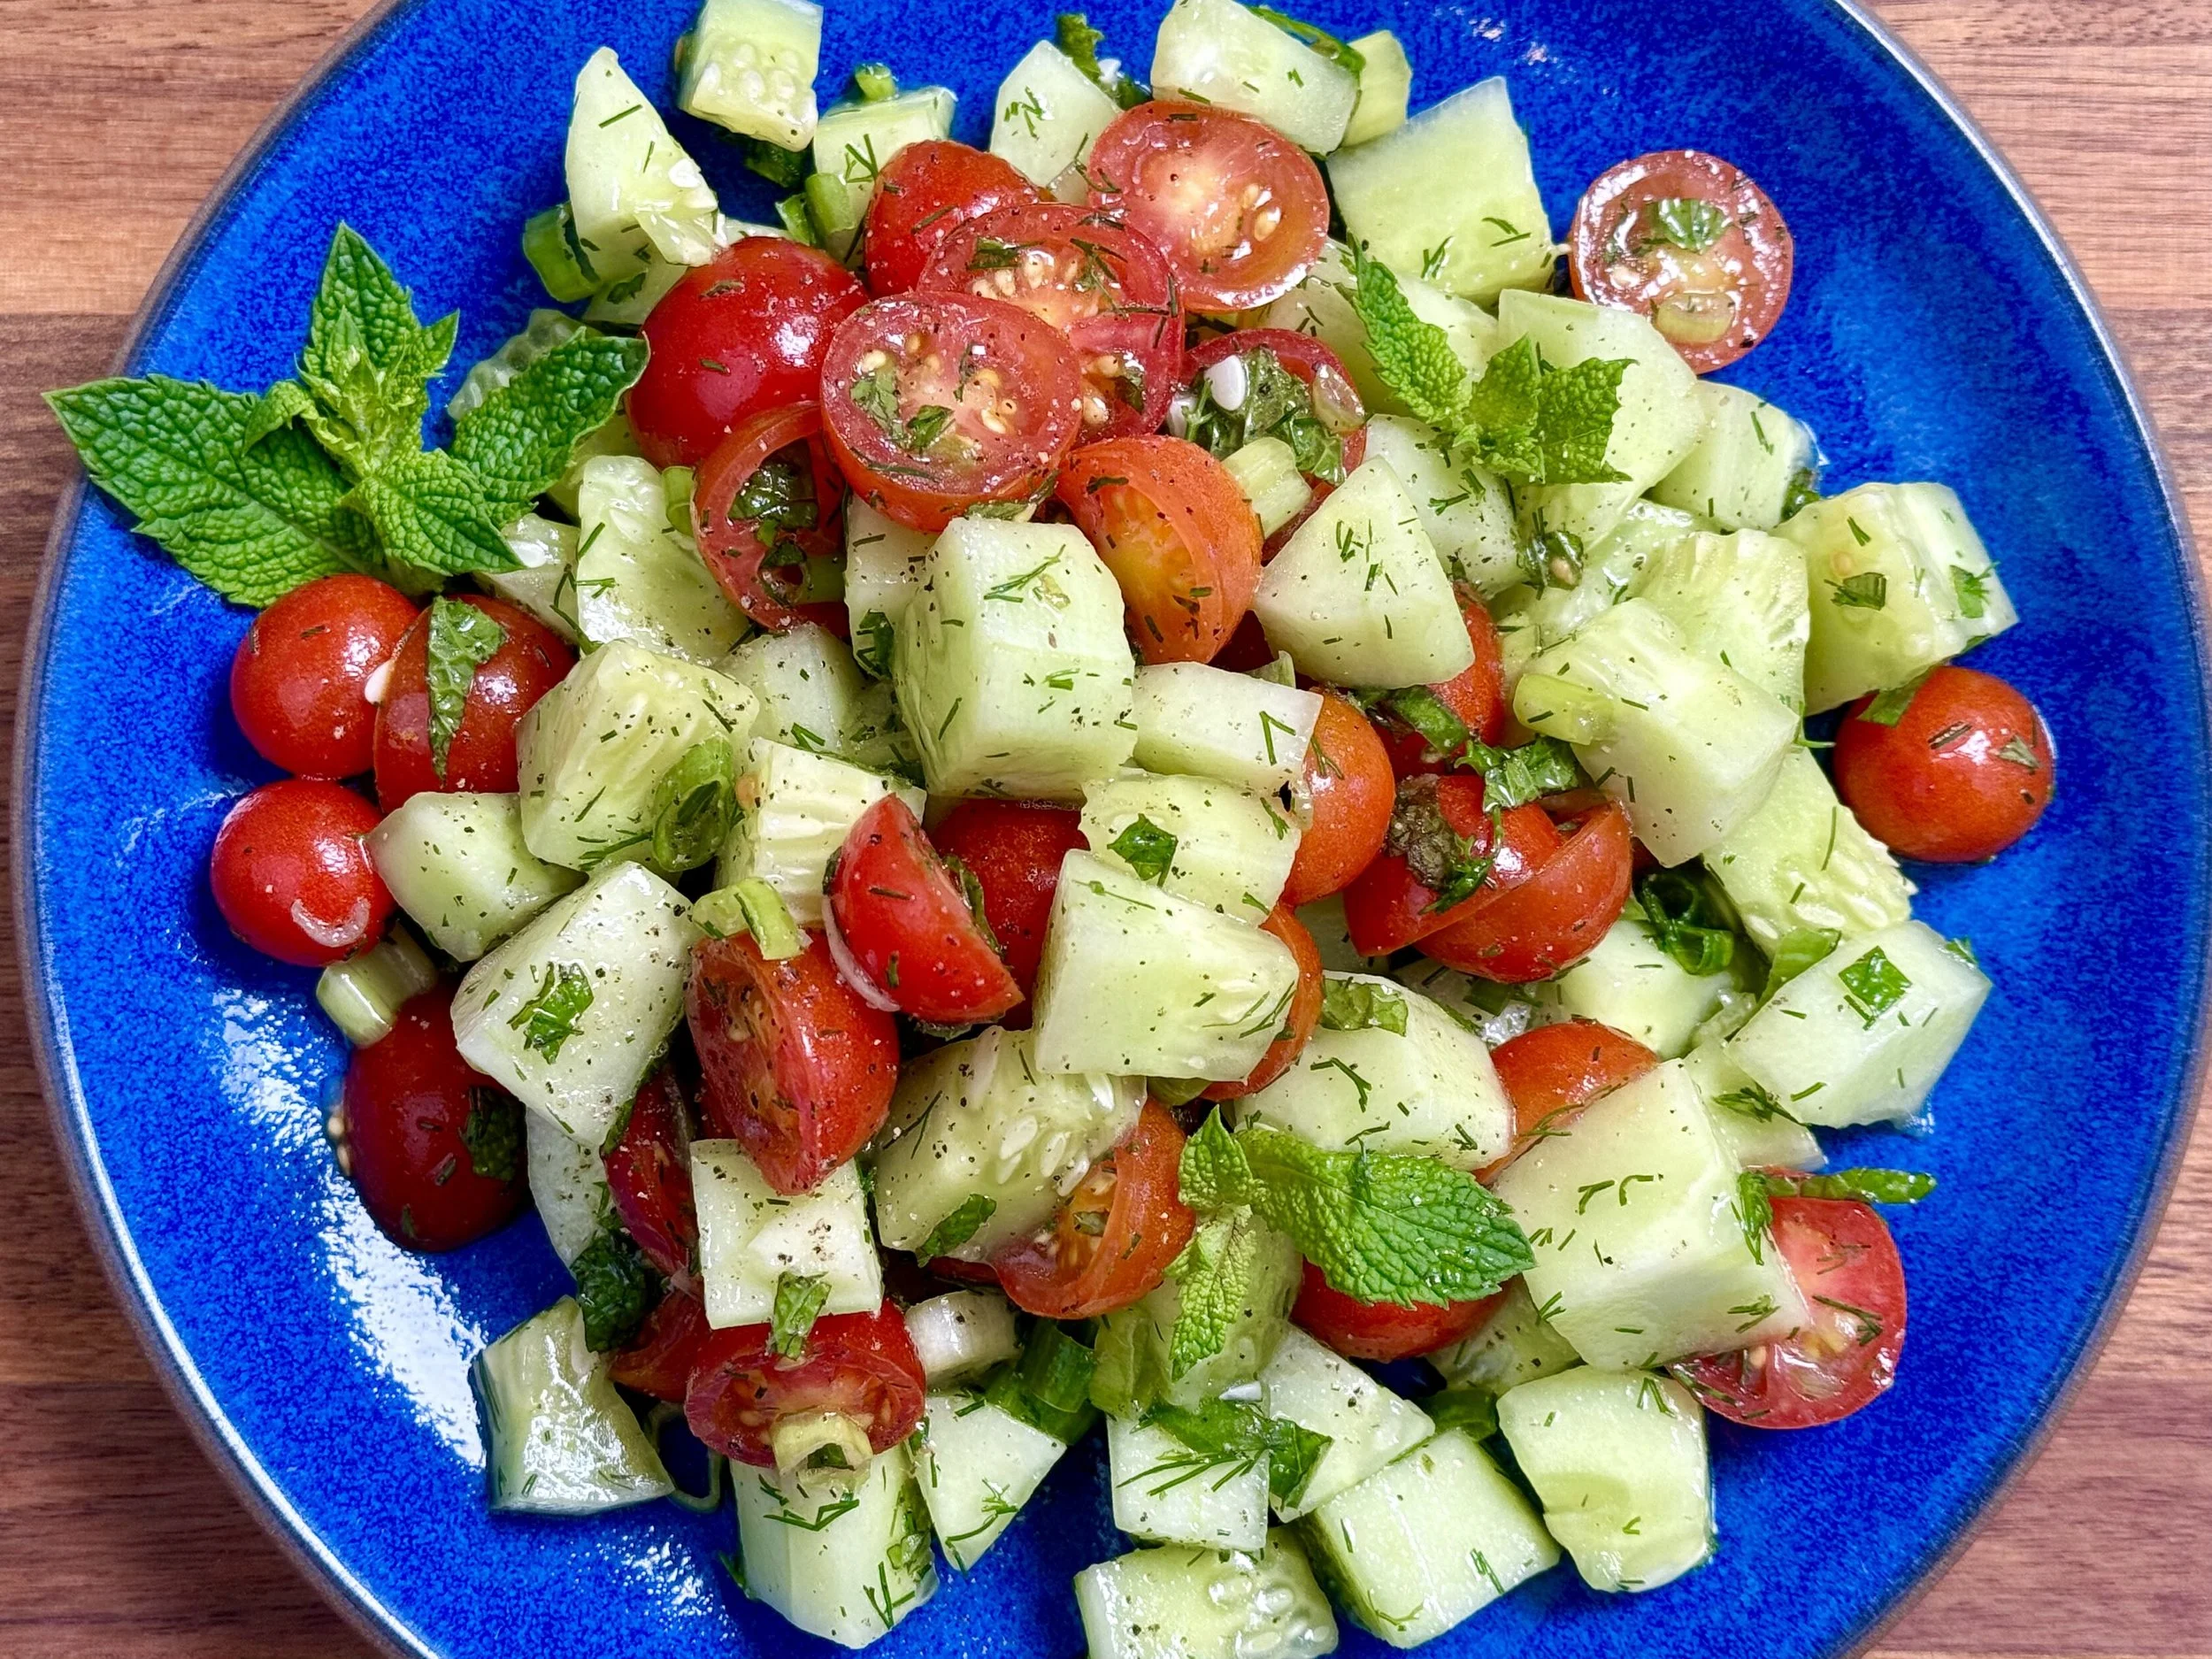
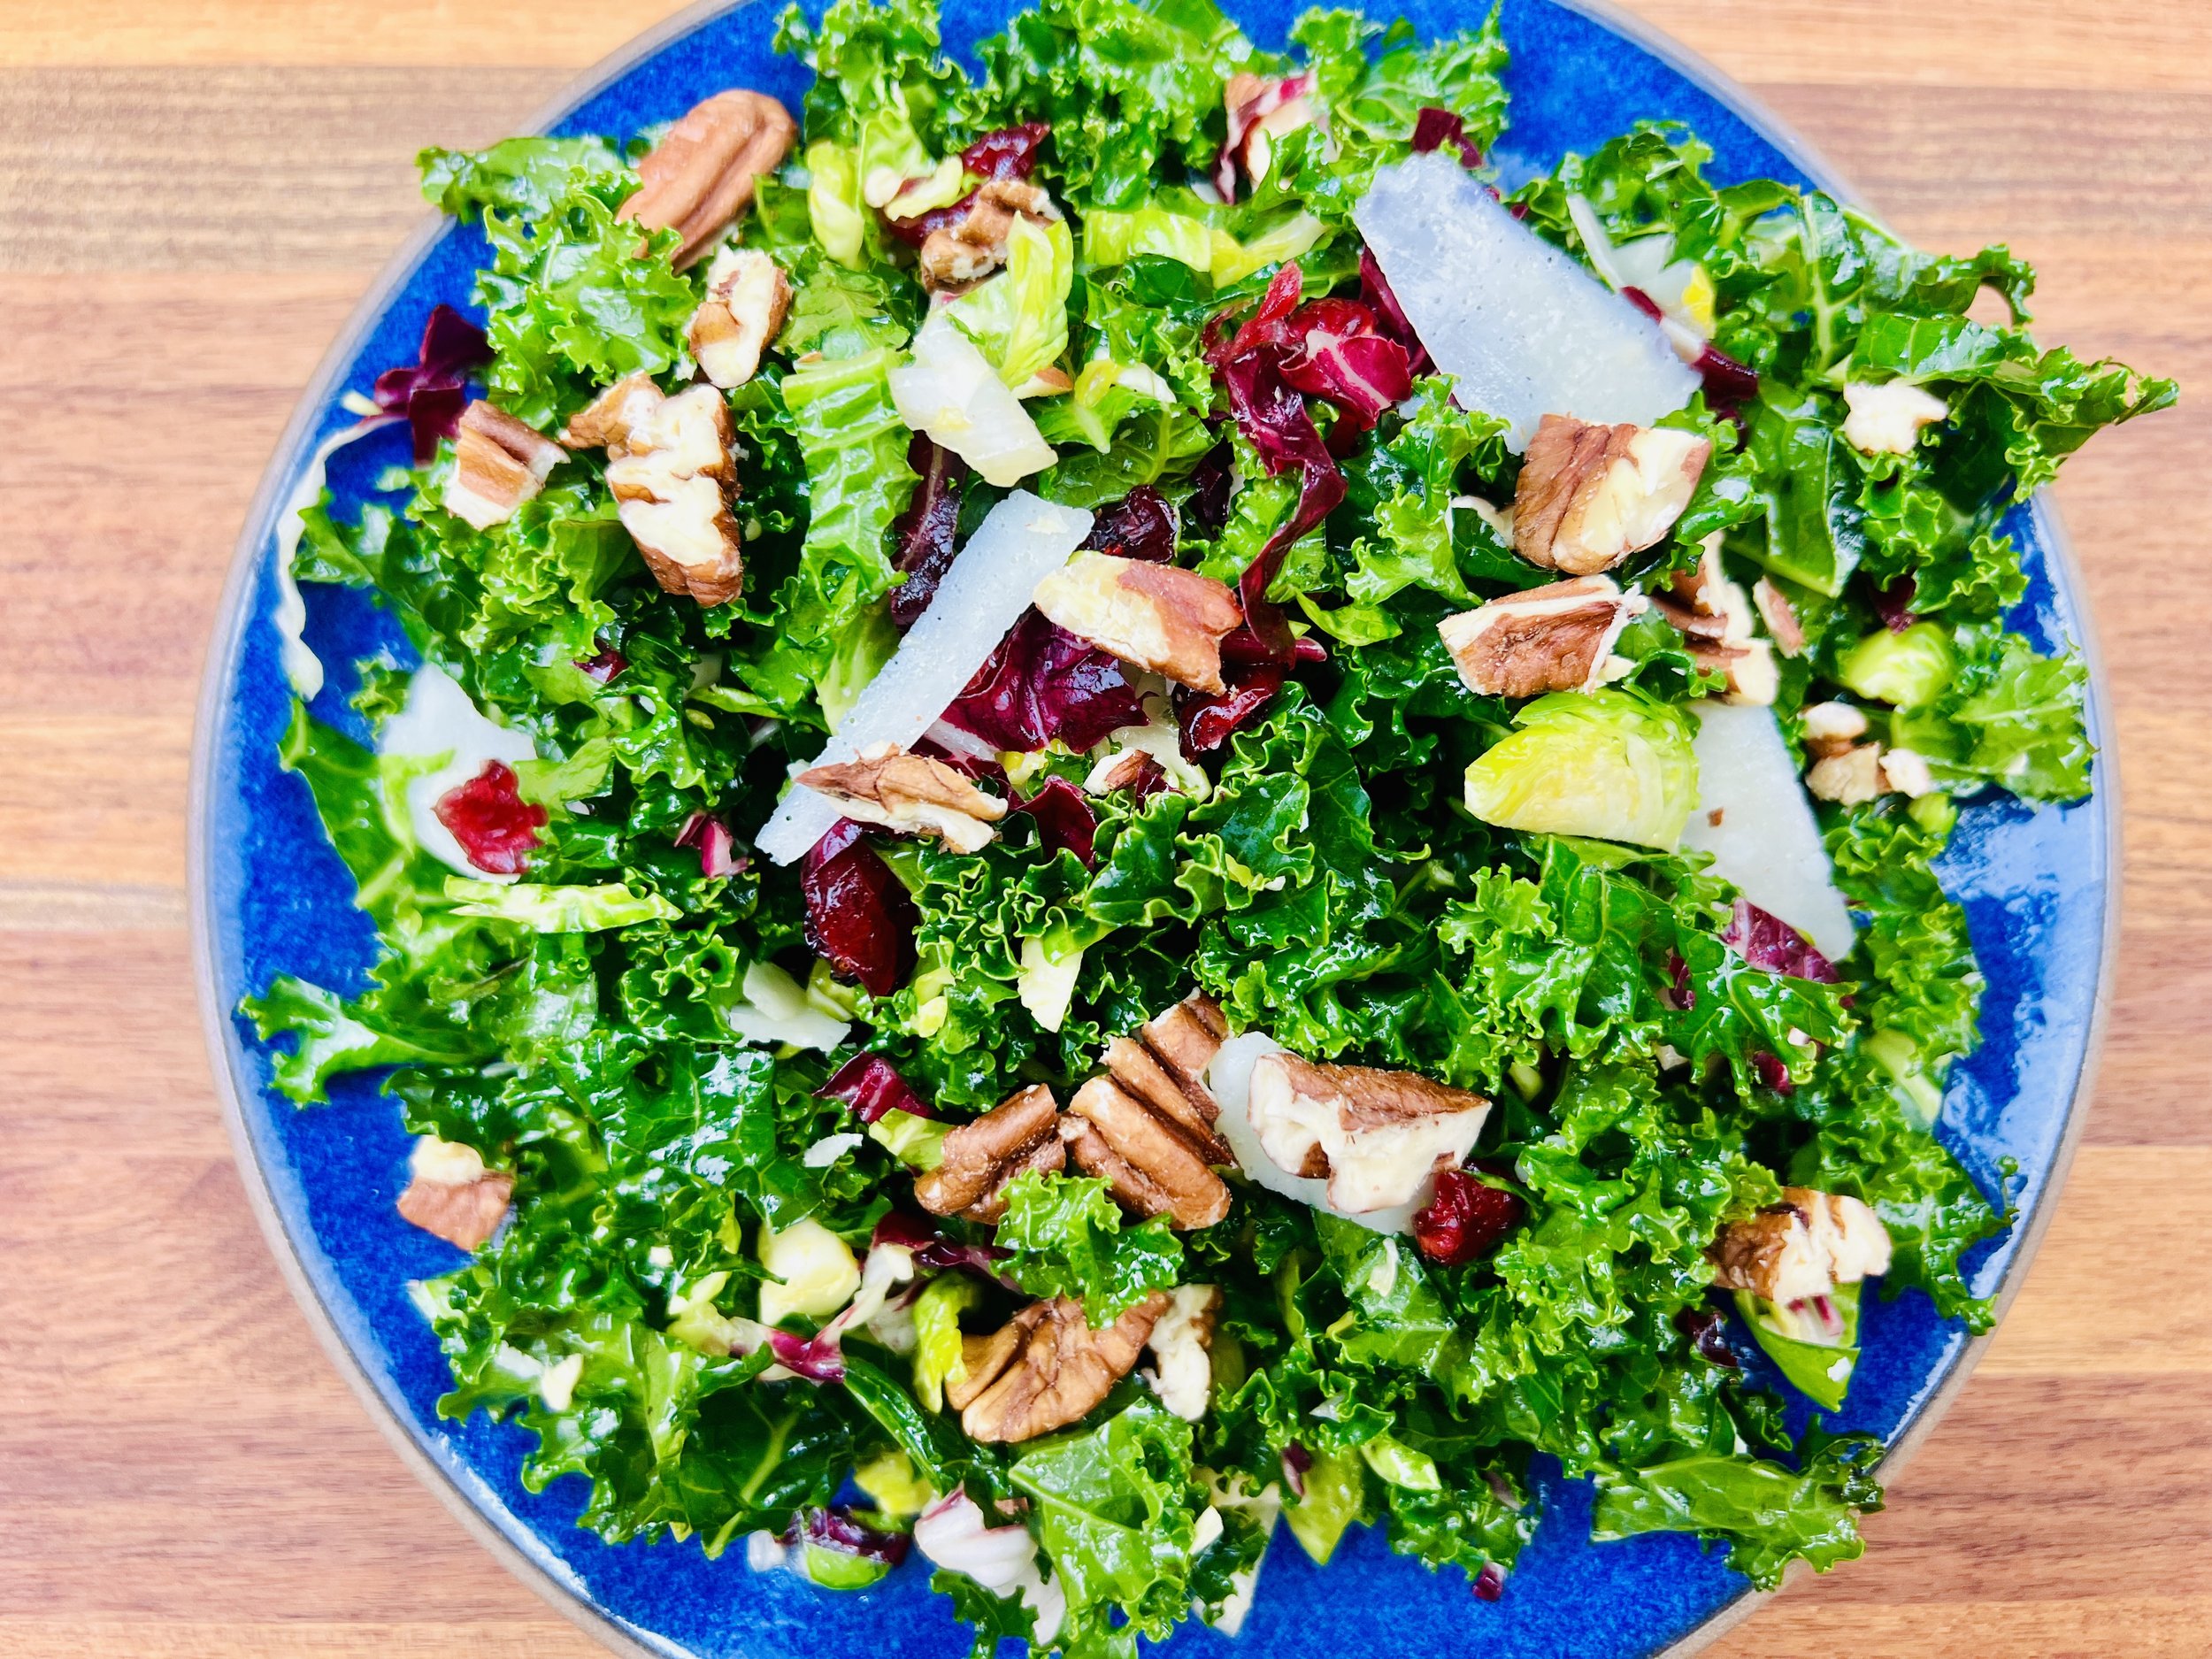
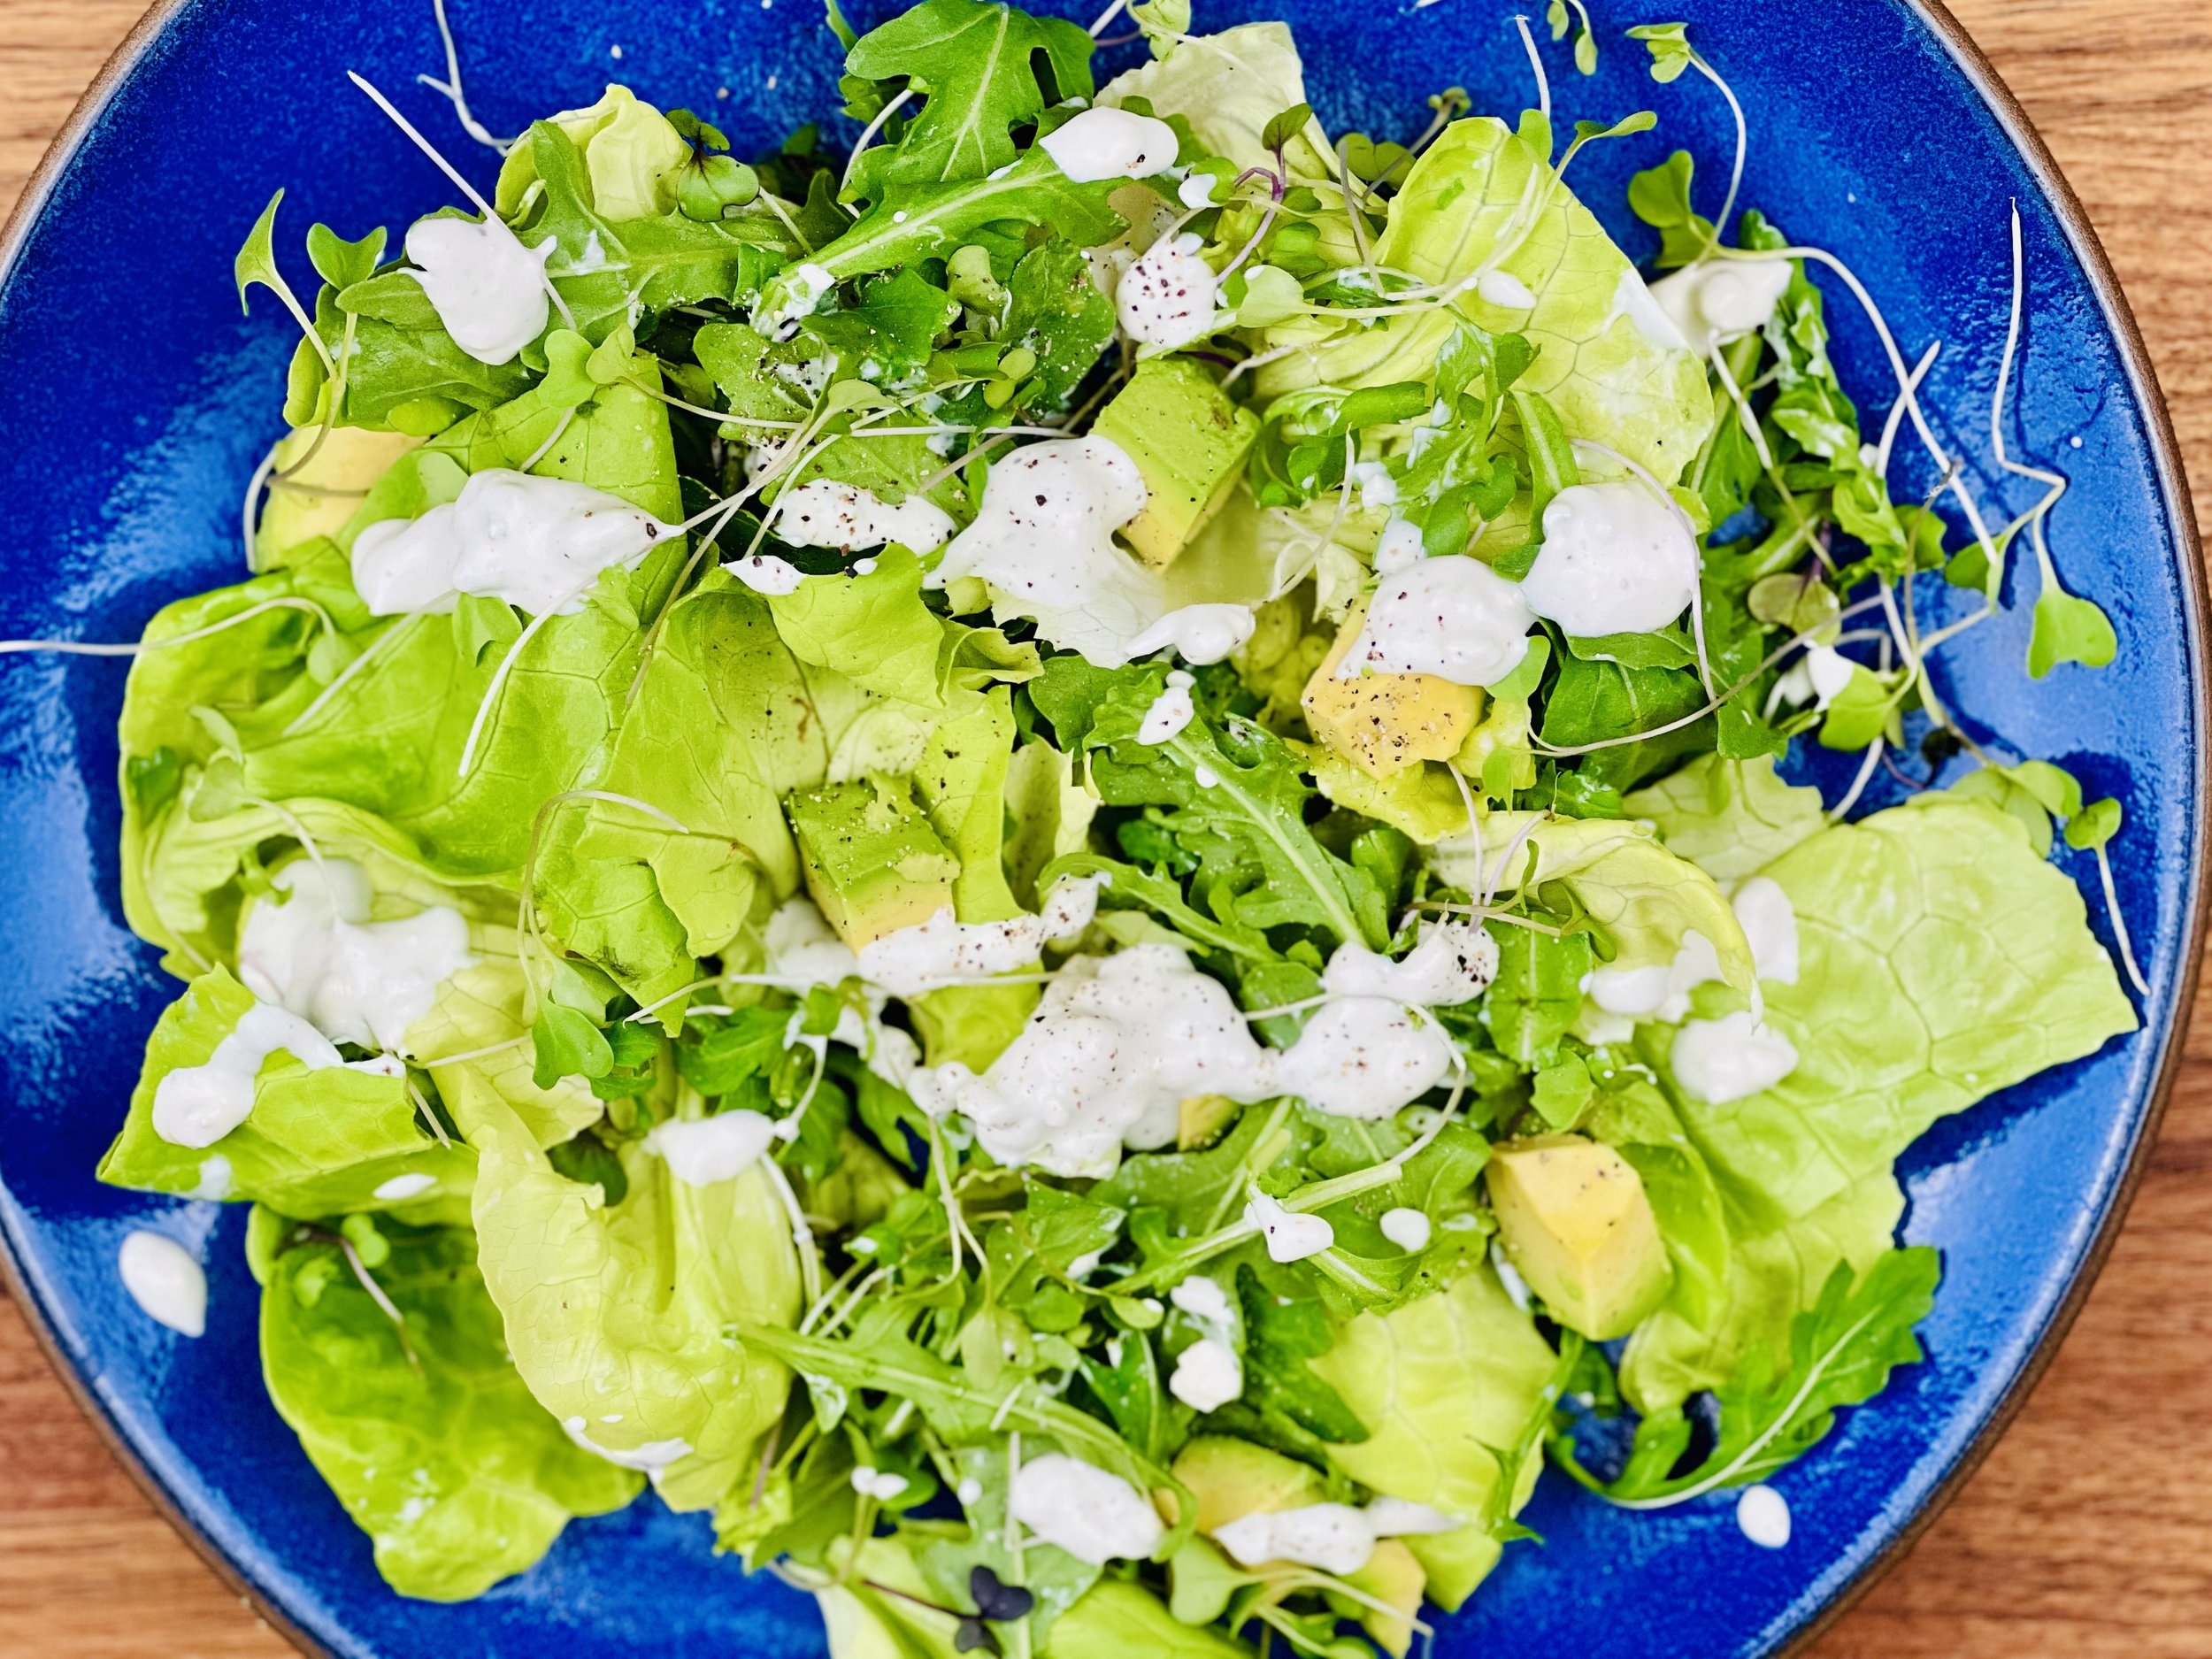
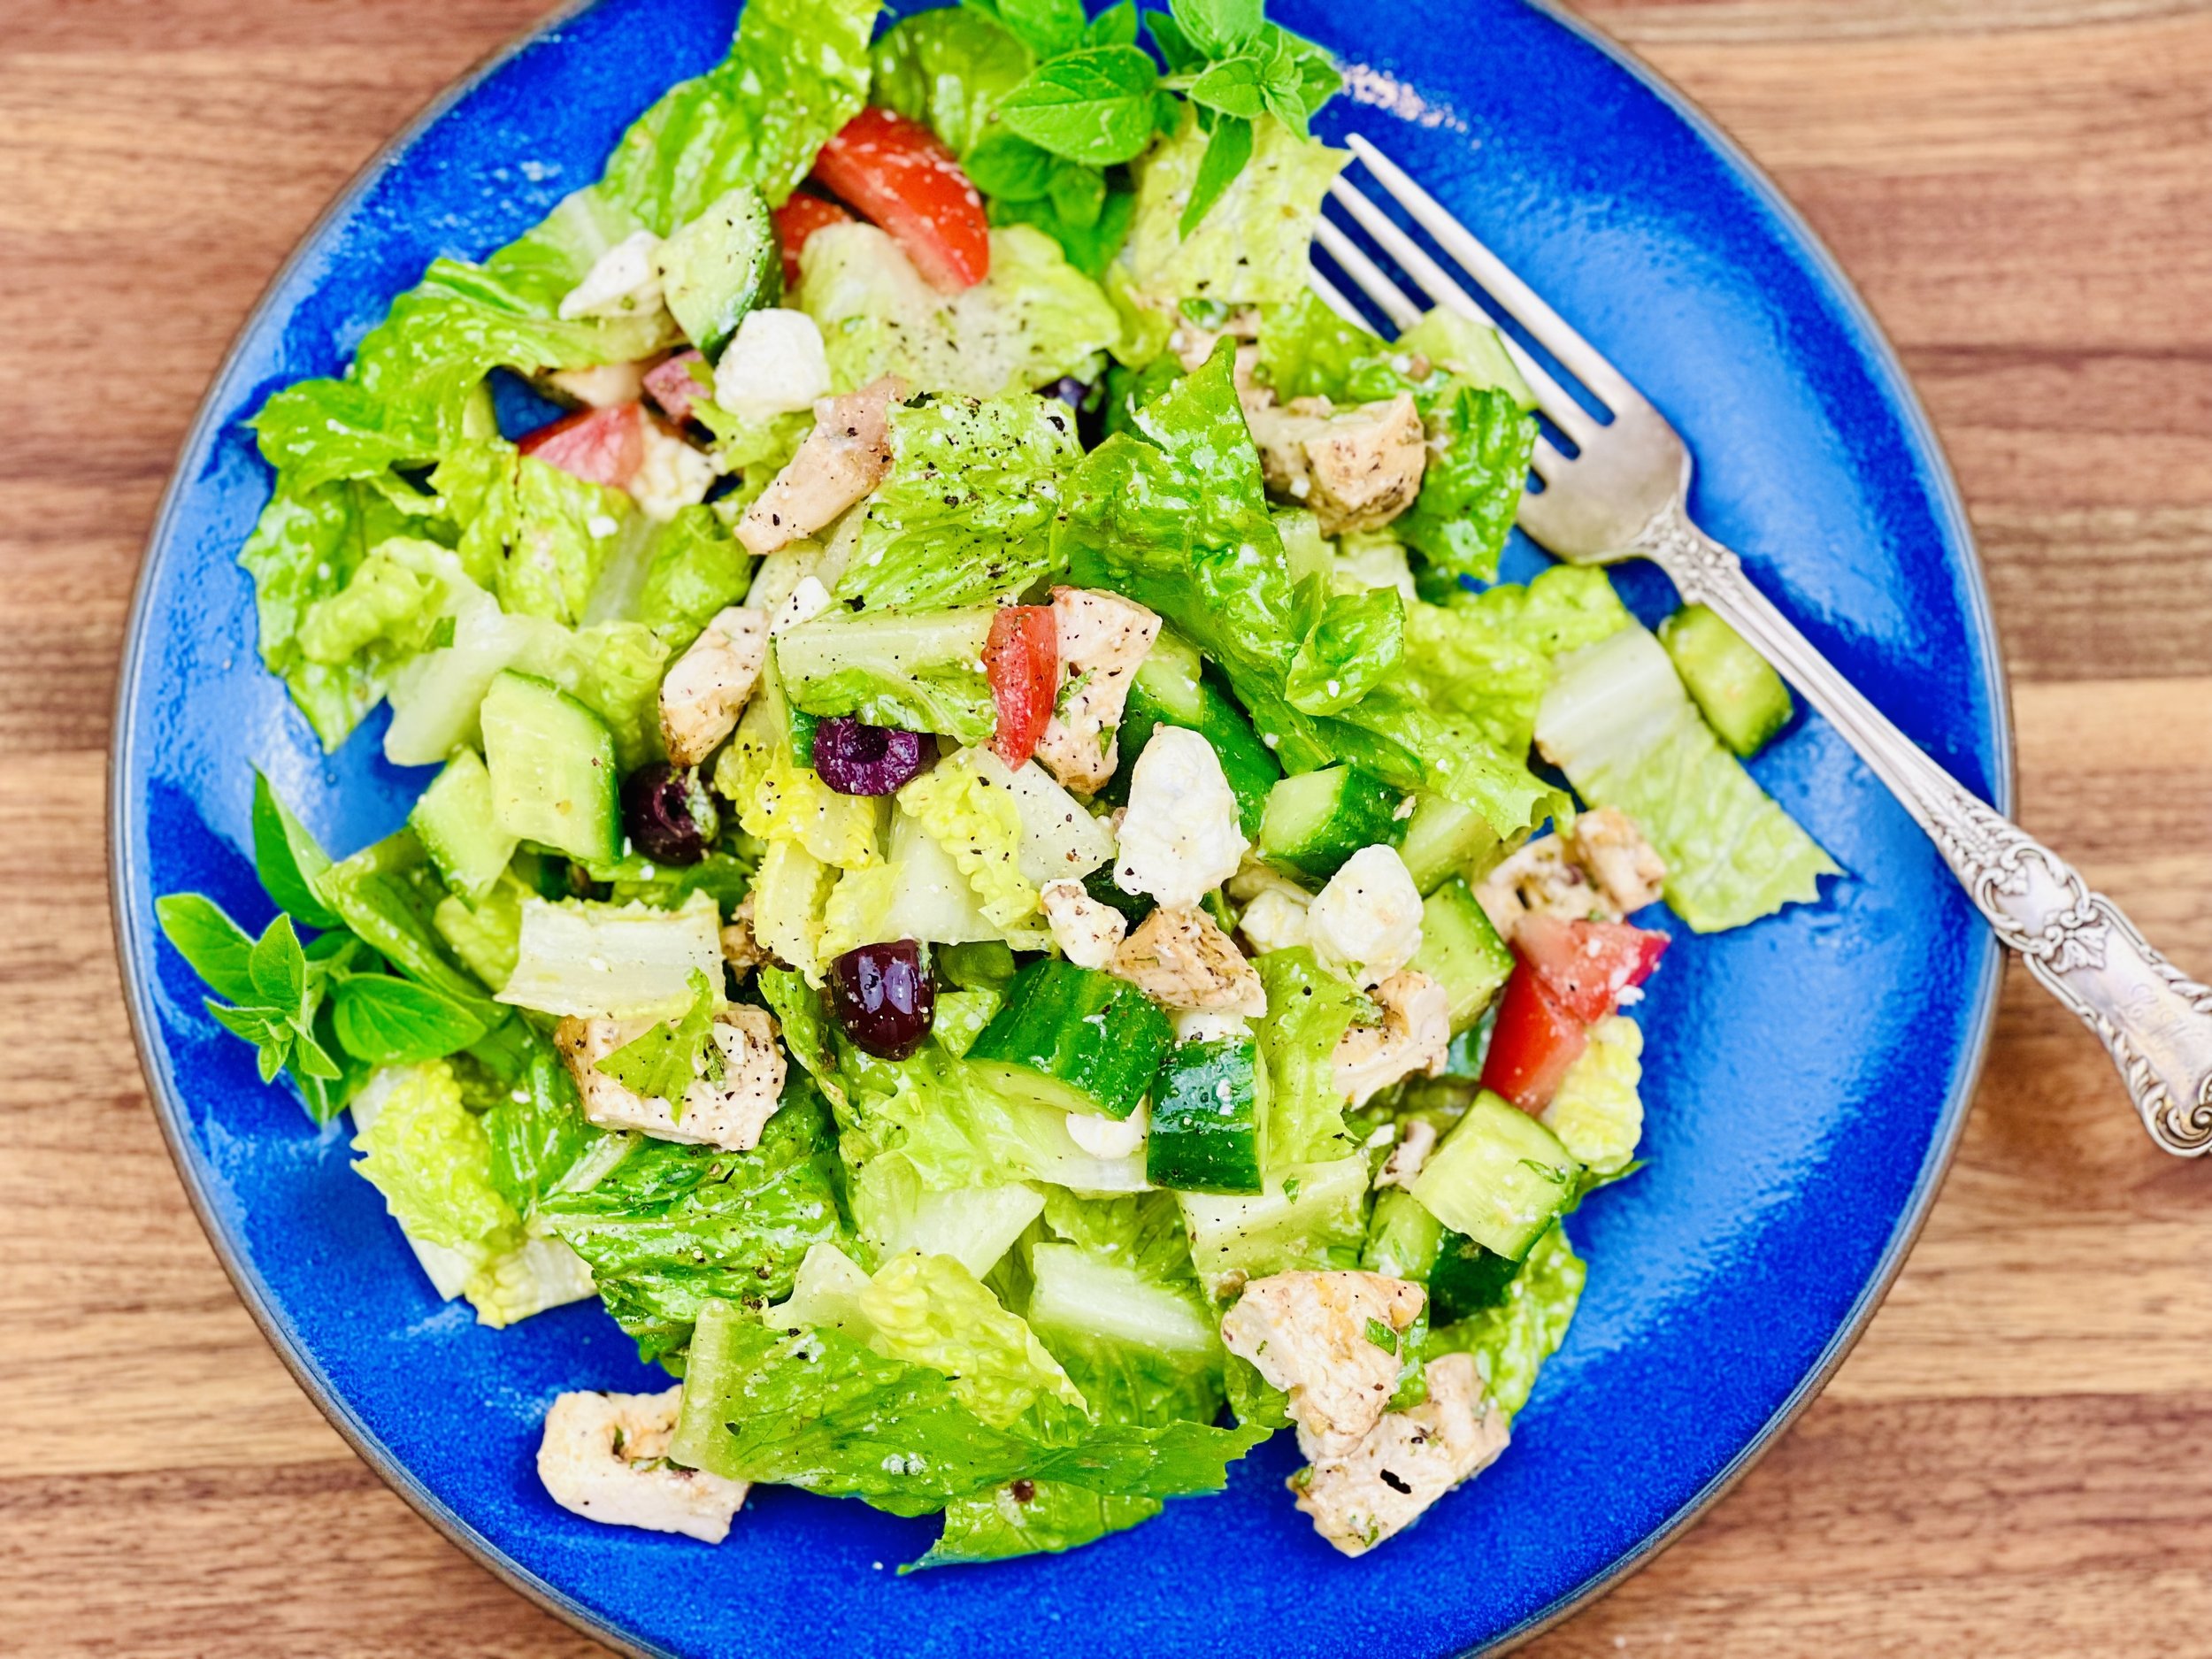
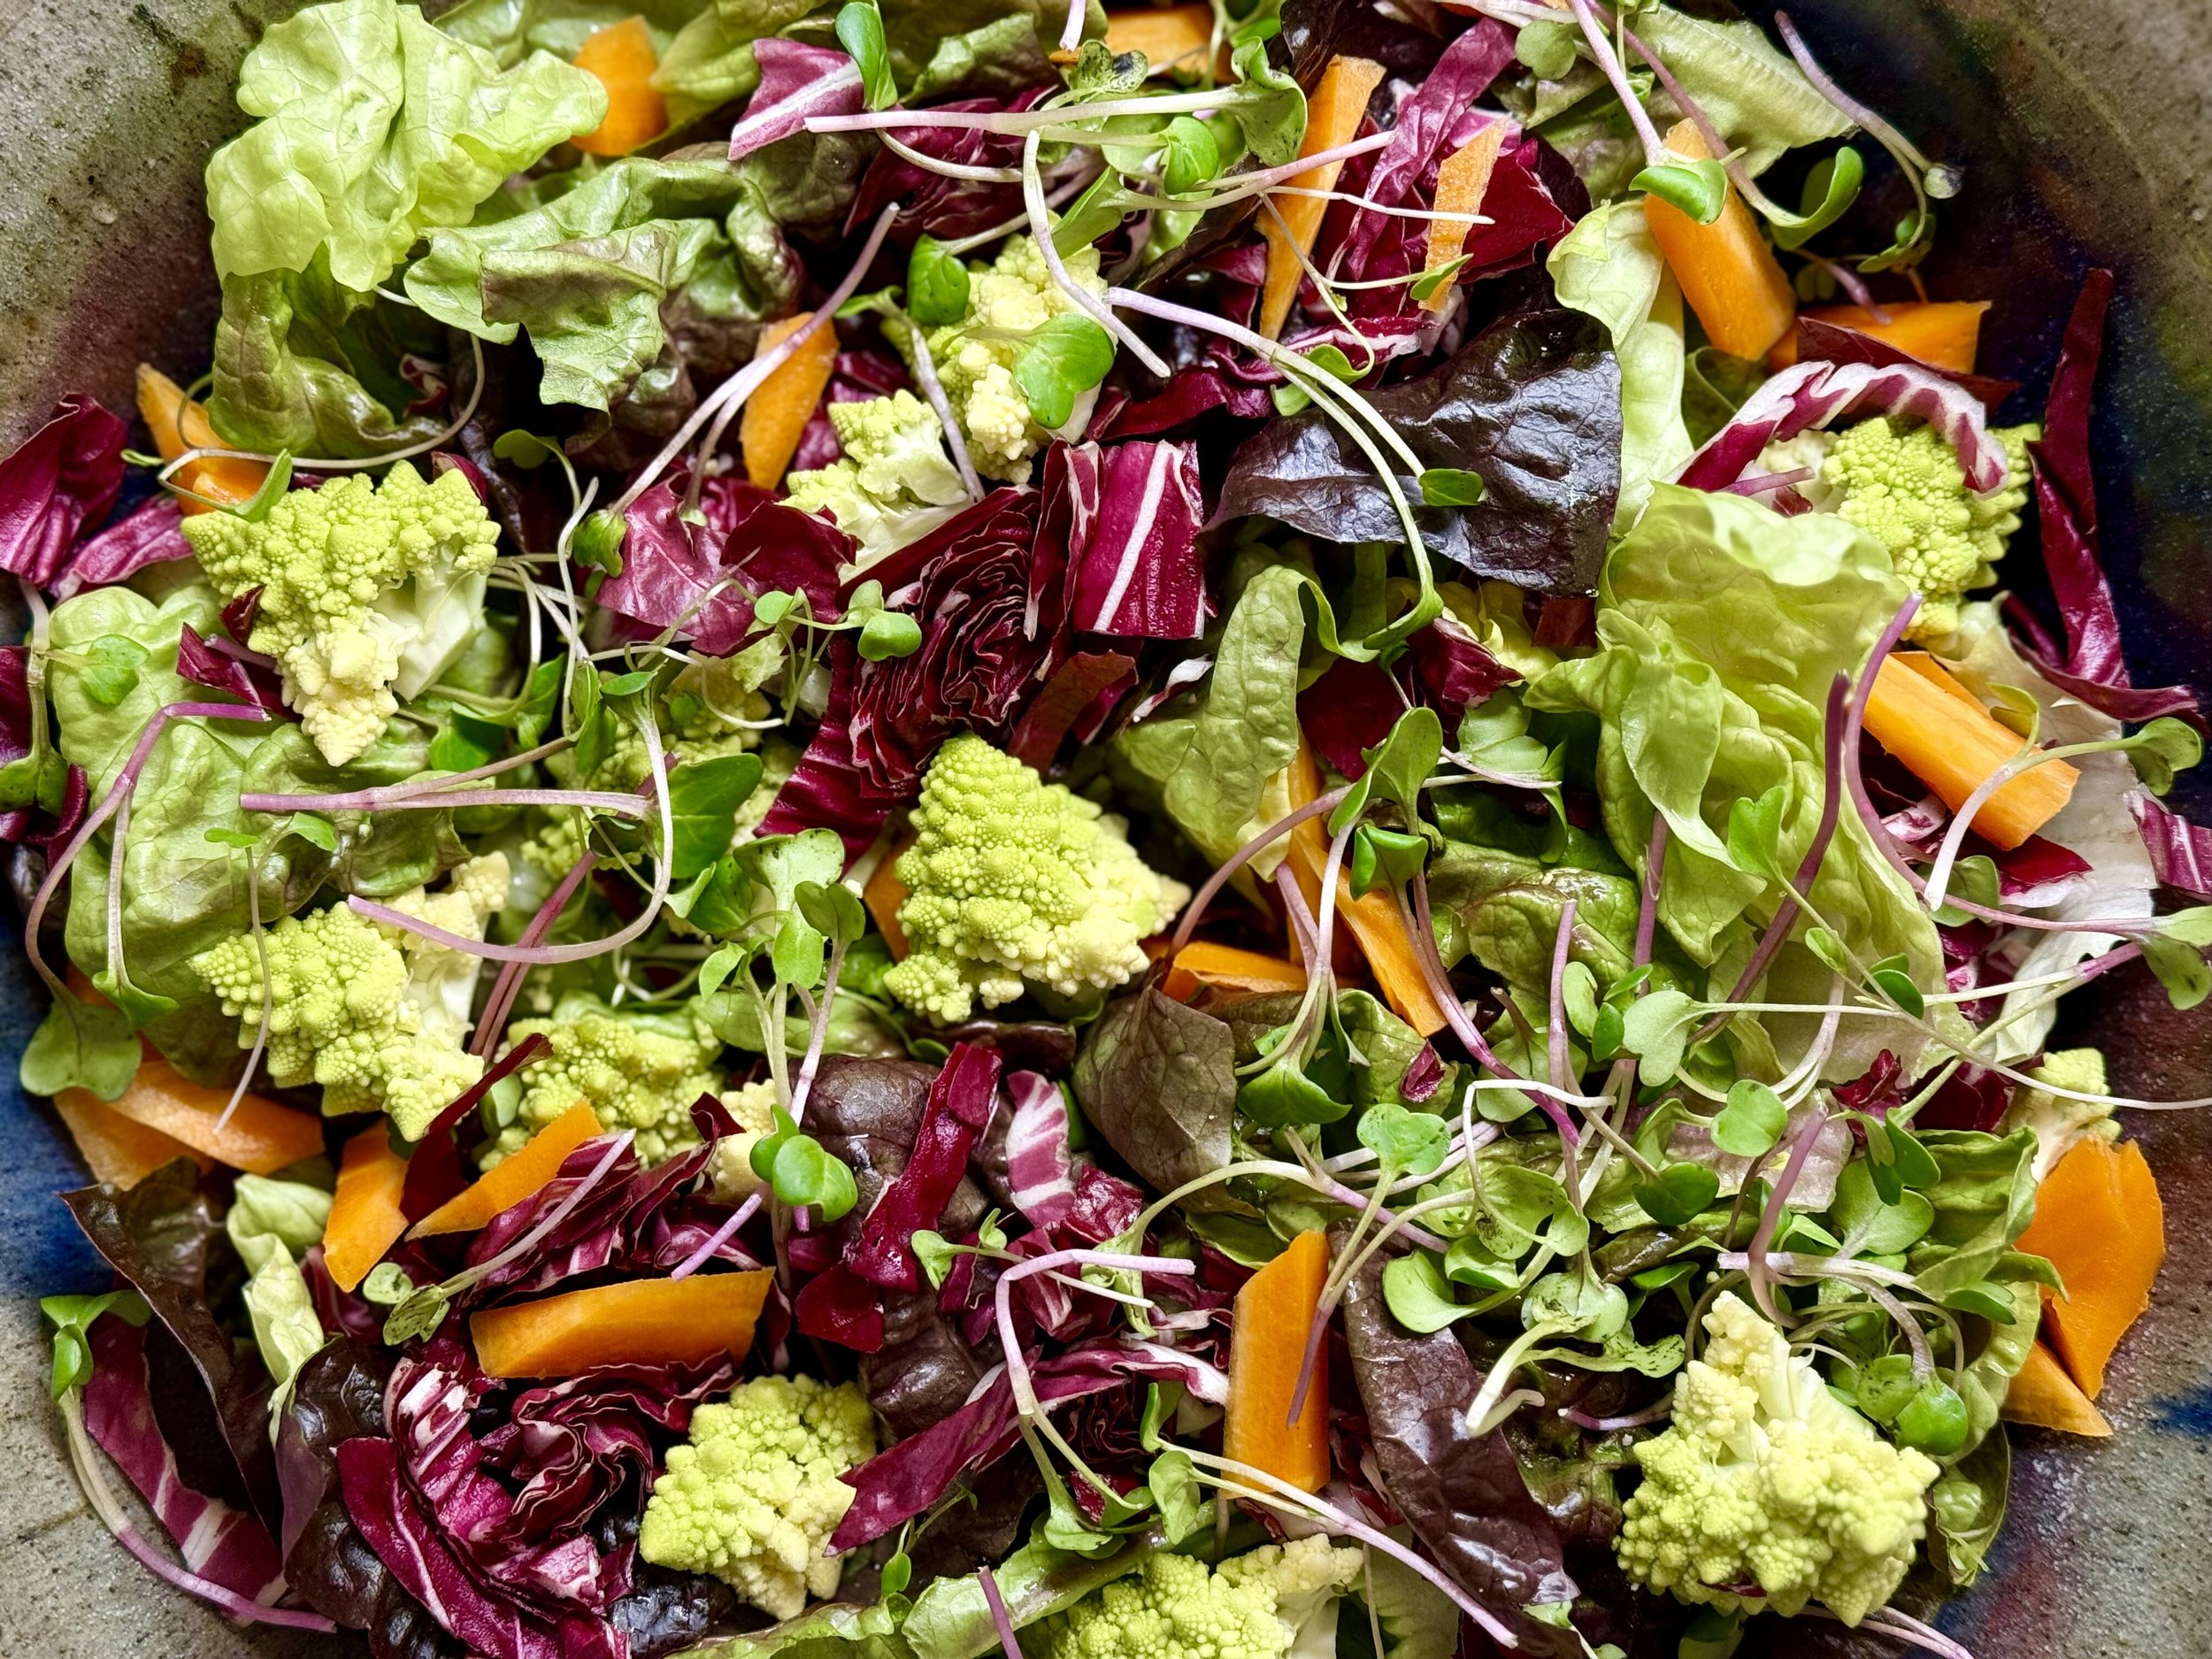
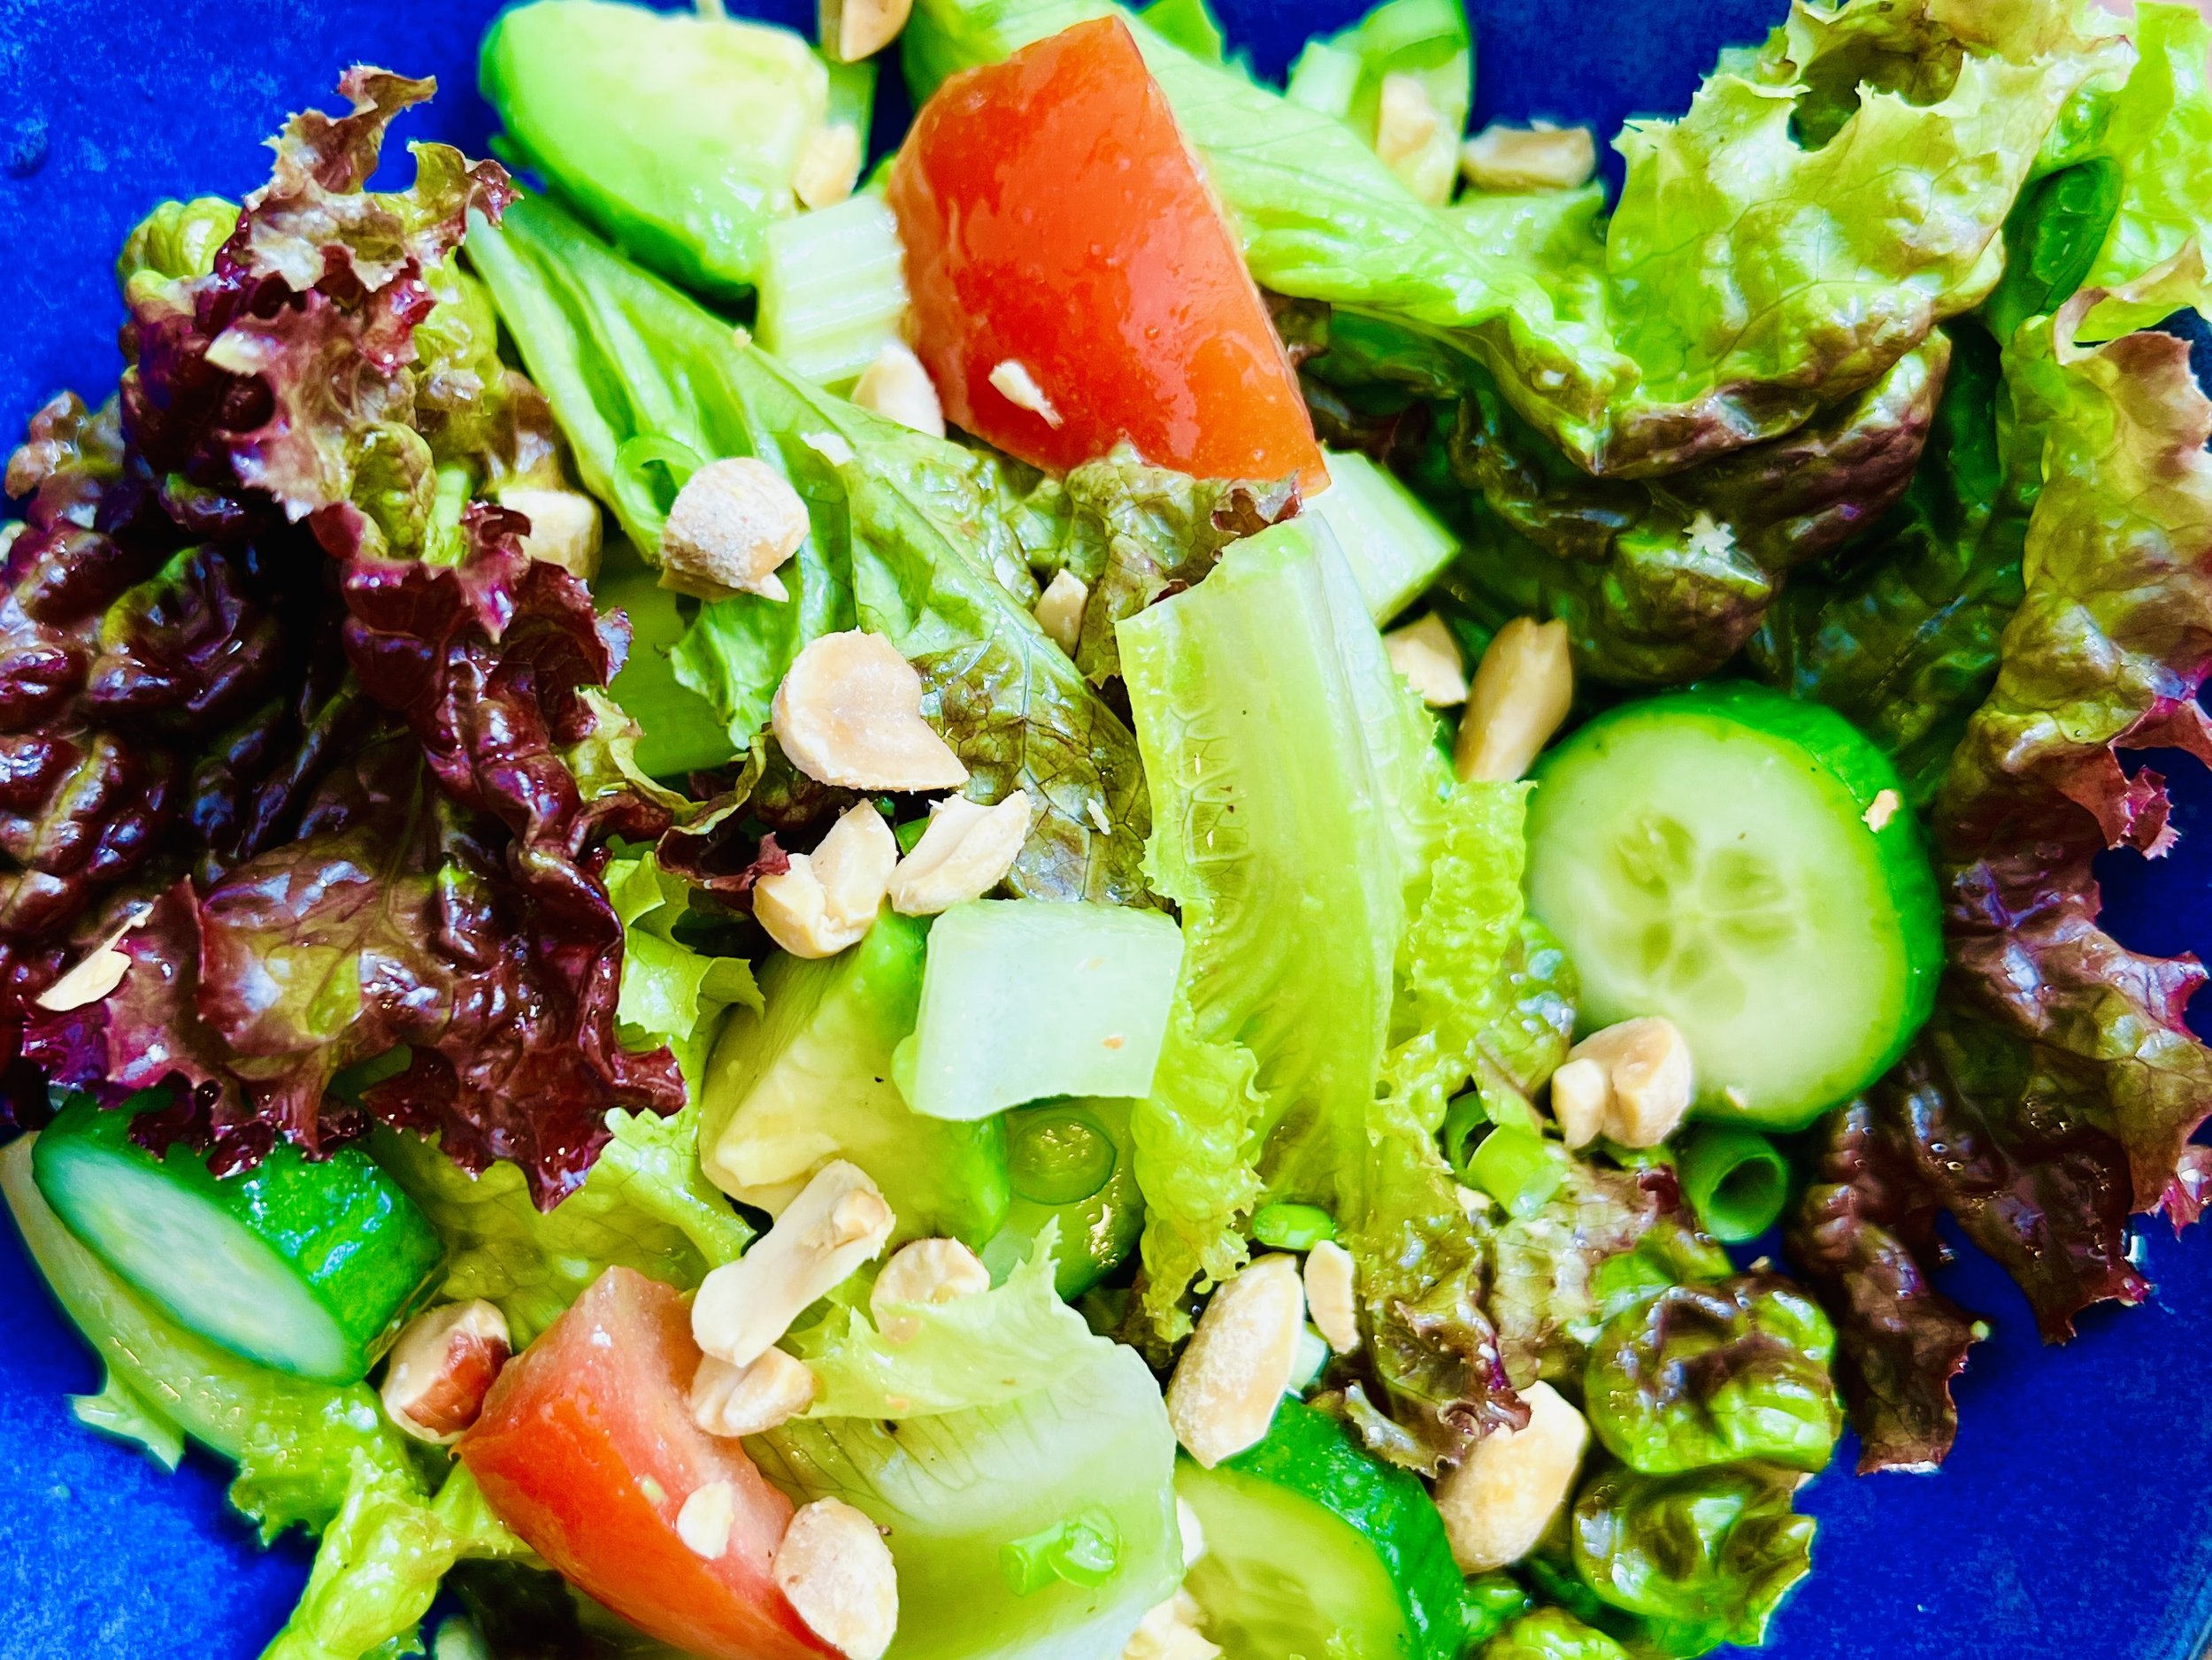
Butter Lettuce Salad with Herby Lemon Feta (Low FODMAP)
15 Minutes prep • Low FODMAP • Gluten-free • Vegetarian • Serves 4
15 Minutes prep • Low FODMAP • Gluten-free • Vegetarian • Serves 4 • Ok to make ahead: Steps 1-3
This crisp salad is just bursting with flavor thanks to the lemony herb dressing. It’s quick to make and can be assembled at the last minute so it’s perfect for the family or for a dinner party. You can change up the greens if you like and add more or less depending on what you have on hand. This salad is a great change of pace from the standard fare so if you looking for a new salad to try, this is it! I hope you enjoy it as much as I do.
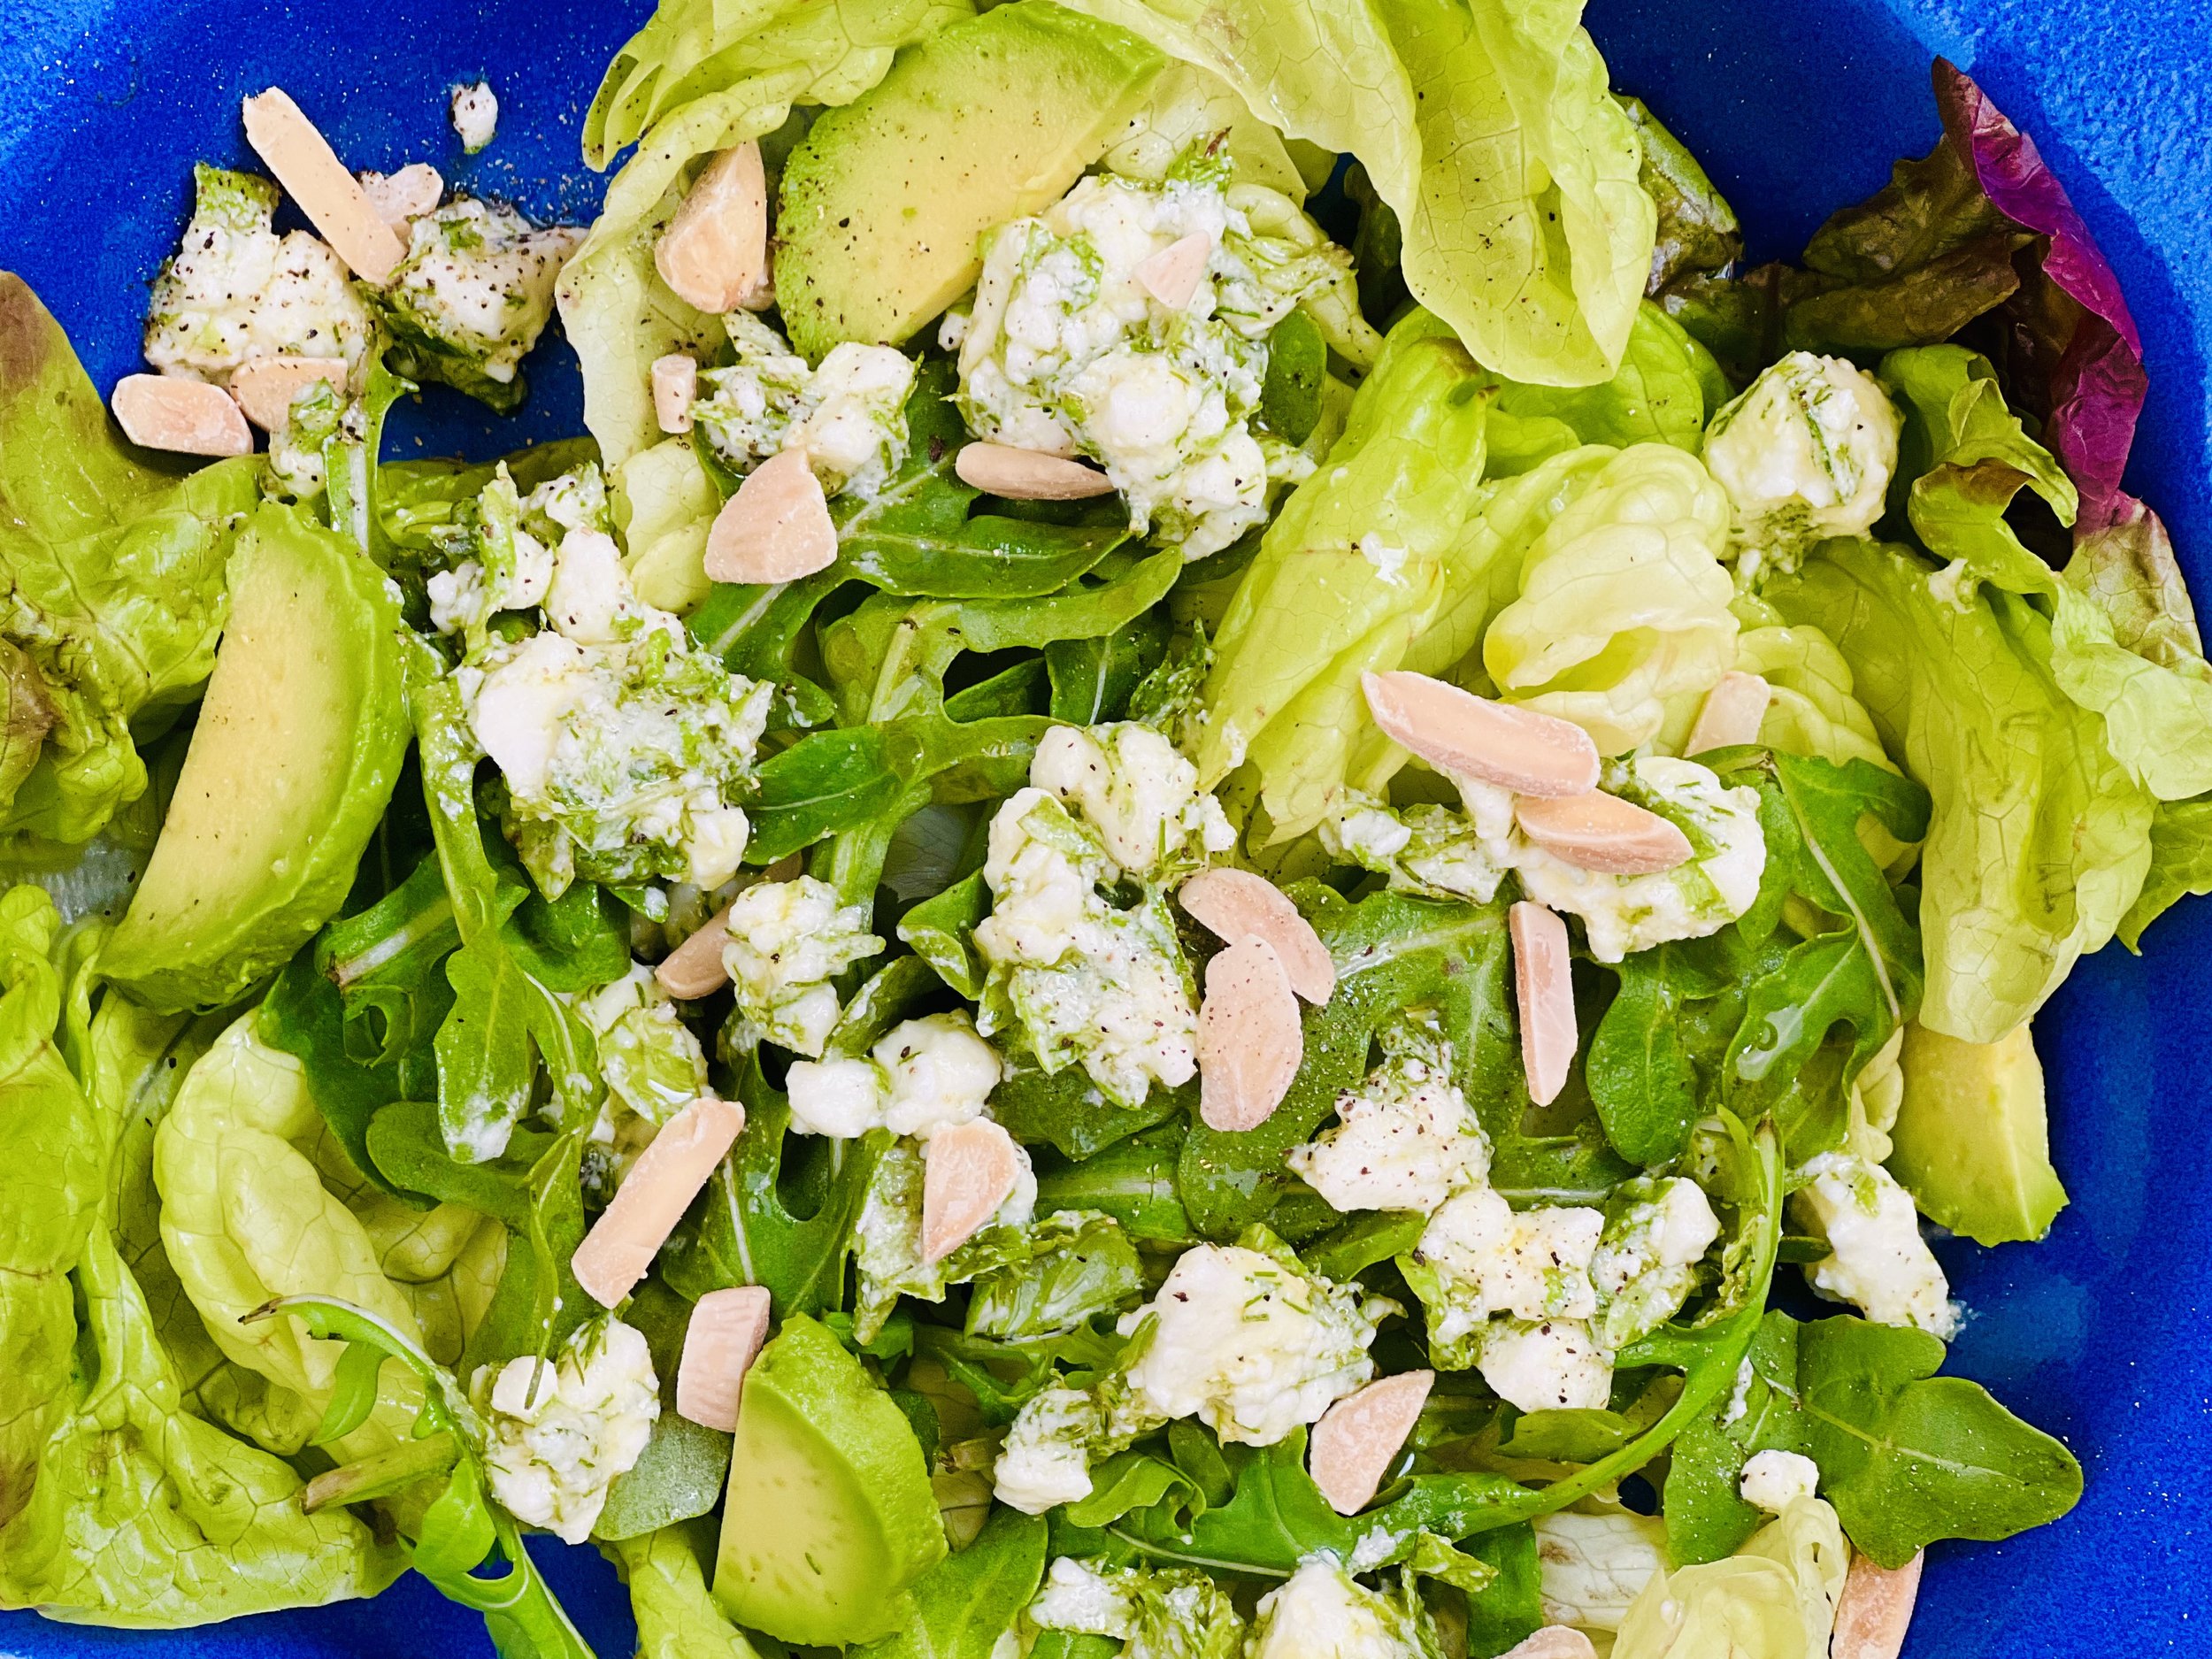
Ingredients: Salad
4 cups butter lettuce, washed and dried
1 cup arugula (optional)
4 Persian cucumbers (optional)
1/2 avocado, diced
1/3 cup slivered toasted almonds (or sliced or chopped raw almonds are ok too)
Ingredients: Dressing
5 ounces crumbled feta cheese
1/4 cup extra virgin olive oil
1 tablespoon lemon juice
1 tablespoon fresh dill, chopped
1/2 cup fresh basil, chopped
1/4 teaspoon black pepper
Pinch red pepper flakes (for serving, optional); and here’s a nifty red pepper flake grinder too
Directions
(1) Prepare: Wash and dry the lettuce. Slice the cucumbers (if using) and chop the almonds.
(2) Build the salad: Put the lettuce and arugula (if using) in a large salad bowl. Add the cucumbers and the avocado.
(3) Make the dressing: Put the crumbled feta cheese in a bowl. Add the olive oil, lemon juice, and dill. Toss gently. Season with pepper, and chili flakes (if using). Toss to combine. Add
(4) Finish: Pour the dressing over the lettuce and gently toss the salad with the dressing. Sprinkle with the slivered almonds.
(5) Plate and serve: This salad is great on its own or as a side to seafood (especially), chicken, or beef.
Eat and enjoy every bite because you can!
Have a question you’d like to have answered? Email me at hello@ibsgamechanger.com
Link note: This post may contain affiliate links for you to easily purchase items that are linked. I may earn a small commission from qualifying purchases but none of this costs you a thing so feel free to use the links! In addition, for some items, I have provided a special discount code for IBS Game Changers so be sure to use the code when you purchase an item to get the discount that has been arranged just for you.
More Deliciously Low FODMAP™ salad recipes
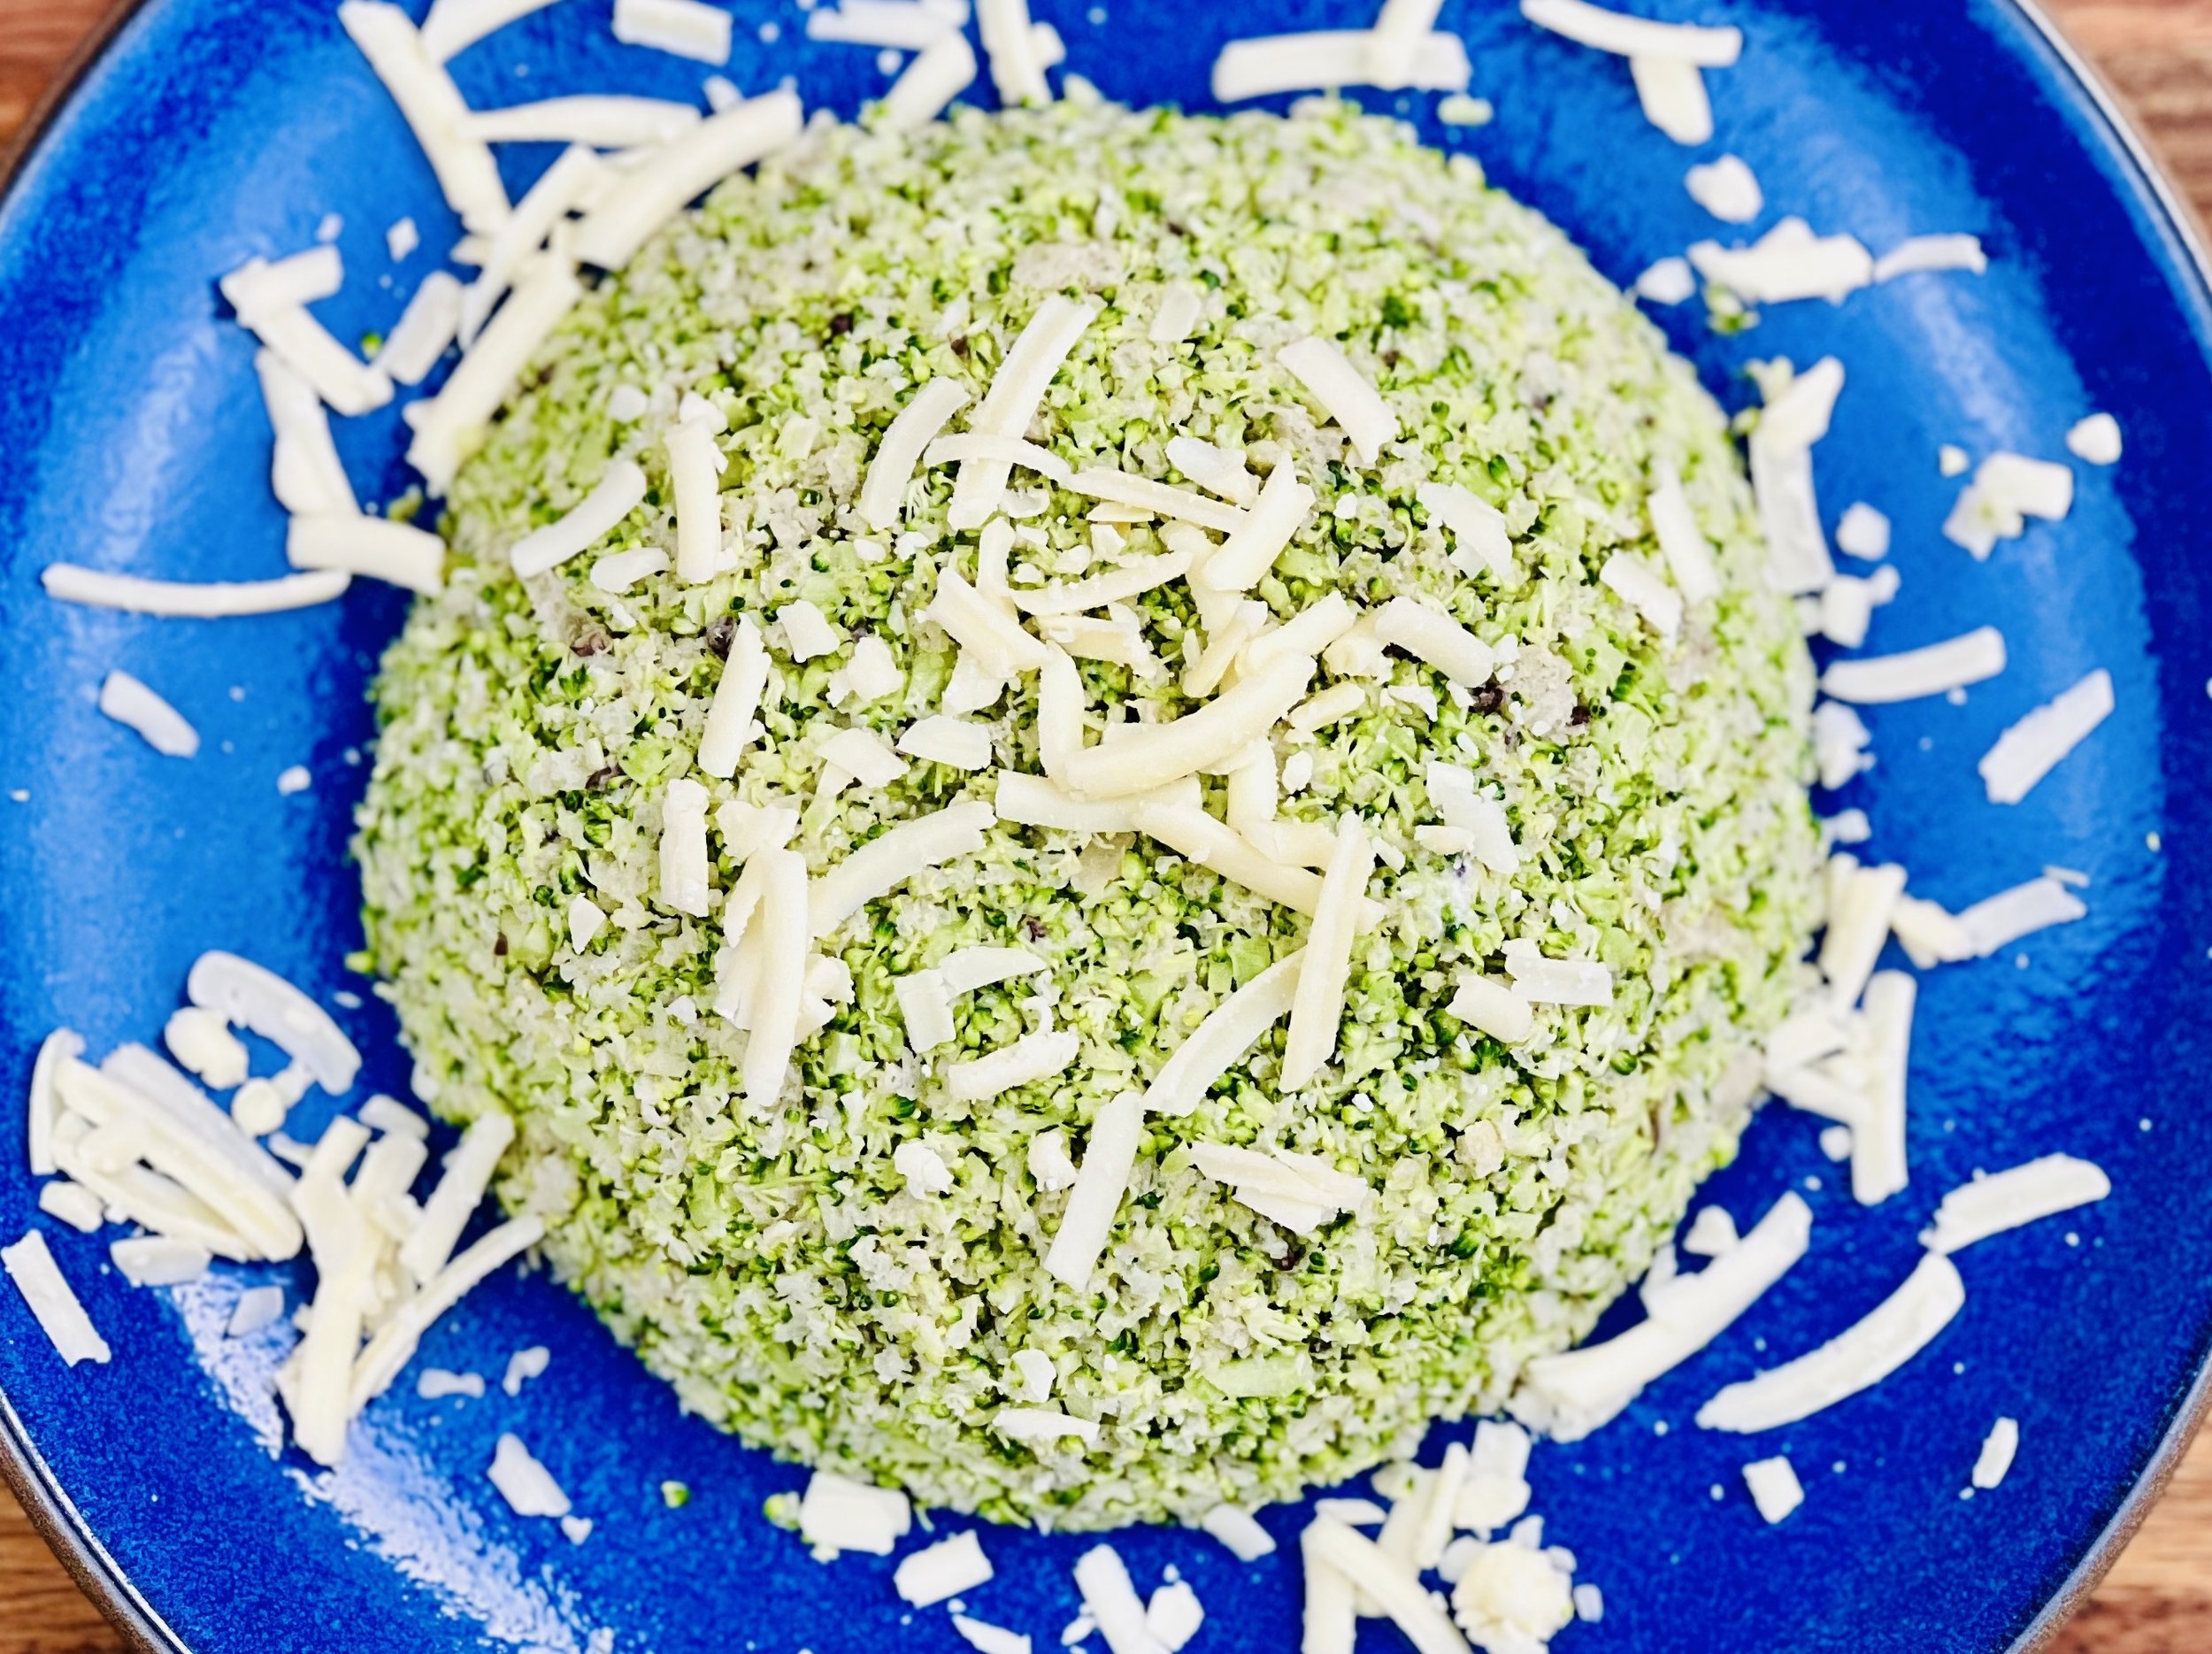
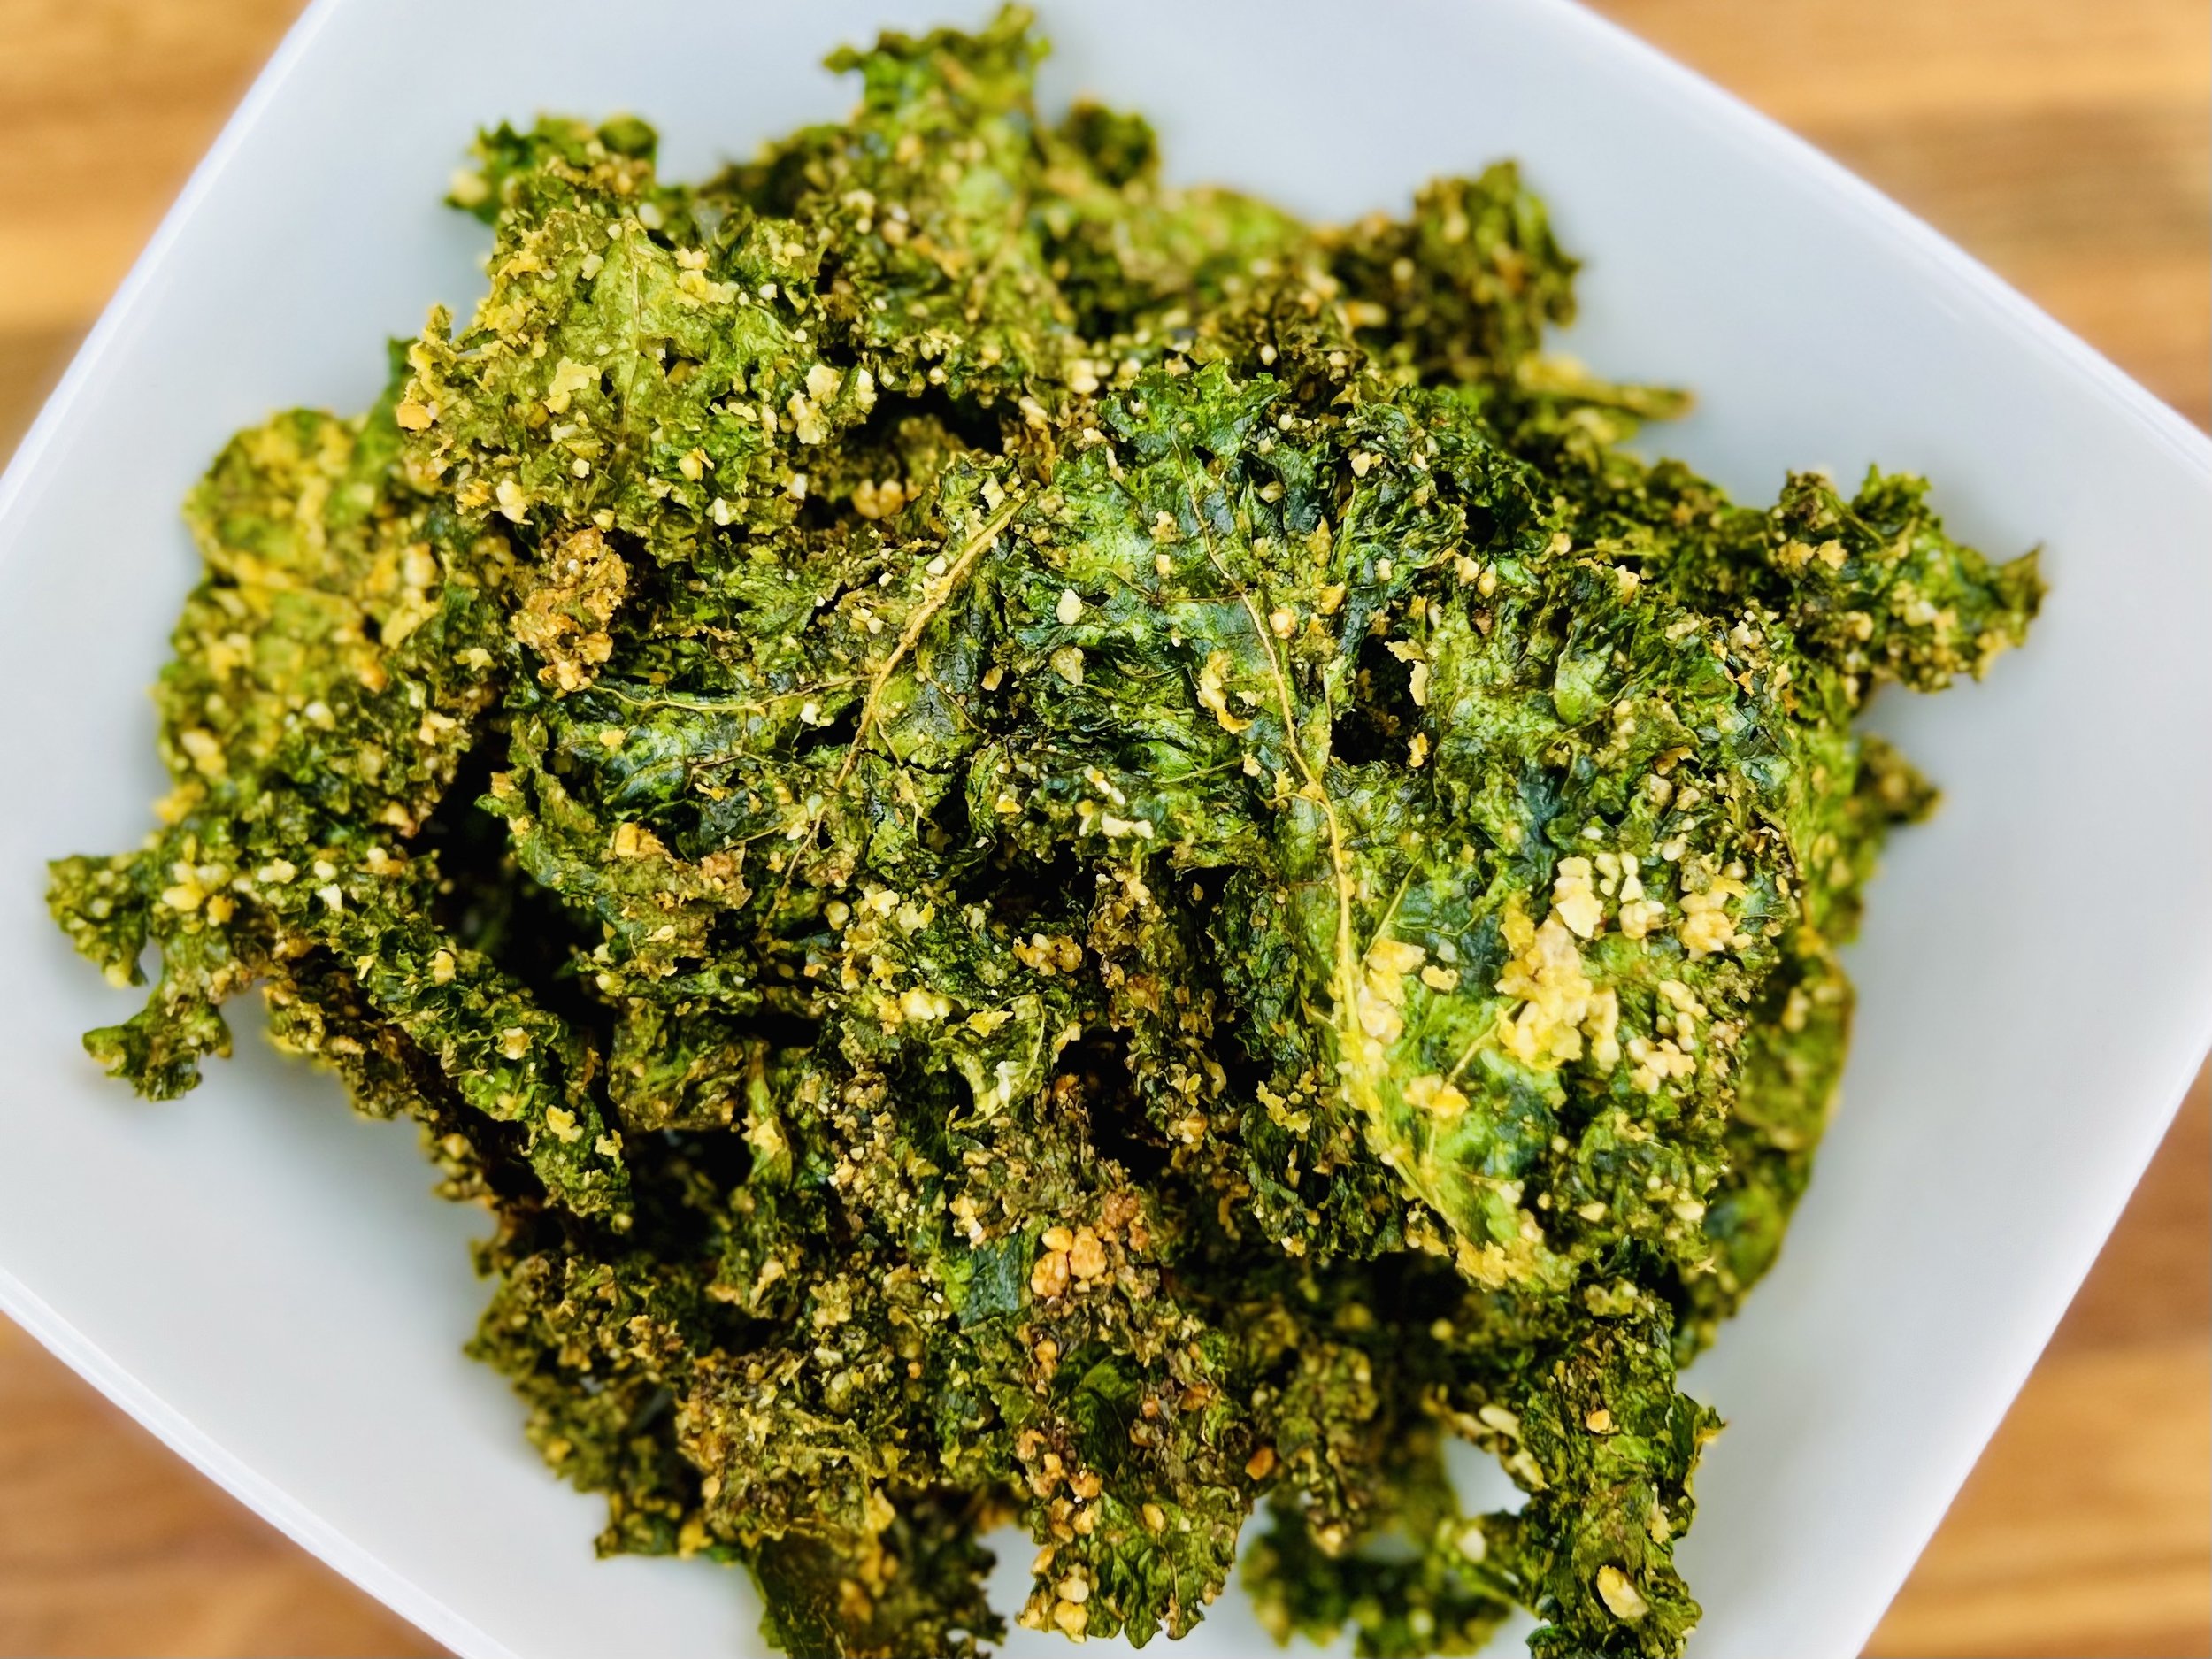
Crispy “Cheesy” Keto Kale Chips (Low FODMAP)
10 Minutes prep • 20 Minutes cook • Low FODMAP • Gluten-free • Lactose-free • Vegan • Serves 5
10 Minutes prep • 20 Minutes cook • Low FODMAP • Gluten-free • Lactose-free • Vegan • Serves 5 • Ok to make ahead: Steps 1-6
I was having lunch at Sauce Whole Foods Cafe in Ashland, Oregon and they served the most delicious kale chips alongside the salad. So, of course, I had to attempt to recreate those kale chips in a low FODMAP version for you! These chips are delicious, crispy, and super flavorful with an almost “cheesy” taste (even though they are 100% dairy free.) This is a great twist on the classic kale chip recipe that I think you will love. These kale chips are not only a superfood (thanks to the kale), but they are also loaded with protein (thanks to the nuts and nutritional yeast used in the coating). They make a great appetizer, side, or even sprinkled on top of your favorite salad. I was truly tempted to eat them all they were so delicious.
Ingredients
One bunch kale (about 10 ounces of leaves after stripping the stalks)
2 tablespoons garlic-infused olive oil
1/4 cup roasted and salted macadamia nuts
2 tablespoons raw sunflower seeds
5 tablespoons nutritional yeast
1/4 teaspoon Kosher salt
1/4 teaspoon black pepper
1 generous pinch of cayenne pepper (optional but adds a nice kick)
Directions
(1) Prepare: Preheat the oven to 300 degrees F. Cut the leaves from the stems of the kale and discard the stems. Wash and spin dry the leaves then cut into bite-size pieces.
(2) Massage kale: Put kale leaves in a large mixing bowl and drizzle 2 tablespoons of olive oil over them. Use your hands to massage the kale to soften it up and coat all the leaves with the oil. Set aside.
(3) Prepare the “cheesy blend”: In your blender (or mini food processor) combine the macadamia nuts, sunflower seeds, nutritional yeast, salt, pepper, and cayenne pepper. Blend/pulse for about 30 seconds until it turns into a fine meal. Scrape down the sides of the bowl if needed and pulse again to break down all the nuts.
(4) Combine: Sprinkle the “cheesy blend” mixture on the kale and toss with your hands to distribute as evenly as possible, working it into the leaves until they are thoroughly coated.
(5) Prepare to cook the kale: Divide the kale between 2 large rimmed baking sheets and spread it into one layer, making sure the leaves aren’t overlapping so they can get extra crispy. You may need to bake them in two batches depending on the size of your baking sheets.
(6) Cook the kale: Bake for 15 minutes. Remove from the oven and toss/turn the kale to ensure even baking. Bake for 5-10 minutes more, or until chips are crispy and golden brown. Watch carefully to be sure they don’t burn!
(7) Serve: Let chips cool slightly before serving. Serve as an appetizer, a topping for your salad, or a side dish.
Make-ahead note: Once completely cooled, store leftovers in an airtight container for 2-3 days. They will get less crispy after 24 hours, so eat them as close to cooking as possible.
Eat and enjoy every bite because you can!
Recipe note: I use Diamond Crystal Kosher salt in all my recipes because it has a wonderful flat and crisp flake that tastes delicious. It is also the least salty salt available so you can use it more liberally as a seasoning than you can table salt or sea salt. If you use another type of salt, you may need to reduce the amount so it is not over-salted.
Have a question you’d like to have answered? Email me at hello@ibsgamechanger.com
Link note: This post may contain affiliate links for you to easily purchase items that are linked. I may earn a small commission from qualifying purchases but none of this costs you a thing so feel free to use the links! In addition, for some items, I have provided a special discount code for IBS Game Changers so be sure to use the code when you purchase an item to get the discount that has been arranged just for you.
More Deliciously Low FODMAP™ vegetarian recipes
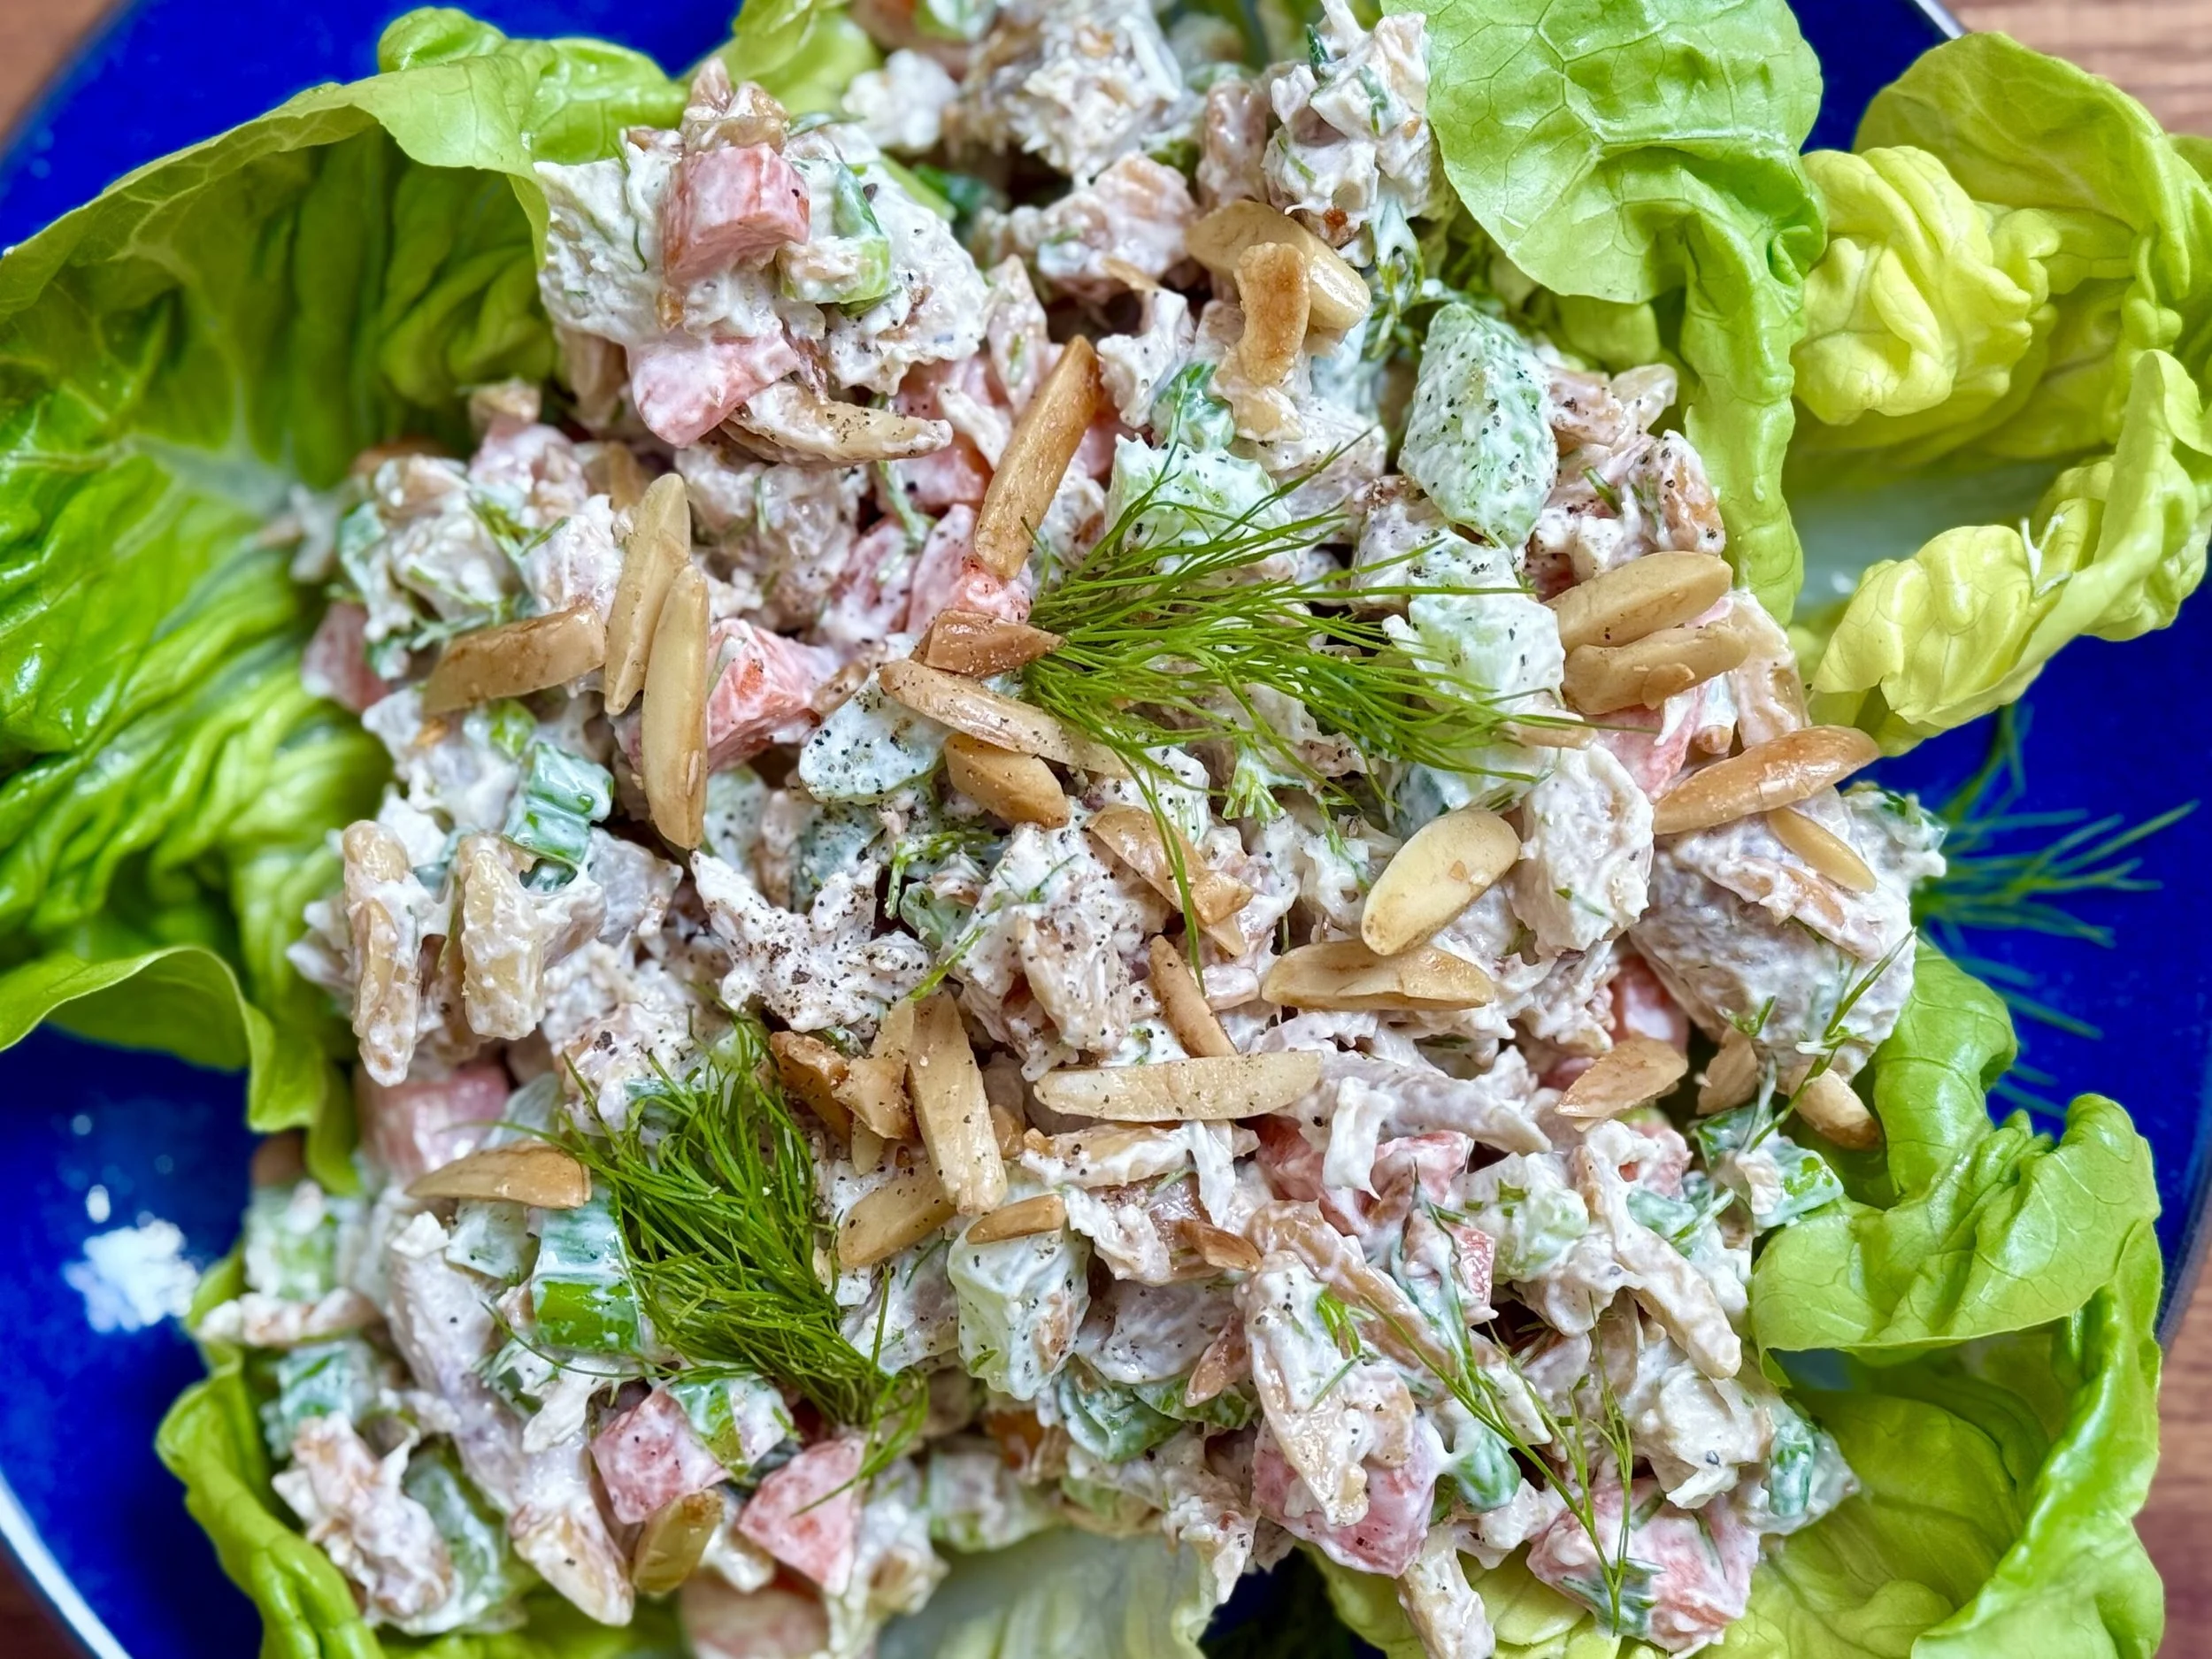
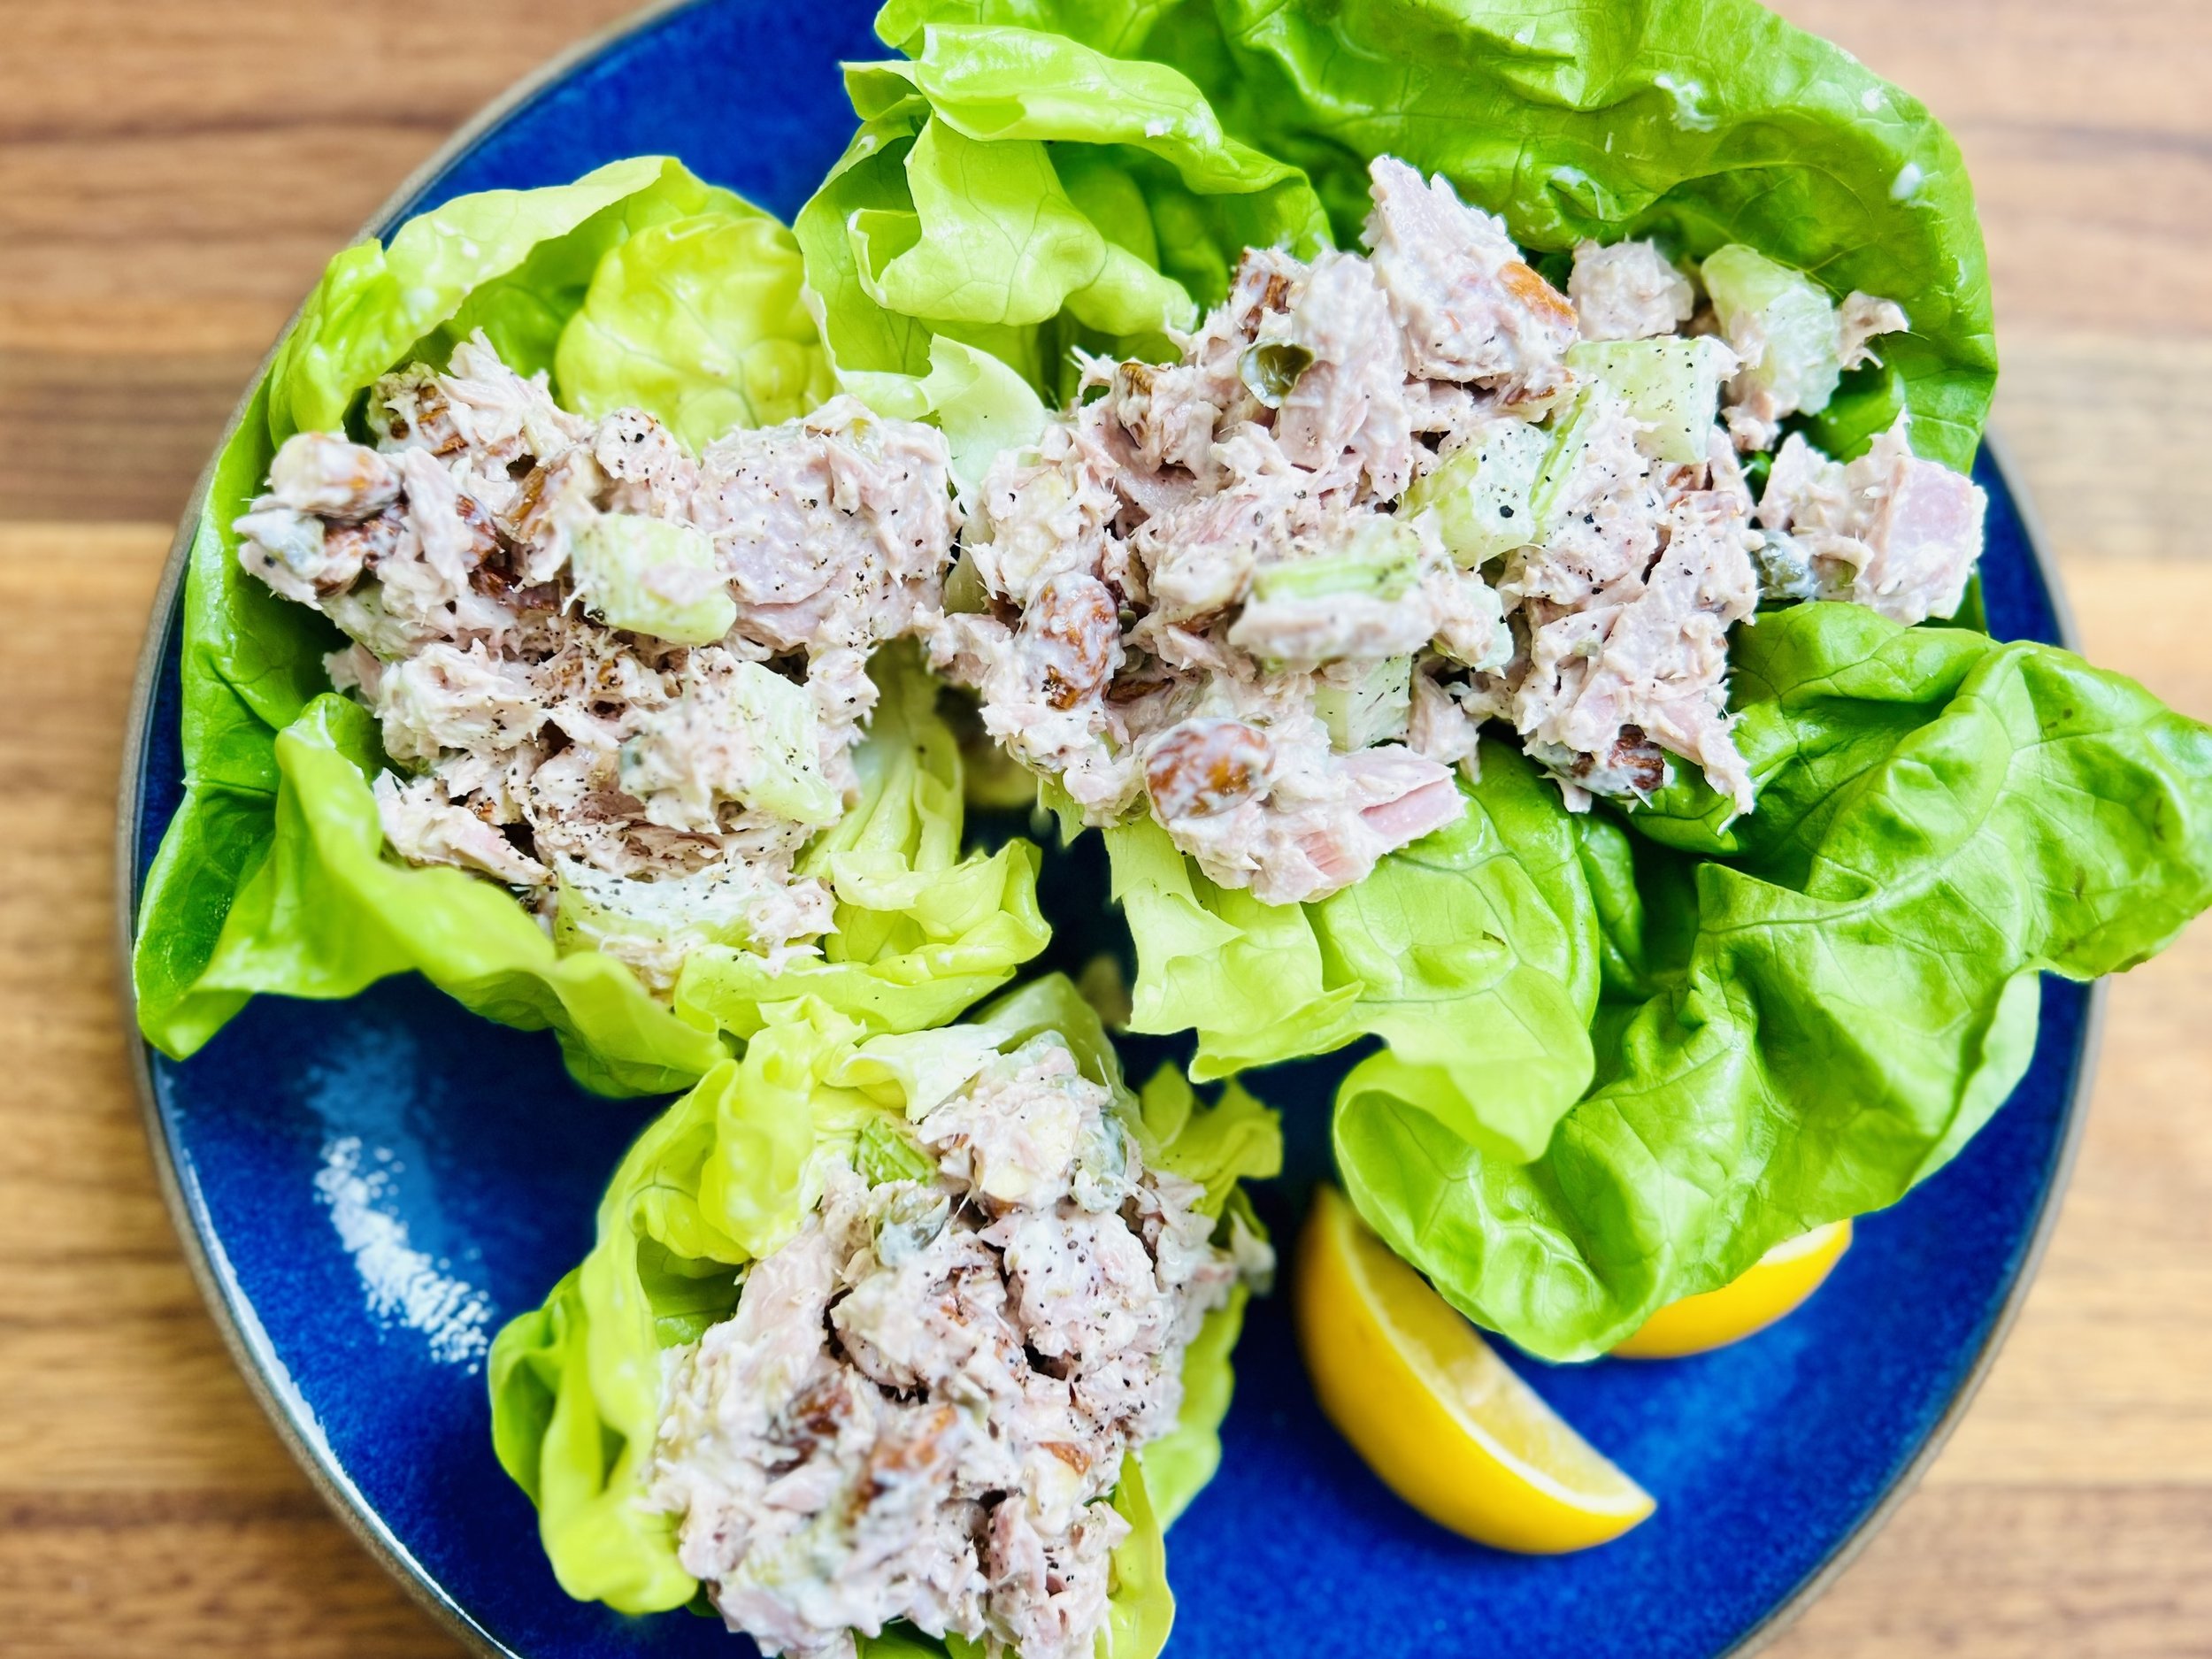
Simply Delicious Tuna Salad (Low FODMAP)
10 Minutes prep • Low FODMAP • Gluten-free • Lactose-free • Serves 2
10 Minutes prep • Low FODMAP • Gluten-free • Lactose-free • Serves 2 • Ok to make ahead: Steps 1-2
Tuna is a wonderful protein source full of important omega 3’s. And, it’s easy to keep on hand in your pantry. It’s also one of those foods we often forget about so this recipe should serve as a reminder to get that tuna out of the pantry and make something delicious! There are all kinds of tuna options available in the grocery store now that are quite delicious. I use Yellow Fin Tuna, or Skipjack Tuna to ensure a low mercury content. This recipe includes chopped celery and almonds for some crunch and green onions for some added flavor and color. I served it on a bed of mixed greens with some hard-cooked eggs alongside and it made a perfect summer supper.
Ingredients
5-ounce can Yellow Fin Tuna, or Skipjack Tuna, drained
2 tablespoons mayonnaise
Juice of 1/2 lemon (about 1 tablespoon)
1 green onion, green part only, chopped
1/4 cup raw almonds, roughly chopped
1/2 stalk celery, chopped
1/2 teaspoon Kosher salt
1/4 teaspoon black pepper
Mixed salad greens and chopped veggies, for serving
Hard-cooked eggs, optional, for serving
Directions
(1) Prepare: Chop the green onion greens and the almonds. Drain the liquid off the can of tuna.
(2) Combine: Combine tuna, mayonnaise, lemon juice, green onion greens, almonds, celery, salt, and pepper in a small bowl and use a fork to blend. Don’t over mix so you keep some of the form of the tuna.
Make-ahead note: At this point, you may cover the bowl with plastic wrap and store the mixture in the refrigerator until you’re ready to serve.
(3) Prepare your greens and veggies: Wash and dry the lettuce and chop the veggies you want to include. Then make a bed of greens and veggies on each plate.
(4) Plate and serve: Put a scoop of tuna salad on top of the greens. Serve alongside a couple of hard-cooked eggs or a piece of toasted sourdough bread.
Eat and enjoy every bite because you can!
Recipe note: I use Diamond Crystal Kosher salt in all my recipes because it has a wonderful flat and crisp flake that tastes delicious. It is also the least salty salt available so you can use it more liberally as a seasoning than you can table salt or sea salt. If you use another type of salt, you may need to reduce the amount so it is not over-salted.
Have a question you’d like to have answered? Email me at hello@ibsgamechanger.com
Link note: This post may contain affiliate links for you to easily purchase items that are linked. I may earn a small commission from qualifying purchases but none of this costs you a thing so feel free to use the links! In addition, for some items, I have provided a special discount code for IBS Game Changers so be sure to use the code when you purchase an item to get the discount that has been arranged just for you.
More Deliciously Low FODMAP™ salad recipes
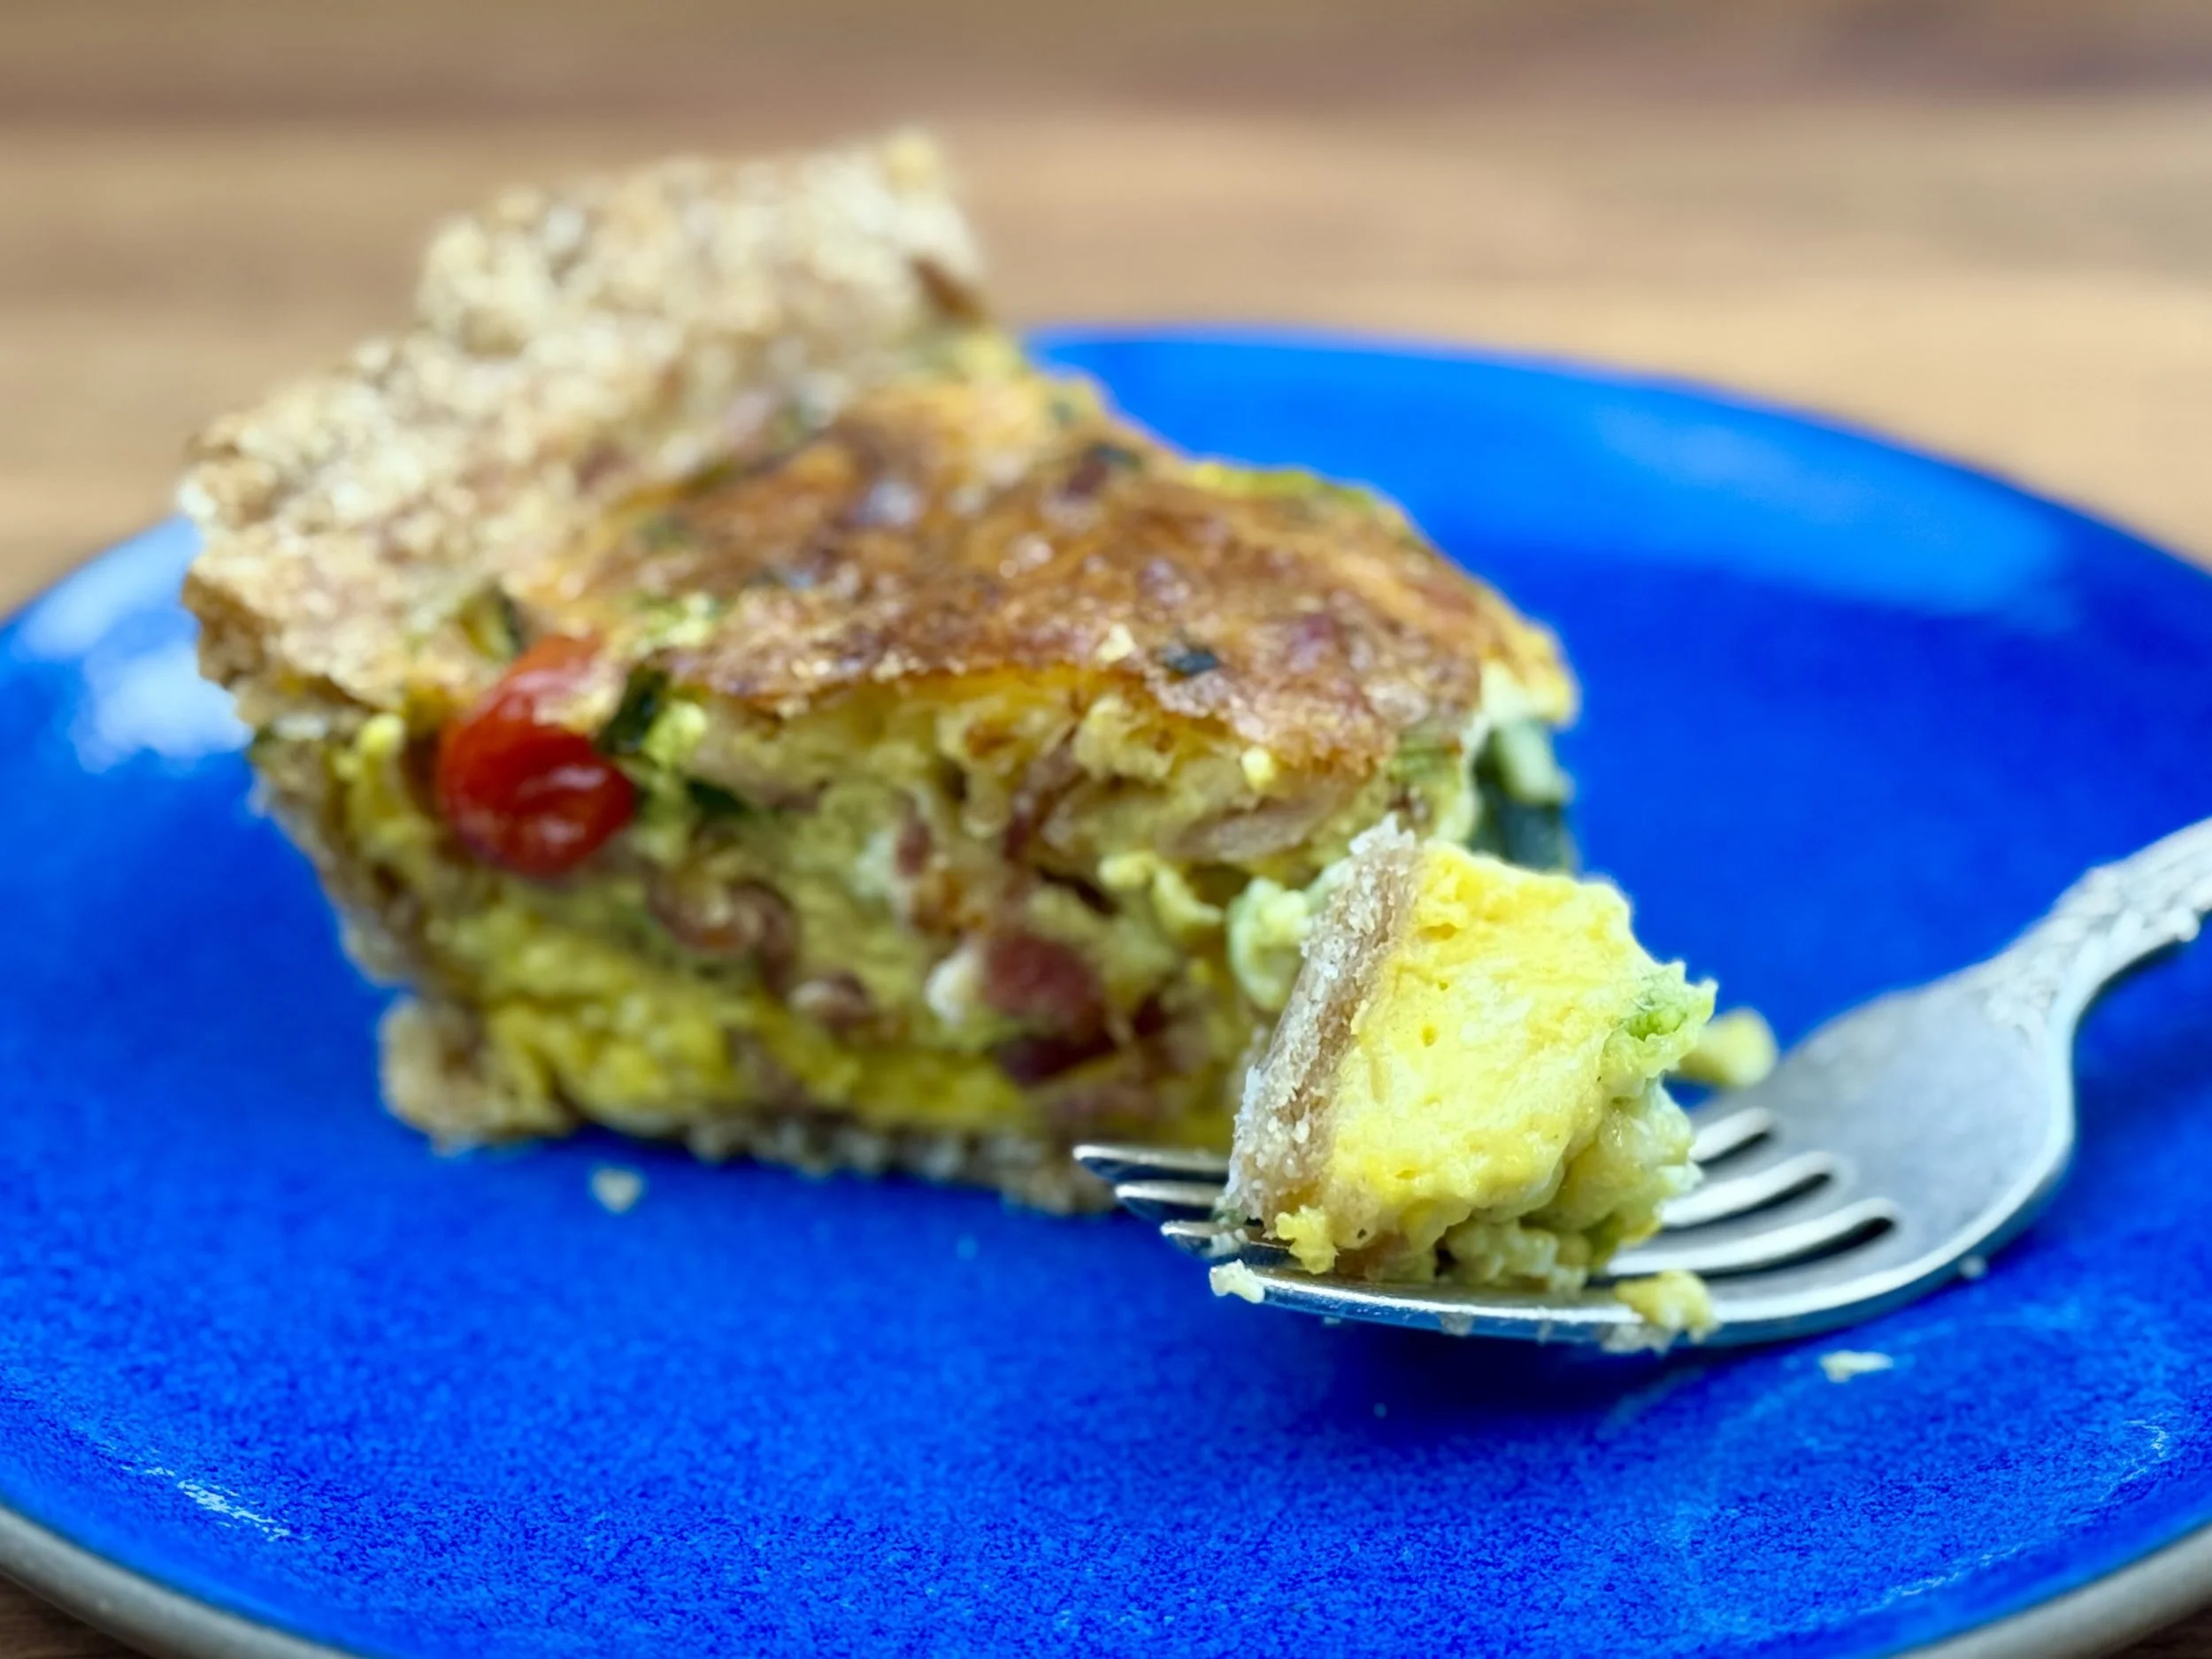
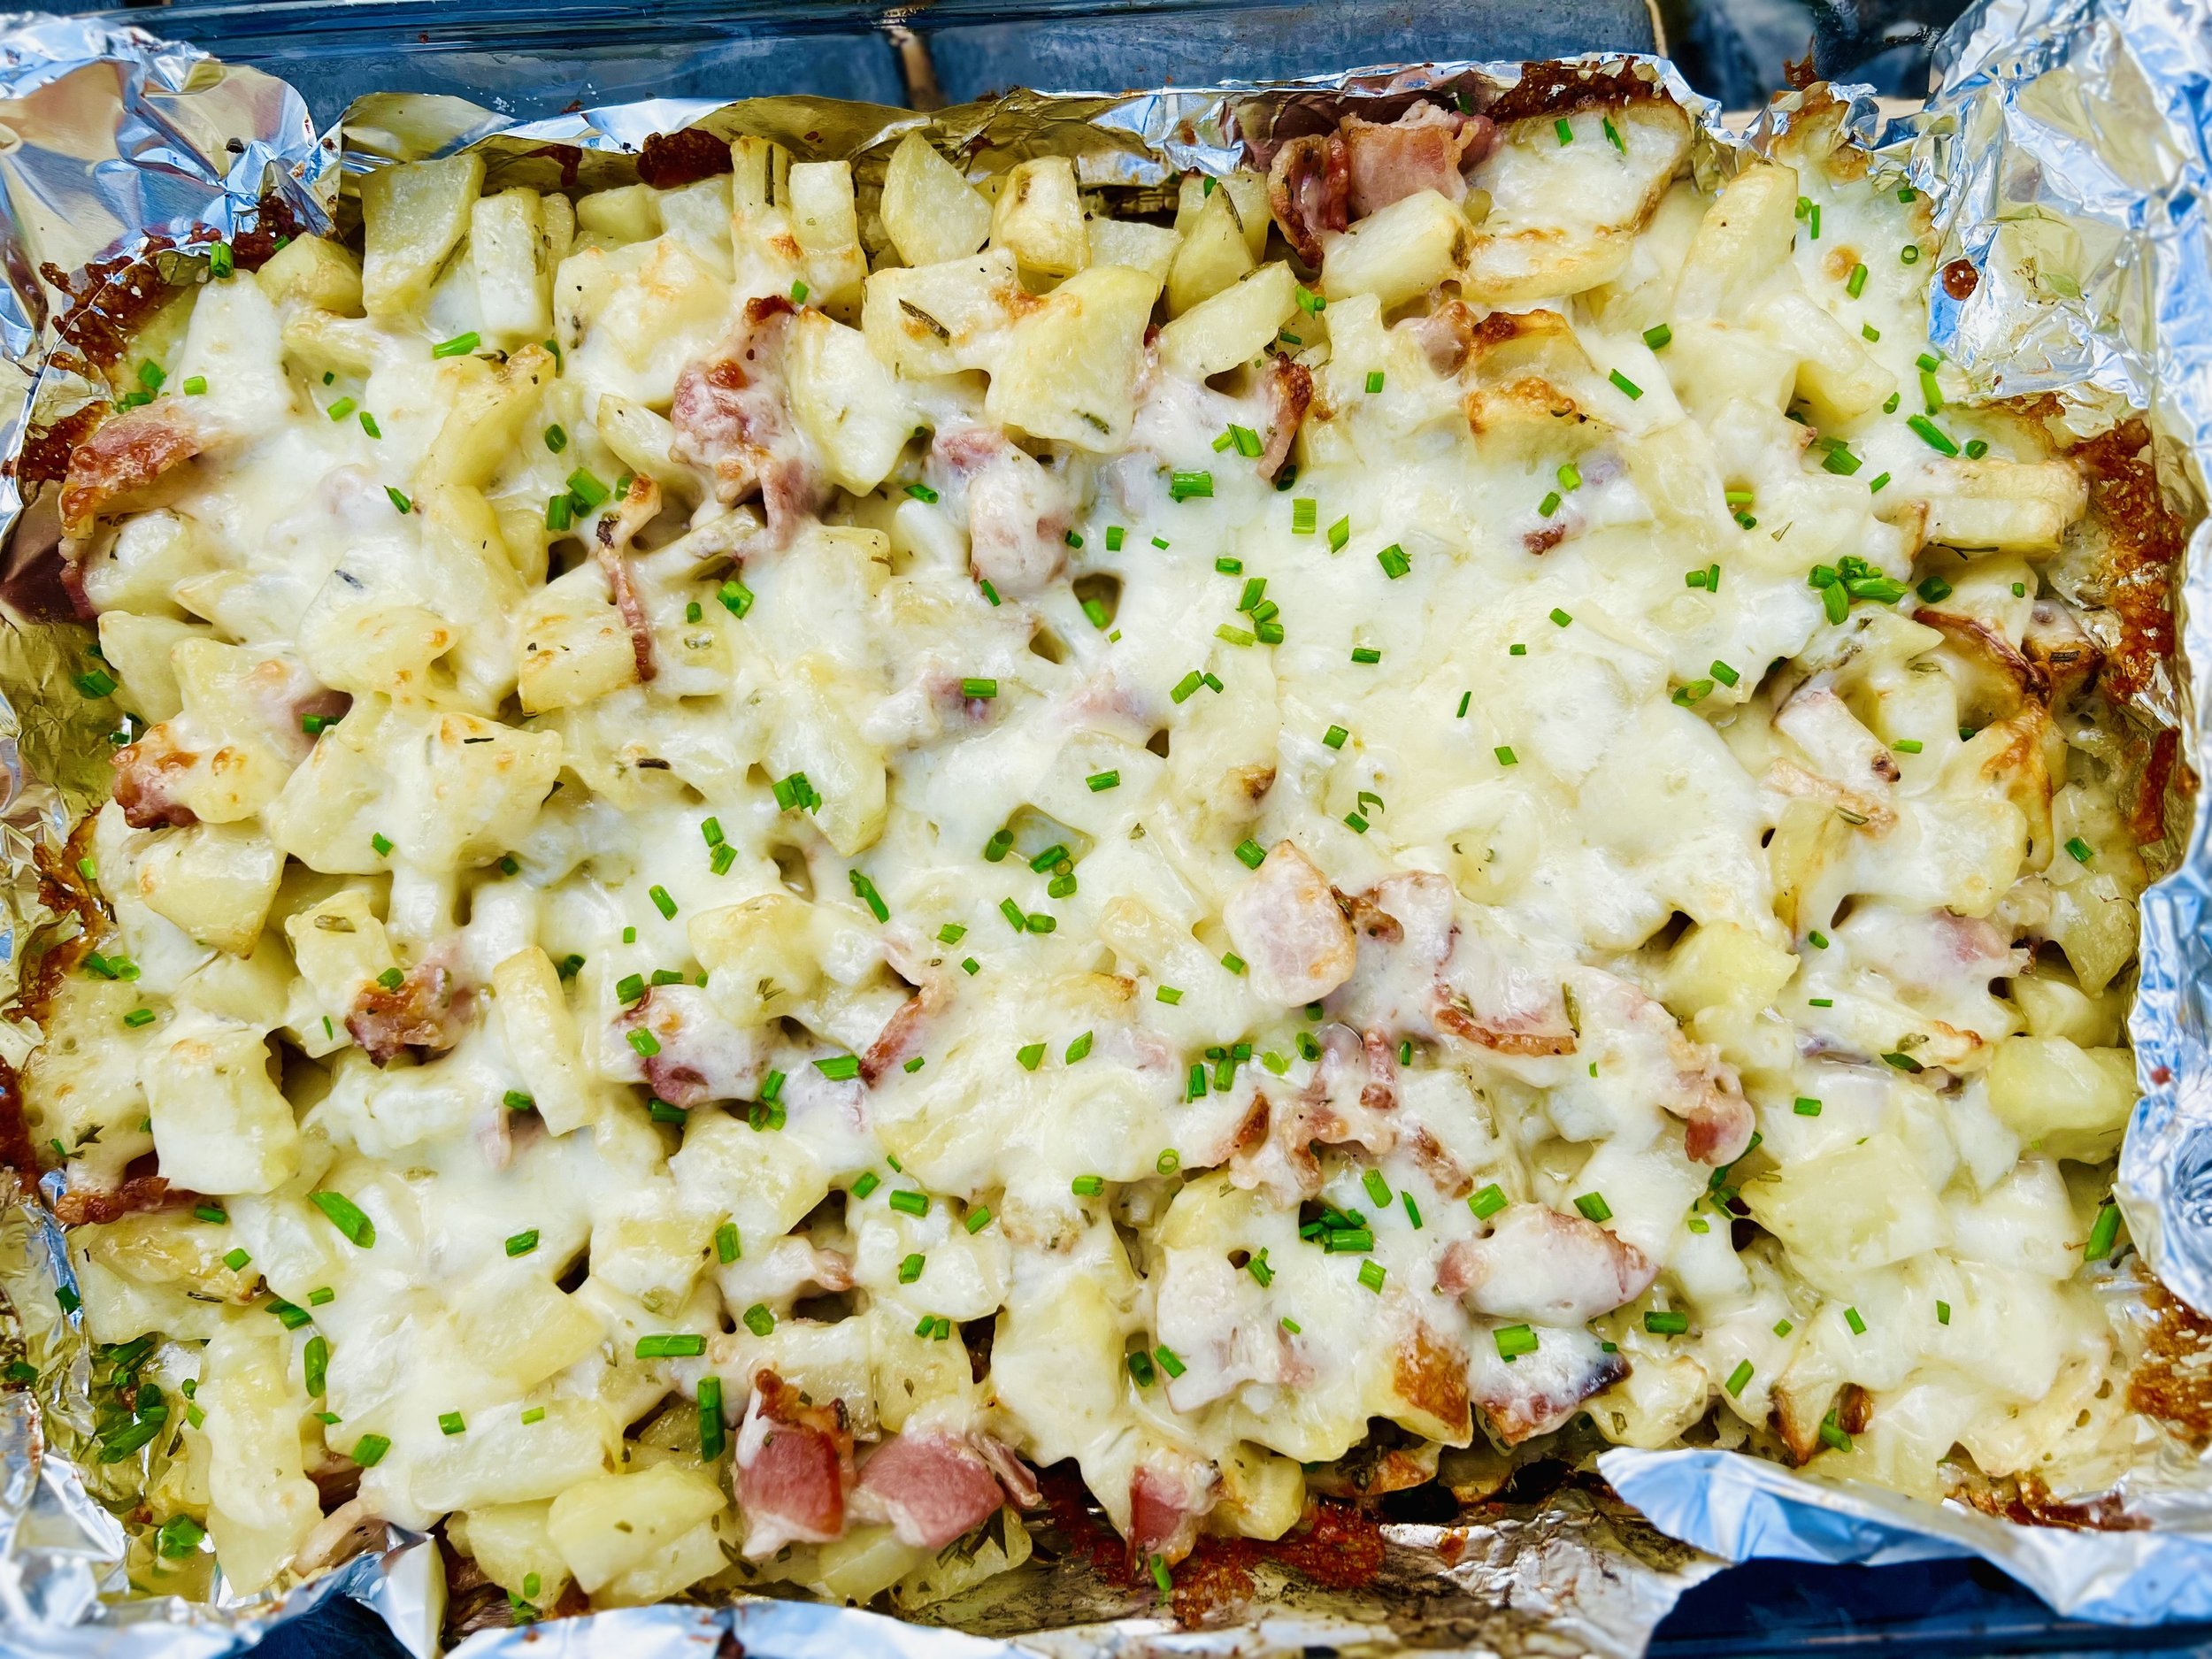
Italian Sausage Breakfast Bake (Low FODMAP)
20 Minutes prep • 45 Minutes cook • Low FODMAP • Gluten-free • Makes 12 pieces
20 Minutes prep • 45 Minutes cook • Low FODMAP • Gluten-free • Makes 12 pieces • Ok to make ahead: Steps 1-5
Delicious Italian sausage, baked together with eggs and potatoes and topped with really flavorful cheese means you have the whole breakfast menu at once! This breakfast bake comes together quickly and easily and your kitchen will smell delicious while it’s cooking so it’s a great way to greet the day. A perfect breakfast or brunch for the whole family or a table of guests—or cut the recipe in half for a smaller crowd. Leftovers are also delicious and heat up nicely in the microwave or oven.
This is an exclusive recipe just for recipe club members.
In addition to the two free recipes I create each week I am creating and delivering one very special recipe just for my recipe club members. If you’re not yet a member, I encourage you to join! Membership in the club includes access to the complete archive of recipes with filters so it can become your virtual low FODMAP cookbook plus, I am creating and delivering one special NEW recipe every week ONLY for recipe club members.
Your membership in the club helps me continue creating new, delicious, easy-to-make, low FODMAP recipes just for you.
As always, all recipes will emphasize simple ingredients, easy preparation, and delicious low FODMAP results. Recipes will be for everything from main courses, salads, soups, side dishes, appetizers, desserts, sauces, breakfast and lunch, and even mocktails and cocktails. Everything you need to prepare fantastic low FODMAP meals everyone will love.
Join the club. Let’s keep making delicious Low FODMAP meals together.
More Deliciously Low FODMAP™ breakfast recipes
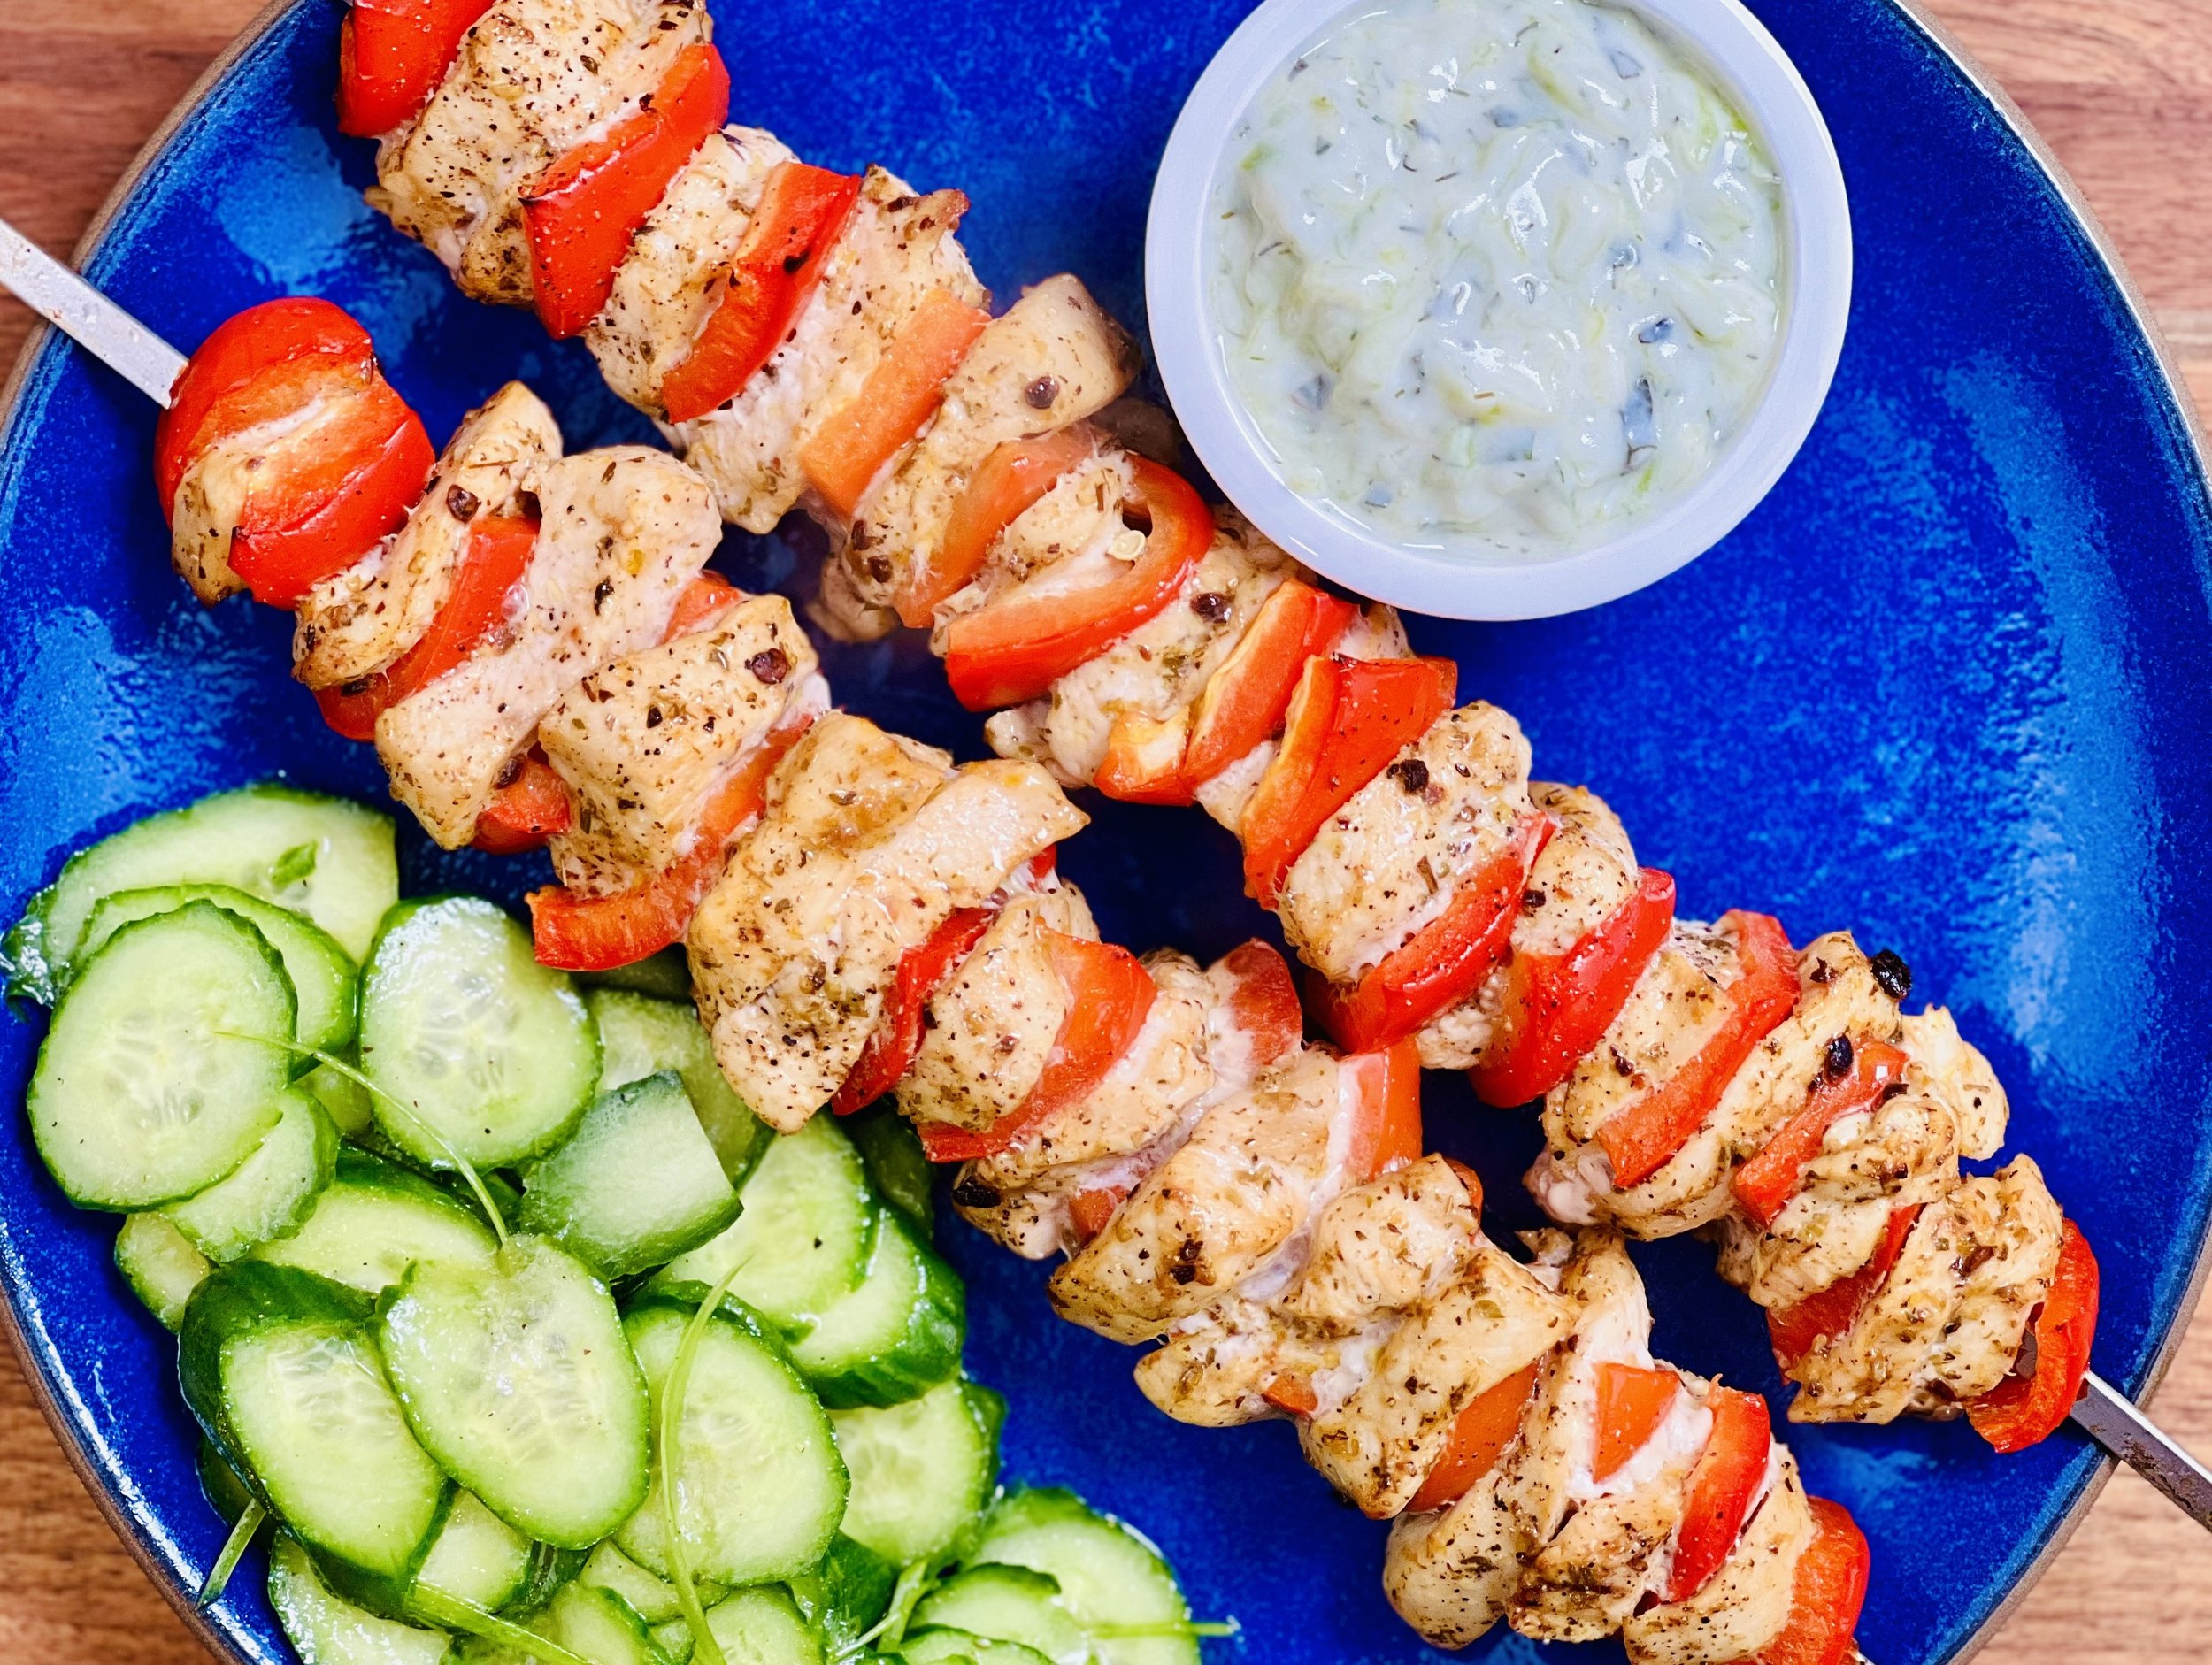
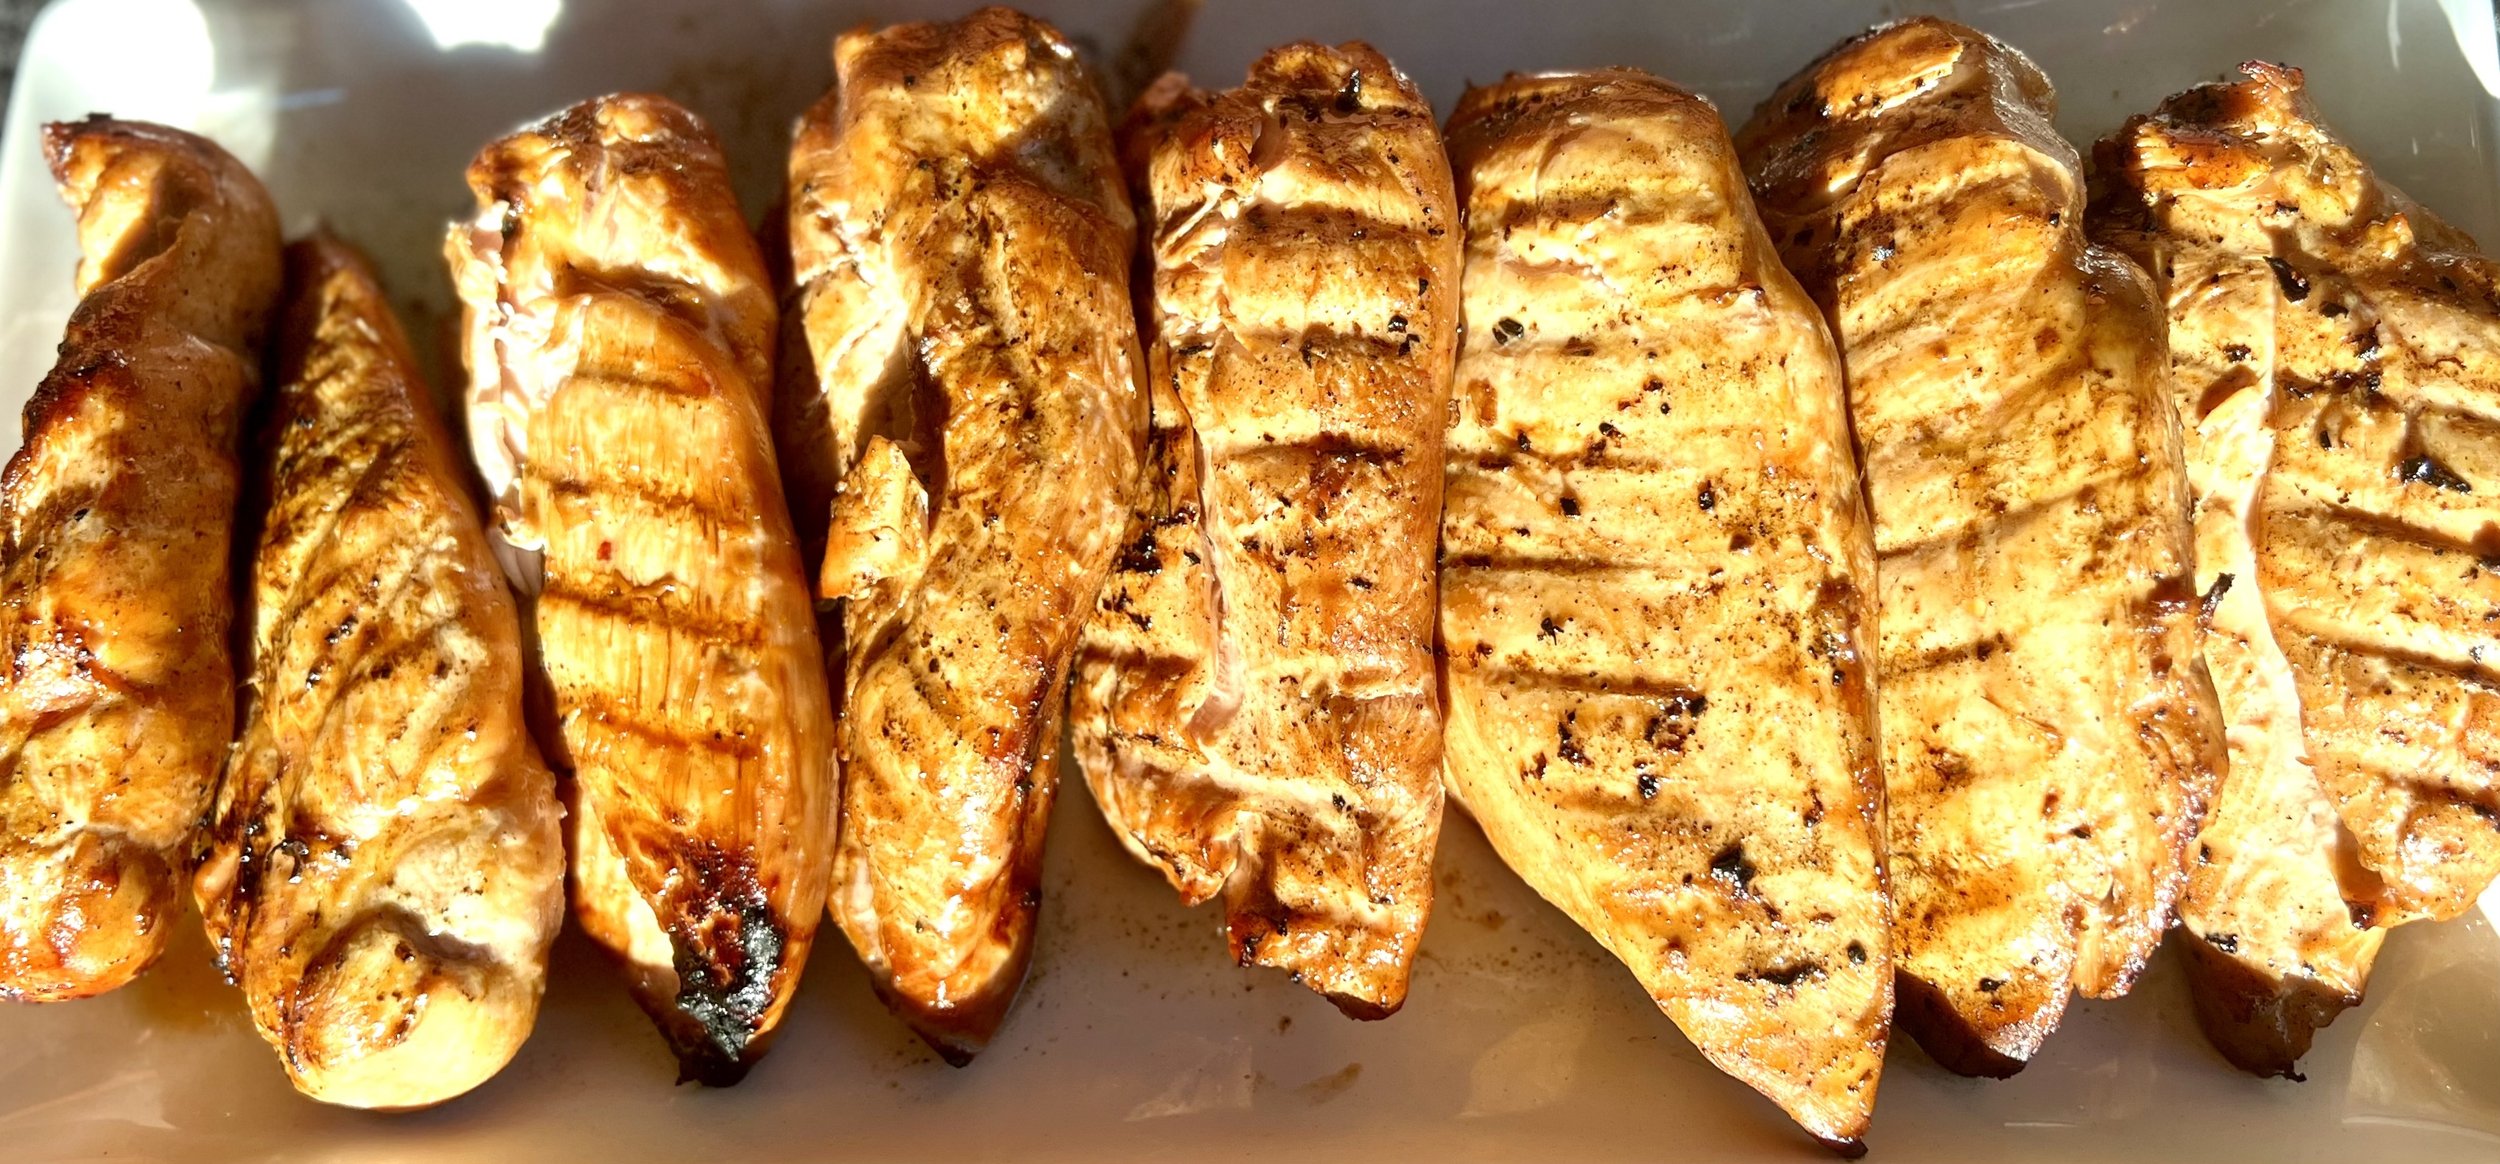
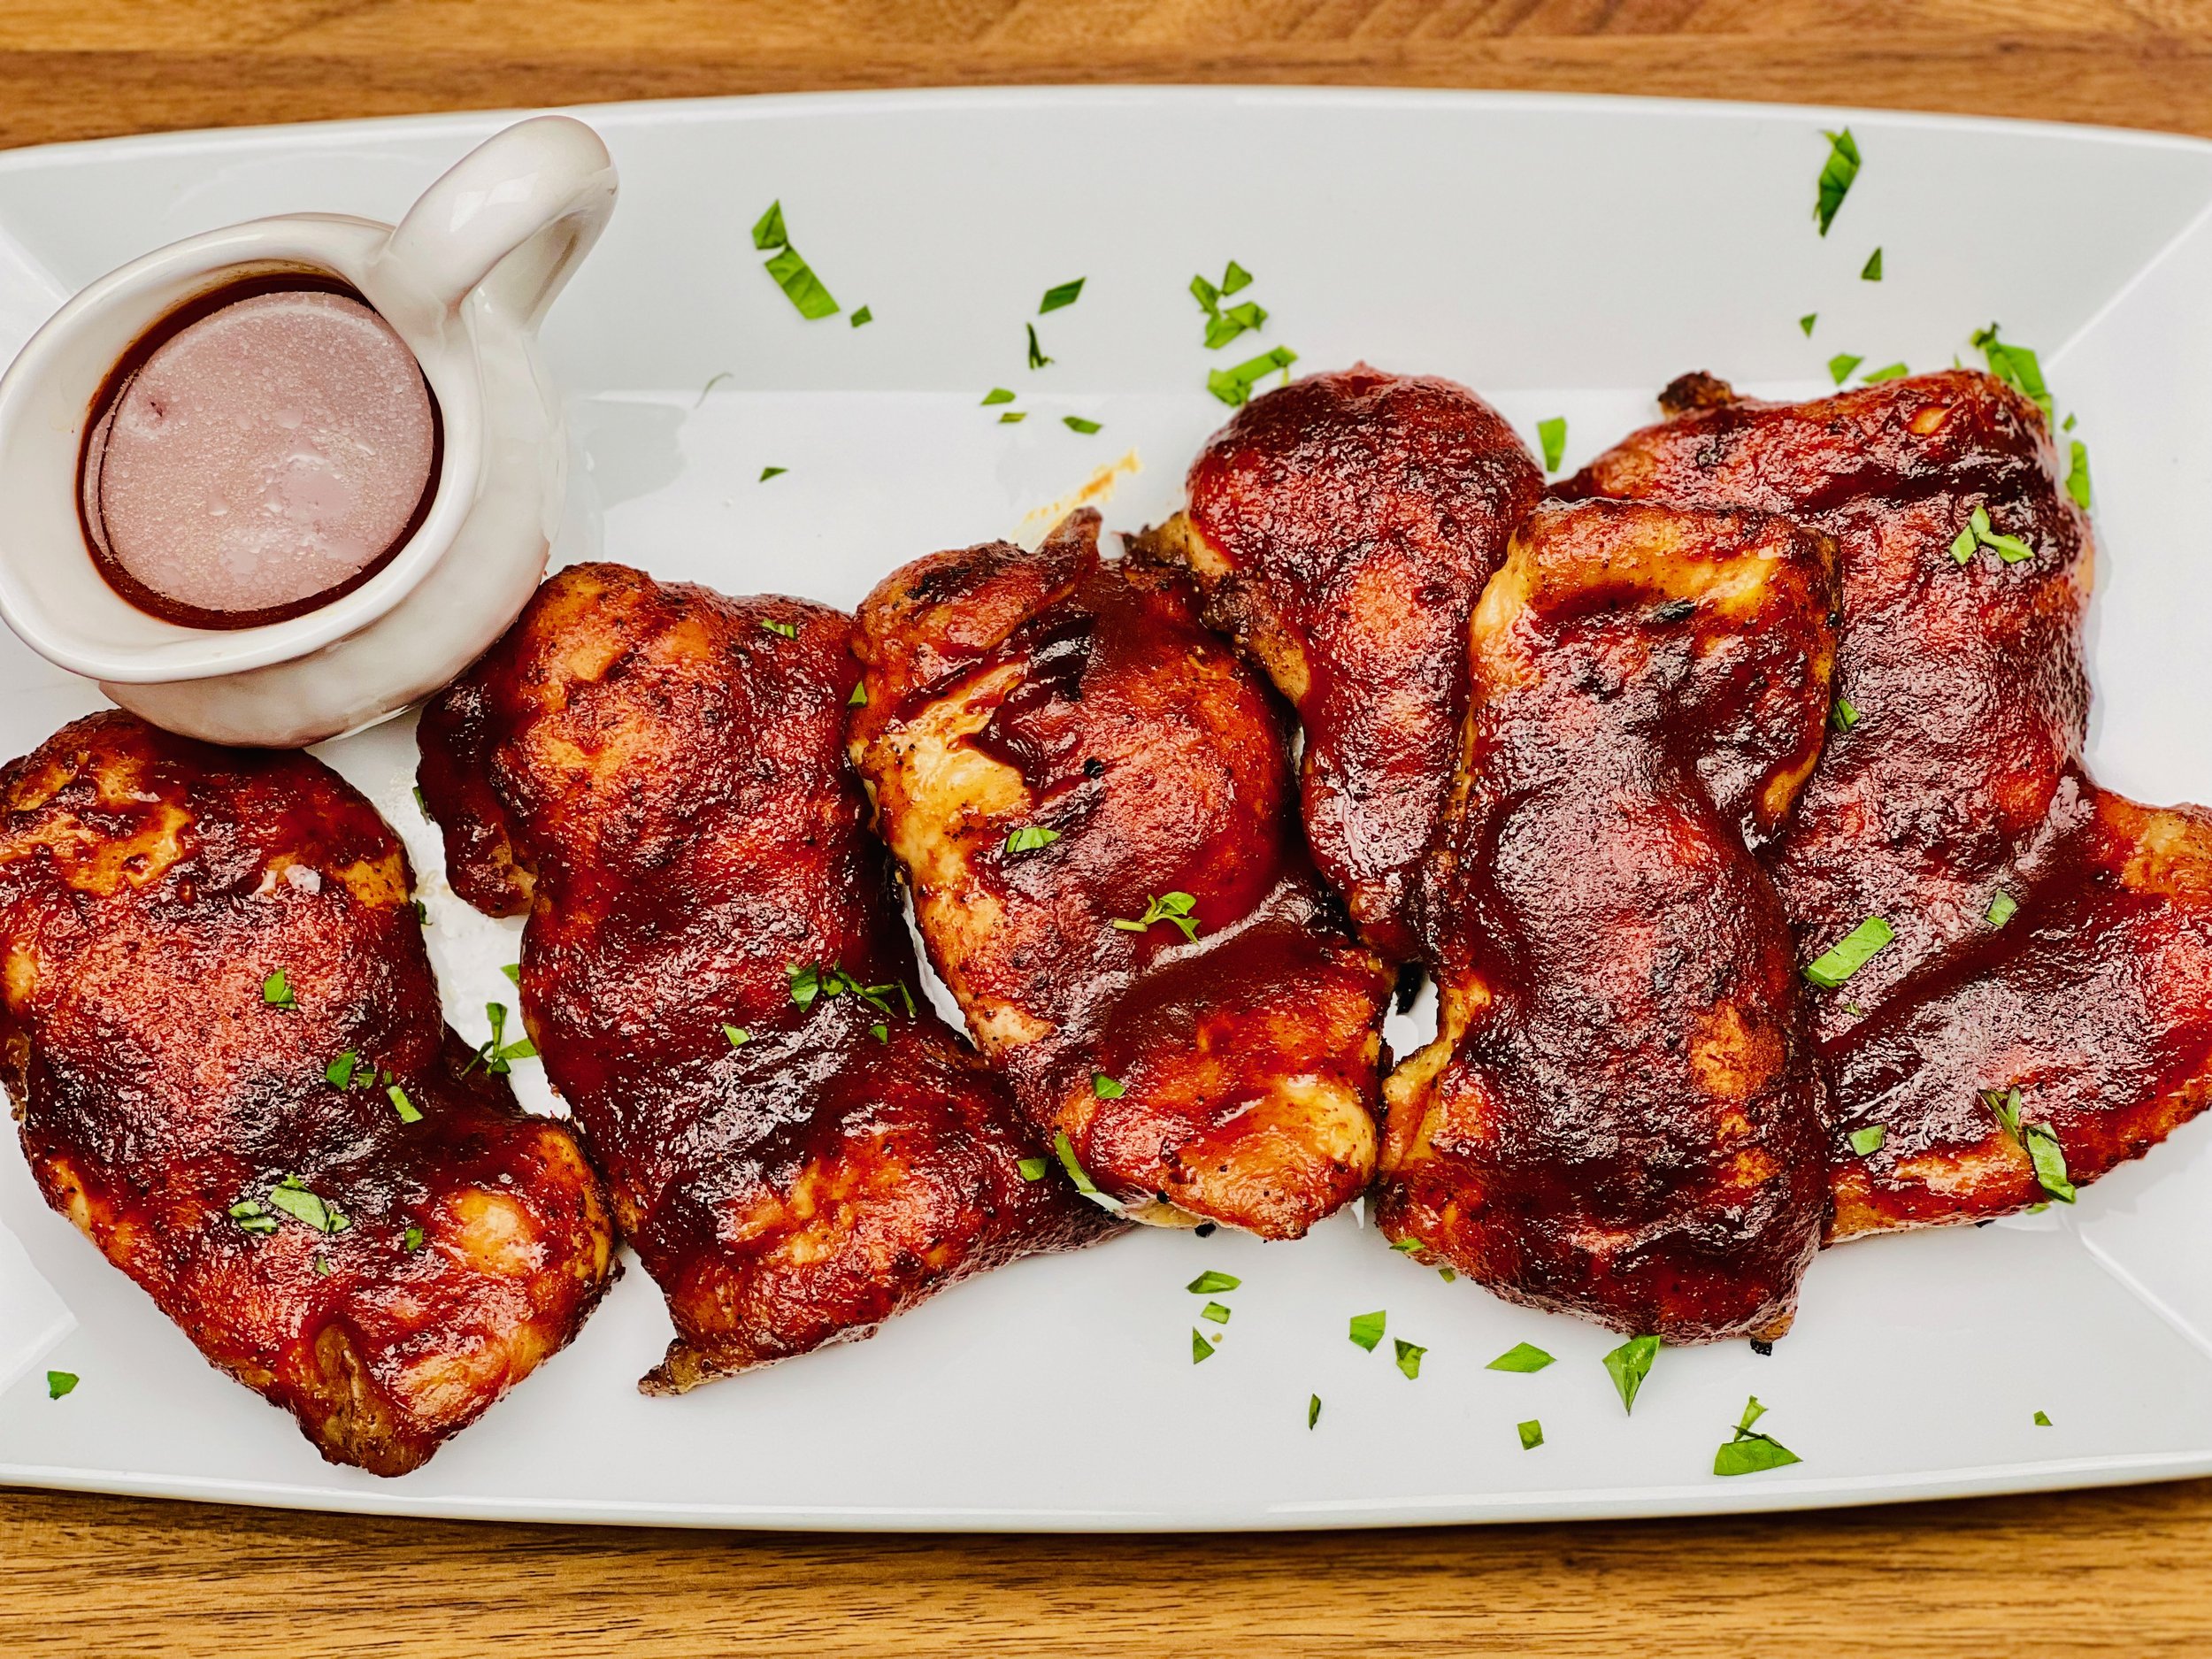
6-Ingredient Teriyaki Chicken (Low FODMAP)
15 Minutes prep • 30 minutes - 4 Hours marinate • 20 minutes Cook • Low FODMAP • Gluten-free • Lactose-free • Serves 4
15 Minutes prep • 30 minutes - 4 Hours marinate • 20 minutes Cook • Low FODMAP • Gluten-free • Lactose-free • Serves 4 • Ok to make ahead: Steps 1-2
Perfect tender chicken breasts are a great complement to just about any salad you put on your plate. But how do you get that great teriyaki taste in a simple way without a lot of FODMAPs? This recipe will deliver just that—using only six ingredients and 30 minutes of marinating time. If you have a little more time, you can marinate the chicken for up to 4 hours before cooking to get even more flavor. Watching the temperature and taking the chicken off the grill as soon as it hits 165 degrees F is the way to get the perfect chicken every time.
Ingredients
4 boneless, skinless chicken breasts (ideally all similar size)
1/4 cup gluten-free low-sodium soy sauce
2 tablespoons maple syrup
2 tablespoons rice vinegar
1 tablespoon fresh ginger, grated
2 tablespoons toasted sesame oil
Directions
(1) Make the marinade: In a small bowl, whisk together the gluten-free soy sauce, maple syrup, rice vinegar, grated ginger, and toasted sesame oil.
(2) Marinate the chicken: Place the chicken breasts in a shallow dish or a resealable plastic bag and pour the marinade over them. Make sure the chicken is evenly coated. Marinate in the refrigerator for at least 30 minutes, or up to 4 hours for more flavor.
(3a) Grill the chicken: If using a grill, preheat the grill to medium-high heat. Remove the chicken breasts from the marinade and discard the marinade. Place the chicken breasts on the preheated grill and cook for about 6-8 minutes per side, or until the chicken is cooked through. The internal temperature of the chicken should just reach 165° F.
(3b) Smoke the chicken: If using a smoker, remove the chicken breasts from the marinade and discard the marinade. Place the chicken directly on the smoker grate and cook for about 15 minutes. Flip the chicken and cook another 10 - 15 minutes or until the internal temperature just reaches 165° F.
(4) Finish: Remove the chicken from the grill and let it rest for a few minutes before slicing and serving.
Eat and enjoy every bite because you can!
Recipe note: I use Diamond Crystal Kosher salt in all my recipes because it has a wonderful flat and crisp flake that tastes delicious. It is also the least salty salt available so you can use it more liberally as a seasoning than you can table salt or sea salt. If you use another type of salt, you may need to reduce the amount so it is not over-salted.
Have a question you’d like to have answered? Email me at hello@ibsgamechanger.com
Link note: This post may contain affiliate links for you to easily purchase items that are linked. I may earn a small commission from qualifying purchases but none of this costs you a thing so feel free to use the links! In addition, for some items, I have provided a special discount code for IBS Game Changers so be sure to use the code when you purchase an item to get the discount that has been arranged just for you.
More Deliciously Low FODMAP™ main course recipes
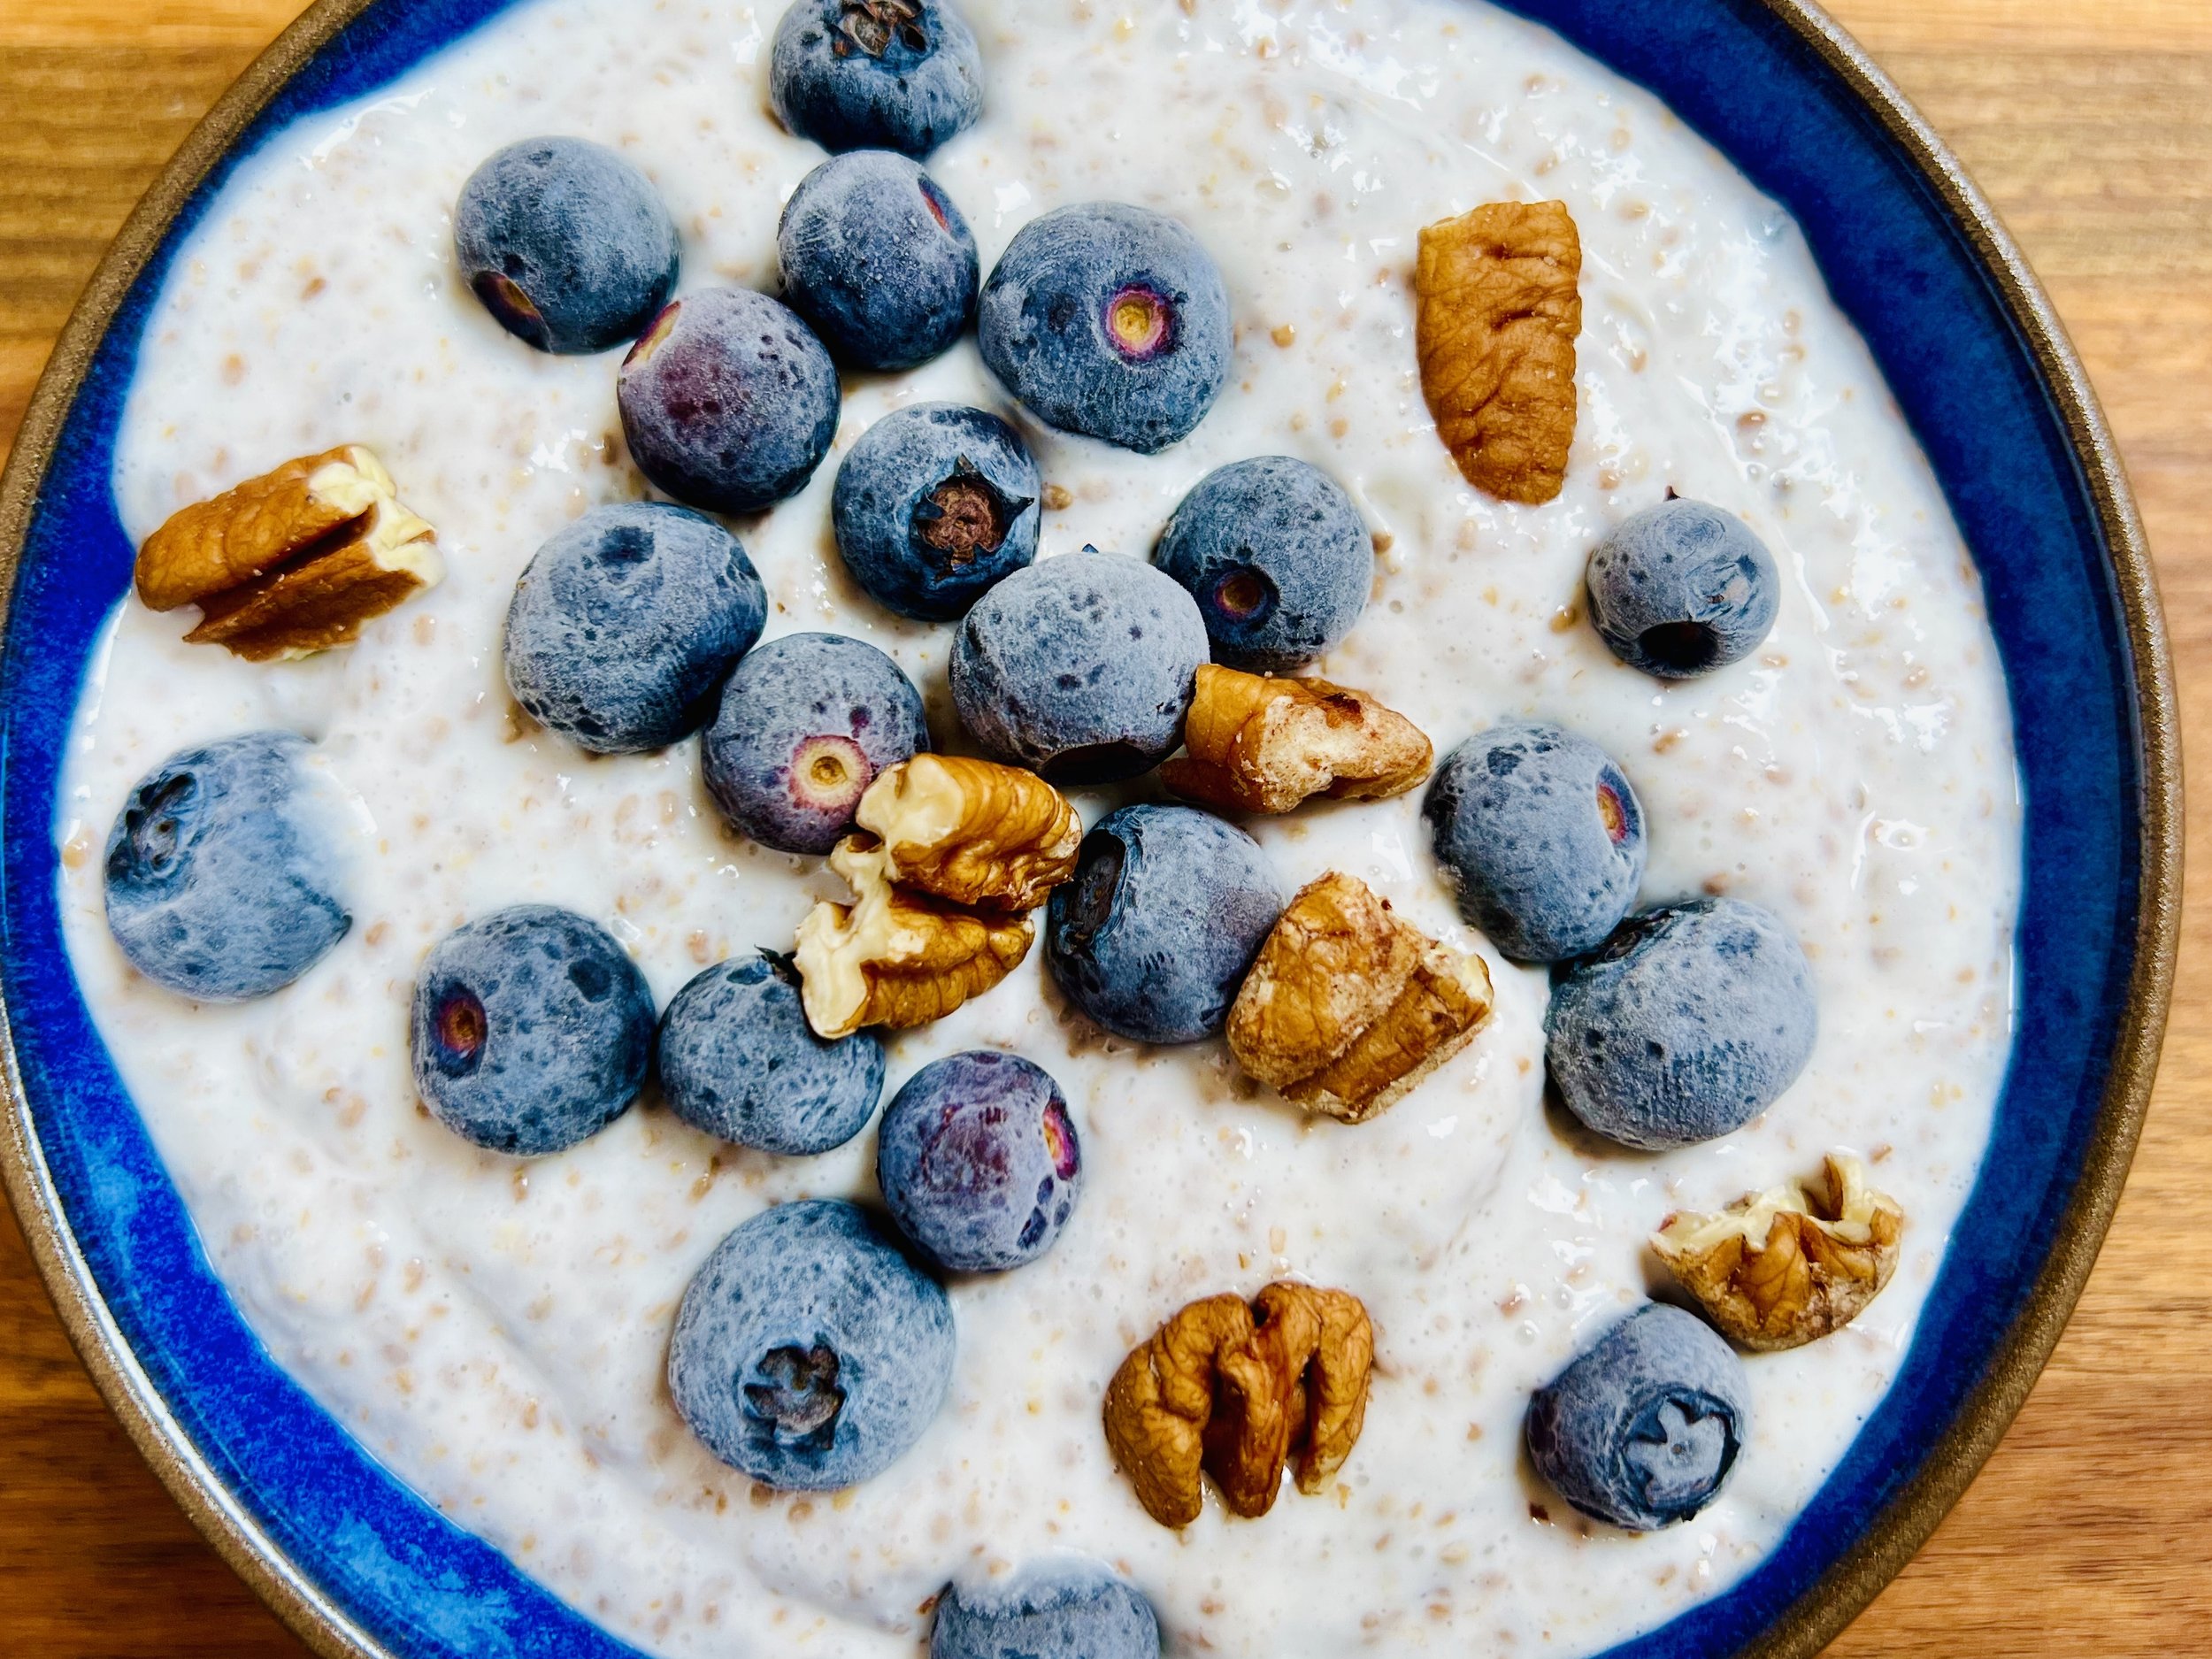
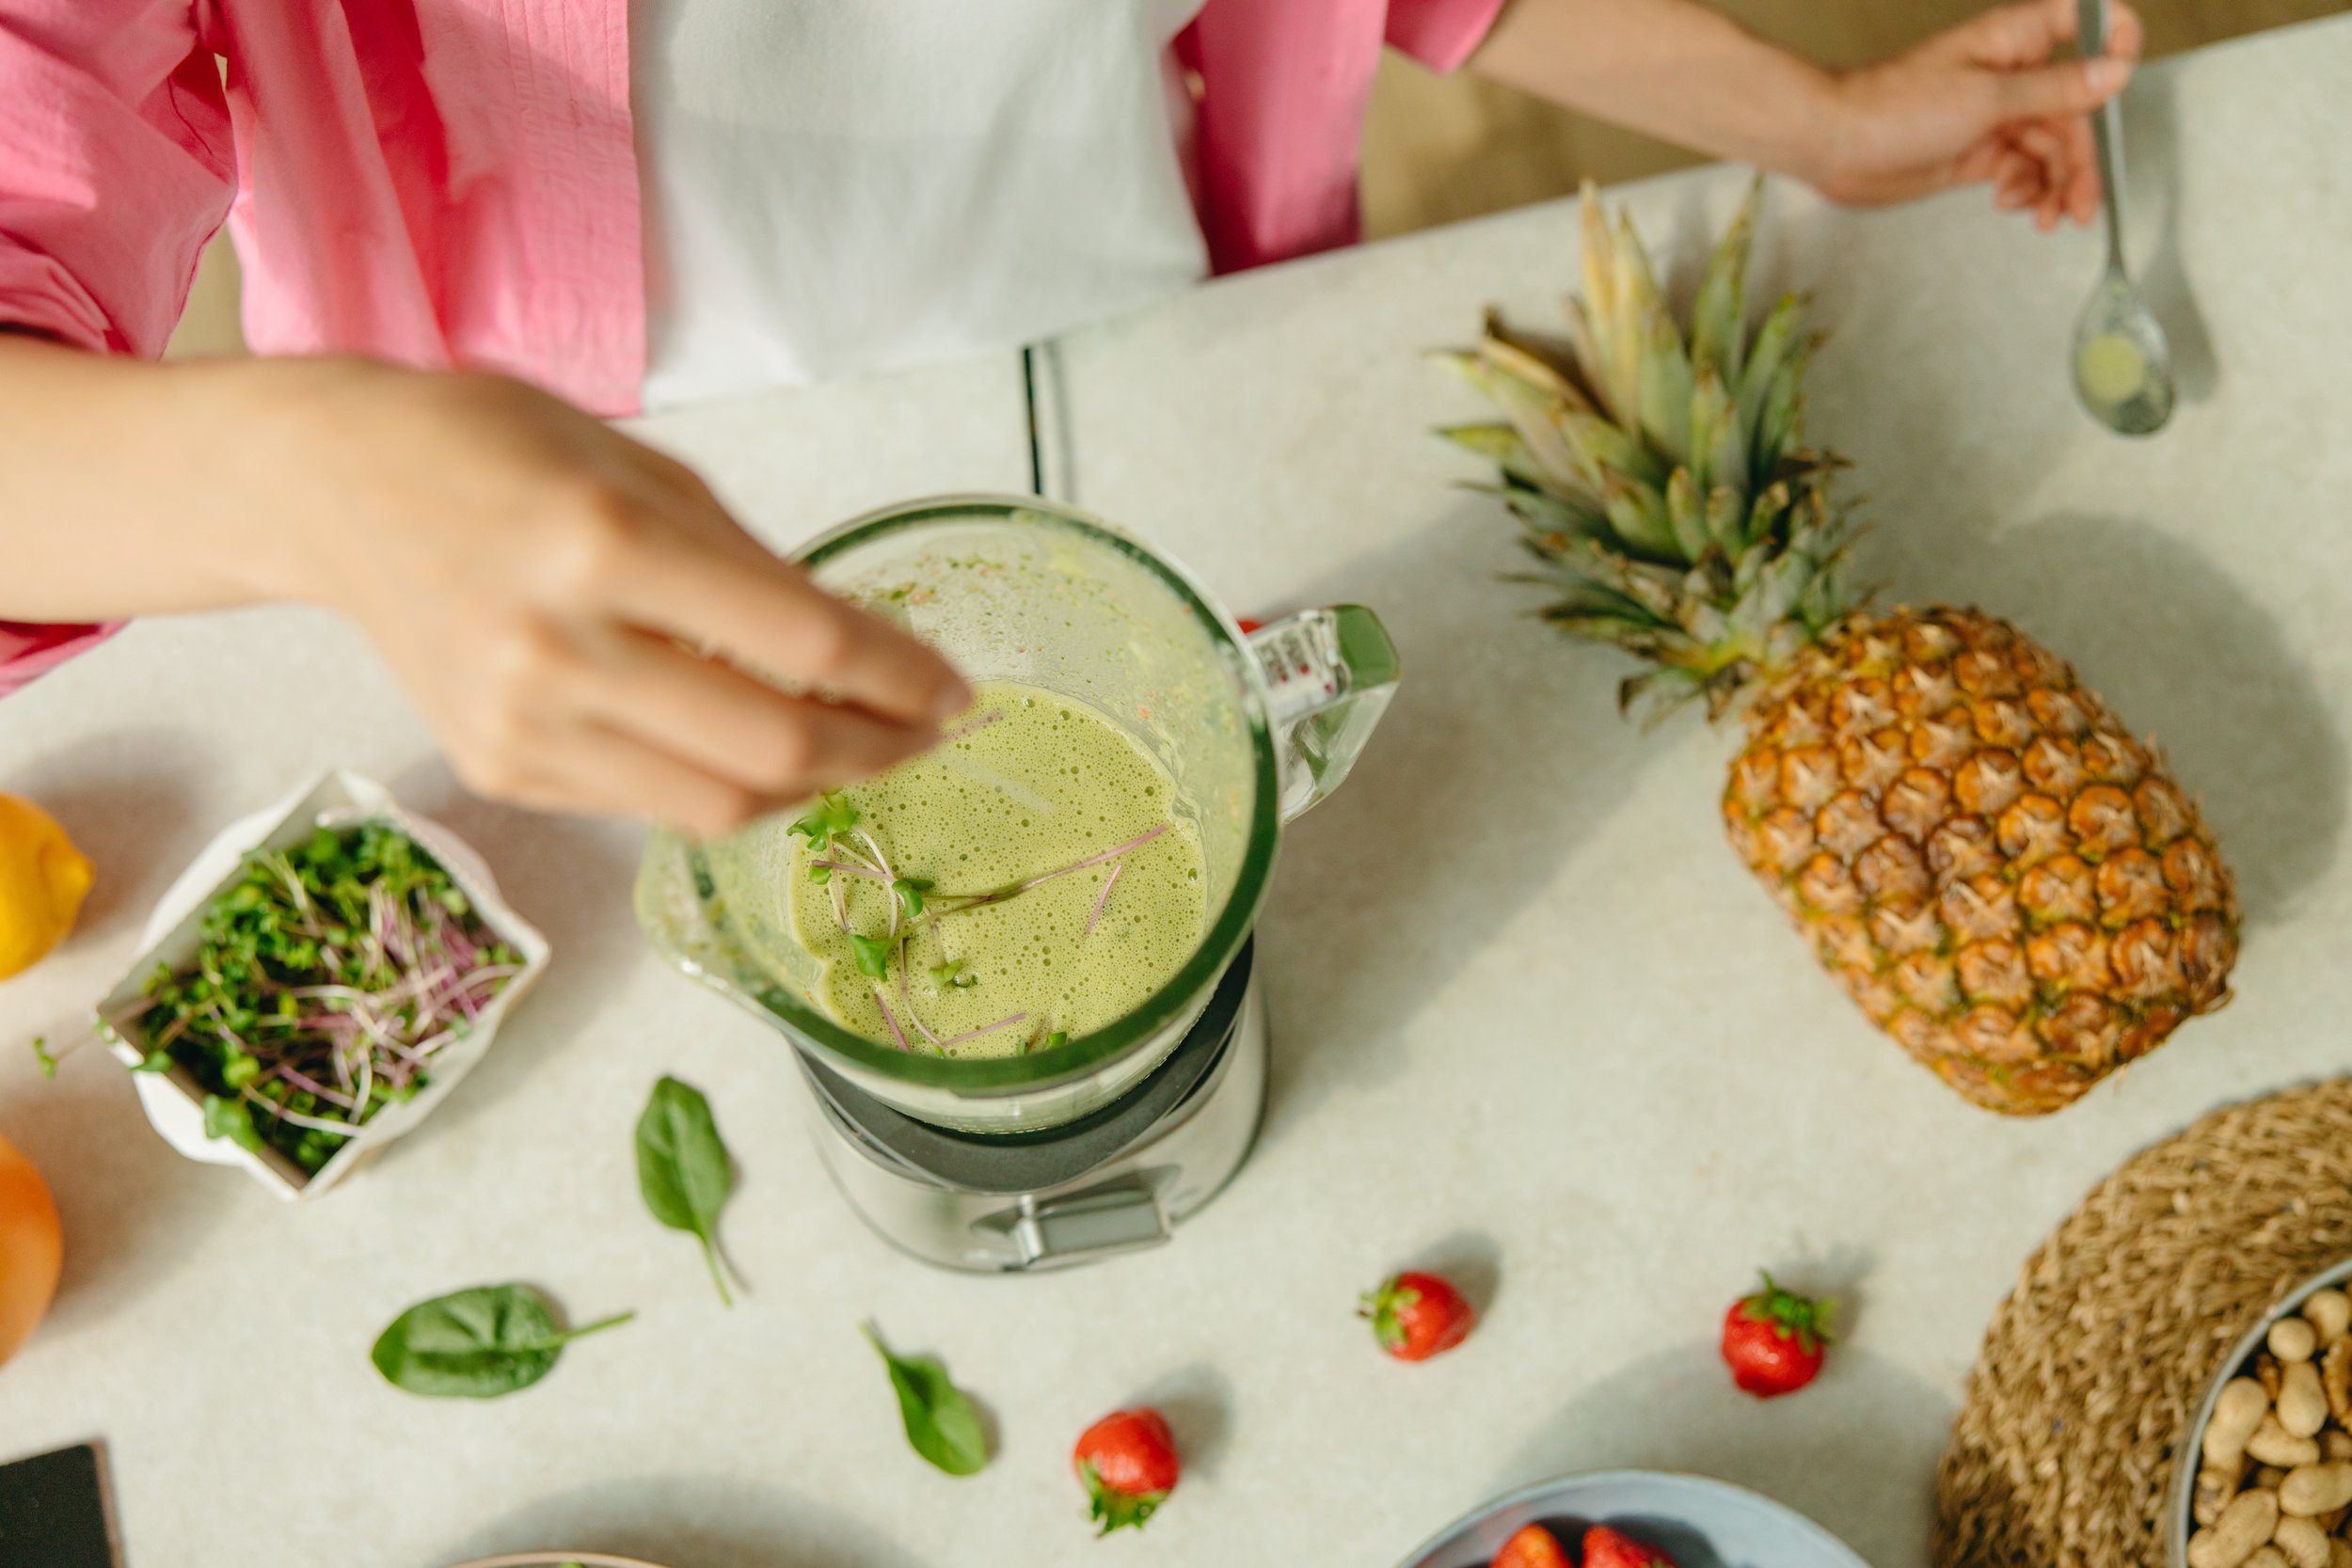
Super Breakfast Shake (Low FODMAP)
210 Minutes prep • Low FODMAP • Gluten-free • Lactose-free • Serves 1
10 Minutes prep • Low FODMAP • Gluten-free • Lactose-free • Serves 1 • Ok to make ahead: Steps 1-3
I’m not a huge fan of blending food before eating it because the whole food makes us work a little harder to digest it which slows down the rate at which our body accesses ingredients that might raise our blood sugar for example. Even so, it’s a great way to add protein, fiber, vitamins, and minerals to your diet and some of you just really enjoy a blended shake! So I created a recipe that would be low in FODMAPs and full of delicious ingredients to nourish your body without adding FODMAP triggers to the start of your day.
Ingredients
3/4 - 1 cup unsweetened macadamia nut milk, almond milk, coconut milk, coconut yogurt, or other low fodmap milk or lactose-free yogurt
1 scoop Low FODMAP protein powder (I like Naked Pea protein - see notes below)
OR 2 tablespoons hemp seeds (for protein)
1 teaspoon (or more) coconut oil to add fat for satiation and slow the absorption of the sugar
1/2 cup of fruit such as pineapple, banana (not overripe), strawberries, blueberries, raspberries (frozen or fresh) or some combination of fruits
1/2 - 1 cup leafy greens such as spinach (optional for added vitamins/minerals, organic if possible)
Pinch microgreens (optional for added plant variety and flavor - I like arugula, kale, or radish greens)
1/4 - 1 scoop Resistant Starch Fiber (optional—let me know if you’re interested in ordering this amazing fiber supplement at a discount)
OR 1 tablespoon chia seeds (optional for added fiber)
1 tablespoon unsweetened shredded coconut (optional for added flavor)
1 tablespoon almond butter or peanut butter (optional for added protein and fat)
Directions
(1) Prepare: Chop any large fruit, such as pineapple, into smaller chunks. Wash your leafy greens.
(2) Blend: Put all ingredients except the leafy greens in your blender and blend until smooth. Add more “milk,” water, or a bit more unfrozen fruit if it’s too thick, and blend until combined.
(3) Add the optional greens: Add the greens and blend until combined.
(4) Serve: Pour into a tall glass or mason jar (for a great “to-go” container) and enjoy a delicious, protein, fiber, and vitamin-rich shake.
Regarding Pea Protein
Pea protein is isolated from ground yellow peas. It is naturally rich in quality protein, as well as iron. One serving will typically give you 15 grams of protein, which is close to the recommended amount of protein per meal, for most individuals. Many with IBS are concerned about pea protein because peas can be high FODMAP, but Monash University shows one serving of pea protein to be low FODMAP!
Here are some pea proteins that I would recommend:
Naked Pea Protein Powder (unsweetened)
Naked Seed Protein Powder (unsweetened)
If you really don’t like the taste of the unsweetened pea protein, you can add a tablespoon of maple syrup, or use a protein that has some sweetness such as:
HUM Pea Protein Powder (Vanilla - sweetened with Stevia)
Drink and enjoy every sip because you can!
Have a question you’d like to have answered? Email me at hello@ibsgamechanger.com
Link note: This post may contain affiliate links for you to easily purchase items that are linked. I may earn a small commission from qualifying purchases but none of this costs you a thing so feel free to use the links! In addition, for some items, I have provided a special discount code for IBS Game Changers so be sure to use the code when you purchase an item to get the discount that has been arranged just for you.
More Deliciously Low FODMAP™ breakfast recipes
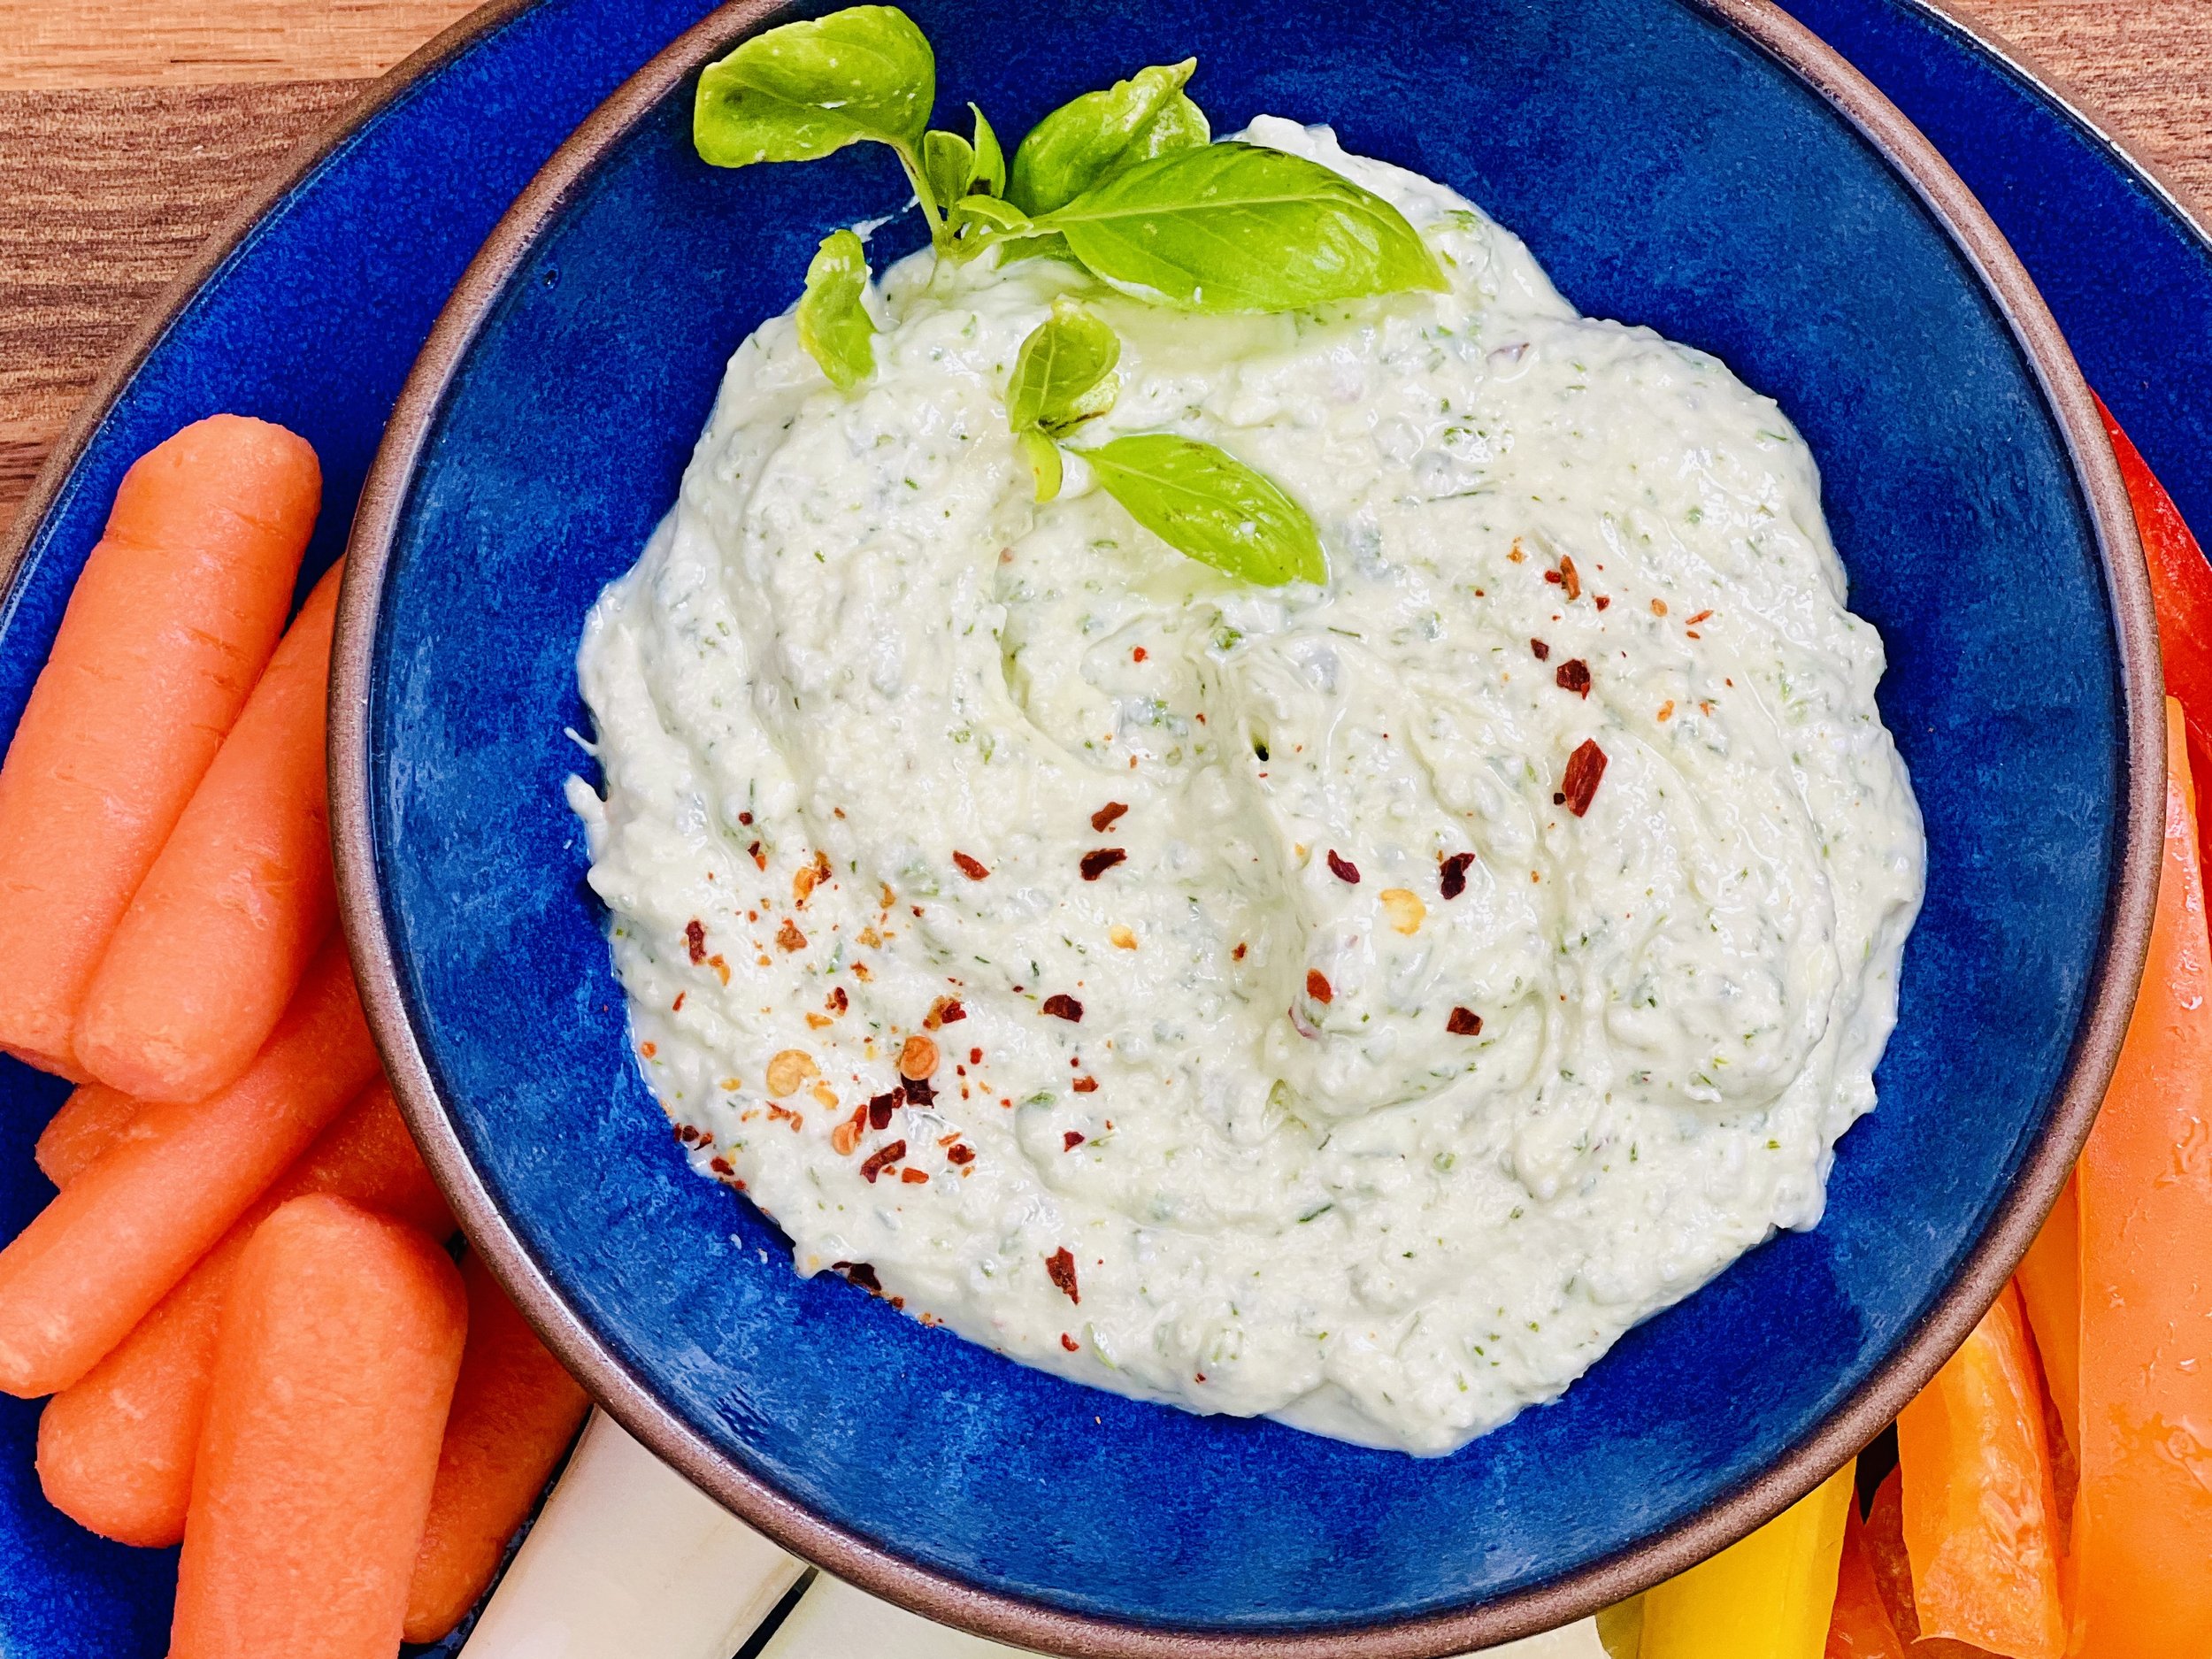
Basil Caraway Cottage Cheese Dip (Low FODMAP)
15 Minutes prep • 1 hour chill • Low FODMAP • Gluten-free • Vegetarian • Serves 4 or more
15 Minutes prep • 1 hour chill • Low FODMAP • Gluten-free • Vegetarian • Serves 4 or more • Ok to make ahead: Steps 1-2
This combination of fresh herbs, nutty caraway, and silky smooth blended cottage cheese is remarkably delicious! It’s full of protein and lots of flavor and it will be a welcome change to the standard dip on your appetizer tray. It’s perfect with veggies, crostini, or even crispy chips. If you love it as much as I do, use it as a sandwich spread! For a little added color, serve the dip in a split bell pepper or fill small split bell peppers and make bite-size “boats” of deliciousness.
This is an exclusive recipe just for recipe club members.
In addition to the two free recipes I create each week I am creating and delivering one very special recipe just for my recipe club members. If you’re not yet a member, I encourage you to join! Membership in the club includes access to the complete archive of recipes with filters so it can become your virtual low FODMAP cookbook plus, I am creating and delivering one special NEW recipe every week ONLY for recipe club members.
Your membership in the club helps me continue creating new, delicious, easy-to-make, low FODMAP recipes just for you.
As always, all recipes will emphasize simple ingredients, easy preparation, and delicious low FODMAP results. Recipes will be for everything from main courses, salads, soups, side dishes, appetizers, desserts, sauces, breakfast and lunch, and even mocktails and cocktails. Everything you need to prepare fantastic low FODMAP meals everyone will love.
Join the club. Let’s keep making delicious Low FODMAP meals together.
More Deliciously Low FODMAP™ appetizer recipes
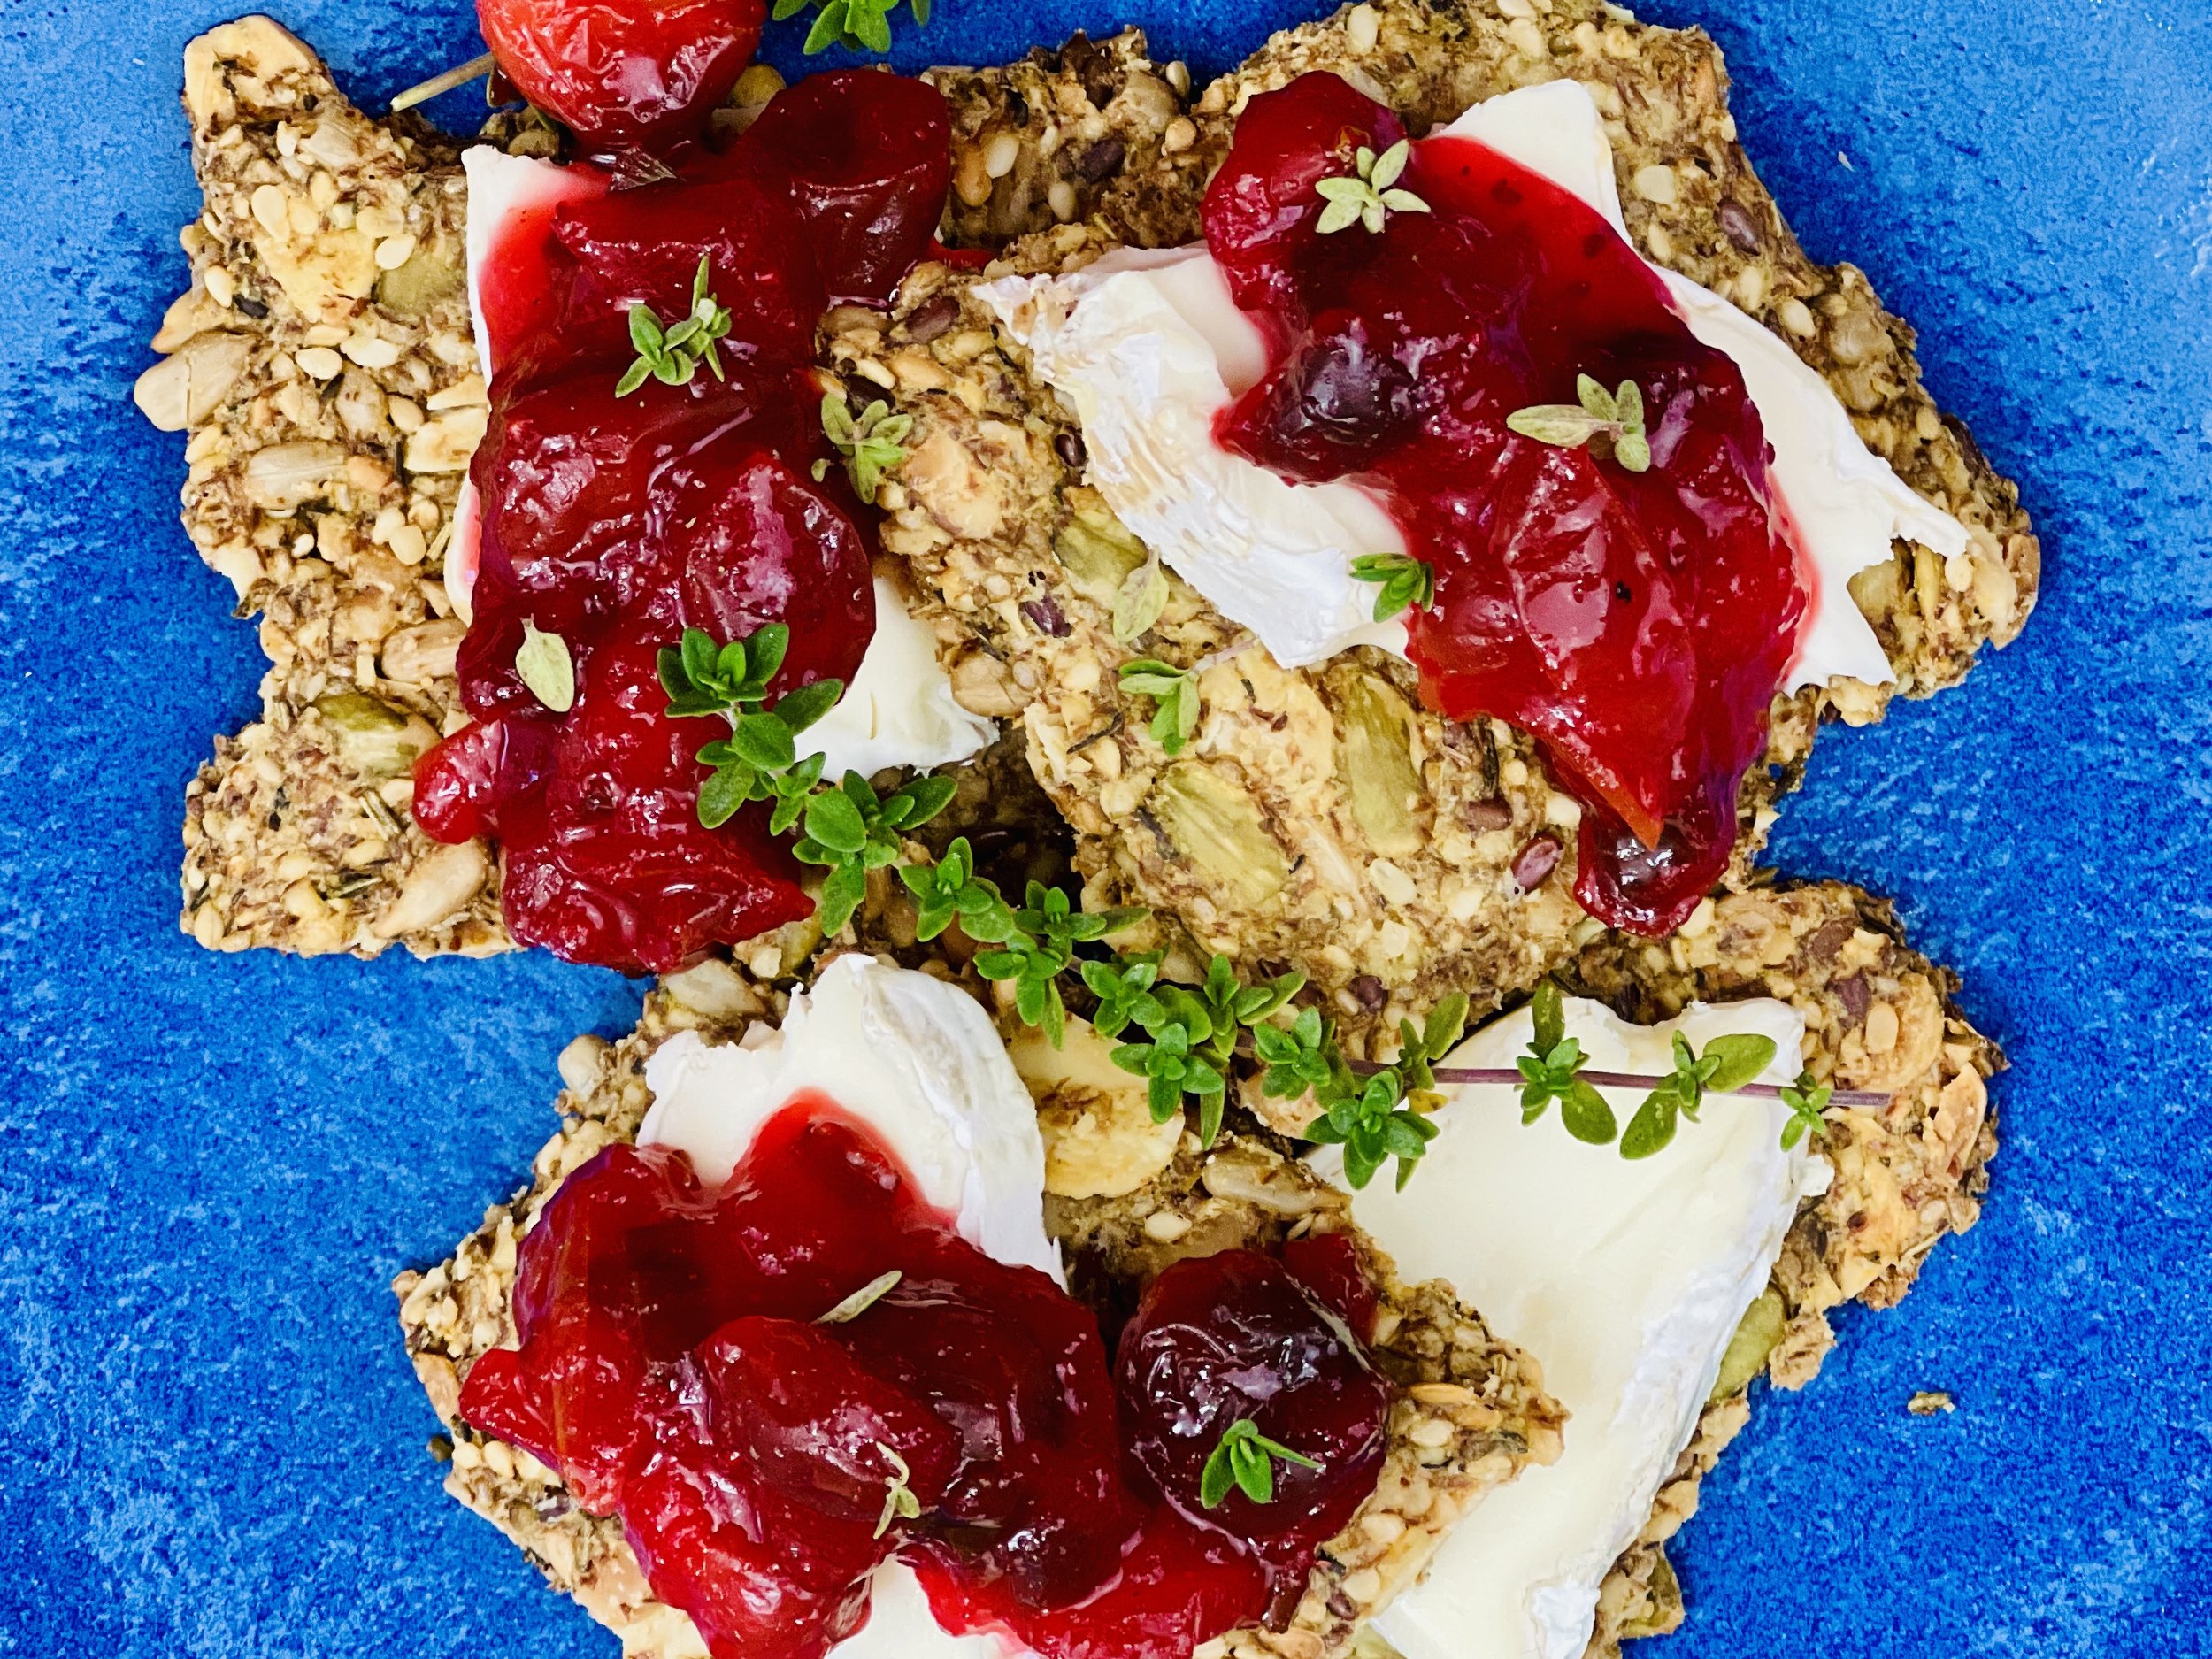
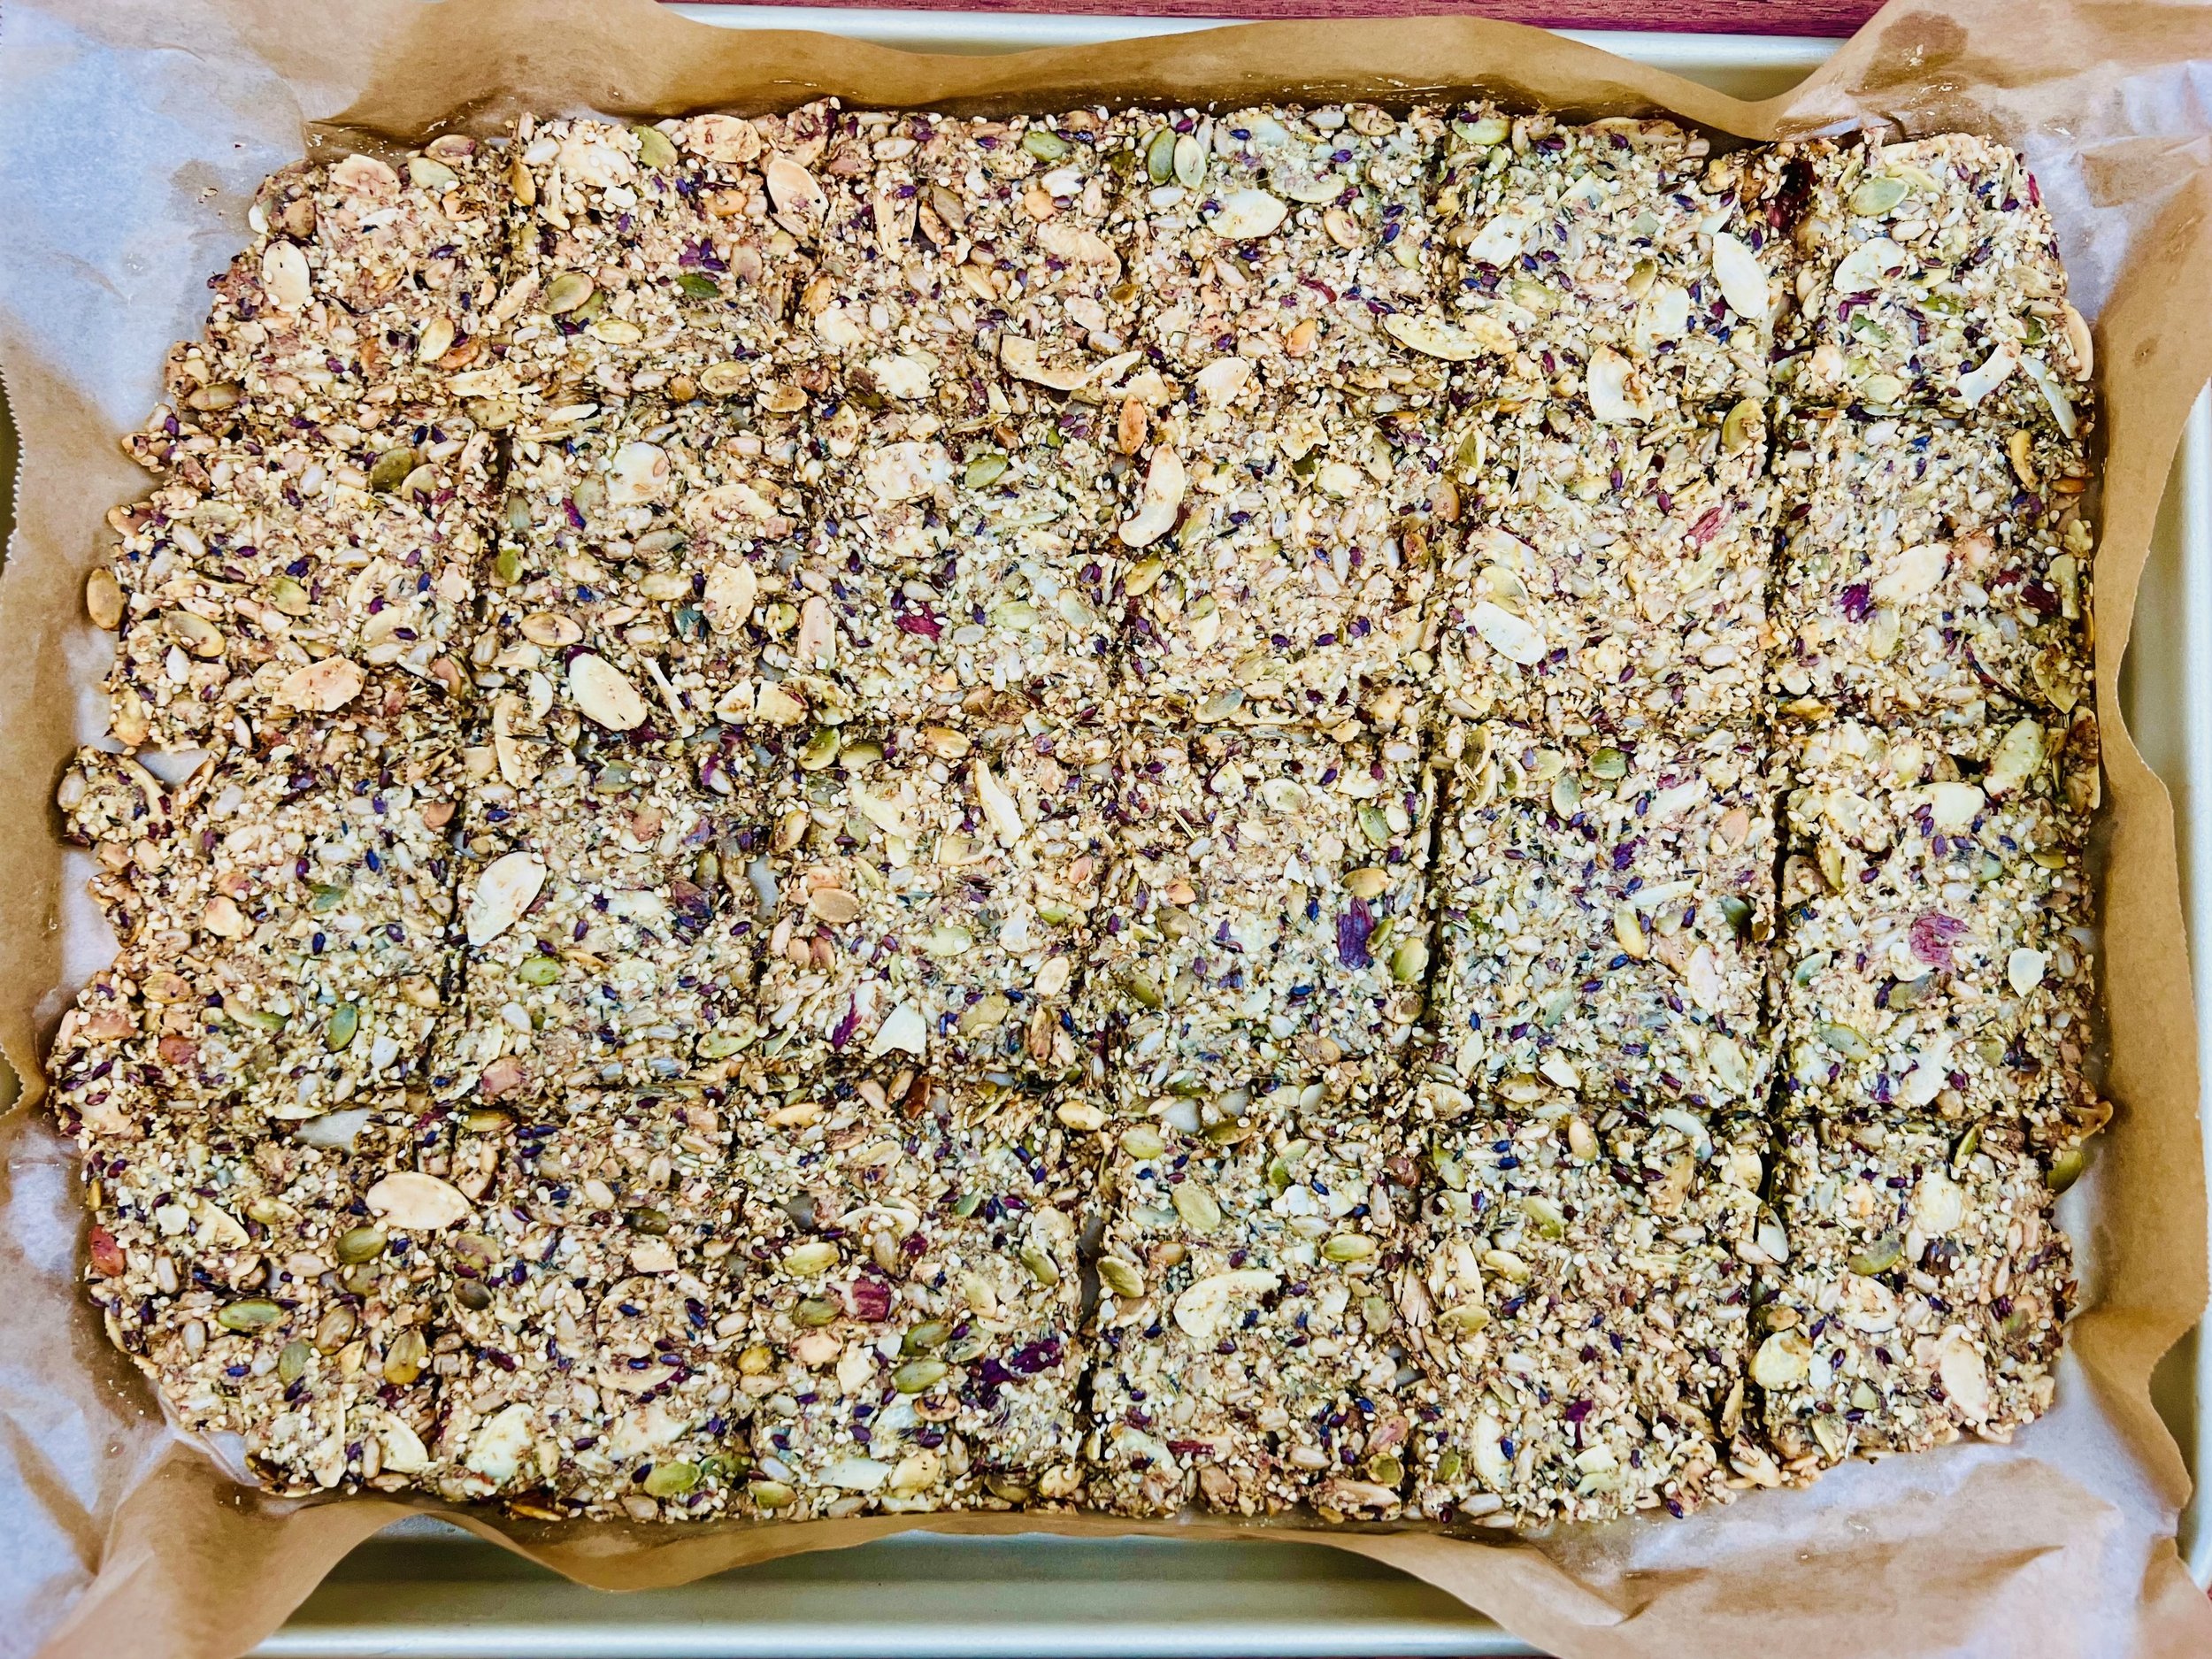
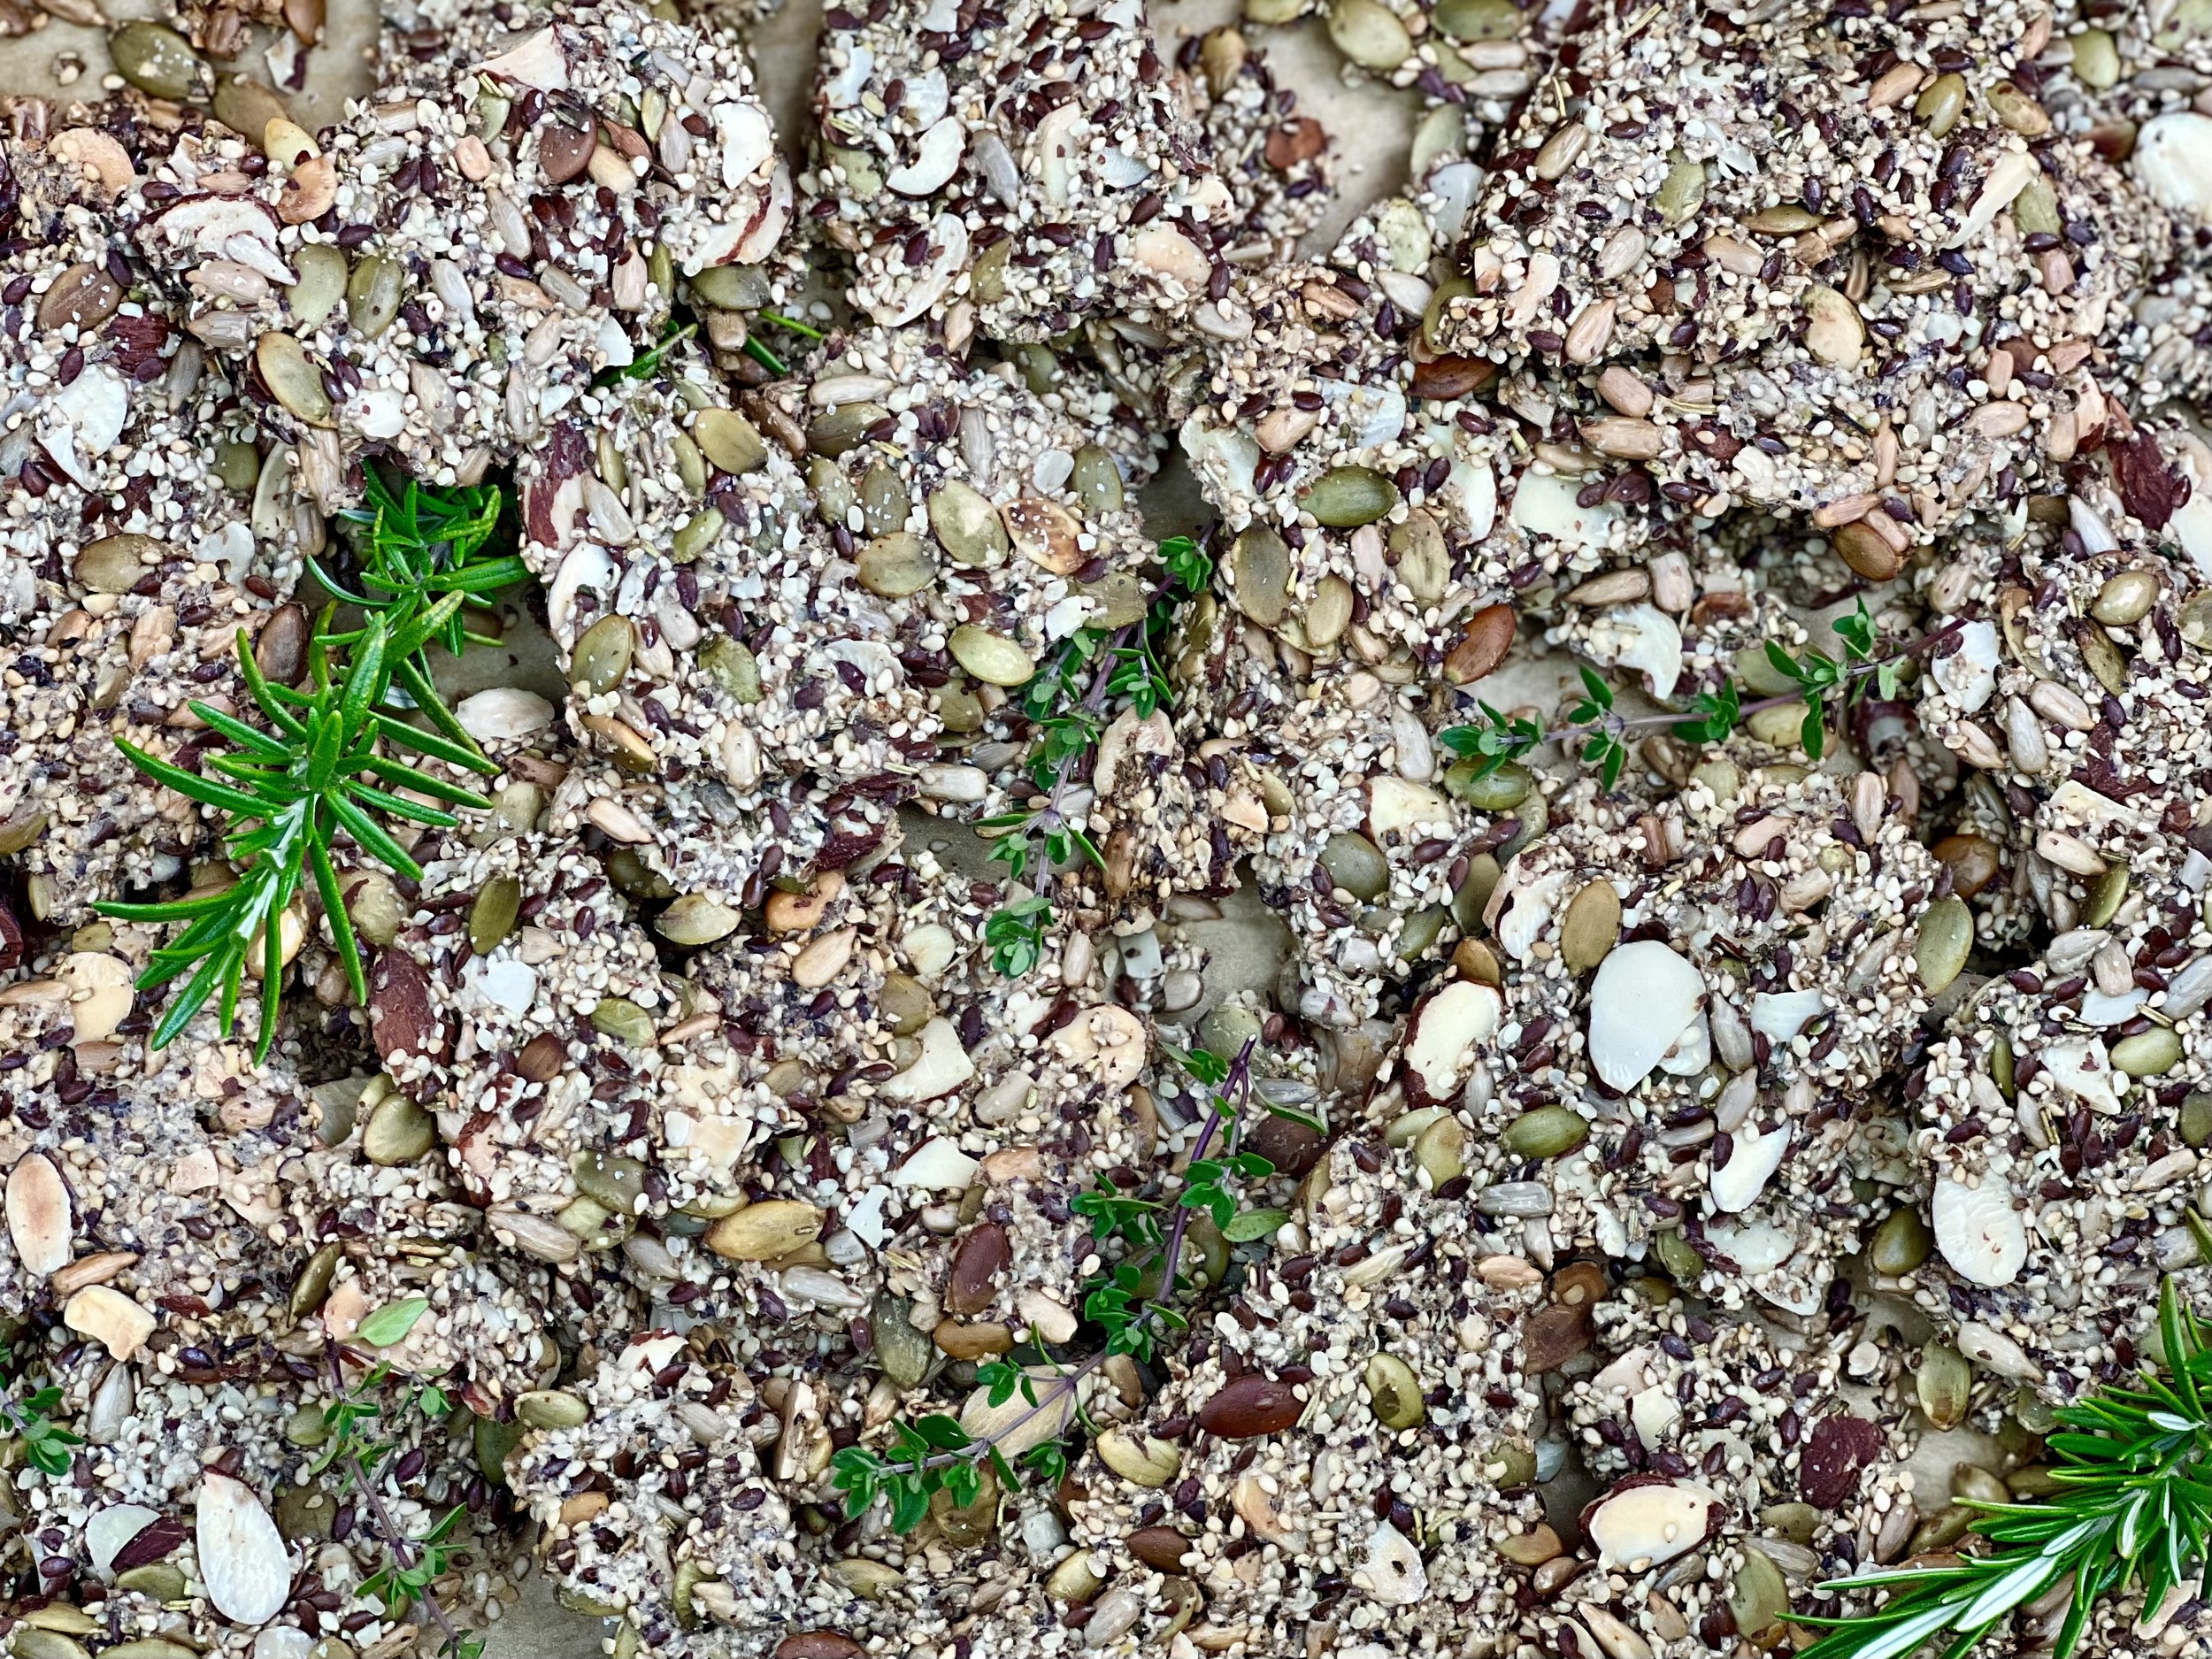
10 Minutes Prep • 50 Minutes Cook • Gluten-free • Dairy-free • Low FODMAP • Serving size 3-4 crackers