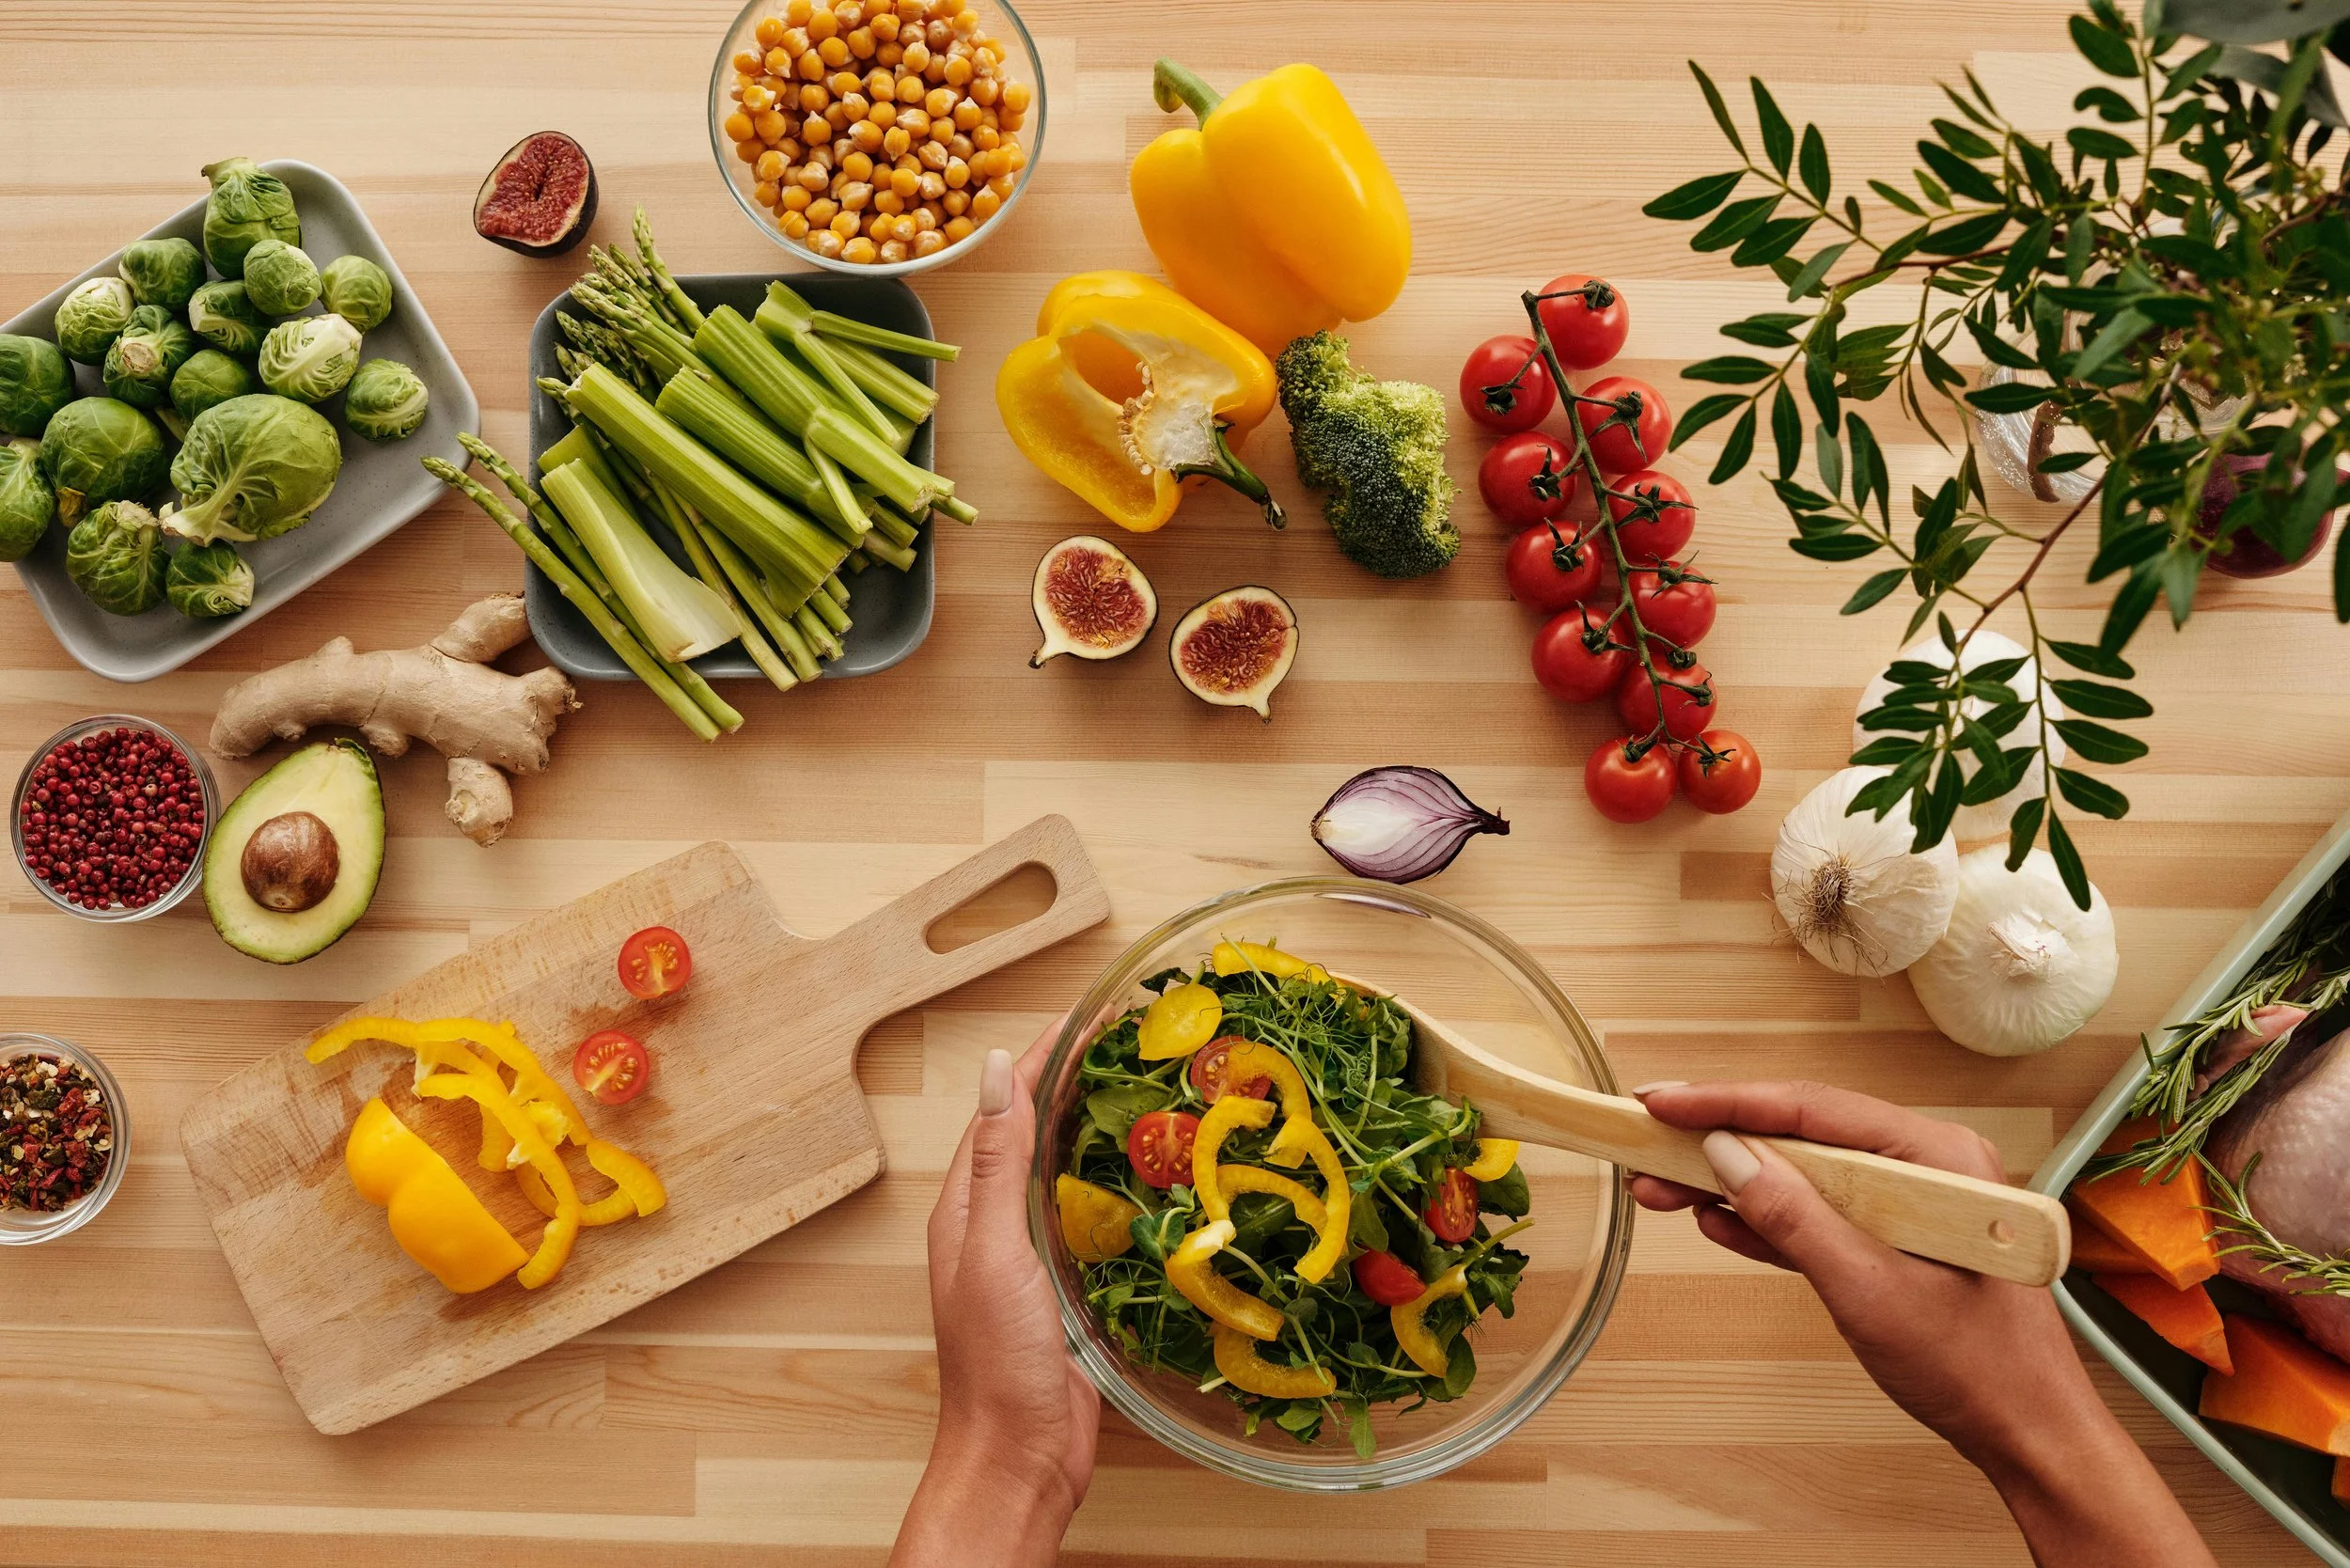
Deliciously Low FODMAP

Inspire yourself with hundreds of delicious low FODMAP recipes, tips, and tools, and enjoy the abundance that is yours even when you have IBS.
Use the buttons and filters to find something specific or browse the complete collection for inspiration.
Discover a treasure trove of recipes with my FREE recipe club! Get new ideas delivered straight to your inbox every week.
Deliciously Low FODMAP is a trademark of IBS Game Changer, LLC
Filter to find Recipes and Tools
More Filtering Options
- All 827
- Appetizer 56
- BBQ 49
- Bowl 32
- Breakfast 69
- Cocktails 13
- Collection 1 58
- Collection 10 27
- Collection 11 30
- Collection 12 27
- Collection 13 31
- Collection 14 29
- Collection 15 31
- Collection 16 34
- Collection 17 31
- Collection 18 33
- Collection 19 36
- Collection 2 32
- Collection 20 33
- Collection 21 33
- Collection 22 40
- Collection 23 63
- Collection 24 46
- Collection 3 28
- Collection 4 29
- Collection 5 30
- Collection 6 32
- Collection 7 31
- Collection 8 31
- Collection 9 32
- Condiments 6
- Crock Pot 4
- Dessert 119
- Diabetes Game Changer Exception Protocol Contains Alcohol 11
- Diabetes Game Changer Exception Protocol Contains Flour 113
- Diabetes Game Changer Exception Protocol Contains Flour AND Sugar 79
- Diabetes Game Changer Exception Protocol Contains Sugar 52
- Diabetes Game Changer First Four Weeks 405
- Dinner 371
- Drink 8
- Easter 1
- Free Guide 17
- Gluten-free 686
- Gut Microbiome 2
- Guthealth 3
- Holidays 73
- IBS Triggers 4
- Keto Friendly 178
- Lactose-Free 184
- Low Carb 22
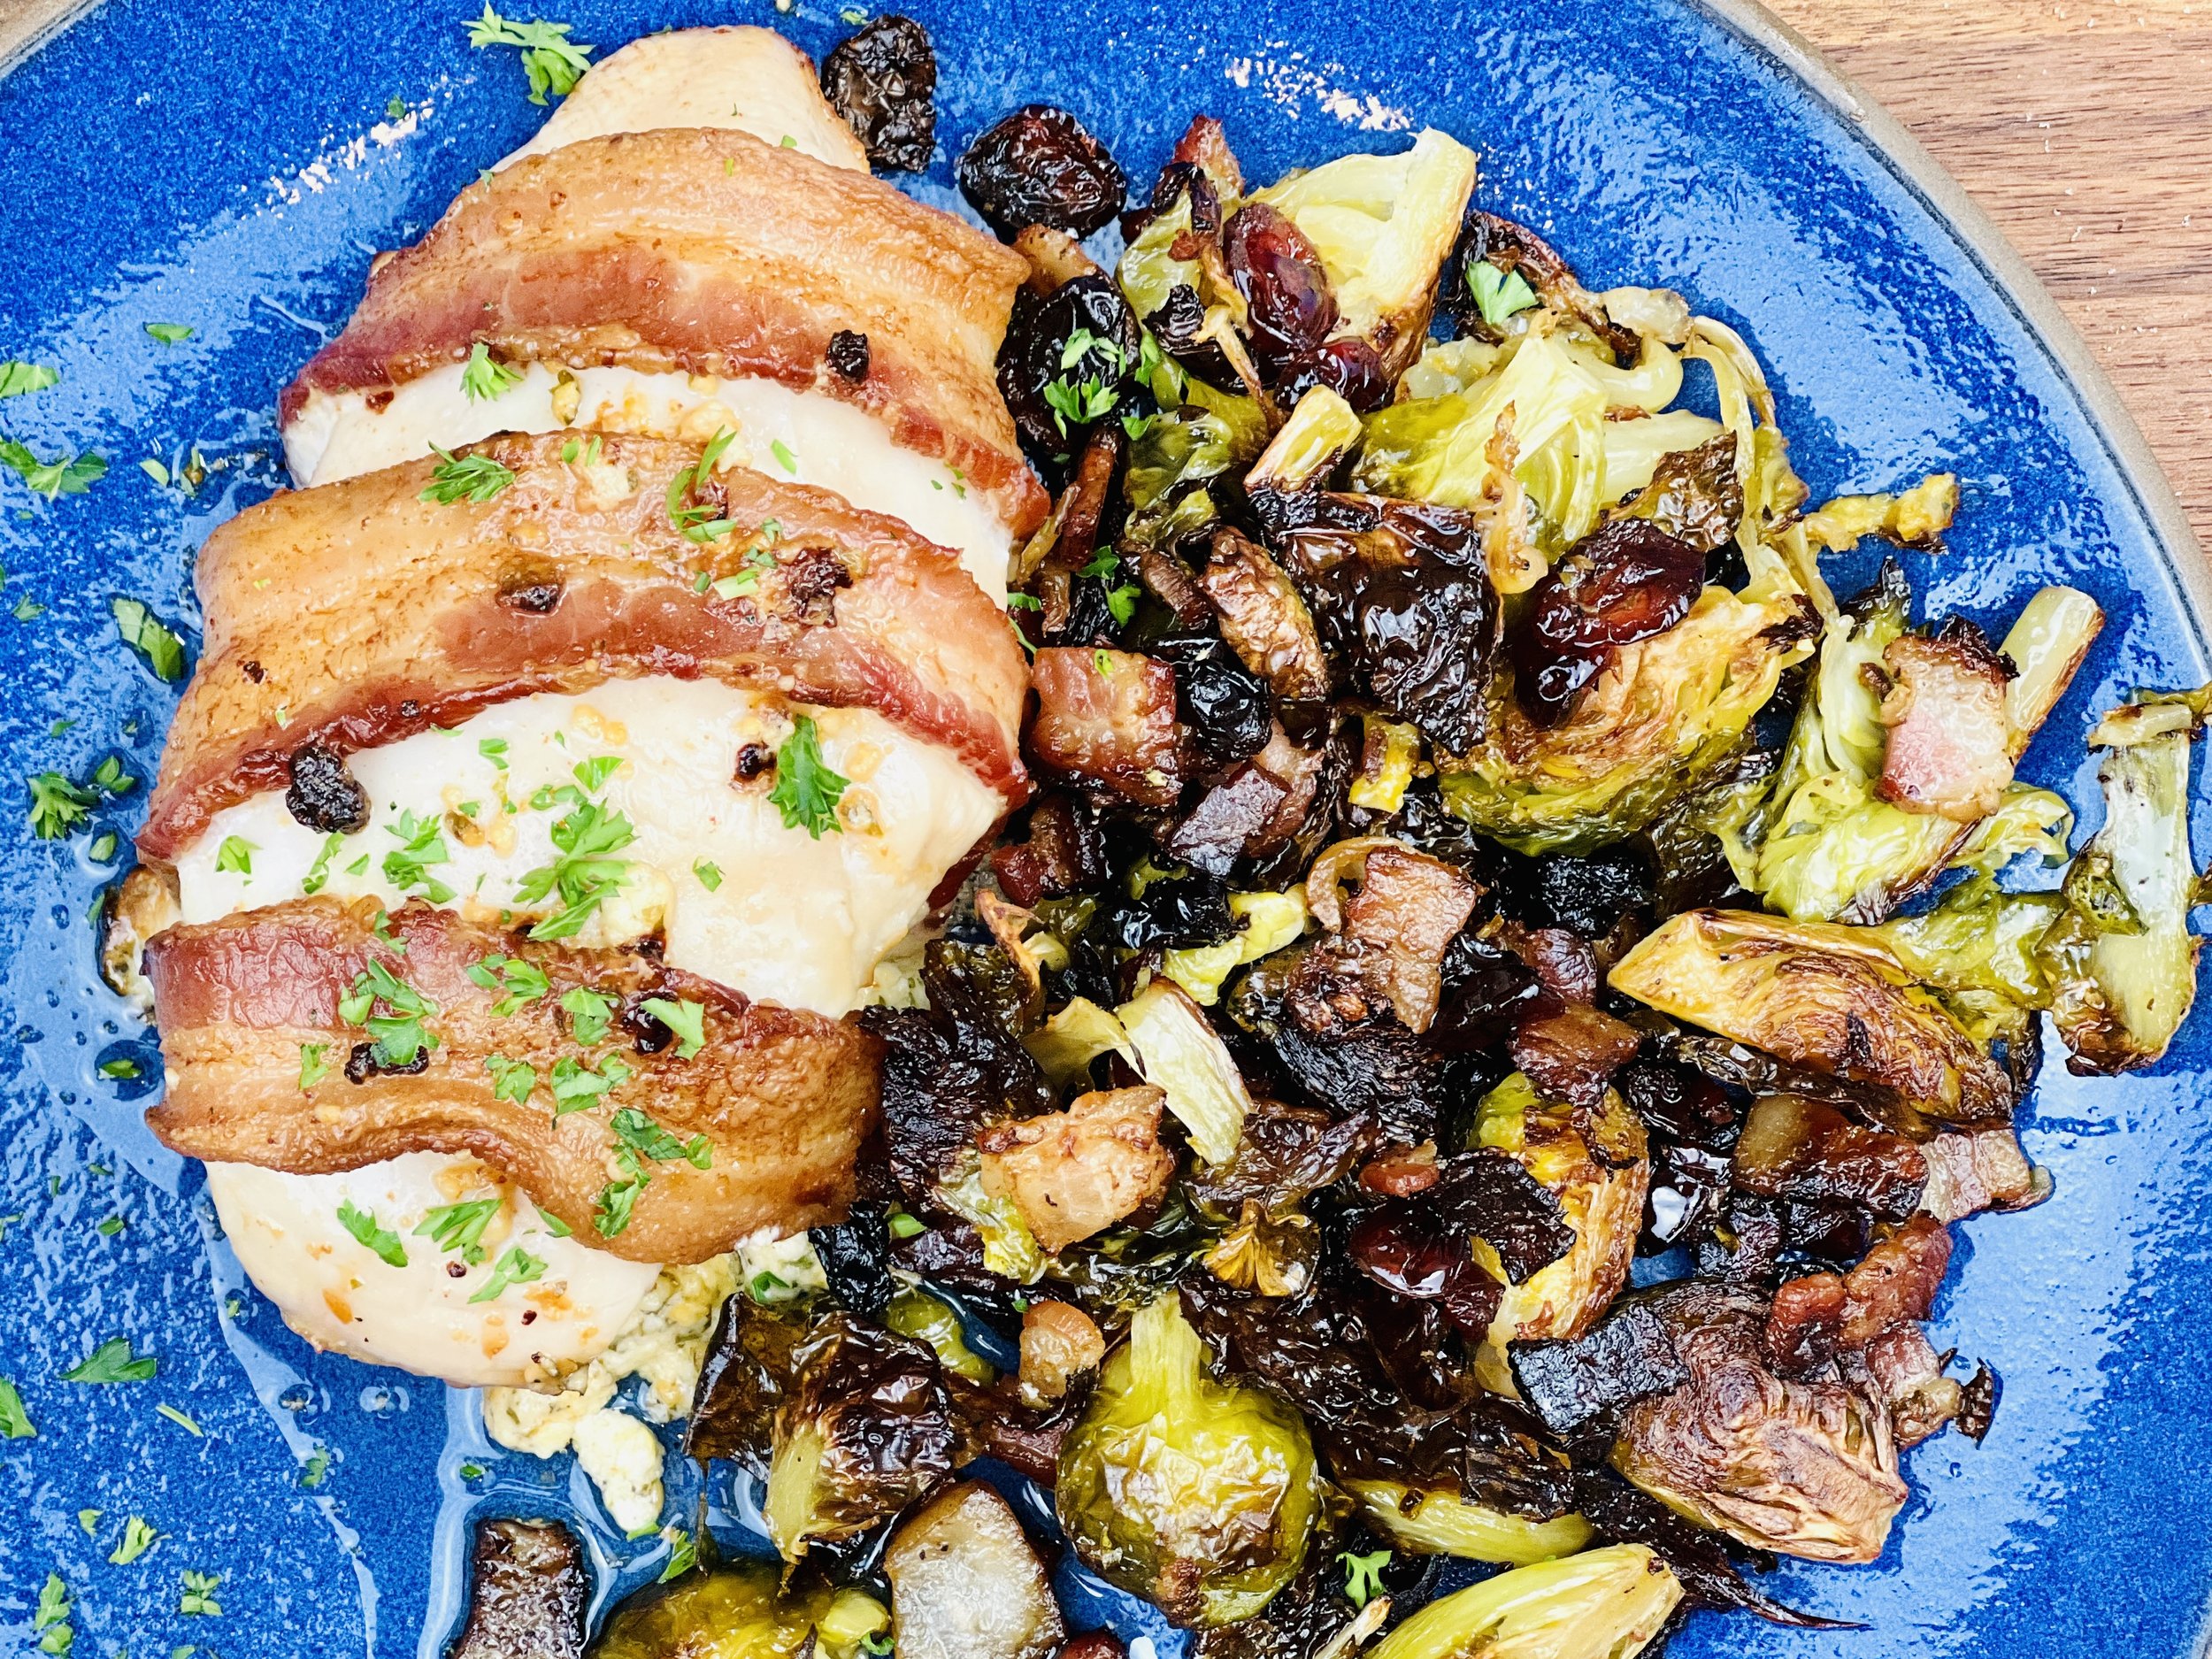
Three Cheese Stuffed Chicken Breasts (Low FODMAP)
20 Minutes prep • 40 Minutes cook • Low FODMAP • Gluten-free • Serves 4
20 Minutes prep • 40 Minutes cook • Low FODMAP • Gluten-free • Serves 4 • Ok to make ahead: Steps 1-5
This sheet pan chicken recipe is easy to make just for two or for a whole table full of people. Cutting into the chicken breast reveals the delicious filling with a combination of cheeses that is wonderful with the bacon. I served this chicken with Brussels sprouts roasted on the same pan with the chicken, but you can use potatoes if you prefer. You can stuff and wrap the chicken breasts ahead of time and cook them when you’re ready, so this can be a great make-ahead meal if you’re pressed for time.
Ingredients
4 boneless skinless chicken breasts
2 ounces lactose-free cream cheese, at room temperature
1/4 cup shredded cheddar cheese
1/4 cup shredded Havarti, Mozerella, or fontina cheese
1 teaspoon finely chopped parsley
1/4 teaspoon Smoke N Sanity Essence of Garlic Salt
1/4 teaspoon black pepper or to taste
8 slices bacon
1 pound small new potatoes, cut in half or quarters if they are large (or substitute Brussels sprouts for a lower carb version)
2 tablespoons olive oil
Chopped parsley (optional) for serving
Directions
(1) Prepare the chicken: This step is optional but results in a more flavorful and tender chicken. Remove chicken from the package, and put it in one layer on a rimmed plate or baking dish. Season both sides of each piece lightly with Kosher salt (about 1/4 teaspoon per side). Cover the dish with plastic wrap and refrigerate until ready to use, ideally about 4 hours before cooking or overnight.
(2) Prepare: Preheat the oven to 400 degrees F. Line a rimmed baking sheet with parchment paper. Grate the cheeses. Chop the parsley.
(3) Make the filling: In a small bowl, combine the cream cheese with the other two cheeses, parsley, garlic salt, and pepper.
(4) Stuff the chicken breasts: Using a small sharp knife, cut a deep pocket in each chicken breast by slicing into the breast down the thicker long side of the meat. Spoon 1/4 of the cheese mixture into the pocket of each chicken breast. You may need to press it in a bit to get it to stay.
(5) Wrap the chicken breasts: If you didn’t salt the chicken ahead of time, sprinkle the surface lightly with salt, then wrap two bacon slices around each chicken breast. Lay them on the pan using the weight of the chicken to hold the ends of the bacon slices in place.
Make-ahead note: At this point, you may put the wrapped chicken breasts in the refrigerator for up to a few hours until you’re ready to cook them.
(6) Add the vegetables: Add the chopped potatoes or Brussels sprouts to one side of the pan. Drizzle with olive oil. Sprinkle with 1/2 teaspoon salt and 1/4 teaspoon pepper. (If using Brussels sprouts, add 2 tablespoons each of raisins and cranberries if you like.)
(5) Cook the chicken: Put the pan in the preheated oven and bake for about 40 minutes. You may want to toss the vegetables 1/2 way through cooking.
(6) Finish: Turn the oven to broil and, watching carefully, broil the chicken for about 3 minutes until the bacon is browned and crispy on top.
(5) Plate and serve: Serve warm with chopped parsley.
Eat and enjoy every bite because you can!
Recipe note: I use Diamond Crystal Kosher salt in all my recipes because it has a wonderful flat and crisp flake that tastes delicious. It is also the least salty salt available so you can use it more liberally as a seasoning than you can table salt or sea salt. If you use another type of salt, you may need to reduce the amount so it is not over-salted.
Have a question you’d like to have answered? Email me at hello@ibsgamechanger.com
Link note: This post may contain affiliate links for you to easily purchase items that are linked. I may earn a small commission from qualifying purchases but none of this costs you a thing so feel free to use the links! In addition, for some items, I have provided a special discount code for IBS Game Changers so be sure to use the code when you purchase an item to get the discount that has been arranged just for you.
More Deliciously Low FODMAP™ main course recipes


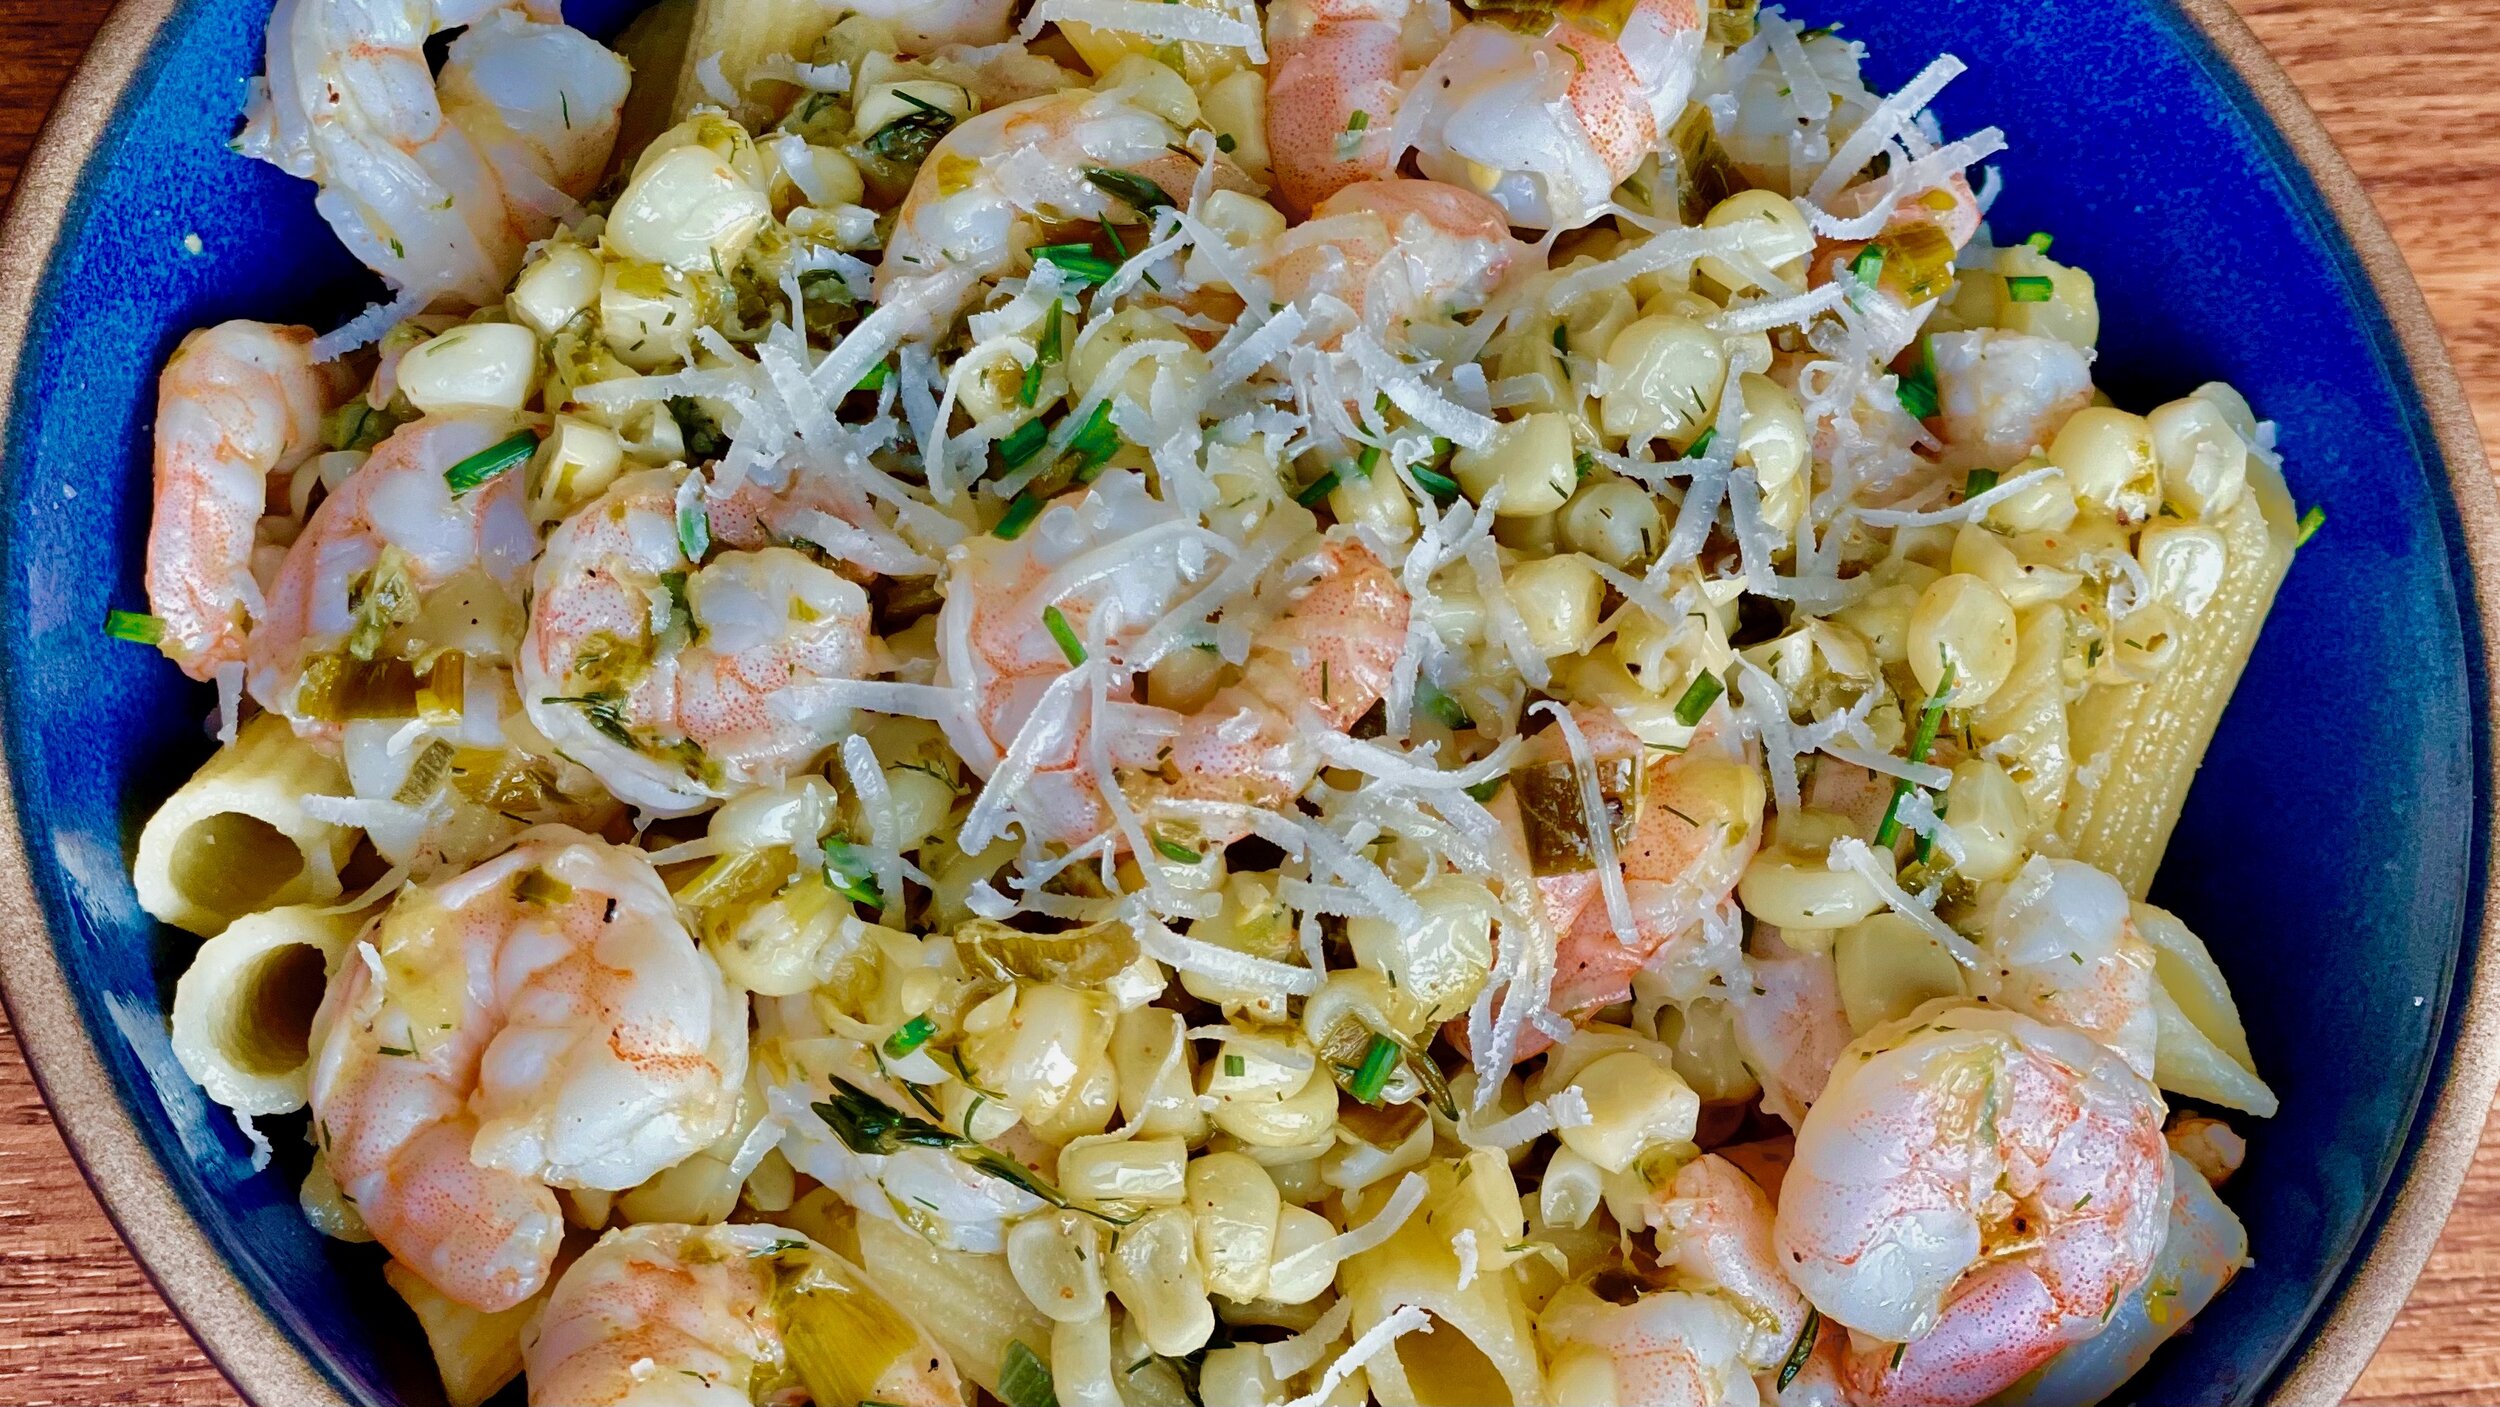
Crispy Salmon Cakes (Low FODMAP)
15 Minutes prep • 10 Minutes cook • Low FODMAP • Gluten-free • Lactose-free
15 Minutes prep • 10 Minutes cook • Low FODMAP • Gluten-free • Lactose-free • Makes 12 • Ok to make ahead: Steps 1-3
You may have had crab cakes, but have you had salmon cakes? You might think they’re even more delicious! Crispy on the outside and tender and flavorful on the inside, salmon cakes are easy to make with canned salmon so they’re a great dish you can make right out of your pantry. Serve them as an appetizer, or make them a little bigger and serve them as a main course with all the fixings like a burger. No matter how you shape them, just be sure you make enough because they’re so good, they’ll go fast!
Ingredients: Salmon Cakes
2 tablespoons avocado oil (or other high smoke point oil)
14 ounces canned salmon (or cooked salmon)
1/2 cup gluten-free panko crumbs (use Pork Panko for low-carb version)
2 large eggs, lightly beaten
1 tablespoon gluten-free, low-sodium, soy sauce
1 teaspoon Smoke N Sanity Essence of Garlic Salt
1 teaspoon chili powder
1/2 teaspoon black pepper
Chives or green onions (optional for serving)
1/4 teaspoon red pepper flakes (optional for serving)
Ingredients: Sauce
1/2 cup mayonnaise
1 teaspoon gluten-free, low-sodium soy sauce
Directions
(1) Prepare: Remove the salmon from the can, drain the juice off, and remove the salmon skin. Make the sauce: combine the mayonnaise and soy sauce and stir until smooth.
(2) Combine ingredients: In a medium-sized mixing bowl, combine the salmon, panko, eggs, soy sauce, garlic salt, chili powder, and black pepper. Use a fork to blend and break up the salmon. Stir until the mixture starts to thicken as the panko absorbs the liquid.
(3) Shape the cakes: Scoop a generous two tablespoons into your palm and shape into a small patty. Lay on a plate and shape the rest of the salmon mixture into patties. You should get about 12 salmon cakes out of the mixture.
Make-ahead note: At this point, you may put the salmon cakes in the refrigerator for up to a few hours until you’re ready to cook them.
(4) Cook: Heat a large skillet over medium-high heat. When the pan is warm, add the avocado oil. Heat until the oil shimmers, then add the salmon cakes leaving space between each cake to ensure they get nice and crispy. Fry for 3 - 5 minutes on each side until they are crispy and golden brown (I cooked them in two batches). Set aside on paper towels until all are cooked.
(5) Plate and serve: Serve warm with the mayo sauce and sprinkle with chives or green onions and red pepper flakes.
Eat and enjoy every bite because you can!
Recipe note: I use Diamond Crystal Kosher salt in all my recipes because it has a wonderful flat and crisp flake that tastes delicious. It is also the least salty salt available so you can use it more liberally as a seasoning than you can table salt or sea salt. If you use another type of salt, you may need to reduce the amount so it is not over-salted.
Have a question you’d like to have answered? Email me at hello@ibsgamechanger.com
Link note: This post may contain affiliate links for you to easily purchase items that are linked. I may earn a small commission from qualifying purchases but none of this costs you a thing so feel free to use the links! In addition, for some items, I have provided a special discount code for IBS Game Changers so be sure to use the code when you purchase an item to get the discount that has been arranged just for you.
More Deliciously Low FODMAP™ appetizer recipes


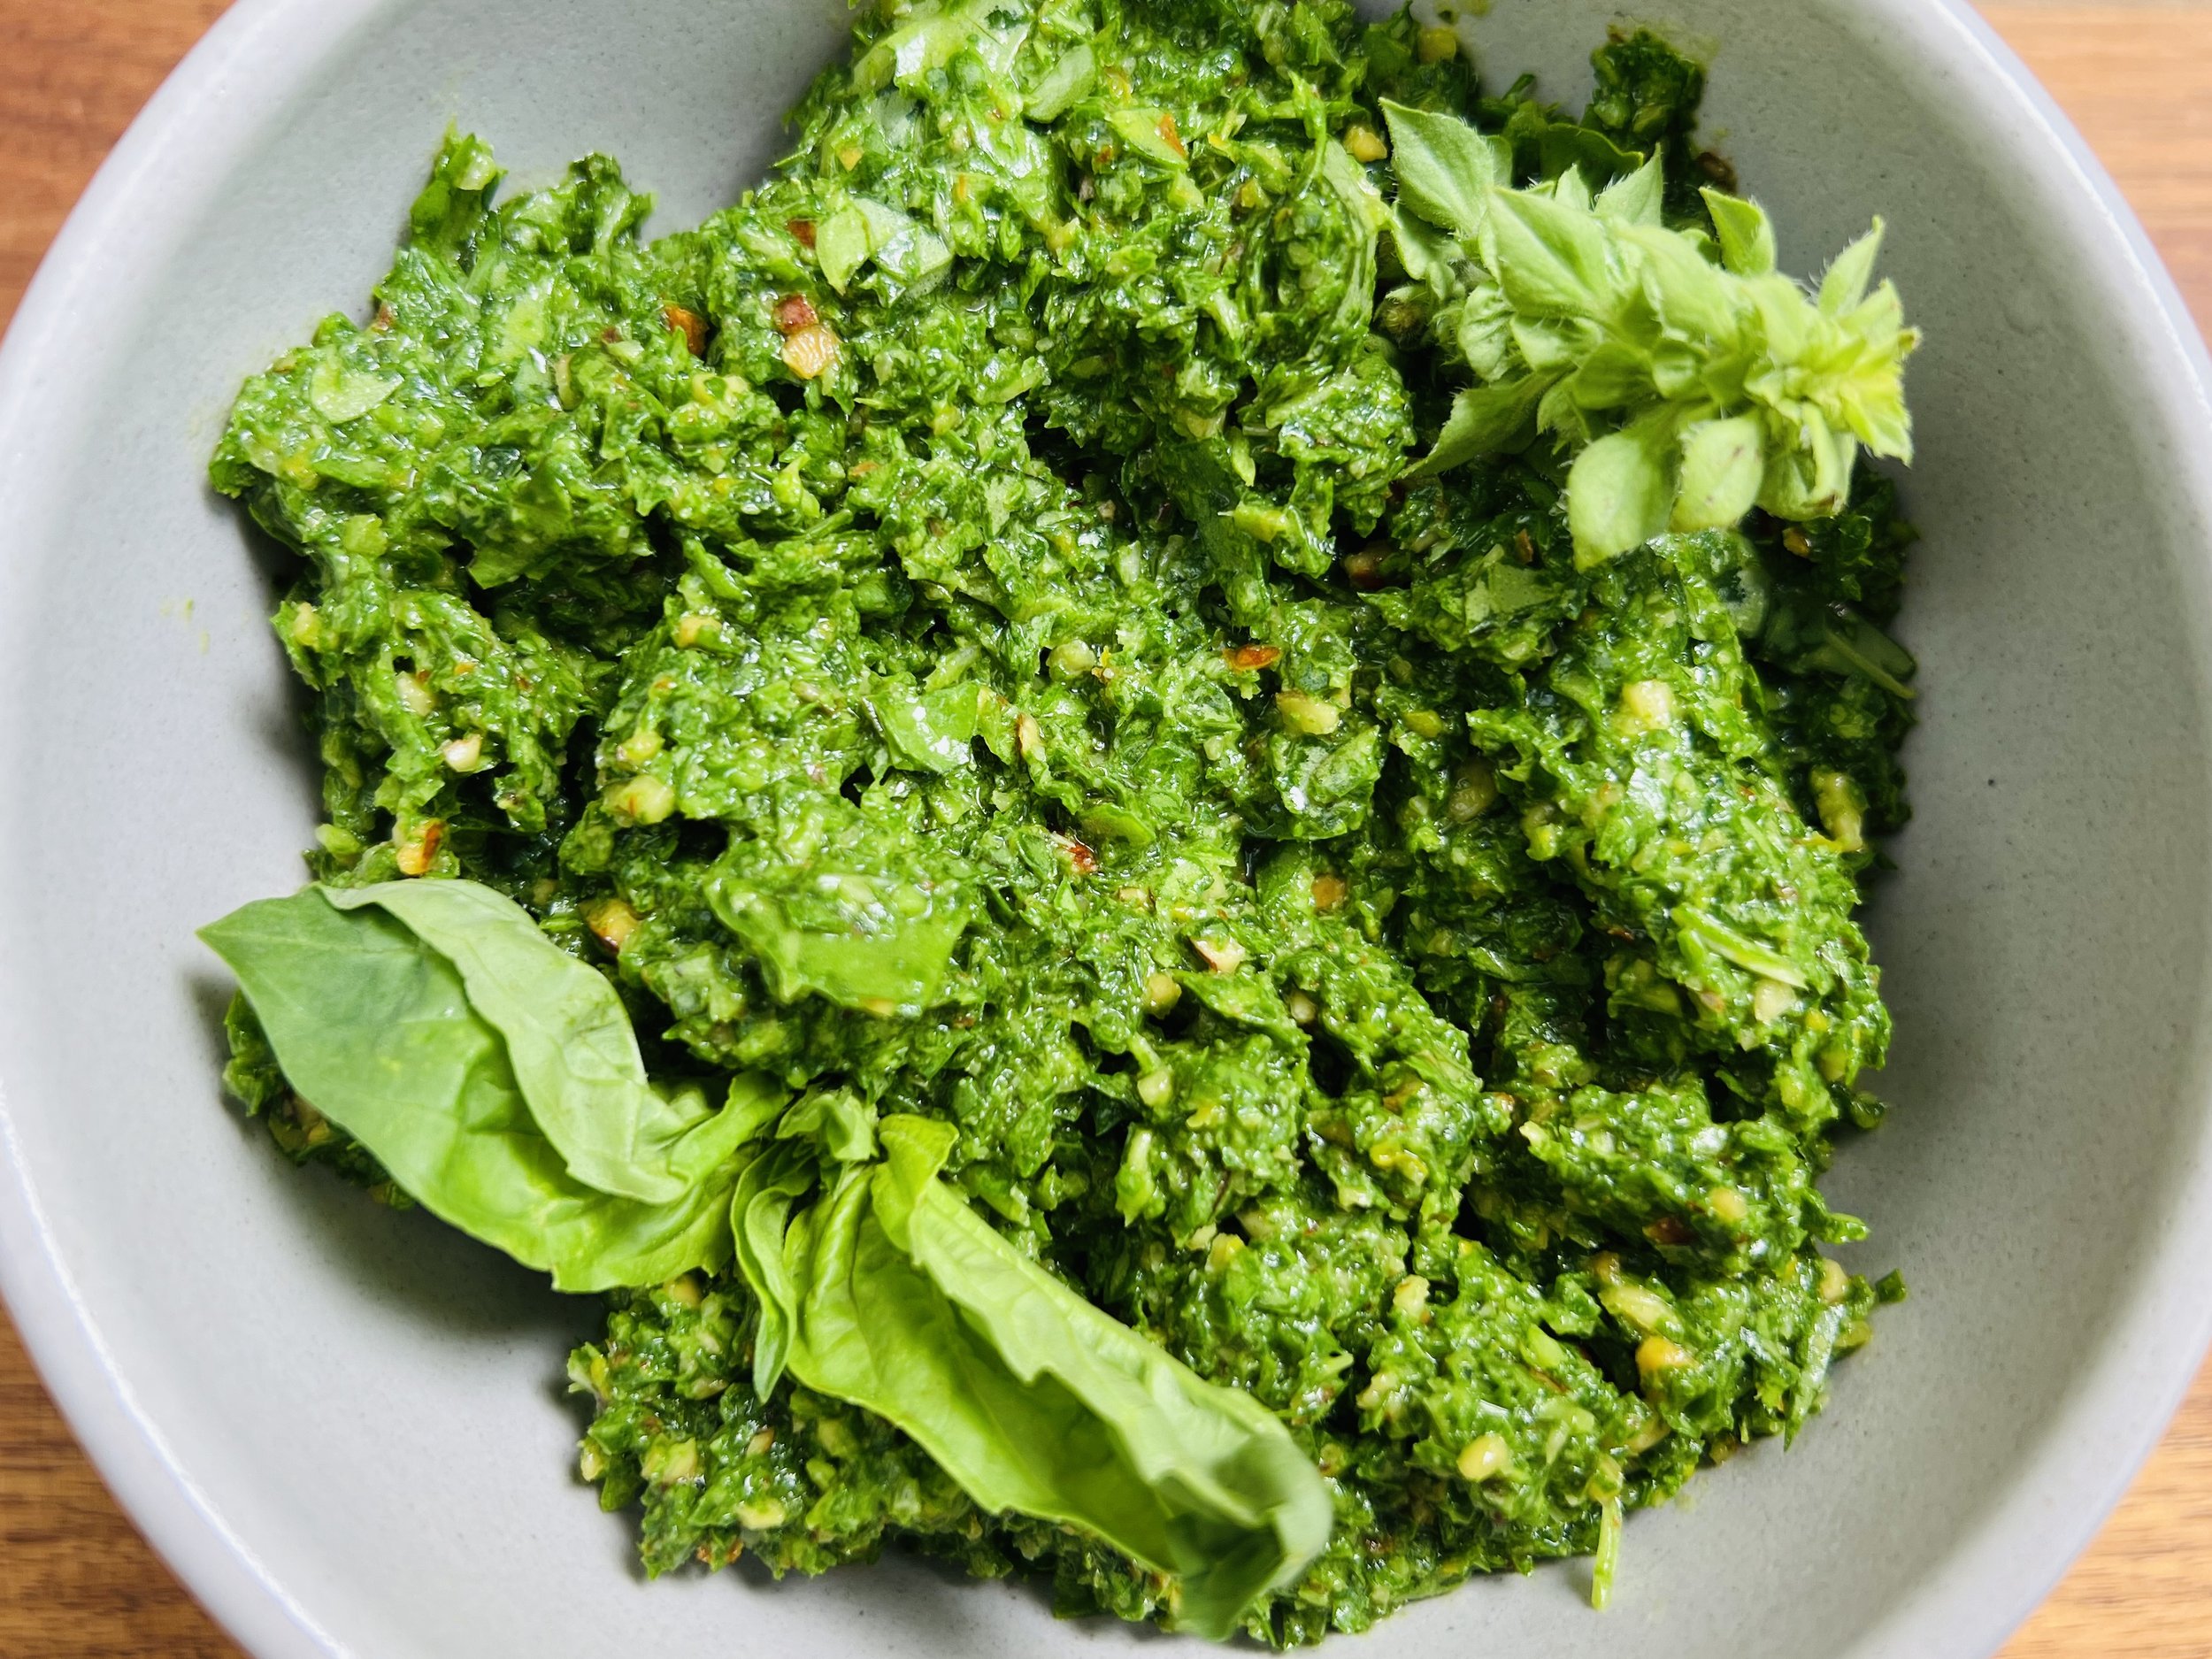


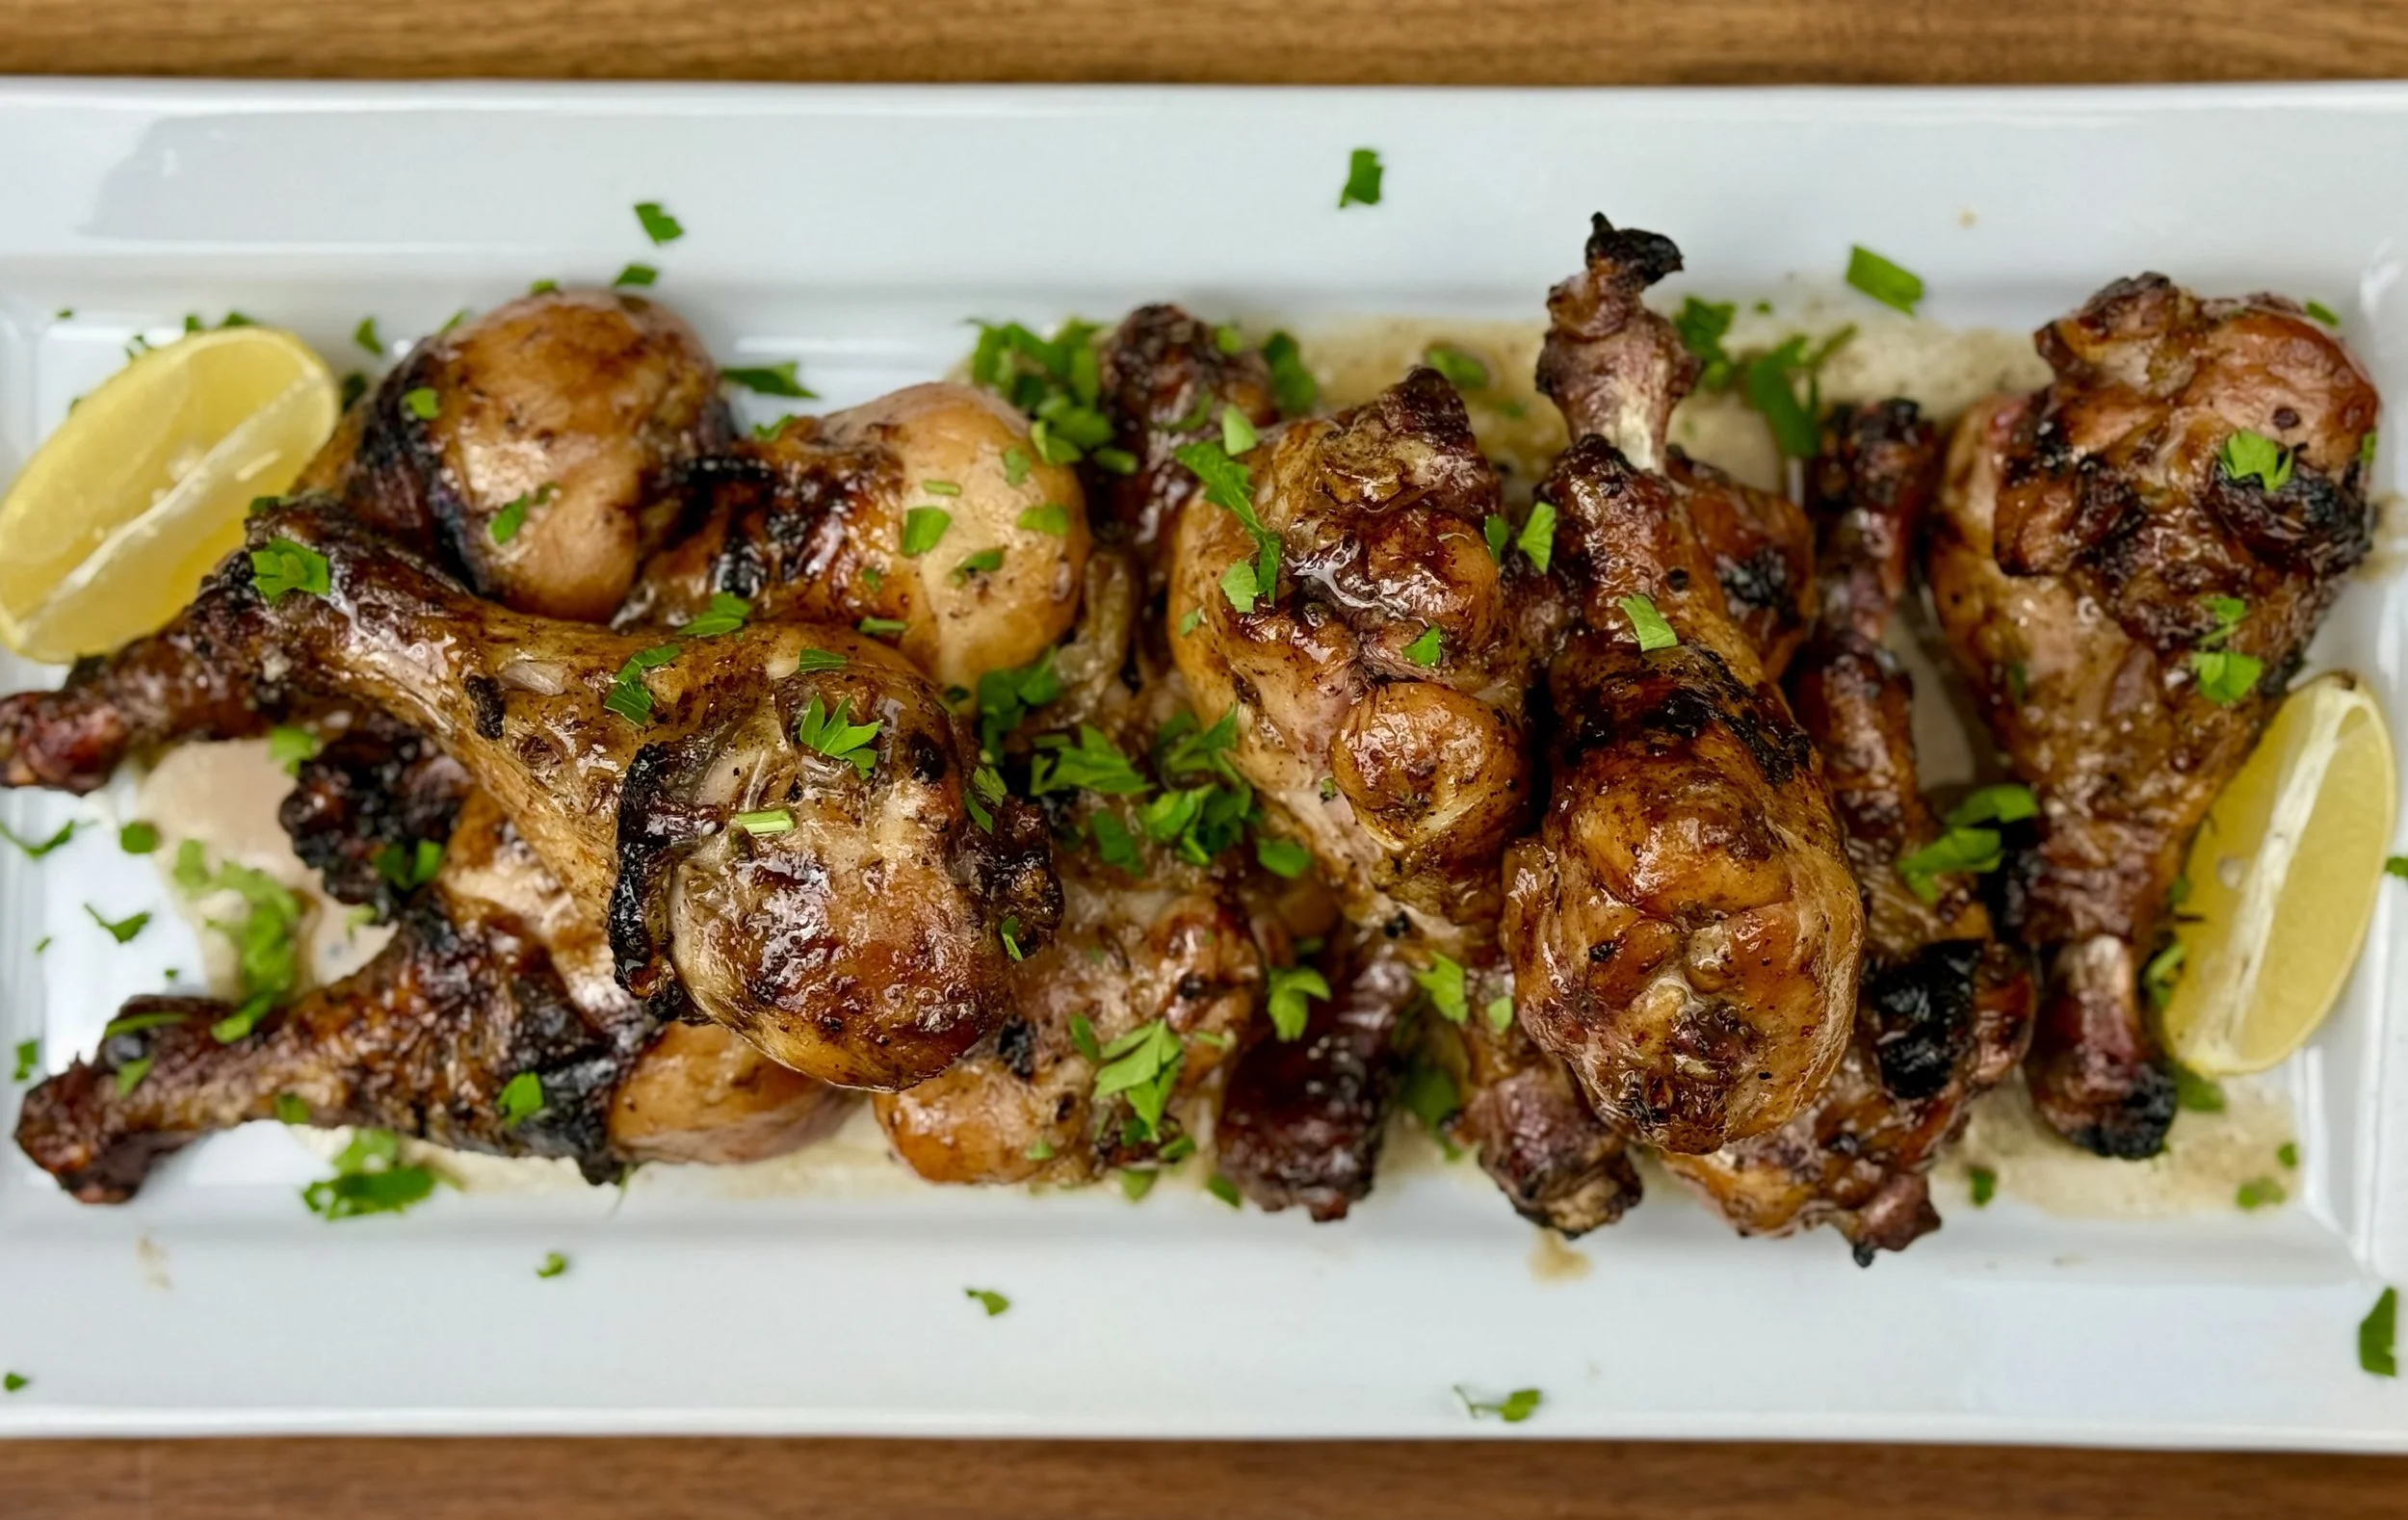
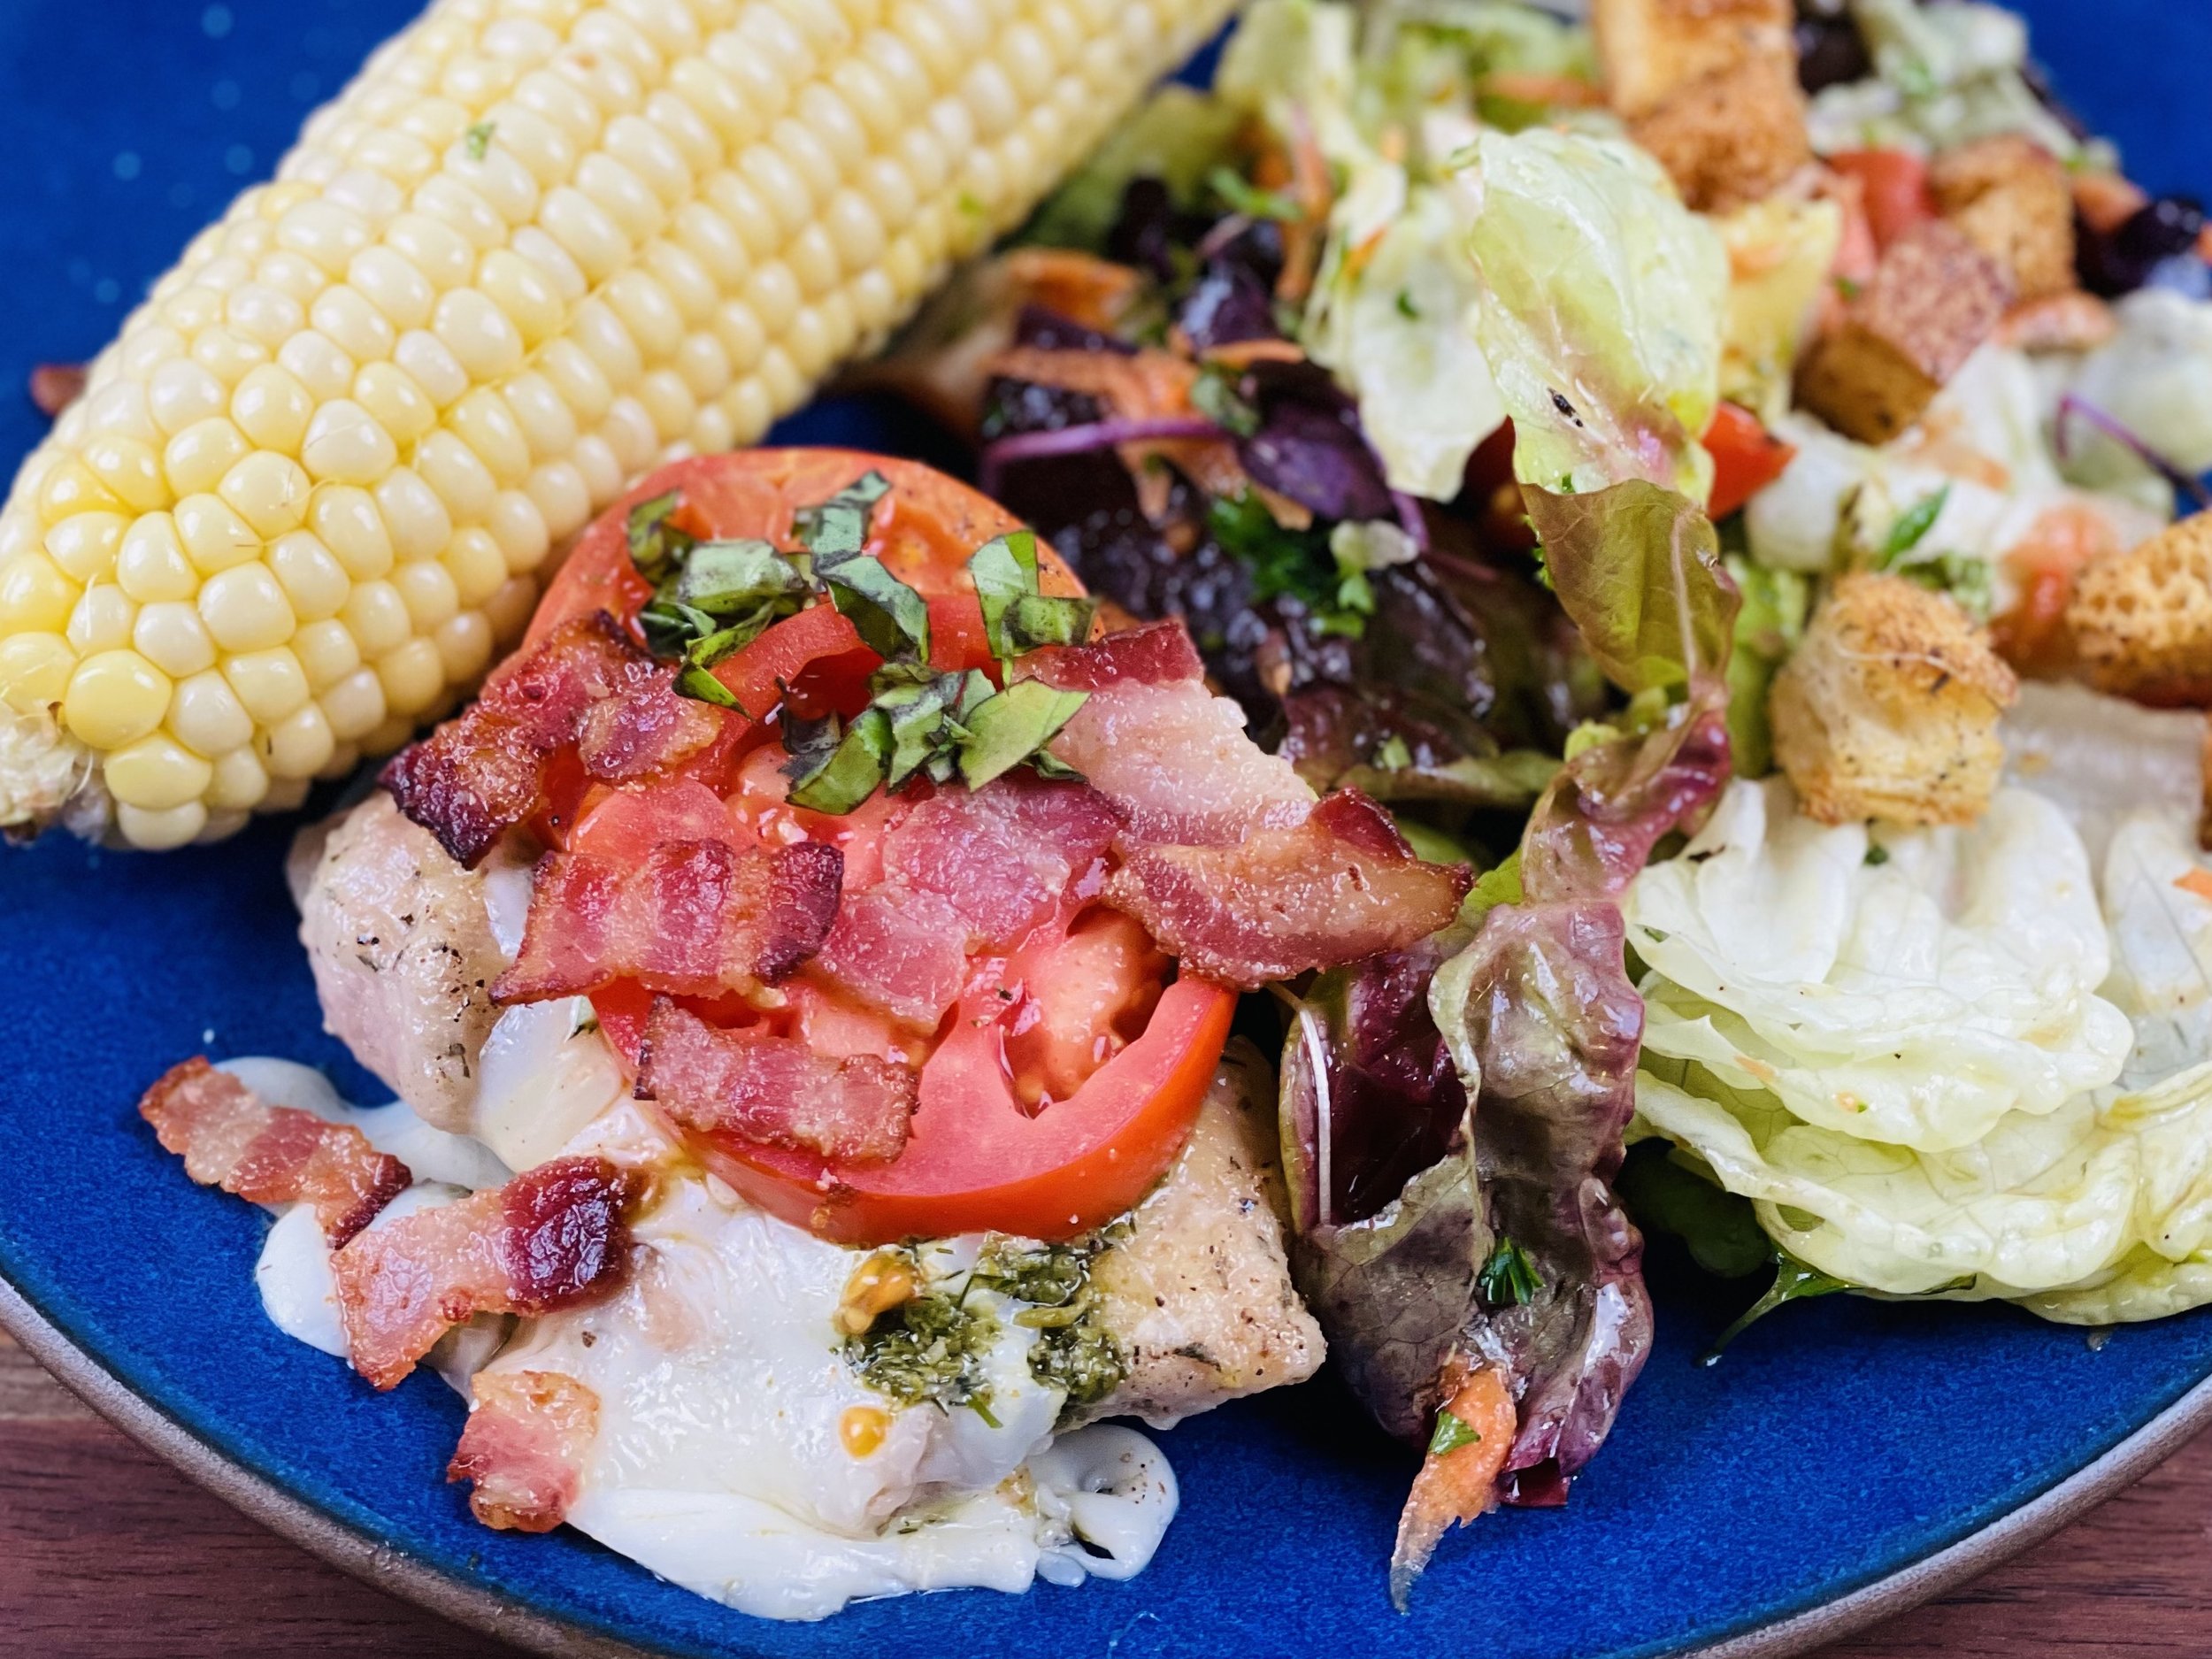
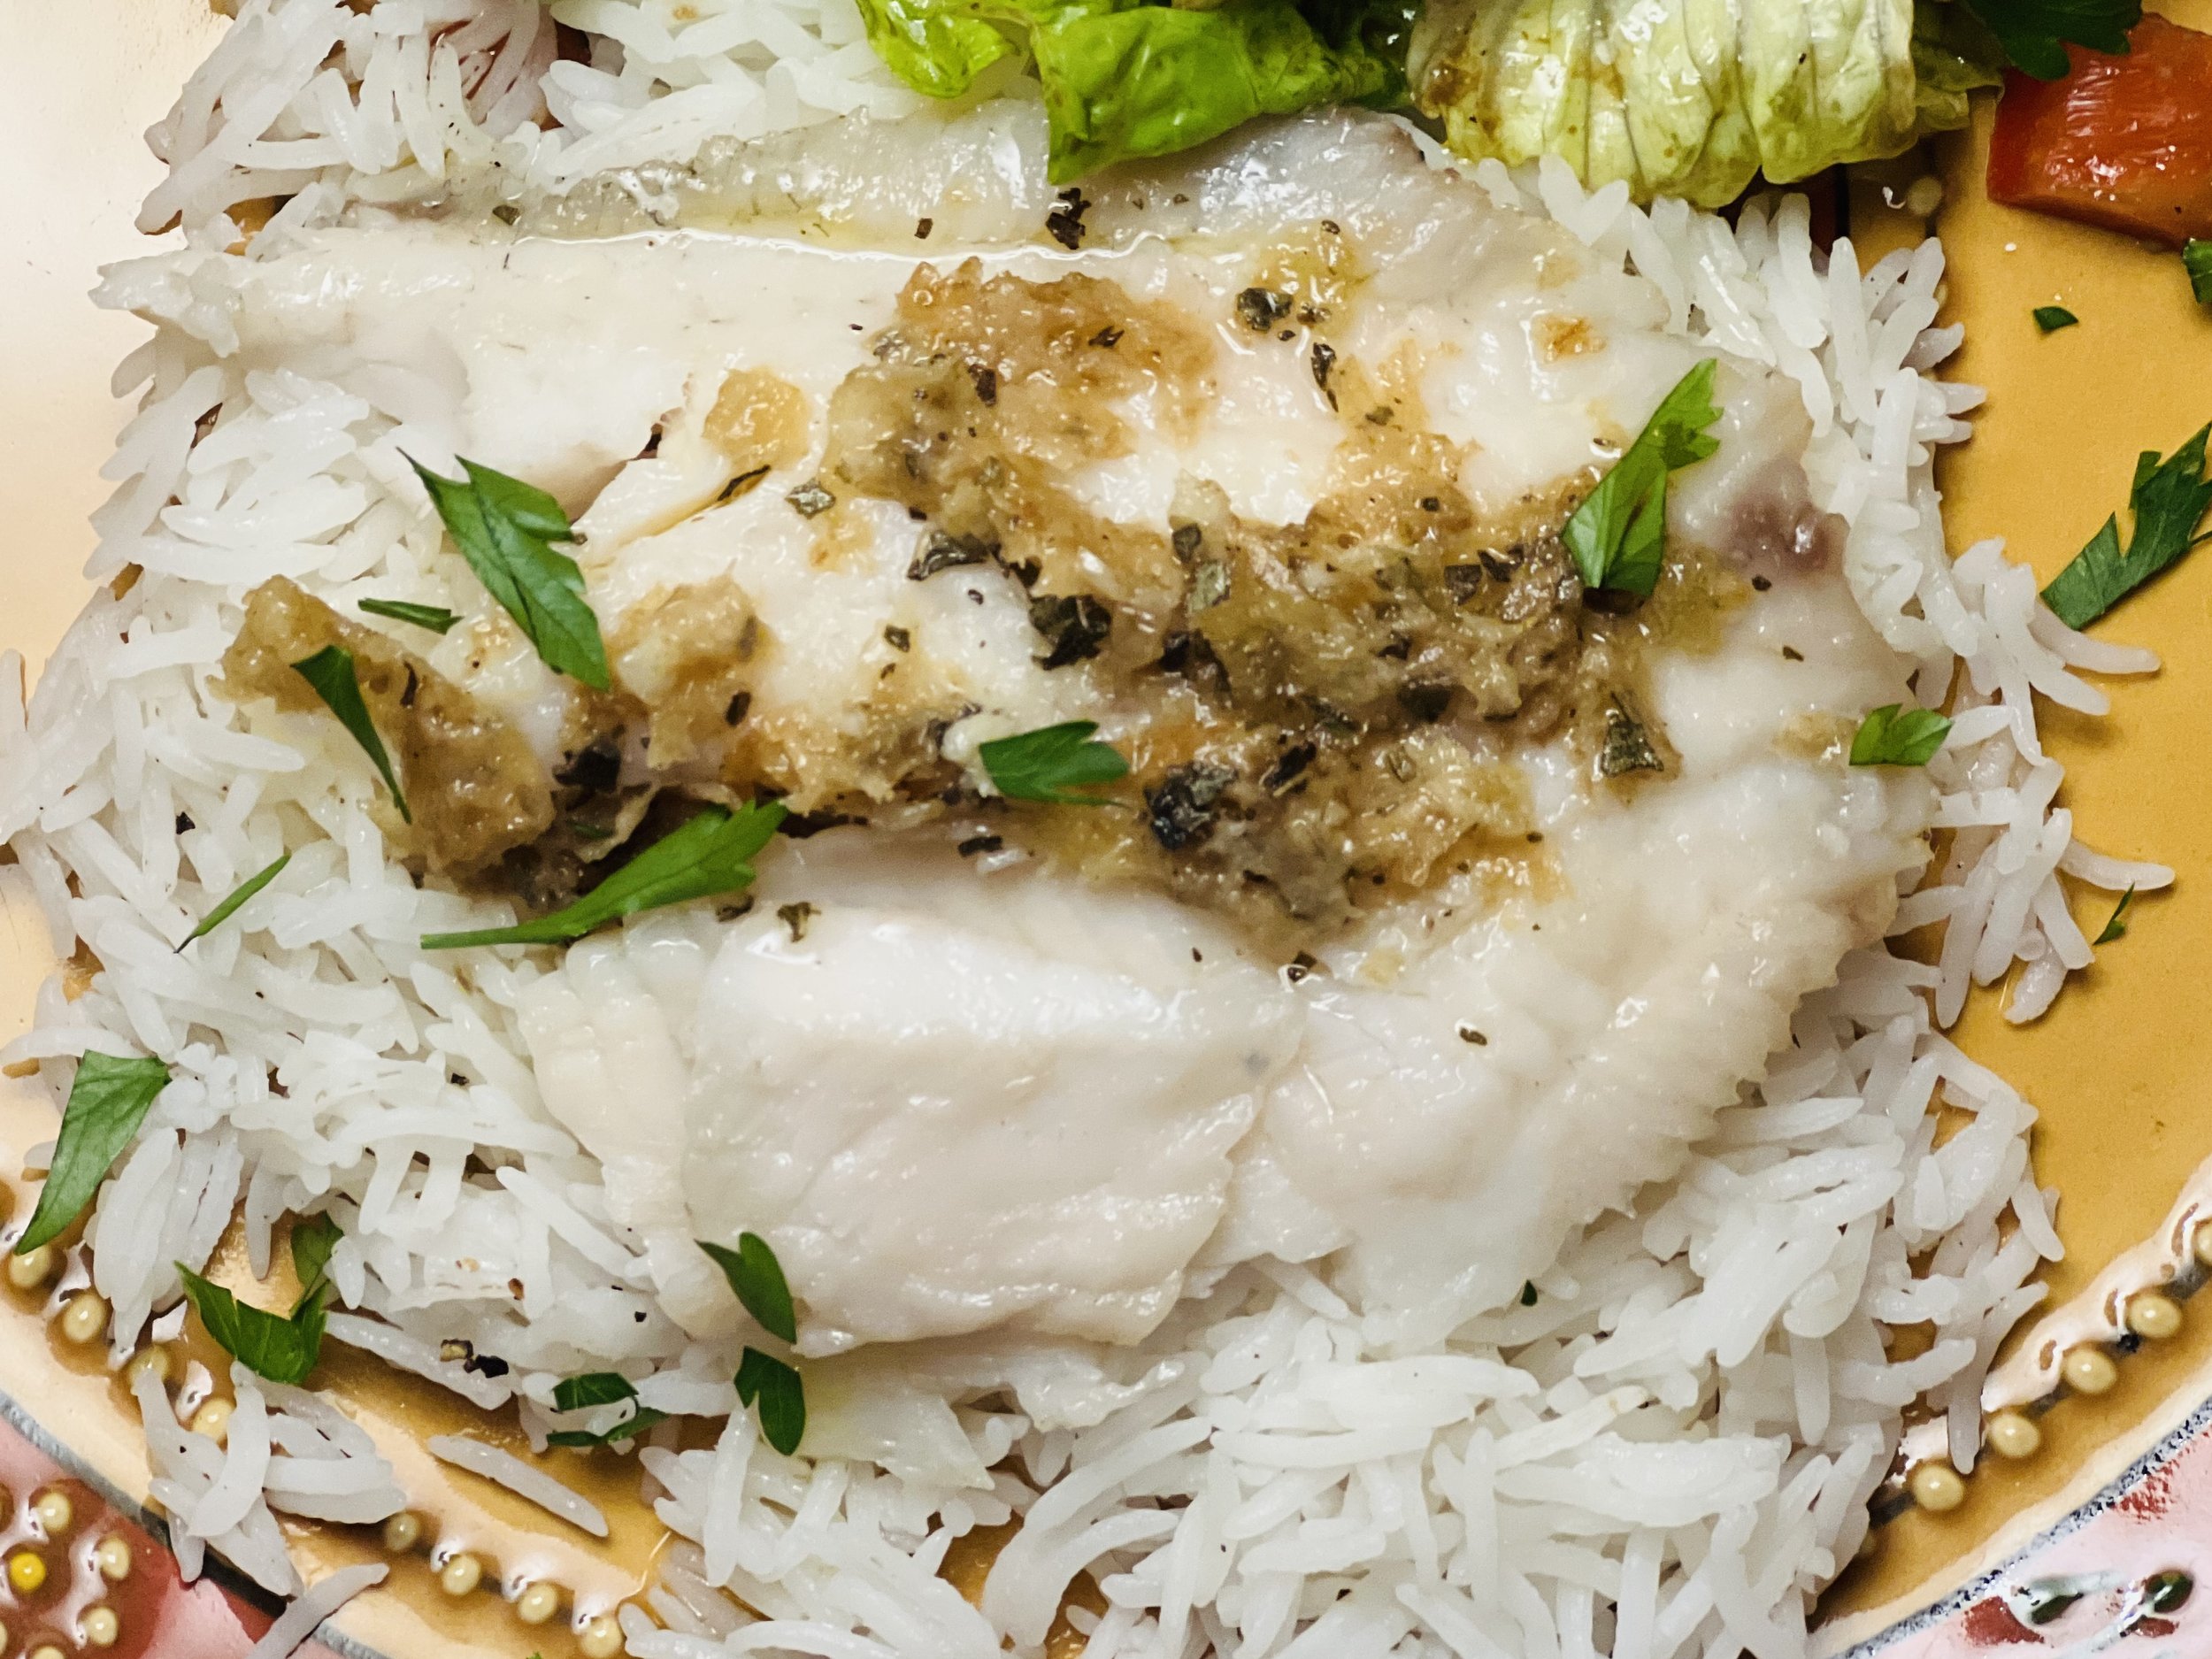
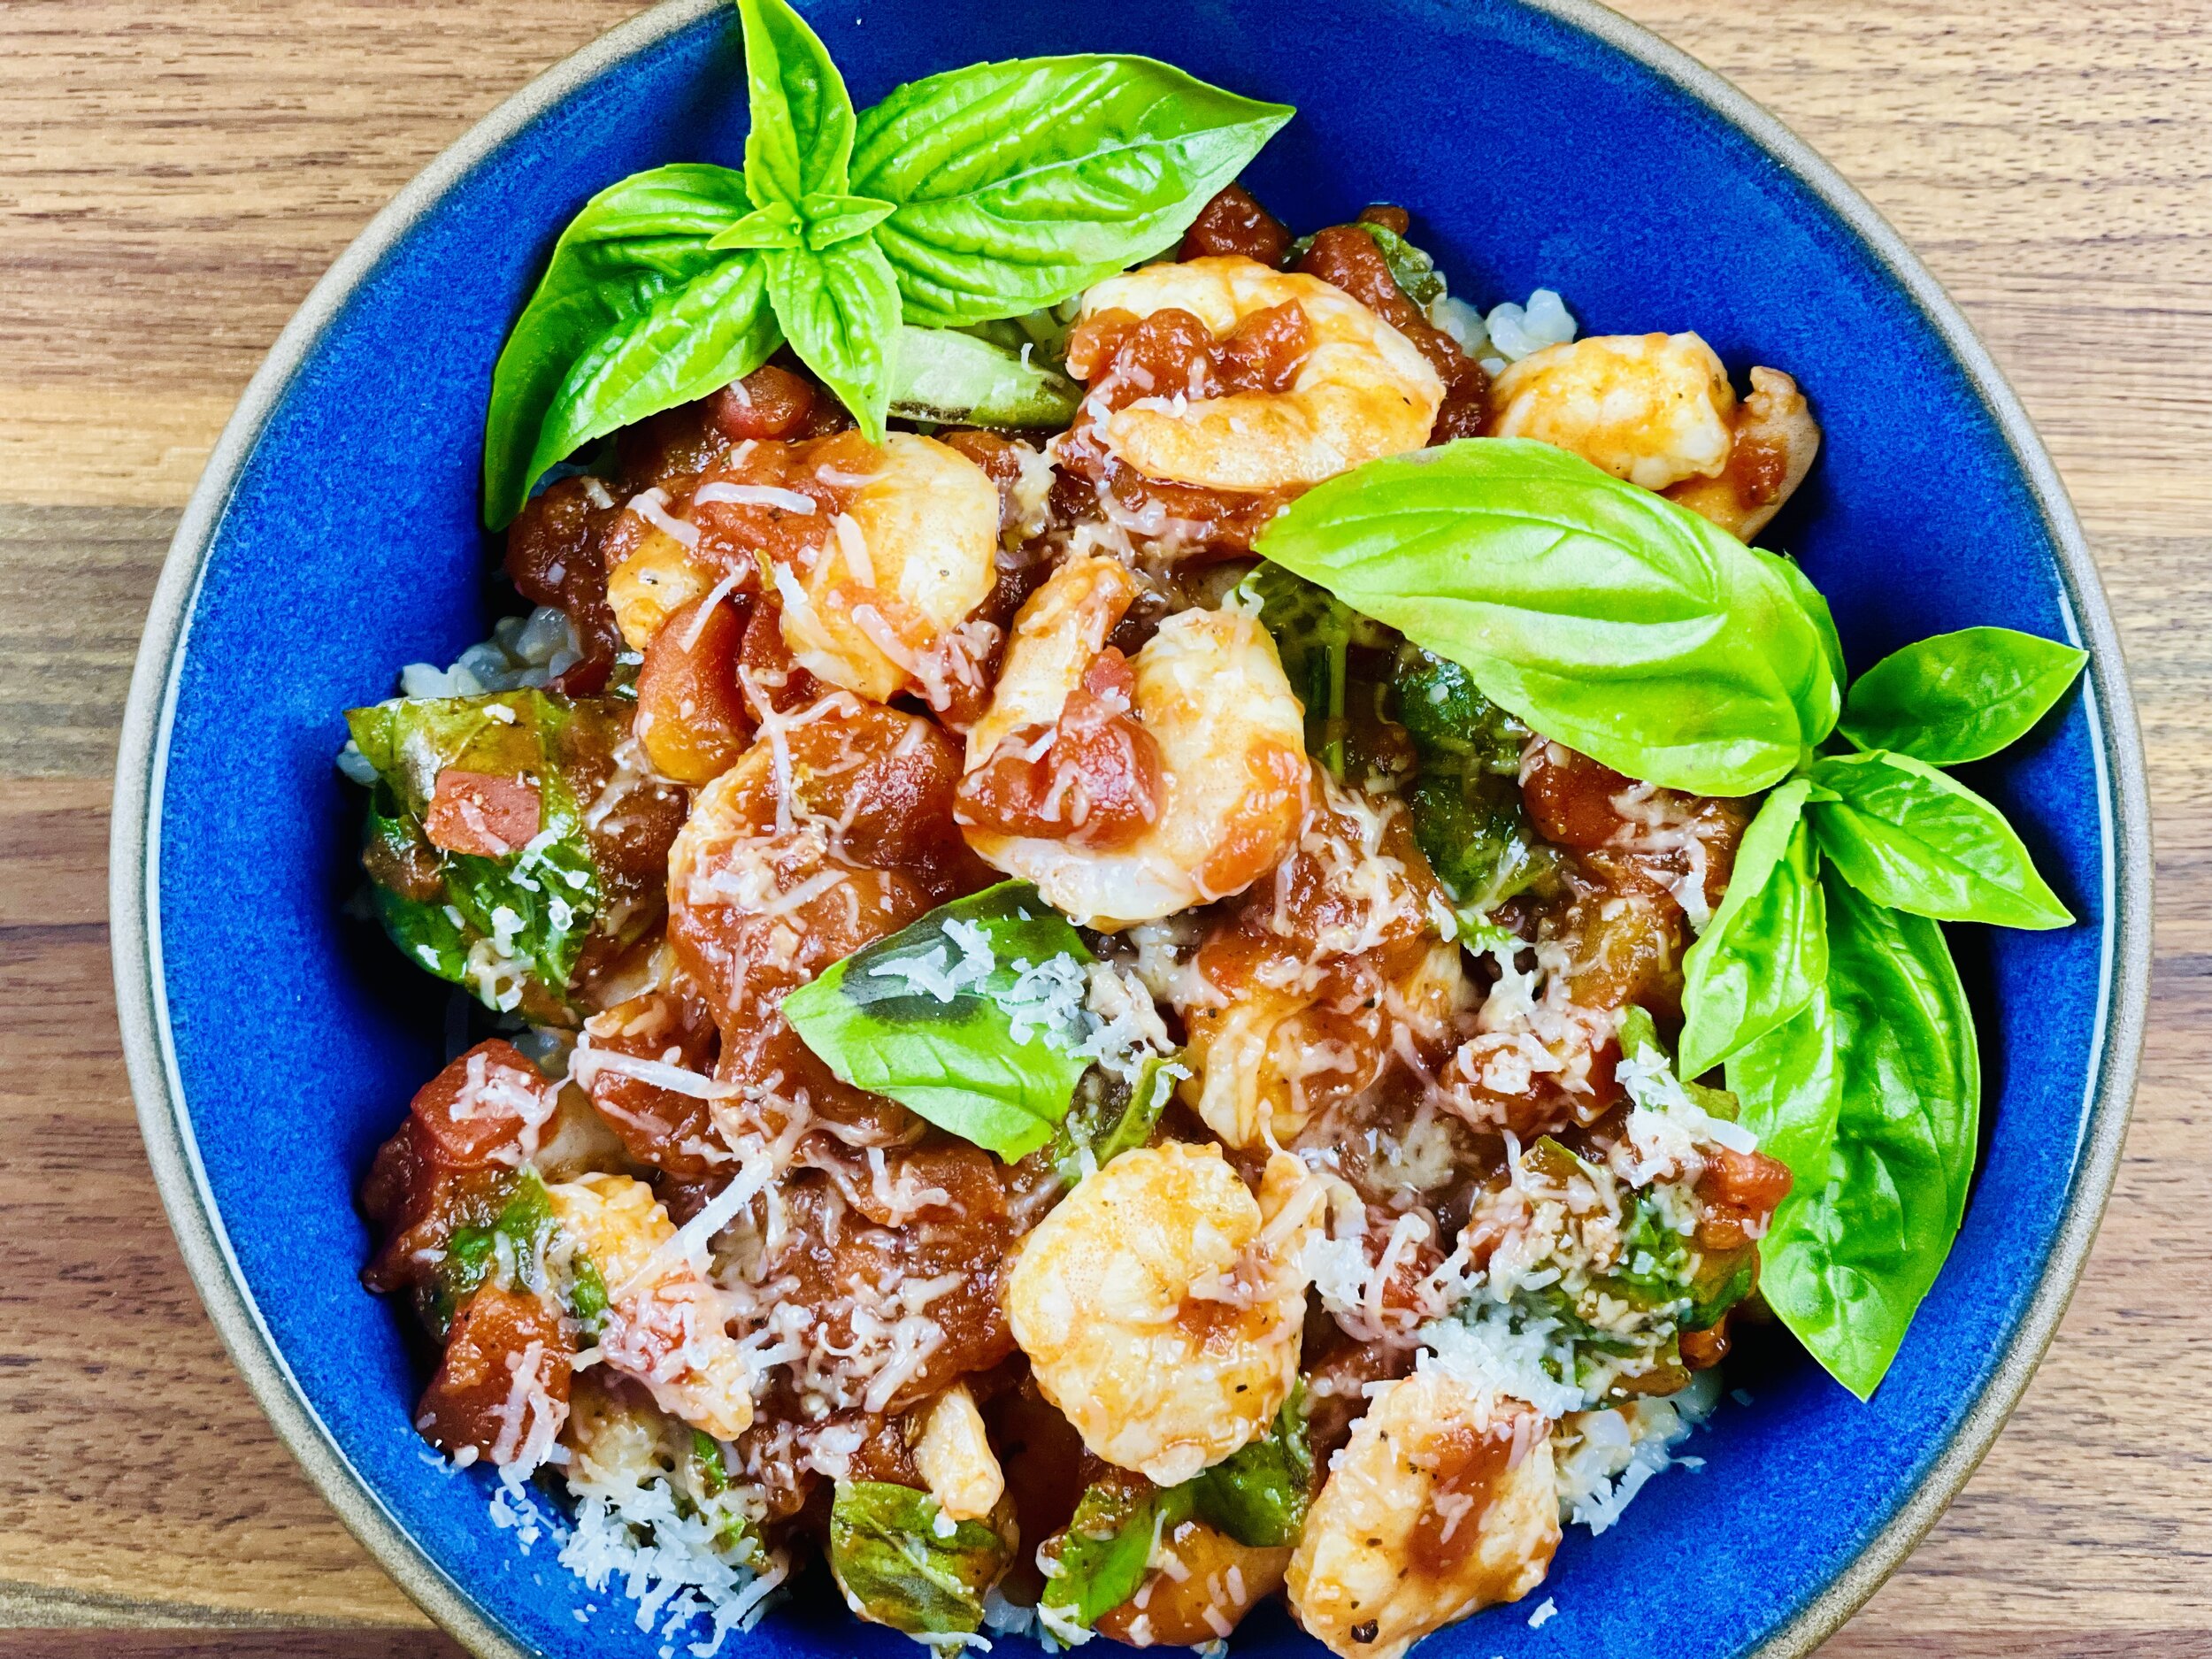
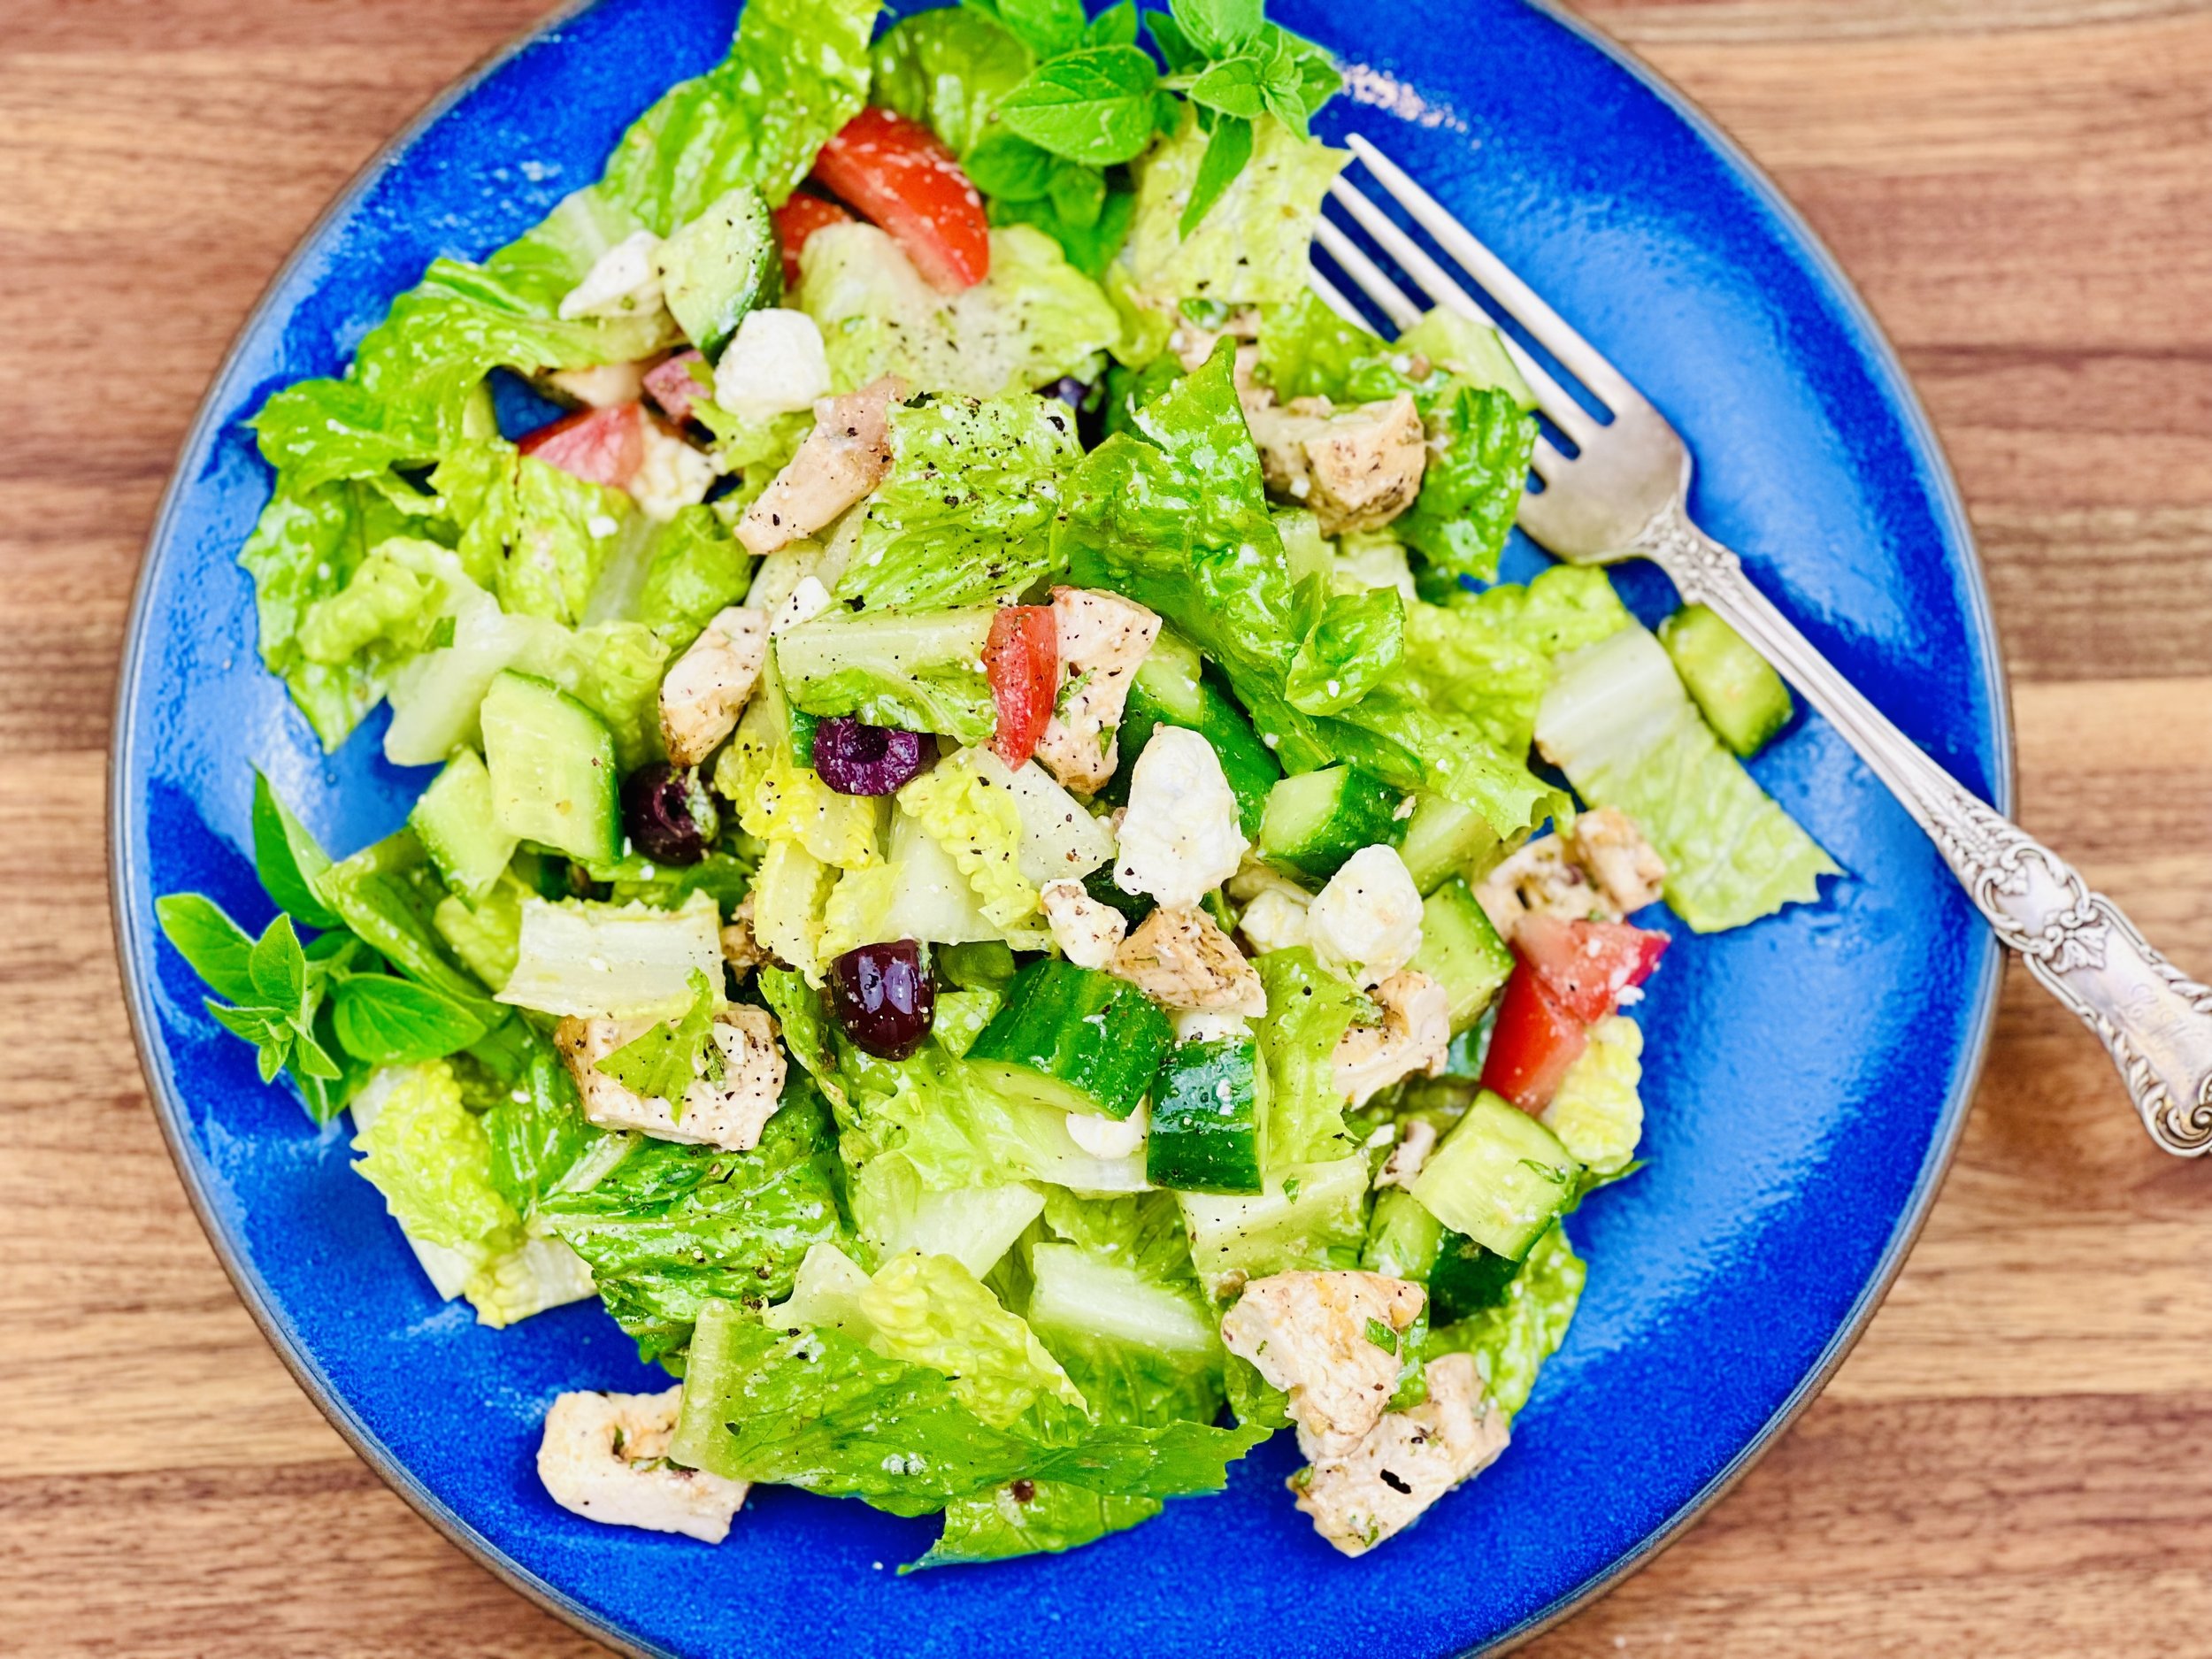
Caprese Chicken (low FODMAP)
15 Minutes prep • 25 Minutes cook • Low FODMAP • Gluten-free • Serves 4
15 Minutes prep • 25 Minutes cook • Low FODMAP • Gluten-free • Serves 4 • Ok to make-ahead: Steps 1 - 2
The Caprese style combines basil, tomato, and mozzarella cheese that, when blended together, amplify each other in a wonderful way. This recipe takes that blend up a few notches by adding our lemon basil pesto and bacon to deliver chicken that is truly special. The chicken gains a creamy quality and the flavors are rich and comforting.
Ingredients
1/4 cup gluten-free all-purpose flour (I used Bob’s Red Mill 1 to 1)
1/4 cup grated parmesan
1 tablespoon fresh rosemary, chopped
1 teaspoon freshly ground black pepper
4 boneless skinless chicken thighs (or chicken breasts if you prefer)
4 slices thick-cut bacon, chopped
3 tablespoons extra virgin olive oil
3/4 cup dry white wine, such as Pinot Grigio or Sauvignon Blanc
1/3 cup of our lemon basil pesto (or other low FODMAP pest)
6 ounces mozzarella cheese, sliced (one low FODMAP serving of Mozerella is 1.4 ounces)
1-2 heirloom, on the vine, or early girl tomatoes, sliced thickly
1/2 teaspoon Kosher salt
1/4 teaspoon black pepper to taste
1/2 cup fresh basil, chopped
Directions
(1) Prepare the chicken: For best flavor and texture, salt the chicken a day, or at least 4-6 hours before you plan to cook it. This allows the salt time to get into the meat so the flavor is carried throughout instead of just on the surface. I take the chicken out of the package, lay it in a dish that allows the chicken to be in one layer, and then salt it with Diamond Crystal Kosher salt, using about 1/2 teaspoon per piece of chicken and sprinkling the salt as evenly over the meat as possible. Cover the dish with plastic wrap and refrigerate until ready to use. If you miss this step, don’t worry.
(2) Make the pesto: See my lemon basil pesto recipe. This too can be done ahead of time and refrigerated.
(3) Preheat the oven to 425 degrees F.
(4) Dredge the chicken: Place the flour, parmesan, pepper, and chopped rosemary in a shallow bowl and make sure it is well-mixed. Dredge both sides of the chicken through the mixture, tossing to coat. Set aside on a plate until you’re ready to cook.
(5) Cook the bacon: In an oven-safe skillet large enough to hold the chicken in one layer. cook the bacon until crisp but not burned. Remove the bacon from the skillet and set it aside on paper towels to absorb excess grease.
(6) Cook the chicken: In the same skillet, add 2 tablespoons of olive oil to the bacon grease that’s in the pan and heat the oil over medium-high heat. When the oil is hot, add the chicken and cook until golden on both sides, about 3 minutes per side. Reduce the heat to medium-low and pour in the wine. Simmer for 5 minutes until the meat is cooked through and the sauce has reduced a bit, then remove from the heat.
(7) Finish: Spoon the pesto over each piece of chicken, then add a slice of mozzarella, and 1-2 tomato slices over the top of each piece of chicken. Drizzle everything with 1 tablespoon of olive oil and season with salt and pepper. Bake 8-10 minutes until the cheese is melted.
(8) Plate and serve: If serving family style, keep chicken in the baking dish and top each piece with bacon and fresh basil. Otherwise, plate and add the bacon and basil to the top of each piece before serving. Serve with one of my delicious salads and a half a cob of corn for a perfect meal.
Eat and enjoy every bite because you can!
Recipe note: I use Diamond Crystal Kosher salt in all my recipes because it has a wonderful flat and crisp flake that tastes delicious. It is also the least salty salt available so you can use it more liberally as a seasoning than you can table salt or sea salt. If you use another type of salt, you may need to reduce the amount so it is not over-salted.
Have a question you’d like to have answered? Email me at hello@ibsgamechanger.com
Link note: This post may contain affiliate links for you to easily purchase items that are linked. I may earn a small commission from qualifying purchases but none of this costs you a thing so feel free to use the links! In addition, for some items, I have provided a special discount code for IBS Game Changers so be sure to use the code when you purchase an item to get the discount that has been arranged just for you.
More Deliciously Low FODMAP™ main course recipes
One Pan Thai Peanut Chicken and Veggies (Low FODMAP)
15 Minutes prep • 25 Minutes cook • Low FODMAP • Gluten-free • Serves 4
20 Minutes prep • 20 Minutes cook • Low FODMAP • Gluten-Free • Lactose-free • Serves 4
Finely chopped mushrooms and green onions serve as the foundation for this delicious Thai chicken and veggies so it doesn’t need added rice to be a perfect one-bowl meal. Celery and bell pepper, added near the end of the cooking time, add crunch, color, and nutrition to this dish. It’s an all-in-one bowl meal so it’s a snap to make and one-pan cooking means clean-up is easy too! If you’re lucky enough to have some leftovers, throw them in a frying pan with a little olive oil and a couple of eggs and stir-fry it into a perfect lunch. This recipe is very low carb so it’s gluten-free, keto-friendly, and Whole 30 compliant.

Ingredients
4- 5 boneless, skinless chicken breasts or thighs, sliced (if using breast meat reduce the cooking time)
2 tablespoons Smoke N Sanity Thai Marinade and Seasoning
1 tablespoon olive oil
2 tablespoons toasted sesame oil
2 green onions, green part only
1 1/2 cups oyster mushrooms, chopped
3/4 teaspoon Kosher salt
1/2 teaspoon black pepper
1/2 head broccoli (florets only) cut into bite-size pieces
1/2 red bell pepper, cut into slices
1 large stalk celery, chopped
1 tablespoon gluten-free, low-sodium soy sauce
1/4 teaspoon red pepper flakes
Juice of 1 lemon
2 tablespoons cilantro, chopped, optional, for serving
1/4 cup dry roasted peanuts, chopped, optional, for serving
Directions
(1) Prepare the chicken: Slice the chicken into bite-size strips. Put it in a medium bowl and add the olive oil and Smoke N Sanity Thai Marinade and Seasoning. Stir well to coat and let sit for about 20 minutes (in the refrigerator if it will be more than about 20 minutes).
(2) Prepare: Chop the green onion greens, mushrooms, and broccoli. Chop the cilantro and the peanuts.
(3) Cook the mushrooms and broccoli: In a large frying pan over medium-high heat, add the toasted sesame oil. When hot, add the chopped green onion greens, and mushrooms. Stir to coat with the oil. Sprinkle with salt and pepper. Spread evenly in the pan and let cook undisturbed for about 2 minutes. Stir, spread out into one layer again, and cook another two minutes. Add the broccoli, stir well, spread out, and cook another two minutes. Continue cooking in this way (stirring and spreading out into one layer) until the mushrooms start to turn golden brown and the broccoli is tender but still bright green (about 4 minutes). Remove from the pan and set aside on a plate.
(4) Cook the chicken: In the same pan, add the marinated chicken and spread it into one layer. Cook undisturbed for about 3 - 4 minutes, stir well, turning all chicken pieces over. Spread in one layer and cook undisturbed for another 3 - 4 minutes. Add the broccoli and mushroom mixture back to the pan. Stir well, spread into one layer, and cook for a minute or two. Add the bell peppers, celery, gluten-free soy sauce, and red pepper flakes. Cook, stirring frequently, for 1 - 2 minutes until the celery and bell pepper are just tender.
(5) Finish: Remove from the heat and stir in the lemon juice.
(6) Plate and serve: Serve hot in bowls topped with chopped peanuts and cilantro. If you’re lucky enough to have some leftovers, throw them in a frying pan with a little olive oil and a couple of eggs and stir-fry it into a perfect lunch!
Eat and enjoy every bite because you can!
Recipe note: I use Diamond Crystal Kosher salt in all my recipes because it has a wonderful flat and crisp flake that tastes delicious. It is also the least salty salt available so you can use it more liberally as a seasoning than you can table salt or sea salt. If you use another type of salt, you may need to reduce the amount so it is not over-salted.
Have a question you’d like to have answered? Email me at hello@ibsgamechanger.com
Link note: This post may contain affiliate links for you to easily purchase items that are linked. I may earn a small commission from qualifying purchases but none of this costs you a thing so feel free to use the links! In addition, for some items, I have provided a special discount code for IBS Game Changers so be sure to use the code when you purchase an item to get the discount that has been arranged just for you.
More Deliciously Low FODMAP™ main course recipes
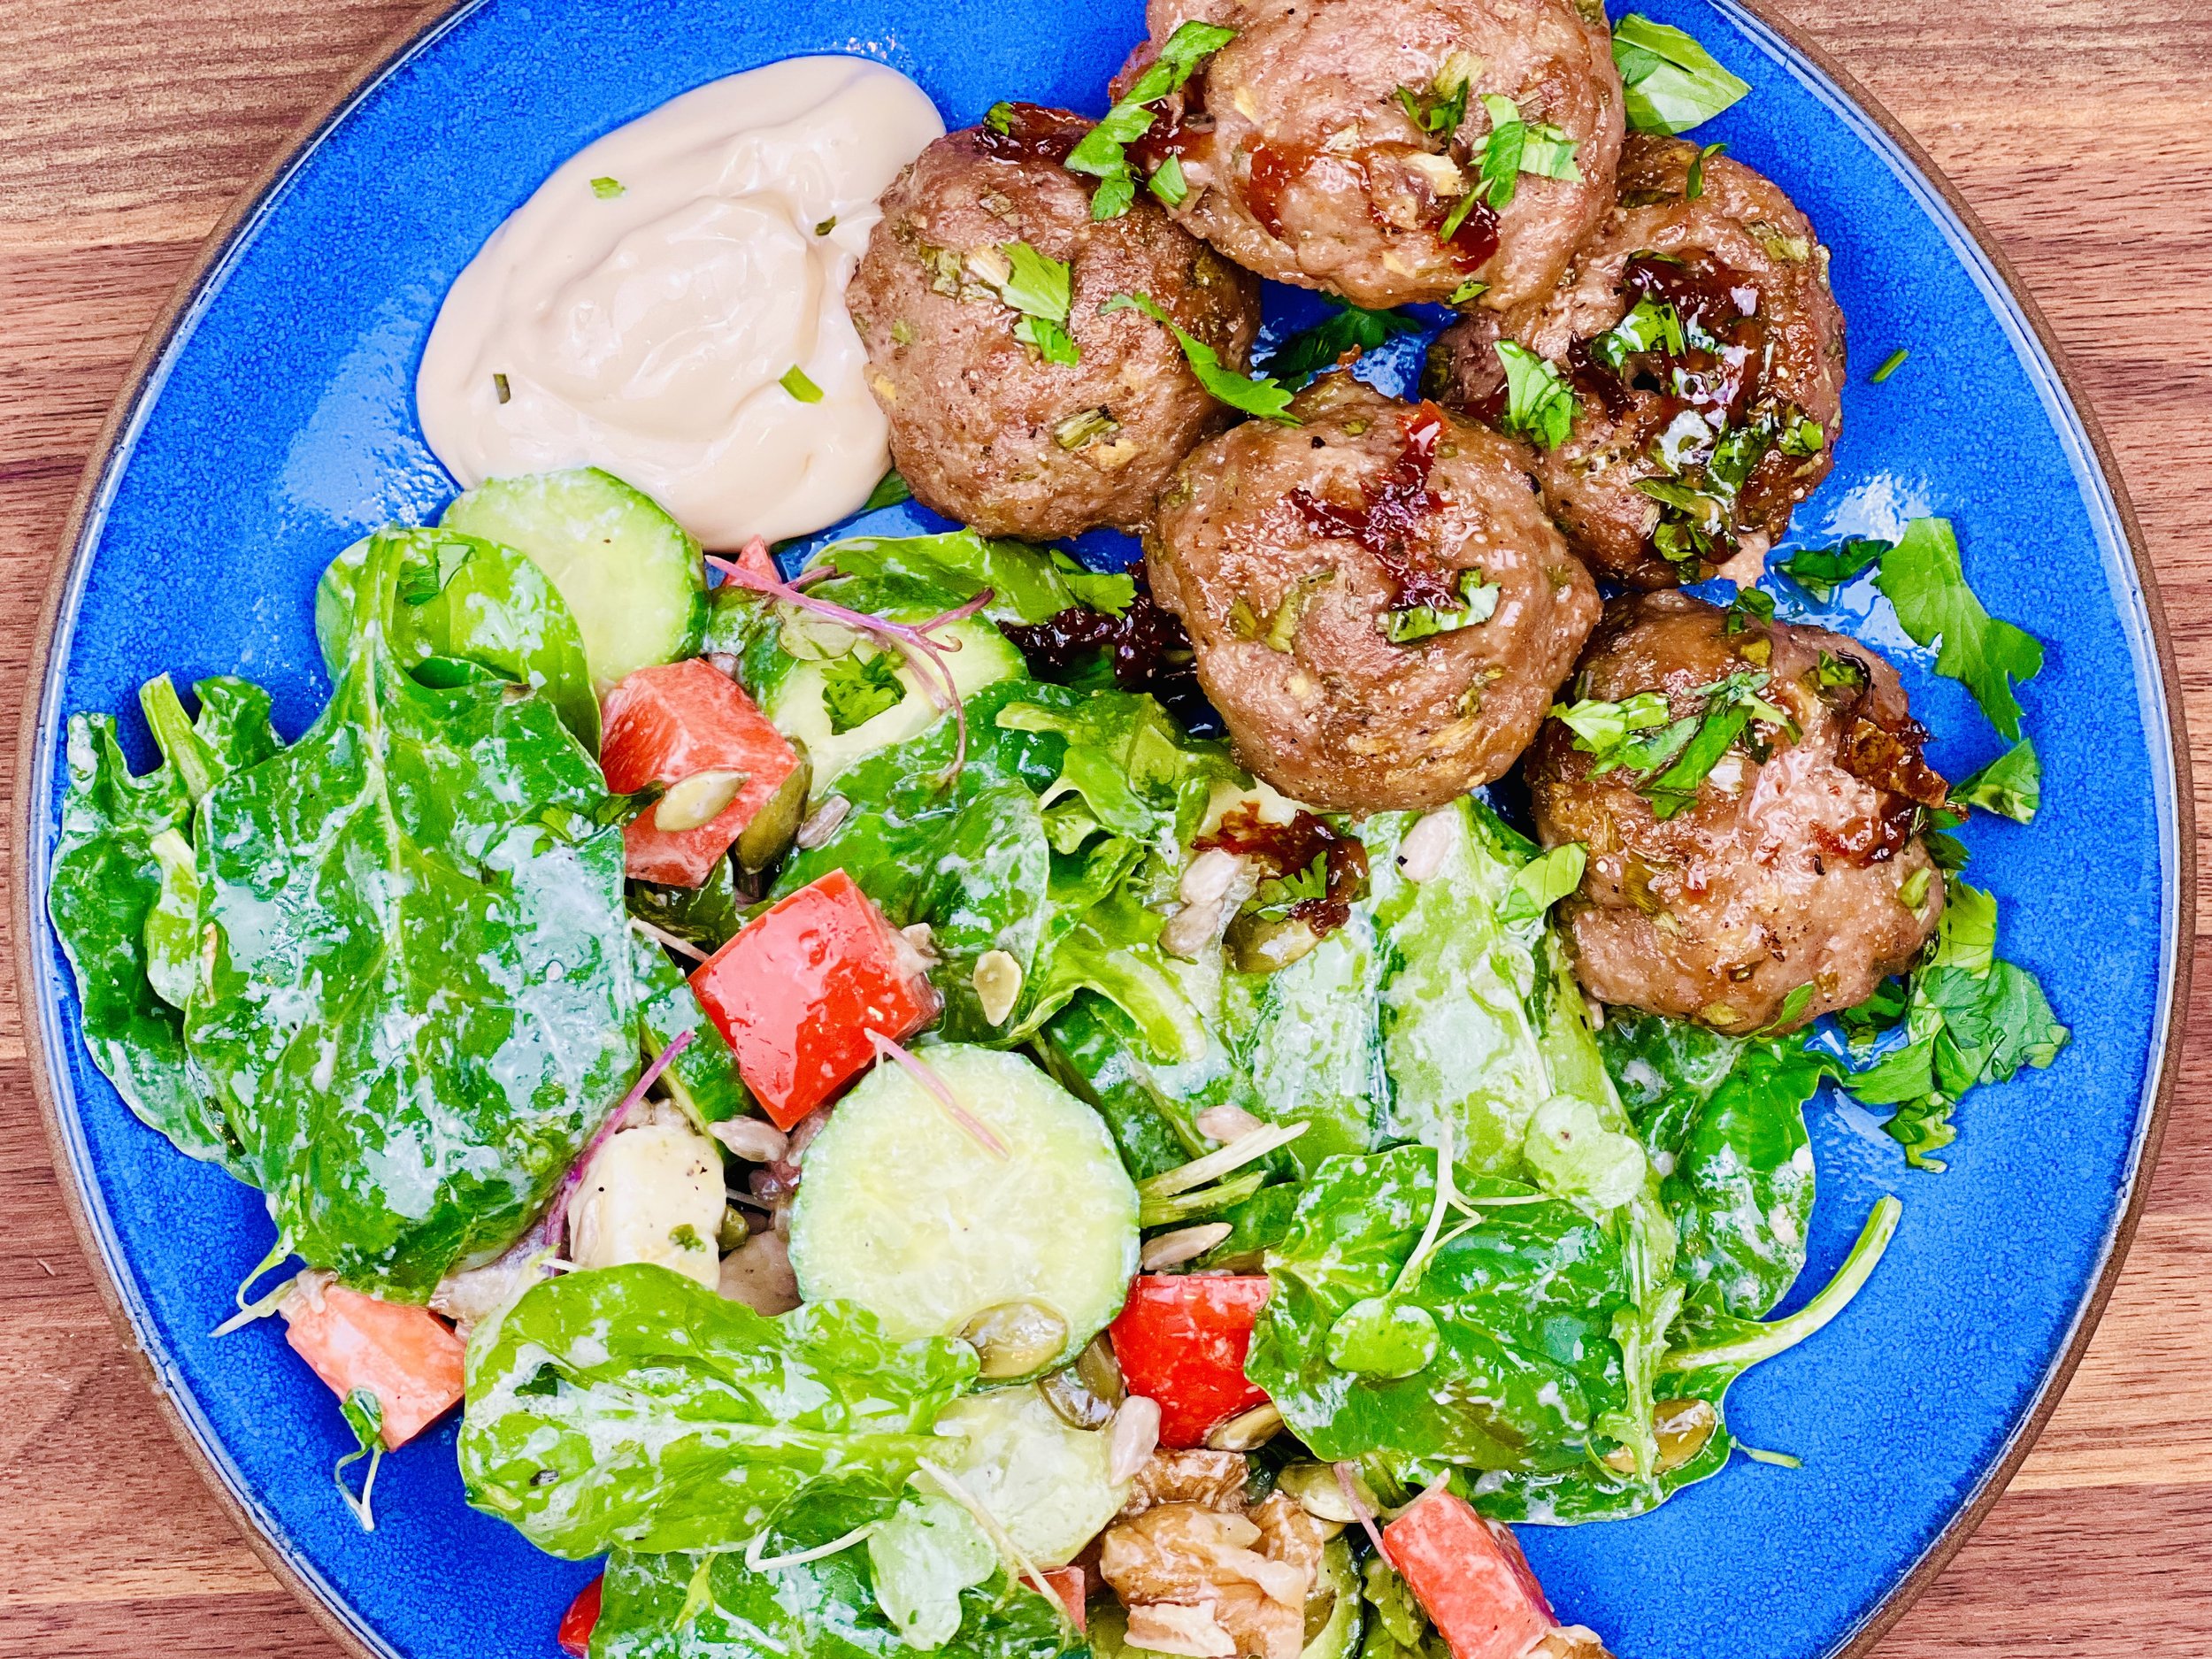
Asian Pork Meatballs and Sesame Mayo (Low FODMAP)
20 Minutes prep • 20 Minutes cook • Low FODMAP • Makes 12 - 24 • Gluten-free
20 Minutes prep • 20 Minutes cook • Low FODMAP • Makes 12 - 24 • Gluten-free • Ok to make ahead: Steps 1-3
Super flavorful and a fun change of pace. You can serve these meatballs as a main course with one of my delicious salads or as a fun bite-size appetizer. The ginger and toasted sesame oil combine to bring out the Asian flavor in these delicious meatballs. The sauce is a great companion and super easy to make. Made with Pork Panko, these meatballs are gluten-free, very low in carbs, and perfect for a low FODMAP, Keto-friendly diet.
Ingredients
2 tablespoons peeled and minced ginger
1 tablespoon gluten-free low sodium soy sauce sauce
1 bunch green onions, green part only, chopped
1 teaspoon freshly ground black pepper
1/2 teaspoon Smoke N Sanity Essence of Garlic Salt (or Kosher salt)
1/2 cup pork panko (or other gluten-free panko)
1 pound grass-fed ground pork
Cilantro (optional) for serving
Ingredients: Sauce
1/2 cup mayonnaise
1- 2 teaspoons gluten-free low sodium soy sauce
1- 2 teaspoons toasted sesame oil
Directions
(1) Prepare: Preheat the oven to 425 degrees F. Line a rimmed baking sheet with parchment paper. Chop the green onion greens. Blend the sauce ingredients in a small bowl. Taste and add more soy sauce or sesame oil to taste. Set aside in the refrigerator until ready to serve.
(2) Blend the ingredients: In a large bowl, combine all the ingredients and use your hands to mix them all together evenly.
(3) Shape the meatballs: Roll the meat mixture into 12 balls (about 2 inches in diameter) and arrange with some space between them on the prepared baking sheet. (You can also make them much smaller and serve as a bite-size appetizer with toothpicks and dipping sauce if you prefer—just reduce the cooking time to about 12 minutes and check for doneness.)
Make-ahead note: At this point, you may keep the meatballs in the refrigerator until you’re ready to cook them.
(4) Bake: Bake until golden and cooked through about 15 minutes.
(5) Plate and serve: Remove from the pan to your serving dish. Pour some of the oil that is in the pan over the meatballs and scrape the crispy bits from the parchment and lay them on top of the meatballs (this part is delicious!) Serve warm with the sesame mayonnaise on the side.
(6) Leftovers (or make ahead): Leftover meatballs can be refrigerated or even frozen. They can be thawed (if frozen) and reheated in a 375-degree F oven until warmed through (about 20 minutes).
Eat and enjoy every bite because you can!
Recipe note: I use Diamond Crystal Kosher salt in all my recipes because it has a wonderful flat and crisp flake that tastes delicious. It is also the least salty salt available so you can use it more liberally as a seasoning than you can table salt or sea salt. If you use another type of salt, you may need to reduce the amount so it is not over-salted.
Have a question you’d like to have answered? Email me at hello@ibsgamechanger.com
Link note: This post may contain affiliate links for you to easily purchase items that are linked. I may earn a small commission from qualifying purchases but none of this costs you a thing so feel free to use the links! In addition, for some items, I have provided a special discount code for IBS Game Changers so be sure to use the code when you purchase an item to get the discount that has been arranged just for you.
More Deliciously Low FODMAP™ appetizer recipes
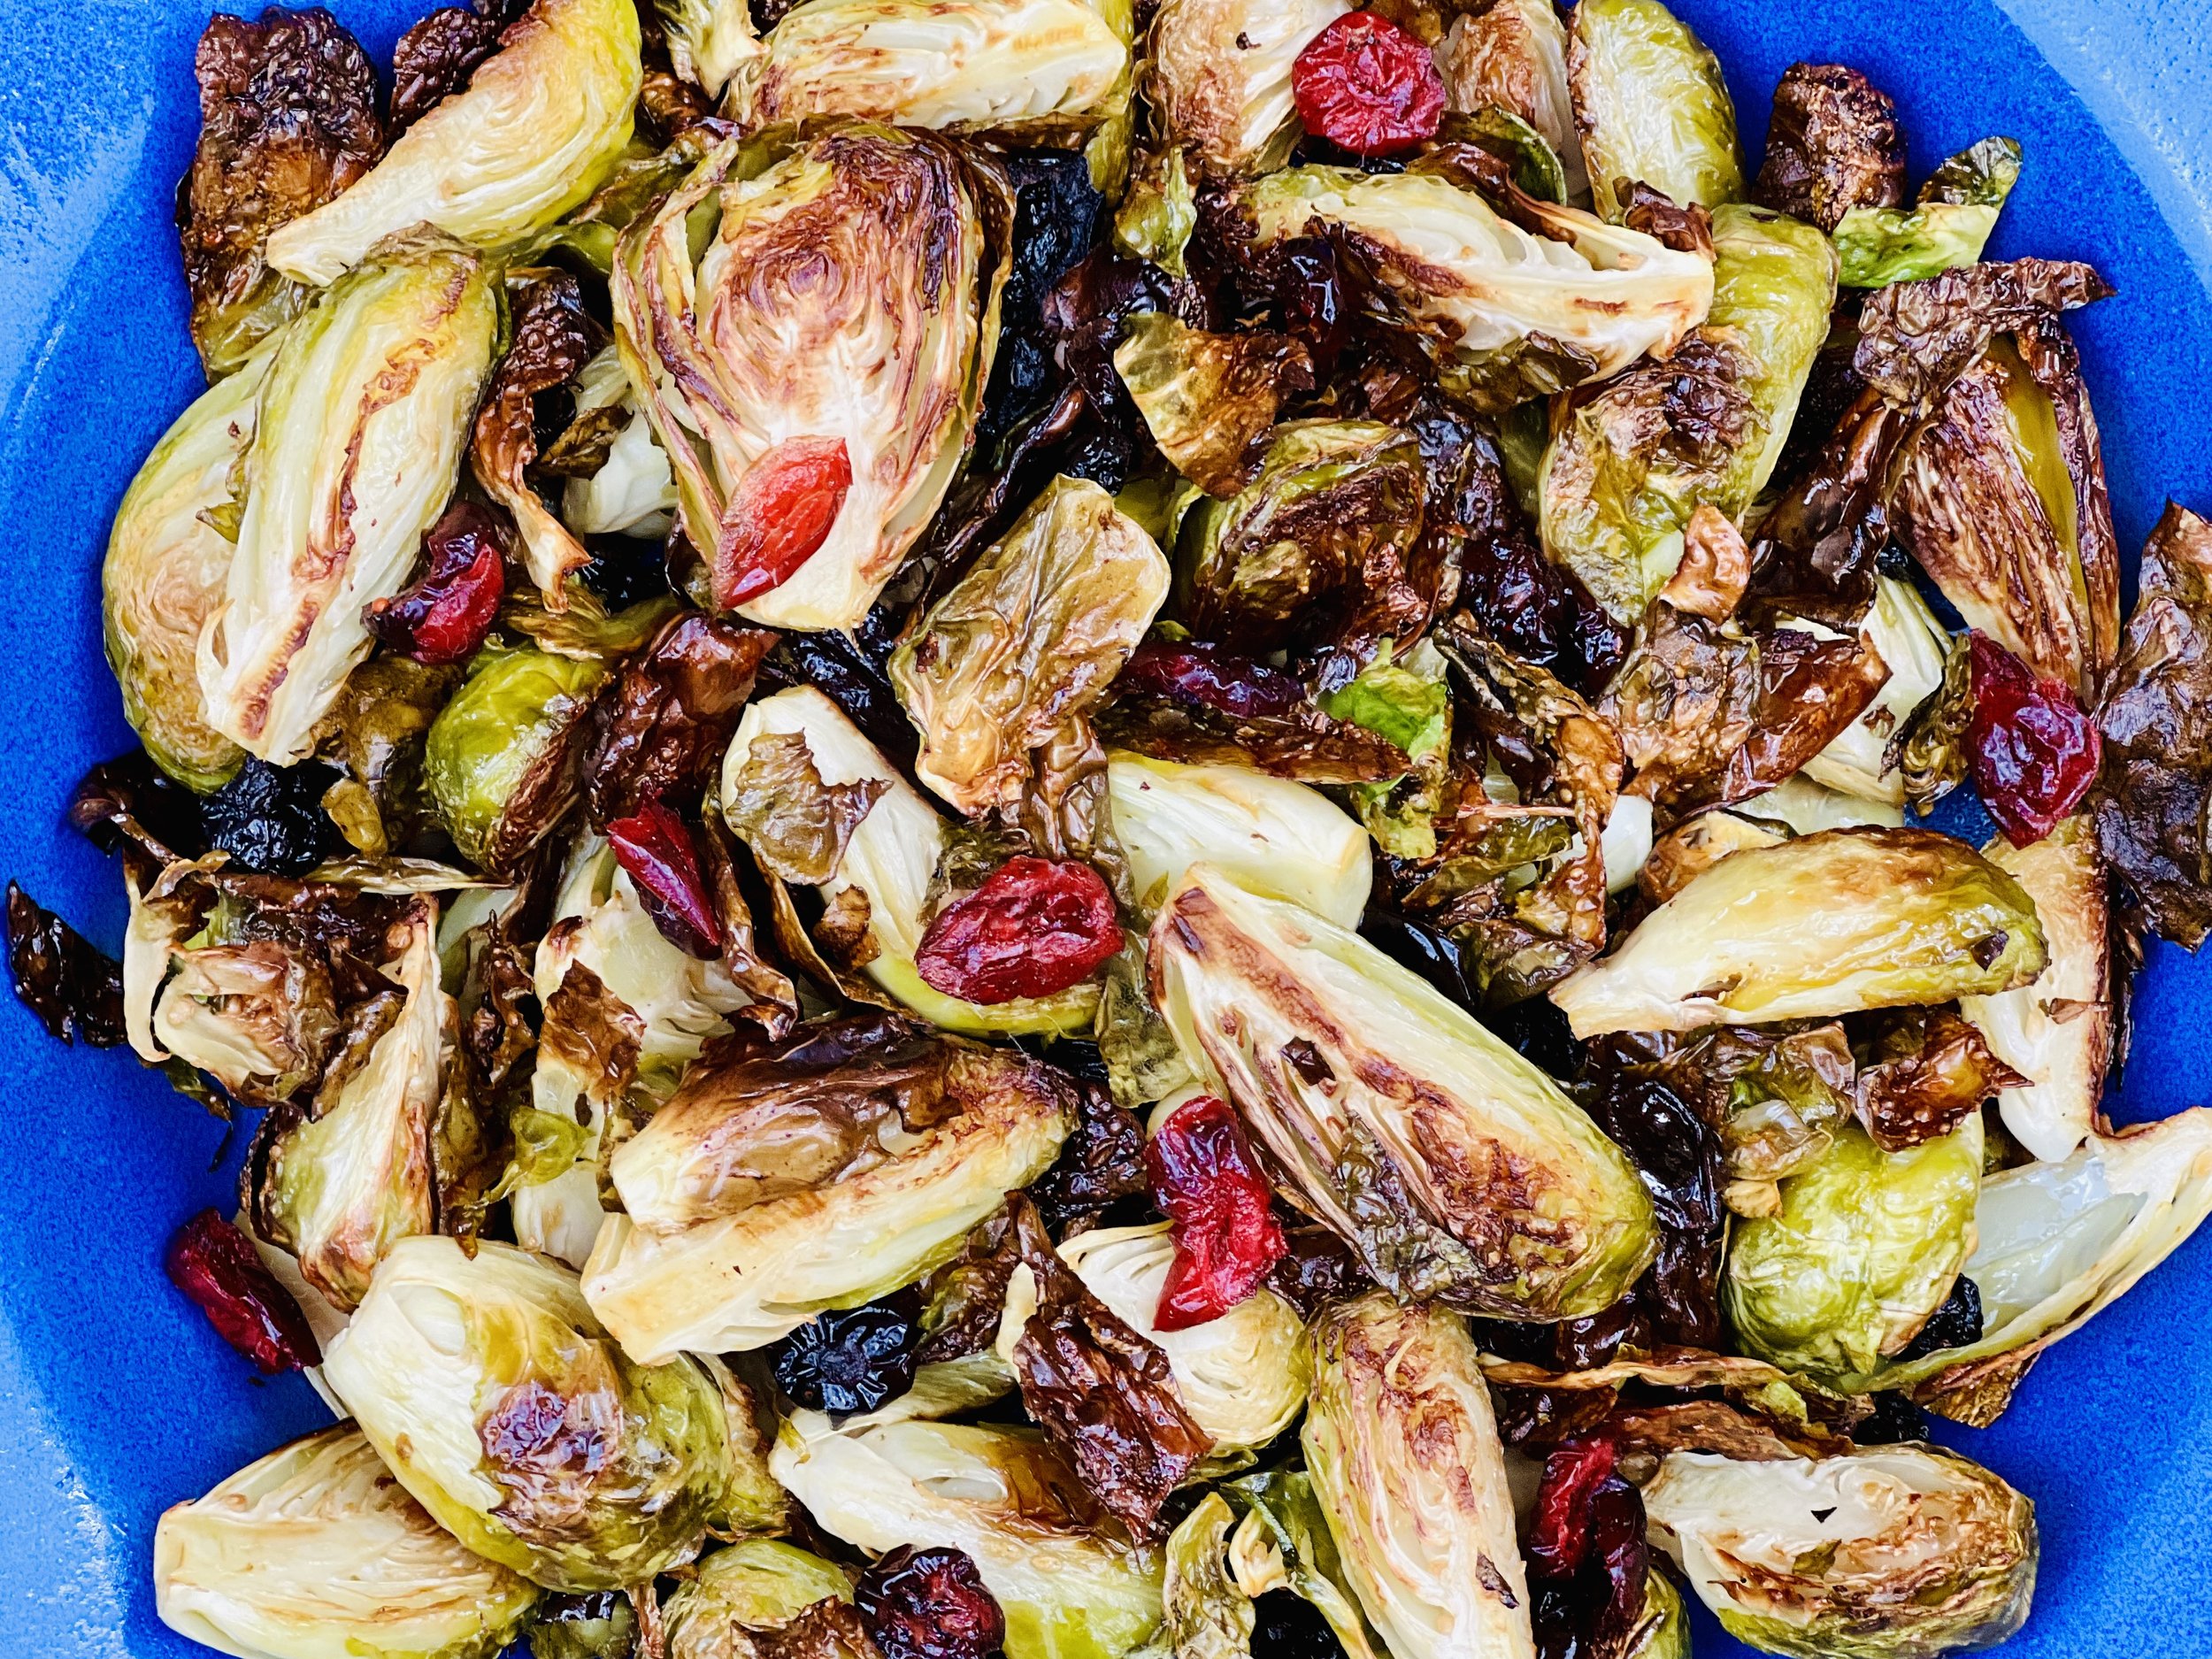
Sweet and Savory Roasted Brussels Sprouts (Low FODMAP)
10 Minutes prep • 25 Minutes cook • Low FODMAP • Gluten-free • Lactose-free • Serves 4
10 Minutes prep • 25 Minutes cook • Low FODMAP • Gluten-free • Lactose-free • Serves 4 • Ok to make ahead: Steps 1-4
Roasting Brussels sprouts is a wonderful way to bring out their naturally sweet flavor. And, when roasted with a little bacon and the sweet and tangy taste of raisins and cranberries, the combination is really delicious. The sprouts turn out crispy on the outside and tender on the inside. The raisins and cranberries get wonderfully charred and chewy. Altogether this is a fantastic combination.
This is an exclusive recipe just for recipe club members.
In addition to the two free recipes I create each week I am creating and delivering one very special recipe just for my recipe club members. If you’re not yet a member, I encourage you to join! Membership in the club includes access to the complete archive of recipes with filters so it can become your virtual low FODMAP cookbook plus, I am creating and delivering one special NEW recipe every week ONLY for recipe club members.
Your membership in the club helps me continue creating new, delicious, easy-to-make, low FODMAP recipes just for you.
As always, all recipes will emphasize simple ingredients, easy preparation, and delicious low FODMAP results. Recipes will be for everything from main courses, salads, soups, side dishes, appetizers, desserts, sauces, breakfast and lunch, and even mocktails and cocktails. Everything you need to prepare fantastic low FODMAP meals everyone will love.
Join the club. Let’s keep making delicious Low FODMAP meals together.
More Deliciously Low FODMAP™ side dish recipes


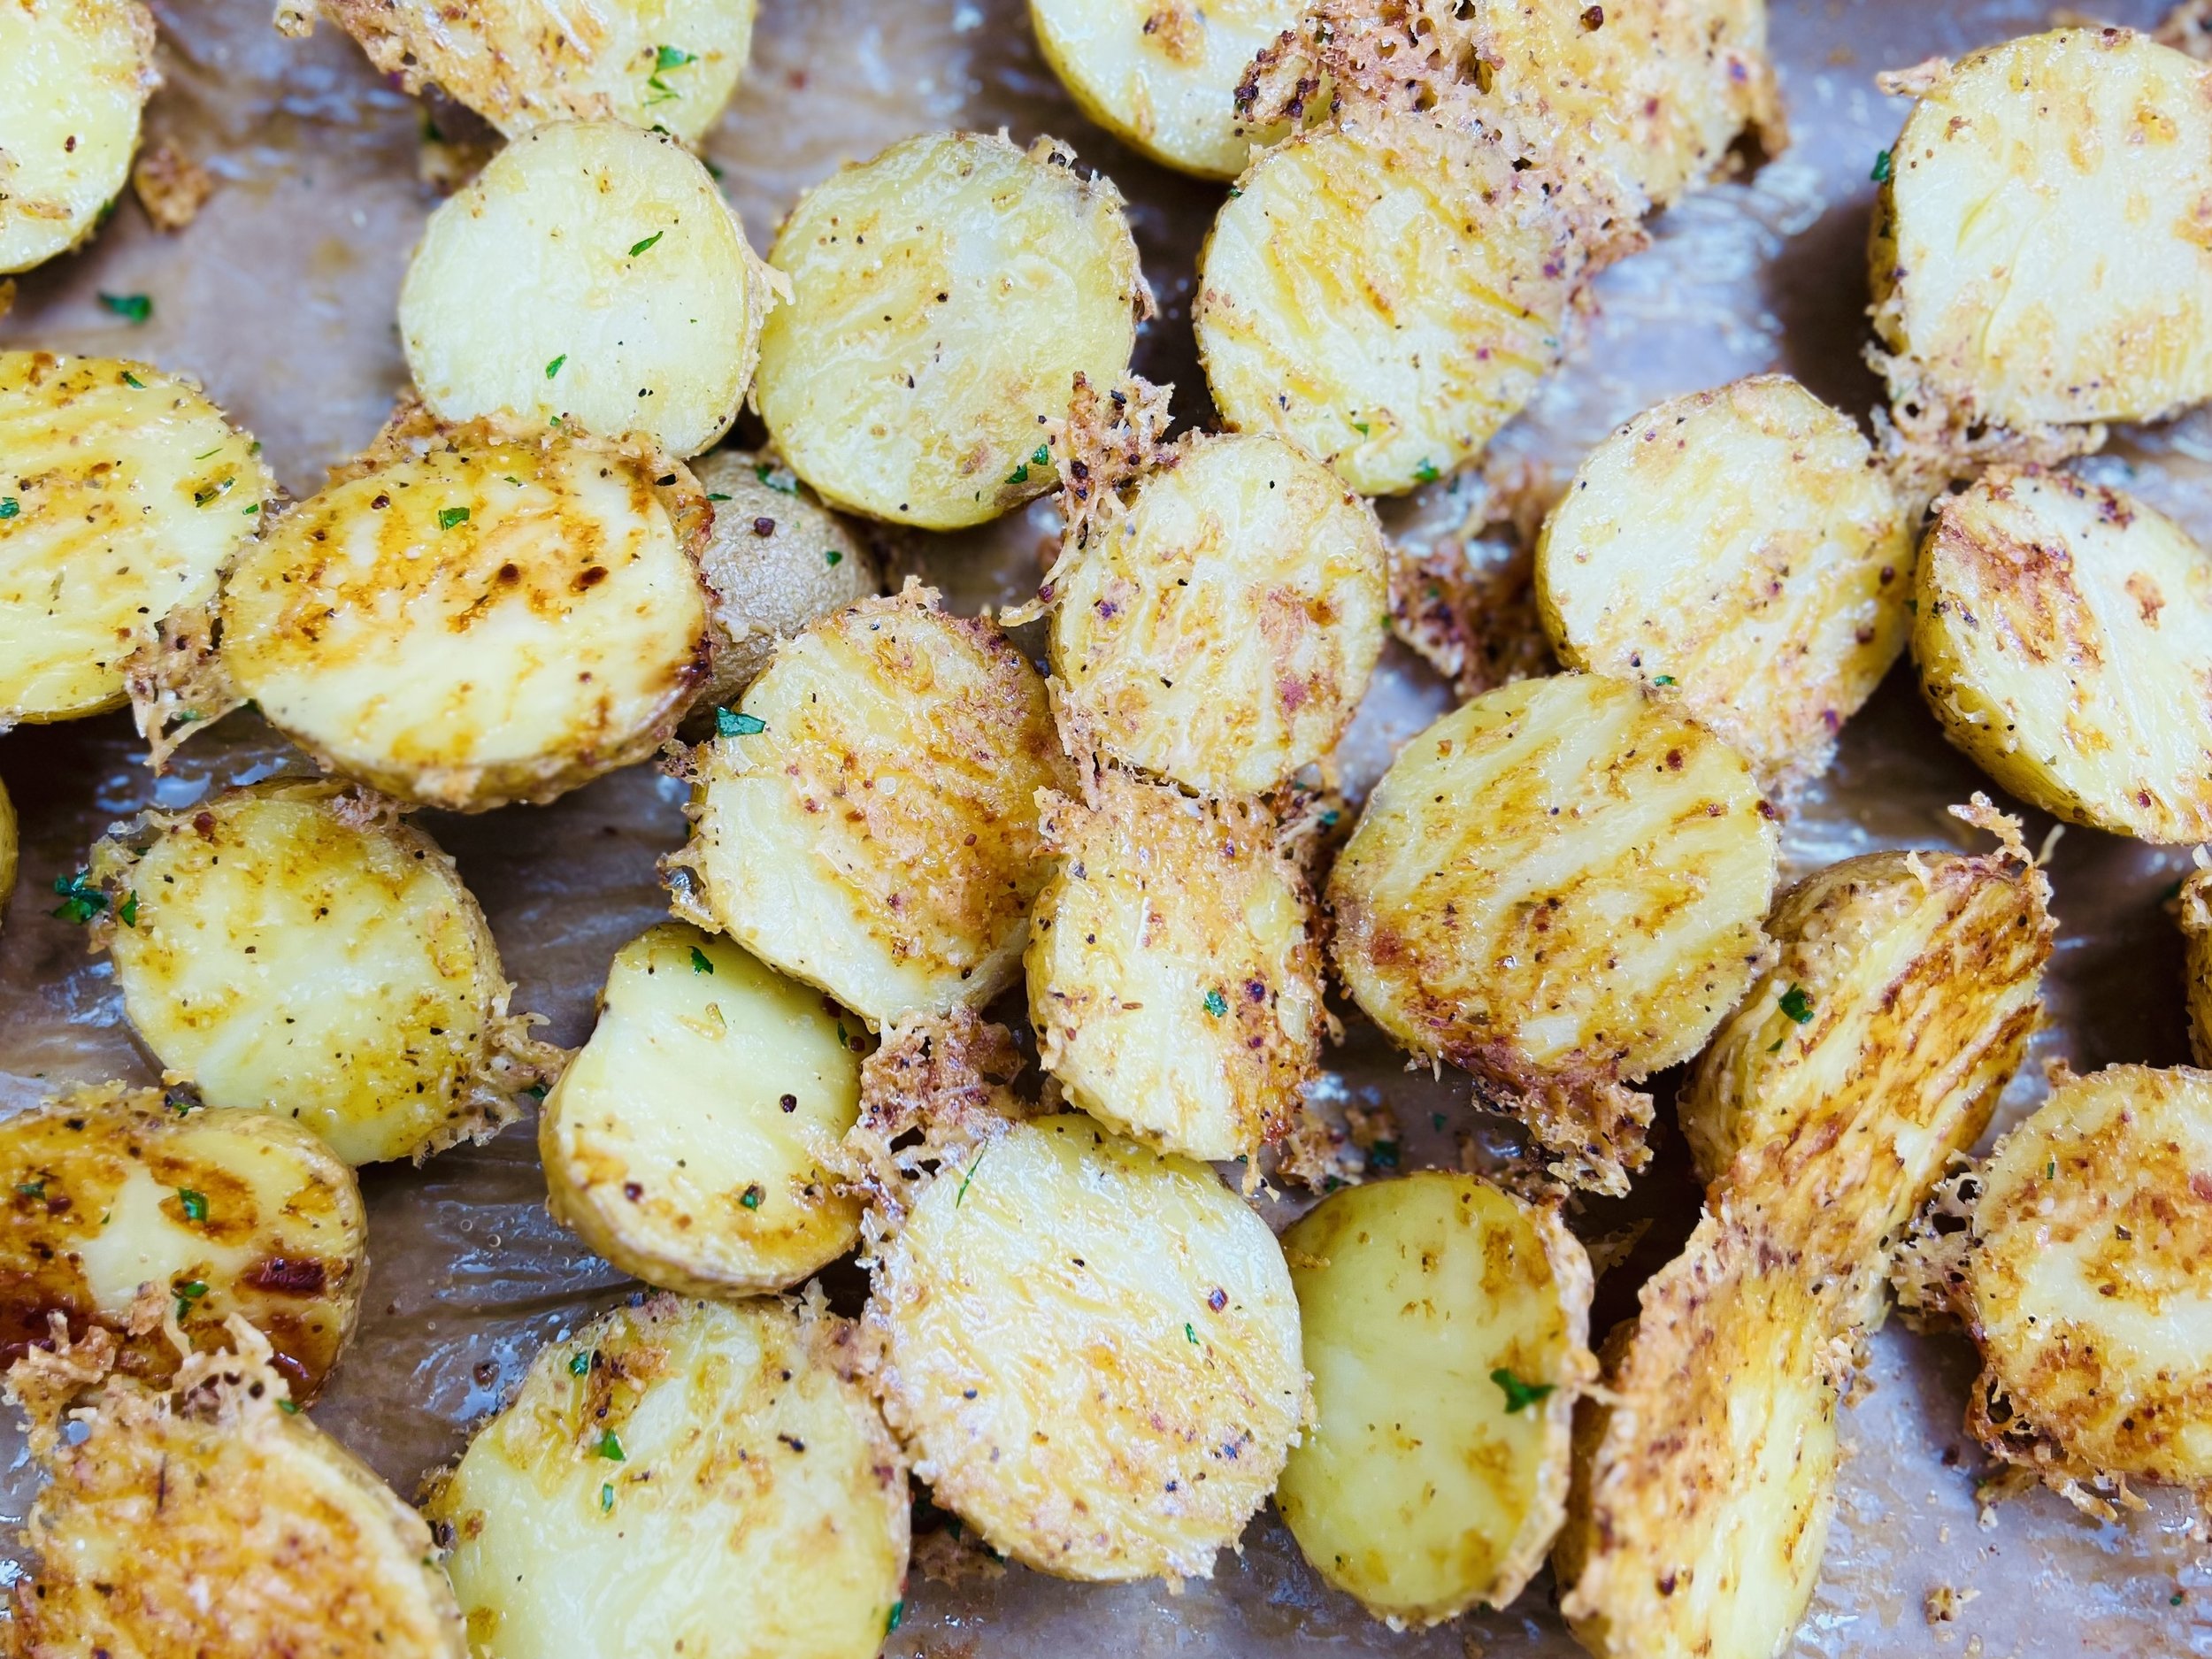
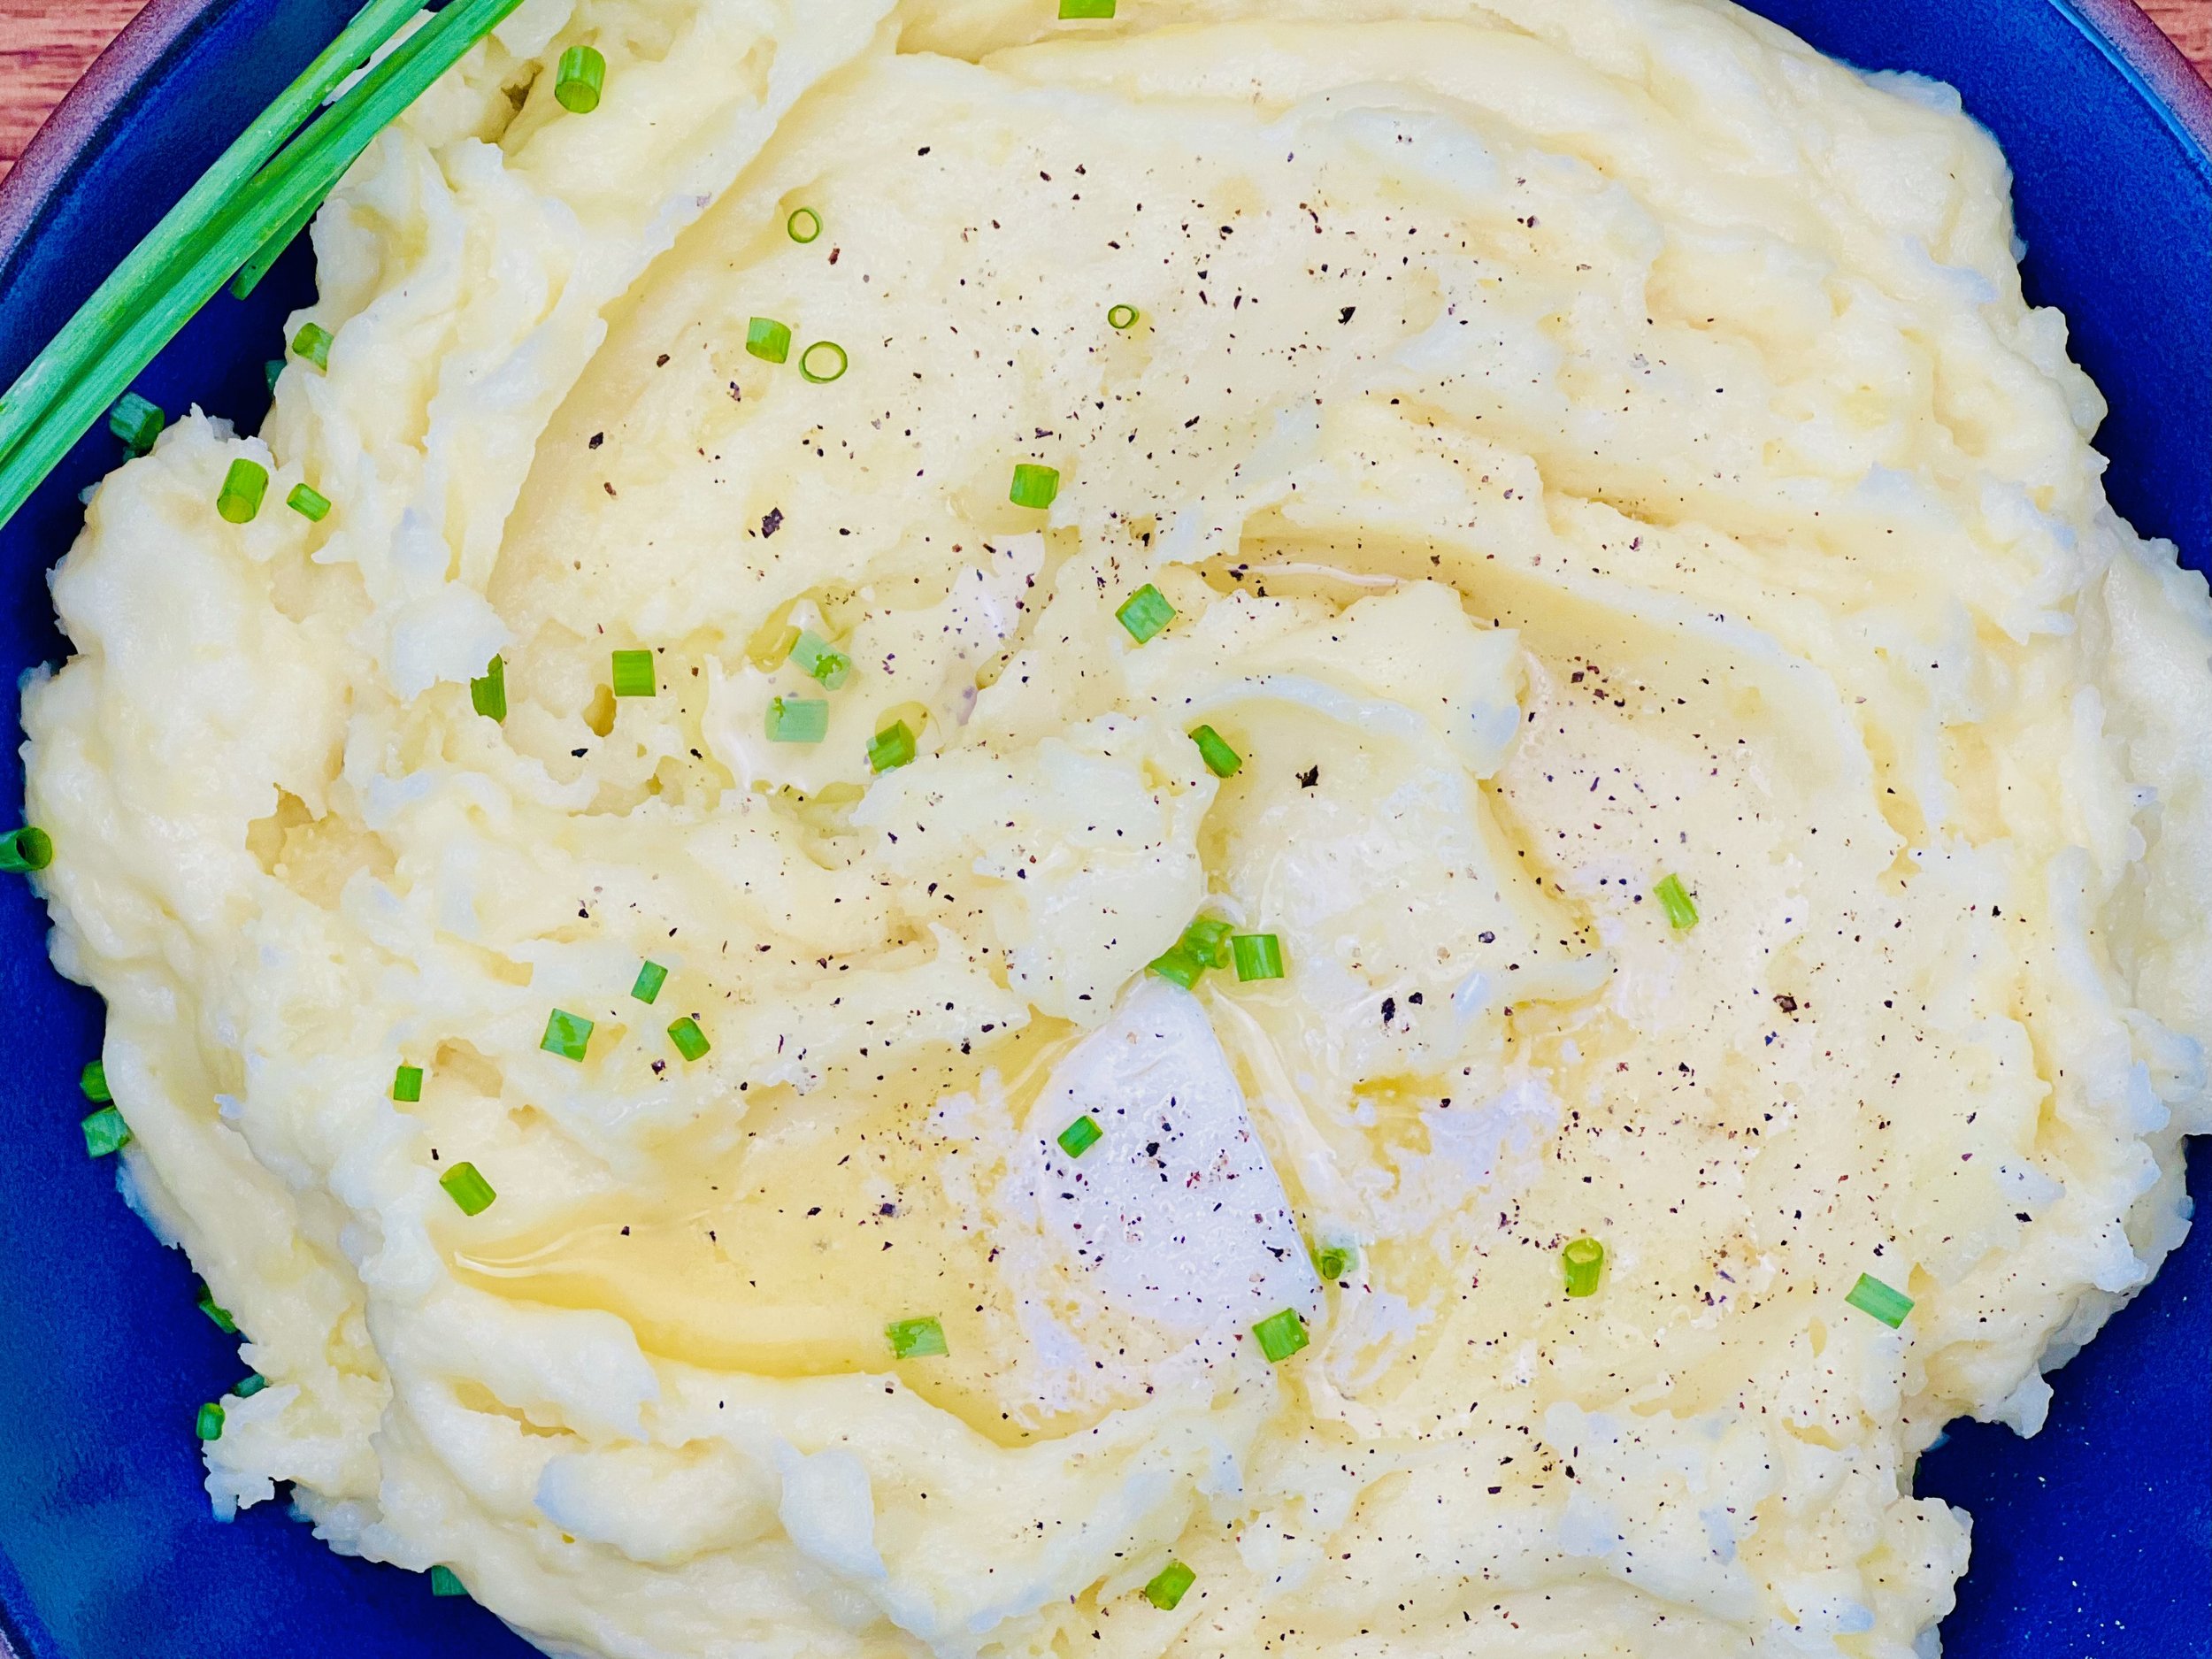

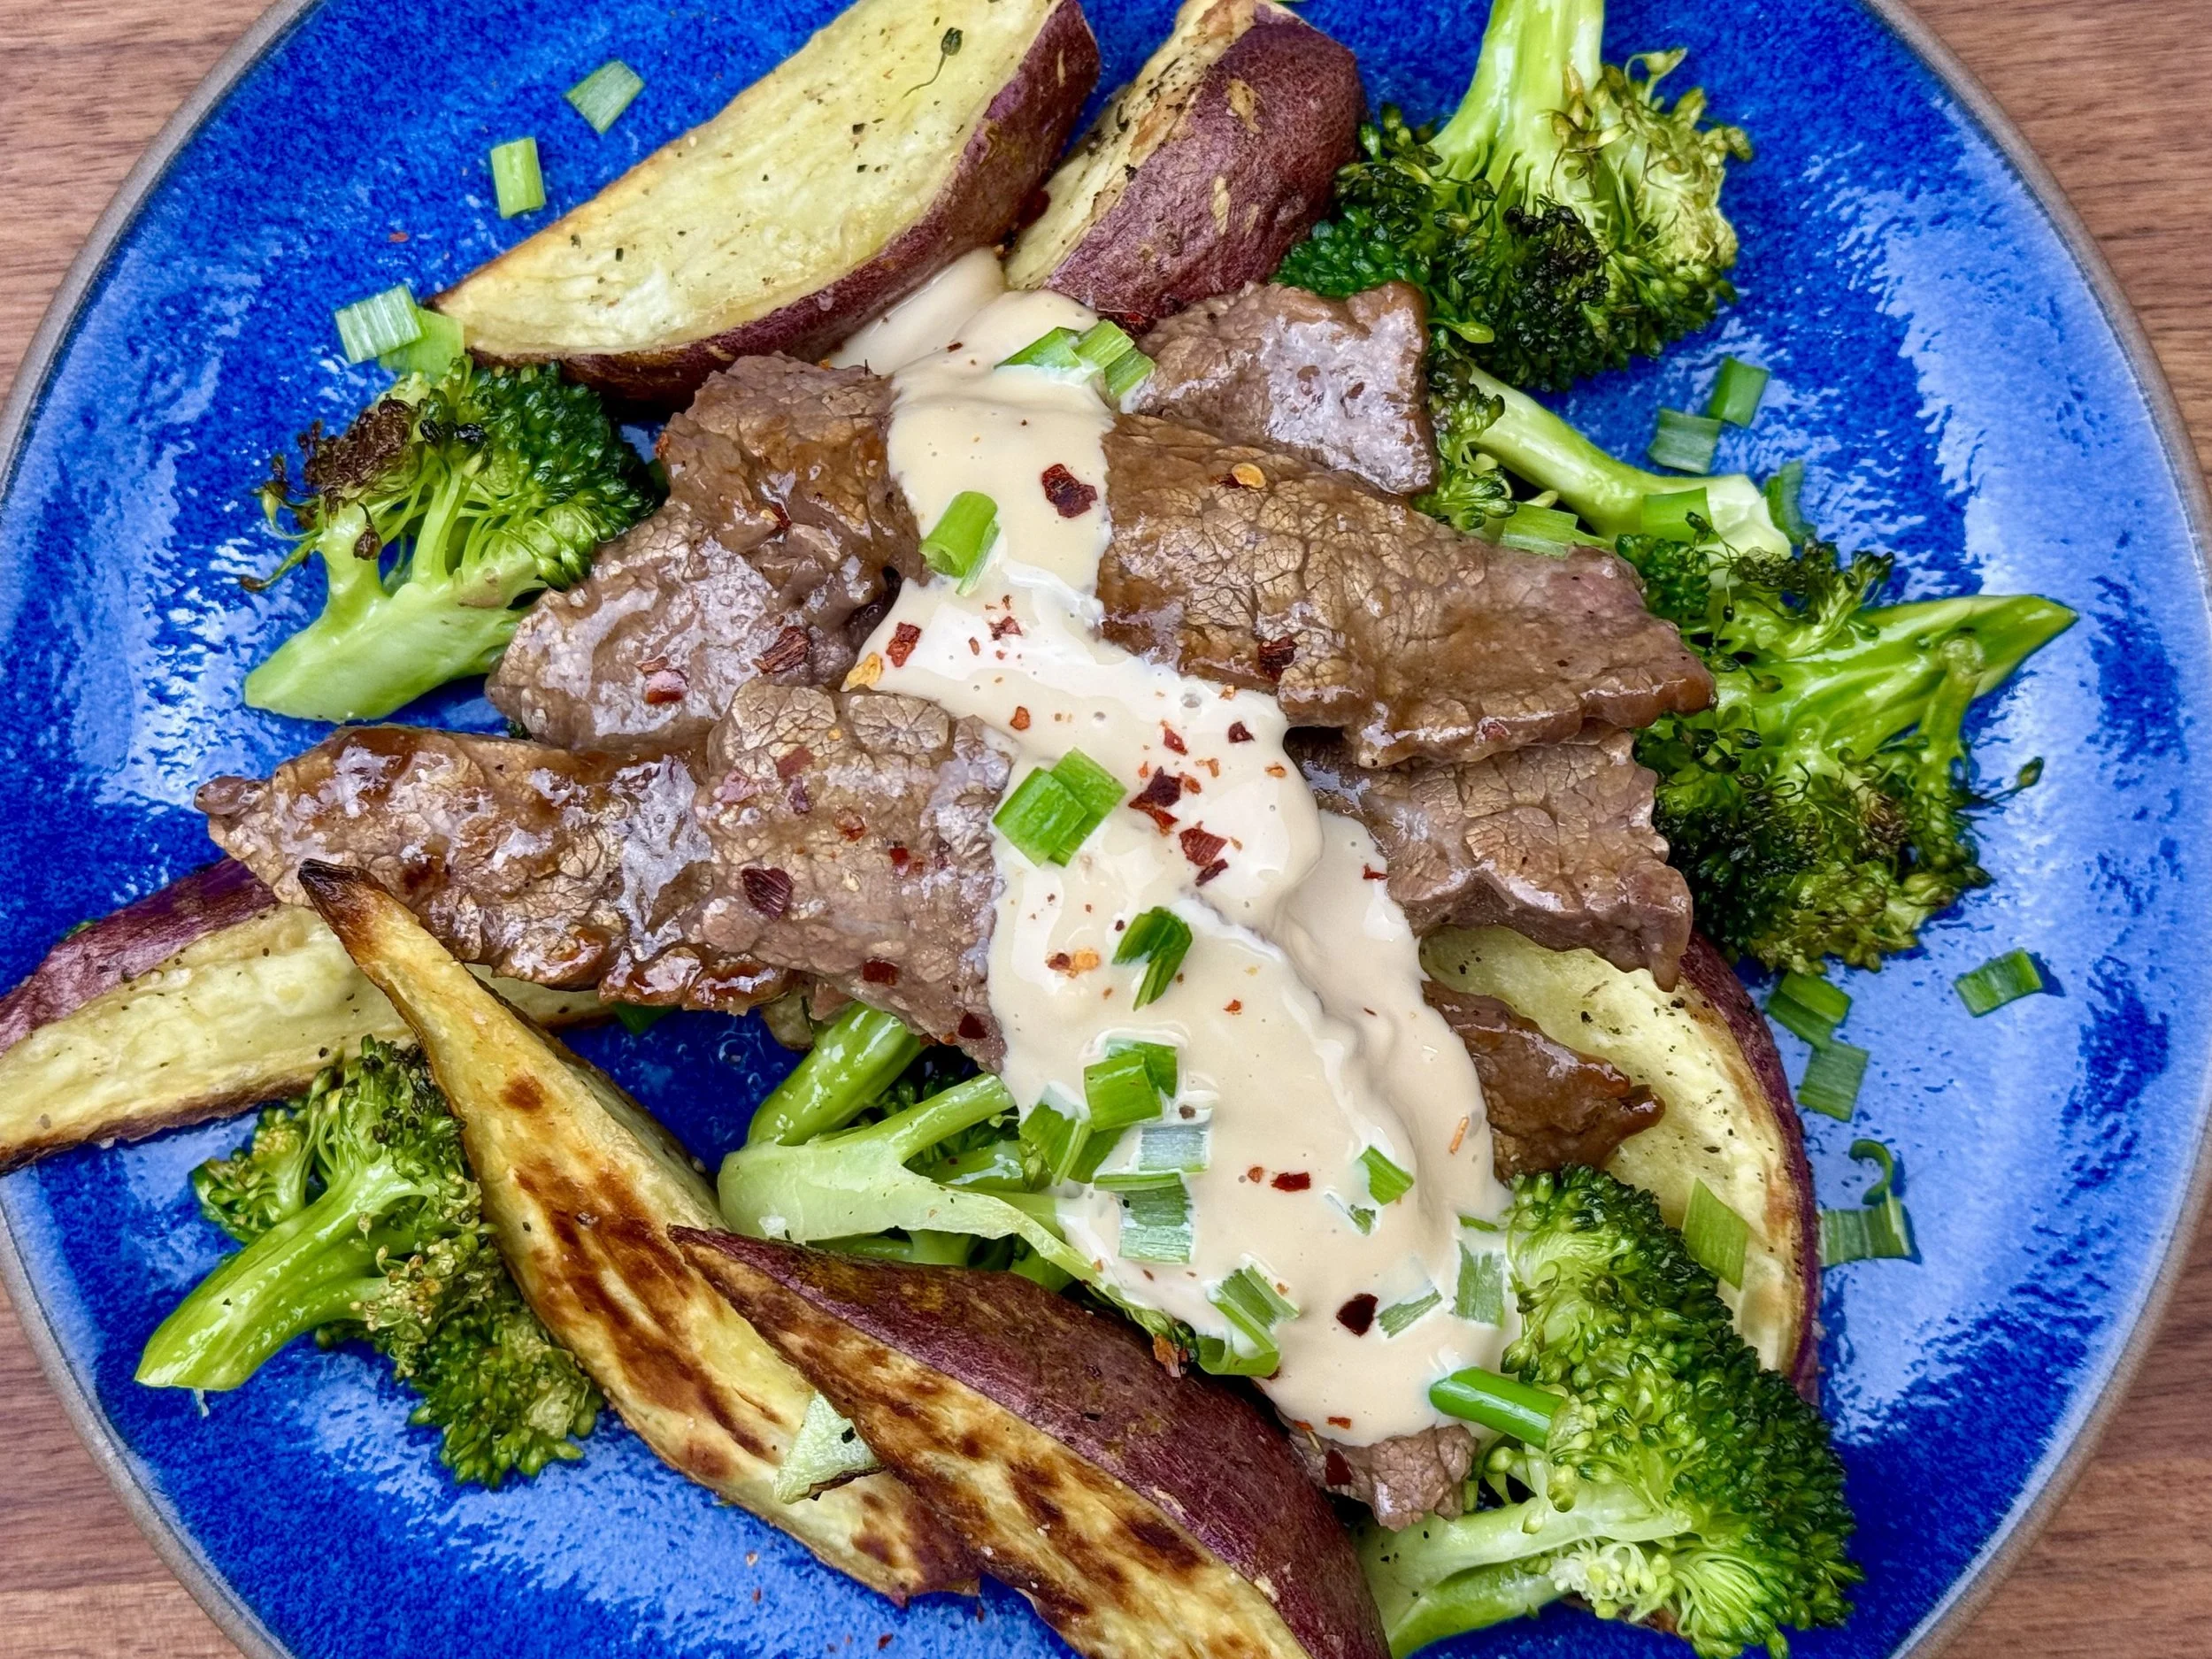
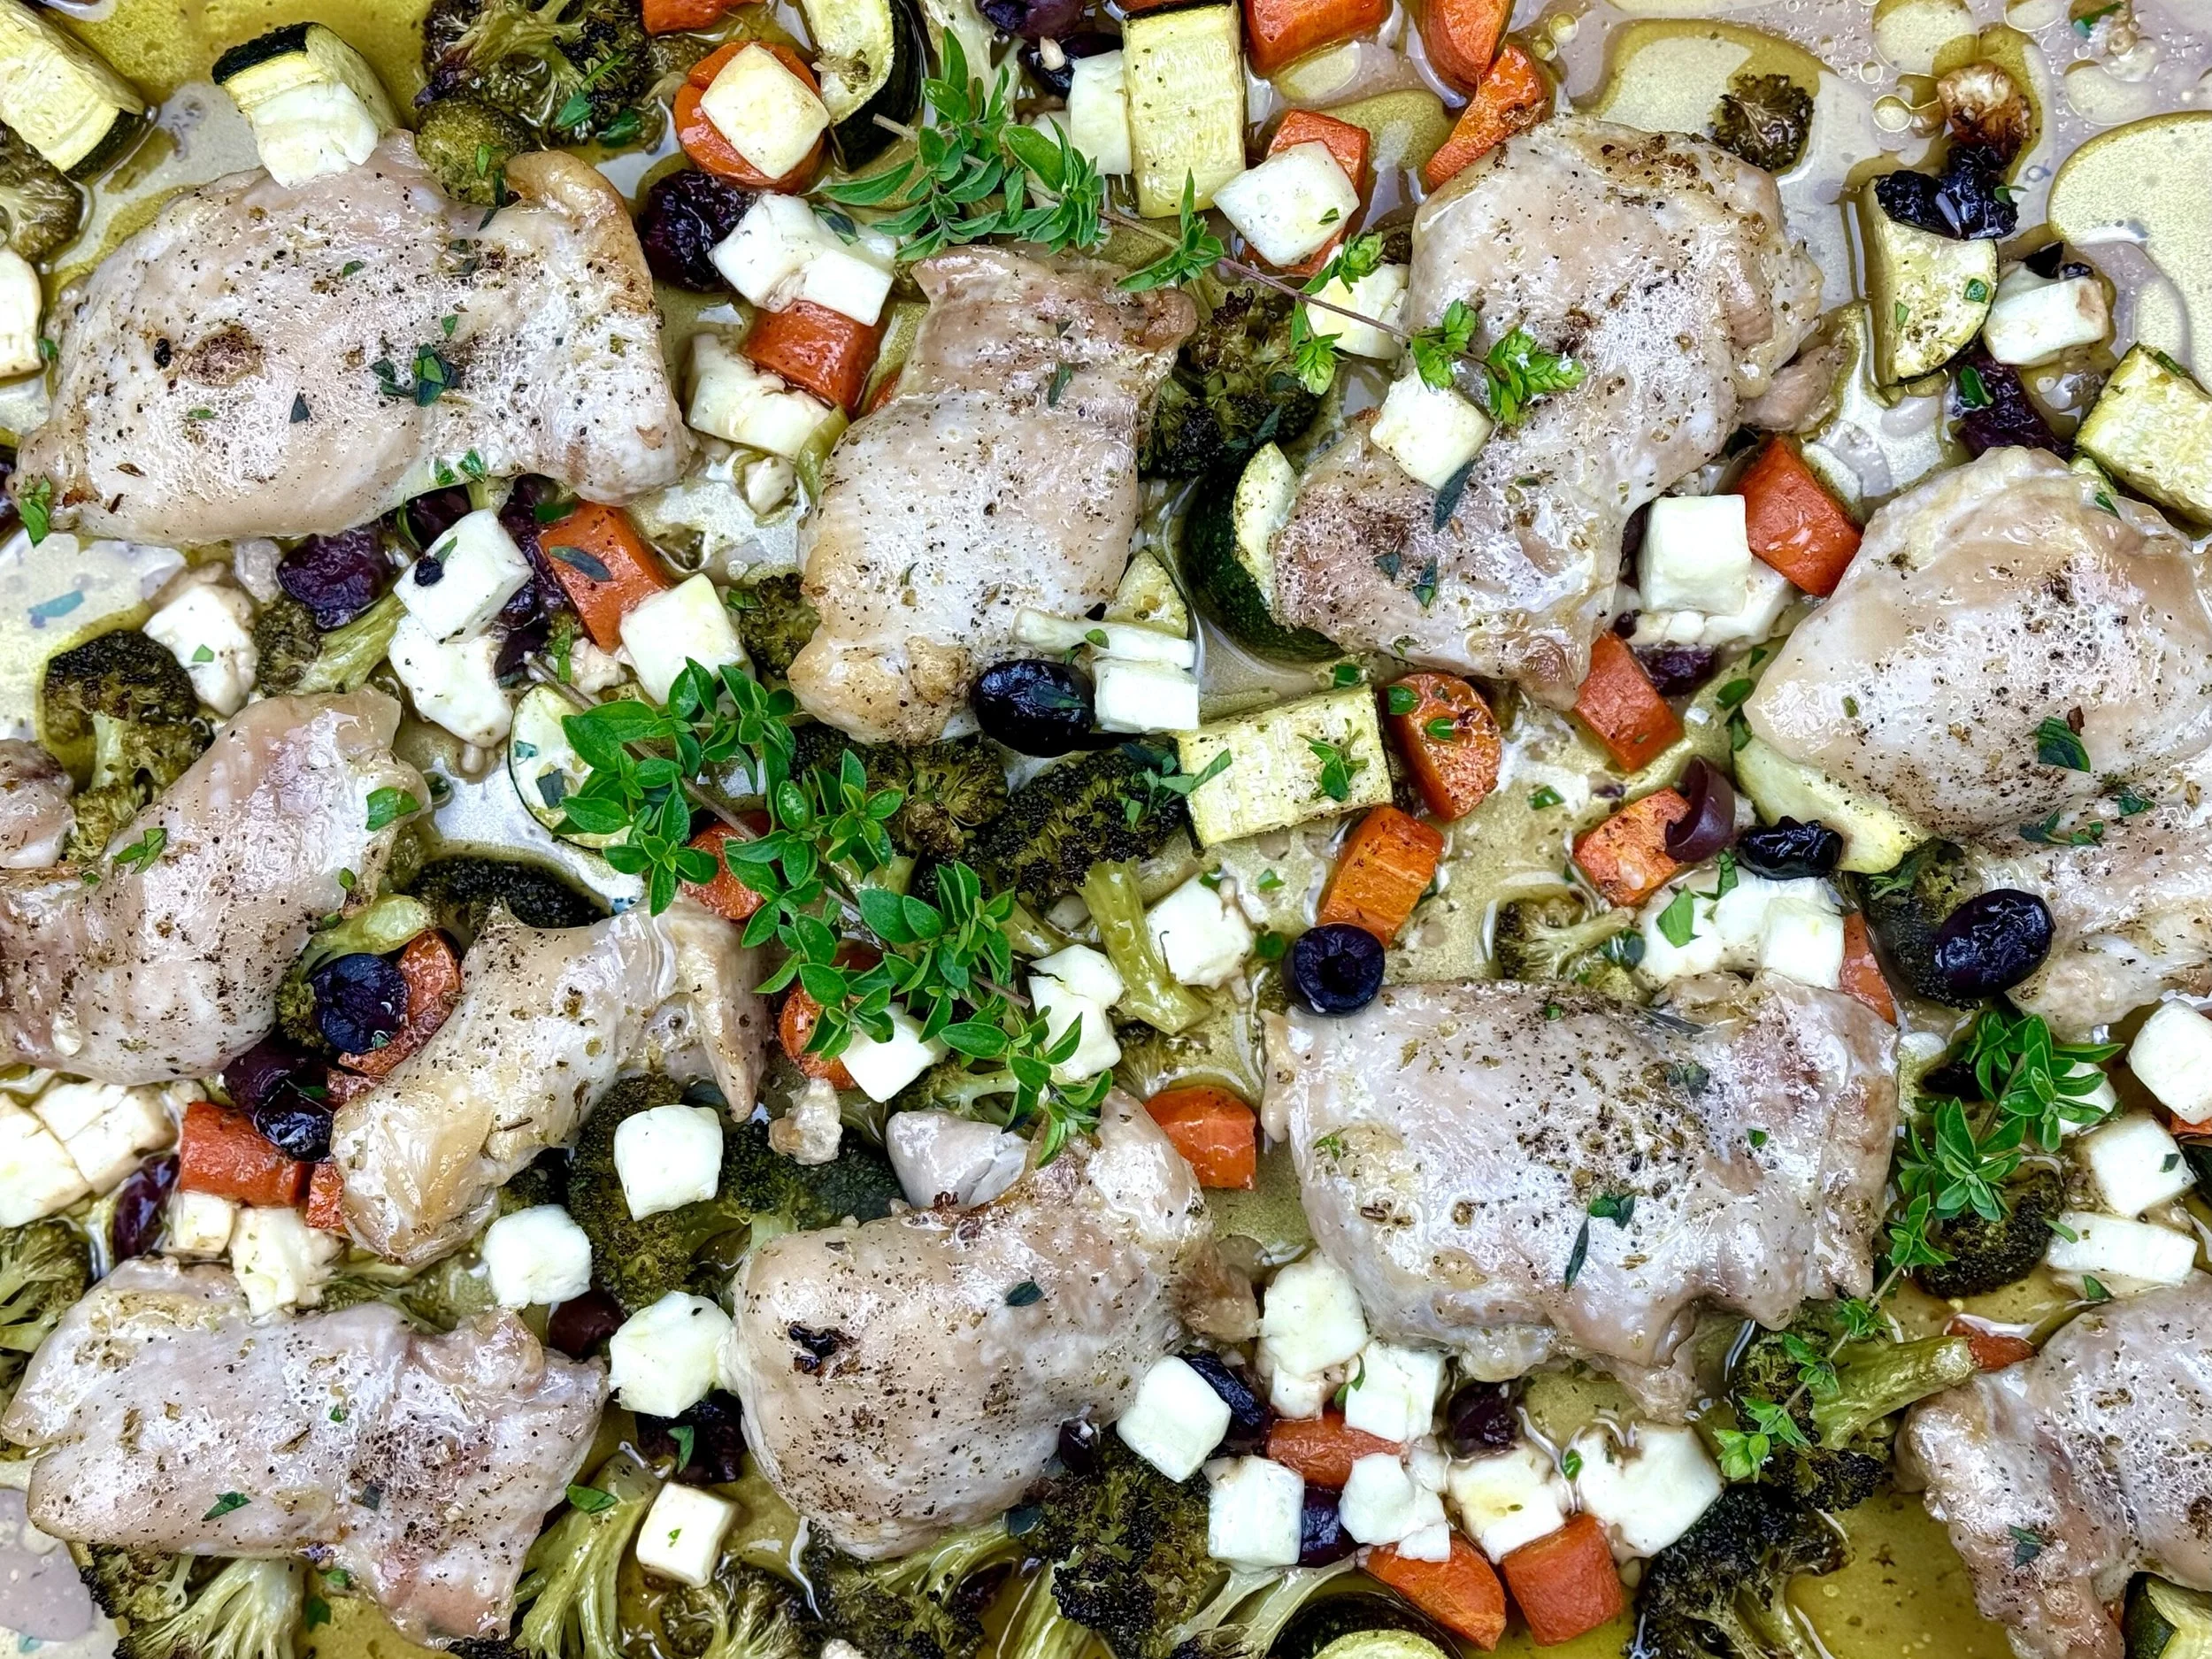
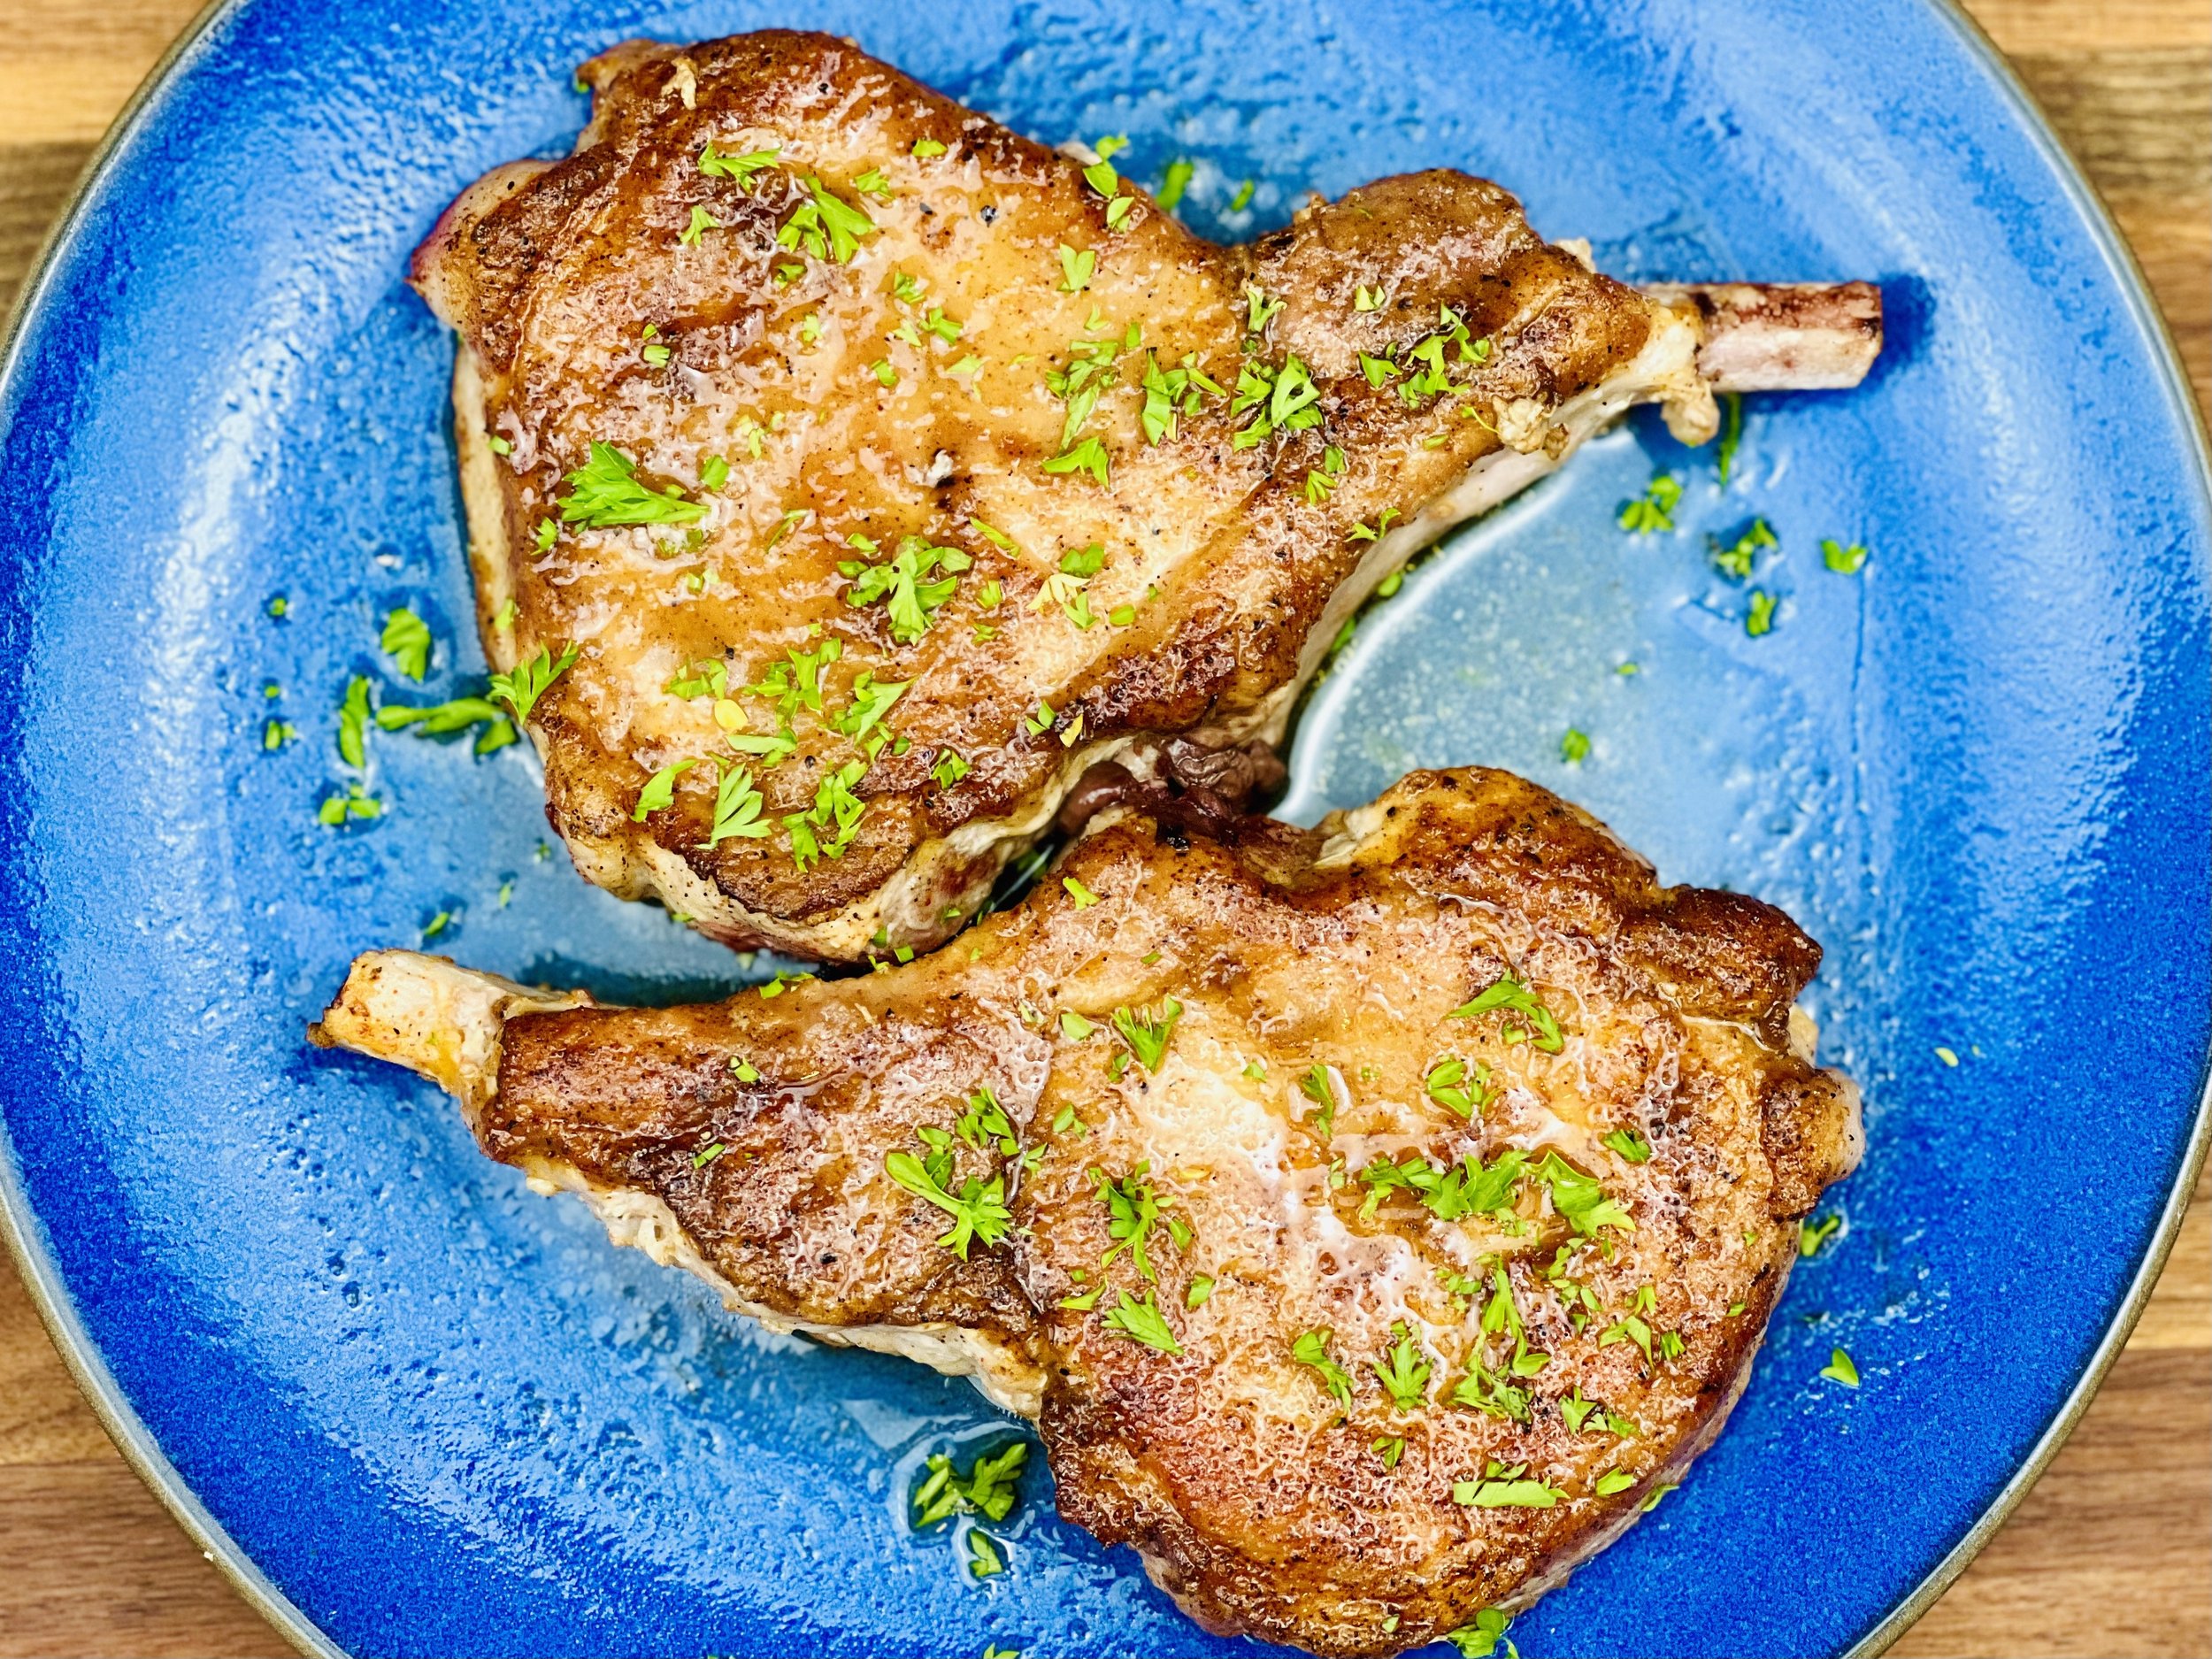
Easy and Delicious Pork Chops (Low FODMAP)
20 Minutes prep • 15 Minutes cook • Low FODMAP • Serves 4 • Gluten-free
20 Minutes prep • 15 Minutes cook • Low FODMAP • Serves 4 • Gluten-free • Ok to make ahead: Steps 1-2
These pork chops are so delicious and so easy to make, you may find yourself adding them to your weekly meal planning! A simple rub gives them excellent flavor, color, and crispiness. Delicious on their own, you may also serve them with my Spinach Alfredo and Buttery Mashed Yukon Gold Potatoes for an excellent combination sure to please a crowd. Serve these simple chops on a weeknight for the family, or on the weekend for a simple yet stunning main course for guests.
Ingredients: Dry Rub
(You may also use 2 1/2 tablespoons of your favorite dry rub if you prefer)
1 tablespoon gluten-free flour
1 teaspoon chili powder
1 teaspoon Smoke N Sanity Essence of Garlic Salt
1 teaspoon Smoke N Sanity Essence of Onion Salt
1/2 teaspoon smoked paprika
1/2 teaspoon ground black pepper
Ingredients: Pork Chops
4 pork chops, about 1-inch thick and 6 to 7 ounces each, (see note about meat below)
1 tablespoon avocado oil or vegetable oil
2 tablespoons chopped fresh parsley, optional
Directions
(1) Prepare the meat: This step is optional but results in more flavorful and tender meat. Remove pork from the package and put it in one layer on a rimmed plate or baking dish. Season both sides of each piece lightly with Kosher salt (no more than 1/4 teaspoon per side). Cover the dish with plastic wrap and refrigerate until ready to use, ideally about 4 hours before cooking or overnight
(2) Make the spice rub: In a small bowl, mix the flour, chili powder, garlic salt, onion salt, smoked paprika, and 1/2 teaspoon of black pepper. This is a delicious combination but, as noted, you may substitute your favorite low-FODMAP dry rub if you prefer.
(3) Remove the chops from the fridge and let them rest at room temperature for about 20 minutes. After 20 minutes, use a paper towel to pat the pork chops dry, then sprinkle both sides of the chops with the spice rub and press it into the meat with your fingers.
(4) Sear the chops: In a frying pan large enough to hold all the chops in one layer, heat the oil over medium-high heat. When the oil shimmers (and is hot) add the pork chops to the pan in one layer. Cook for 2- 3 minutes until golden brown on the bottom. Flip the pork chops over so the seared side is facing up. If the chops have a fatty edge, use kitchen tongs to hold each chop fat-side-down until it sizzles and browns slightly; about 30 seconds for each chop.
(5) Cook the chops: Reduce the heat to low, then cover the skillet with a lid. Cook for 5 to 8 minutes or until an instant-read thermometer reads 145 degrees F when inserted into the thickest part of the pork chop. The cook time will depend on how thick the chops are. If you don’t have an instant-read thermometer, cut into one of the chops and, if the juices run clear, it’s done.
(6) Rest the chops: Transfer the pork chops to a plate and cover loosely with foil. Let the chops rest for 5 minutes before serving.
(7) Plate and Serve: When ready to serve place a pork chop on each plate and drizzle the juice from the resting plate, and/or the frying pan, over each of the chops. Serve with my Spinach Alfredo and my Buttery Mashed Yukon Gold Potatoes for a wonderful combination.
A note about the meat: I used center-cut, bone-in, 1-inch thick chops for this recipe, but you can use thicker or thinner chops, with or without the bone, if you prefer. Note: thinner chops will cook much faster, so check for doneness before you think you need to. Bone-in chops add a minute or two of extra cook time, but the added flavor is worth the wait!
Eat and enjoy every bite because you can!
Recipe note: I use Diamond Crystal Kosher salt in all my recipes because it has a wonderful flat and crisp flake that tastes delicious. It is also the least salty salt available so you can use it more liberally as a seasoning than you can table salt or sea salt. If you use another type of salt, you may need to reduce the amount so it is not over-salted.
Have a question you’d like to have answered? Email me at hello@ibsgamechanger.com
Link note: This post may contain affiliate links for you to easily purchase items that are linked. I may earn a small commission from qualifying purchases but none of this costs you a thing so feel free to use the links! In addition, for some items, I have provided a special discount code for IBS Game Changers so be sure to use the code when you purchase an item to get the discount that has been arranged just for you.
More Deliciously Low FODMAP™ main course recipes
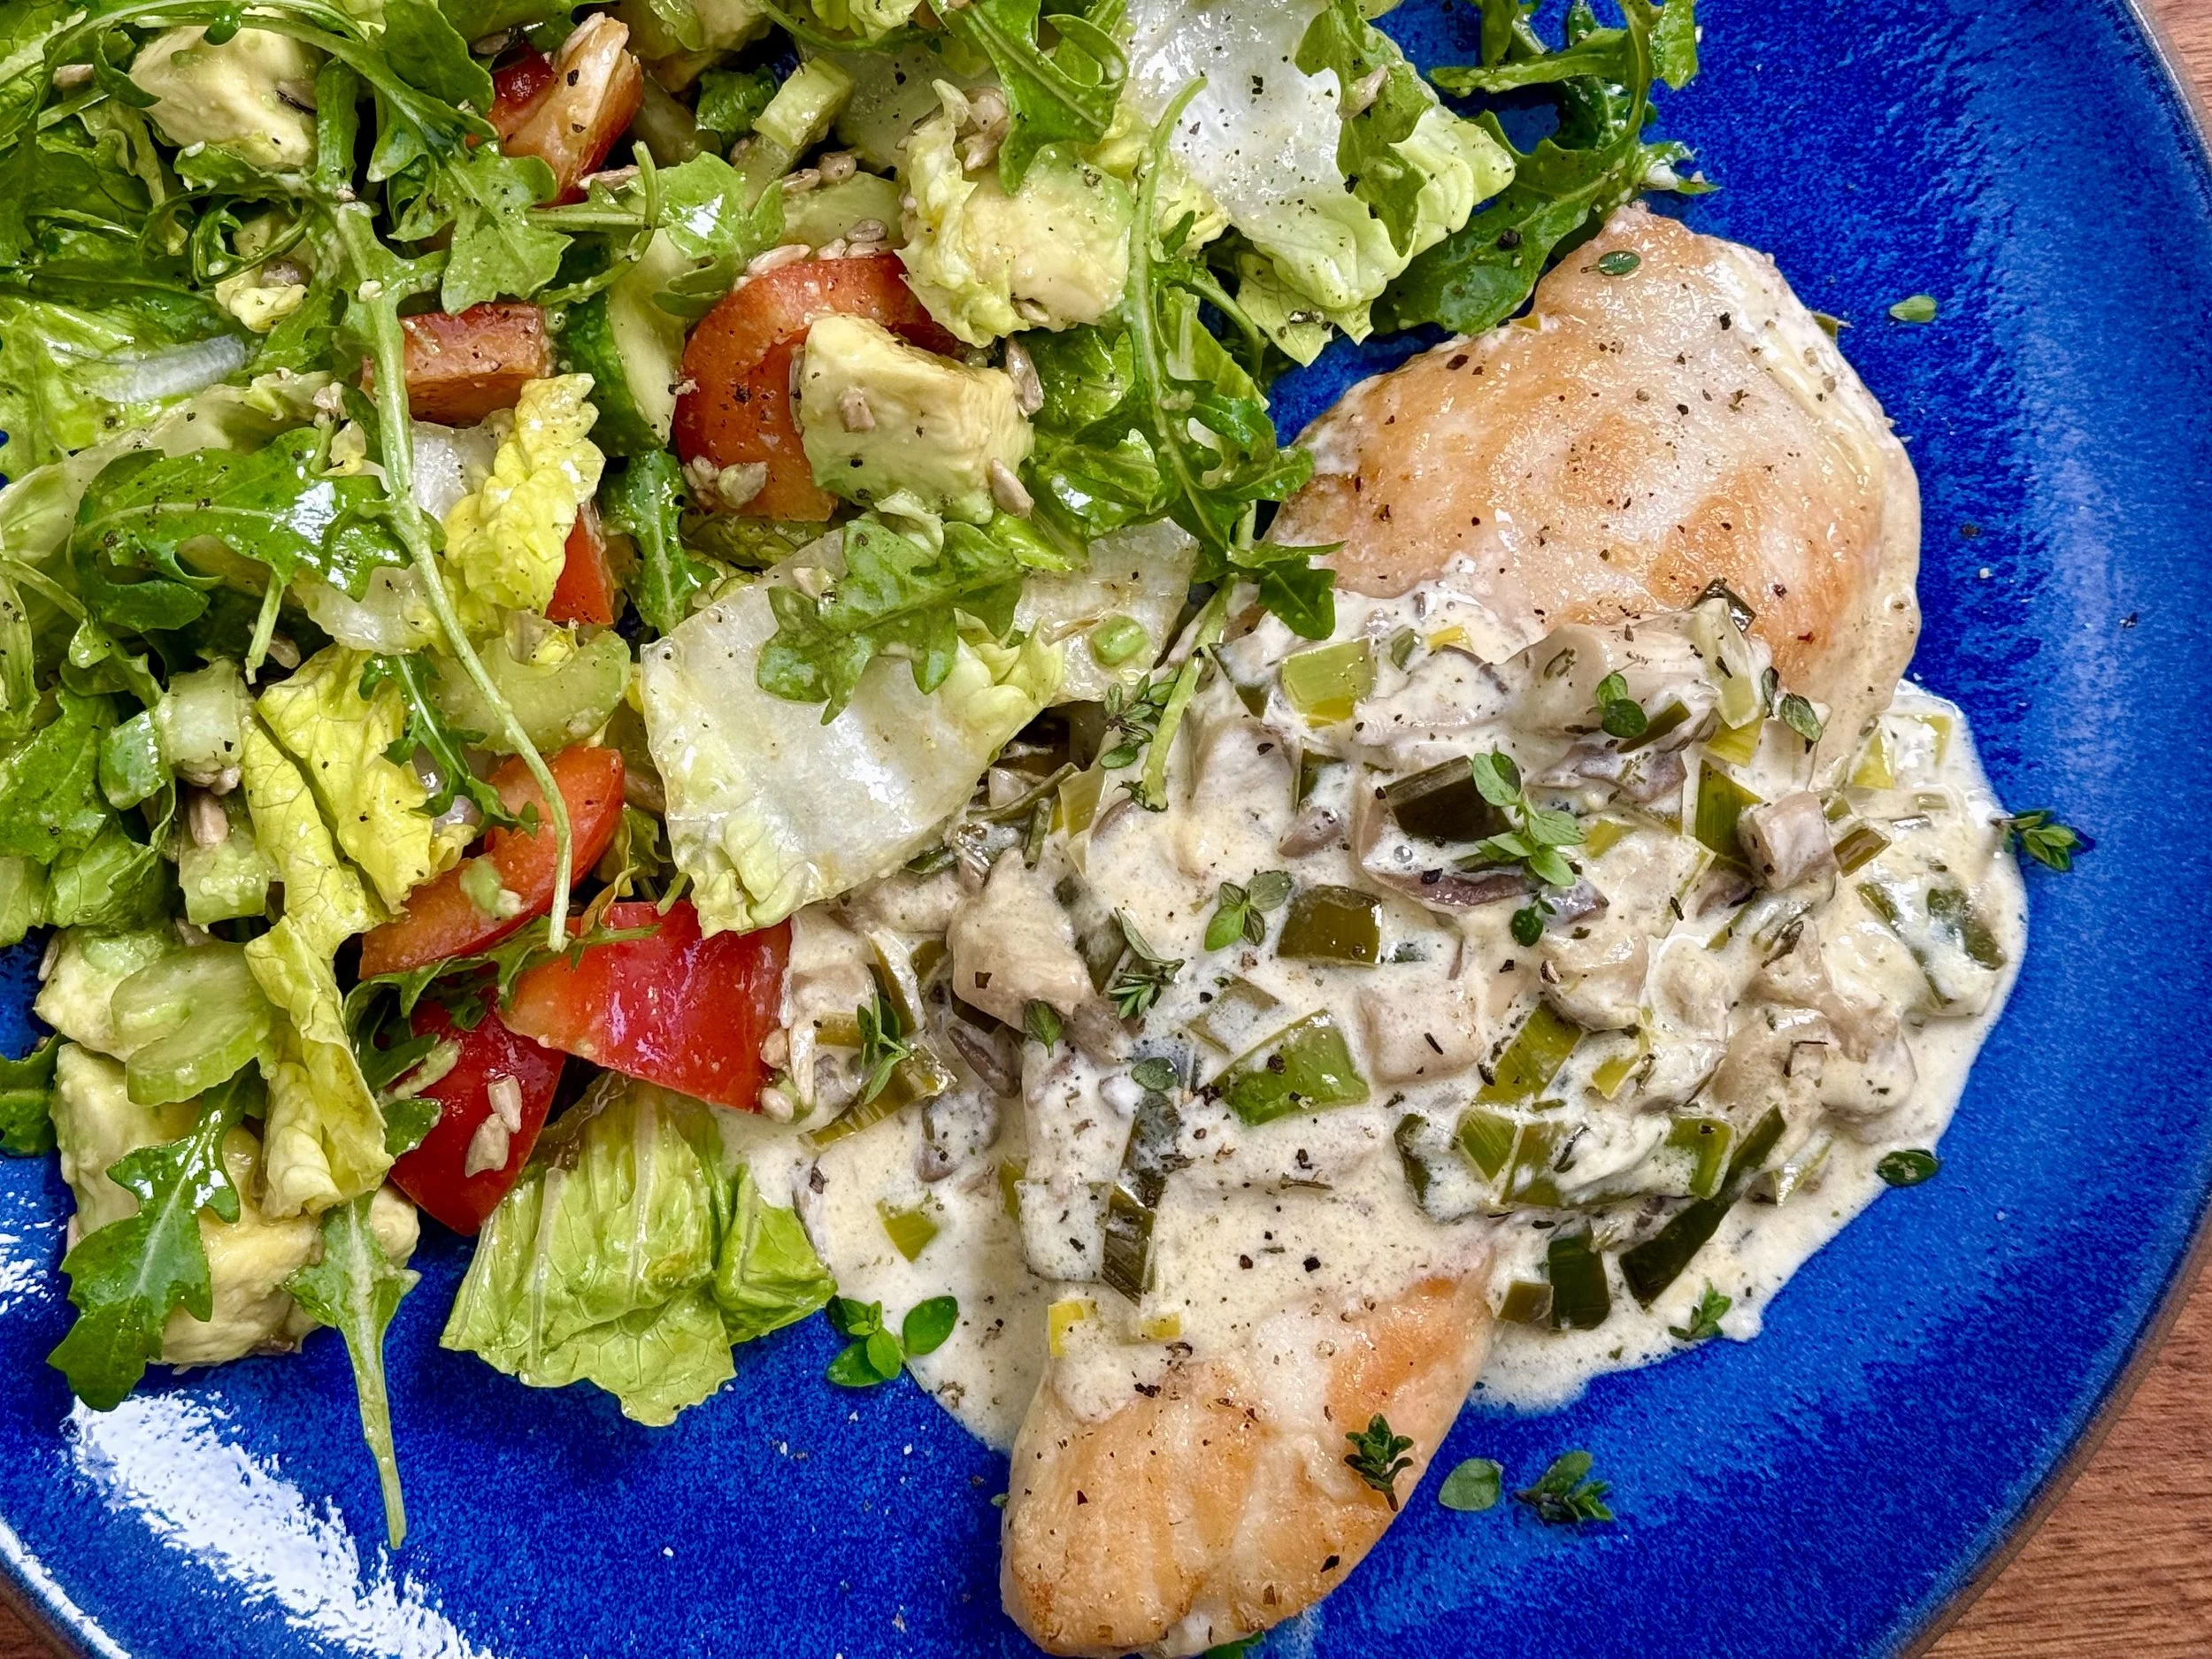
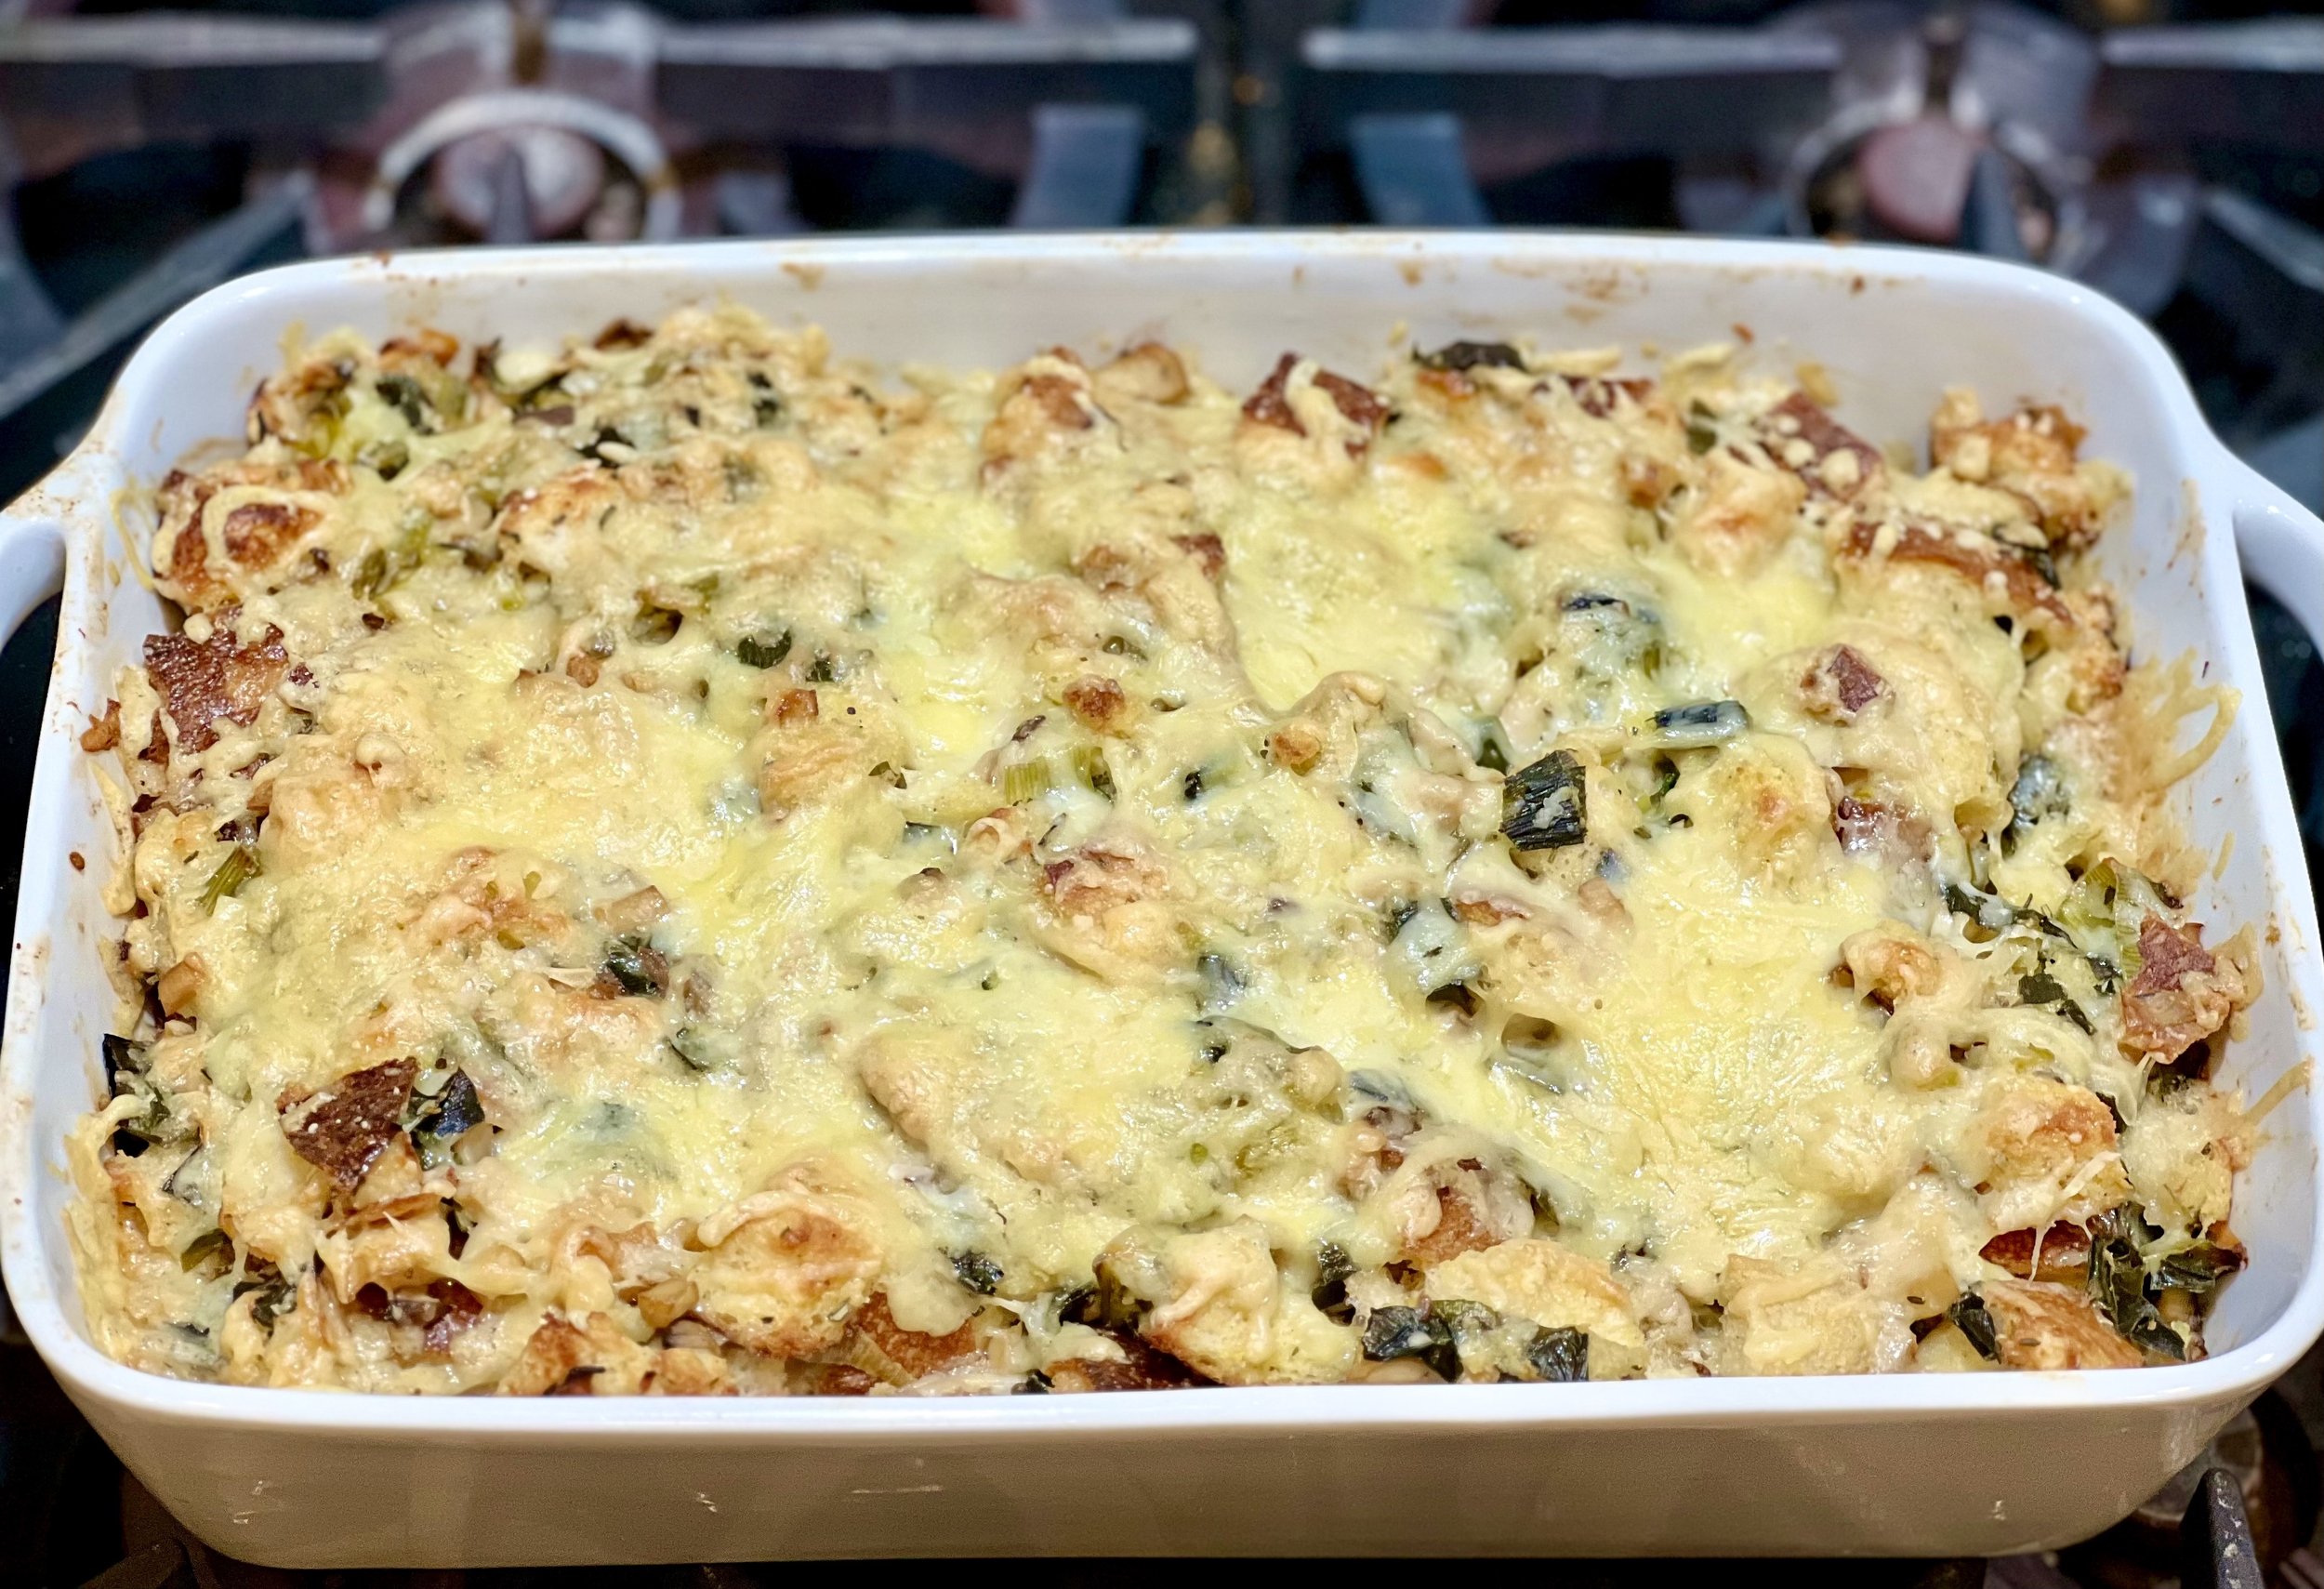
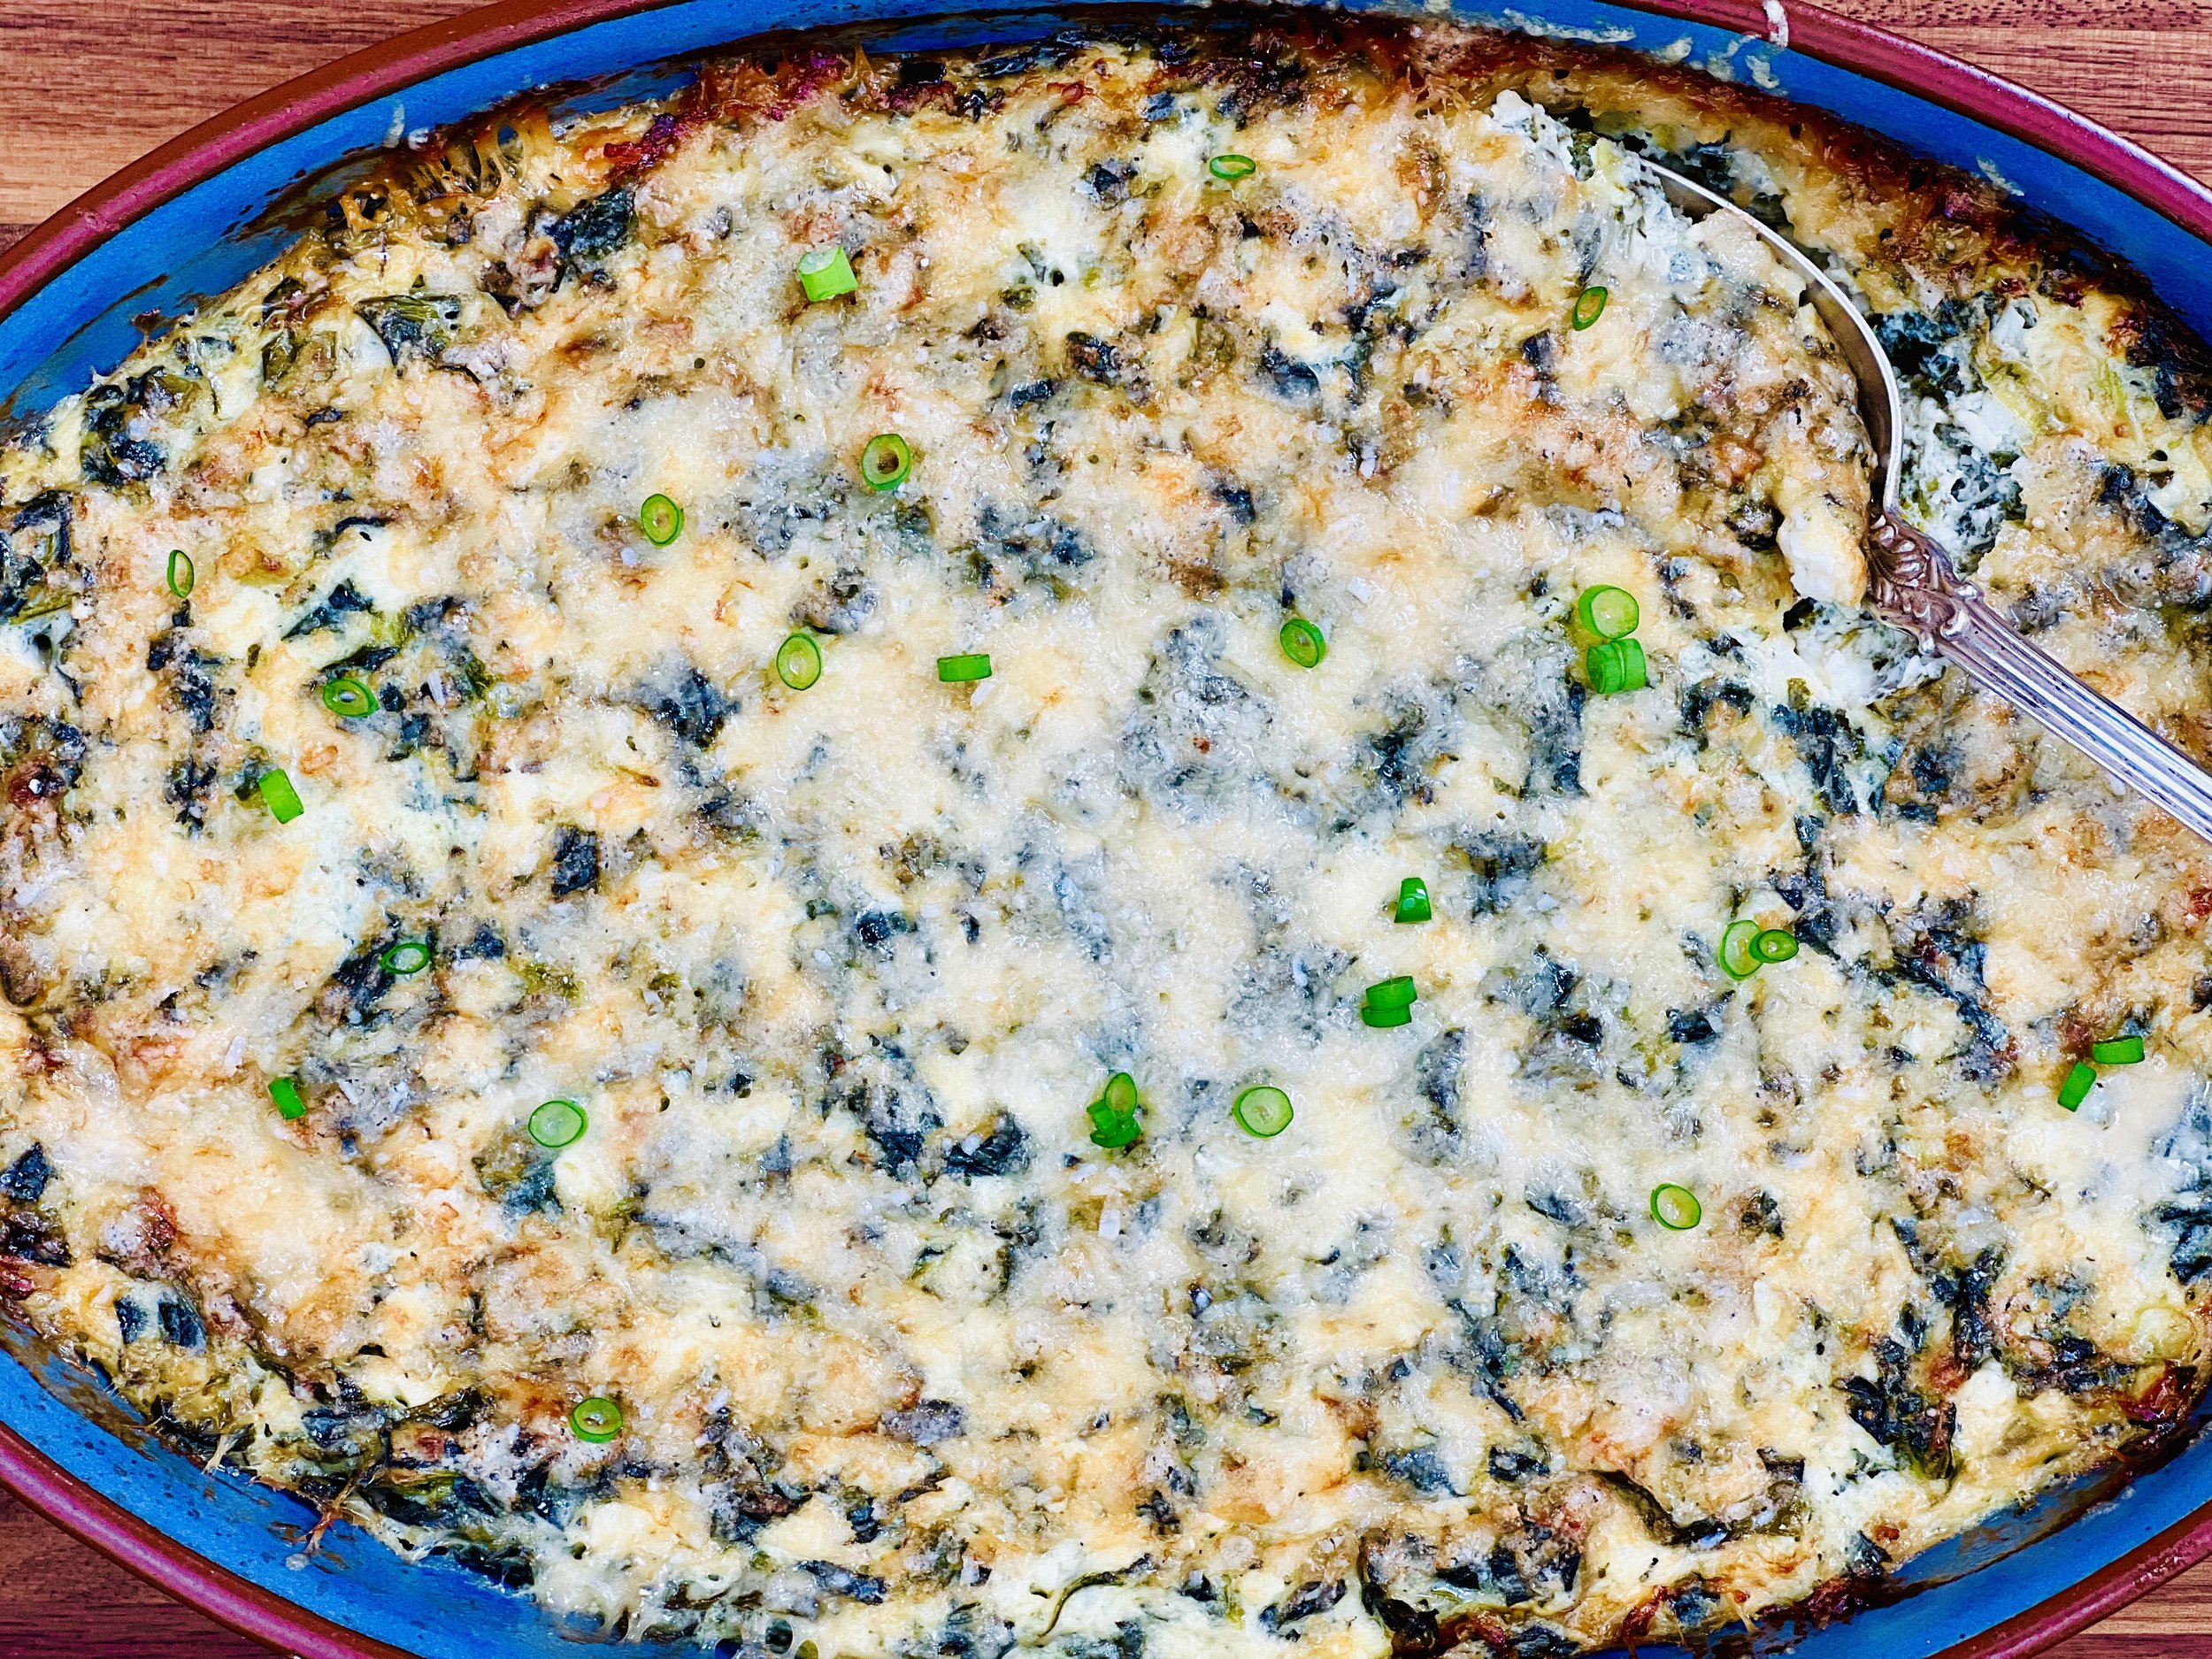
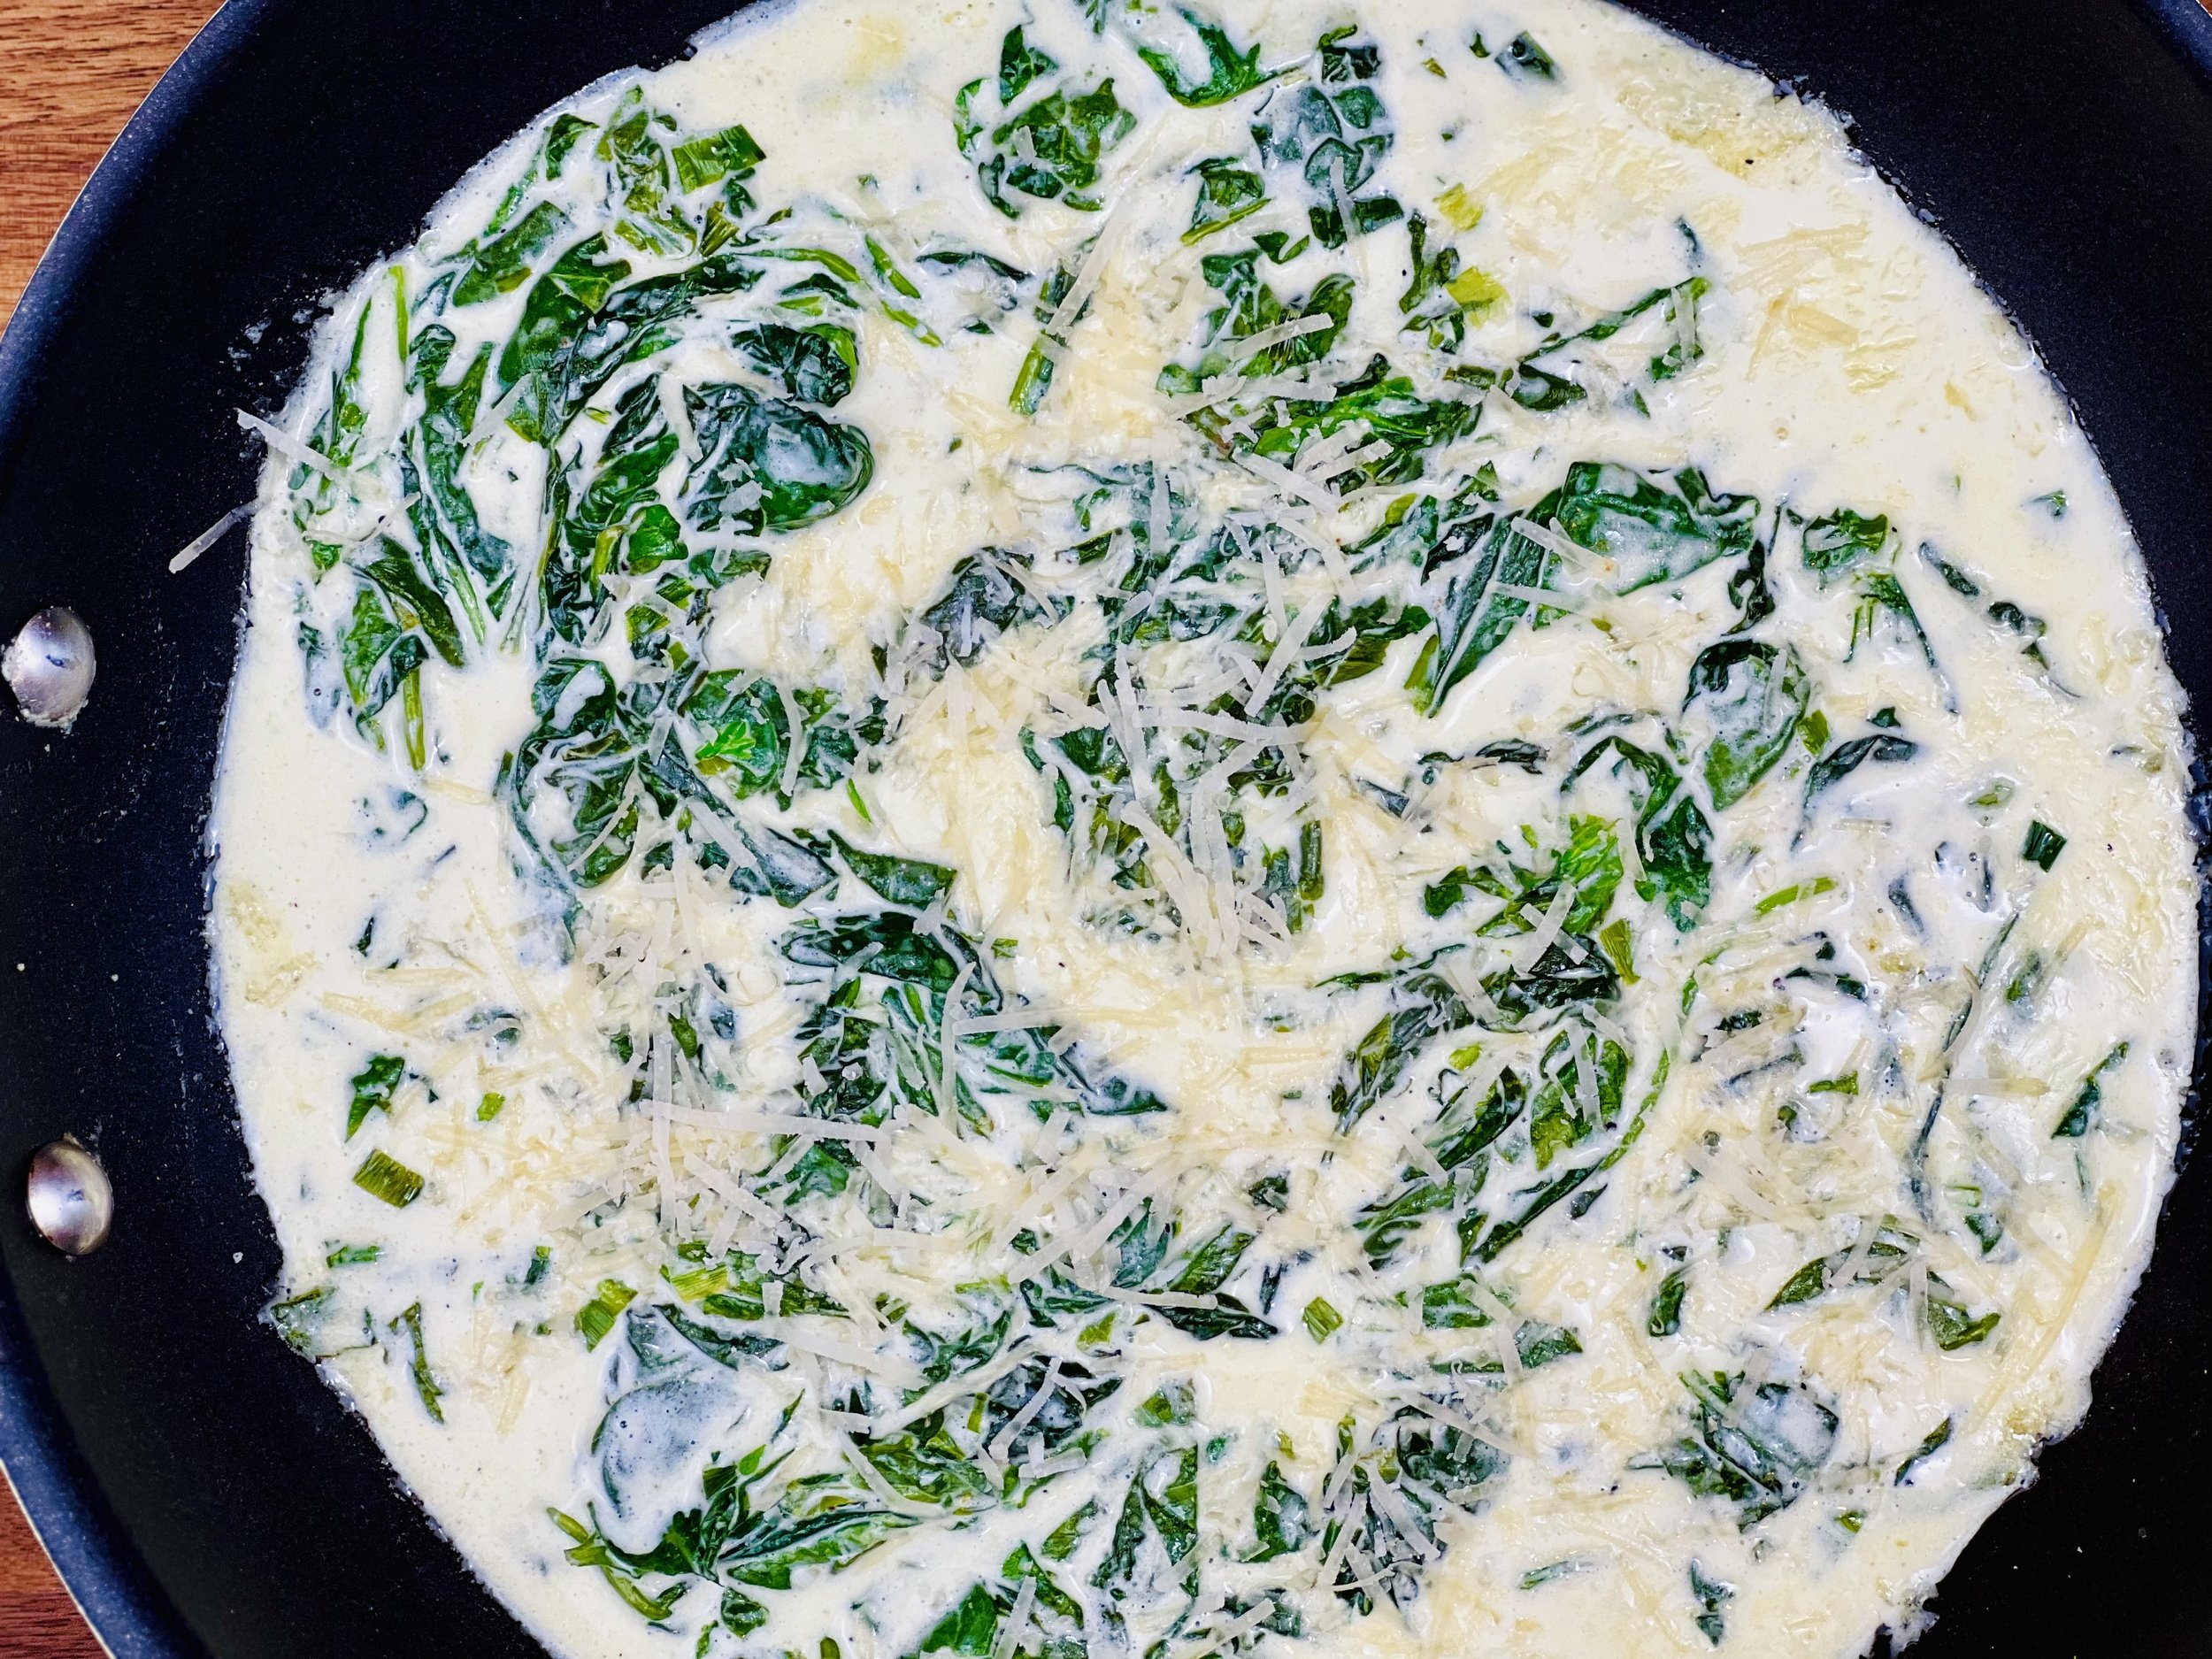
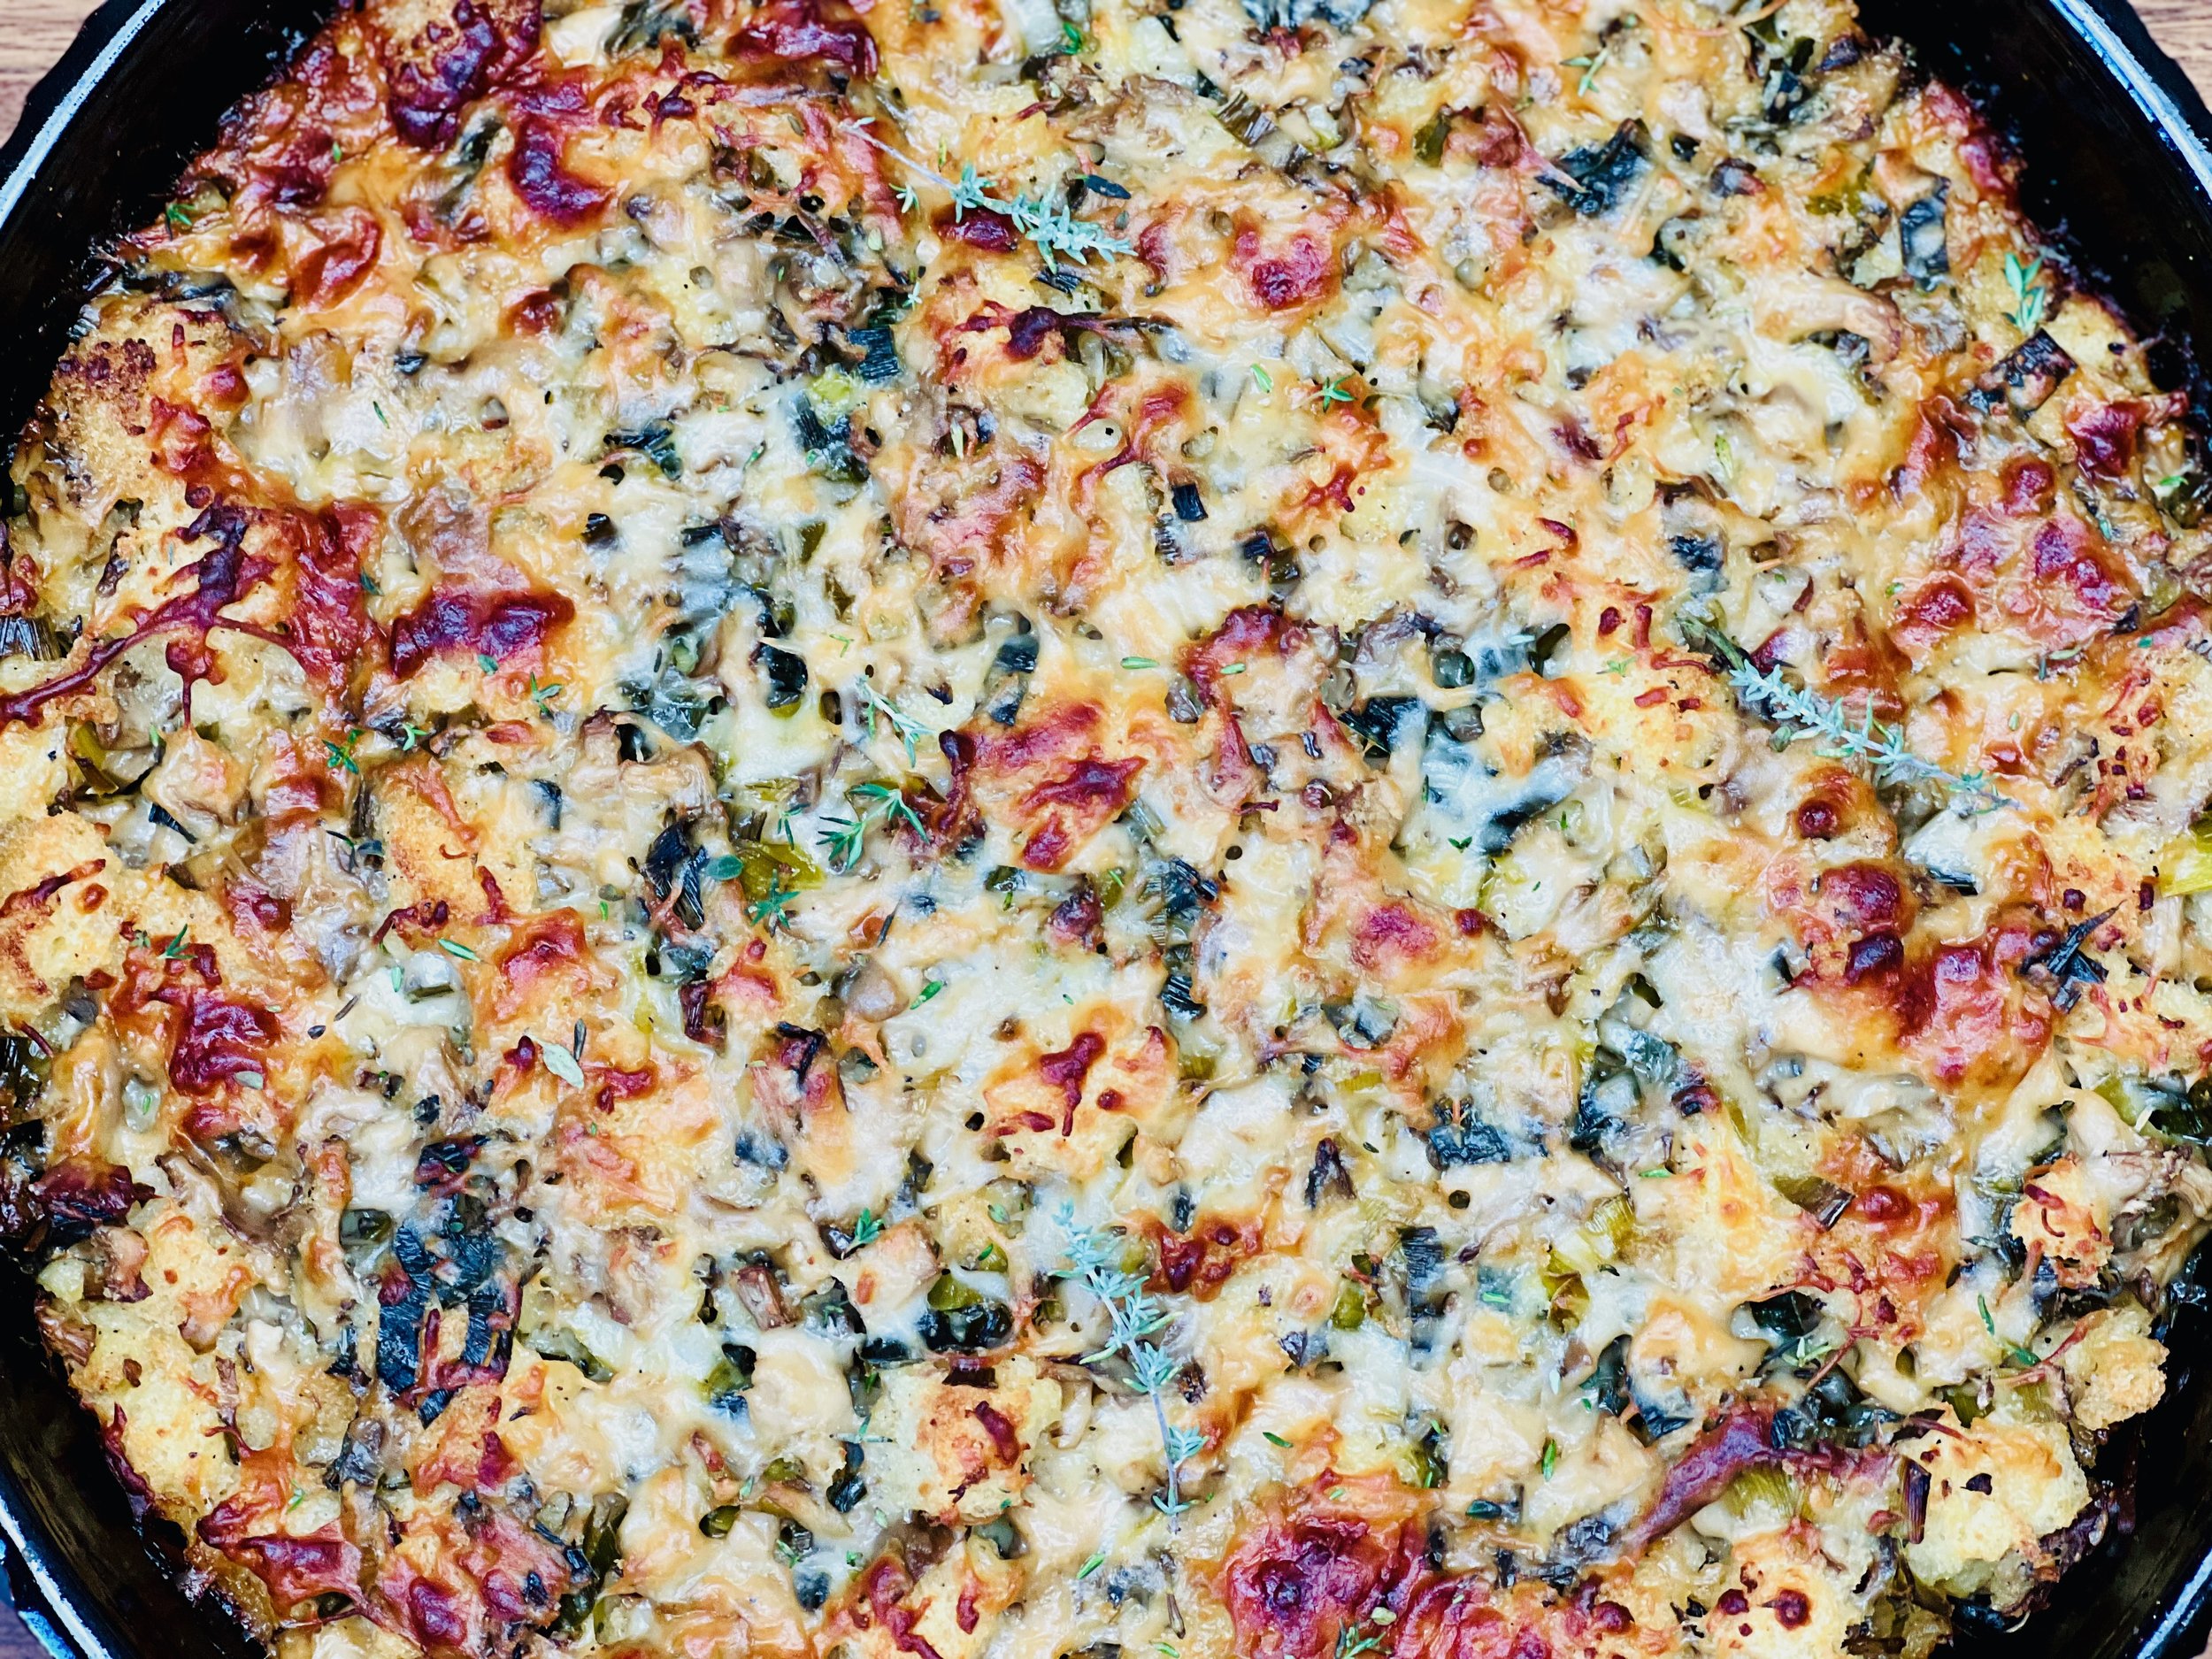
Spinach Alfredo (Low FODMAP)
15 Minutes prep • 15 Minutes cook • Low FODMAP • Gluten-free • Vegetarian • Serves 4
15 Minutes prep • 15 Minutes cook • Low FODMAP • Gluten-free • Vegetarian • Serves 4 • Ok to make ahead: Step 1
While you can pour this amazing sauce over pasta, it definitely doesn’t need pasta, or anything else, to be a highlight of your meal. Enjoy it on its own or serve it with my Easy and Delicious Pork Chops or really just about anything! Spinach is a wonderful accompaniment to the creamy sauce and tangy cheese. And when you use enough spinach it’s the perfect carrier to hold every drop of the creamy cheesy sauce.
Ingredients
3 tablespoons butter
2 leeks, green part only
2 tablespoons lactose-free cream cheese (optional but makes the sauce thicker)
1/2 cup cream
1/2 cup lactose-free half-and-half or whole milk (or use all cream)
1/3 cup grated parmesan cheese, plus more for serving
1/2 teaspoon Kosher salt
1/2 teaspoon black pepper
16 ounces fresh spinach, washed, and stems removed
Directions
(1) Prepare: Wash and remove the long stems from the spinach. Grate the parmesan cheese. Chop the leek greens.
(2) Cook the leeks: Heat the butter in a large skillet over medium heat. Once melted, add the leek greens and cook for about 5 minutes until they are softened and beginning to brown.
(3) Finish the sauce: Add the cream and half and half (if using), and bring. it just to a simmer. Add the cream cheese (if using) and the parmesan cheese and stir until the cream cheese is melted and the sauce is smooth.
Make-ahead note: At this point, you may let the sauce cool and then reheat when ready to finish and serve.
(4) Finish: Add the spinach to the cream mixture and fold it over and over until the leaves are coated. As it heats, the spinach will cook down and settle into the sauce. Keep cooking and turning until all the spinach is submerged and tender. Taste for seasoning and add salt or pepper if needed.
(5) Plate and serve: Serve warm with a sprinkle of parmesan cheese over the top.
Eat and enjoy every bite because you can!
Recipe note: I use Diamond Crystal Kosher salt in all my recipes because it has a wonderful flat and crisp flake that tastes delicious. It is also the least salty salt available so you can use it more liberally as a seasoning than you can table salt or sea salt. If you use another type of salt, you may need to reduce the amount so it is not over-salted.
Have a question you’d like to have answered? Email me at hello@ibsgamechanger.com
Link note: This post may contain affiliate links for you to easily purchase items that are linked. I may earn a small commission from qualifying purchases but none of this costs you a thing so feel free to use the links! In addition, for some items, I have provided a special discount code for IBS Game Changers so be sure to use the code when you purchase an item to get the discount that has been arranged just for you.
More Deliciously Low FODMAP™ plant forward recipes


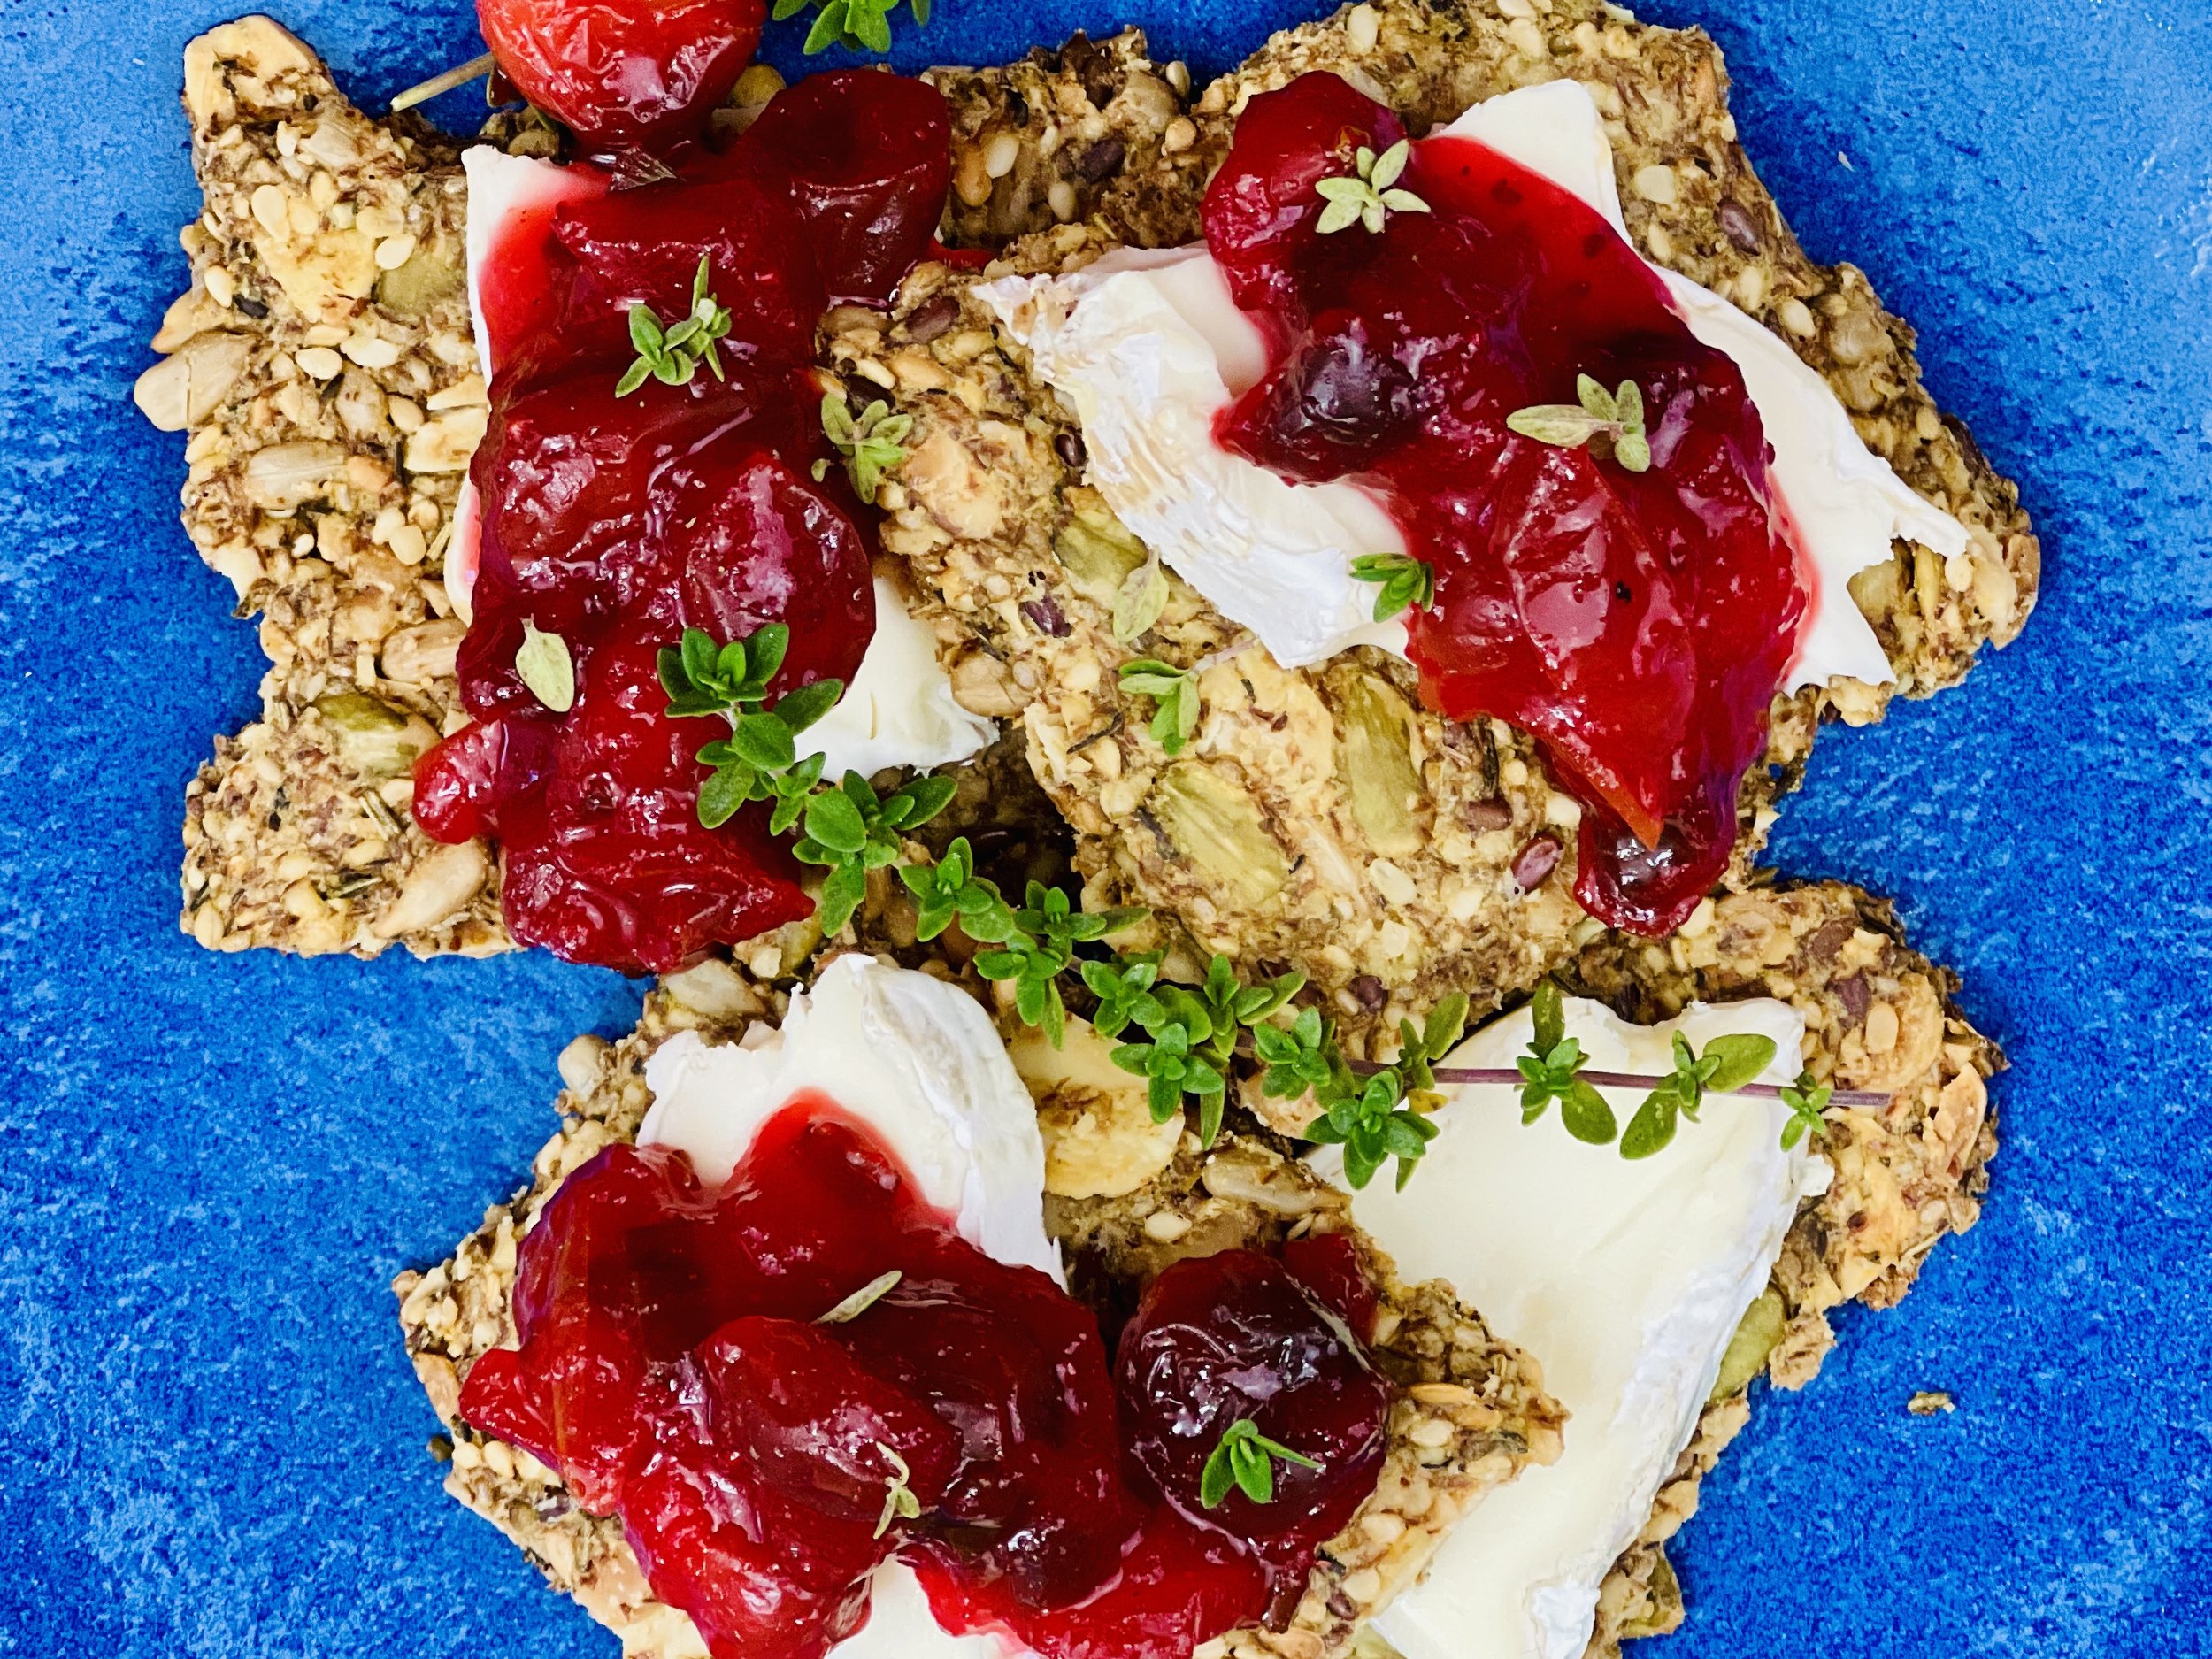
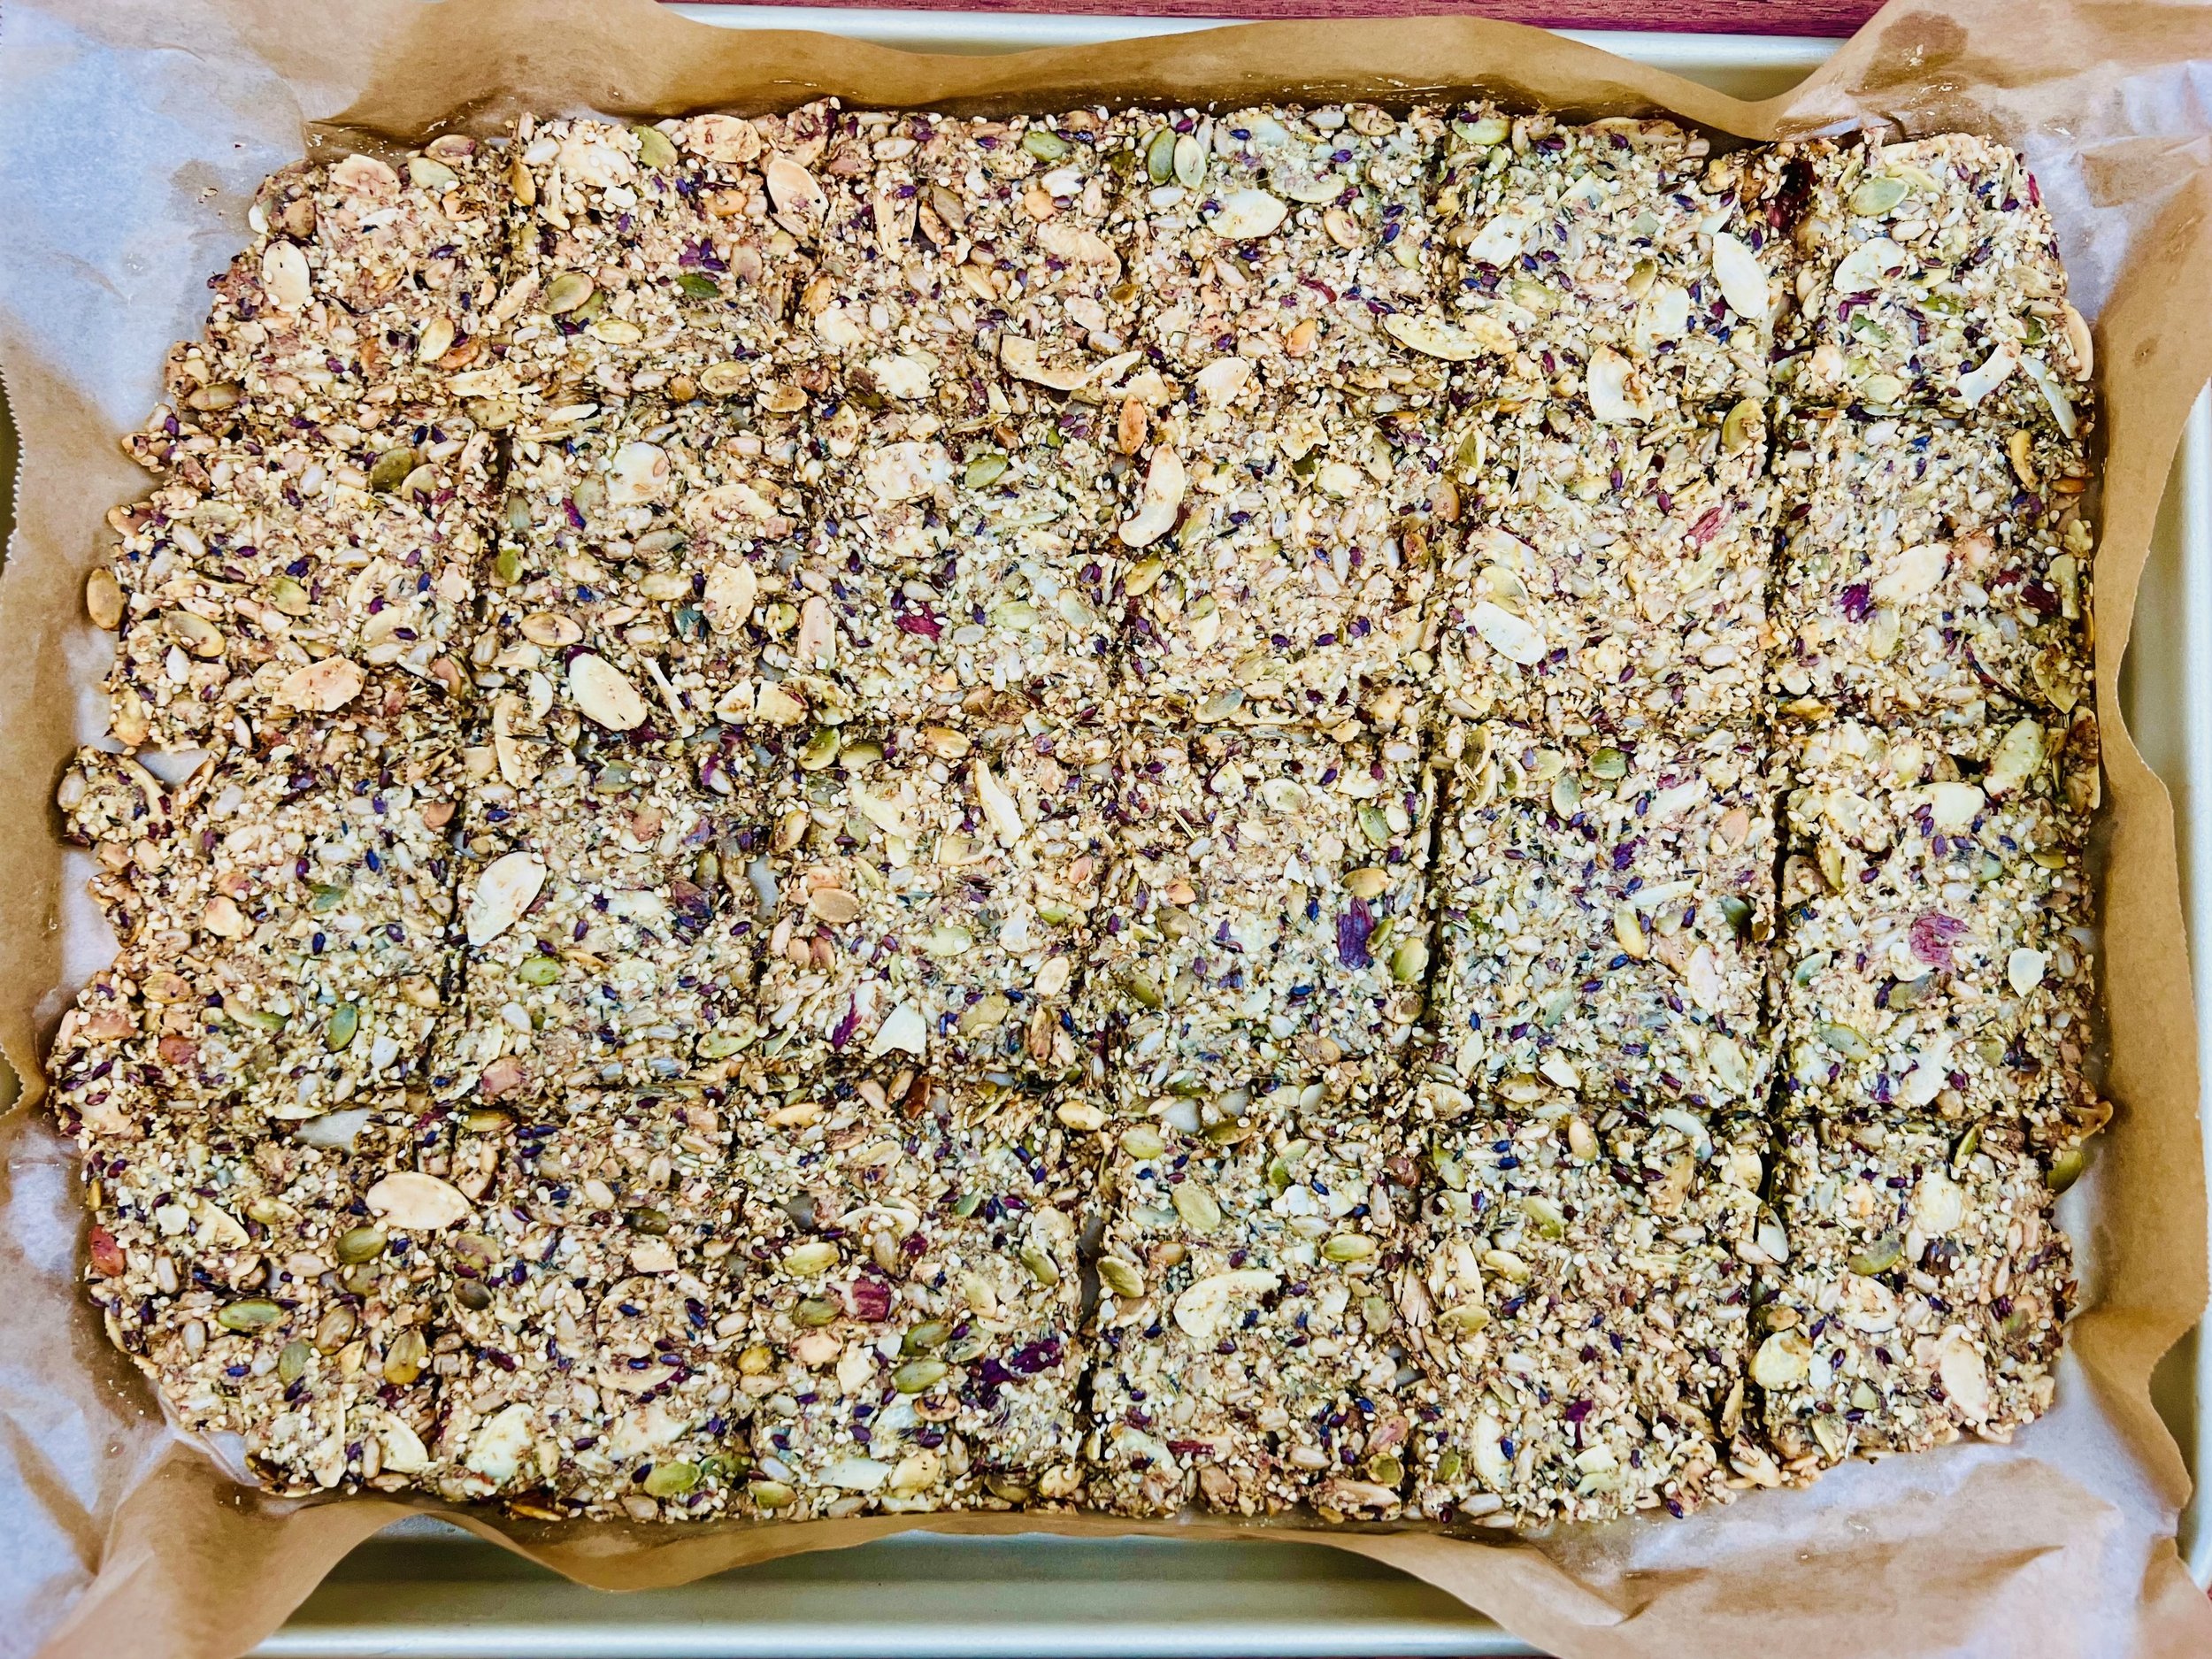
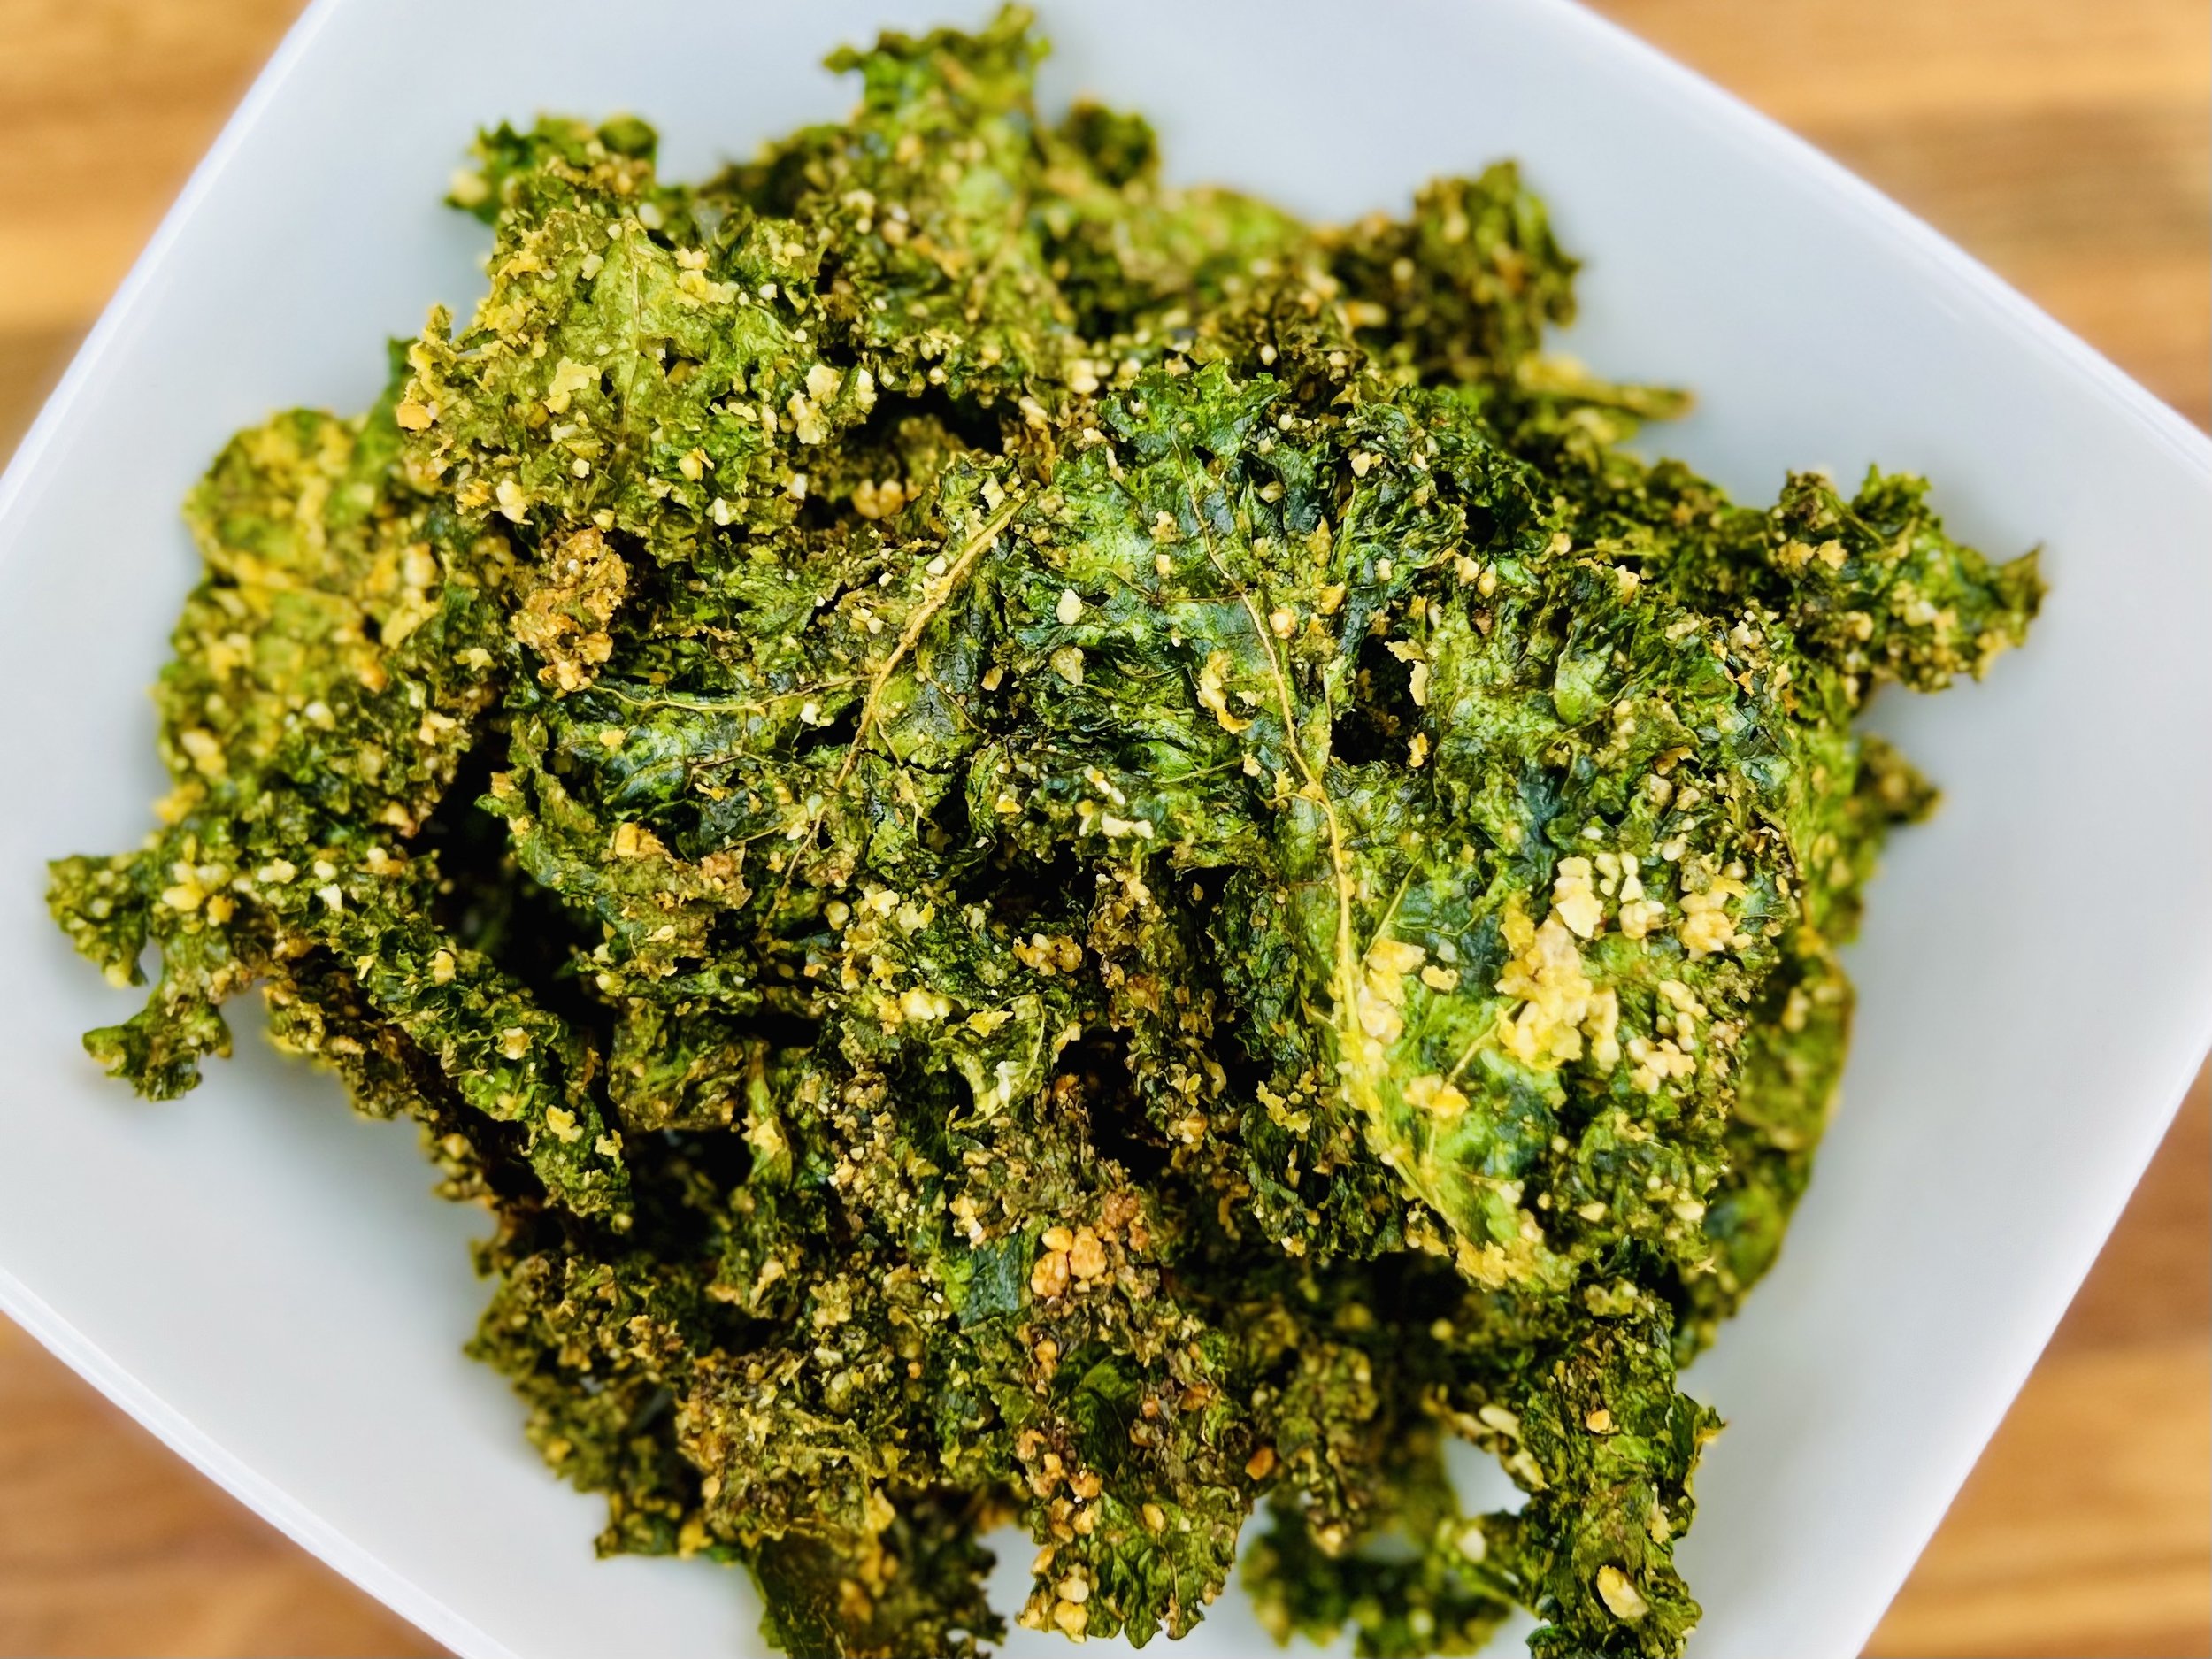
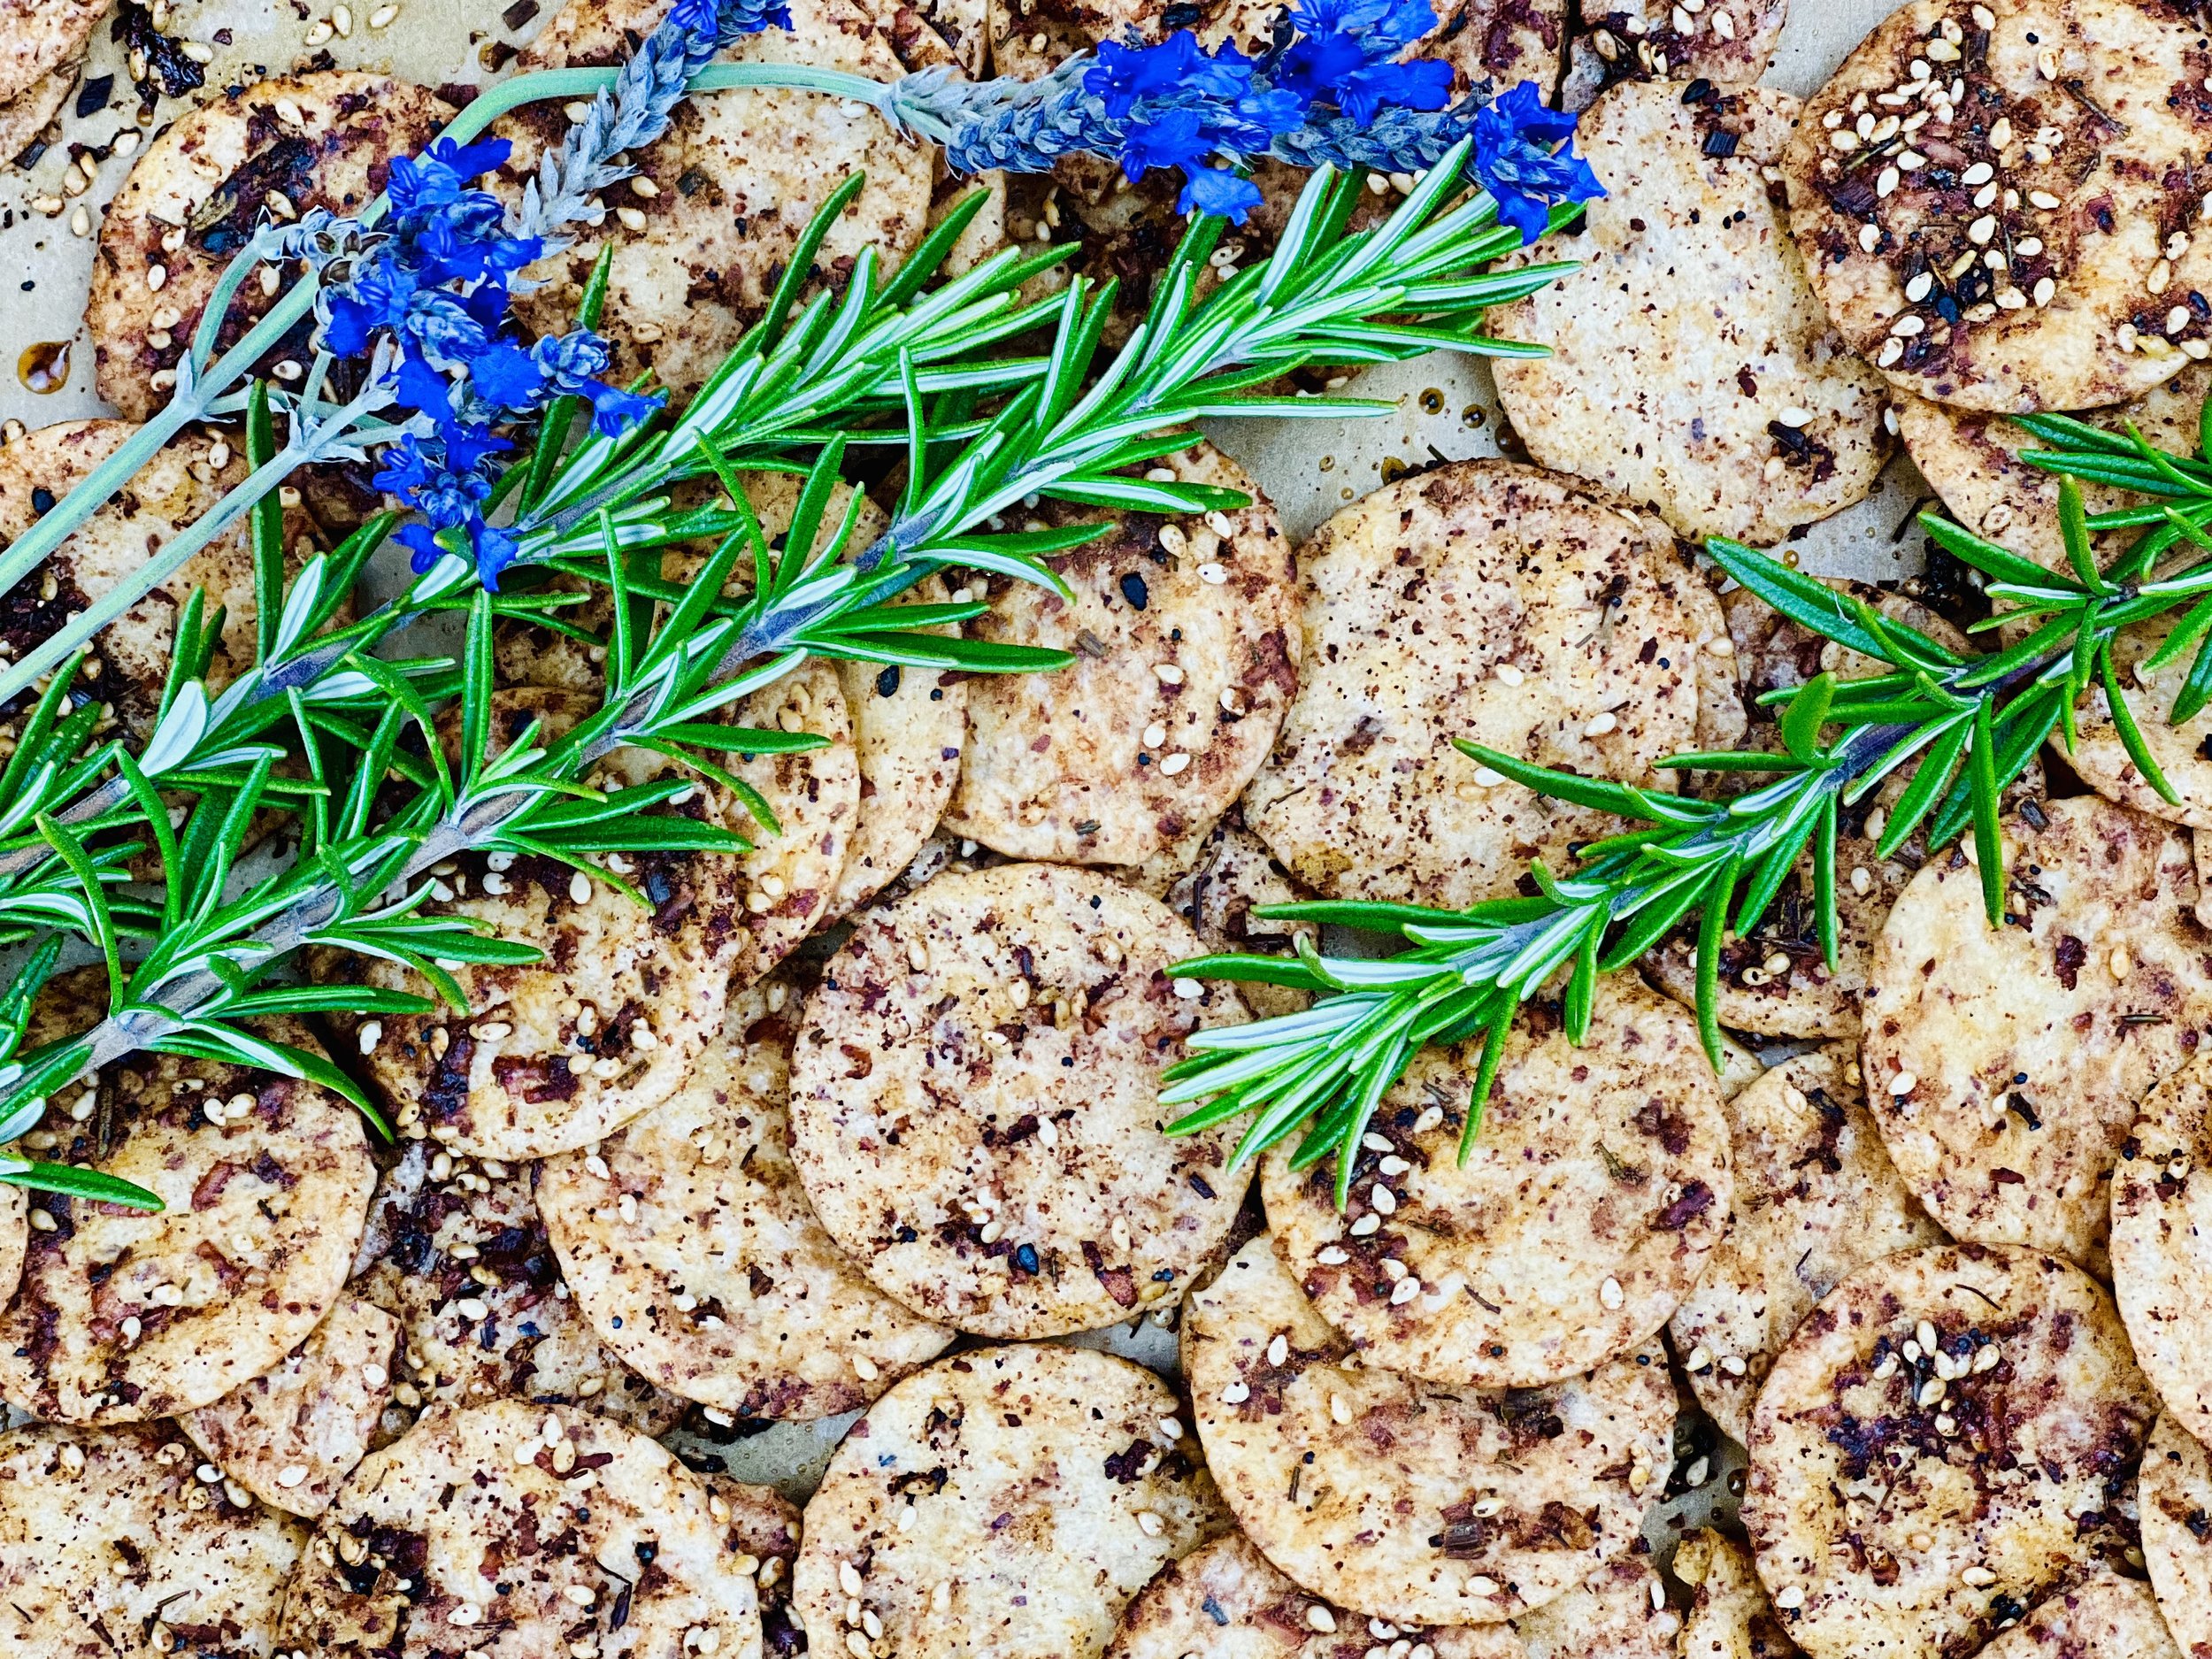
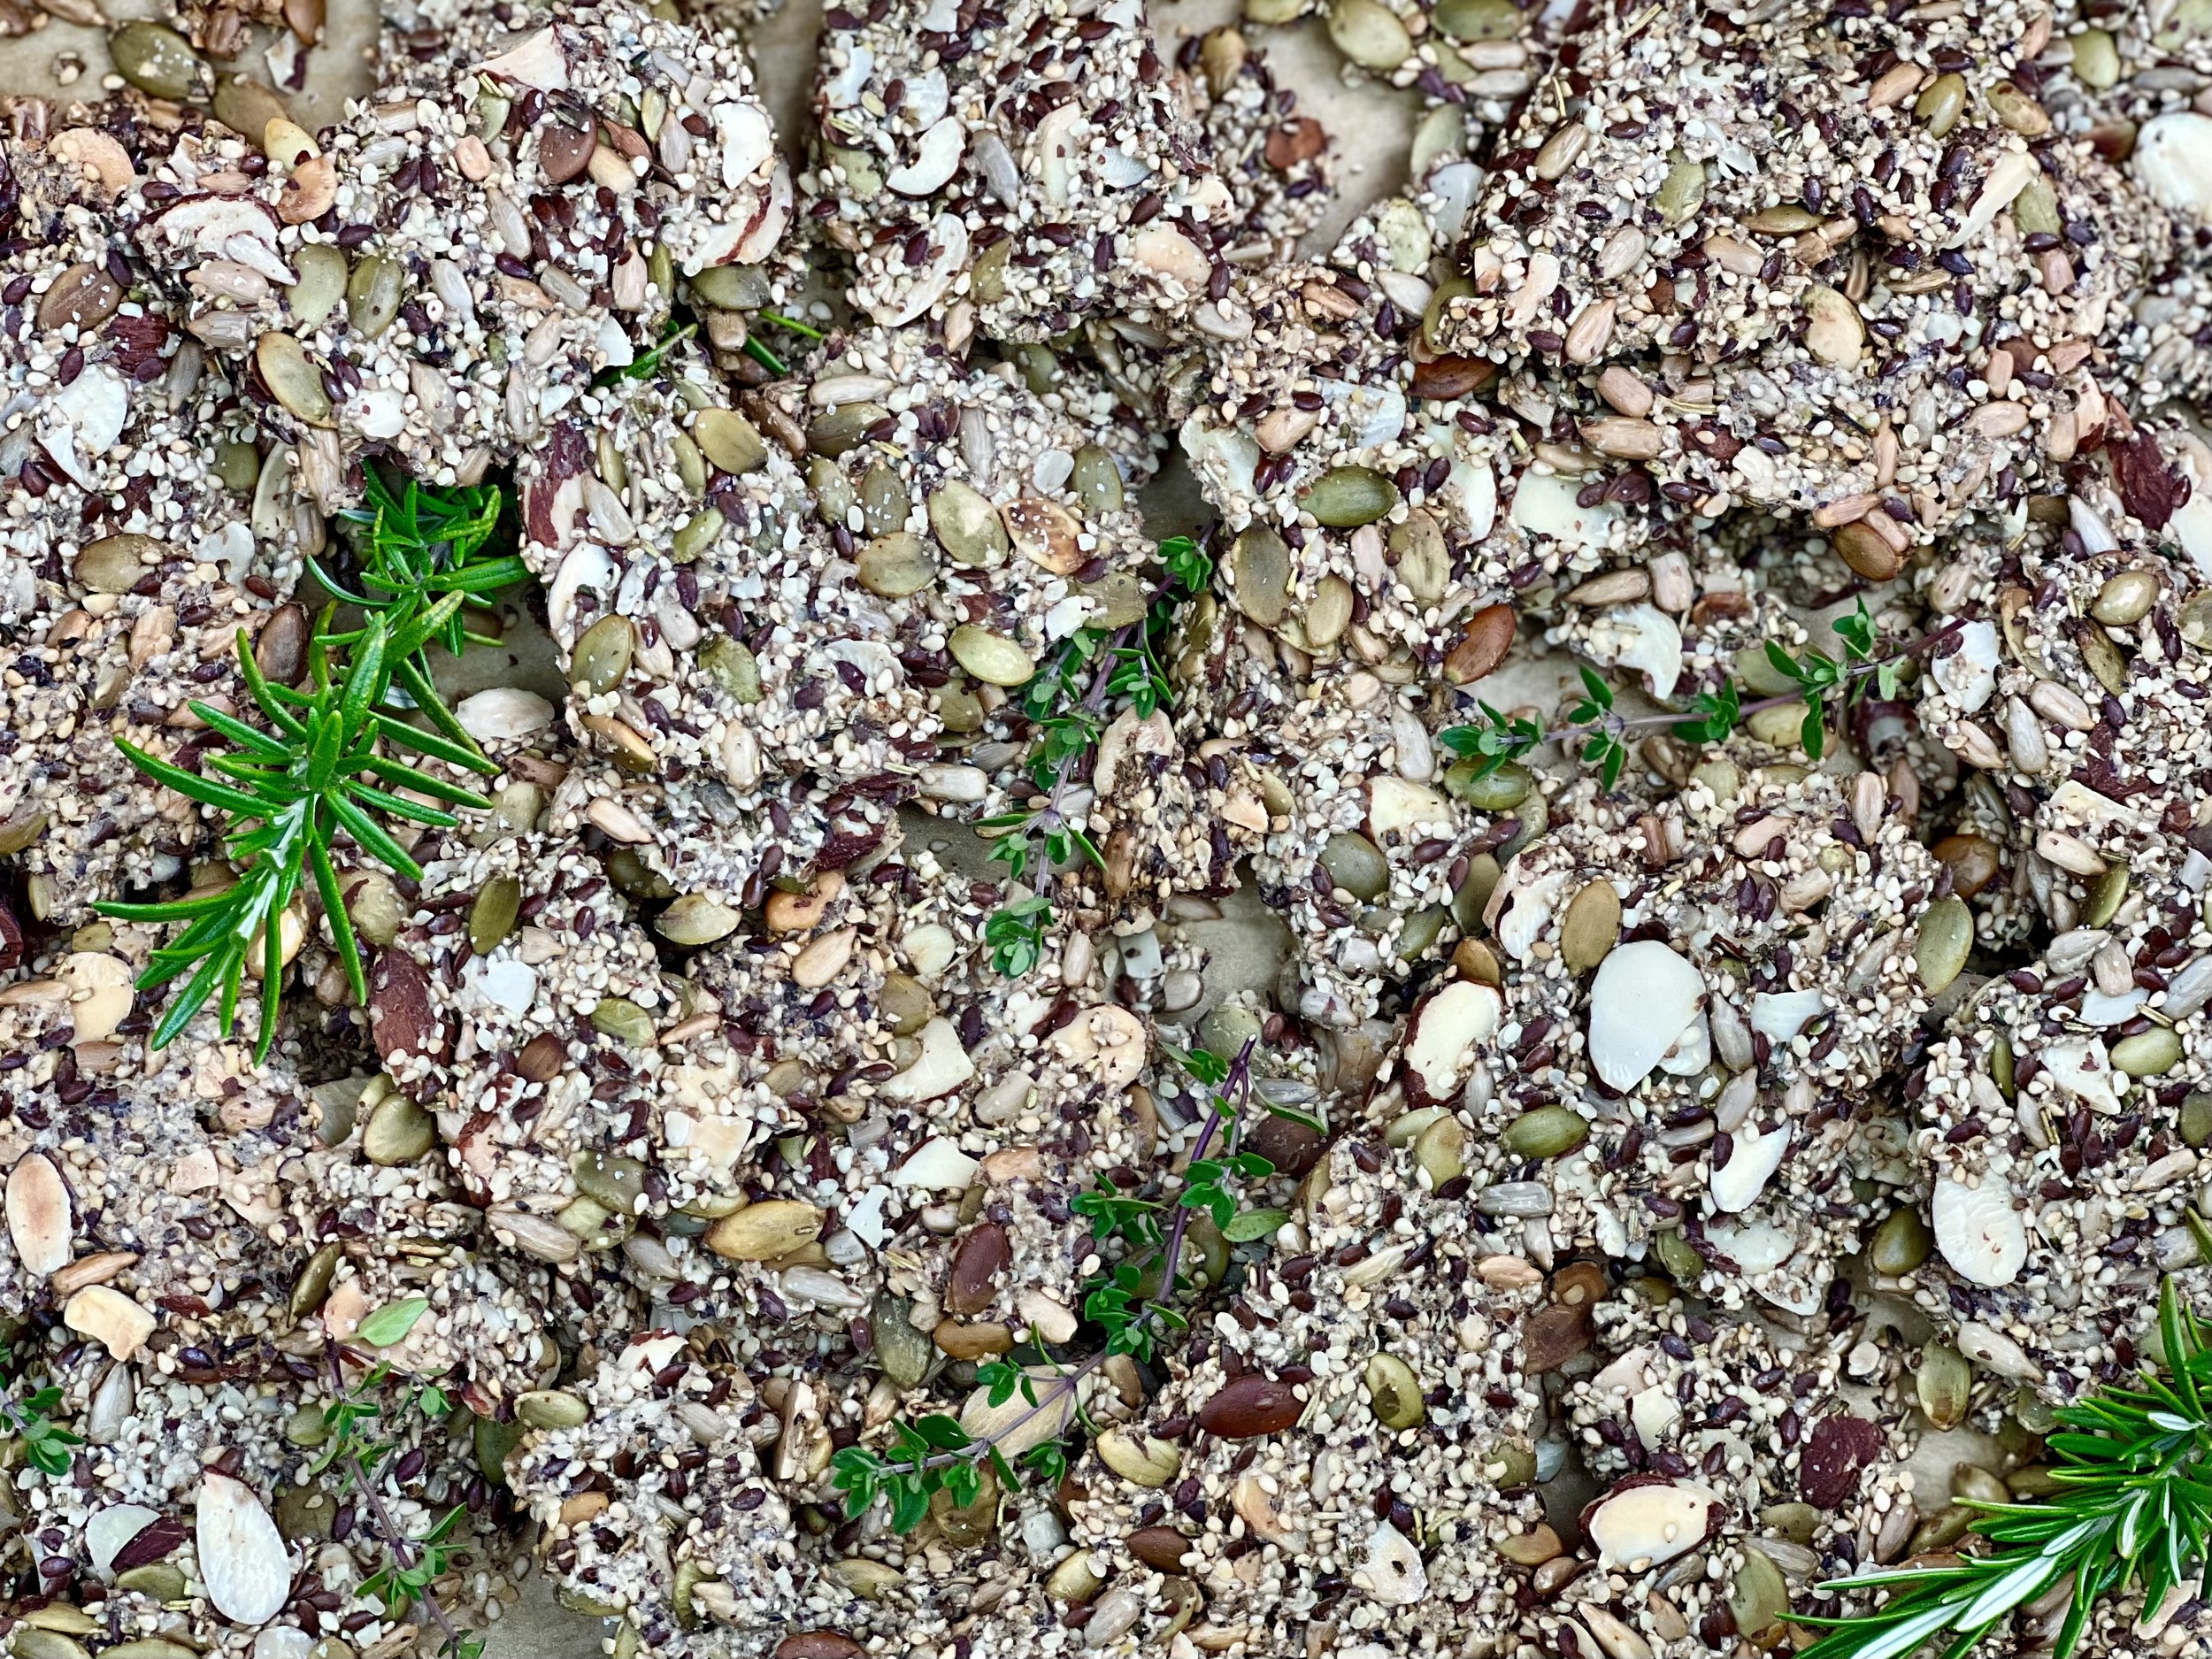
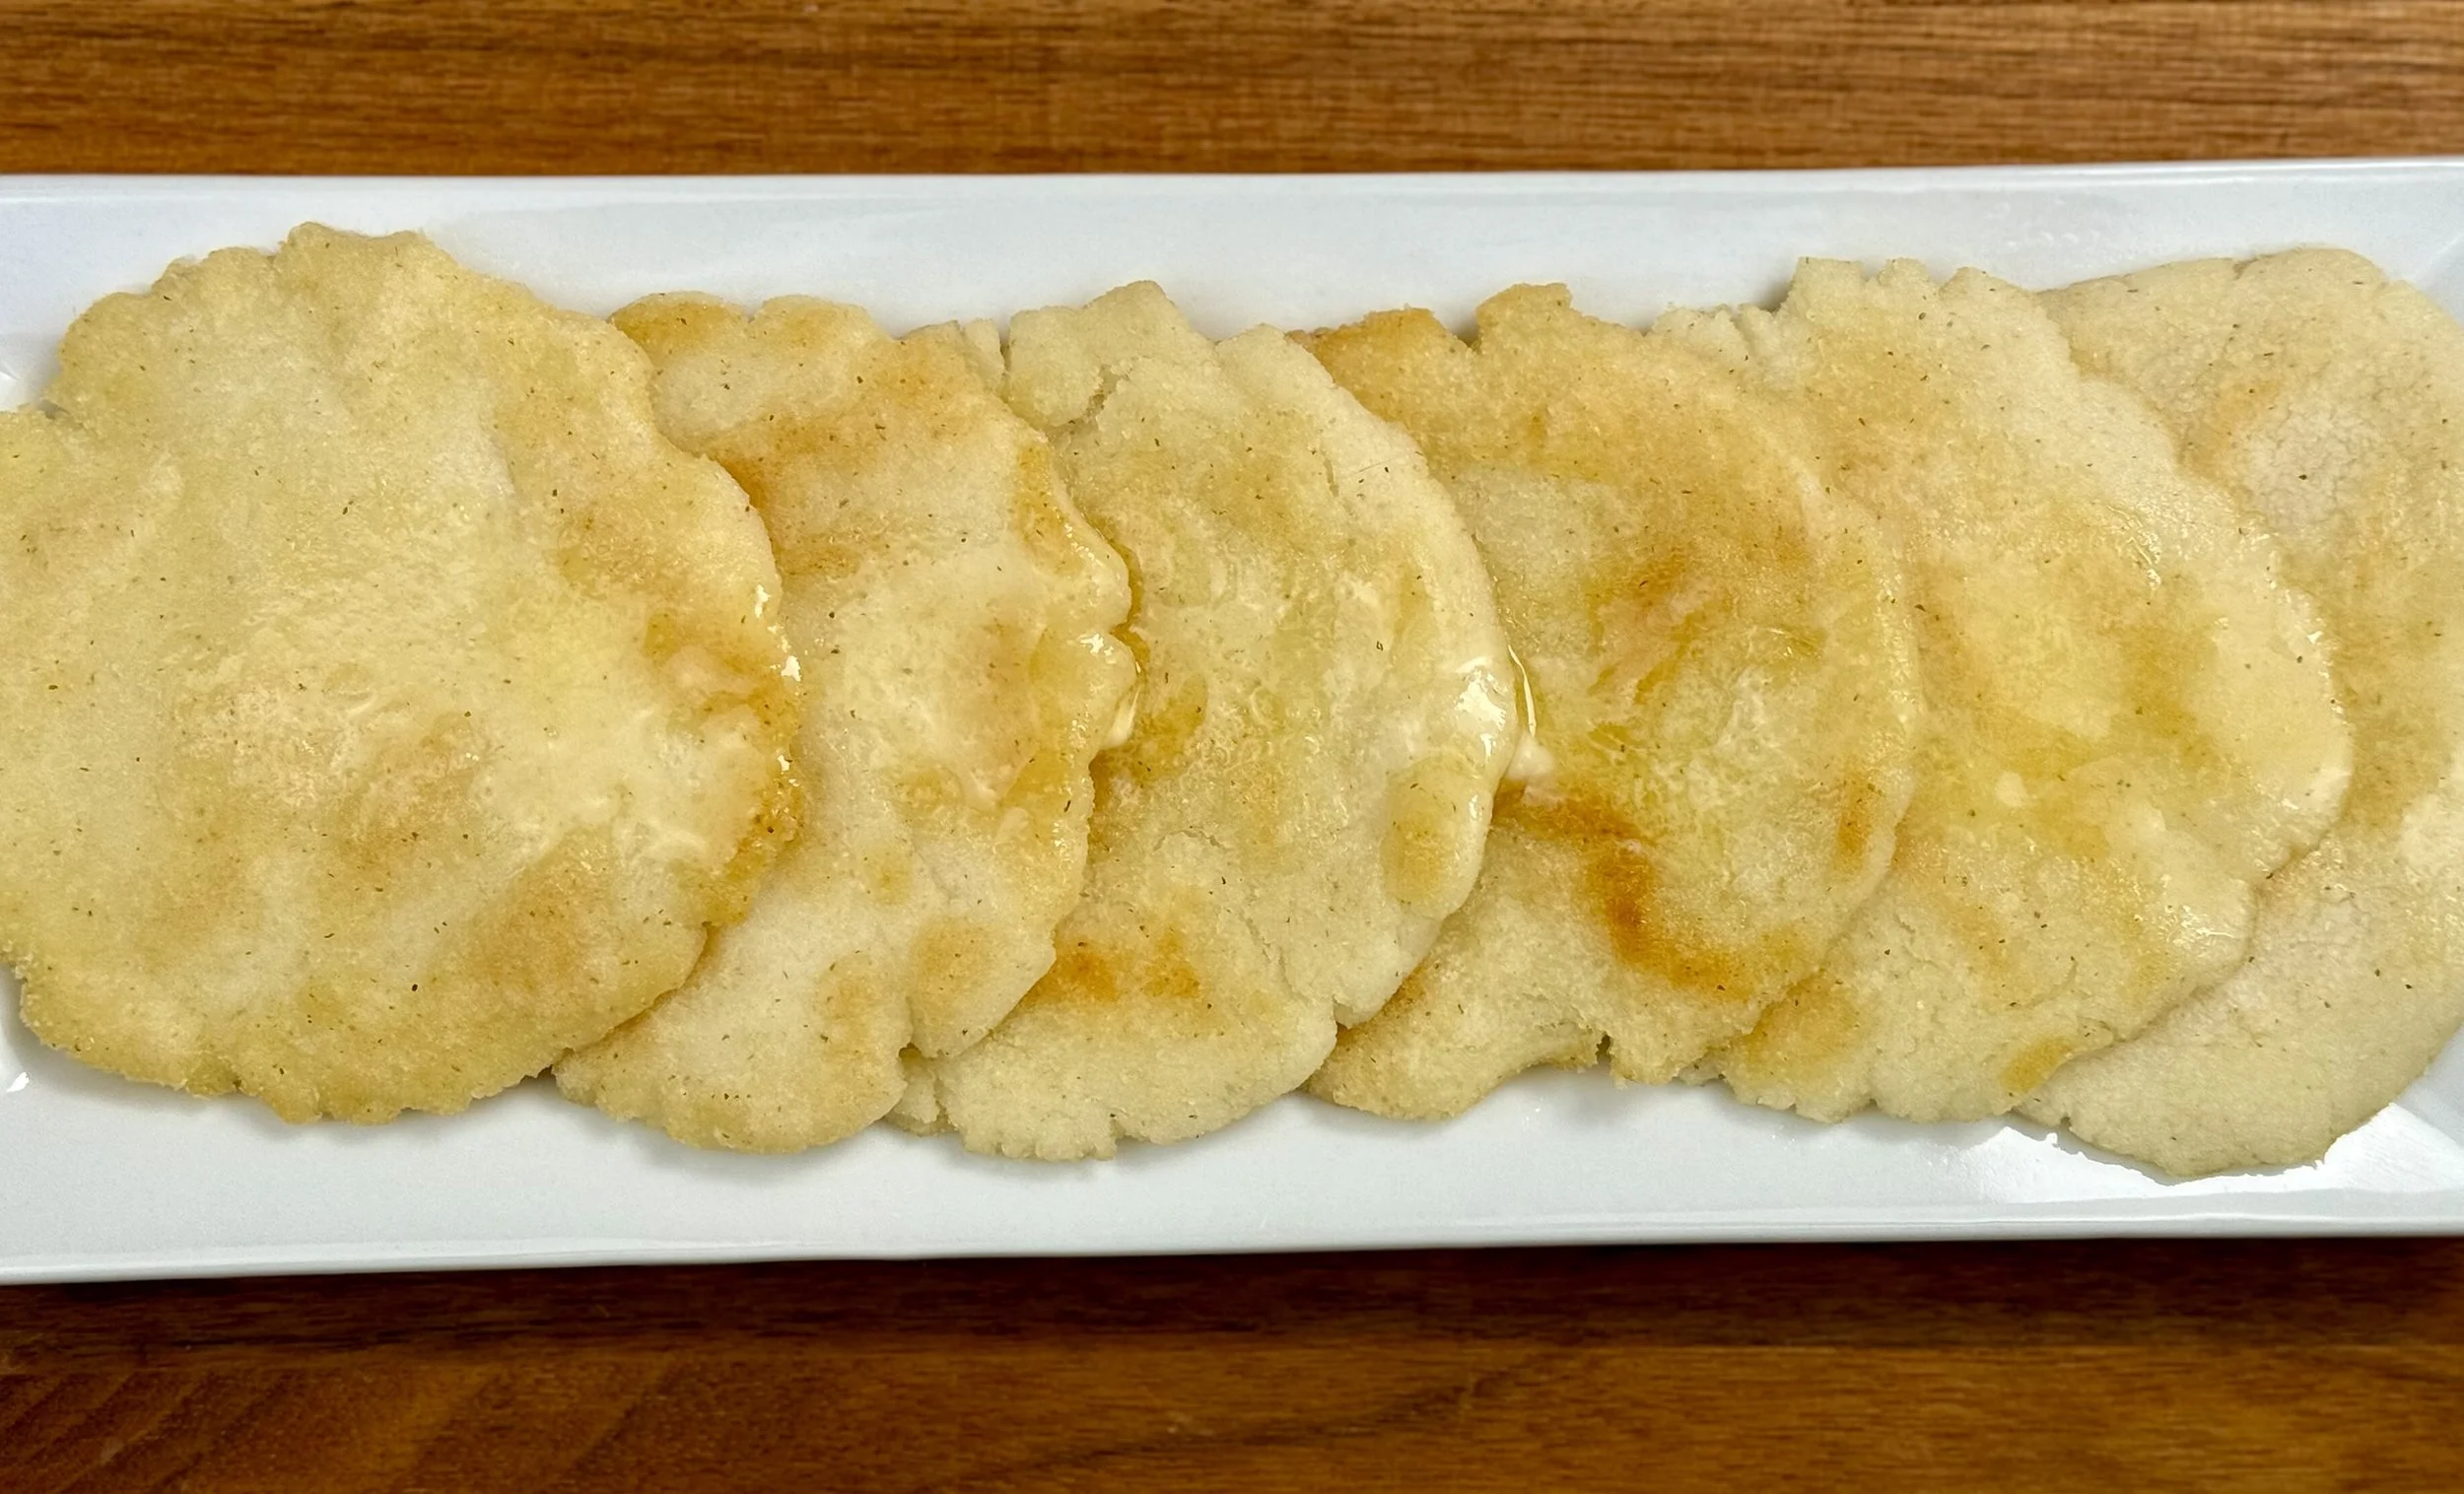
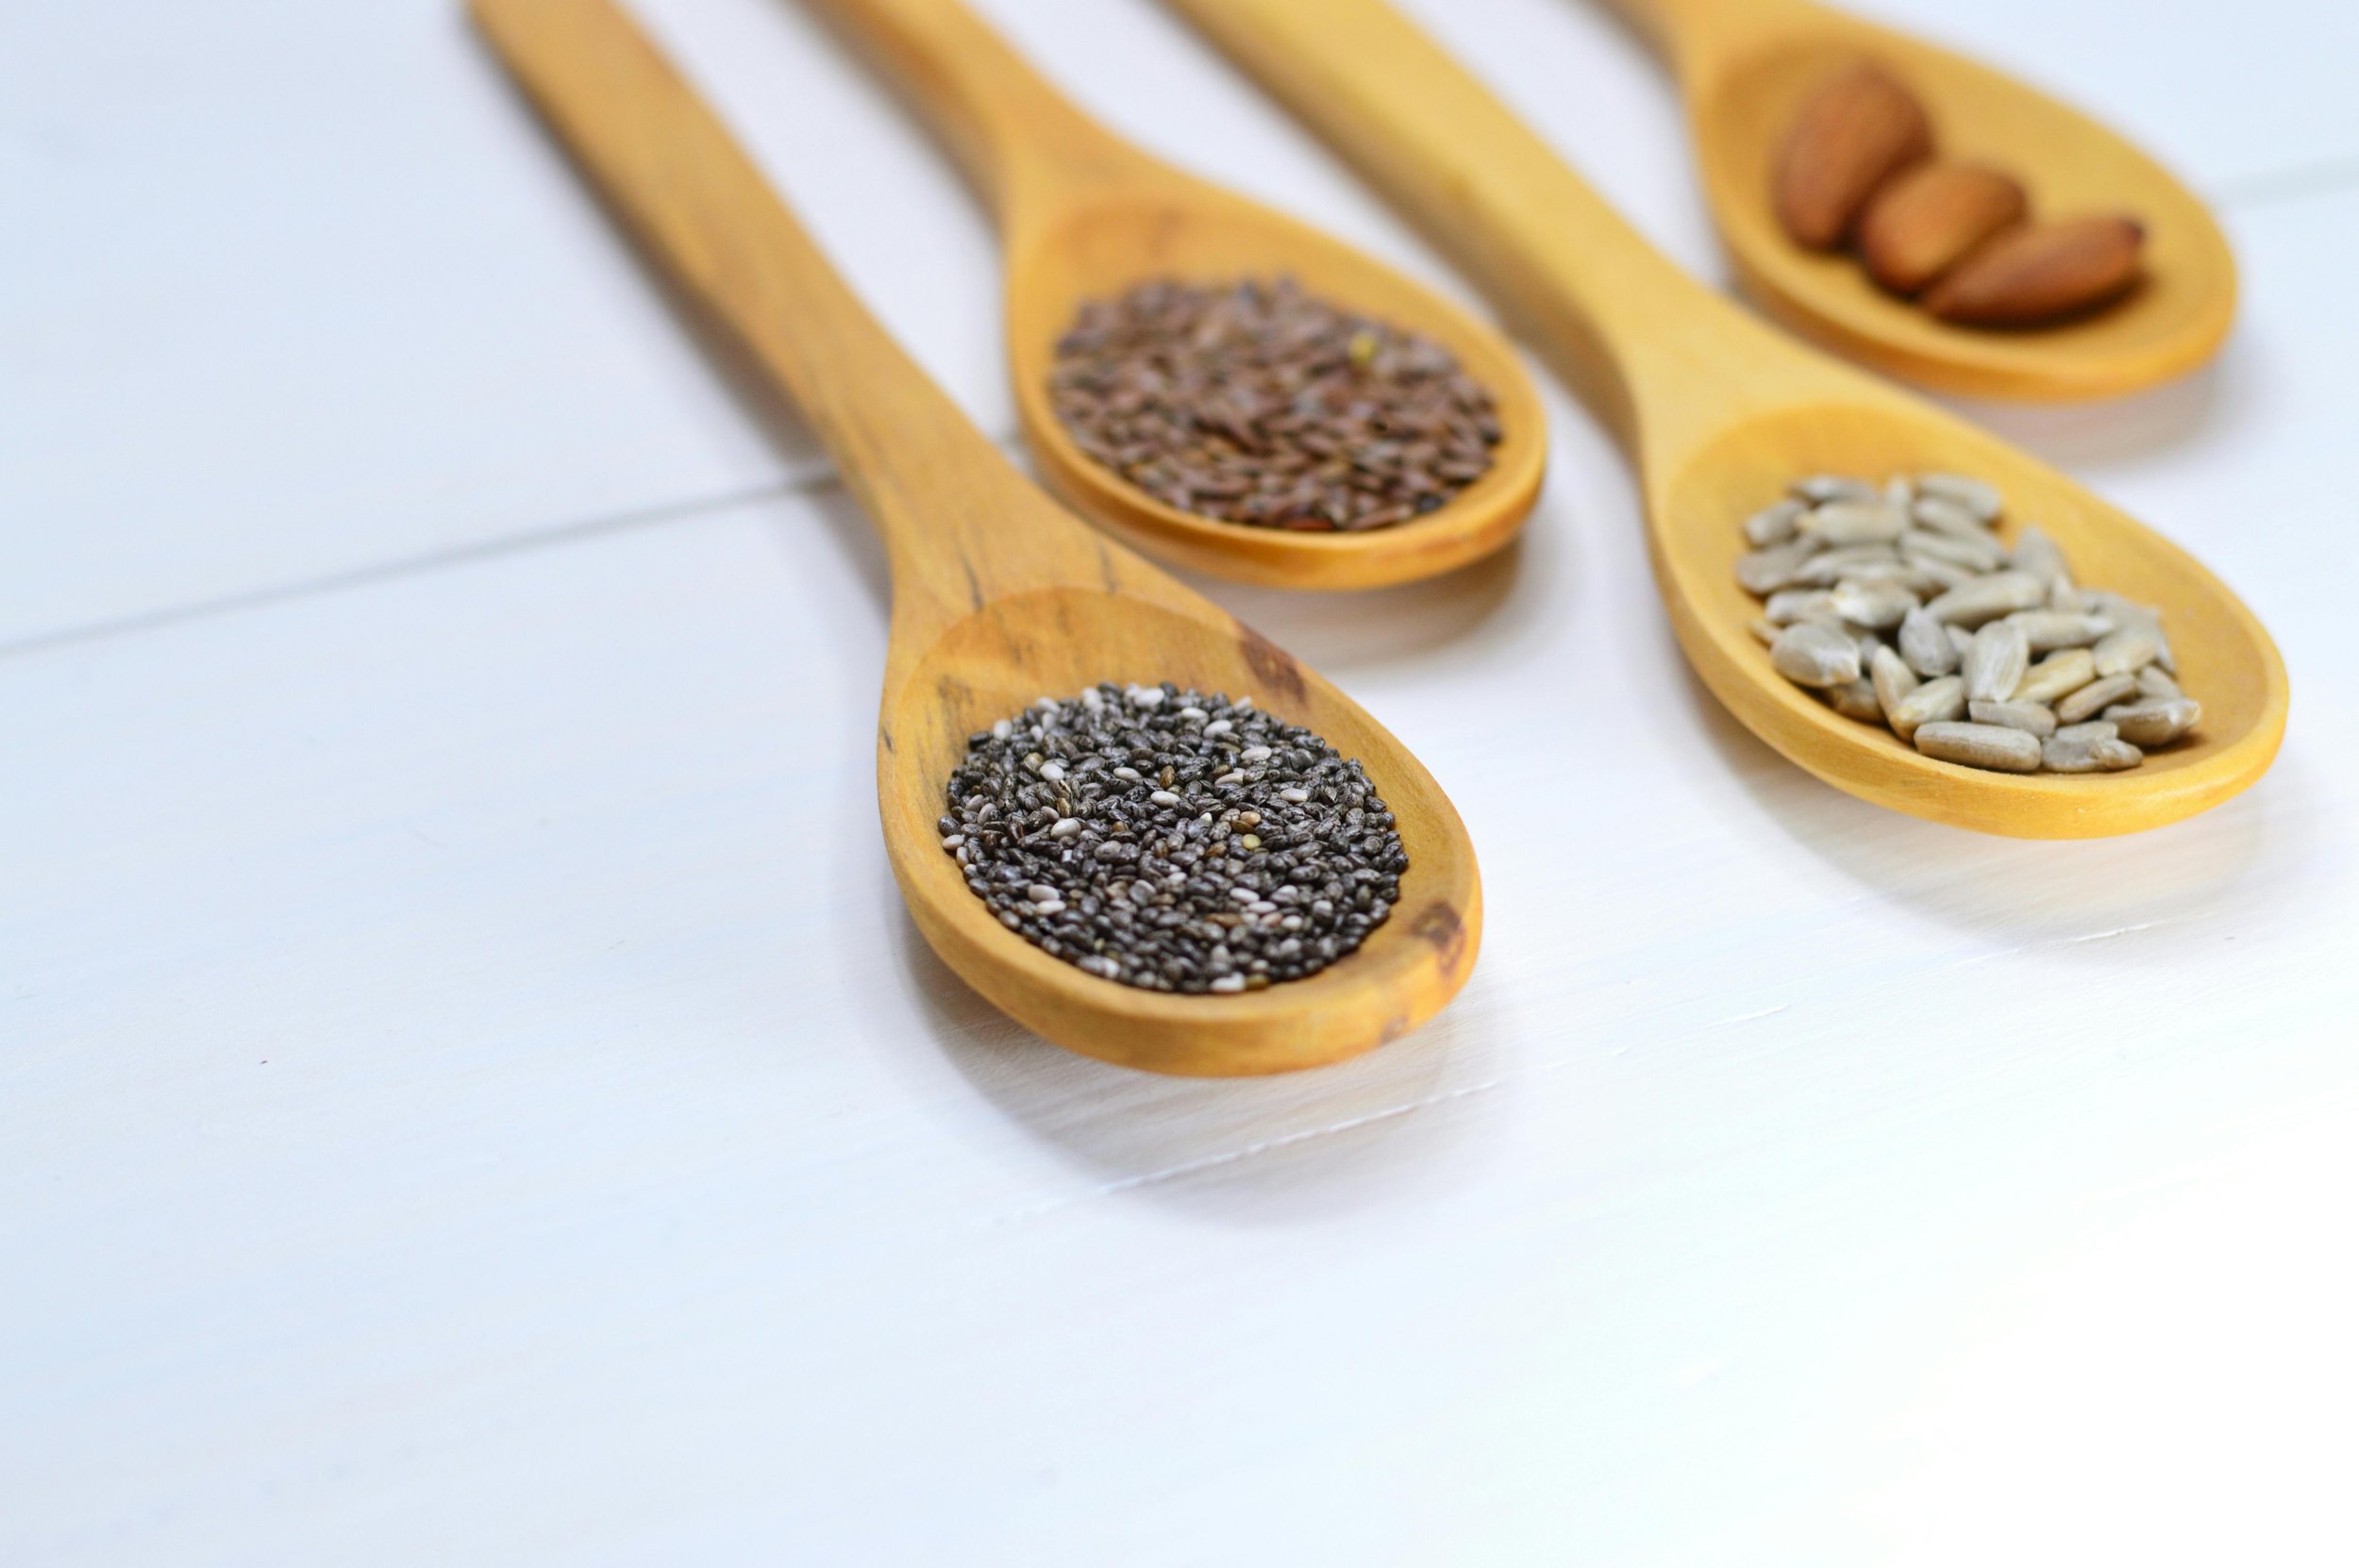
Amazing Seed Crackers (Low FODMAP)
10 Minutes Prep • 50 Minutes Cook • Gluten-free • Dairy-free • Low FODMAP • Serving size 3-4 crackers
10 Minutes Prep • 50 Minutes Cook • Low FODMAP • Gluten-free • Dairy Free • Serving size 3 - 4 crackers • Ok to make ahead: Steps 1-4
I first had a version of these in Kenya where they are very creative in coming up with gluten-free menu items. When I returned home I had to create the recipe because I found I couldn’t live without them! These amazing seed crackers have become a staple of my diet and I eat them with cheese, nut or seed butter, or just plain. They pack a protein punch and are so delicious you’ll want to eat them every day. (Just don’t eat too many at once as they are also loaded with fiber.) Because I get many requests for this recipe and because I have updated the recipe over time, I am republishing with my updates.
Ingredients
1 cup raw sunflower seeds
1 cup raw pumpkin seeds
1/2 cup chia seeds (very important! This is what holds everything together)
1/2 cup flax seeds (whole)
1/4 cup flax seed meal
1/4 cup hemp seeds (optional)
1/4 cup sesame seeds (optional)
1/4 cup sliced almonds (optional)
1 1/2 cups water
1 1/2 tablespoons olive oil
2 tablespoons dried herbs of your choice (I used half thyme and half rosemary or all rosemary is also wonderful)
1 teaspoon cumin powder
1/4 teaspoon cayenne pepper
2 teaspoons Kosher salt
Other optional ingredients
2 tablespoons Smoke N Sanity Everything Bagel Seasoning
1/2 teaspoon (or more to taste) Red pepper flakes
1/2 teaspoon (or more to taste) Curry powder
Use your imagination!
Directions
(1) Prepare: Preheat oven to 325 degrees F. Lay parchment on two large-sized rimmed baking sheets.
(2) Mix ingredients: Combine all ingredients in a mixing bowl and stir well. Let sit (and stir a few times) for about 5 minutes until most of the liquid is absorbed.
(3) Prepare to bake: Spread half the mixture on each sheet and smooth out with a rubber spatula as EVENLY and thinly as you can. You want the entire amount to be as close to the same thickness as possible so you don’t overcook/undercook parts of your tray. (A thinner layer makes crispier crackers.)
(4) Bake: Bake for 45 – 50 minutes until crispy but not burned. Swap your pans from top to bottom in your oven halfway through baking. To check for doneness, bend the parchment up and see if the cracker cracks. If it bends instead of cracking, then cook it a few minutes longer. When cool, break into crackers and store in an air-tight container for up to 2 weeks.
(5) Troubleshooting: If your crackers are not the same thickness some sections may be a bit chewy while others are crisp. Break all the crisp parts into crackers and then put the thicker part back into the oven.
(6) Plate and serve: Eat them plain as a crisp and flavorful snack or serve them with your favorite nut butter, cheese, or even melted cheese.
Eat and enjoy every bite because you can!
Recipe note: I use Diamond Crystal Kosher salt in all my recipes because it has a wonderful flat and crisp flake that tastes delicious. It is also the least salty salt available so you can use it more liberally as a seasoning than you can table salt or sea salt. If you use another type of salt, you may need to reduce the amount so it is not over-salted.
Original recipe inspired by David Kisevu, head chef, Giraffe Manor, Nairobi.
Link note: This post contains links for you to easily purchase items listed on the page. In some cases, we have provided a special discount code for IBS Game Changers so be sure to use it when you purchase an item to get the discount that has been arranged just for you! As an Amazon Associate, I earn a commission from qualifying Amazon purchases.
More Deliciously Low FODMAP™ appetizer recipes
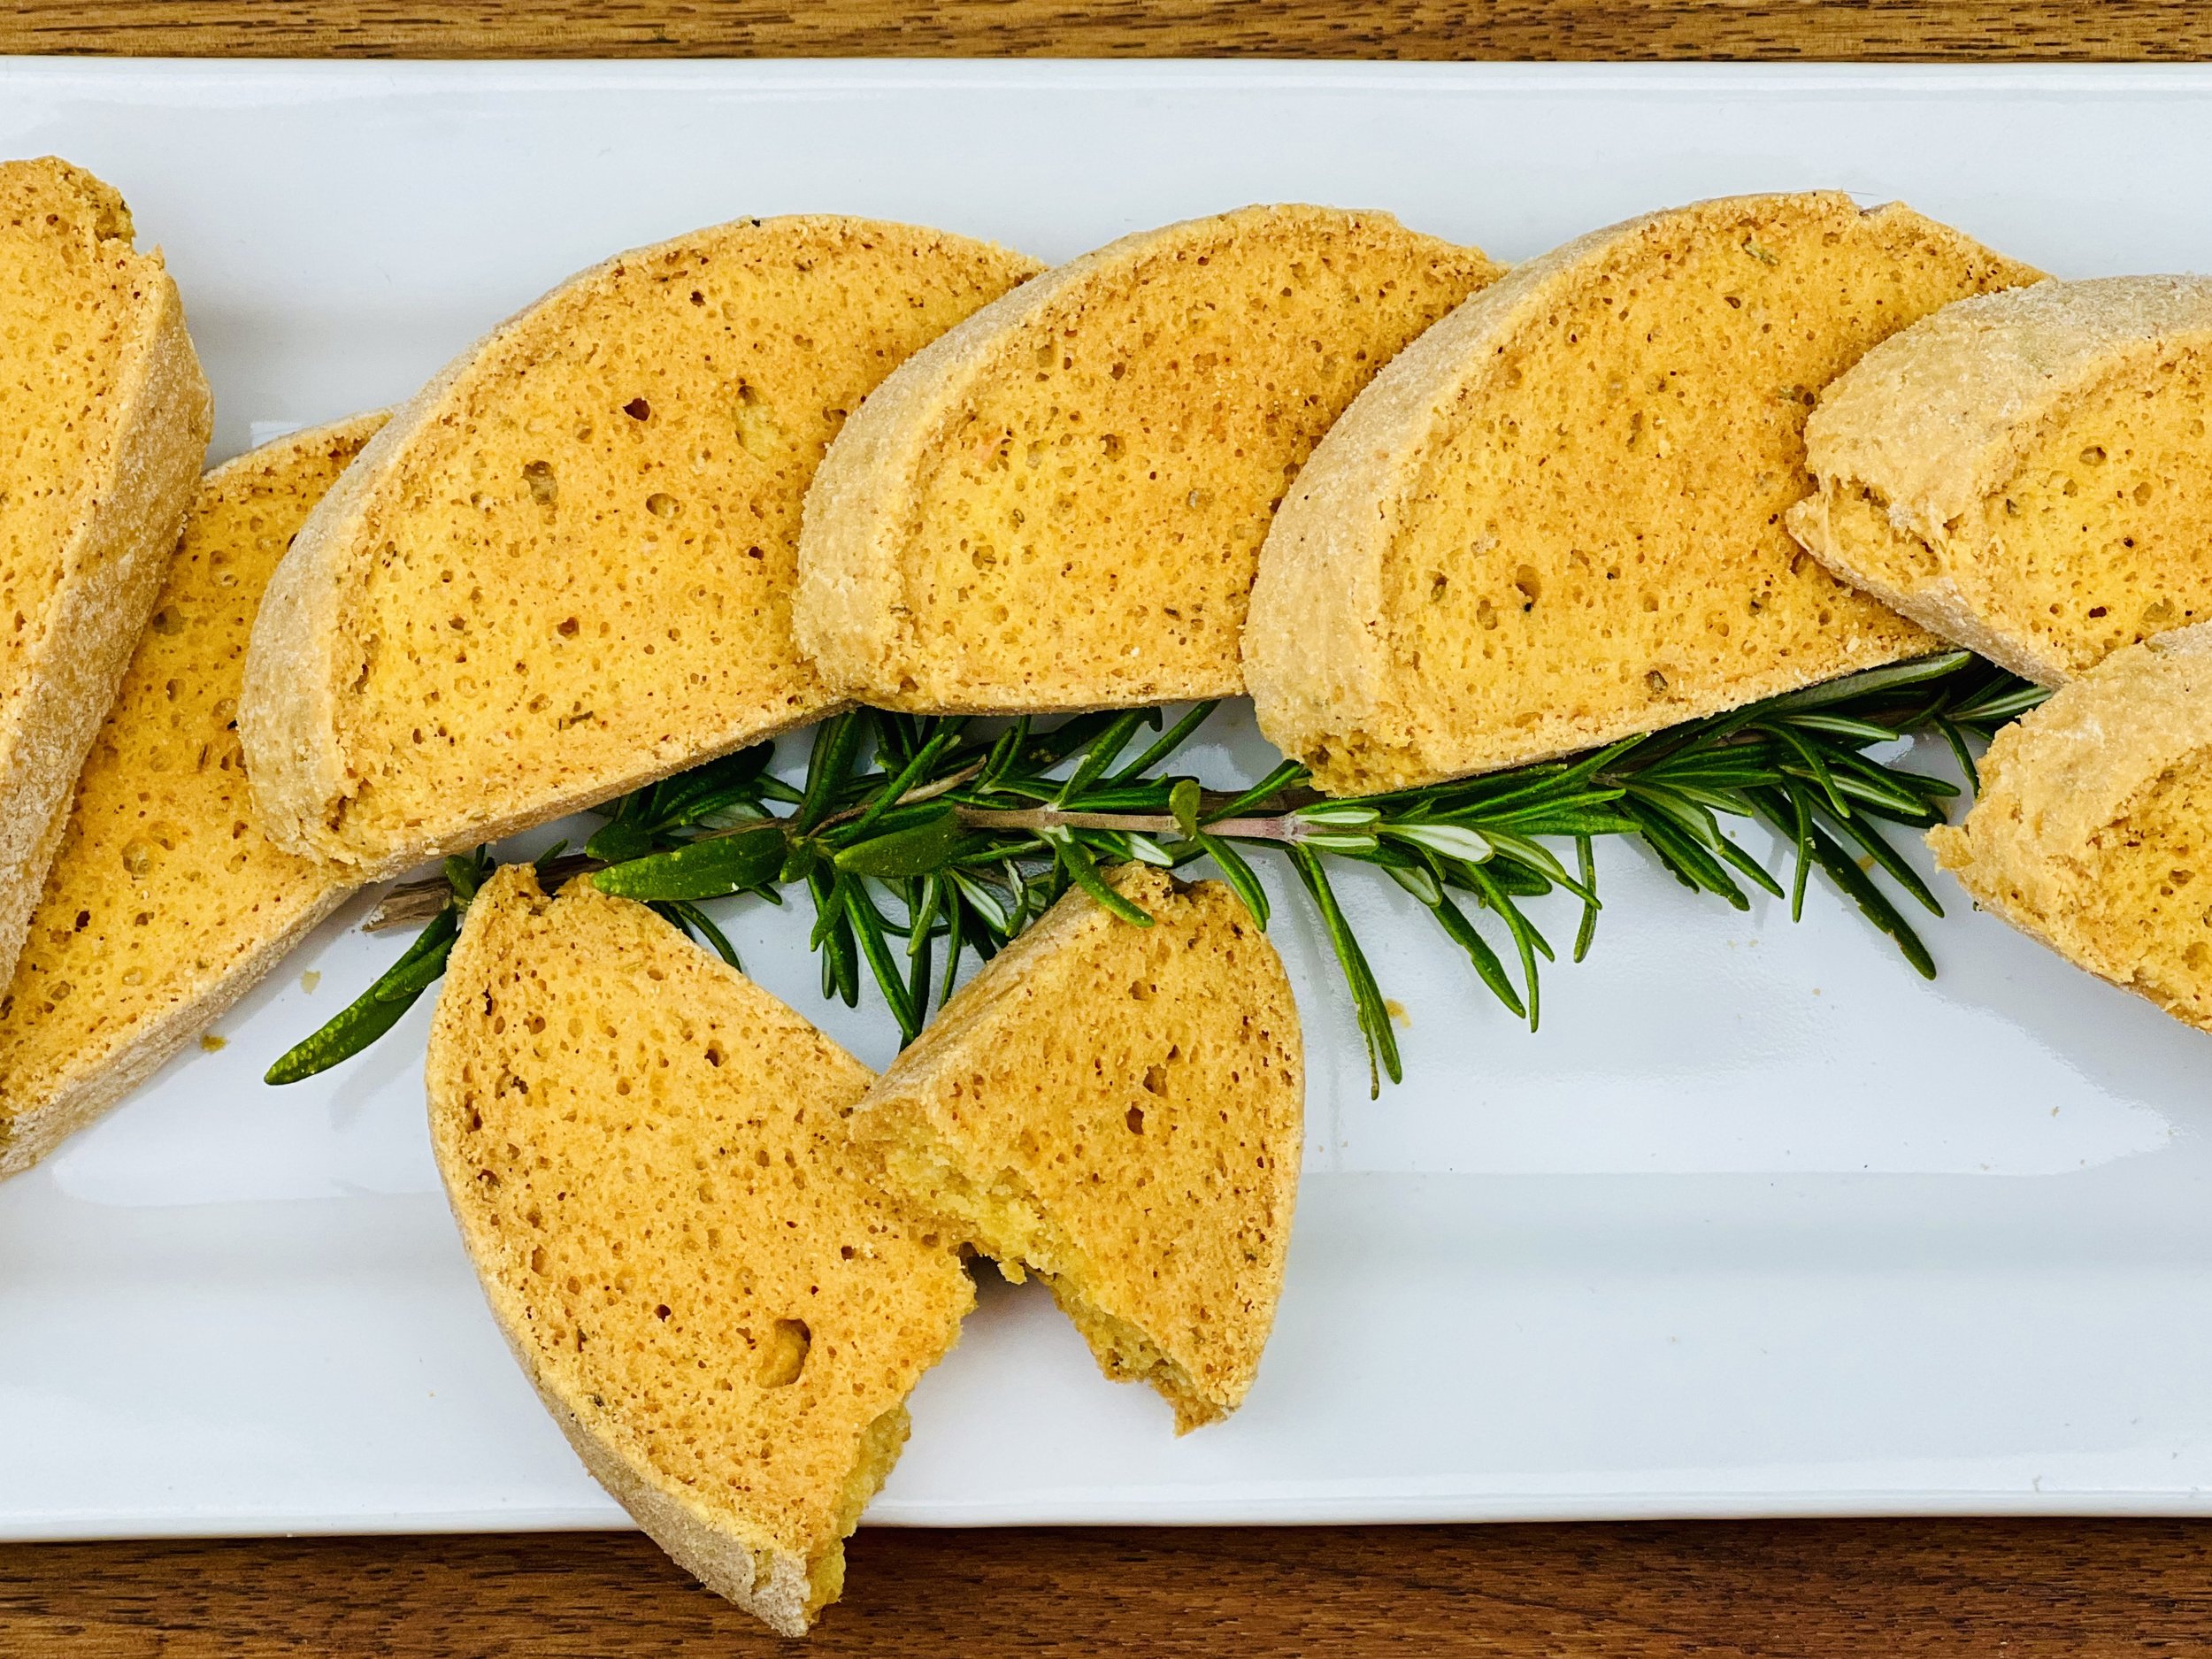
Savory Waffles Benedict (Low FODMAP)
30 Minutes prep • 20 Minutes cook • Low FODMAP • Gluten-free • Serves 4-8
30 Minutes prep • 20 Minutes cook • Low FODMAP • Gluten-free • Serves 4-8 • Ok to make ahead: Steps 1-5
Want a new (dare I say better) version of classic Eggs Benedict? One that can easily be made gluten-free? This is it! Waffles Benedict, made with crisp and cheesy savory waffles, flavorful ham, perfectly poached eggs, and creamy Hollandaise sauce. Worried about making the Hollandaise sauce yourself? Follow my Easy Hollandaise Sauce recipe and you’ll be a pro in no time. So, next time you get family or friends together for brunch, impress them with your culinary skills by serving them this fabulous breakfast.

Ingredients
2 cups gluten-free flour
1 1/2 teaspoons Kosher salt
1 1/2 teaspoons baking powder
2 tablespoons granulated sugar
2 eggs
4 tablespoons, 1/2 stick, unsalted butter, melted
2 cups lactose-free milk
1 cup shredded Swiss or gruyere cheese
2 tablespoons fresh chives, chopped (plus more for serving)
1/4 teaspoon black pepper (to taste)
8 slices Canadian bacon or ham
8 poached eggs
1 cup hollandaise sauce (recipe below)
Directions
(1) Prepare: Make the hollandaise sauce (recipe below). Melt the butter. Heat and lightly brown the Canadian bacon (if using) or the ham in a dry frying pan over medium-high heat.
(2) Combine dry ingredients: Put flour, salt, baking powder, and sugar in a medium mixing bowl and whisk to combine.
(3) Combine wet ingredients: In a separate, small bowl, whisk the milk, eggs, and melted butter together.
(4) Blend the batter: Pour the blended wet ingredients over the dry ingredients and stir with a wooden spoon until combined. There’s no need to get all the lumps out.
(5) Add the cheese: Fold in the cheese, chives, and pepper.
Make-ahead note: At this point, let the batter rest while you preheat the waffle iron, or cover the bowl tightly with plastic wrap and keep it in the refrigerator for a few hours or up to 1 day until you’re ready to cook the waffles.
(6) Cook: Preheat the waffle iron. Once your waffle iron is heated, spray the iron top and bottom with coconut oil cooking spray (or another cooking spray), then ladle an equal amount of batter into each segment of the waffle iron. Cook until crisp but not burned (about 3 minutes). Remove from the waffle iron to a cooling rack to keep the waffles crisp.
(7) Poach the eggs: Poaching eggs is a snap with this nifty egg-poacher insert for your frying pan. In a deep frying pan put about 1/4 inch of water and set the poacher in the water. Turn the heat to medium-high just until the water boils, then turn it down to medium. Put about 1/2 teaspoon of butter in each poaching container. Once it melts, spread it up the sides of each container. Add an egg to each poaching container plus a light sprinkle of salt and a grind of pepper. Cover the pan and cook for 3-5 minutes, depending on how soft you like your eggs. Remove from heat as soon as they reach your desired doneness.
(7) Plate and serve: Starting with a waffle (or two) on each plate, add a drizzle of Hollandaise sauce, then layer on the Canadian bacon or ham, the poached egg, and another generous drizzle of Hollandaise sauce. Sprinkle with chopped chives and a grind of fresh black pepper. You can also set this up like a waffle sandwich with one waffle on the bottom and one on top!
Ingredients: Easy Hollandaise Sauce
3 egg yolks
1 tablespoon fresh-squeezed lemon juice (or more to taste)
1 teaspoon Dijon mustard
1/2 teaspoon Kosher salt
1/2 cup salted butter, melted
Directions: Easy Hollandaise Sauce
(1) Prepare: Separate the eggs so you have just the 3 egg yolks in a medium-sized mixing bowl or in the jar of a blender. Add the lemon juice, Dijon mustard, salt, and cayenne pepper. Whisk until well combined or blend for about 5 seconds.
(2) Melt the butter: In a microwave-safe cup, melt the butter for about 1 minute until it’s hot. Or do this in a small saucepan on the stove over medium heat. Butter should be fully melted and hot but not browning.
(3) Combine: While whisking constantly, slowly pour the hot butter into the egg yolk mixture until all butter is fully incorporated. If using a blender, slowly pour the hot butter into the egg yolk mixture while the blender is running at medium speed. If using an immersion blender, slowly pour the hot butter into the egg yolk mixture with the immersion blender, in the middle of the mixture, running on medium speed.
(4) Finish: Once all the butter is incorporated and your sauce is smooth, taste and add more salt if needed.
Eat and enjoy every bite because you can!
Recipe note: I use Diamond Crystal Kosher salt in all my recipes because it has a wonderful flat and crisp flake that tastes delicious. It is also the least salty salt available so you can use it more liberally as a seasoning than you can table salt or sea salt. If you use another type of salt, you may need to reduce the amount so it is not over-salted.
Have a question you’d like to have answered? Email me at hello@ibsgamechanger.com
Link note: This post may contain affiliate links for you to easily purchase items that are linked. I may earn a small commission from qualifying purchases but none of this costs you a thing so feel free to use the links! In addition, for some items, I have provided a special discount code for IBS Game Changers so be sure to use the code when you purchase an item to get the discount that has been arranged just for you.
More Deliciously Low FODMAP™ breakfast recipes


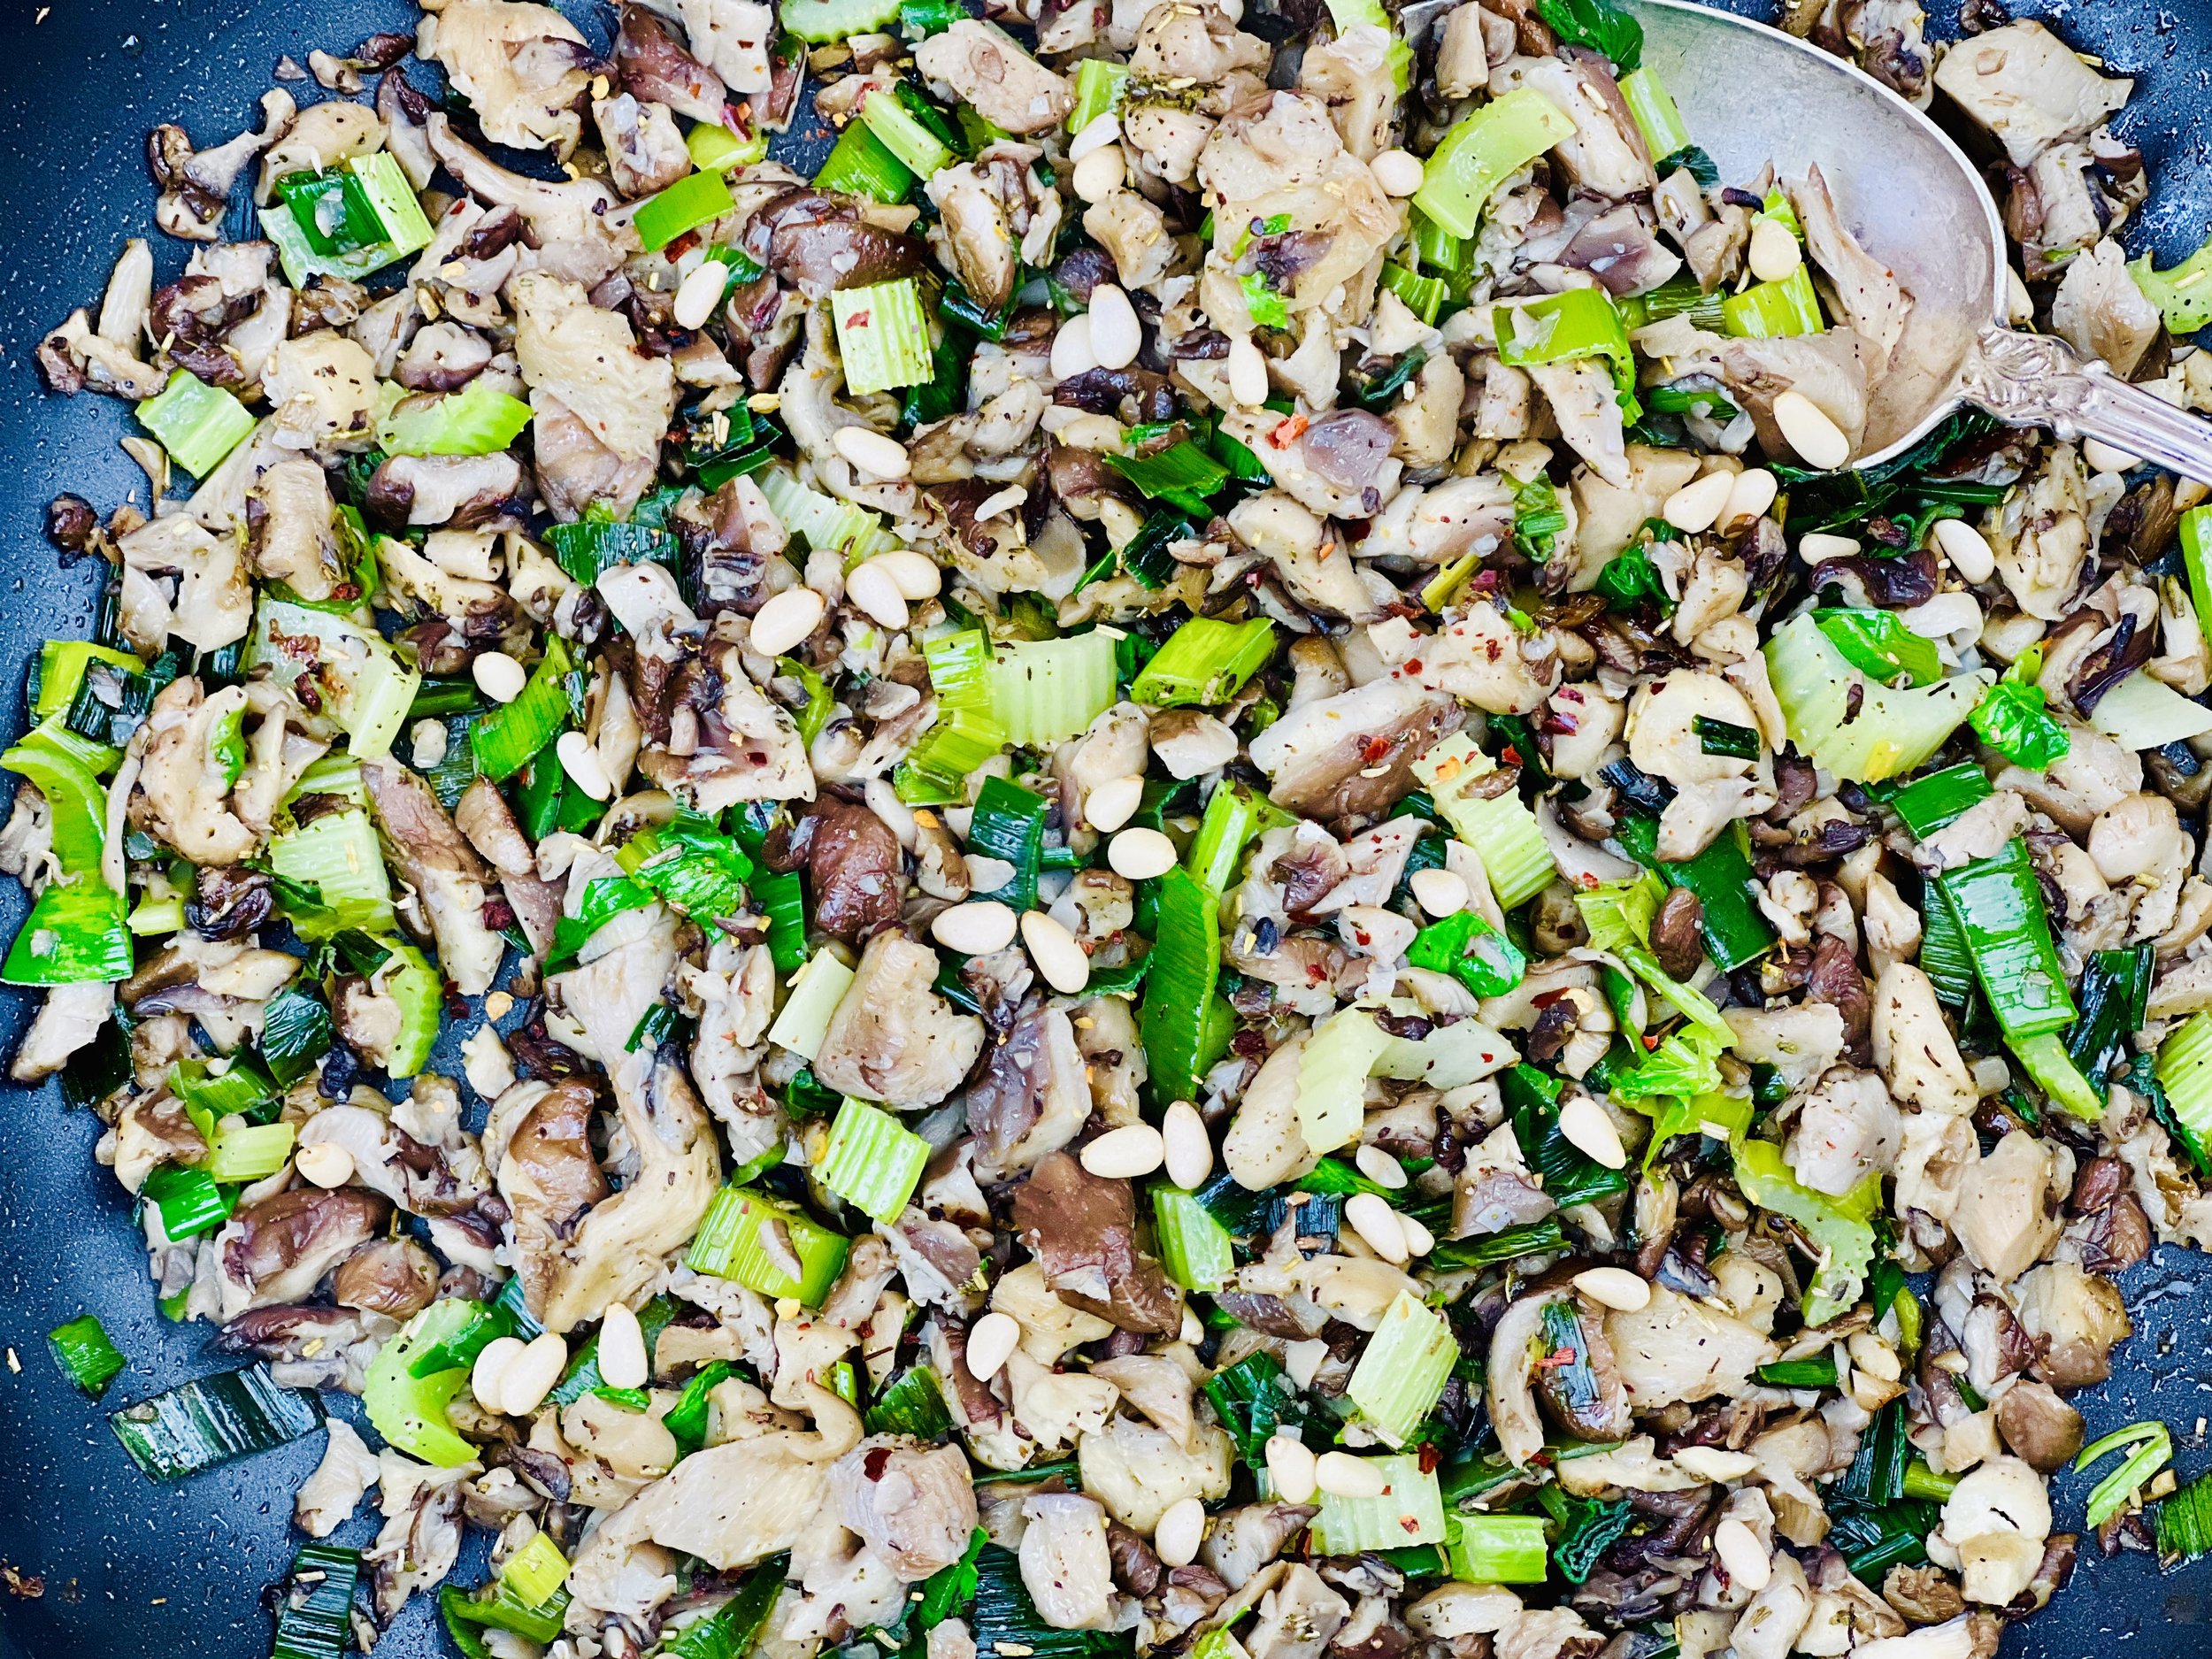
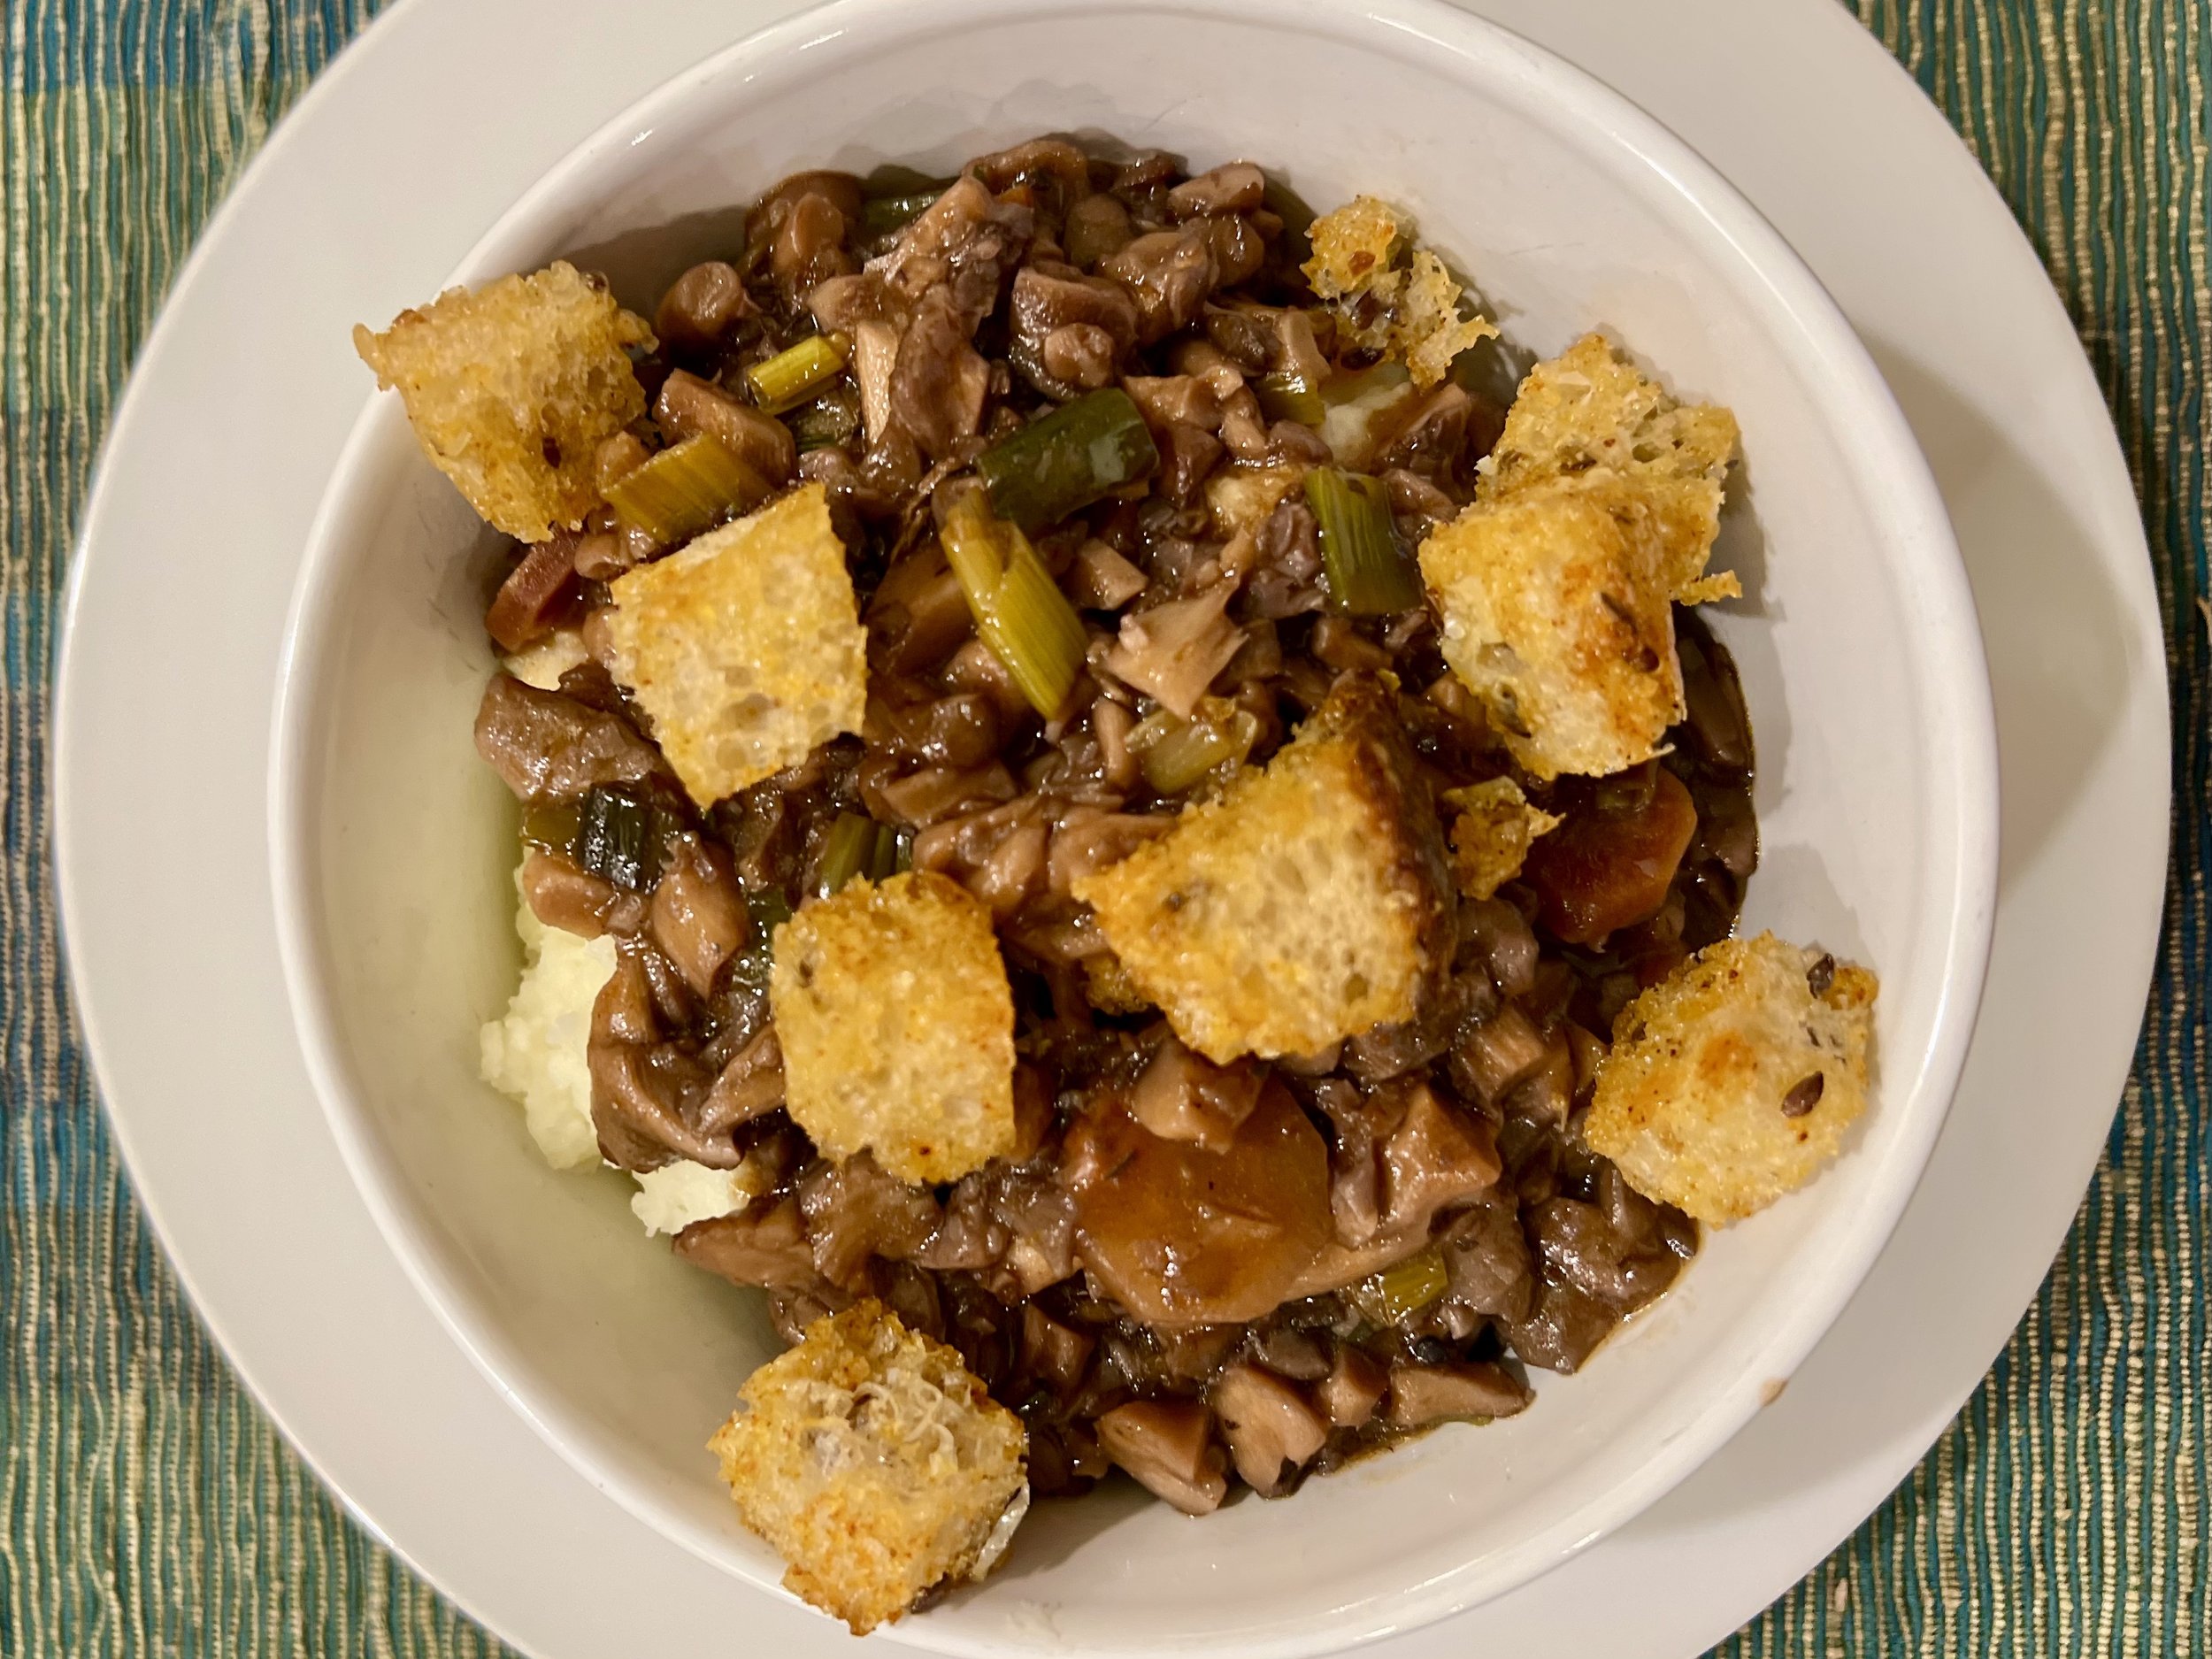
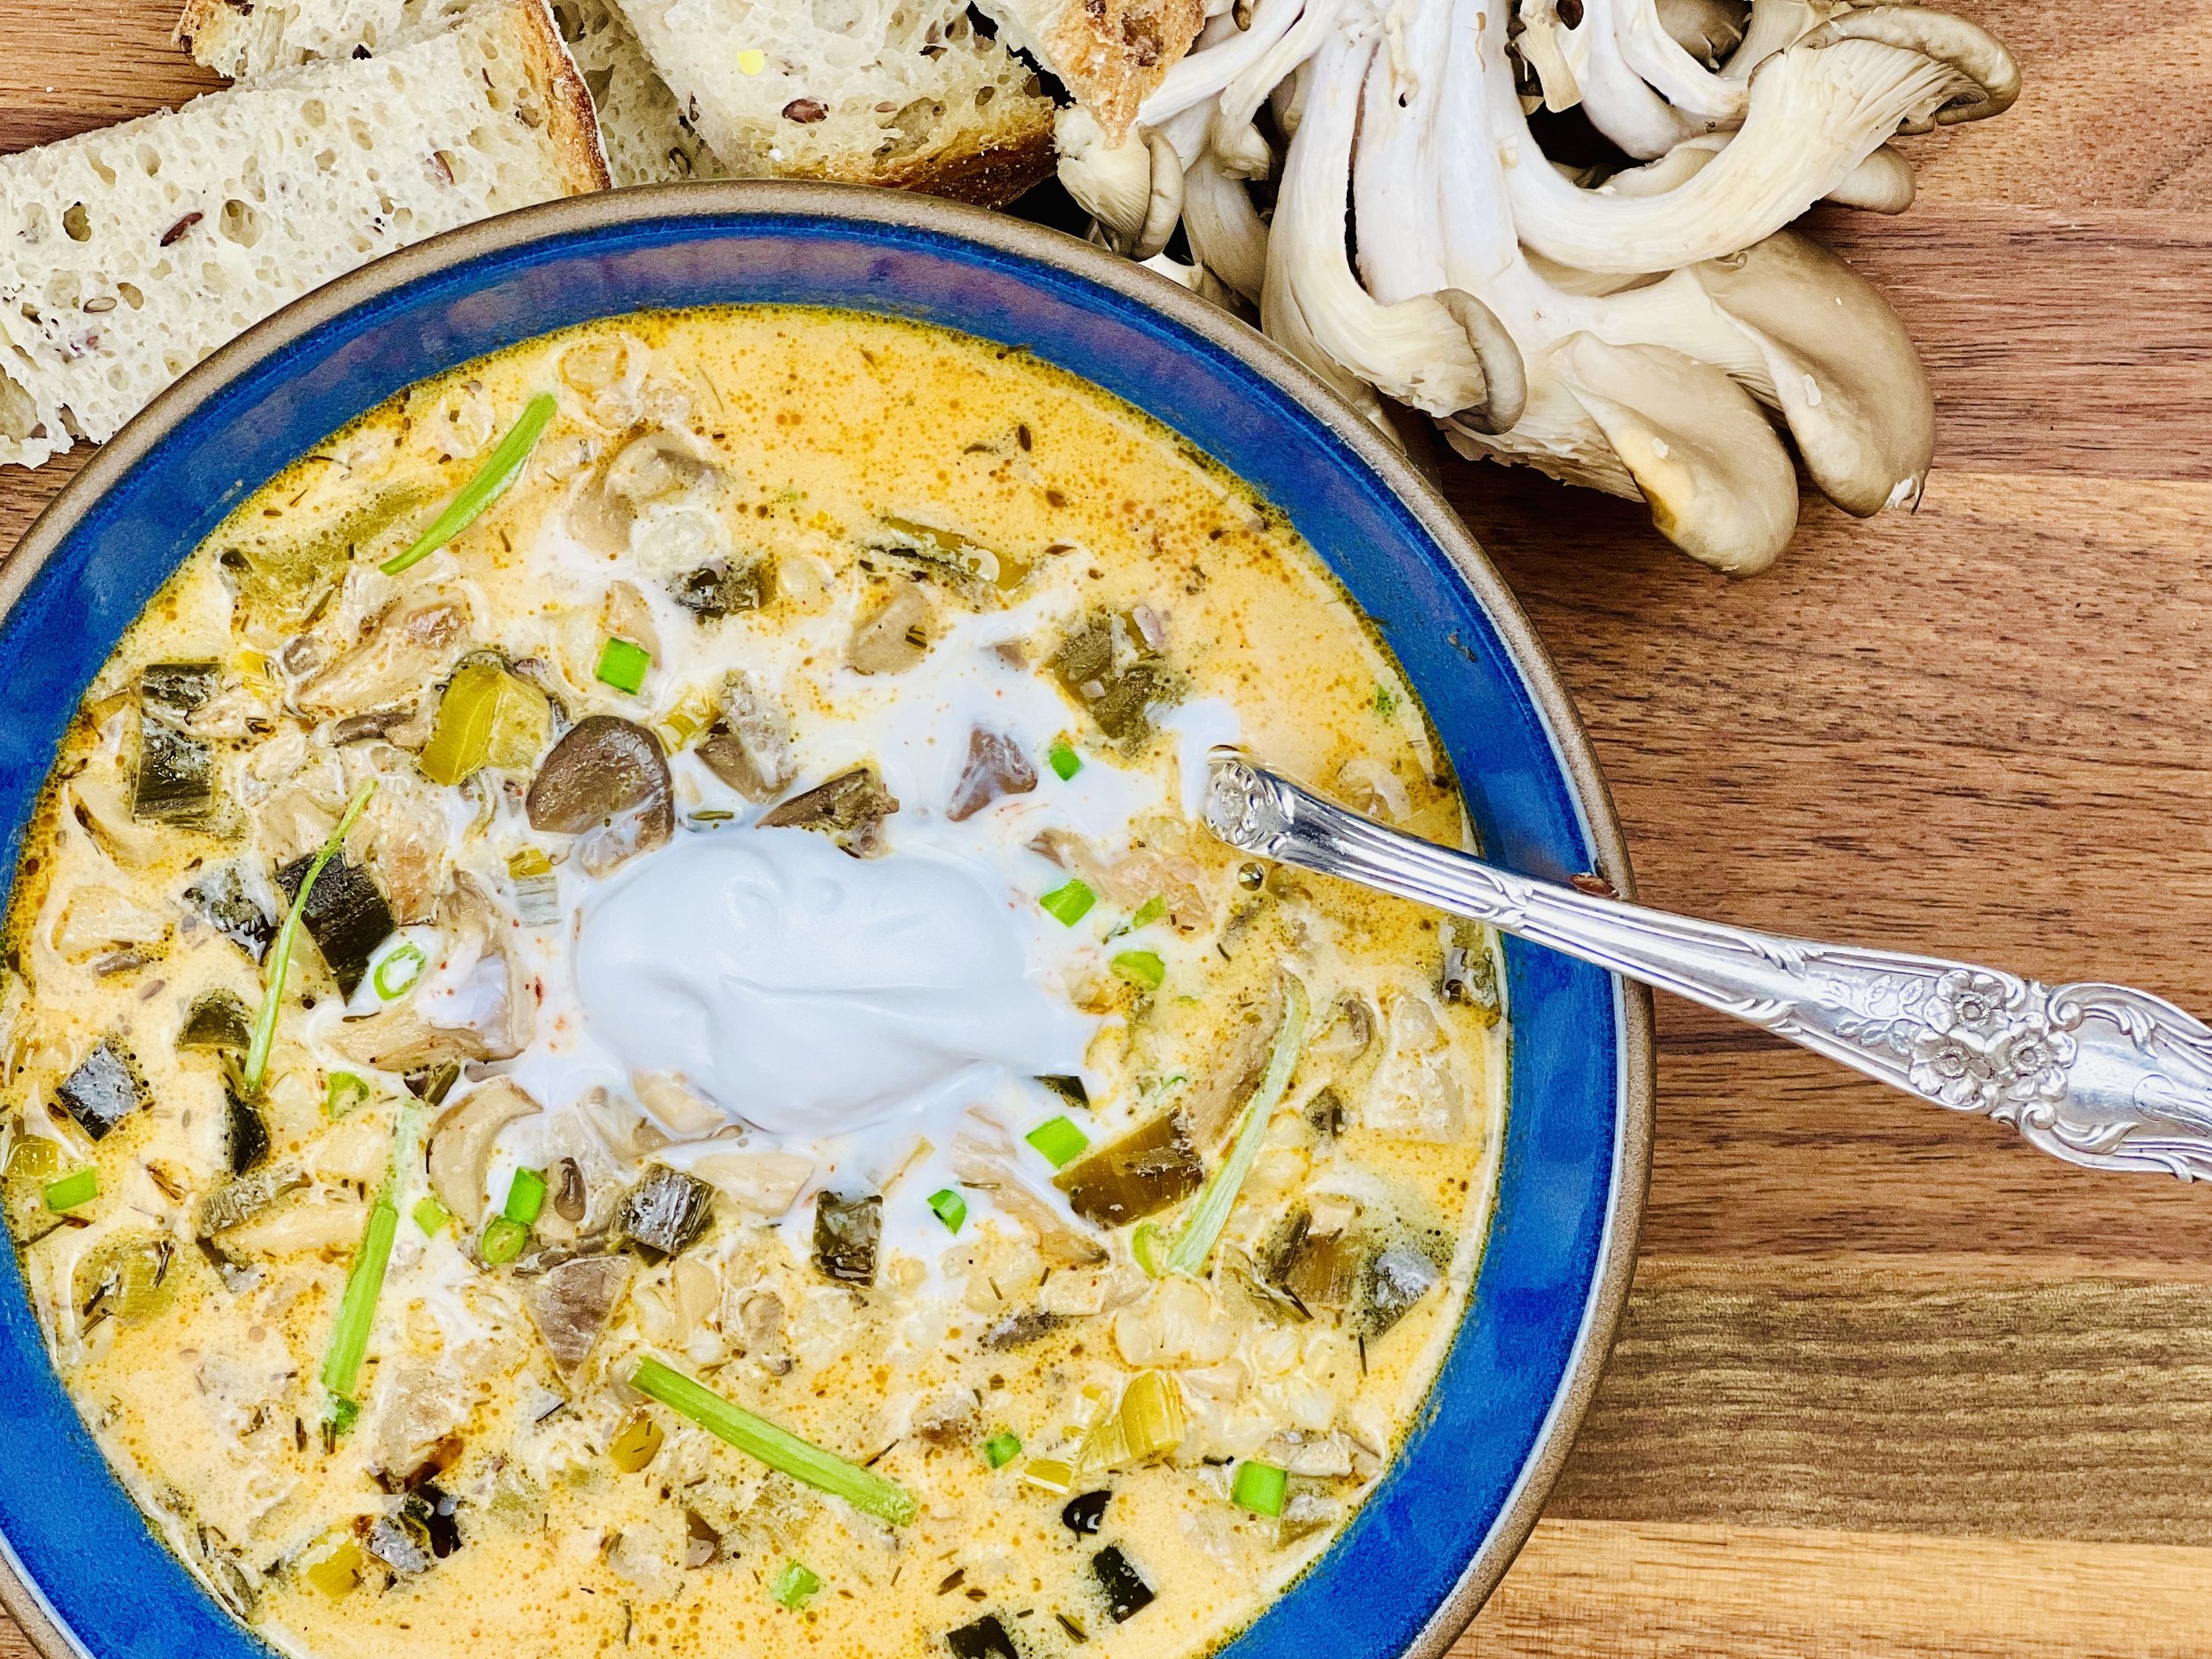
Mushroom Pilaf (Low FODMAP)
10 Minutes prep • 15 Minutes cook • Low FODMAP • Gluten-free • Lactose-free • Serves 4
10 Minutes prep • 15 Minutes cook • Low FODMAP • Gluten-free • Lactose-free • Serves 4 • Ok to make ahead: Steps 1-3
This is a wonderful plant-forward substitute for rice or pasta to serve with a main course that wants a “bed” of something to be served on. It’s incredibly flavorful and loaded (of course) with plenty of good plant ingredients. You can adjust the seasoning to complement what you’re serving — going with lemon, butter, dill, and parsley for seafood or a more robust collection of rosemary, thyme, and sage to go with chicken or beef.
Ingredients
2 tablespoons garlic-infused olive oil
1 tablespoon butter (or you can use all olive oil if you are very sensitive to lactose)
1 teaspoon each dry rosemary, thyme, and sage
1 bunch green onions (green part only), chopped
1 large or 2 medium leeks (green part only), chopped
4 cups oyster mushrooms, chopped
2 stalks celery, with leaves, chopped
1/2 teaspoon Kosher salt and 1/2 teaspoon black pepper (or more to taste)
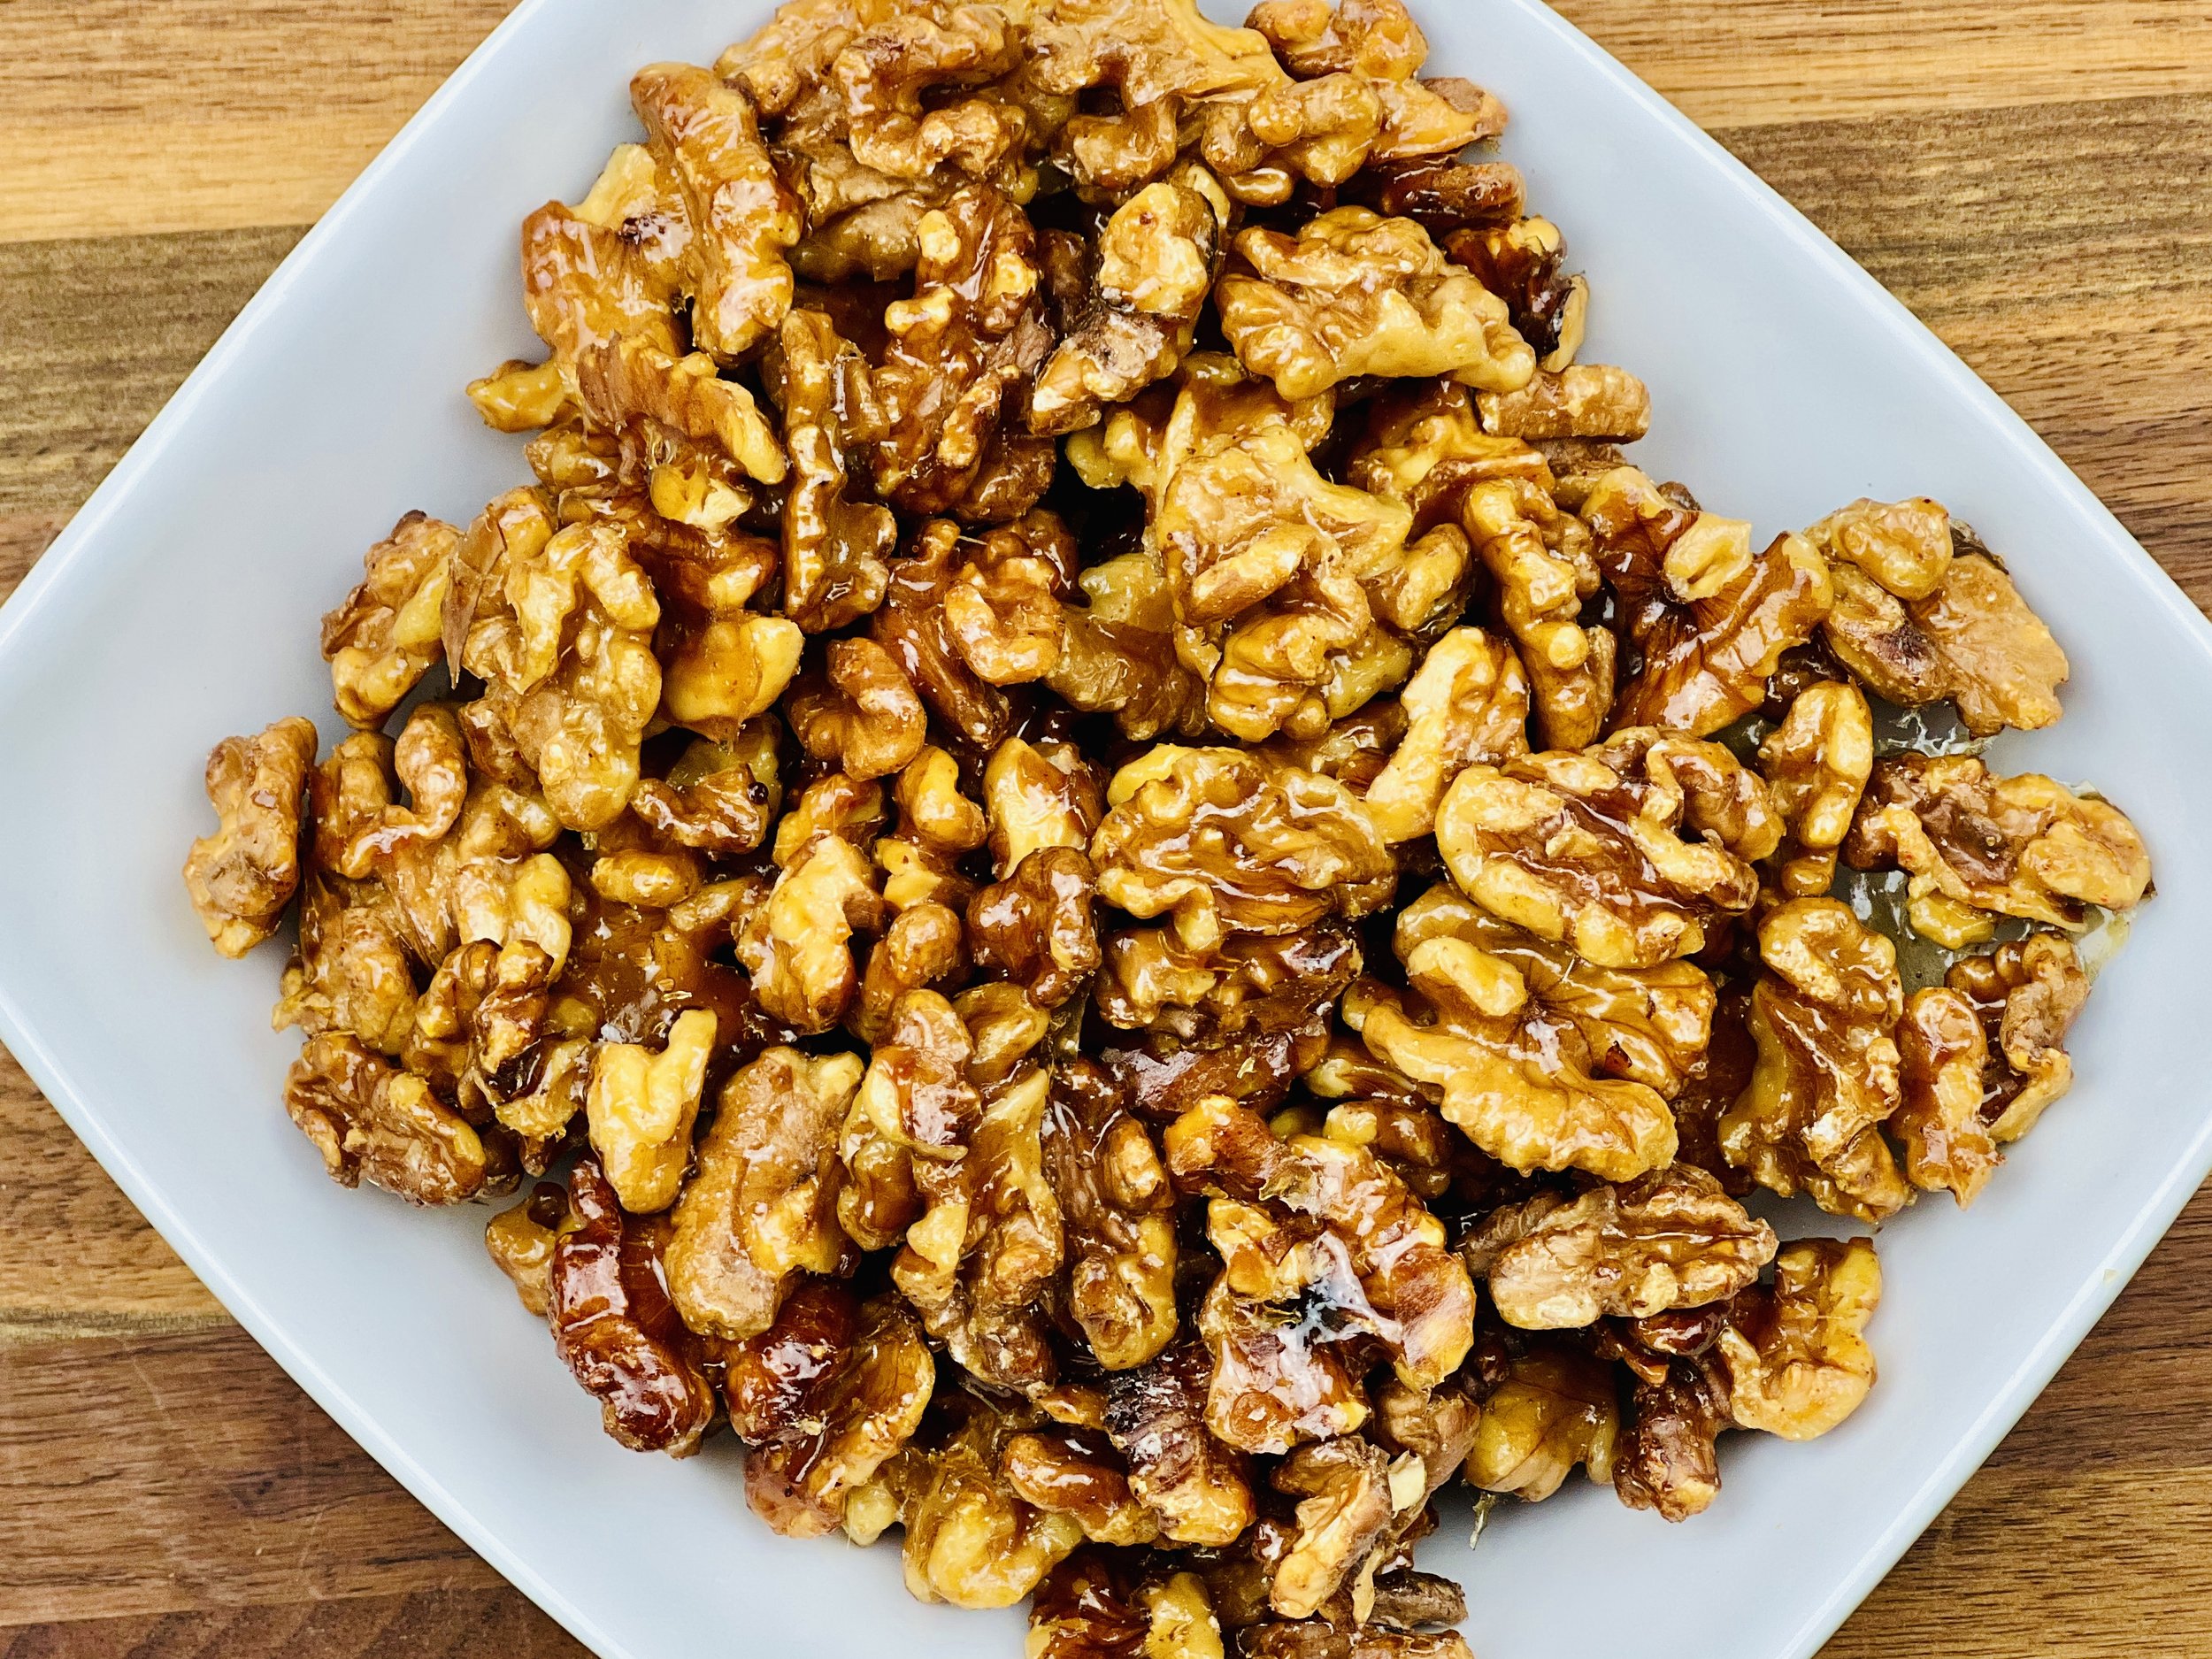
1/4 cup Pine nuts or chopped walnuts (or both!)
1/2 teaspoon red pepper flakes
Directions
(1) Prepare: Chop the leek greens, green onions, mushrooms, and celery.
(2) Cook the veggies: Heat the olive oil in a large skillet over medium-high heat. When the oil shimmers, add the seasonings and let them toast in the oil for about 30 seconds. Then add the green onion greens and leek greens and cook for a couple of minutes until tender. Stir in the mushrooms and celery and season with salt and pepper. Cook until the mushrooms are starting to brown, 7-10 minutes.
(3) Finish: Add the pine nuts or walnuts and red pepper flakes and cook for another minute or two. Taste and add more salt or pepper if needed.
Make-ahead note: At this point, you may let the vegetables cool, then reheat when you are near ready to serve.
(4) Plate and serve: Serve warm with a bit of butter melting into the top as a vegetarian main dish or top with whatever you like. Add a grind or two of red pepper flakes (here’s a nifty red pepper flake grinder.)
Eat and enjoy every bite because you can!
Recipe note: I use Diamond Crystal Kosher salt in all my recipes because it has a wonderful flat and crisp flake that tastes delicious. It is also the least salty salt available so you can use it more liberally as a seasoning than you can table salt or sea salt. If you use another type of salt, you may need to reduce the amount so it is not over-salted.
Have a question you’d like to have answered? Email me at hello@ibsgamechanger.com
Link note: This post may contain affiliate links for you to easily purchase items that are linked. I may earn a small commission from qualifying purchases but none of this costs you a thing so feel free to use the links! In addition, for some items, I have provided a special discount code for IBS Game Changers so be sure to use the code when you purchase an item to get the discount that has been arranged just for you.
More Deliciously Low FODMAP™ plant forward recipes

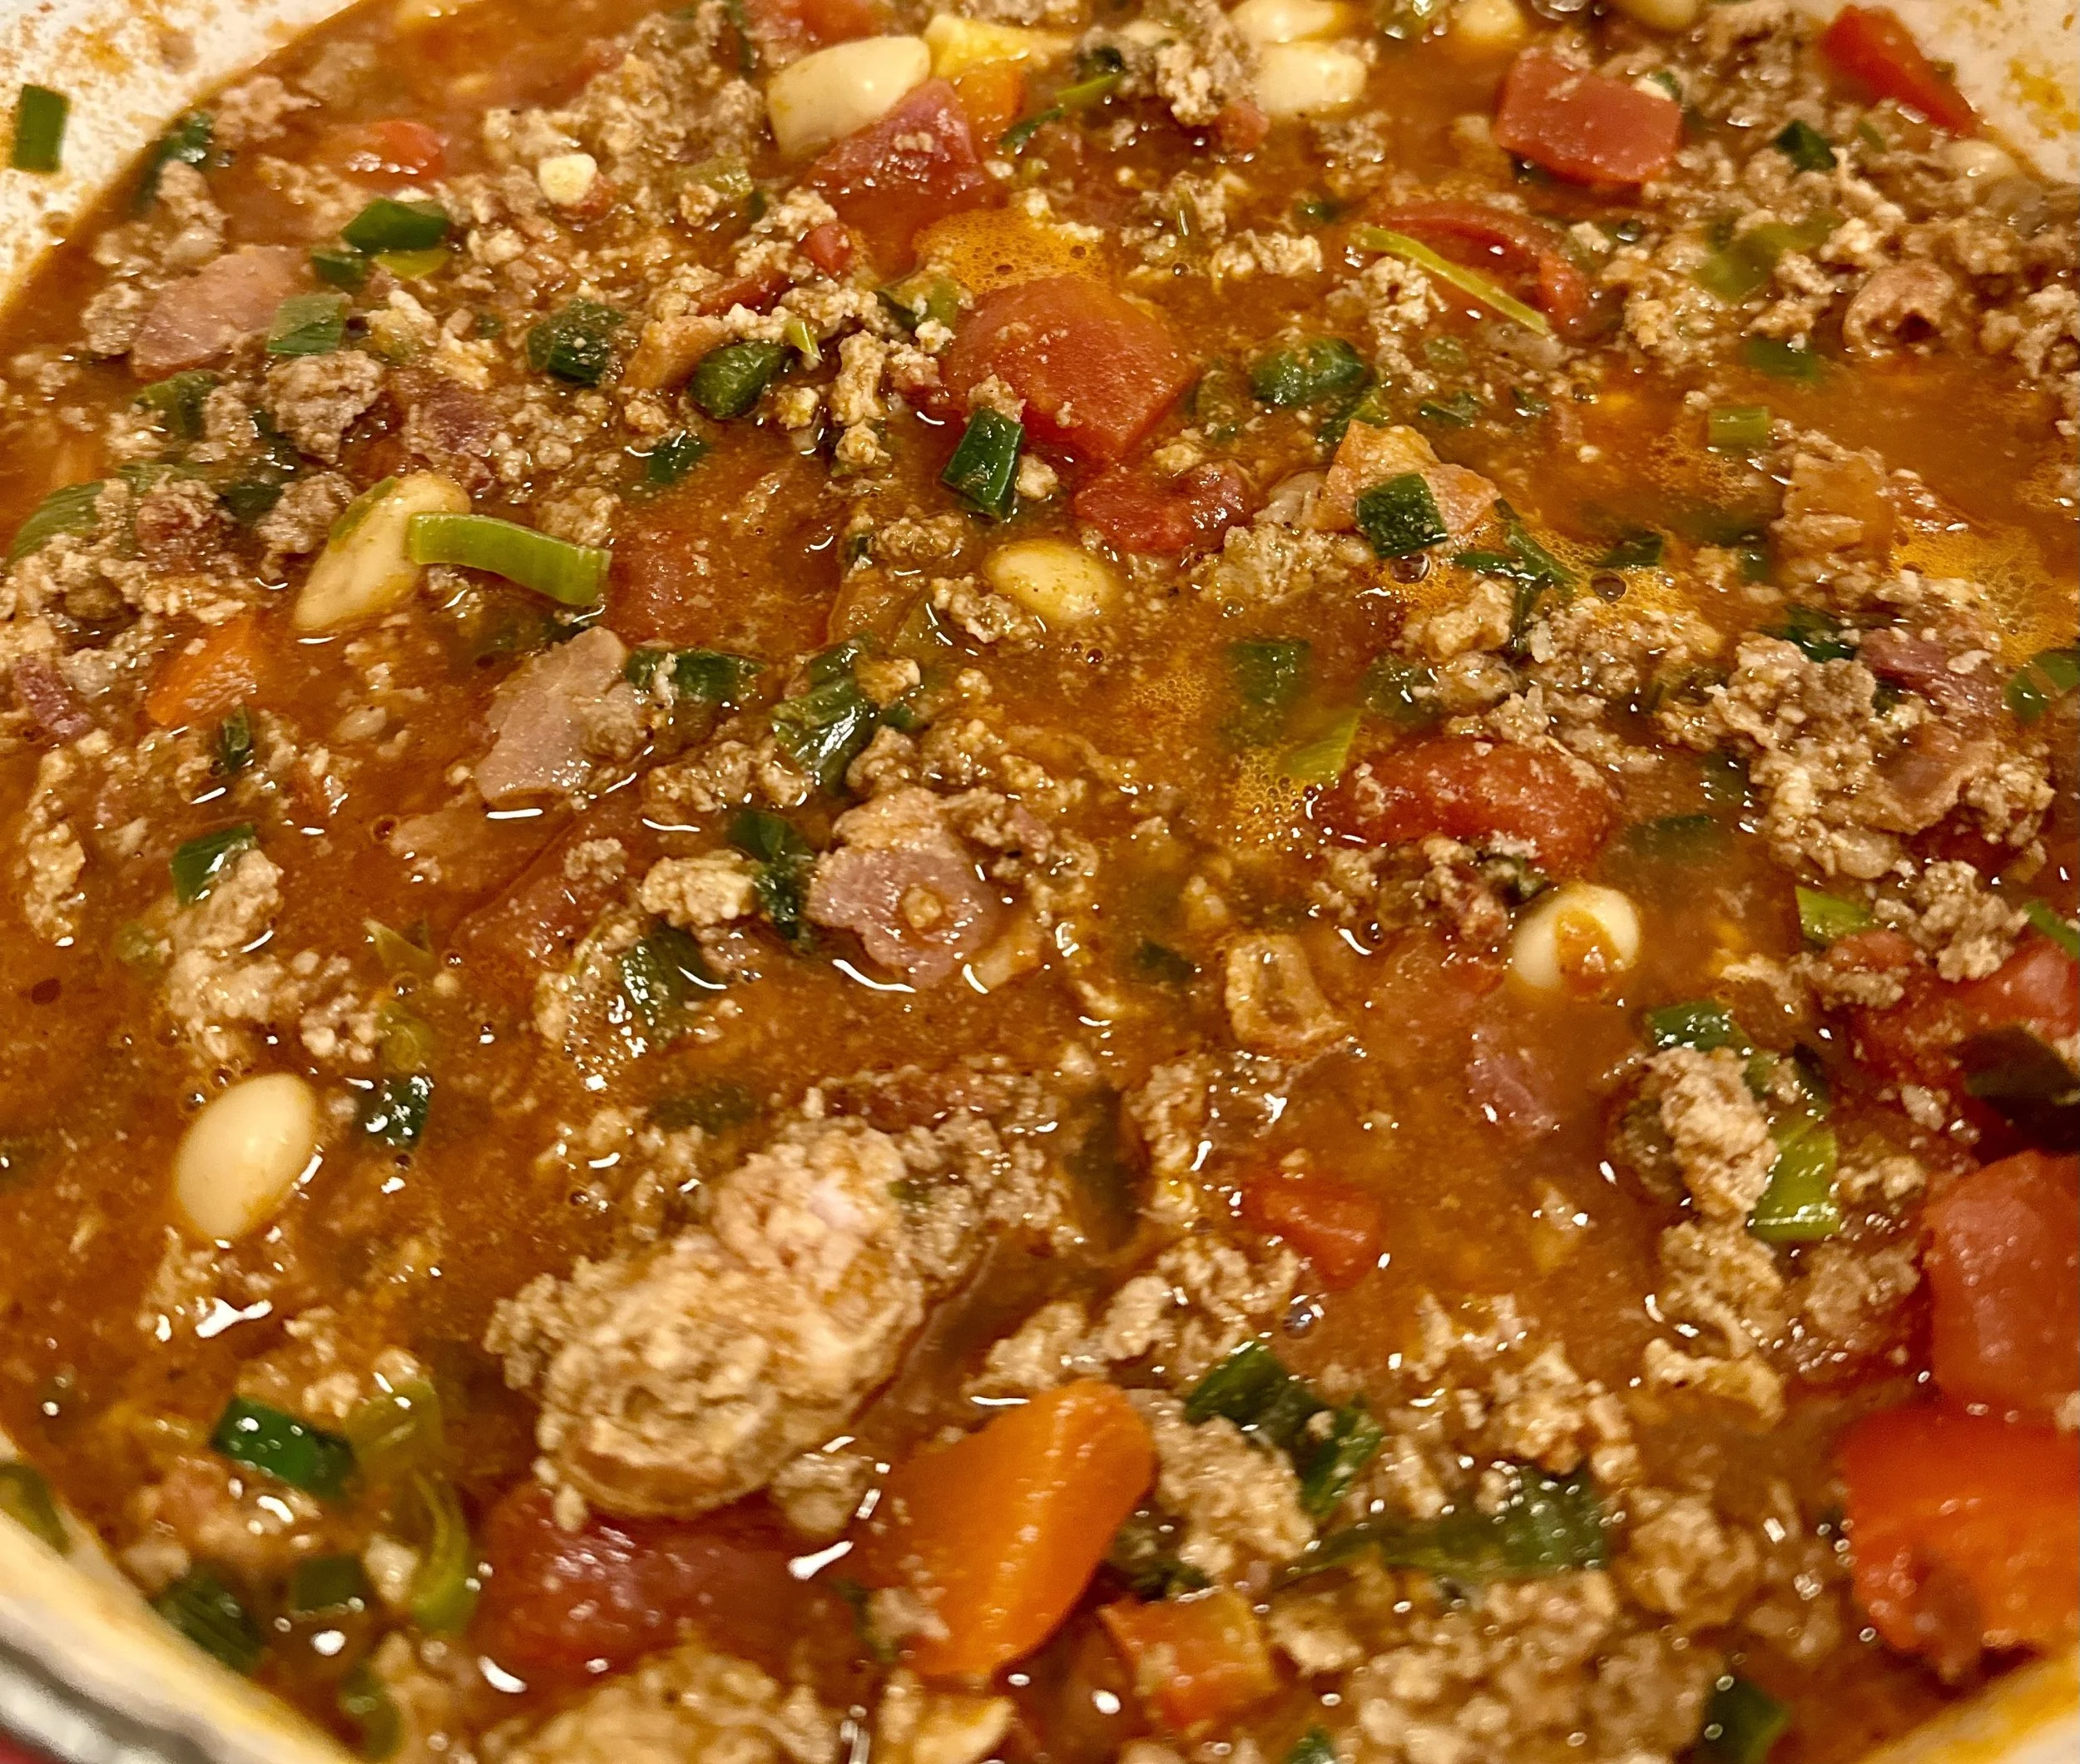
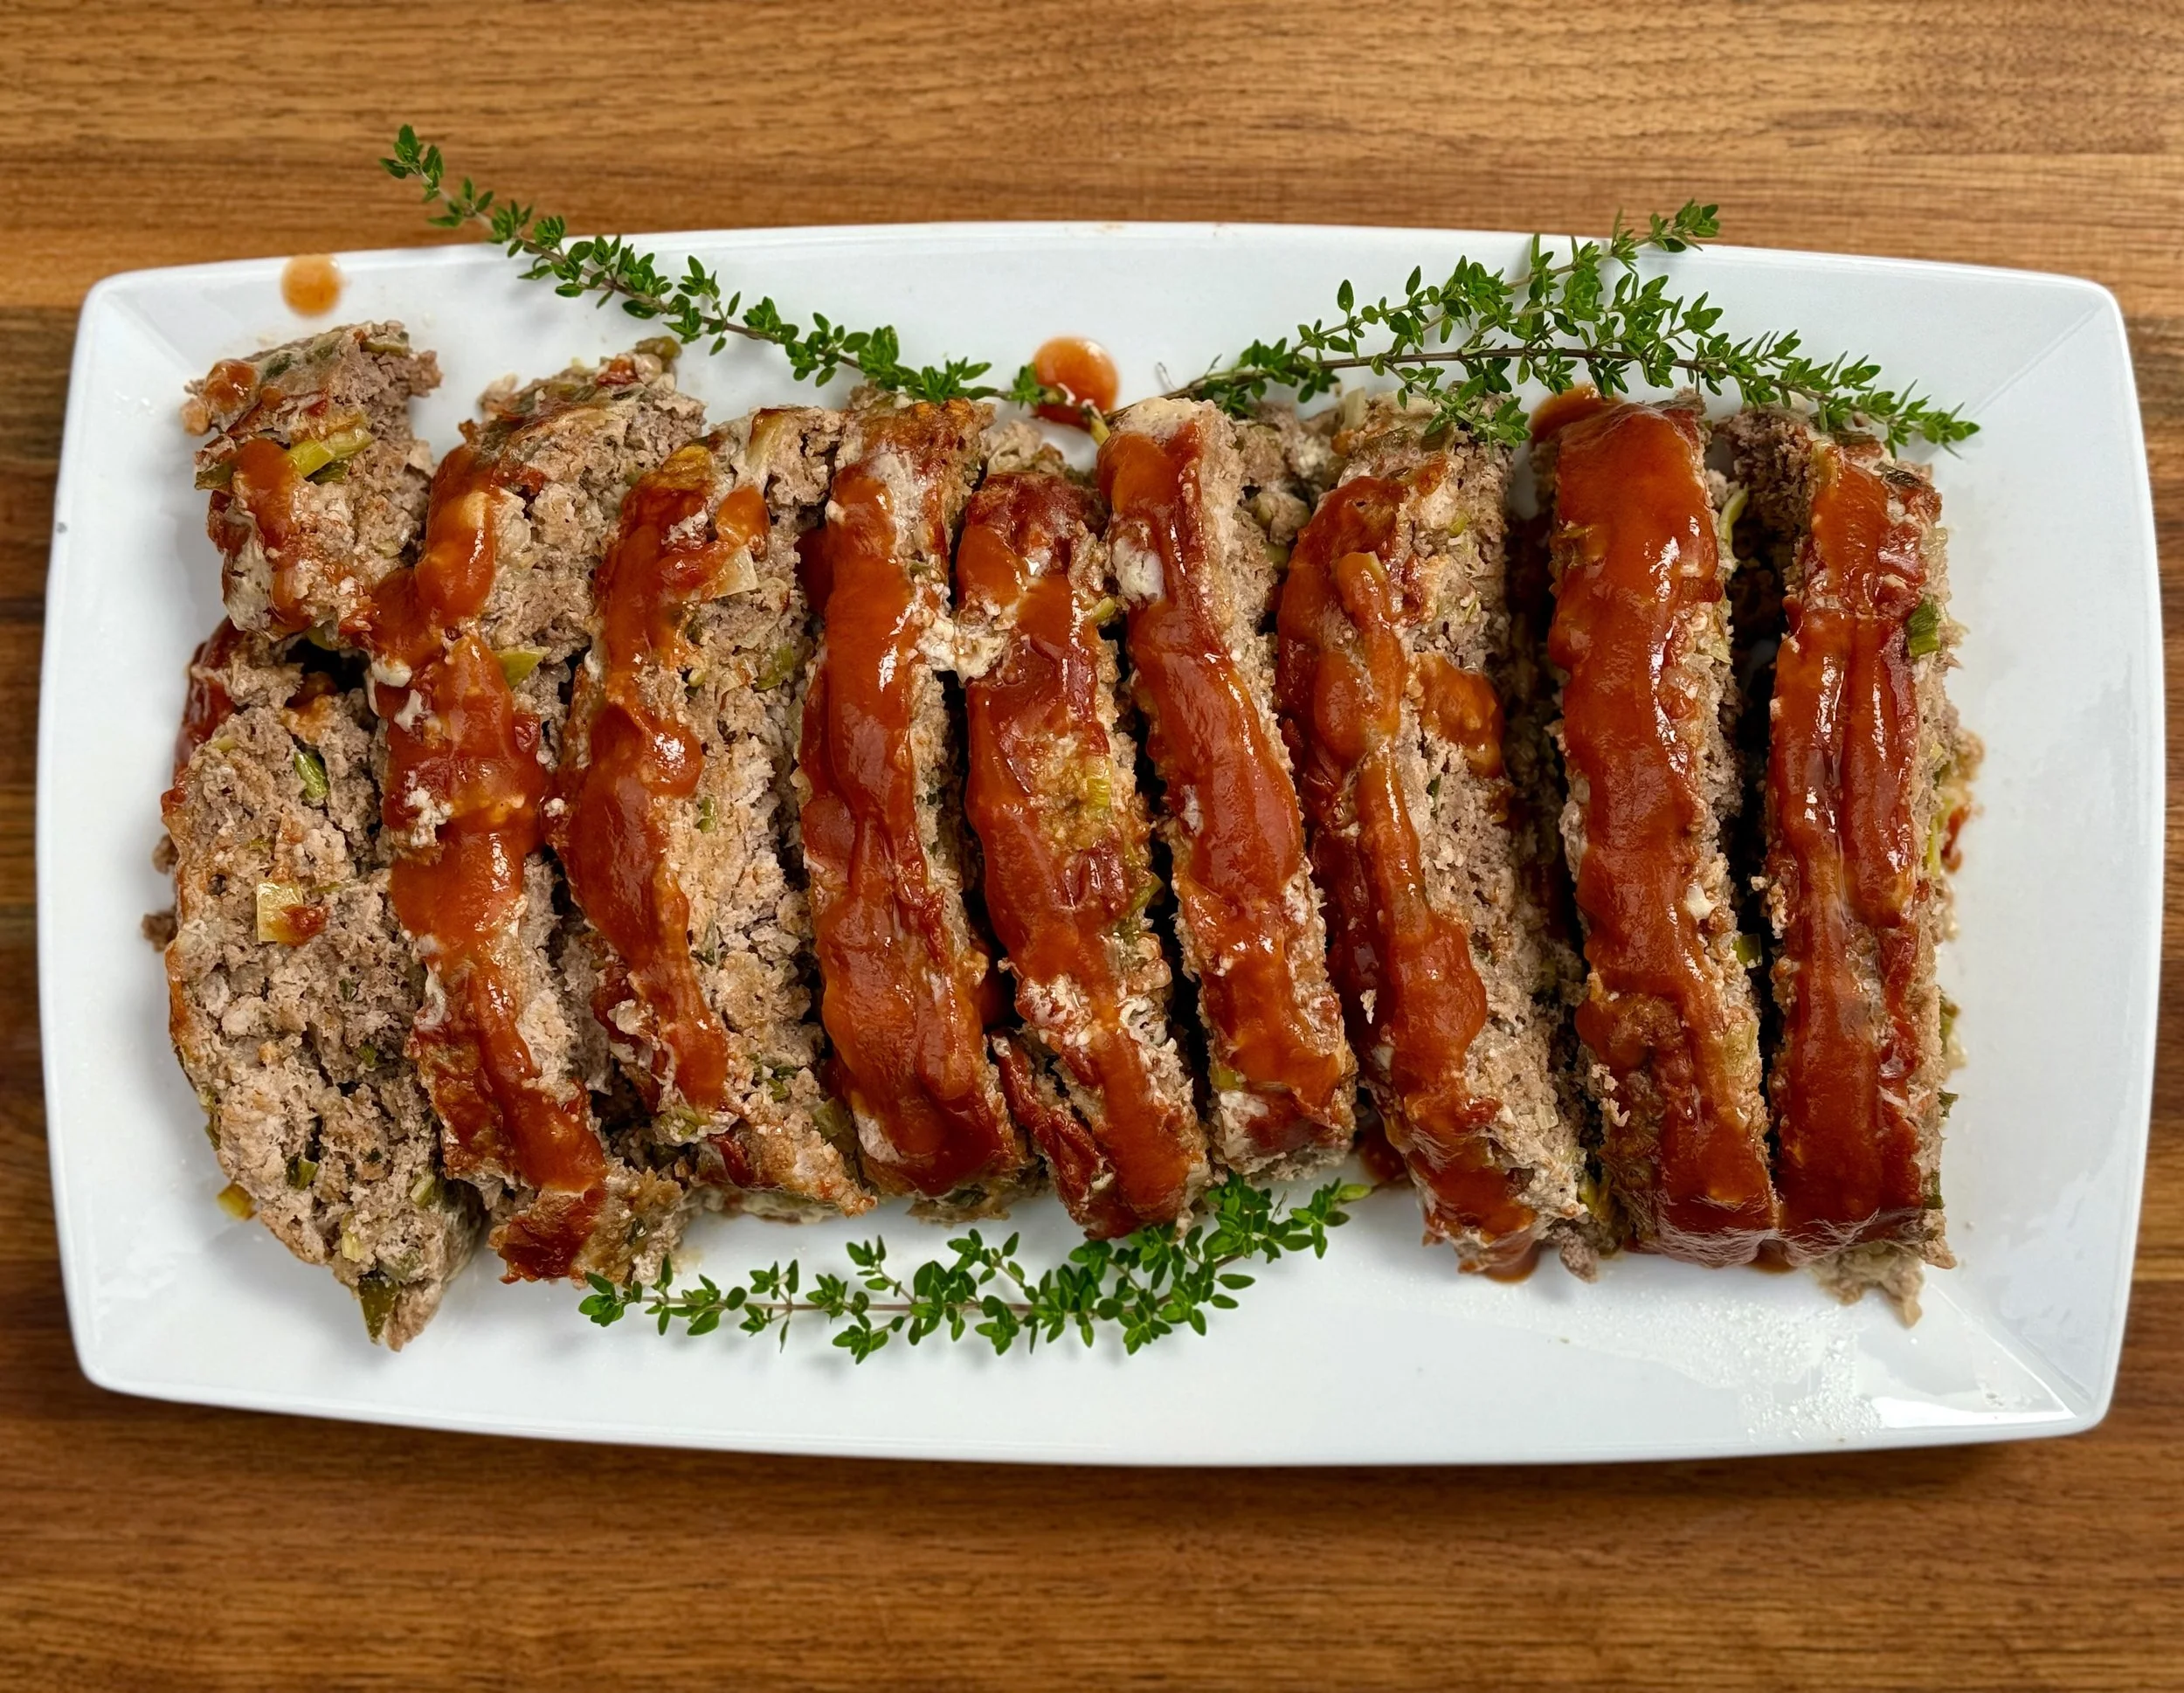
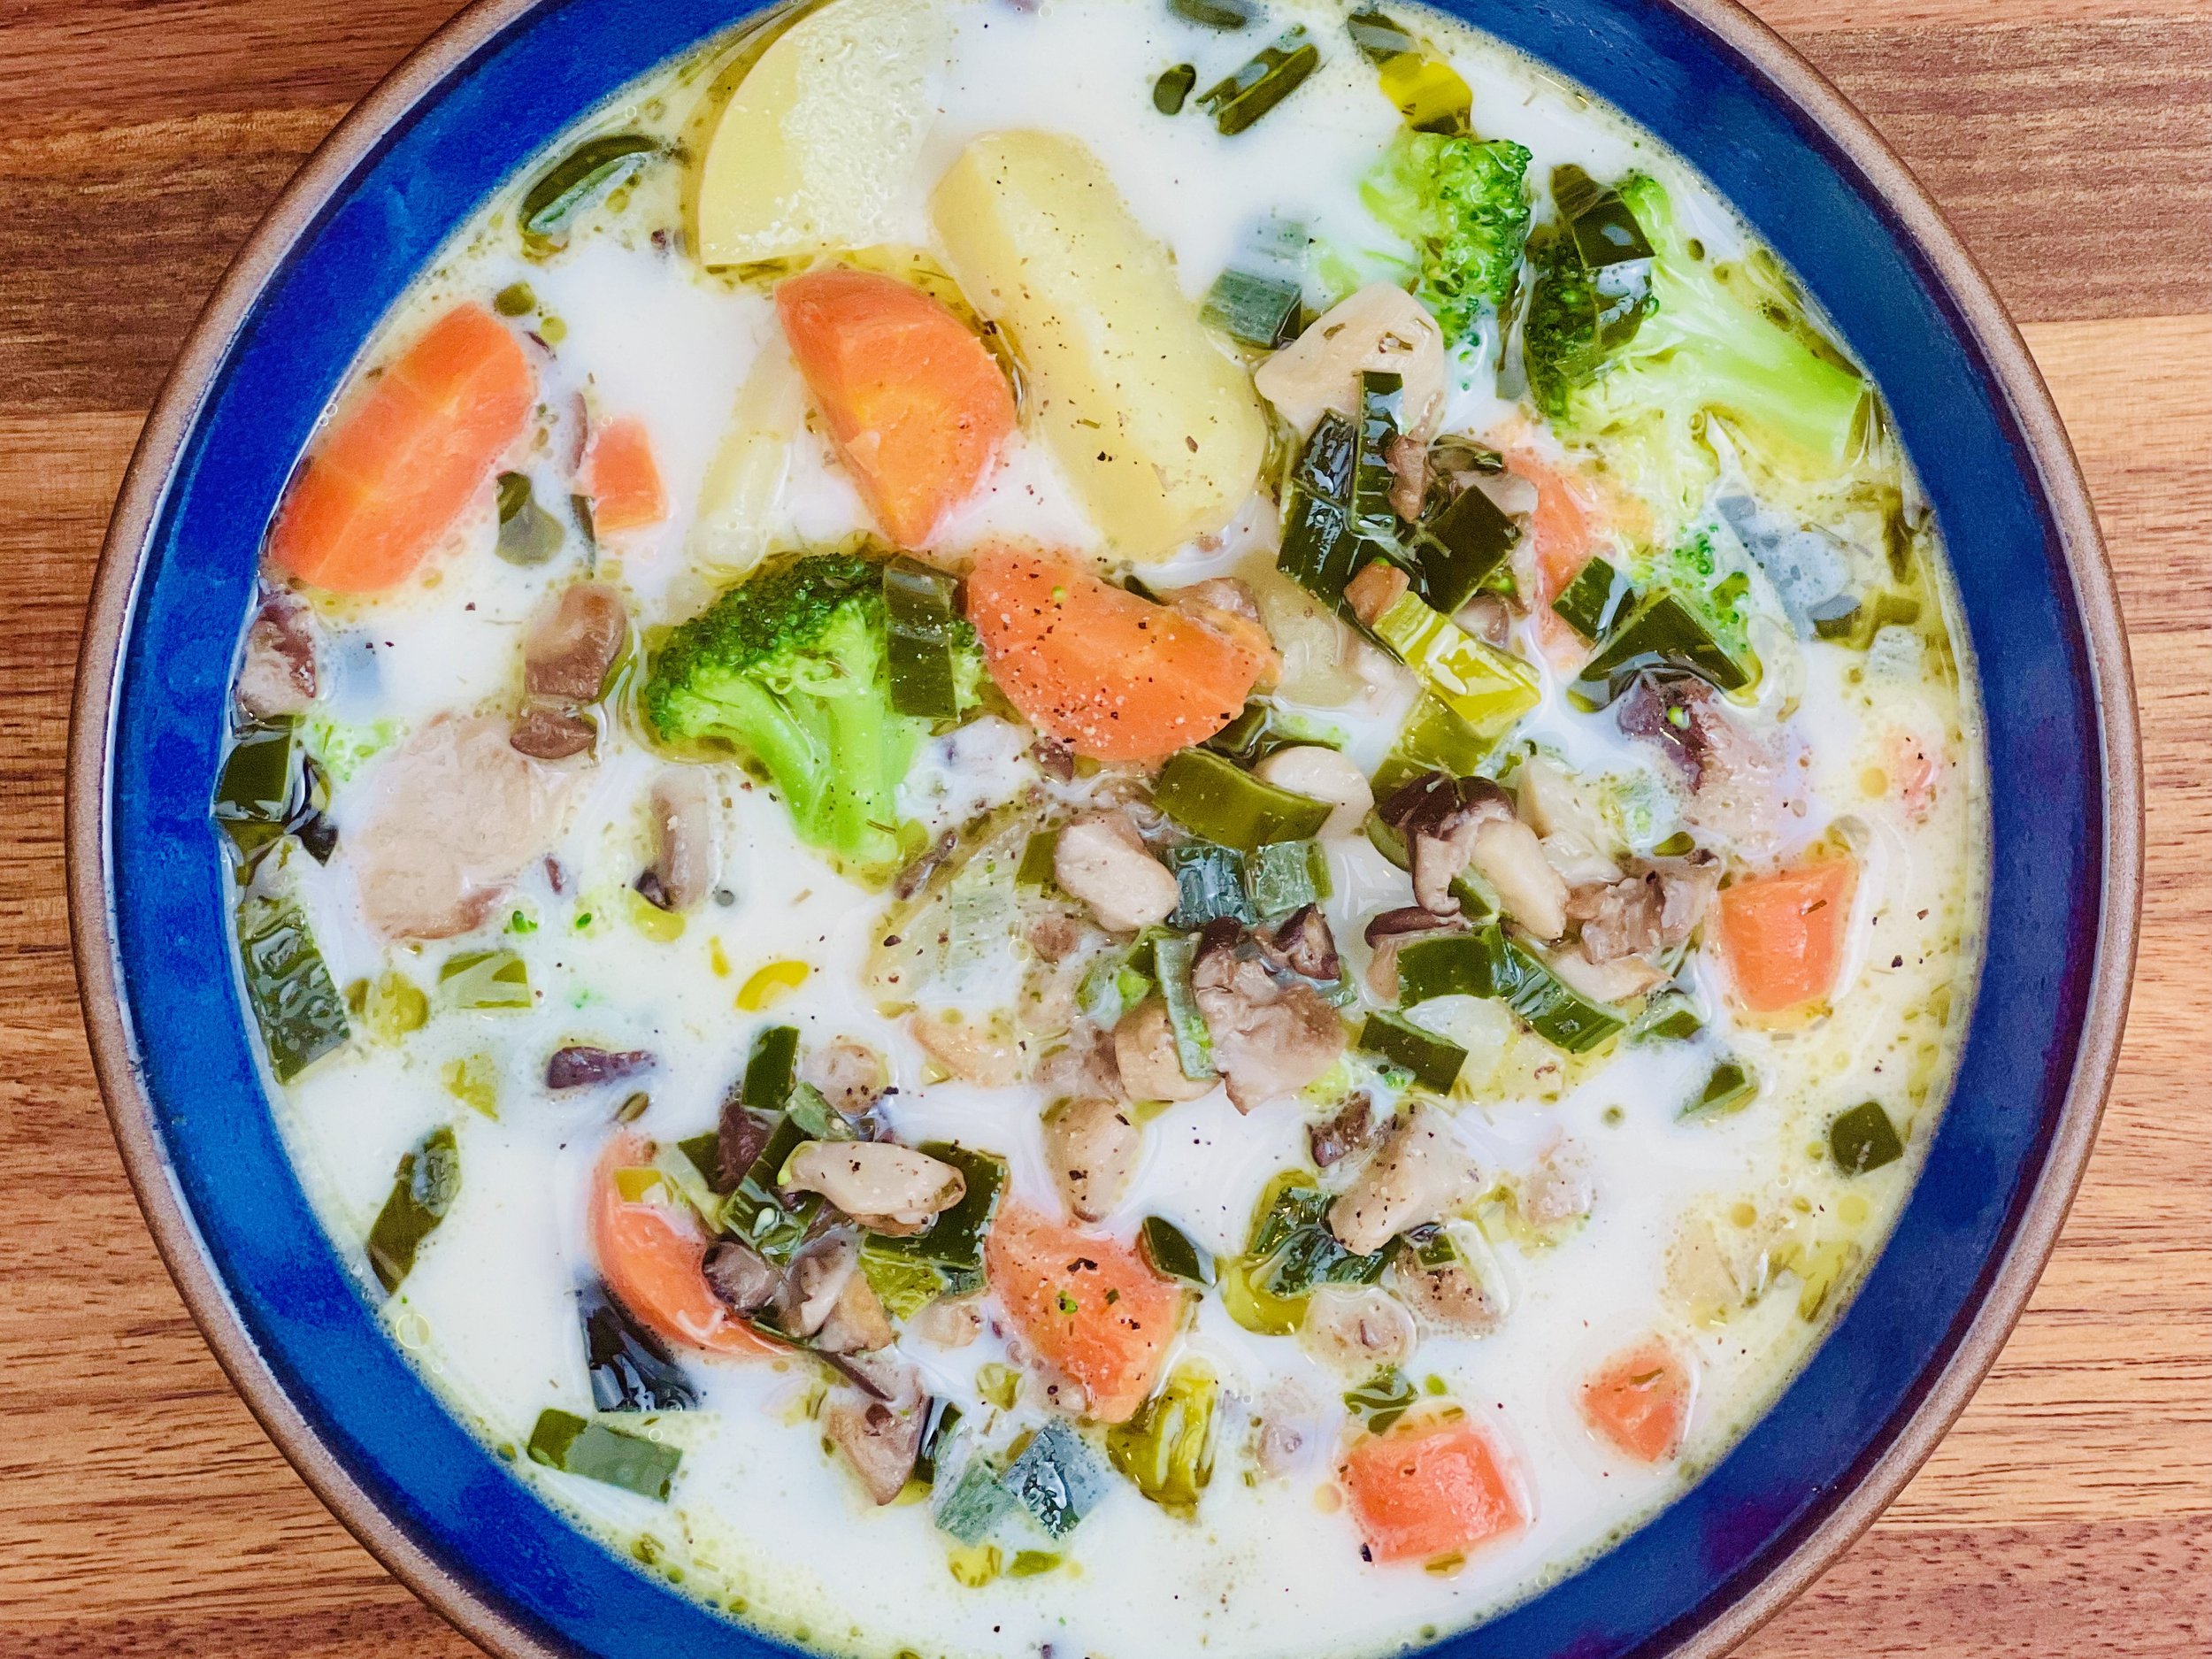
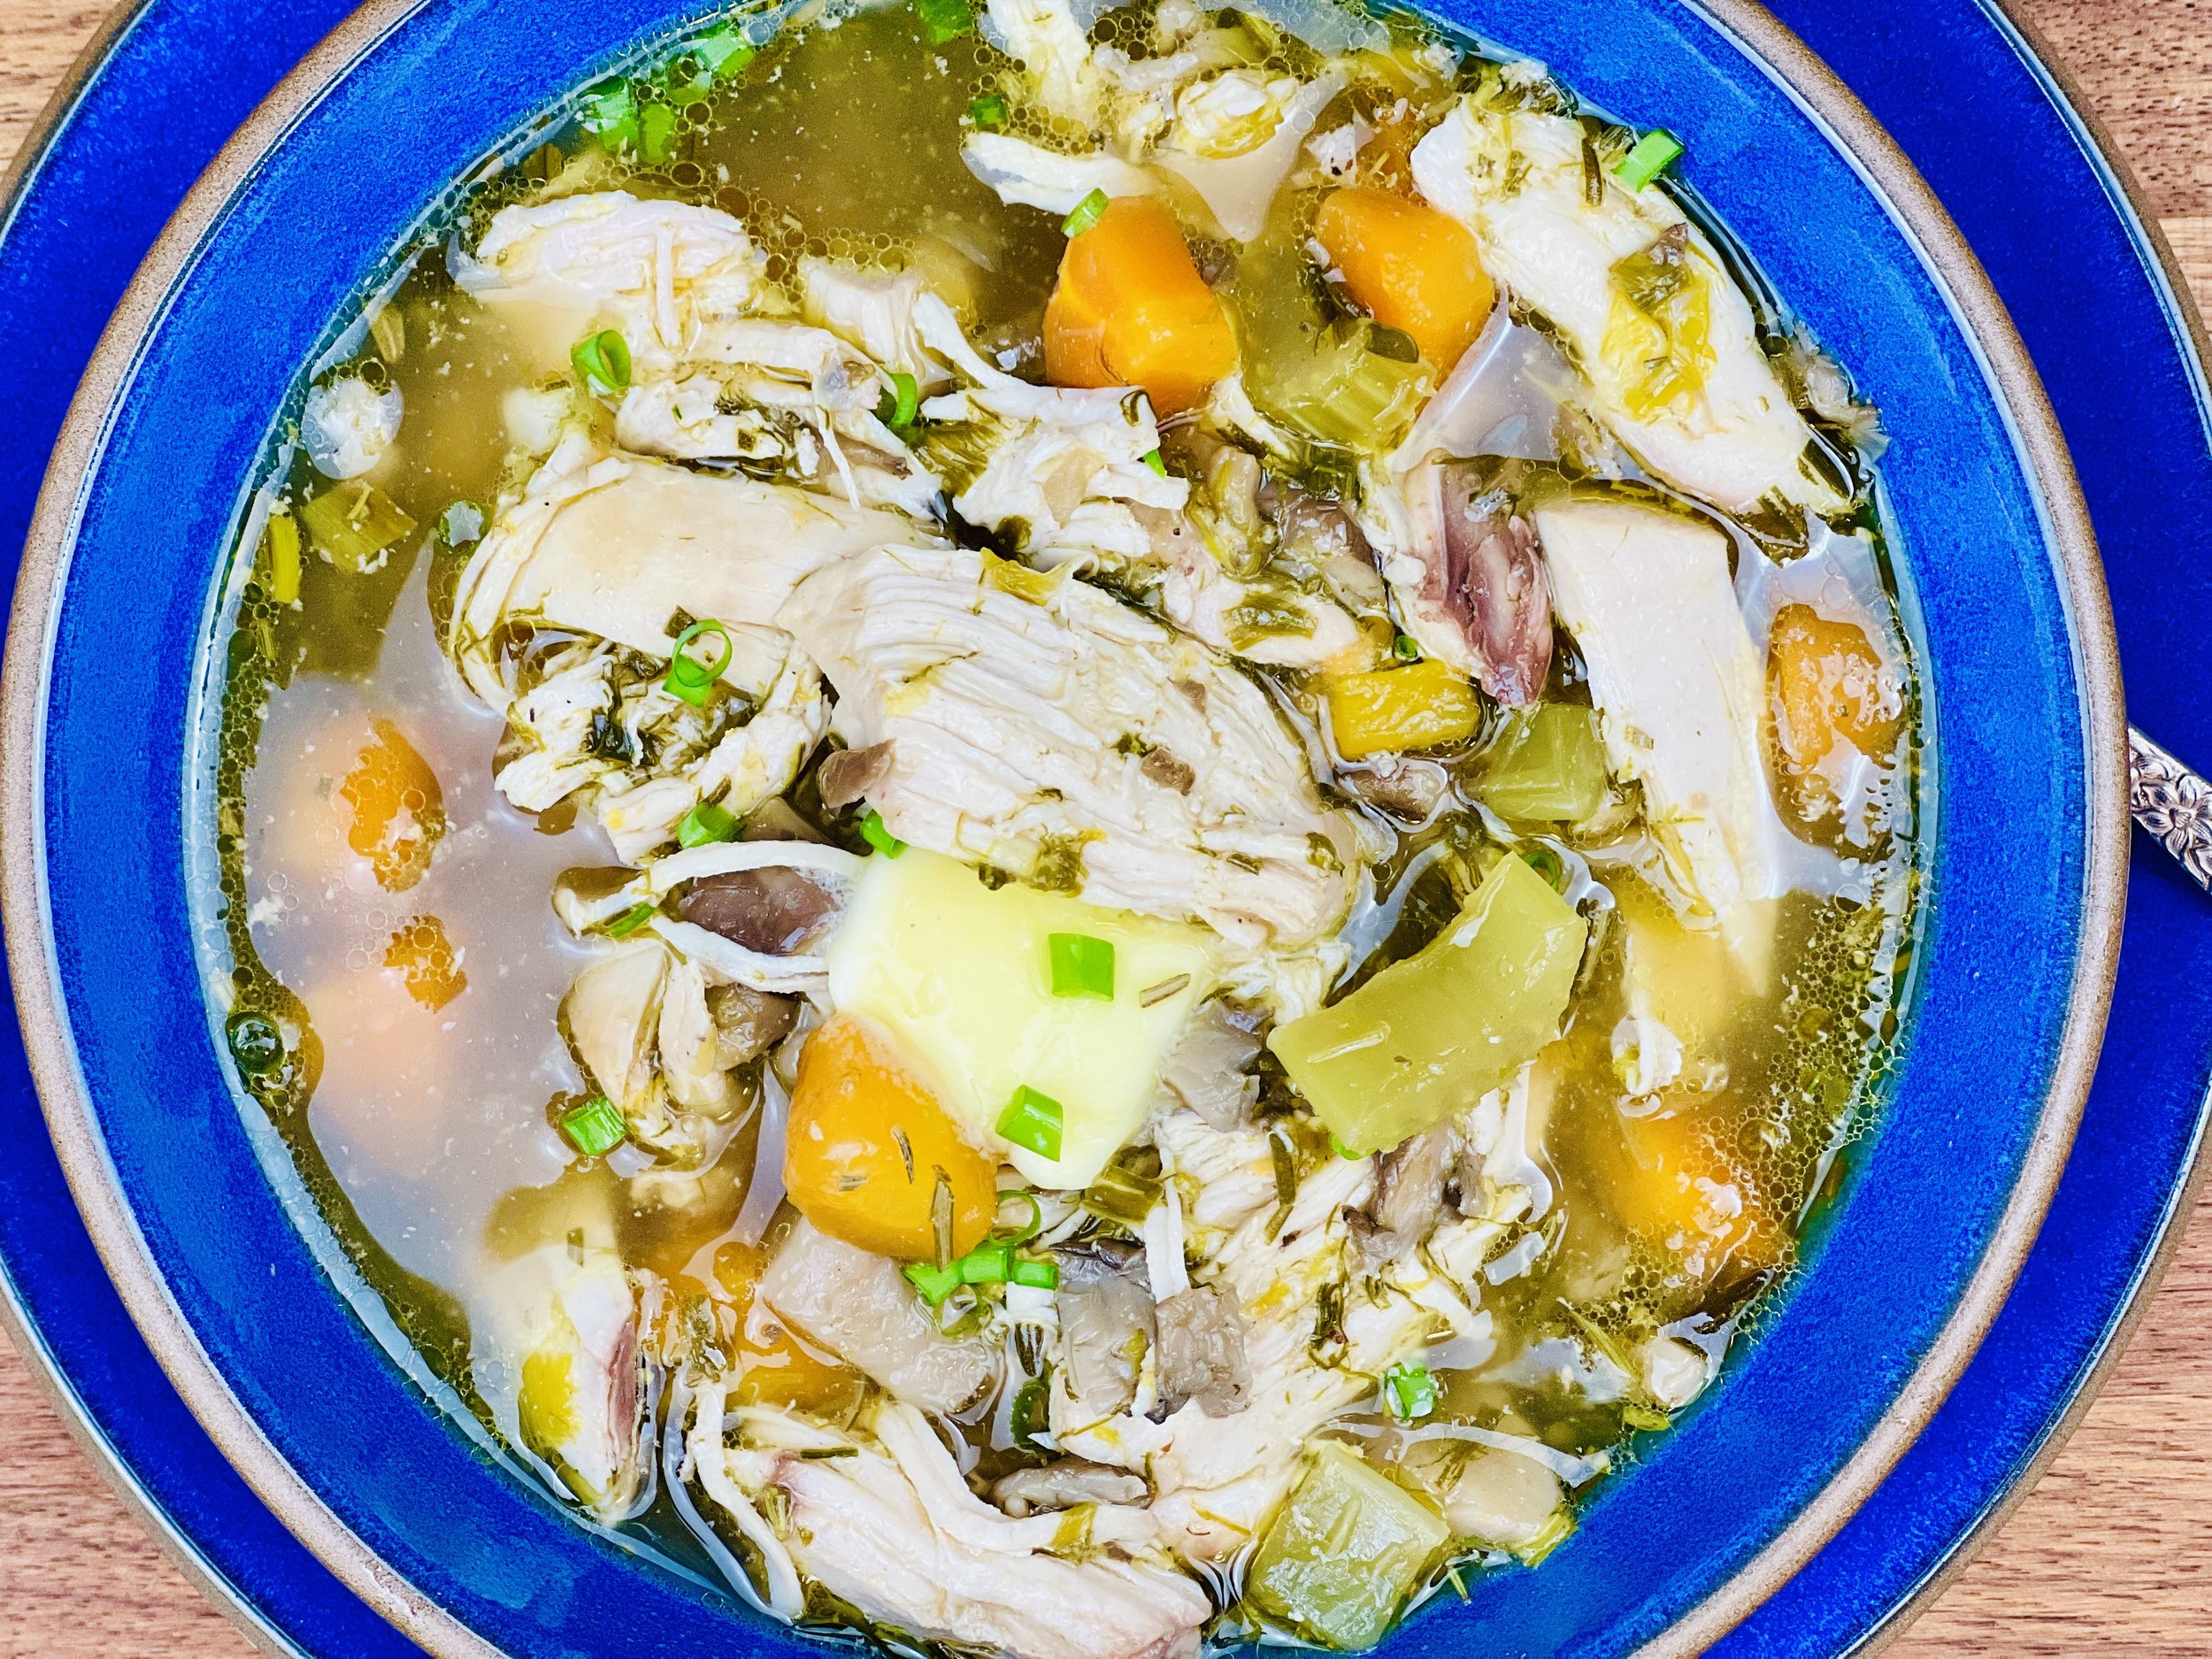
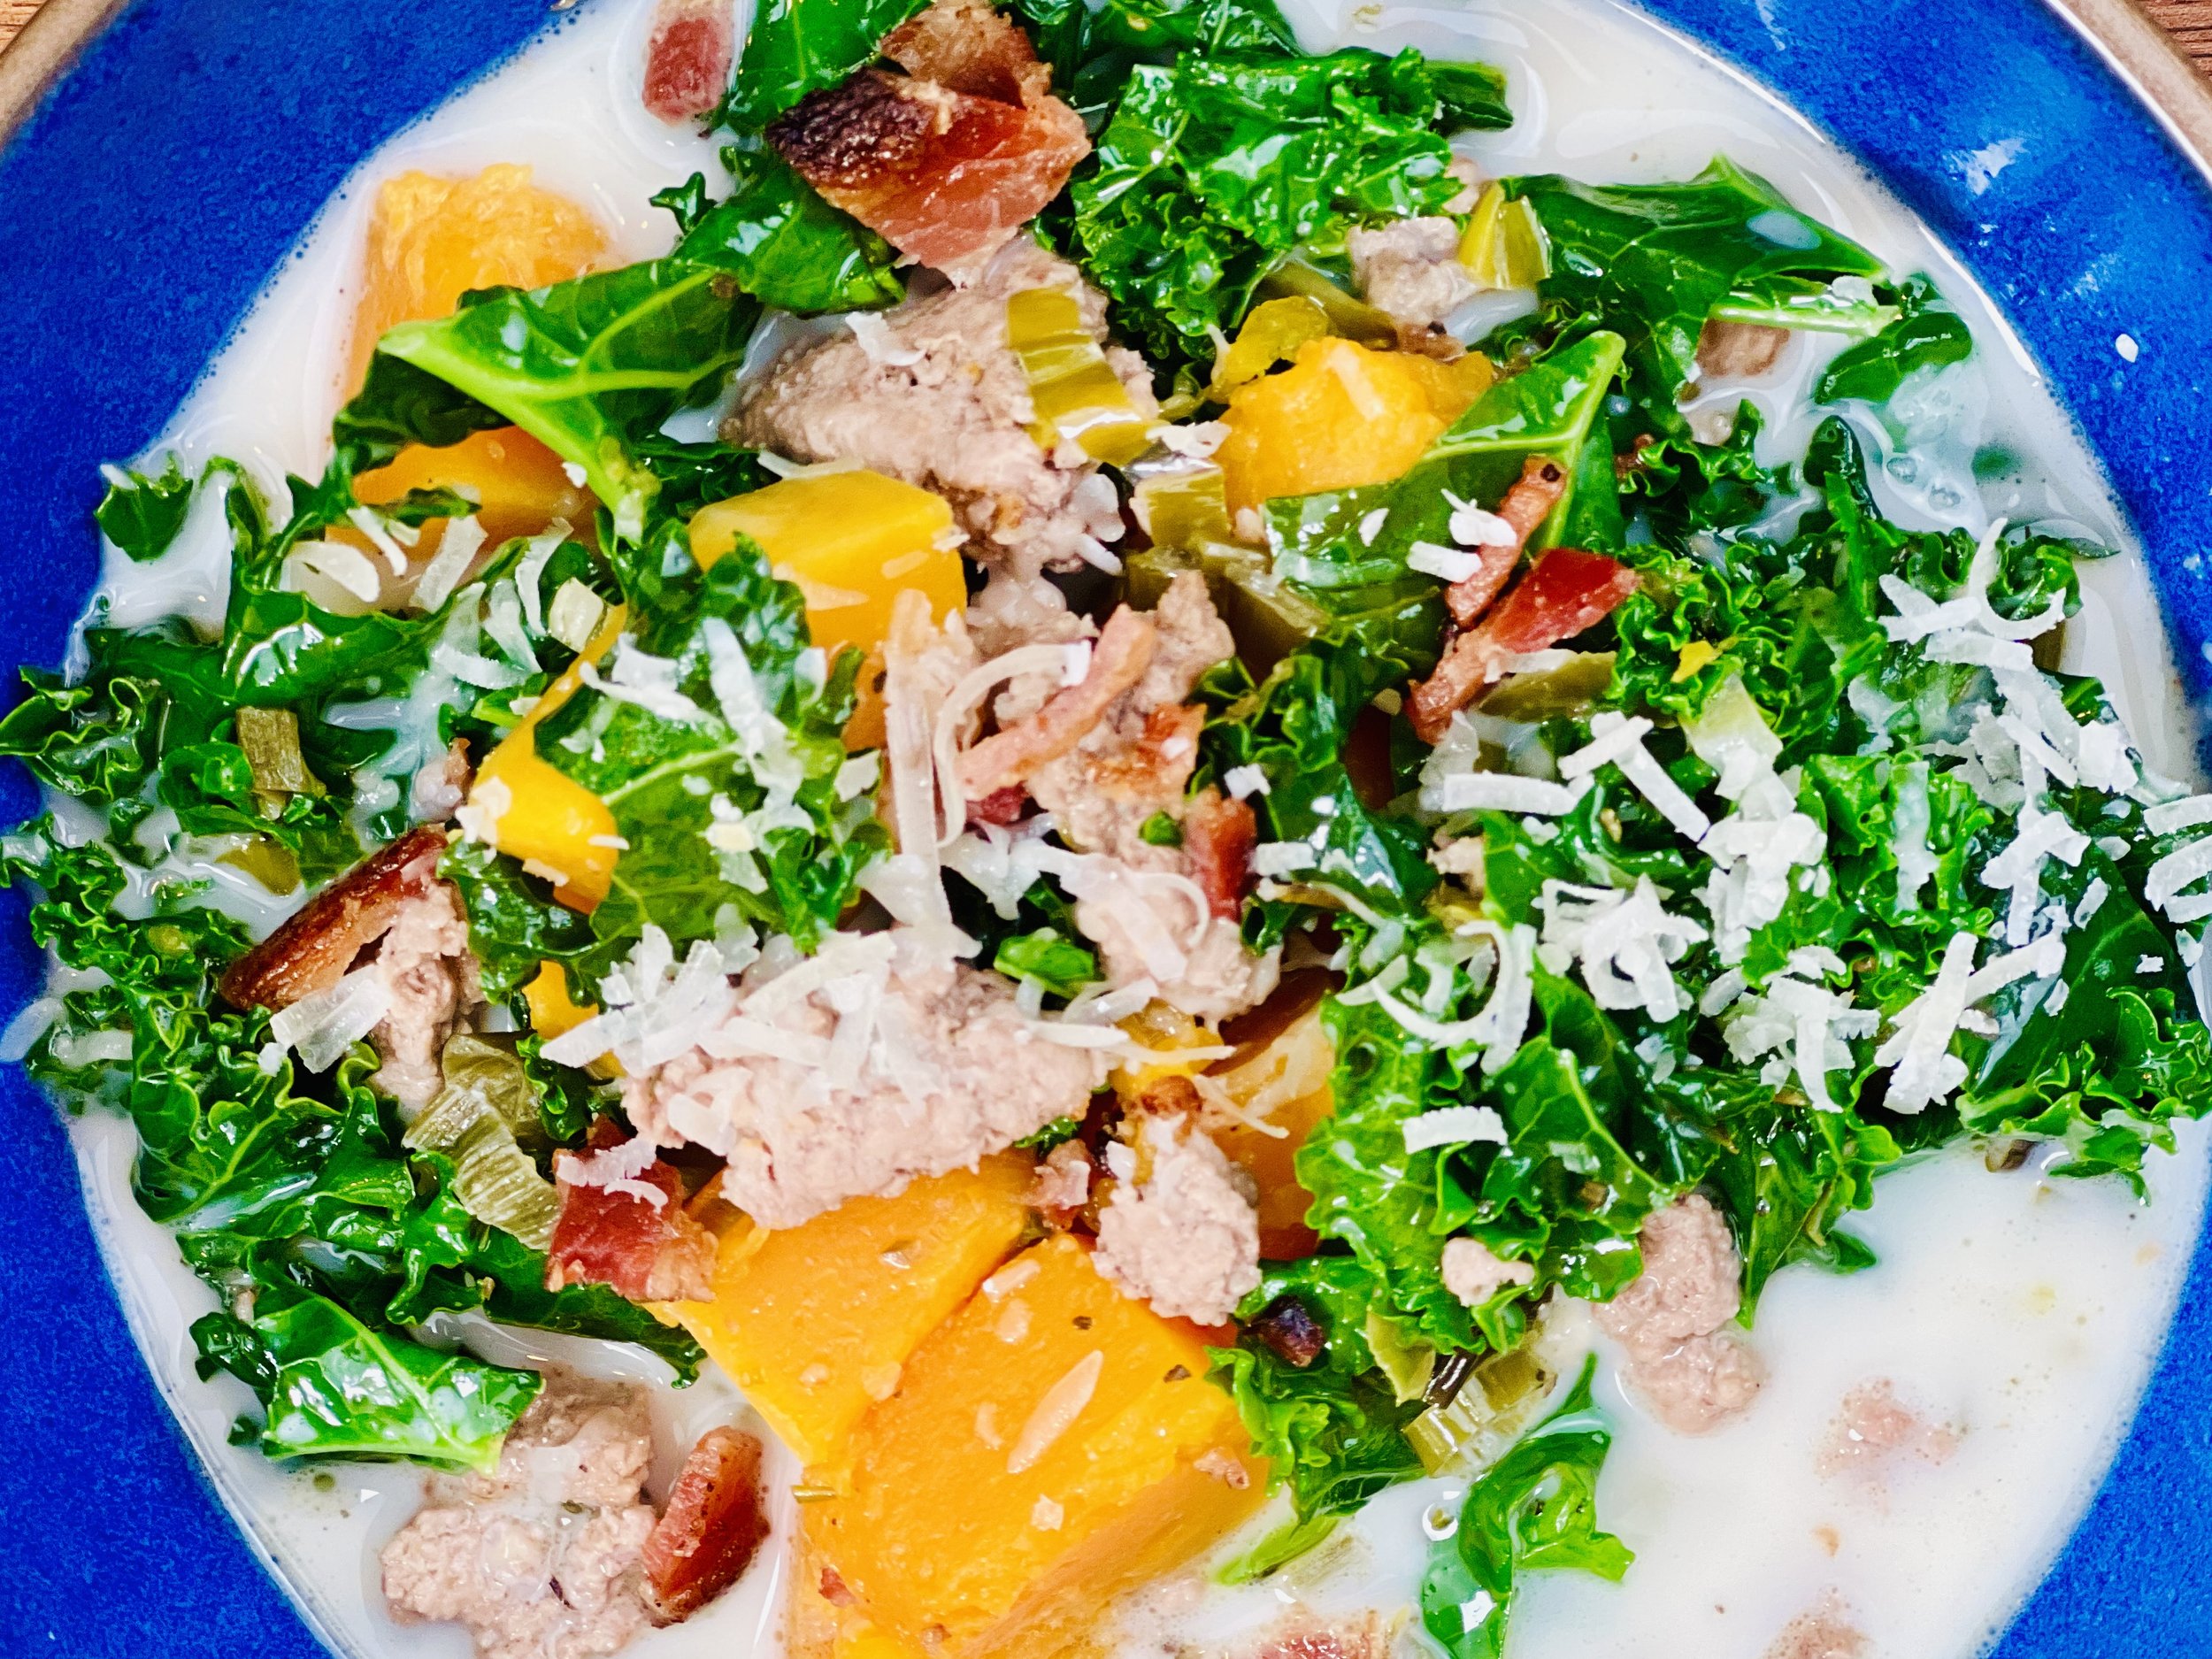
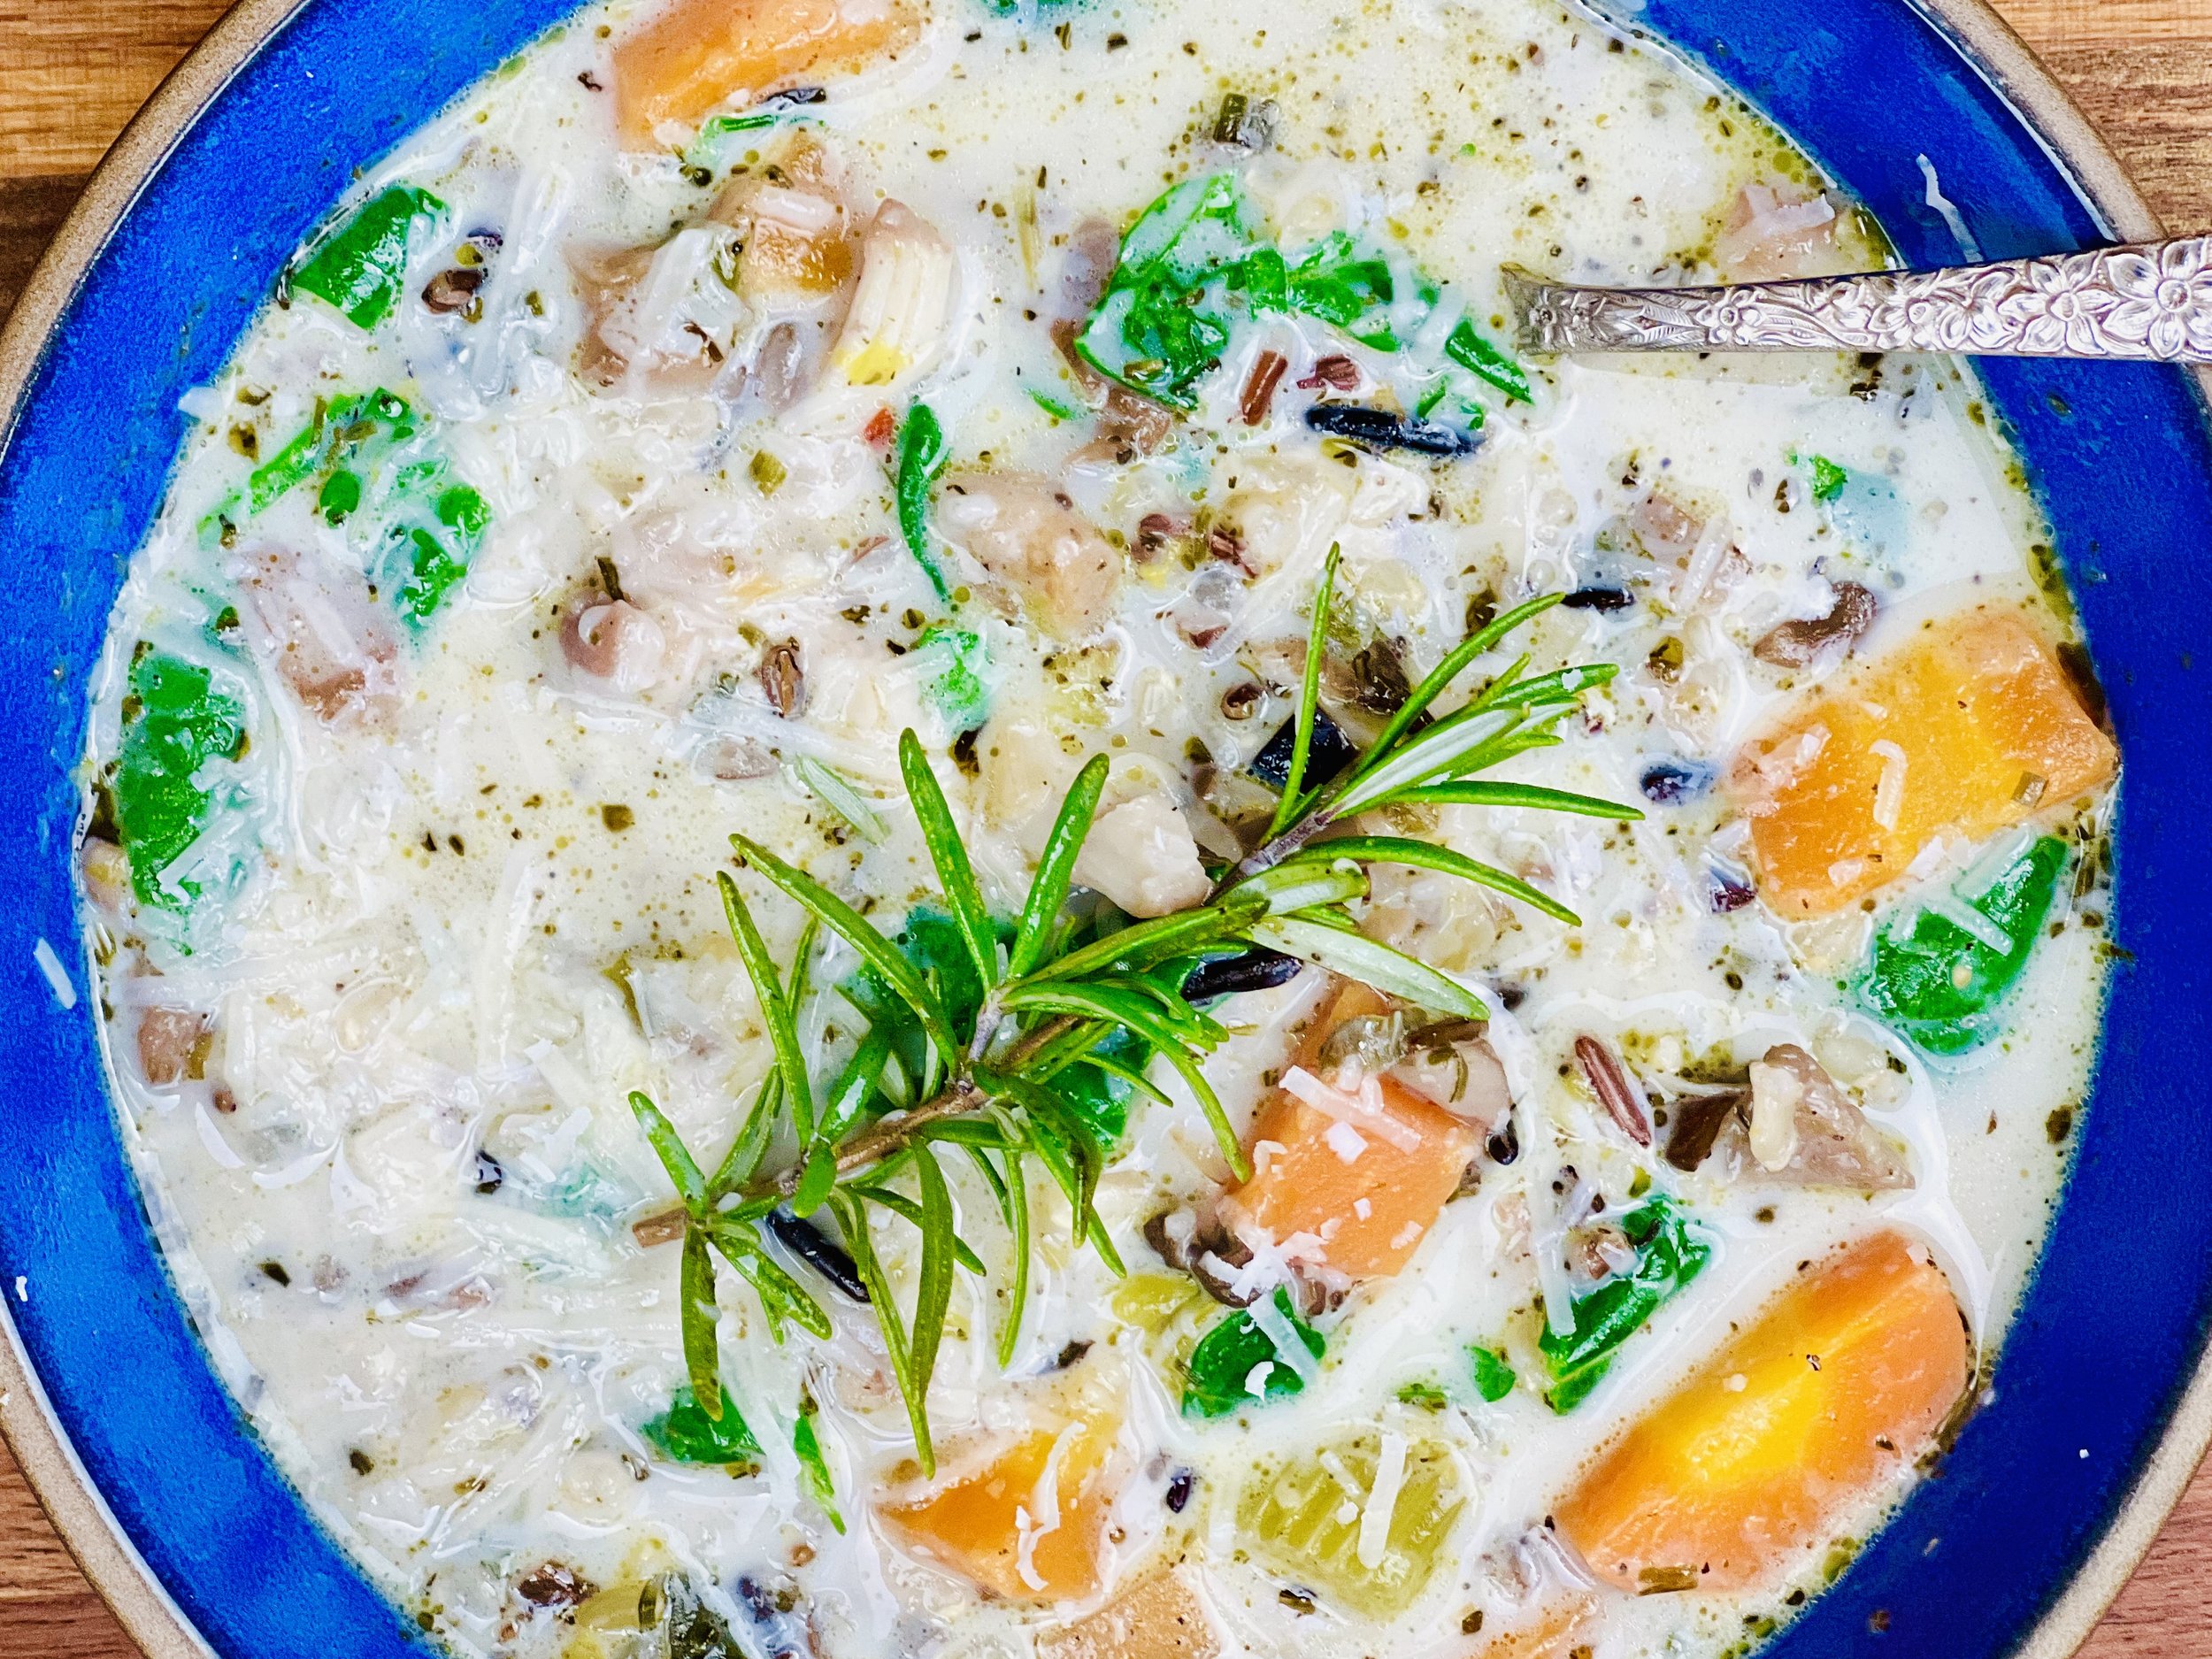
Slow Cooked Zuppa Toscana (Low FODMAP)
20 Minutes prep • 4 1/2 Hours cook • Low FODMAP • Gluten-free • Serves 6-8
20 Minutes prep • 4 1/2 Hours cook • Low FODMAP • Gluten-free • Serves 6-8 • Ok to make ahead: Steps 1-3
This is a delicious twist on the traditional Zuppa Toscana with butternut squash in place of potatoes. The delicate flavor blends perfectly with the rich and creamy broth and it’s delicious with the meat and the kale. This is a hearty and delightful meal. Best of all, it’s dinner all in one bowl! No need for additional dishes on the side.
Ingredients
16 ounces ground pork (or you can substitute ground chicken, or beef)
3/4 teaspoon Kosher salt and 1/2 teaspoon black pepper
2 teaspoons Italian Seasoning (or blend your own with rosemary, thyme, oregano, basil, and marjoram)
6 slices bacon, chopped
1 bunch green onions (green part only), chopped
1 leek (green part only), chopped
4 cups cubed butternut squash
1 teaspoon red pepper flakes
48 ounces low FODMAP chicken broth (I use Whole Foods Organic 365 chicken broth or Gourmend low FODMAP Organic Chicken Broth - use code IBSGC15 for 15% discount)
1 parmesan rind (optional—but adds to the flavor)
4-6 cups kale, chopped
1 cup heavy cream (or substitute full-fat coconut milk)
Directions
(1) Prepare: Peel and chop the butternut squash. Chop the leeks, the green onion greens, the kale, and the bacon.
(2) Cook the sausage: In a skillet sauté the ground meat until starting to brown. Add the salt and pepper and Italian seasoning and cook until it’s browned through. Place the cooked sausage into a slow cooker.
(3) Cook the bacon: In the same skillet cook the bacon until crispy. Drain the bacon on a paper towel. Remove 1/2 cup of the bacon and put the remaining bacon into the slow cooker.
(4) Cook the leek greens: In the same pan cook the leek greens and green onion greens until softened and add to the slow cooker.
(5) Add the remaining ingredients: Add the butternut squash, red pepper flakes, salt, pepper, chicken broth, and water to the slow cooker.
(6) Cook: Cook on high for 4 hours. After 4 hours add the heavy cream and kale to the crock pot and stir to combine. Cook another 30 minutes or until the kale is tender.
(5) Plate and serve: Serve a generous portion in each bowl with grated Parmesan cheese and a sprinkle of the reserved bacon.
Eat and enjoy every bite because you can!
Recipe note: I use Diamond Crystal Kosher salt in all my recipes because it has a wonderful flat and crisp flake that tastes delicious. It is also the least salty salt available so you can use it more liberally as a seasoning than you can table salt or sea salt. If you use another type of salt, you may need to reduce the amount so it is not over-salted.
Have a question you’d like to have answered? Email me at hello@ibsgamechanger.com
Link note: This post may contain affiliate links for you to easily purchase items that are linked. I may earn a small commission from qualifying purchases but none of this costs you a thing so feel free to use the links! In addition, for some items, I have provided a special discount code for IBS Game Changers so be sure to use the code when you purchase an item to get the discount that has been arranged just for you.
More Deliciously Low FODMAP™ soup recipes


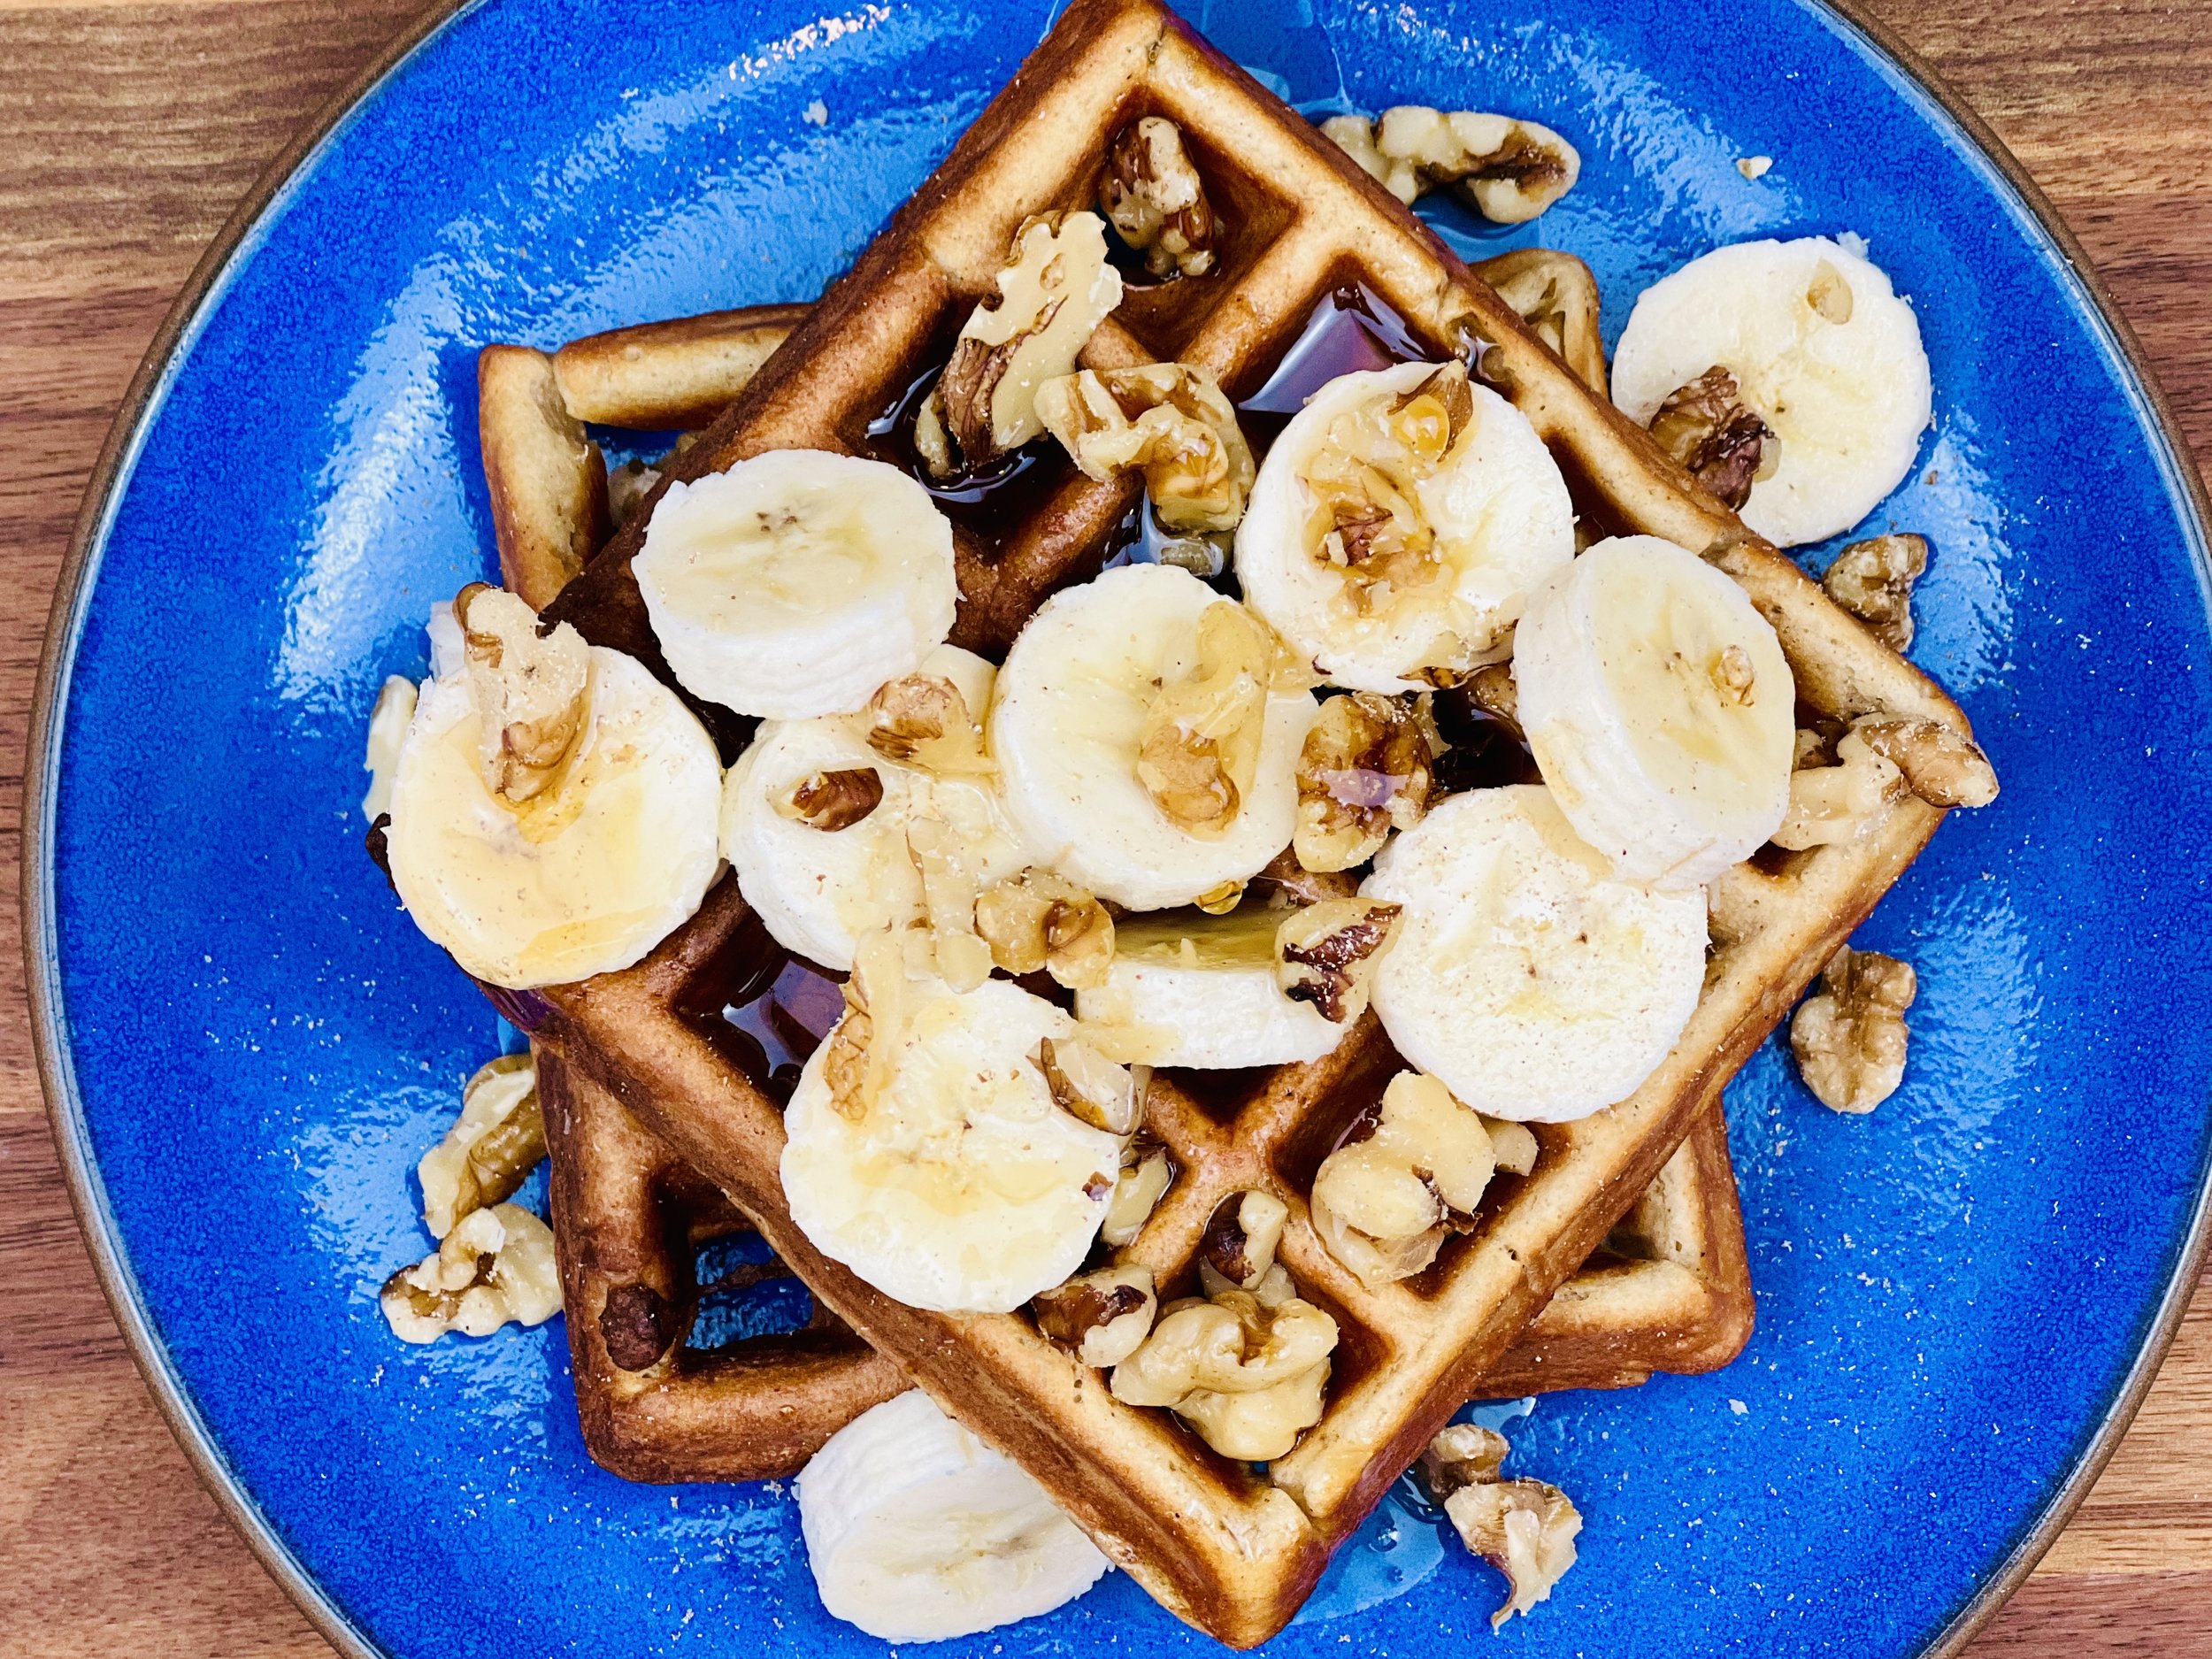
Banana Walnut Mixed Spice Waffles (Low FODMAP)
15 Minutes prep • 15 Minutes cook • Low FODMAP • Gluten-free • Makes 8 Belgian waffle squares
15 Minutes prep • 15 Minutes cook • Low FODMAP • Gluten-free • Makes 8 Belgian waffle squares • Ok to make ahead: Steps 1-4
Mixed spice is a blend of spices that’s similar to gingerbread spice—but not the same thing at all! The unique flavor in this blend is a part of many traditional British recipes including Christmas desserts, cakes, pies, and baked goods. Mixed spice includes a balance of some or all of the following dry spices: cinnamon, coriander seed, caraway, nutmeg, ginger, cloves, allspice, and mace. For this recipe, I omitted the caraway and mace (simply because I didn’t have them on hand) and the waffles came out wonderfully! The combination of bananas, walnuts, maple syrup, and delightfully spiced waffles is a must-try!
This is an exclusive recipe just for recipe club members.
In addition to the two free recipes I create each week I am creating and delivering one very special recipe just for my recipe club members. If you’re not yet a member, I encourage you to join! Membership in the club includes access to the complete archive of recipes with filters so it can become your virtual low FODMAP cookbook plus, I am creating and delivering one special NEW recipe every week ONLY for recipe club members.
Your membership in the club helps me continue creating new, delicious, easy-to-make, low FODMAP recipes just for you.
As always, all recipes will emphasize simple ingredients, easy preparation, and delicious low FODMAP results. Recipes will be for everything from main courses, salads, soups, side dishes, appetizers, desserts, sauces, breakfast and lunch, and even mocktails and cocktails. Everything you need to prepare fantastic low FODMAP meals everyone will love.
Join the club. Let’s keep making delicious Low FODMAP meals together.
More Deliciously Low FODMAP™ breakfast recipes
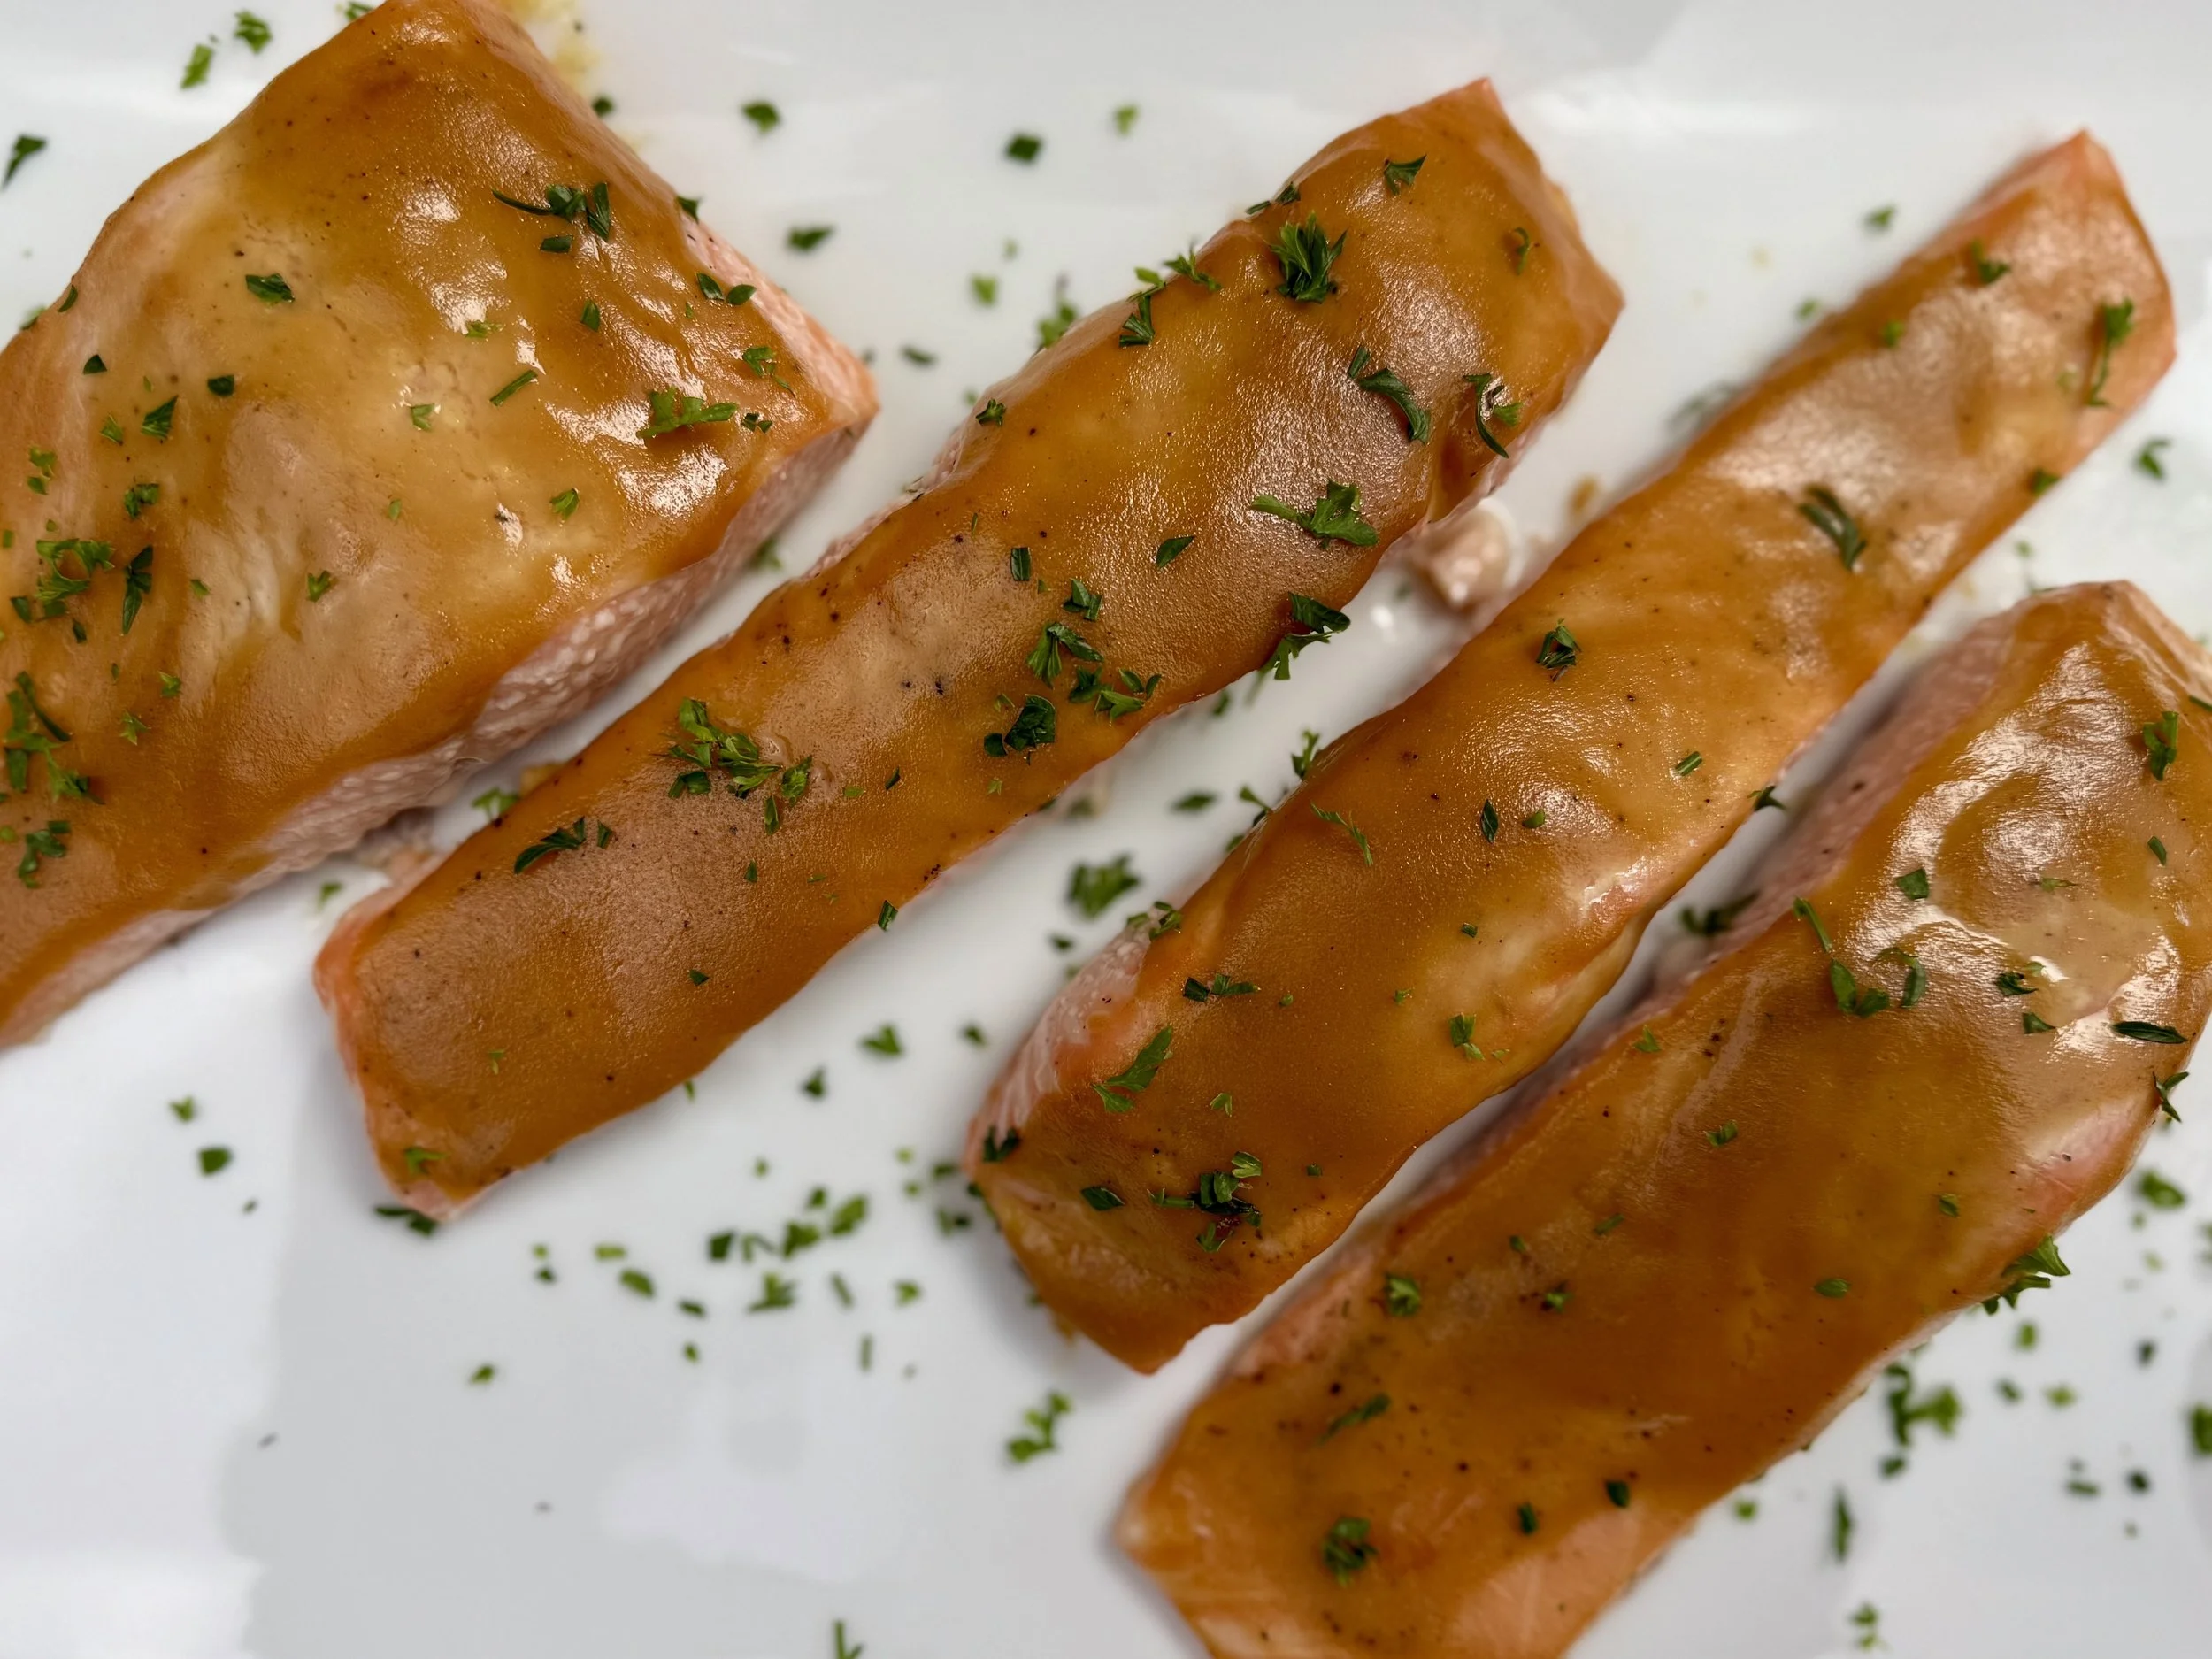
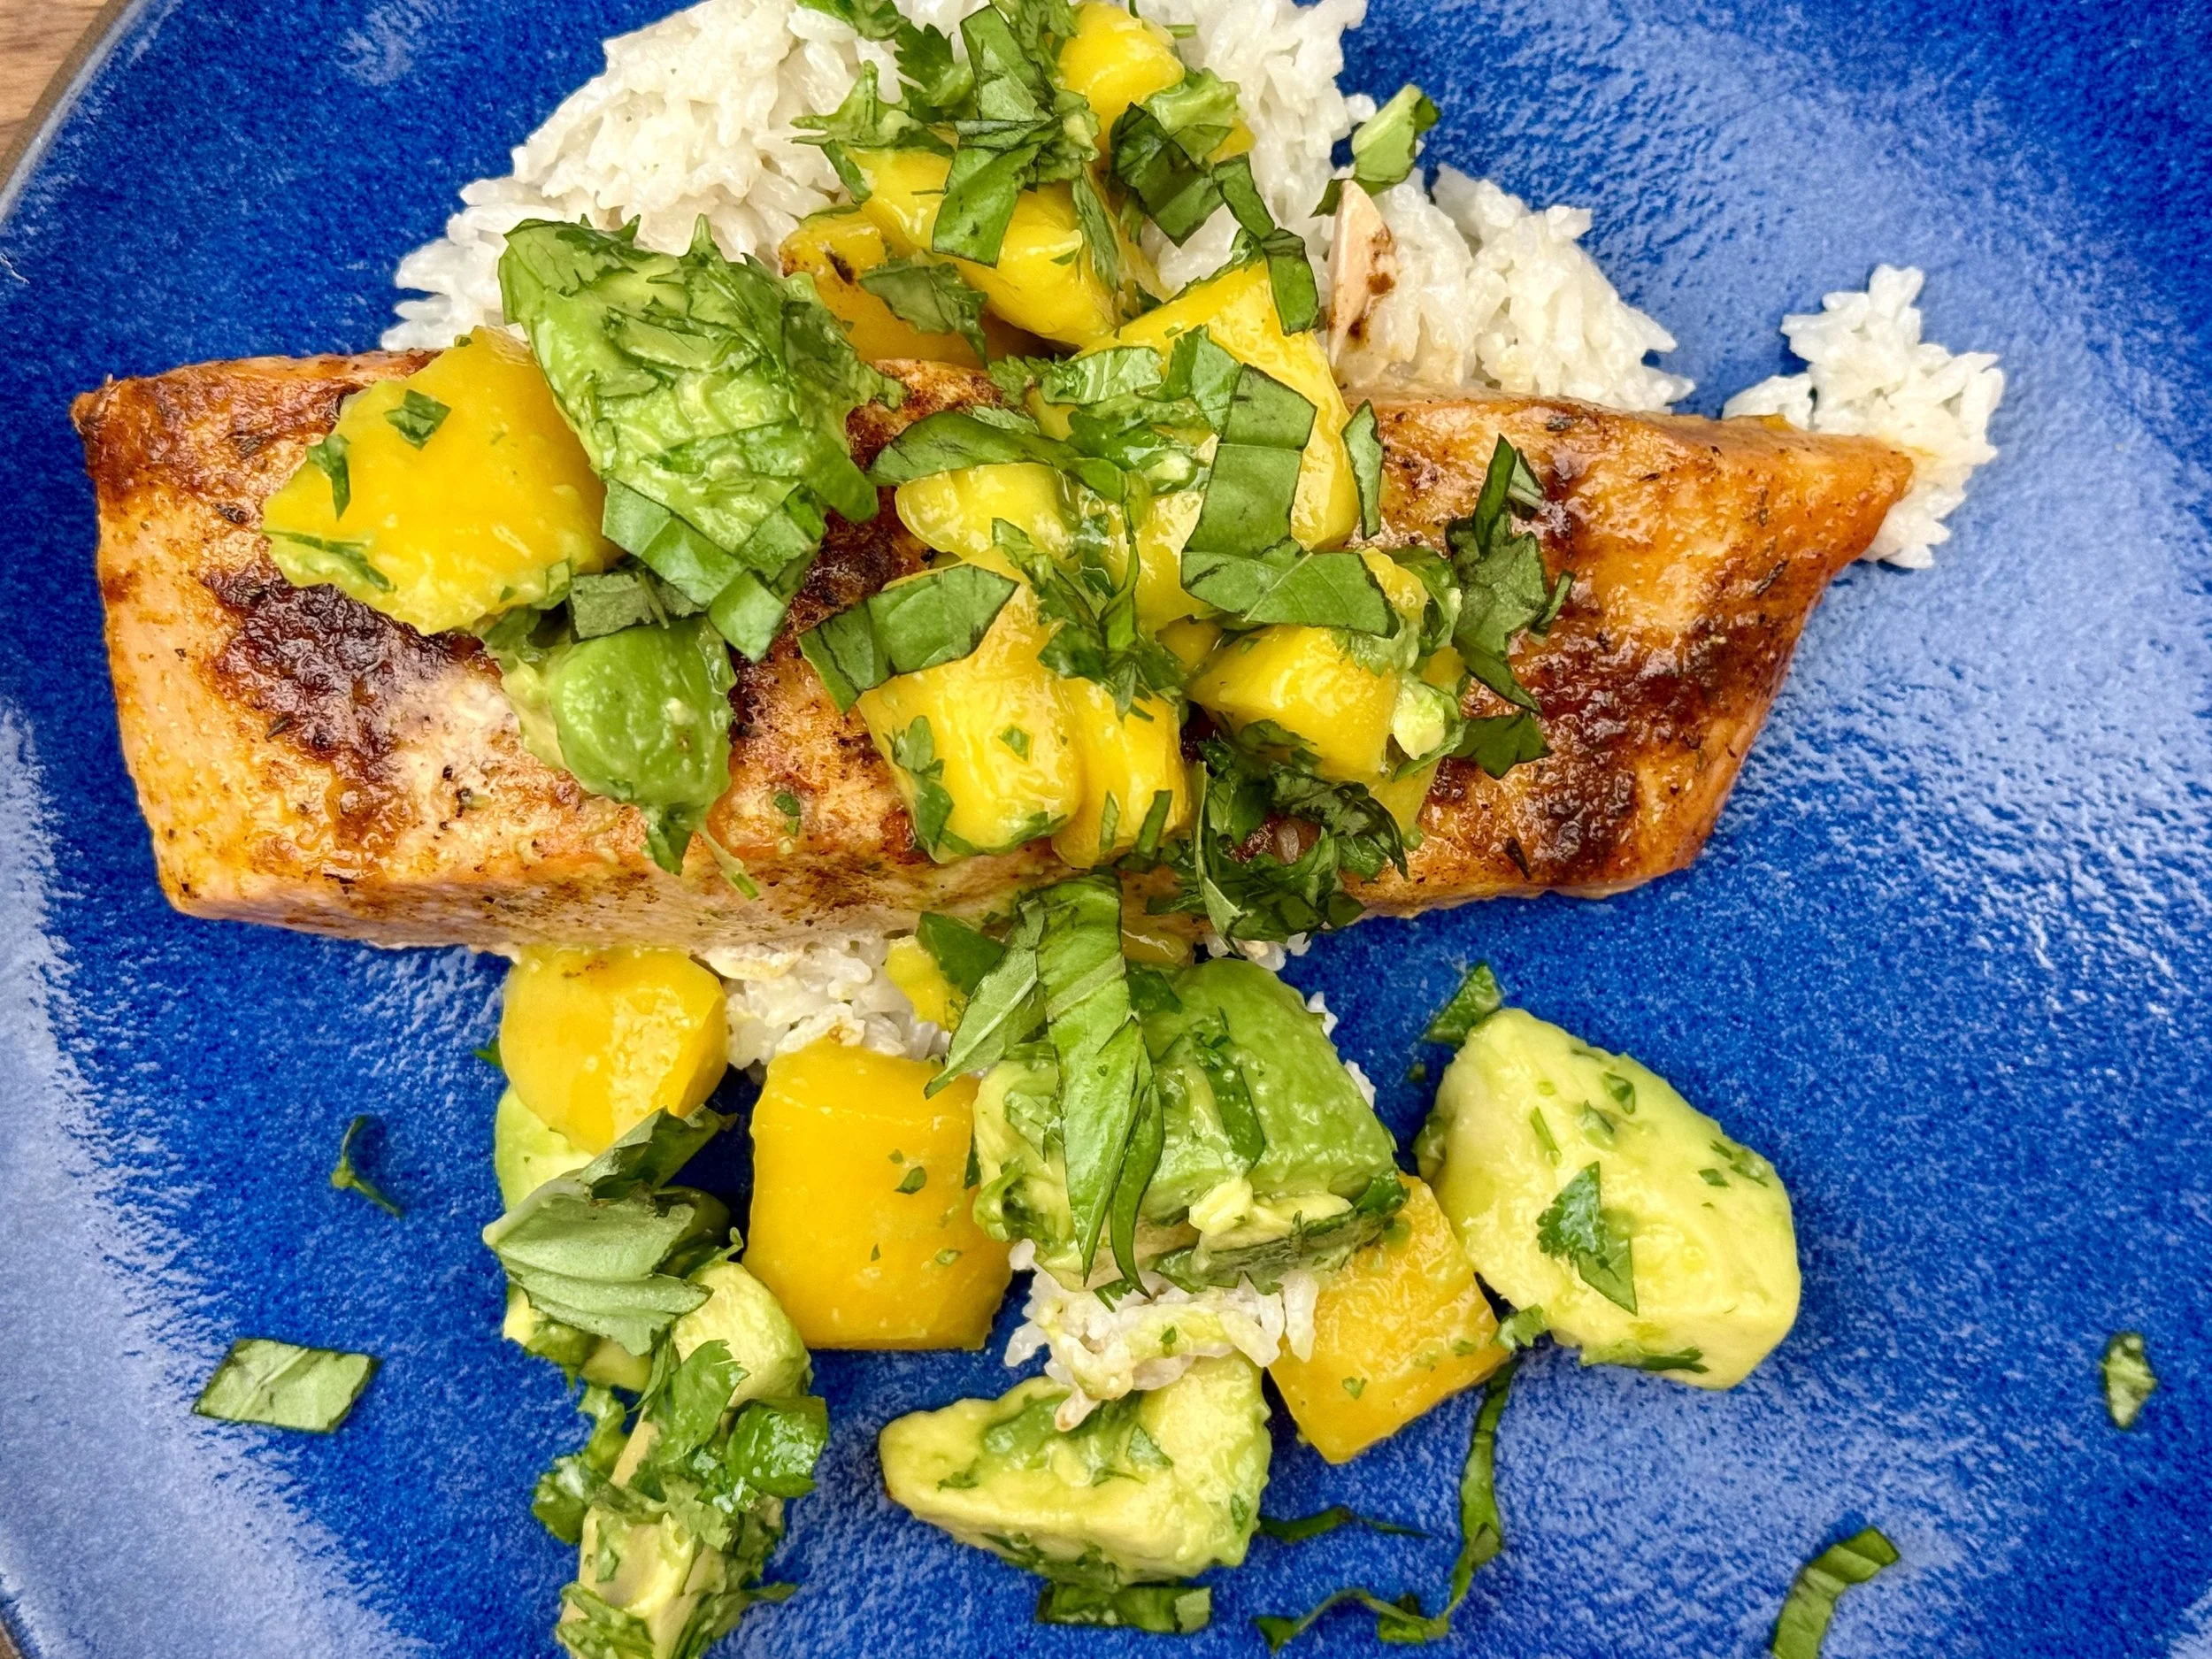
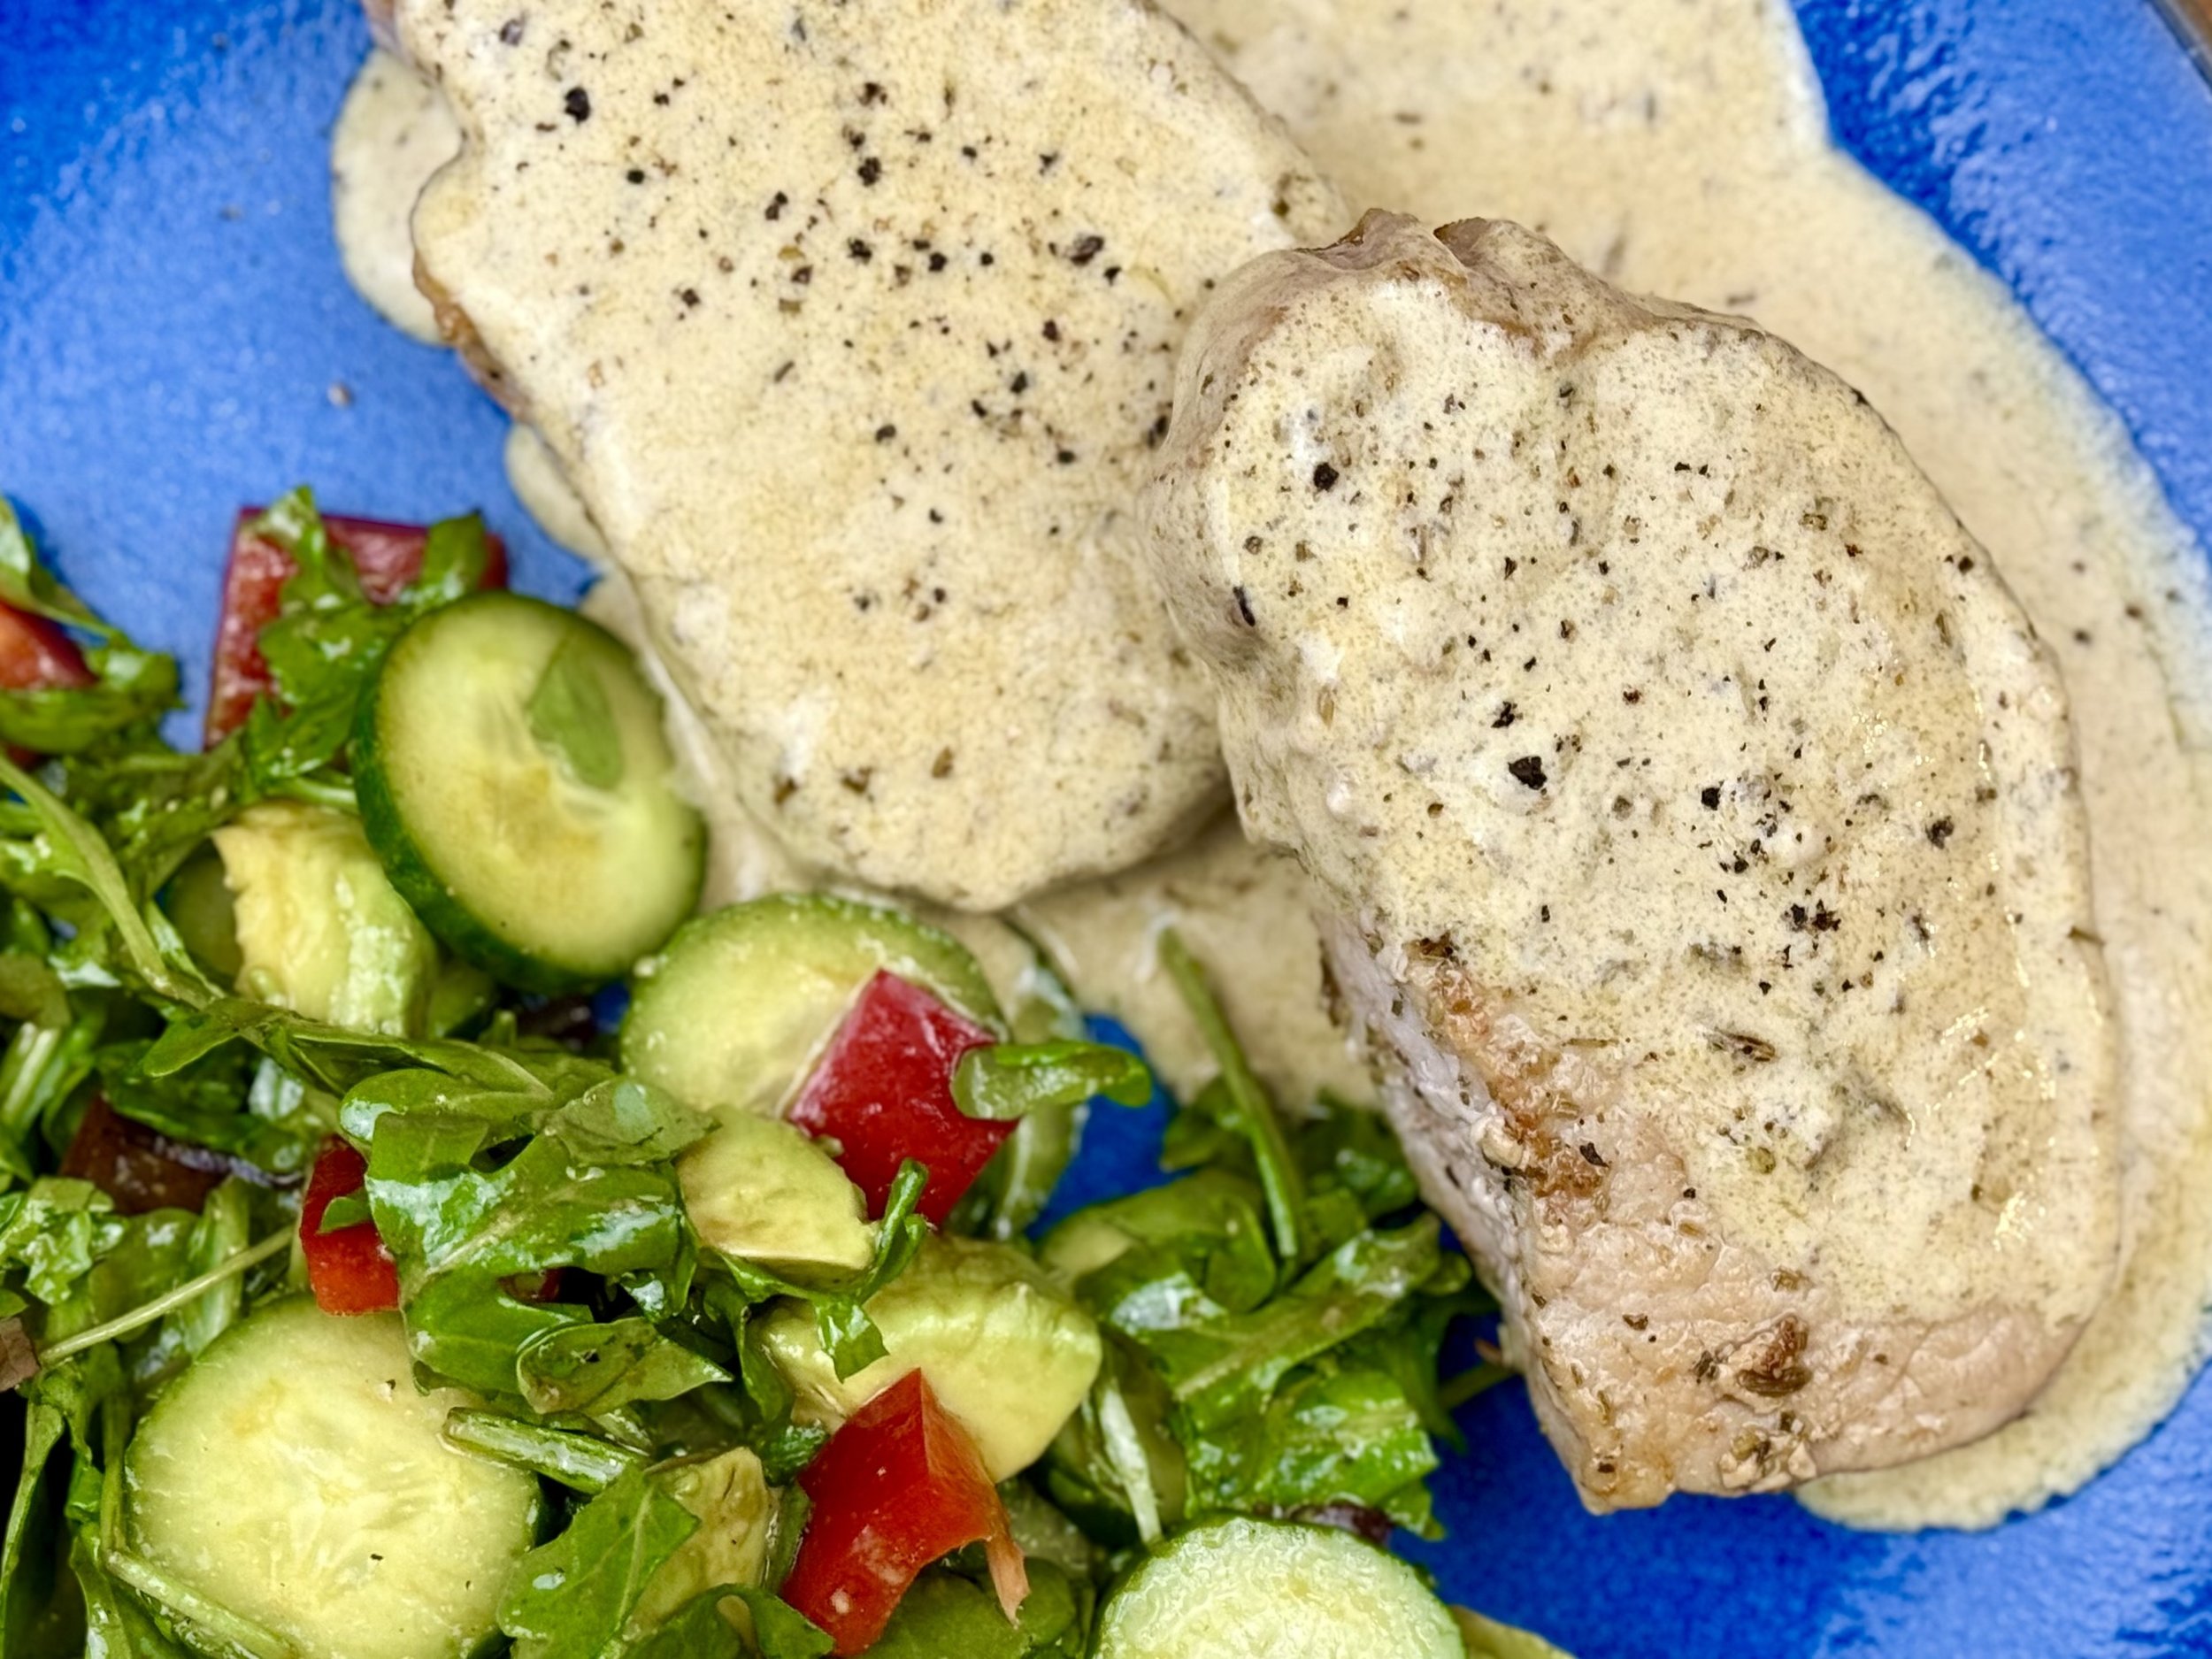
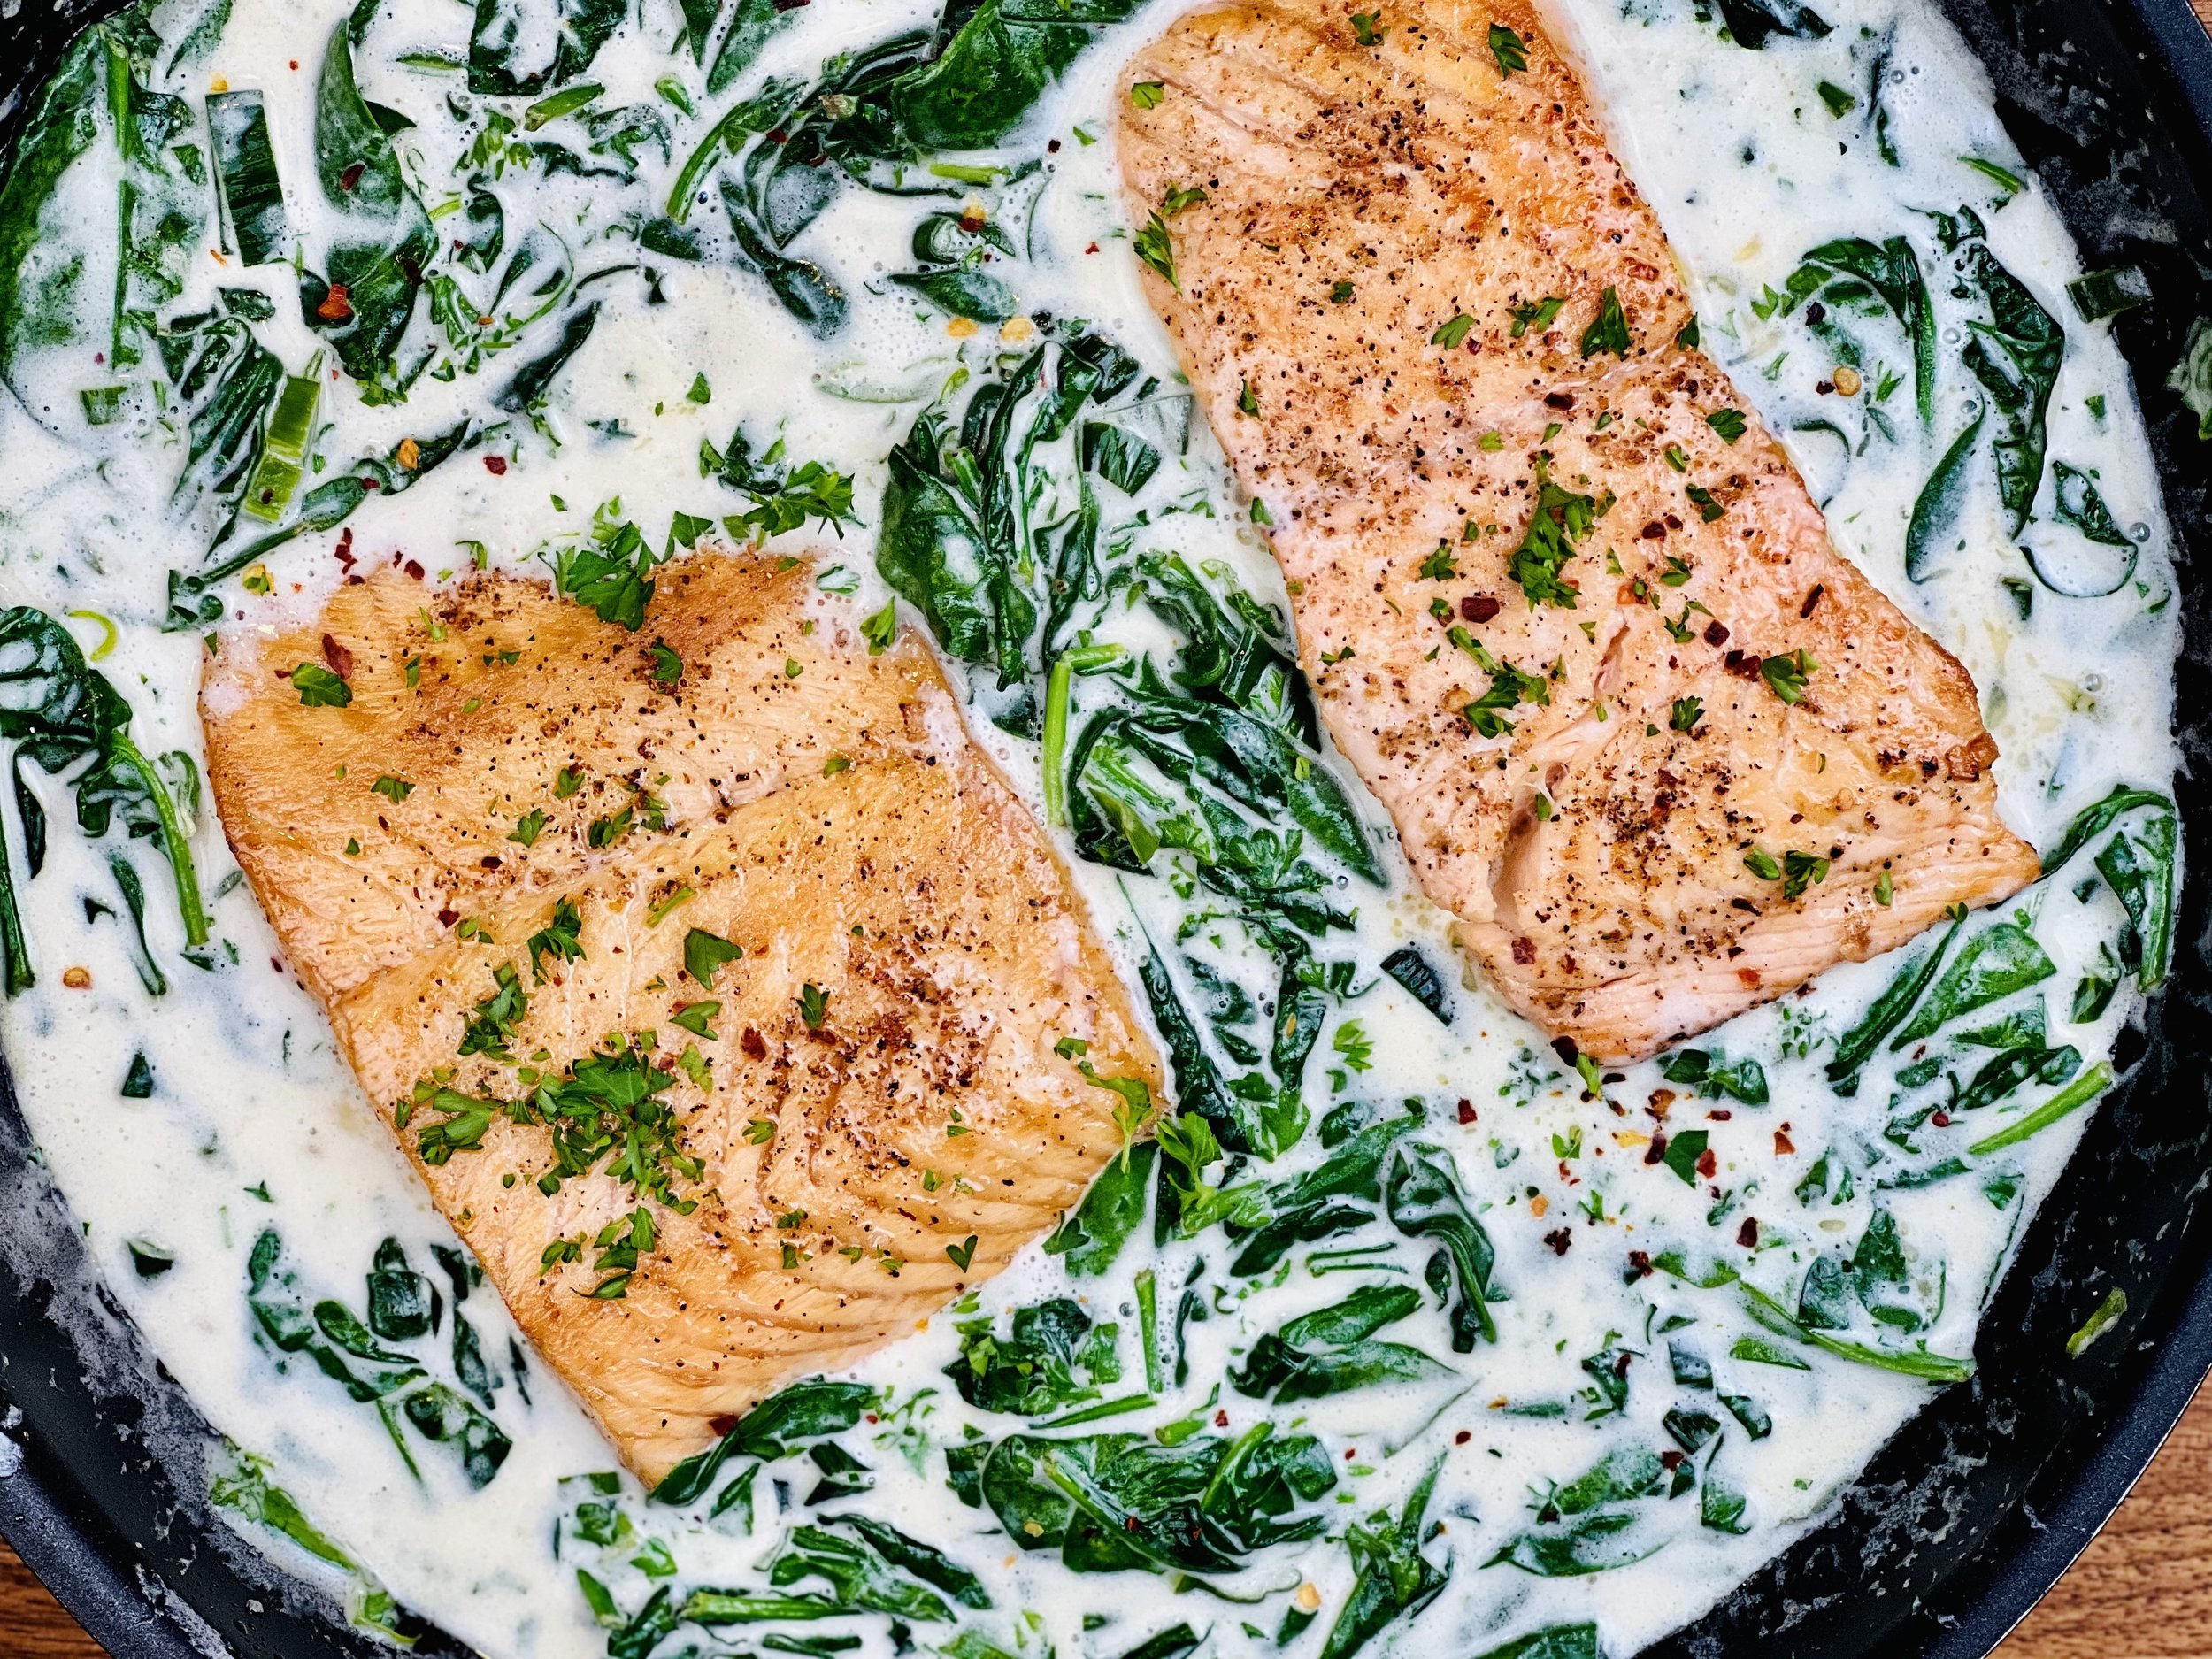
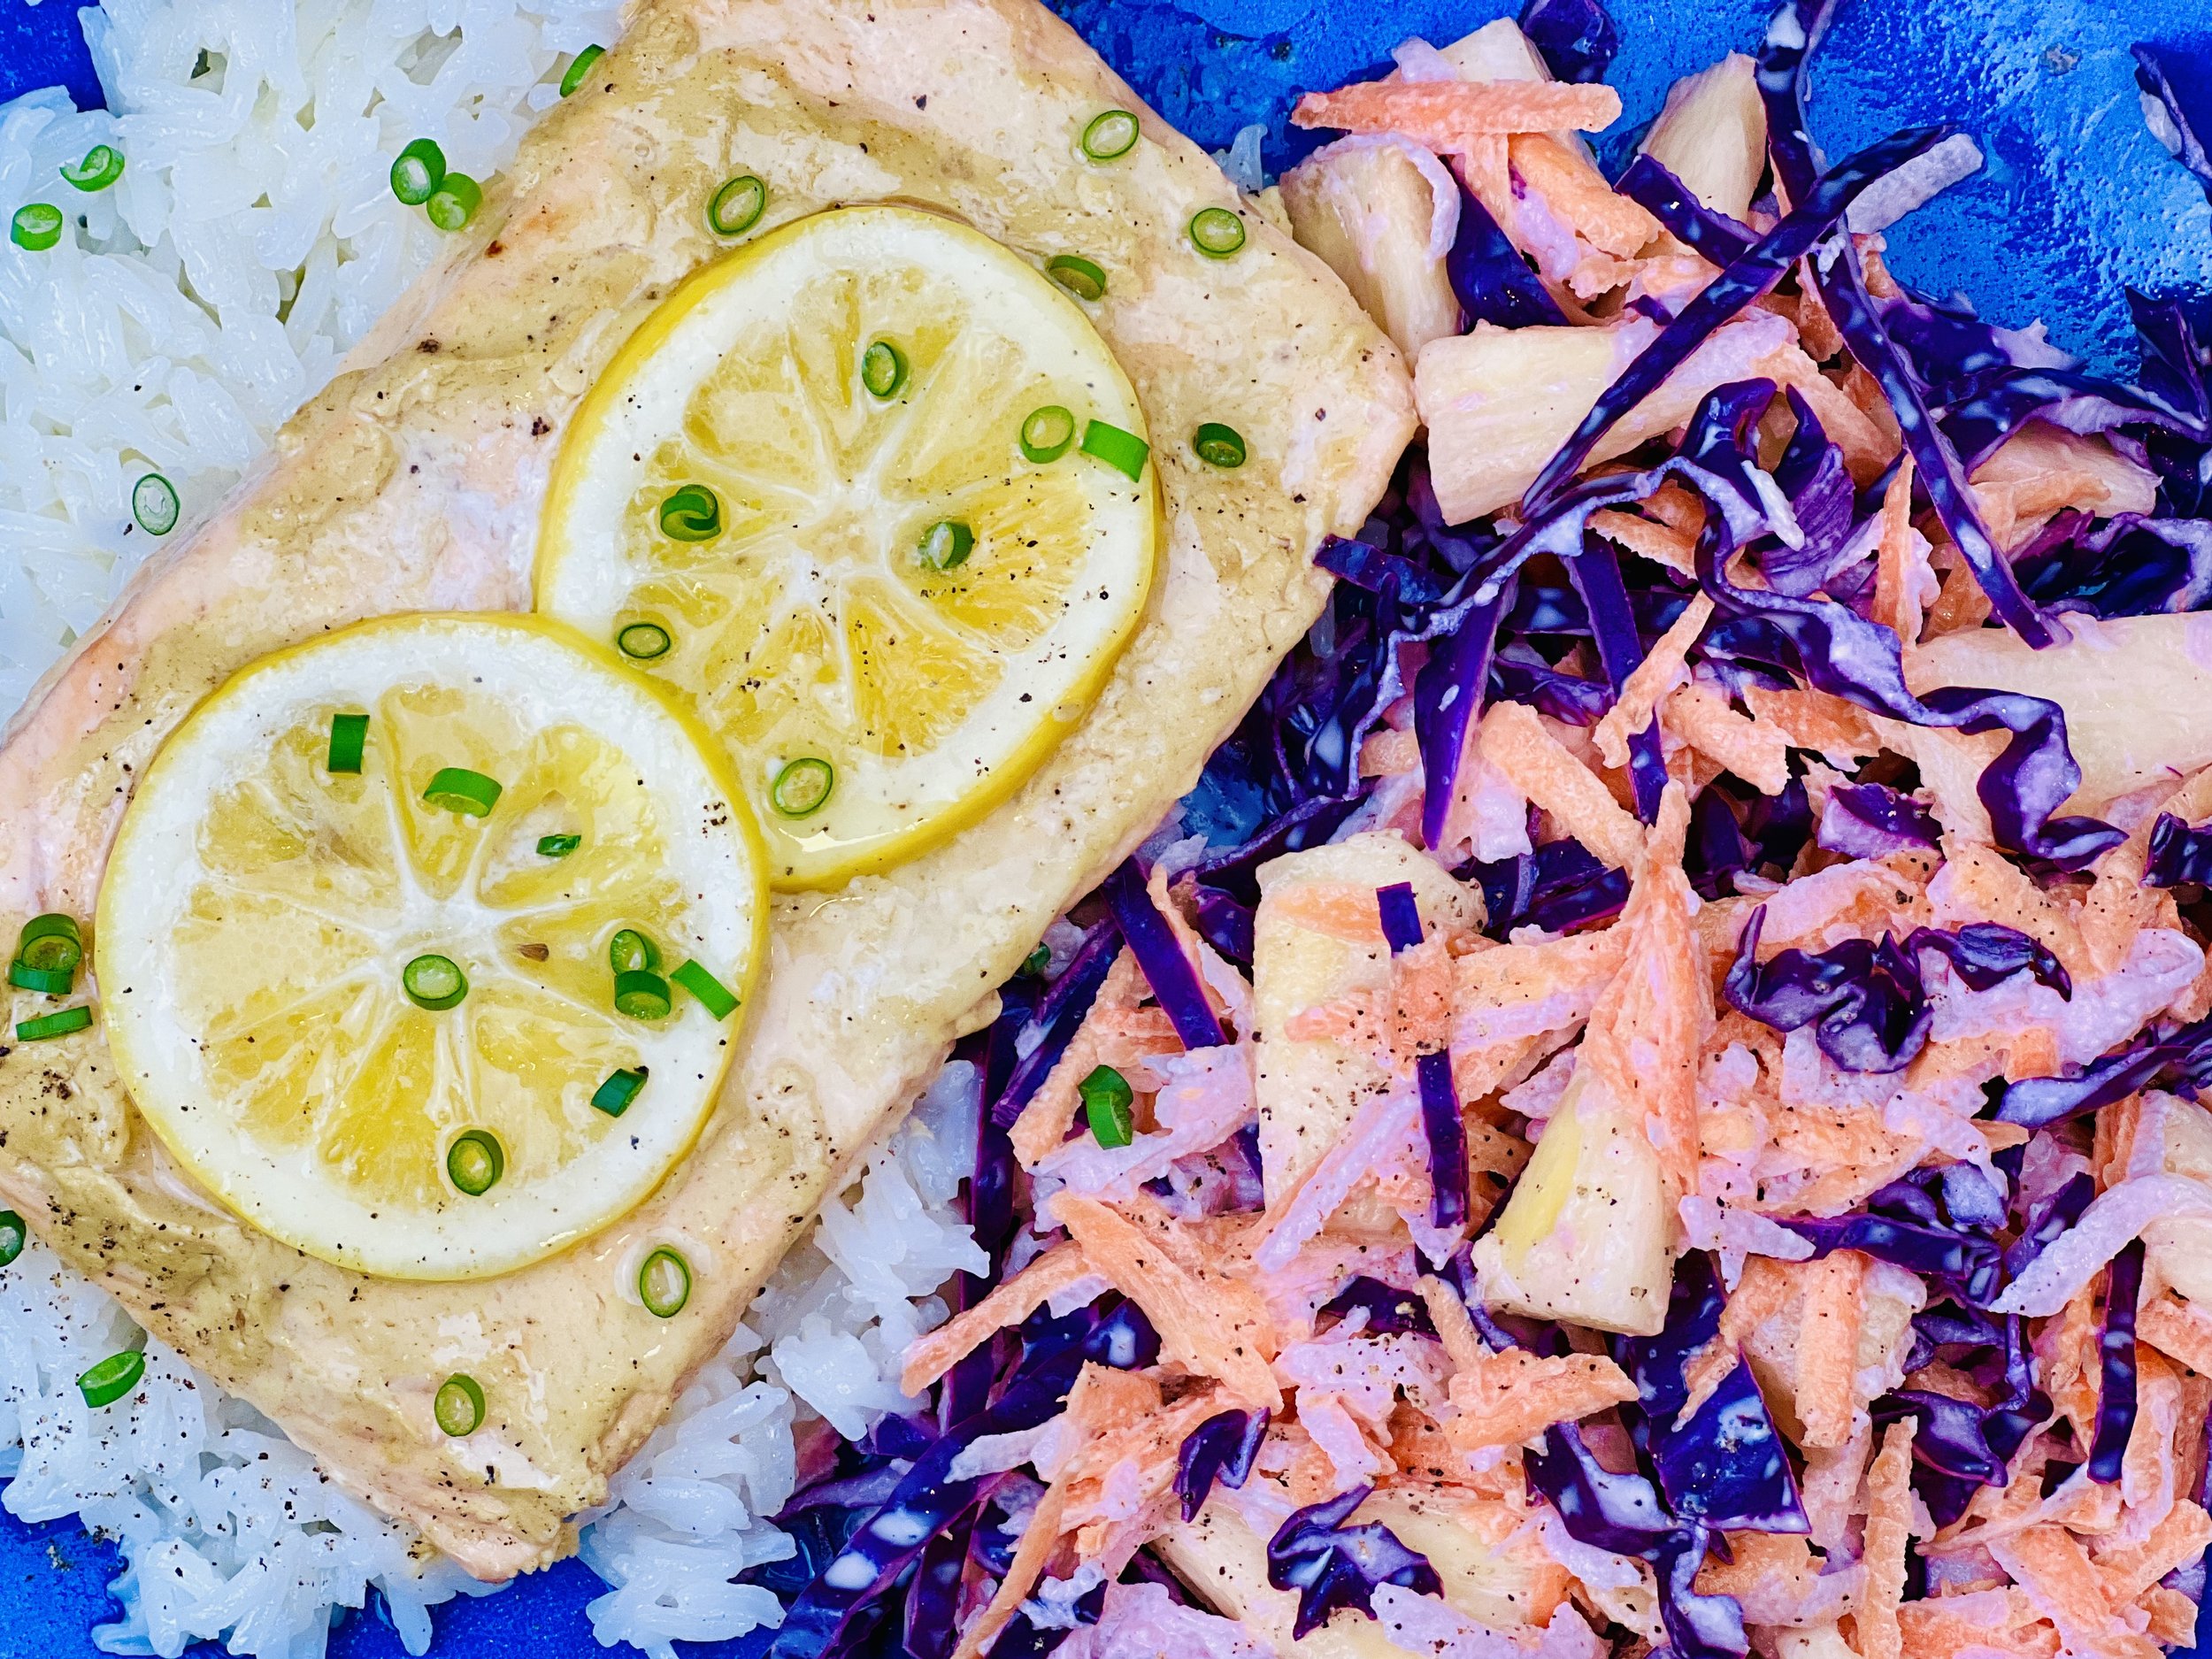
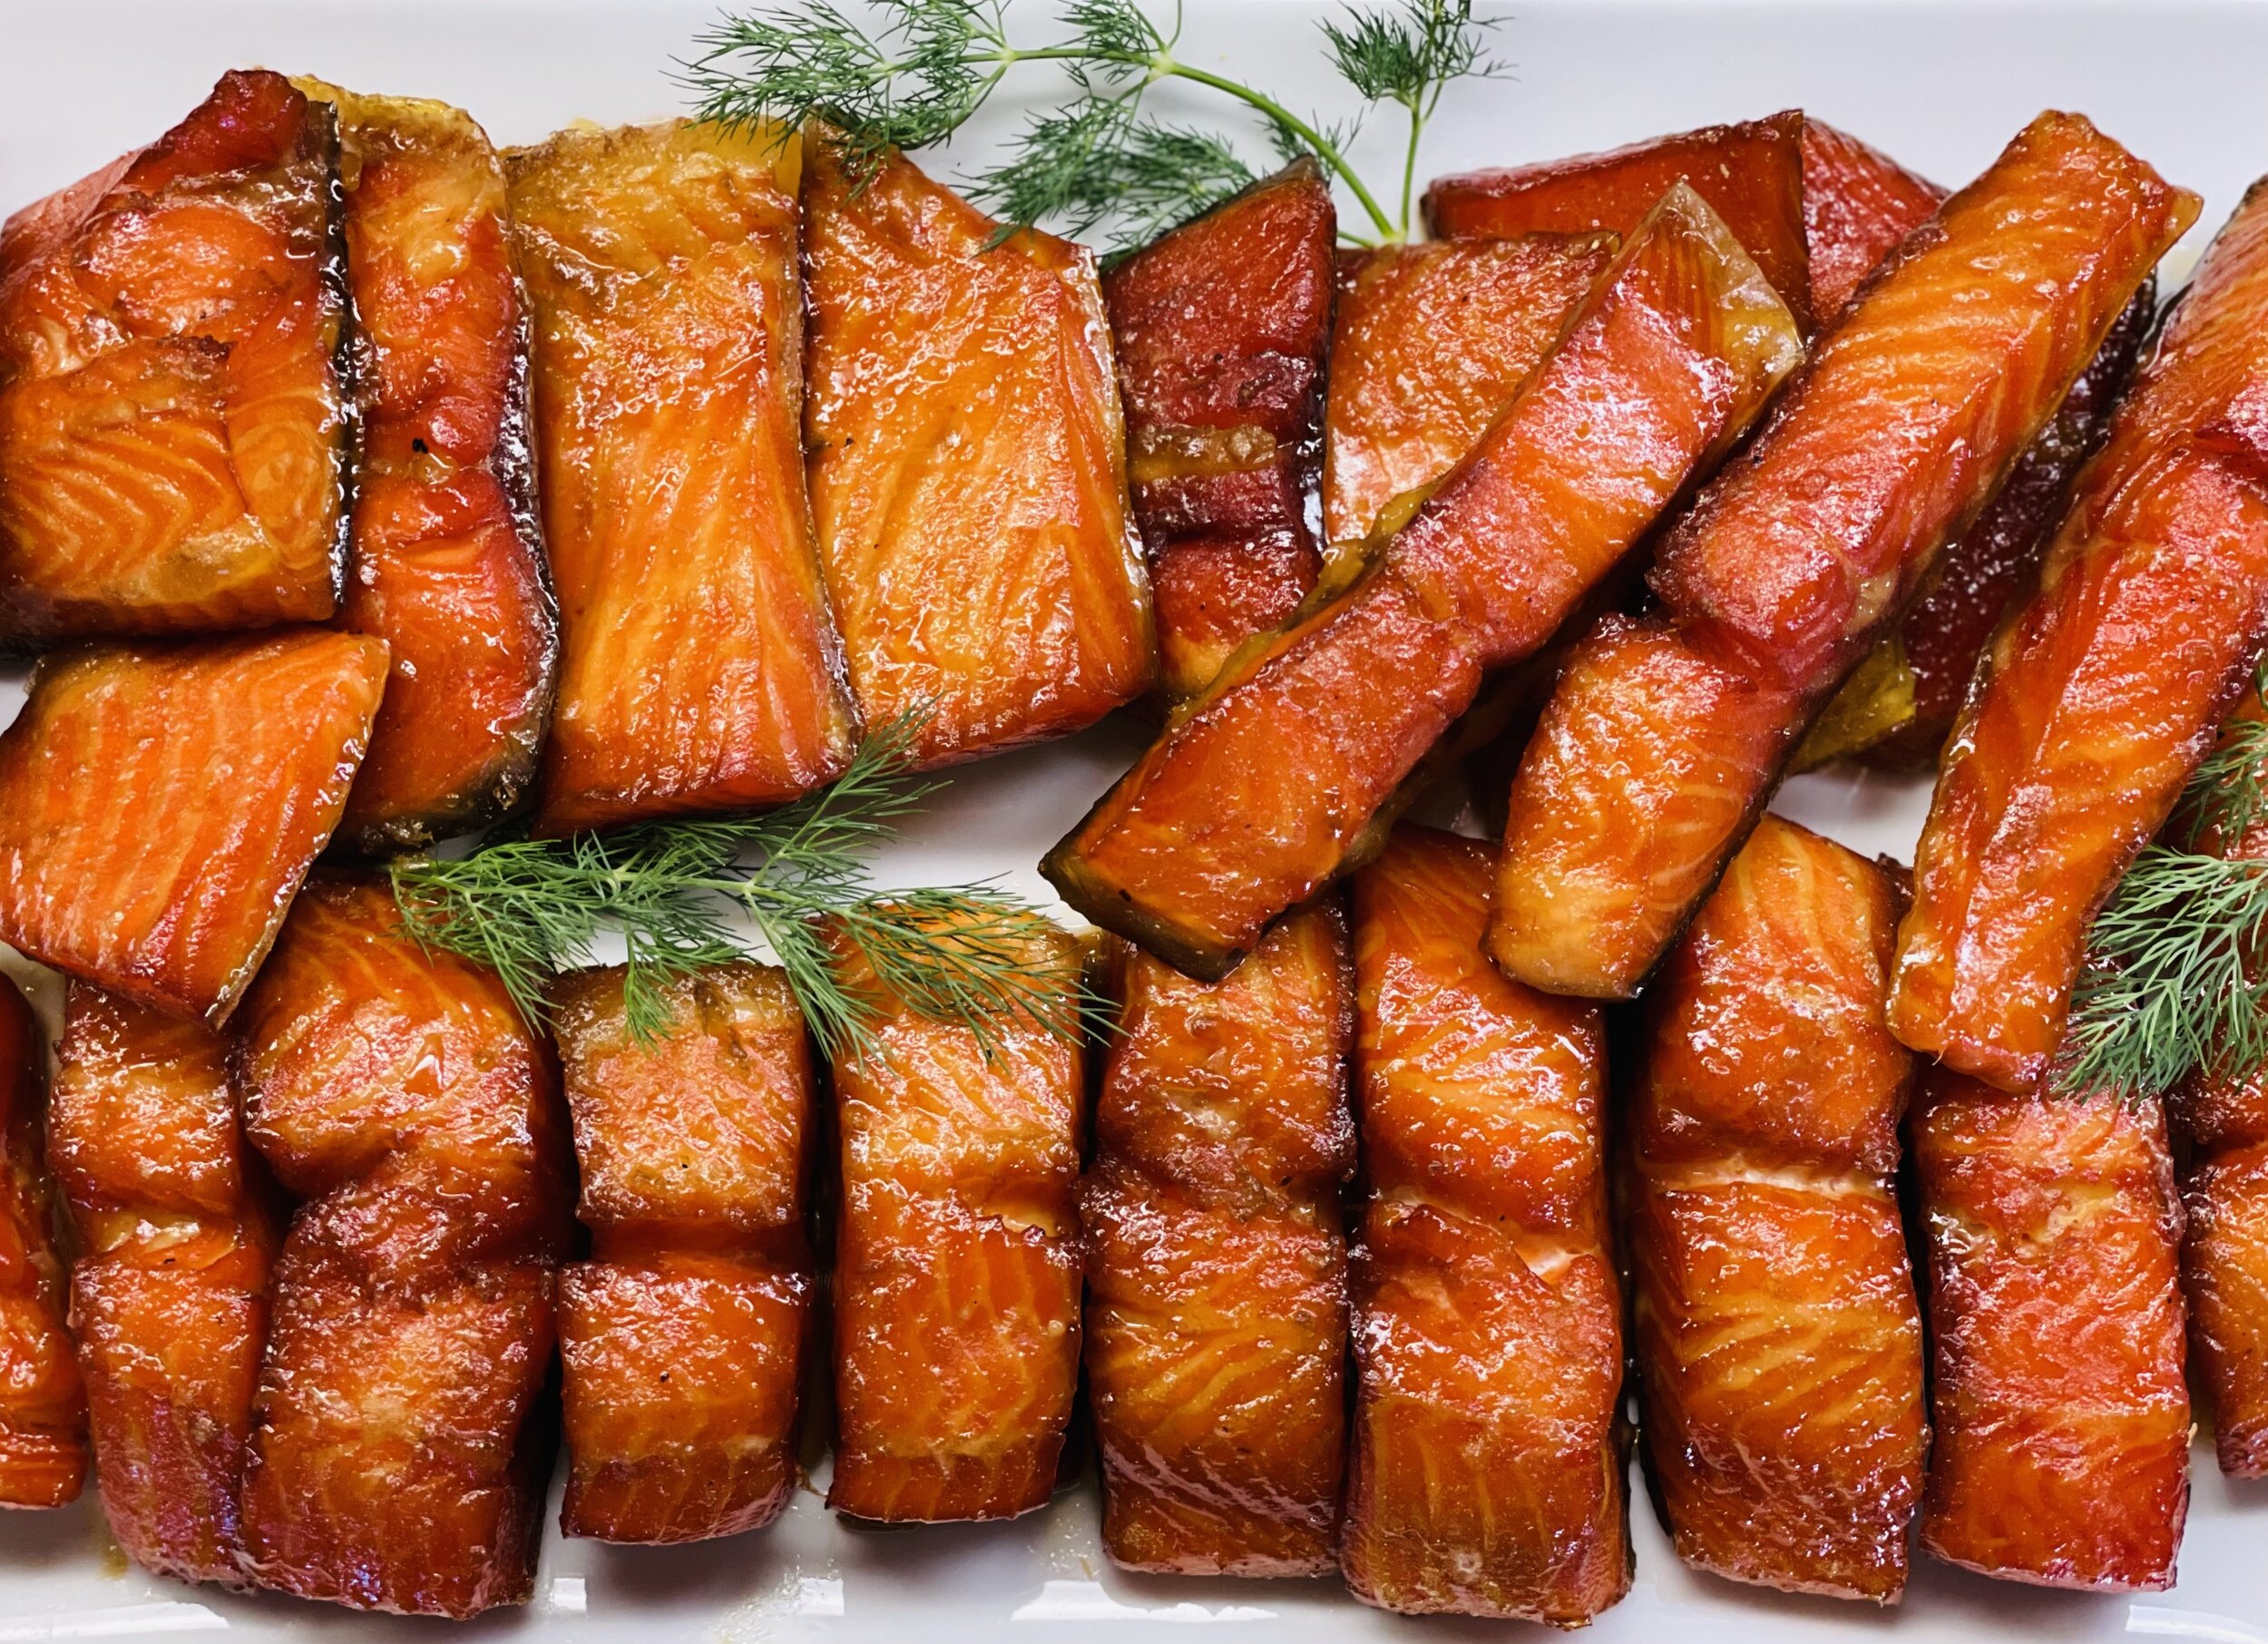
Creamy Spinach and Salmon (Low FODMAP)
10 Minutes prep • 15 Minutes cook • Low FODMAP • Gluten-free • Serves 4
10 Minutes prep • 15 Minutes cook • Low FODMAP • Gluten-free • Serves 4
Five-star flavor on a weeknight? This is it. Super creamy and delicious, this one-pan meal is quick and easy enough to make on a weeknight and fancy enough to serve for company. And, because you make it all in one pan, clean-up is a snap too. Tons of fresh spinach turns silky in the lemony cream sauce and makes a perfect companion for delicious salmon filets. Use fresh salmon for the best flavor and texture, but frozen salmon works great too!
Ingredients
4 salmon filets, with or without skin
2 tablespoons garlic-infused olive oil
2 tablespoons salted butter
1 leek (green part only), thinly sliced
1/2 teaspoon crushed red pepper flakes
1 cup canned full-fat coconut milk, or heavy cream (or a combination)
1/2 cup lactose-free milk (if needed to thin the sauce)
2 ounces lactose-free cream cheese, at room temperature
1/2 teaspoon Kosher salt and 1/4 teaspoon black pepper
1/2 cup grated parmesan cheese
4 cups fresh baby spinach
Juice of 1 lemon
2 tablespoons chopped fresh parsley, plus more for serving
Directions
(1) Prepare: Season the salmon with a sprinkle of salt and pepper on each side.
(2) Cook the salmon: Heat the olive oil in a large skillet over medium heat. When the oil shimmers, add the salmon, skin side down (if using salmon with skin), and cook for 2-3 minutes until the salmon is crisp on the bottom. Carefully flip each filet, and continue cooking for another 2-3 minutes, or until the salmon is cooked to your preference. Remove to a plate and set aside. If desired, remove the salmon skin and discard.
(3) Make the sauce: To the same skillet, add the butter and leek greens and cook for about a minute. Add the crushed red pepper flakes, coconut milk, cream, and cream cheese. Season the sauce with salt and pepper. Bring to a simmer over medium heat, stirring until smooth and creamy. Add the parmesan, and spinach and cook until the spinach is wilted, about 3-5 minutes. Stir in the lemon juice and parsley. Taste and add more salt or pepper if needed.
(4) Finish: Put the salmon back into the pan and cook for a minute or two to warm the salmon if it has cooled.
(5) Plate and serve: To serve, put a scoop of spinach and cream on each plate then add a piece of salmon atop the spinach, then spoon the sauce over the top. Serve with a sprinkle of chopped parsley and red pepper flakes.
Eat and enjoy every bite because you can!
Recipe note: I use Diamond Crystal Kosher salt in all my recipes because it has a wonderful flat and crisp flake that tastes delicious. It is also the least salty salt available so you can use it more liberally as a seasoning than you can table salt or sea salt. If you use another type of salt, you may need to reduce the amount so it is not over-salted.
Have a question you’d like to have answered? Email me at hello@ibsgamechanger.com
Link note: This post may contain affiliate links for you to easily purchase items that are linked. I may earn a small commission from qualifying purchases but none of this costs you a thing so feel free to use the links! In addition, for some items, I have provided a special discount code for IBS Game Changers so be sure to use the code when you purchase an item to get the discount that has been arranged just for you.
More Deliciously Low FODMAP™ seafood recipes


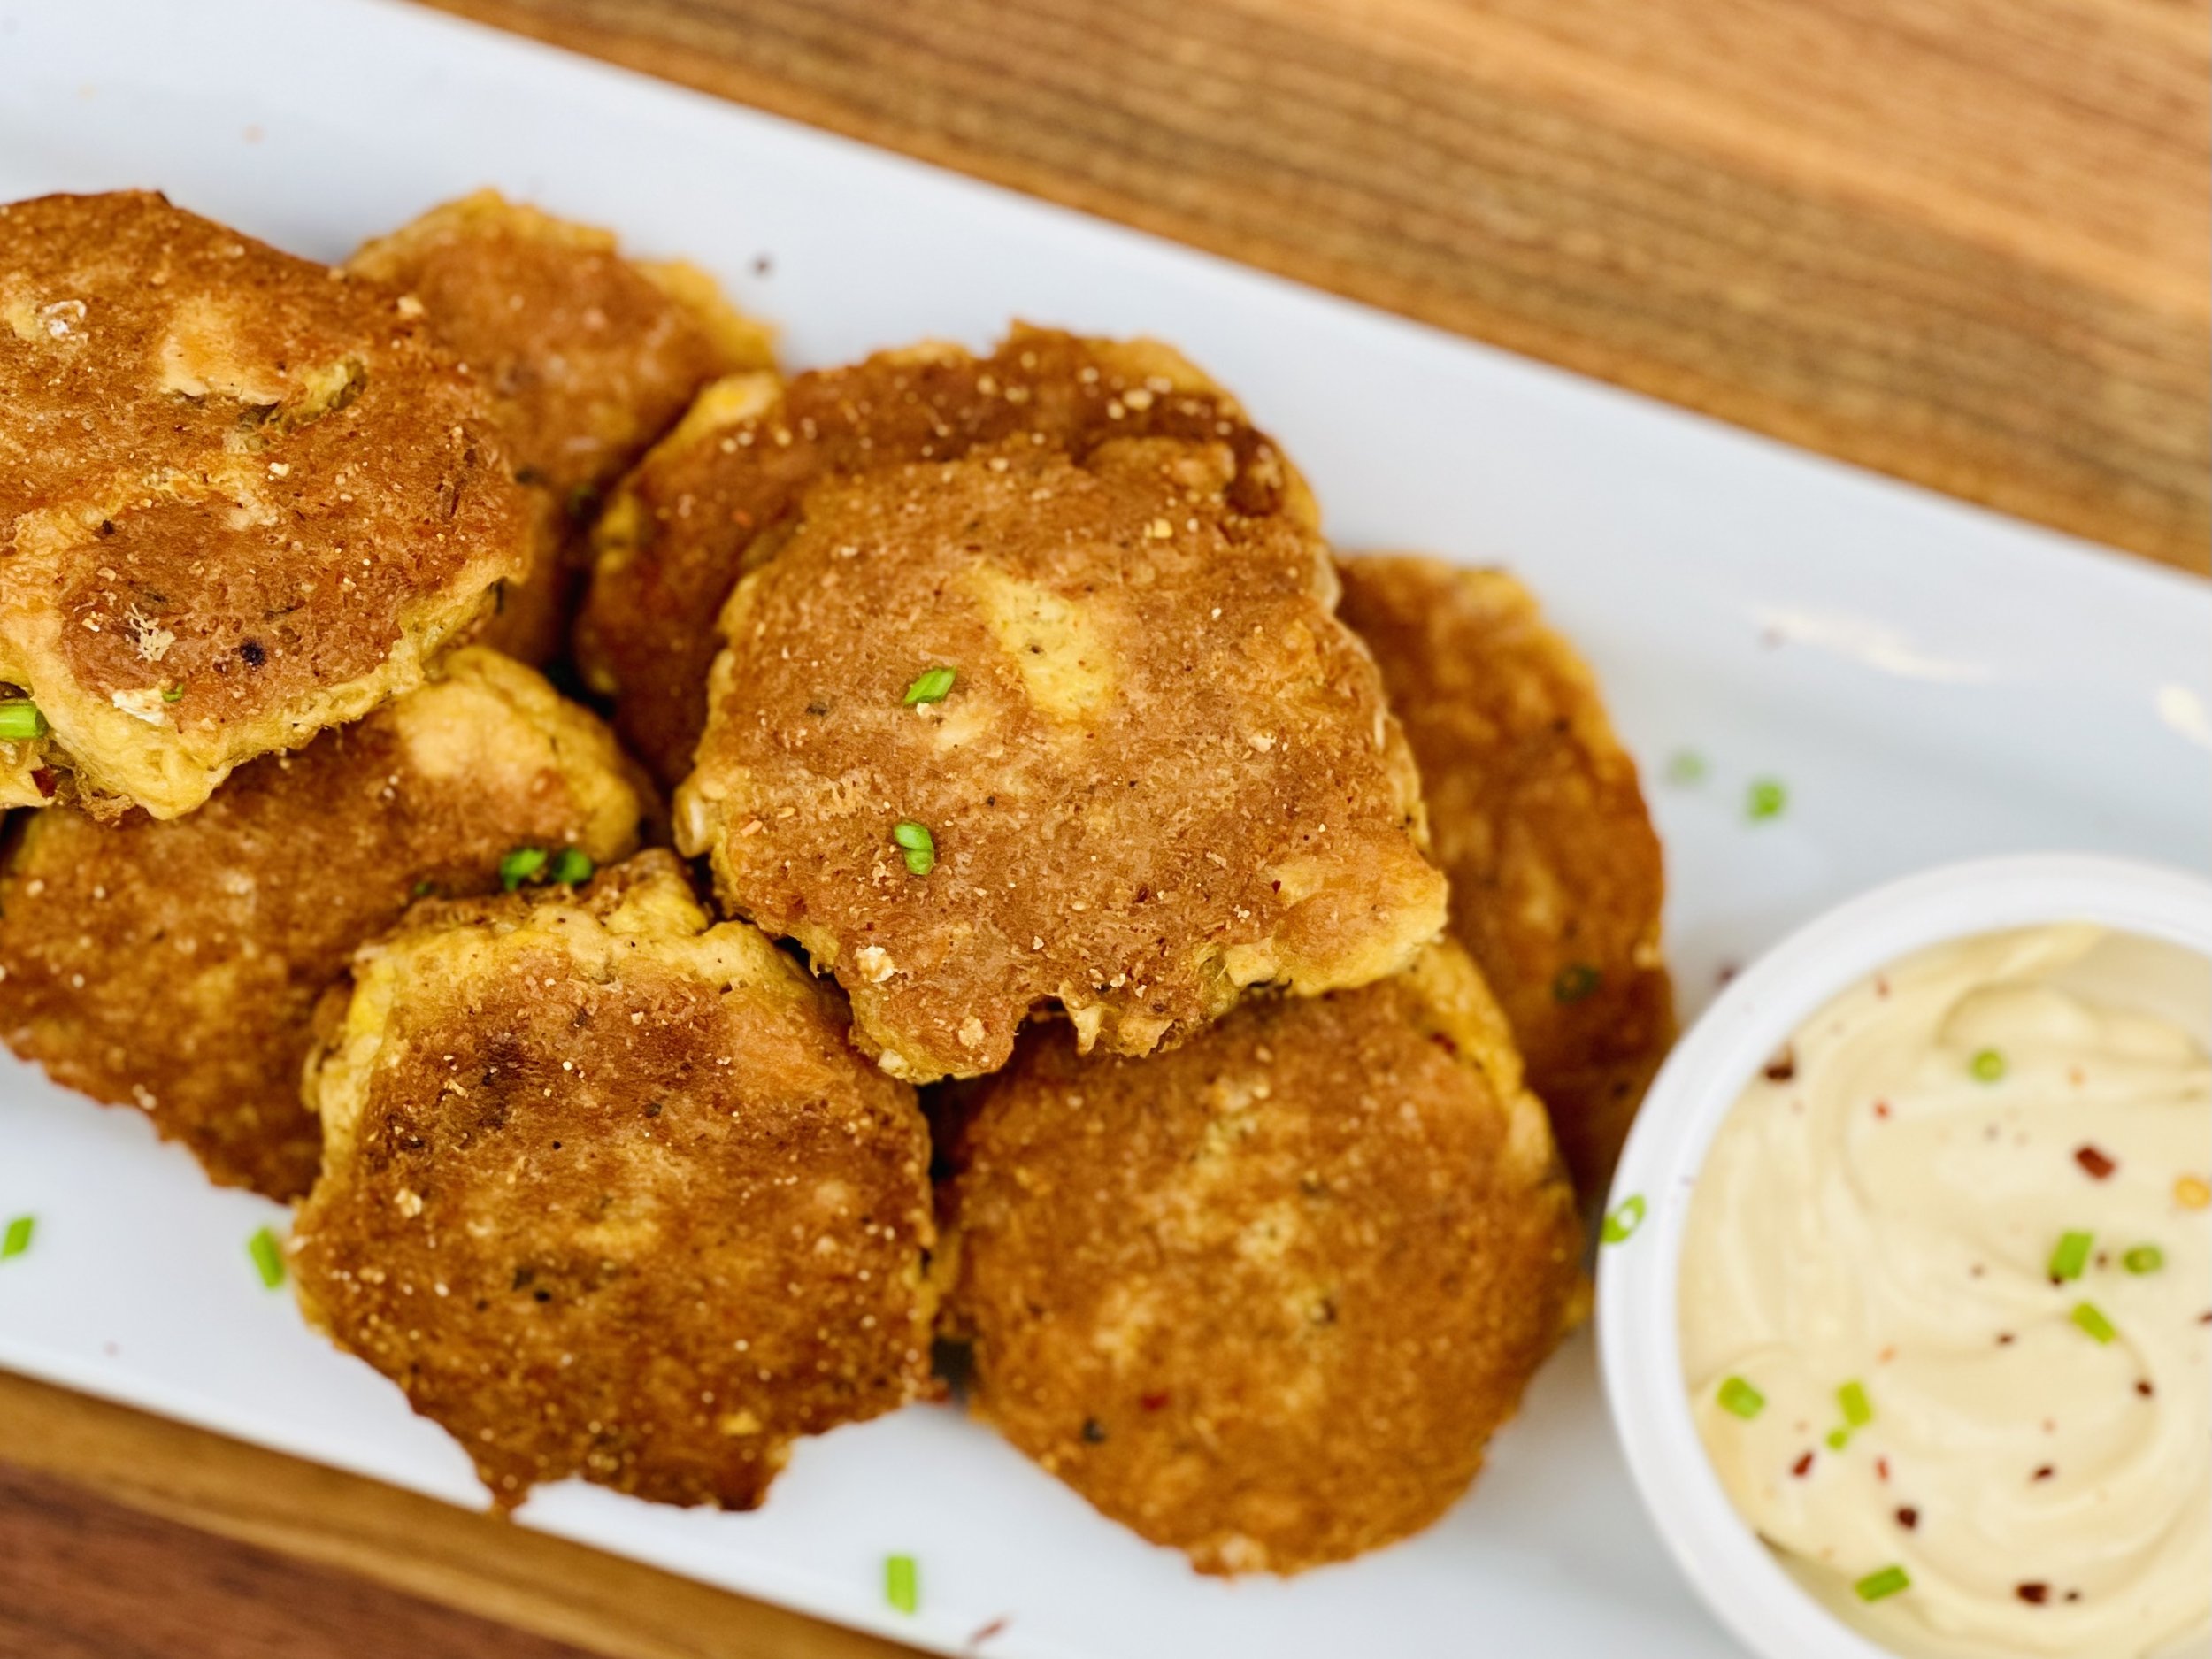
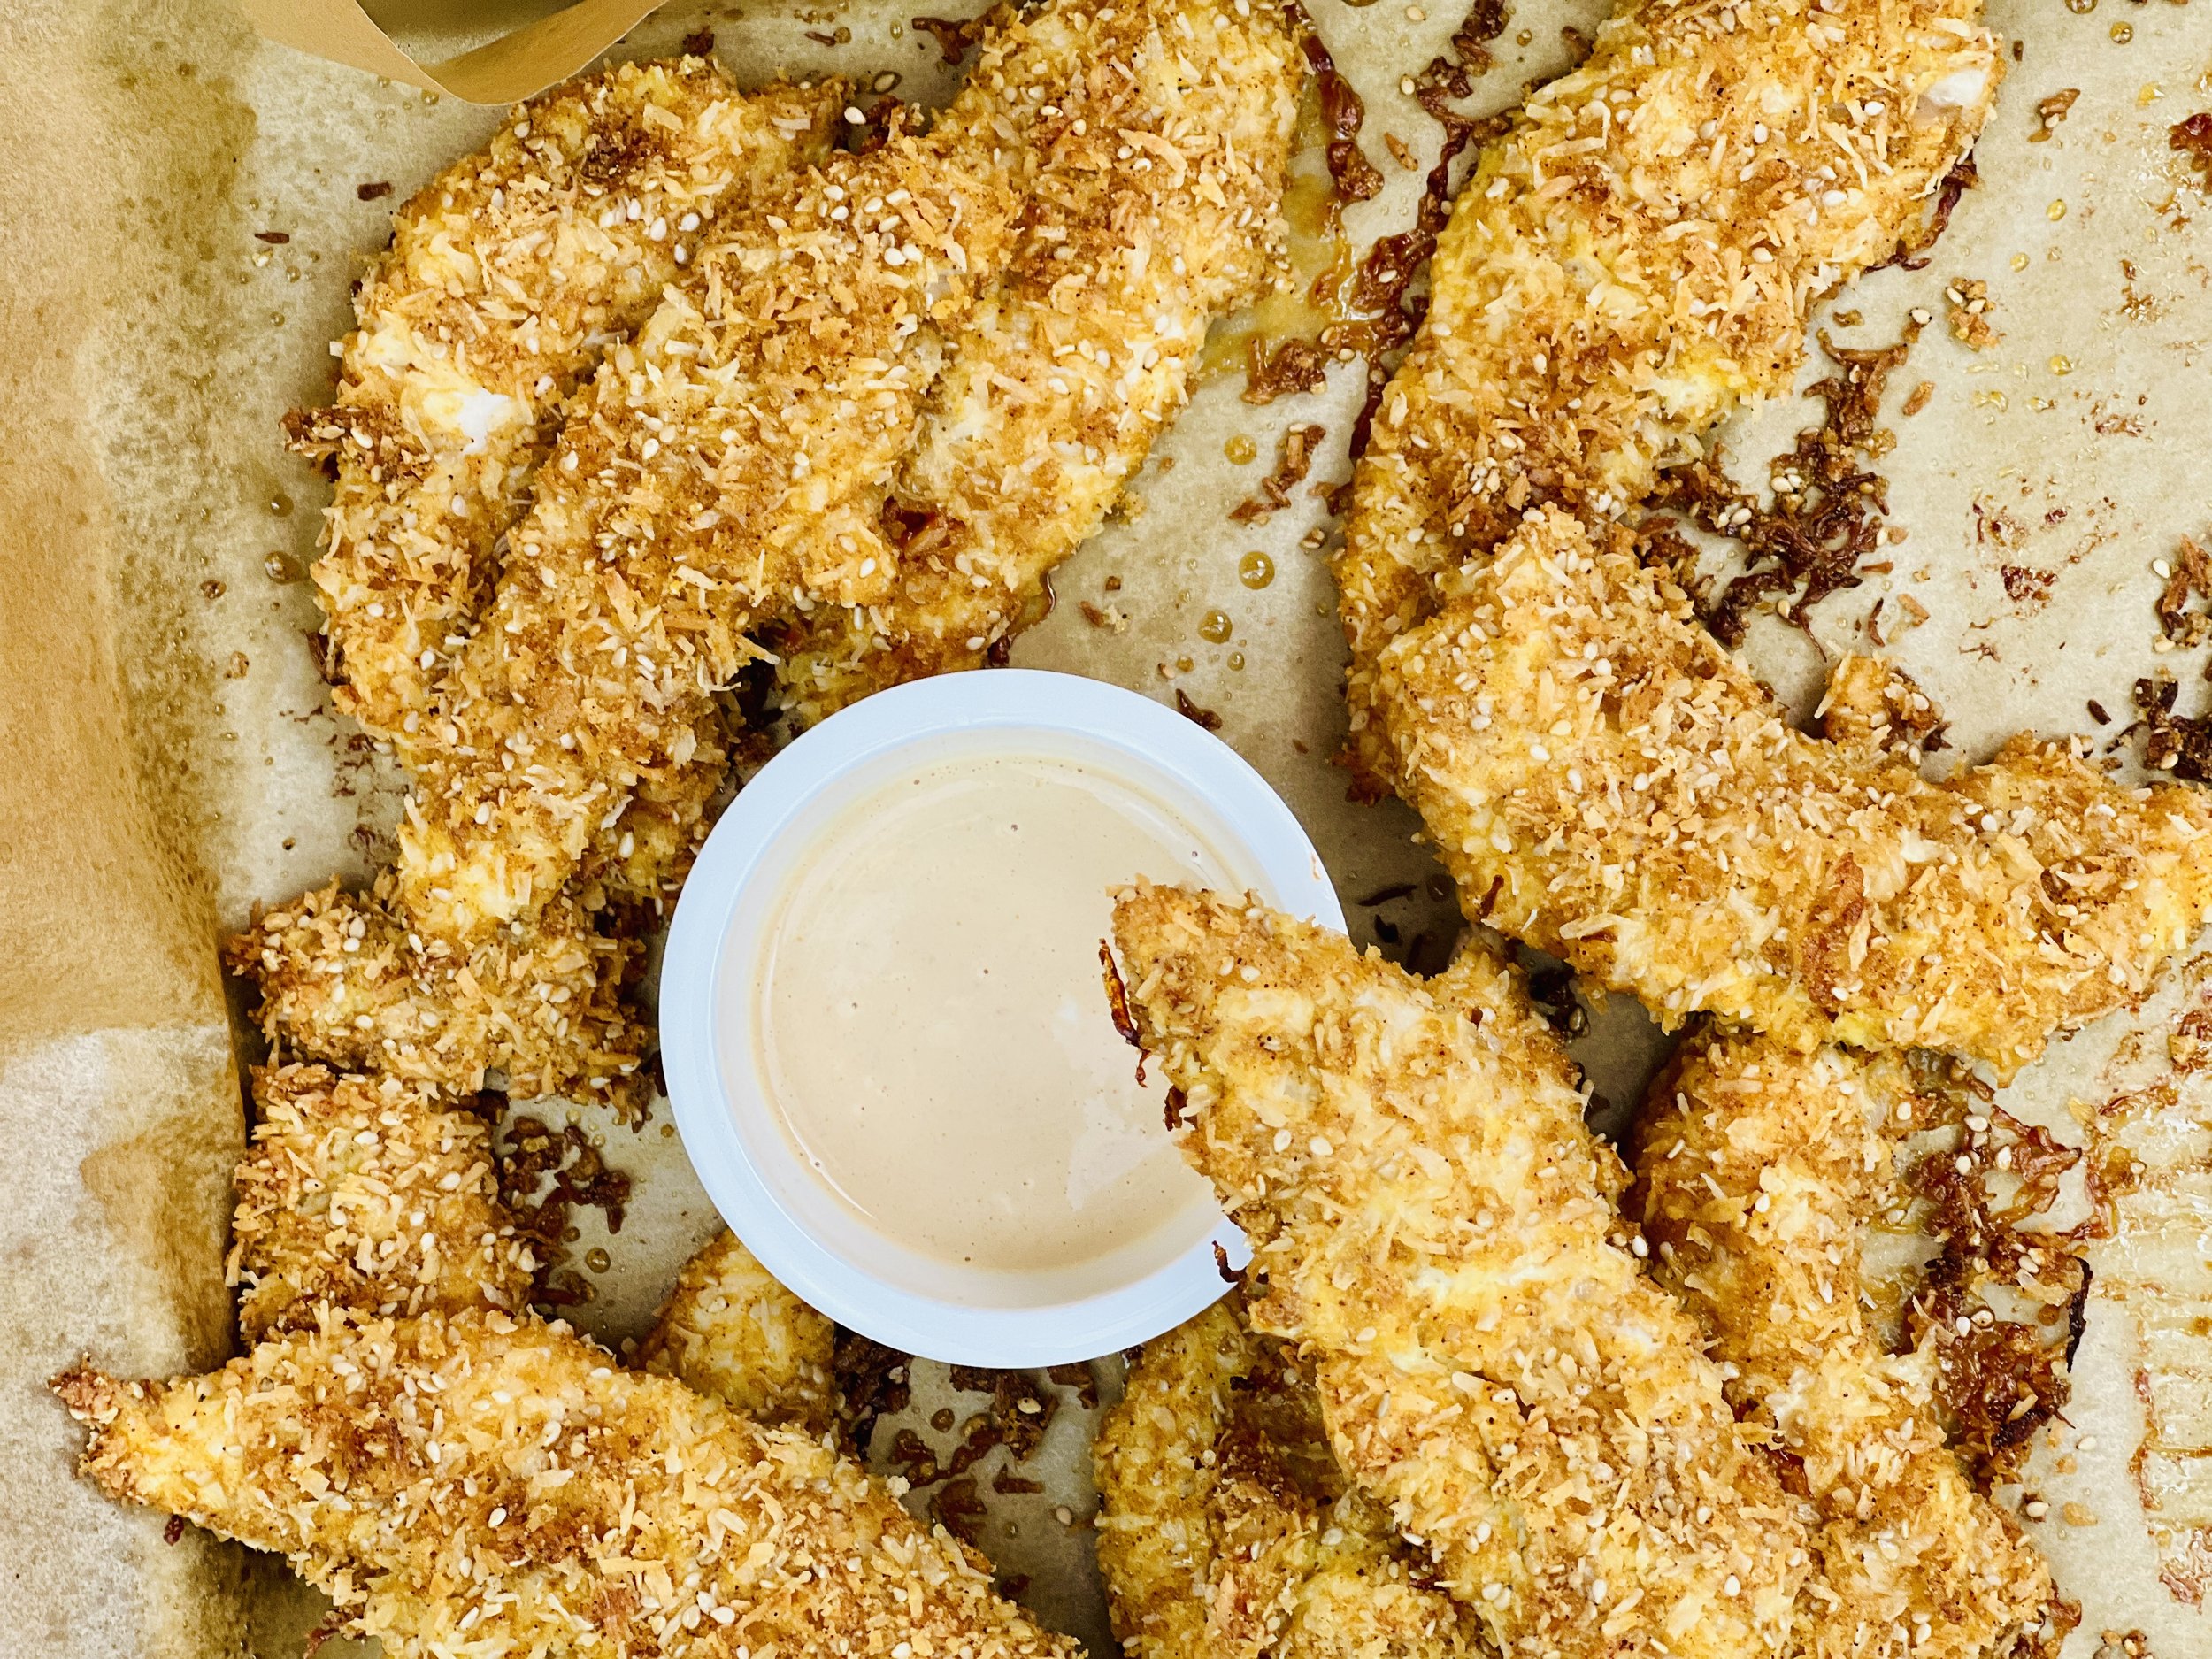
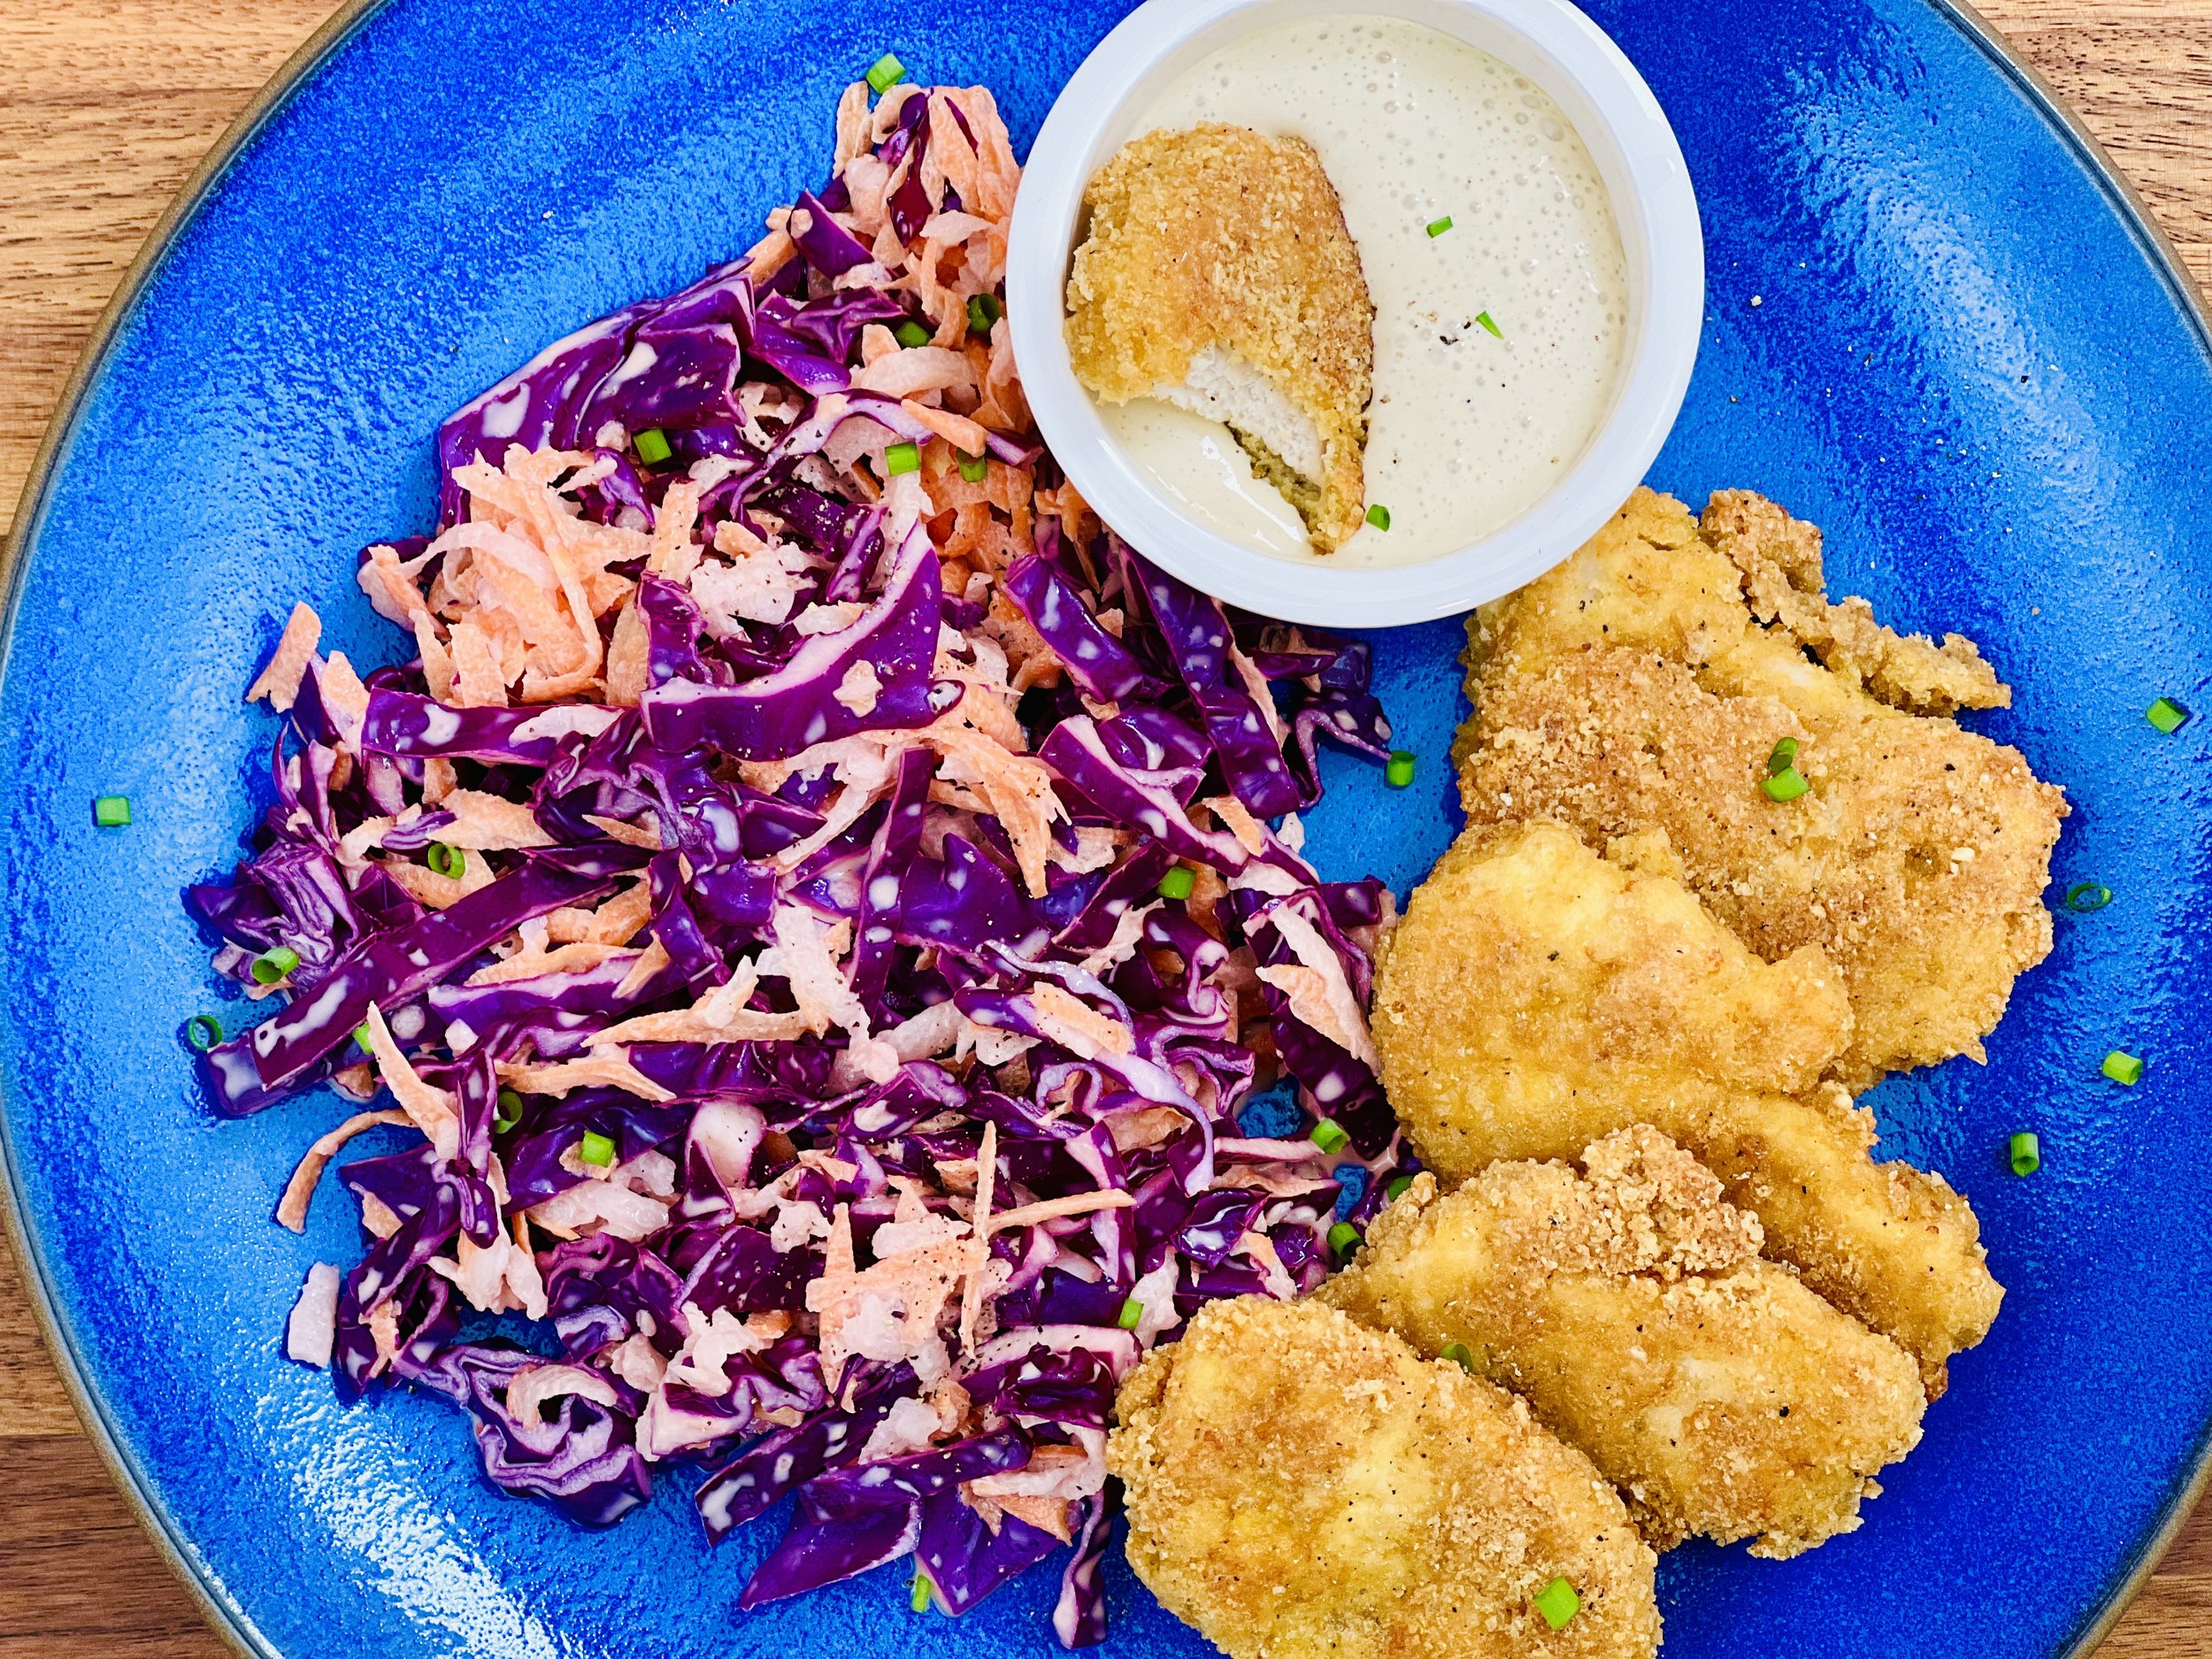
Crispy Keto-Friendly Chicken Tenders (Low FODMAP)
15 Minutes prep • 15 Minutes cook • Low FODMAP • Gluten-free • Serves 4
15 Minutes prep • 15 Minutes cook • Low FODMAP • Gluten-free • Serves 4 • Ok to make ahead: Step 6
Keto-friendly chicken tenders? What? It’s all in the panko you use. This recipe achieves gluten-free crispy crunchiness with Pork Panko (no, it doesn’t taste like bacon). They are easy to make whether baked in the oven or fried on the stove, and you won’t miss the flour (or the carbs) one bit! I served them with a quick and creamy Dijon dipping sauce and my Crisp Veggie Slaw, but you could put them on your appetizer tray, or serve them to your kids with Smoke N Sanity Low FODMAP ketchup. No matter how you serve them, they’re too good to last long!
Ingredients: Chicken
1 pound chicken tenders or chicken breast meat, cut into strips
1 1/2 cups Pork Panko or ground pork rinds, divided
1/3 cup almond flour (or gluten-free flour)
1 teaspoon Smoke N Sanity Essence of Garlic Salt
1 teaspoon Smoke N Sanity Essence of Onion Salt
1/4 teaspoon black pepper
2 eggs
Ingredients: Sauce
1 tablespoon Dijon mustard
1/4 teaspoon gluten-free Worcestershire sauce
2 tablespoons heavy cream (or mayonnaise)
Directions
(1) Prepare: Preheat the oven to 400 degrees F (if you are baking in the oven). Line a rimmed baking sheet with parchment paper. If you didn’t get chicken tender meat, slice the chicken breast into 1/4 inch thick pieces and pat dry with a paper towel. Season with a light sprinkle of salt and pepper. Then set aside.
(2) Prepare the panko mixture: In a shallow bowl or rimmed plate, mix together 1 cup pork panko, almond flour, garlic salt, onion salt, and pepper. In a separate bowl or rimmed plate, add the remaining 1/2 cup of pork panko.
(3) Prepare the egg wash: Whisk together two eggs with 3 tablespoons of water.
(4) Coat the chicken: Add one chicken tender to the panko almond flour mixture and turn and toss until fully coated. Then, dip the chicken tender in the egg wash, then put it back into the bowl with the panko almond flour mixture for another layer. For extra crispy chicken tenders, do a final coating with the pork panko only. As each piece is coated, set it on the parchment-lined baking tray, leaving a bit of space between each piece.
(5a) Bake (Oven Directions):
You may spray the top of the chicken strips with an oil spray such as this extra virgin olive oil spray to help keep the strips moist as they bake. Bake at 400 degrees F for 8 - 10 minutes, then turn them over and cook for another 8 - 10 minutes.
(5b) Fry (Stovetop Directions):
Fill a skillet with about 1/4 inch of avocado oil and heat over medium heat. Once oil ripples as you turn the skillet, you are ready to add your chicken strips. Working in batches, add breaded chicken tenders to the hot oil and fry for 3-5 minutes on each side until the chicken is cooked through. Remove to a plate lined with paper towels to absorb the excess oil.
(6) Make the sauce: In a small bowl or jar combine sauce ingredients and whisk or shake to blend. If you like a thicker sauce, make it ahead and chill for a few hours or overnight.
(7) Plate and serve: Serve chicken tenders warm or at room temperature with the sauce alongside for dipping.
Eat and enjoy every bite because you can!
Have a question you’d like to have answered? Email me at hello@ibsgamechanger.com
Link note: This post may contain affiliate links for you to easily purchase items that are linked. I may earn a small commission from qualifying purchases but none of this costs you a thing so feel free to use the links! In addition, for some items, I have provided a special discount code for IBS Game Changers so be sure to use the code when you purchase an item to get the discount that has been arranged just for you.
More Deliciously Low FODMAP™ appetizer recipes
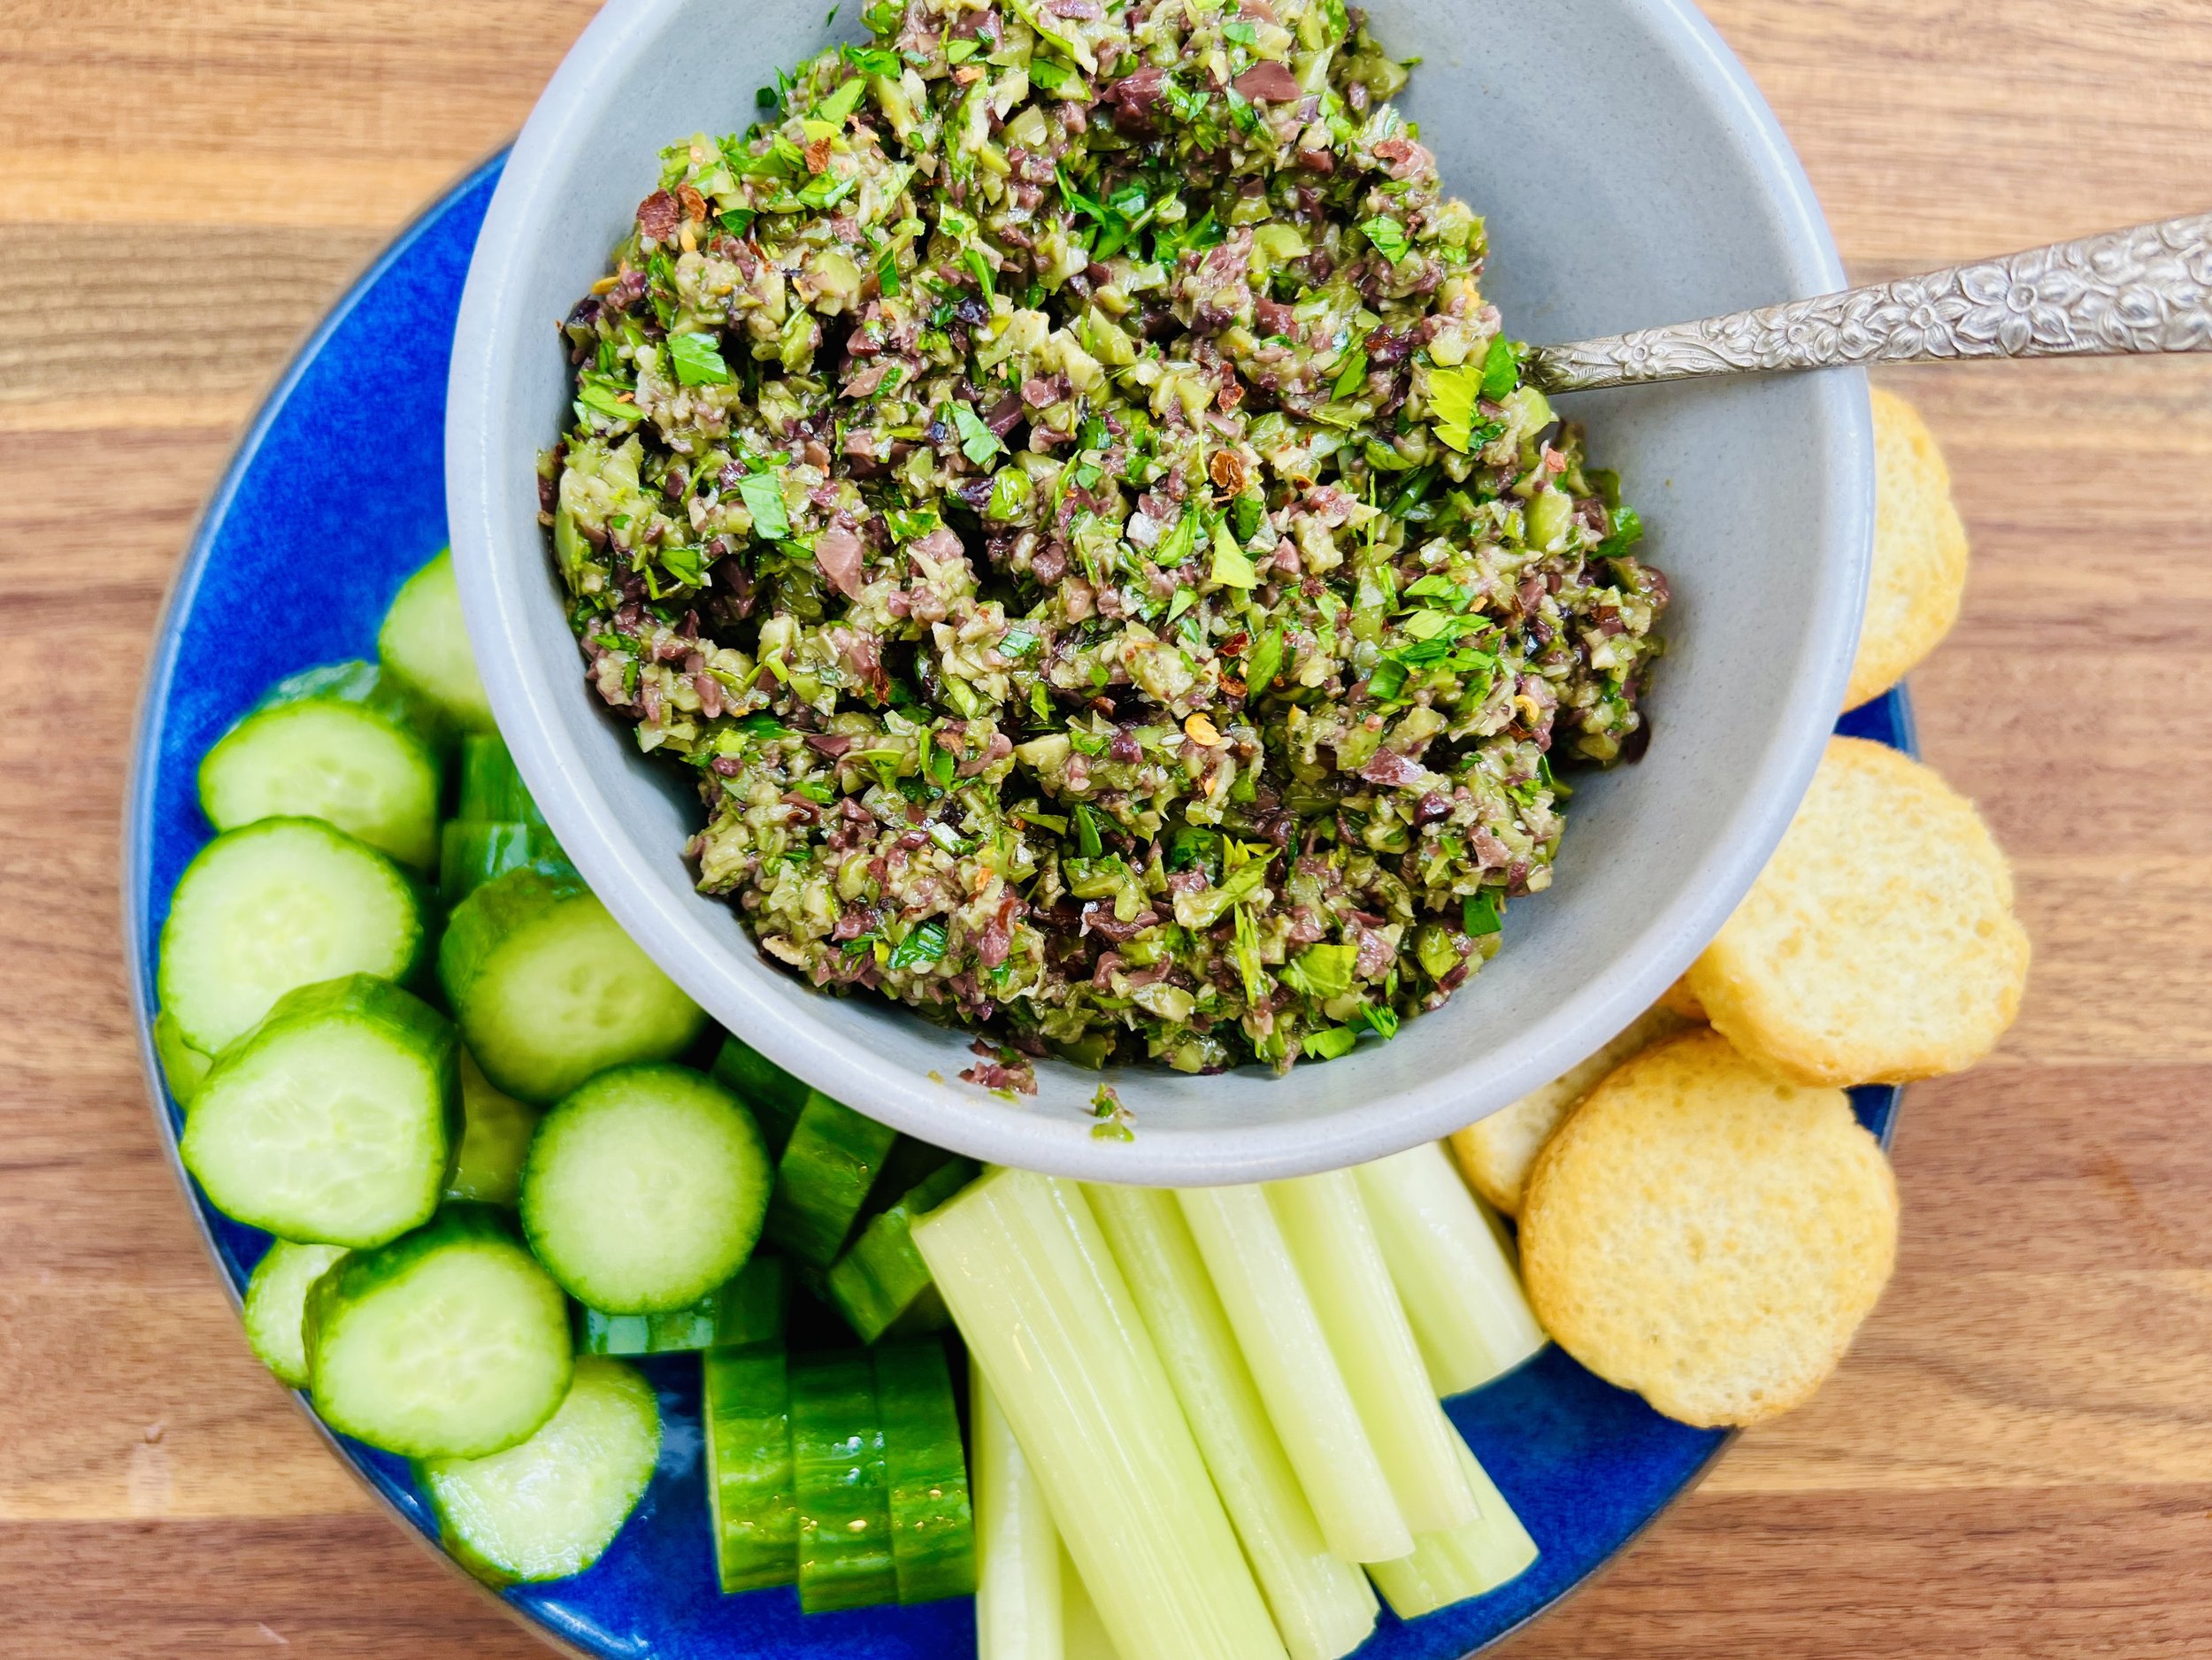
What’s so Great About Olive Oil? Everything!
Which olive oil is best? Extra virgin olive oil (EVOO)? Virgin olive oil? Just straight-up olive oil? Read this article and it will all make sense.
If you’ve been with me for long, you know I use olive oil in just about all of my savory recipes. Why is that? Because it’s delicious, of course, and also because it has some amazing health properties. I buy all my olive oil at a local farmstand. They make their own olive oils, they are always fresh and delicious and they offer many different infused olive oils that are also wonderful. I realize not everyone will have such a bounty in their backyard, so I’m sharing this article, written by my amazing sister Sarah Aitken and featured in her Diabetes Game Changer Program, that will help you navigate the vast array of olive oils on the supermarket shelves so you can buy the one that’s best for you.

Olive oil differs from other oils, such as canola, vegetable, and soybean oil in a few very key ways. These oils are extracted and refined using very high heat and chemicals, resulting in less flavor and destruction of the health benefits that may be included in unrefined oils. But which olive oil is best? Extra virgin olive oil (EVOO)? Virgin olive oil? Just straight-up olive oil?
The wide world of olive oil can be confusing! But essentially there are just 3 main kinds, and they all have their pros and cons based on the ingredients used and the methods of production. My top pic? EVOO whenever possible. It’s healthy AND delicious, and using it liberally can help to make your diet highly satisfying.
Have a question you’d like to have answered? Email me at hello@ibsgamechanger.com
More Deliciously Low FODMAP™ Tips and tools


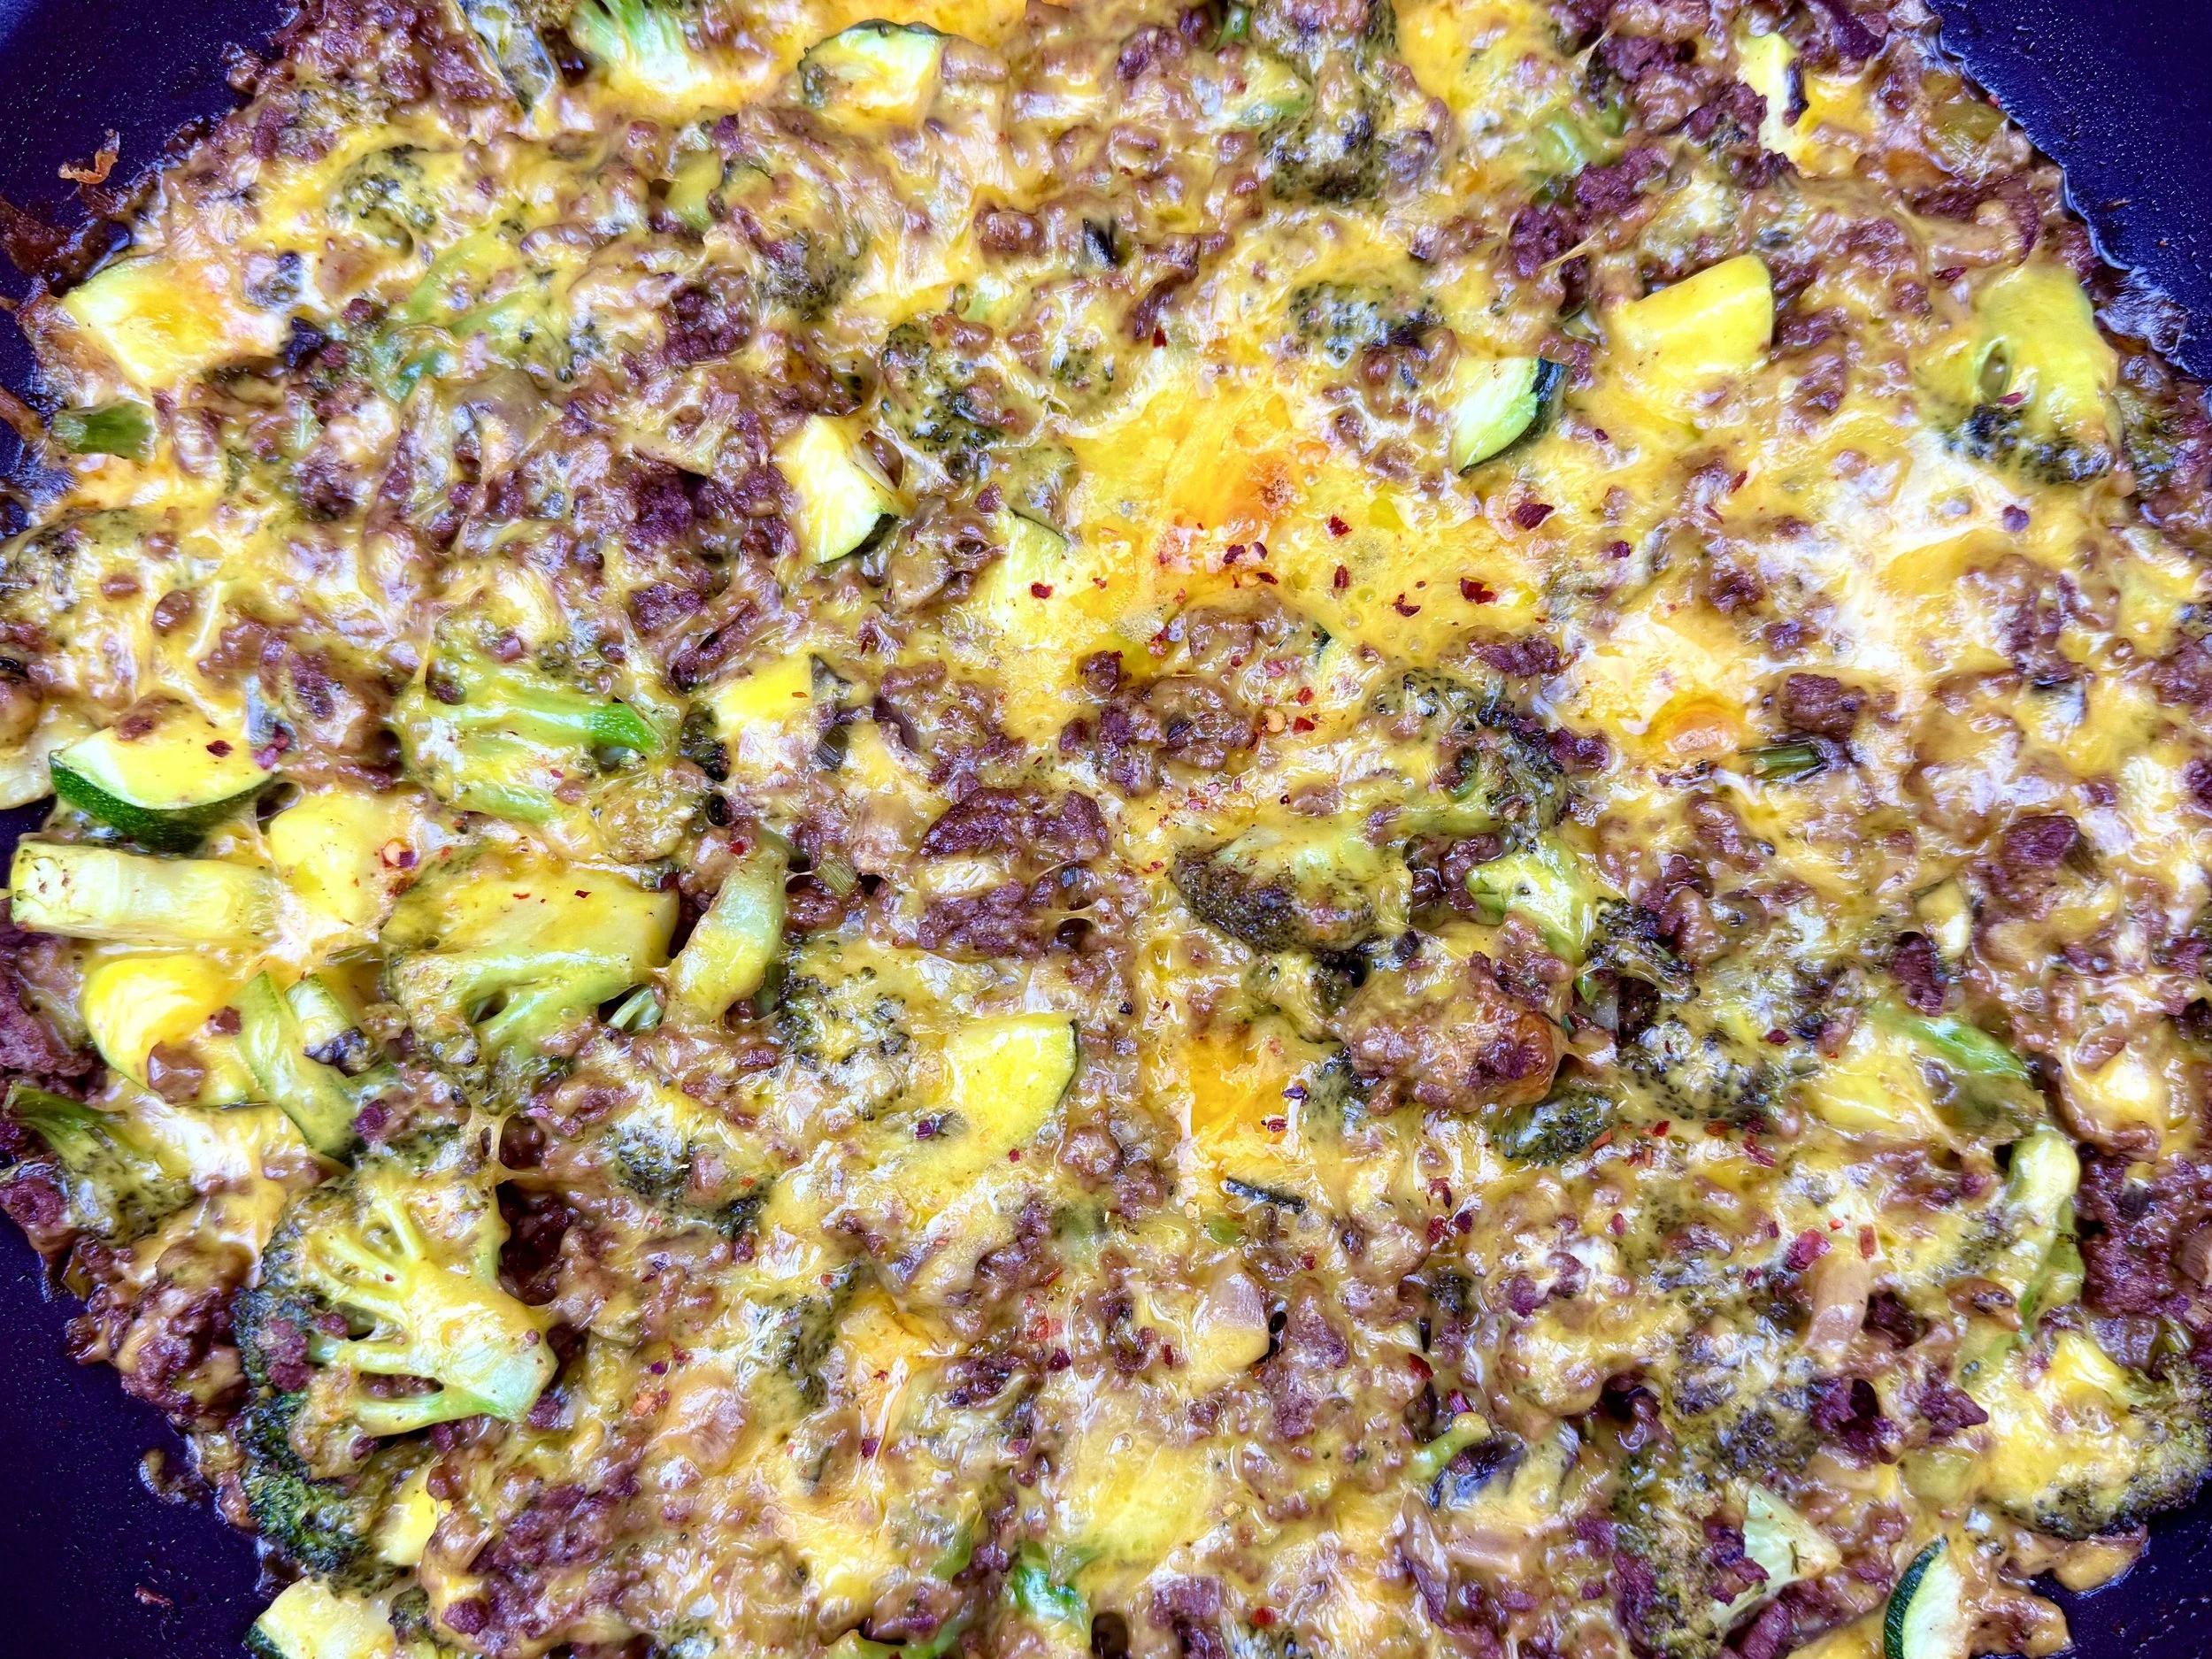
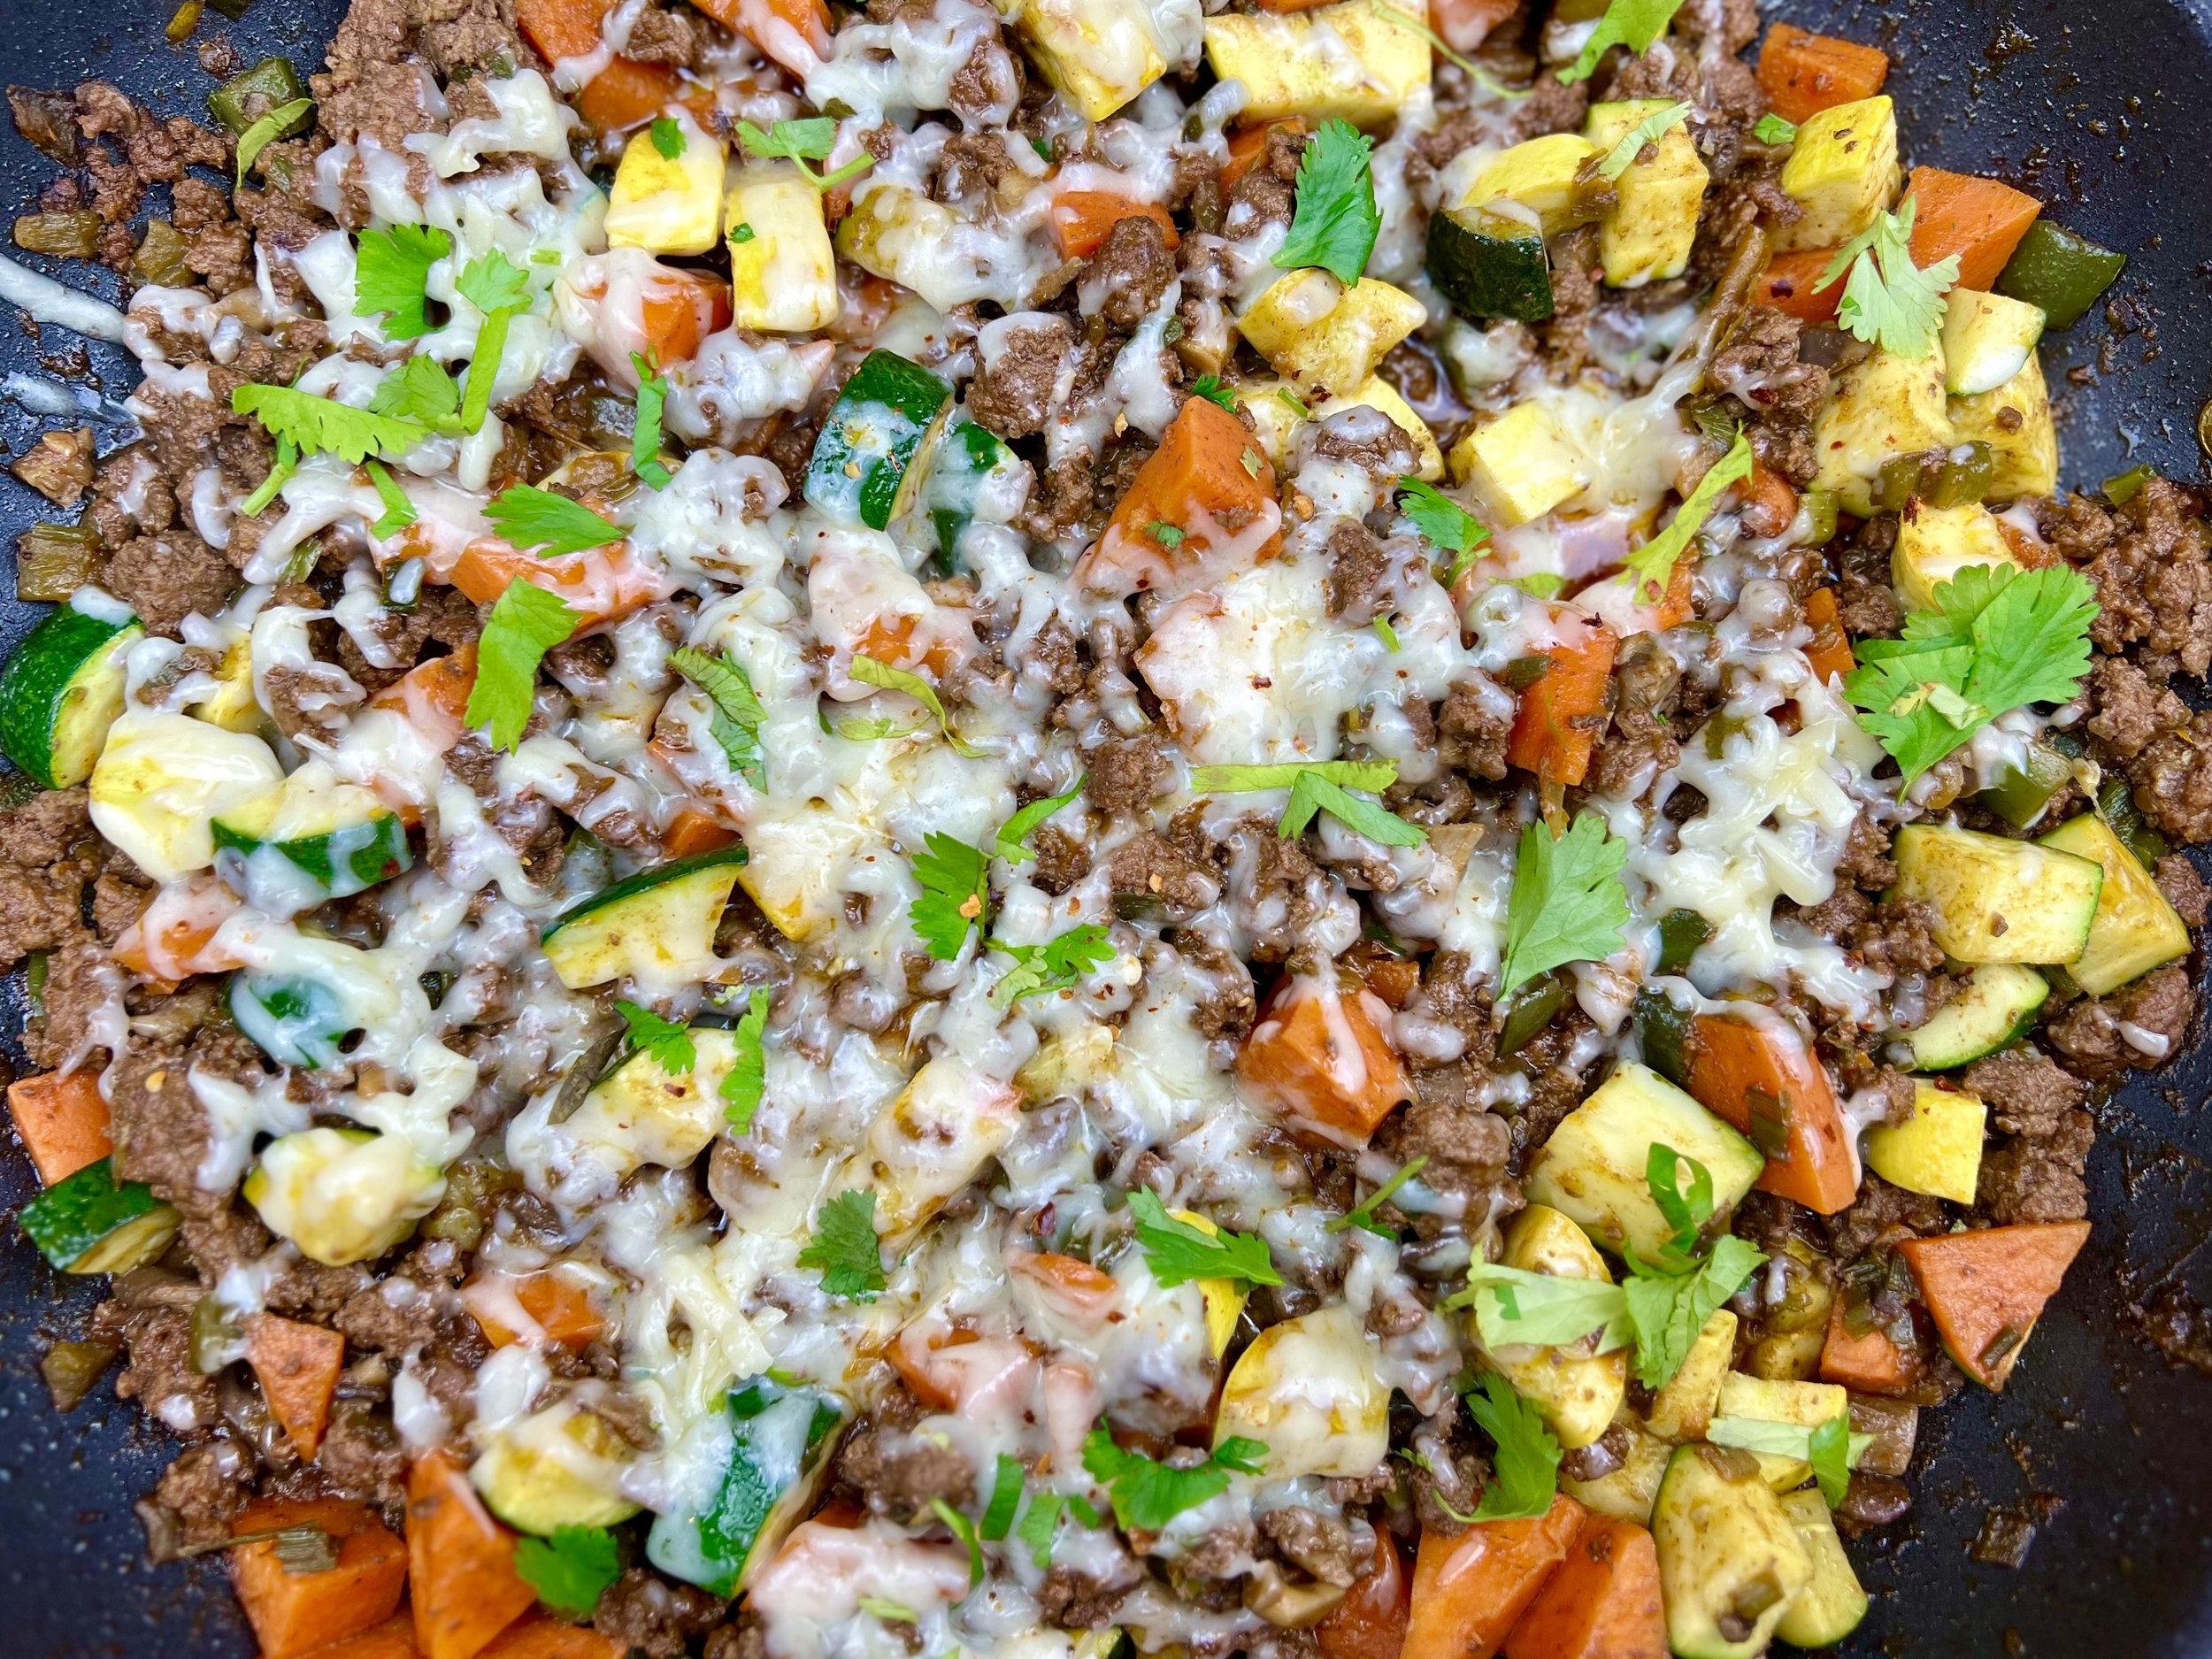
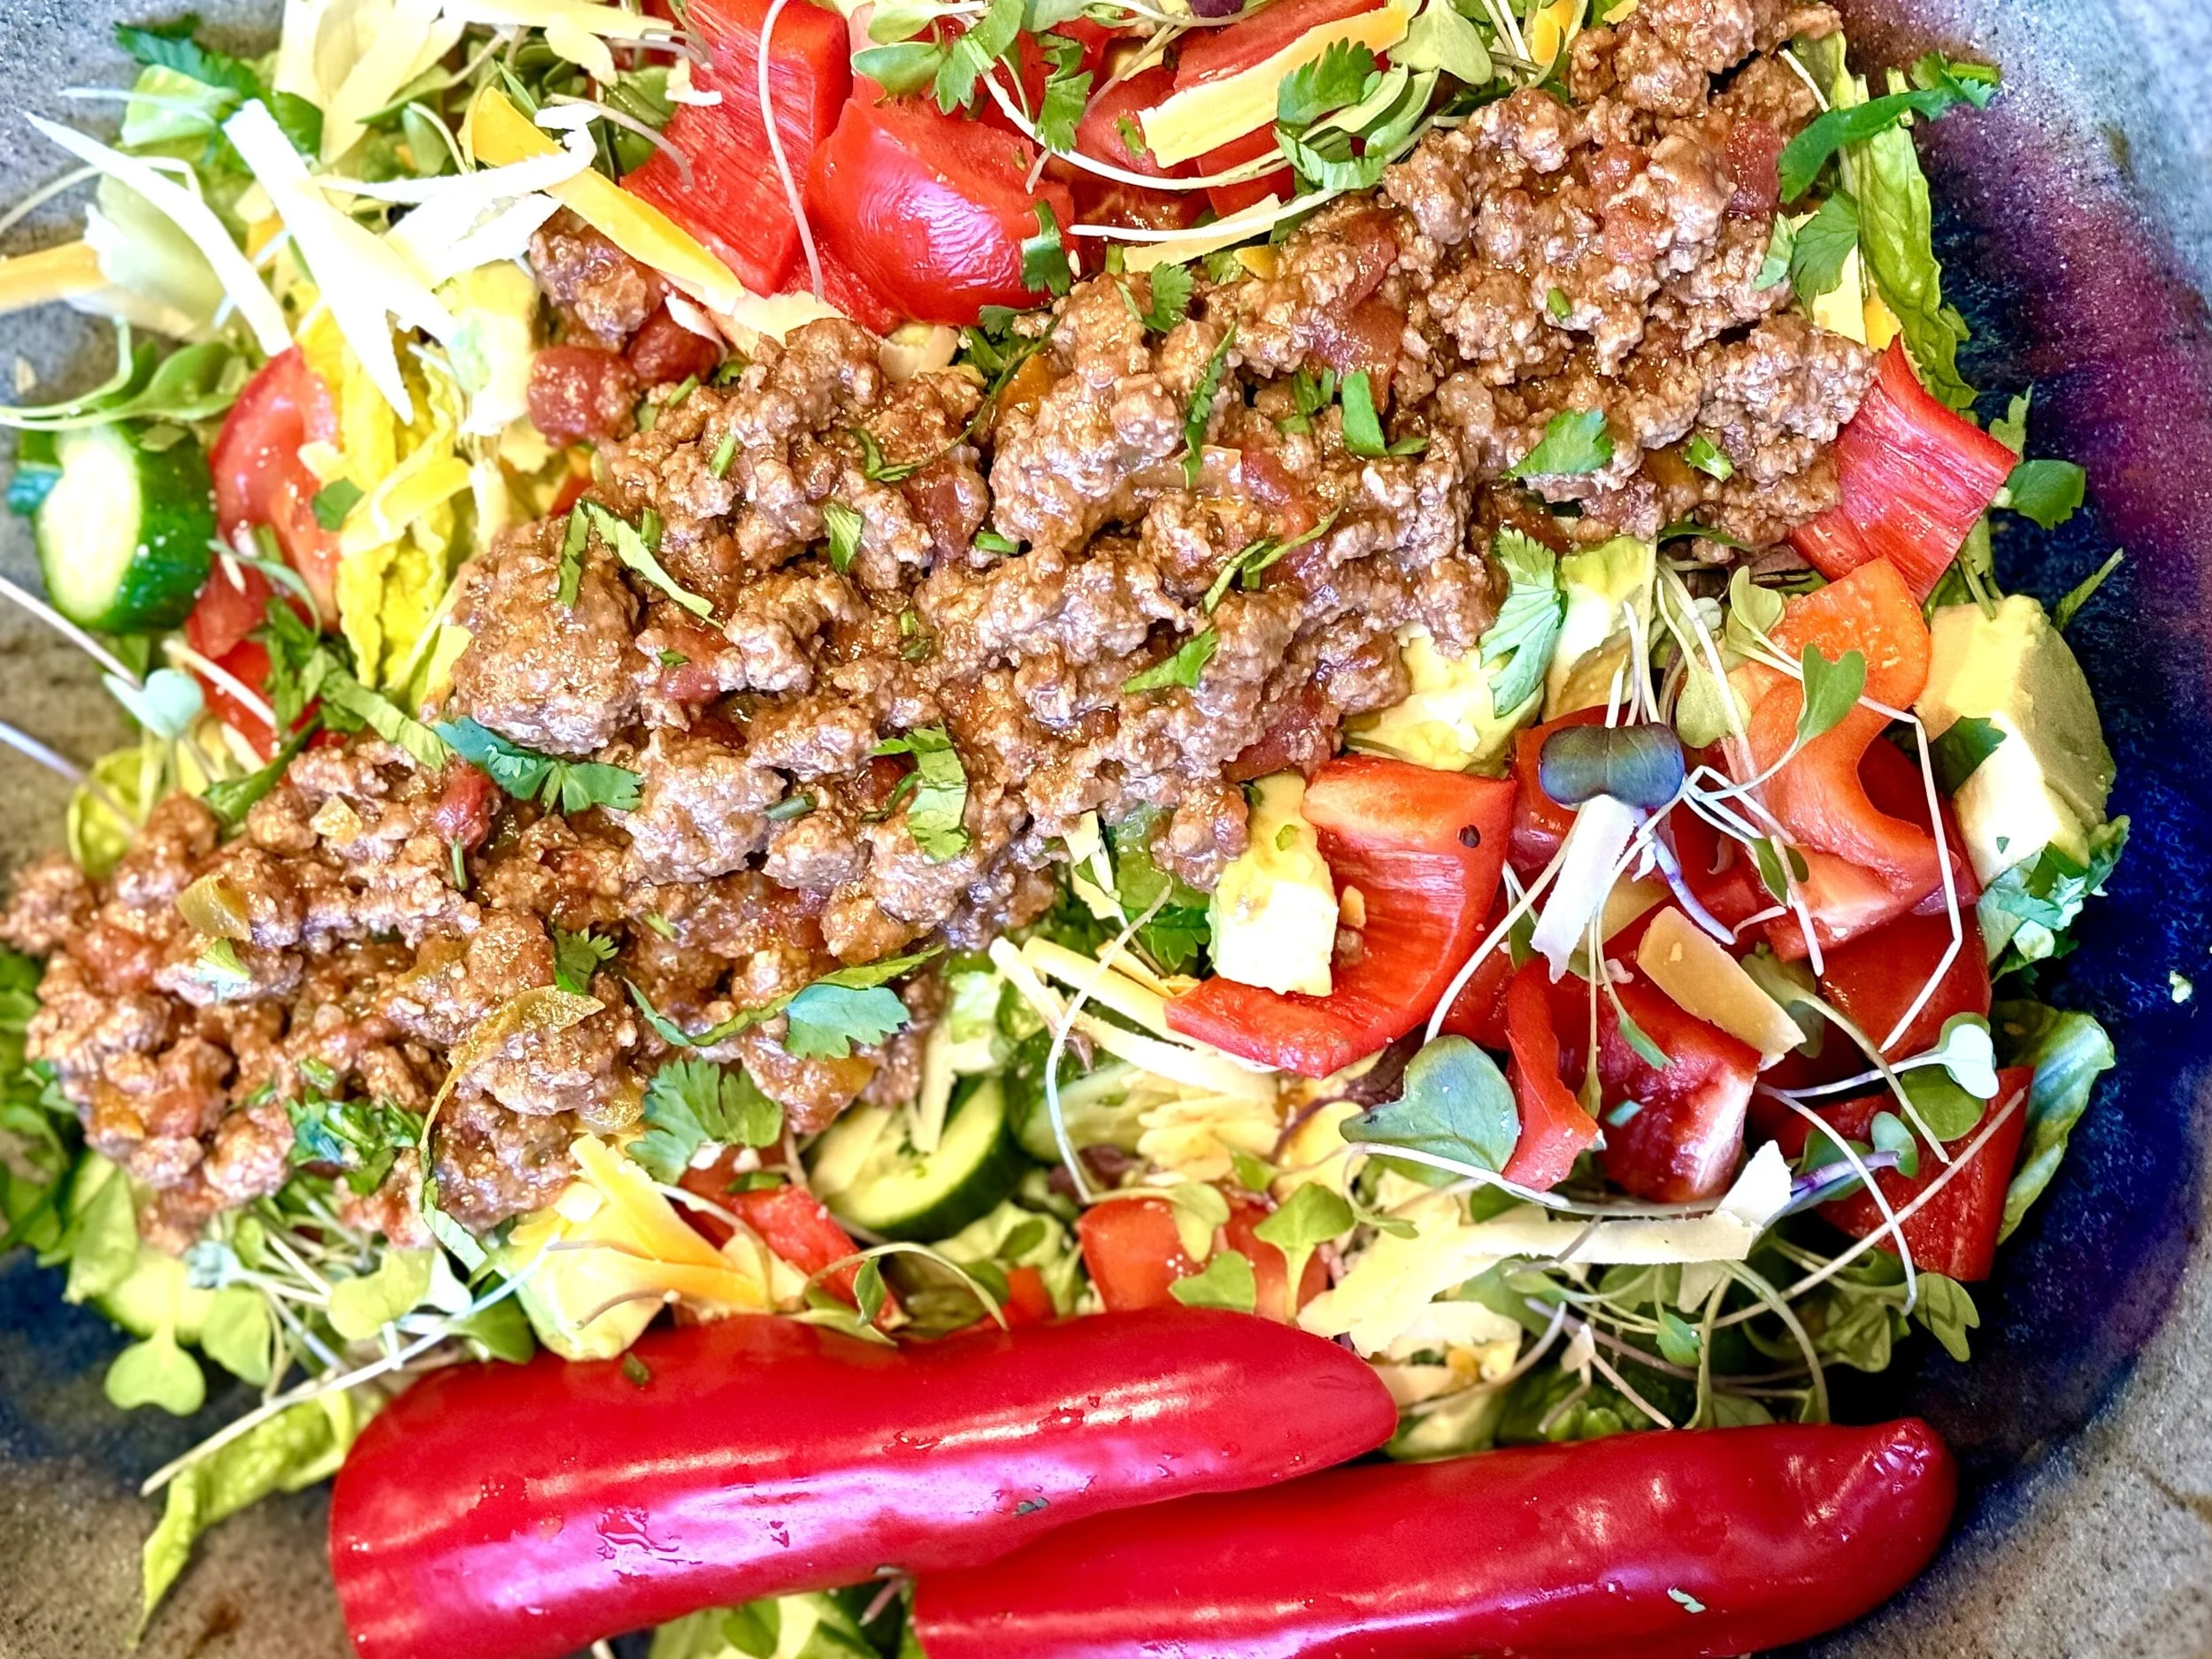
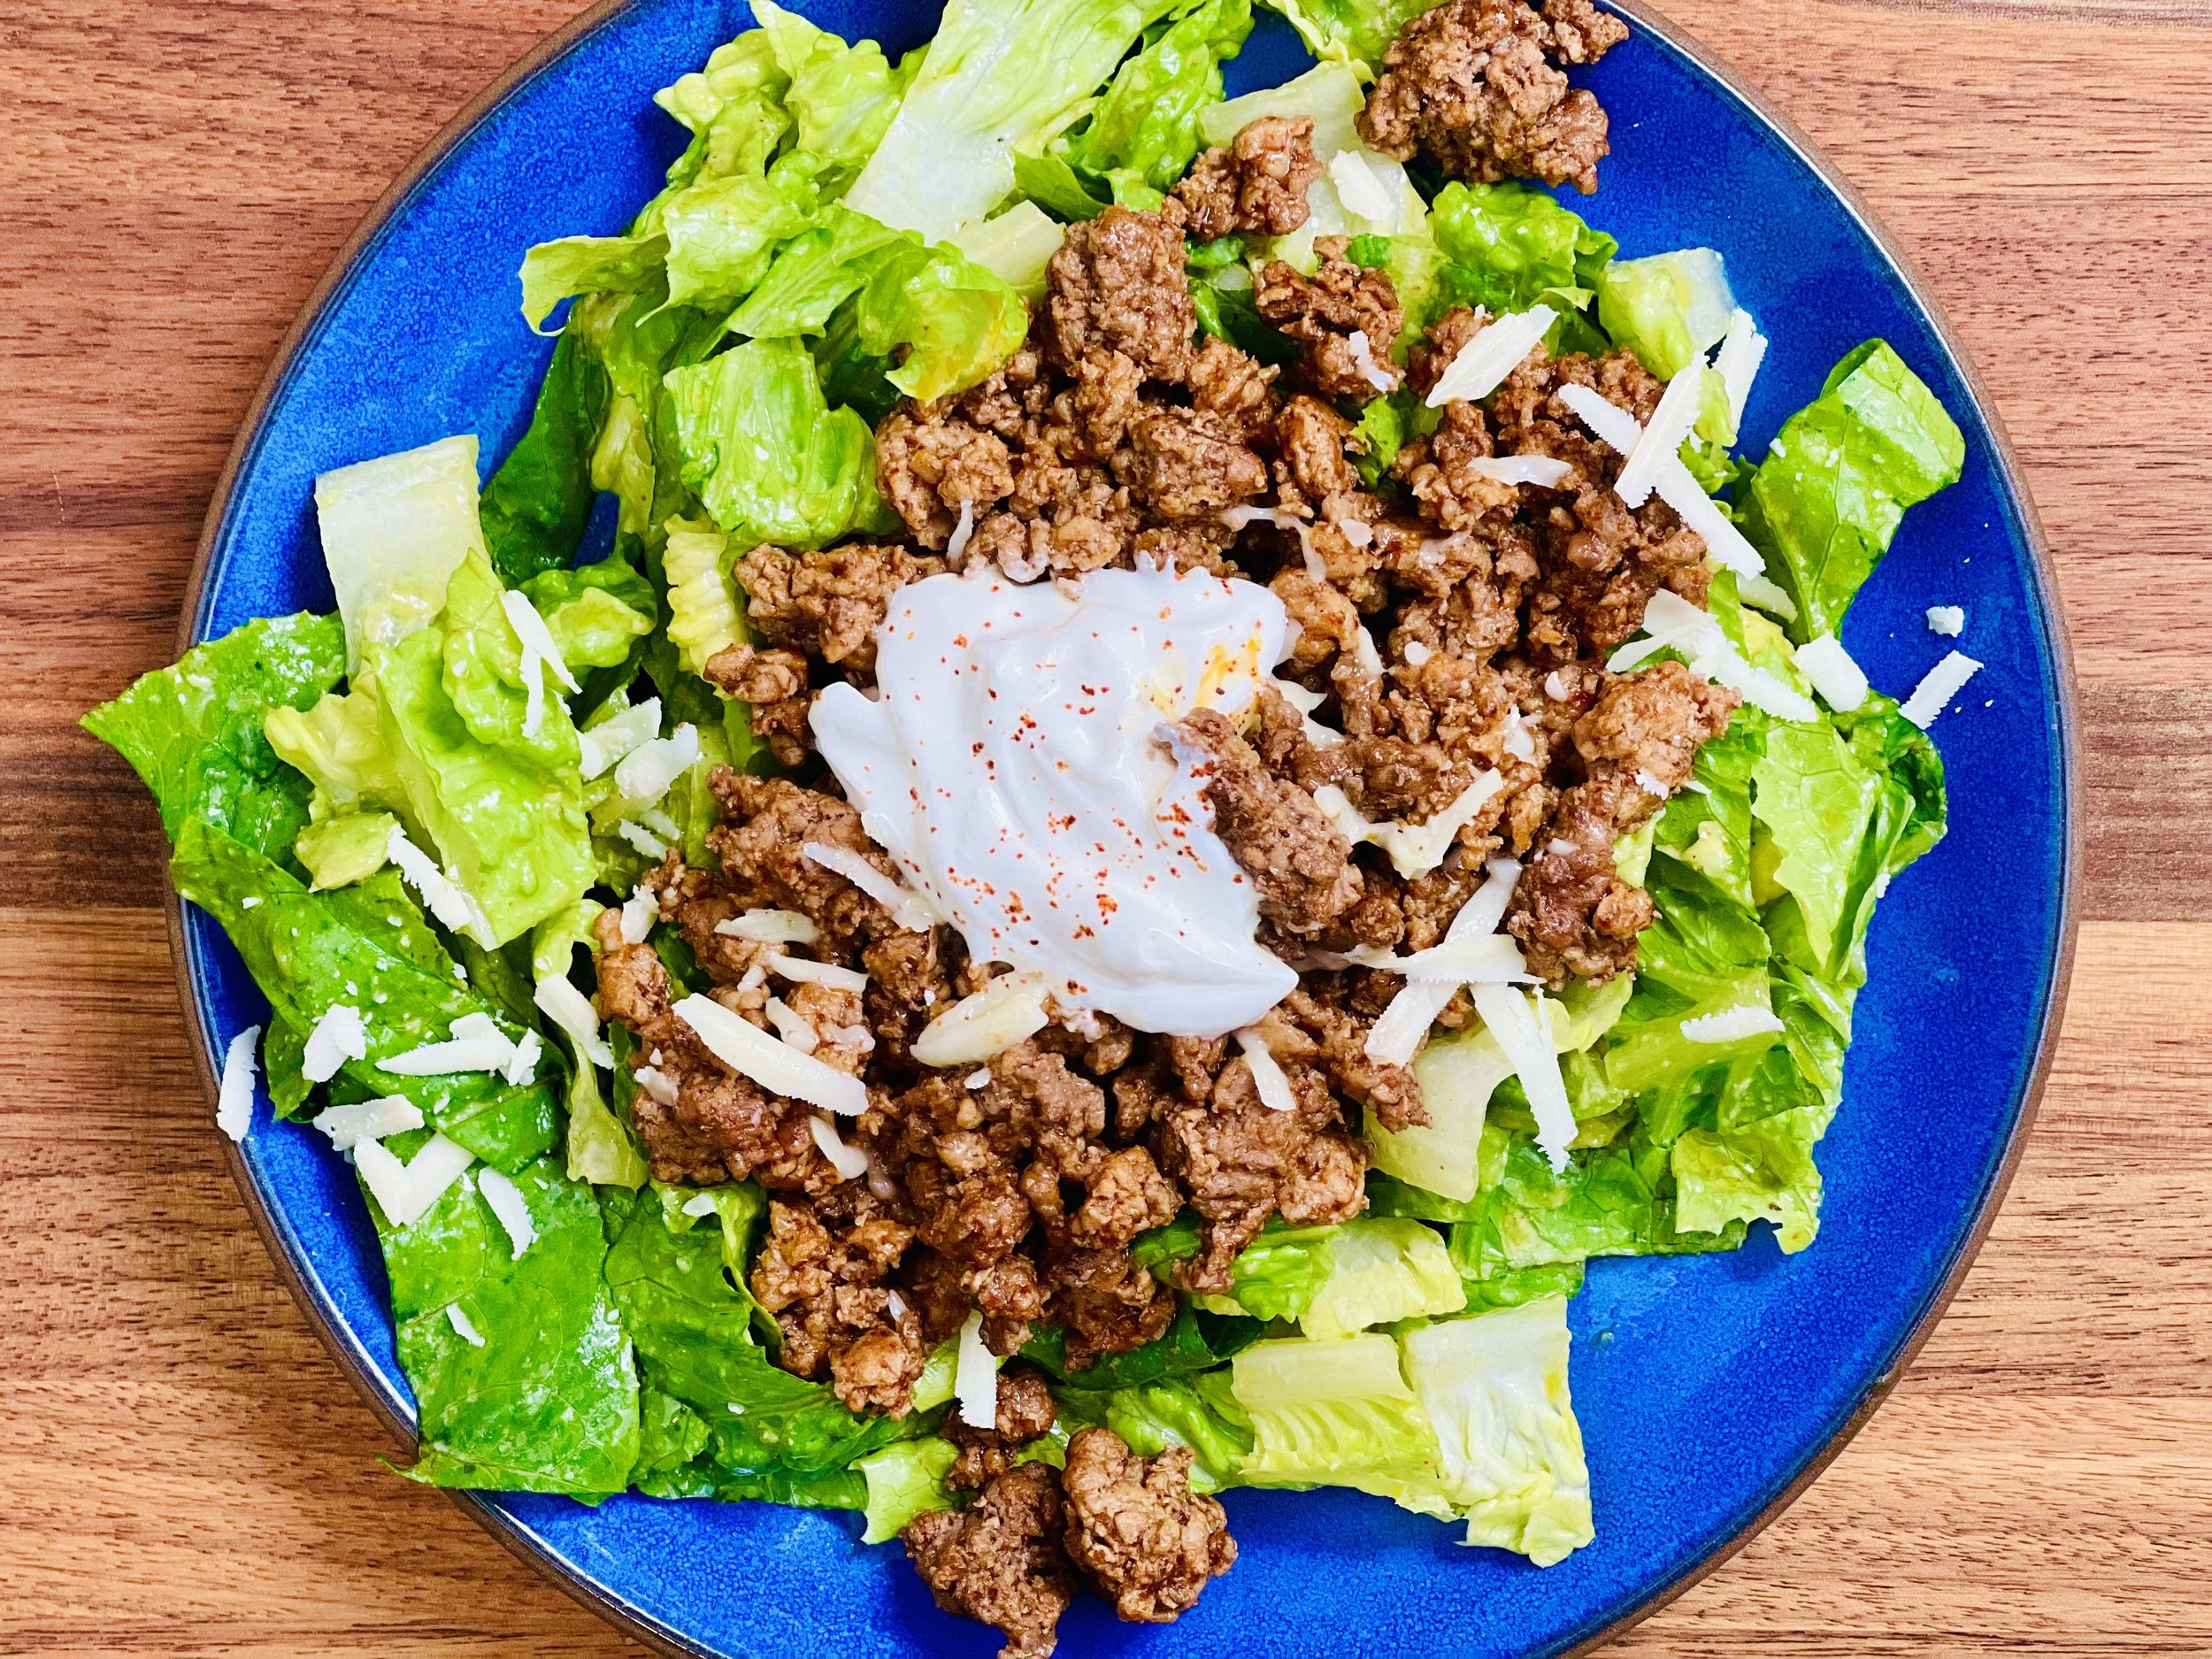
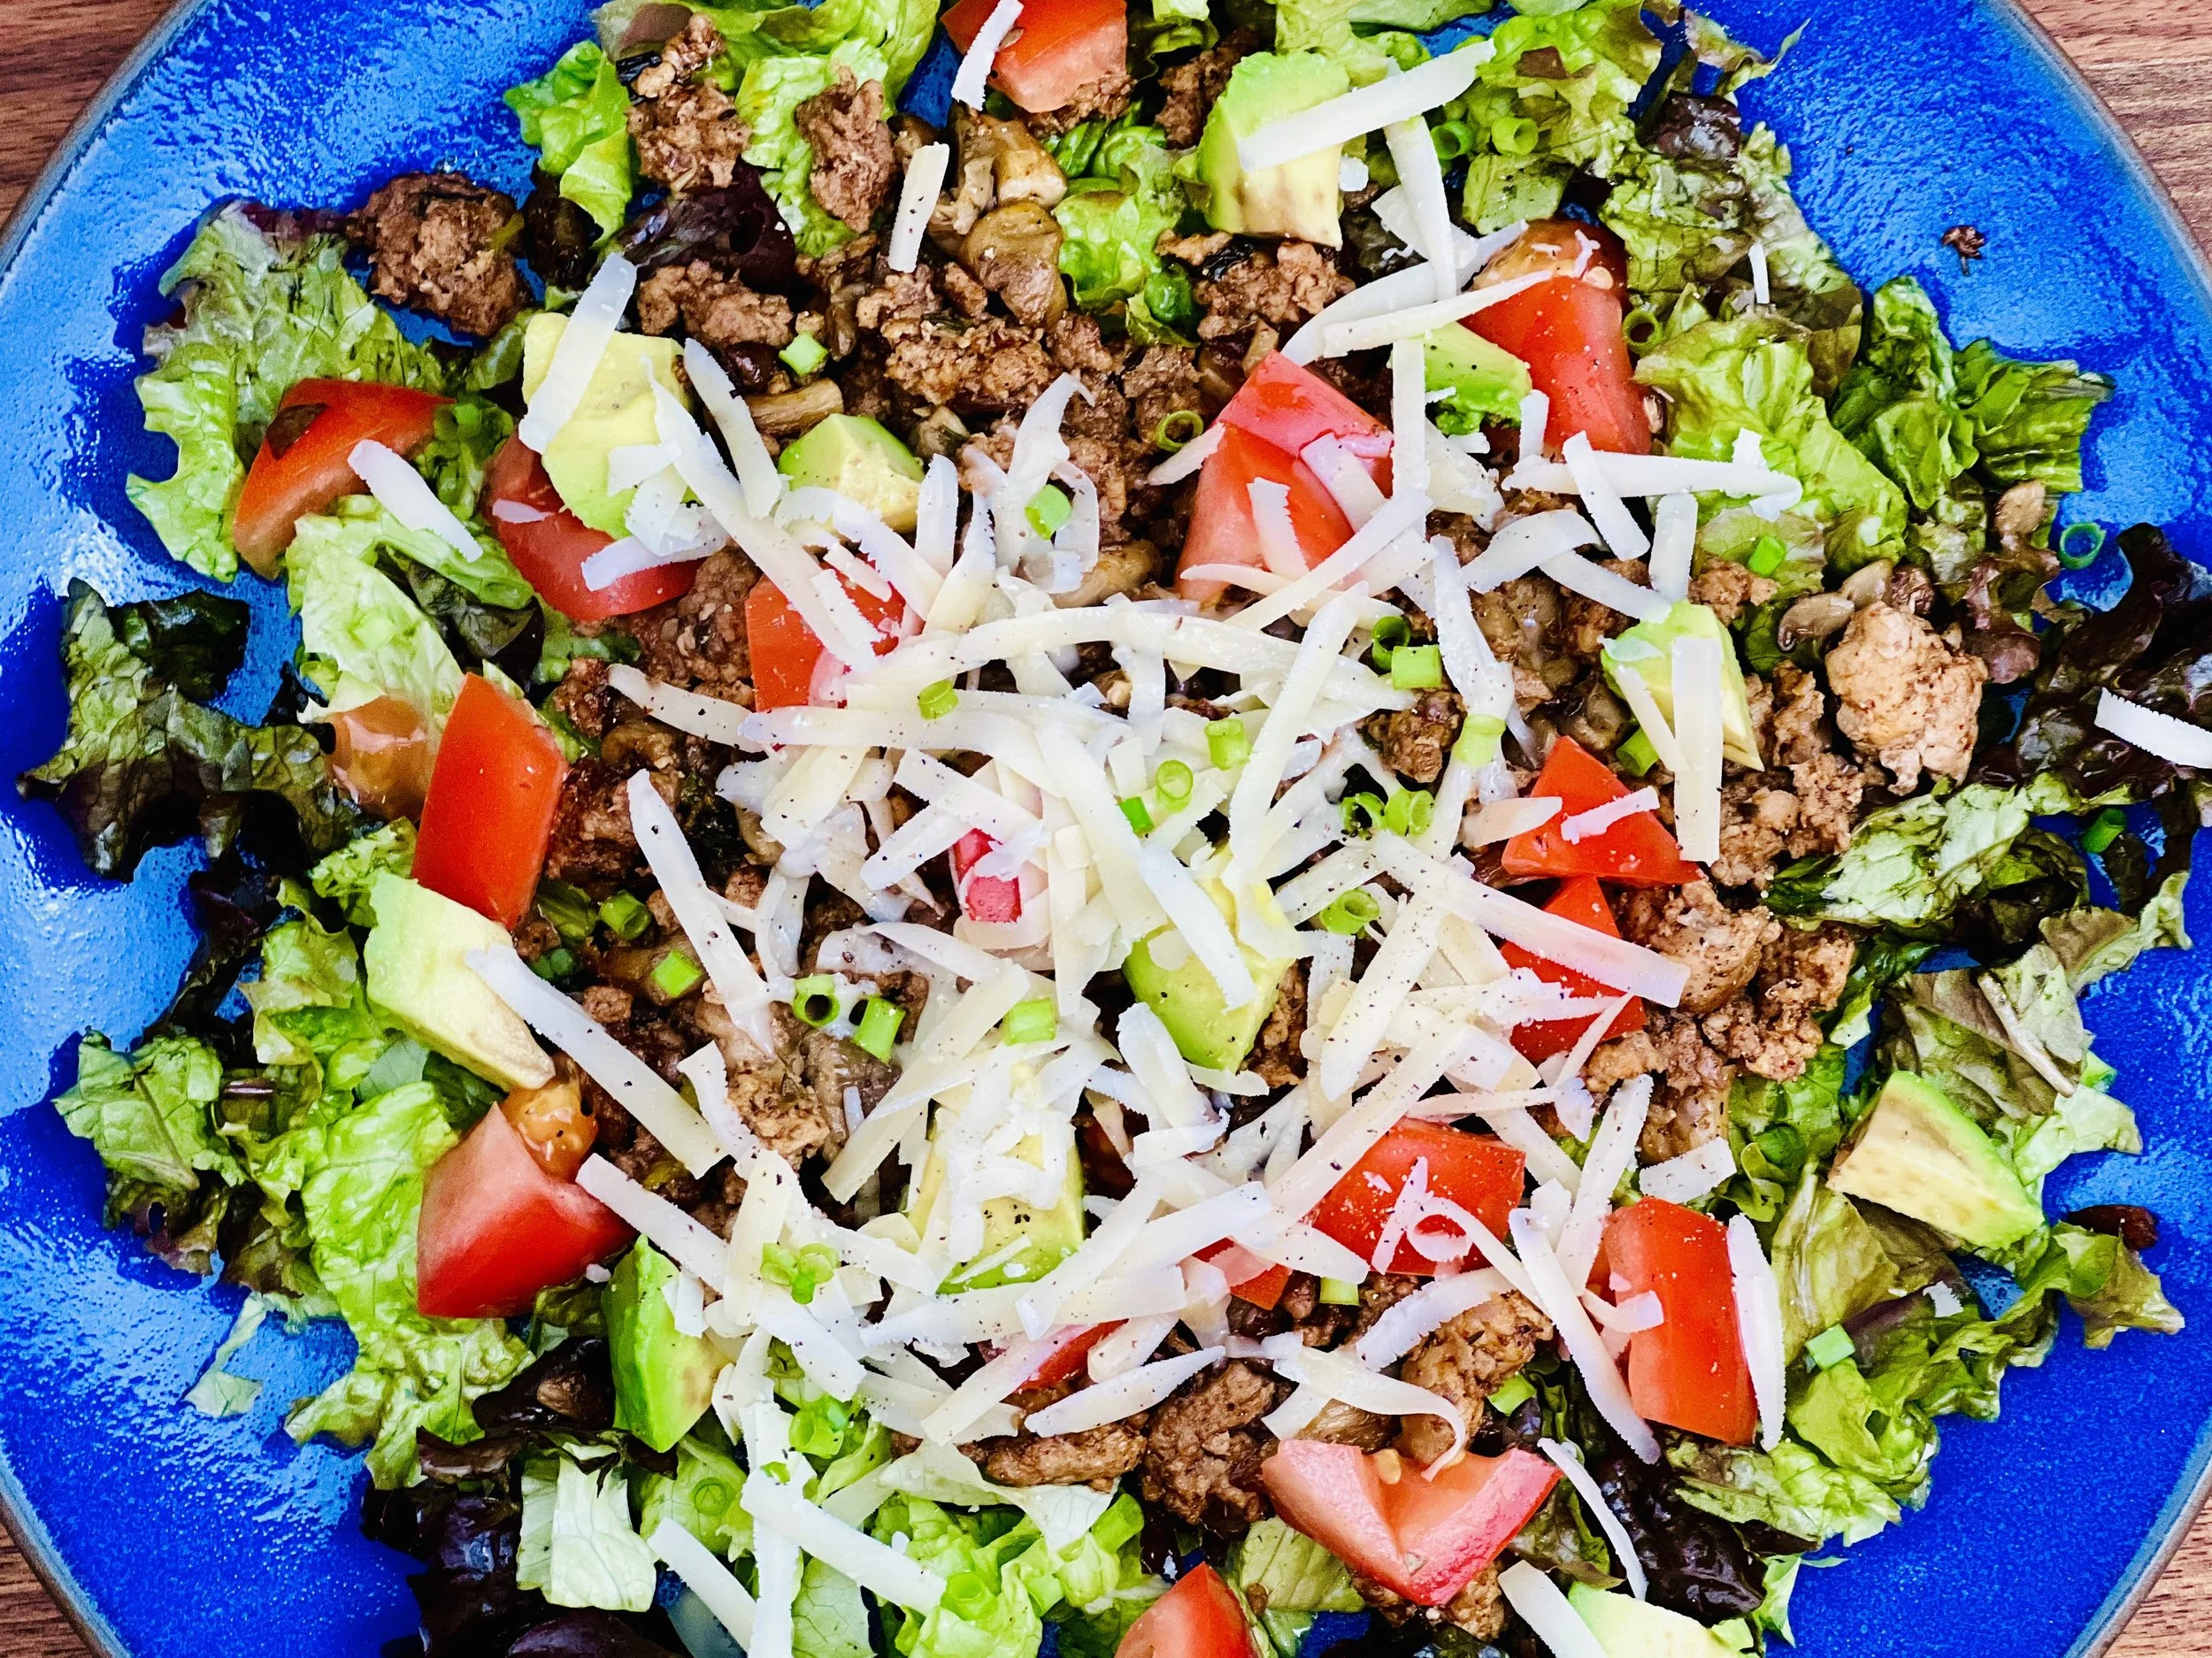
30-Minute Taco Veggie Bowl (Low FODMAP)
10 Minutes prep • 20 Minutes cook • Low FODMAP • Gluten-free • Serves 4
10 Minutes prep • 20 Minutes cook • Low FODMAP • Gluten-free • Serves 4 • Ok to make ahead: Steps 1-4
When you hear “taco” you might think of tortillas and a heavy meal. And don’t get me wrong, I love a good corn tortilla! This Taco bowl, however, is much lower in starch. The ground meat is combined with tons of veggies so it’s light and delicious—but with all the flavor of classic tacos. It’s quick to make (all in one pan) so it’s a perfect weeknight dinner, and leftovers are delicious so plan on having a great lunch item the next day.
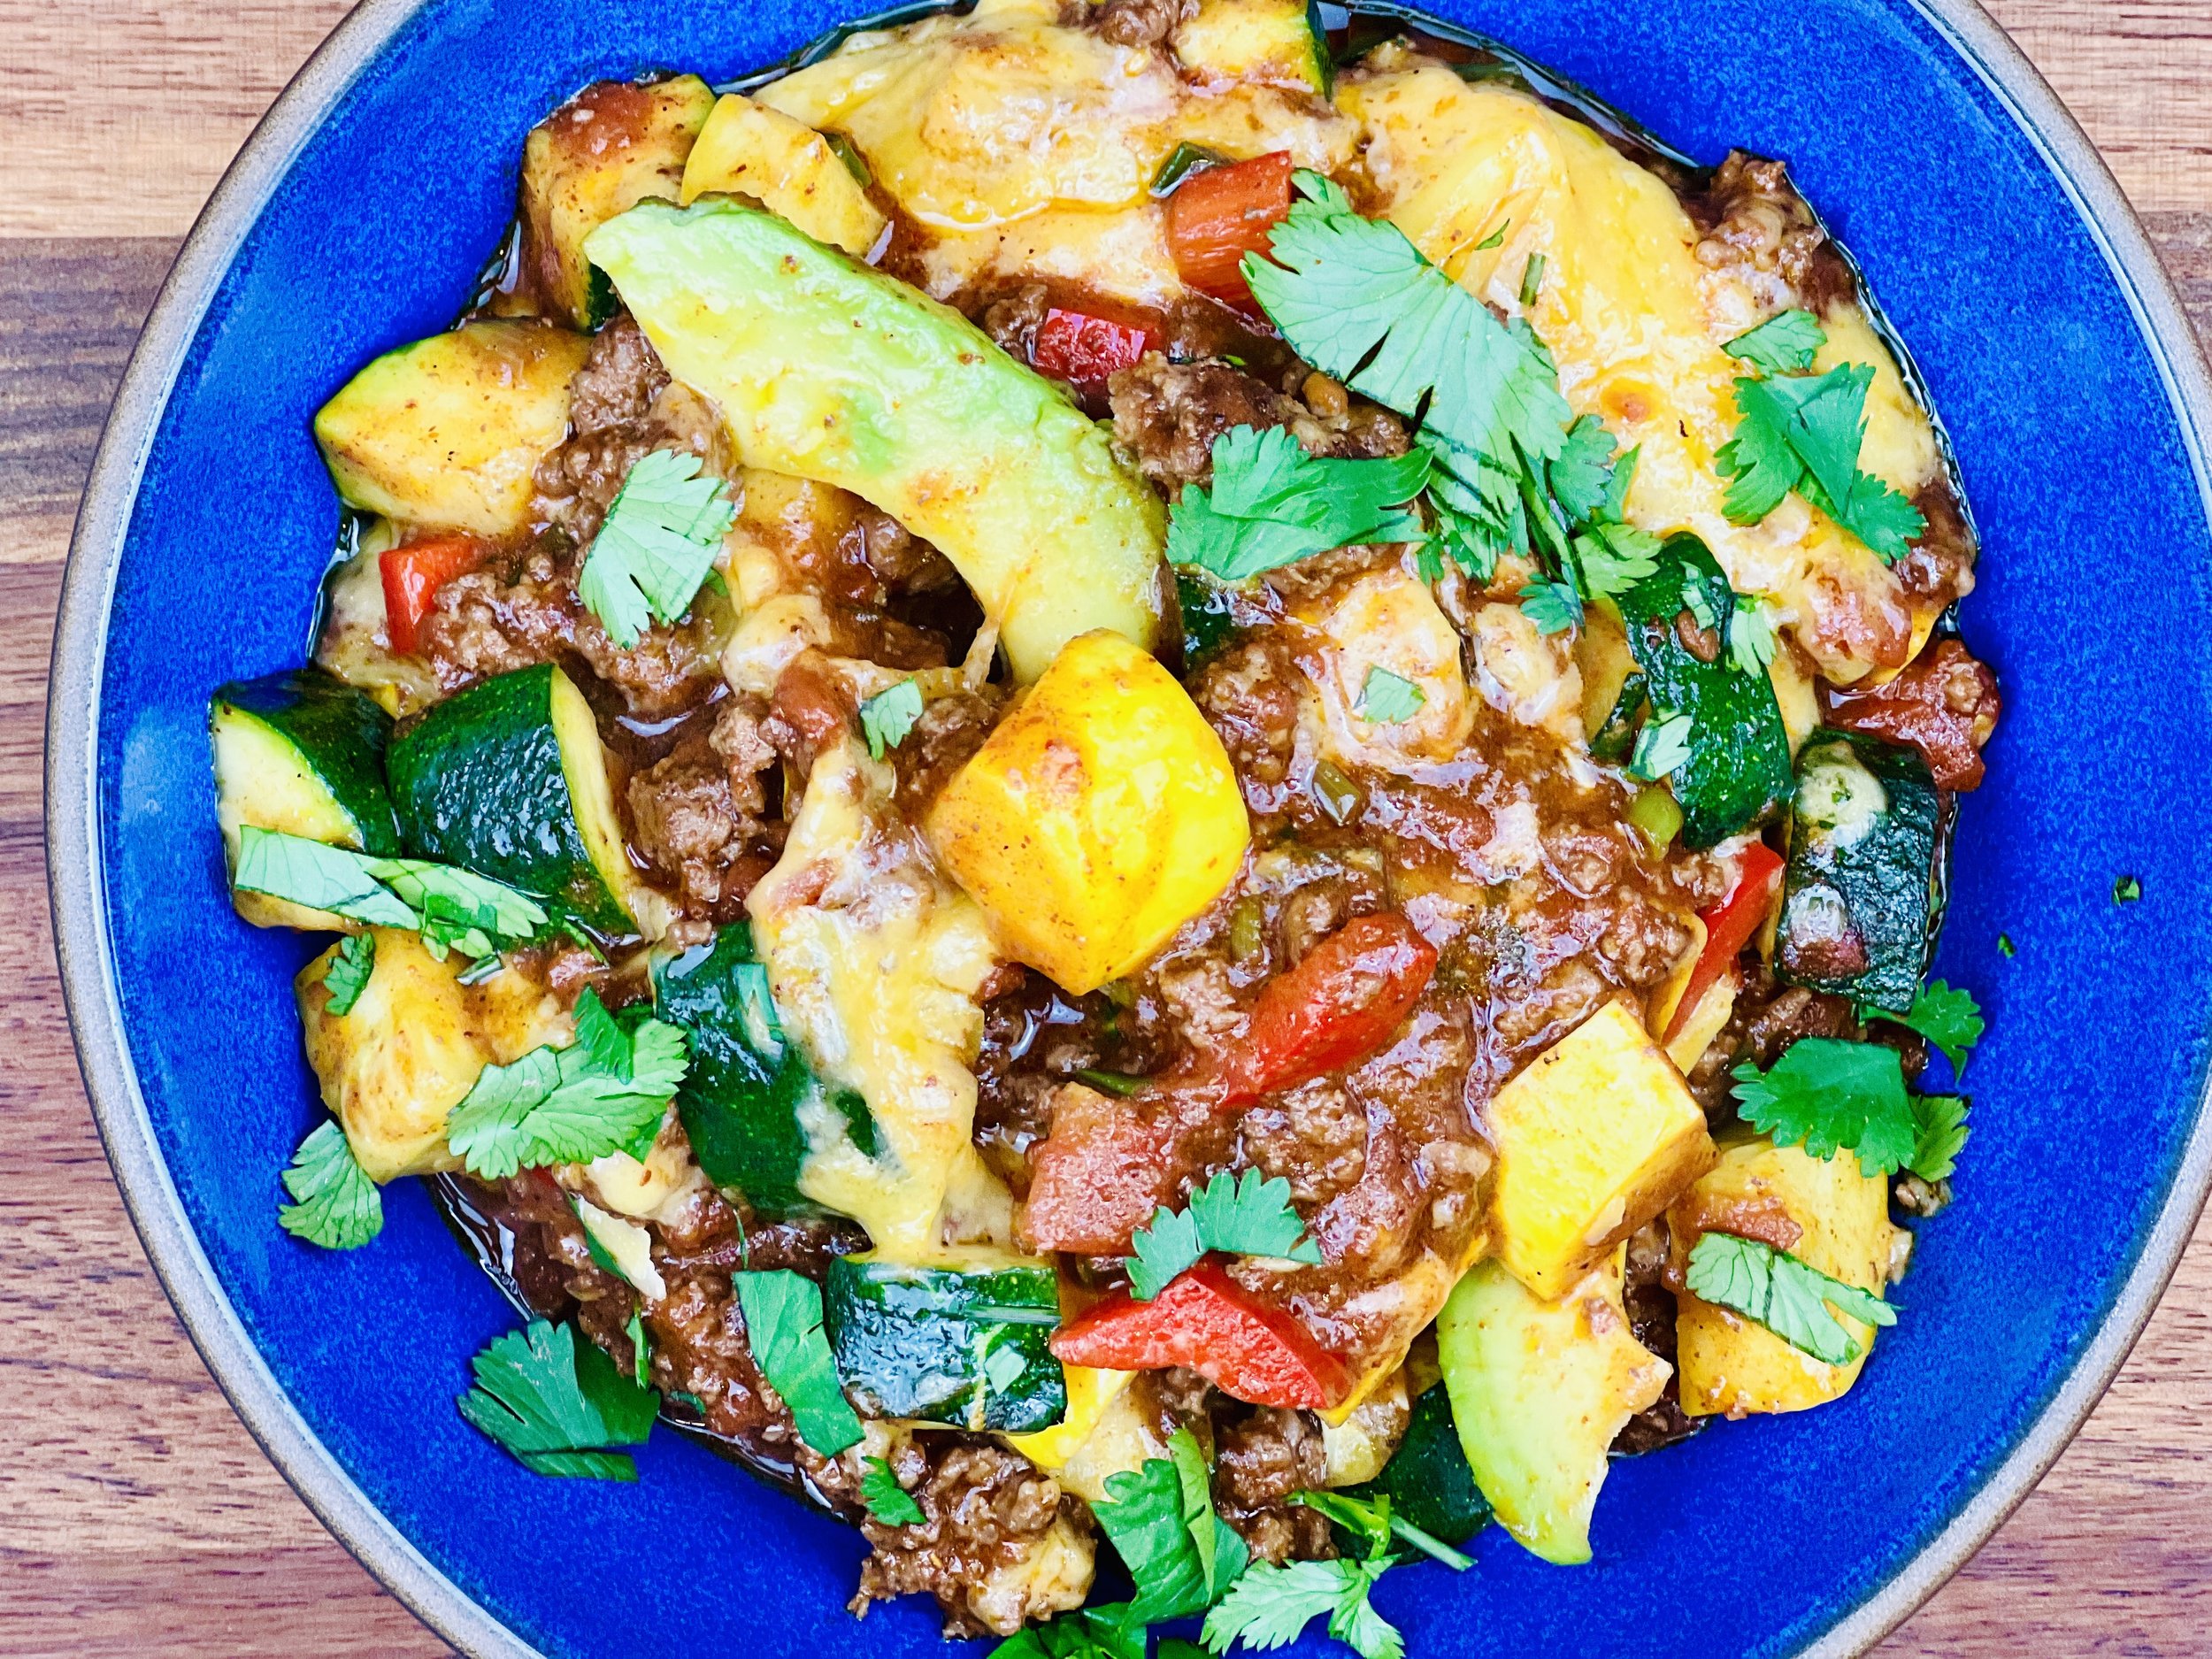
Ingredients
1 pound ground meat (beef, chicken, turkey, pork)
1 bunch green onions (green part only), chopped
1/2 cup red bell pepper, finely chopped
1 cup zucchini, chopped
1 cup summer squash (or pattypan squash), chopped
10 ounces chopped tomatoes with juice (can or carton)
4-ounce can mild green chilies (optional)
3 - 4 tablespoons Smoke N Sanity Taco Seasoning (used code IBSGC15 for 15% discount) see below for a homemade recipe if needed
1 cup extra sharp cheddar cheese, shredded
For Serving:
Cilantro or more green onion greens, chopped
Lactose-free sour cream
Avocado slices
Red pepper flakes
Directions
(1) Prepare: Chop green onion greens, zucchini, and summer squash. Grate the cheese.
(2) Cook the meat: Use a deep skillet (such as a cast-iron skillet) set over medium-high heat. When the pan is hot, add the meat and use a spatula to break it up. Cook until the meat is just cooked through (about 8 minutes).
(3) Season the meat: Add the green onion greens and cook for a minute until they are tender. Add the taco seasoning, tomatoes, and canned green chilies (if using), and stir well to blend in the seasoning evenly. Cook until the mixture is warmed through (about 2 minutes).
(4) Add the veggies: Add the zucchini and summer squash (or pattypan squash). Cook until the vegetables are just tender but still brightly colored (about 3 - 5 minutes). Taste and add more taco seasoning, salt, or pepper, if needed.
(5) Finish: Turn the broiler on and sprinkle the cheese over the mixture. Put the whole pan in the oven to broil until the cheese is well melted and just starting the brown at the edges.
(6) Plate and serve: Serve hot in bowls with any combination of avocado slices, chopped cilantro, green onion greens, lactose-free sour cream, and/or red pepper flakes.
Eat and enjoy every bite because you can!
Ingredients: Taco Seasoning
These quantities make 4 tablespoons
2 tablespoons chili powder
1/2 teaspoon crushed red pepper flakes
1/2 teaspoon dried oregano
1 teaspoon paprika
3 teaspoons ground cumin
1/2 teaspoon Kosher salt
1/2 teaspoon black pepper
Directions: Taco Seasoning
(1) Blend ingredients: Combine all ingredients in a small bowl and whisk to blend. Store any leftover seasoning in an airtight container. Make more than you need because you’re going to want more!
Recipe note: I use Diamond Crystal Kosher salt in all my recipes because it has a wonderful flat and crisp flake that tastes delicious. It is also the least salty salt available so you can use it more liberally as a seasoning than you can table salt or sea salt. If you use another type of salt, you may need to reduce the amount so it is not over-salted.
Have a question you’d like to have answered? Email me at hello@ibsgamechanger.com
Link note: This post may contain affiliate links for you to easily purchase items that are linked. I may earn a small commission from qualifying purchases but none of this costs you a thing so feel free to use the links! In addition, for some items, I have provided a special discount code for IBS Game Changers so be sure to use the code when you purchase an item to get the discount that has been arranged just for you.
More Deliciously Low FODMAP™ main course recipes
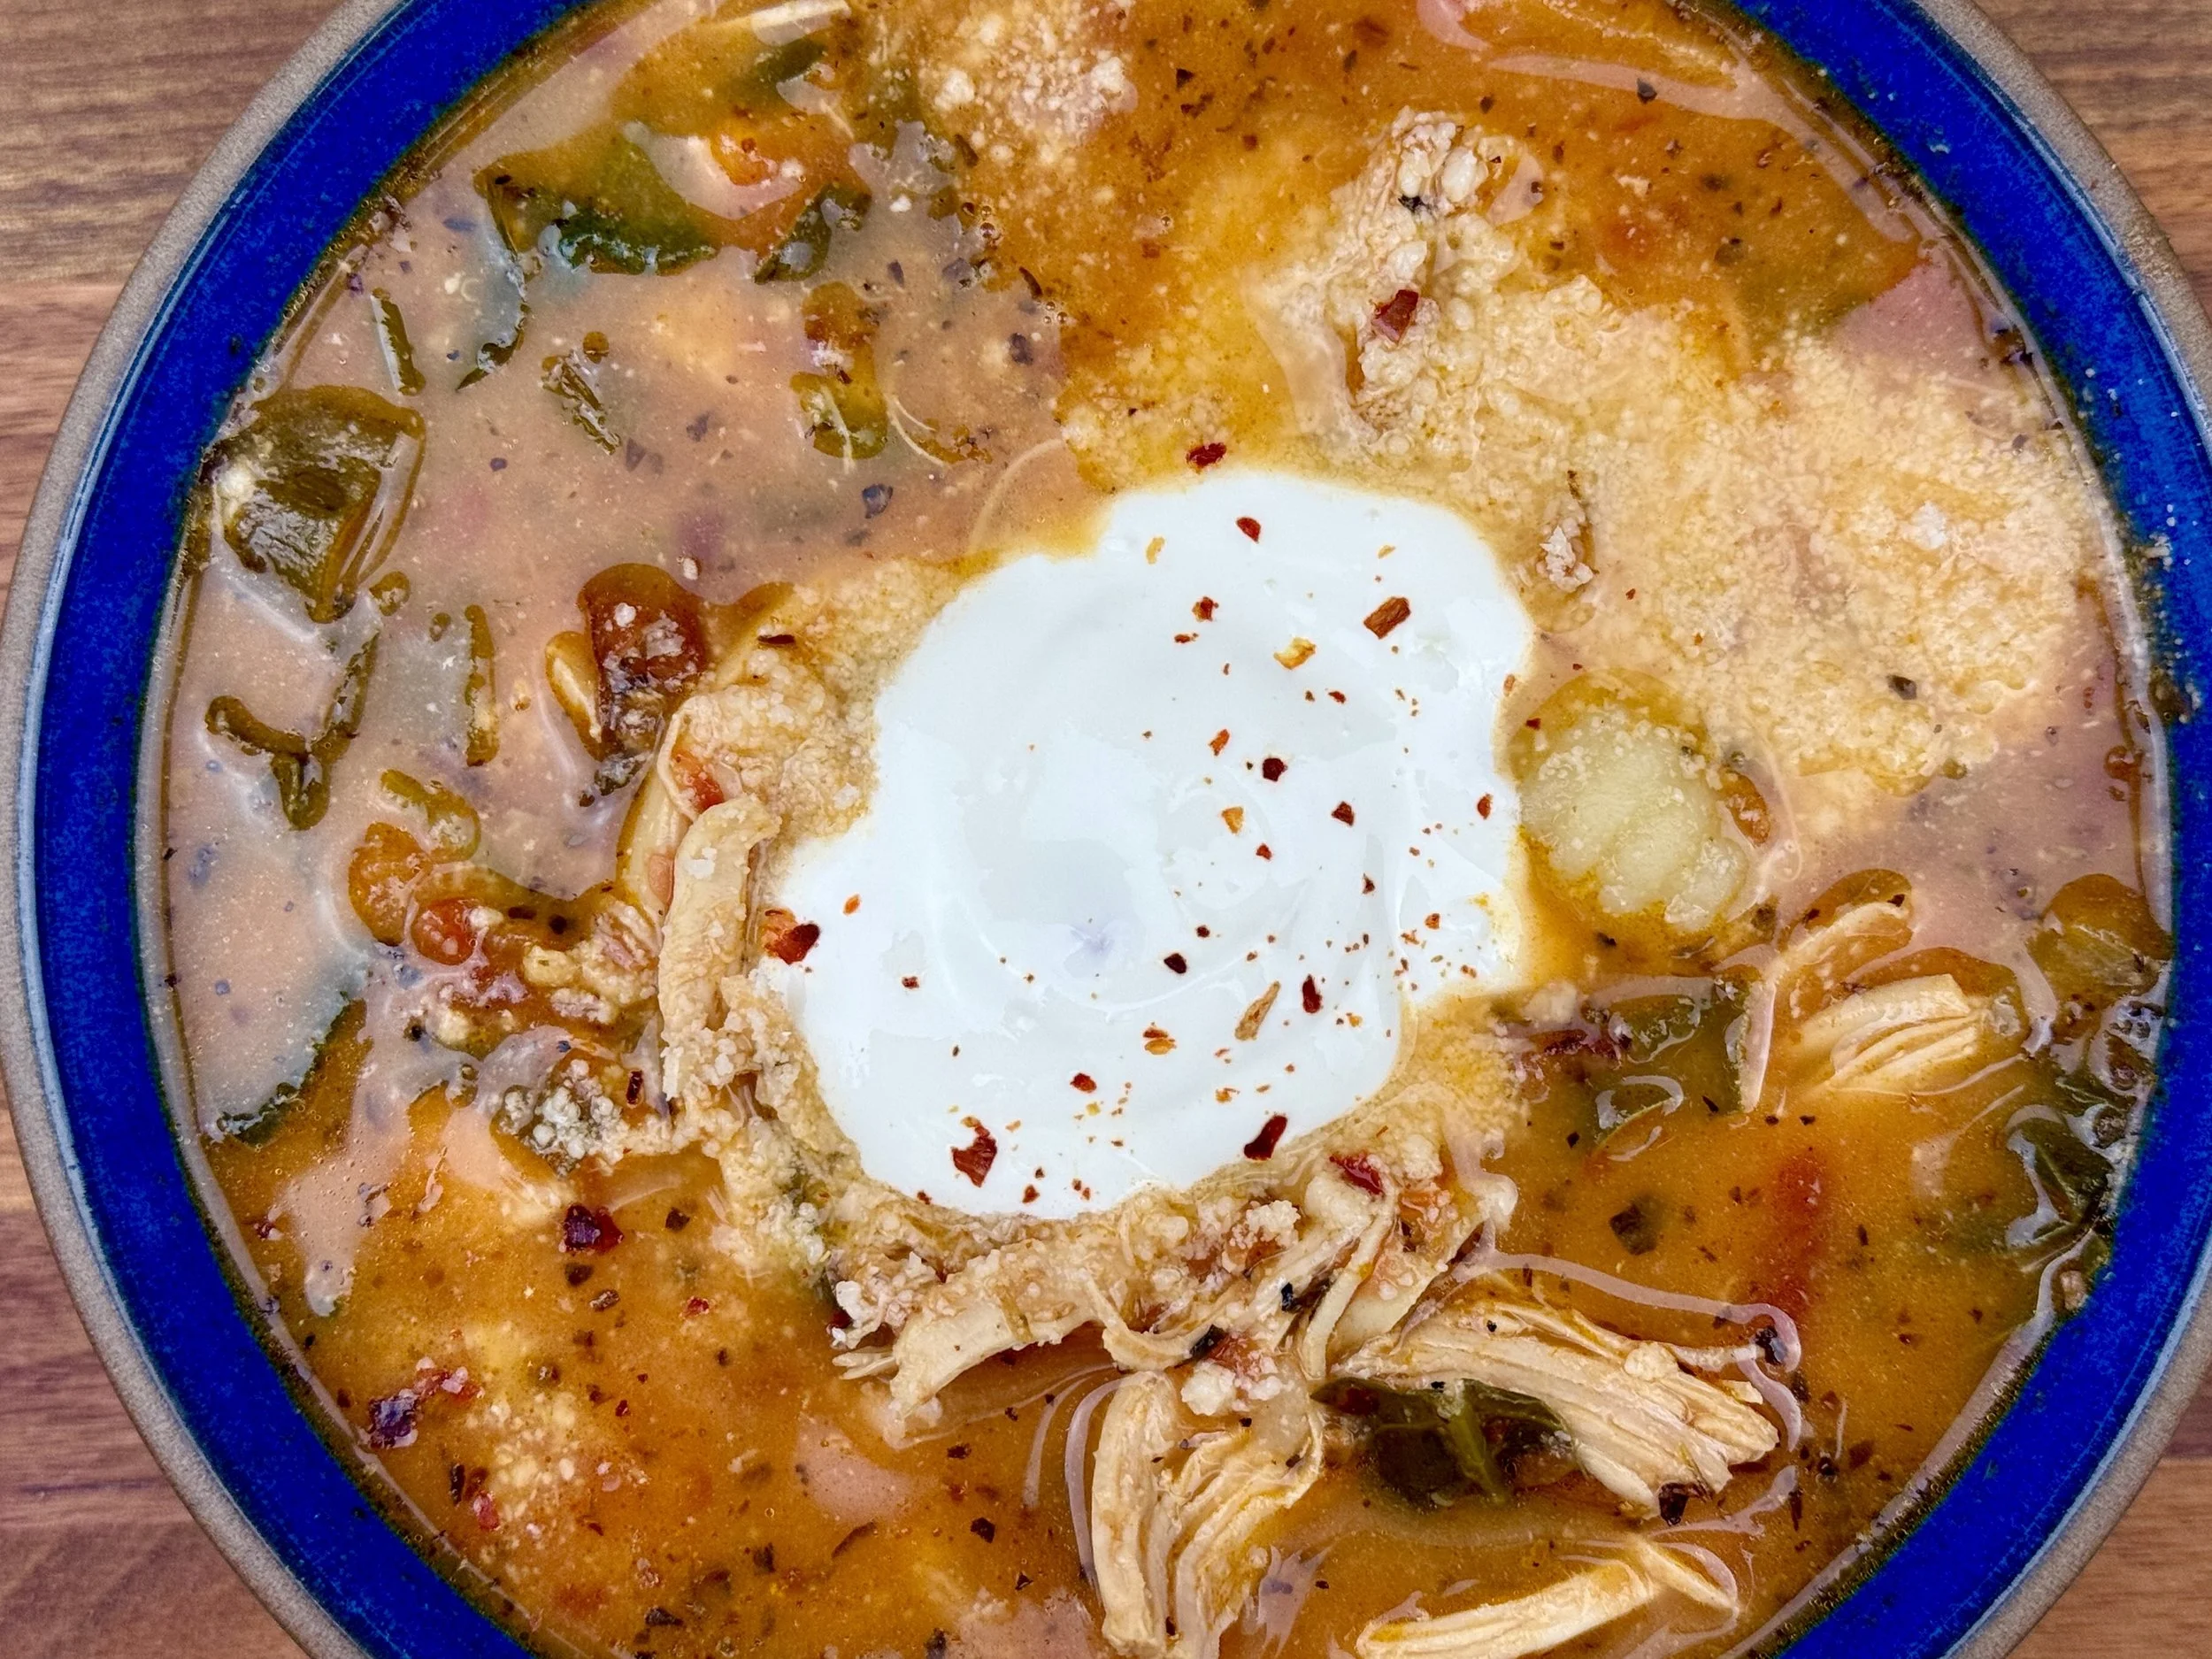
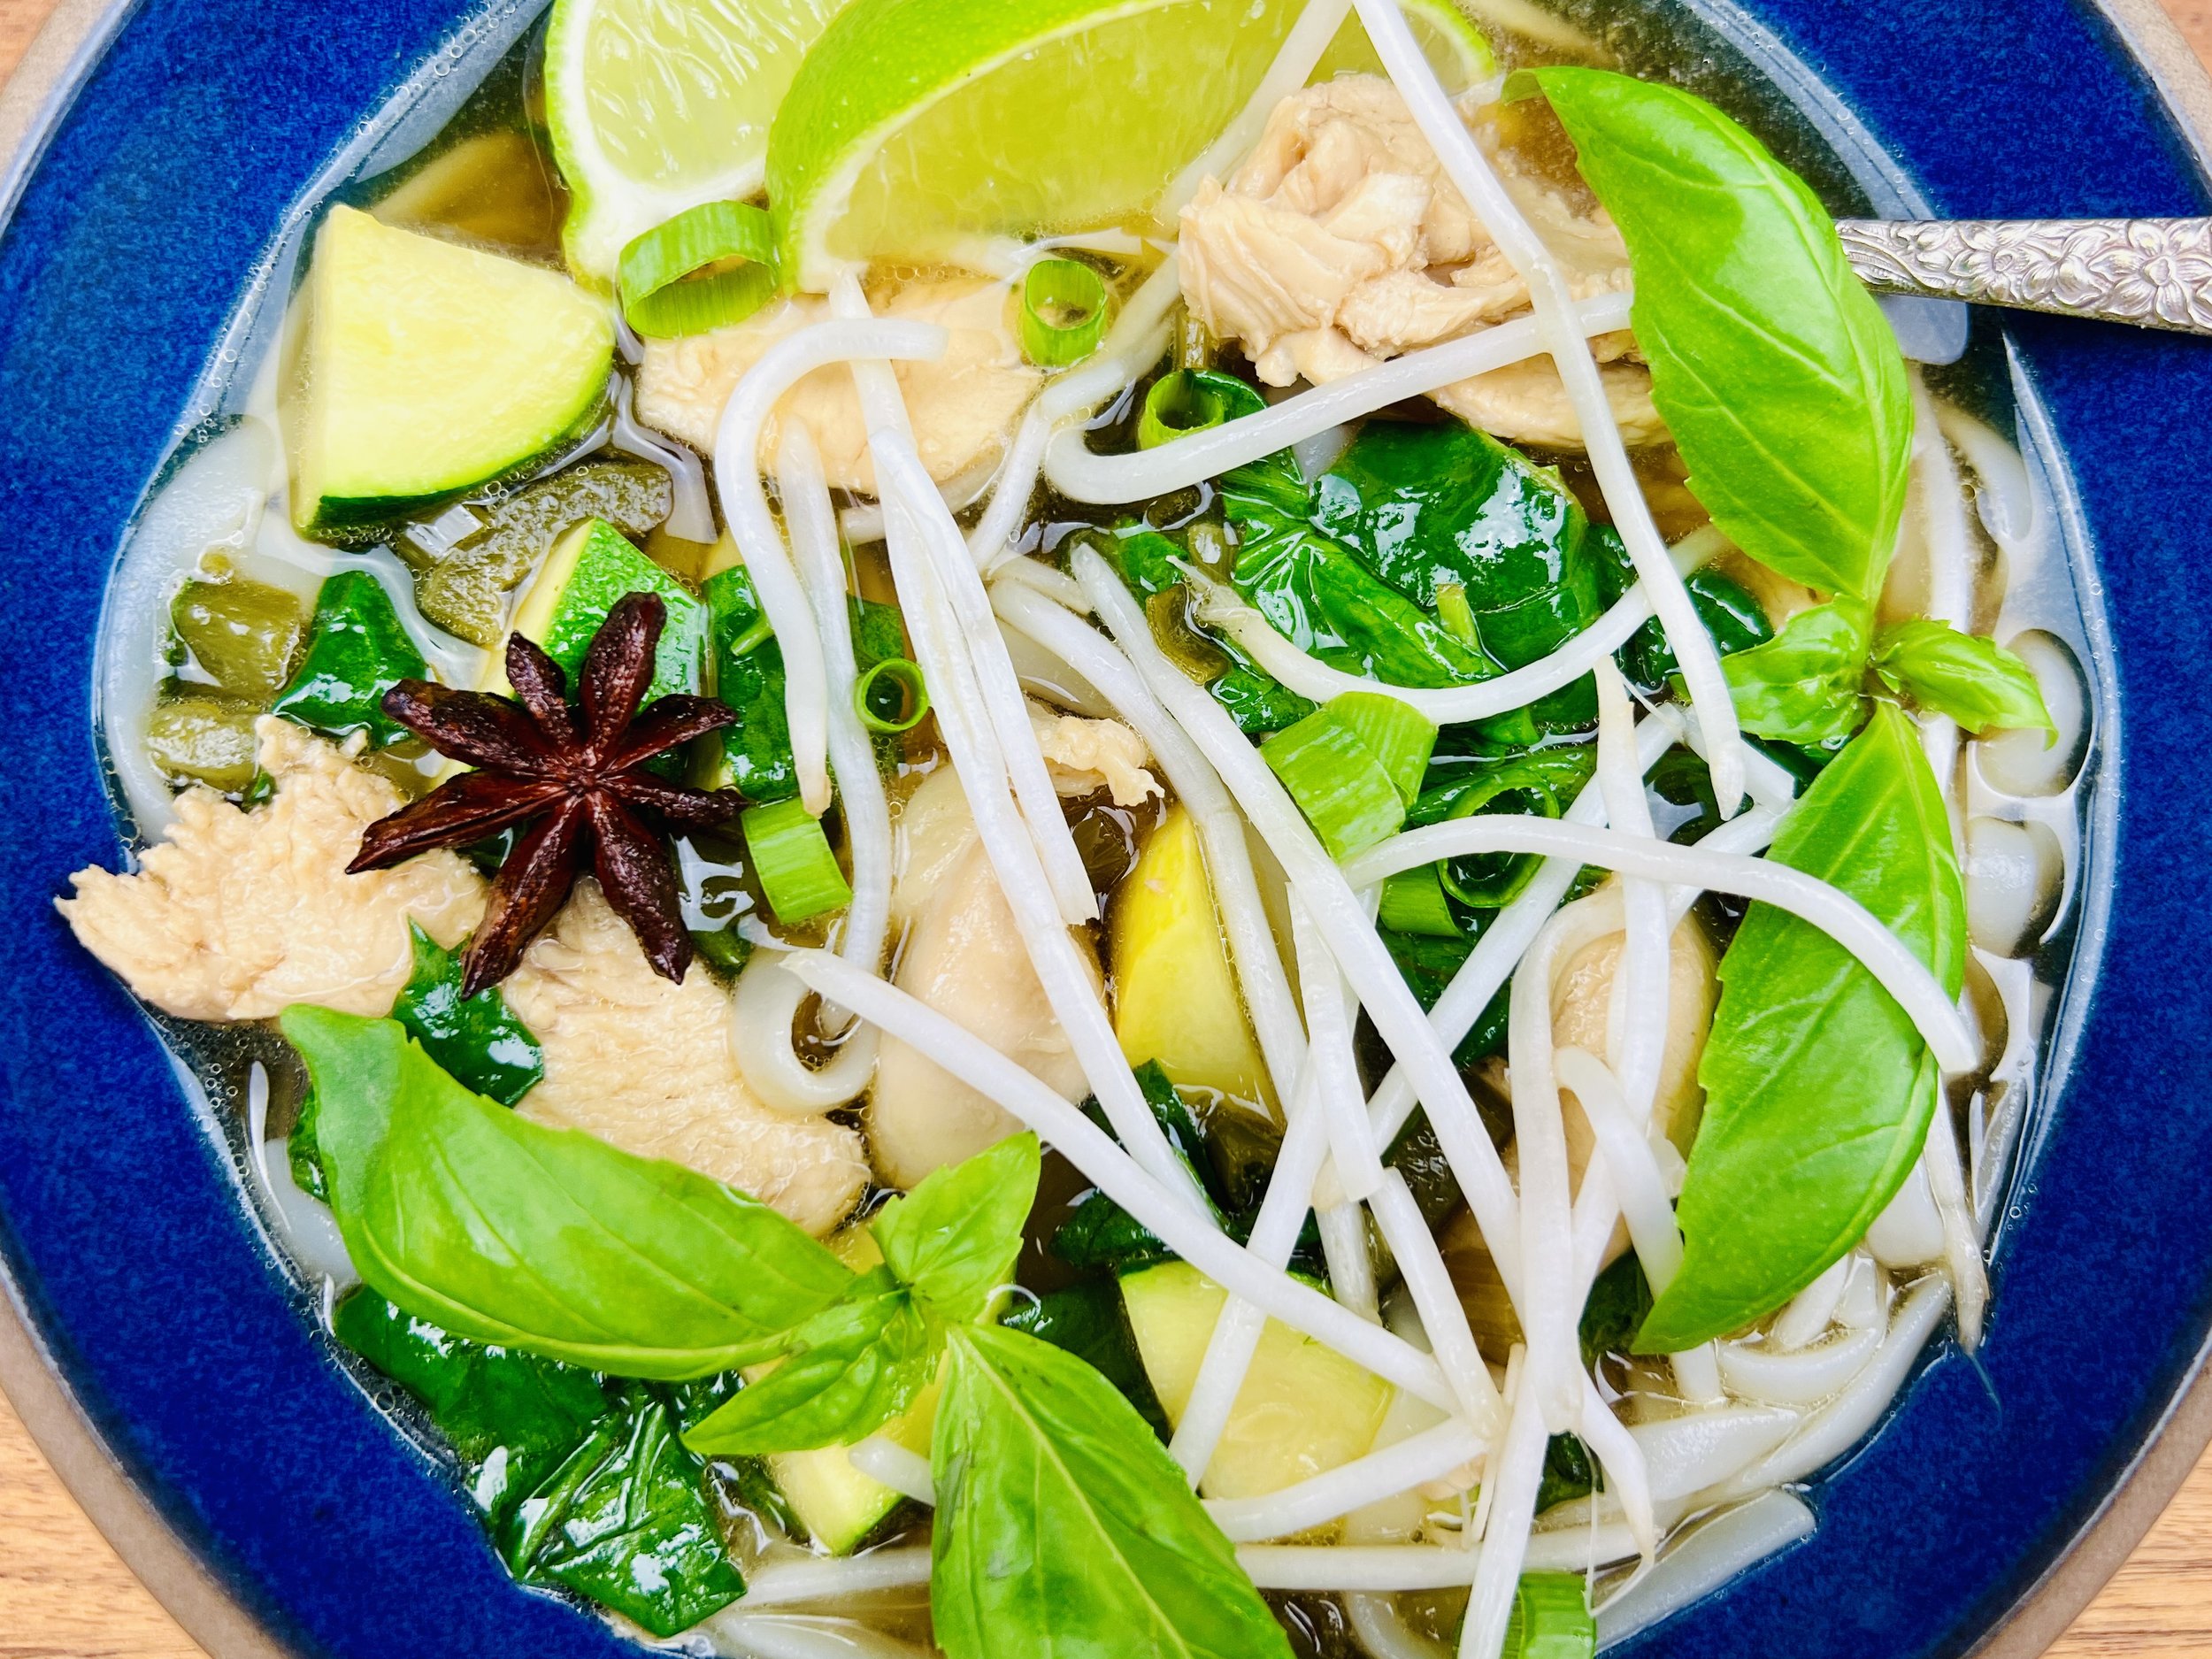
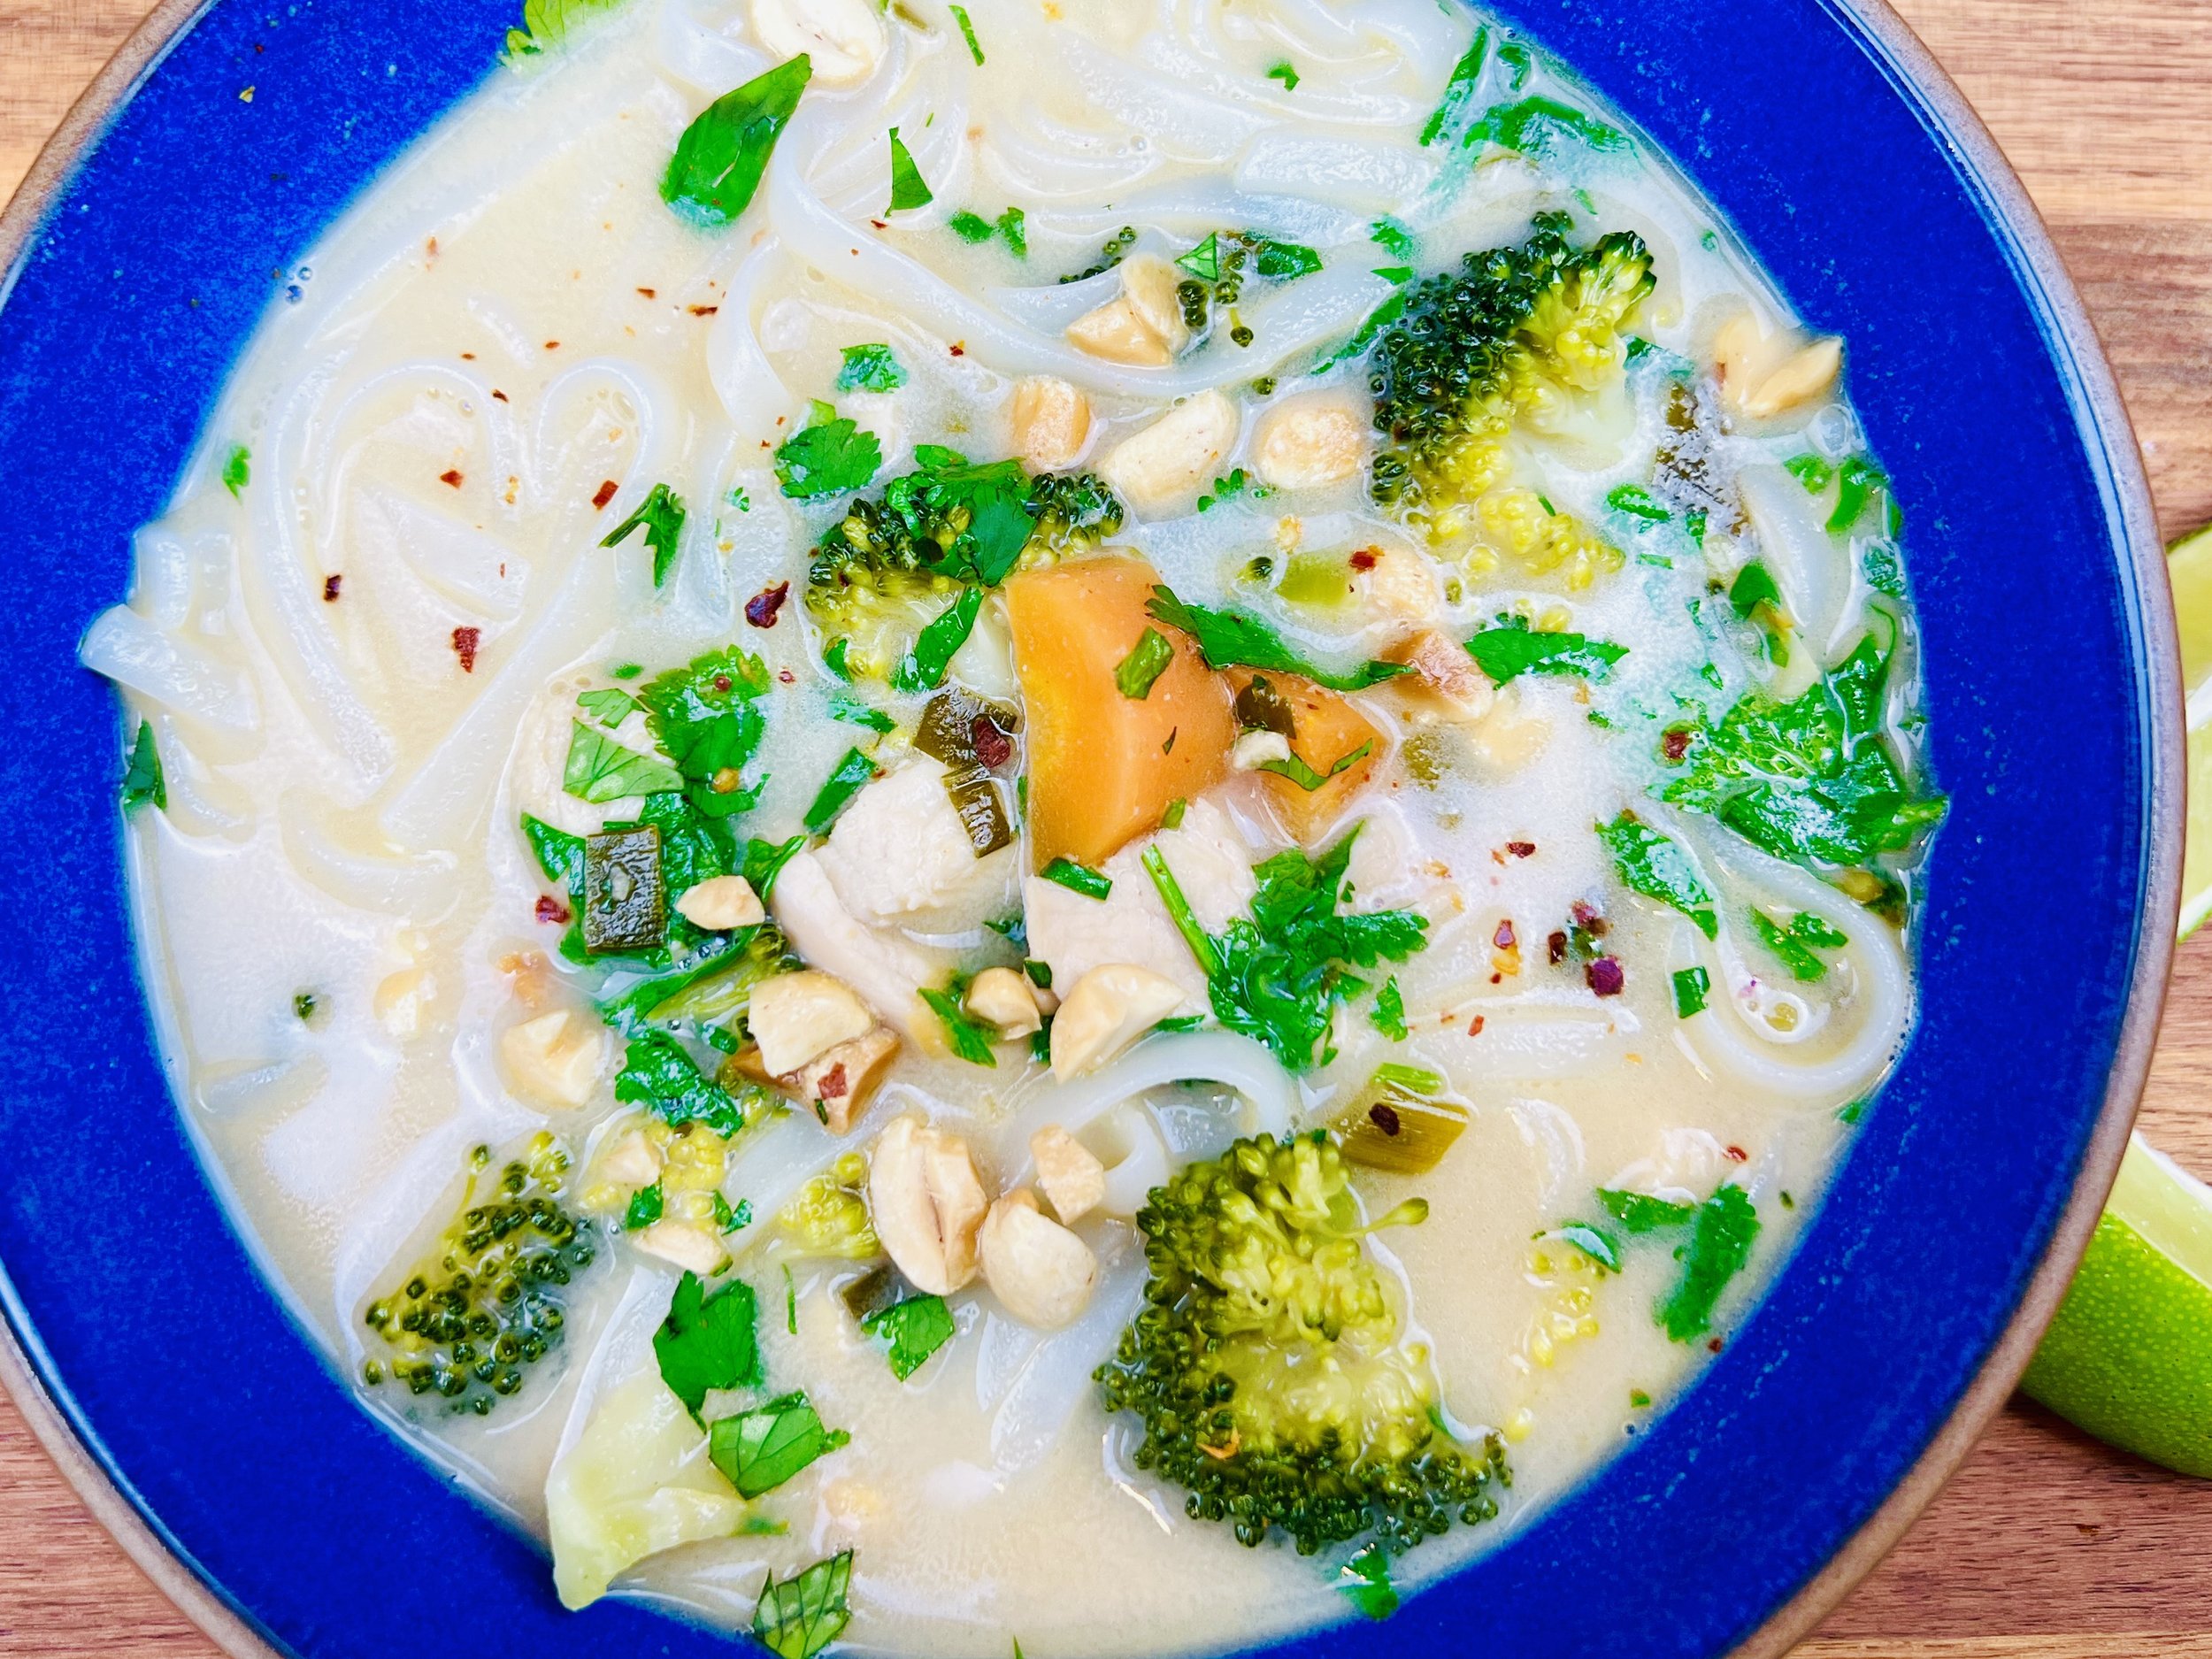
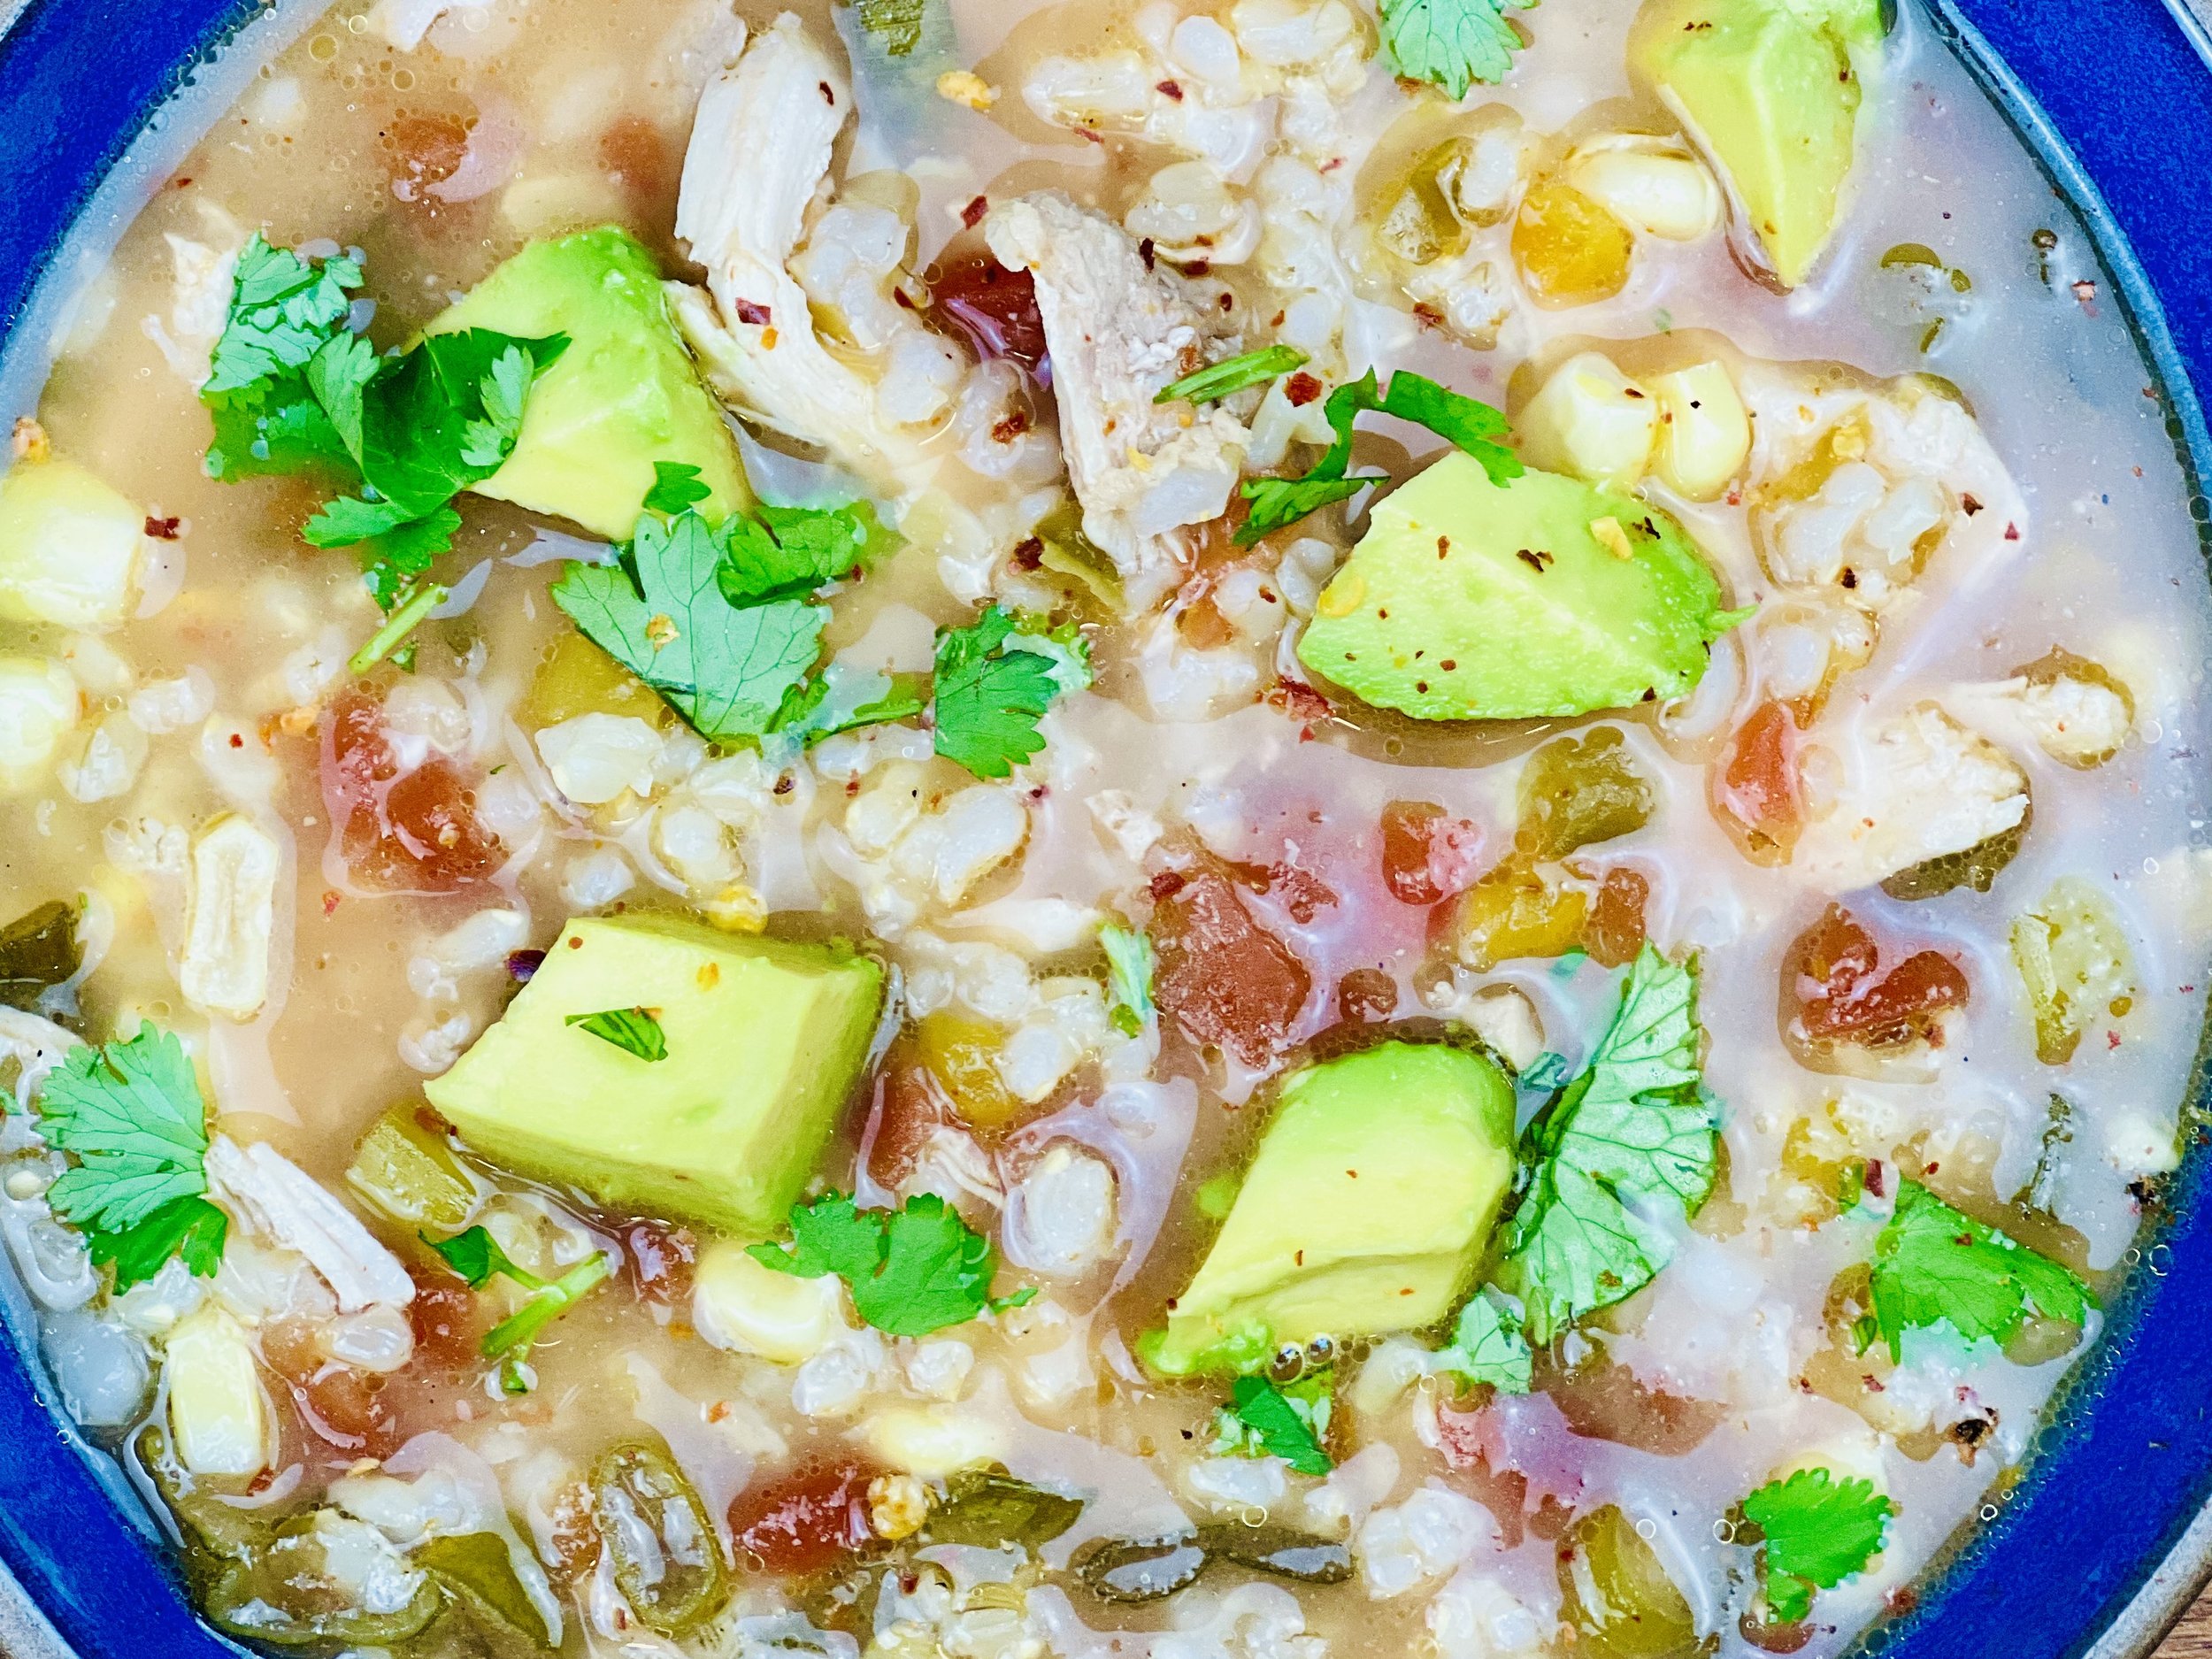
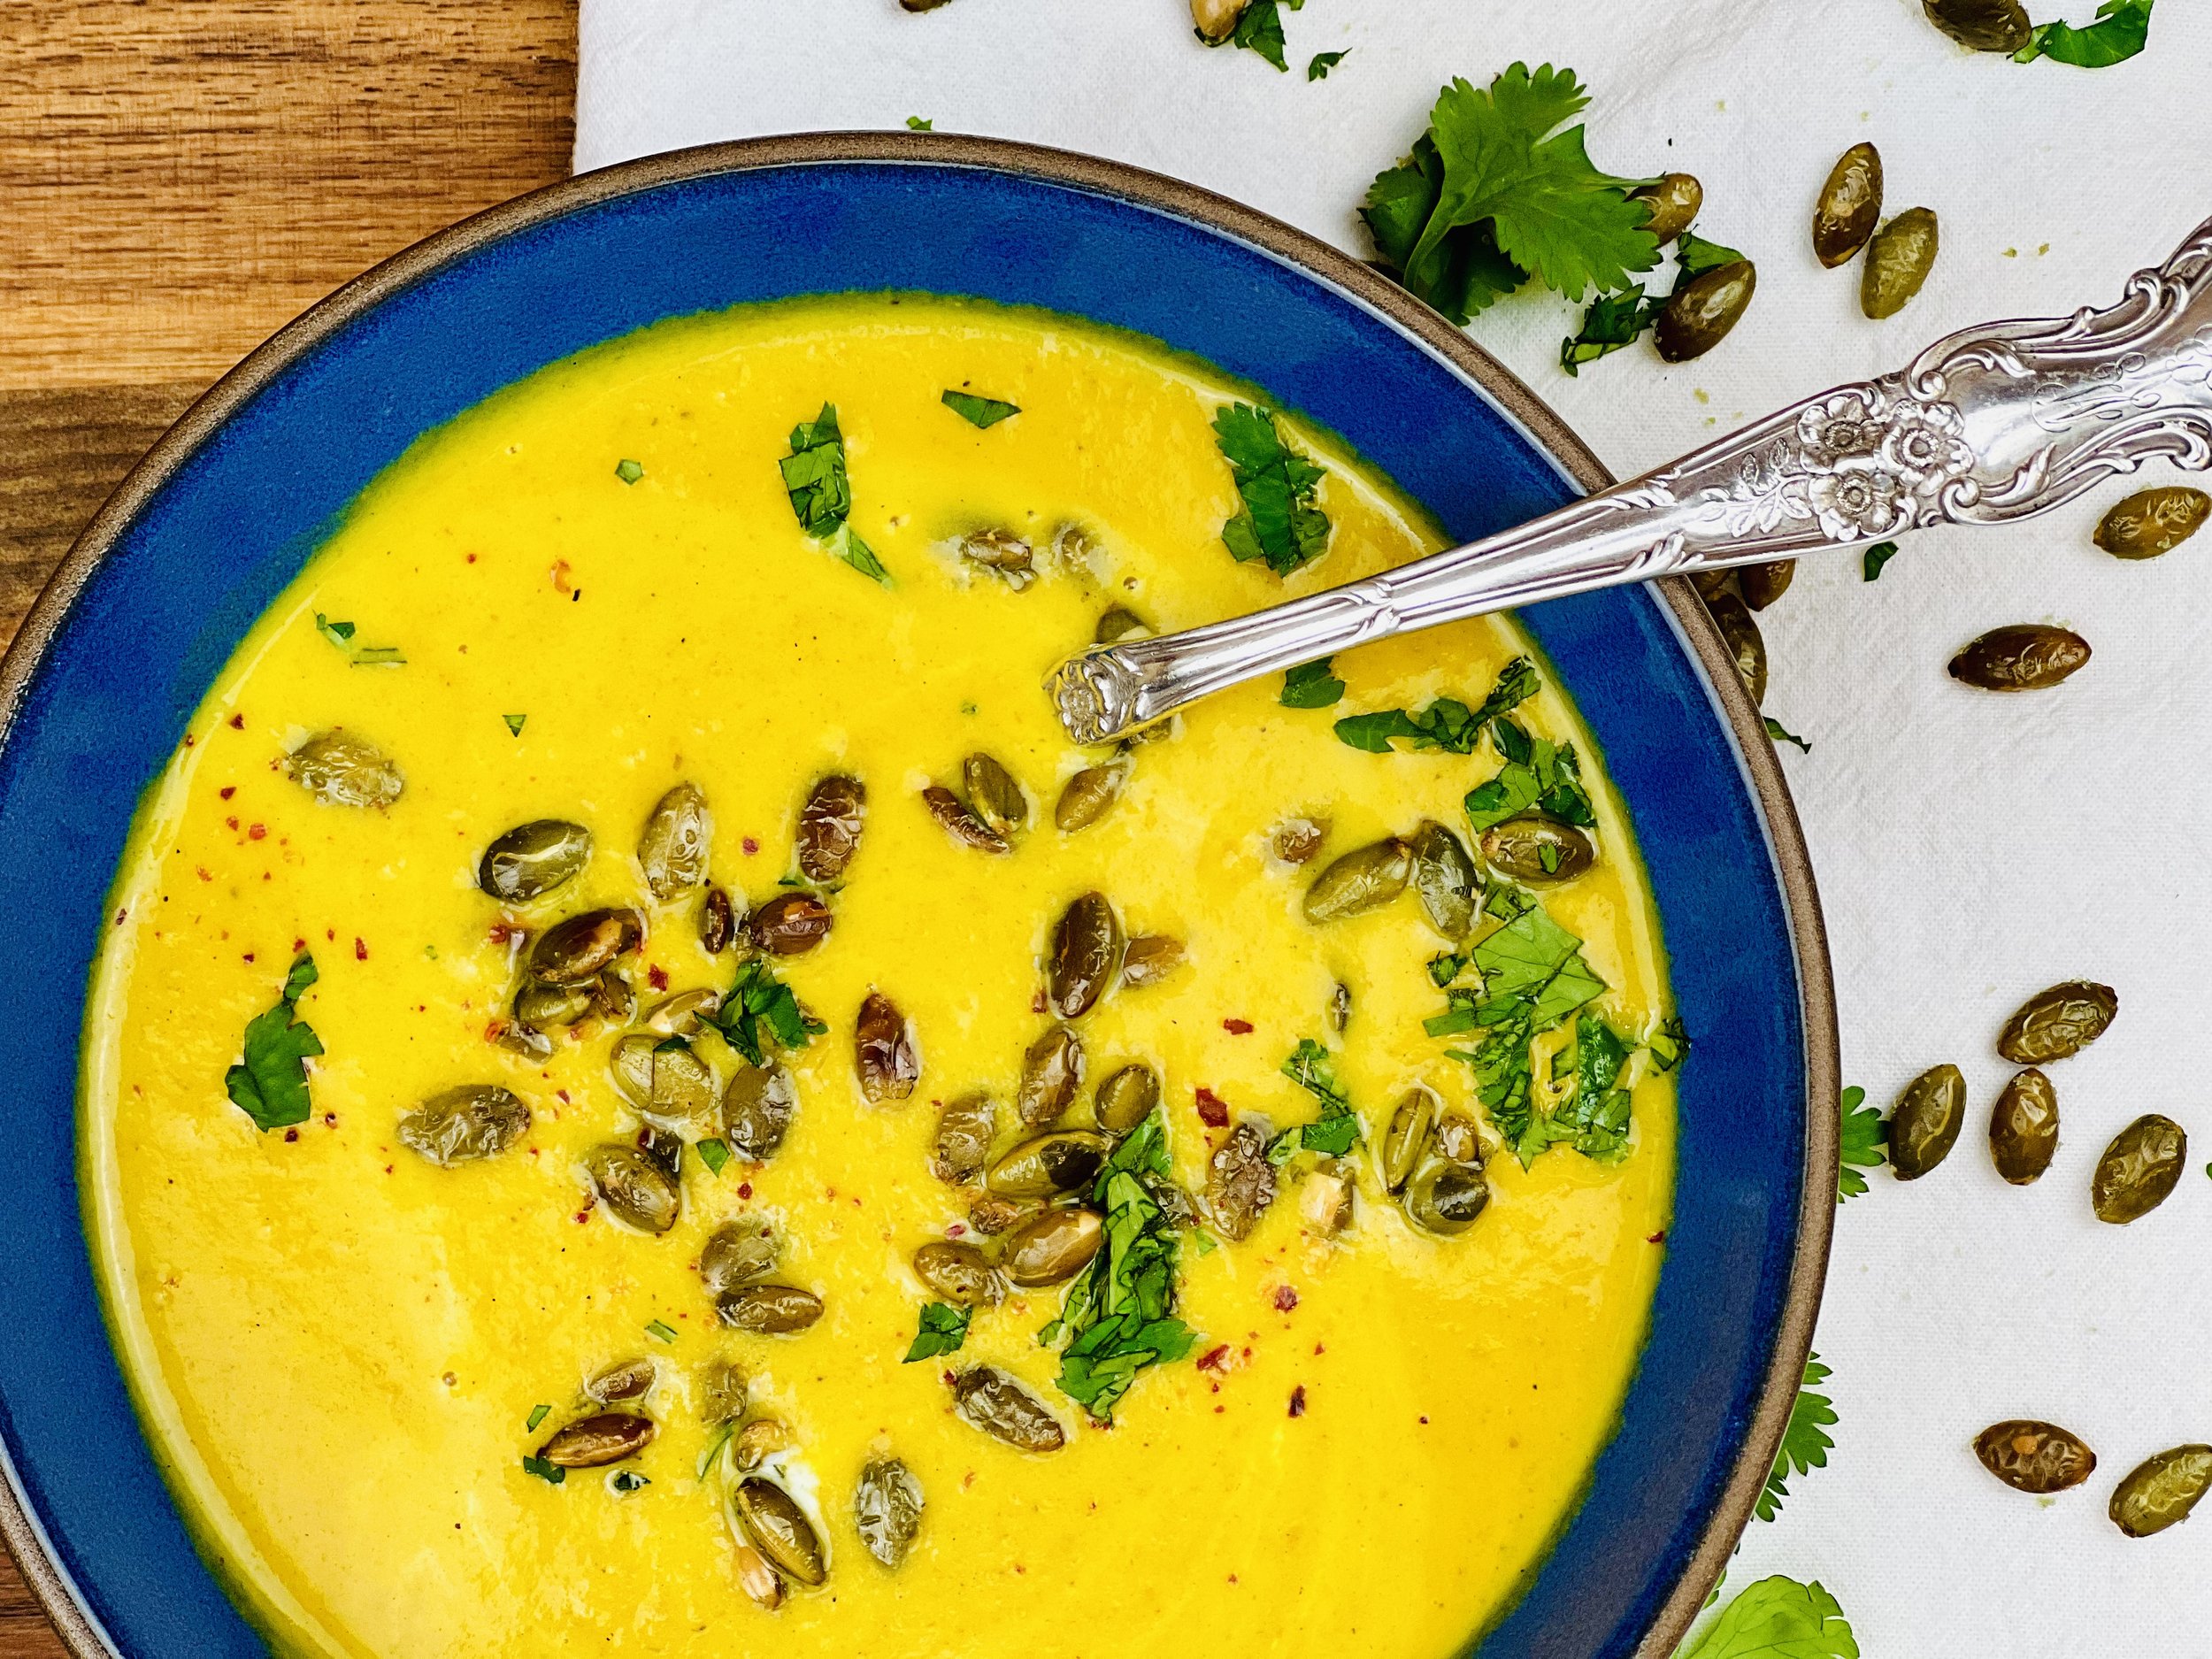
30-Minute Thai Coconut Chicken Noodle Soup (Low FODMAP)
10 Minutes prep • 20 Minutes cook • Low FODMAP • Gluten-free • Dairy-free • Serves 4
10 Minutes prep • 20 Minutes cook • Low FODMAP • Gluten-free • Dairy-free • Serves 4 • Ok to make ahead: Steps 1-3
I love a simple soup recipe and this one qualifies! This Thai-inspired soup is intensely flavorful and packed full of delightful colors and textures. Rice noodles and vegetables blend with the chicken and broth to make it hearty and satisfying. It comes together quickly so it’s a perfect weeknight or any night meal. This recipe is dairy-free so it’s also a great option if you are avoiding dairy all together.
This is an exclusive recipe just for recipe club members.
In addition to the two free recipes I create each week I am creating and delivering one very special recipe just for my recipe club members. If you’re not yet a member, I encourage you to join! Membership in the club includes access to the complete archive of recipes with filters so it can become your virtual low FODMAP cookbook plus, I am creating and delivering one special NEW recipe every week ONLY for recipe club members.
Your membership in the club helps me continue creating new, delicious, easy-to-make, low FODMAP recipes just for you.
As always, all recipes will emphasize simple ingredients, easy preparation, and delicious low FODMAP results. Recipes will be for everything from main courses, salads, soups, side dishes, appetizers, desserts, sauces, breakfast and lunch, and even mocktails and cocktails. Everything you need to prepare fantastic low FODMAP meals everyone will love.
Join the club. Let’s keep making delicious Low FODMAP meals together.
More Deliciously Low FODMAP™ soup recipes
Crisp Veggie Slaw (Low FODMAP)
20 Minutes prep • Low FODMAP • Gluten-free • Lactose-free • Serves 4
20 Minutes prep • Low FODMAP • Gluten-free • Lactose-free • Serves 4 • Ok to make ahead: Steps 1-3
This twist on the classic cole slaw is so good, you may never go back! The combination of crisp vegetables with the savory dressing and sweet pineapple is not only delicious, it’s a great rainbow of colors to add to your plate. This salad is a wonderful make-ahead dish because it stays crisp and the flavors get better with a little time. So, toss some together on the weekend and enjoy it with lunch or dinner during the week.
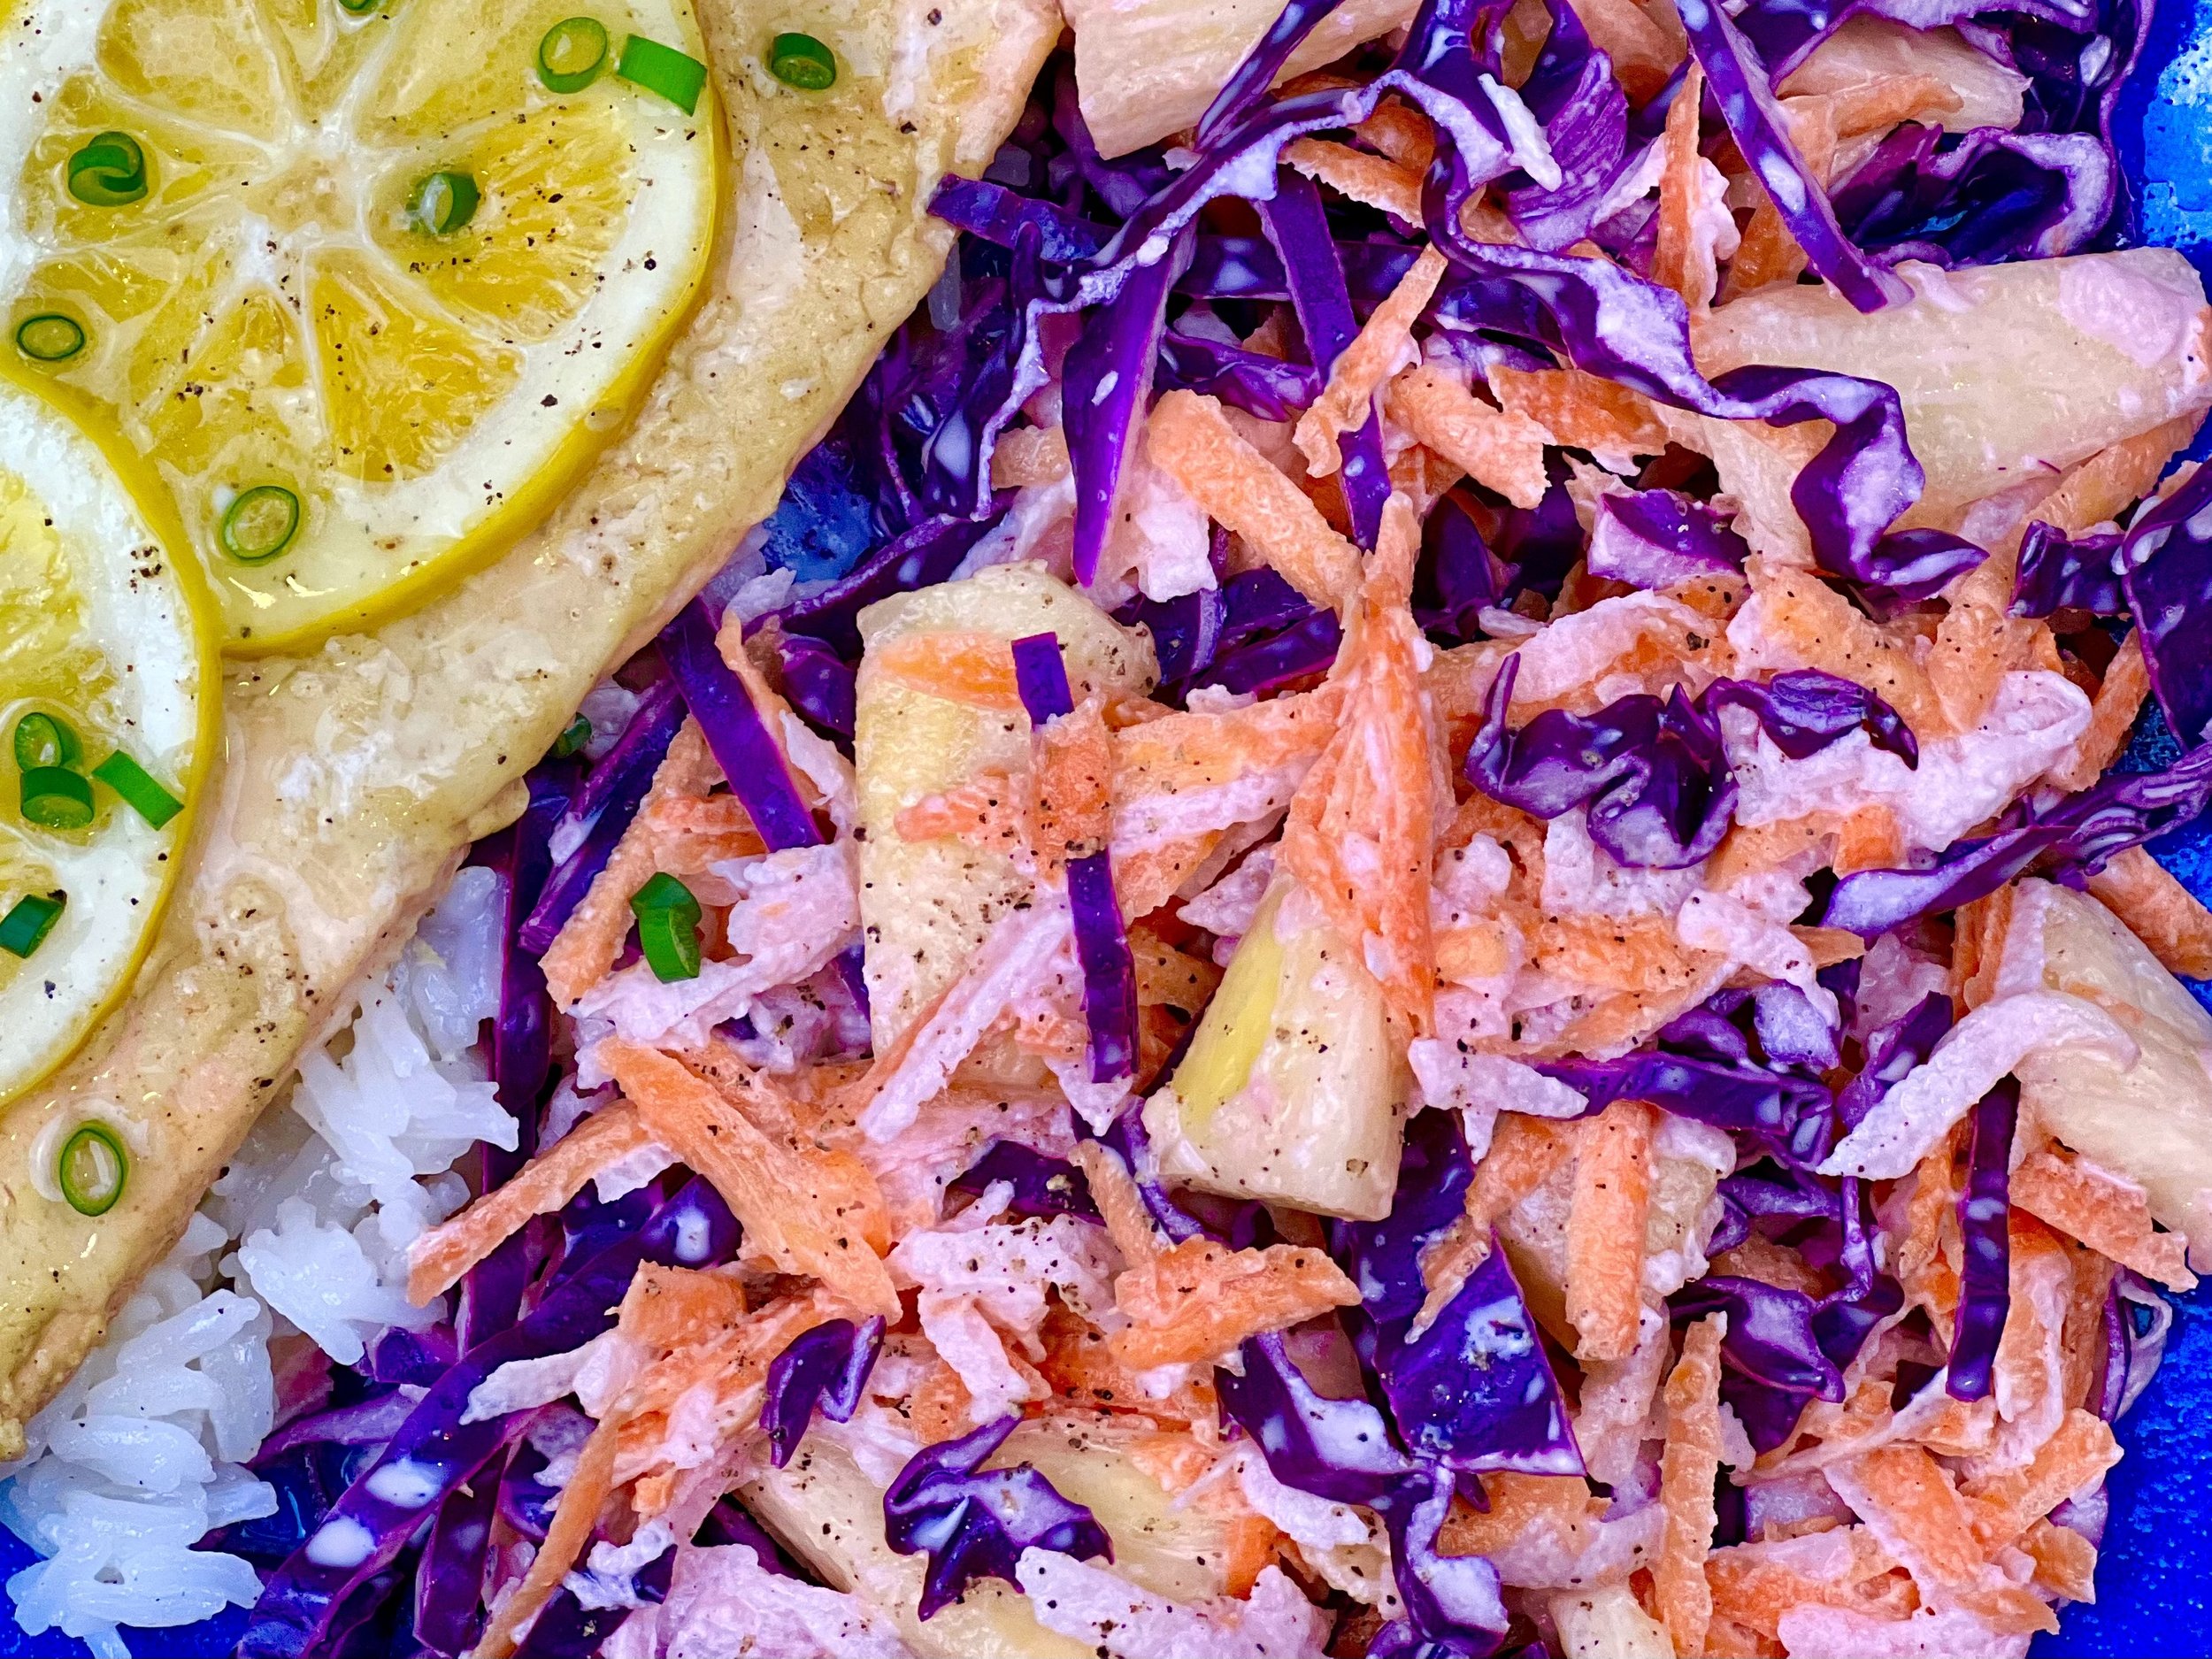
Ingredients: Salad
3 cups (7.95 oz) red cabbage, thinly sliced
4 medium carrots (10 oz), grated (peeling is optional)
2 cups (10 oz) jicama, peeled and grated
1 cup (4.94 oz) fresh pineapple, chopped (optional)
Ingredients: Dressing
2-3 (1 - 1.5 oz) tablespoons mayonnaise
1 (0.5 oz) tablespoon Lime juice
1 tablespoon (0.7 oz) Maple syrup
1 tablespoon (0.5 oz) Worcestershire
Kosher salt and black pepper (for serving)
Directions
(1) Prepare: Slice the cabbage. Grate the carrots and jicama. Chop the pineapple. Put all ingredients in a salad bowl.
(2) Make the dressing: Combine all dressing ingredients in a glass jar or small bowl. Shake or whisk to combine.
(3) Make the salad: Drizzle about half the dressing over the vegetables and pineapple in the bowl. Toss to combine. Taste and then add more dressing to your taste.
Make-ahead note: At this point, you may put the salad in an airtight container and keep it in the refrigerator for up to 3 days.
(5) Plate and serve: Serve cold all by itself or alongside a hot or cold main course. Add a sprinkle of salt and pepper if you like.
Eat and enjoy every bite because you can!
Have a question you’d like to have answered? Email me at hello@ibsgamechanger.com
Link note: This post may contain affiliate links for you to easily purchase items that are linked. I may earn a small commission from qualifying purchases but none of this costs you a thing so feel free to use the links! In addition, for some items, I have provided a special discount code for IBS Game Changers so be sure to use the code when you purchase an item to get the discount that has been arranged just for you.
More Deliciously Low FODMAP™ salad recipes


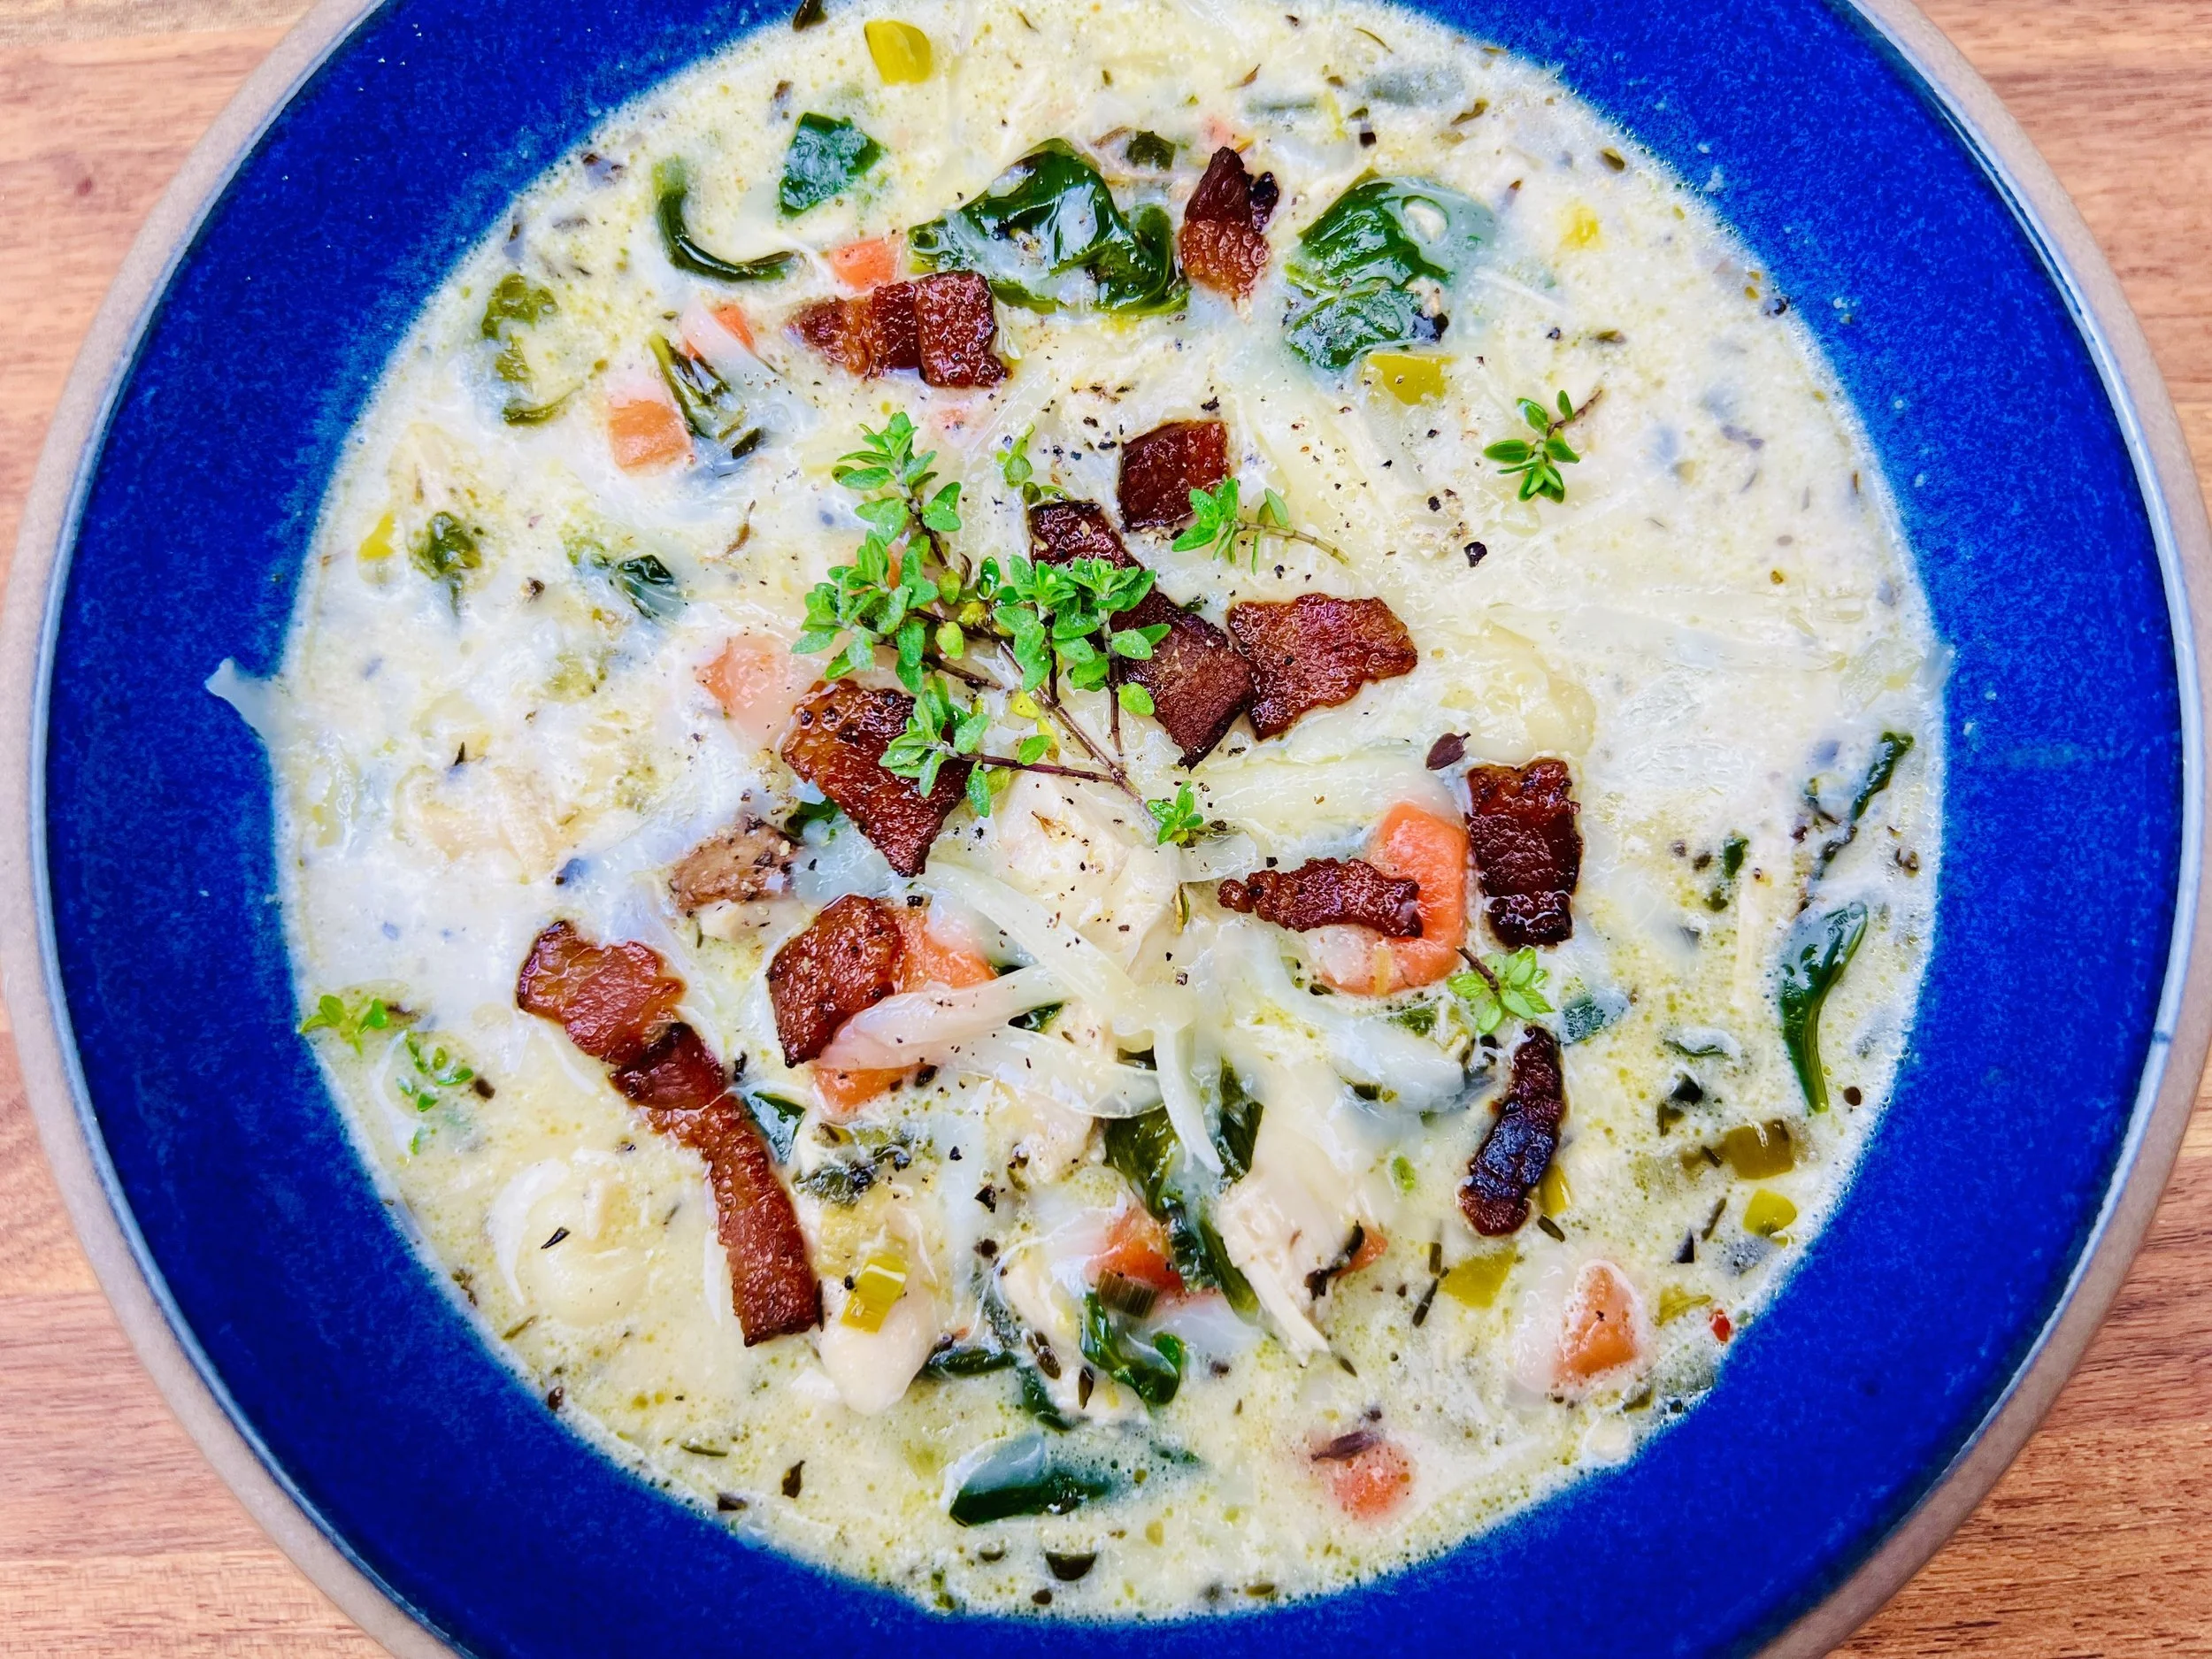
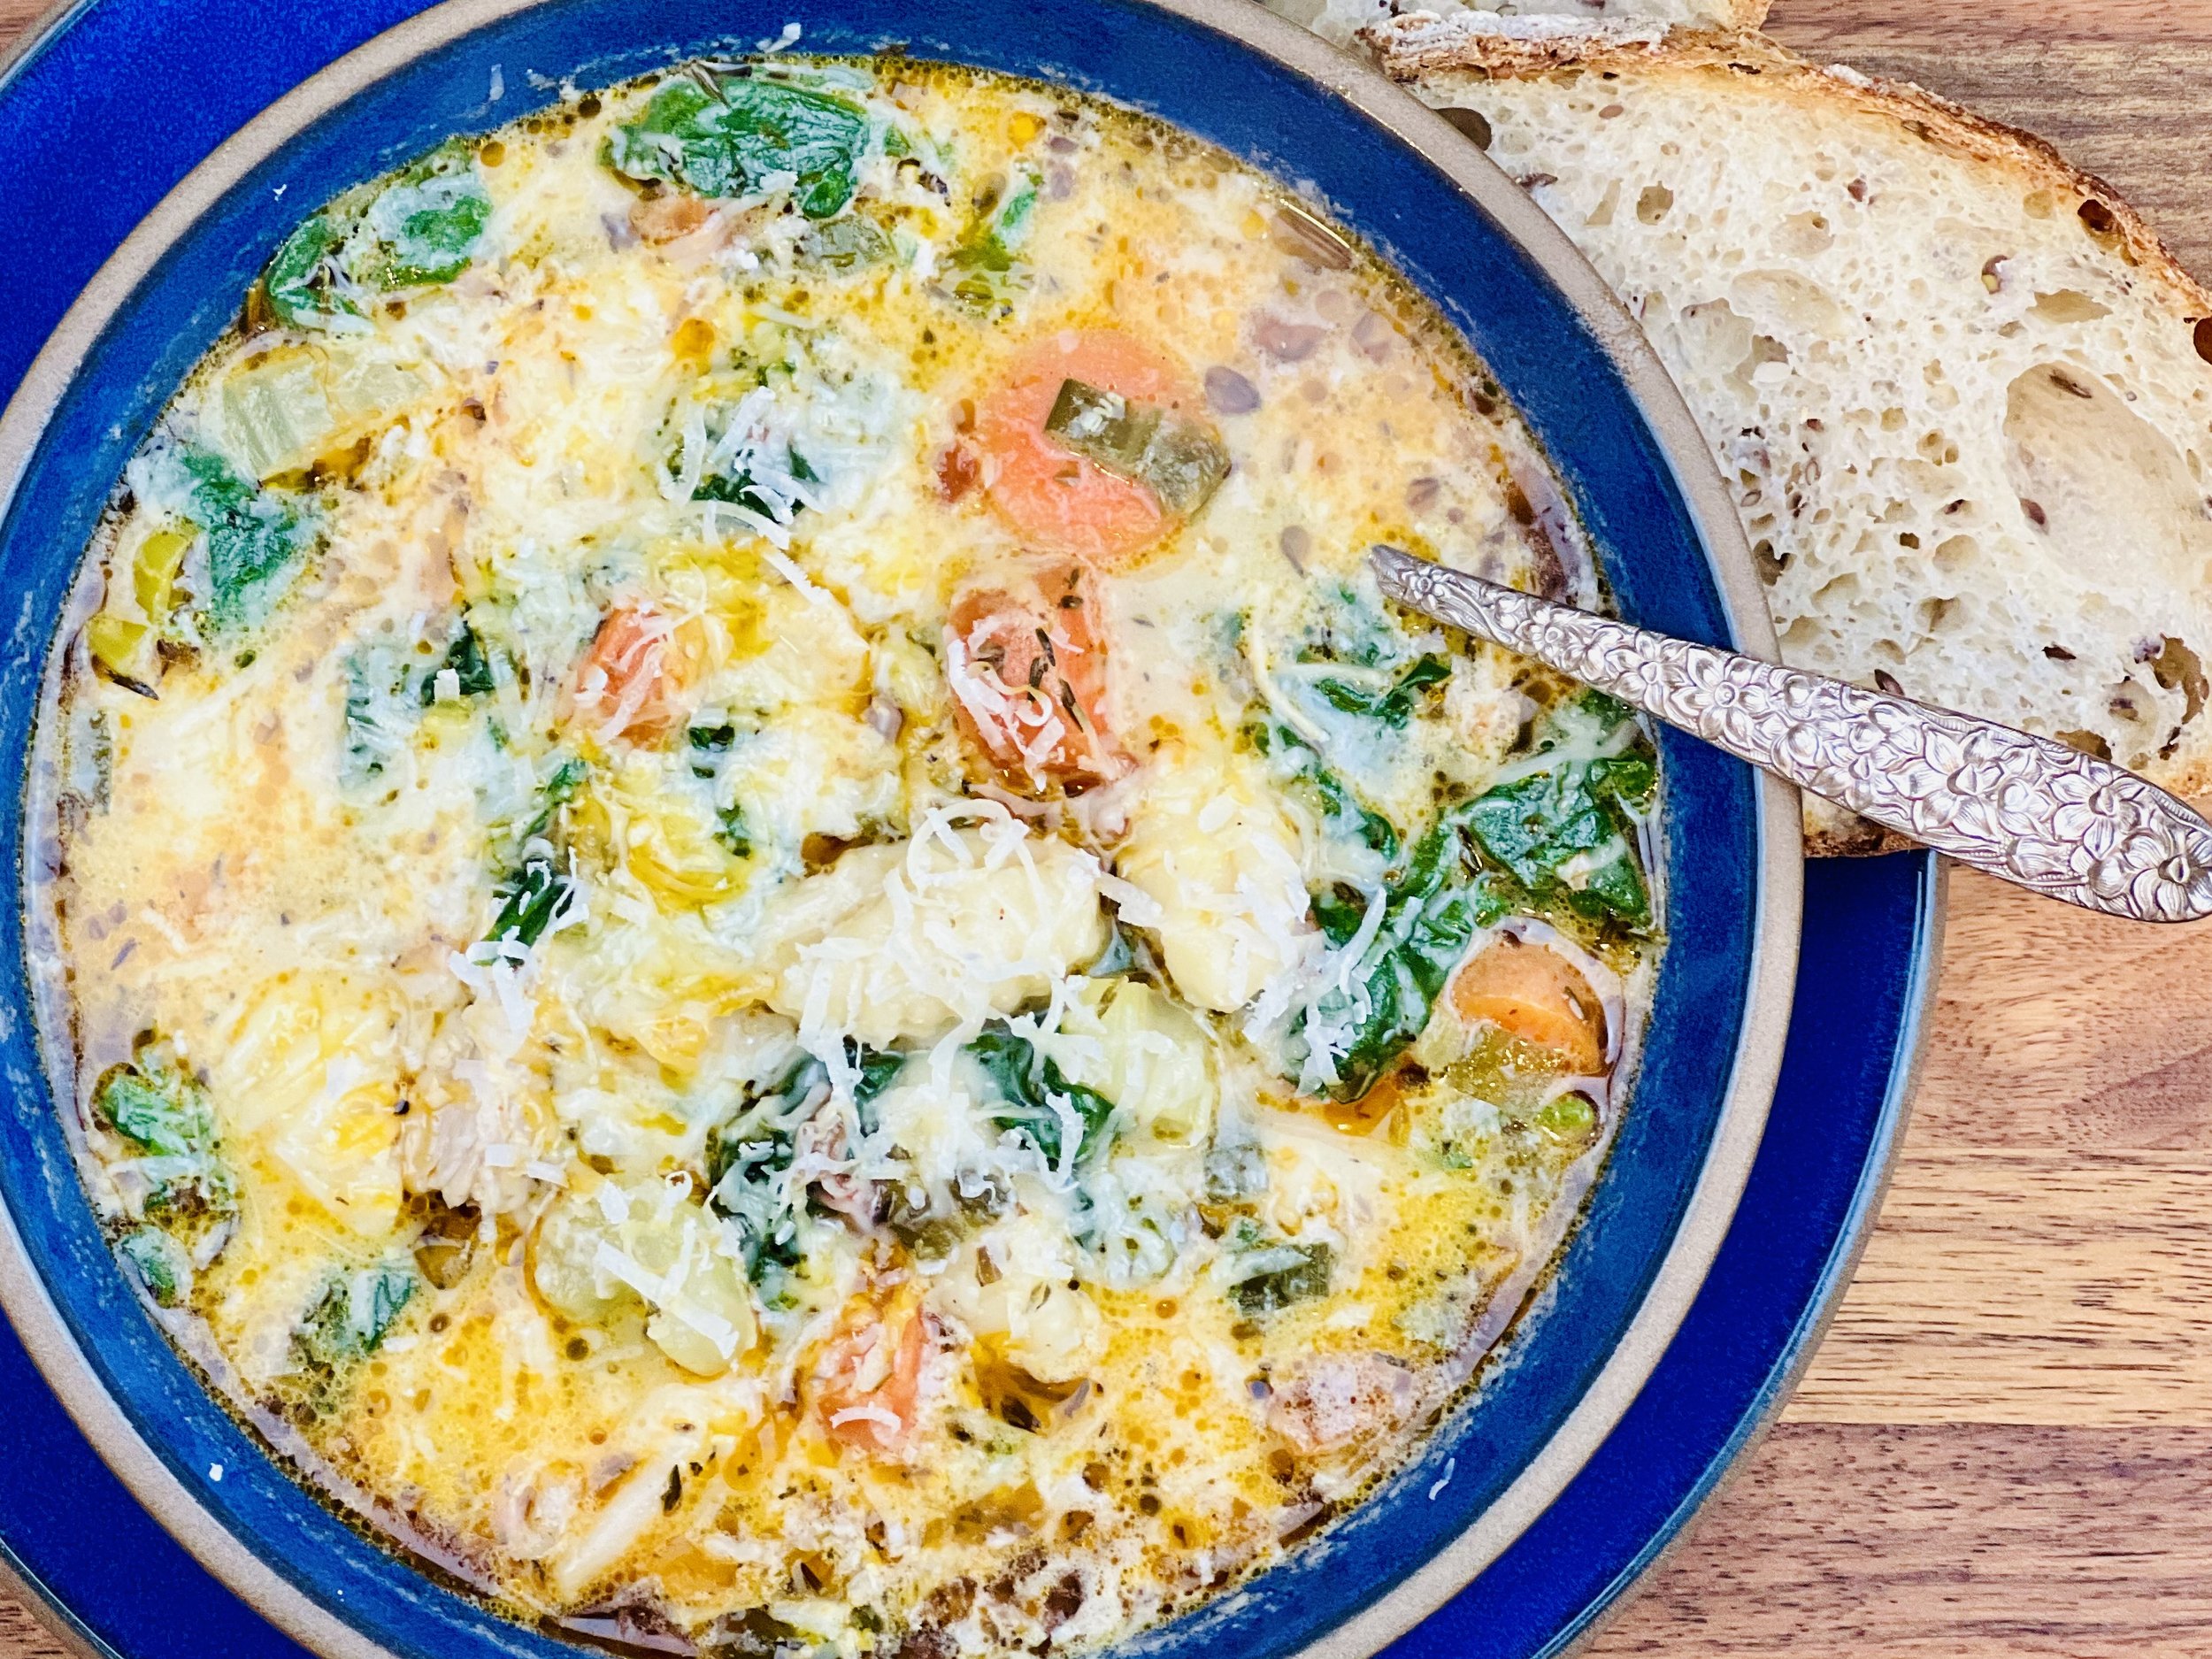
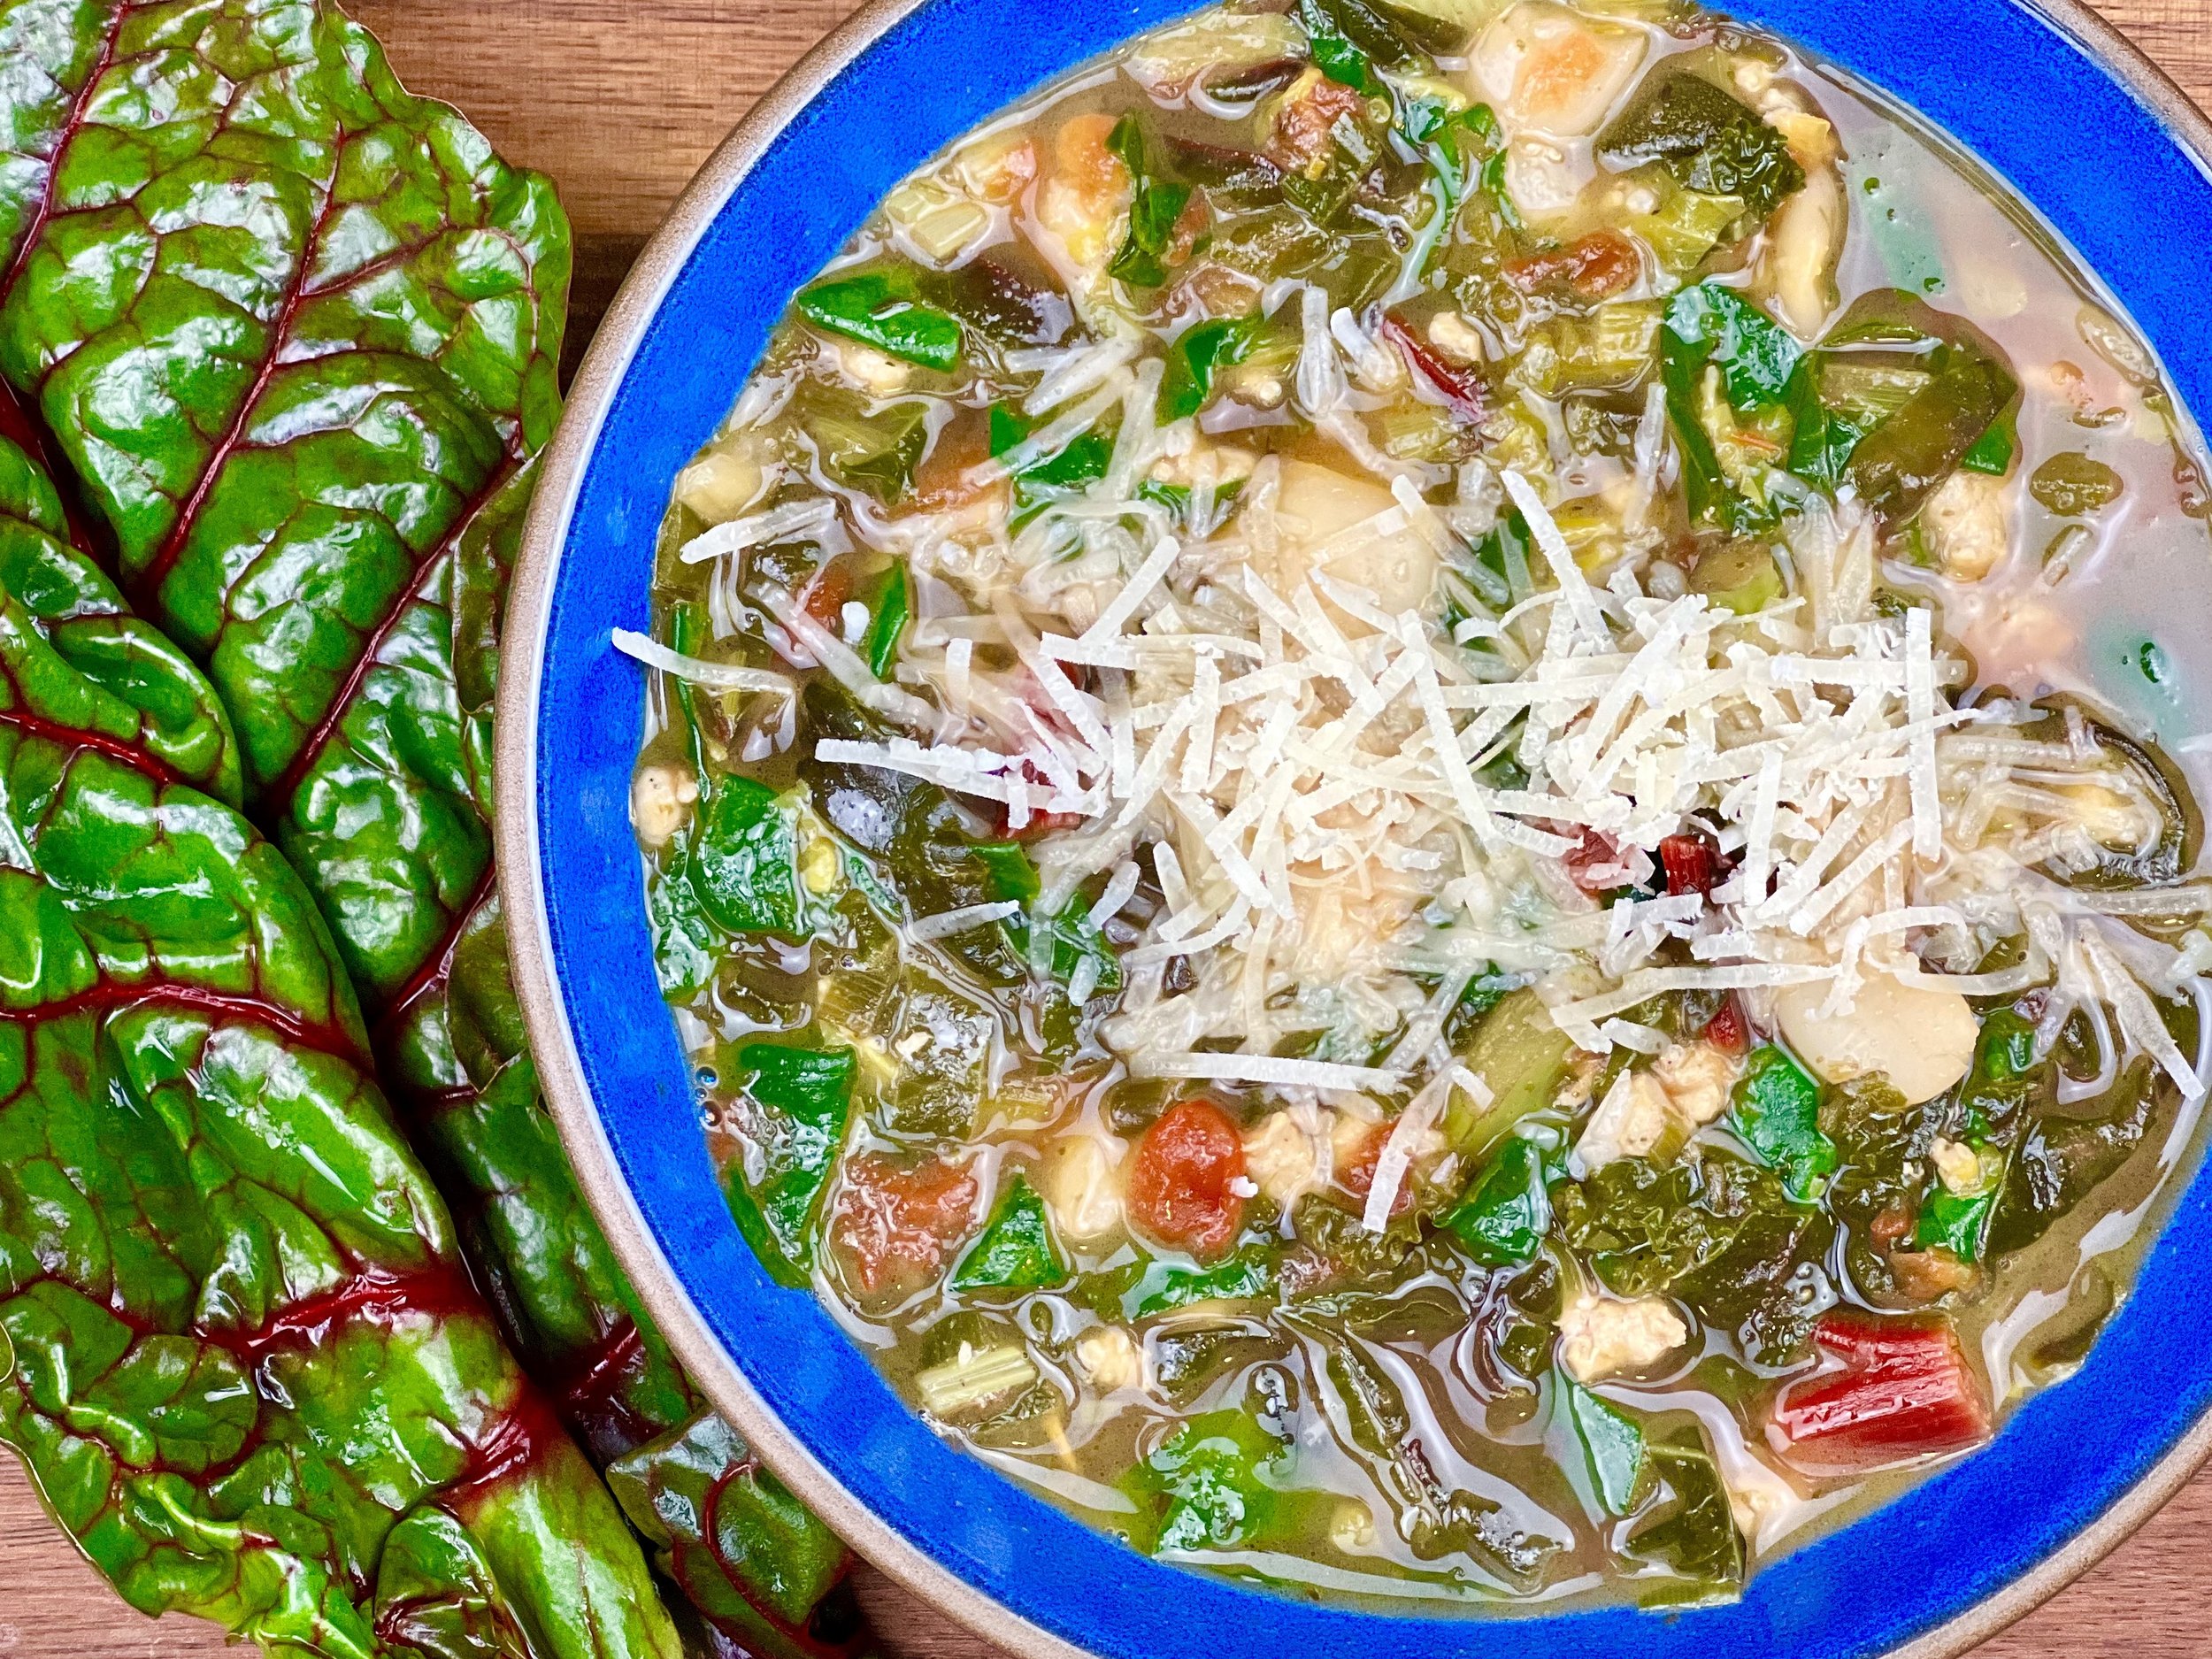
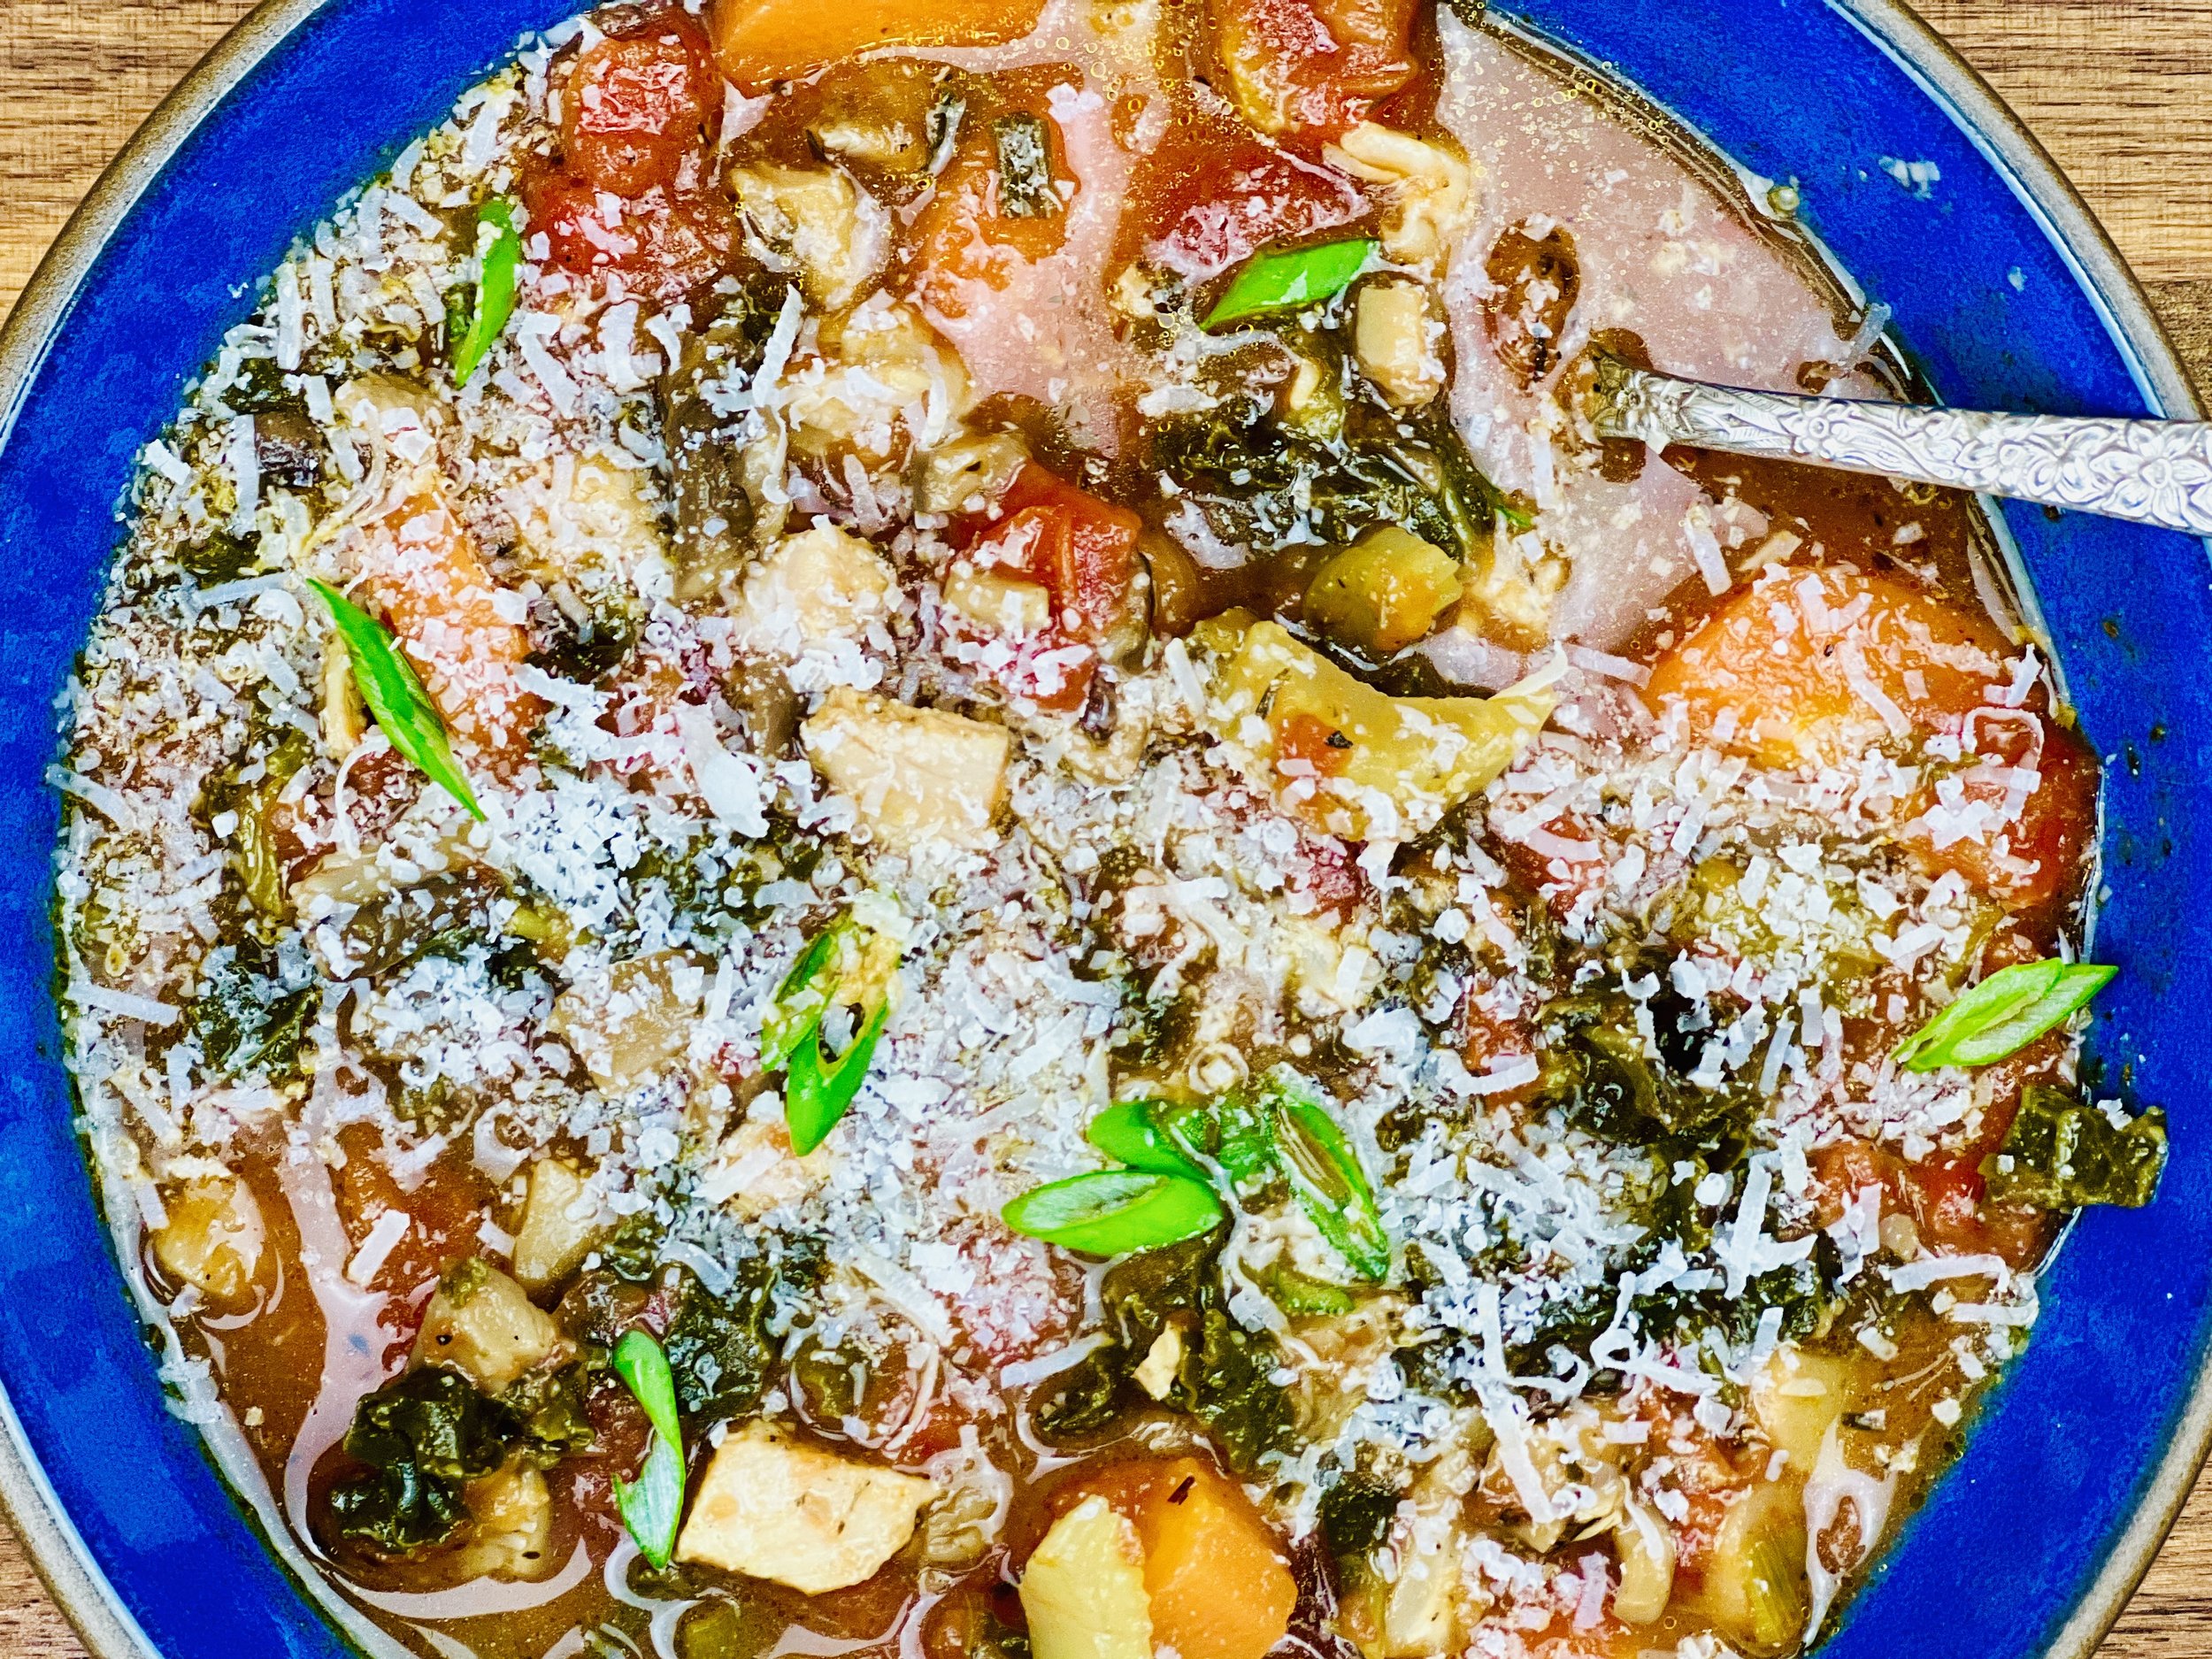
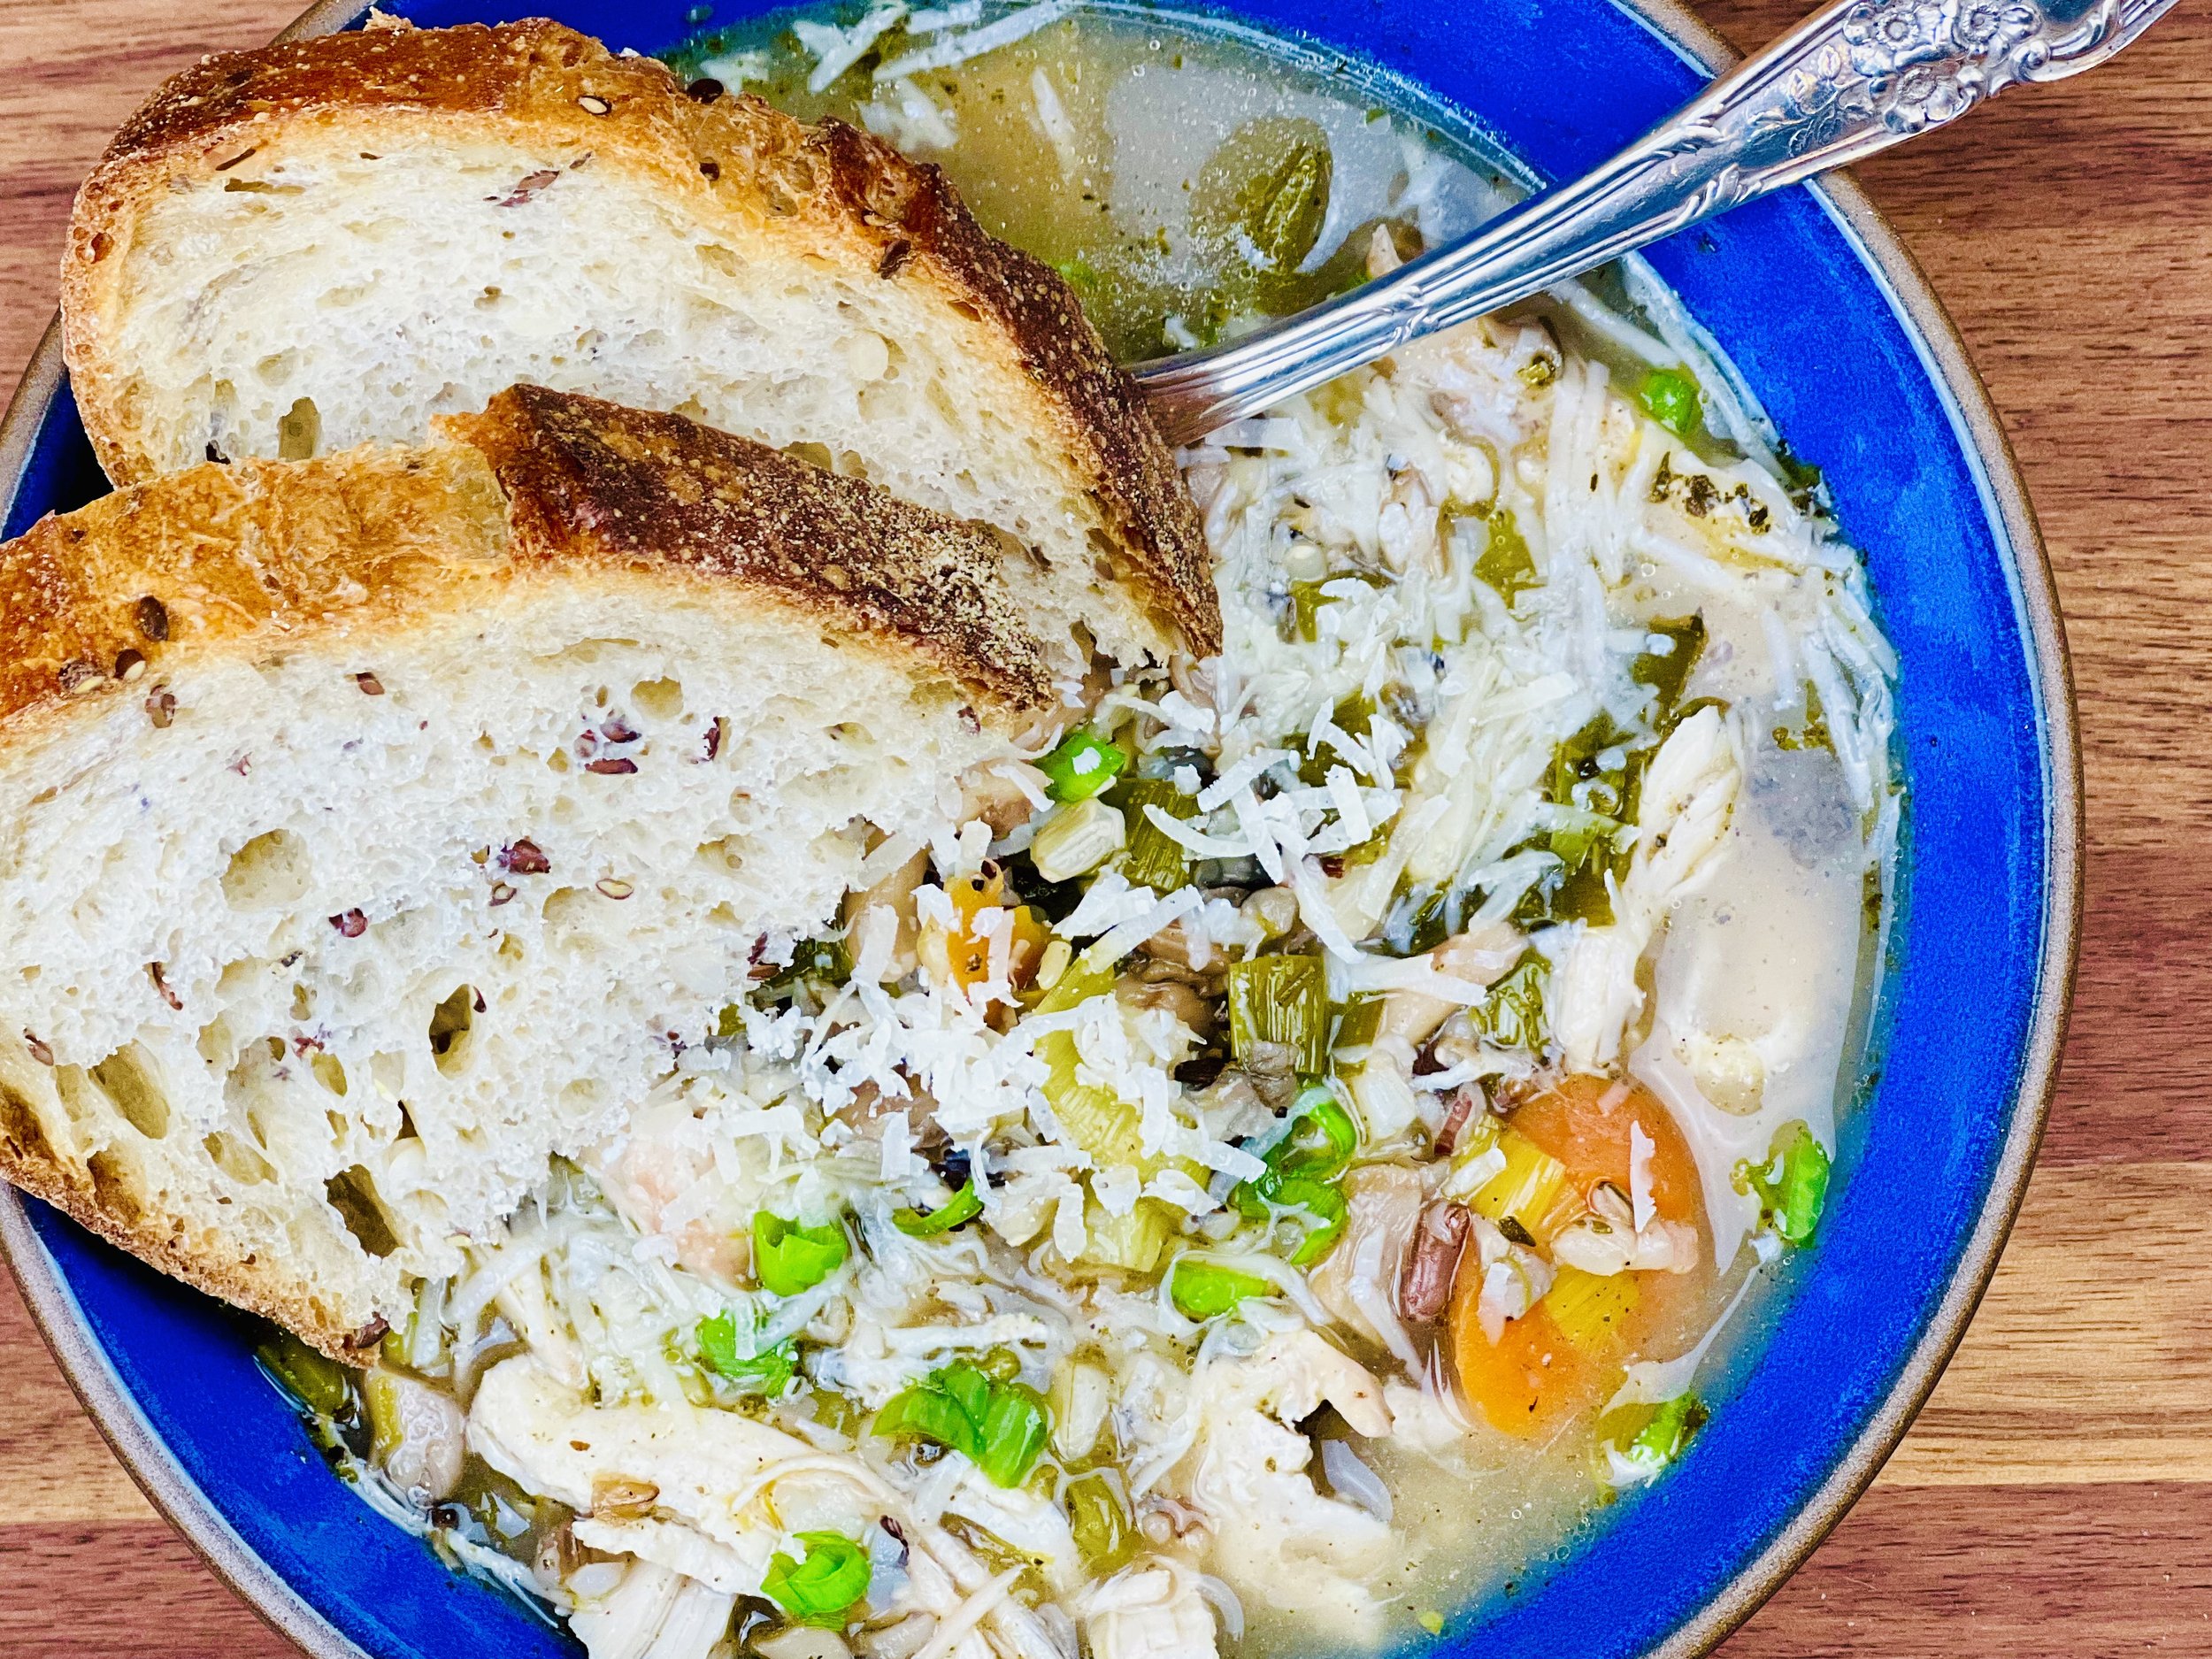
Vegetable Minestrone Soup (Low FODMAP)
15 Minutes prep • 30 Minutes cook • Low FODMAP • Gluten-free • Serves 4
15 Minutes prep • 30 Minutes cook • Low FODMAP • Gluten-free • Serves 4 • Ok to make ahead: Steps 1-3
Minestrone is a hearty Italian vegetable soup made with a tomato broth and plenty of vegetables. It was traditionally made to use up leftover vegetables, so you may use any seasonal vegetables and greens you have on hand. I used chard, kale, and spinach for the greens in this recipe, and butter beans instead of the traditional pasta, and it was quite delicious. Make up a big pot and eat this soup for a day or two. It gets better with a bit of time. This recipe features 20 different plants as written. Feel free to add more if you have them on hand.
Ingredients
2 tablespoons garlic-infused olive oil
1 tablespoon Italian Seasoning (or your own blend of equal parts of thyme, rosemary, oregano, marjoram, and basil)
1 bunch green onions (green part only), chopped
1 large, or 2 medium leeks (green part only), chopped
2 small celery ribs with leaves
1/2 teaspoon Kosher salt (.07 oz)
1/4 teaspoon black pepper (.03 oz)
1/2 - 1 pound ground chicken (optional)
4 cups (6 oz) chard (I used red chard), washed and chopped
2 ounces kale, washed and chopped
1 can or carton (about 15 oz) chopped tomatoes with juice, undrained
32 ounces low FODMAP chicken broth (I use Whole Foods Organic 365 chicken broth or Gourmend low FODMAP Organic Chicken Broth - use code IBSGC15 for 15% discount)
2 bay leaves, leave whole
2 cups (4 oz) fresh spinach leaves, washed and chopped
1/2 cup zucchini, cubed (optional)
1/2 cup summer squash, cubed (optional)
1 cup (8 ounces), canned butter beans, rinsed and drained
2 tablespoons lemon juice
4 tablespoons butter
Directions
(1) Prepare: Chop the leek and green onion greens. Wash and chop the chard, kale, spinach, and celery. Wash and cube the zucchini and summer squash (if using).
(2) Cook the veggies: In a large soup pot or Dutch Oven, heat the olive oil over medium-high heat. When the oil shimmers, add the Italian seasoning and let it bloom for about 30 seconds. Then add the leek greens, green onion greens, and celery, and cook for a couple of minutes. Add the ground chicken (if using) and continue cooking, stirring to break the ground chicken up as you cook, until the chicken is cooked through and the vegetables are tender (about 5 minutes). Season with salt and pepper.
(3) Add the greens: Add the chard, tomatoes, chicken broth, and bay leaves. Bring just to a boil, then cover and simmer for 10-12 minutes until the chard is tender. Stir in the zucchini, summer squash, spinach, lemon juice, and butter beans. Cook for about 1 minute until the squash starts to soften and the spinach is wilted. Remove from the heat and take the bay leaves out.
(4) Plate and serve: Serve hot with freshly grated Parmesan cheese. Or cool and refrigerate, then reheat on the stove the next day. It will taste even better after a rest in the fridge overnight.
Eat and enjoy every bite because you can!
Recipe note: I use Diamond Crystal Kosher salt in all my recipes because it has a wonderful flat and crisp flake that tastes delicious. It is also the least salty salt available so you can use it more liberally as a seasoning than you can table salt or sea salt. If you use another type of salt, you may need to reduce the amount so it is not over-salted.
Have a question you’d like to have answered? Email me at hello@ibsgamechanger.com
Link note: This post may contain affiliate links for you to easily purchase items that are linked. I may earn a small commission from qualifying purchases but none of this costs you a thing so feel free to use the links! In addition, for some items, I have provided a special discount code for IBS Game Changers so be sure to use the code when you purchase an item to get the discount that has been arranged just for you.
More Deliciously Low FODMAP™ soup recipes
10 Minutes Prep • 50 Minutes Cook • Gluten-free • Dairy-free • Low FODMAP • Serving size 3-4 crackers