Deliciously Low FODMAP

Inspire yourself with hundreds of delicious low FODMAP recipes, tips, and tools, and enjoy the abundance that is yours even when you have IBS.
Use the buttons and filters to find something specific or browse the complete collection for inspiration.
Discover a treasure trove of recipes with my FREE recipe club! Get new ideas delivered straight to your inbox every week.
Deliciously Low FODMAP is a trademark of IBS Game Changer, LLC
Filter to find Recipes and Tools
More Filtering Options
- All 827
- Appetizer 56
- BBQ 49
- Bowl 32
- Breakfast 69
- Cocktails 13
- Collection 1 58
- Collection 10 27
- Collection 11 30
- Collection 12 27
- Collection 13 31
- Collection 14 29
- Collection 15 31
- Collection 16 34
- Collection 17 31
- Collection 18 33
- Collection 19 36
- Collection 2 32
- Collection 20 33
- Collection 21 33
- Collection 22 40
- Collection 23 63
- Collection 24 46
- Collection 3 28
- Collection 4 29
- Collection 5 30
- Collection 6 32
- Collection 7 31
- Collection 8 31
- Collection 9 32
- Condiments 6
- Crock Pot 4
- Dessert 119
- Diabetes Game Changer Exception Protocol Contains Alcohol 11
- Diabetes Game Changer Exception Protocol Contains Flour 113
- Diabetes Game Changer Exception Protocol Contains Flour AND Sugar 79
- Diabetes Game Changer Exception Protocol Contains Sugar 52
- Diabetes Game Changer First Four Weeks 405
- Dinner 371
- Drink 8
- Easter 1
- Free Guide 17
- Gluten-free 686
- Gut Microbiome 2
- Guthealth 3
- Holidays 73
- IBS Triggers 4
- Keto Friendly 178
- Lactose-Free 184
- Low Carb 22
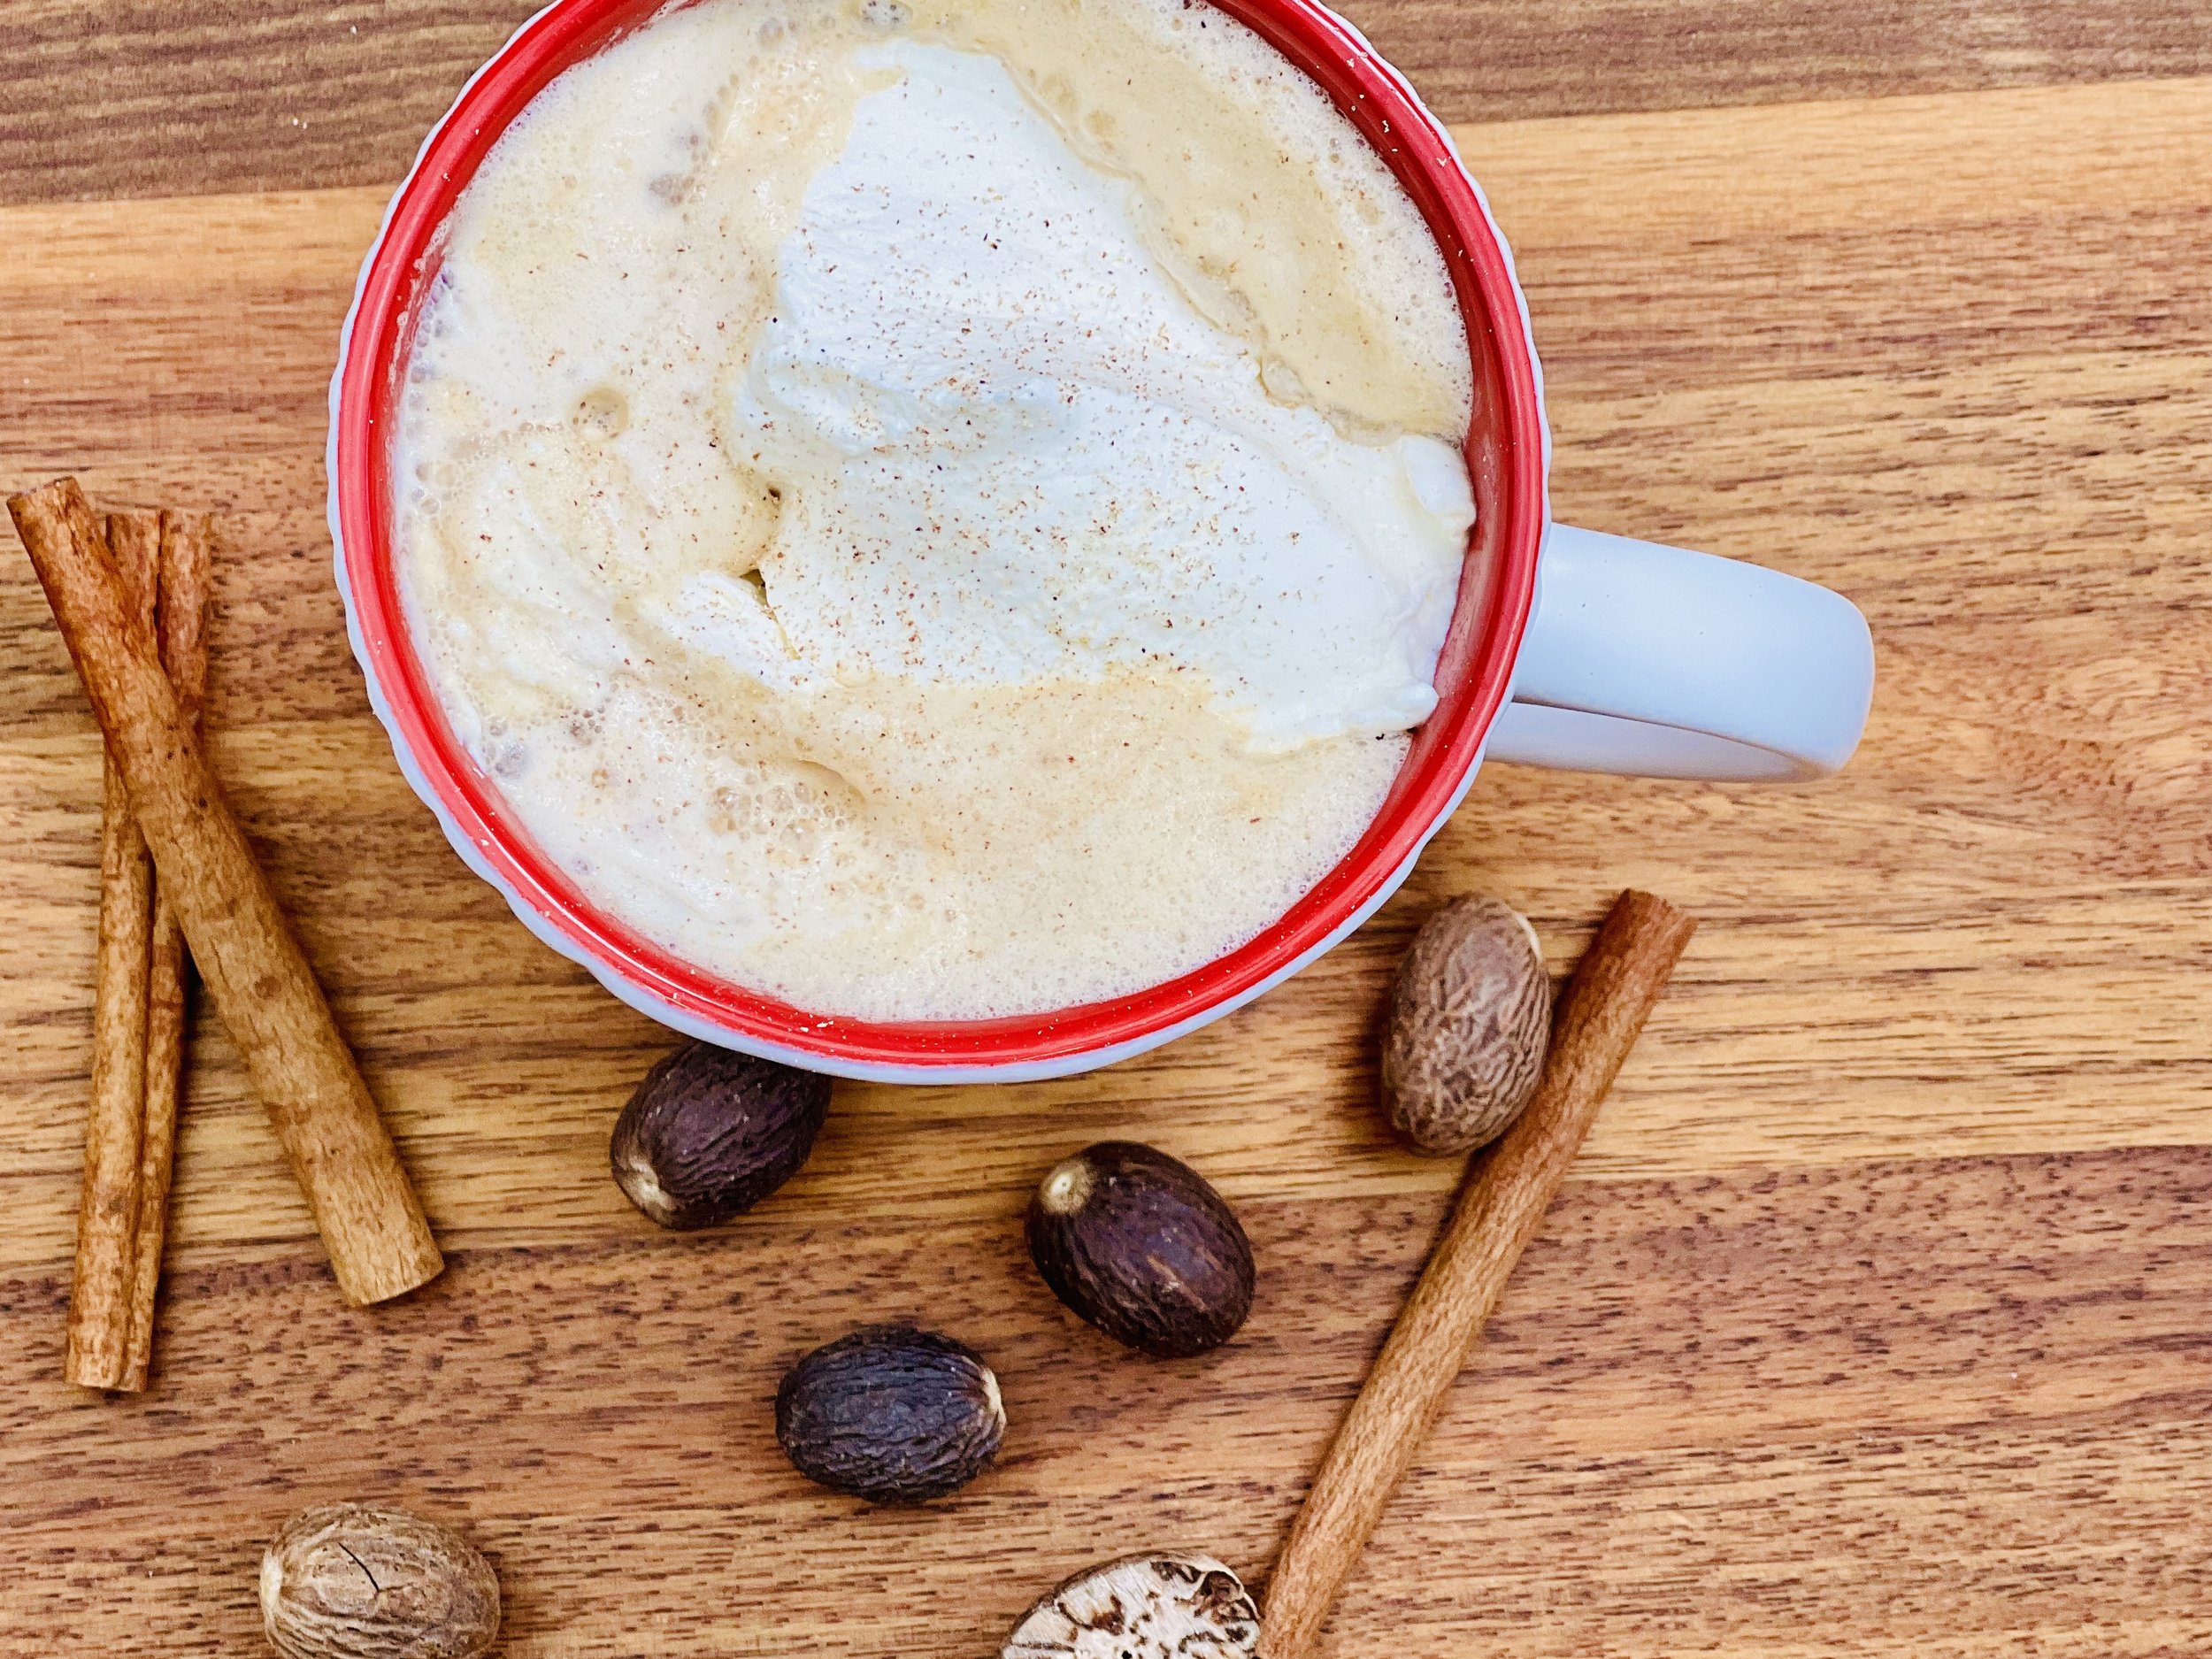
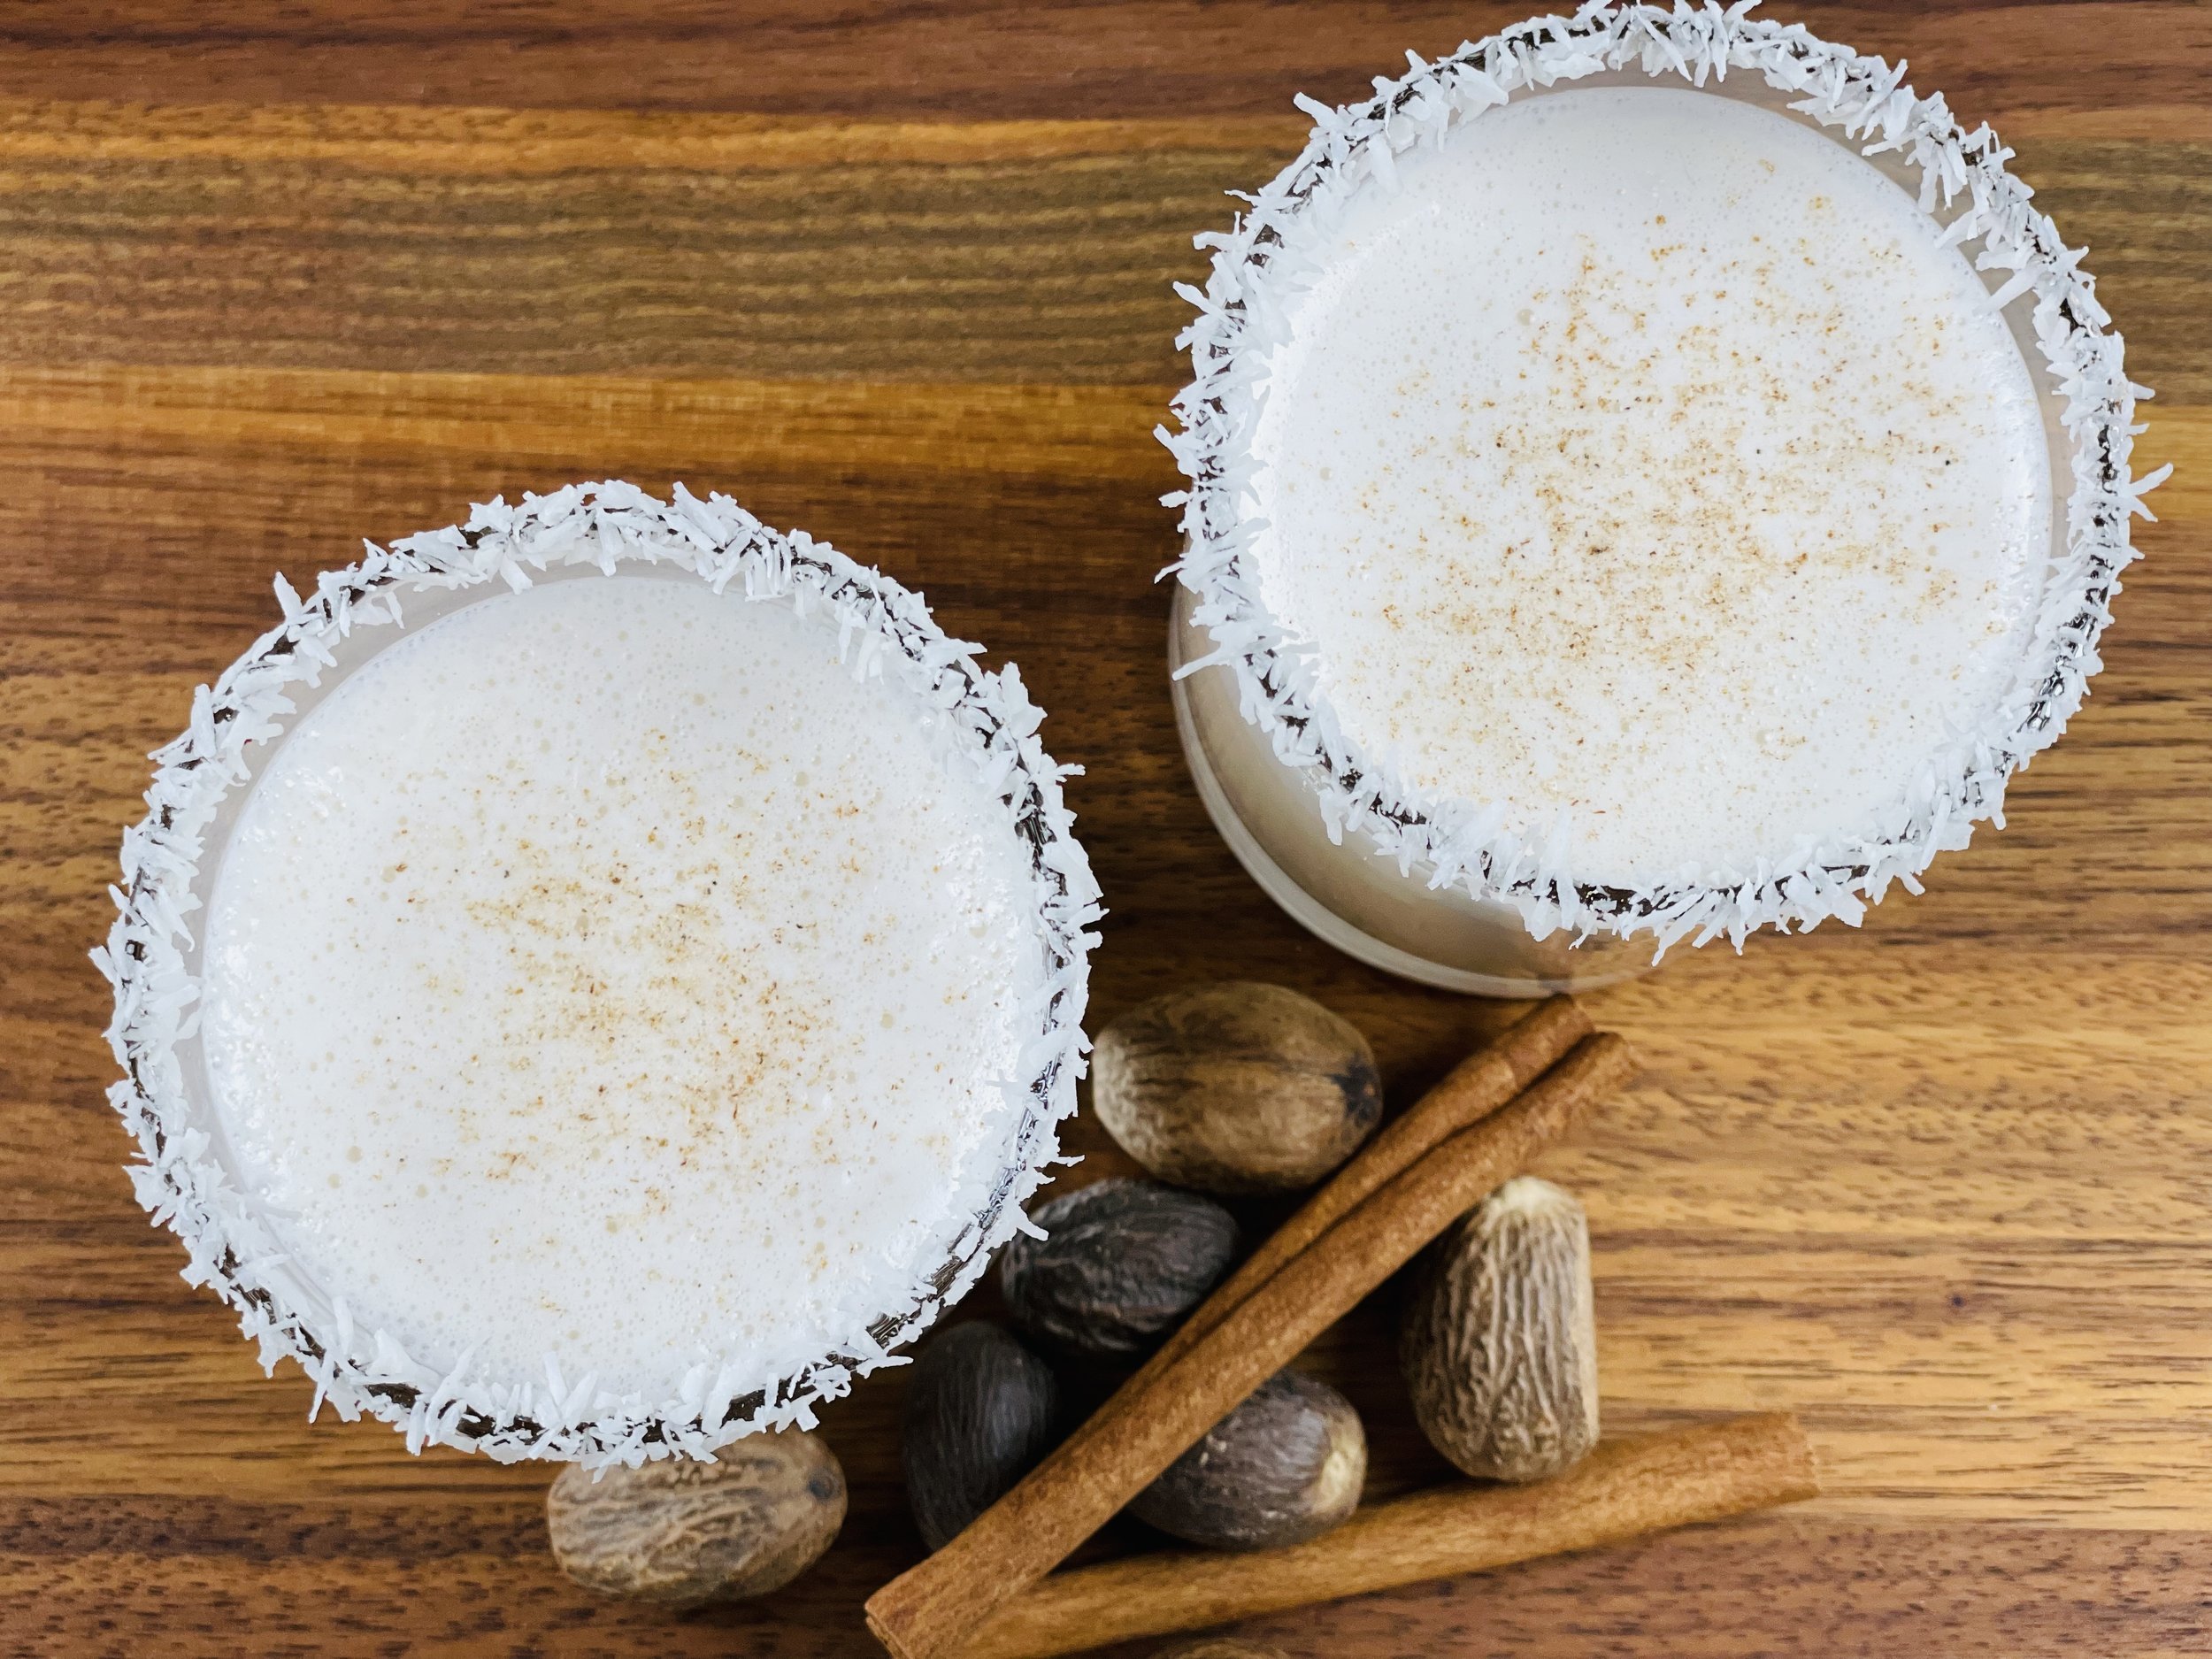
“Coquito” Puerto Rican Eggnog (low FODMAP)
60 Minutes prep • 4 hours chill • Low FODMAP • Gluten-free • Lactose-free • Serves 10
60 Minutes prep • 4 hours chill • Low FODMAP • Gluten-free • Lactose-free • Serves 10 • Ok to make-ahead: Steps 1 - 7
If you love eggnog and you love coconut you must try this no-cook, low FODMAP version of Coquito! Coquito means "little coconut" in Spanish and it’s a traditional Christmas drink that originated in Puerto Rico. Sometimes called Puerto Rican Eggnog, it’s simple to make and oh so delicious! I have modified the recipe to use vodka in place of rum so it can be low FODMAP, but the flavor is pretty darn close to the original version! You can make this Puerto Rican Coquito recipe and store it for up to a month in the fridge. The longer it sits, the more the flavors meld together and get more delicious, so it’s a great make-ahead cocktail for your holiday gathering.
Ingredients
1 cup vanilla vodka
1 cup heavy cream
1 1/2 cups lactose-free Whole milk
1 1/2 cups coconut syrup (like Torani Pure Made Coconut Syrup*)
1 1/2 cups heavy cream
1 1/2 cups coconut cream*
1 teaspoon ground cinnamon*
1/2 teaspoon ground cloves*
1/2 teaspoon ground nutmeg, plus more for serving
To rim the glasses:
1 tablespoon light corn syrup*
2 tablespoons unsweetened shredded coconut*
Directions
(1) Make the Cinnamon vodka: In a pint-size jar with a lid, add the vanilla vodka and the cinnamon stick. Let sit for about an 1 hour.
(2) Prepare glasses: In a small saucer make a circle of corn syrup about the size of the rim of your glasses. In another small saucer, spread out the shredded coconut. Dip the rim of each glass in the coconut syrup and then in the shredded coconut. Set aside.
(3) Combine the creamy ingredients: In a blender, mix all the other ingredients together. Add the cinnamon/vodka mixture and pulse once or twice to combine. Pour into a jar or two (so you can shake it up before serving).
Make-ahead note: At this point, you may store the Coquito in an airtight container in the refrigerator for up to a month.
(4) Finish: Chill for at least 4 hours then shake vigorously before pouring into prepared glasses.
(5) Serve: Serve with a light sprinkle of freshly grated nutmeg.
Drink and enjoy every bit because you can!
*This post may contain links for you to easily purchase items listed on the page. In some cases, we have provided a special discount code for IBS Game Changers so be sure to use it when you purchase an item to get the discount that has been arranged just for you! As an Amazon Associate, I earn a commission from qualifying Amazon purchases.
More Deliciously Low FODMAP™ cocktail recipes you might enjoy


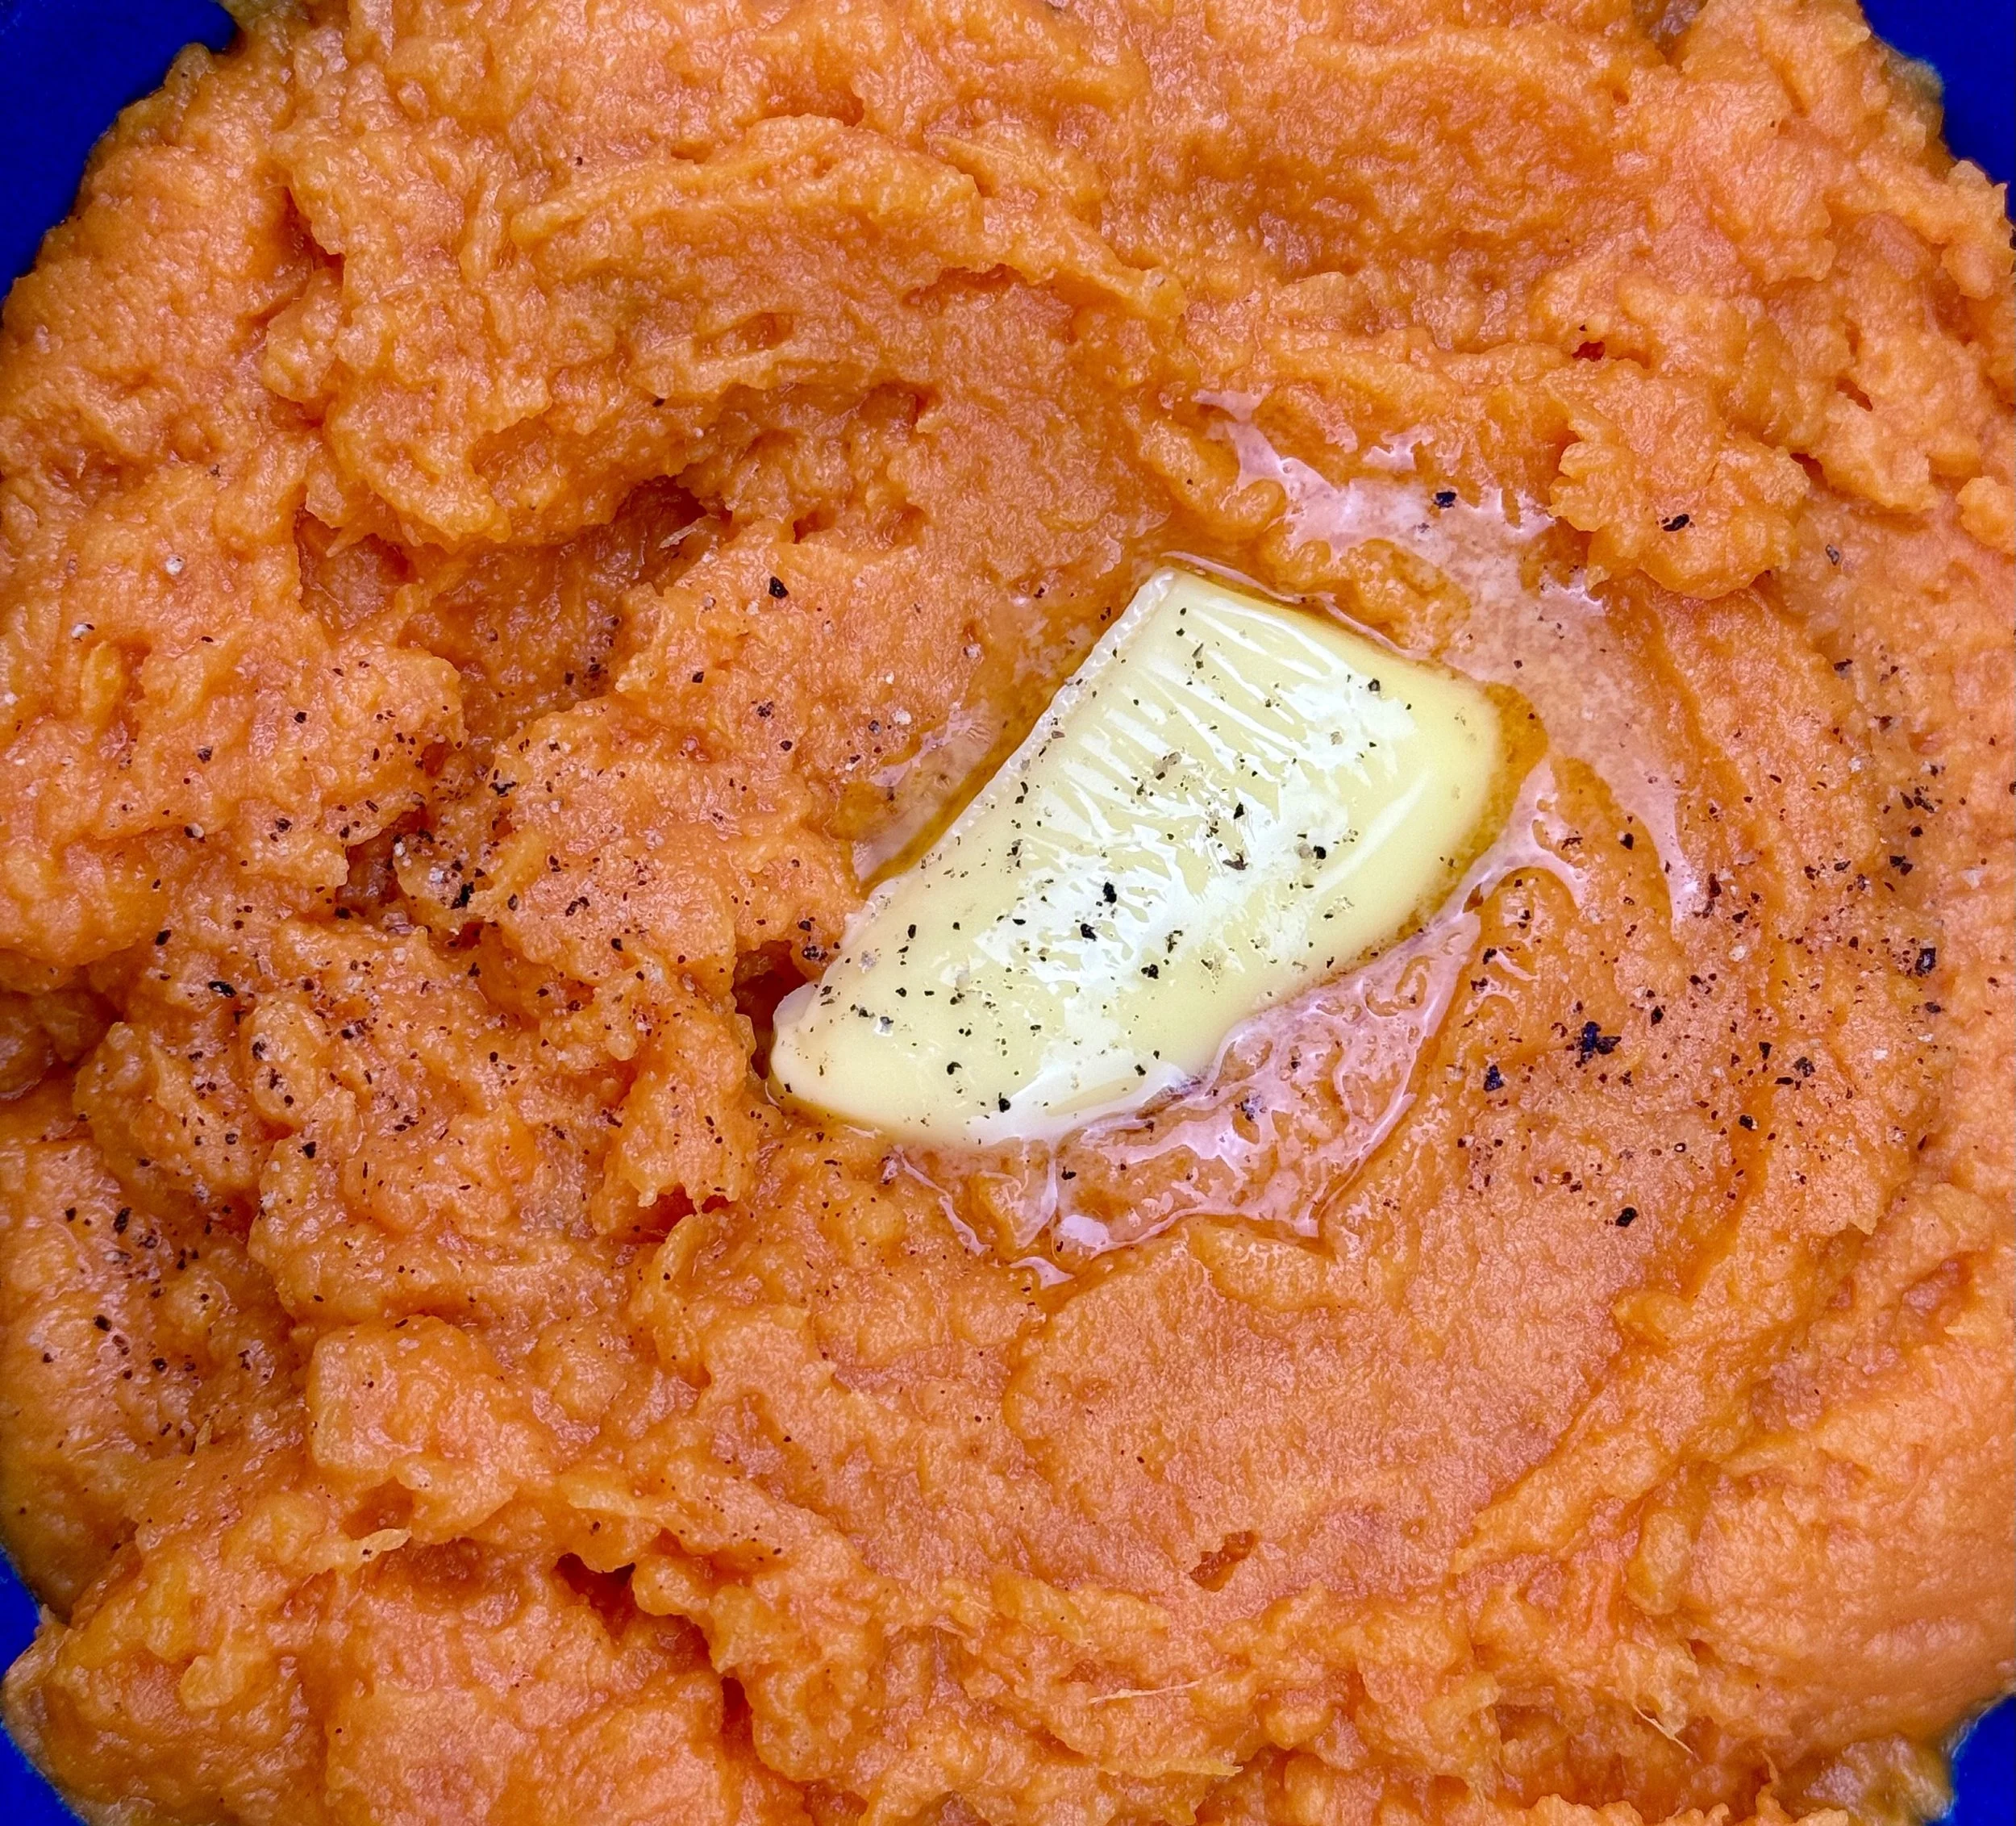
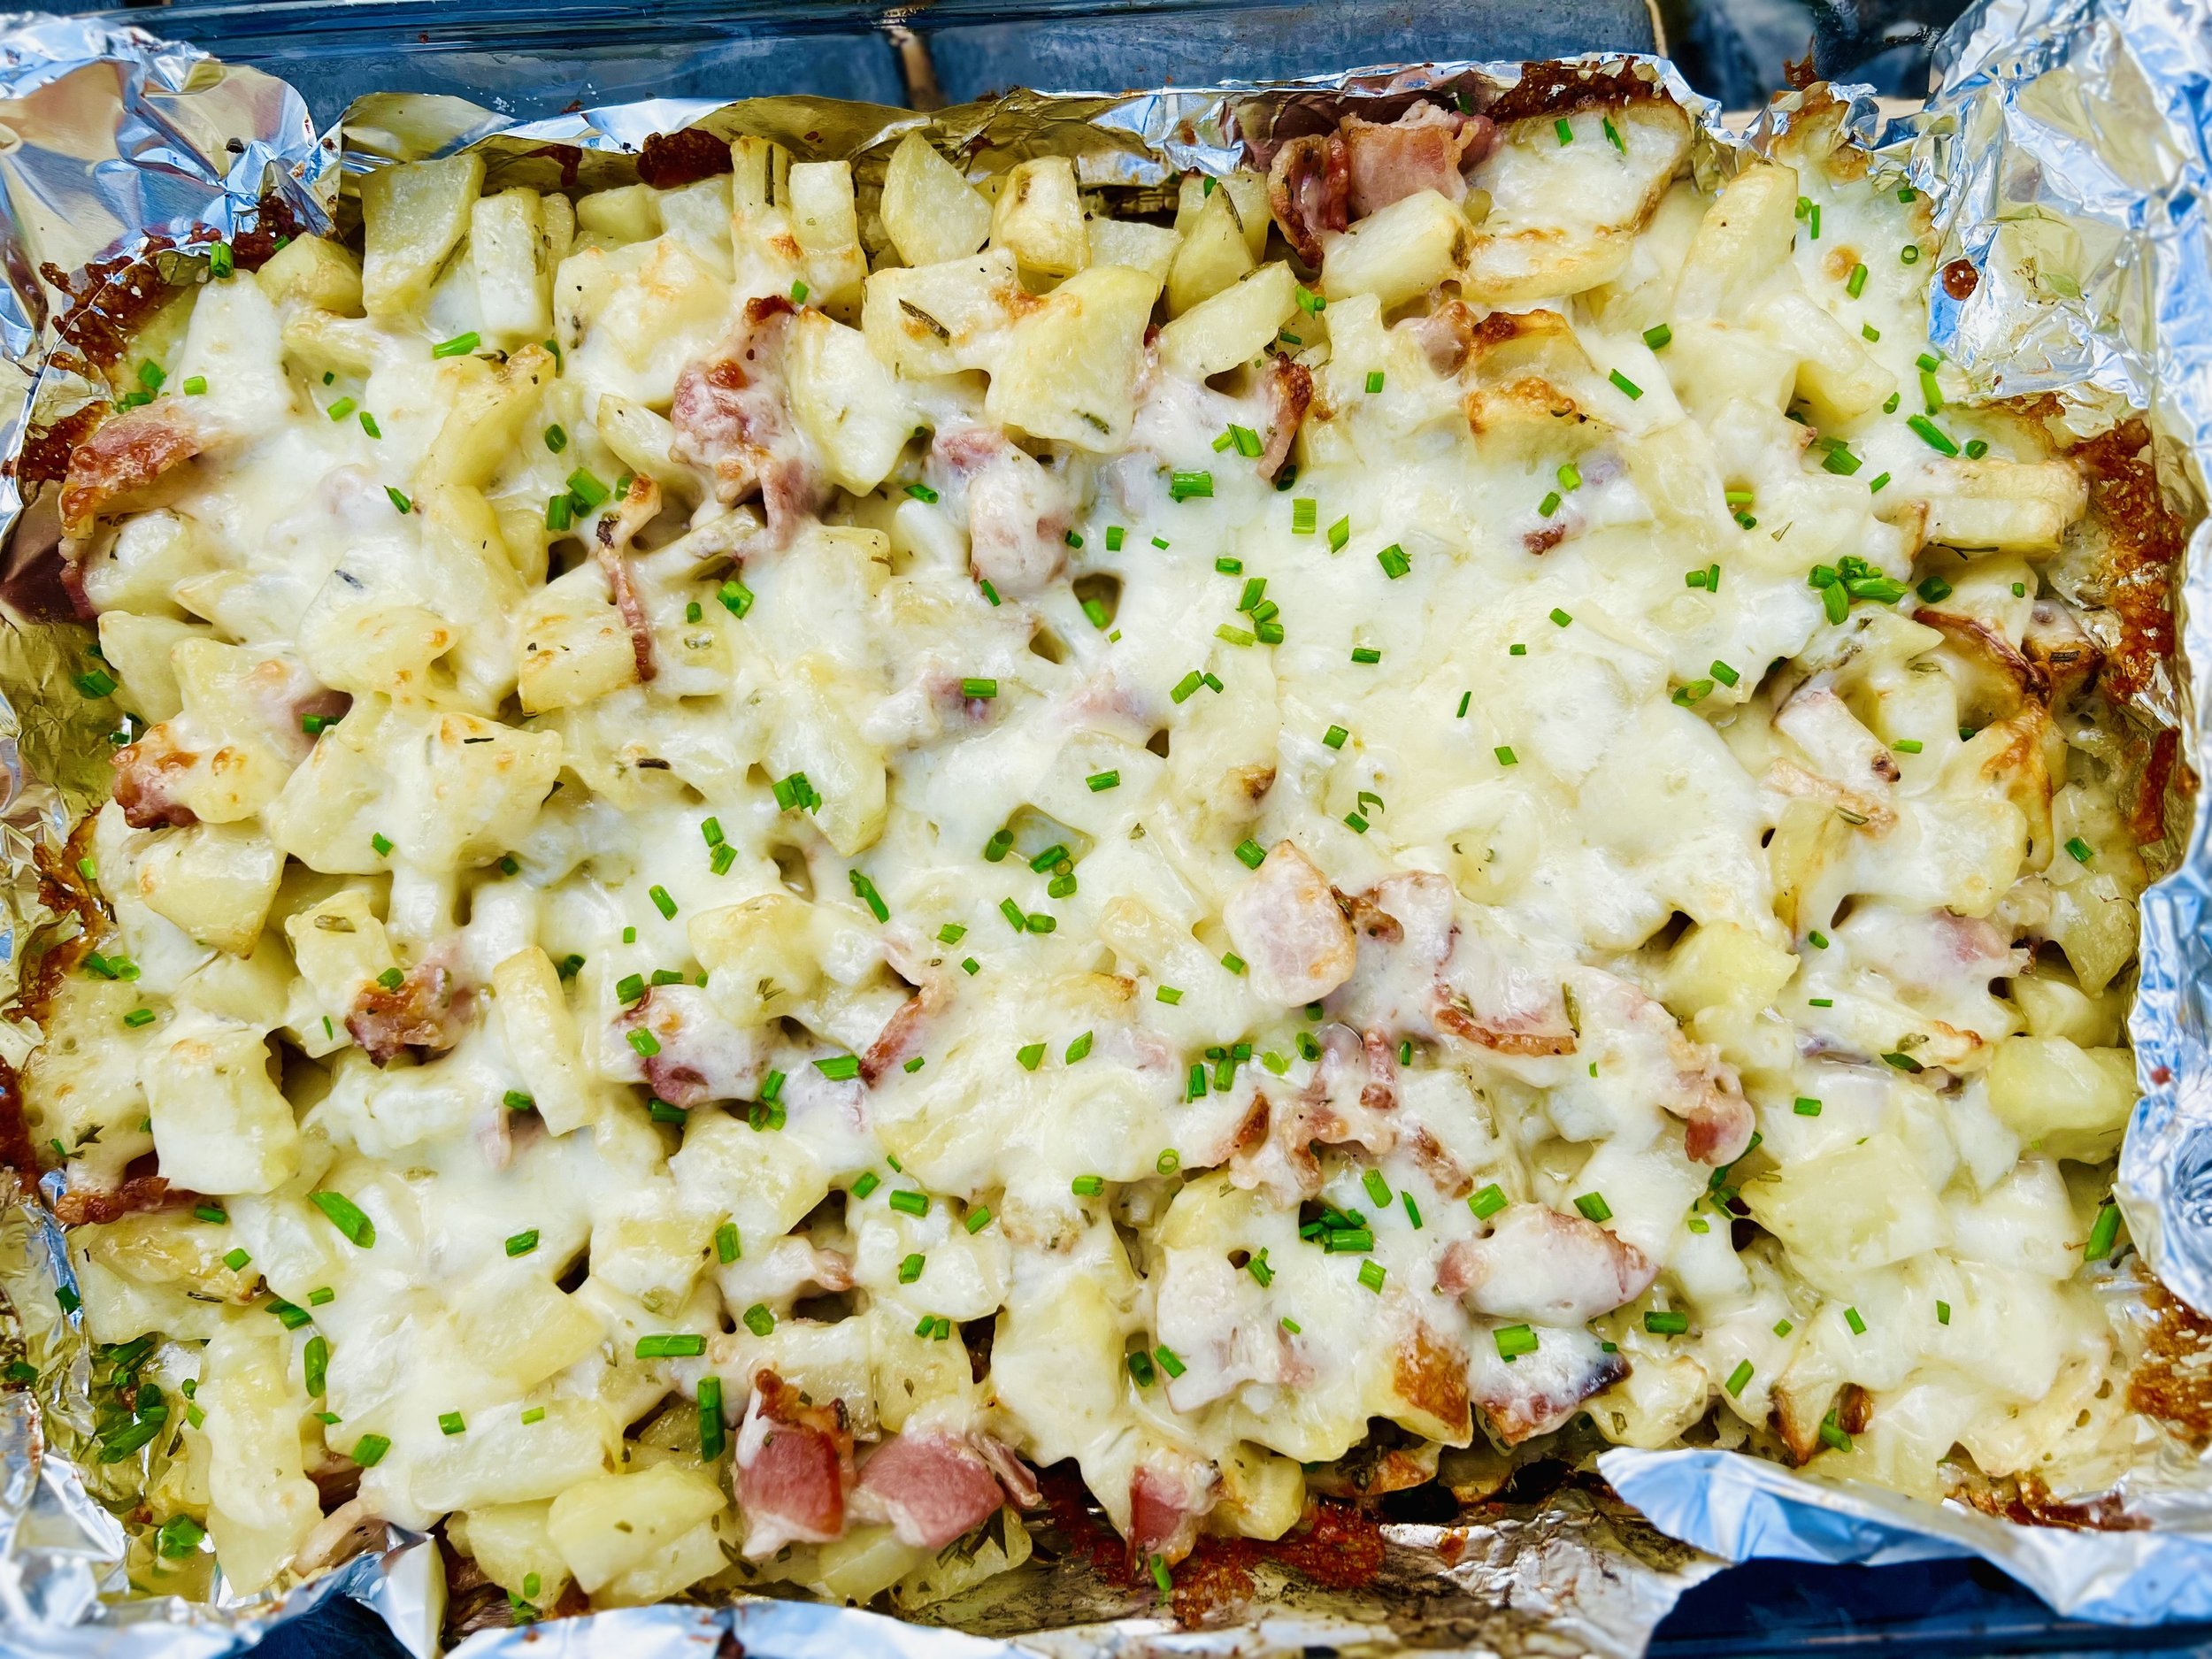
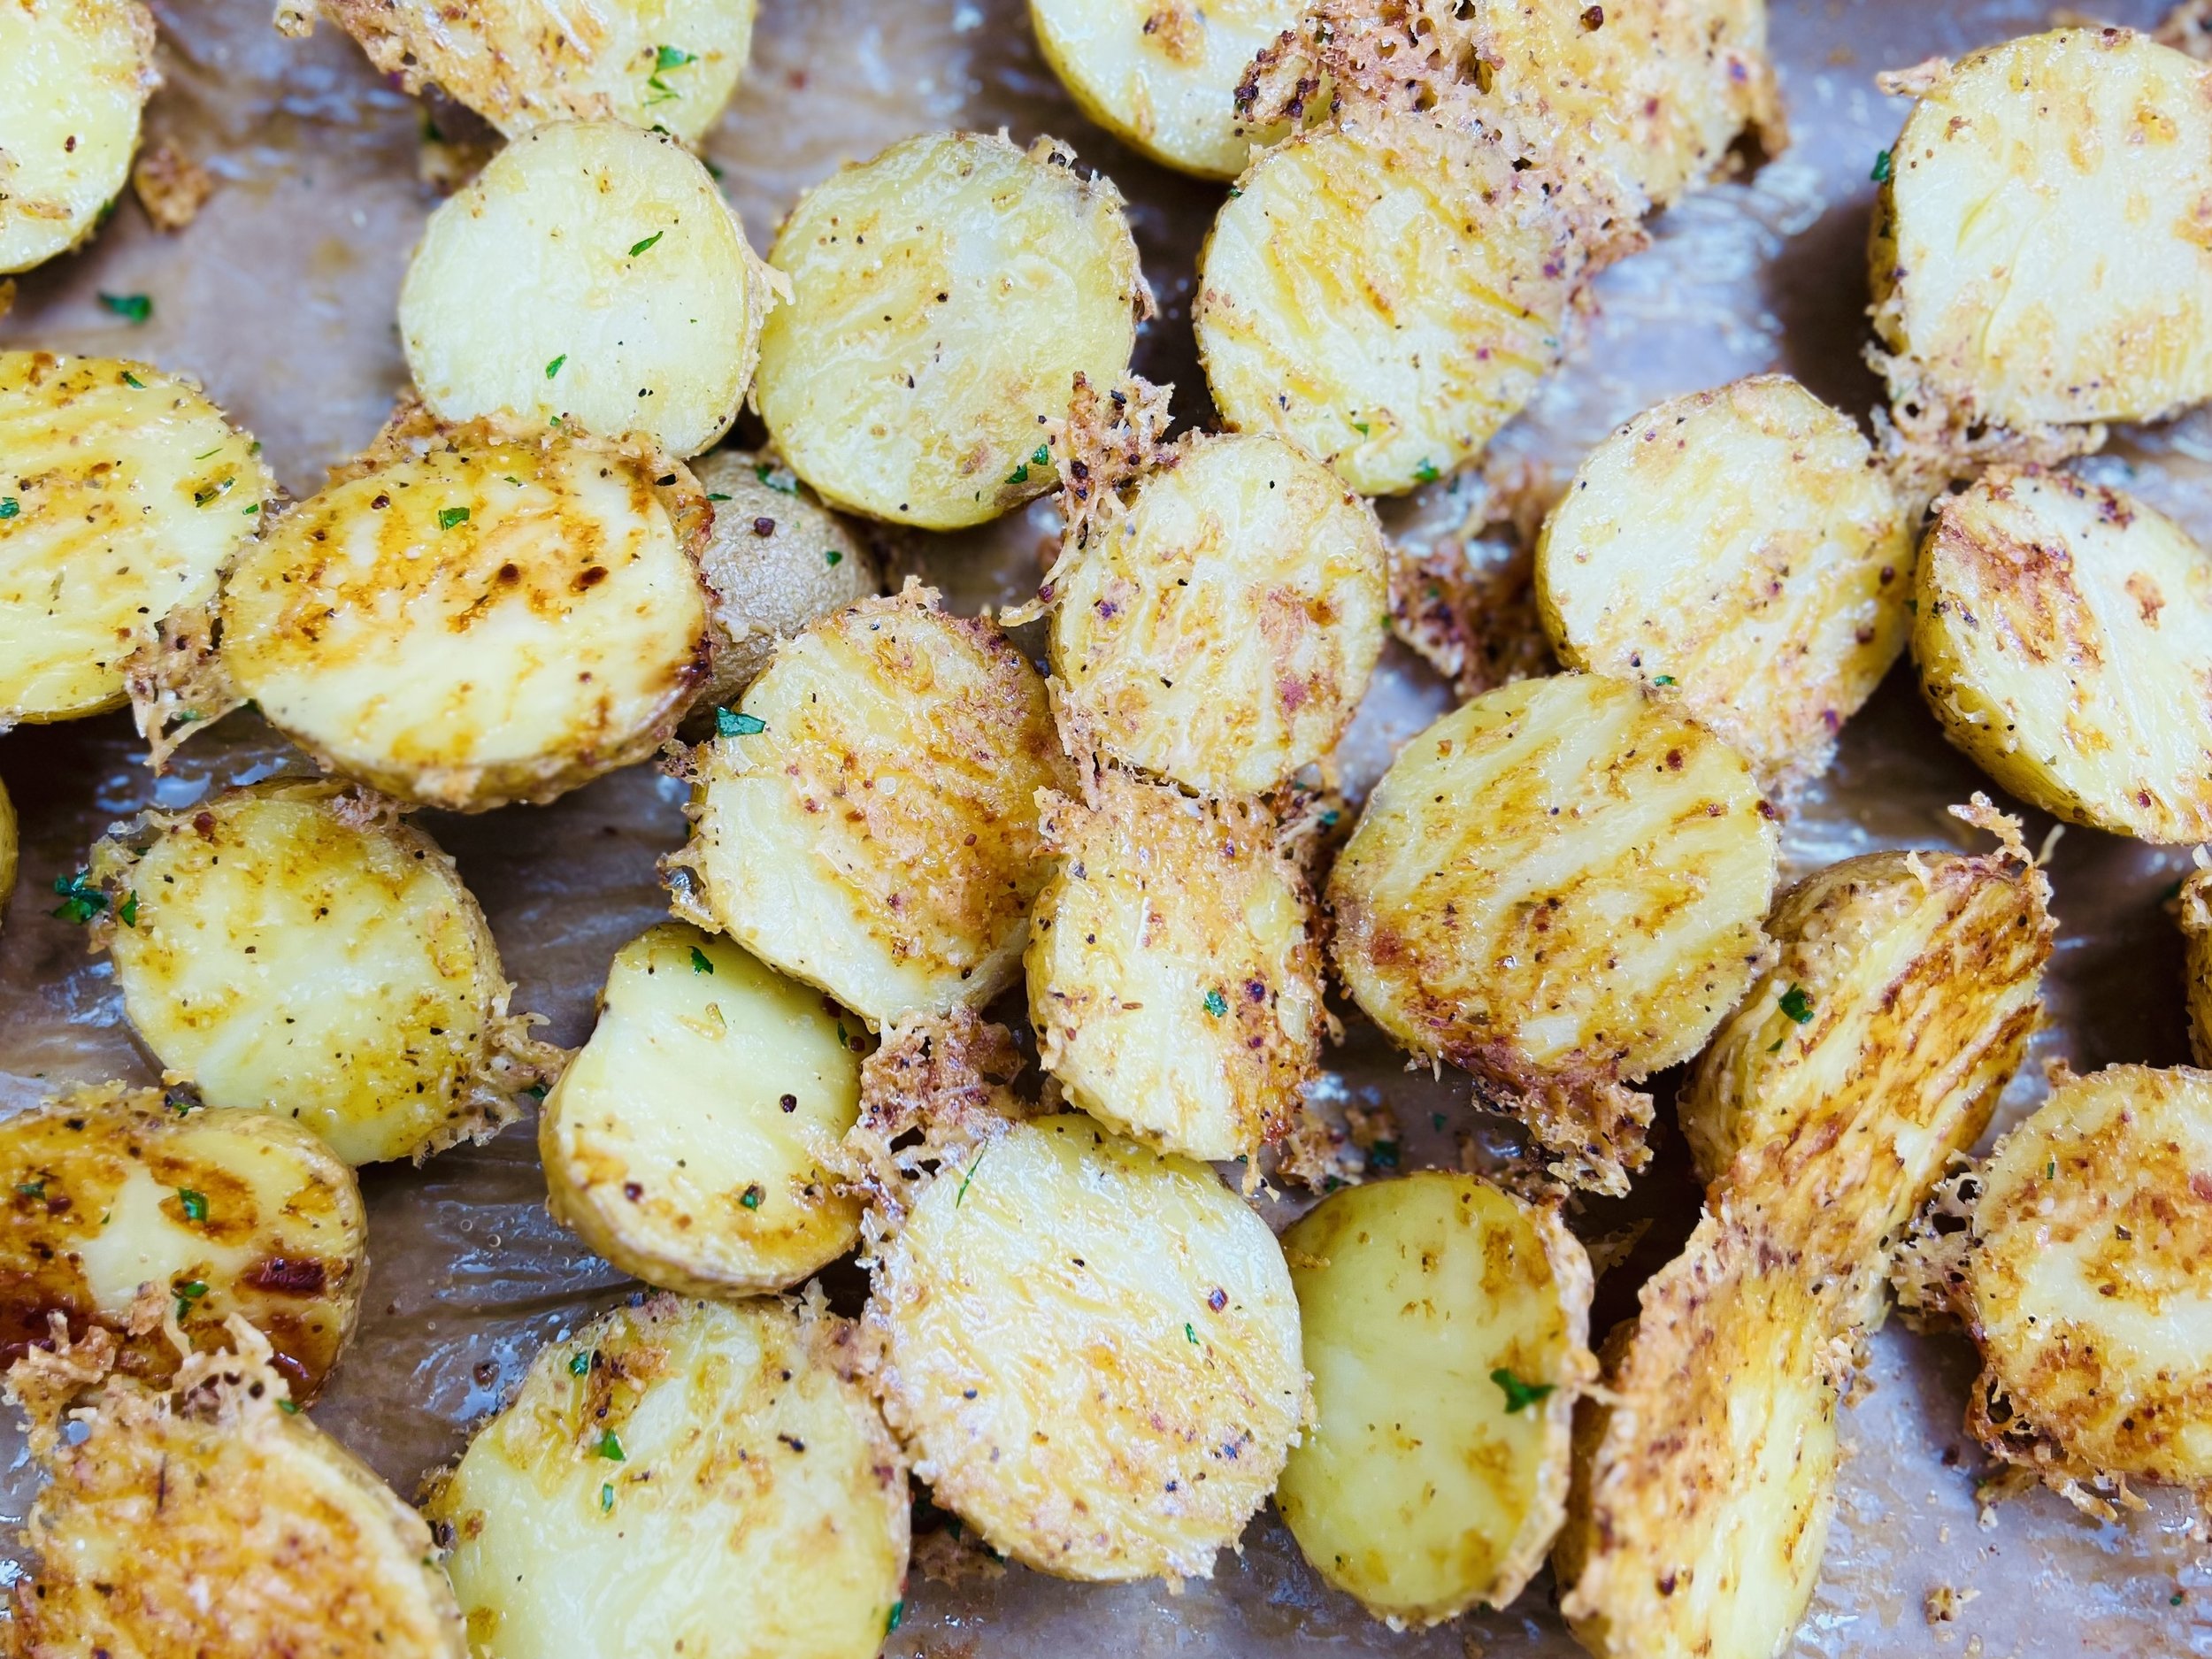
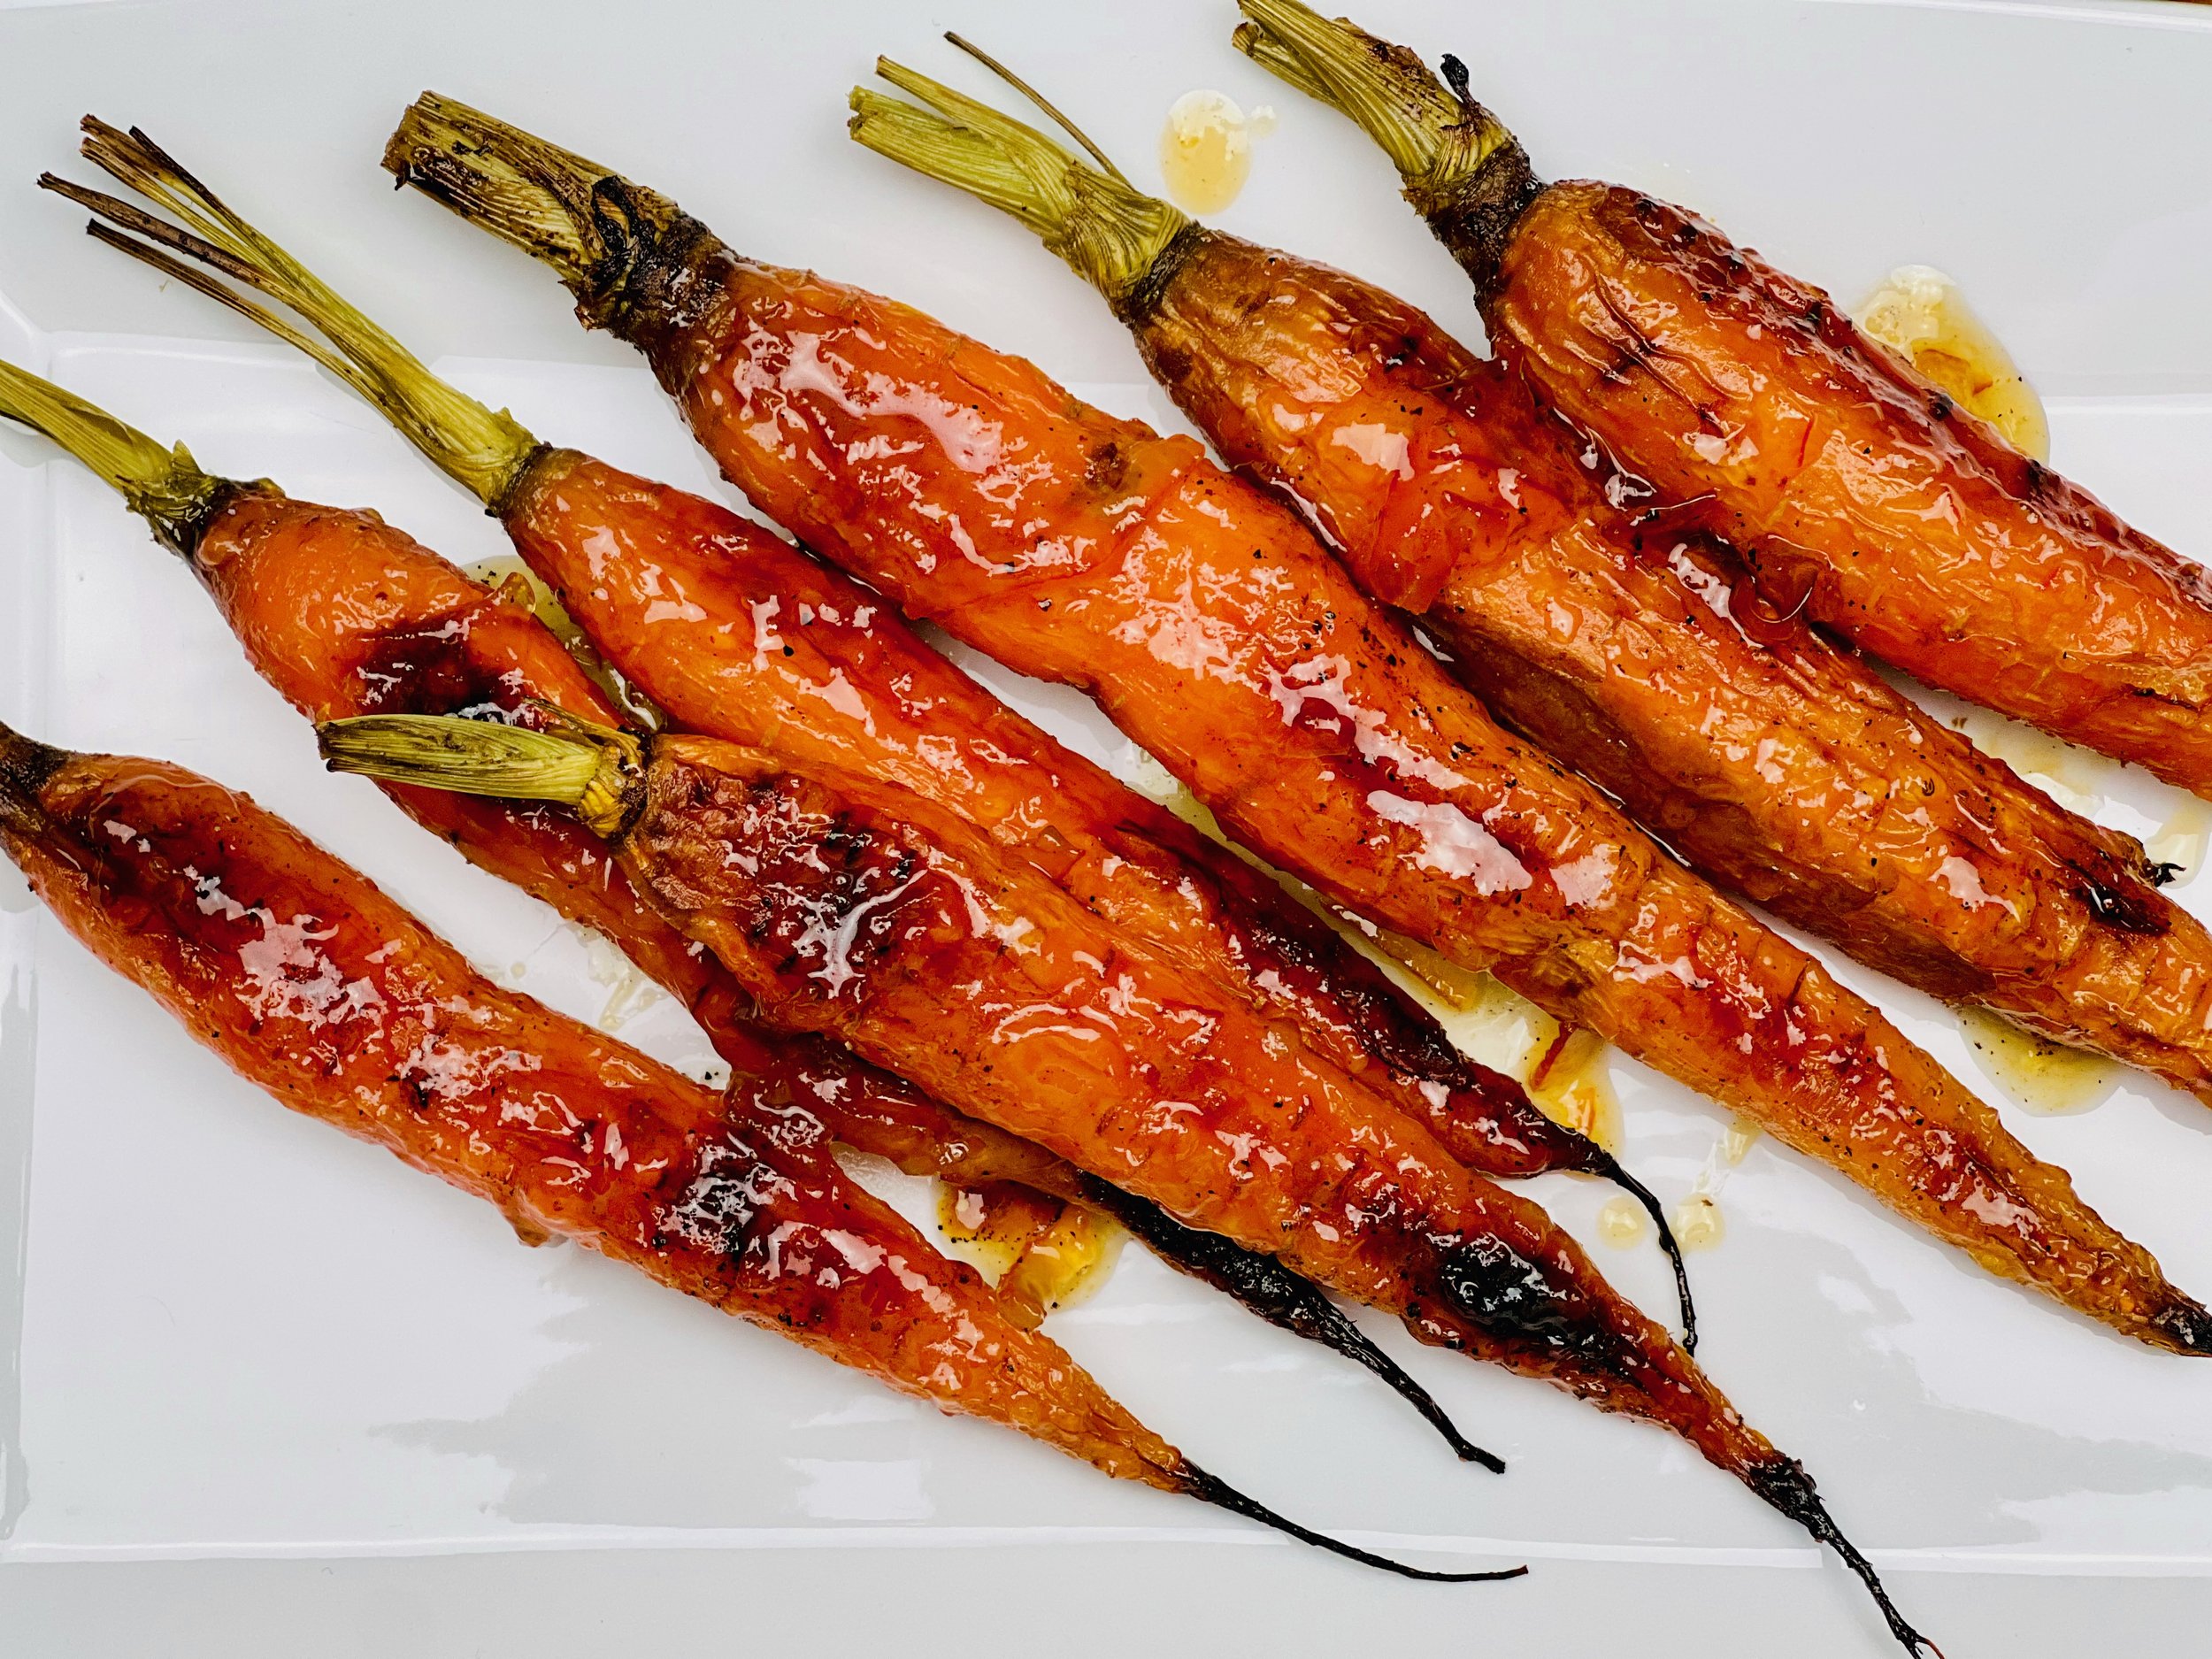
Rosemary Potatoes Au Gratin (low FODMAP)
15 Minutes prep • 60 Minutes cook • Low FODMAP • Gluten-free • Serves 8
15 Minutes prep • 60 Minutes cook • Low FODMAP • Gluten-free • Serves 8 • Ok to make-ahead: Steps 1 - 5 or 6
Are you ready to change up your holiday sweet potatoes? These wonderfully flavorful rosemary potatoes au gratin would be a marvelous addition to your table. The sweetness of the potatoes is mellowed with the savory flavor of the rosemary and the rich nuttiness of the gruyere cheese. The flavor gets better with time, so get a jump on the meal and make them ahead! My sister shared the original version of this recipe with me and we had it as a side for Thanksgiving dinner. It was a fine change of pace and a delicious savory complement to our meal. This version is low FODMAP, easy to make, and very delicious!

Ingredients
1 pound Yukon Gold potatoes
1 pound jewel sweet potatoes or other orange flesh sweet potatoes (the bi-color is pretty but not required if you can only find white sweet potatoes)
Butter for greasing the baking dish
2 cups gruyere cheese, grated
1 tablespoon fresh rosemary, finely chopped (or 1 teaspoon dried rosemary)
Kosher salt* and black pepper*
3/4 cup heavy cream
1 teaspoon Smoke N Sanity Essence of Garlic Salt* OR
1 teaspoon Kosher salt (or to taste) and 1 teaspoon Gourmend Garlic Scape Powder*
Fresh Rosemary for garnish
Directions
(1) Prepare: Preheat oven to 350 degrees F and grease a cake-size baking dish with butter.
(2) Prepare potatoes: Peel and thinly slice sweet potatoes and Yukon Gold potatoes using a food processor, mandoline, or a sharp knife. (Note: you may choose to leave the Yukon Golds with the peel on if you prefer.)
(3) Grate the cheese: Grate the cheese and set it aside.
(4) Layer the ingredients in the pan: Layer half of the sliced potatoes in the pan, sprinkle with about half the cheese, half the rosemary, and a sprinkling of salt and pepper. Layer the other half of the potatoes into the pan, sprinkle with the other half of the rosemary, and sprinkle with salt and pepper.
(5) Finish: Pour cream into a small bowl and whisk to combine with essence of garlic salt or garlic scape powder and salt. Pour evenly over the layered potatoes. Sprinkle with the remaining grated cheese.
Make-ahead note: At this point, you may cover with parchment and foil and refrigerate until ready to cook.
(6) Bake: Cover the pan with a layer of parchment and then a layer of foil. (If your baking dish is very full, place the dish on a rimmed baking sheet in case of bubble over in the oven.) Bake for 45 minutes then remove the foil and bake for another 15 to 20 minutes, or until potatoes are tender and the sauce is bubbly. Let stand 15 minutes before serving.
Make-ahead note: Alternatively, you may bake, covered, for 45 minutes or until potatoes are tender and the sauce is bubbly, let them cool, re-cover them with parchment and foil and refrigerate until ready to use. Then remove from the refrigerator and finish baking in a 350 degree F oven, uncovered, for about 20 minutes, or until fully warmed through.
(7) Plate and serve: Serve garnished with rosemary sprigs.
Eat and enjoy every bite because you can!
*This post may contain links for you to easily purchase items listed on the page. In some cases, we have provided a special discount code for IBS Game Changers so be sure to use it when you purchase an item to get the discount that has been arranged just for you! As an Amazon Associate, I earn a commission from qualifying Amazon purchases.
More Deliciously Low FODMAP™ side dish recipes you might enjoy

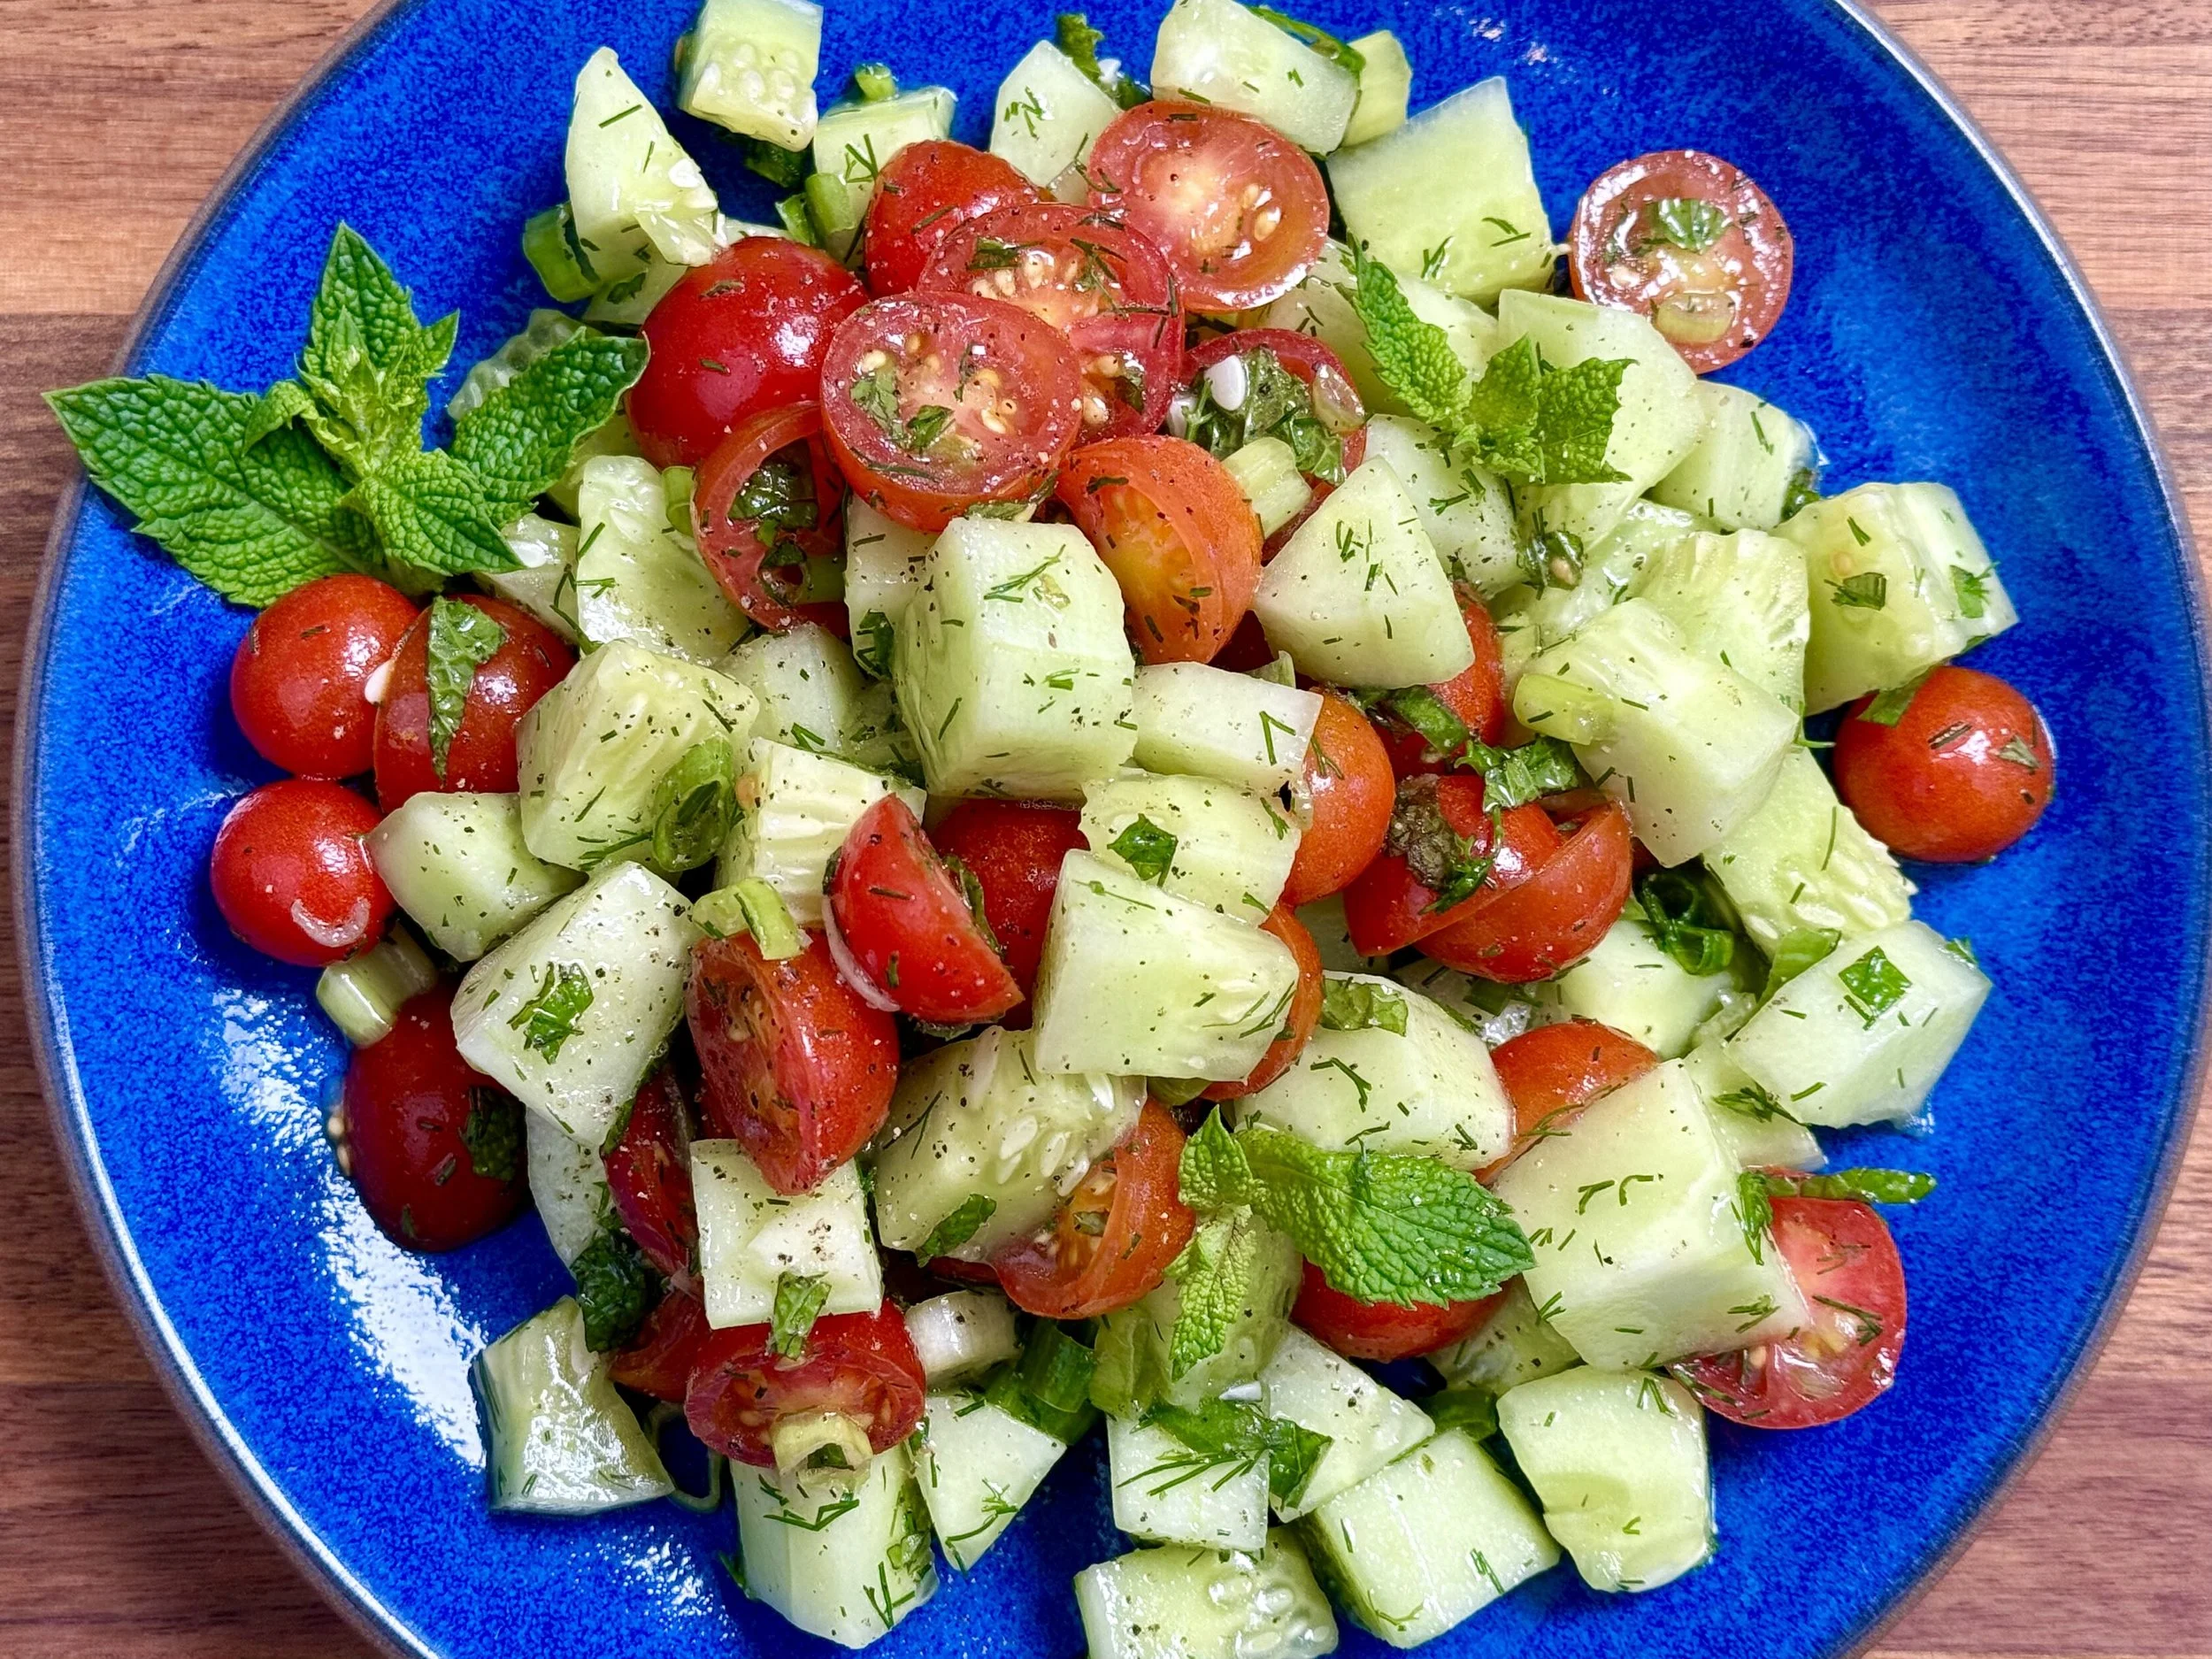


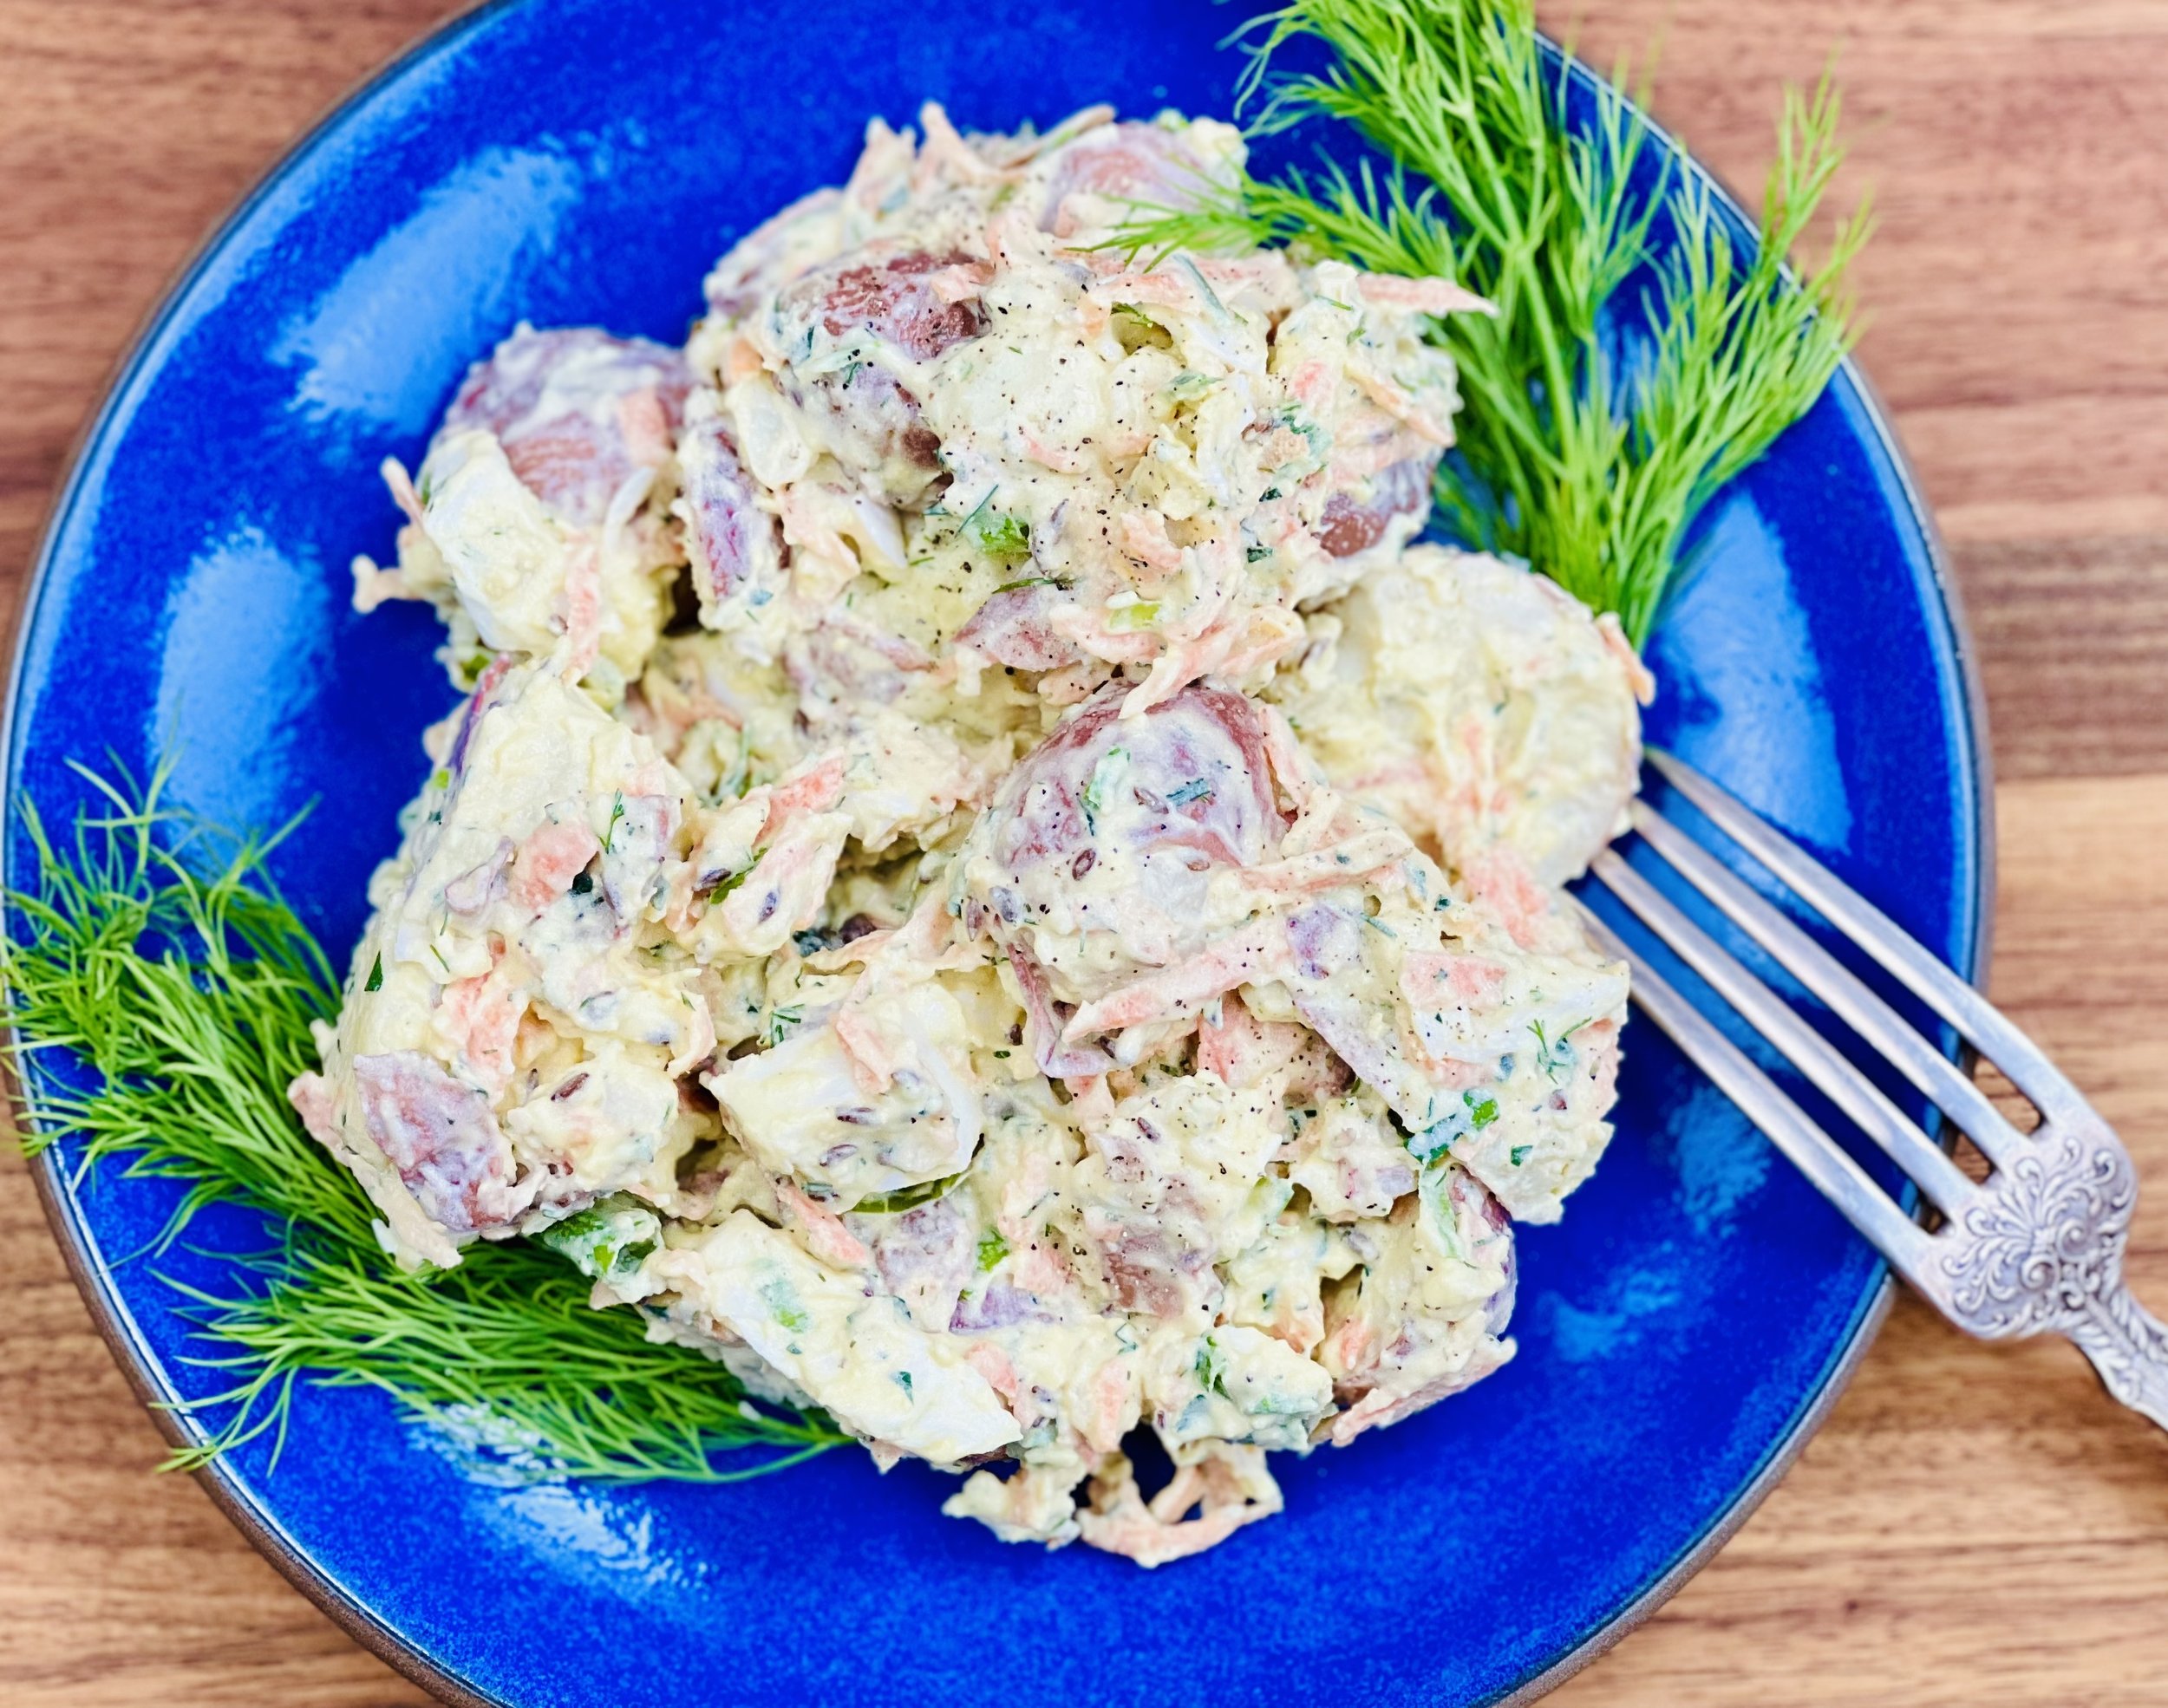

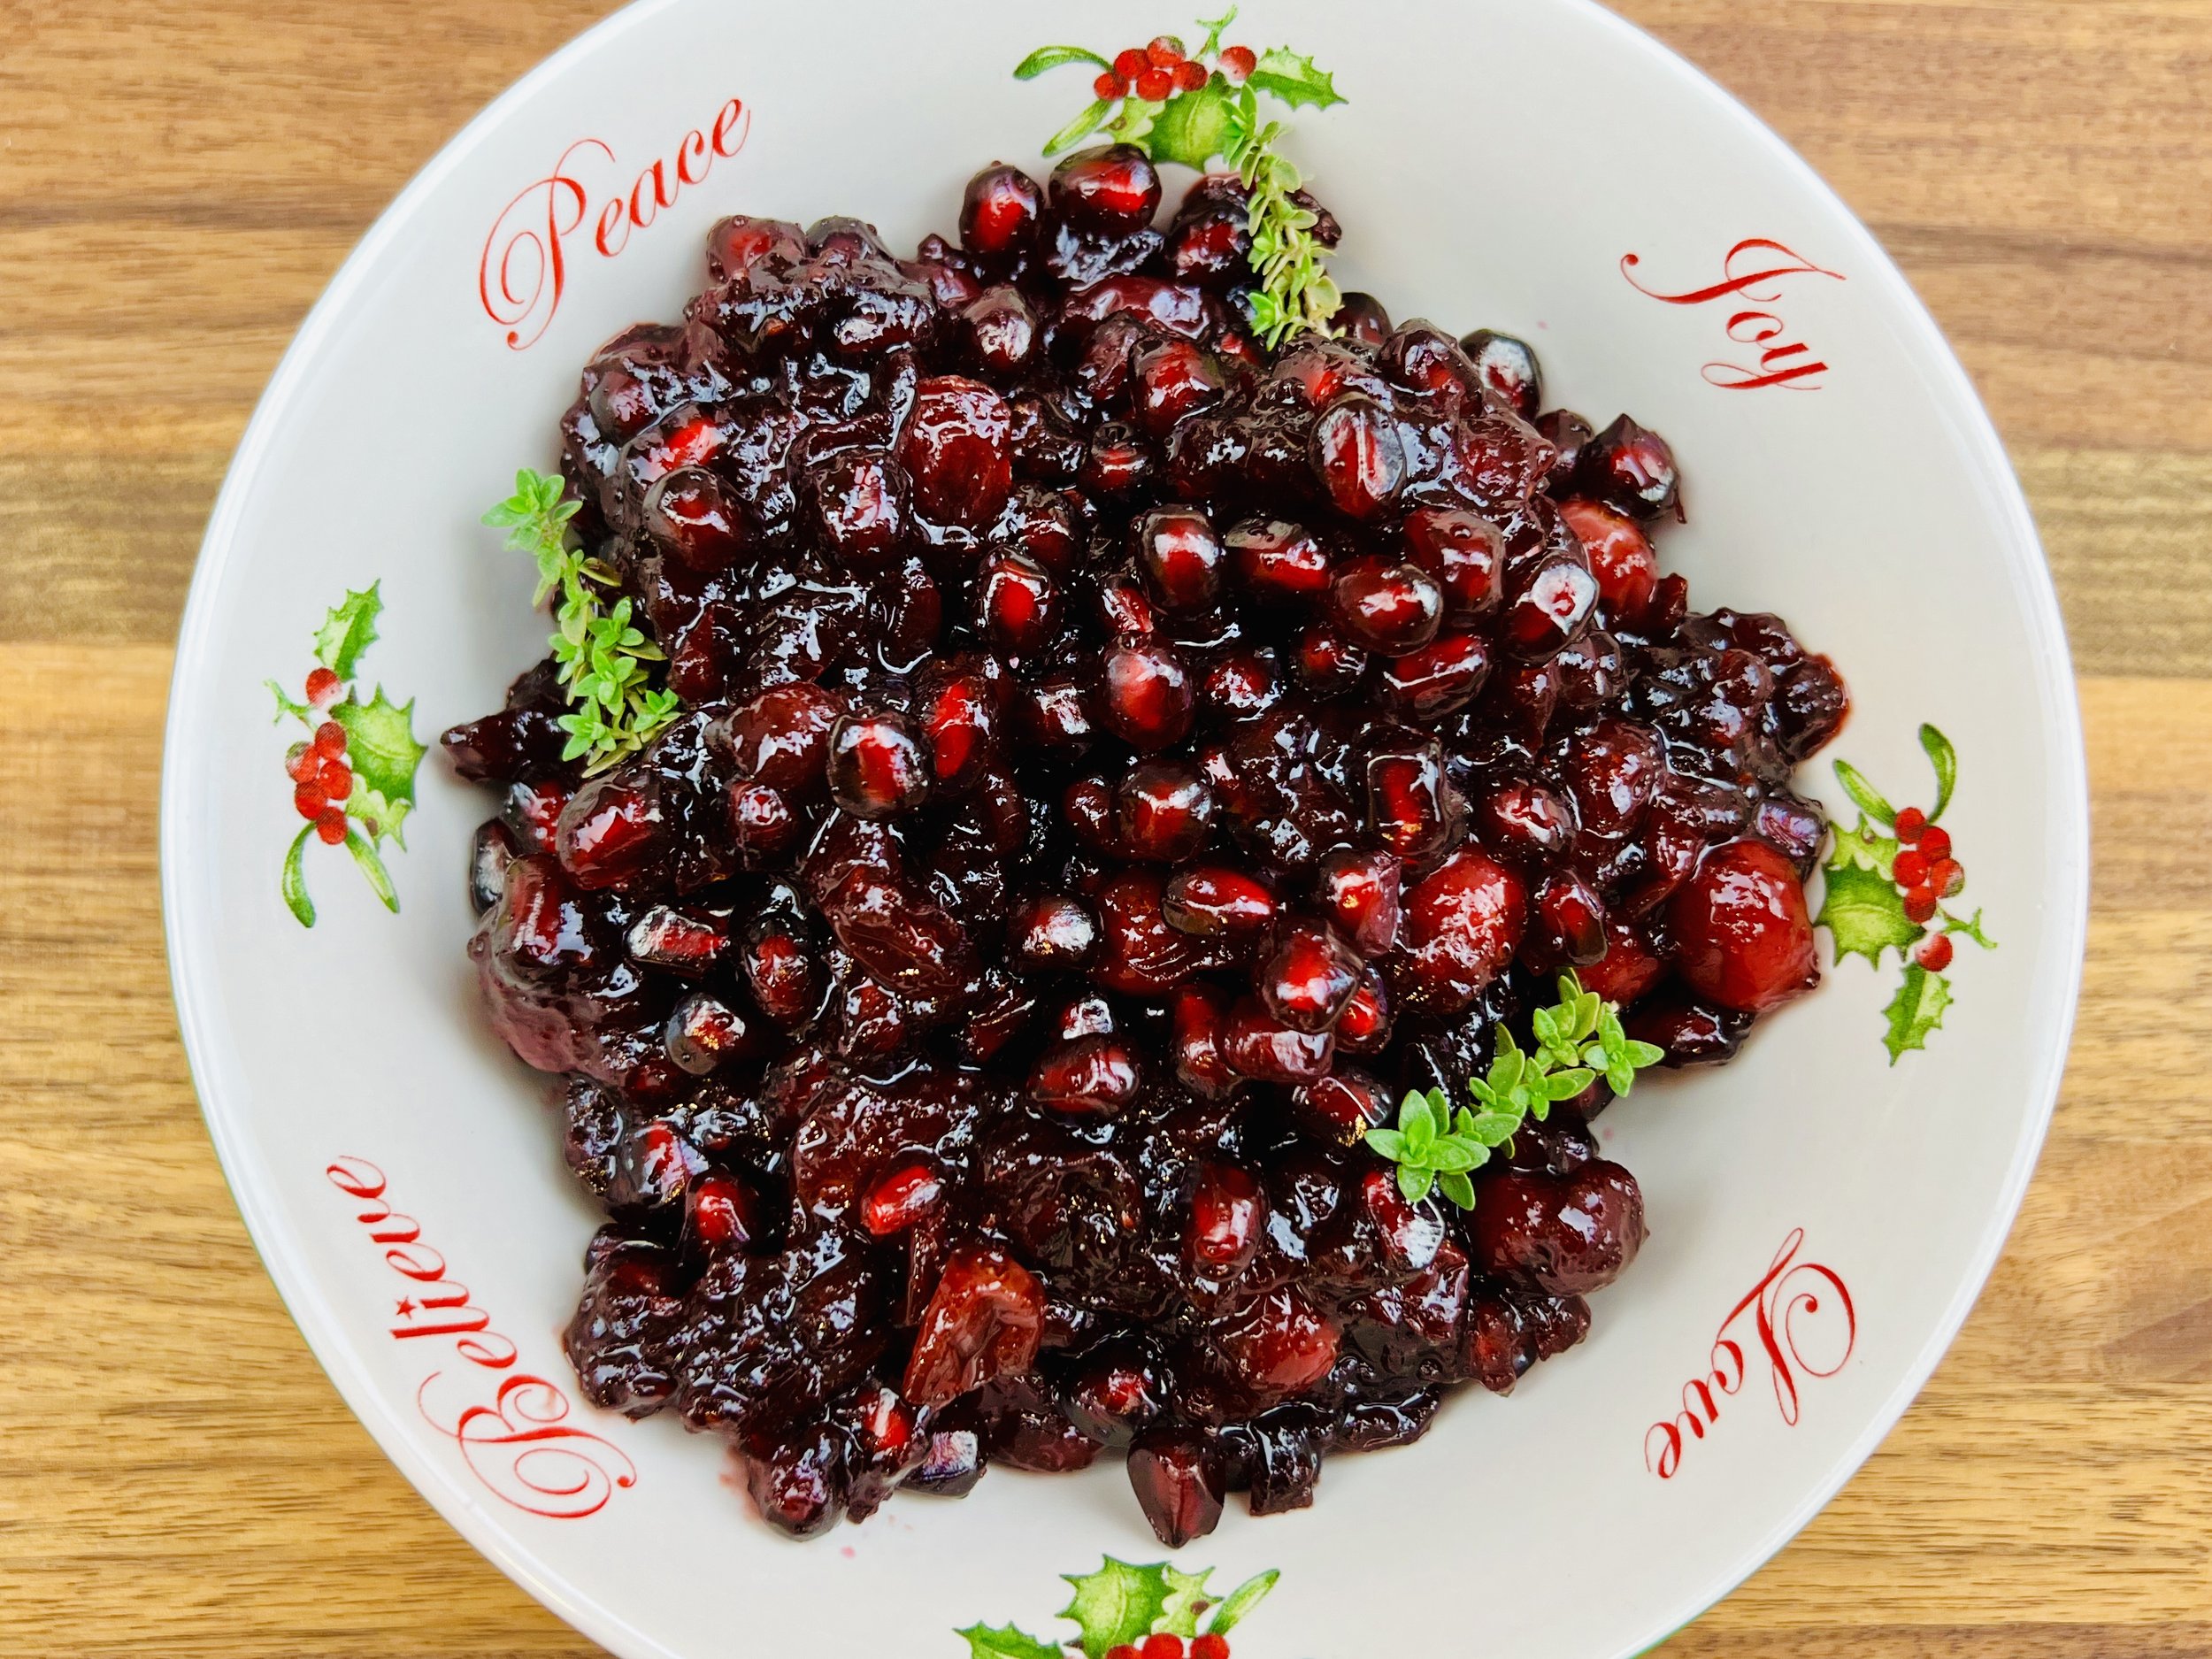

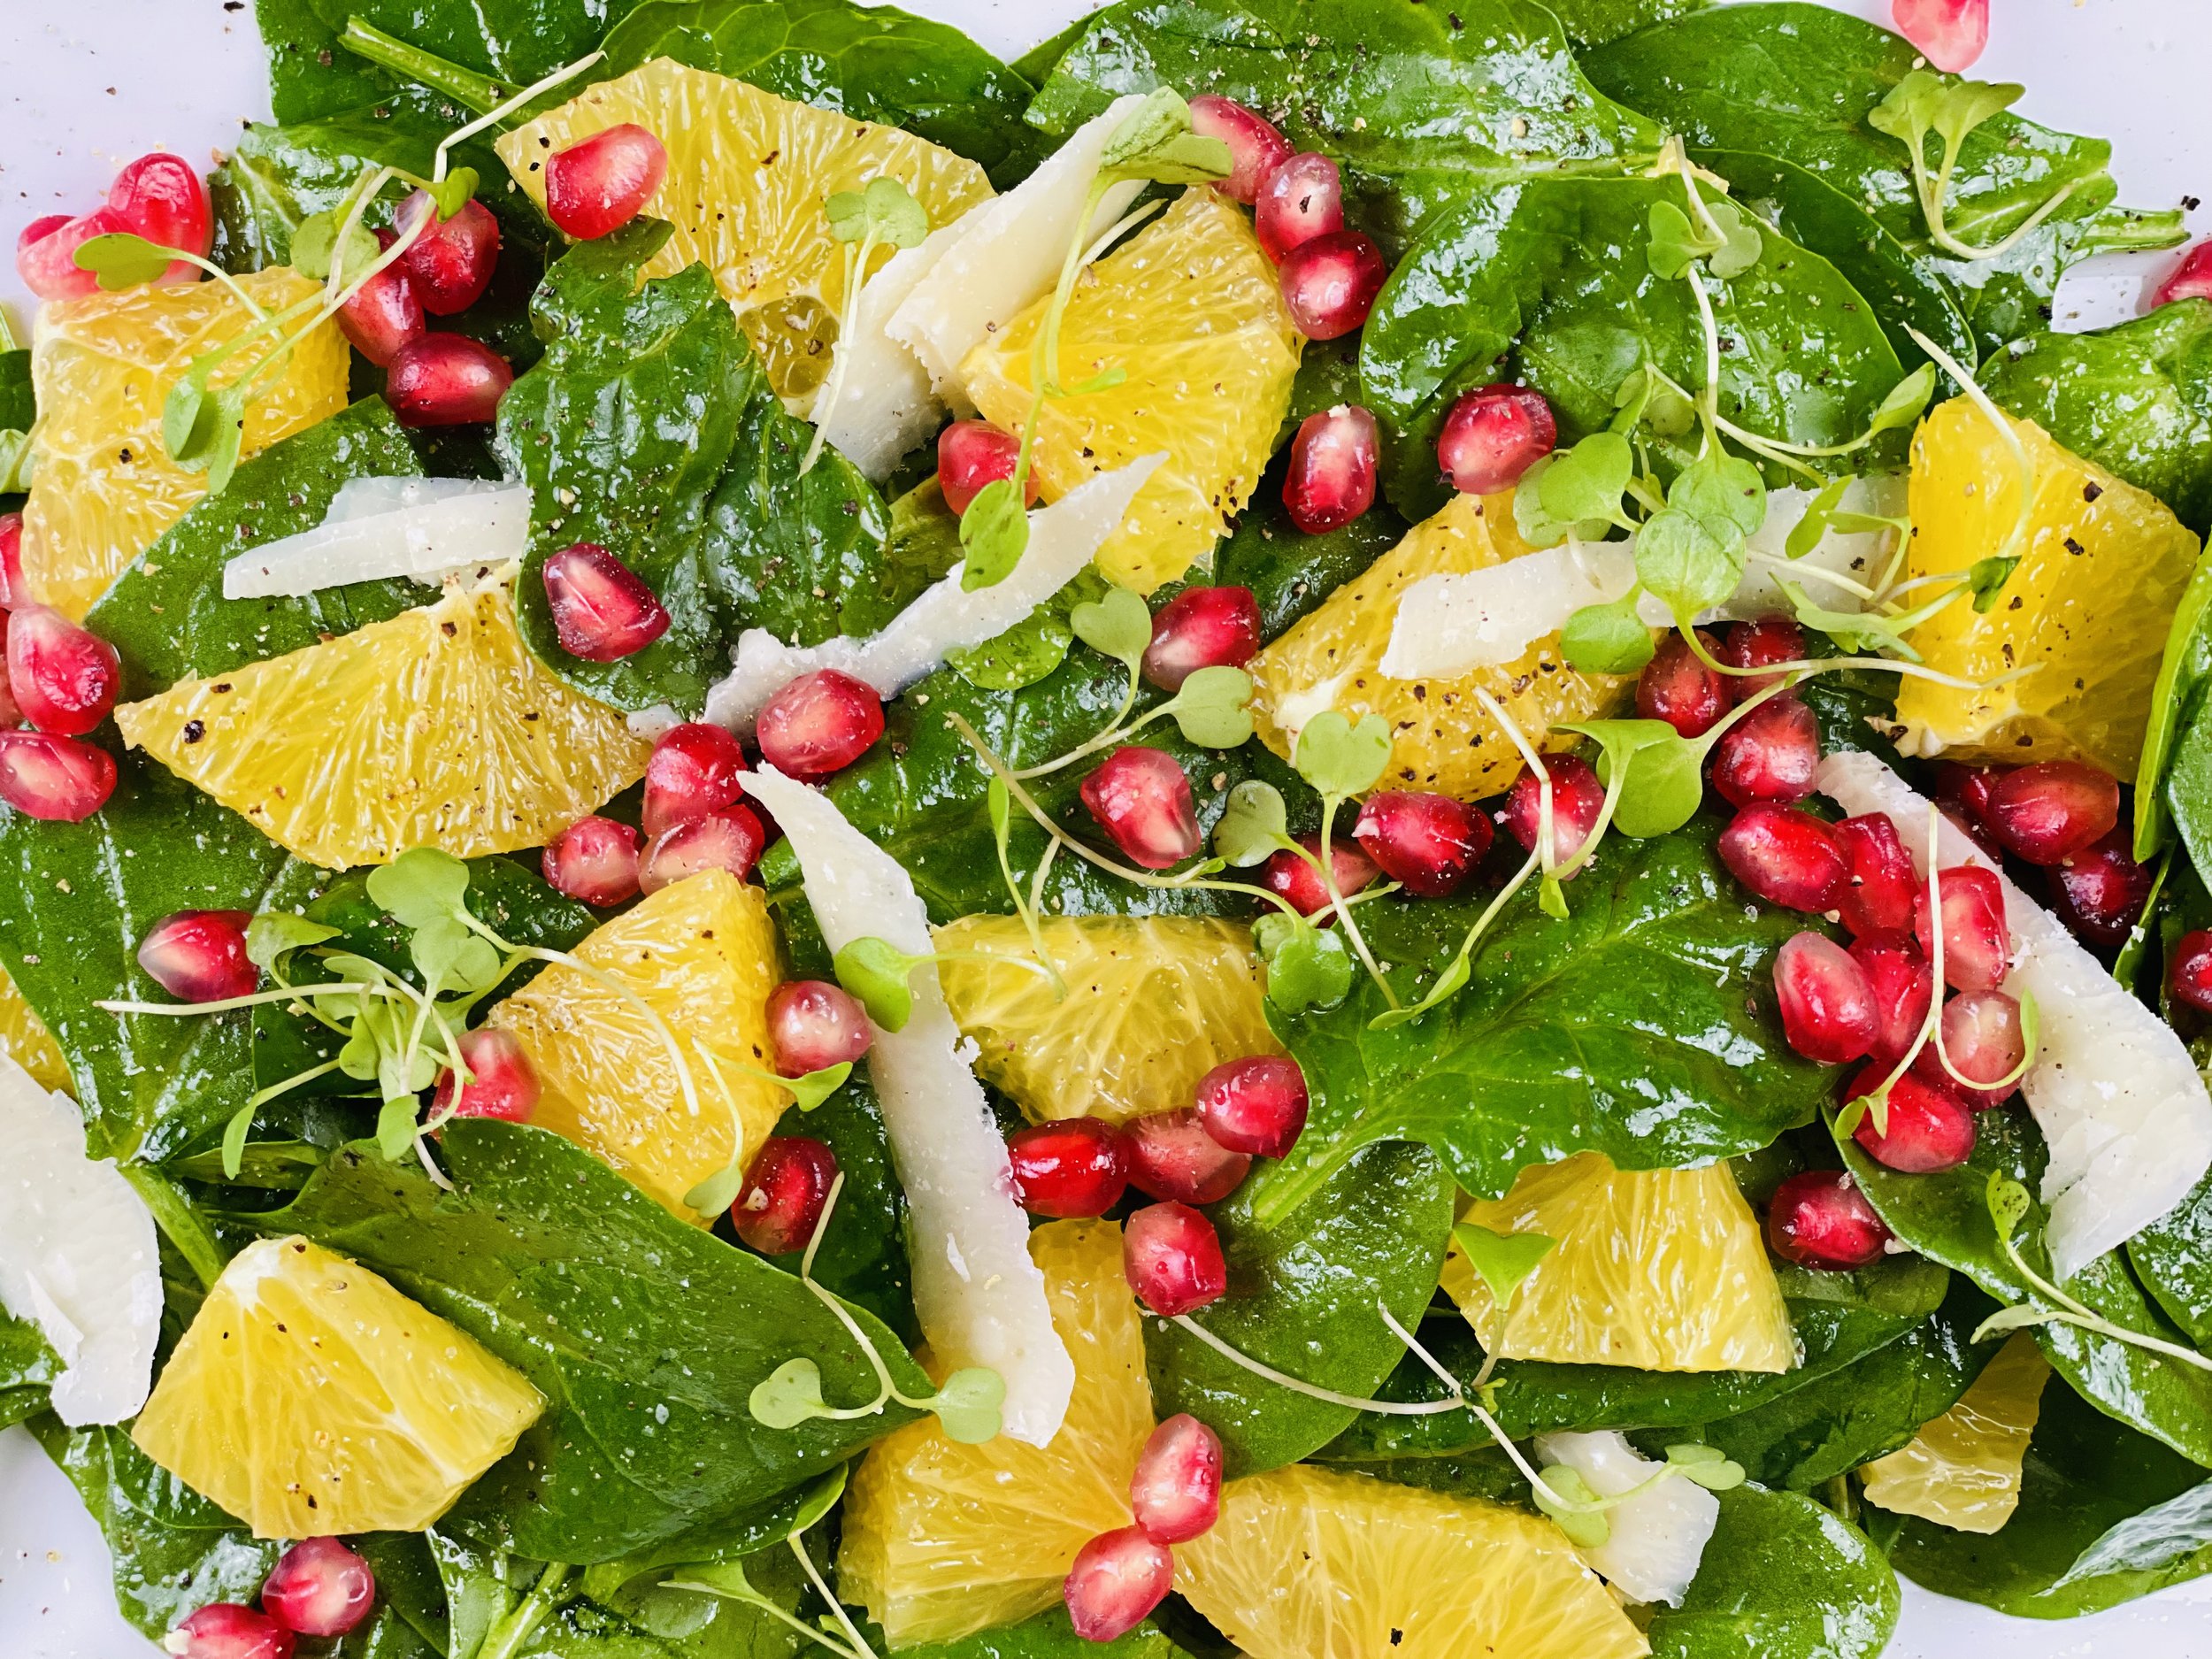
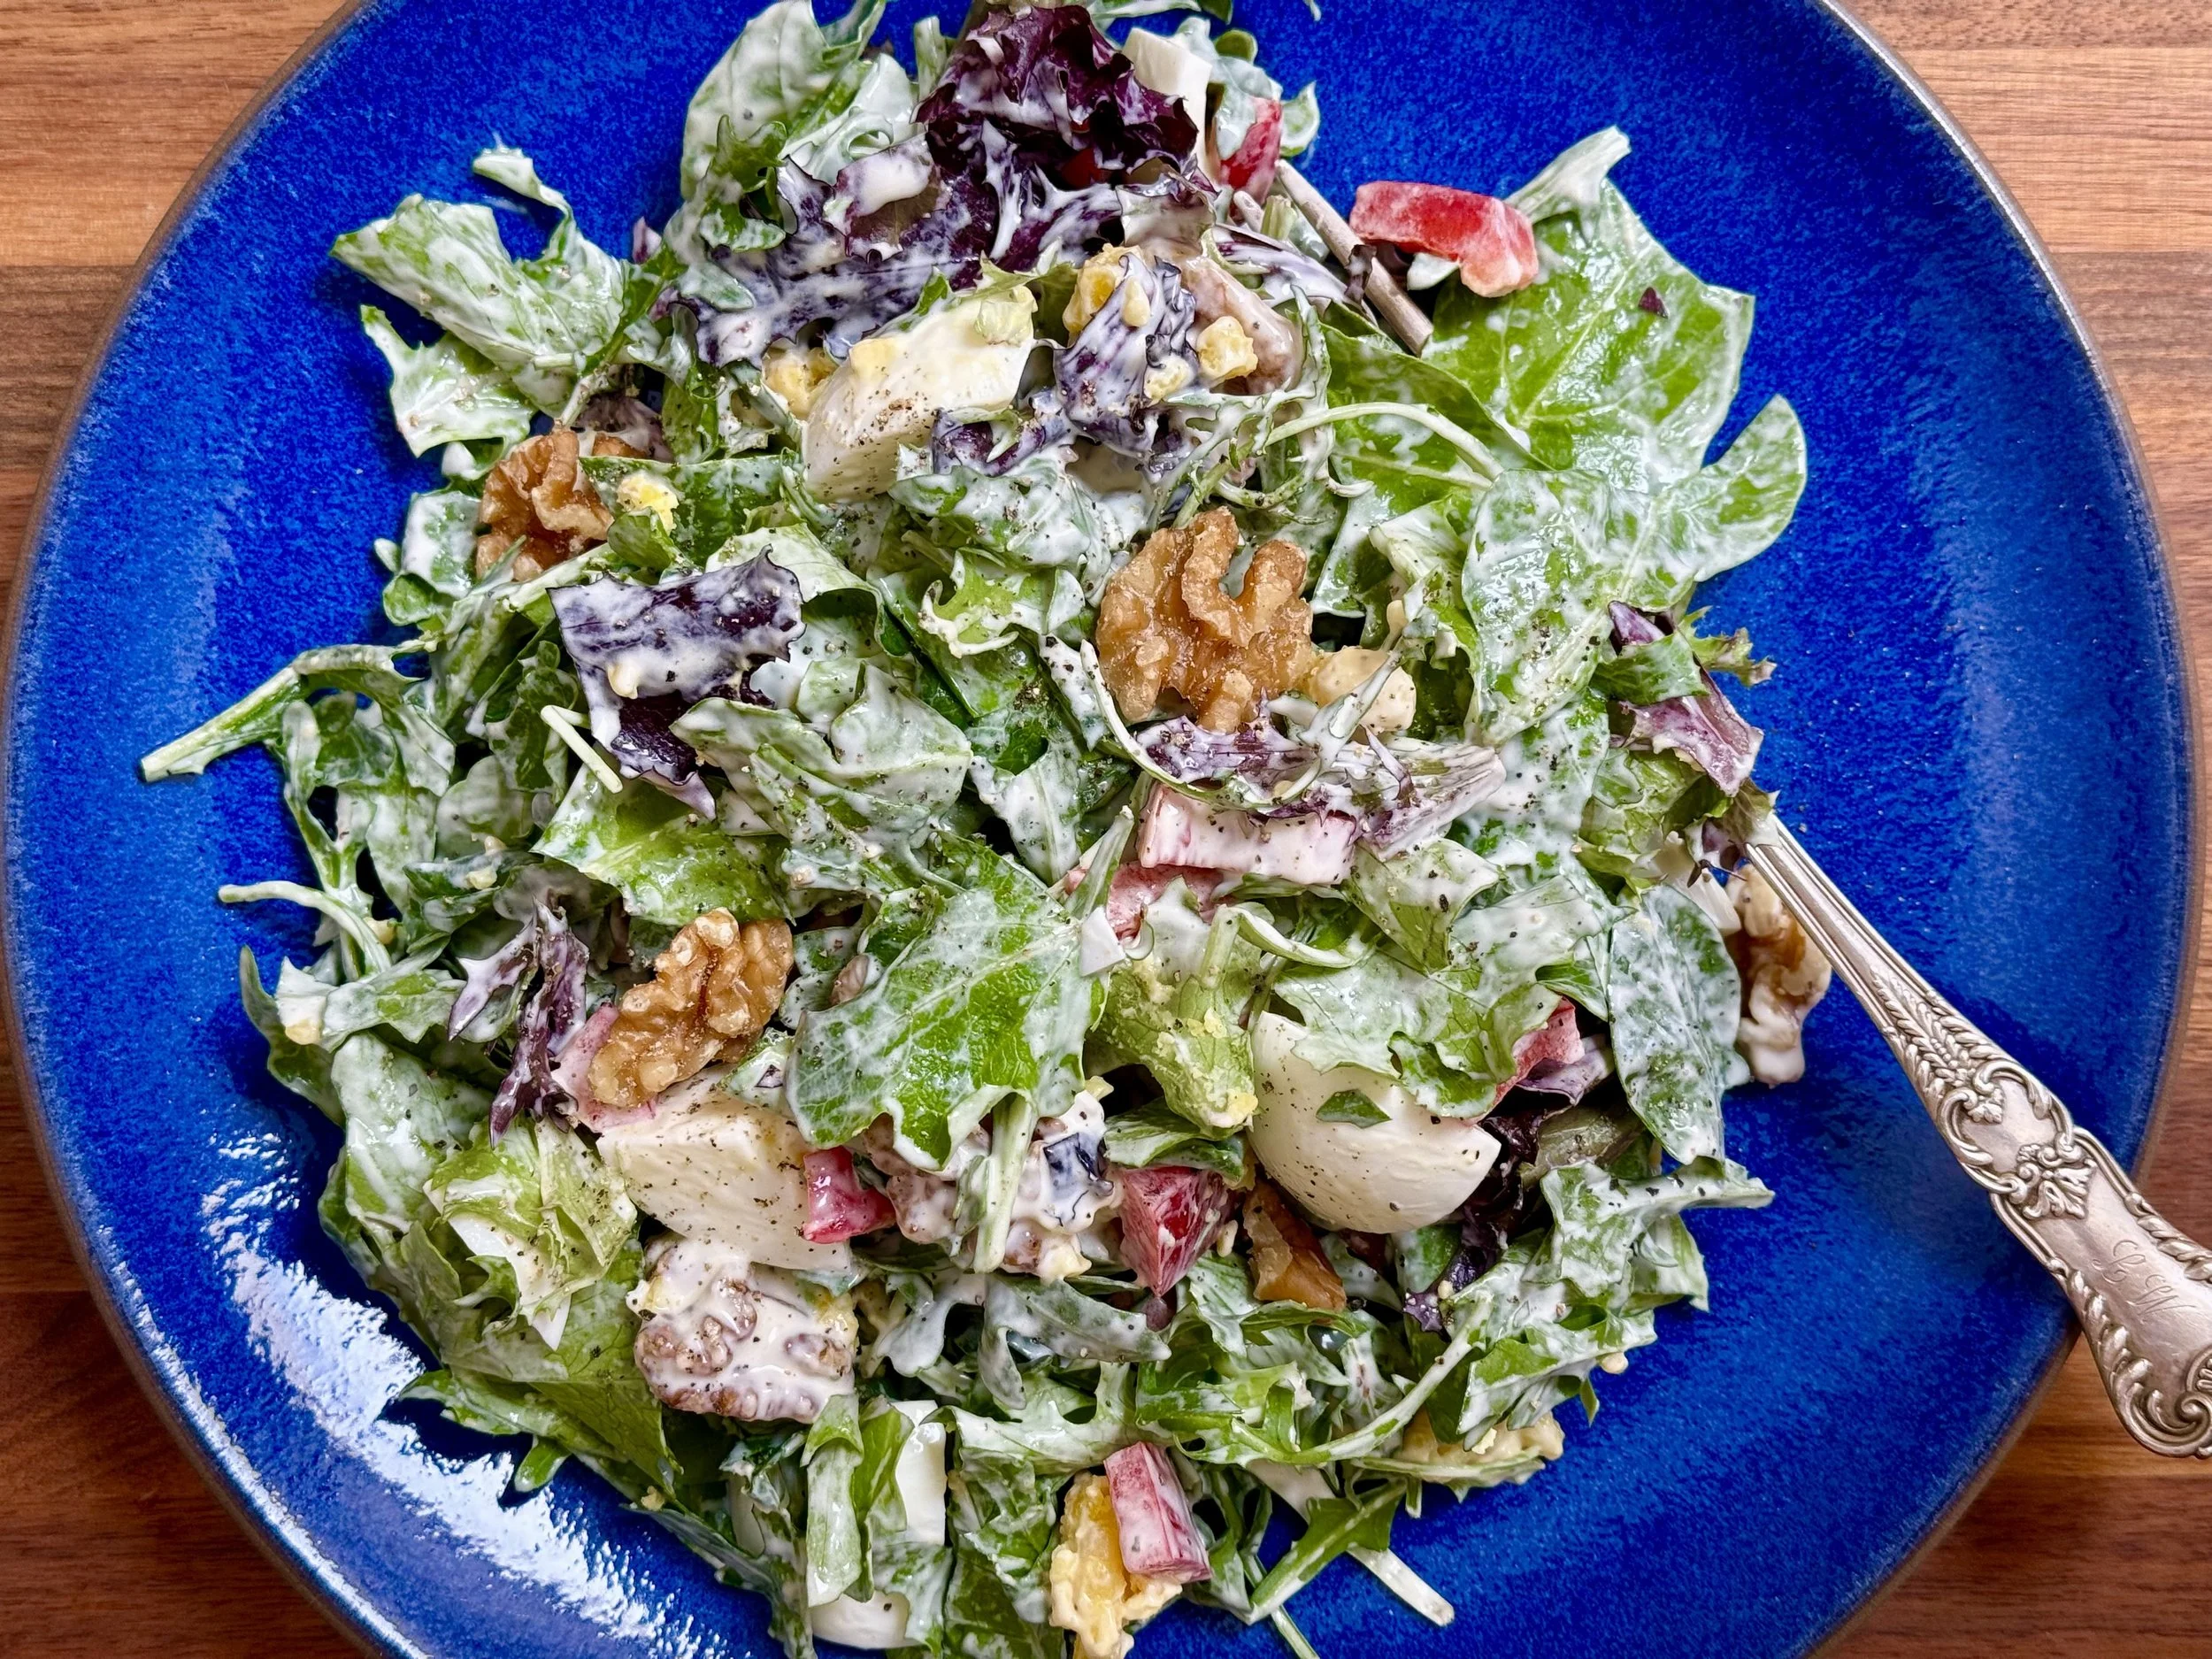
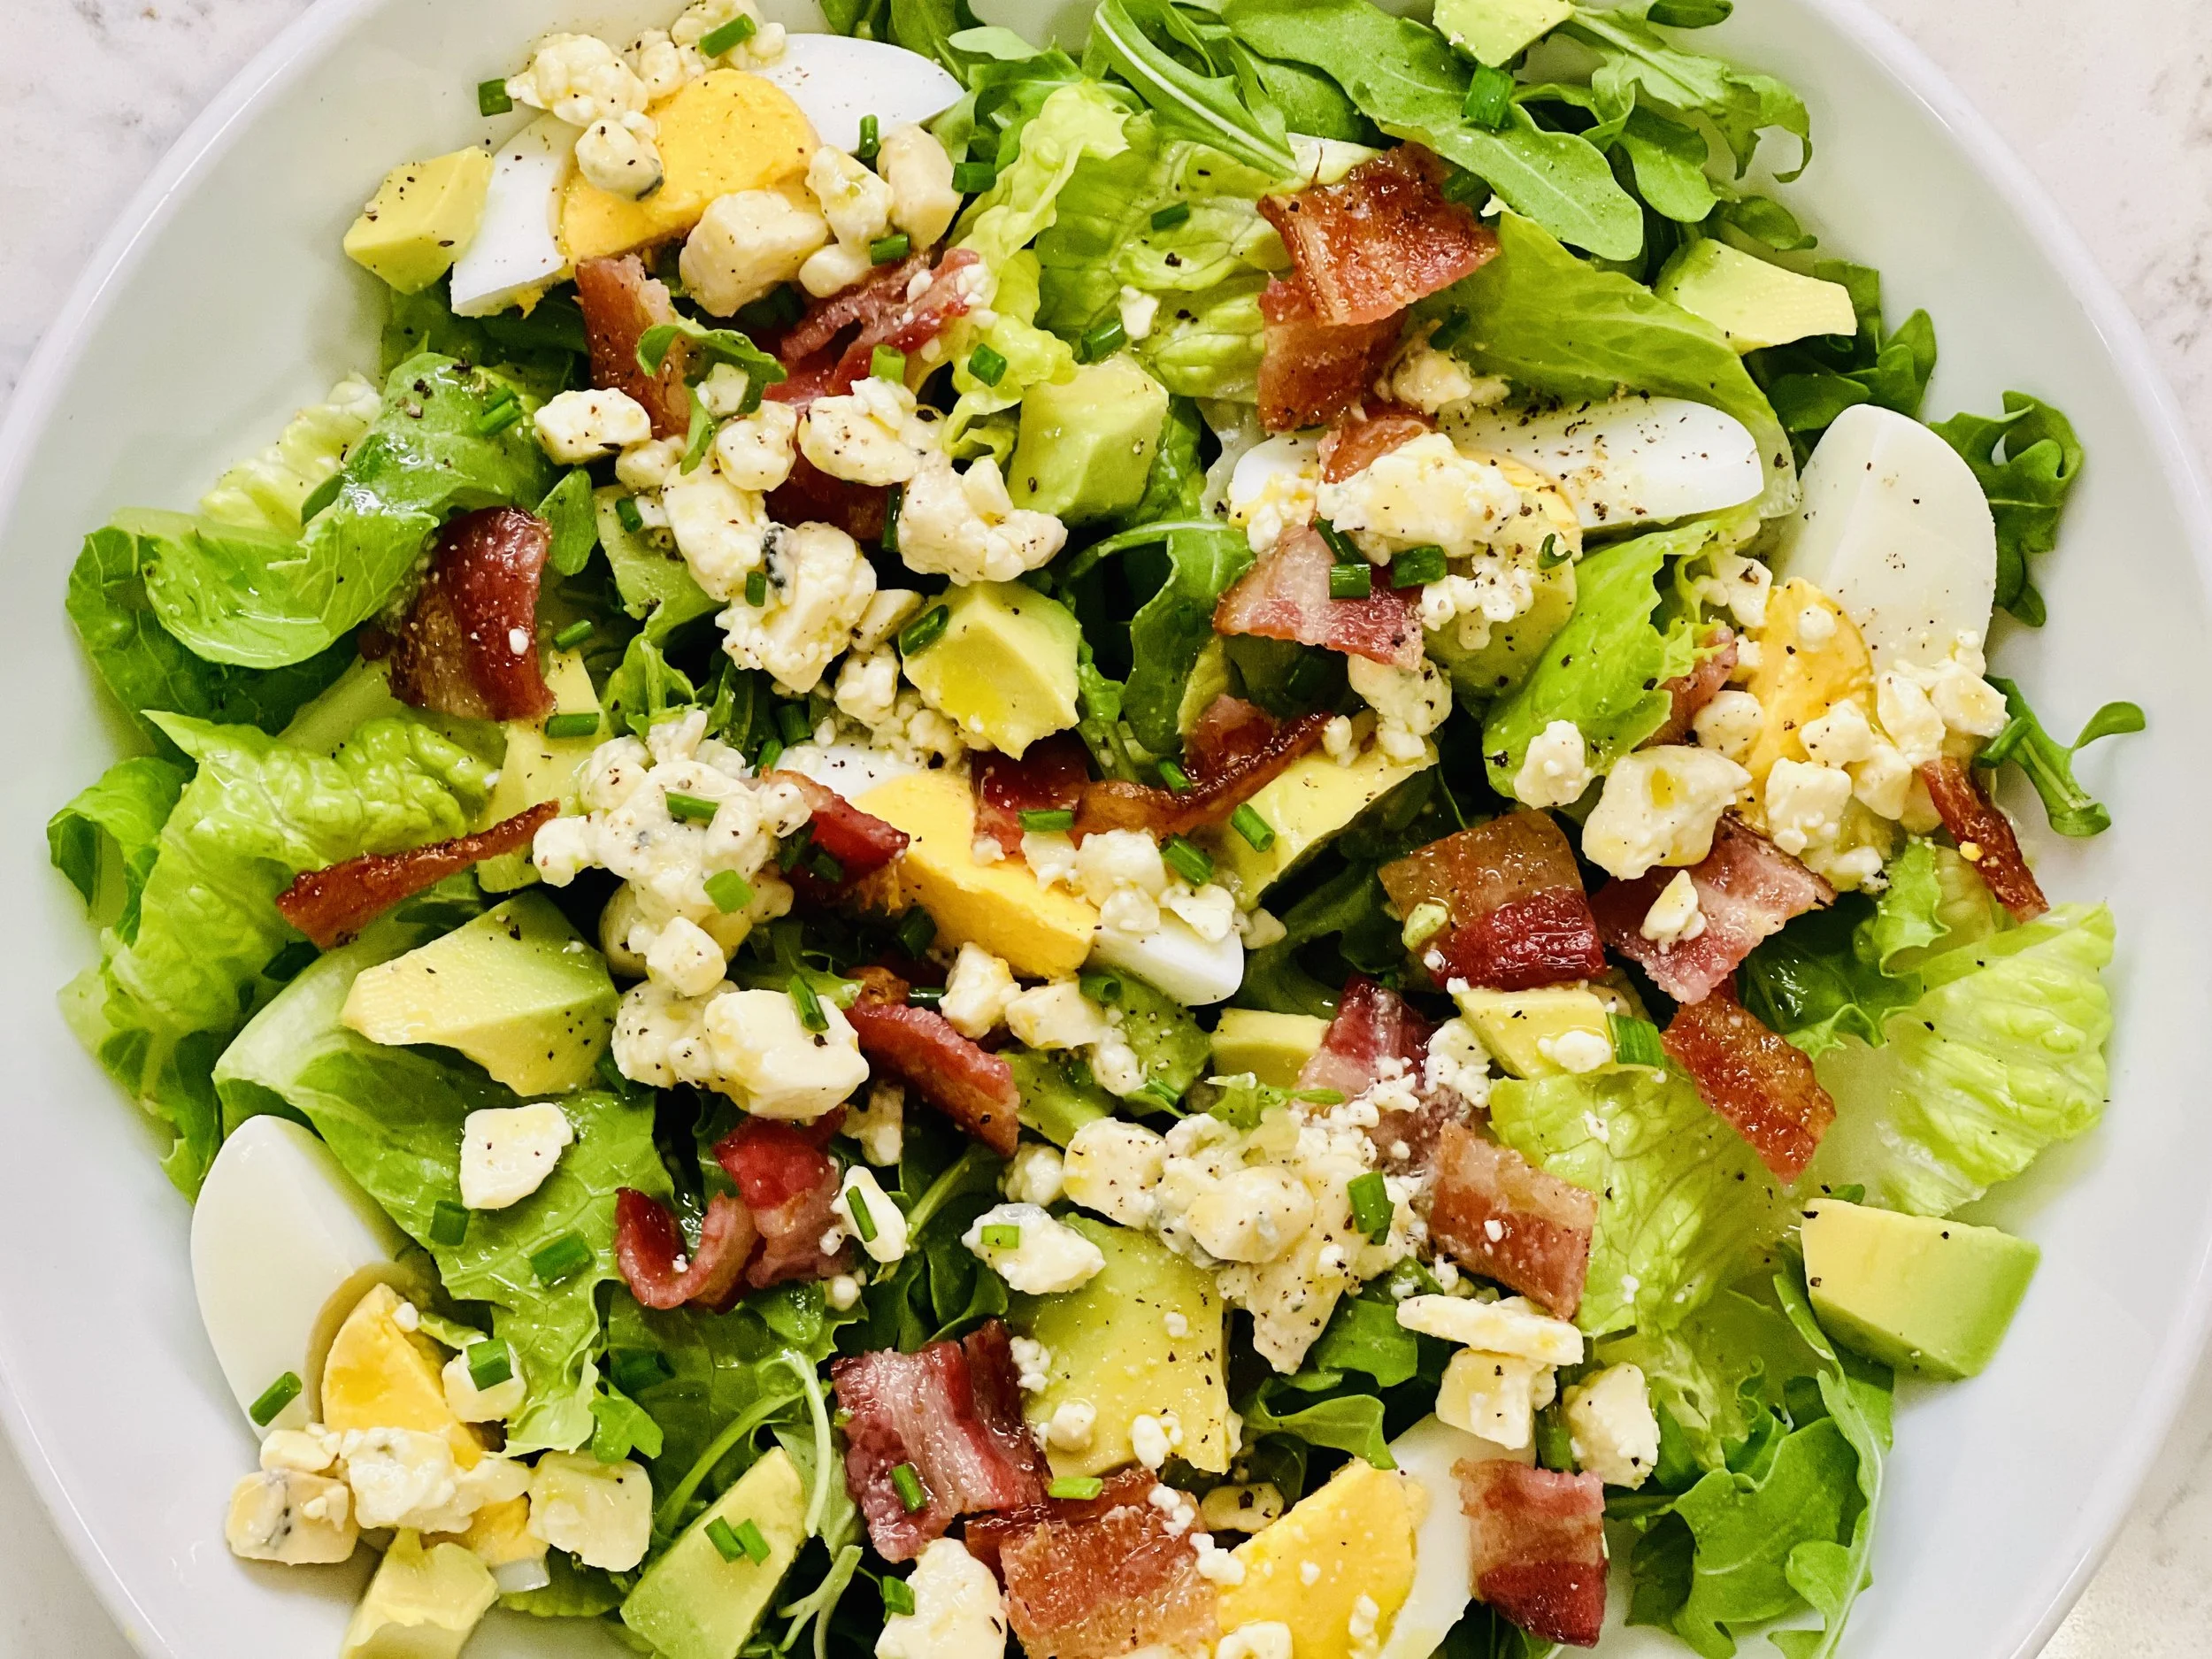
Holiday Salad (low FODMAP)
20 Minutes prep • Low FODMAP • Gluten-free • Vegetarian • Serves 4
20 Minutes prep • Low FODMAP • Gluten-free • Vegetarian • Serves 4 • Ok to make-ahead: Steps 1 - 2
This beautiful salad is the perfect counterpoint to balance the rich and heavy foods we have so much of during the holidays. It’s just the right combination of sweet and savory and it’s a snap to make! You can prepare everything ahead of time and just toss it together at the last minute so there’s no reason not to add this to Thanksgiving day, Christmas day, or any day!
Ingredients
2 tablespoons maple syrup*
2 tablespoons olive oil
1 tablespoon apple cider vinegar*
1 package (5 ounces) pre-washed baby spinach (or any baby spinach will work)
1 Cara Cara or Navel orange, peel removed and sliced
1/4 cup pomegranate arils
1/4 cup shaved Parmesan cheese
Kosher salt* and black pepper*
Microgreens (optional)
Directions
(1) Prepare your ingredients: Wash and dry the spinach. Using a sharp knife, cut the peel and the pith from the orange then slice it and cut into bite-size pieces. Using a vegetable peeler, shave the parmesan cheese (or buy shaved Parmesan).
(2) Make the dressing: In a small jar combine the maple syrup, olive oil, and apple cider vinegar and shake until combined and toss the spinach with the dressing.
Make-ahead note: At this point, you may set your ingredients aside in the refrigerator until you’re ready to assemble your salad.
(3) Finish: To serve, put the spinach on a plate, top with orange slices, pomegranate arils, shaved parmesan, and microgreens (if using). Sprinkle with fresh ground black pepper and Kosher salt.
Eat and enjoy every bite because you can!
*This post may contain links for you to easily purchase items listed on the page. In some cases, we have provided a special discount code for IBS Game Changers so be sure to use it when you purchase an item to get the discount that has been arranged just for you! As an Amazon Associate, I earn a commission from qualifying Amazon purchases.
More Deliciously Low FODMAP™ salad recipes you might enjoy


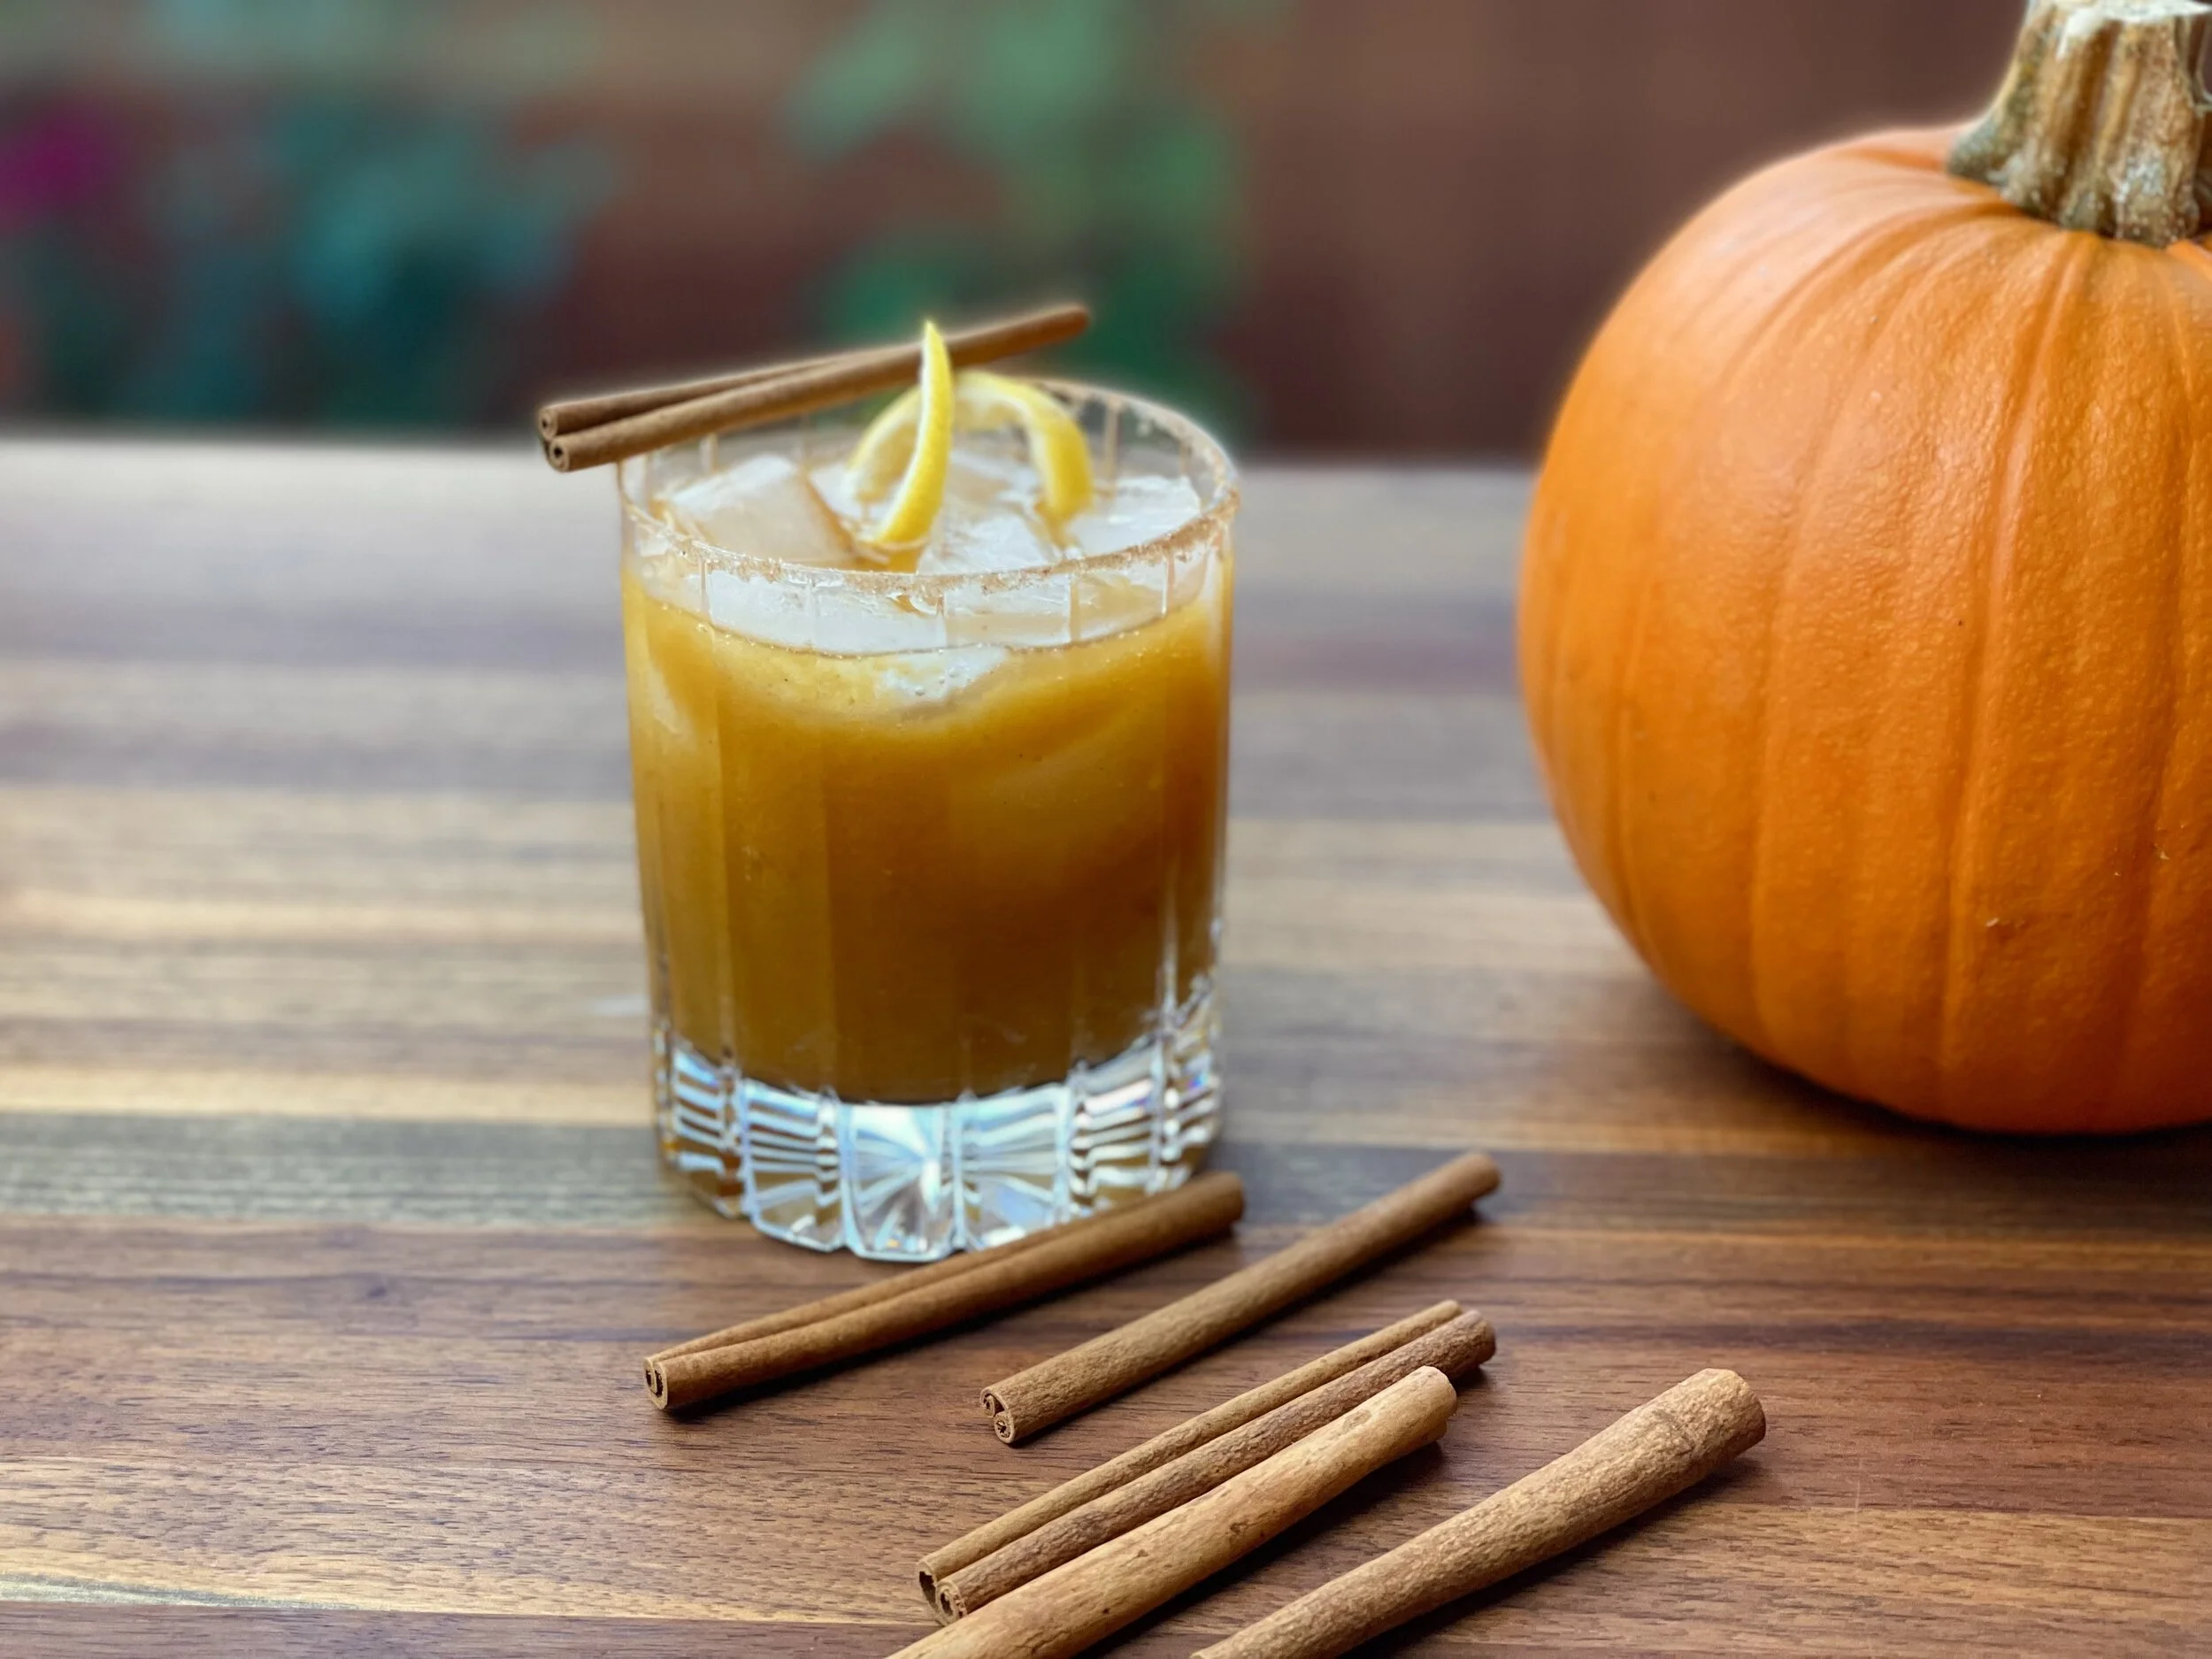
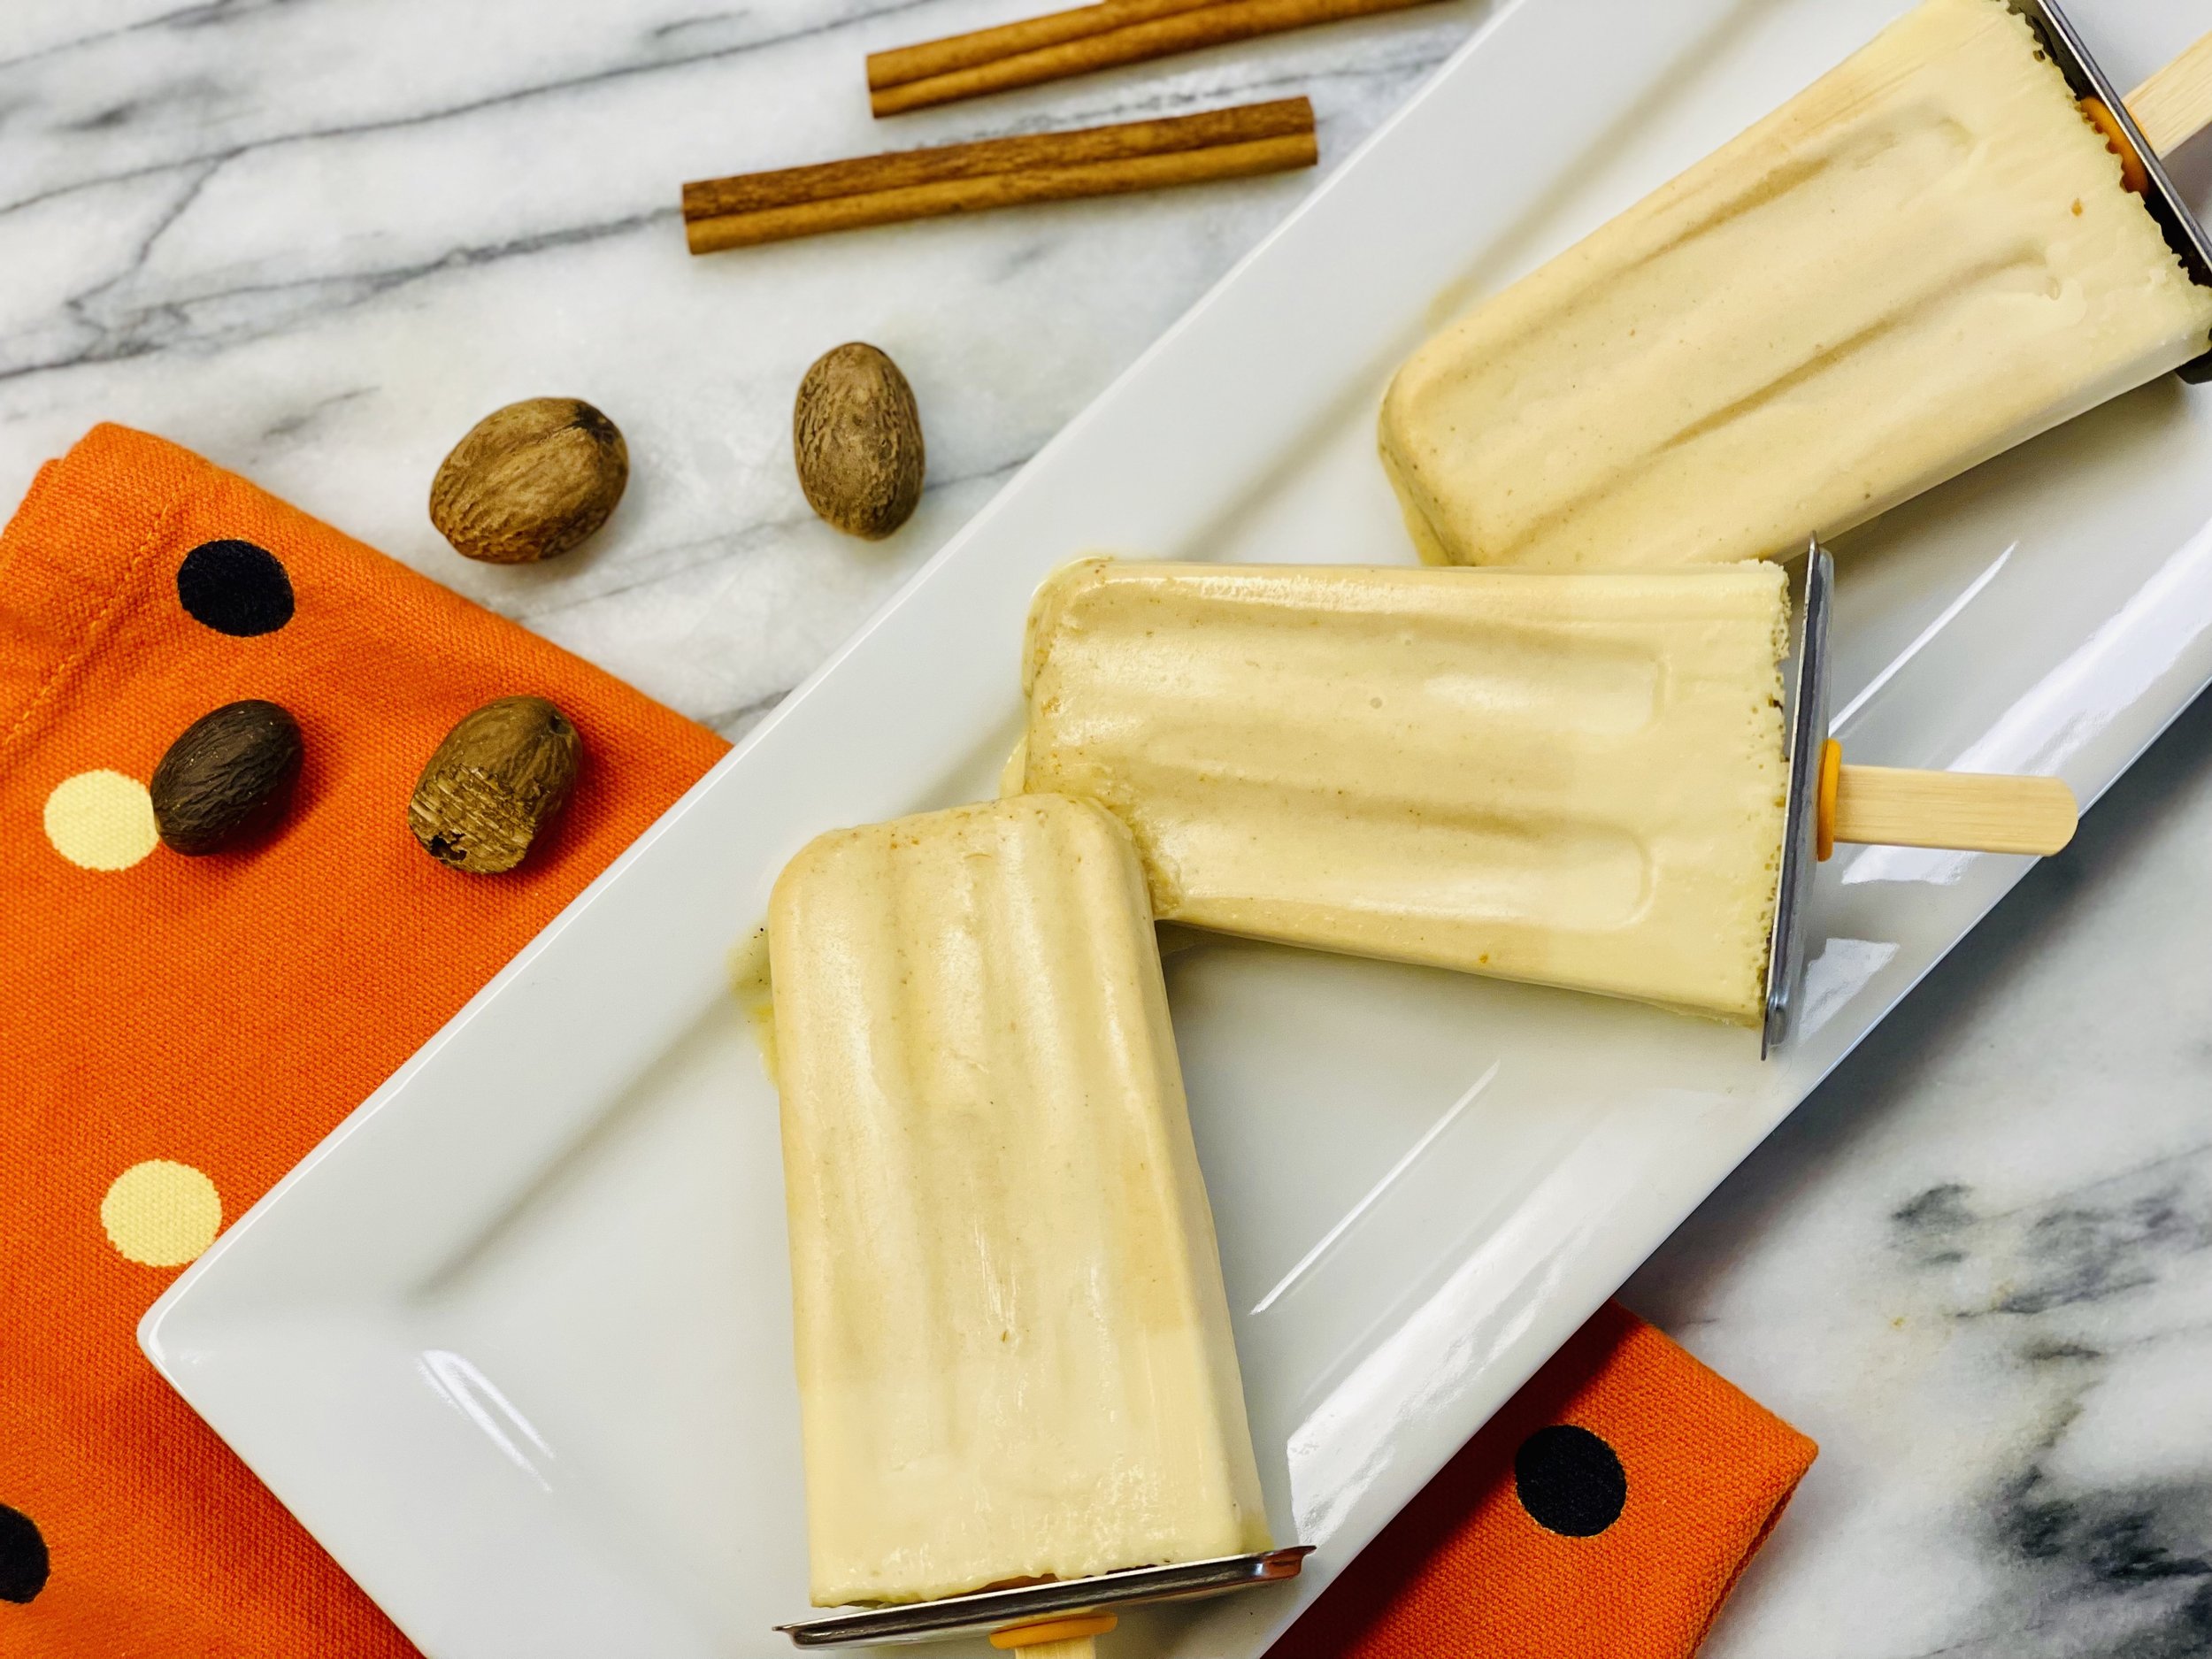
Pumpkin Ginger Screwdriver or Pumpkin Whiskey Ginger (low FODMAP)
10 Minutes prep • 30 minutes Chill • Low FODMAP • Gluten-free • Lactose-free
10 Minutes prep • 30 minutes Chill • Low FODMAP • Gluten-free • Lactose-free • Serves 1 • Ok to make-ahead: Step 1
Both of these festive drinks are pumpkin spice-licious! Our simple pumpkin spice syrup, orange juice, and vanilla vodka turn a “screwdriver” into a delightful, refreshing, holiday cocktail. When combined with some top shelf bourbon, this cocktail gets a bit more serious. Seriously good!
This is an exclusive recipe just for recipe club members.
Each week I am creating and delivering one very special recipe just for my recipe club members. If you’re not yet a member, I encourage you to join! Membership in the club includes access to the complete archive of recipes with filters so it can become your virtual low FODMAP cookbook plus, I am creating and delivering one special NEW recipe every week ONLY for recipe club members. And, for my true fans, I’ll be sharing behind-the-scenes content, and updates on the progress of the new cookbook.
Your membership in the club helps me continue creating new, delicious, easy-to-make, low FODMAP recipes just for you.
As always, all recipes will emphasize simple ingredients, easy preparation, and delicious low FODMAP results. Recipes will be for everything from main courses, salads, soups, side dishes, appetizers, desserts, sauces, breakfast and lunch, and even mocktails and cocktails. Everything you need to prepare fantastic low FODMAP meals everyone will love.
Join the club. Become a Patron. Let’s keep making delicious Low FODMAP meals together.
Simple Pumpkin Spice Syrup (low FODMAP)
5 Minutes prep • 15 Minutes cook • Low FODMAP • Gluten-free • Makes 1 cup
5 Minutes prep • 15 Minutes cook • Low FODMAP • Gluten-free • Makes 1 cup • Ok to make-ahead: Steps 1 - 2
Make your own pumpkin spice cocktails, ice cream bars, or latte with this delicious pumpkin spice syrup. It’s simple to make and it keeps well in the fridge. So make up a batch and keep some on hand to spice up your holidays!
Ingredients
1 cup water
1 cup white sugar
1/4 cup pumpkin puree (I prefer Libby’s brand)
2 teaspoons vanilla extract
2 teaspoons pumpkin pie spice
1 inch fresh ginger peeled and sliced
Directions
(1) Prepare the syrup: Add all ingredients to a saucepan and bring to a boil. Reduce heat and simmer, stirring to make sure sugar is completely dissolved. Add the sliced ginger and simmer for about 15 minutes to allow the syrup to reduce and thicken slightly.
(2) Finish: Remove from the heat and let cool. Remove the ginger slices and pour the syrup into a jar with a tight-fitting lid.
Make-ahead note: At this point, you may store the syrup in an airtight container in the refrigerator for up to two weeks. Shake or stir well before using.
(3) Serve: Use this syrup to make our pumpkin screwdriver or our pumpkin spice ice cream bars or even a pumpkin spice latte!
Use and enjoy every bit because you can!
More Deliciously Low FODMAP™ sweet recipes you might enjoy


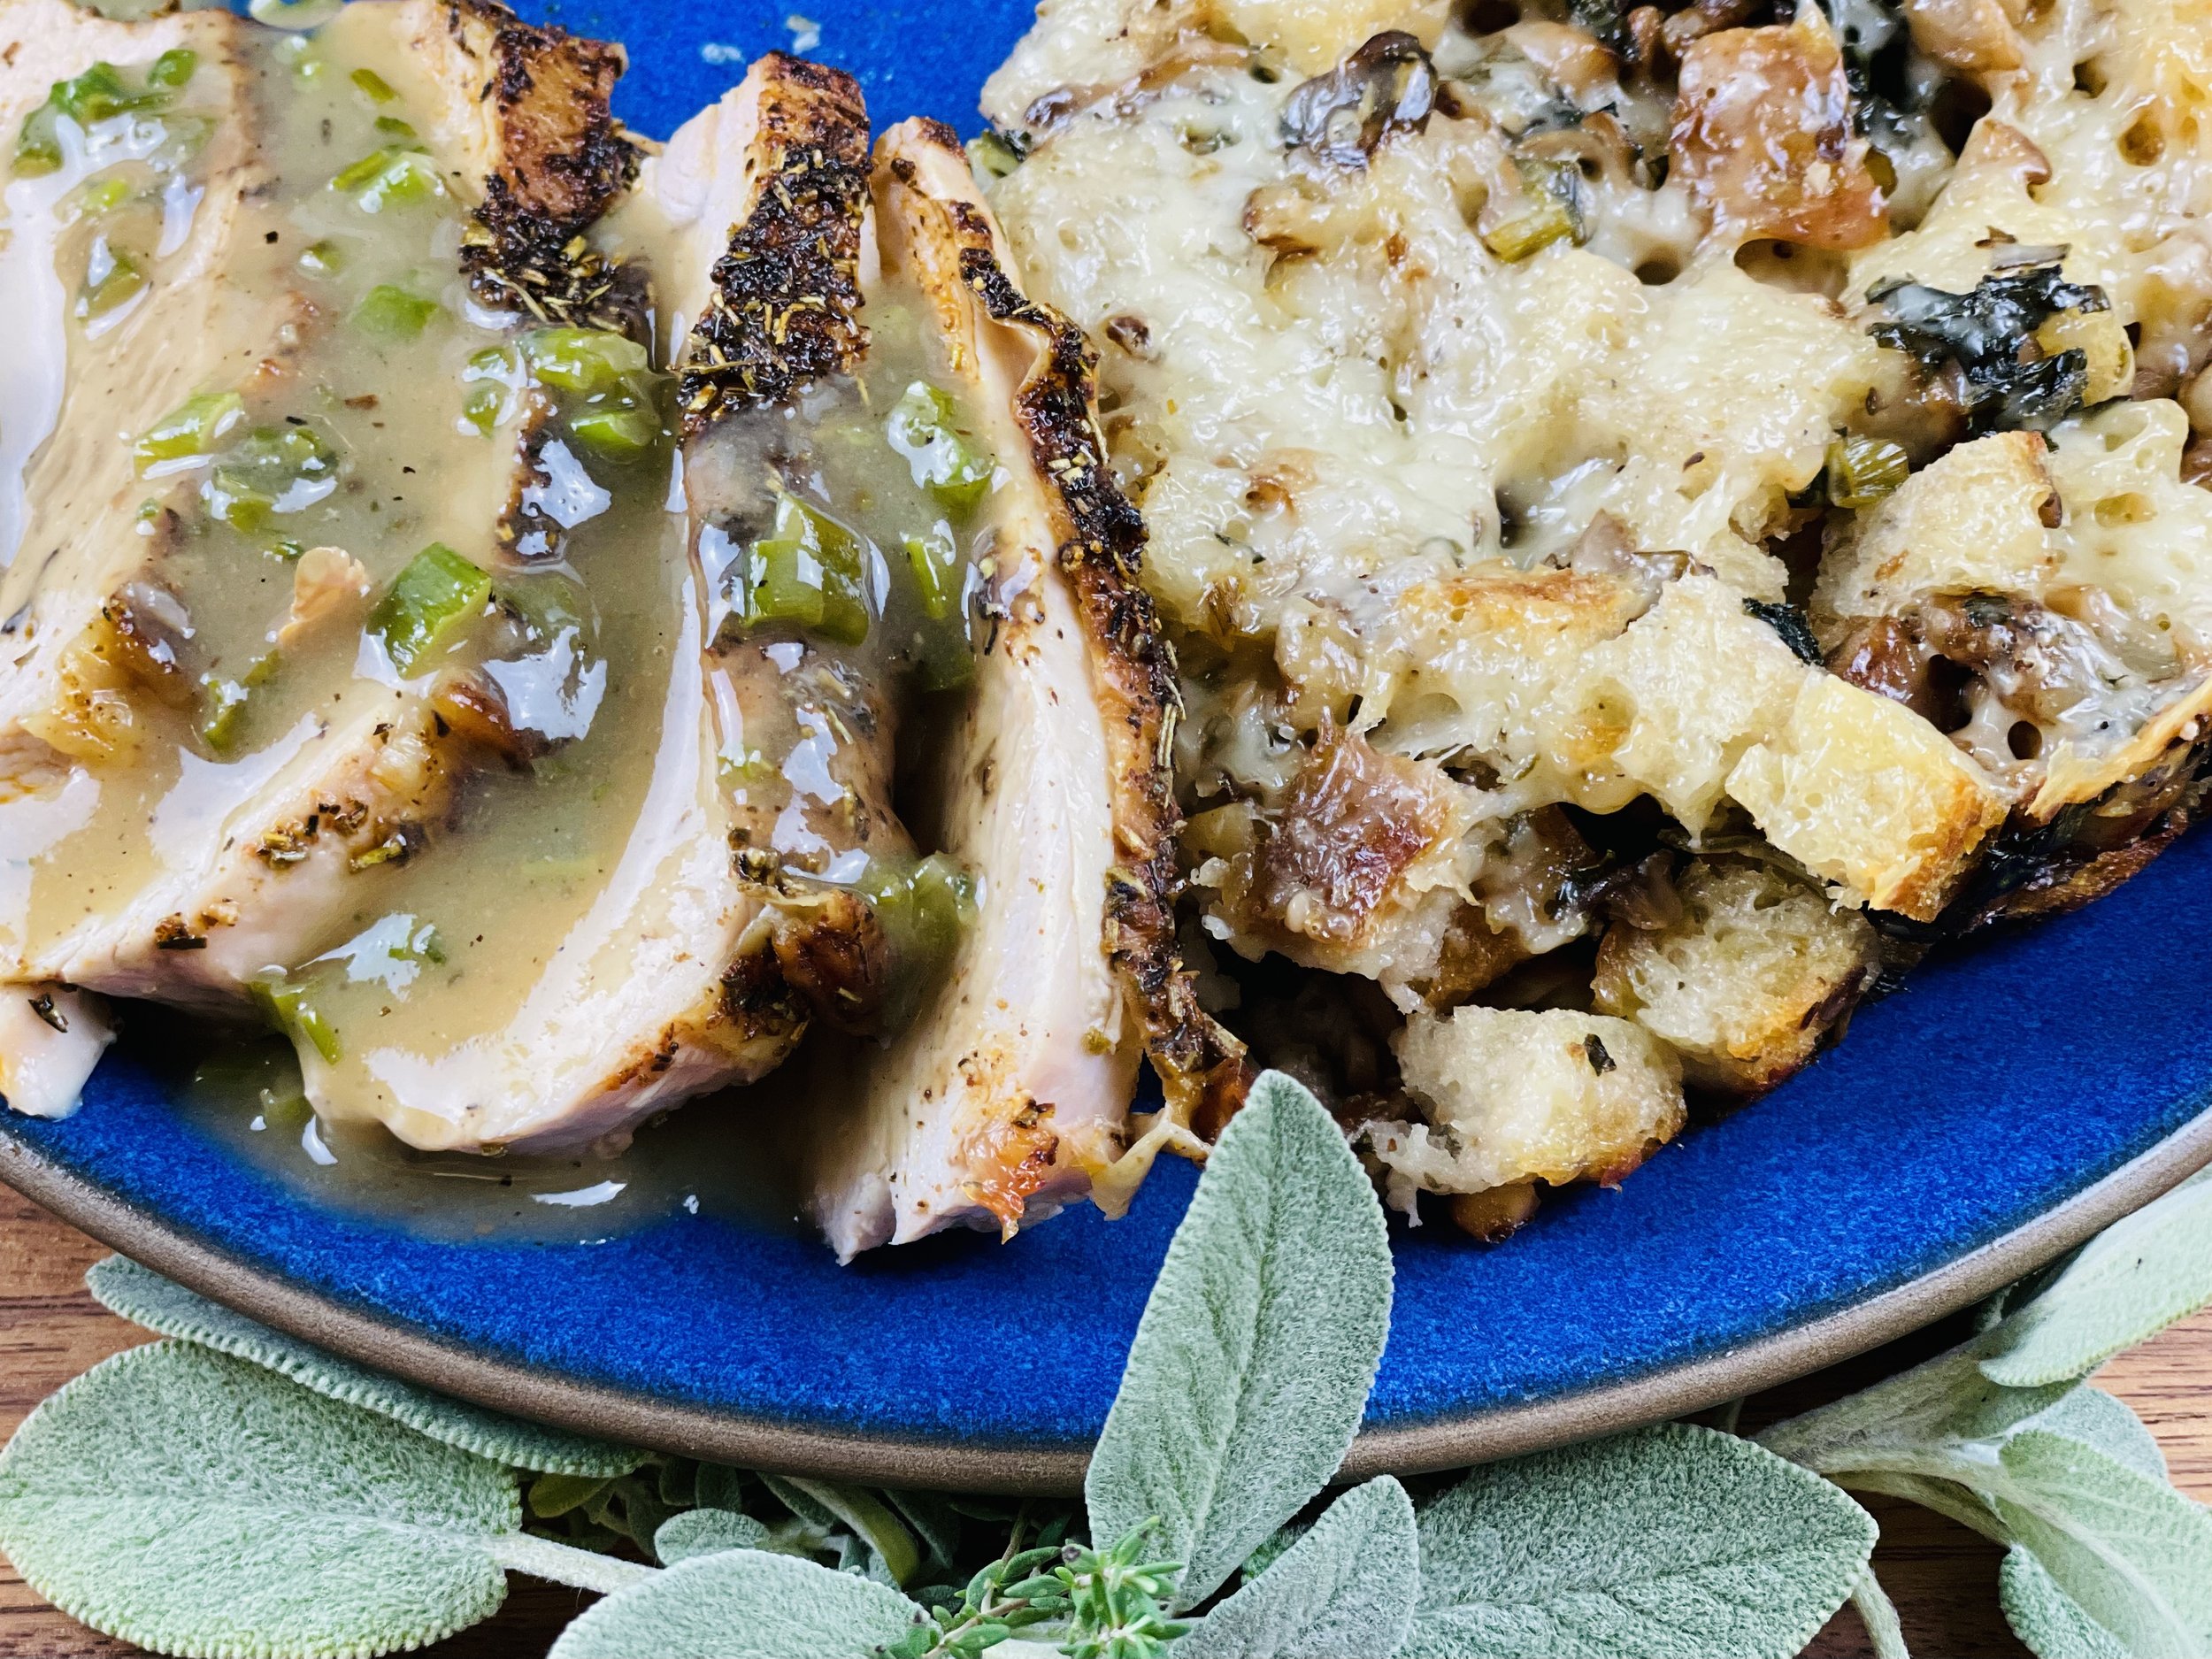
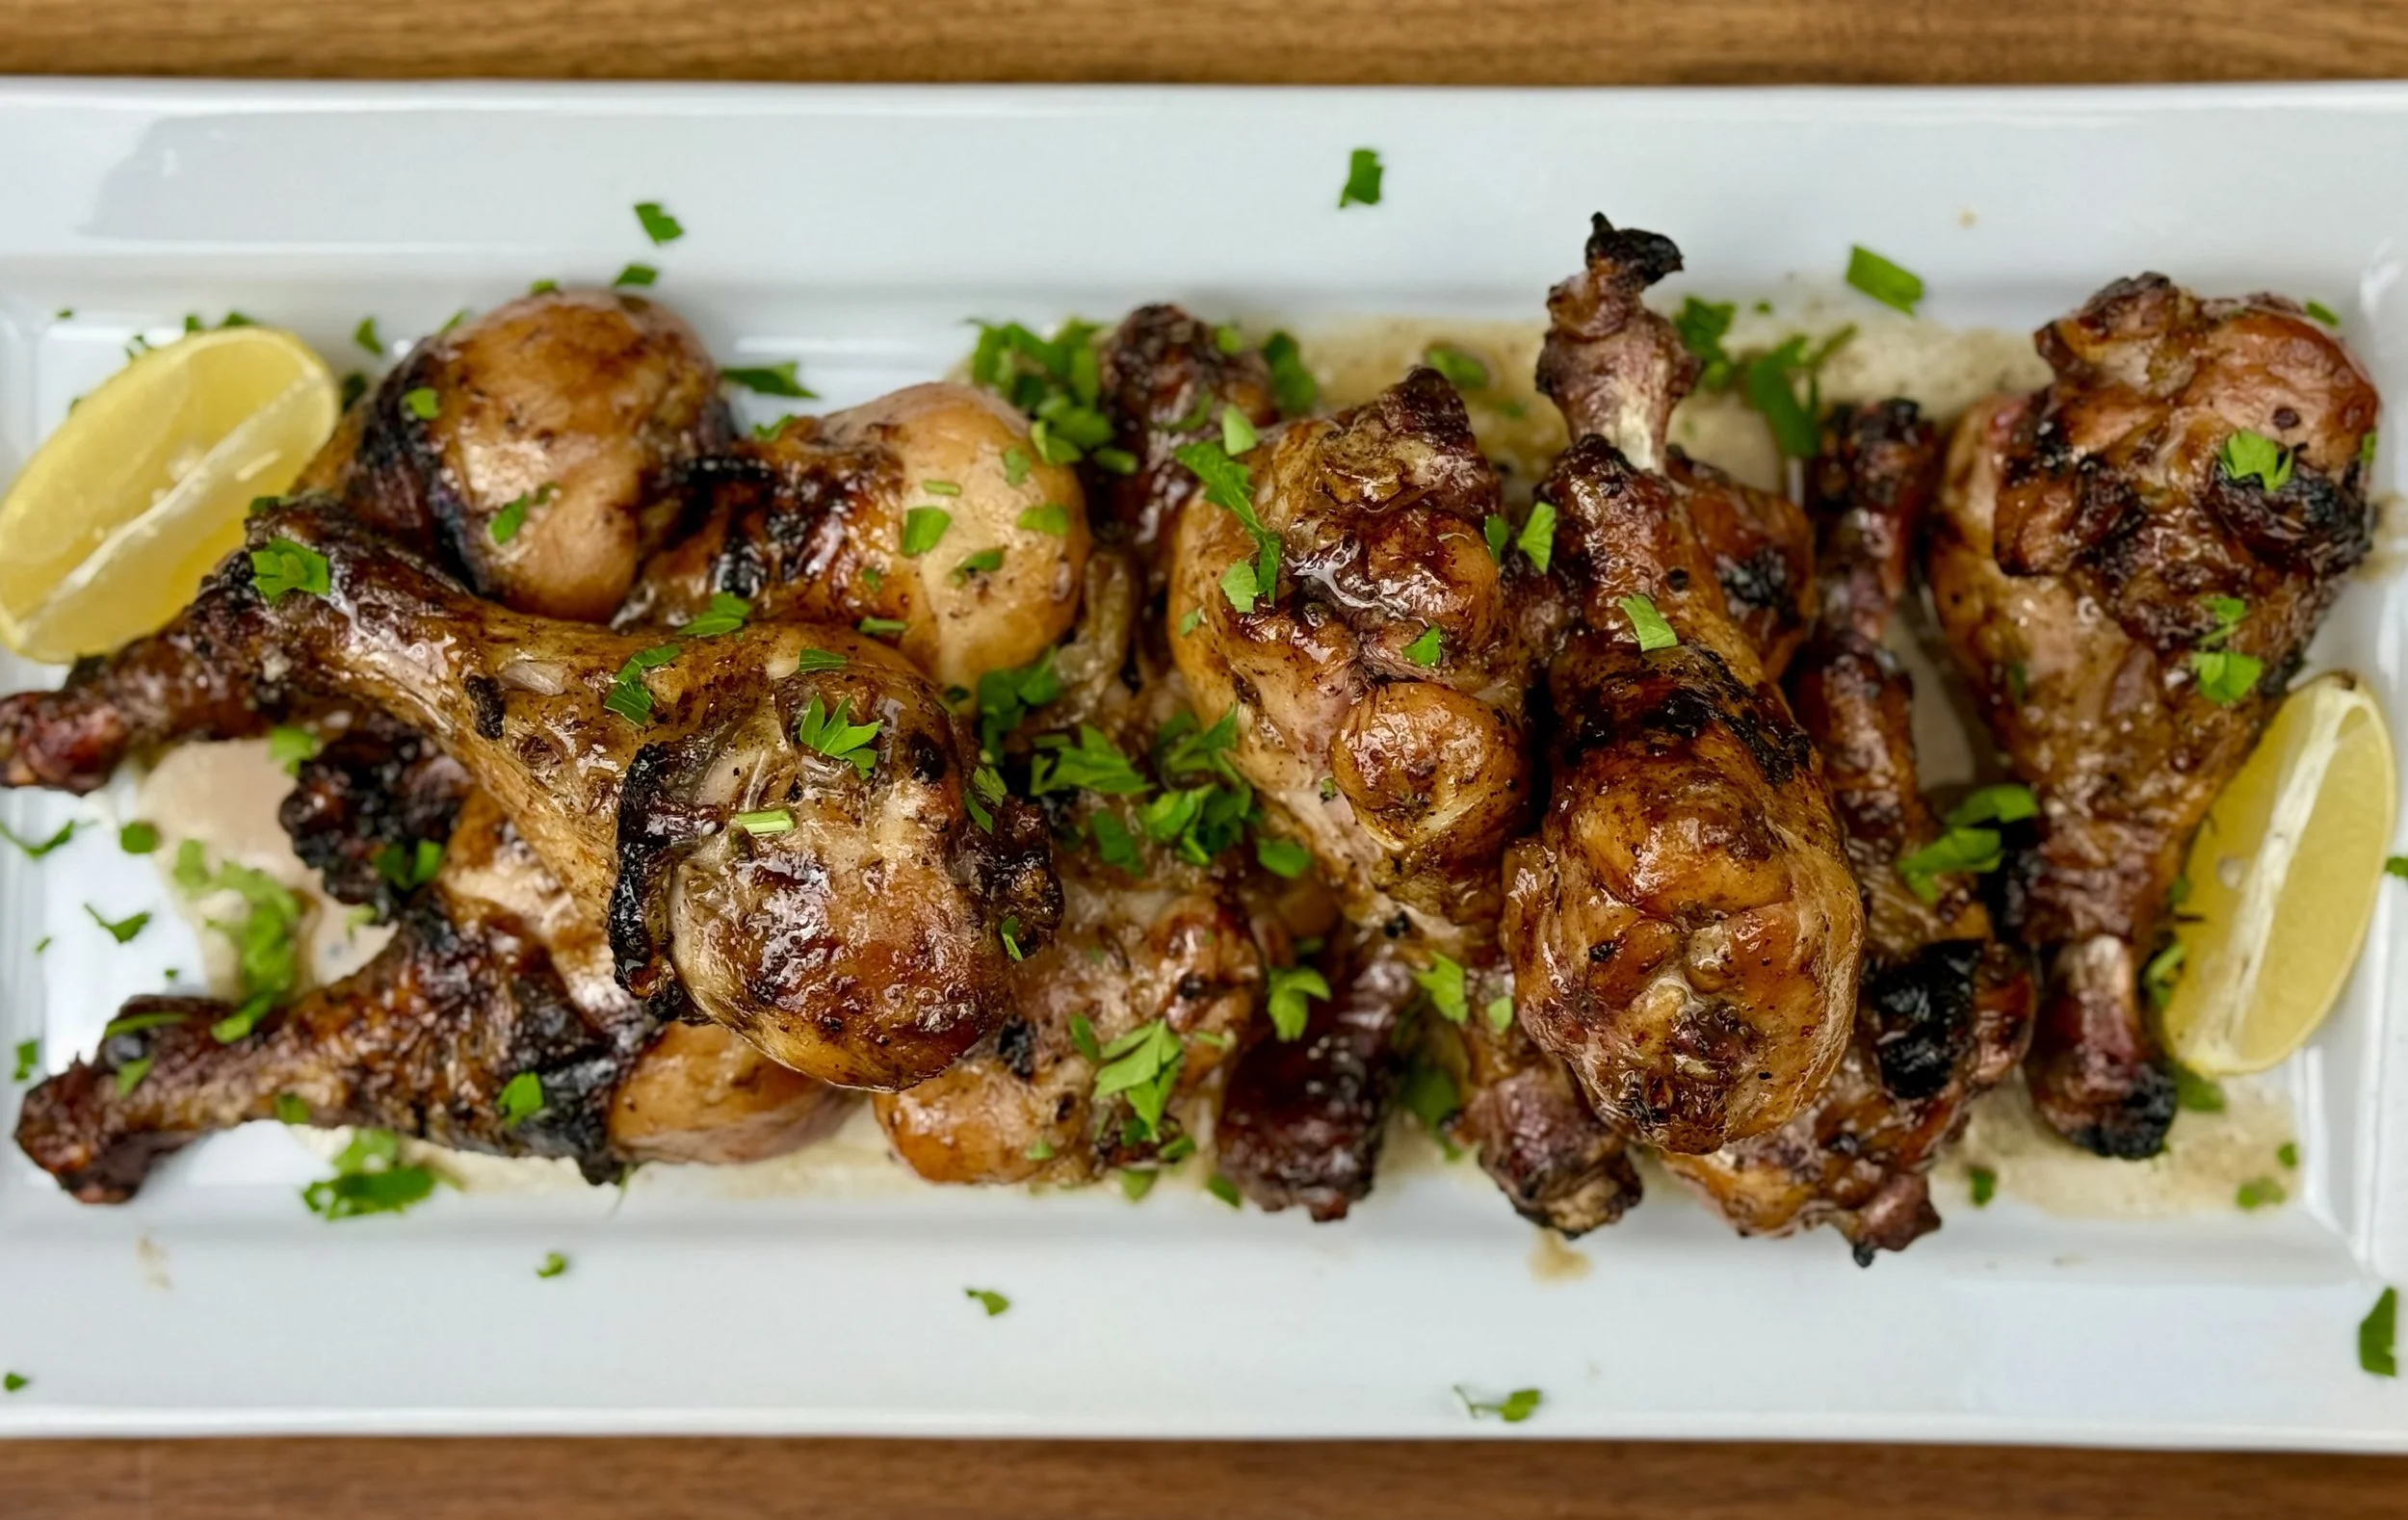
Herb Roasted Turkey Breast (low FODMAP)
15 Minutes prep • 60 Minutes cook • Low FODMAP • Gluten-free • Lactose-free • Serves 6
15 Minutes prep • 60 Minutes cook • Low FODMAP • Gluten-free • Lactose-free • Serves 6 • Ok to make-ahead: Steps 1 - 3
You don’t have to roast an entire turkey to have a fabulous holiday meal. This herb-roasted turkey breast can be just as delicious as the whole turkey and it’s a lot more manageable! Serve it with our fabulous Mushroom Sourdough Stuffing and Great Gravy for a low FODMAP feast everyone will enjoy.
Ingredients
3 tablespoons garlic-infused olive oil
2 teaspoons paprika
2 teaspoons dried oregano
2 teaspoons dried rosemary
2 teaspoons Kosher salt
1 teaspoon dried thyme
1 teaspoon black pepper
1 teaspoon Smoke N Sanity Essence of Onion Salt (use code IBSGC10 for 10% discount)
1 teaspoon Smoke N Sanity Essence of Garlic Salt (use code IBSGC10 for 10% discount)
3 pound turkey breast, bone-in, skin on
Directions
(1) Preheat the oven: If you’re not making ahead, preheat the oven to 375 degrees F.
(2) Prepare the spice mixture: In a small bowl, stir together garlic-infused olive oil paprika, oregano, rosemary, Smoke N Sanity onion and garlic salt, thyme, and black pepper to form a paste.
(3) Prepare the turkey: Put the turkey breast skin side up on the rack of a roasting pan, or into a lightly greased 9x13 pan. Rub the spice mixture on the turkey breast skin. You may also lift the skin and rub some of the spice mixture under the skin as well.
Make-ahead note: At this point, you may cover and refrigerate the turkey breast until you’re ready to cook it.
(4) Cook turkey: Roast in the preheated oven for approximately 20 minutes per pound, until the turkey reaches an internal temperature of 160 degrees F (use a meat thermometer for accuracy and to prevent over-cooking). Measure the temperature in the center of the thickest part of the breast. Actual cooking time will depend on the size of the turkey breast you’re cooking.
(5) Finish: Remove from the oven and put the turkey on a carving board and cover it loosely with aluminum foil so you can use the pan and the drippings to make your turkey gravy. Let the turkey rest for 15 minutes before slicing.
(6) Slice and serve: Then slice and serve with our Mushroom Sourdough Stuffing and Great Gravy.
Eat and enjoy every bite because you can!
*This post may contain links for you to easily purchase items listed on the page. In some cases, we have provided a special discount code for IBS Game Changers so be sure to use it when you purchase an item to get the discount that has been arranged just for you! As an Amazon Associate, I earn a commission from qualifying Amazon purchases.
More Deliciously Low FODMAP™ main course recipes you might enjoy


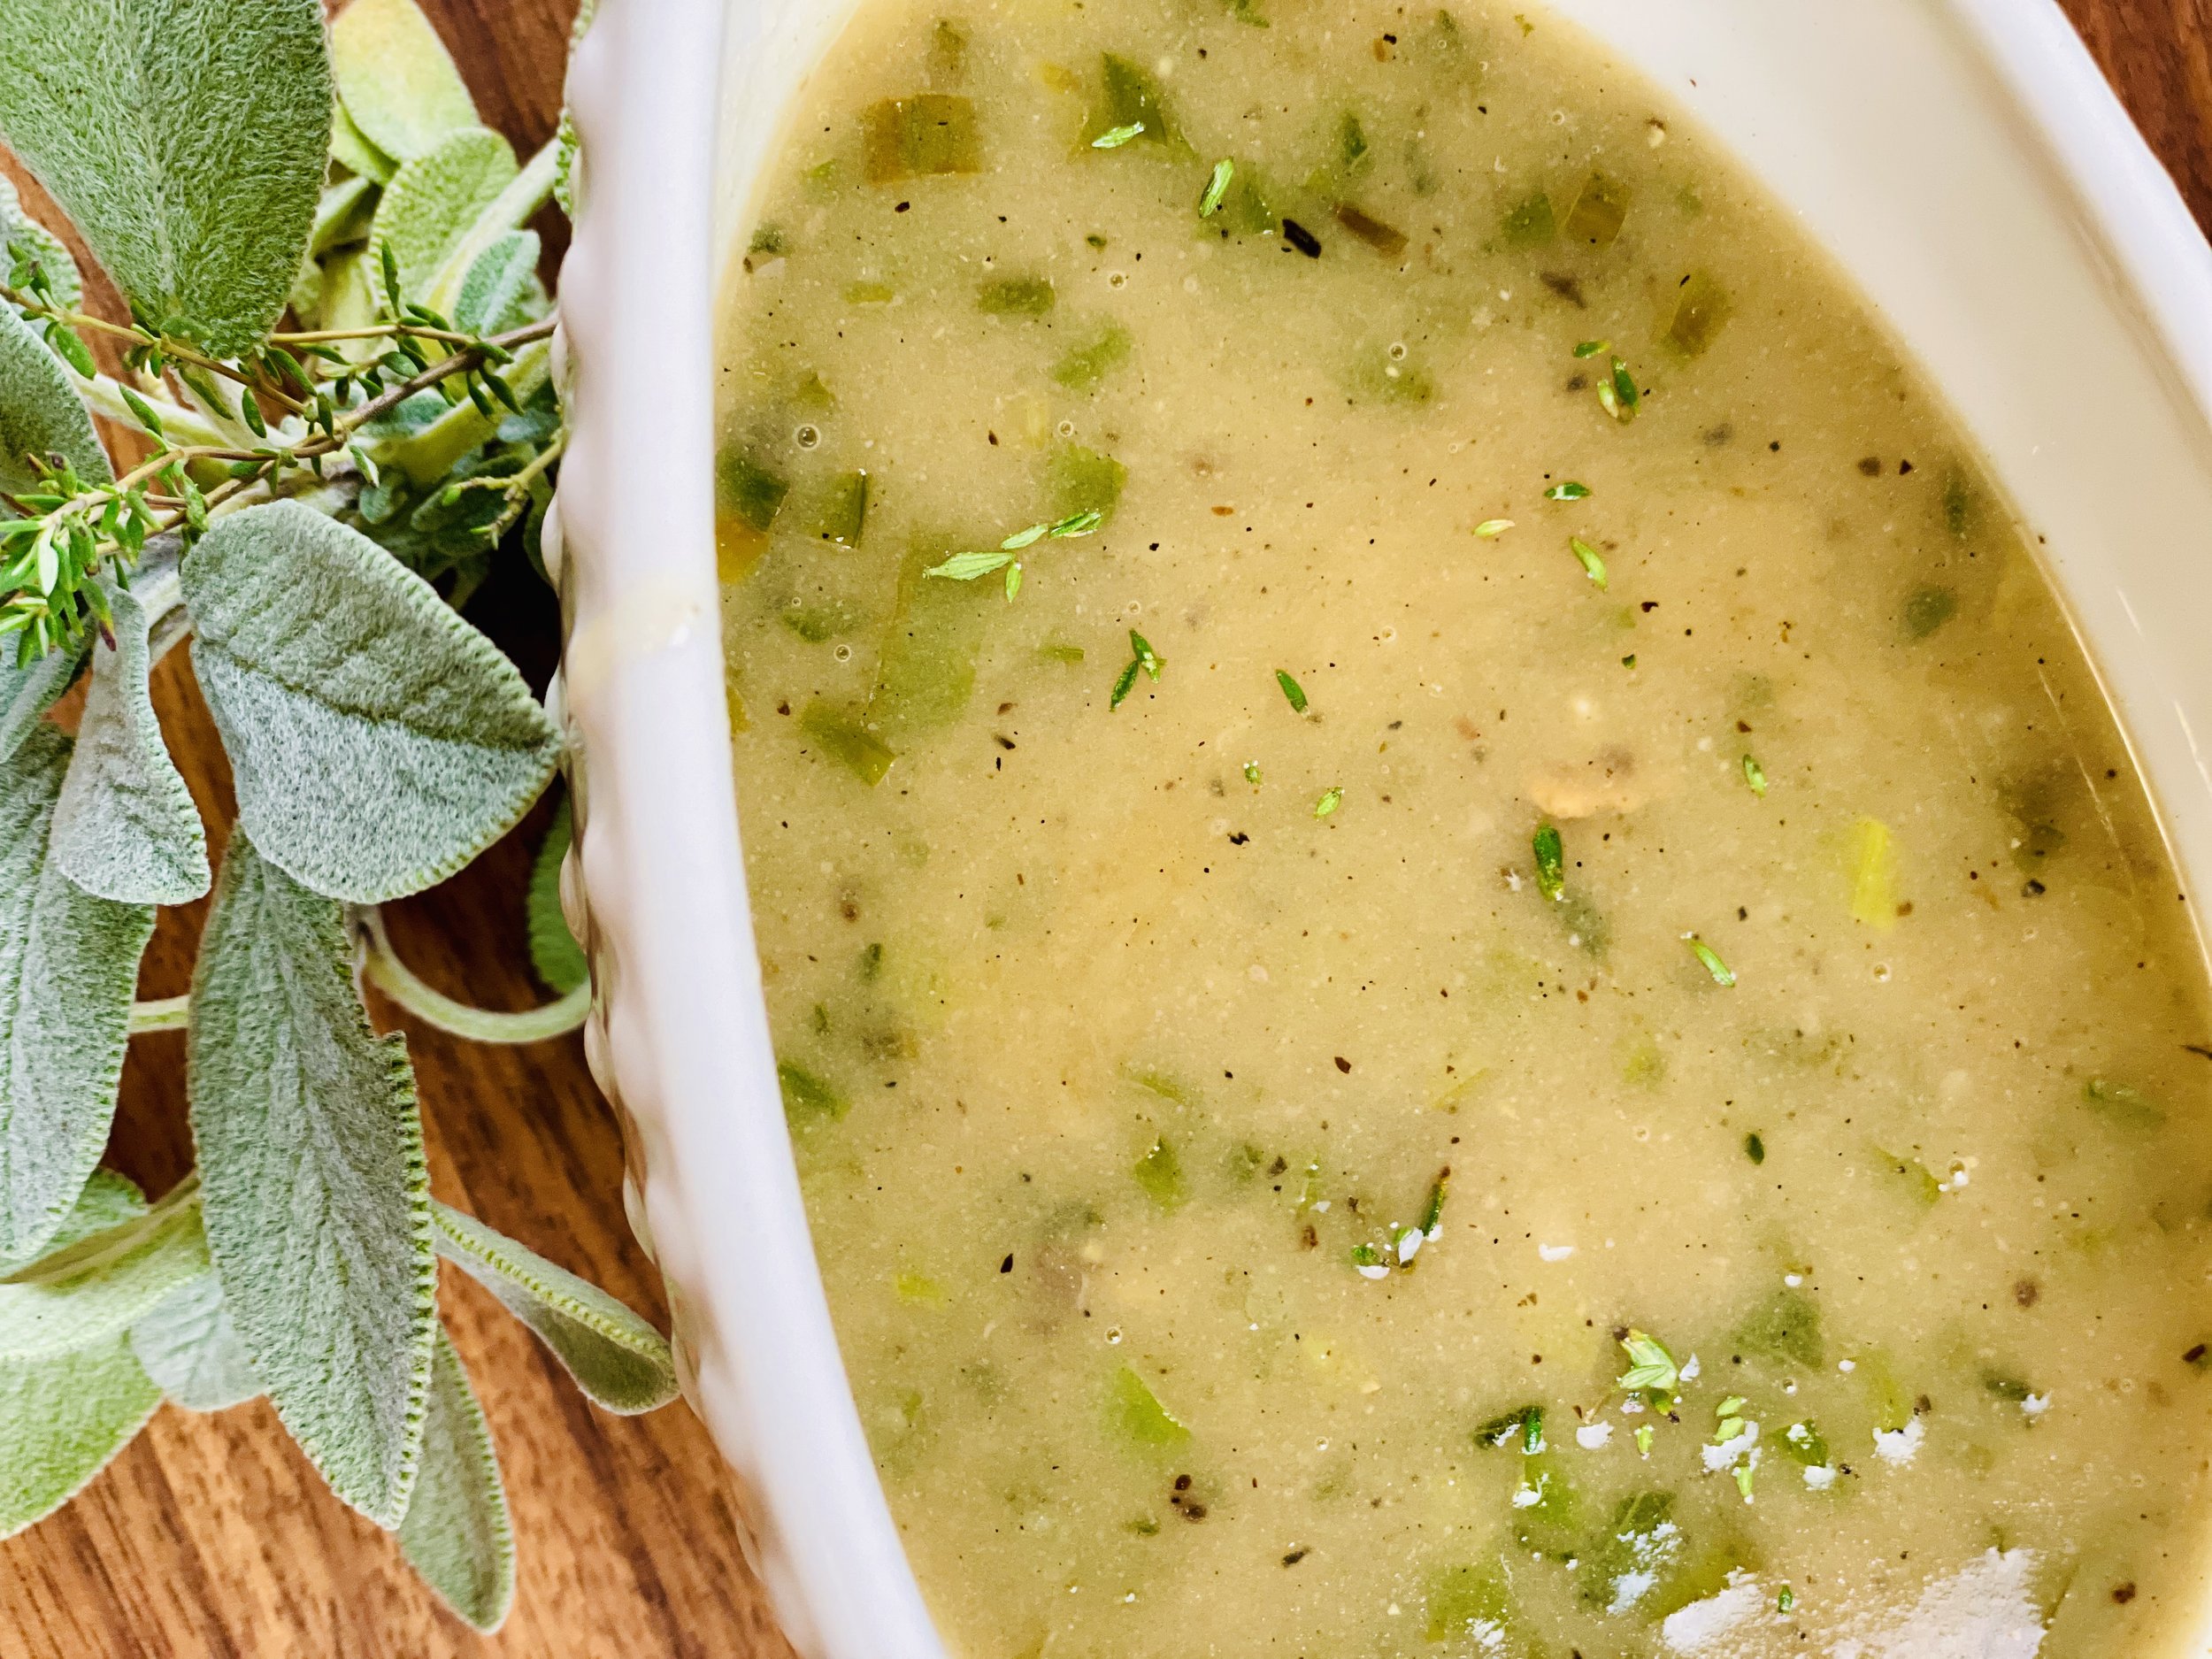
Great Gravy (low FODMAP)
5 Minutes prep • 15 Minutes cook • Low FODMAP • Gluten-free • Lactose-free • Makes 2 Cups
5 Minutes prep • 15 Minutes cook • Low FODMAP • Gluten-free • Lactose-free • Makes 2 Cups • Ok to make-ahead: Steps 1 - 3
With a few fresh herbs and some drippings from your roasting pan, it’s not hard to make low FODMAP gravy that is truly delicious. Making your own gravy ensures you can enjoy it without consequences, and it will complement your turkey perfectly. The make-ahead steps will help you finish it in a snap on the big day. Serve with our Mushroom Sourdough Stuffing and Herb Roasted Turkey Breast.
Ingredients
6 tablespoons salted butter
2 bunches green onions (green part only), chopped
2 tablespoons fresh sage, chopped
1/3 cup gluten-free all-purpose flour (I used King Arthur Measure for Measure*)
3 cups Gourmend low-sodium chicken broth* (use code IBSGC15 for a 15% discount)
Kosher salt* and black pepper*
Pan drippings from roasted turkey
1 cup dry white wine, such as Sauvignon Blanc or Pinot Grigio (you may use chicken broth instead if you prefer)
Directions
(1) Prepare the drippings: If you are making this gravy ahead of time, you can roast a turkey breast or a couple of turkey legs to get the drippings that will add such excellent flavor to your gravy. If you’re making this after you’ve roasted a whole turkey, you will have plenty of pan drippings to work with!
(2) Prepare the herbs: Chop the green onions and the sage.
(3) Make the gravy base: Melt the butter in a medium skillet over medium heat. Add the green onions and cook 1 - 2 minutes, stirring frequently, until softened and fragrant. Add the sage and continue cooking for another minute. Sprinkle the flour over the green onions and sage, stirring for 1-2 minutes to cook the flour a bit. Add the broth slowly and bring to a boil, then boil gently for 2 - 3 minutes, or until thickened. Remove from the heat. Taste and lightly season with salt and pepper if needed.
Make-ahead note: At this point, you can allow the gravy base to cool, then store it in the fridge for up to 3 days.
(4) Prepare the pan drippings: To finish the gravy. Once your turkey has finished roasting, remove the turkey from the roasting pan and pour the liquid from the roasting pan into a glass measuring cup.
(5) Cook the gravy: Place the roasting pan over two burners. Add the wine and bring to a boil, scraping up the browned bits on the bottom of the pan. Simmer for 3-4 minutes or until the wine has reduced slightly. Reduce the heat to low and slowly stir in the gravy base until fully combined. Simmer until the gravy is smooth and thickened slightly about 5 minutes. If the gravy is too thick, thin the gravy with the reserved broth (not the fat) from the roasting pan.
(6) Finish: Taste and season with salt and pepper as needed. Serve warm.
Eat and enjoy every bite because you can!
*This post may contain links for you to easily purchase items listed on the page. In some cases, we have provided a special discount code for IBS Game Changers so be sure to use it when you purchase an item to get the discount that has been arranged just for you! As an Amazon Associate, I earn a commission from qualifying Amazon purchases.
More Deliciously Low FODMAP™ sauce recipes you might enjoy


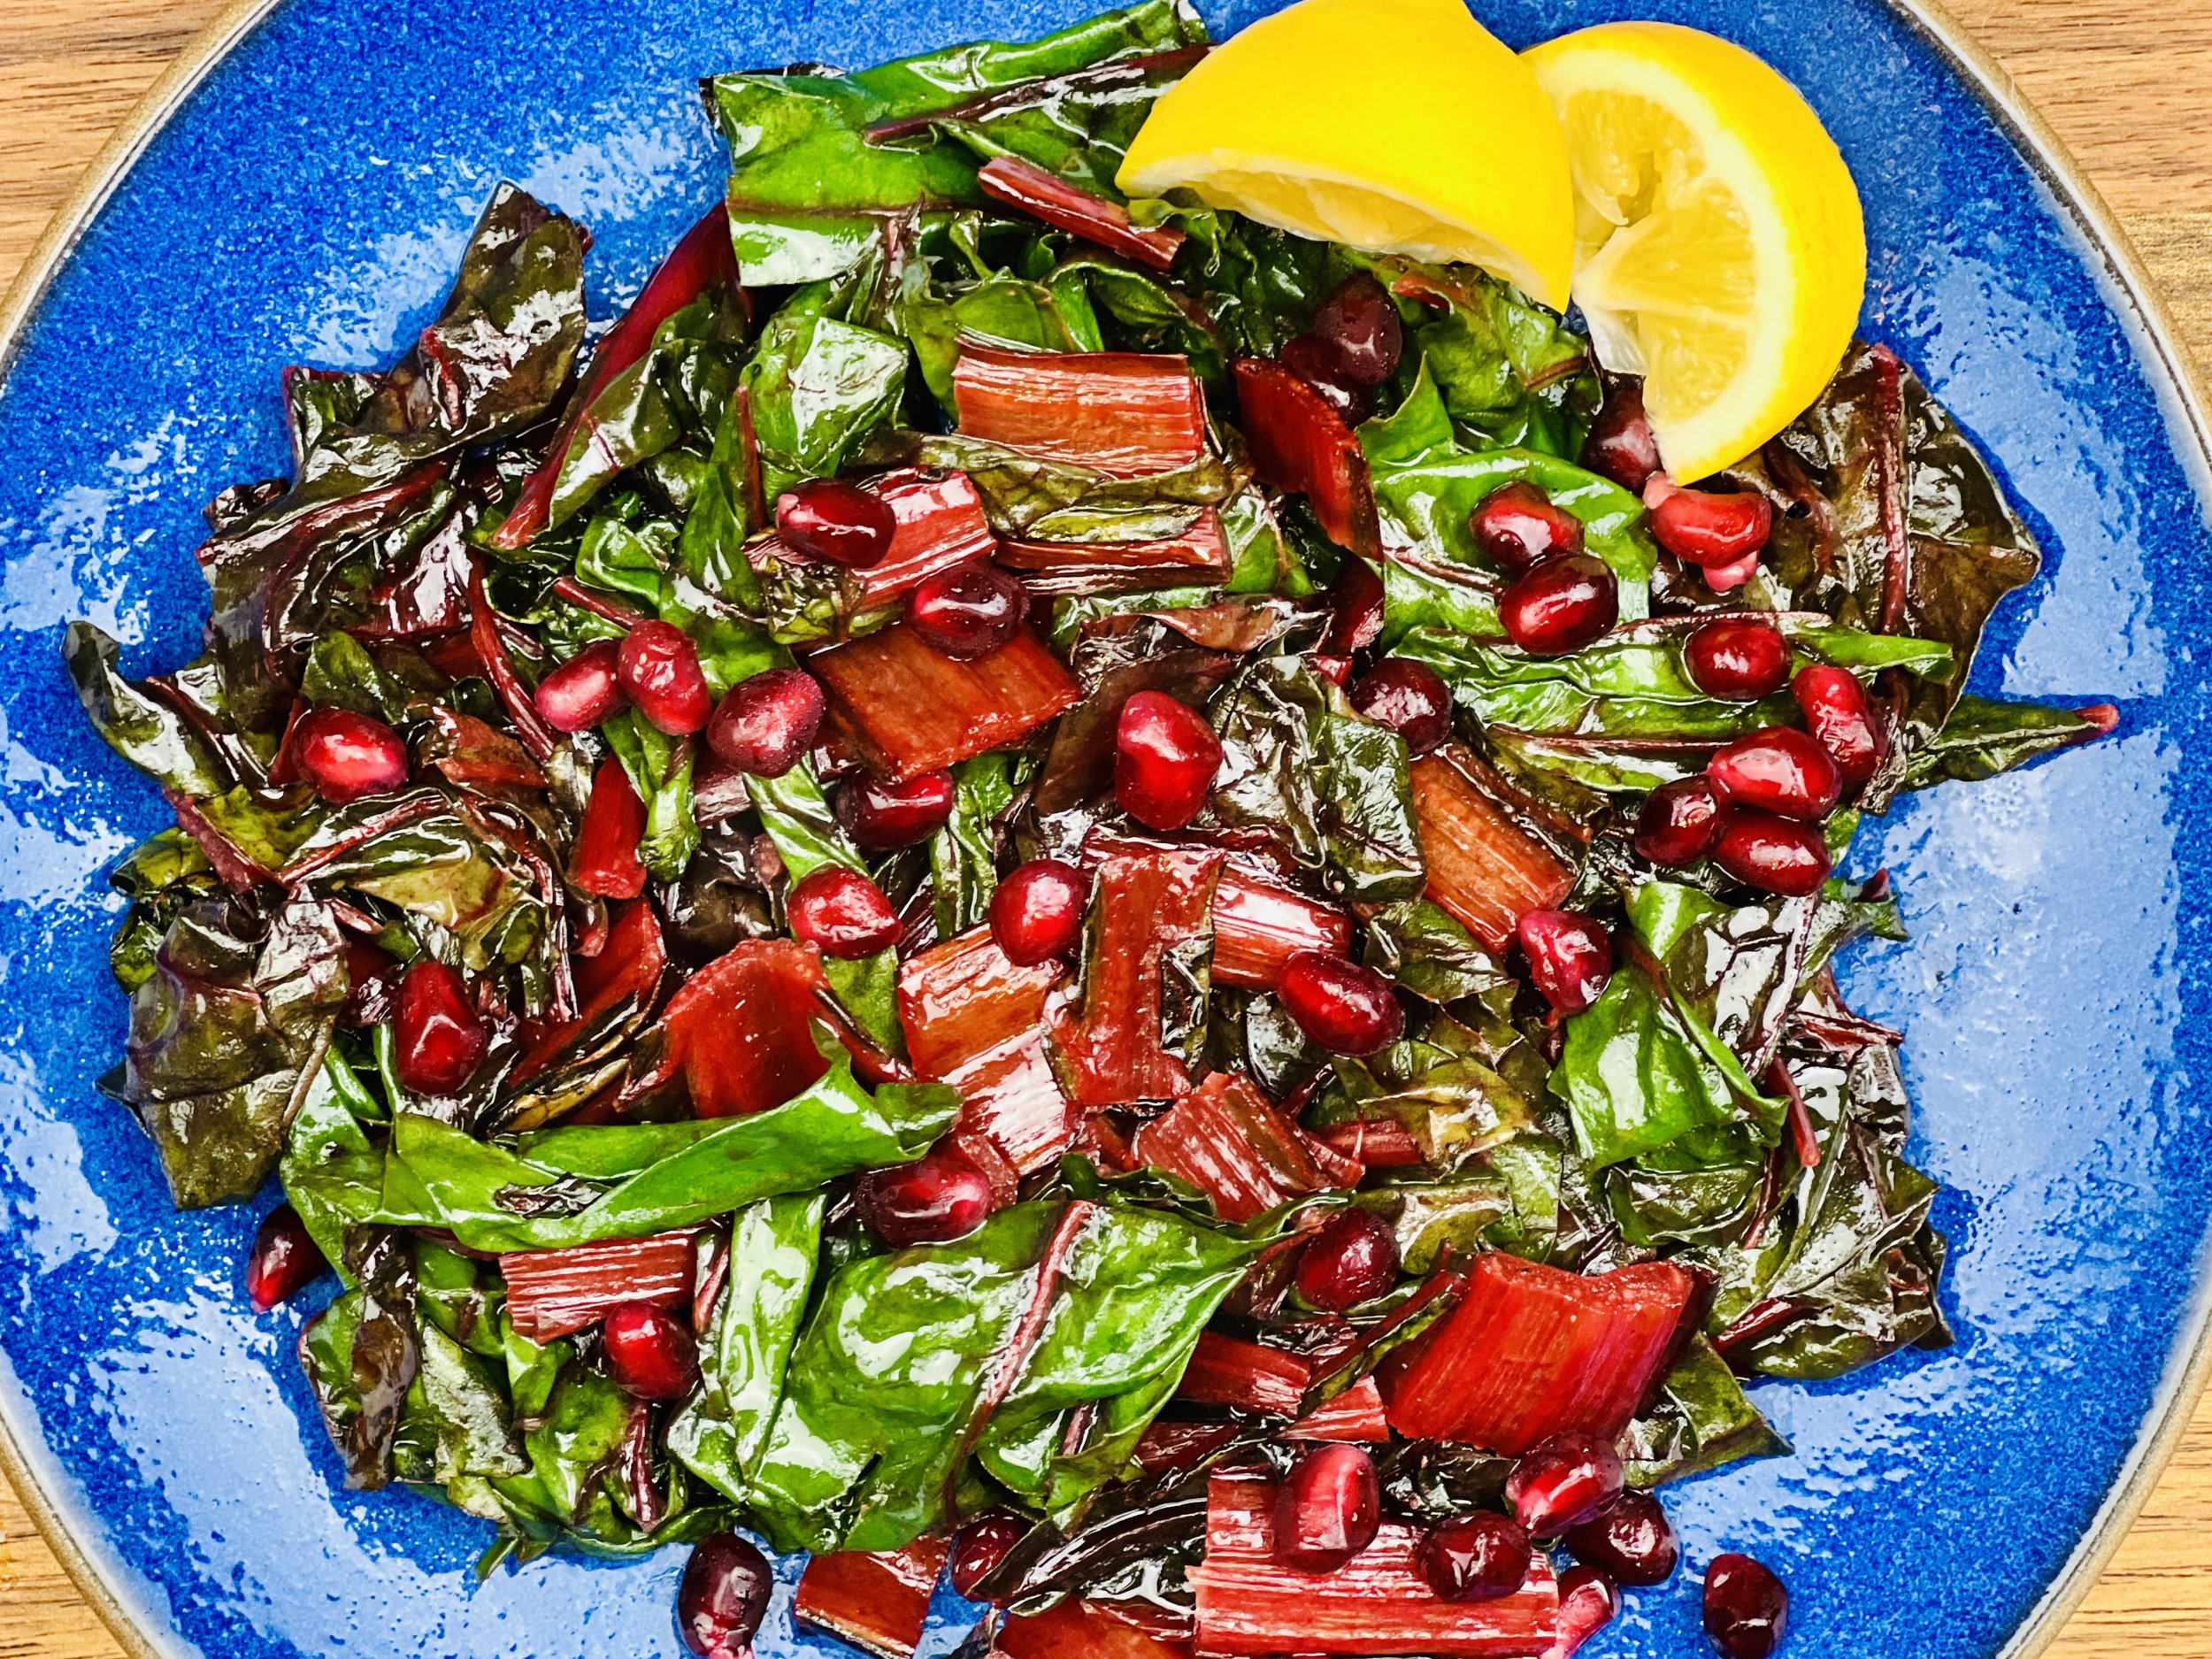
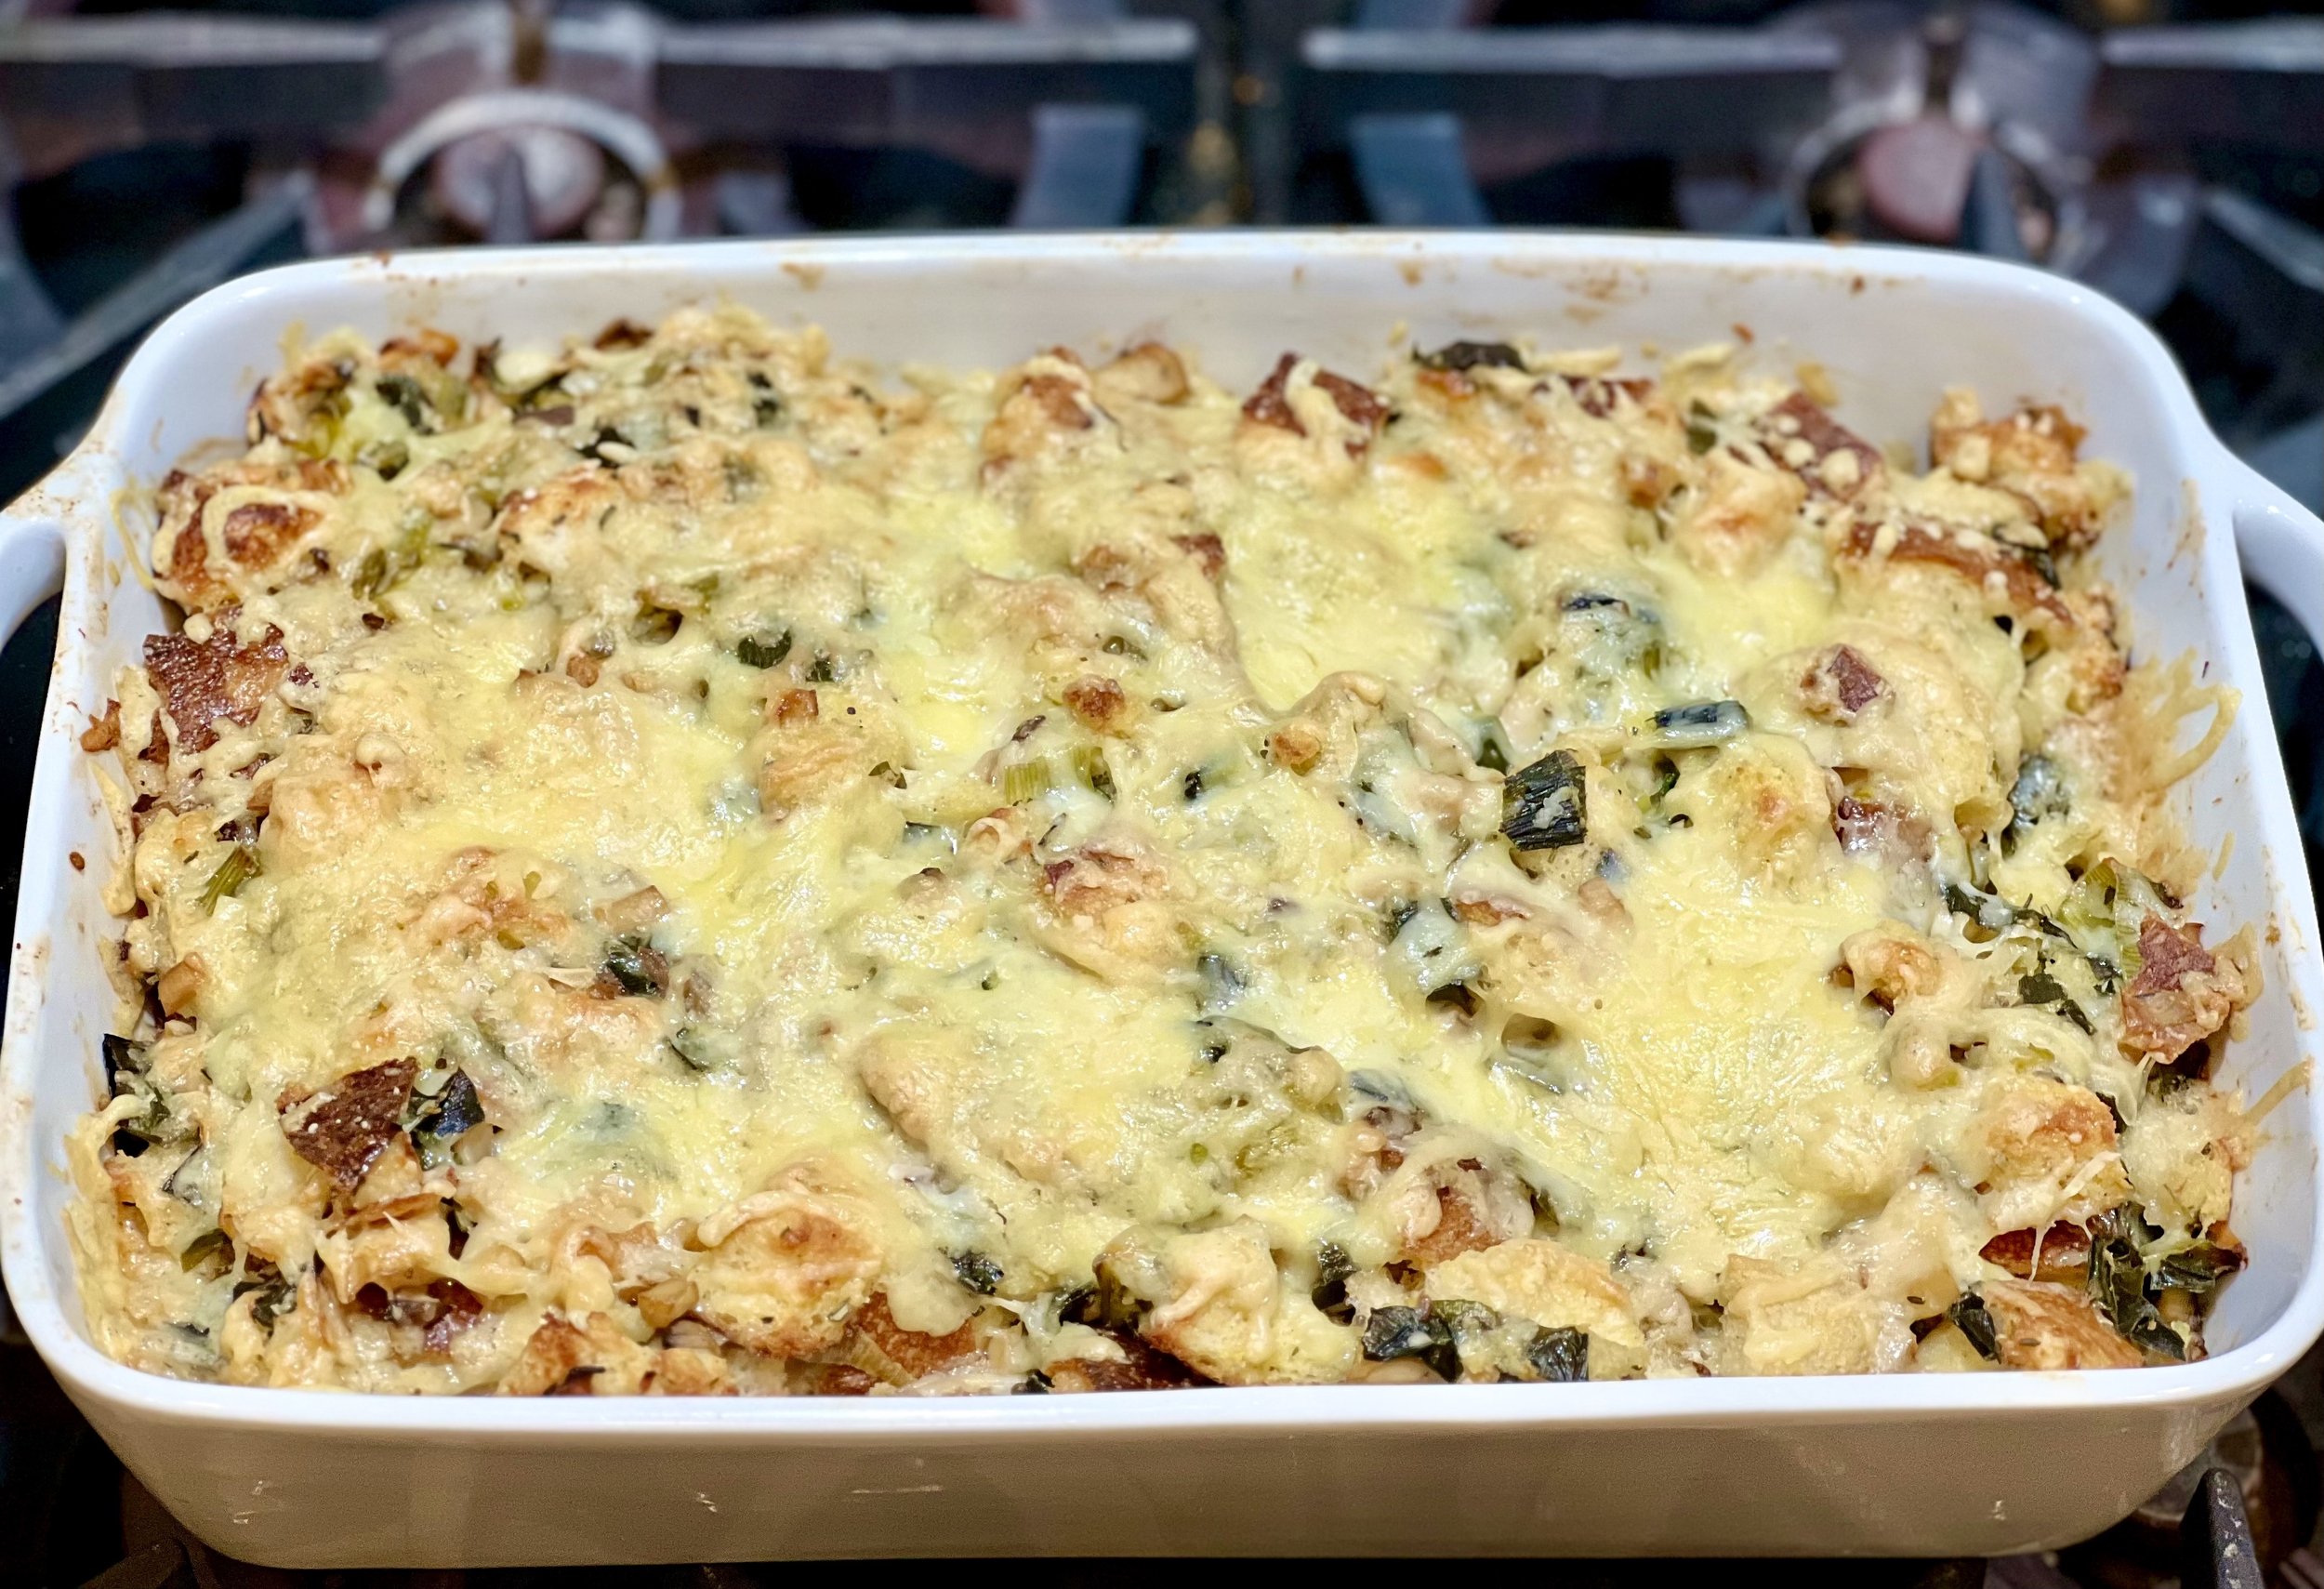
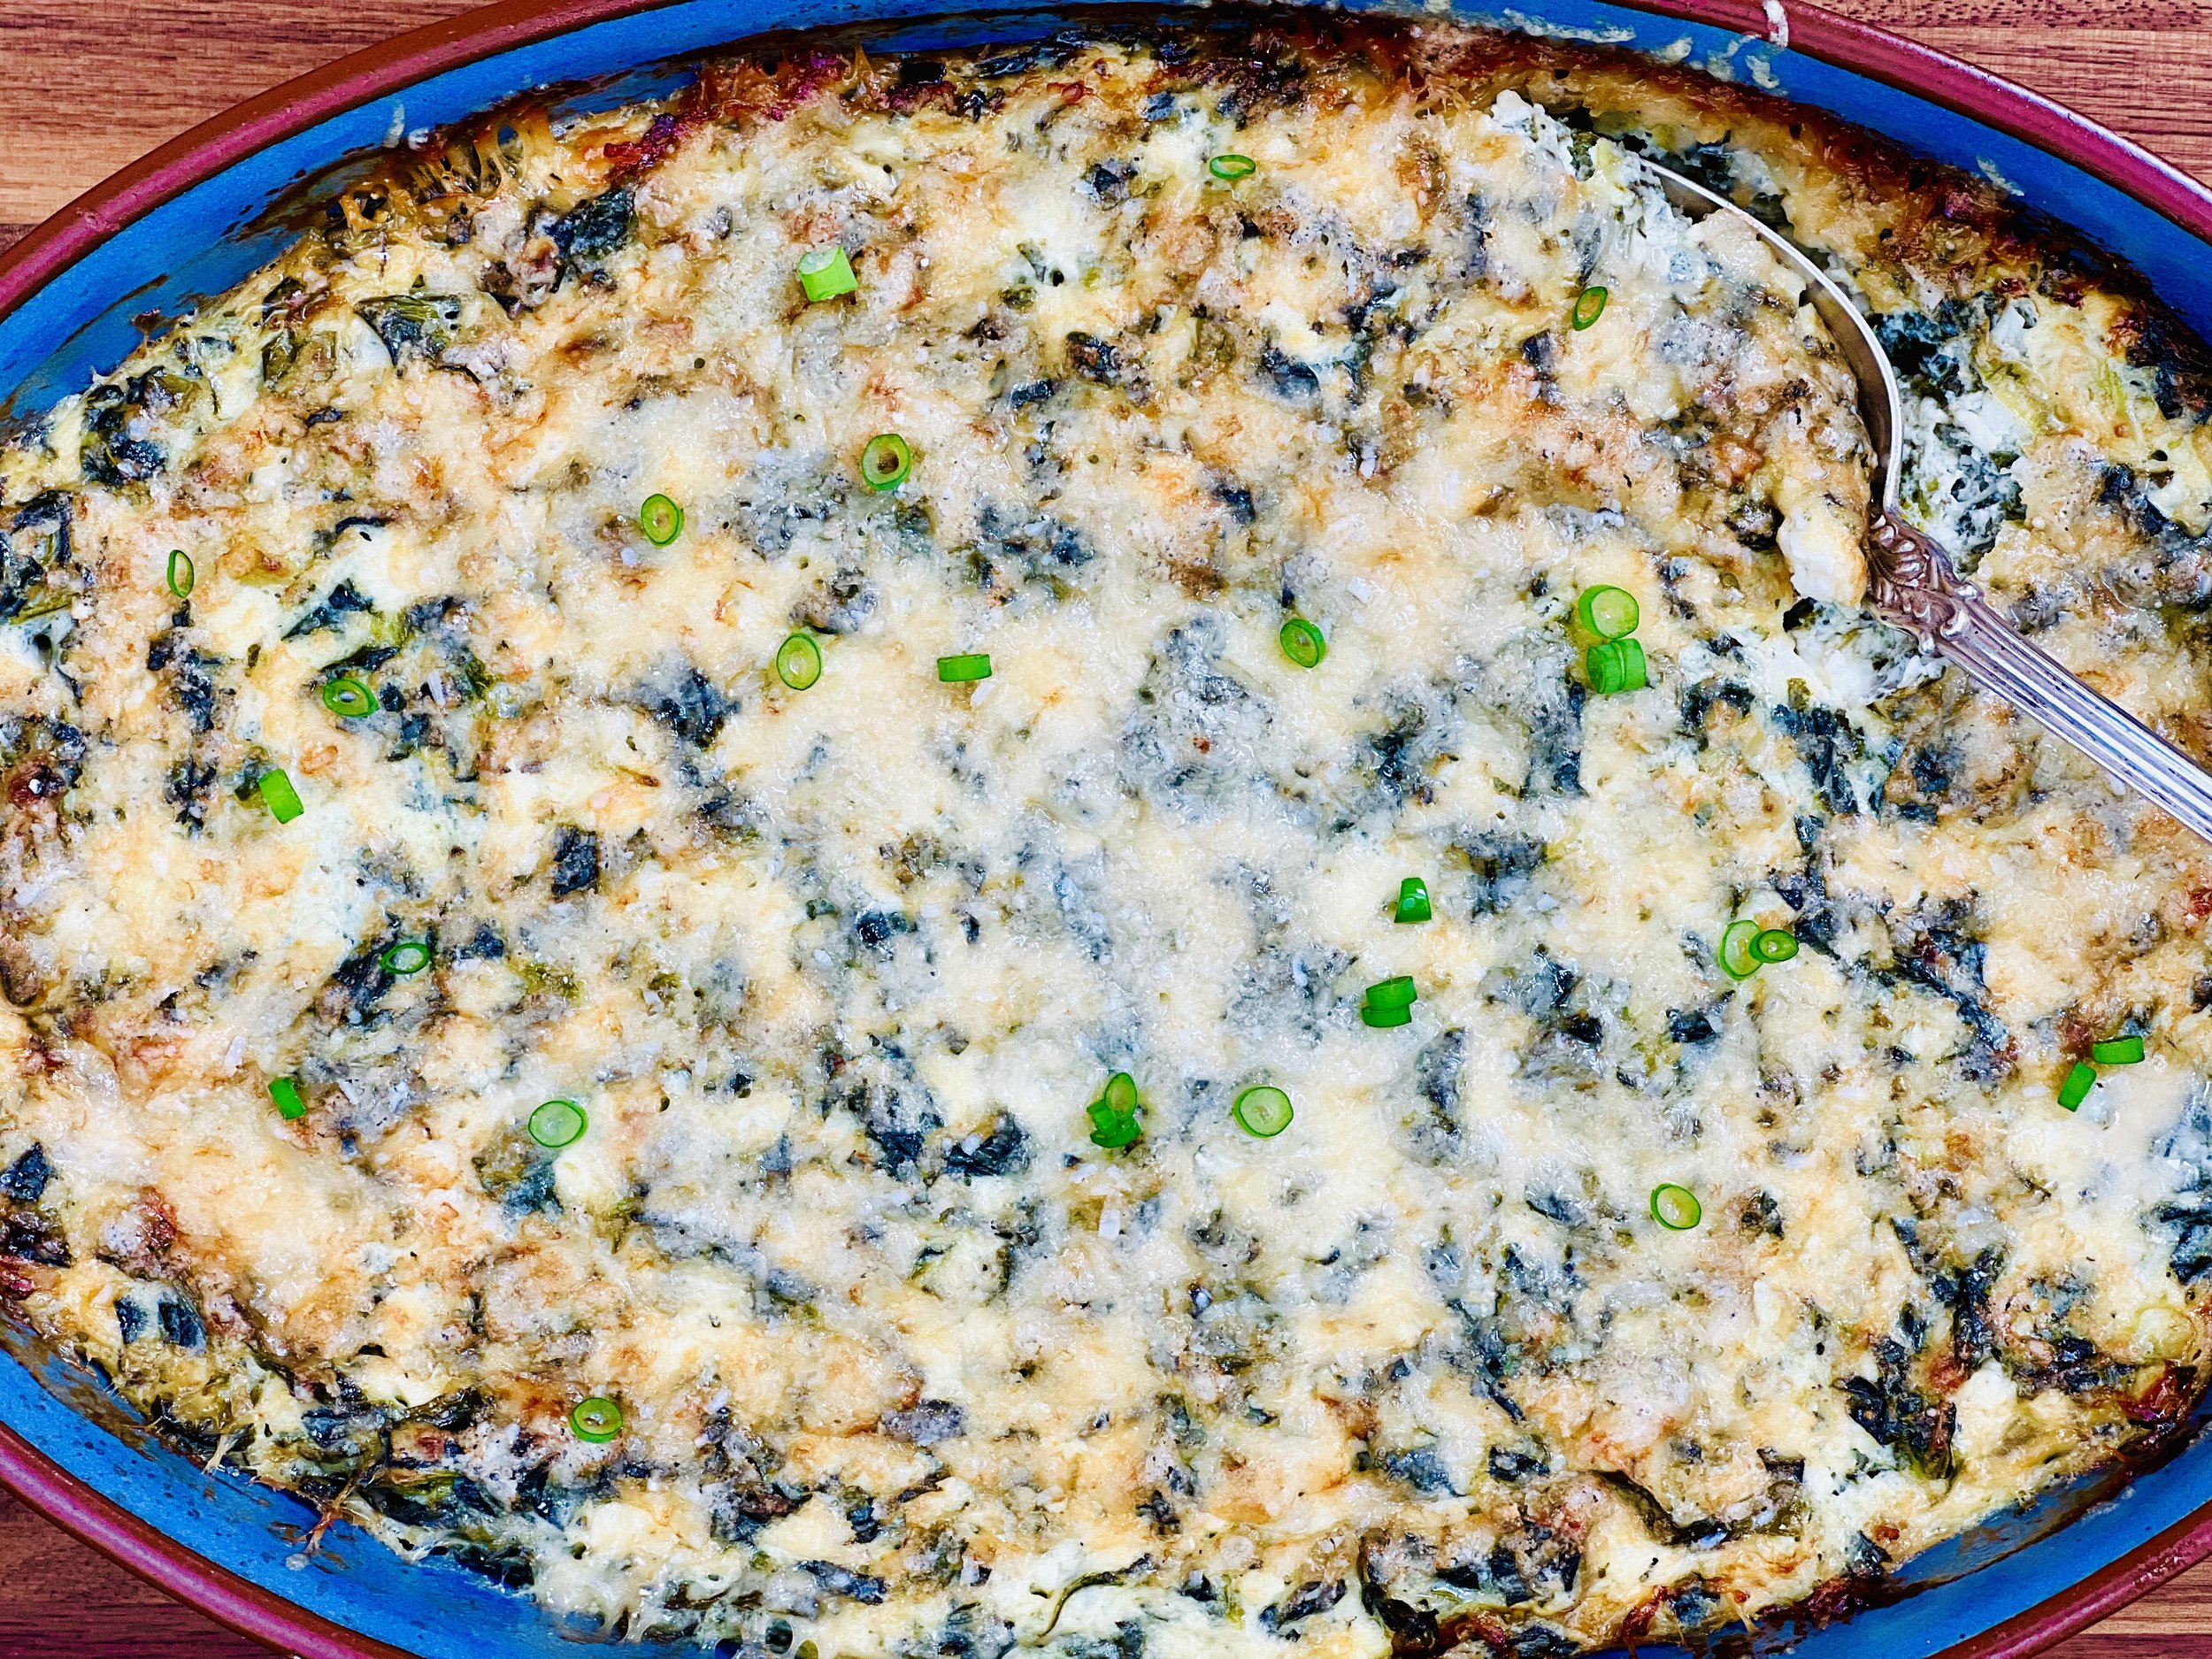
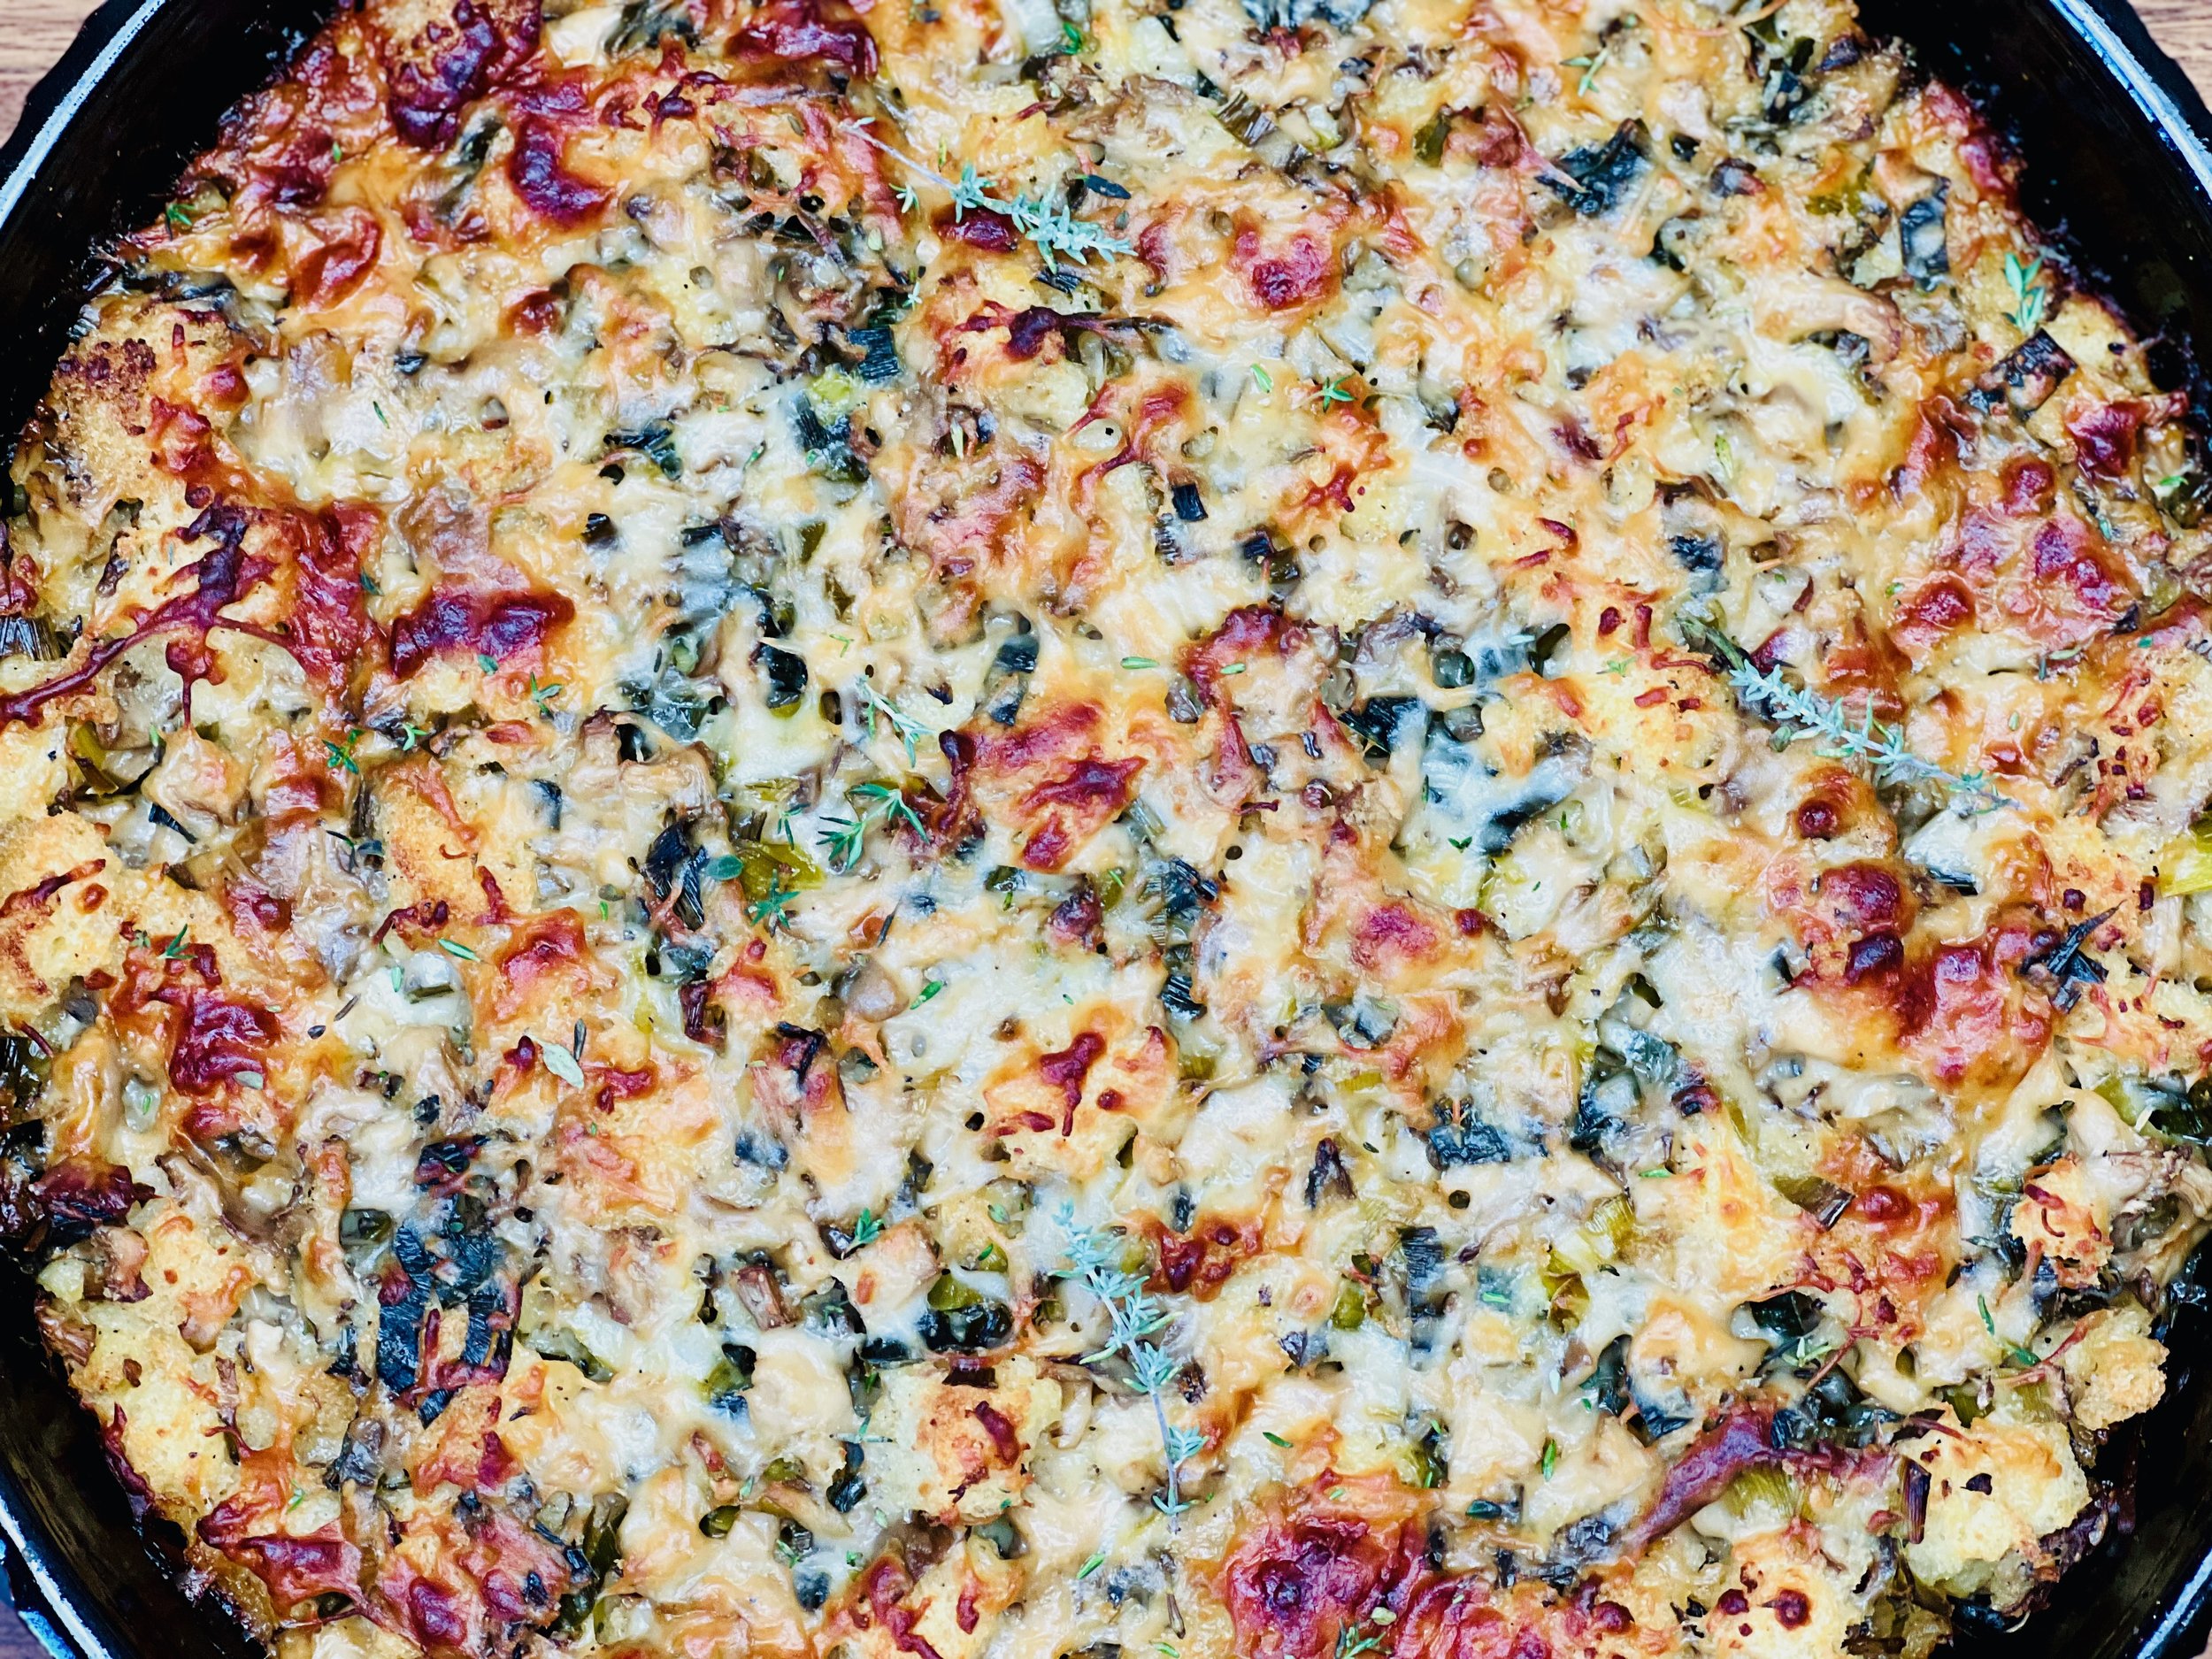
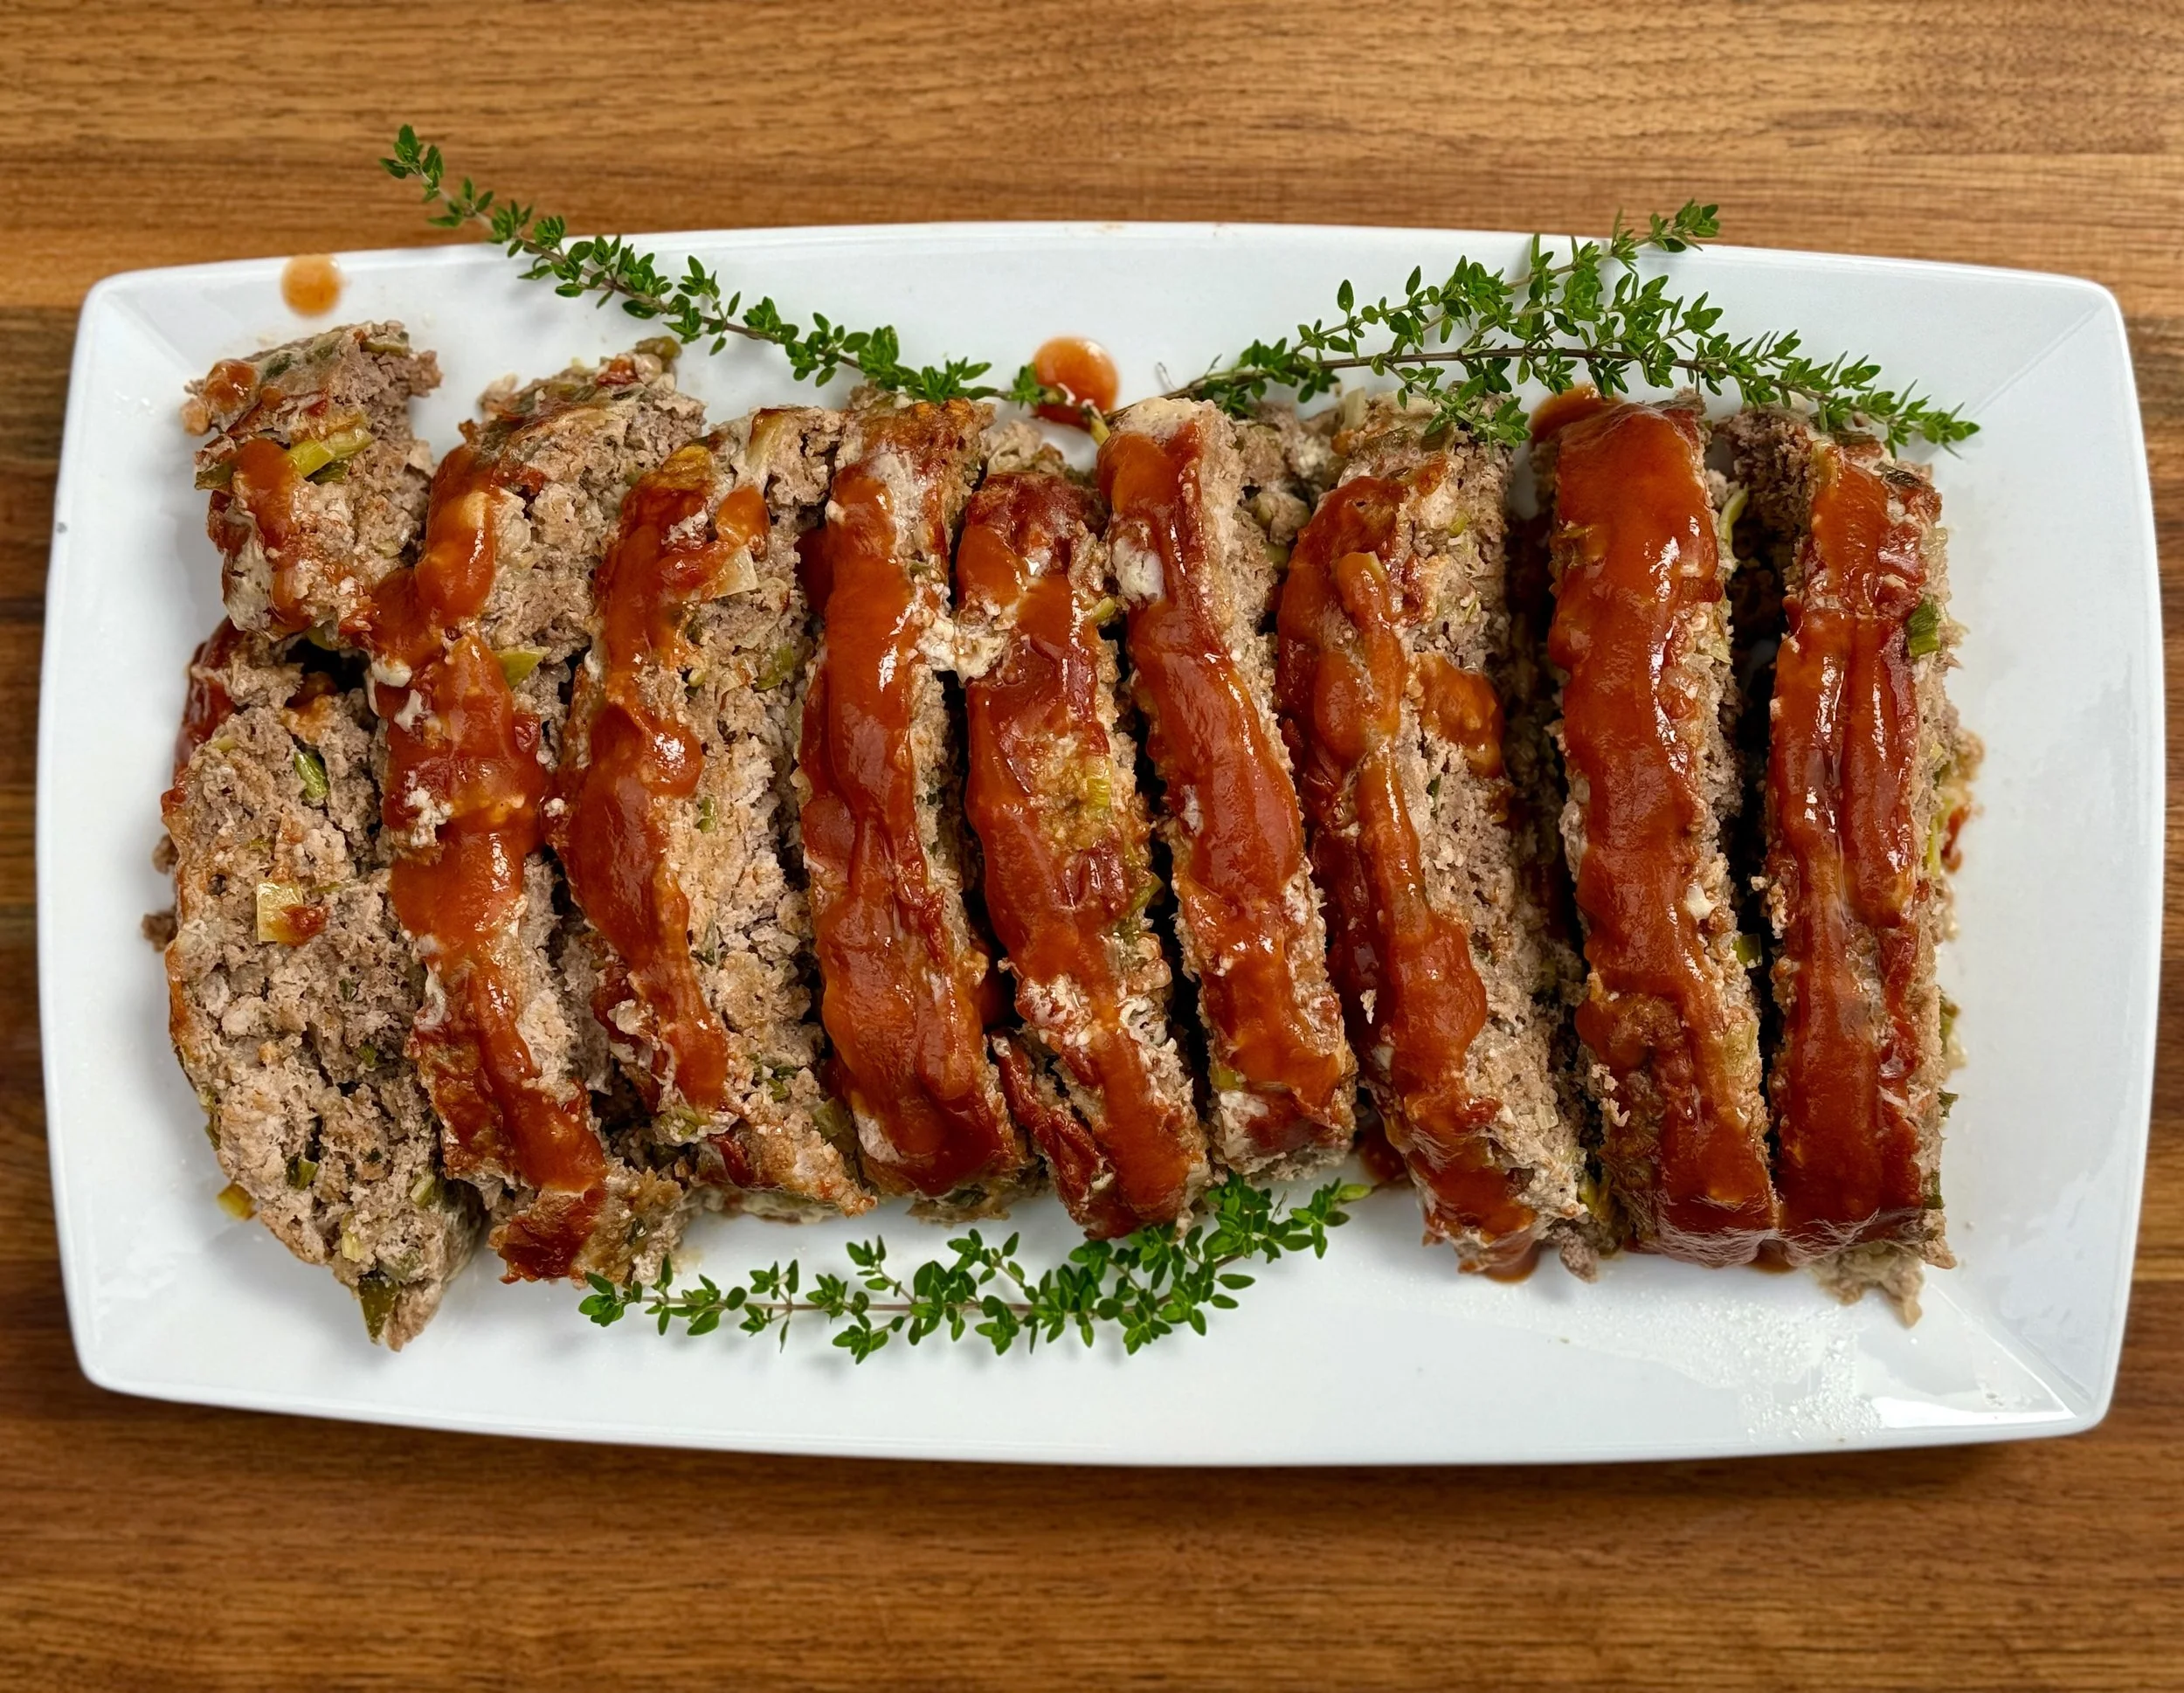
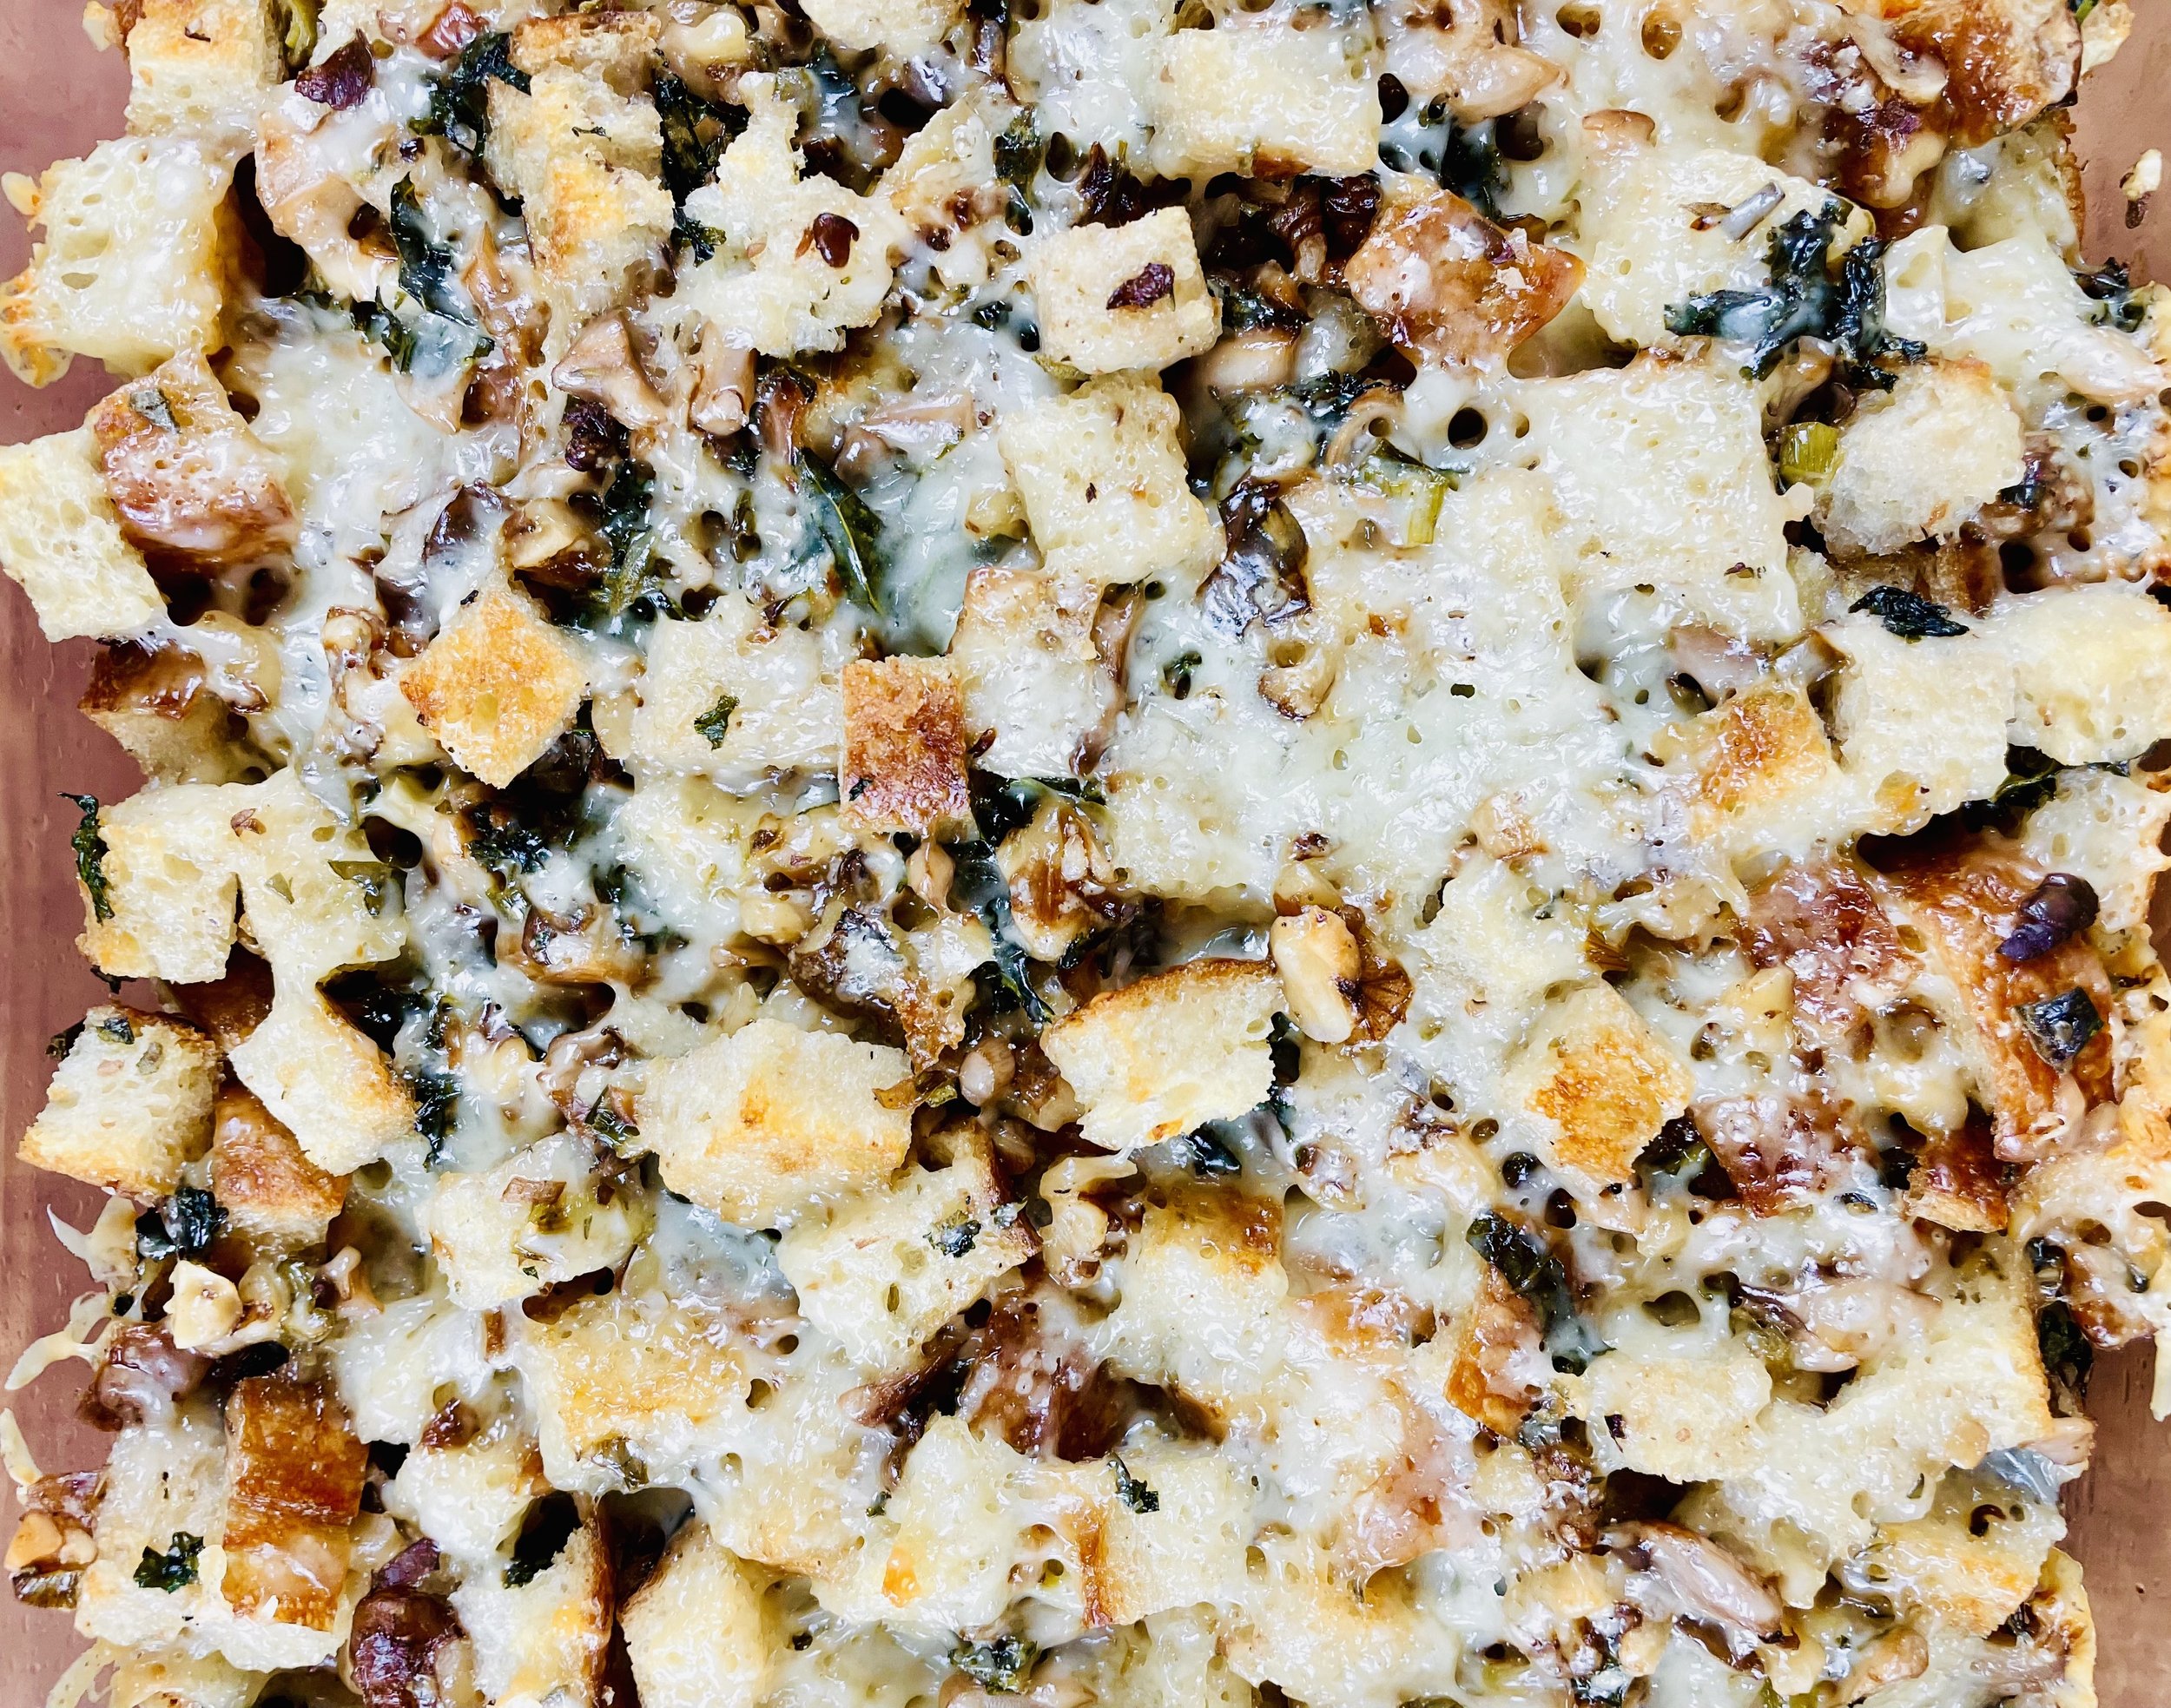
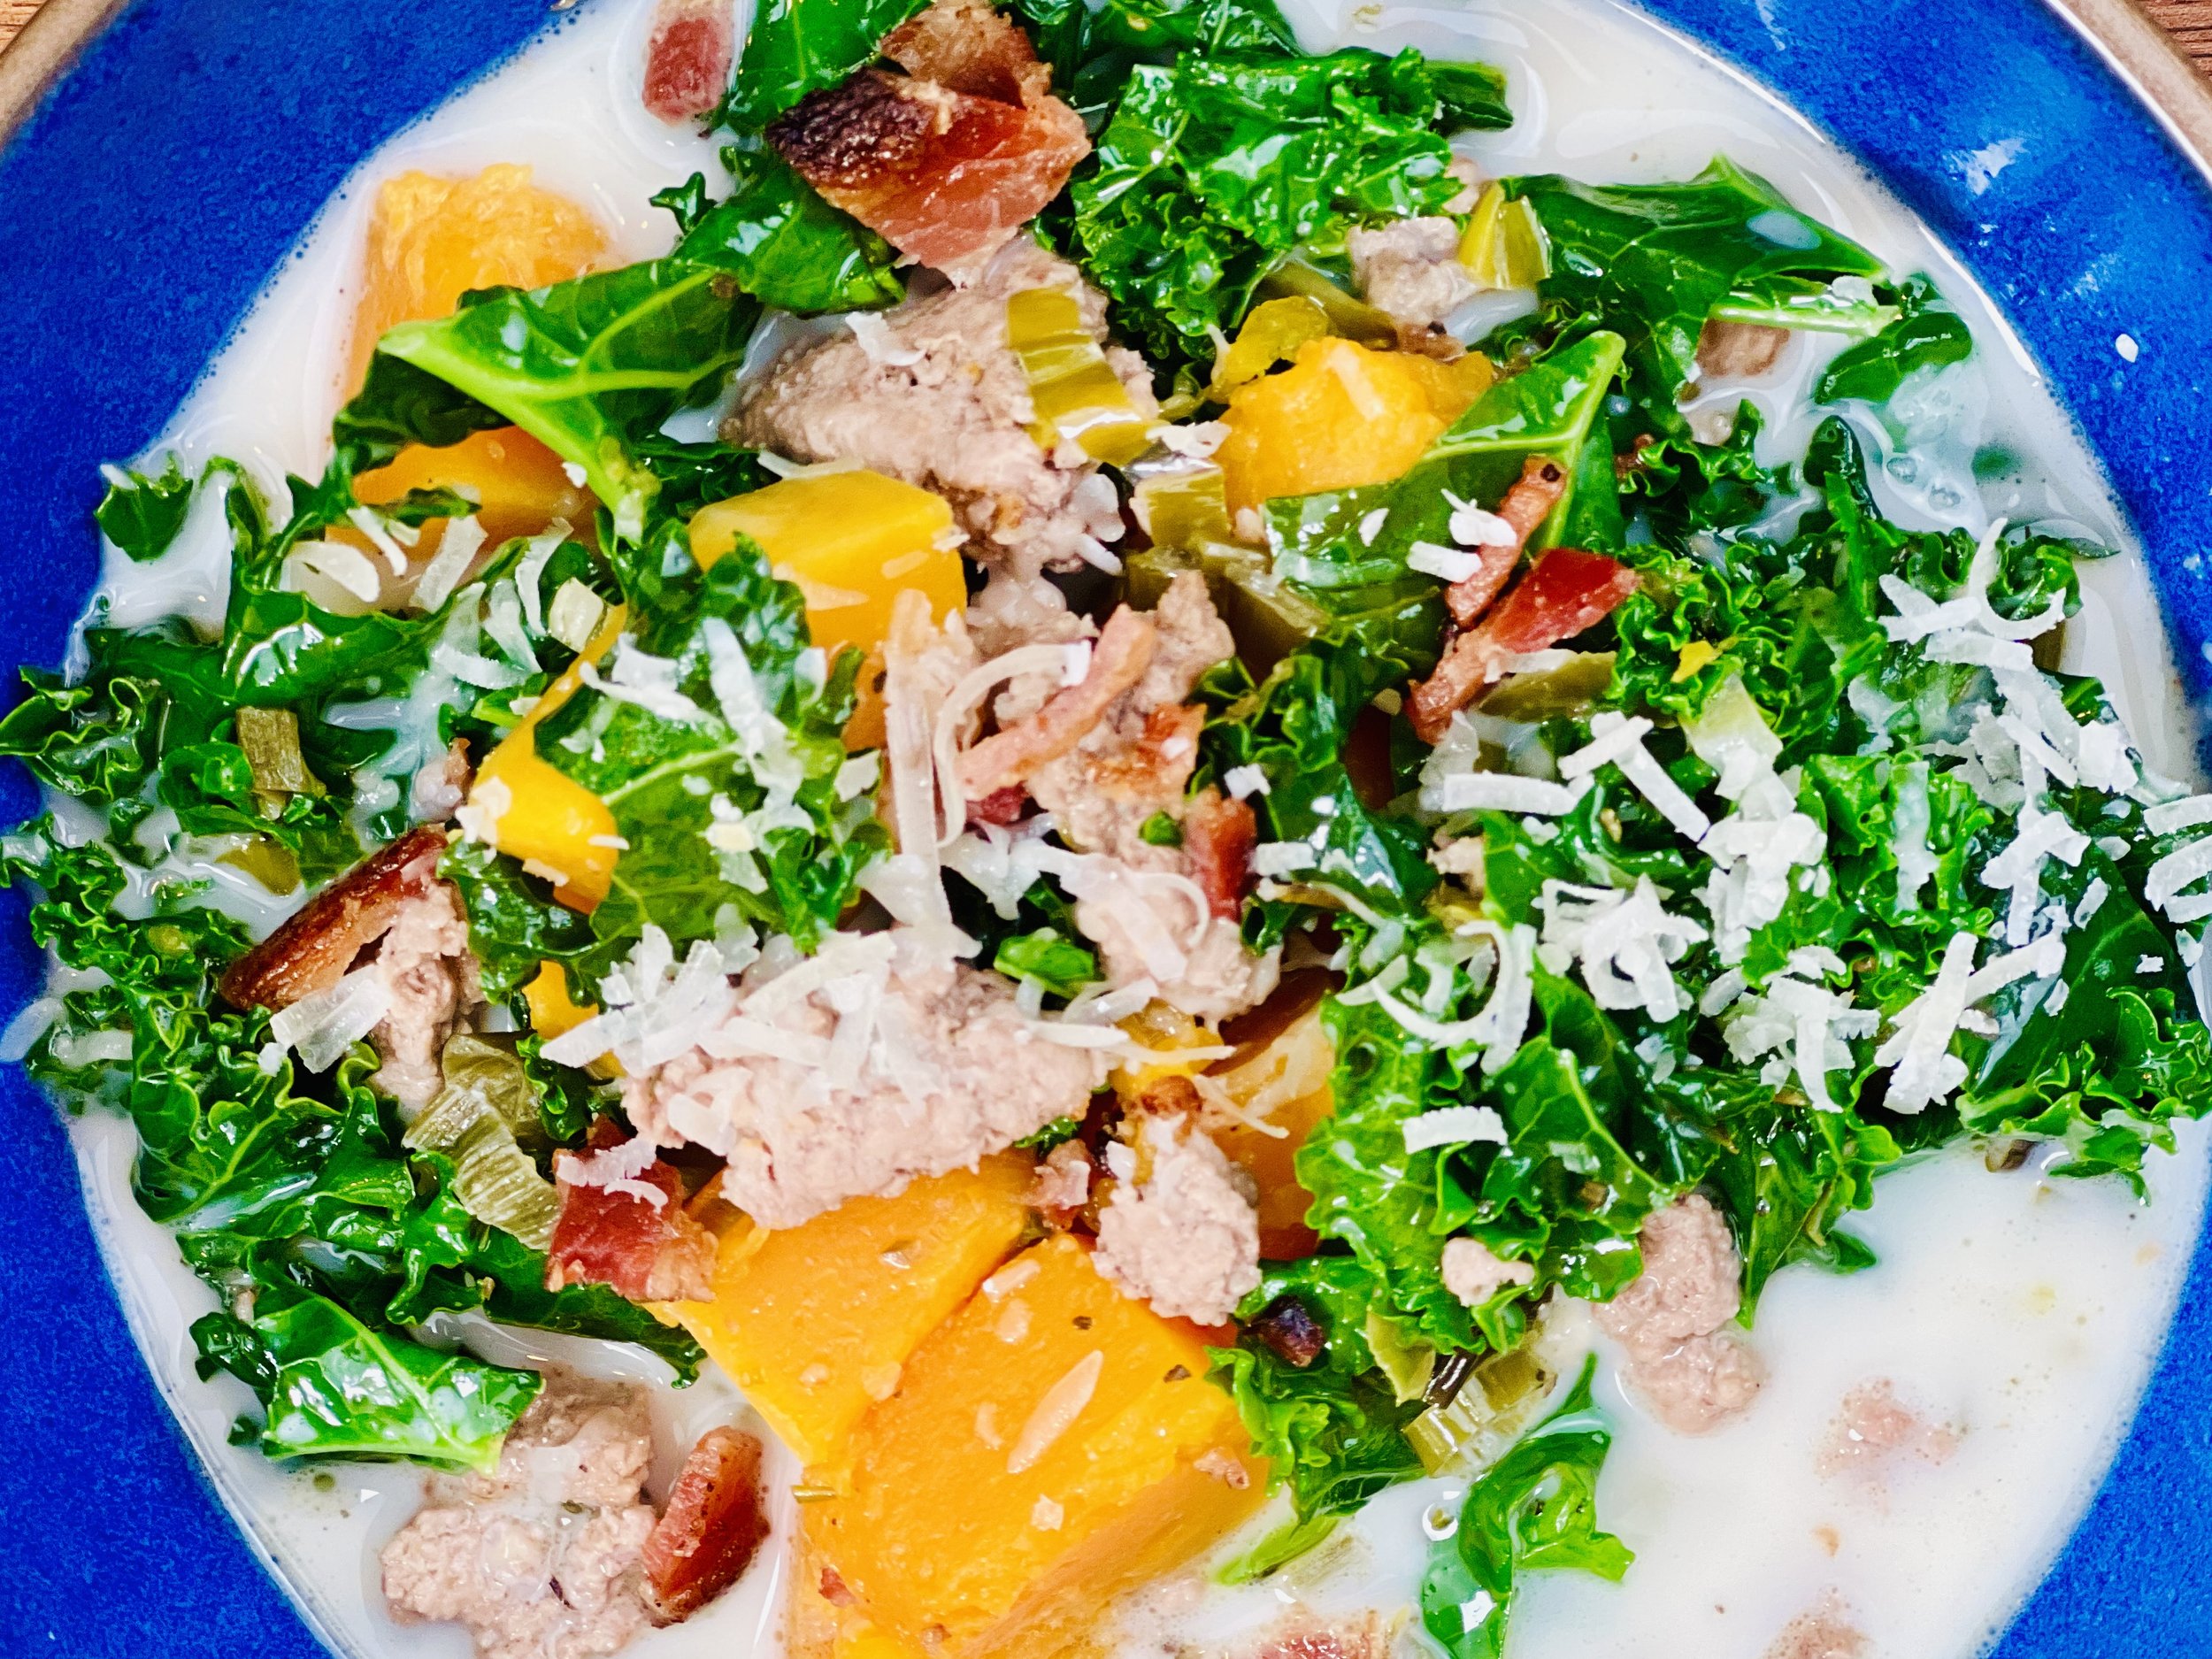
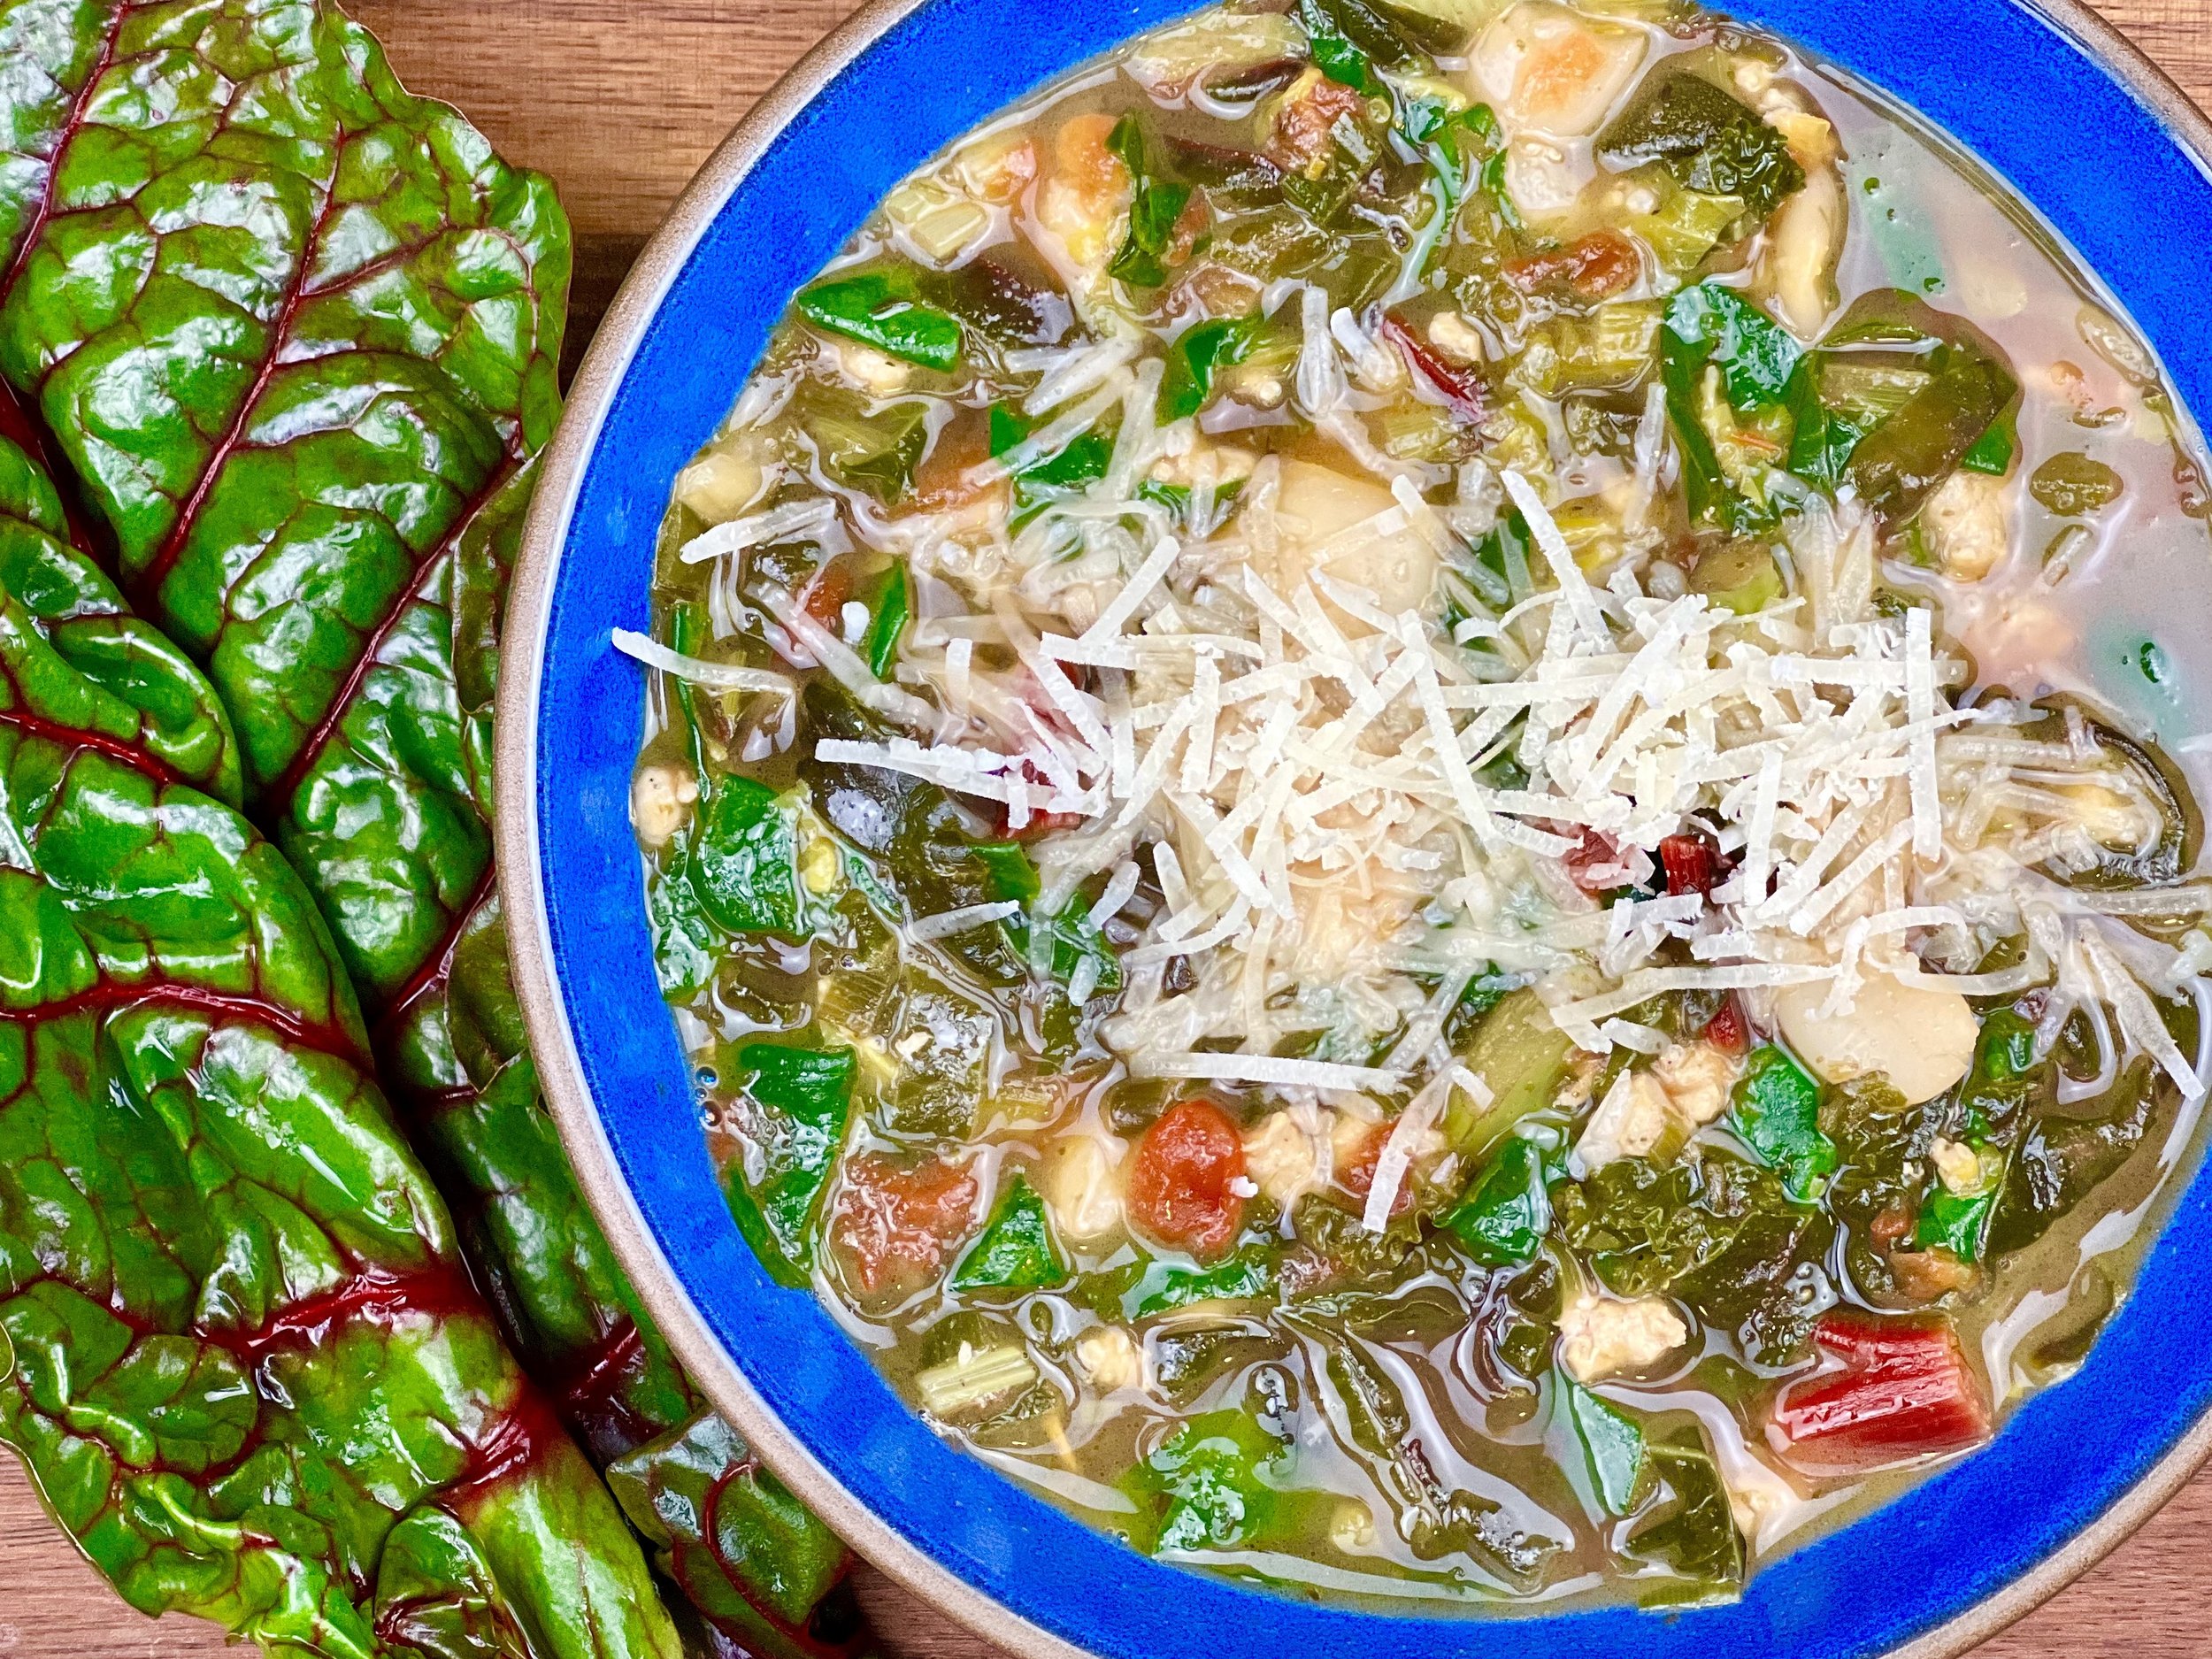
Mushroom Sourdough Stuffing (low FODMAP)
20 Minutes prep • 50 Minutes cook • Low FODMAP • Serves 8
20 Minutes prep • 50 Minutes cook • Low FODMAP • Serves 8 • Ok to make-ahead: Steps 1 - 3
This amazing stuffing recipe might be just the thing you’re looking for to get a few more vegetables into your holiday feast in a very delicious way! With oyster mushrooms and curly kale baked together with sourdough bread and gruyere cheese, it’s a beautiful and delicious way to expand the horizon of your holiday meal and still keep it low FODMAP! Serve this with my Herb Roasted Turkey Breast and Great Turkey Gravy, and you’ve got a holiday meal everyone will love!
Ingredients
12 cups sliced real sourdough bread, cut into cubes
2 tablespoons salted butter, melted
3 tablespoons garlic-infused olive oil
1 bunch green onions (green part only), chopped
3-4 cups oyster mushrooms, finely chopped
1 teaspoon each Kosher salt* and black pepper*
1 stick (8 tablespoons) salted butter
2 cups curly kale, chopped
2 tablespoons fresh sage, chopped
1 tablespoon fresh thyme, chopped
1 cup walnuts, chopped (optional but very good!)
2-3 cups Gourmend low sodium chicken broth*, or other low FODMAP chicken or turkey broth (use code IBSGC15 for 15% discount)
3 eggs, beaten
1 cup shredded Gruyere cheese
Directions
(1) Prepare: Preheat the oven to 350 degrees F. Grease a 9x13 inch or equivalent size baking dish. Cut the sourdough bread into cubes.
(2) Toast the stuffing crumbs: Put the sourdough cubes on a rimmed baking sheet, drizzle the 2 tablespoons of melted butter over the bread. Toss to distribute. Transfer to the oven and bake 8 - 10 minutes, until the stuffing crumbs are lightly toasted.
(3) Cook the vegetables: Meanwhile, heat the olive oil In a large skillet over medium heat. When the oil shimmers, add the green onions and cook until fragrant, about 1 minute. Add the mushrooms, and season with salt and pepper. Cook undisturbed for 5 minutes or until golden, stir and continue cooking until the mushrooms are a nice golden color, another 3-5 minutes. Add the butter, kale, sage, thyme, and walnuts (if using). Cook, stirring occasionally until the kale has wilted down, about 5 minutes. Remove from the heat and set aside.
Make-ahead note: At this point, you can allow the stuffing cubes to come to room temperature and put them in an air-tight container in the refrigerator. Put the mushroom kale mixture in an air-tight container and store it in the refrigerator for up to 3 days. When ready to assemble, remove from the refrigerator and continue on with step 4. This can be done up to 4 hours ahead of time. Bake as directed.
(4) Mix the stuffing ingredients: In a large mixing bowl, whisk together 2 cups of the broth and the eggs. Add the toasted sourdough bread cubes and the mushroom/kale mixture, gently toss to combine. If the mix seems dry, add additional broth, 1/4 cup at a time until all the bread is moist. Pour the mixture into the prepared pan. Top evenly with cheese.
(4) Bake the stuffing: Cover the dish with a layer of parchment and then a layer of foil and bake for 35 minutes. Remove the foil and parchment and check for dryness, if needed drizzle over extra broth, 1/4 cup at a time, to keep things moist, then continue baking for another 10-15 minutes or until the stuffing is golden on top.
(5) Plate and serve: Serve the stuffing warm alongside our Herb Roasted Turkey Breast and Great Turkey Gravy.
Eat and enjoy every bite because you can!
*This post may contain links for you to easily purchase items listed on the page. In some cases, we have provided a special discount code for IBS Game Changers so be sure to use it when you purchase an item to get the discount that has been arranged just for you! As an Amazon Associate, I earn a commission from qualifying Amazon purchases.
More Deliciously Low FODMAP™ side dish recipes you might enjoy
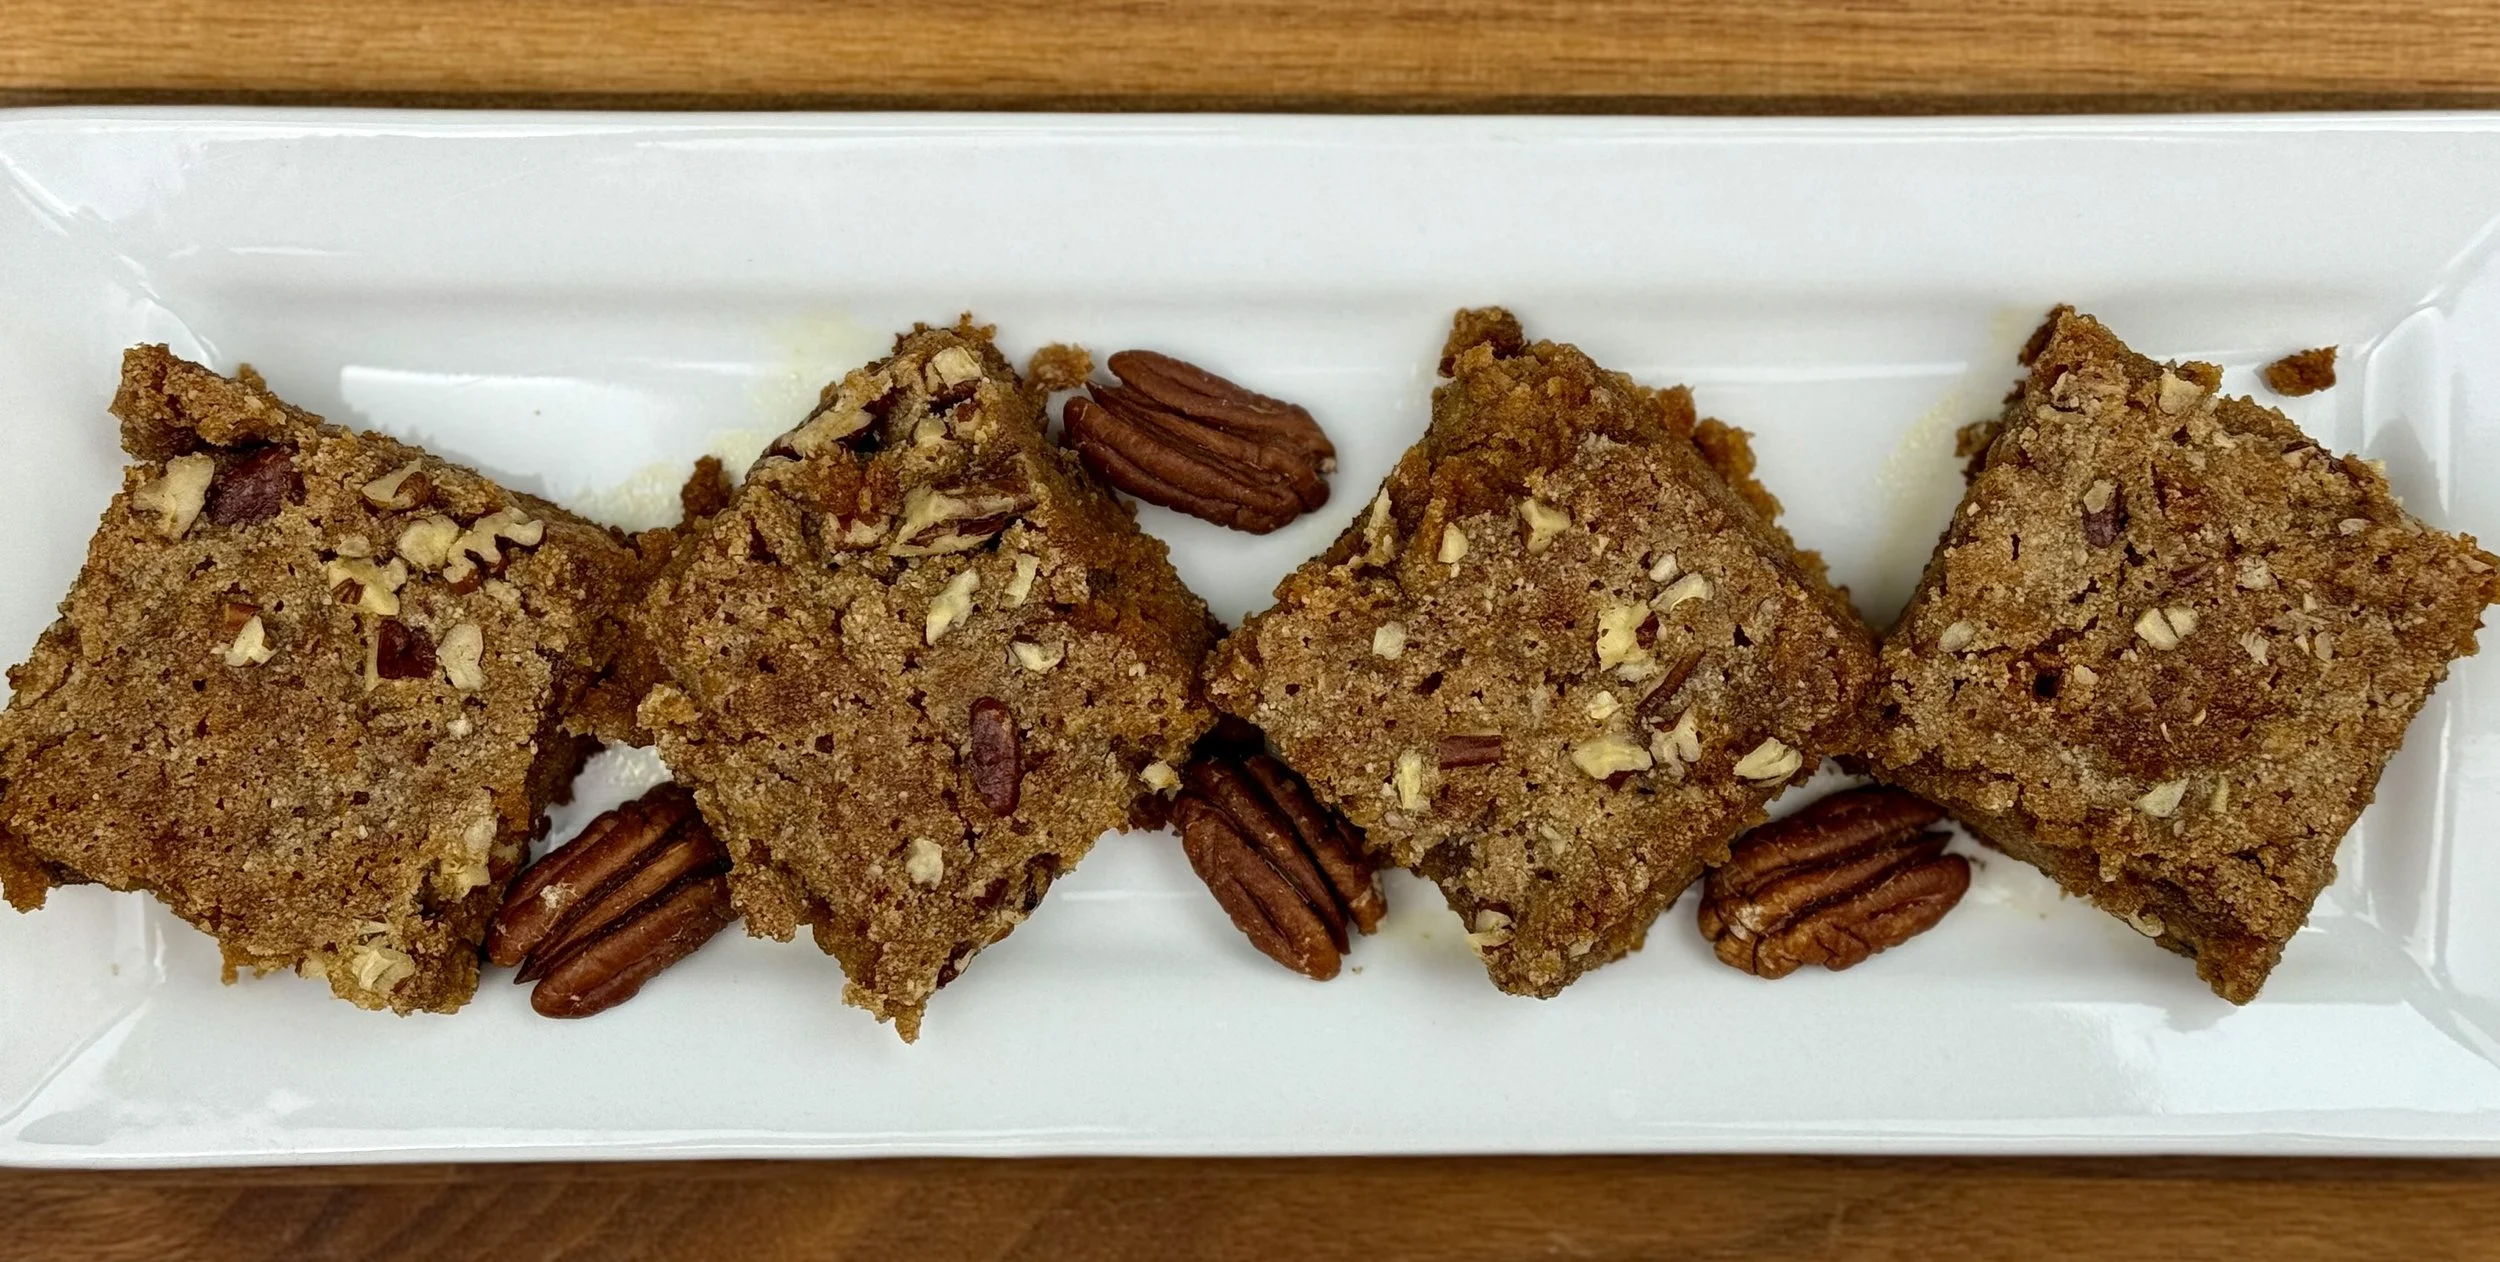
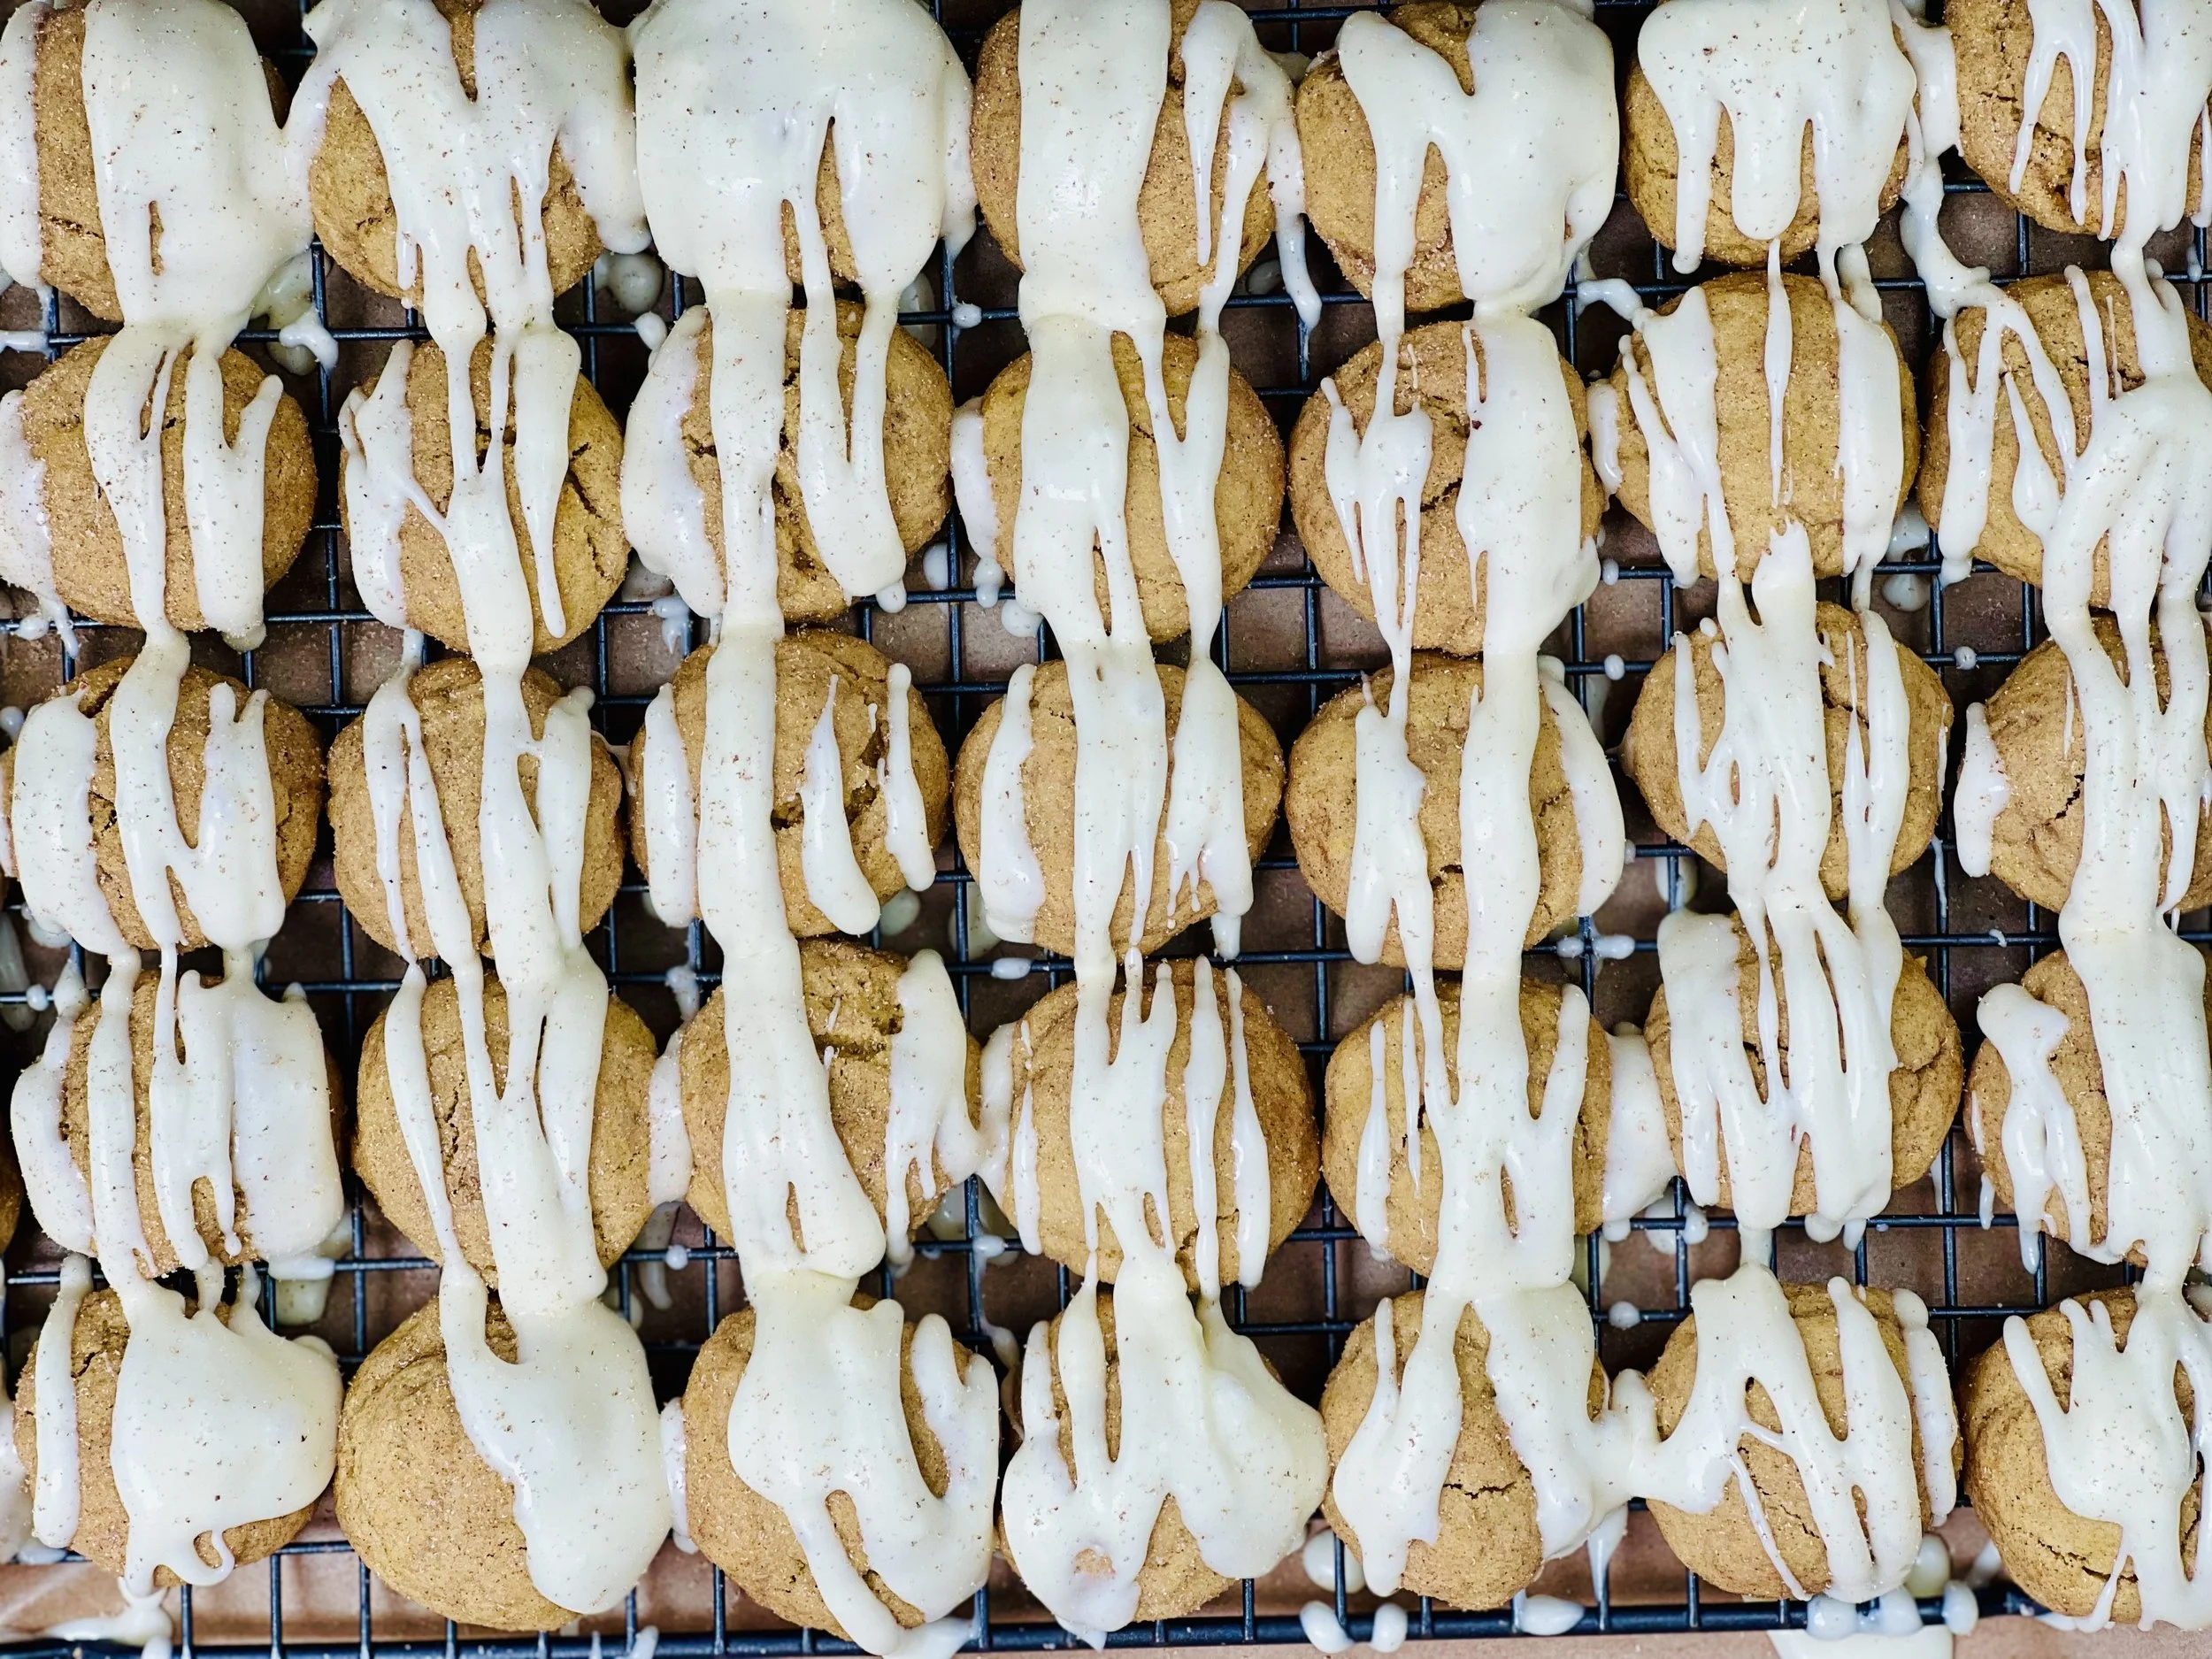
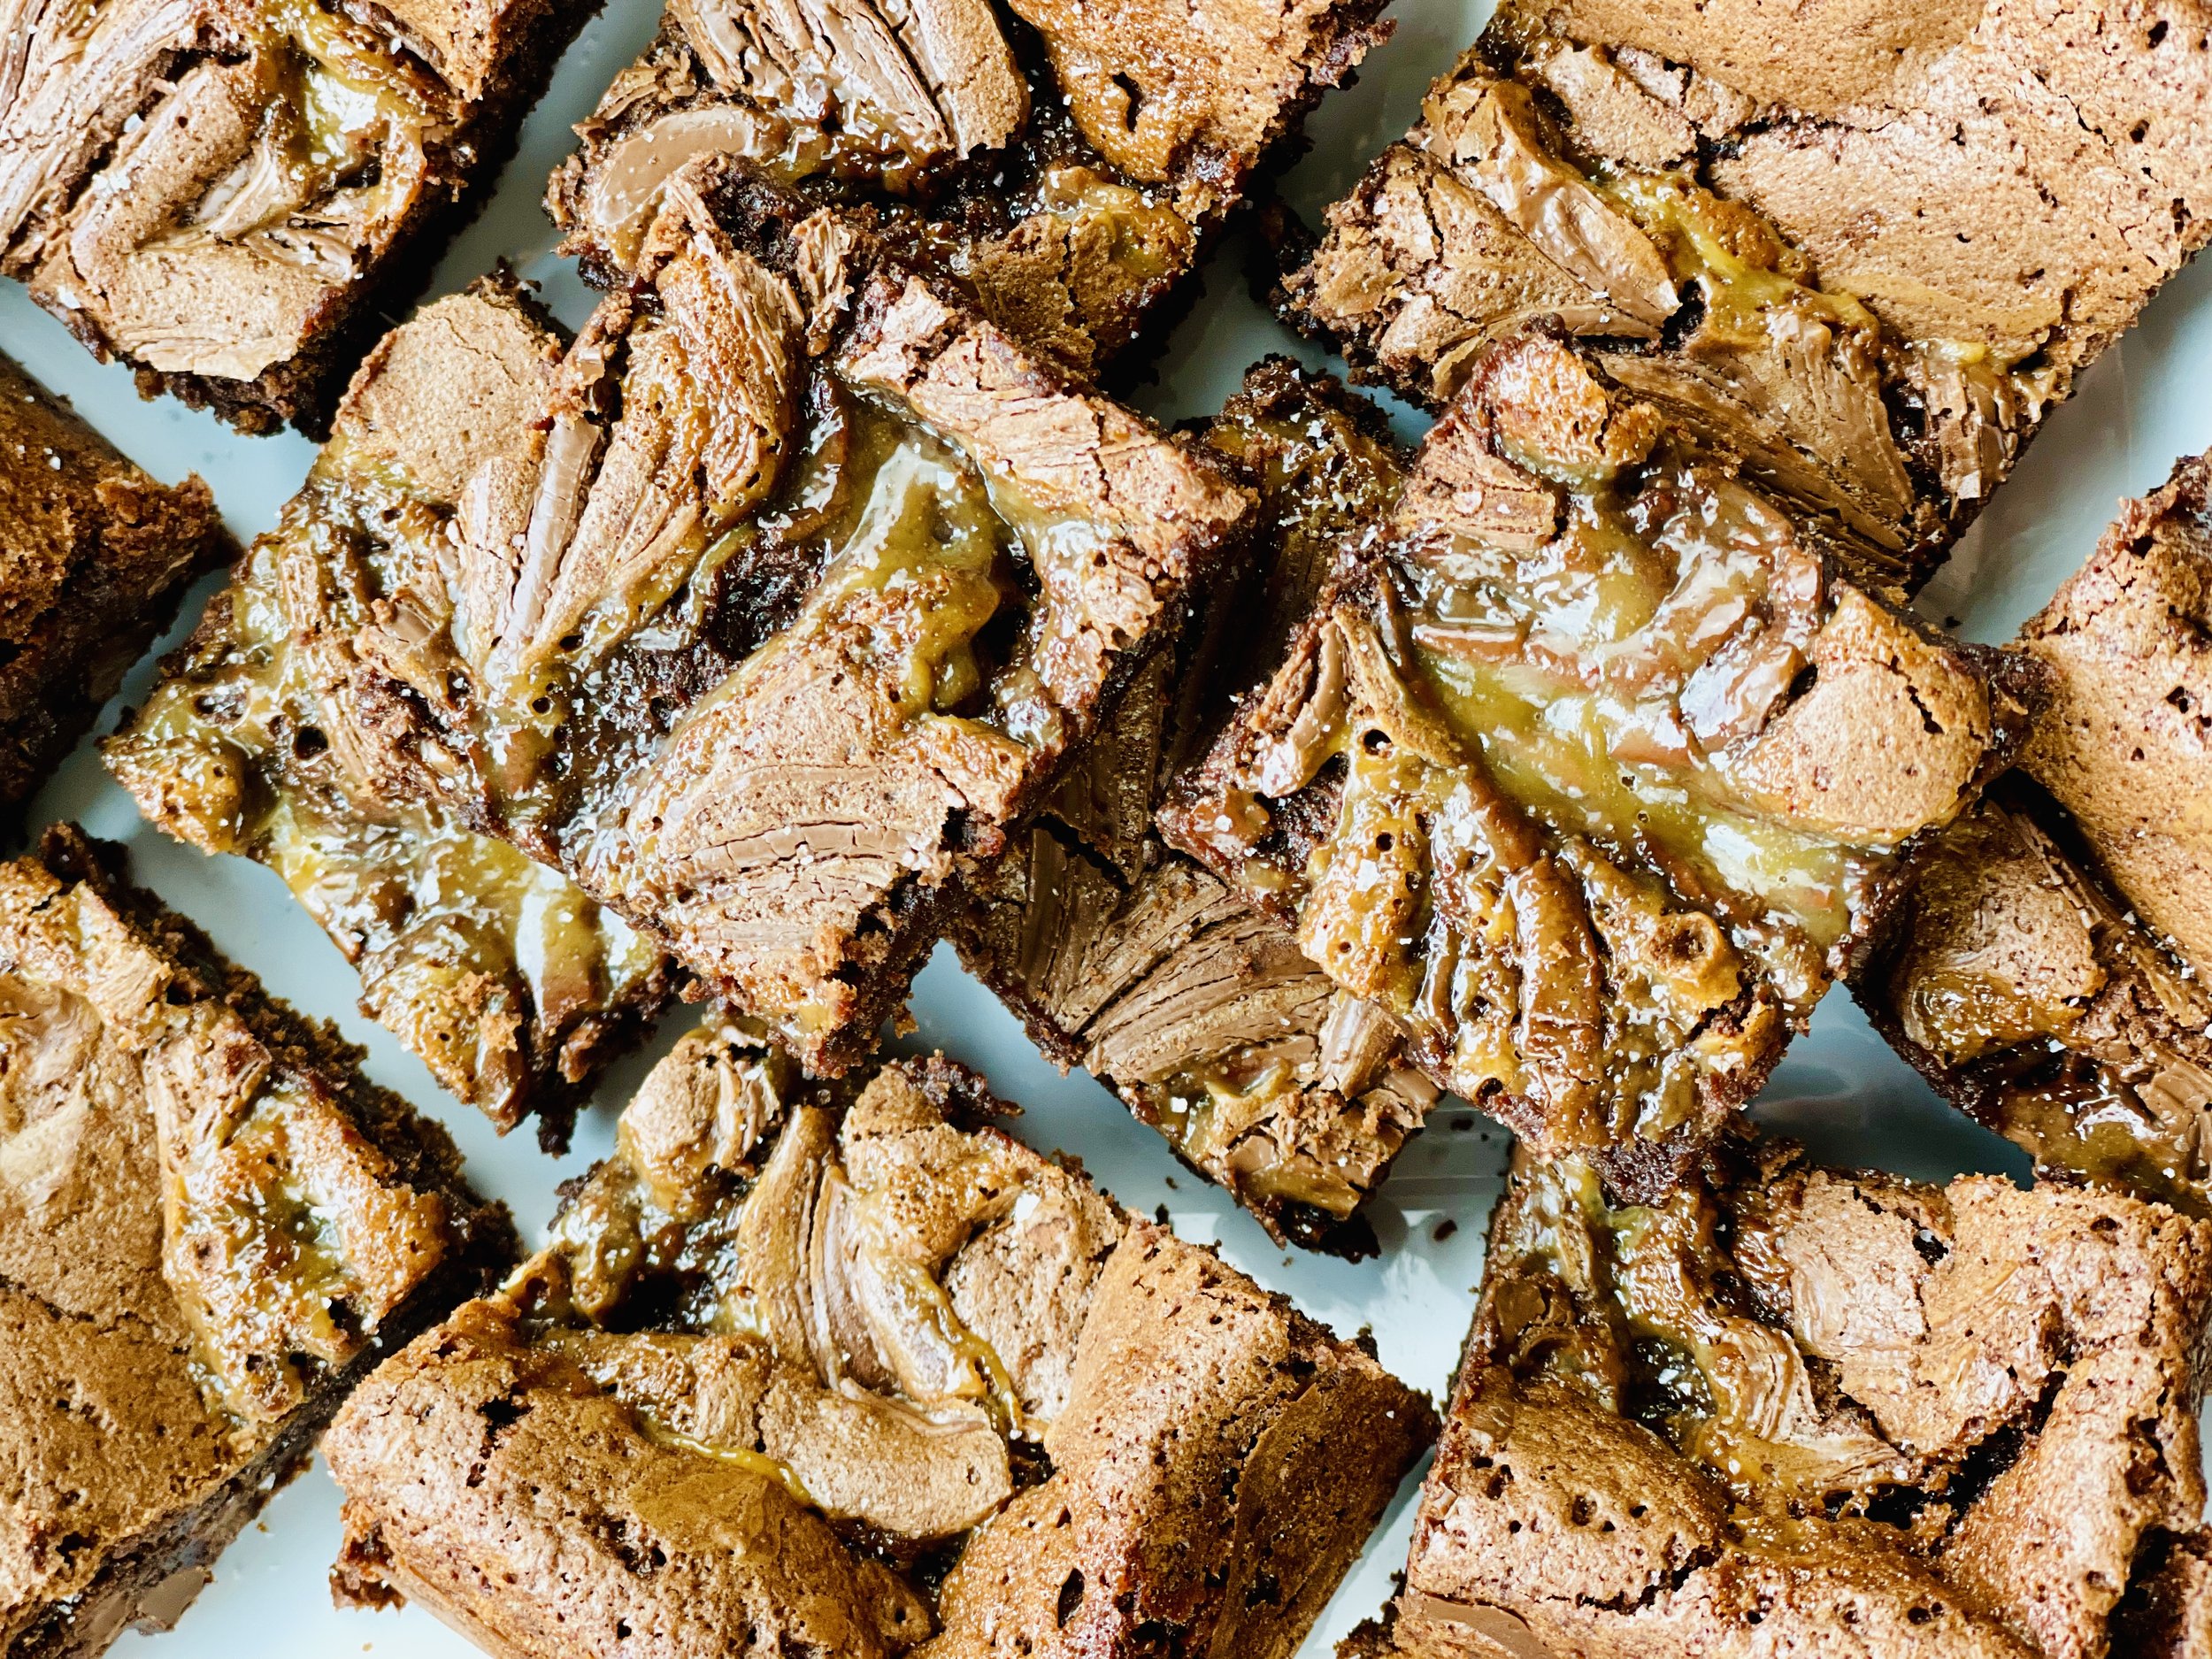
Salted Caramel Coffee Brownies (Low FODMAP)
15 Minutes prep • 35 Minutes cook • Low FODMAP • Gluten-free • Makes 16
15 Minutes prep • 35 Minutes cook • Low FODMAP • Gluten-free • Makes 16 • Ok to make-ahead: Step 1
Brownies are delicious. There’s just no arguing with that! But when you add rich coffee and salted caramel, you’ve taken it up a few notches! These low FODMAP brownies are super chocolatey and rich but with only a small amount of gluten-free flour, they are also quite tender. The caramel comes through as a nice melt-in-your-mouth surprise, not an overwhelming chewiness so don’t worry about these being “sticky” — they’re not! And, making caramel is surprisingly simple so don’t be afraid to try this. I love these brownies and I hope you do too!
This is an exclusive recipe just for recipe club members.
Each week I am creating and delivering one very special recipe just for my recipe club members. If you’re not yet a member, I encourage you to join! Membership in the club includes access to the complete archive of recipes with filters so it can become your virtual low FODMAP cookbook plus, I am creating and delivering one special NEW recipe every week ONLY for recipe club members. And, for my true fans, I’ll be sharing behind-the-scenes content, and updates on the progress of the new cookbook.
Your membership in the club helps me continue creating new, delicious, easy-to-make, low FODMAP recipes just for you.
As always, all recipes will emphasize simple ingredients, easy preparation, and delicious low FODMAP results. Recipes will be for everything from main courses, salads, soups, side dishes, appetizers, desserts, sauces, breakfast and lunch, and even mocktails and cocktails. Everything you need to prepare fantastic low FODMAP meals everyone will love.
Join the club. Become a Patron. Let’s keep making delicious Low FODMAP meals together.
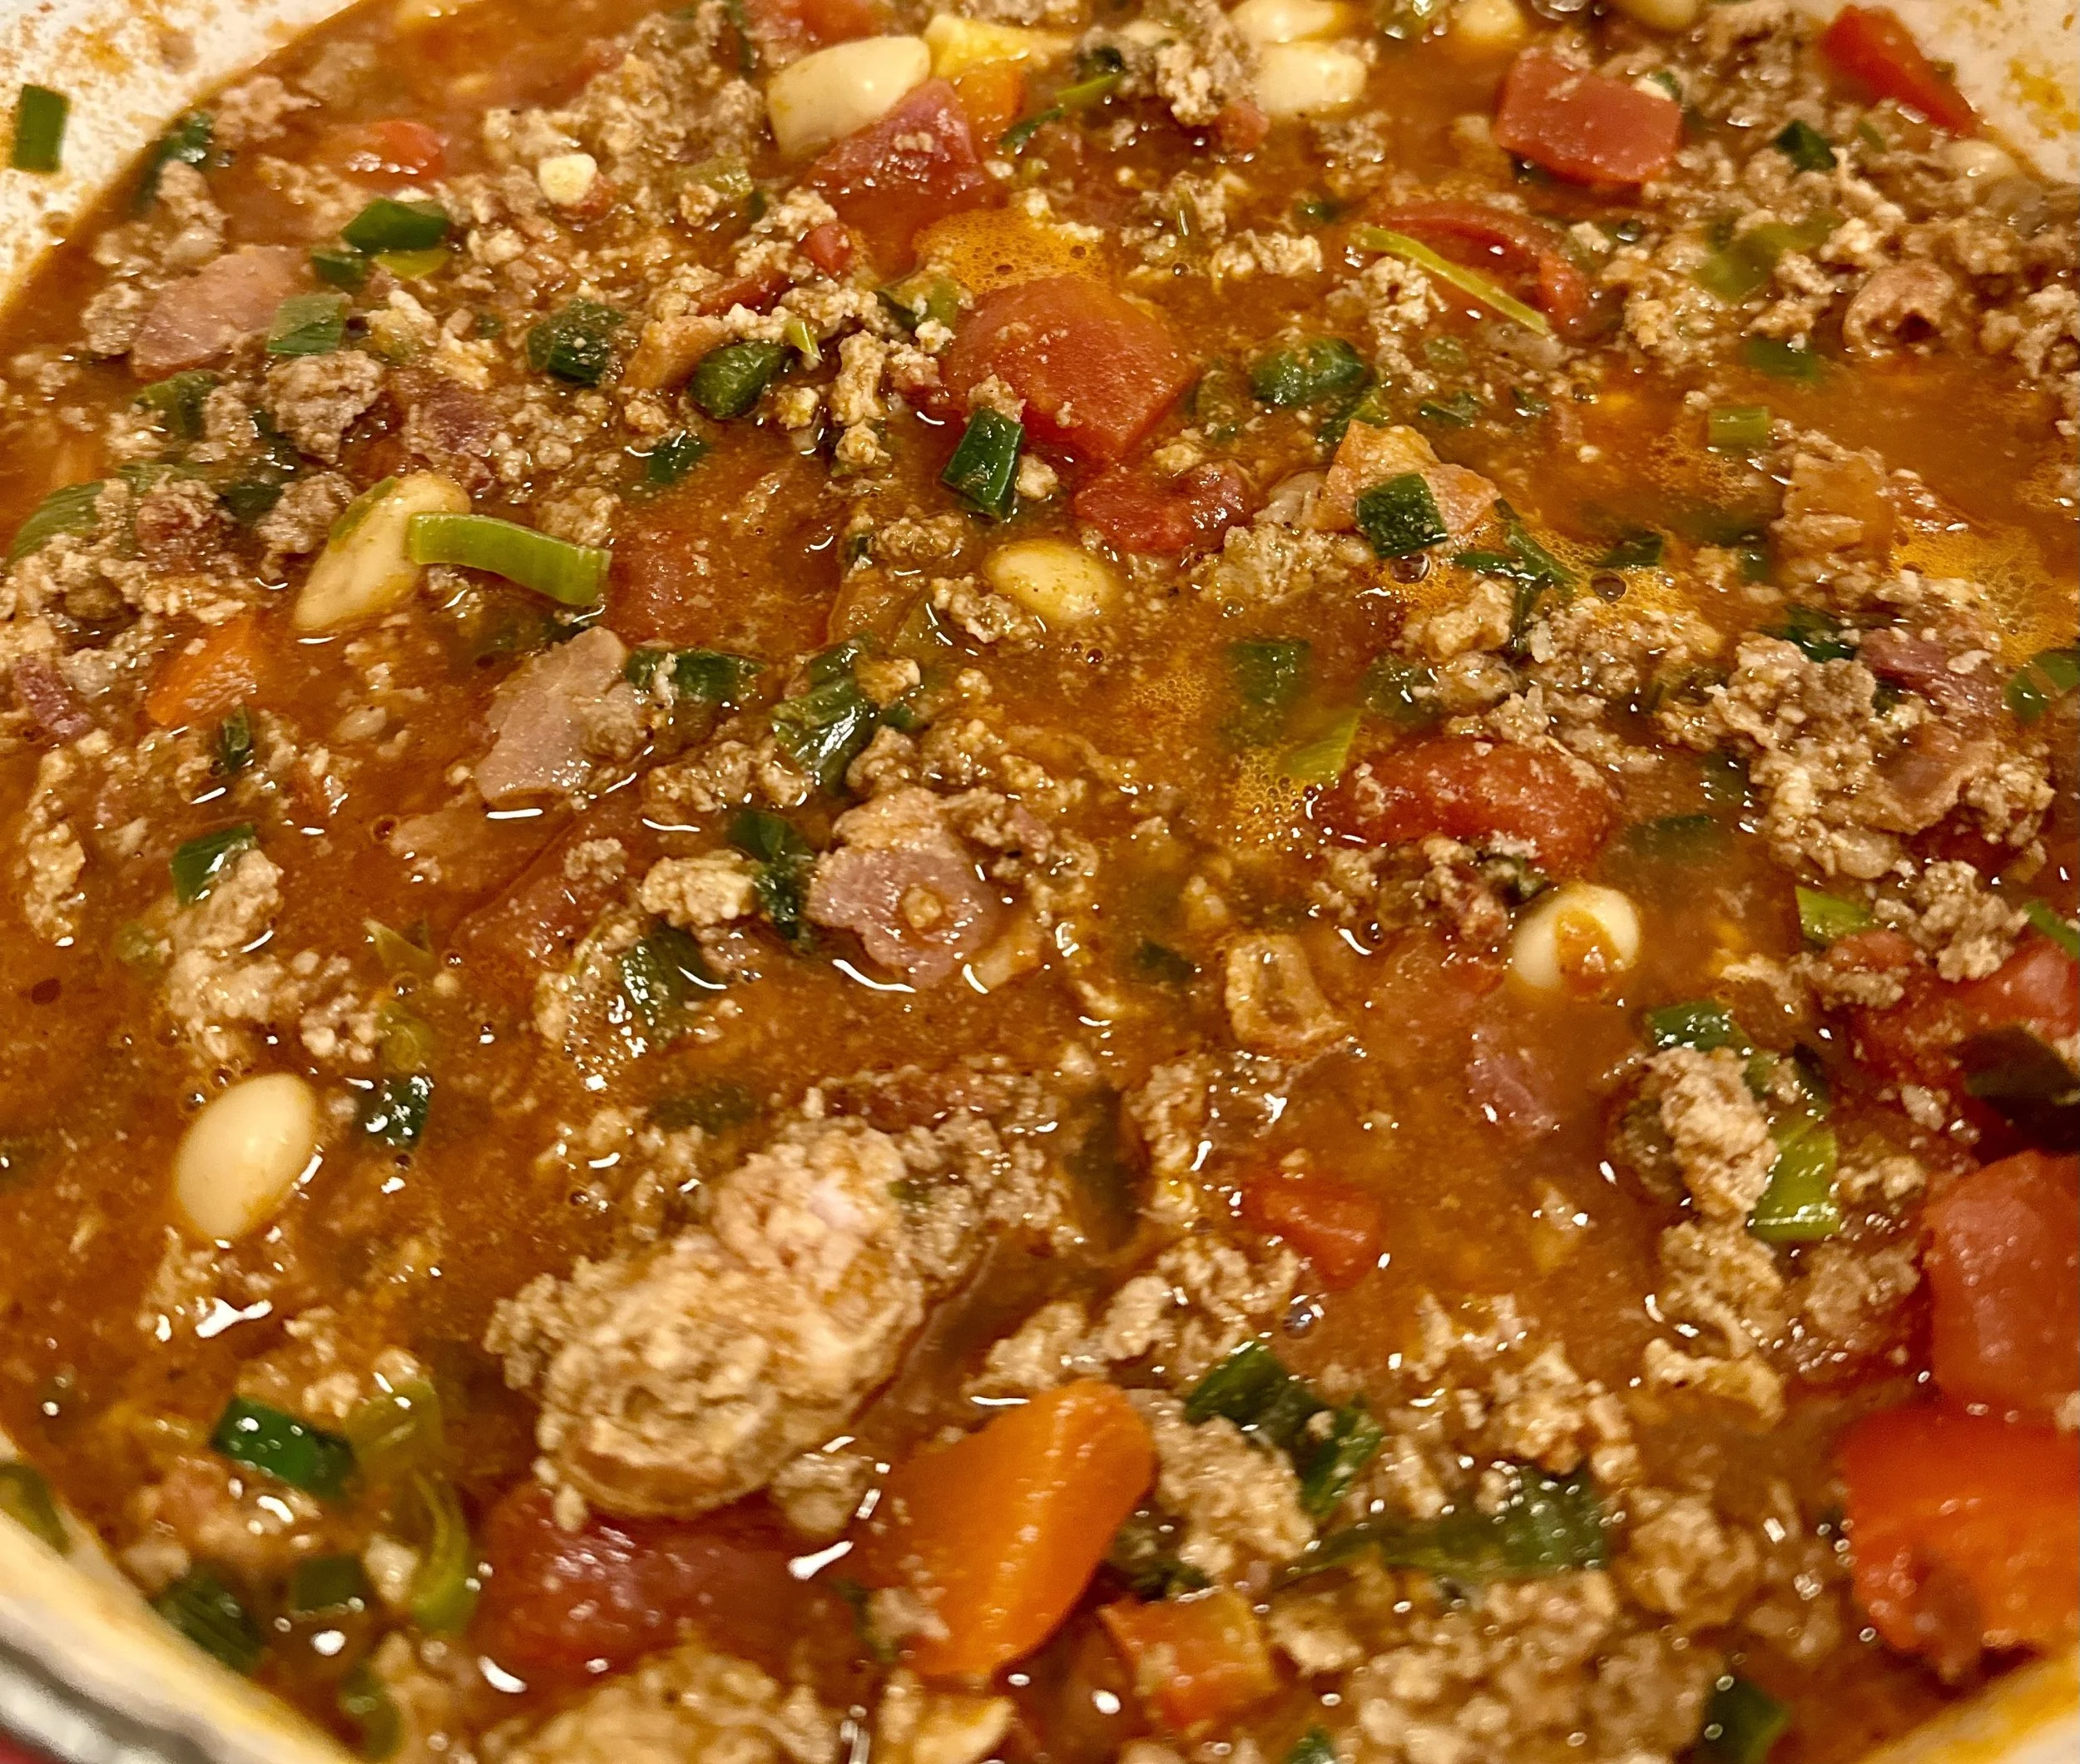
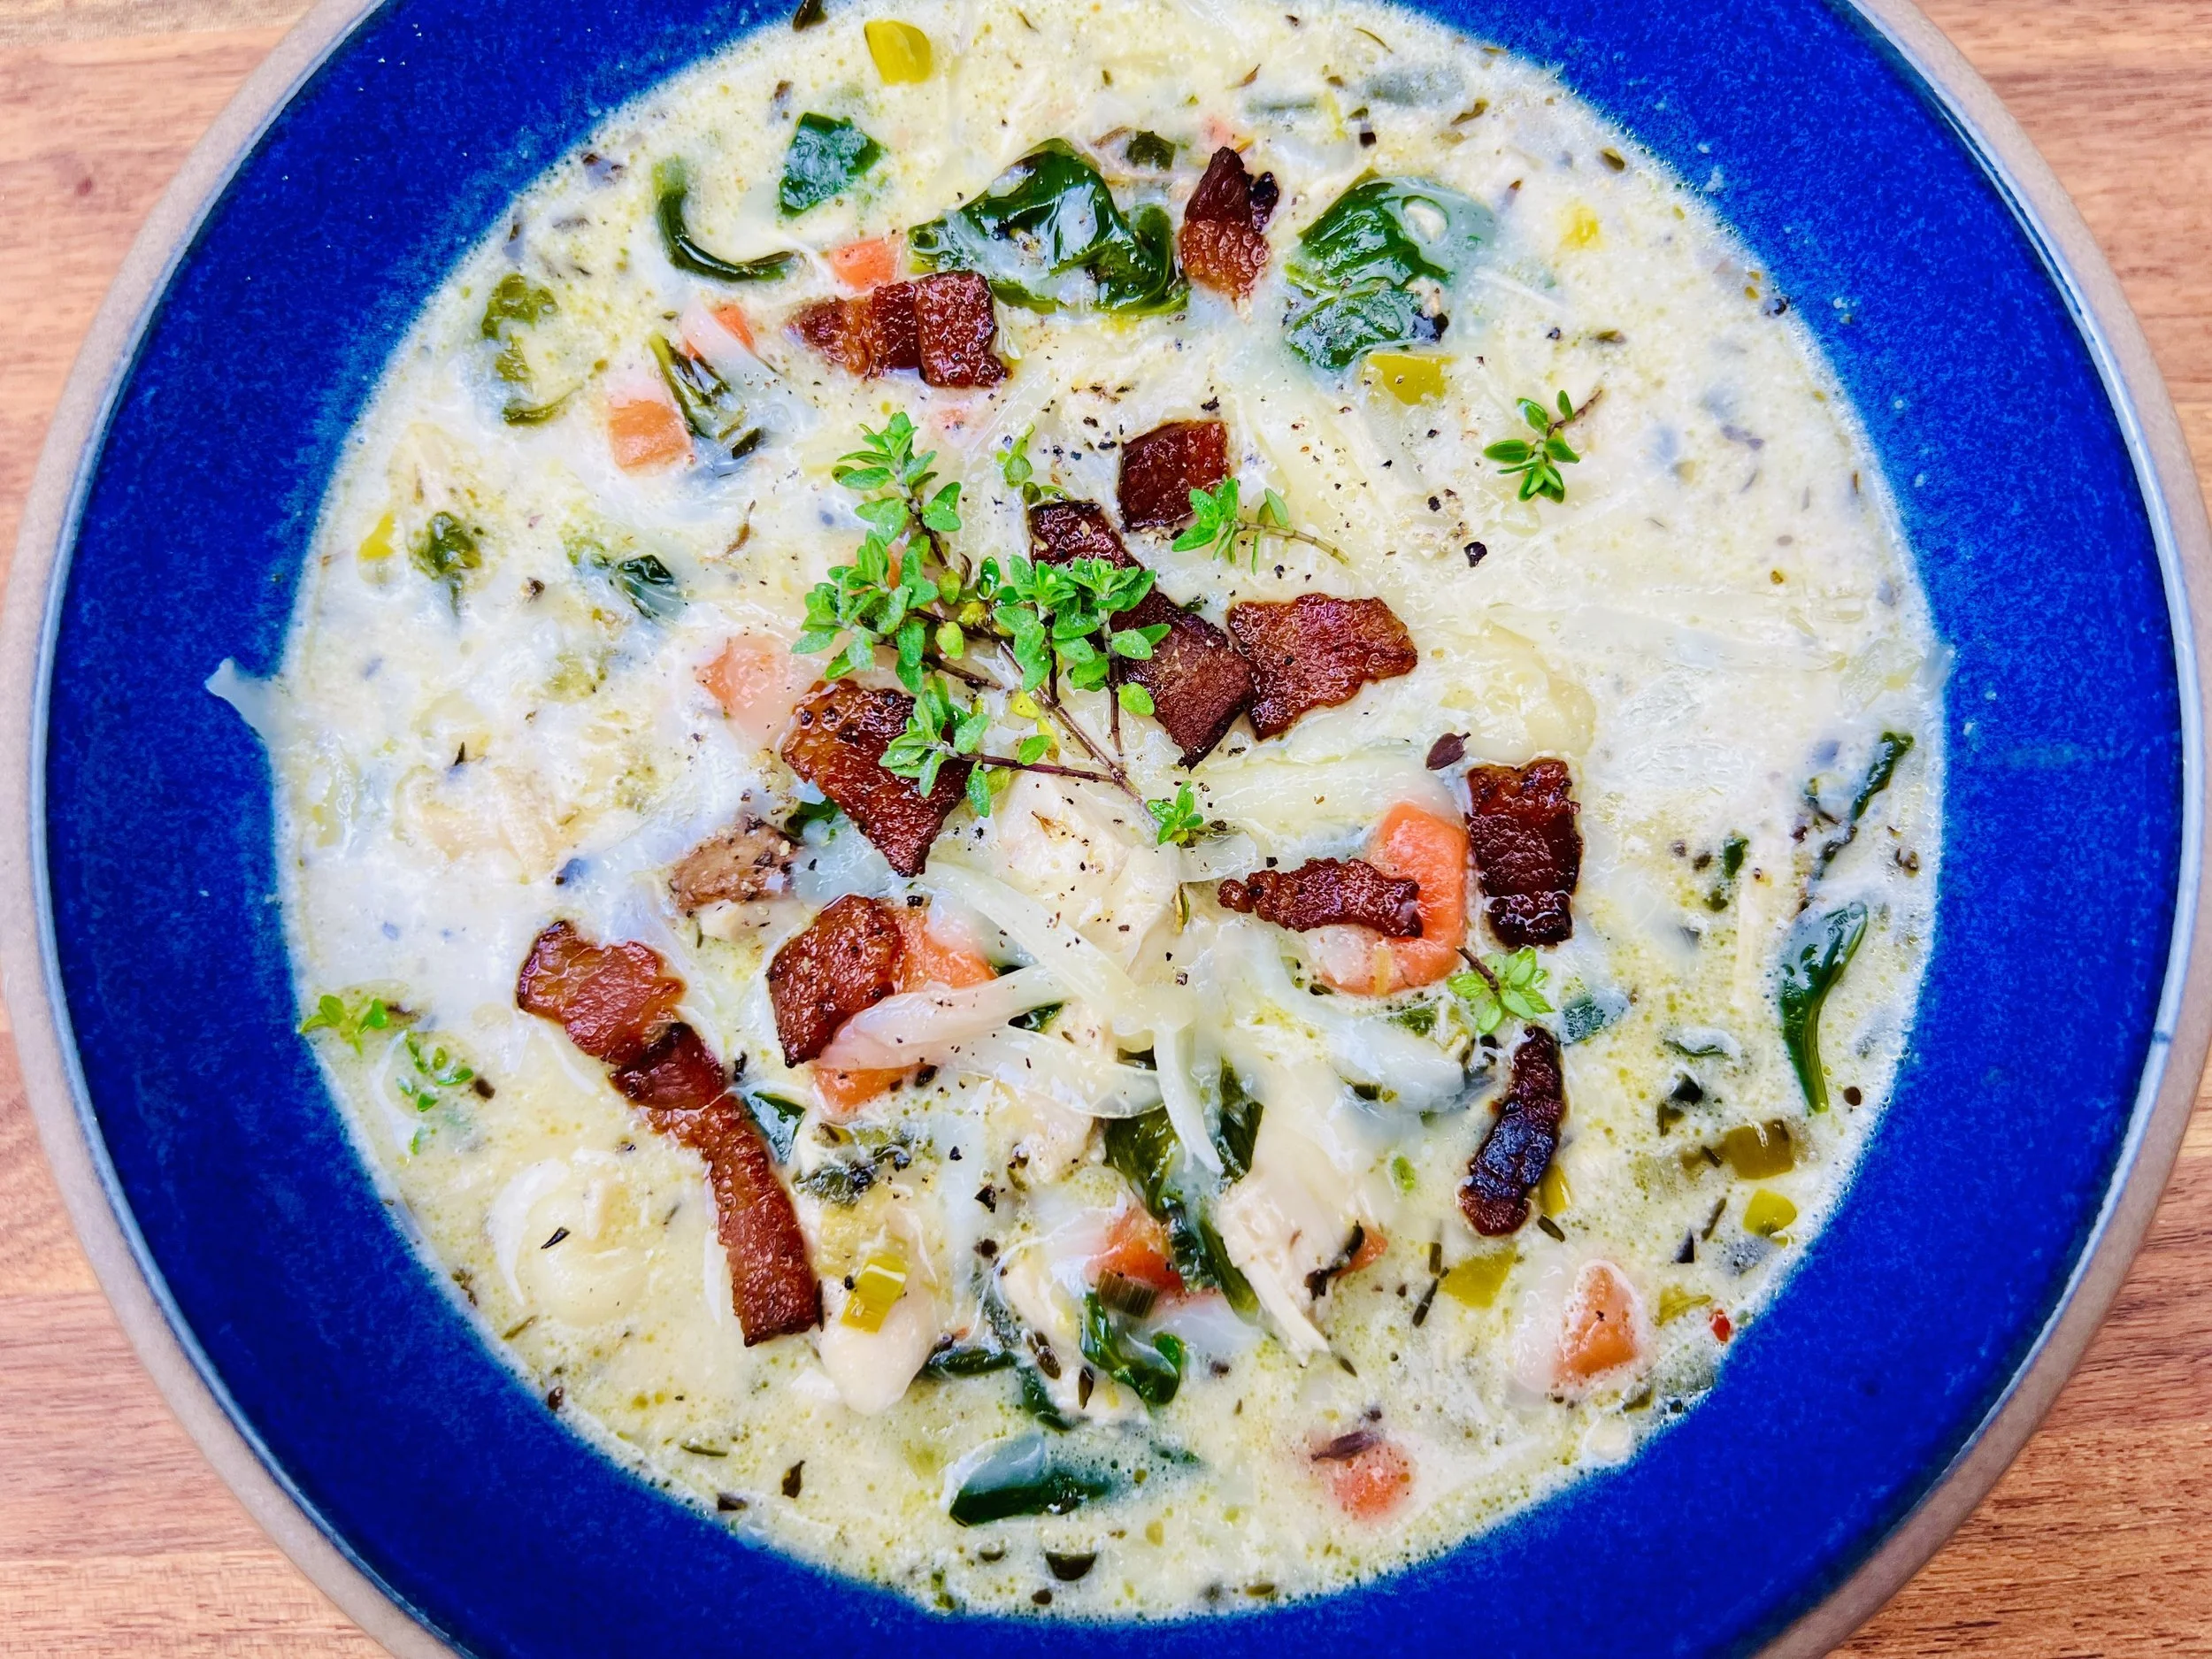
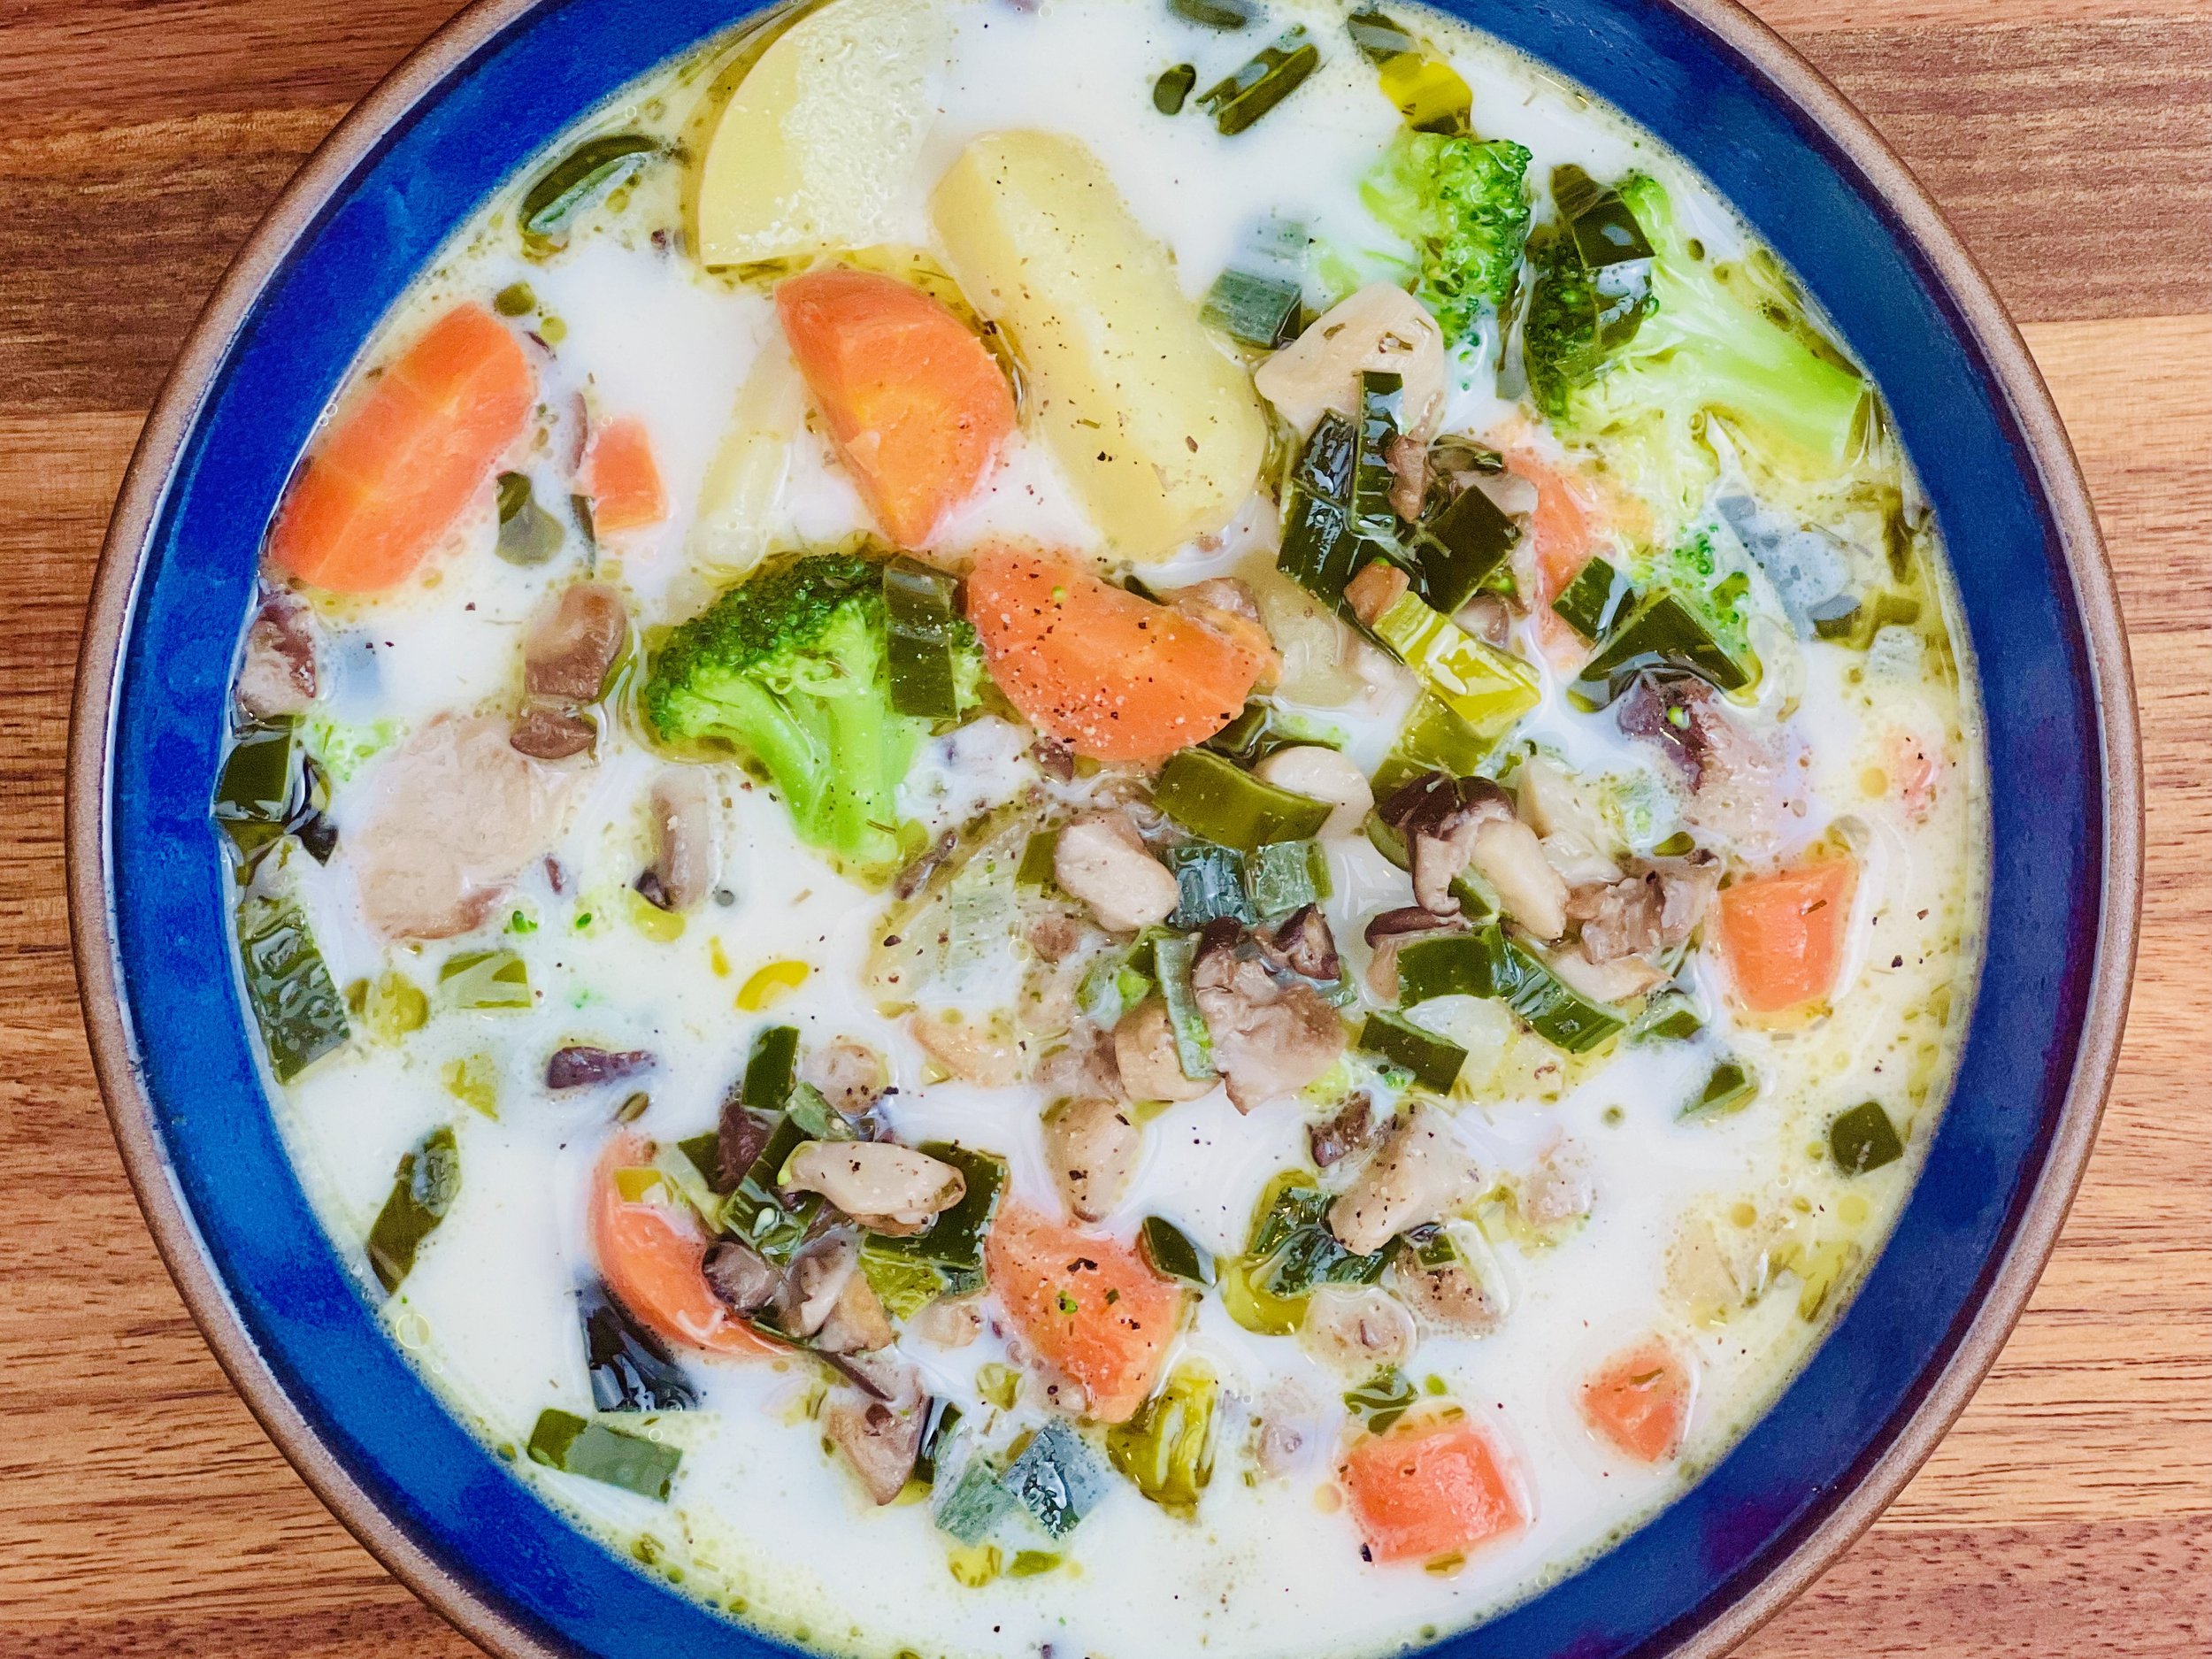
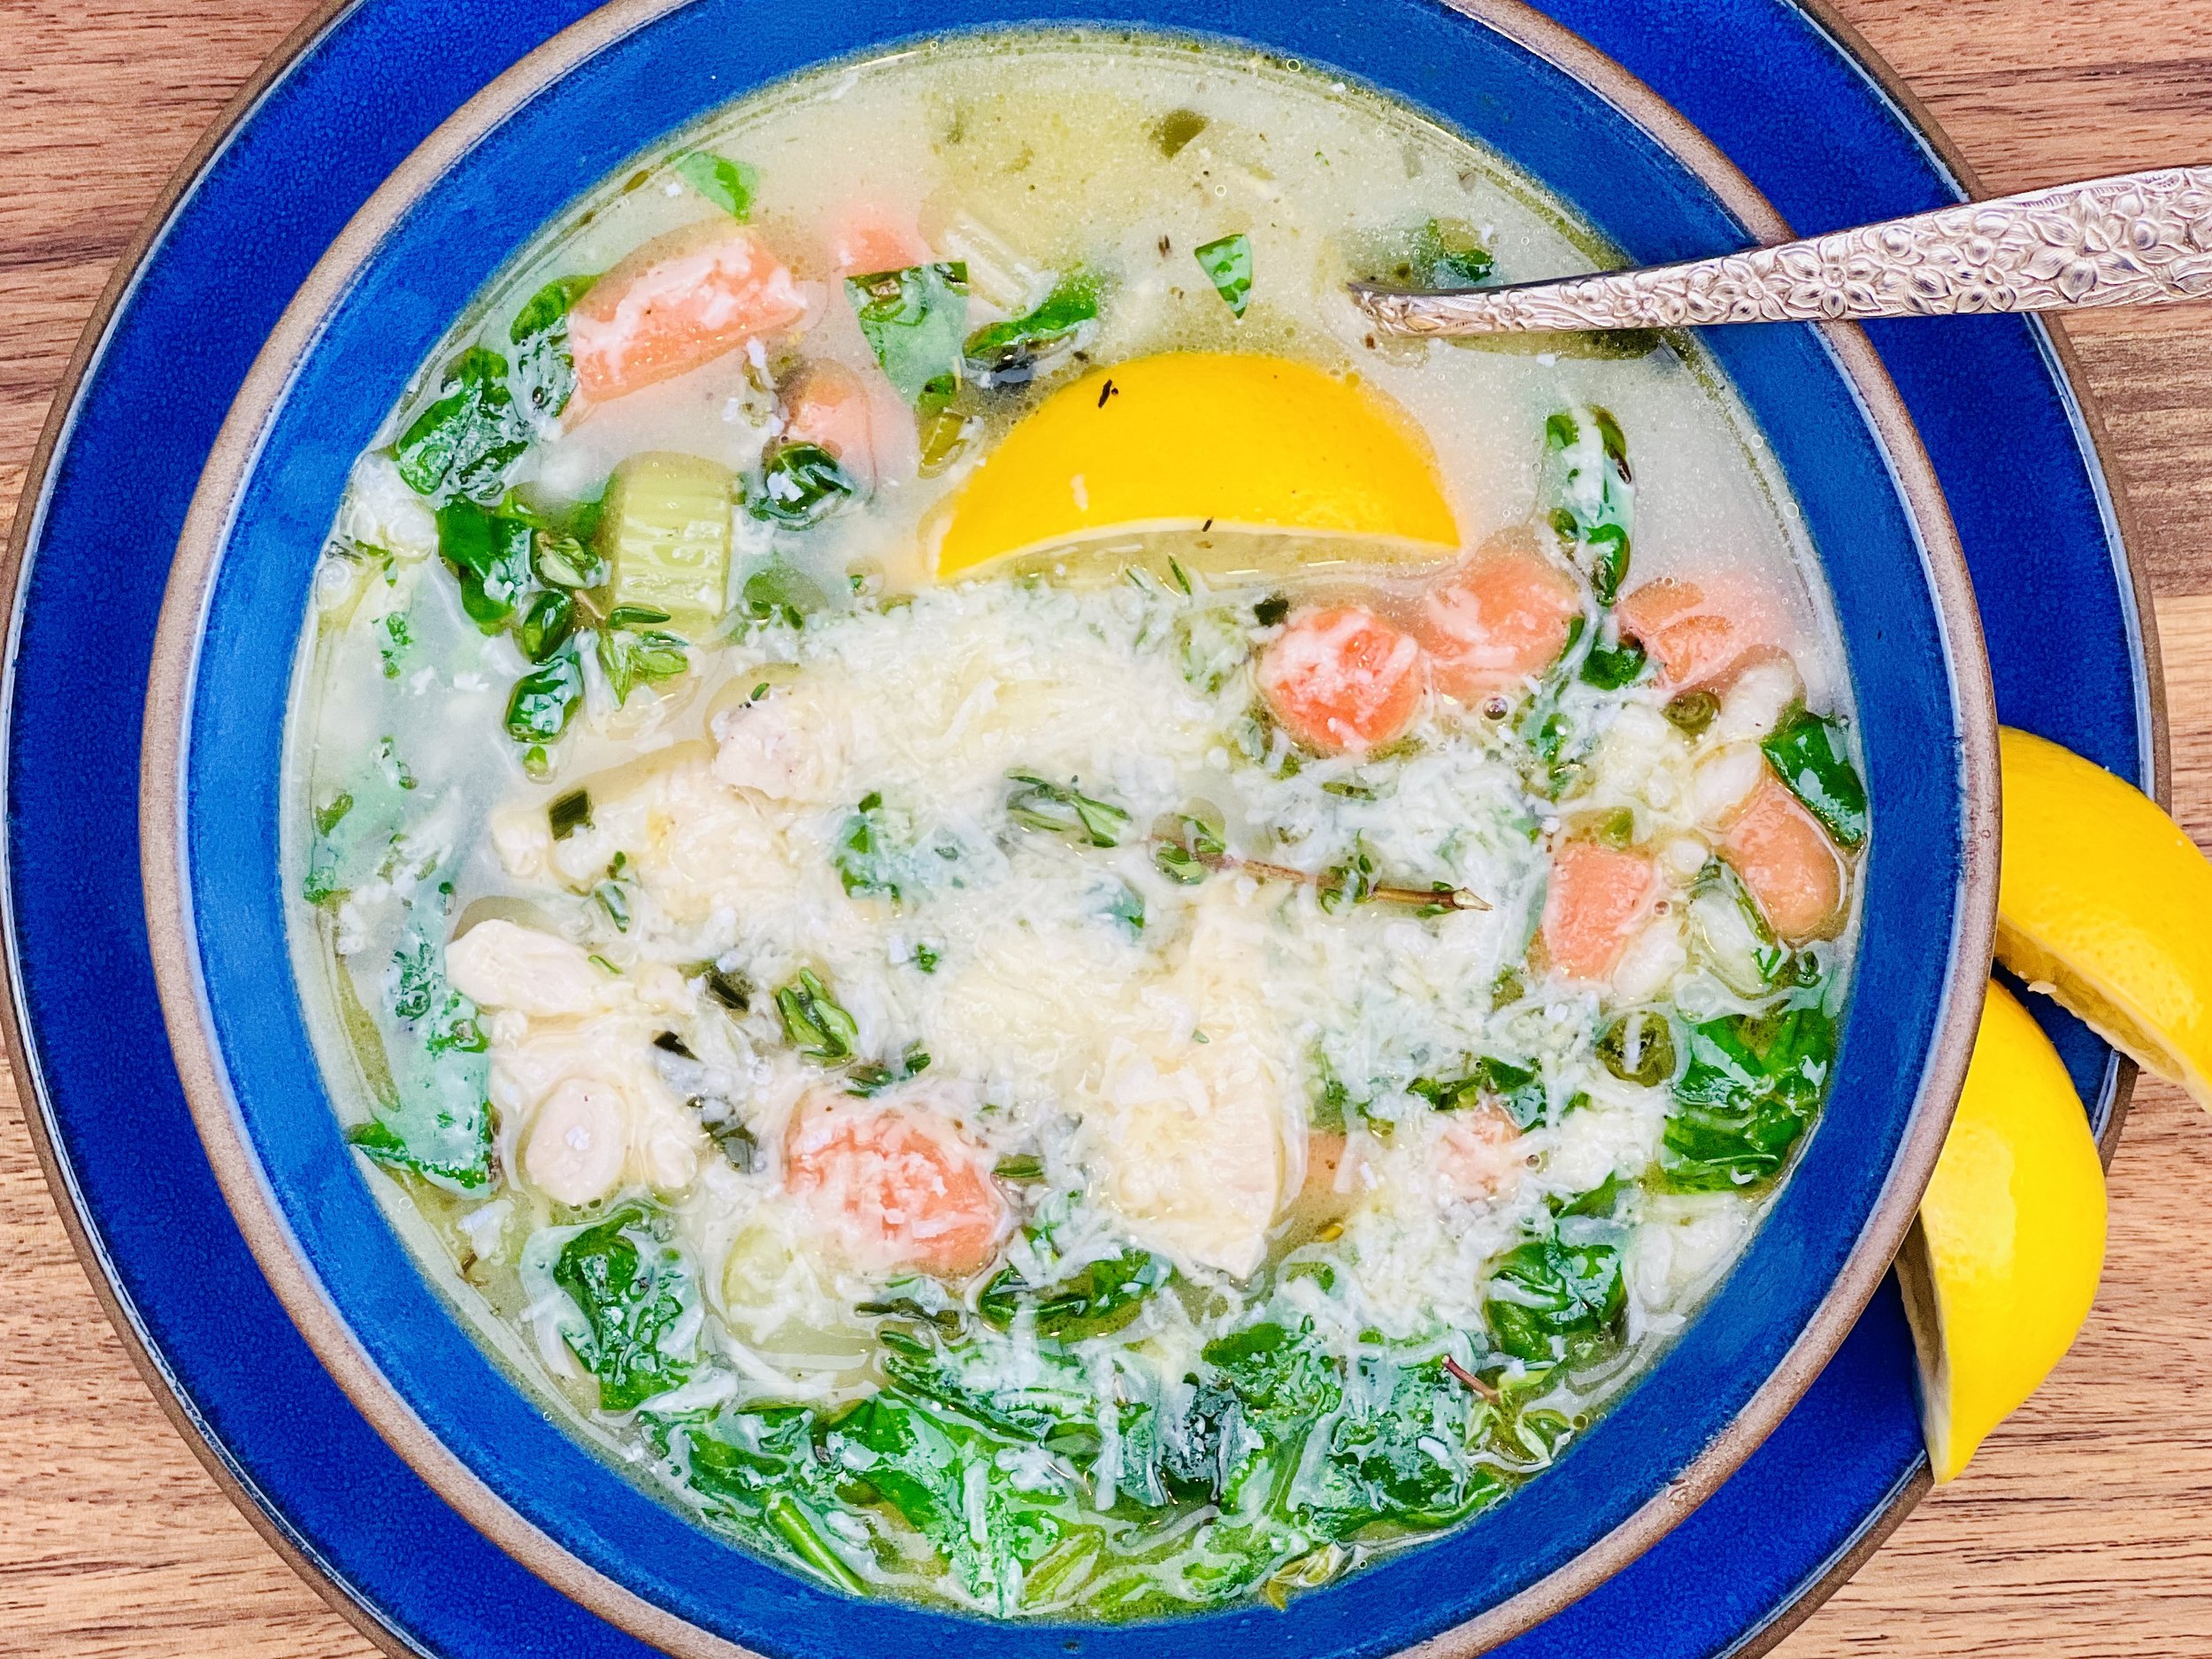
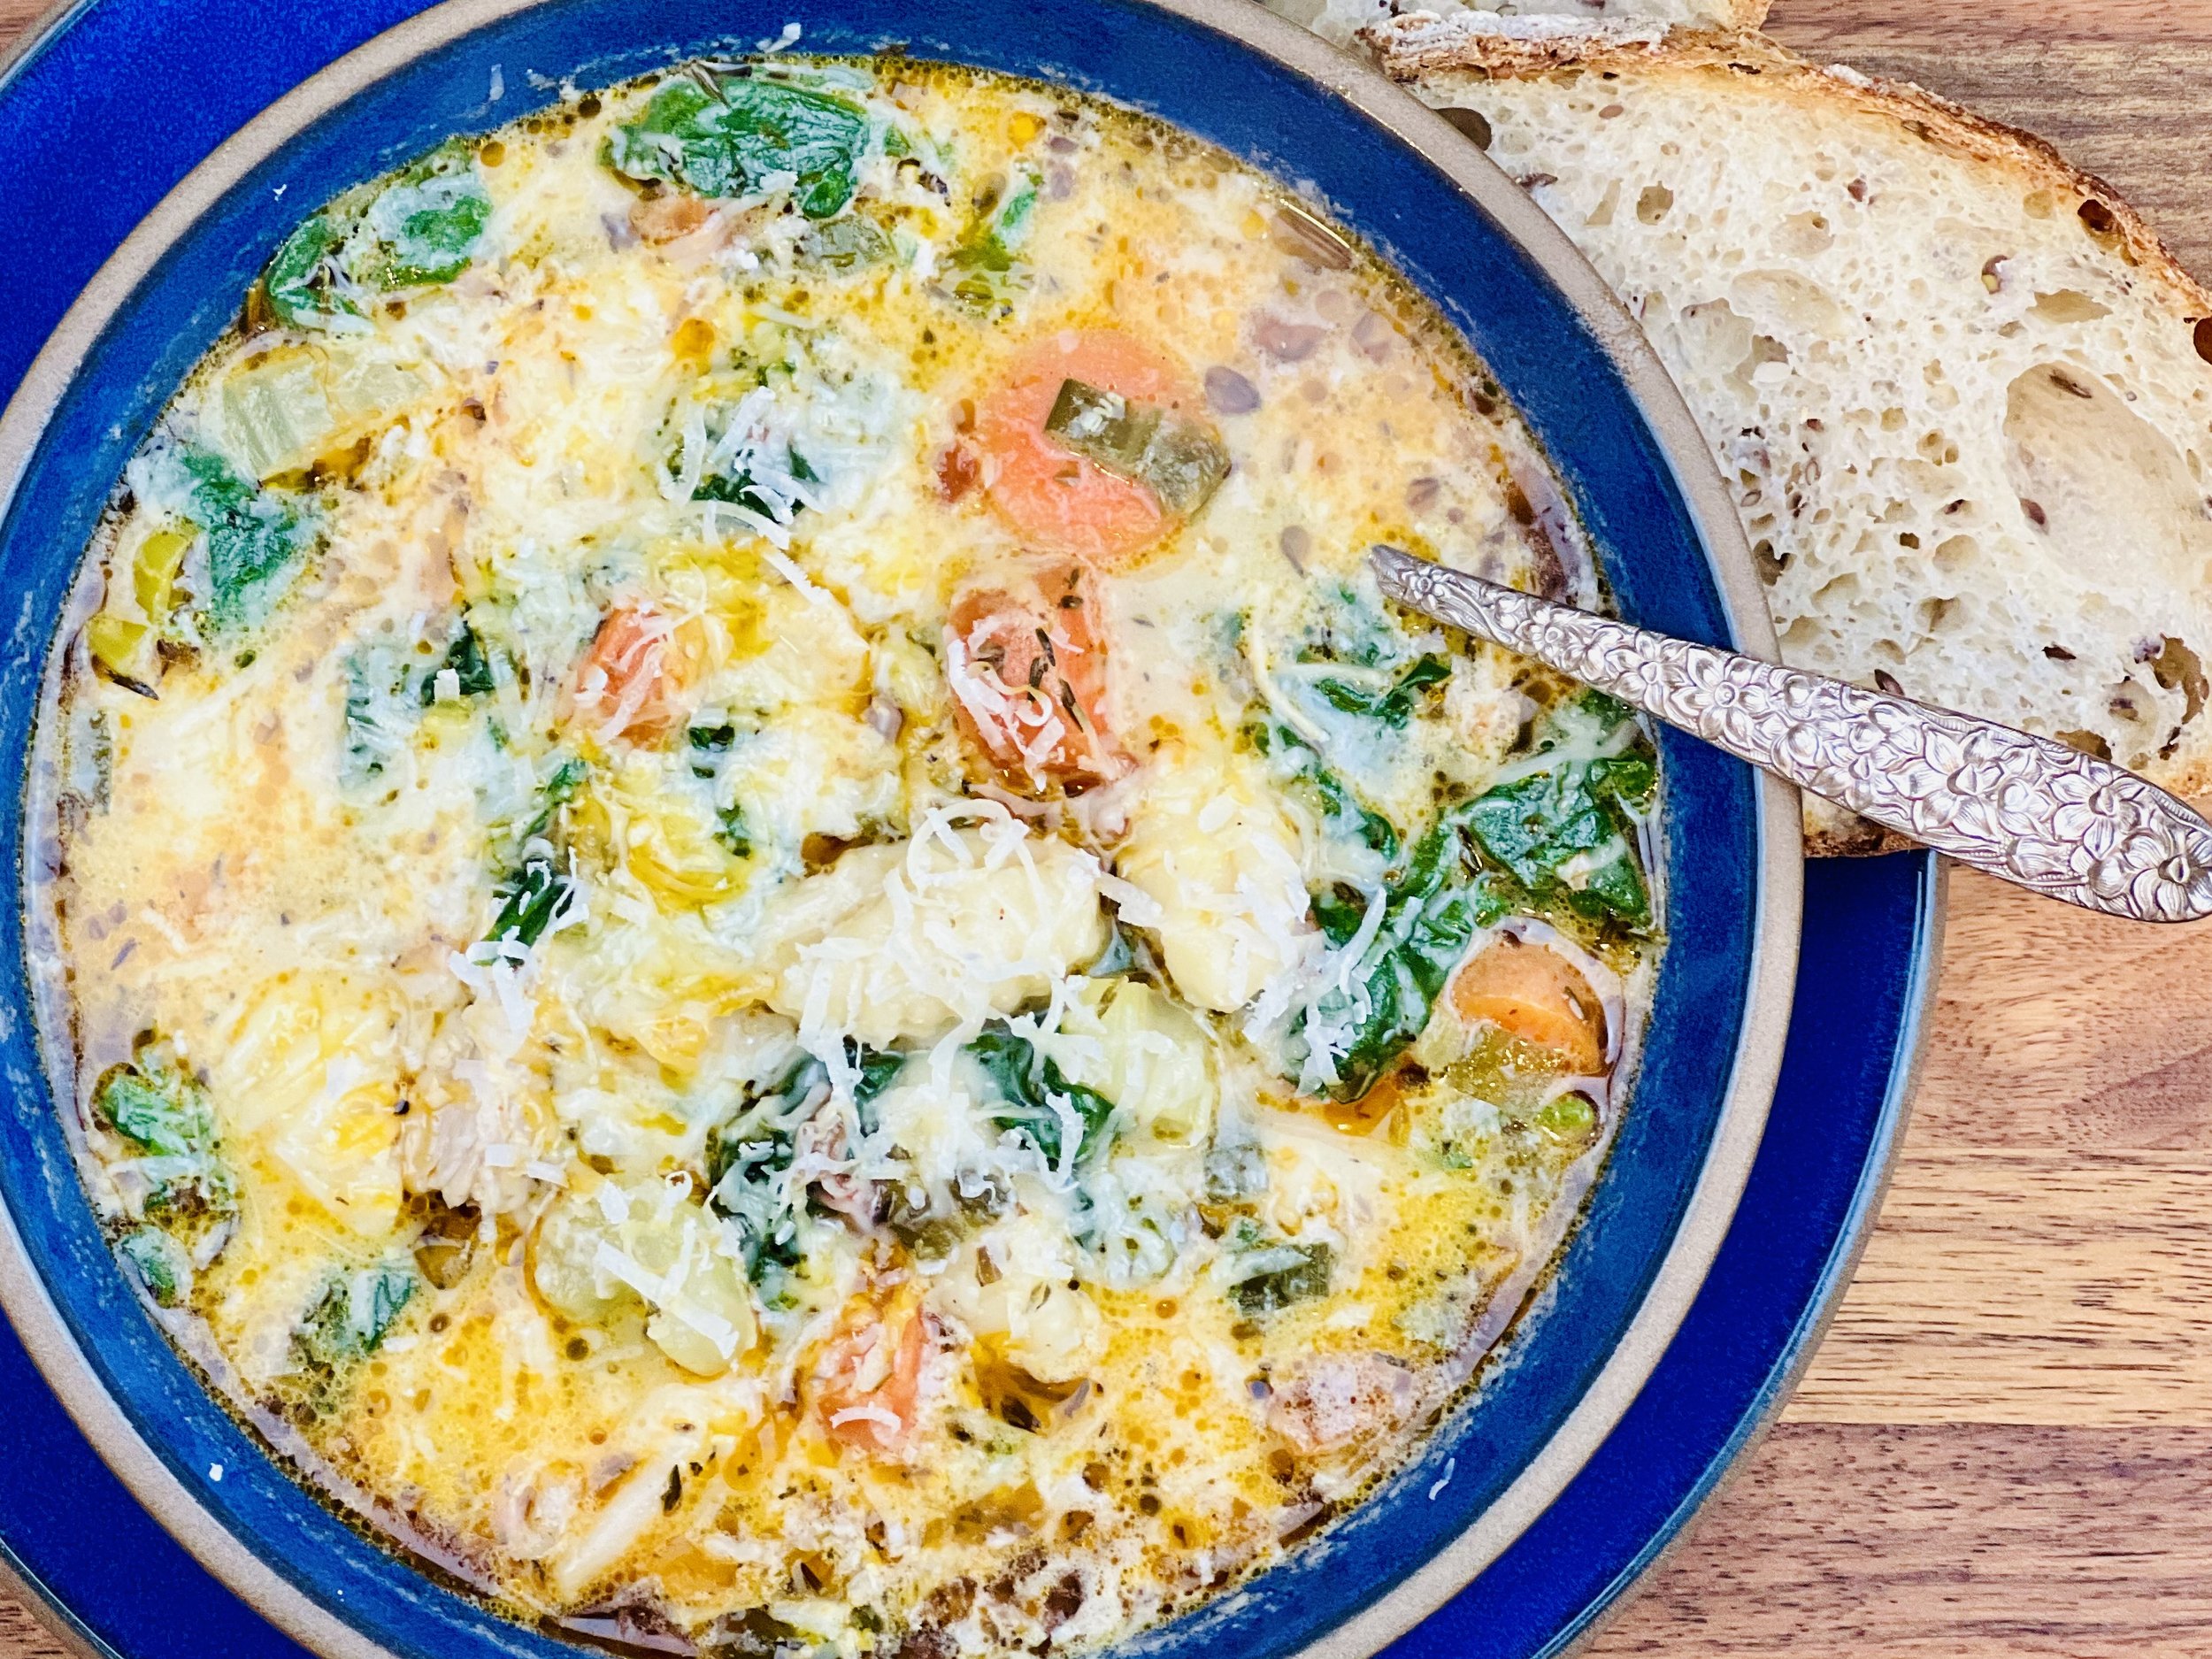
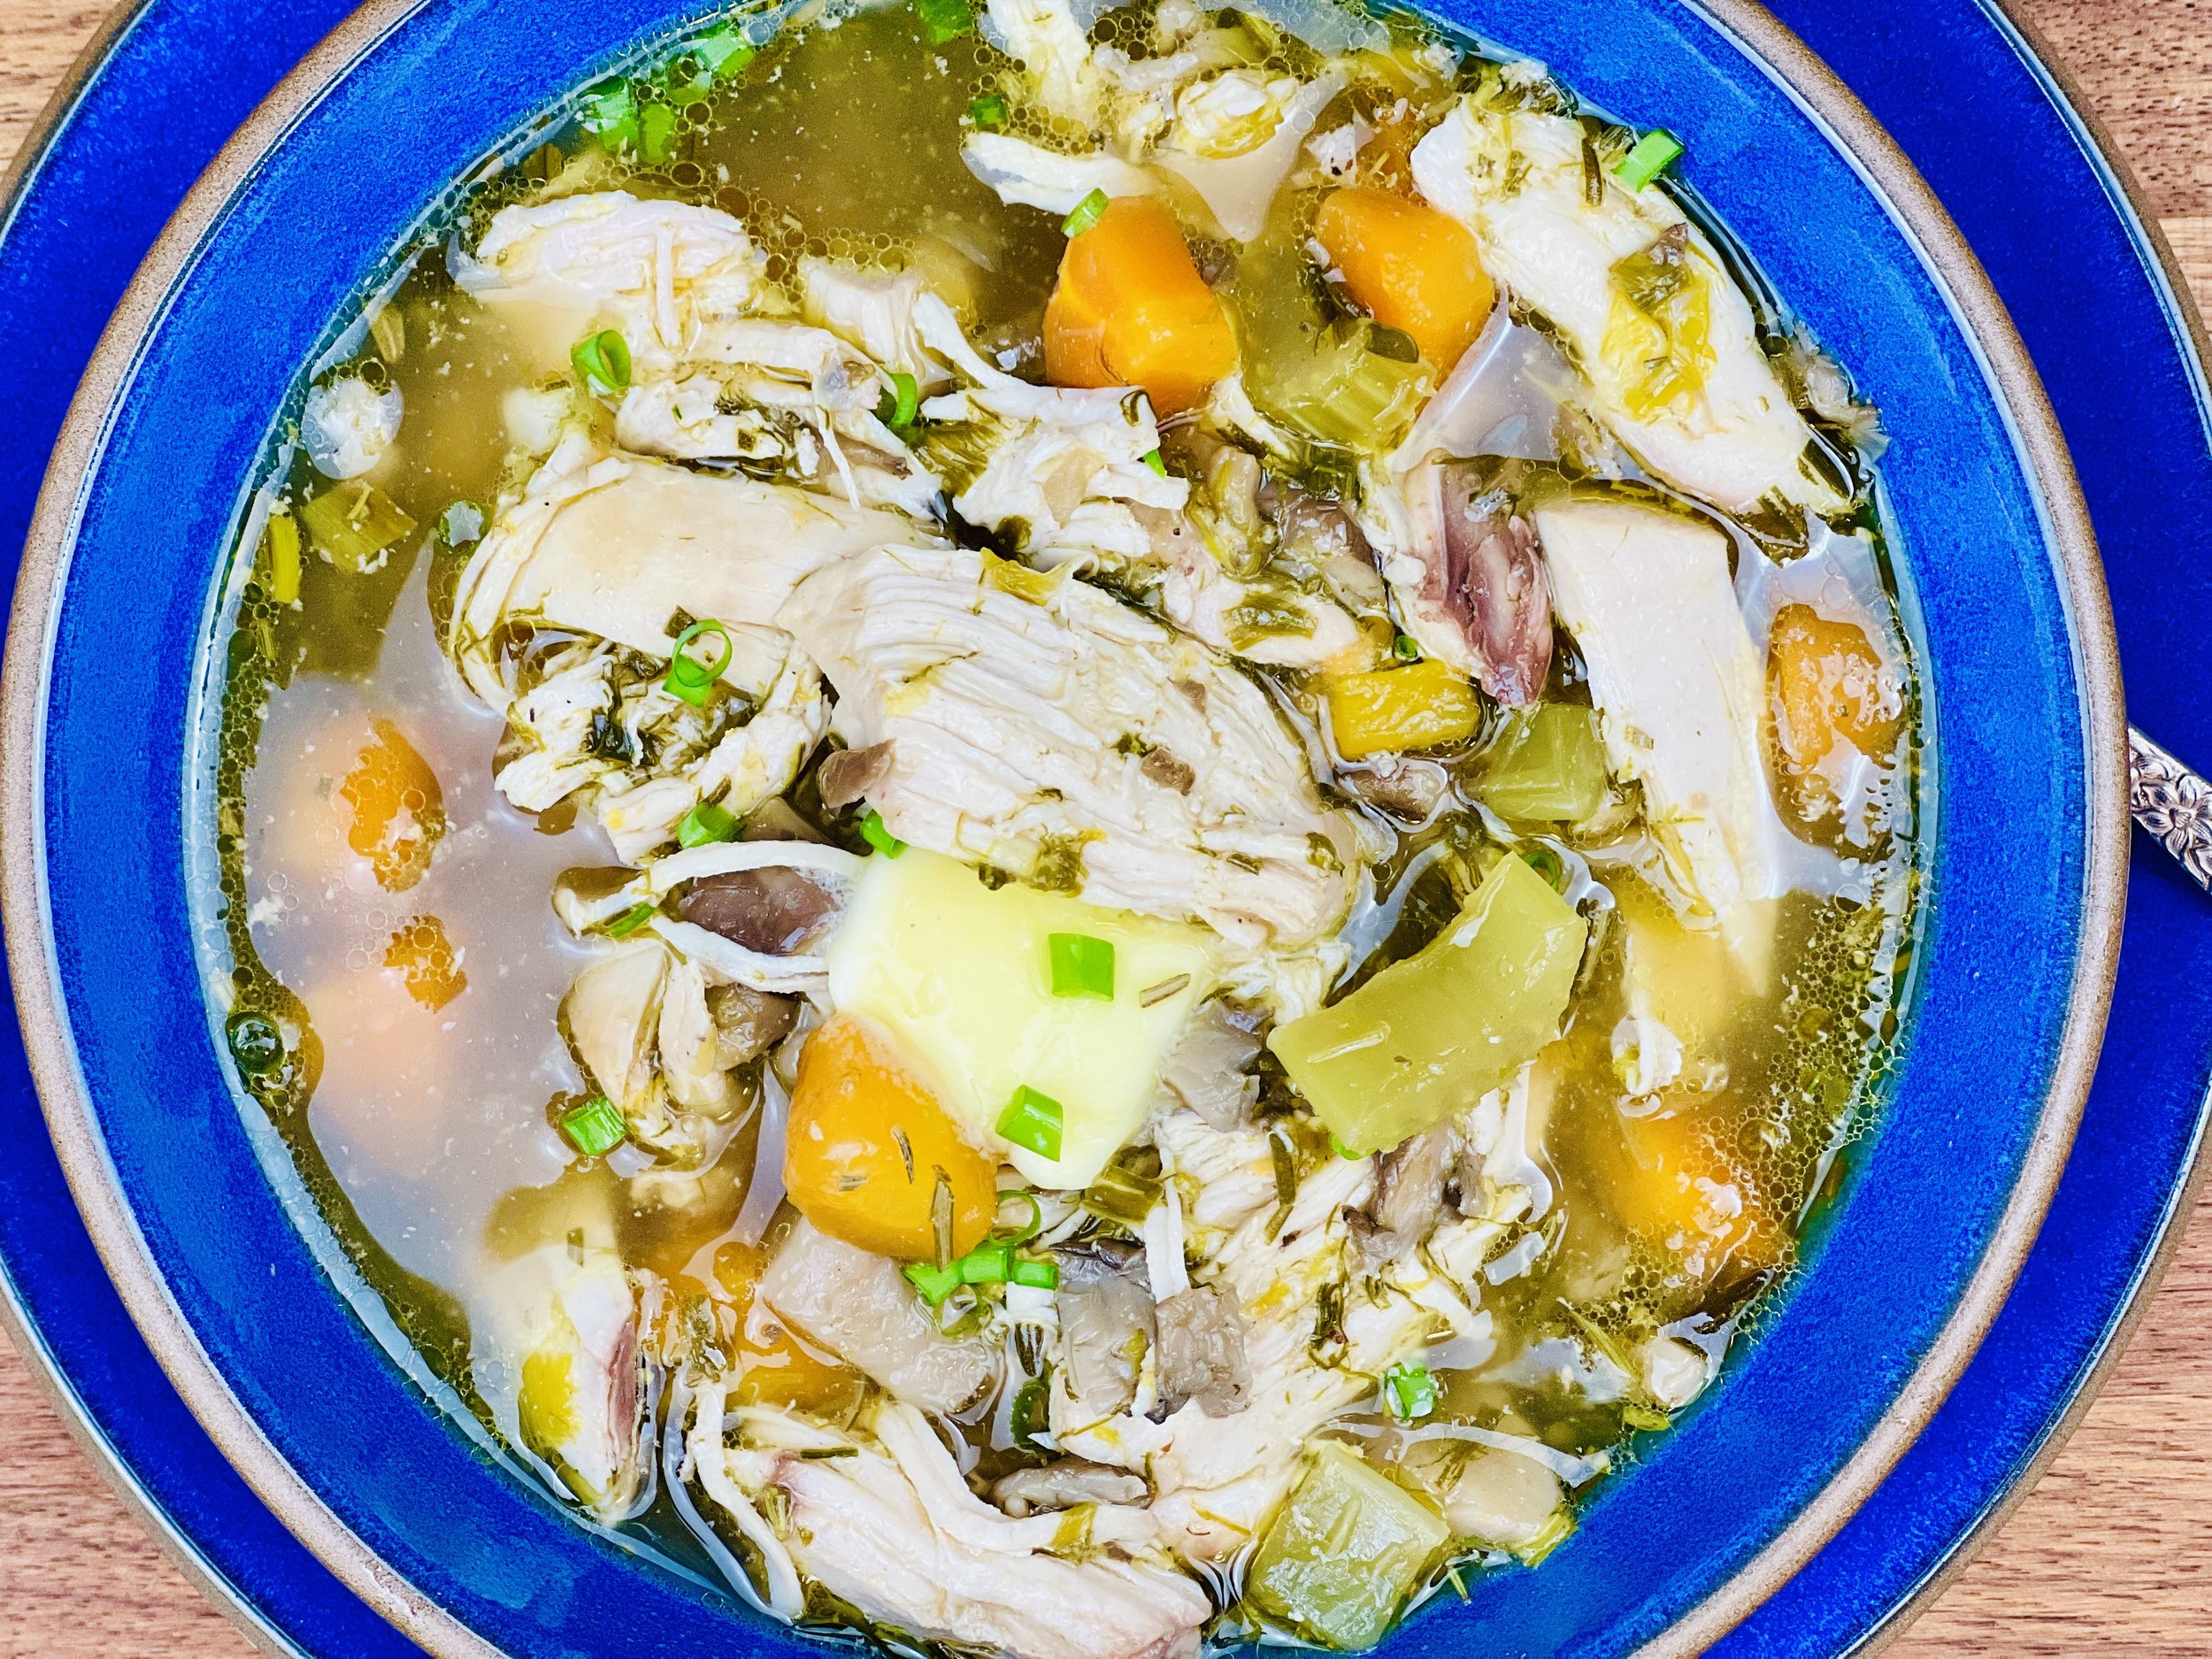
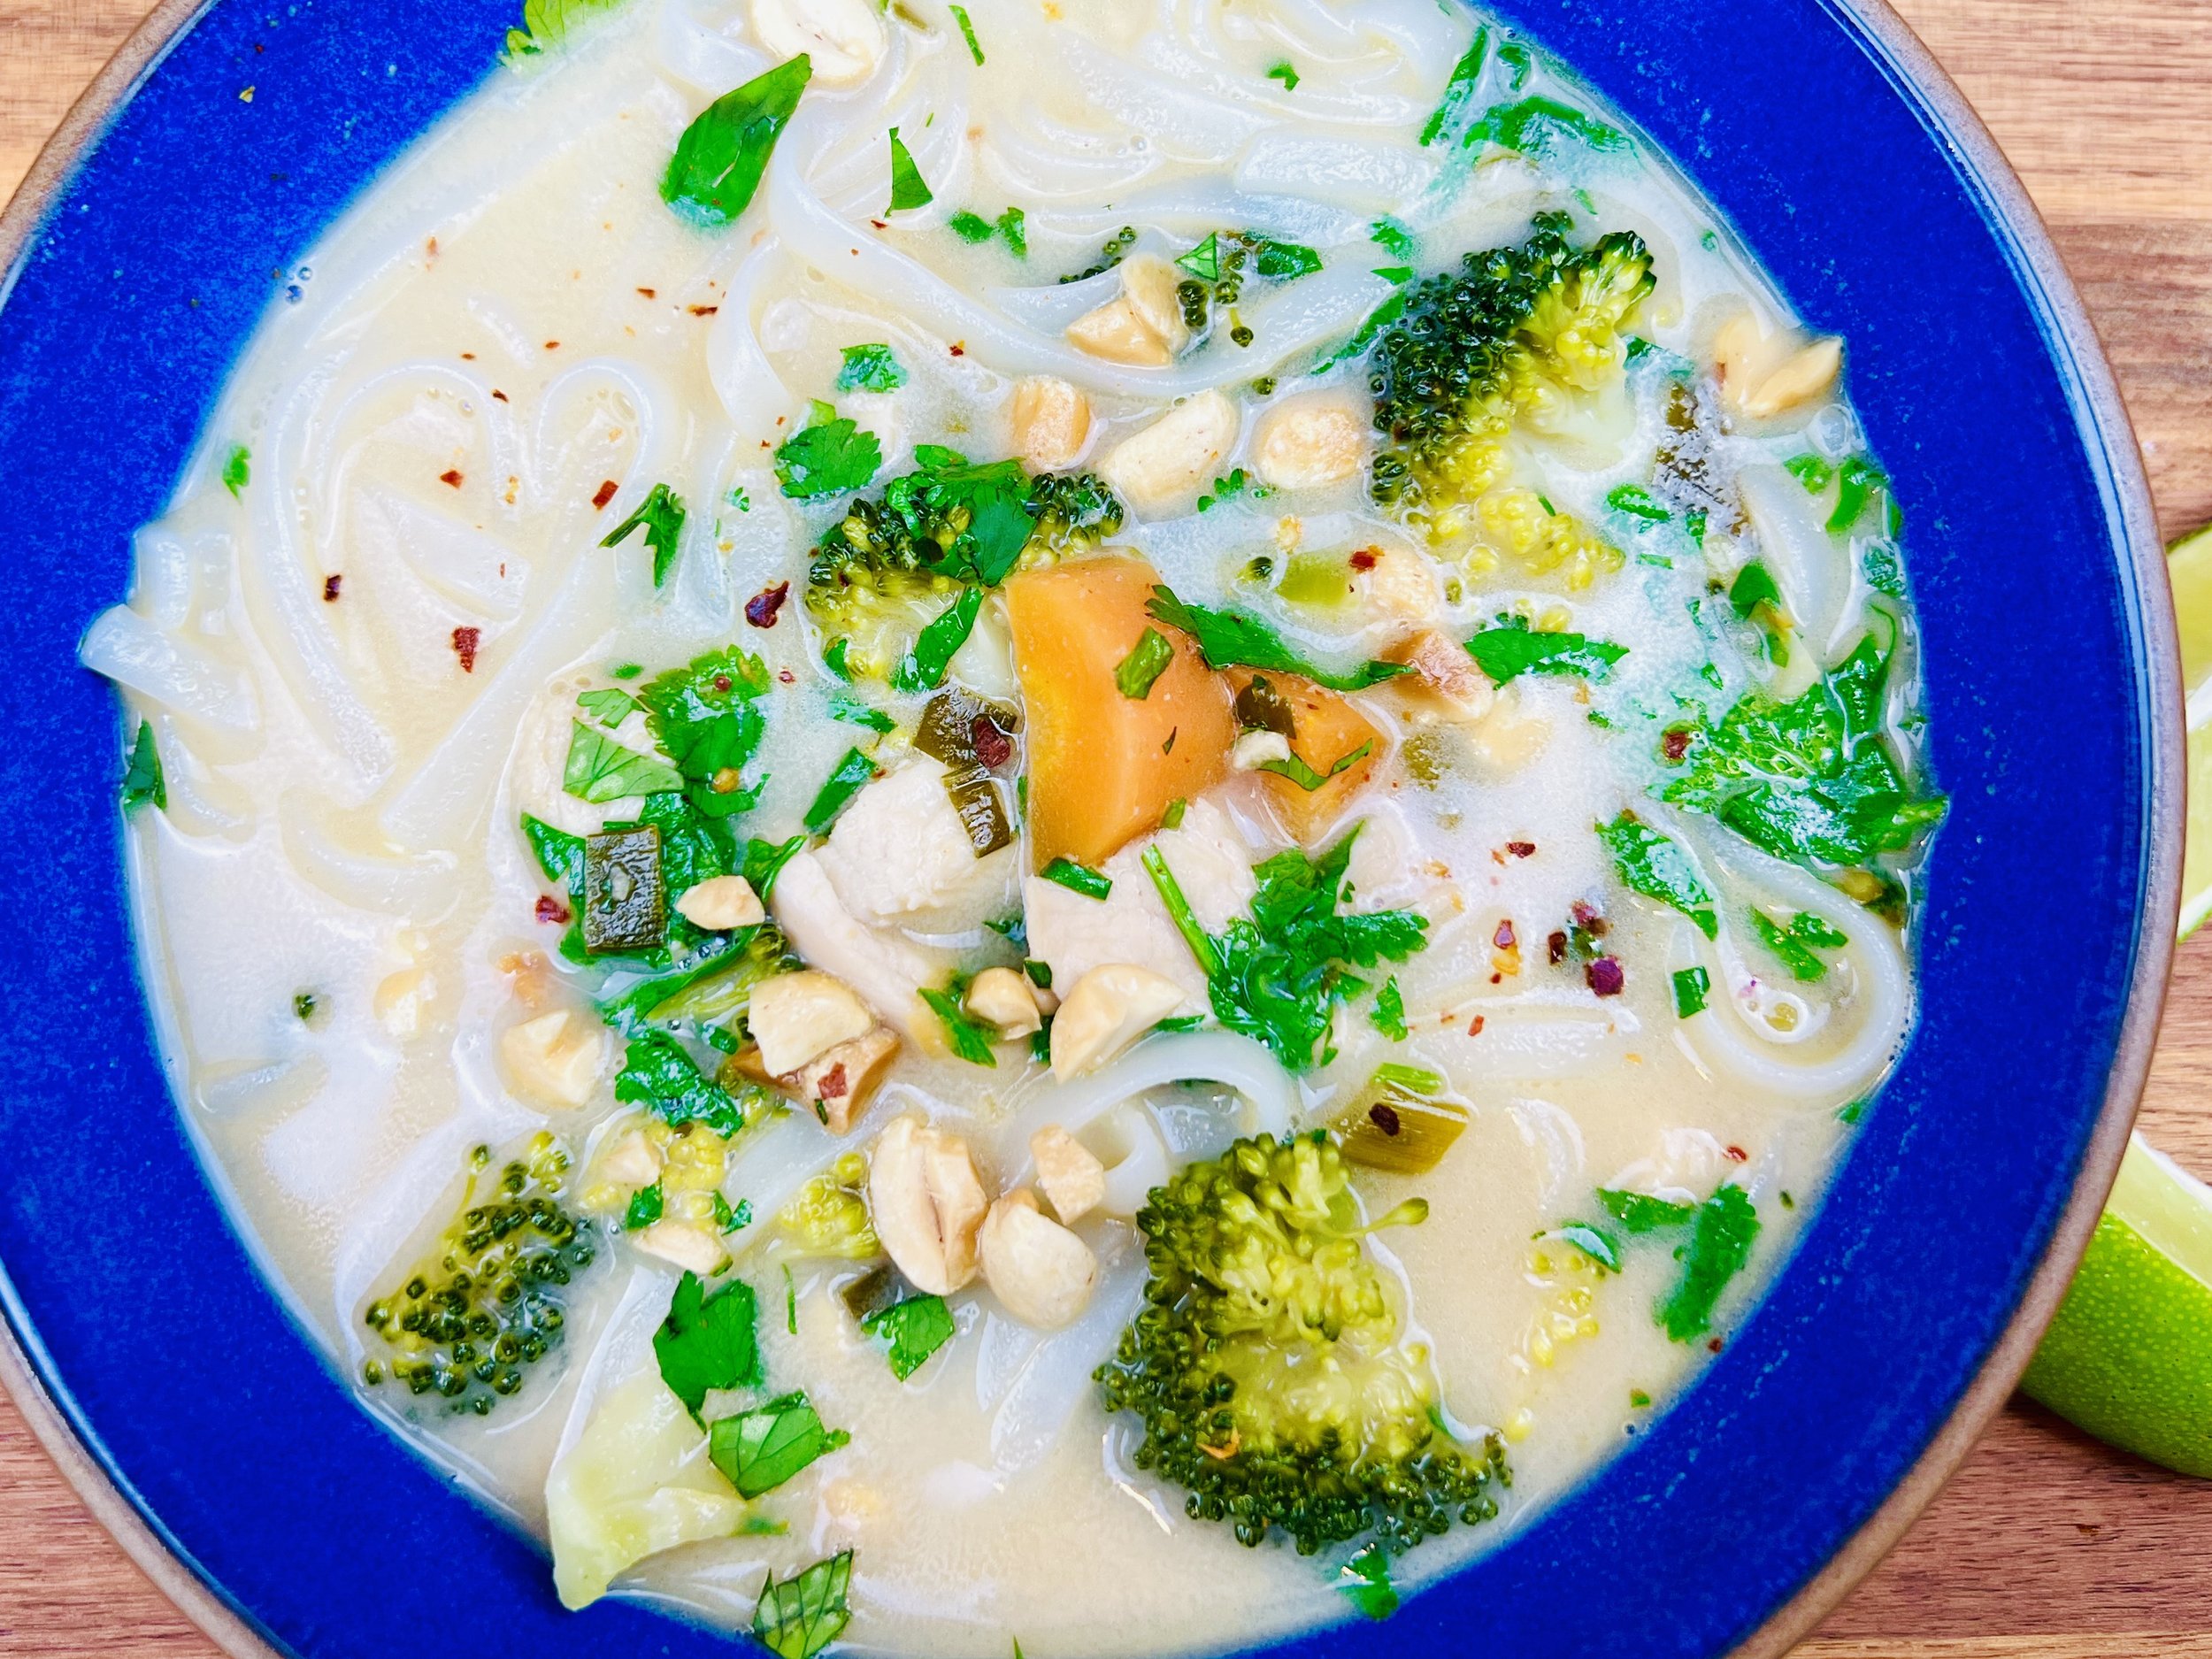
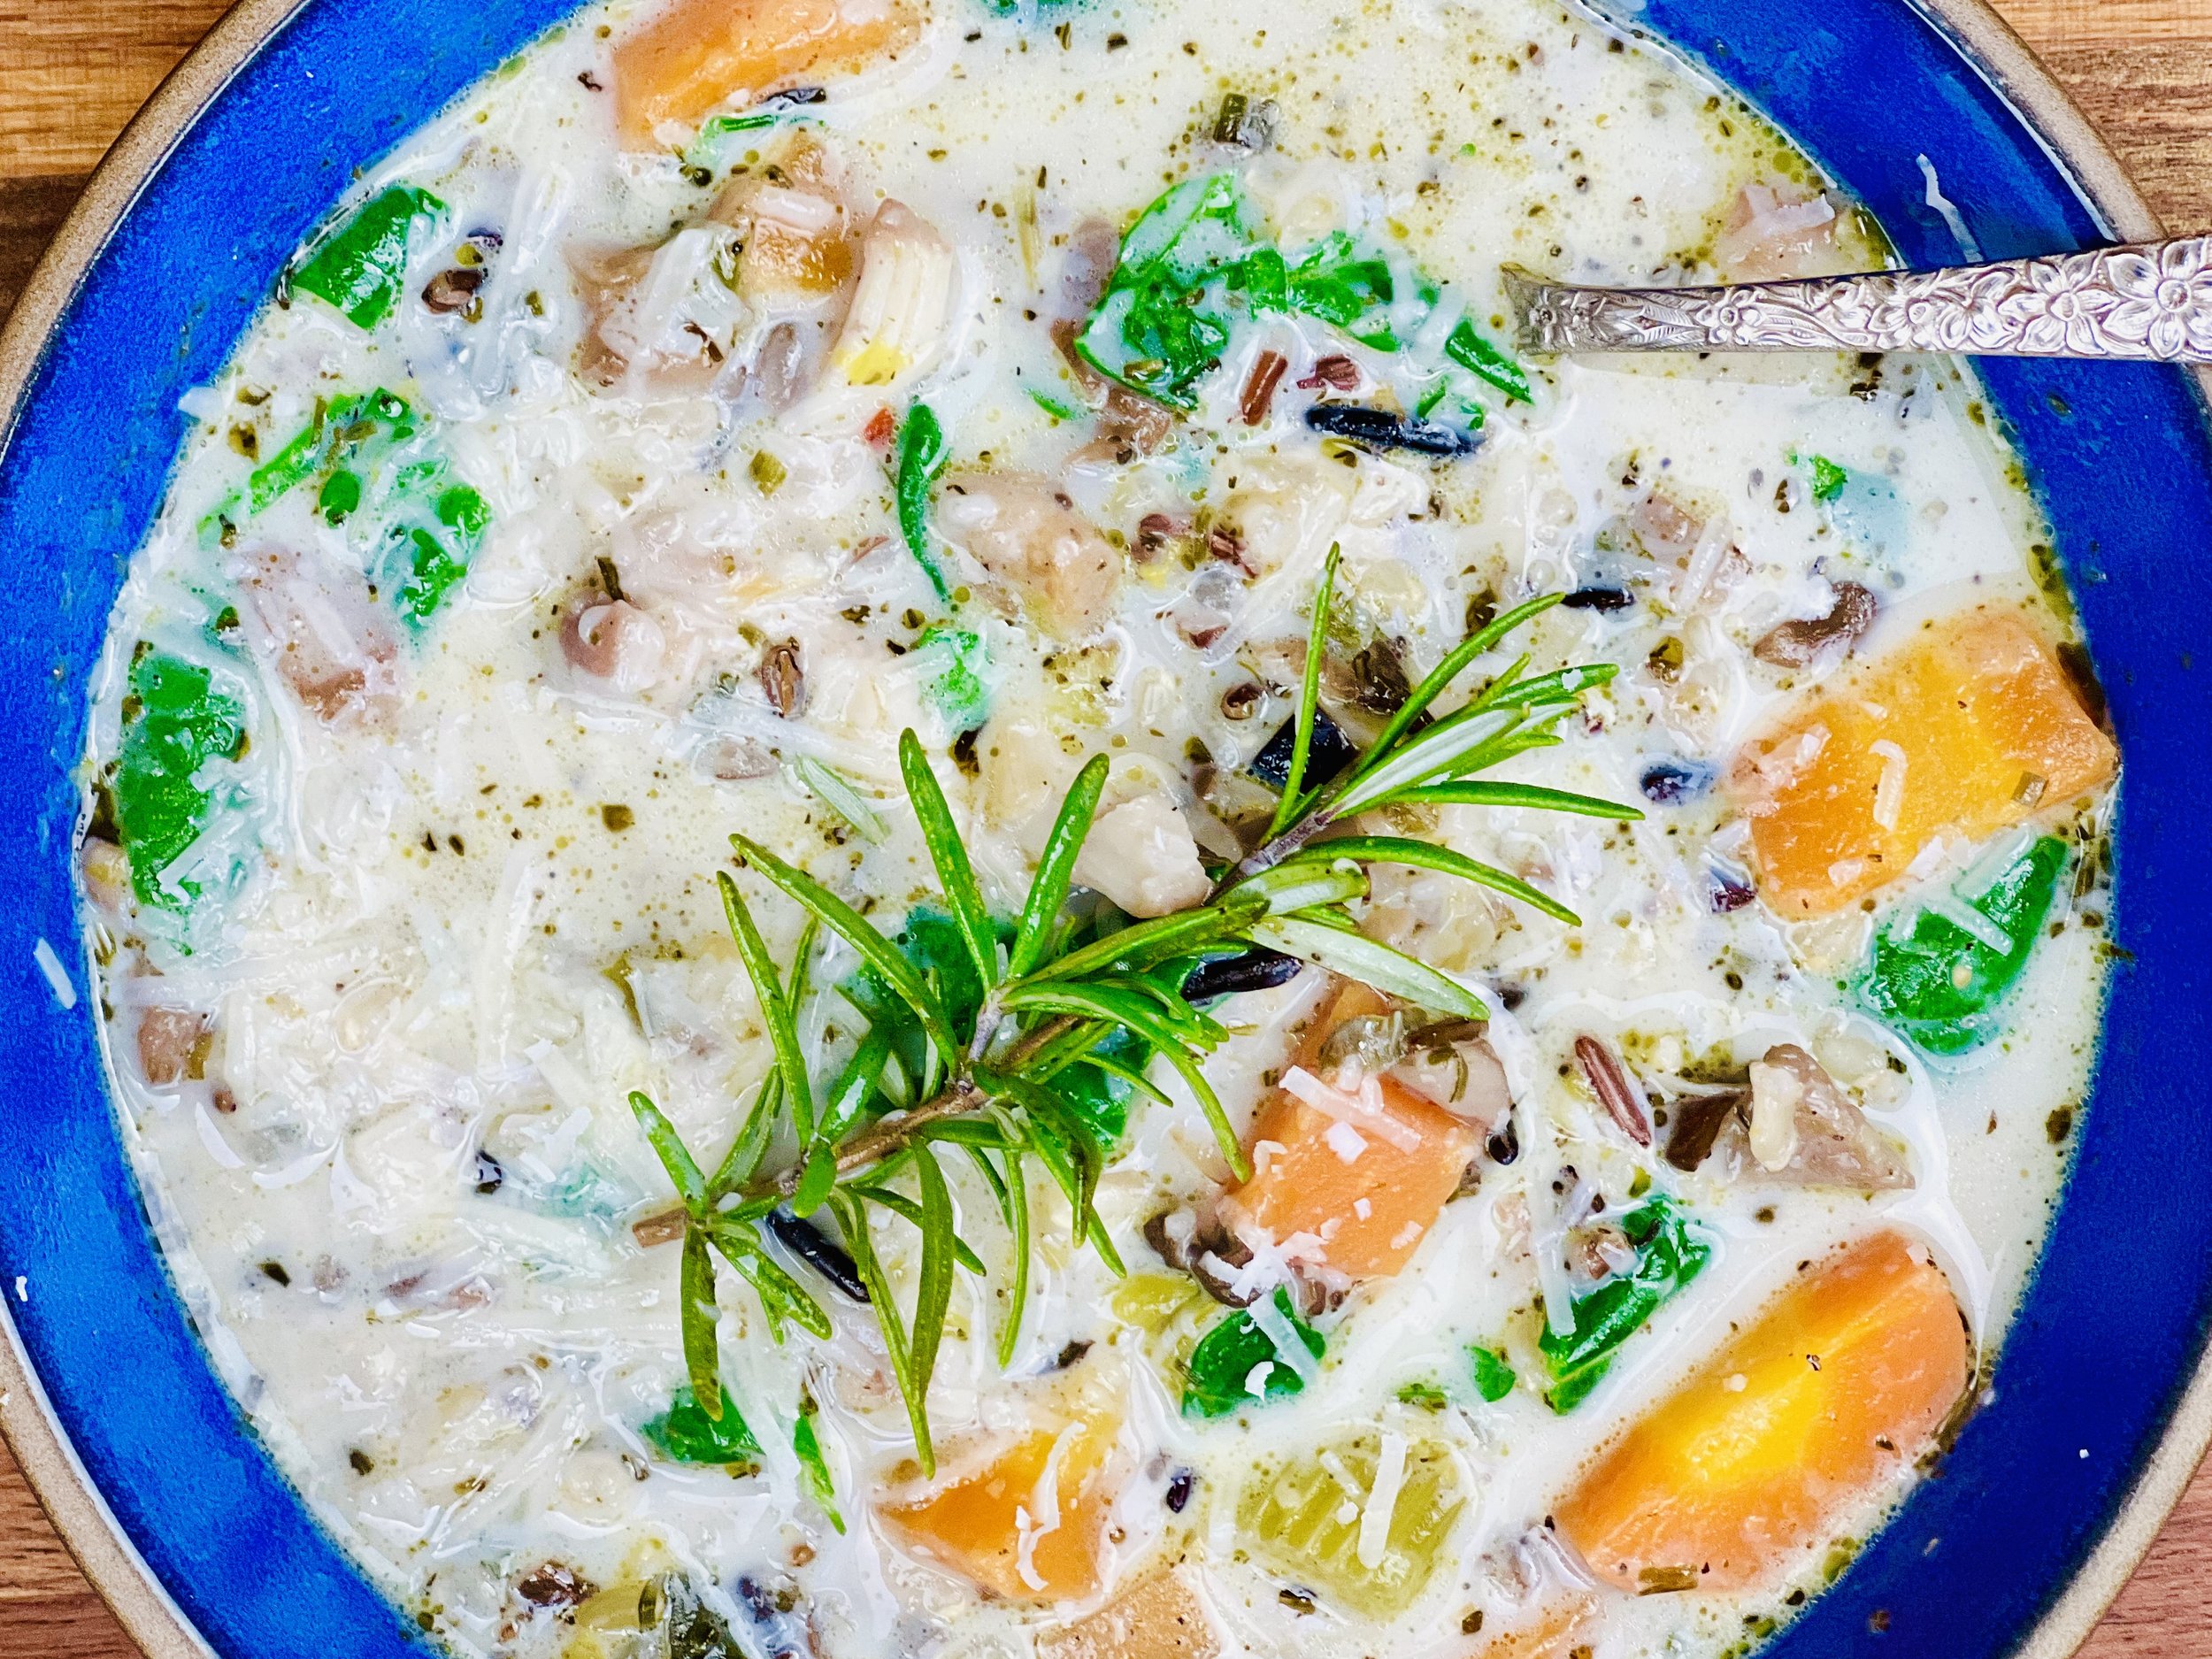
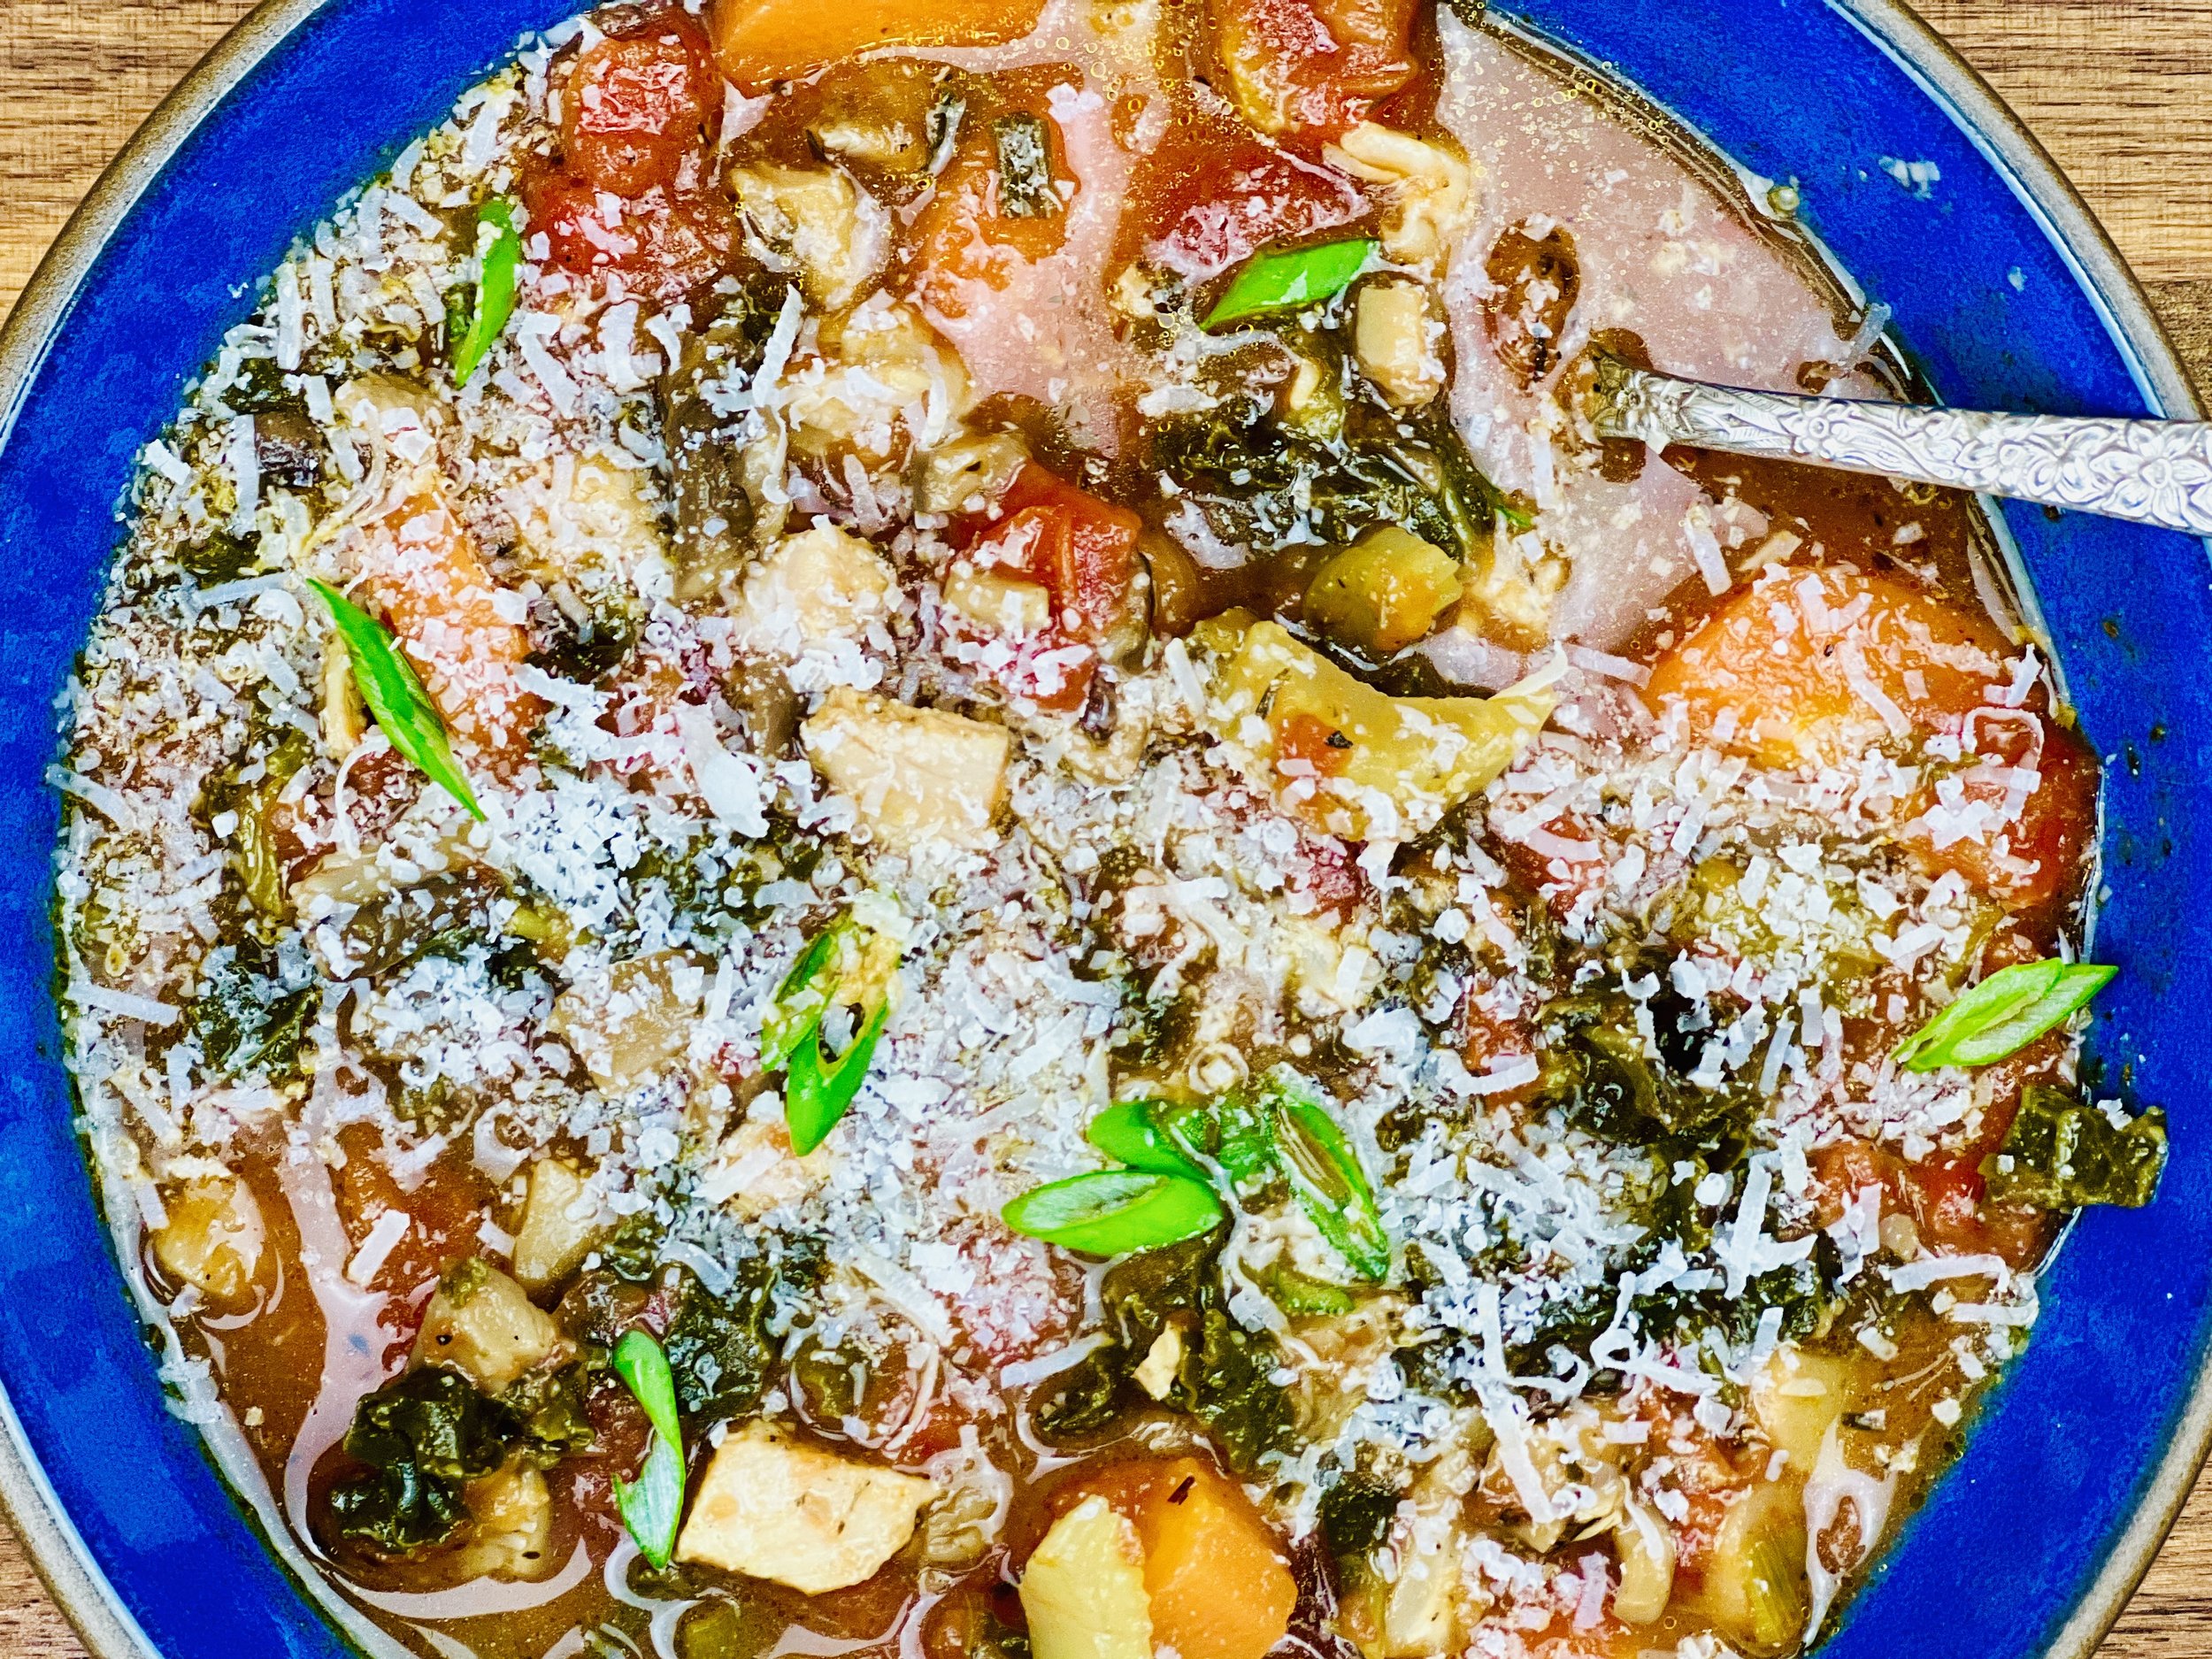
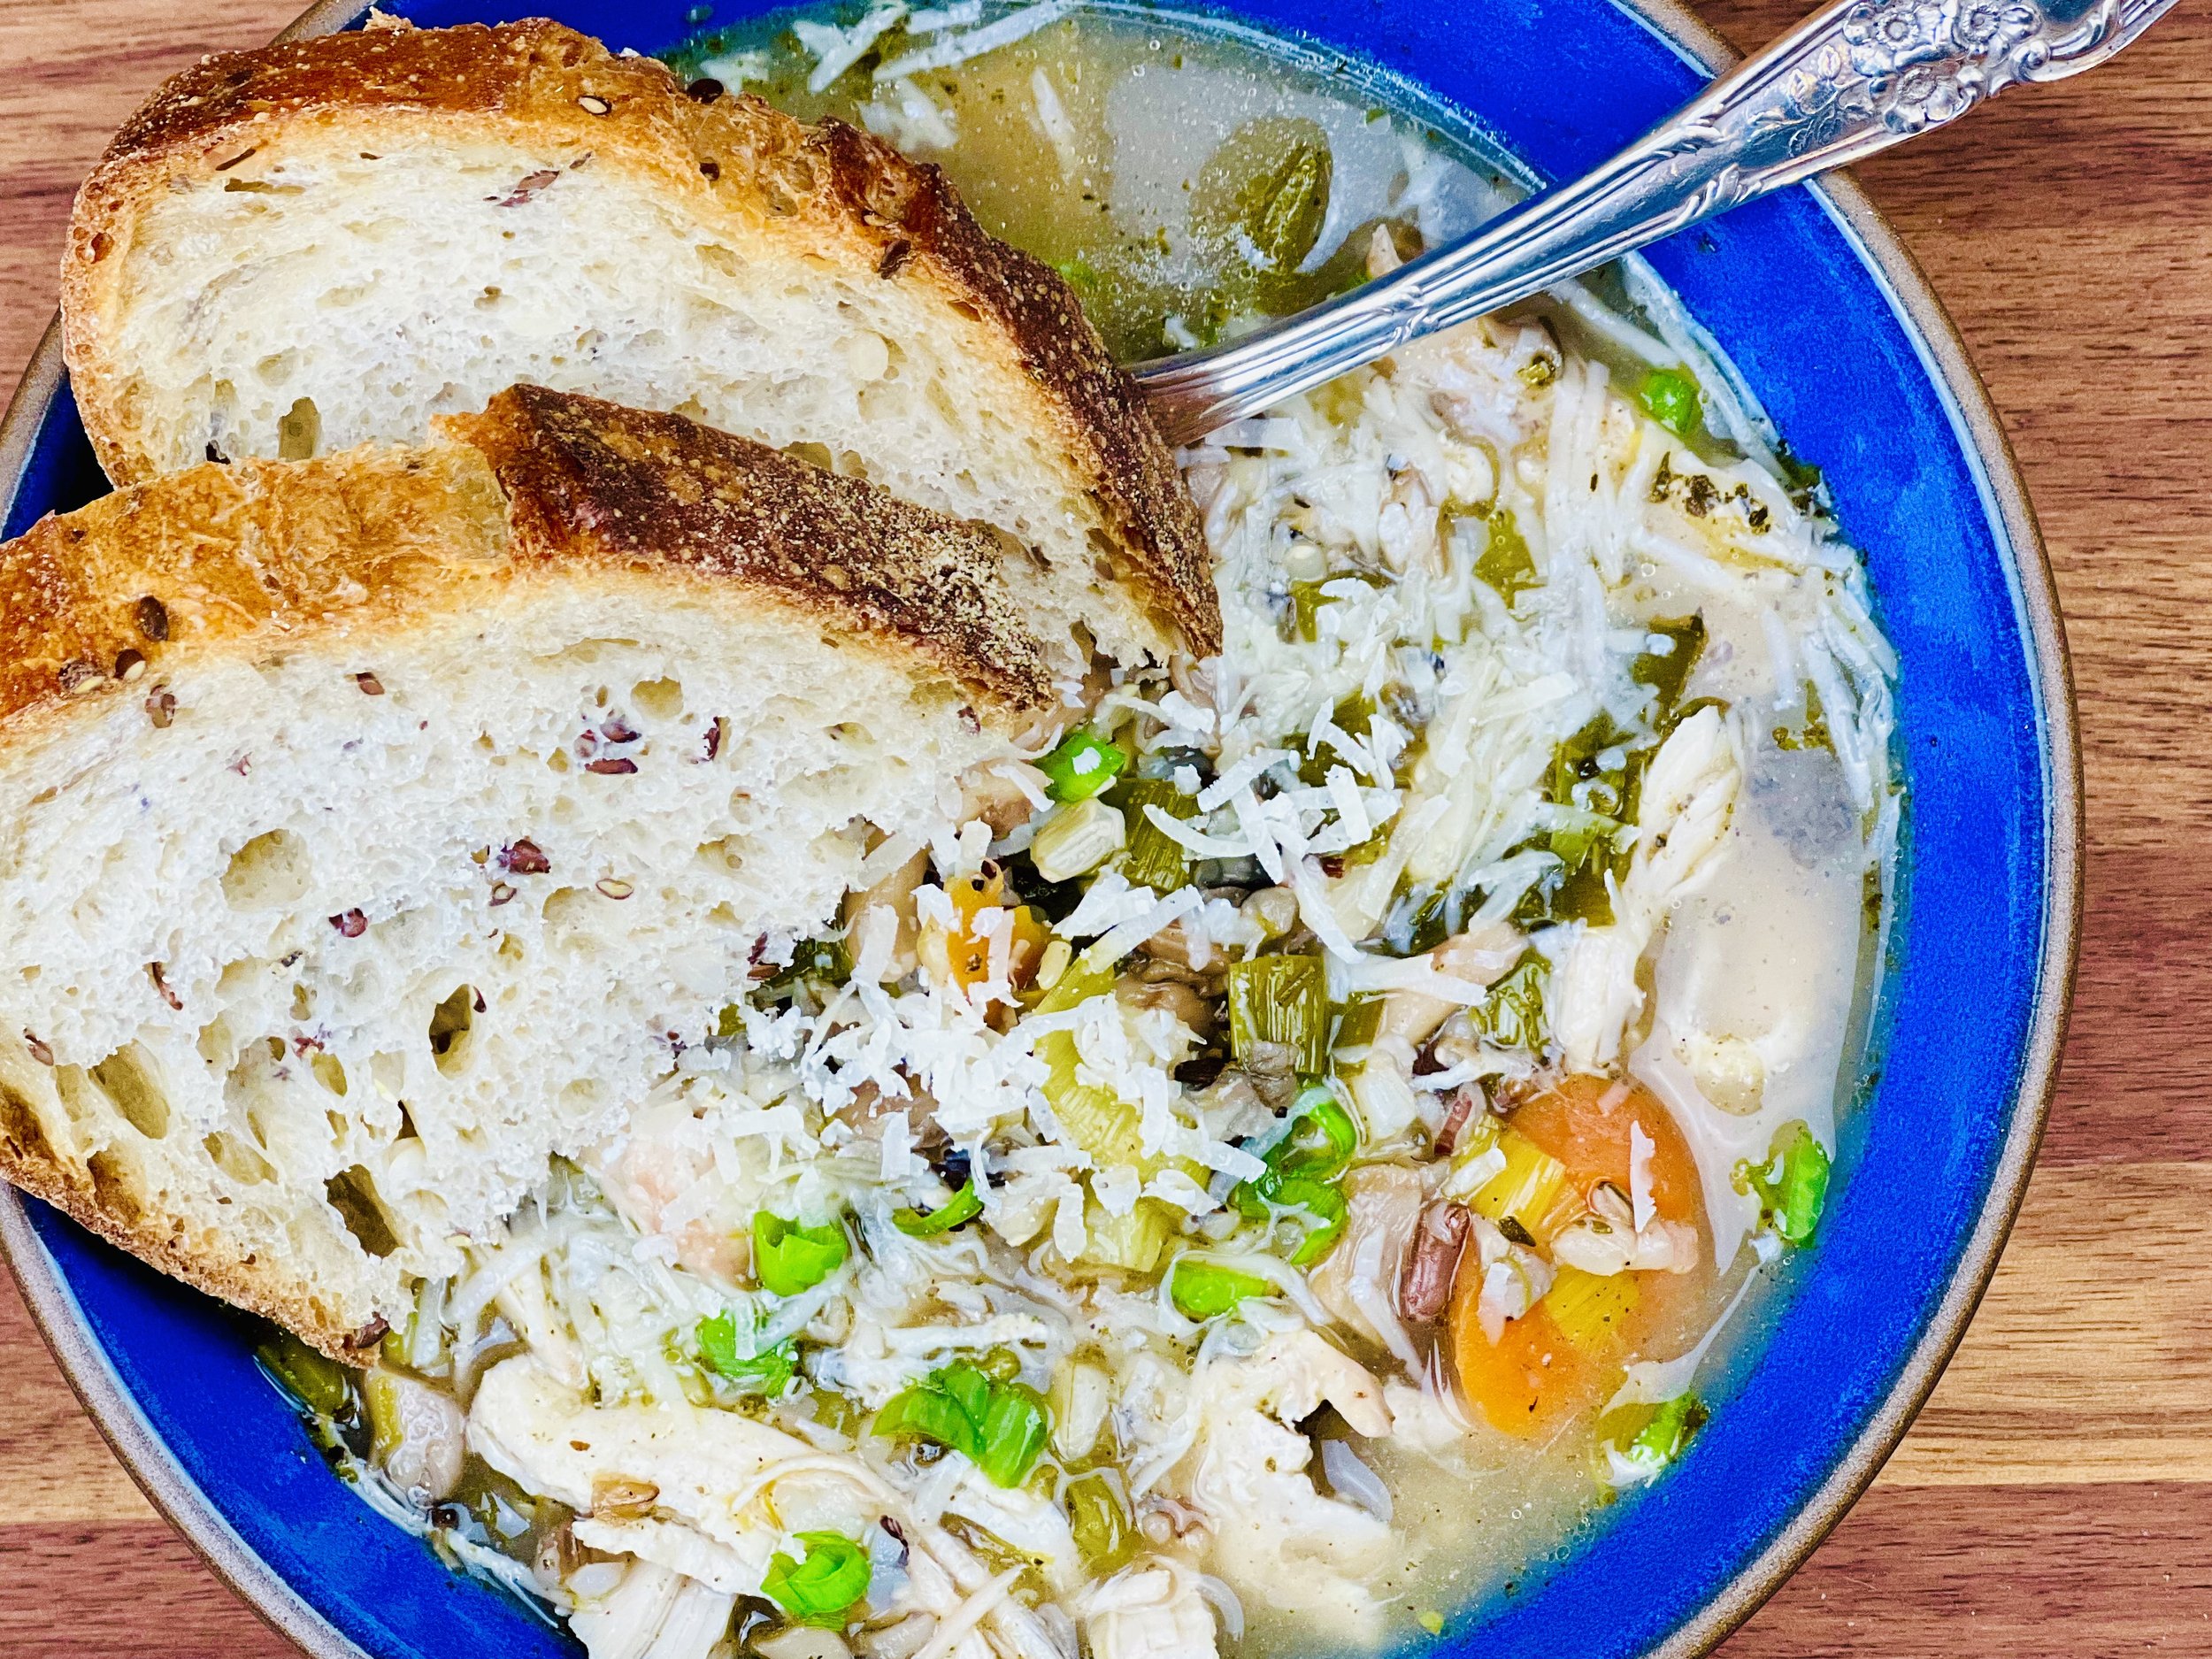
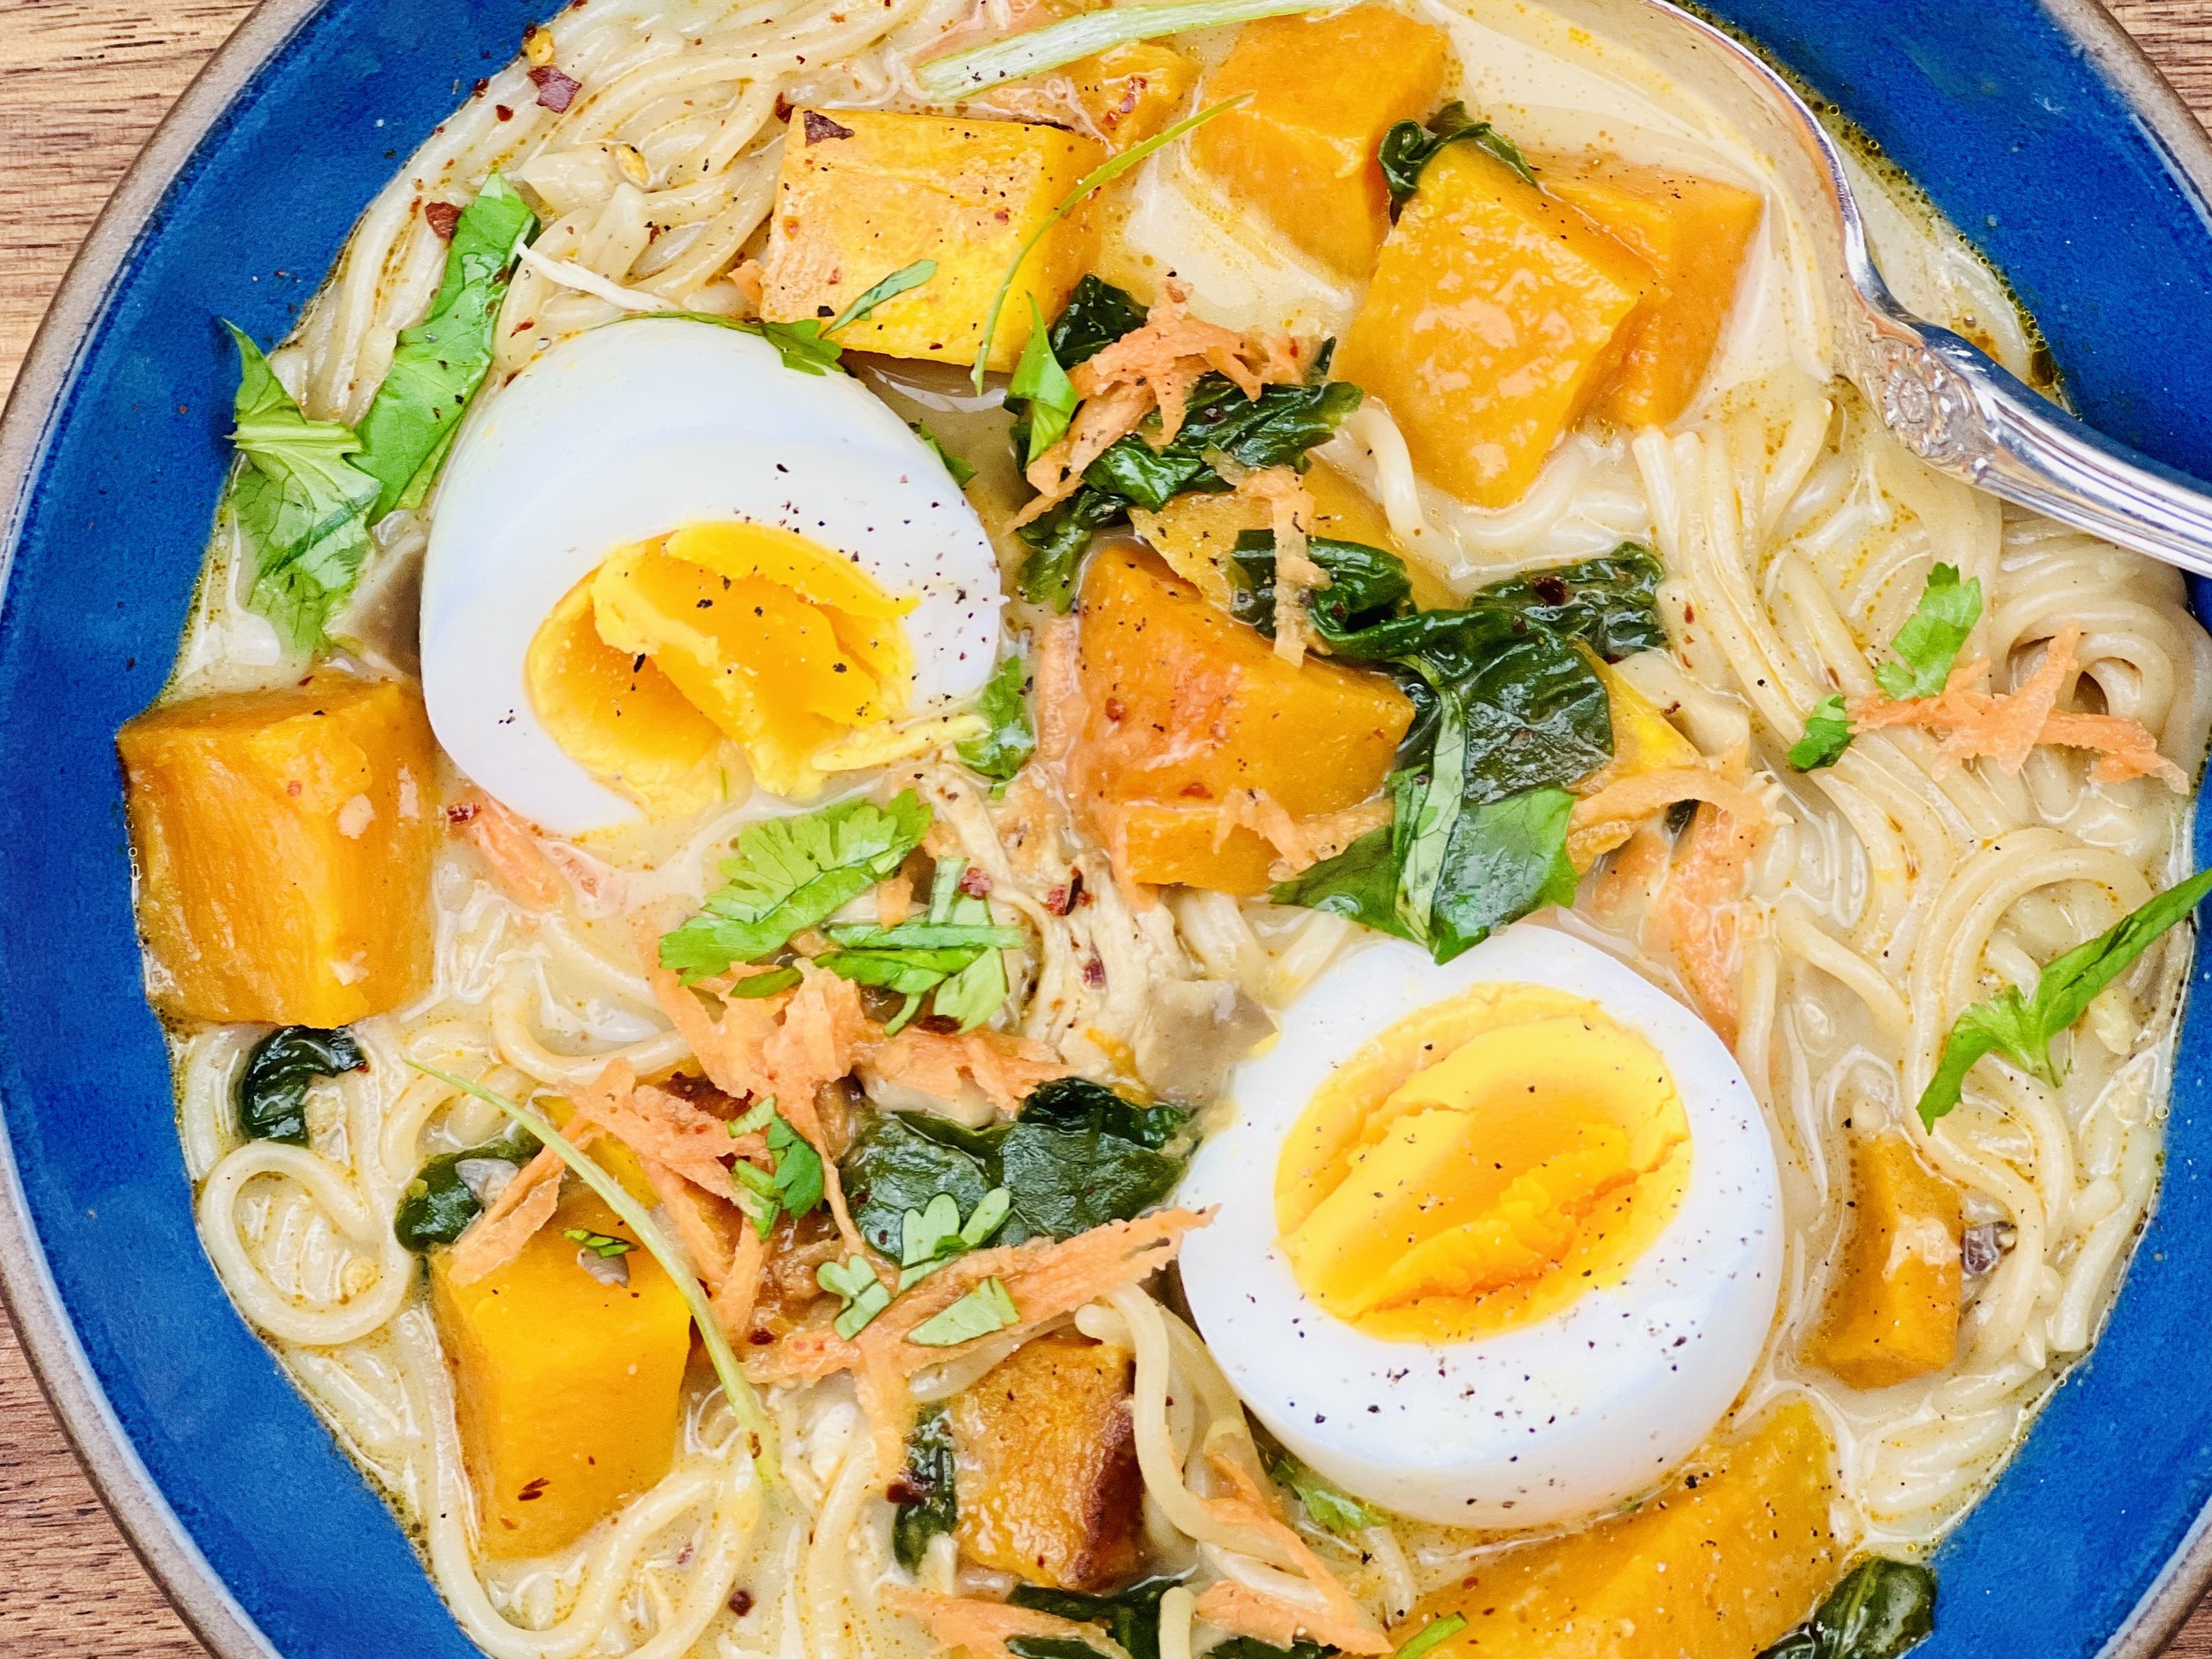
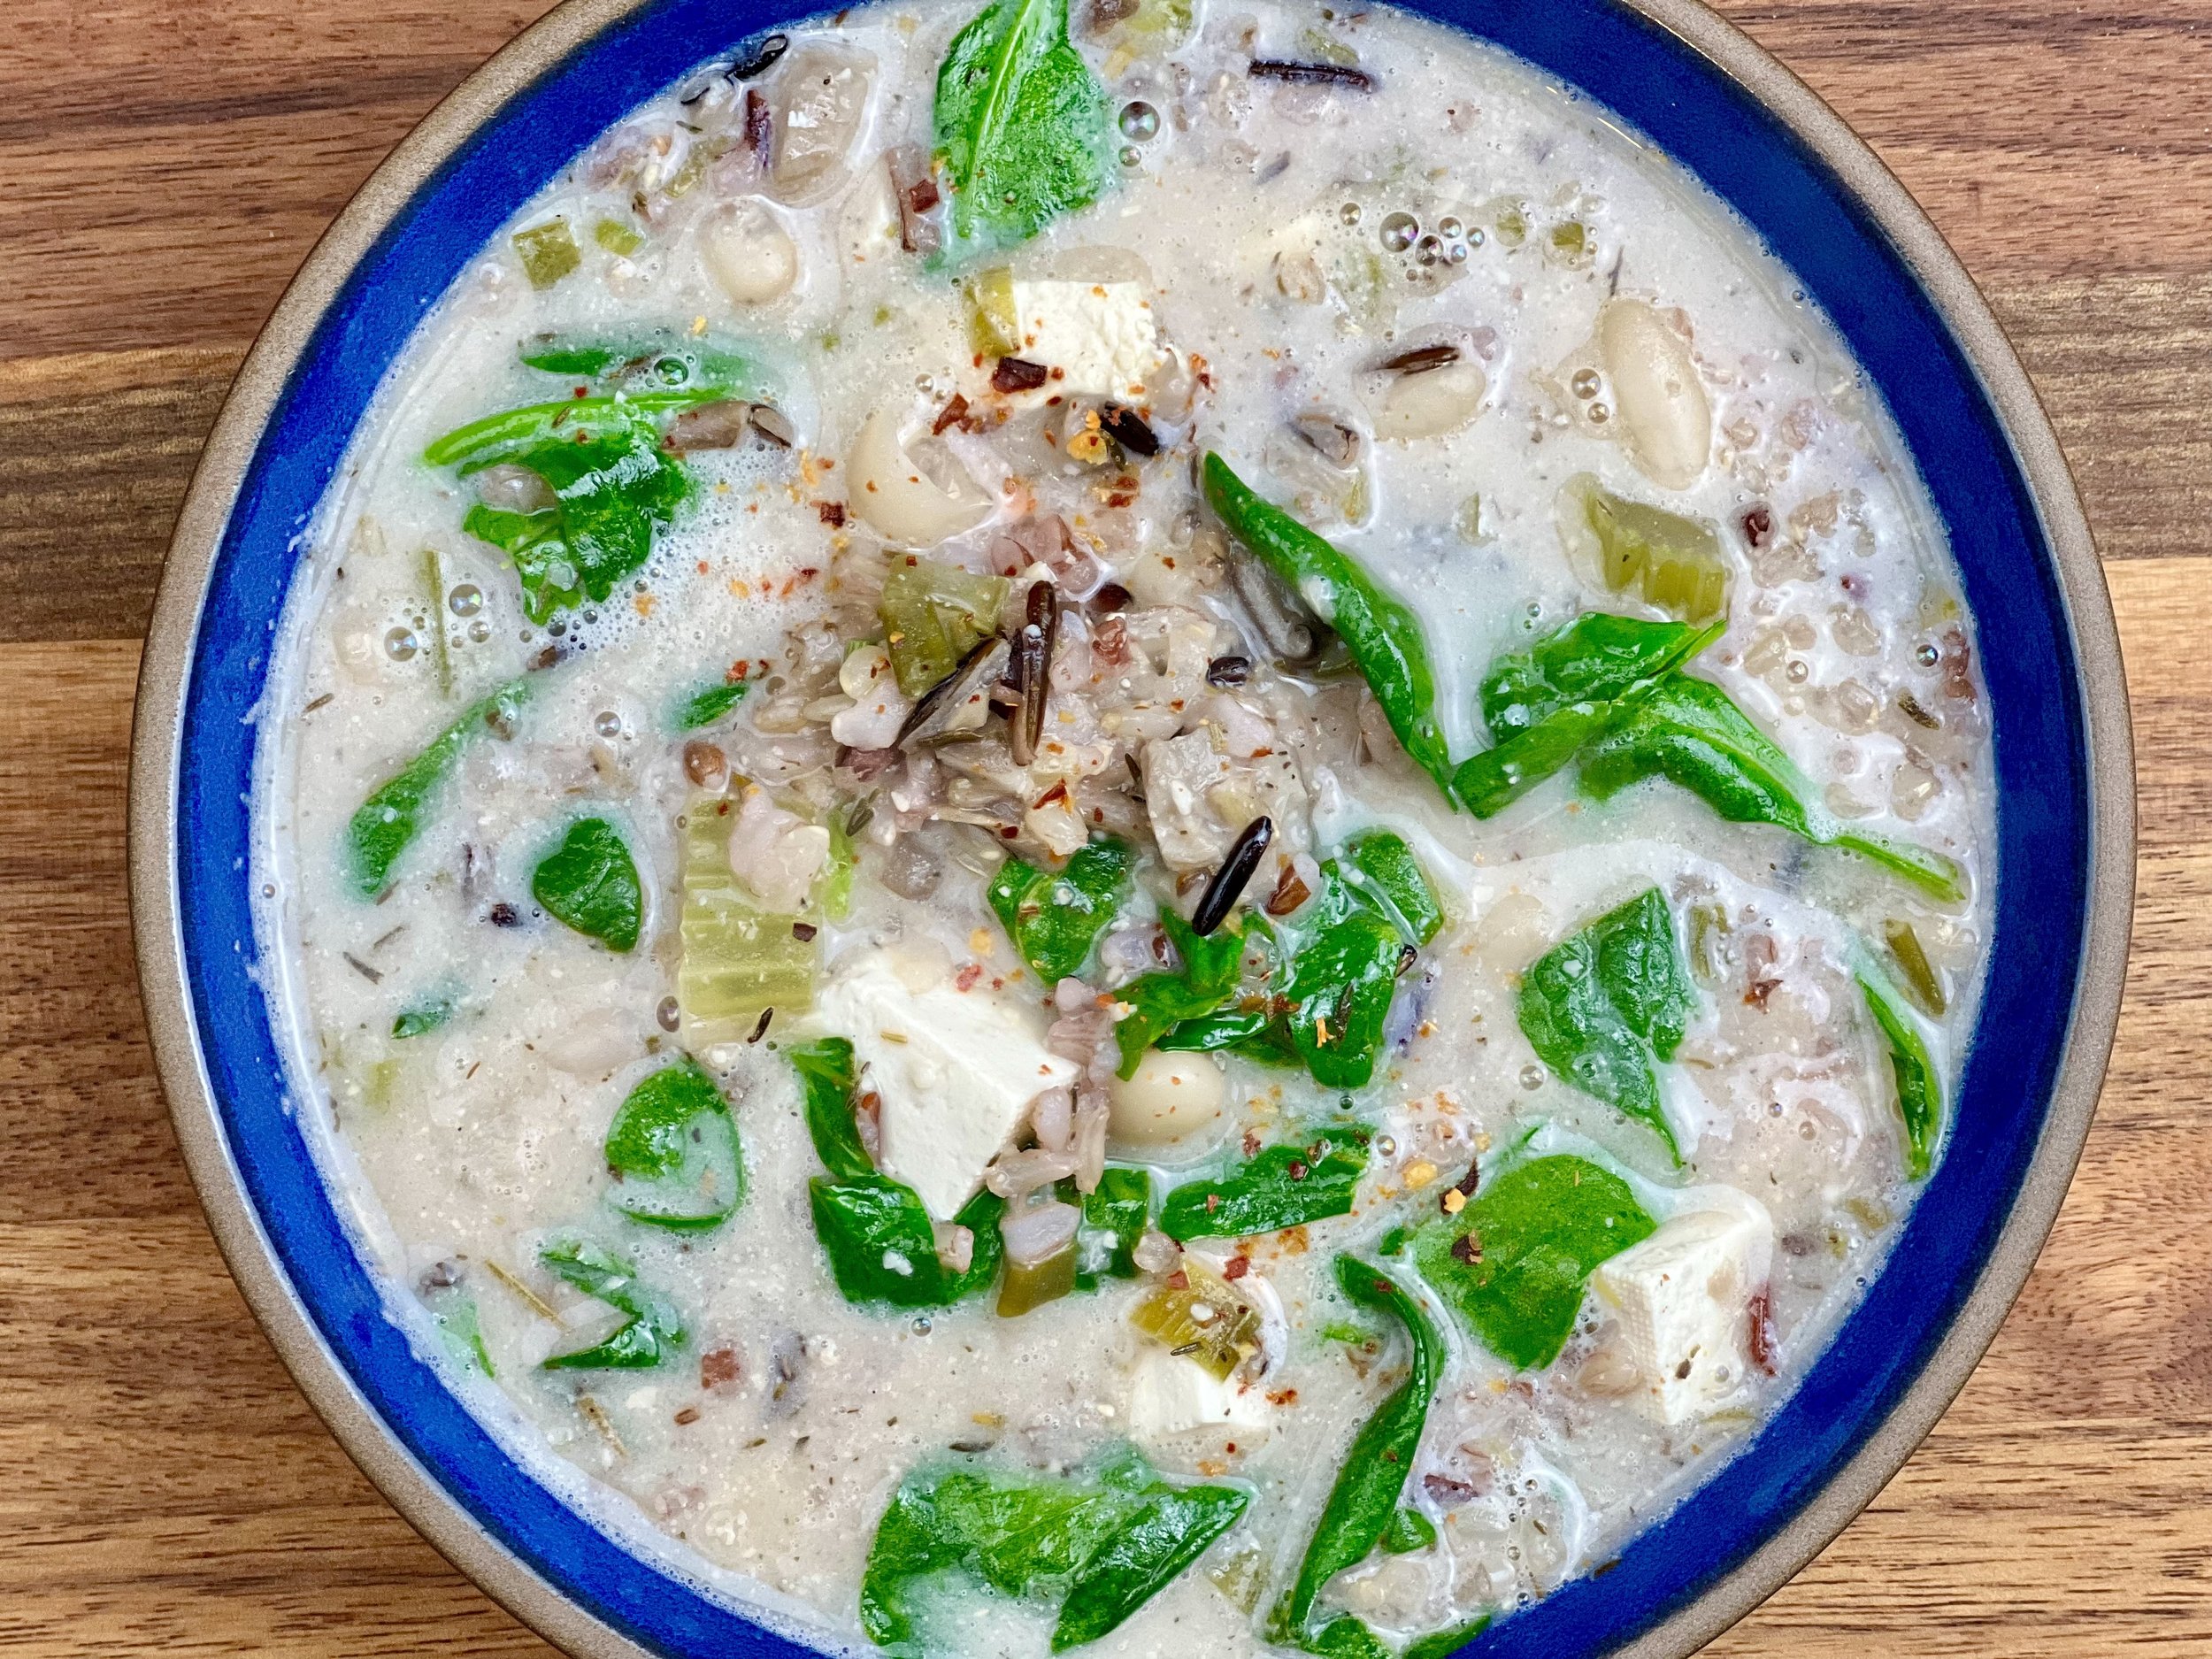
Chicken, Vegetable, and Rice Soup (low FODMAP)
15 Minutes prep • 25 Minutes cook • Low FODMAP • Gluten-free • Serves 6
15 Minutes prep • 25 Minutes cook • Low FODMAP • Gluten-free • Makes 3 quarts • Ok to make-ahead: Steps 1 - 7
There’s nothing quite so warming as chicken and rice soup on a cold day! And THIS chicken and rice soup is my all-time favorite. The recipe includes plenty of fresh herbs to give your soup a wonderful flavor and make your kitchen smell delightful while you’re making it. Serve it with some crusty real sourdough bread and butter for a perfect Sunday supper.
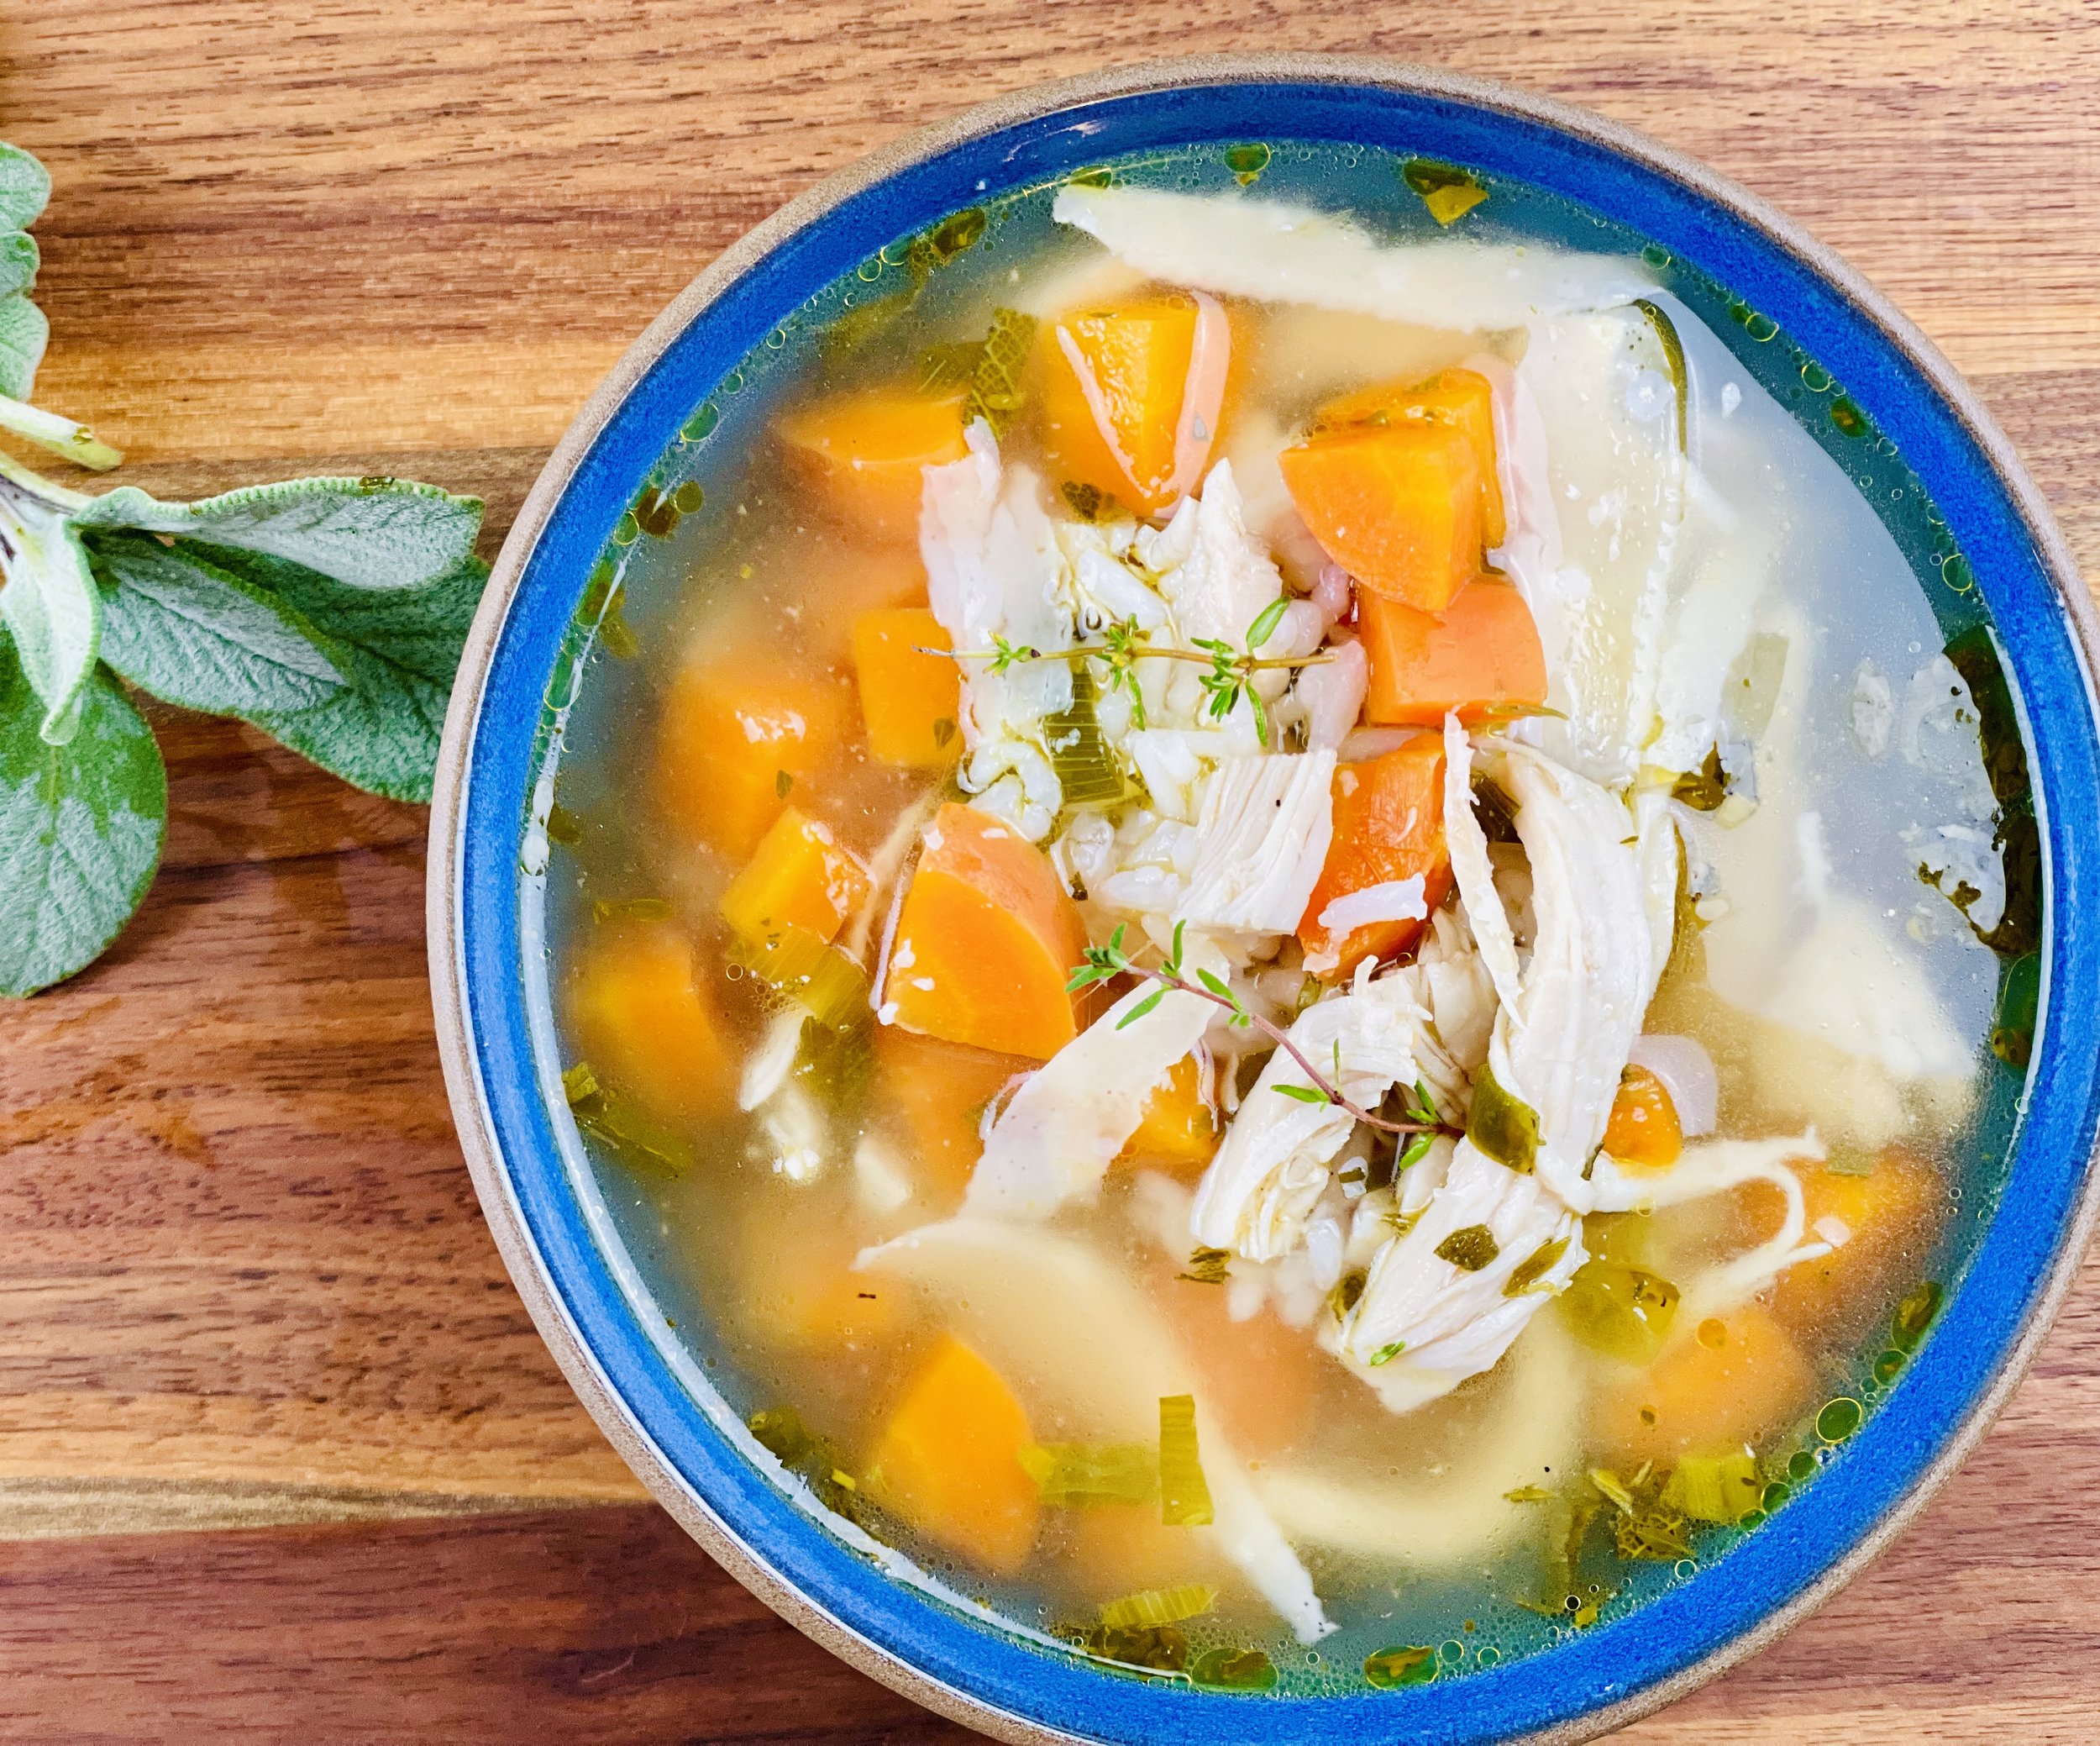
Ingredients
2 tablespoons garlic-infused olive oil
2 tablespoons salted butter
1 bunch green onions (green part only), chopped
6 carrots, chopped
2 tablespoons fresh thyme leaves, chopped
1 tablespoon fresh sage, chopped
1 tablespoon fresh rosemary, chopped
1 bay leaf
1/3 cup dry sherry
6 cups low FODMAP chicken broth* (use code IBSGC15 for a 15% discount)
1 pound boneless, skinless chicken breasts or thighs
1 cup (uncooked) white rice*
Kosher salt and black pepper
Shaved parmesan cheese, for serving
Directions
(1) Prepare the chicken: This step is optional but results in a more flavorful and tender chicken in your soup. Remove chicken breasts from the package and lay on a rimmed plate or baking dish. Season both sides of each breast lightly with Kosher salt. Cover with plastic wrap and refrigerate until ready to use or at least 4 hours before cooking.
(2) Prepare the vegetables: Chop the green onions, carrots, and herbs.
(3) Cook the vegetables: Melt together the olive oil and butter In a large Dutch oven over medium heat. Add the green onions and cook for about 2 minutes. Add the carrots, thyme, sage, and rosemary. Season with salt and pepper. Cook another 5 minutes.
(4) Make the soup: Pour in the sherry and let the alcohol sizzle off a bit, then pour in the broth, and bring to a boil over high heat. Slide in the chicken, bay leaf, and if you have one – a parmesan rind. Reduce heat, cover and simmer for 20 minutes, until the chicken is cooked through.
(5) Cook the rice: Meanwhile, cook the rice according to package instructions except use chicken broth instead of water for extra flavorful rice in your soup.
(6) Shred the chicken: When the chicken is just cooked through, take it out of the broth and shred it using two forks. Then add the chicken back to the soup.
(7) Finish: Remove the parmesan rind and the bay leaf. Add the cooked rice. Taste, and season with salt and pepper as needed.
Make-ahead note: This soup is delicious right away and it can also be prepared ahead of time, refrigerated, and served the next day. You can wait to add the cooked rice if you’re serving it the next day then just stir it in as you heat the soup for serving. If you’re storing leftover soup, you can add some additional chicken broth if the rice has absorbed too much of the liquid.
(8) Plate and serve: Serve in bowls with some shaved parmesan on top and some crusty real sourdough bread and butter alongside.
Eat and enjoy every bite because you can!
*This post may contain links for you to easily purchase items listed on the page. In some cases, we have provided a special discount code for IBS Game Changers so be sure to use it when you purchase an item to get the discount that has been arranged just for you! As an Amazon Associate, I earn a commission from qualifying Amazon purchases.
More Deliciously Low FODMAP™ soup recipes you might enjoy

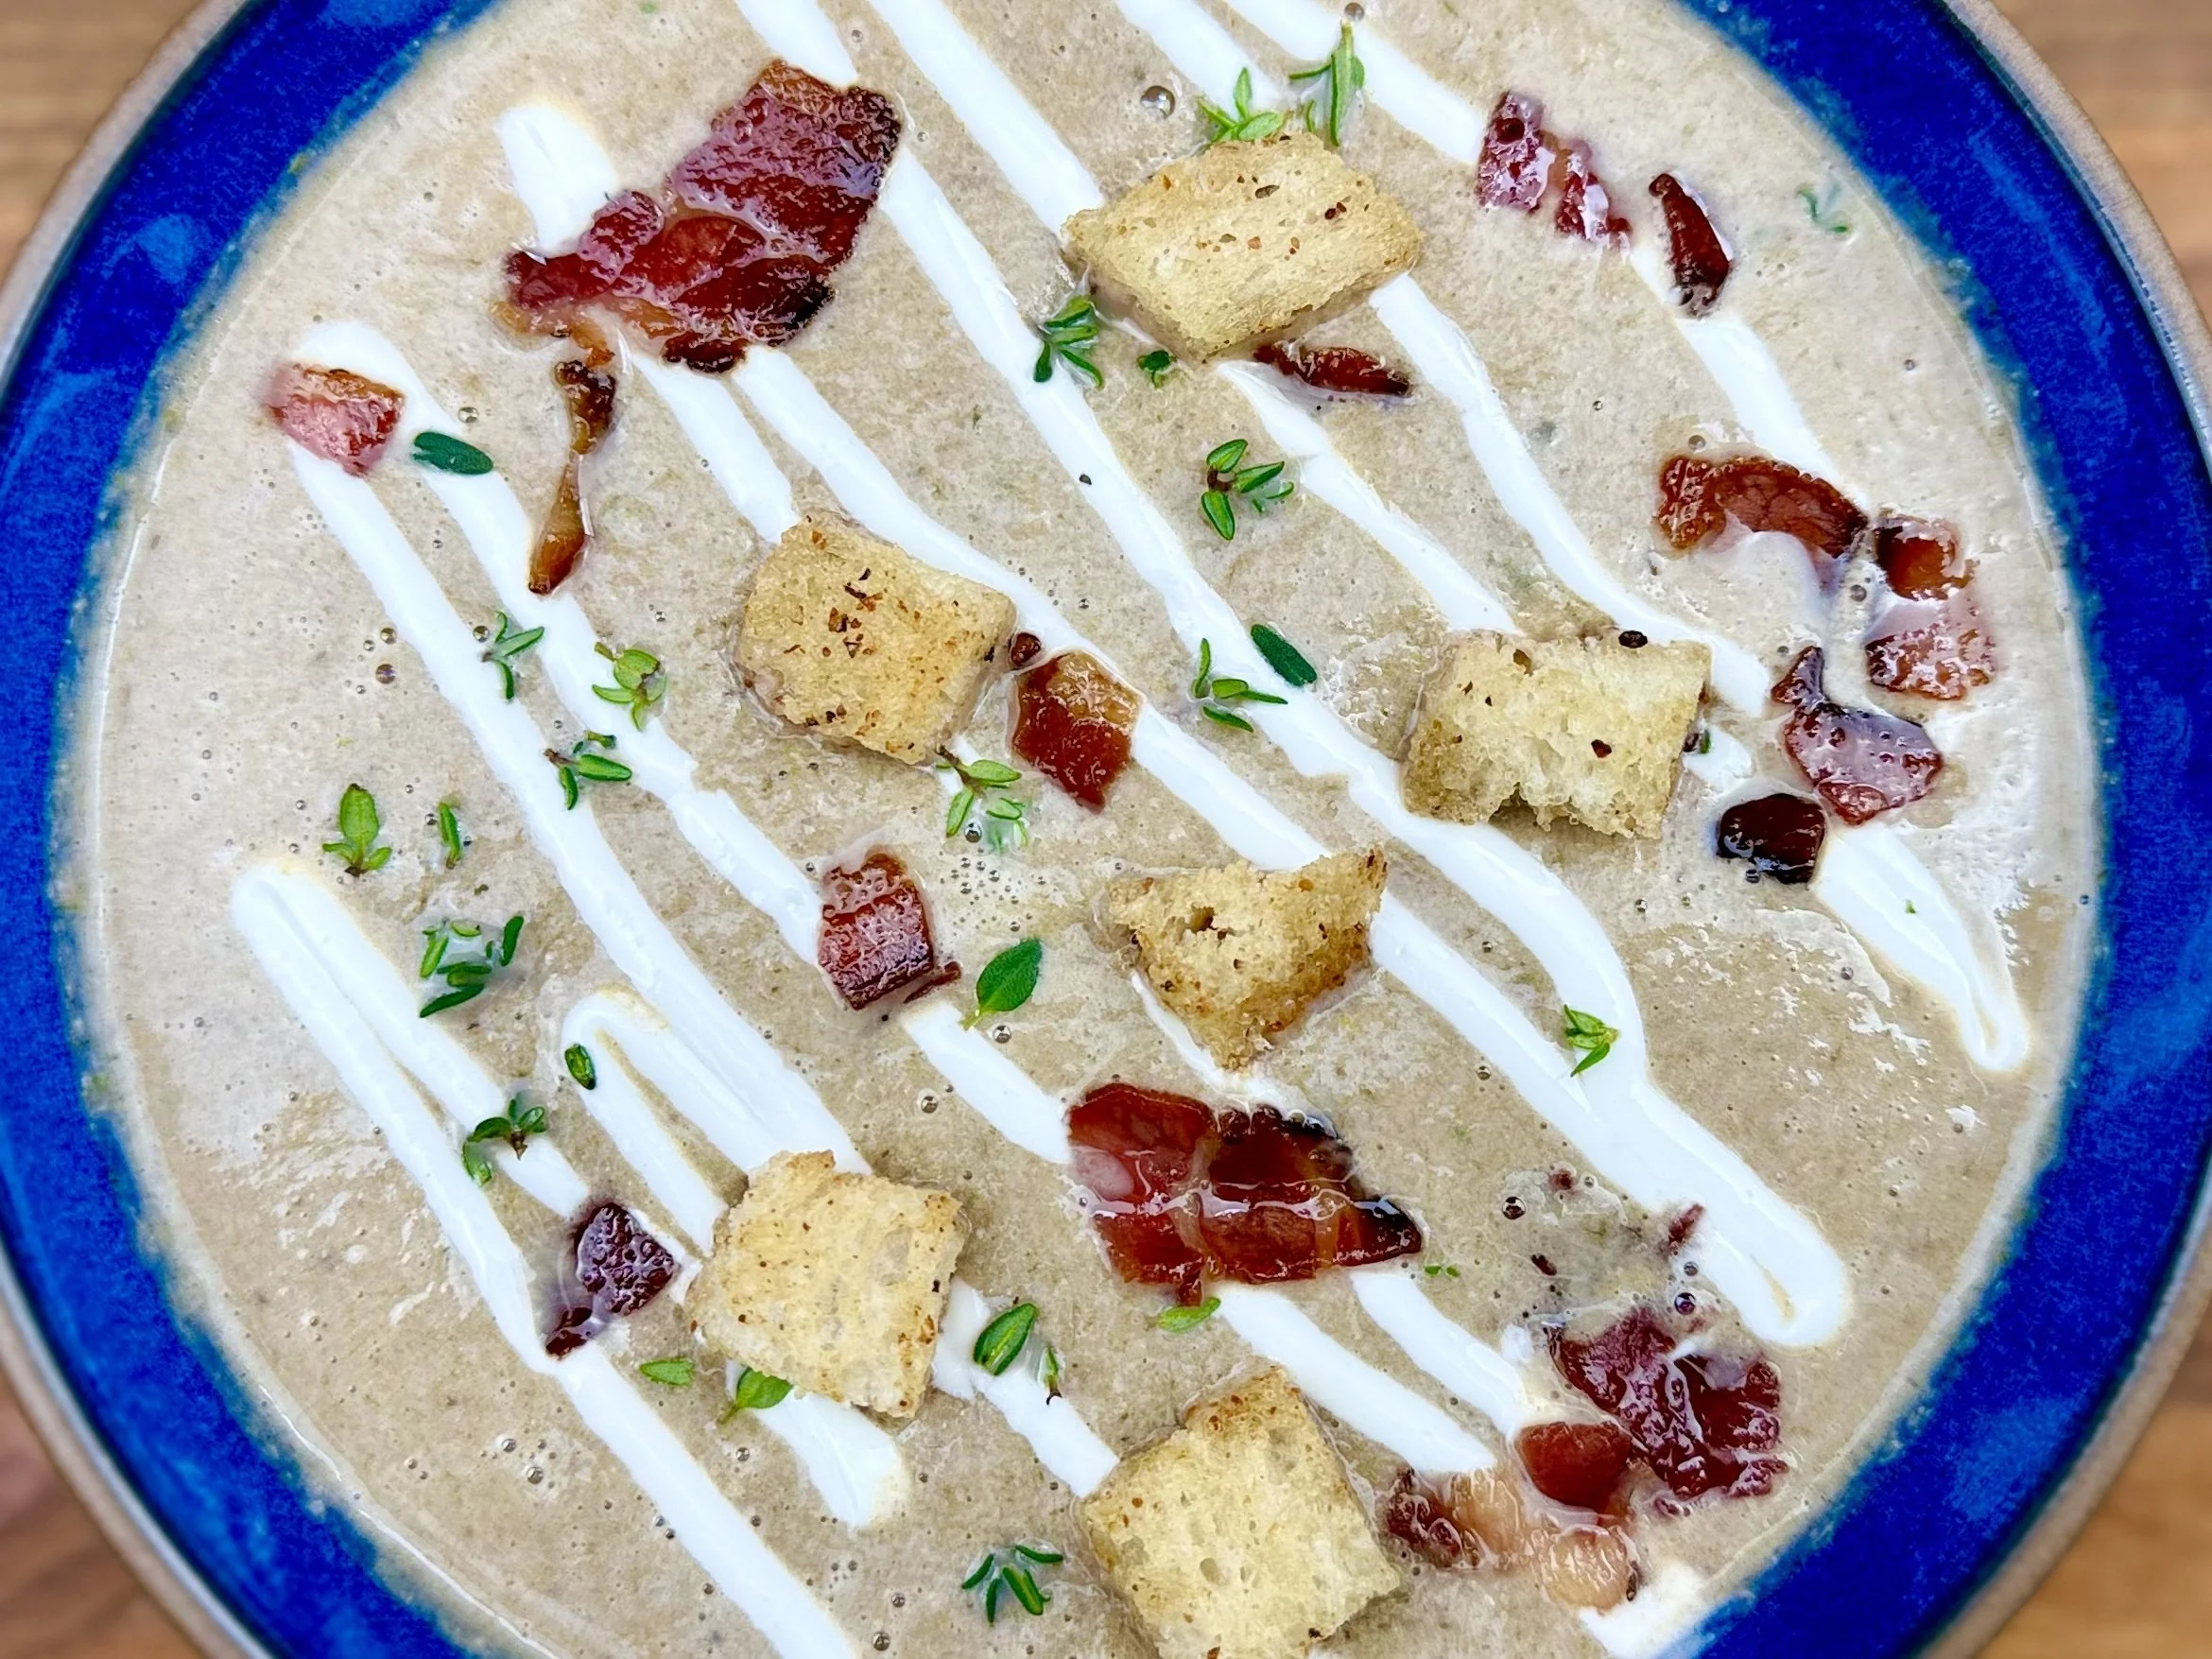


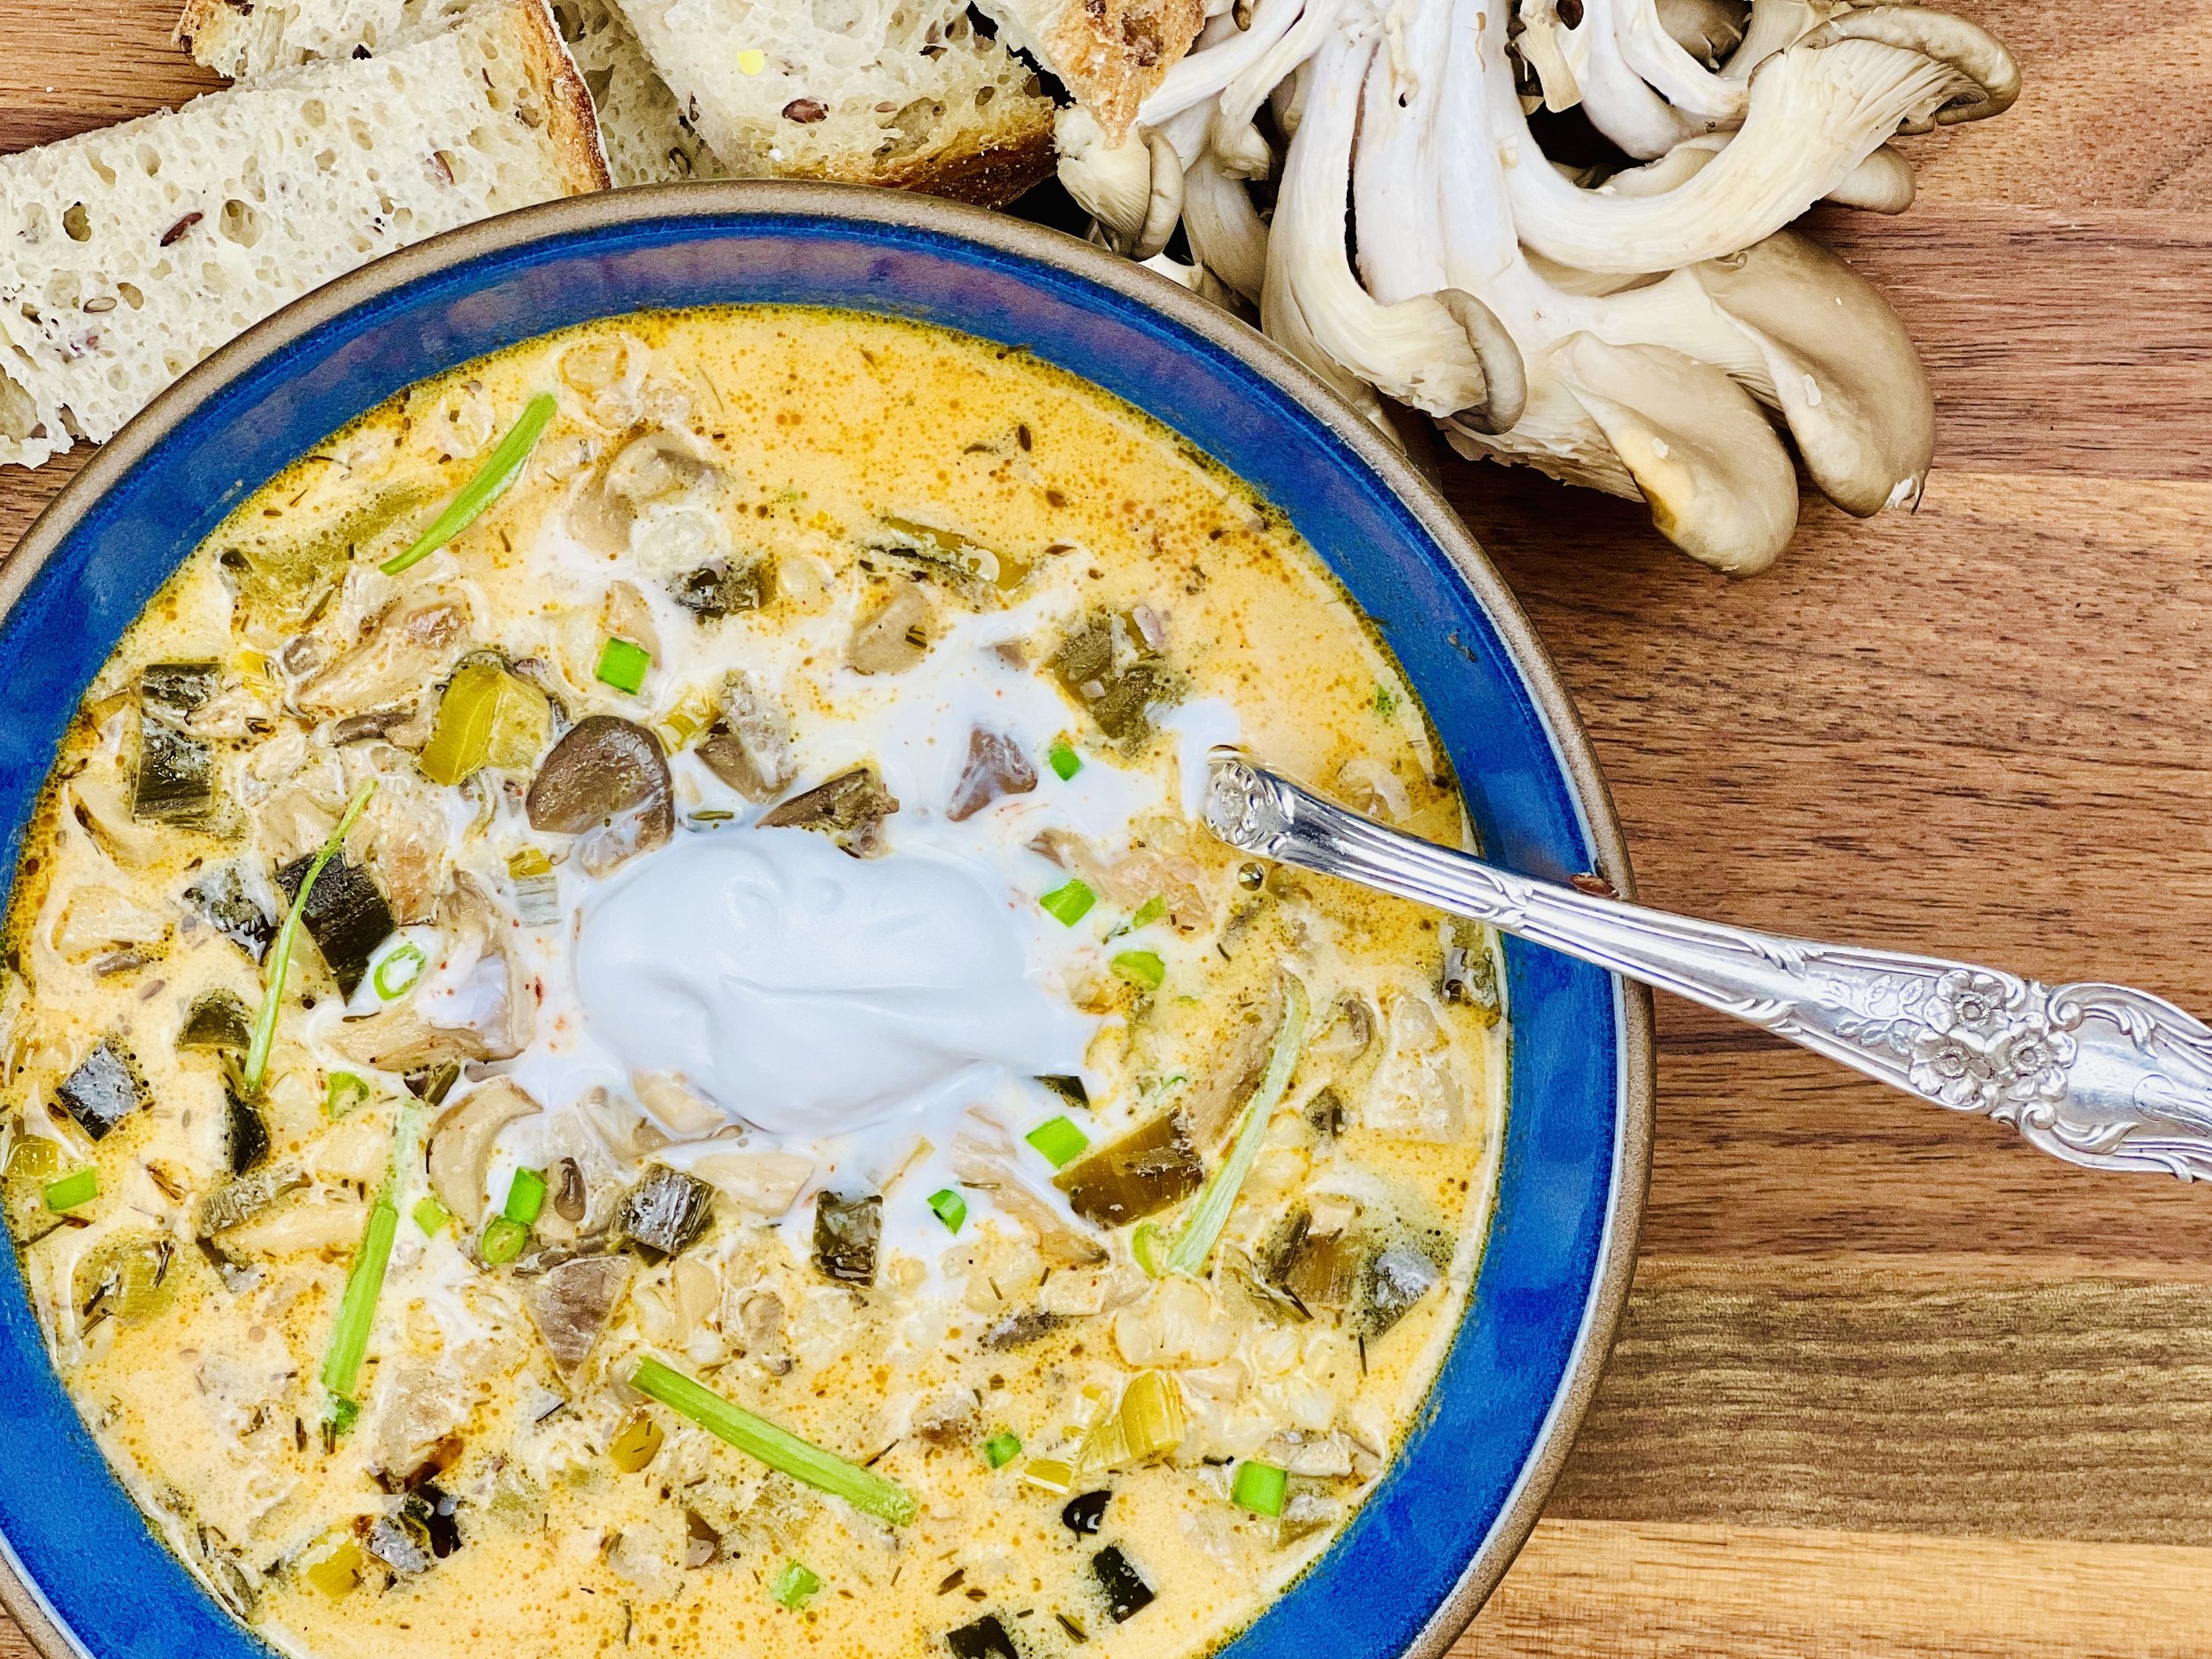

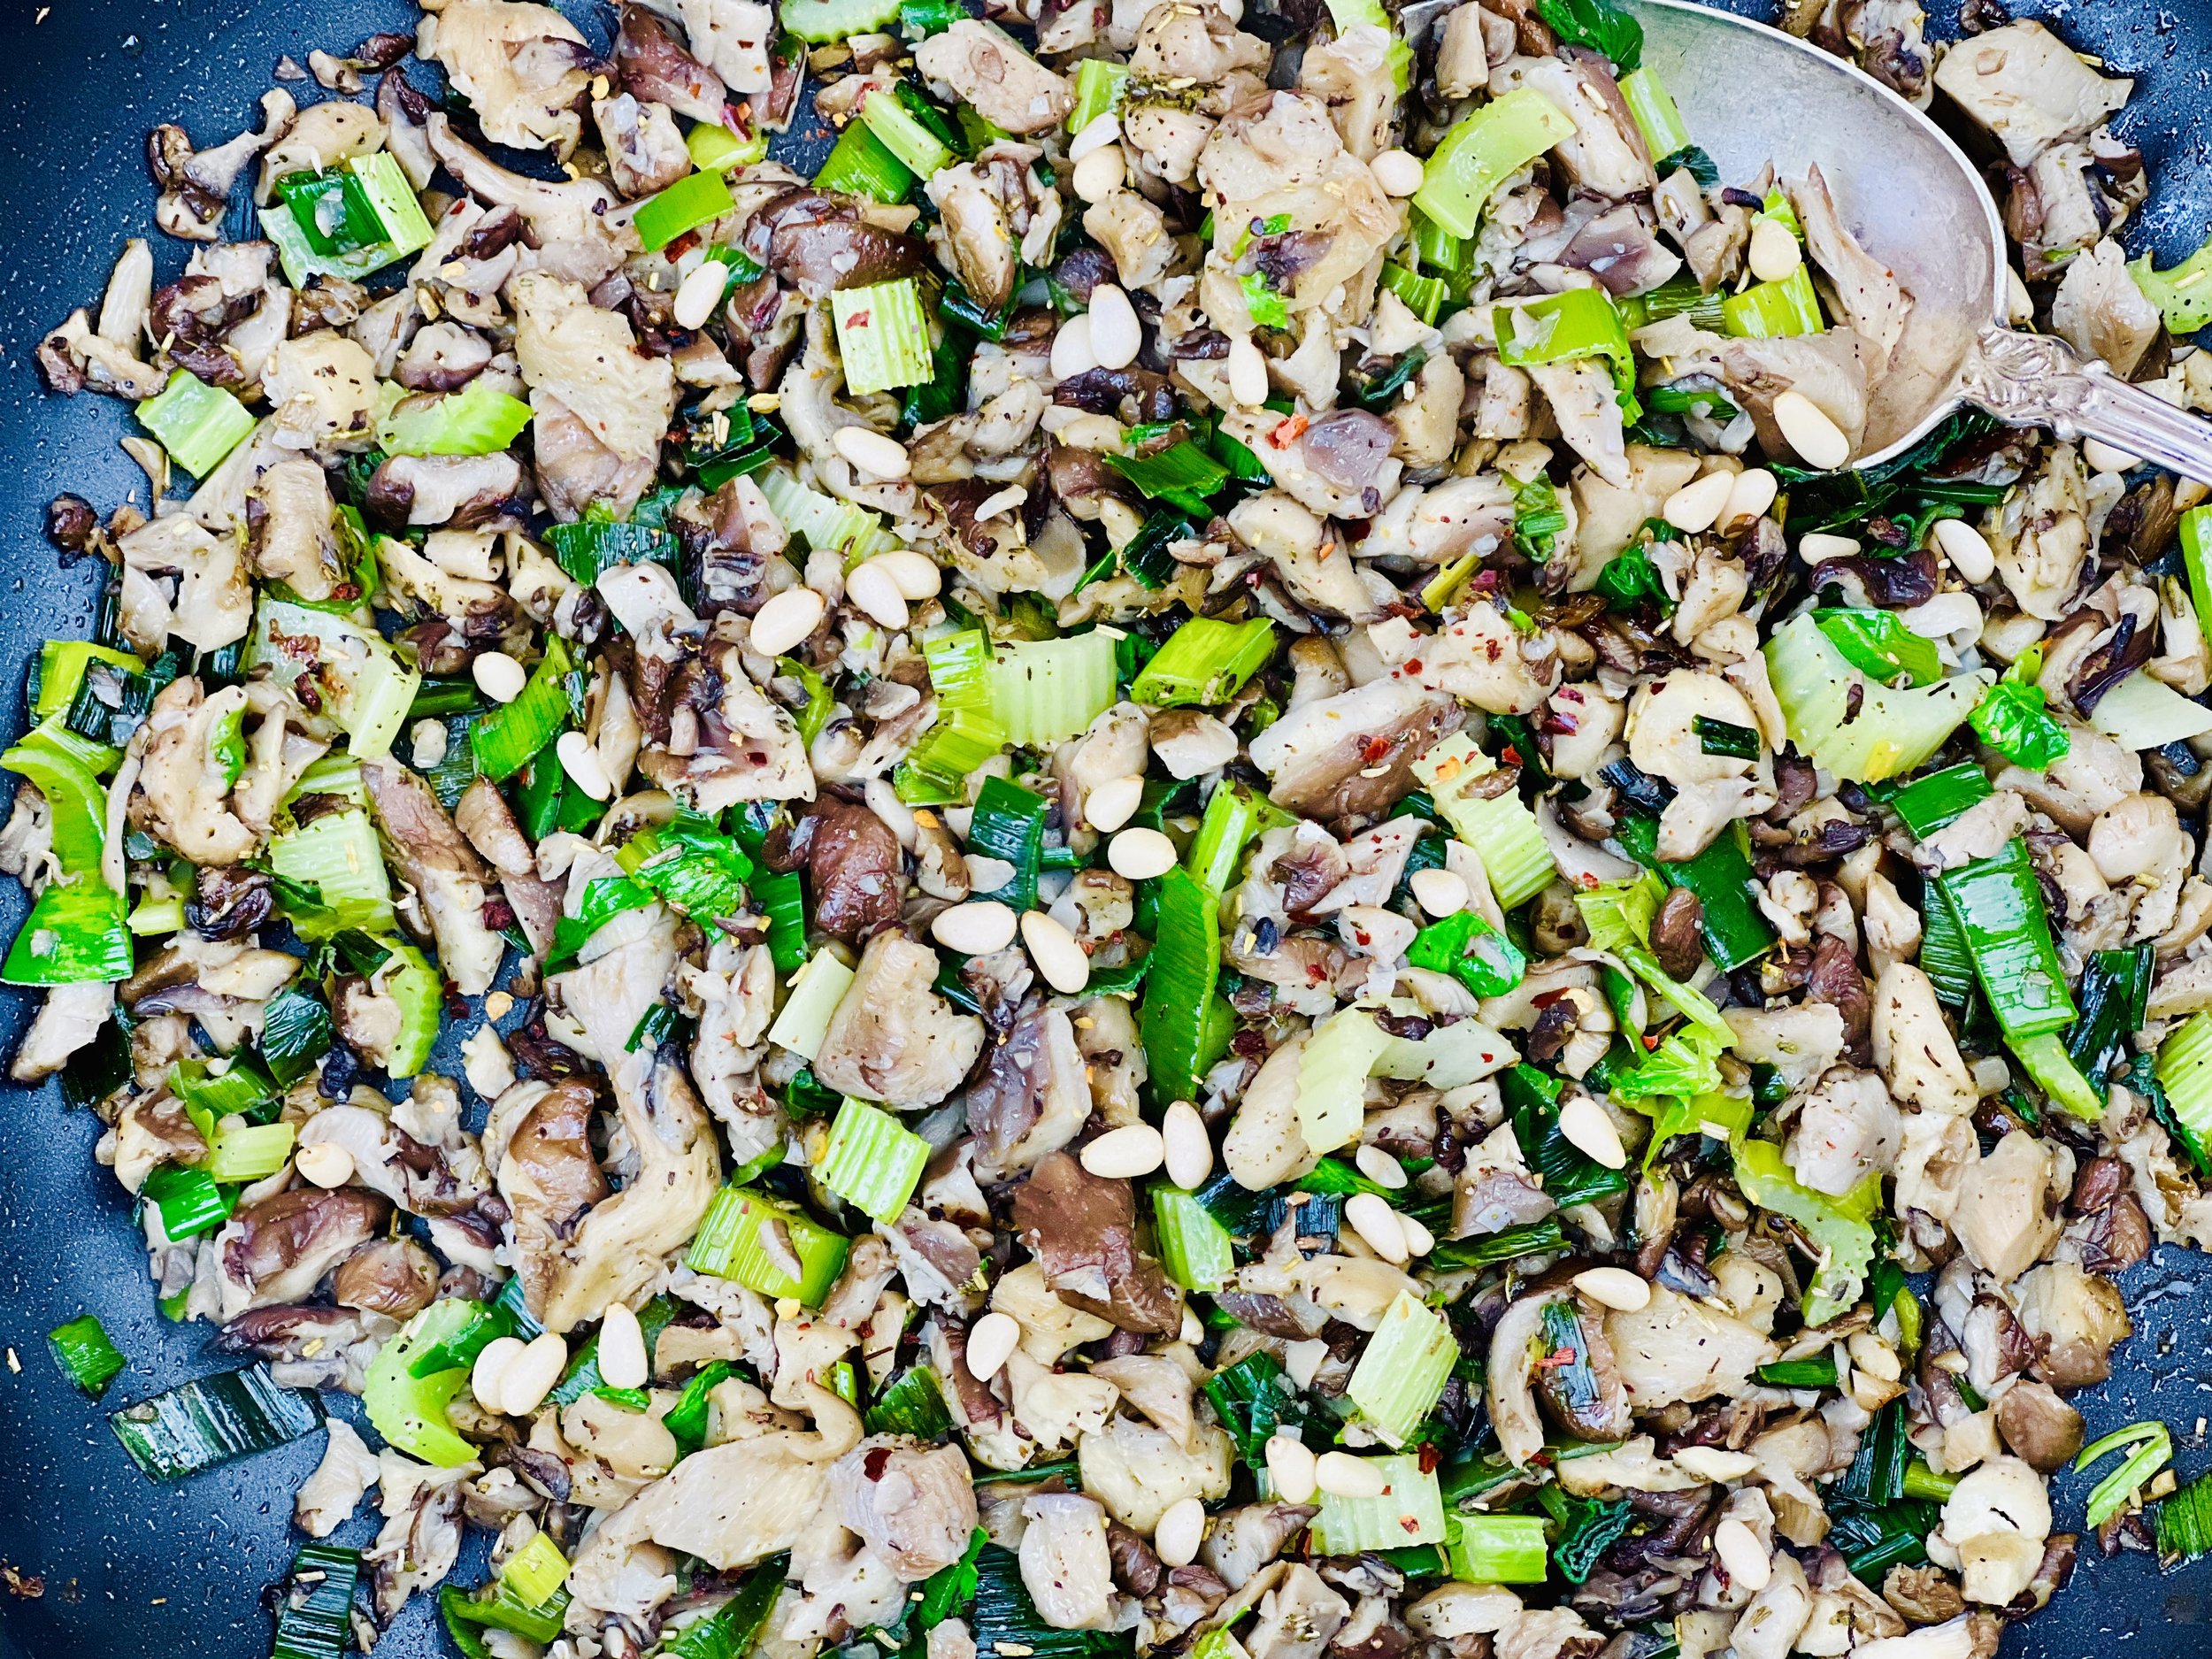
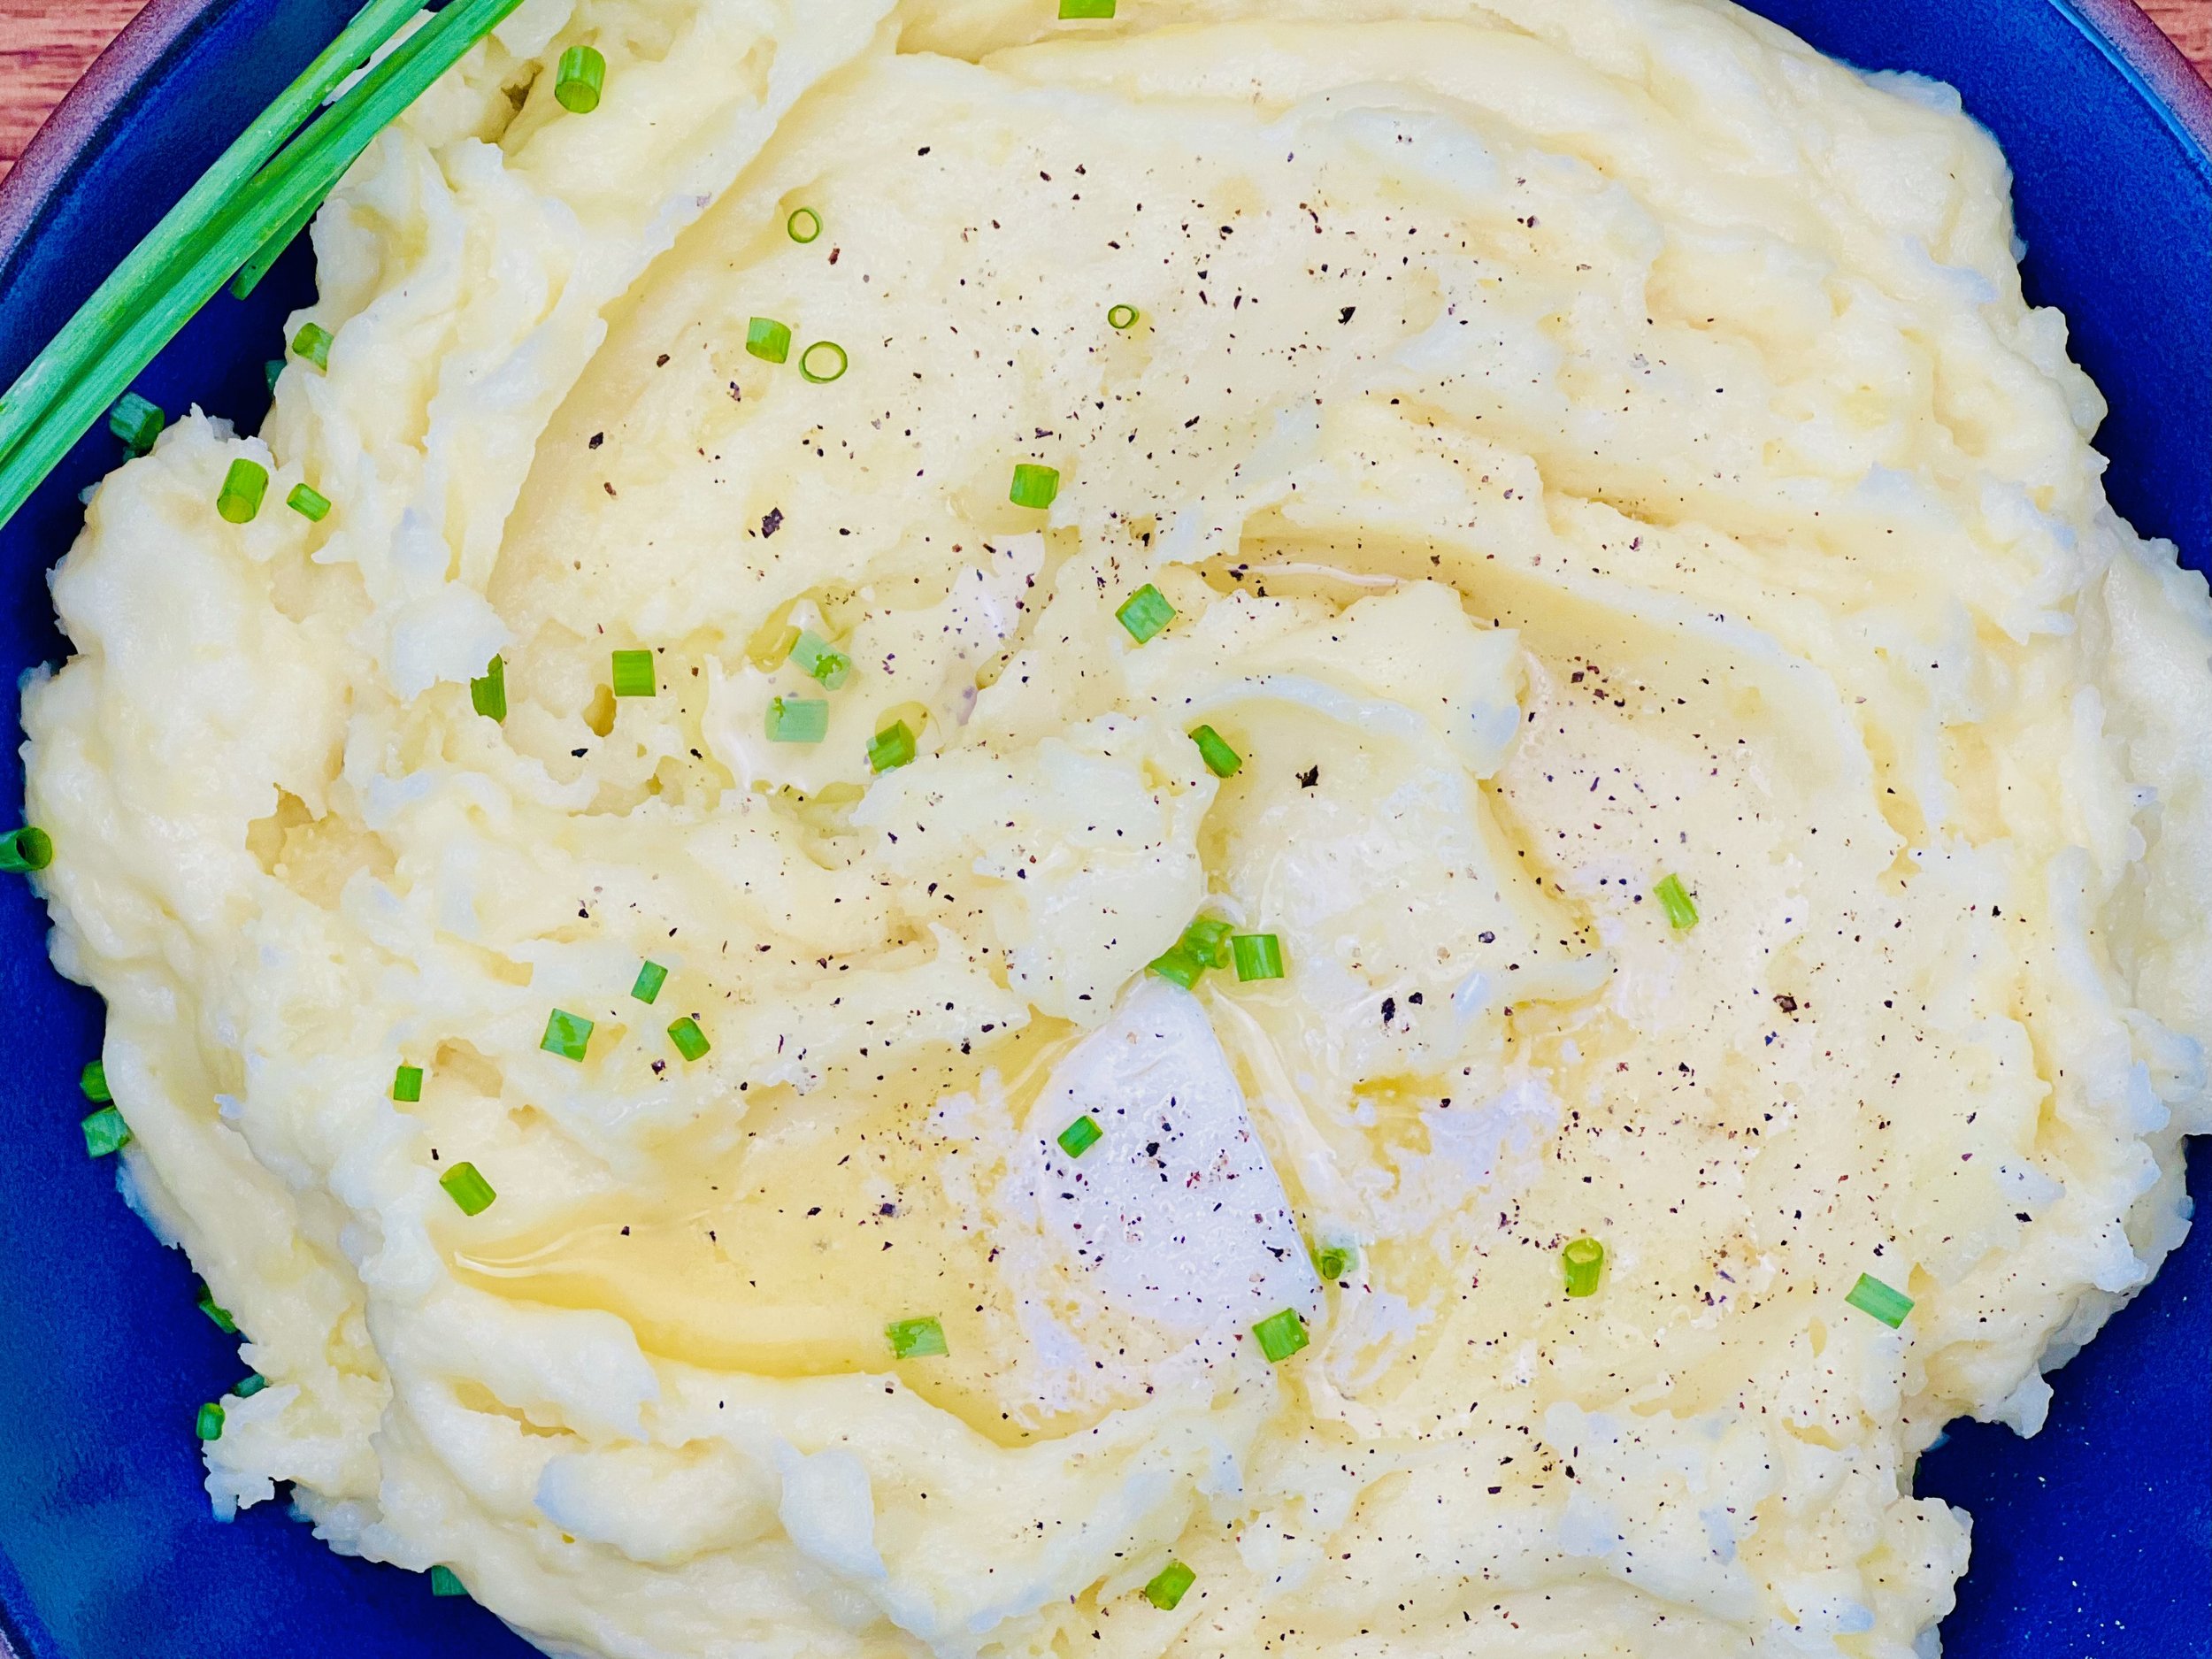
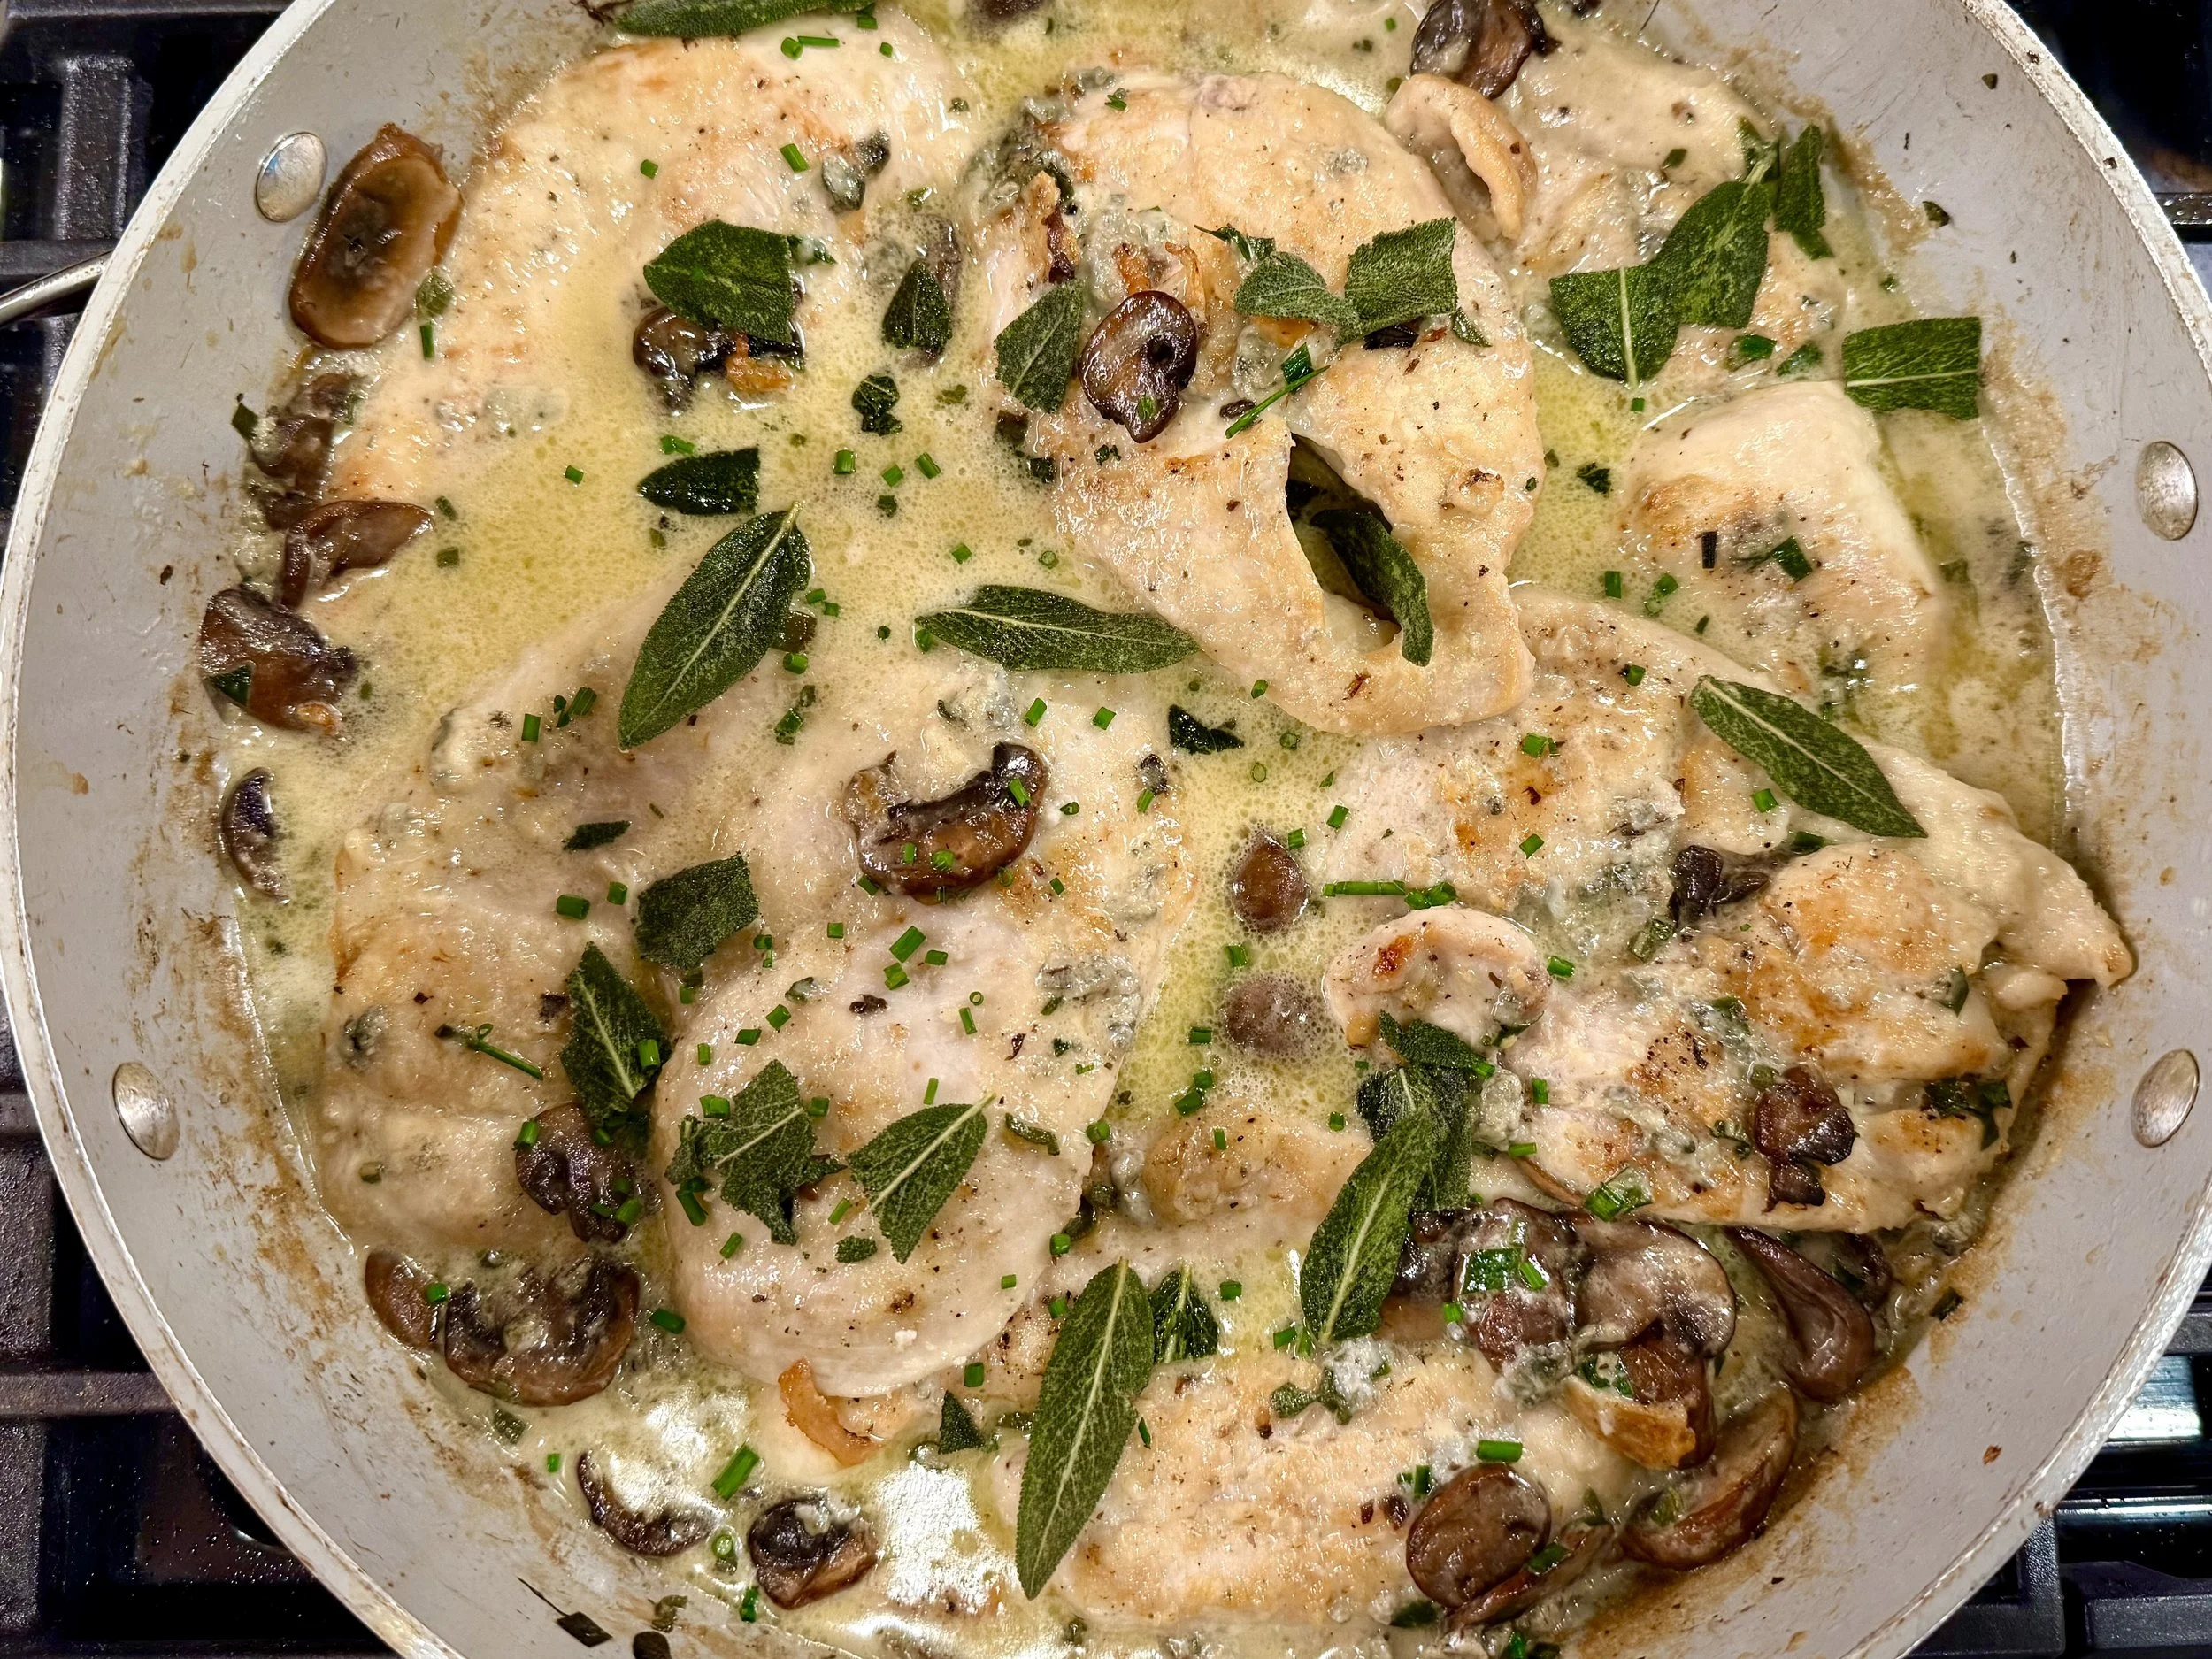
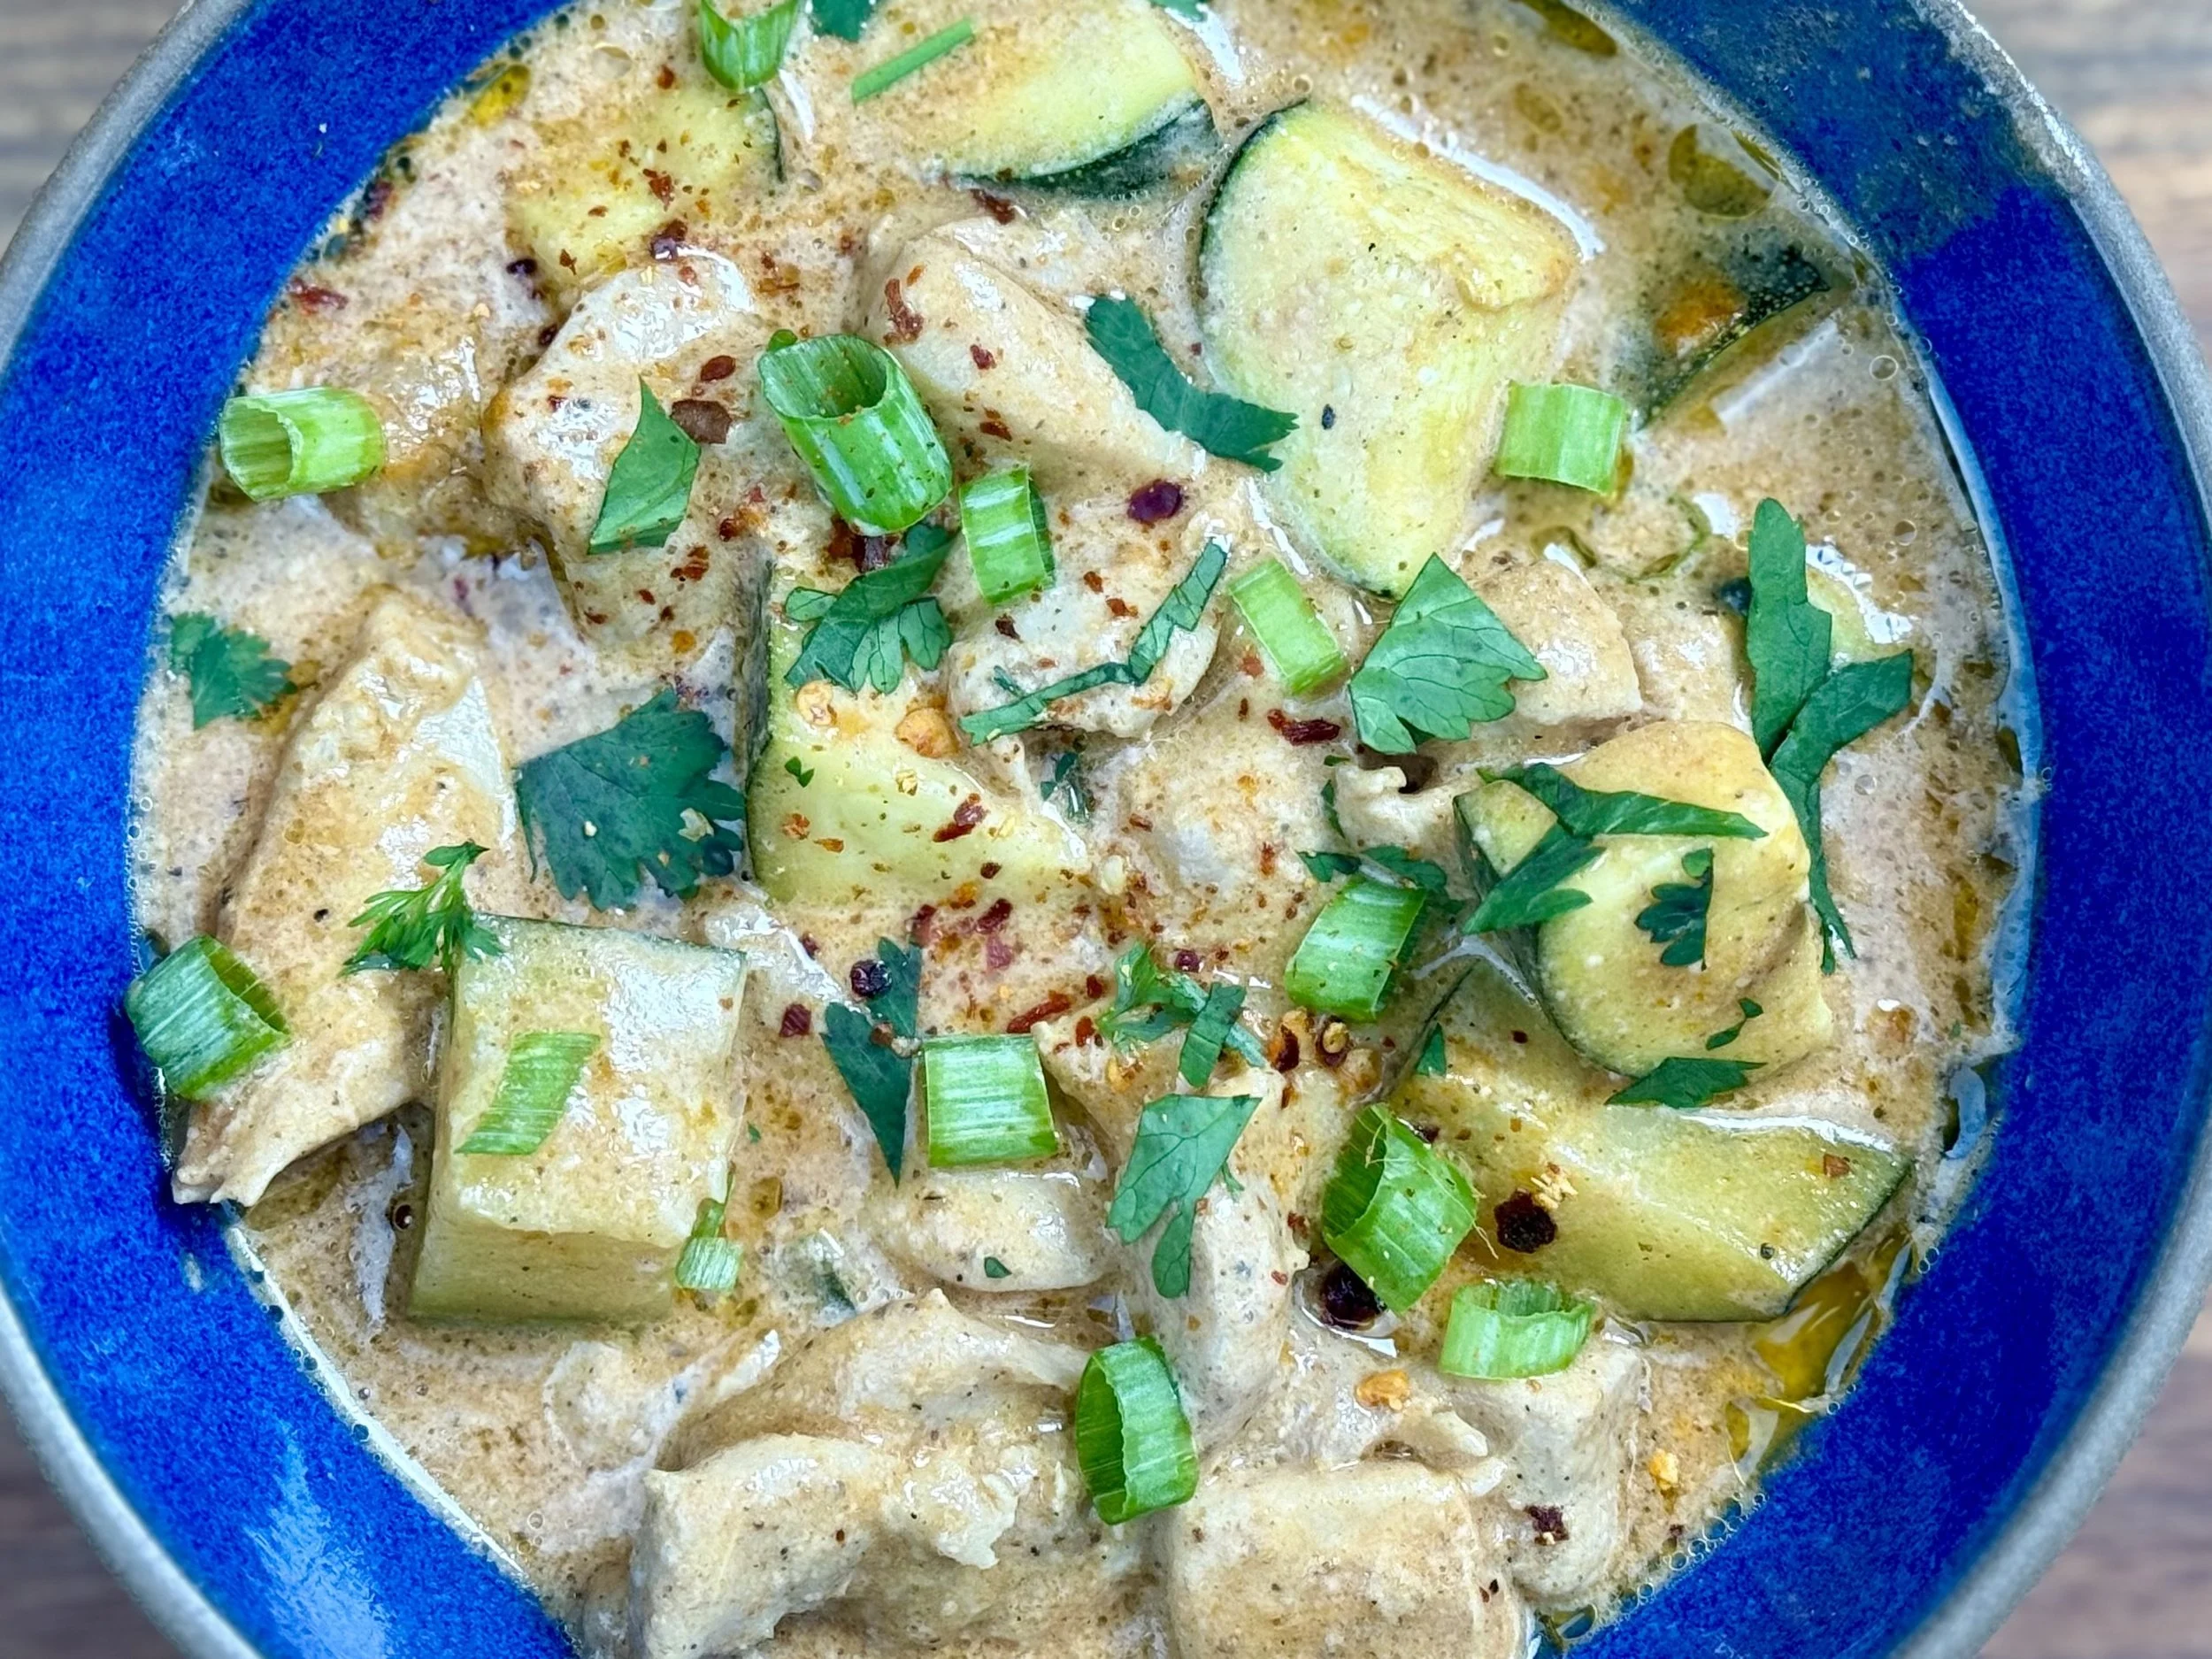
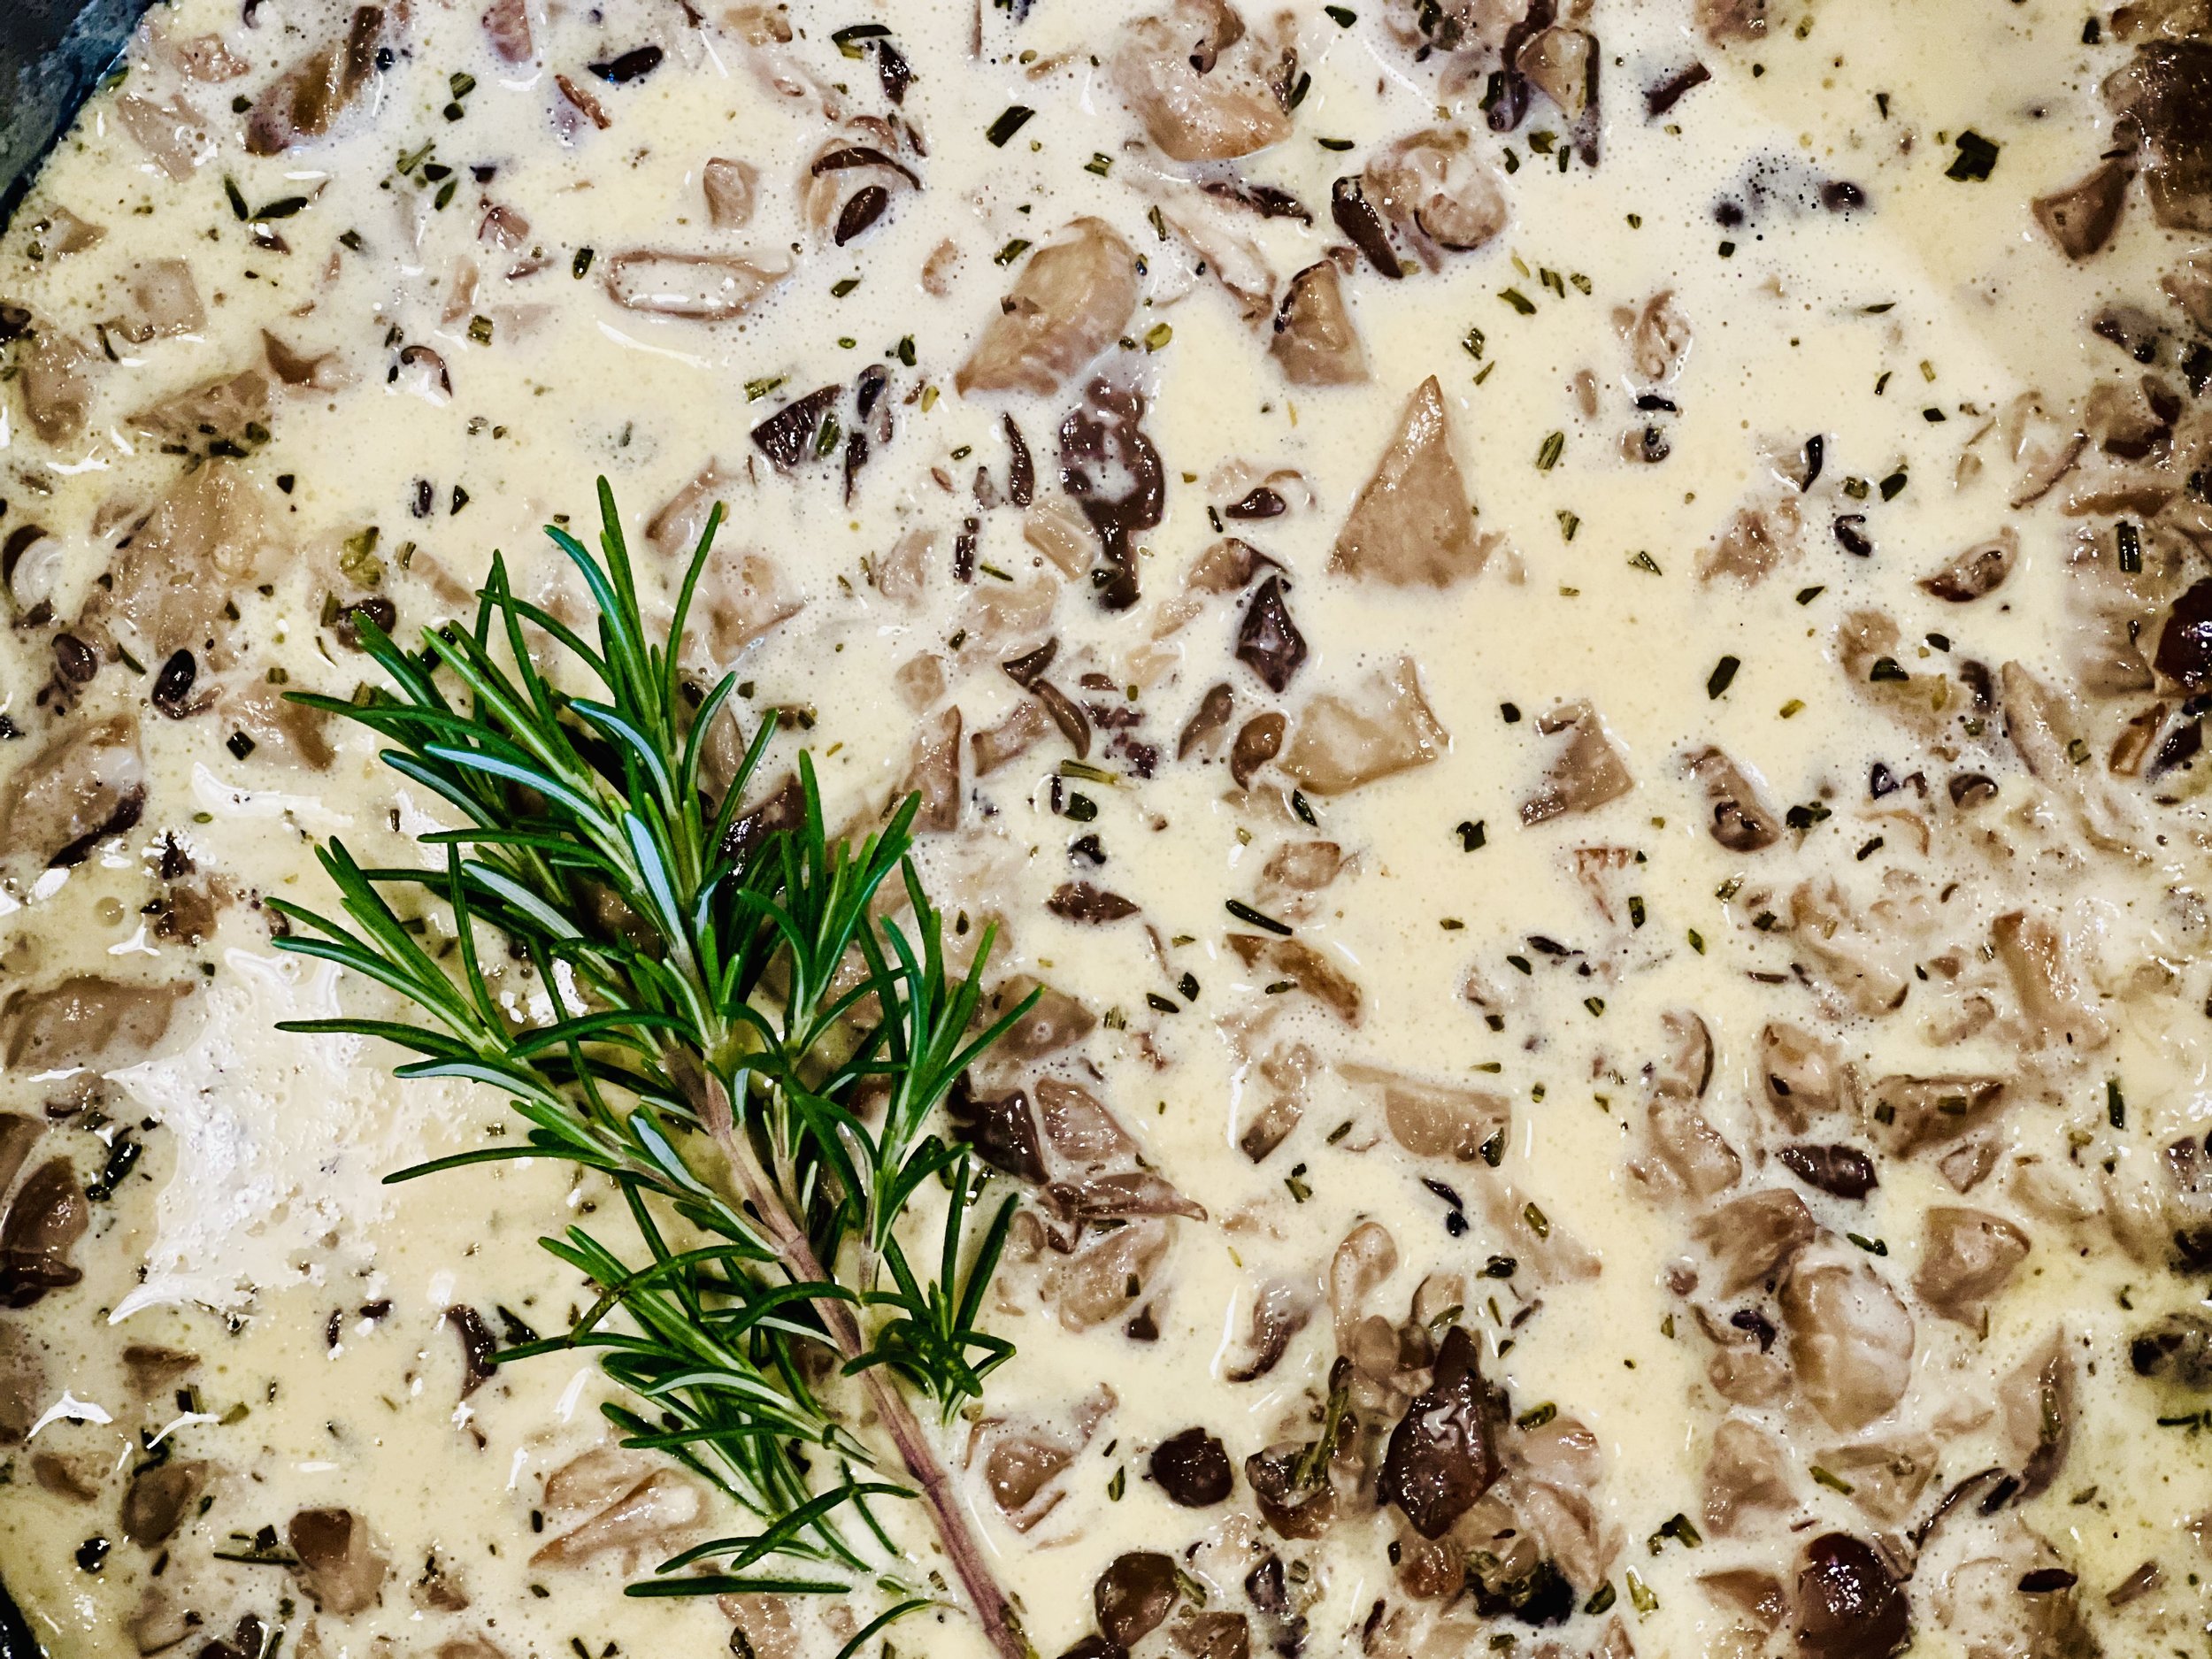
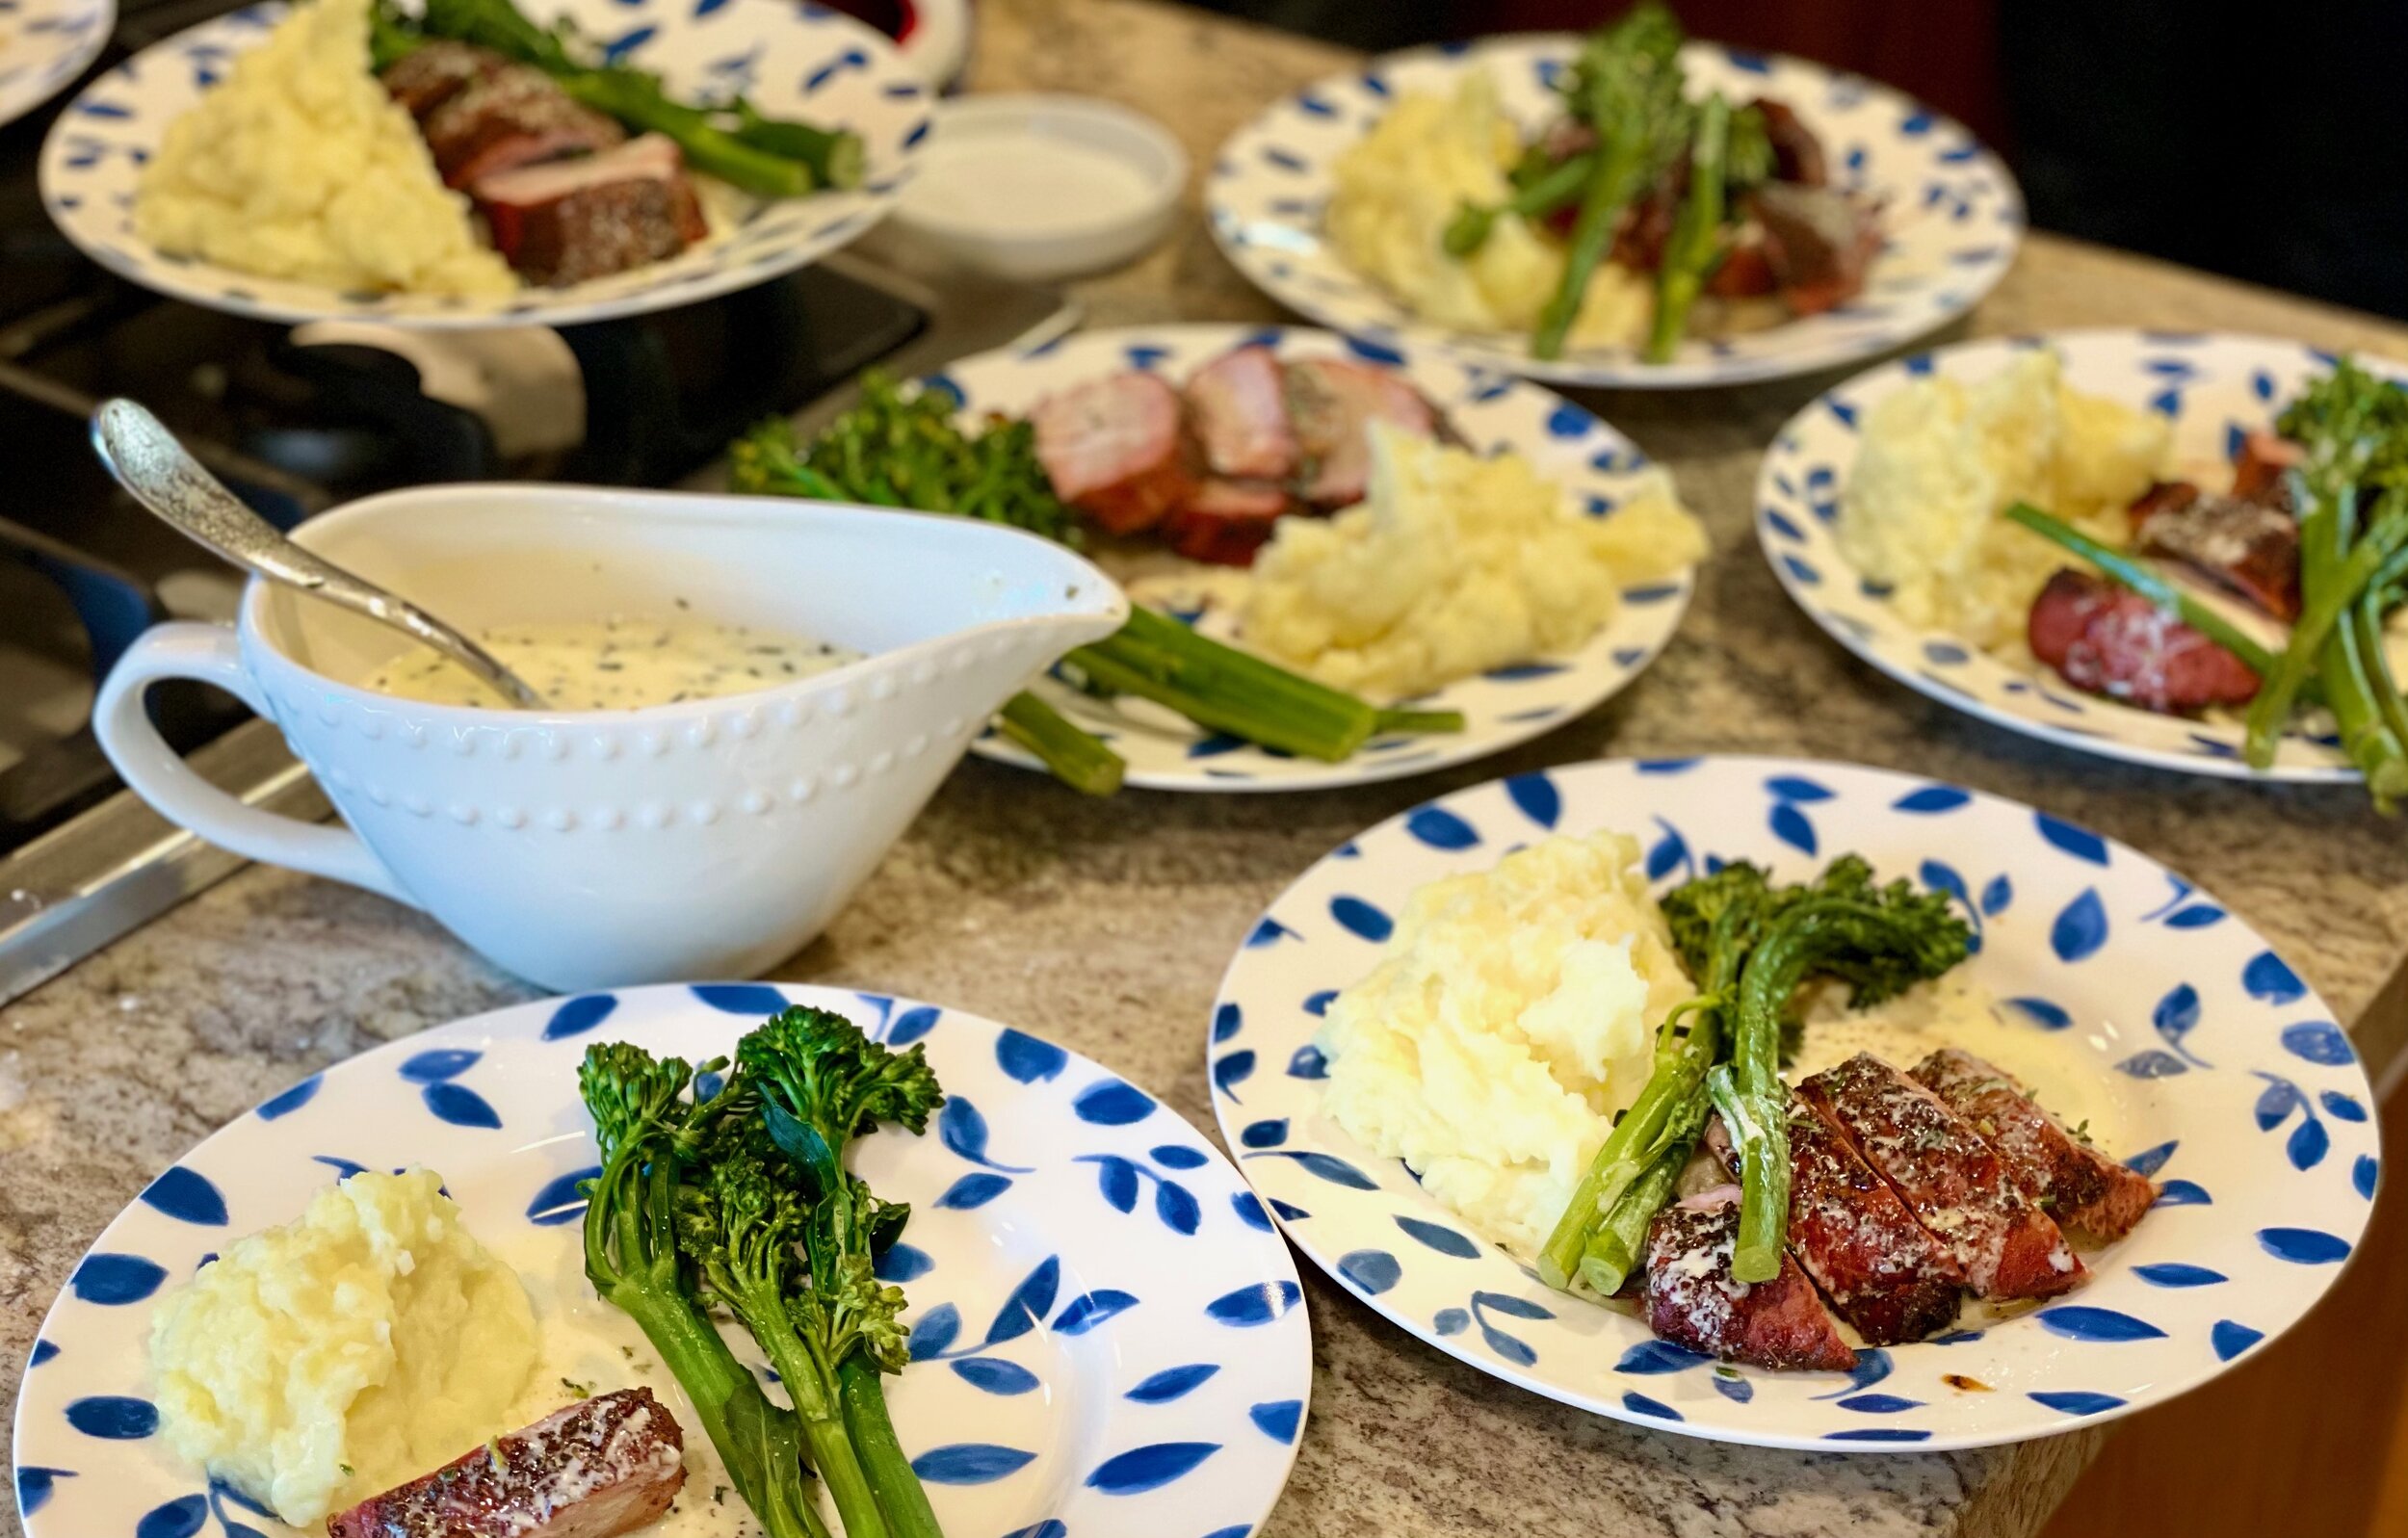
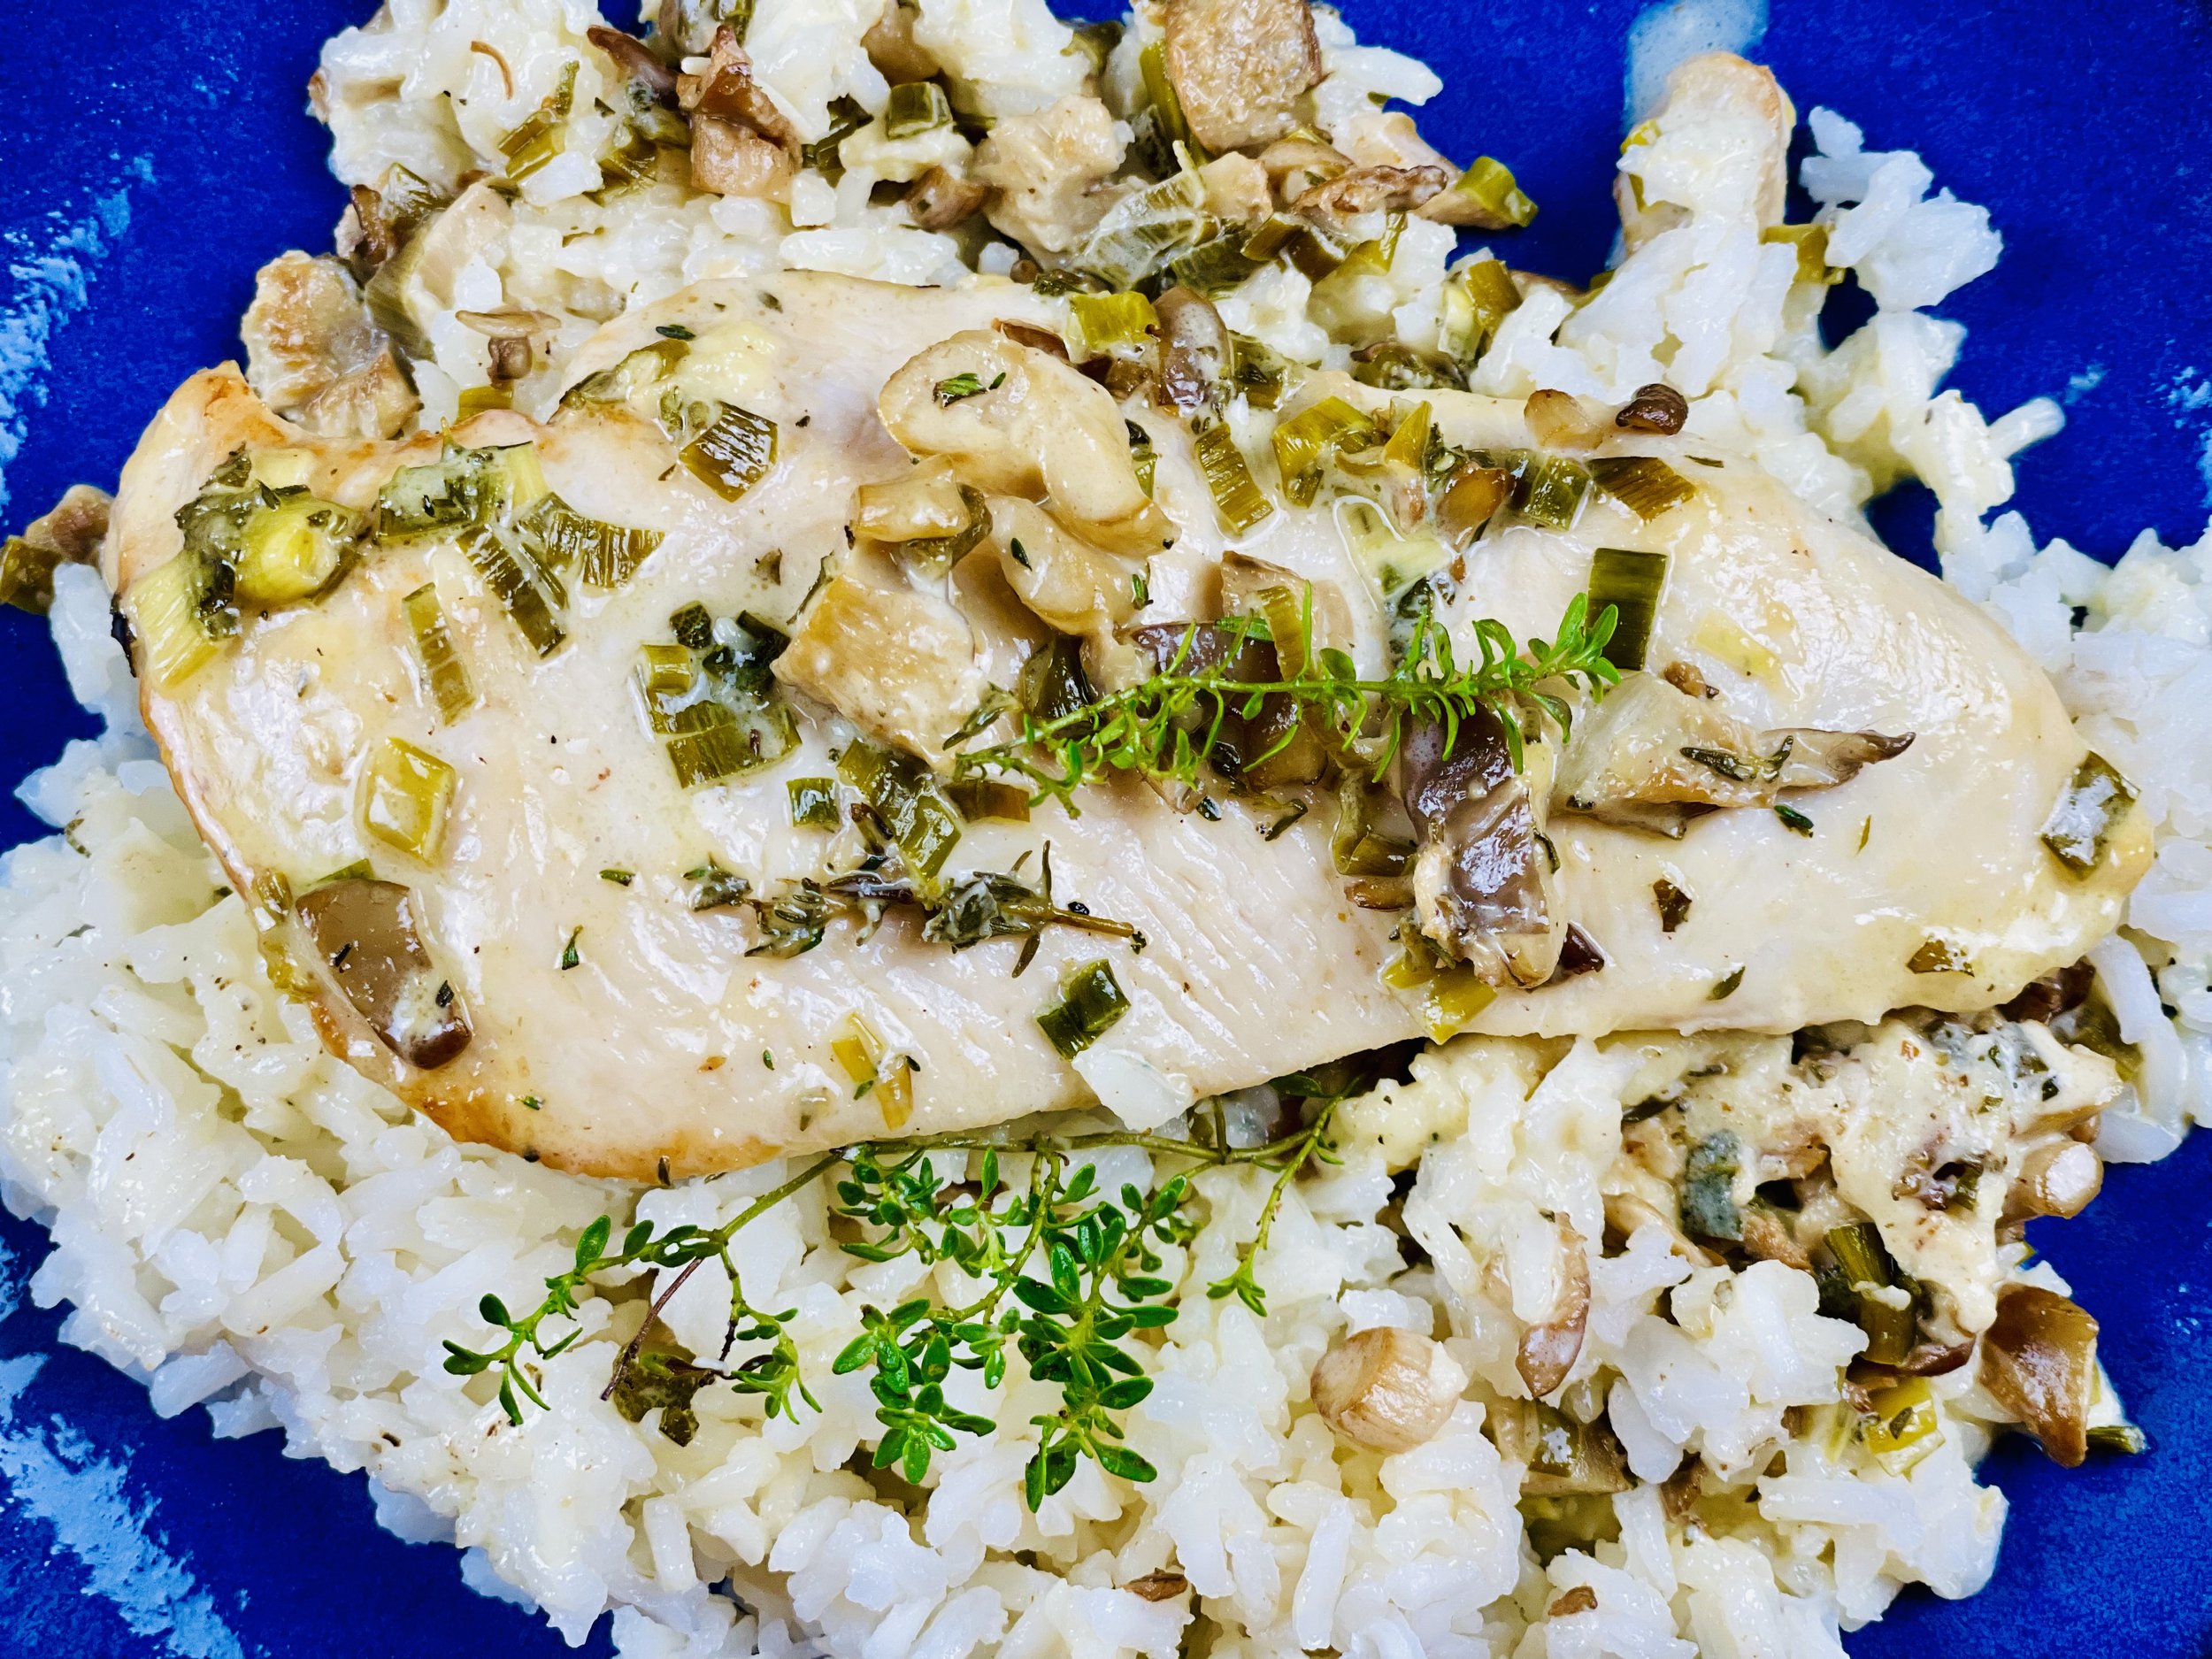
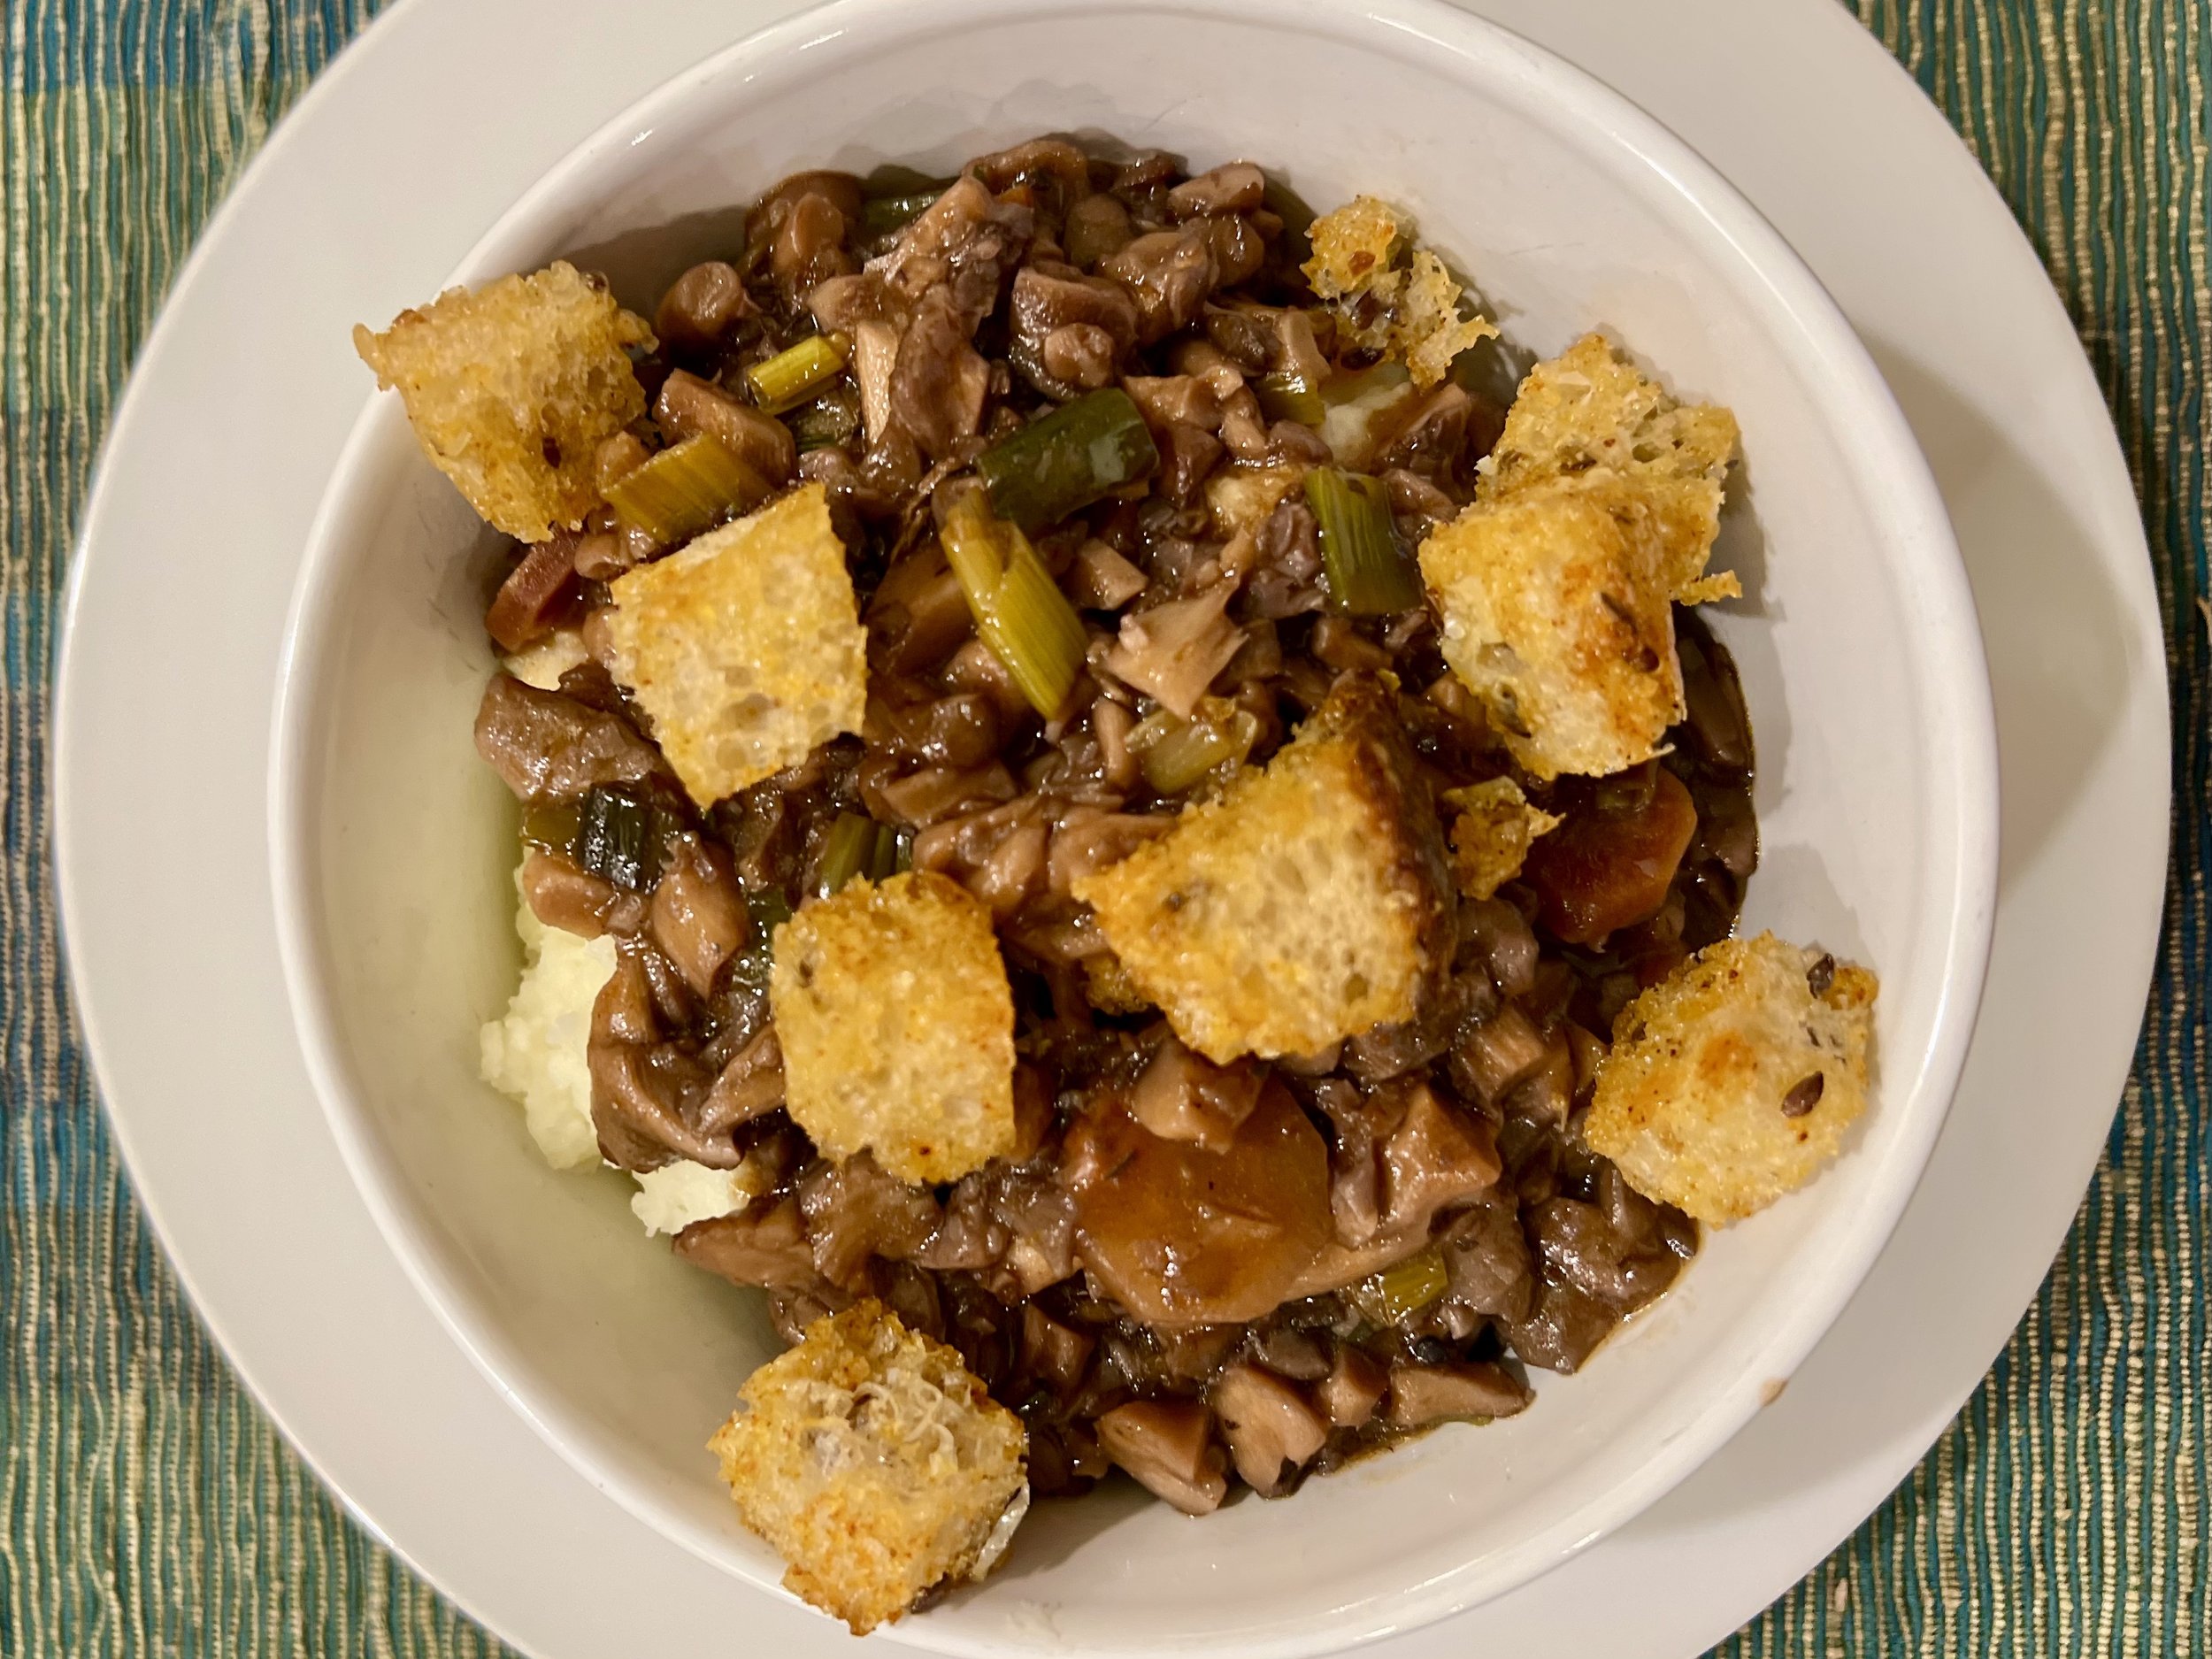
Creamy Mushroom Chicken with Fresh Herbs (low FODMAP)
15 Minutes prep • 30 Minutes cook • Low FODMAP • Gluten-free • Serves 4
15 Minutes prep • 30 Minutes cook • Low FODMAP • Gluten-free • Serves 4 • Ok to make-ahead: Step 1
This creamy sauce is loaded with mushrooms and fresh herbs and it’s simply divine so be sure to serve this dish with rice or potatoes so you have something to “catch” all that good sauce and deliver it to your taste buds! This can be made with white meat or dark, so follow your preference (and cook the dark meat just a bit longer in the oven to be sure it’s done!)
Ingredients
1 tablespoon garlic-infused olive oil
3 tablespoons salted butter
3 boneless chicken breasts or thighs
1 1/2 cups oyster mushrooms, sliced
4 green onions (green part only), chopped
1 tablespoon fresh thyme leaves (or 1 teaspoon dried thyme)
2 teaspoons chopped fresh sage (or 1/2 teaspoon dried sage)
2 teaspoons chopped fresh oregano (or 1/2 teaspoon dried oregano)
1 1/4 cups dry white, wine such as Sauvignon Blanc or Pinot Grigio
3/4 cup heavy cream
4 ounces Brie, rind removed
Directions
(1) Prepare the chicken: Remove chicken breasts from the package. If they are very thick, cut them in half horizontally and lay them on a rimmed plate or baking dish. Season both sides of each breast lightly with Kosher salt. Cover with plastic wrap and refrigerate until ready to use at least 4 hours before cooking.
Make-ahead note: This chicken is pretty quick to cook but the texture and flavor benefit greatly from early salting. So, salt your chicken and let it sit for at least 4 hours before you cook it (or overnight even better!)
(2) Preheat the oven: to 375 degrees F.
(3) Prepare the side: Cook steamed white or brown rice per package instructions or or mashed potatoes.
(4) Sear the chicken: Heat the olive oil in a large skillet set over medium-high heat. Add the chicken and season with fresh-ground black pepper. Sear on both sides until golden, about 3-5 minutes per side. Add 1 tablespoon butter and allow the butter to brown around the chicken, about 2 minutes. Remove the chicken from the skillet and set aside.
(5) Cook the mushrooms: To the skillet, add the mushrooms. Cook stirring occasionally for 5 minutes or until golden. Add 2 tablespoons butter, green onions, thyme, sage, and oregano. Cook 4-5 minutes until the mushrooms have caramelized a bit. Taste and add and a pinch each of salt, and/or pepper if needed.
(6) Add the wine and cream: Pour in the wine. Cook 5 minutes until reduced slightly, then pour in the cream and stir in the brie until it is melted. Slide the chicken back into the sauce and spoon the sauce over each breast if they are not submerged.
(7) Finish: Bake about 10 minutes, until the chicken is just cooked through. Remove from the oven.
(8) Plate and serve: Put steamed rice, or mashed potatoes on each plate and spoon some of the sauce over the top. Then add a chicken breast, a bit more sauce, and top with additional fresh thyme or parsley.
Eat and enjoy every bite because you can!
*This post may contain links for you to easily purchase items listed on the page. In some cases, we have provided a special discount code for IBS Game Changers so be sure to use it when you purchase an item to get the discount that has been arranged just for you! As an Amazon Associate, I earn a commission from qualifying Amazon purchases.
More Deliciously Low FODMAP™ main course recipes you might enjoy
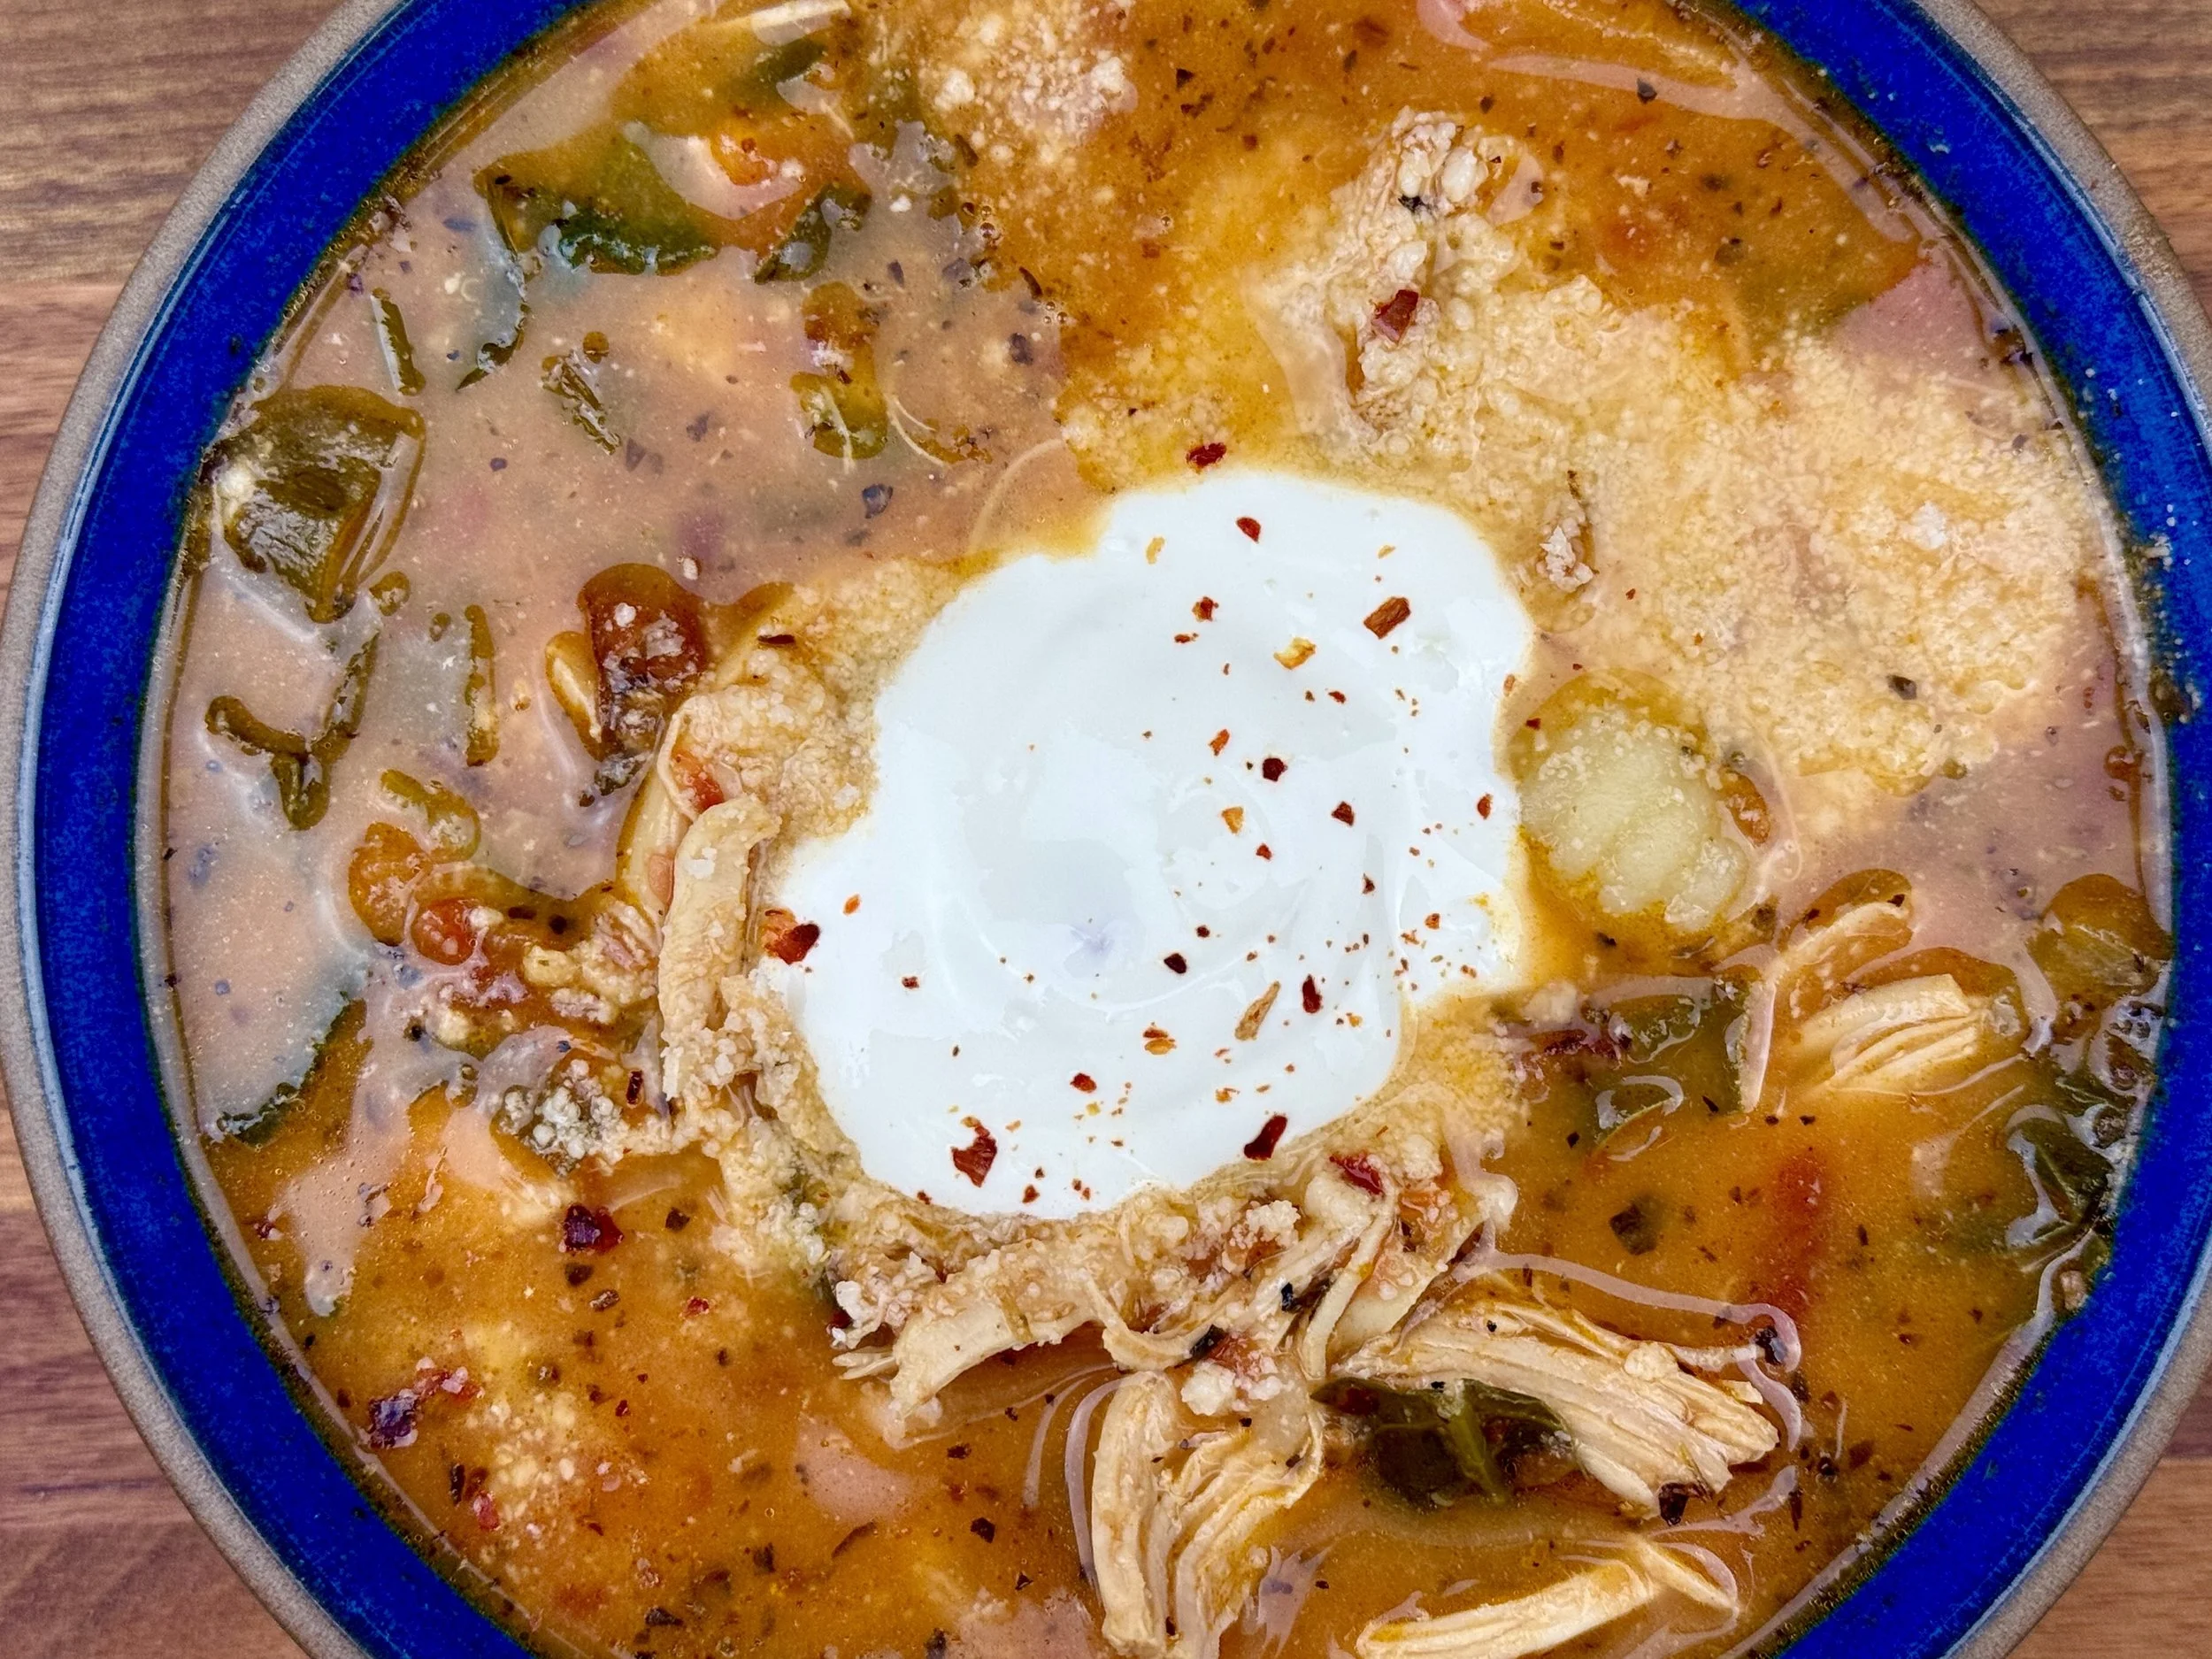
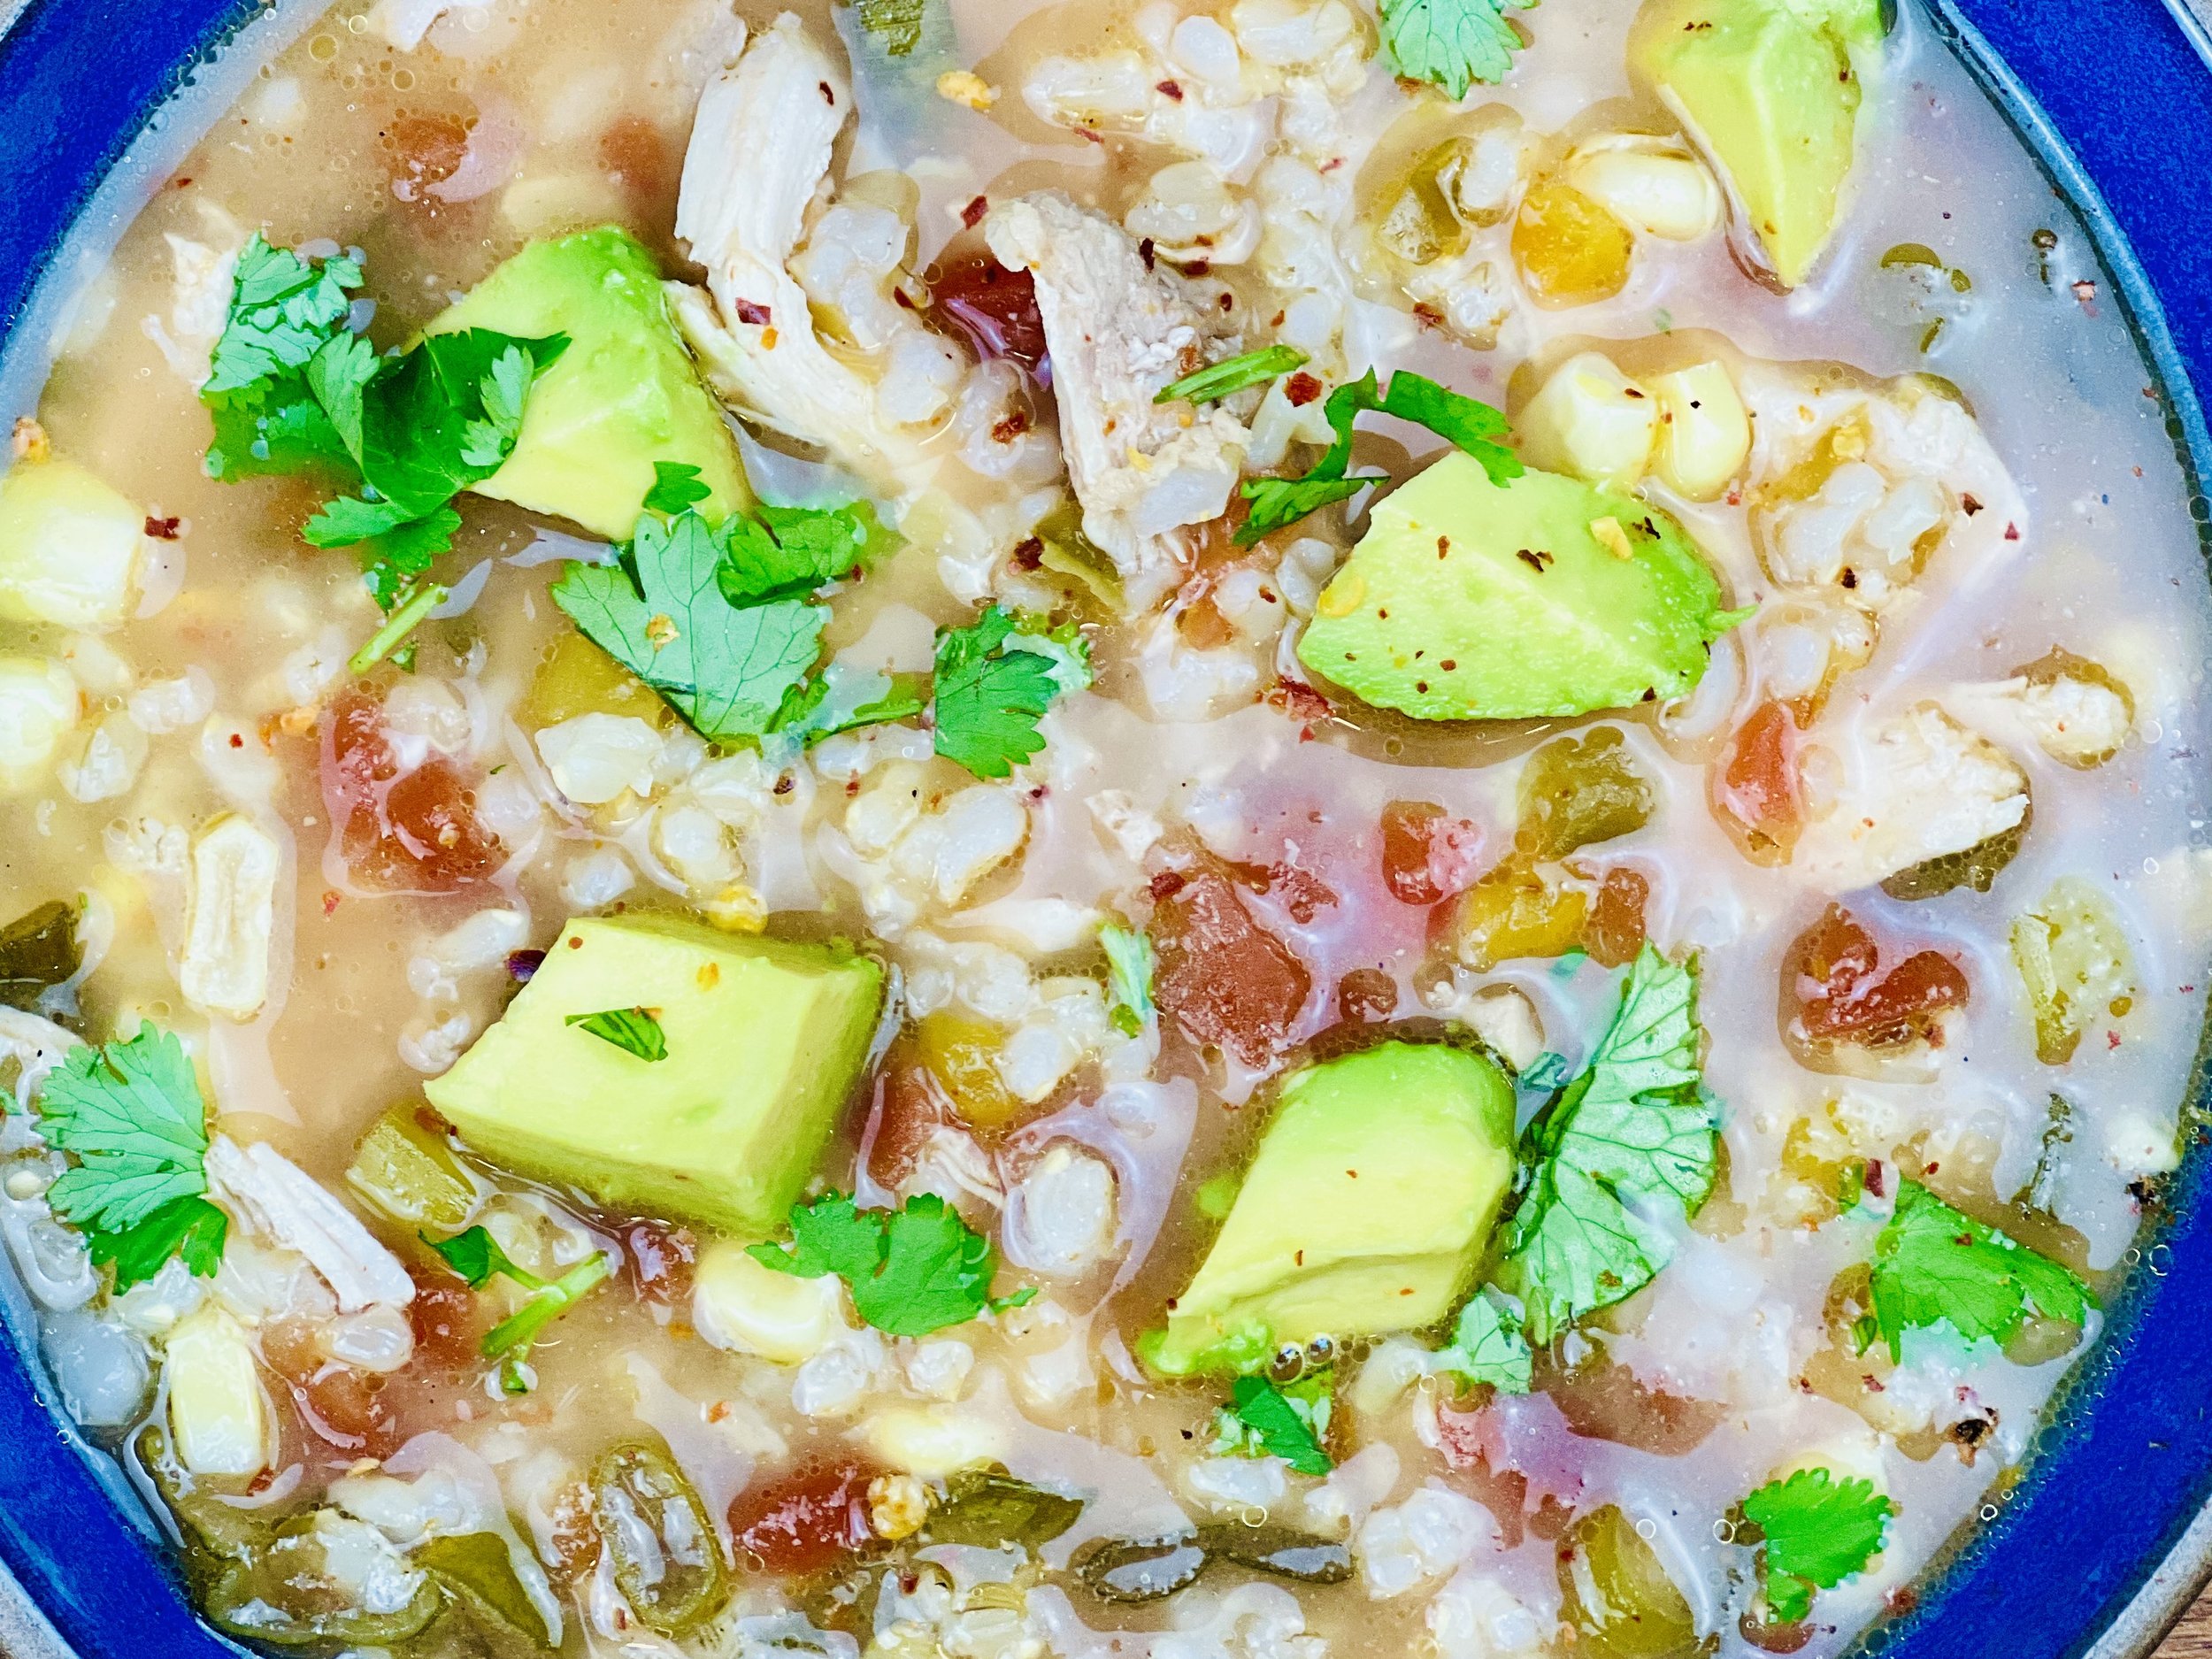
Cheesy Chicken Enchiladas (low FODMAP)
15 Minutes prep • 45 Minutes cook • Low FODMAP • Gluten-free • Serves 6
15 Minutes prep • 45 Minutes cook • Low FODMAP • Gluten-free • Serves 6 • Ok to make-ahead: Steps 1 - 2
When I was a kid we only went out to eat once in awhile and when we did, we often went to special Mexican restaurant that made amazing enchiladas. Until now, I thought those enchiladas were a distant memory that I would never be able to enjoy again — especially because they were probably loaded with garlic and onions! Enter…cheesy chicken enchiladas. These enchiladas are, perhaps, the best I've ever had! Making the enchilada sauce from scratch is a snap and it makes ALL the difference! The rich flavor of ancho chili powder, oregano and cumin are carried through the sauce into the enchiladas for a rich and satisfying taste experience that’s perfect with our Mexican Rice.

Ingredients
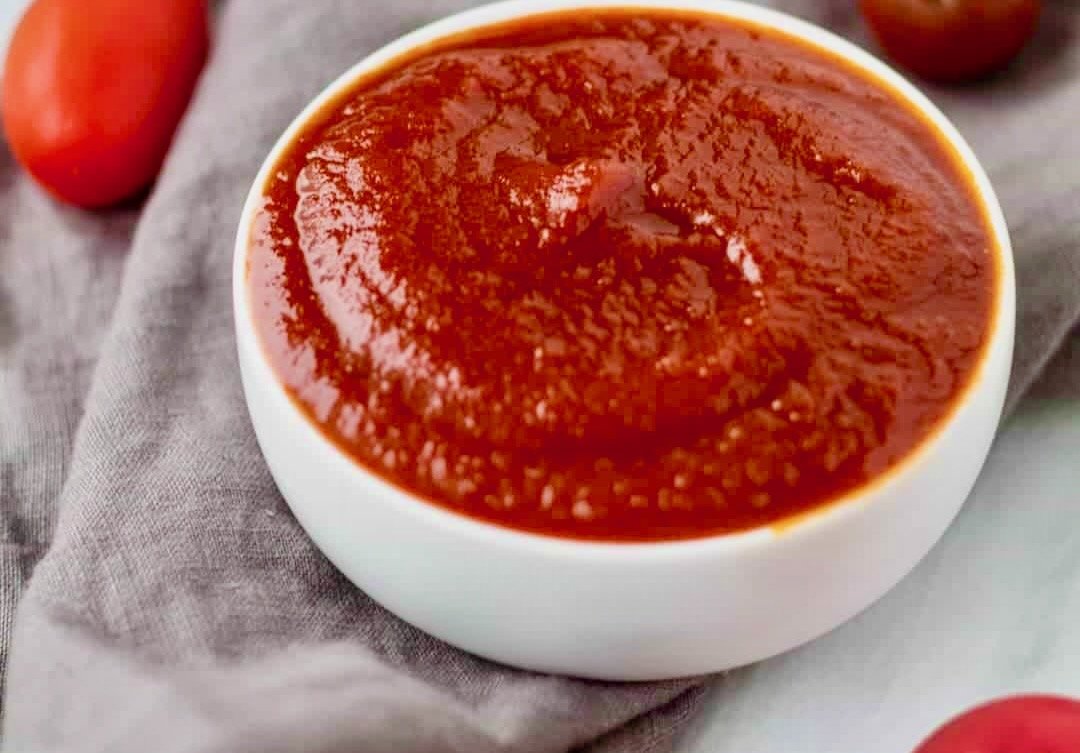
1 1/2 cups of our Red Enchilada Sauce, or purchased low FODMAP red enchilada sauce
1 1/2 pounds boneless, skinless chicken breasts, diced
1/4 teaspoon ancho chili powder*
1/4 teaspoon cumin*
1/4 teaspoon oregano*
Freshly ground black pepper*
2 teaspoons garlic-infused olive oil*
8 ounce can chopped green chilies
8 ounces extra-sharp cheddar cheese, grated
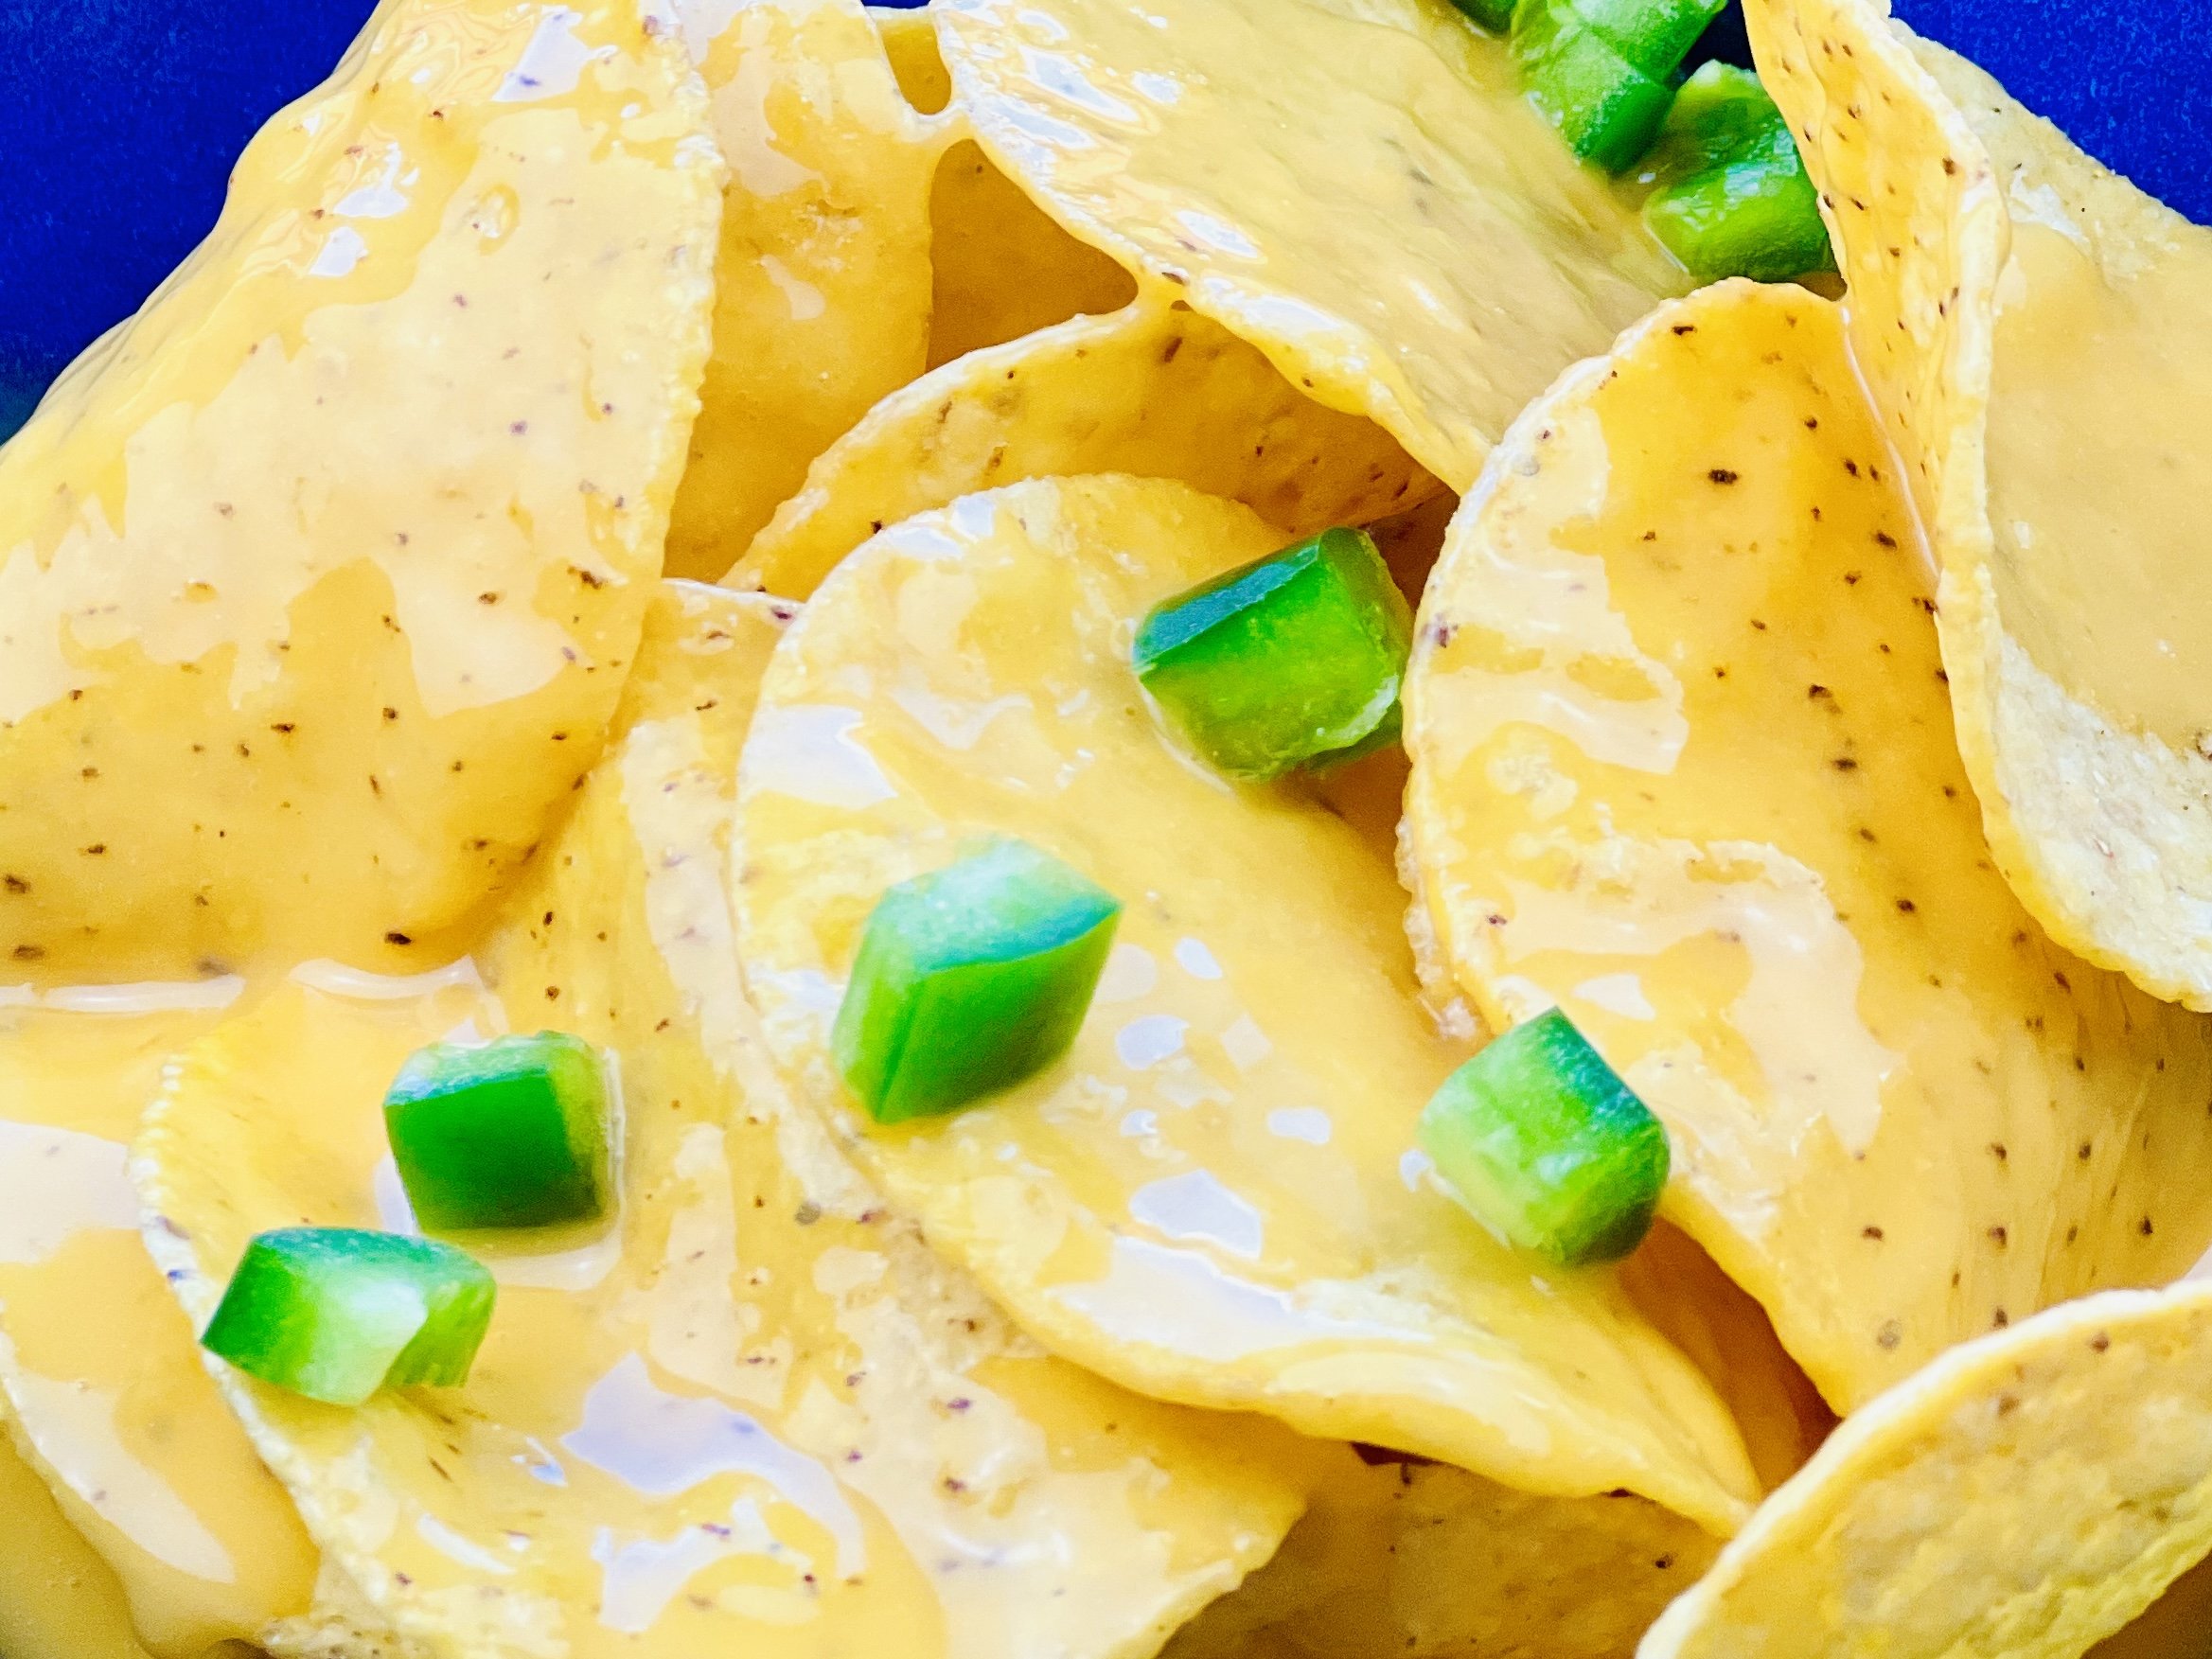
8 corn tortillas (low FODMAP)
4 ounces feta cheese, crumbled
1/4 cup cilantro, chopped
1/4 cup green onions (green part only), chopped
Lactose-free sour cream and sliced avocado (for serving)
Directions
(1) Prepare chicken: This step is optional but results in more tender and flavorful meat. If you don’t have time for this step, don’t worry, It will still be delicious! Remove chicken breasts from the package and lay on a rimmed plate or baking dish. Season both sides of each breast lightly with Kosher salt. Cover with plastic wrap and refrigerate until ready to use or at least 4 hours before cooking.
(2) Season chicken: Place diced chicken in a mixing bowl and add the chili powder, cumin, oregano, and several grinds of black pepper and toss to coat. If you didn’t pre-salt the chicken, add about 1 teaspoon of salt too.
(3) Prepare other ingredients: Preheat oven to 350 degrees F and grate cheese, wash and chop green onions and cilantro,
(4) Cook chicken: Heat oil in a medium-sized nonstick skillet over medium heat until hot, add chicken and cook, stirring often, until about halfway cooked through (just losing its pink color), about 3 to 5 minutes. Stir in green chilis (to taste) and a splash of the enchilada sauce and stir to coat. Continue cooking the chicken until cooked through, about 3 to 5 minutes more.
(4) Prepare enchiladas: Cover the bottom of your 13 x 9 inch baking pan with a small amount of enchilada sauce. In each tortilla, spread a spoonful of enchilada sauce down the middle of the tortilla, then add a spoonful of the cooked chicken and a sprinkle of the grated cheddar cheese. Roll the tortilla and place it seam side down in the prepared pan. Repeat with remaining tortillas, chicken, and about one-third of the cheese. Pour the remaining enchilada sauce over the rolled tortillas, sprinkle with the remaining cheddar cheese and then sprinkle the feta evenly over the top of the cheddar.
Make-ahead note: At this point, you may cover the pan of enchiladas with plastic wrap and refrigerate overnight. When ready to cook, bring enchiladas to room temperature while the oven preheats. You may need to cook for 30 minutes, depending on how cold they are when you put them in the oven.
(5) Bake the enchiladas: Bake for about 20 minutes or until filling is hot and the cheese is bubbly. Sprinkle cilantro and scallions over the top and serve immediately with additional chopped green onions, cilantro, lactose-free sour cream, and sliced avocado.
Recipe note: I use Diamond Crystal Kosher salt in all my recipes because it has a wonderful flat and crisp flake that tastes delicious. It is also the least salty salt available so you can use it more liberally as a seasoning than you can table salt or sea salt. If you use another type of salt, you may need to reduce the amount so it is not over-salted.
Eat and enjoy every bite because you can!
*This post may contain links for you to easily purchase items listed on the page. In some cases, we have provided a special discount code for IBS Game Changers so be sure to use it when you purchase an item to get the discount that has been arranged just for you! As an Amazon Associate, I earn a commission from qualifying Amazon purchases.
More Deliciously Low FODMAP™ main courses you might enjoy
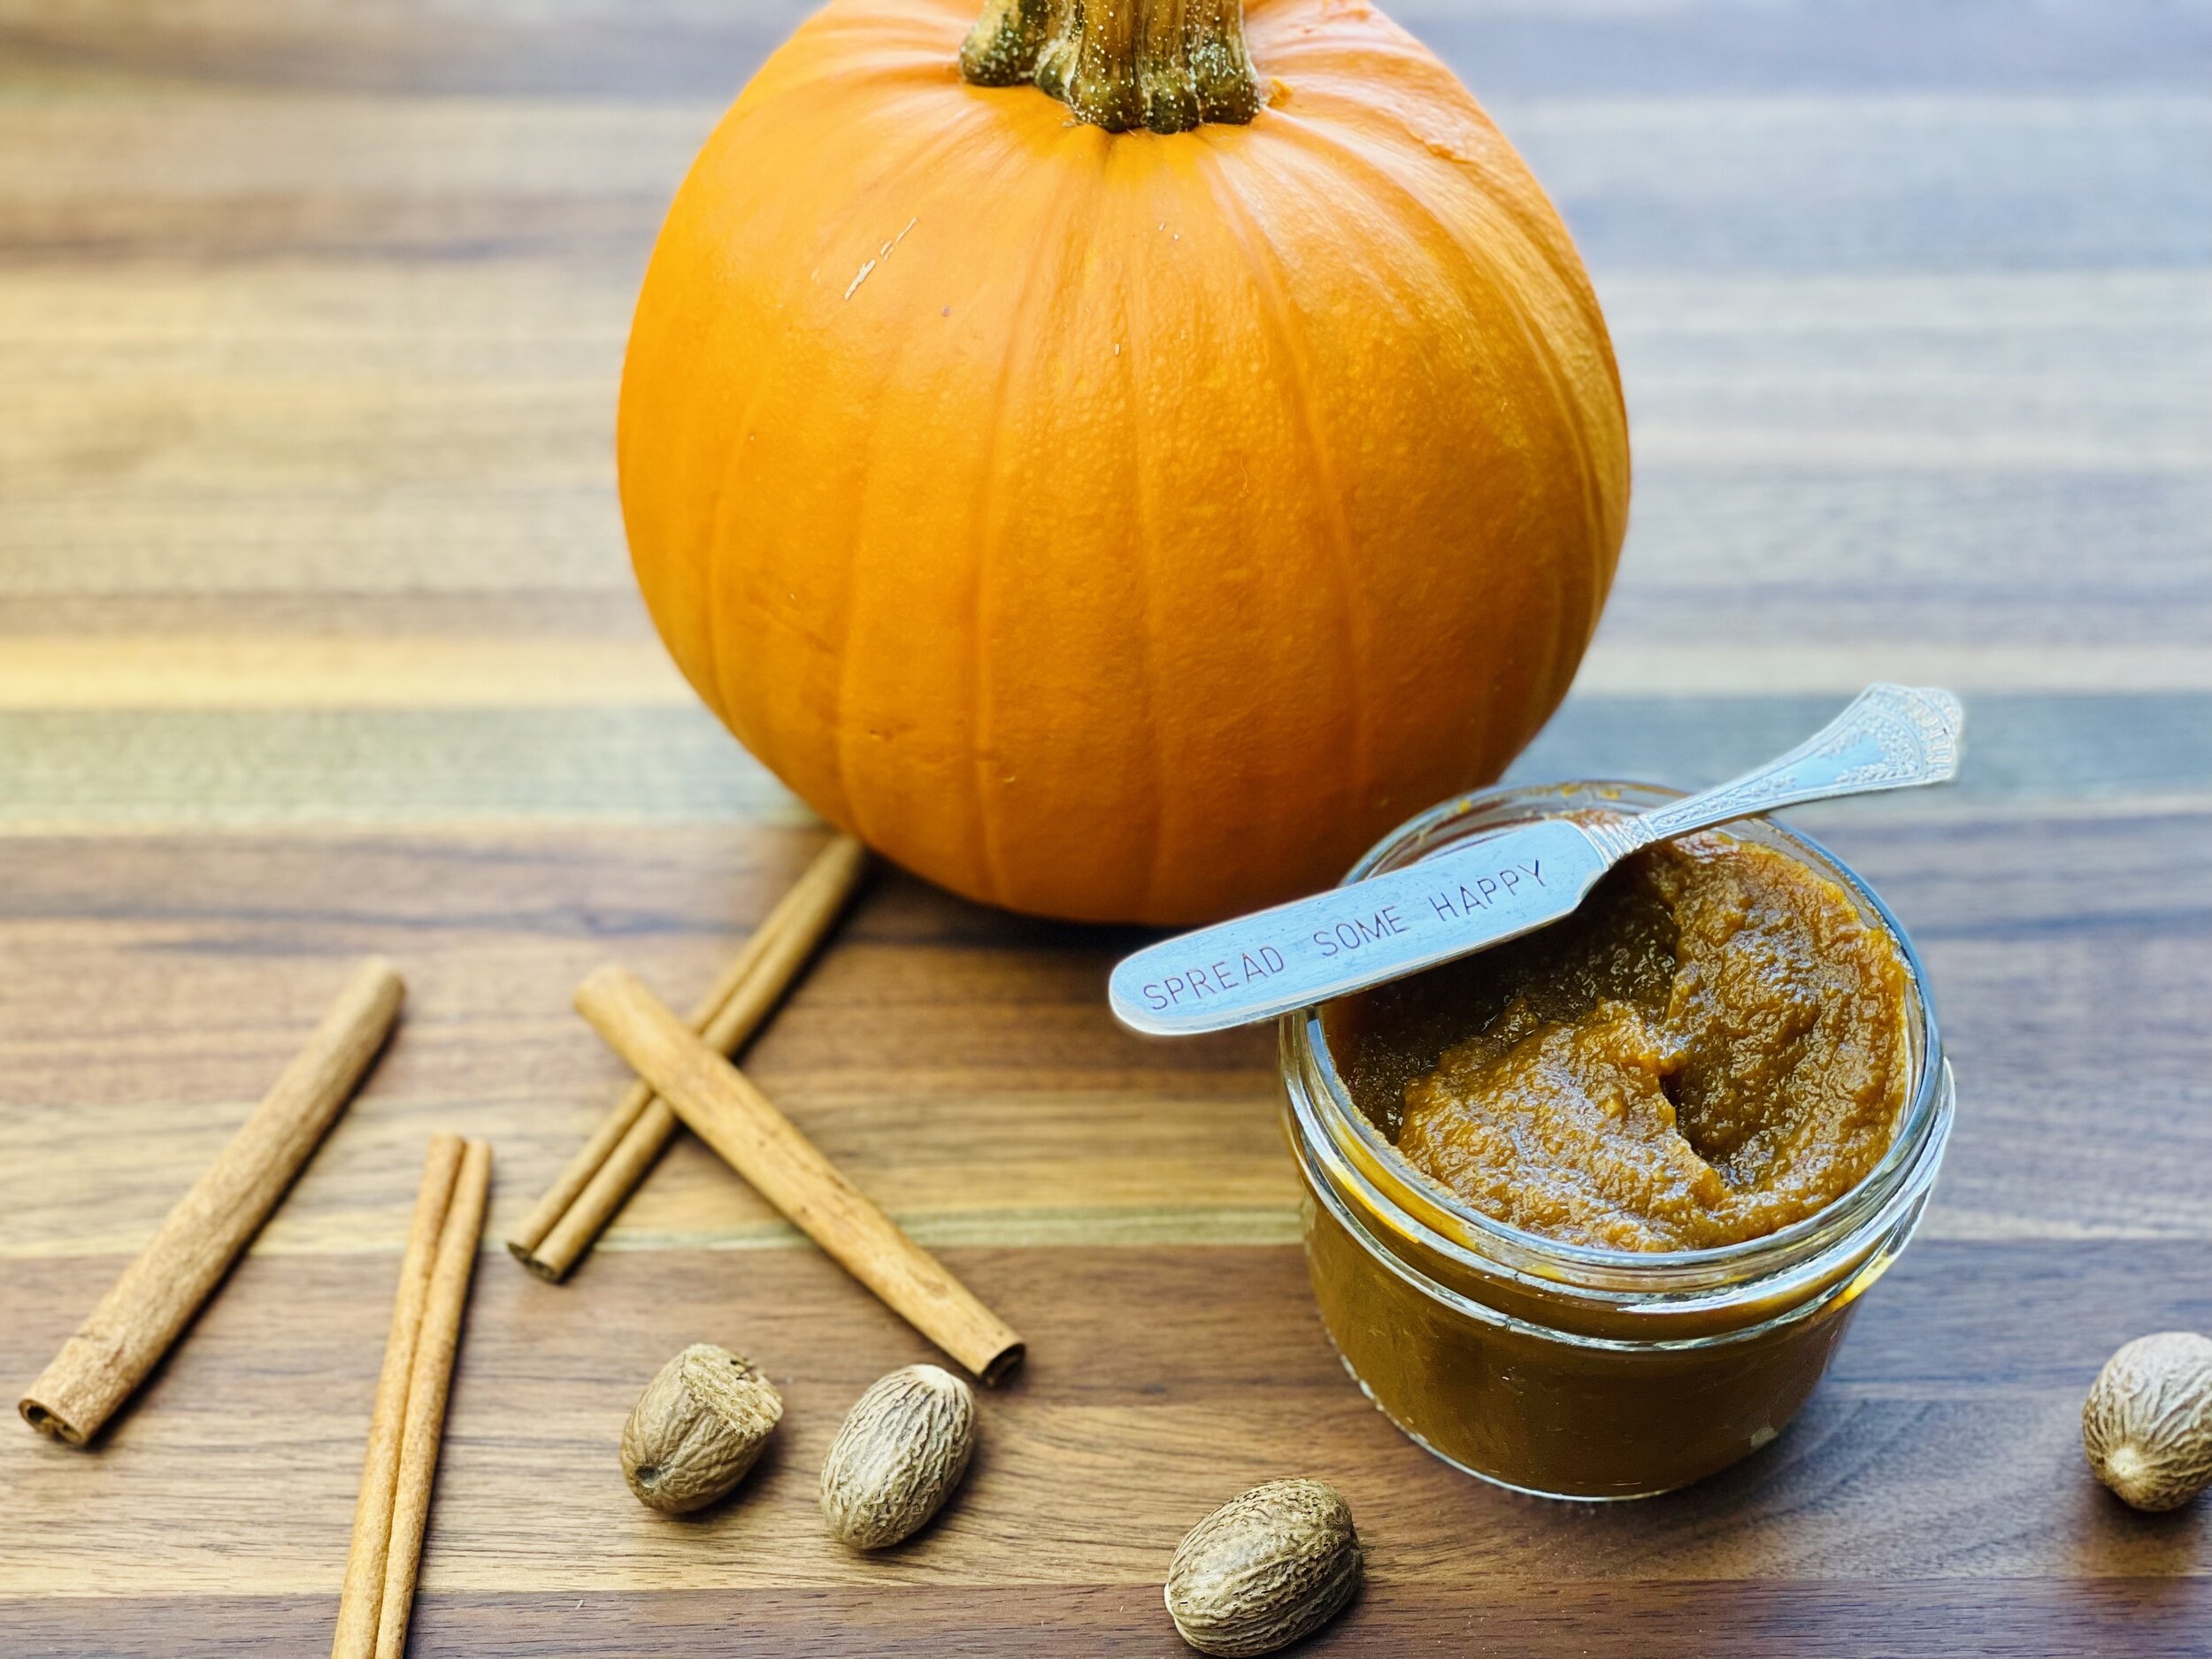
Pumpkin Spice Ice Cream Bars (low FODMAP)
10 Minutes prep • 10 Minutes cook • Low FODMAP • Gluten-free
10 Minutes prep • 10 Minutes cook • Low FODMAP • Gluten-free • Makes 4 - 6 bars • Ok to make-ahead: Step 1
I was born right on top of Thanksgiving and I’ve always attributed that happy connection to my love of all things pumpkin! Particularly pumpkin ice cream!! This recipe captures all the scrumptious flavor of pumpkin spice set in the creamiest package you can imagine. If you’re a pumpkin fan, get ready to discover your new favorite pumpkin ice cream treat!
This is an exclusive recipe just for recipe club members.
Each week I am creating and delivering one very special recipe just for my recipe club members. If you’re not yet a member, I encourage you to join! Membership in the club includes access to the complete archive of recipes with filters so it can become your virtual low FODMAP cookbook plus, I am creating and delivering one special NEW recipe every week ONLY for recipe club members. And, for my true fans, I’ll be sharing behind-the-scenes content, and updates on the progress of the new cookbook.
Your membership in the club helps me continue creating new, delicious, easy-to-make, low FODMAP recipes just for you.
As always, all recipes will emphasize simple ingredients, easy preparation, and delicious low FODMAP results. Recipes will be for everything from main courses, salads, soups, side dishes, appetizers, desserts, sauces, breakfast and lunch, and even mocktails and cocktails. Everything you need to prepare fantastic low FODMAP meals everyone will love.
Join the club. Become a Patron. Let’s keep making delicious Low FODMAP meals together.
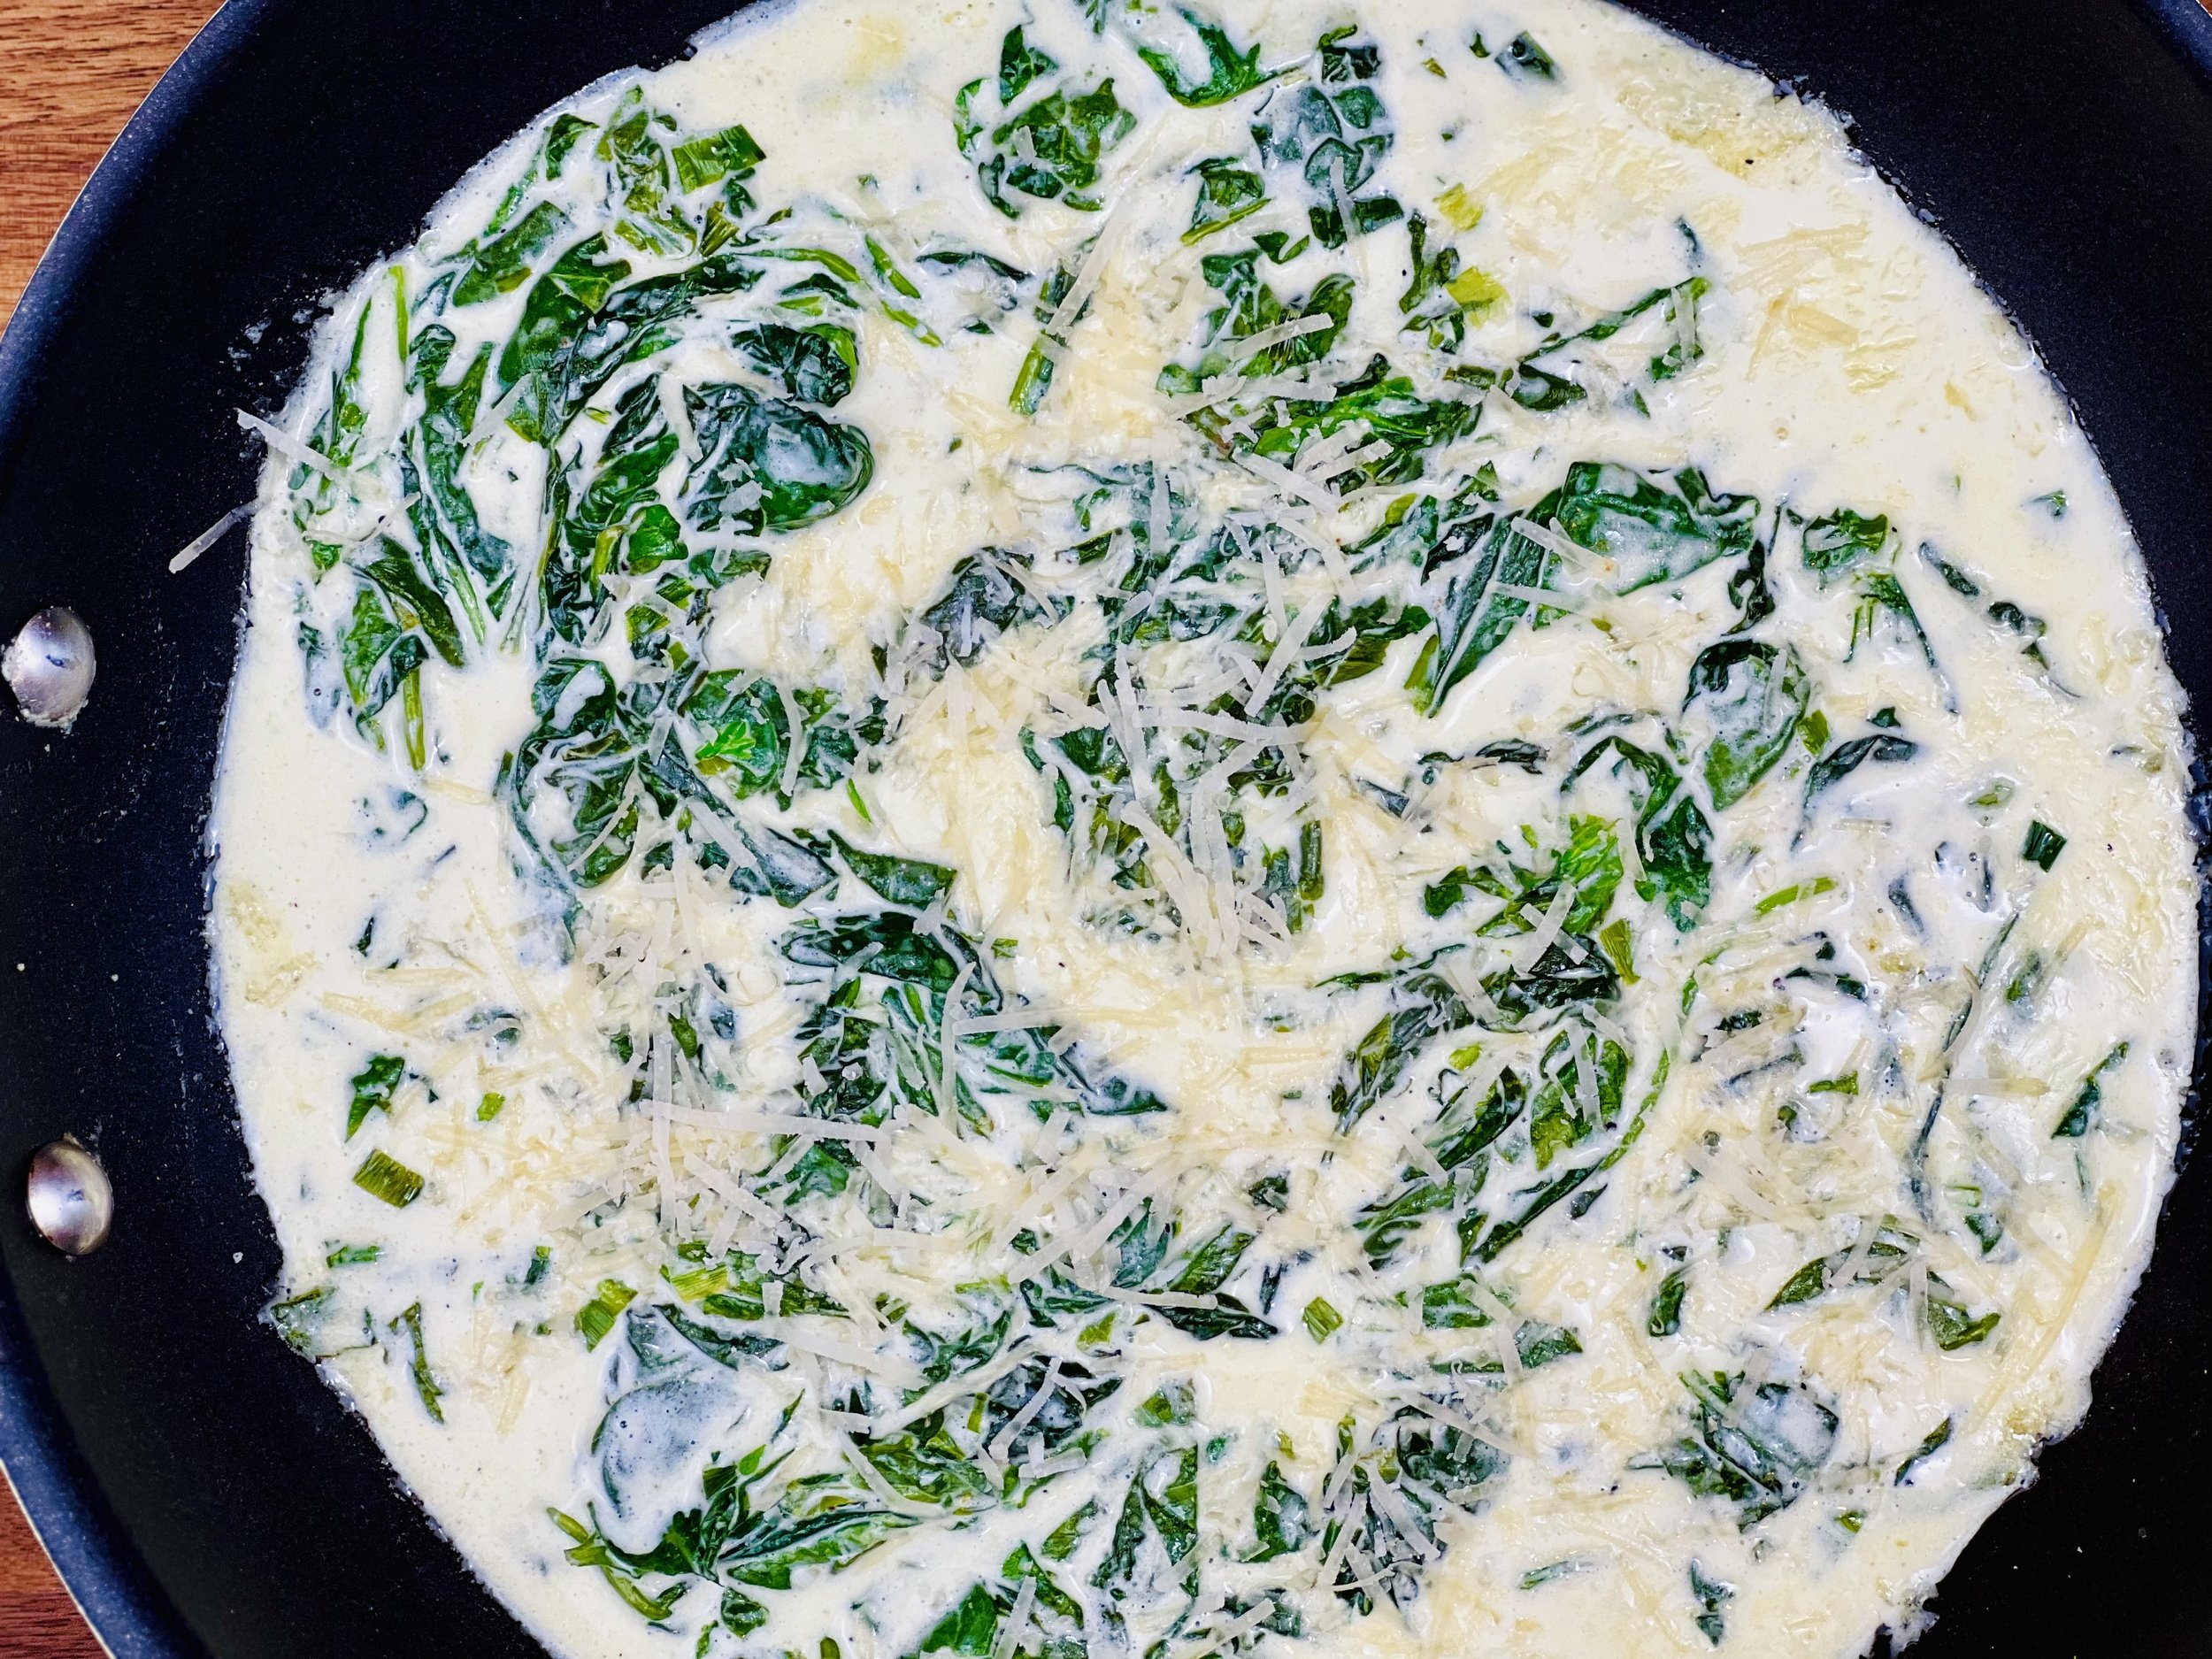
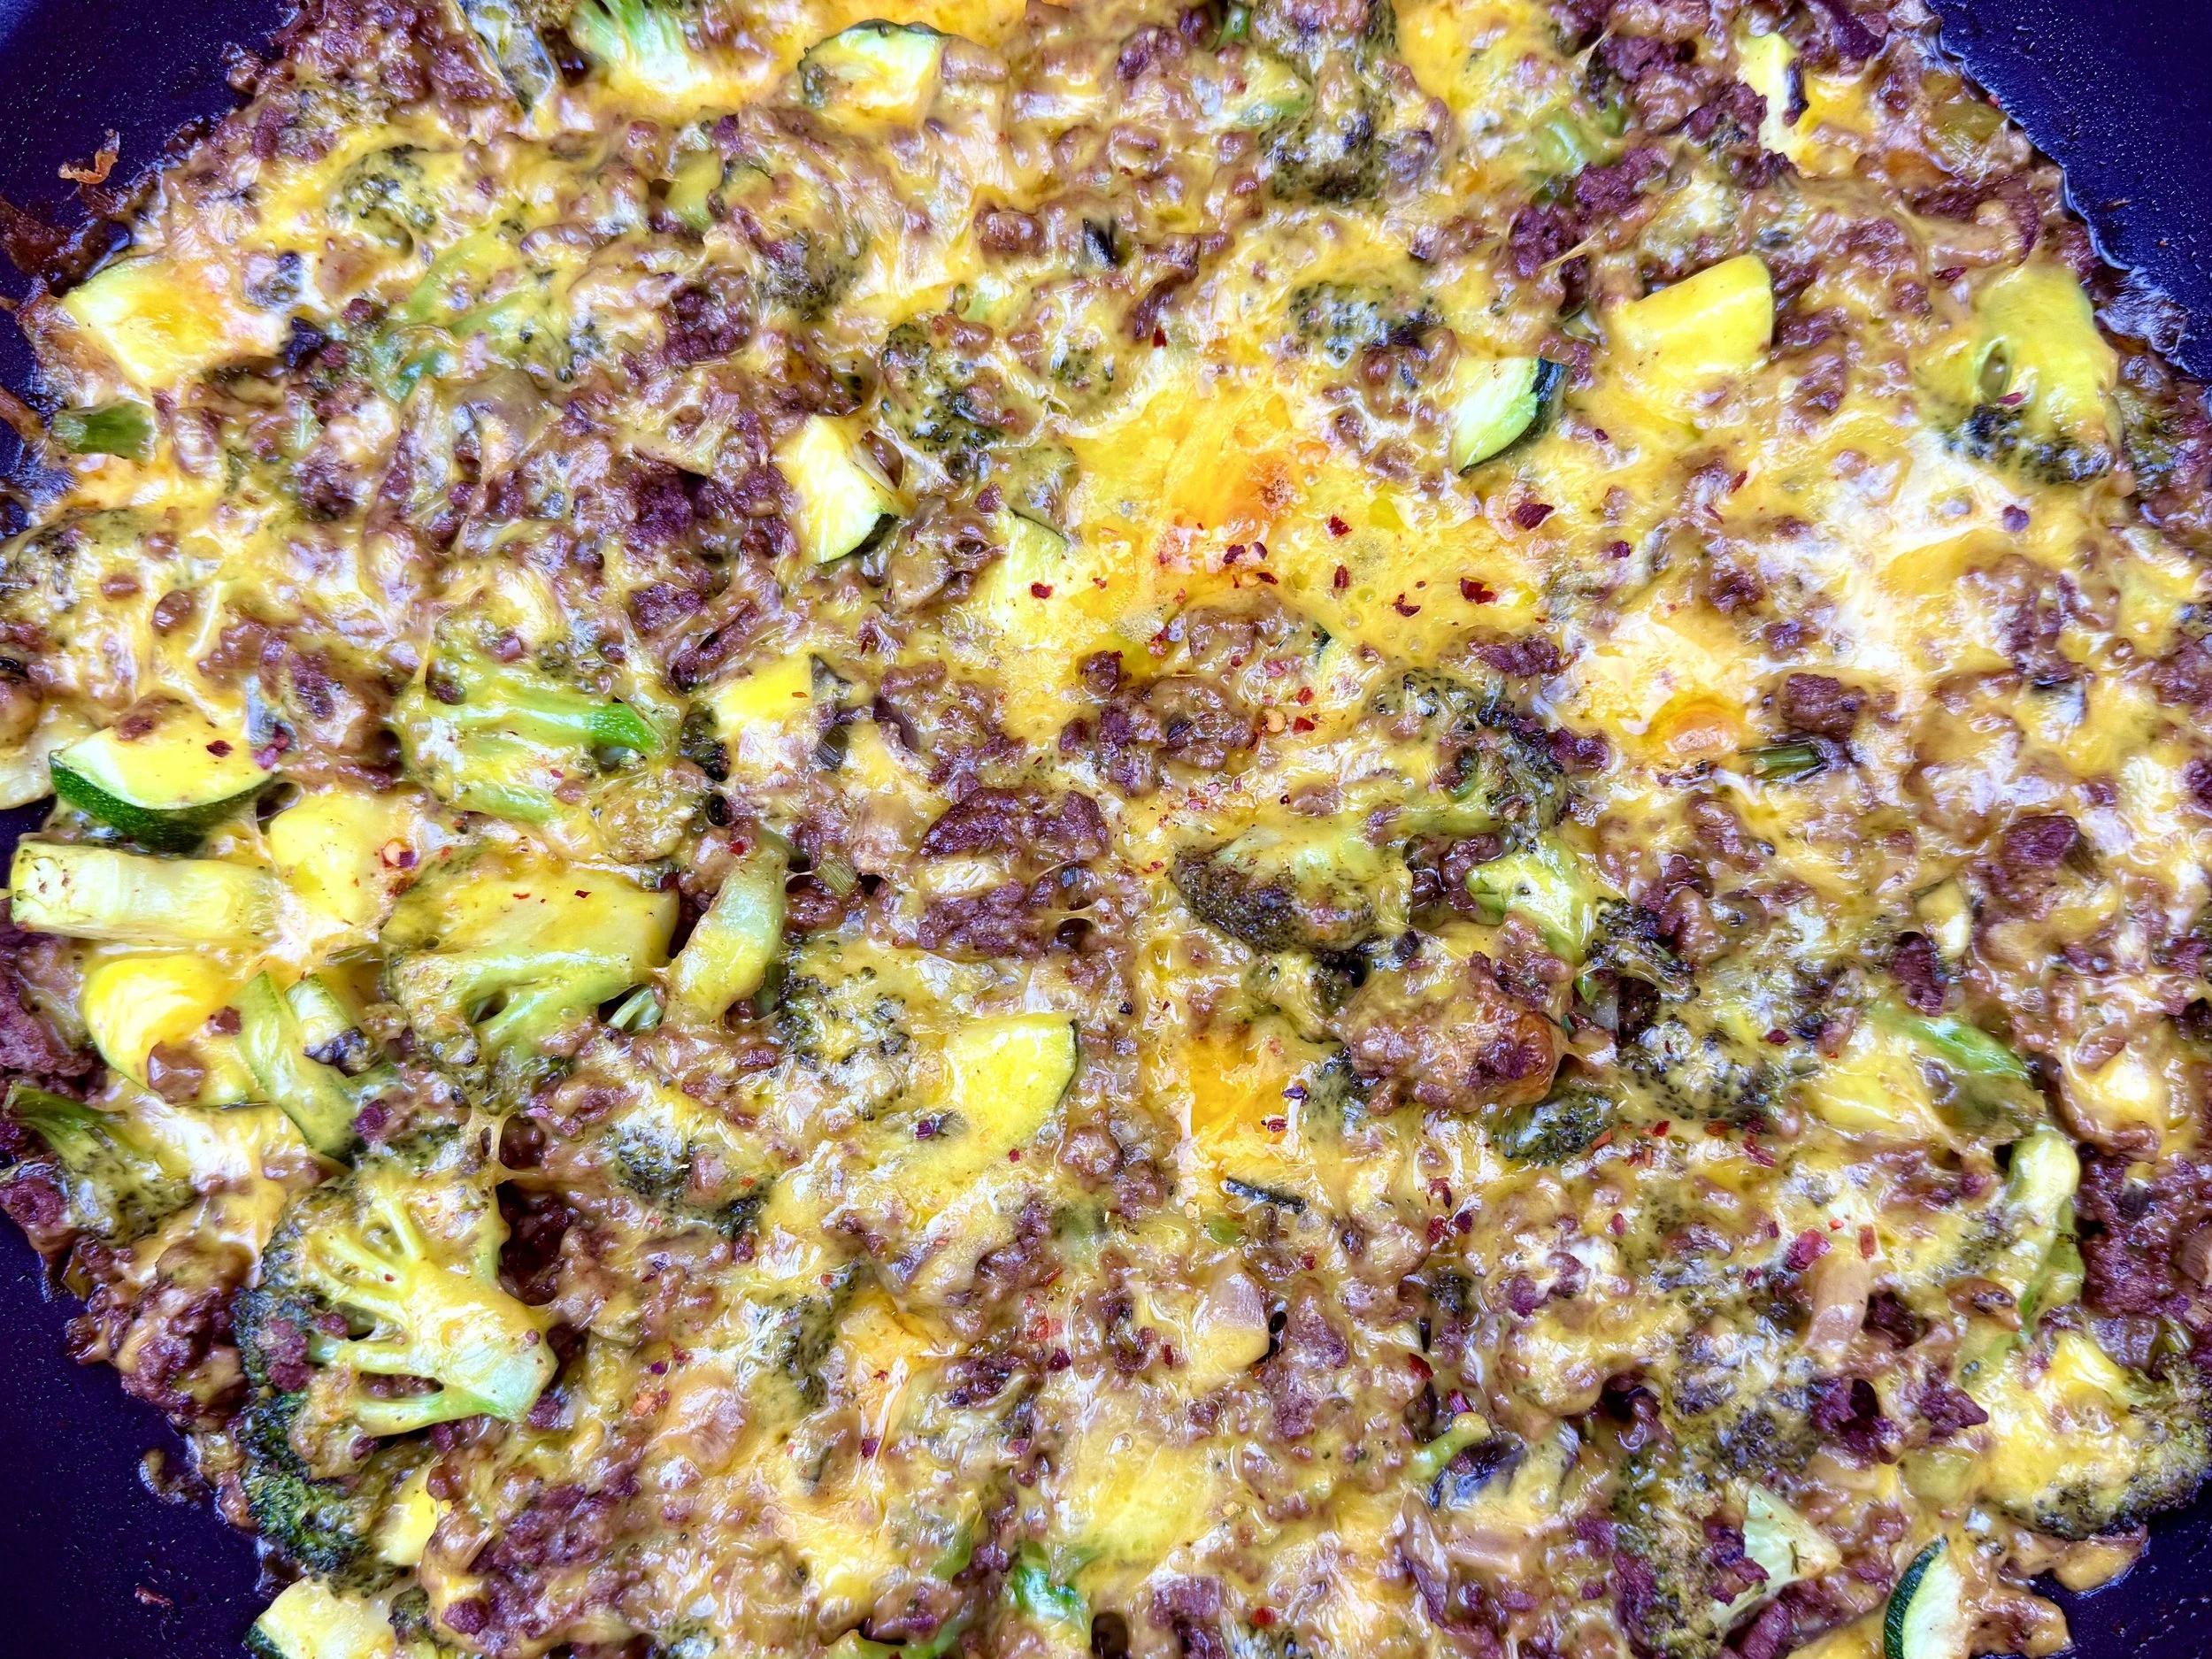
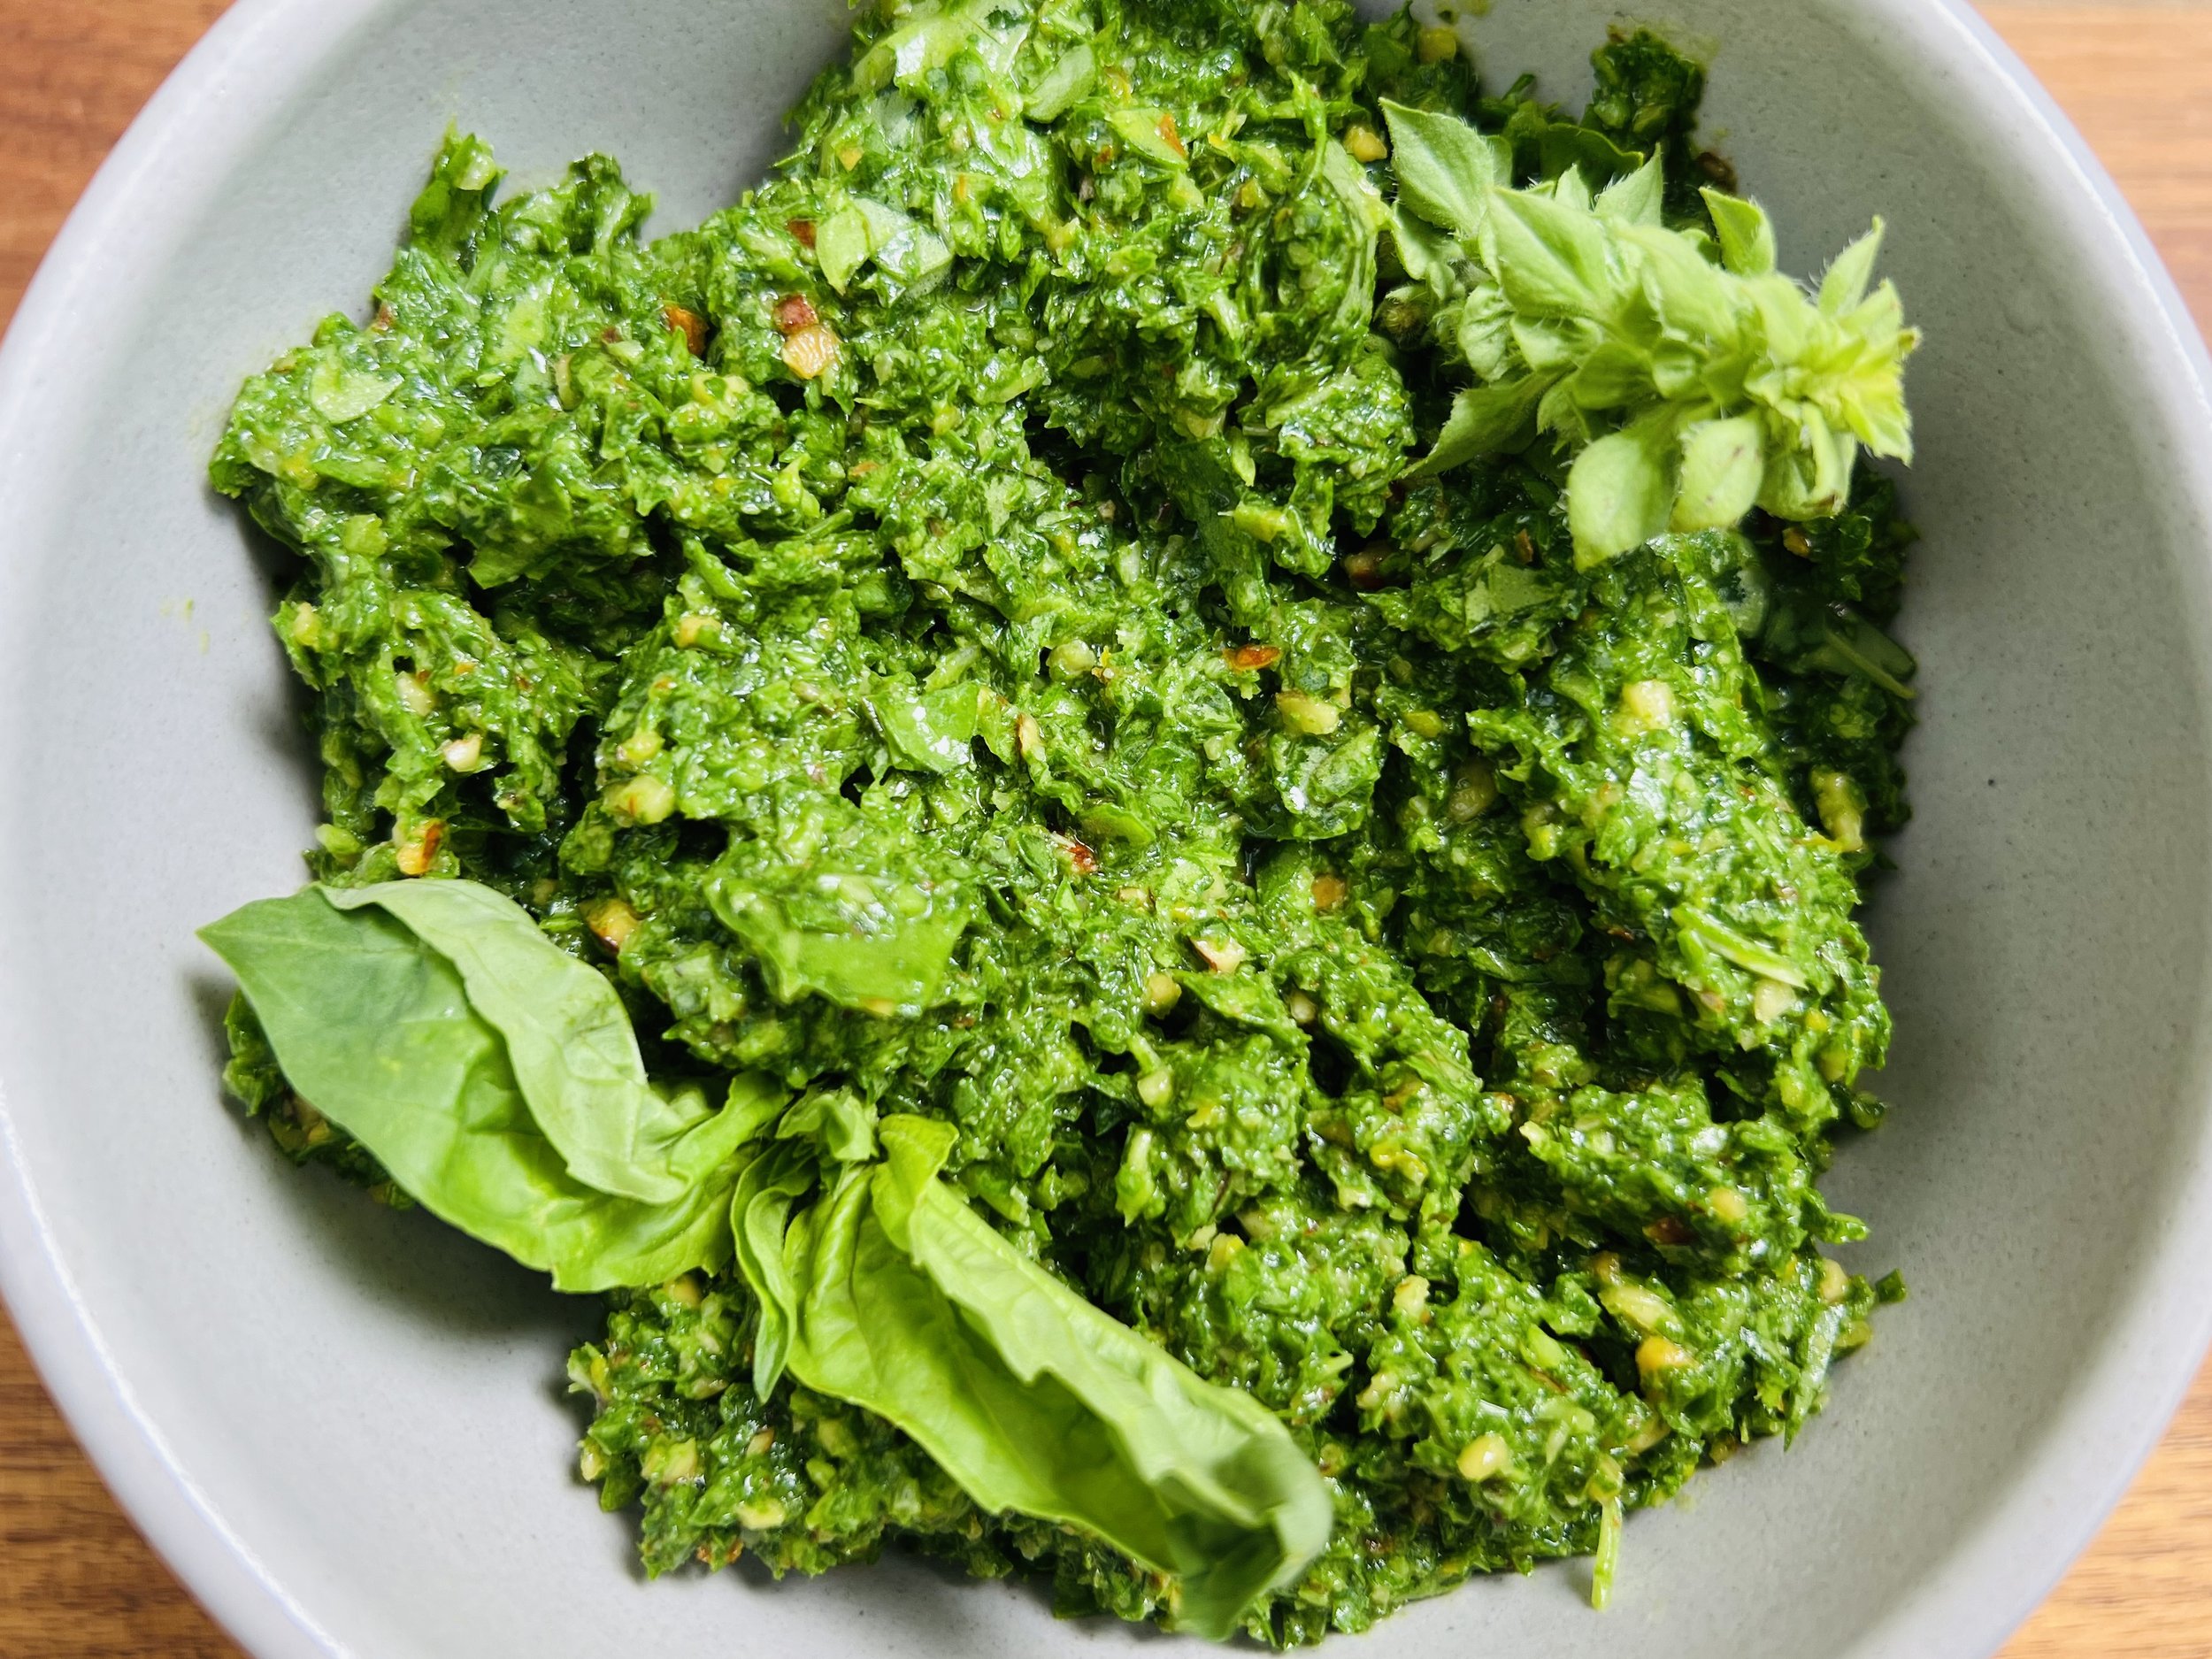
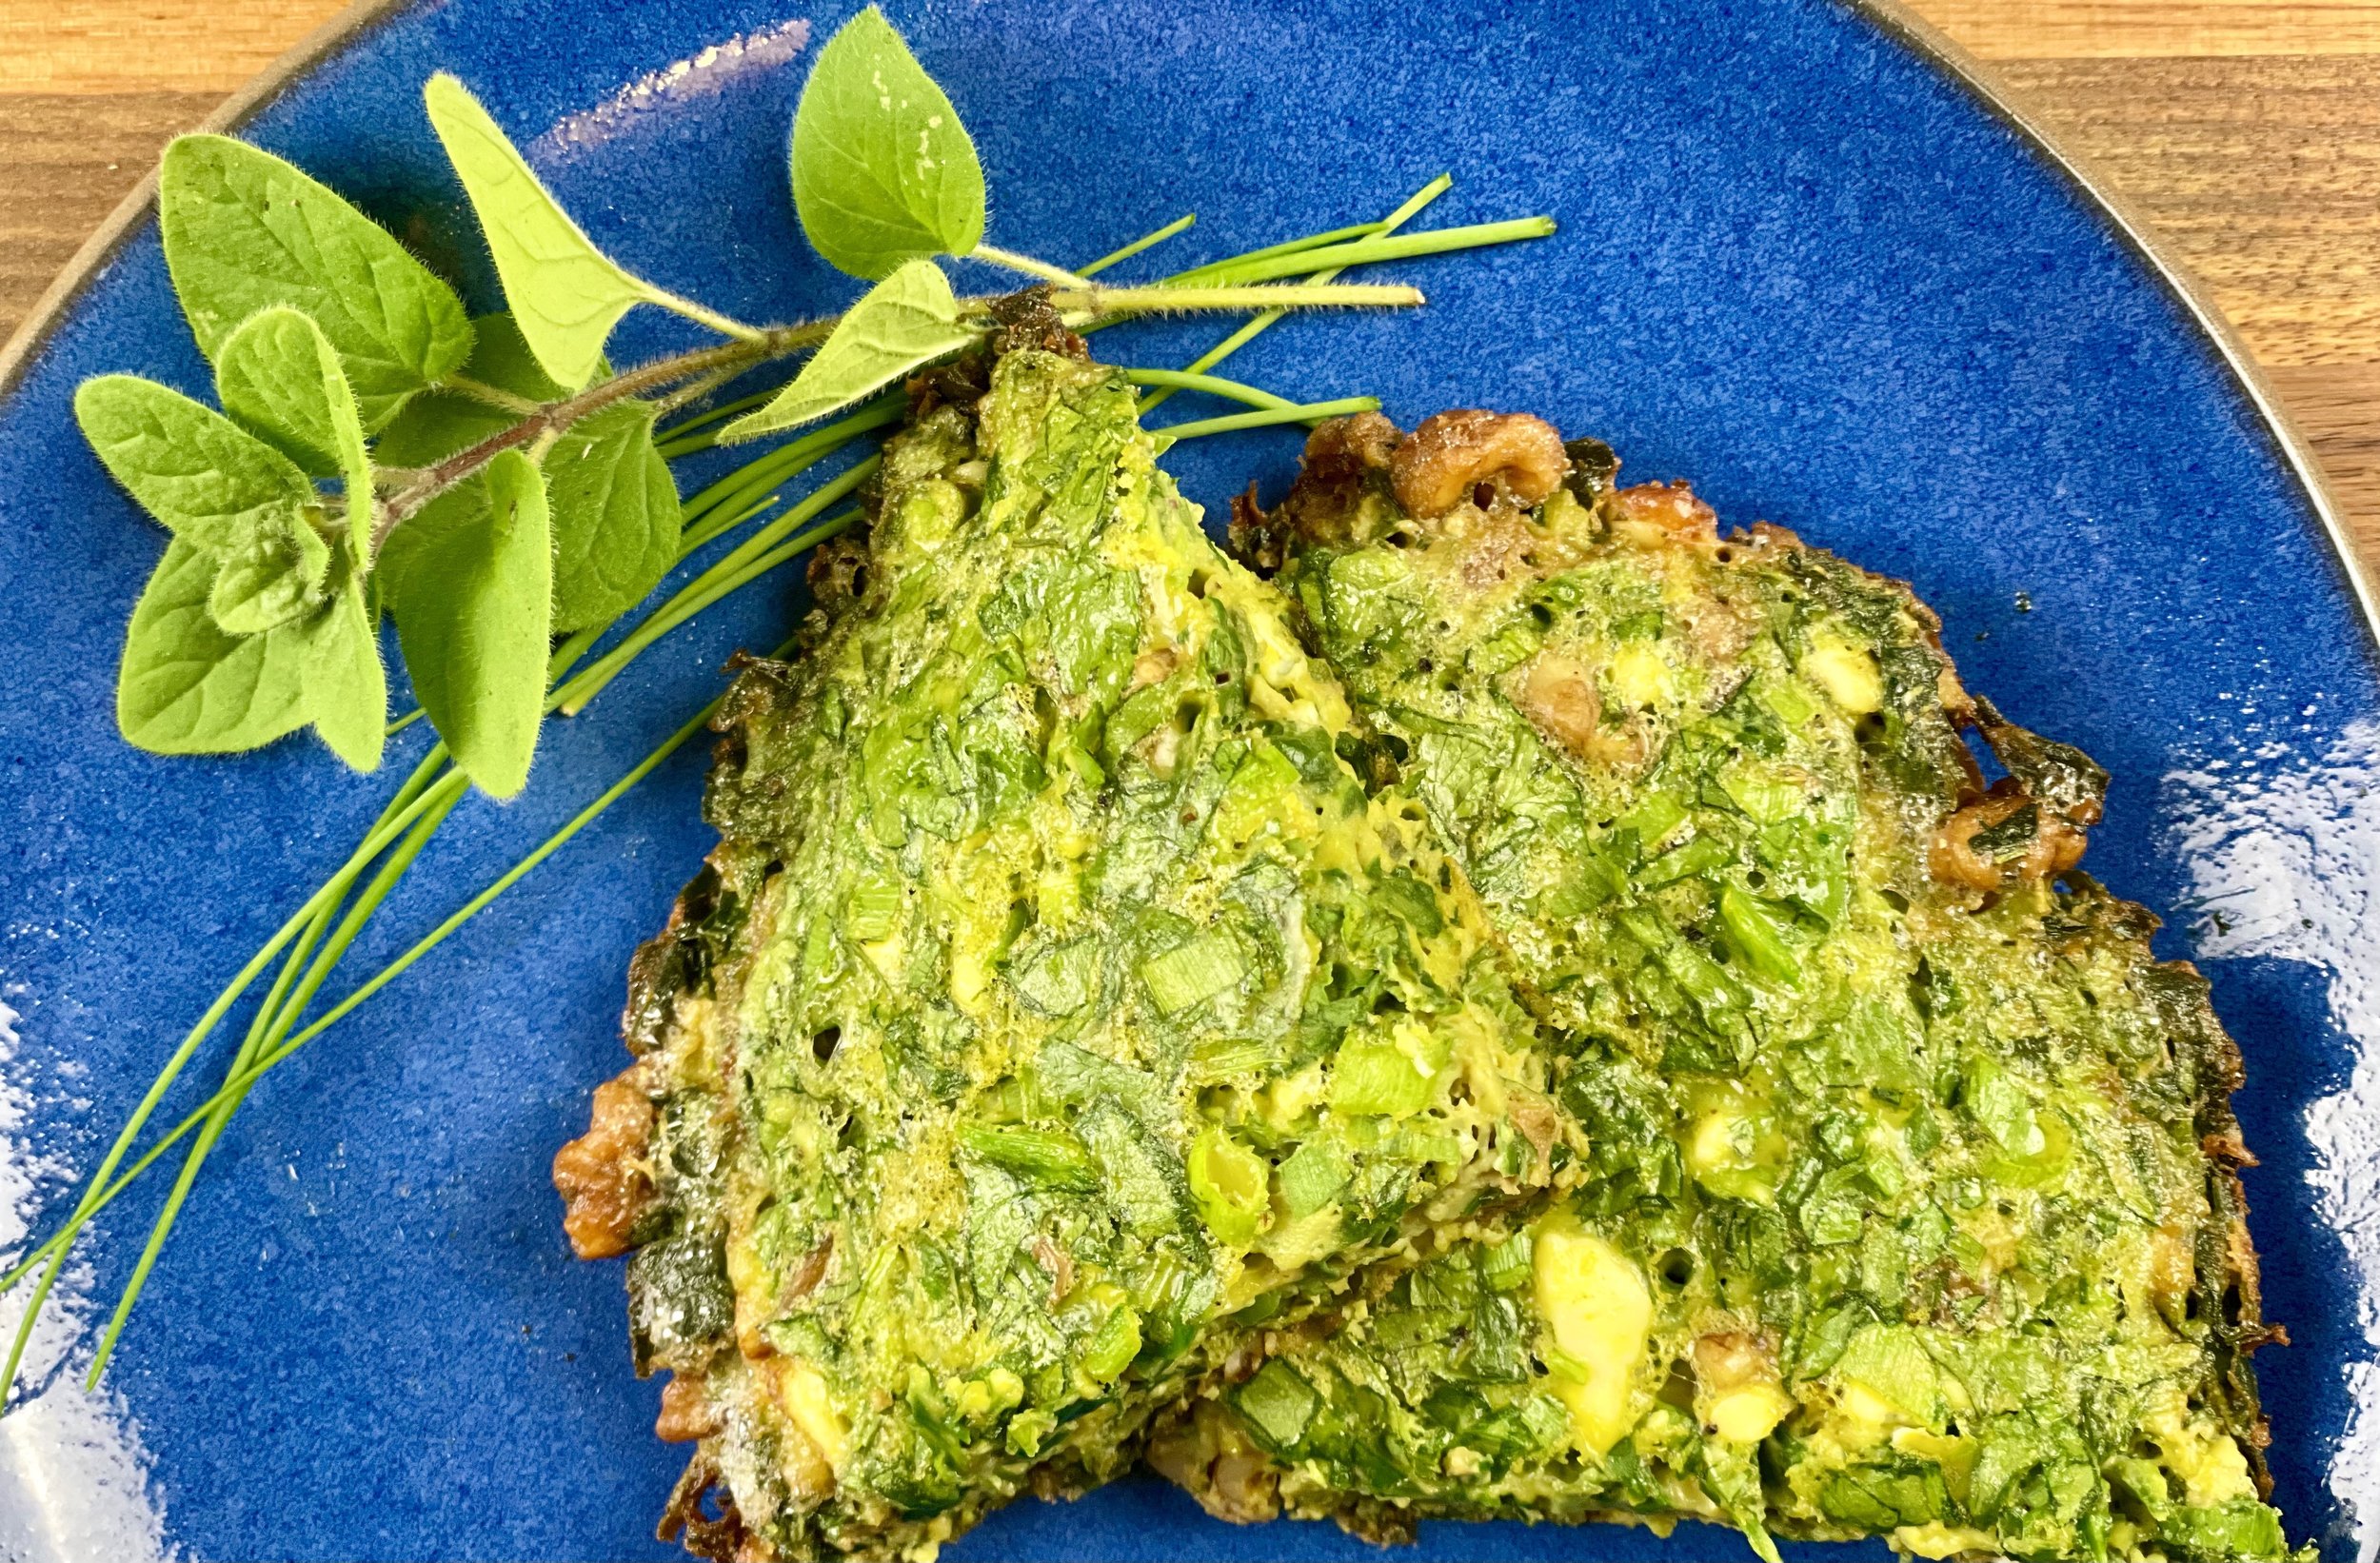
Persian Kuku Sabzi (low FODMAP)
10 Minutes prep • 10 Minutes cook • Low FODMAP • Gluten-free • Vegetarian • Serves 2 - 4
10 Minutes prep • 10 Minutes cook • Low FODMAP • Gluten-free • Vegetarian • Serves 2 - 4 • Ok to make-ahead: Steps 1 - 2
A Kuku is a Persian-style frittata that is often served at Nowruz, the Persian New Year. Sabzi means herbs (or greens), and you can use any tender greens you may have on hand. It takes only a few minutes to make and it turns into a beautiful, nourishing vegetarian dish that can be served as an appetizer, side, or main. Kuku Sabzi is delightful at room temperature so consider making it ahead of time. It’s especially delicious with a dollop of plain lactose-free yogurt or sour cream.
Ingredients
3 large eggs, beaten
2 teaspoons gluten-free flour
1/4 teaspoon turmeric
1/2 teaspoon Kosher salt
Freshly ground black pepper
2 cups finely-chopped tender greens (I used baby spinach, cilantro, and green onions (green part only)
You could also use: Chives, dill, parsley, taragon, basil, or any other tender green you have on hand
3 tablespoons chopped walnuts (optional)
3 tablespoons crumbled feta cheese
1 tablespoon butter
Lactose-free plain yogurt or sour cream, for serving (optional)
Directions
(1) Preheat oven: to 400 degrees F.
(2) Wash and chop ingredients: Wash and finely chop the greens and then chop the walnuts. Set aside.
Make-ahead note: At this point, you may set aside your chopped ingredients until you’re ready to cook the Kuku Sabzi.
(3) Combine the ingredients: Whisk together the eggs, flour, turmeric, salt, and black pepper. Whisk in the herbs, chopped walnuts (if using), and feta crumbled.
(4) Cook the Kuku: Heat the butter in an 8-10" oven-safe skillet over medium heat. Pour the egg mixture into the skillet and use the back of a spoon to spread it out evenly. Cook on the stove until the eggs start to set around the edges of the skillet, about 2 minutes. Place the skillet in the oven and bake until the eggs are completely set (about 5 minutes). To test, cut a small slit in the center. You want your knife to come out clean.
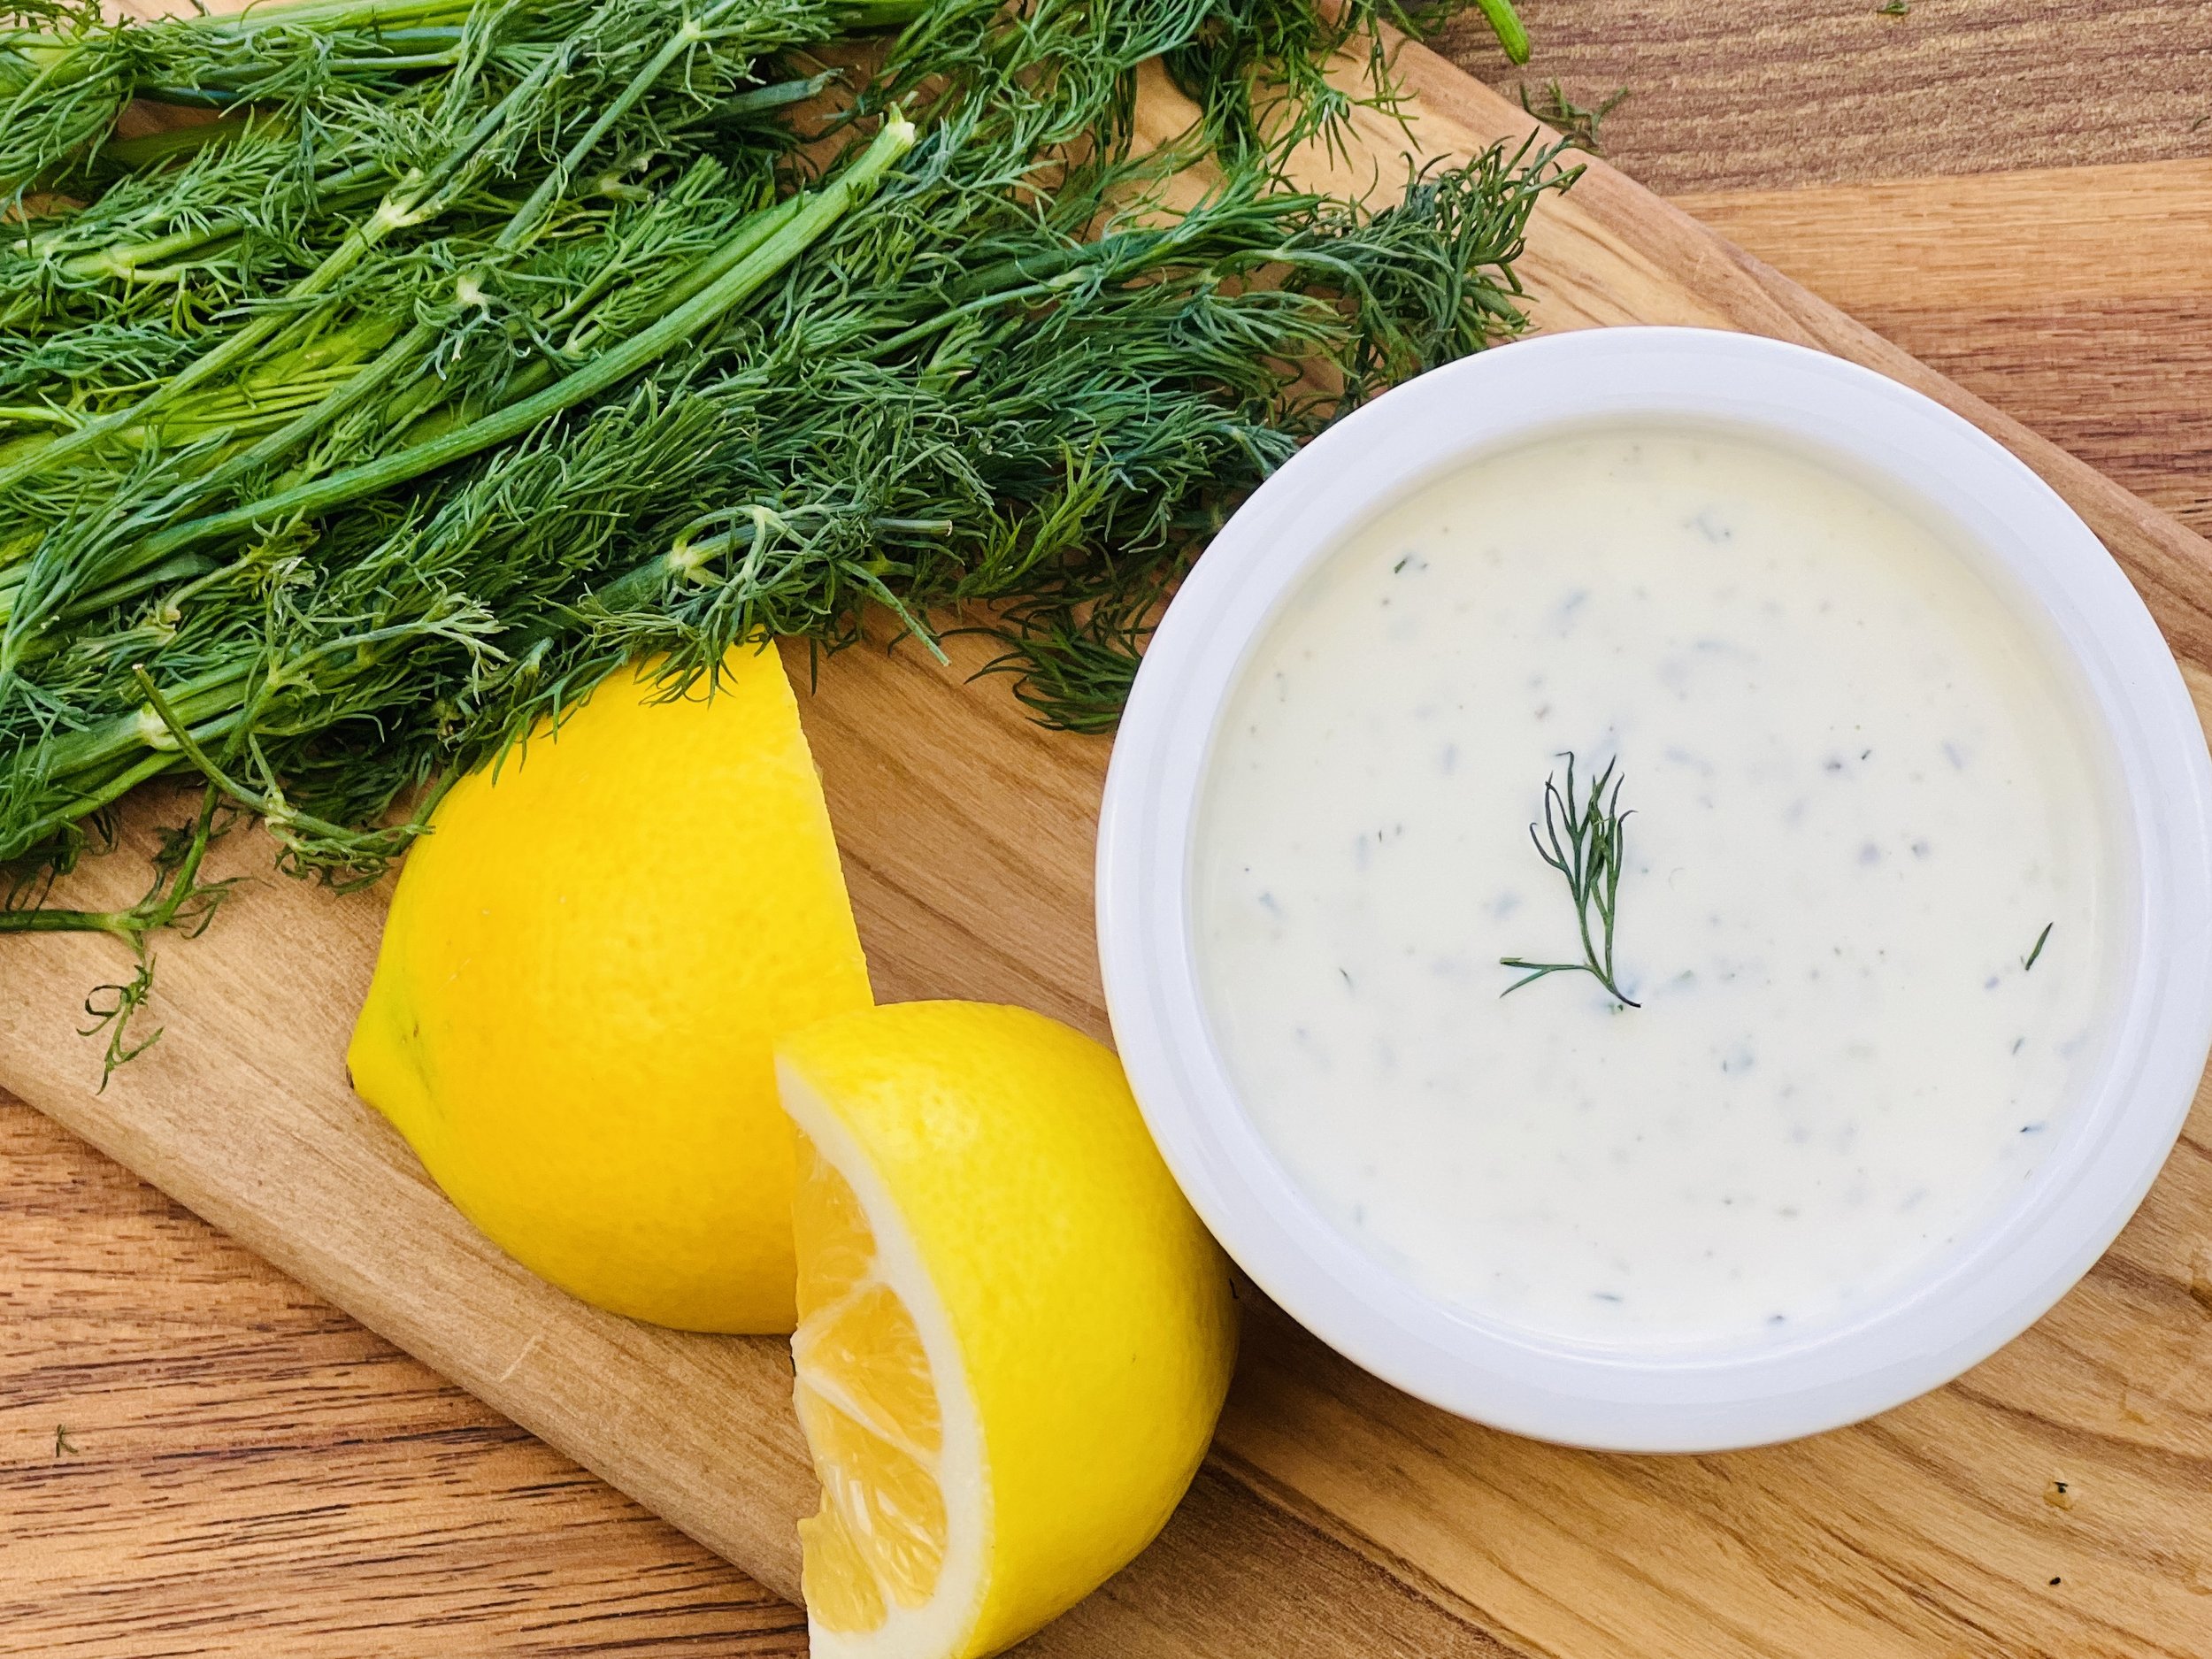
(5) Plate and Serve: Cut into wedges and serve hot or at room temperature as an appetizer, lunch, or dinner. Especially delicious with a dollop of lactose-free plain yogurt or sour cream.
Eat and enjoy every bite because you can!
*This post may contain links for you to easily purchase items listed on the page. In some cases, we have provided a special discount code for IBS Game Changers so be sure to use it when you purchase an item to get the discount that has been arranged just for you! As an Amazon Associate, I earn a commission from qualifying Amazon purchases.
More Deliciously Low FODMAP™ vegetarian recipes you might enjoy


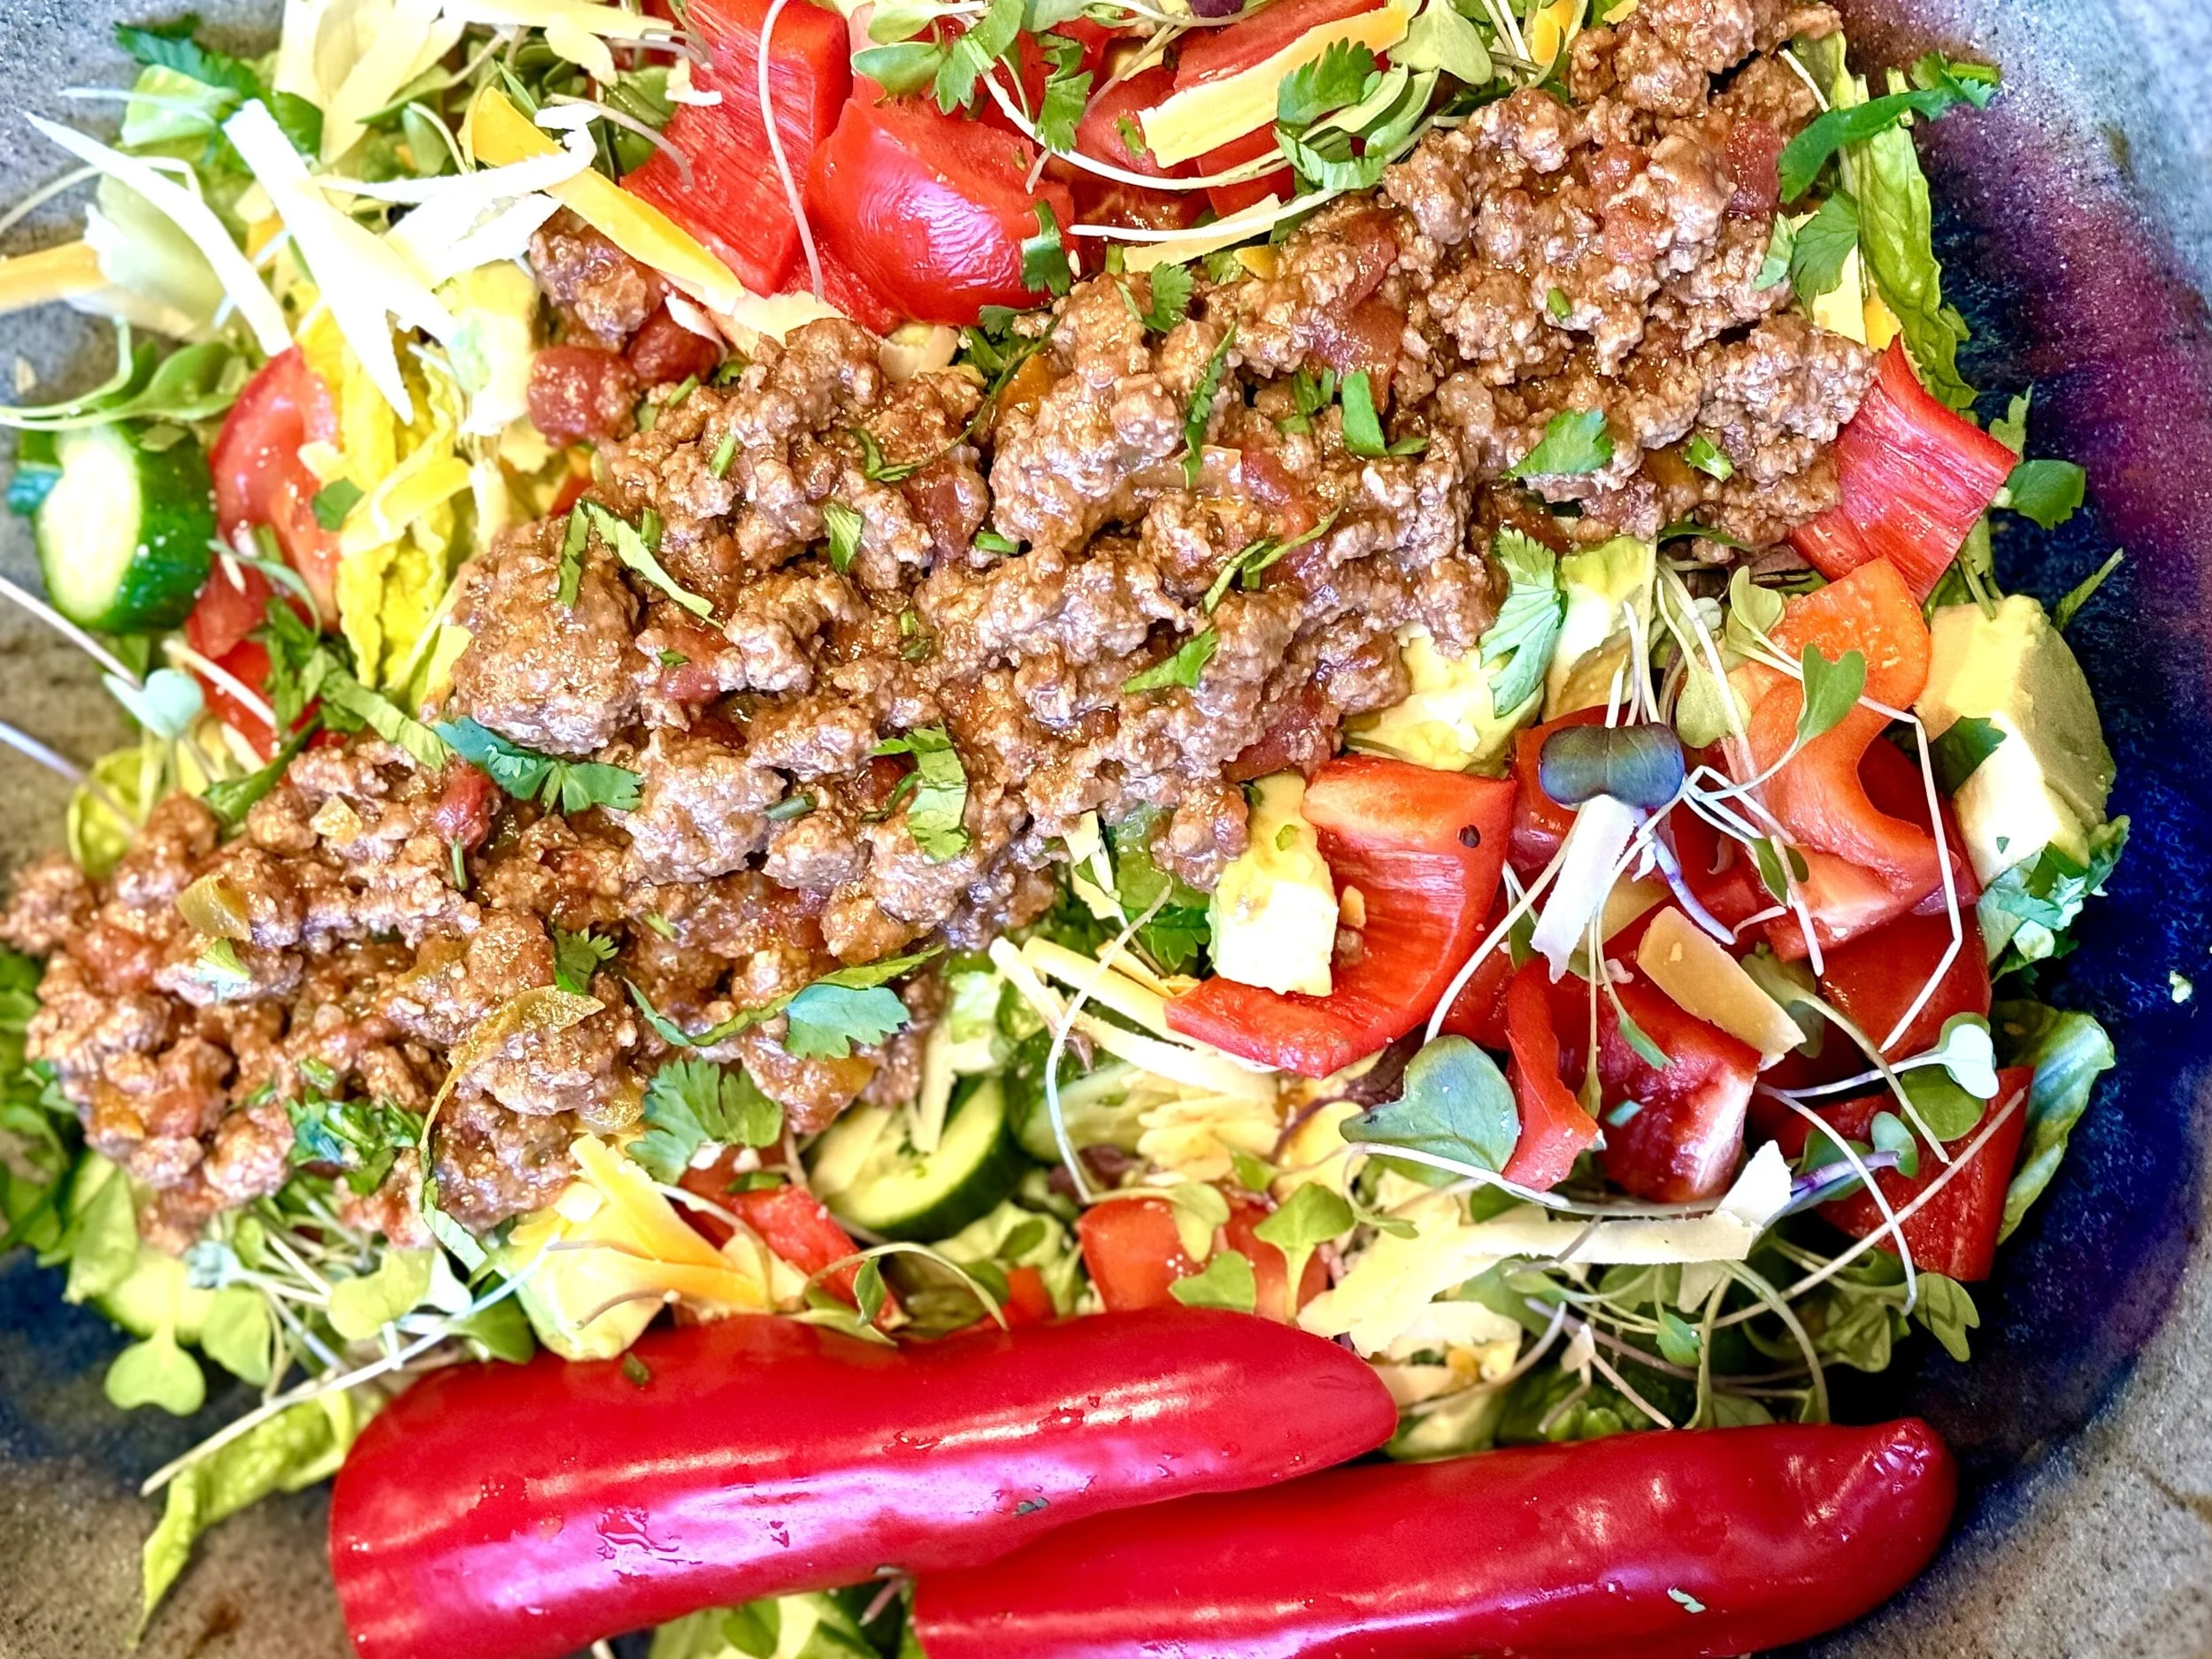
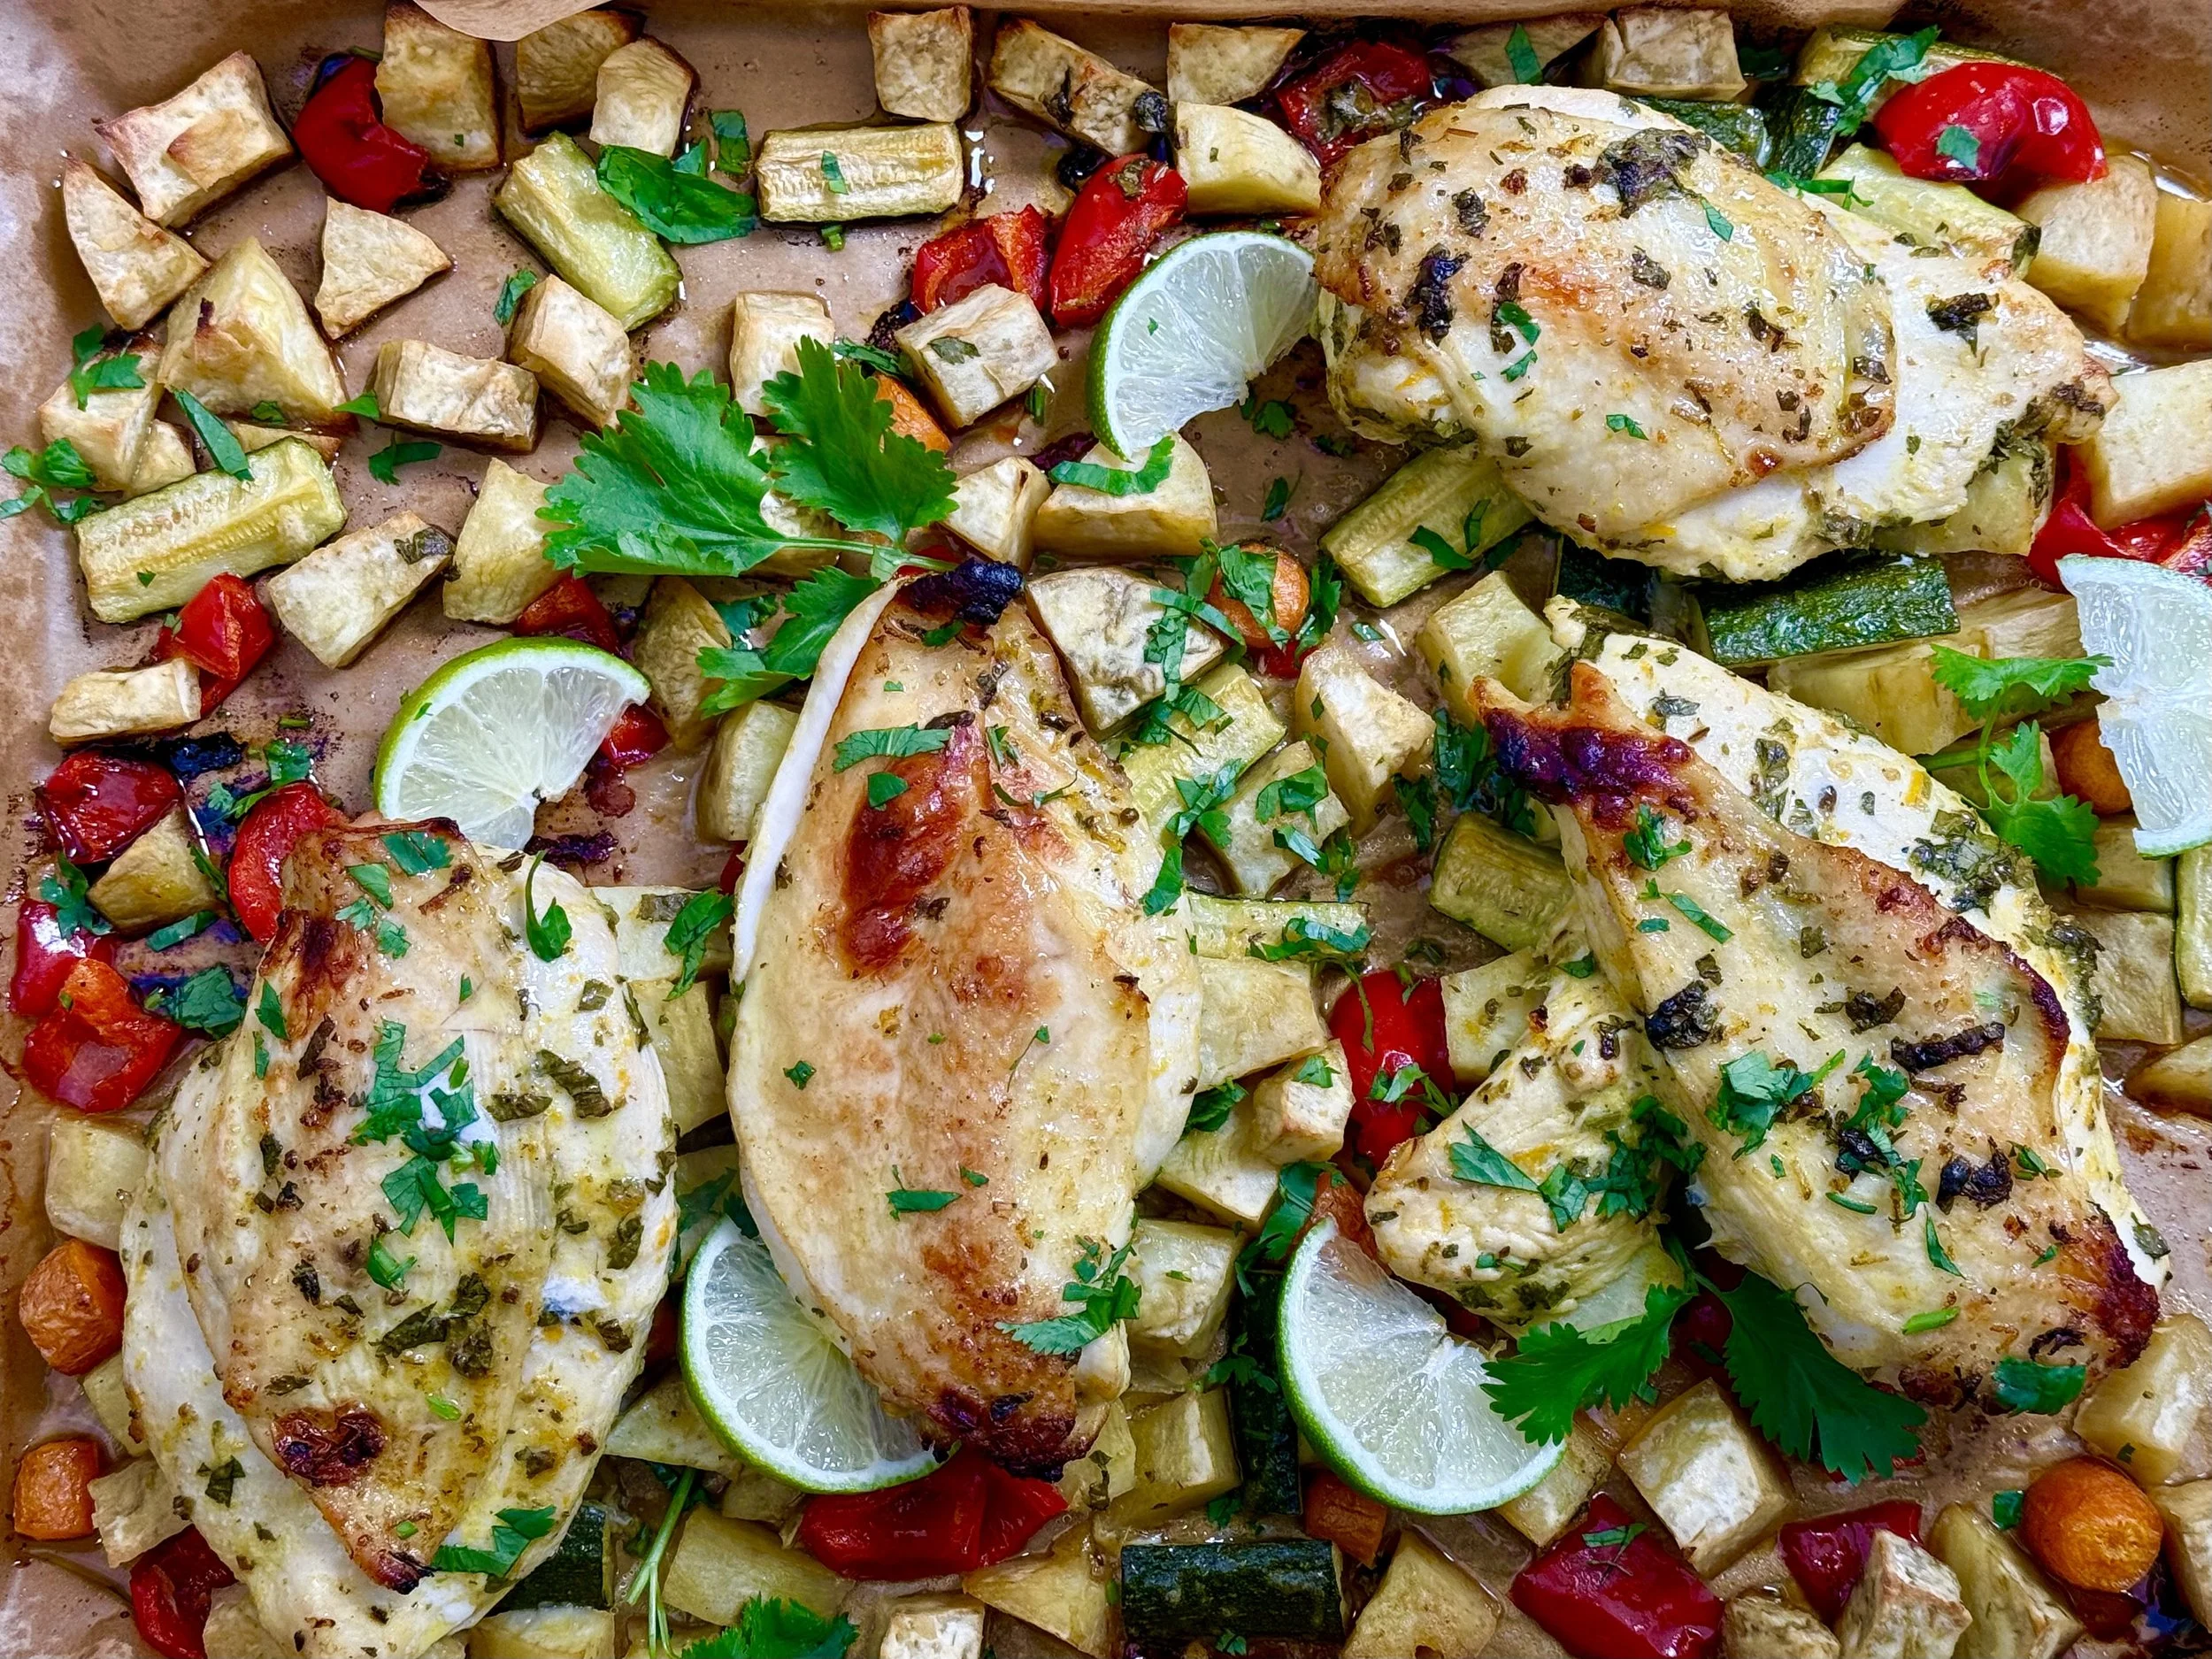
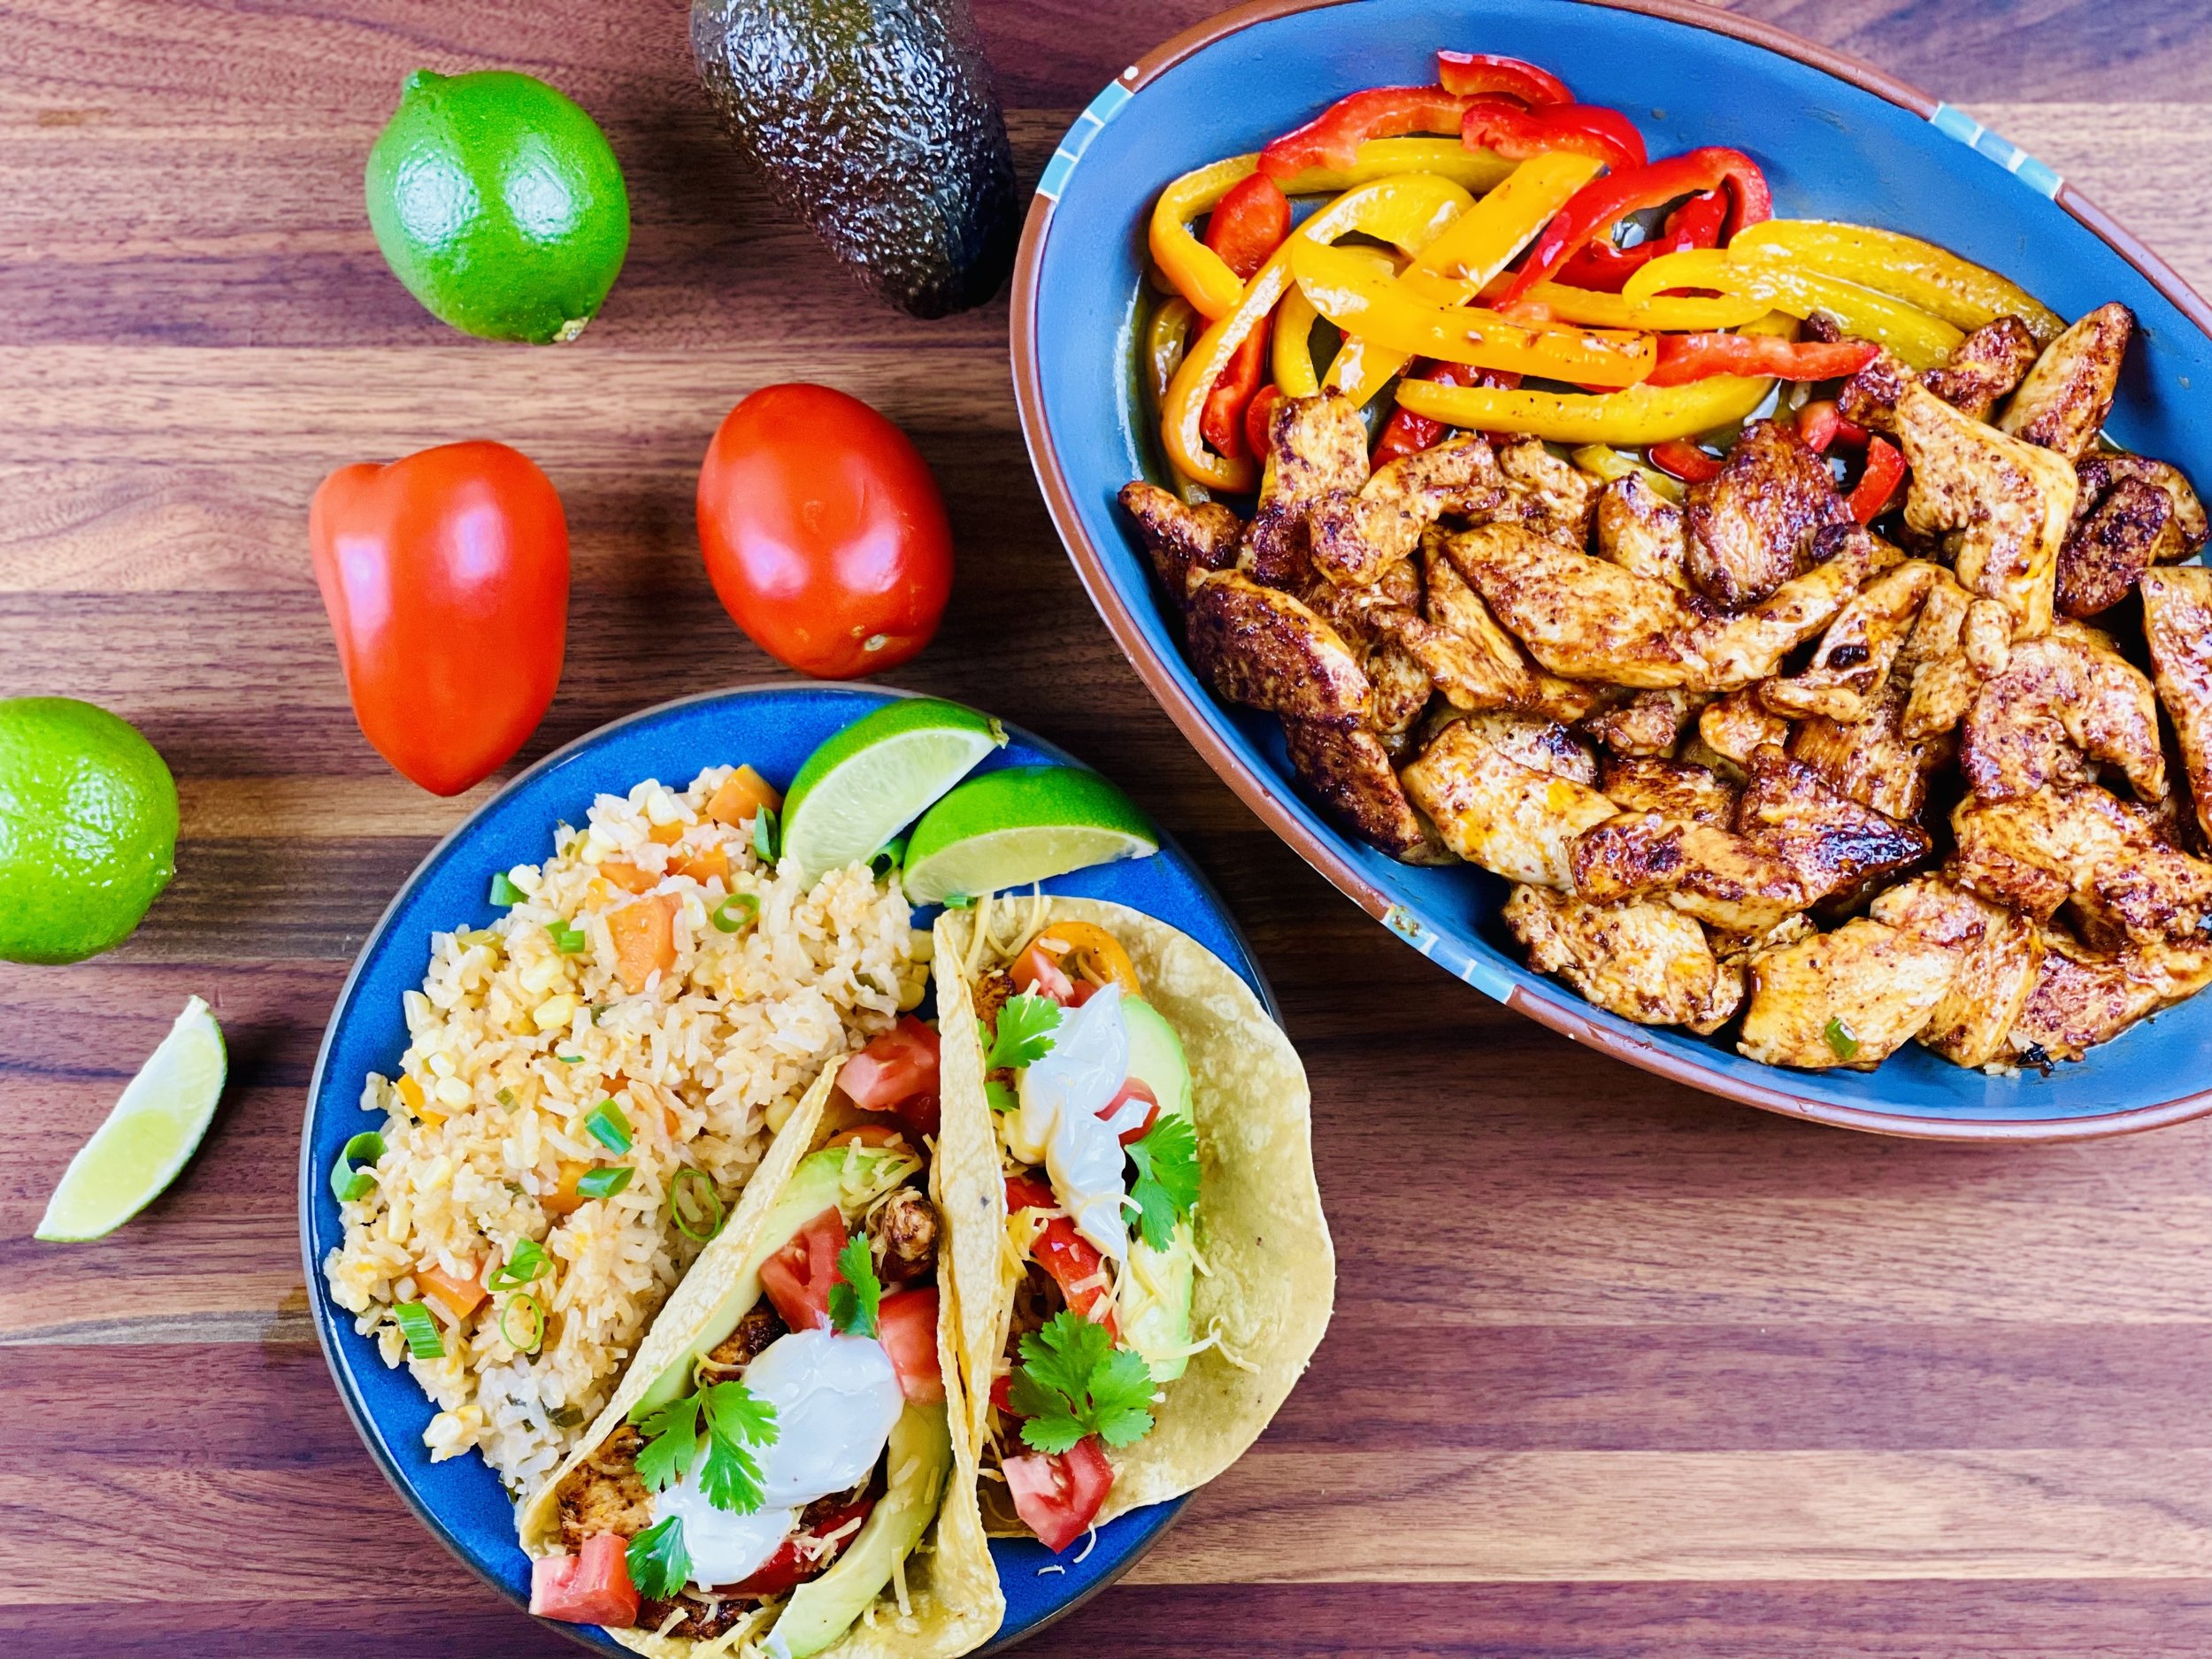
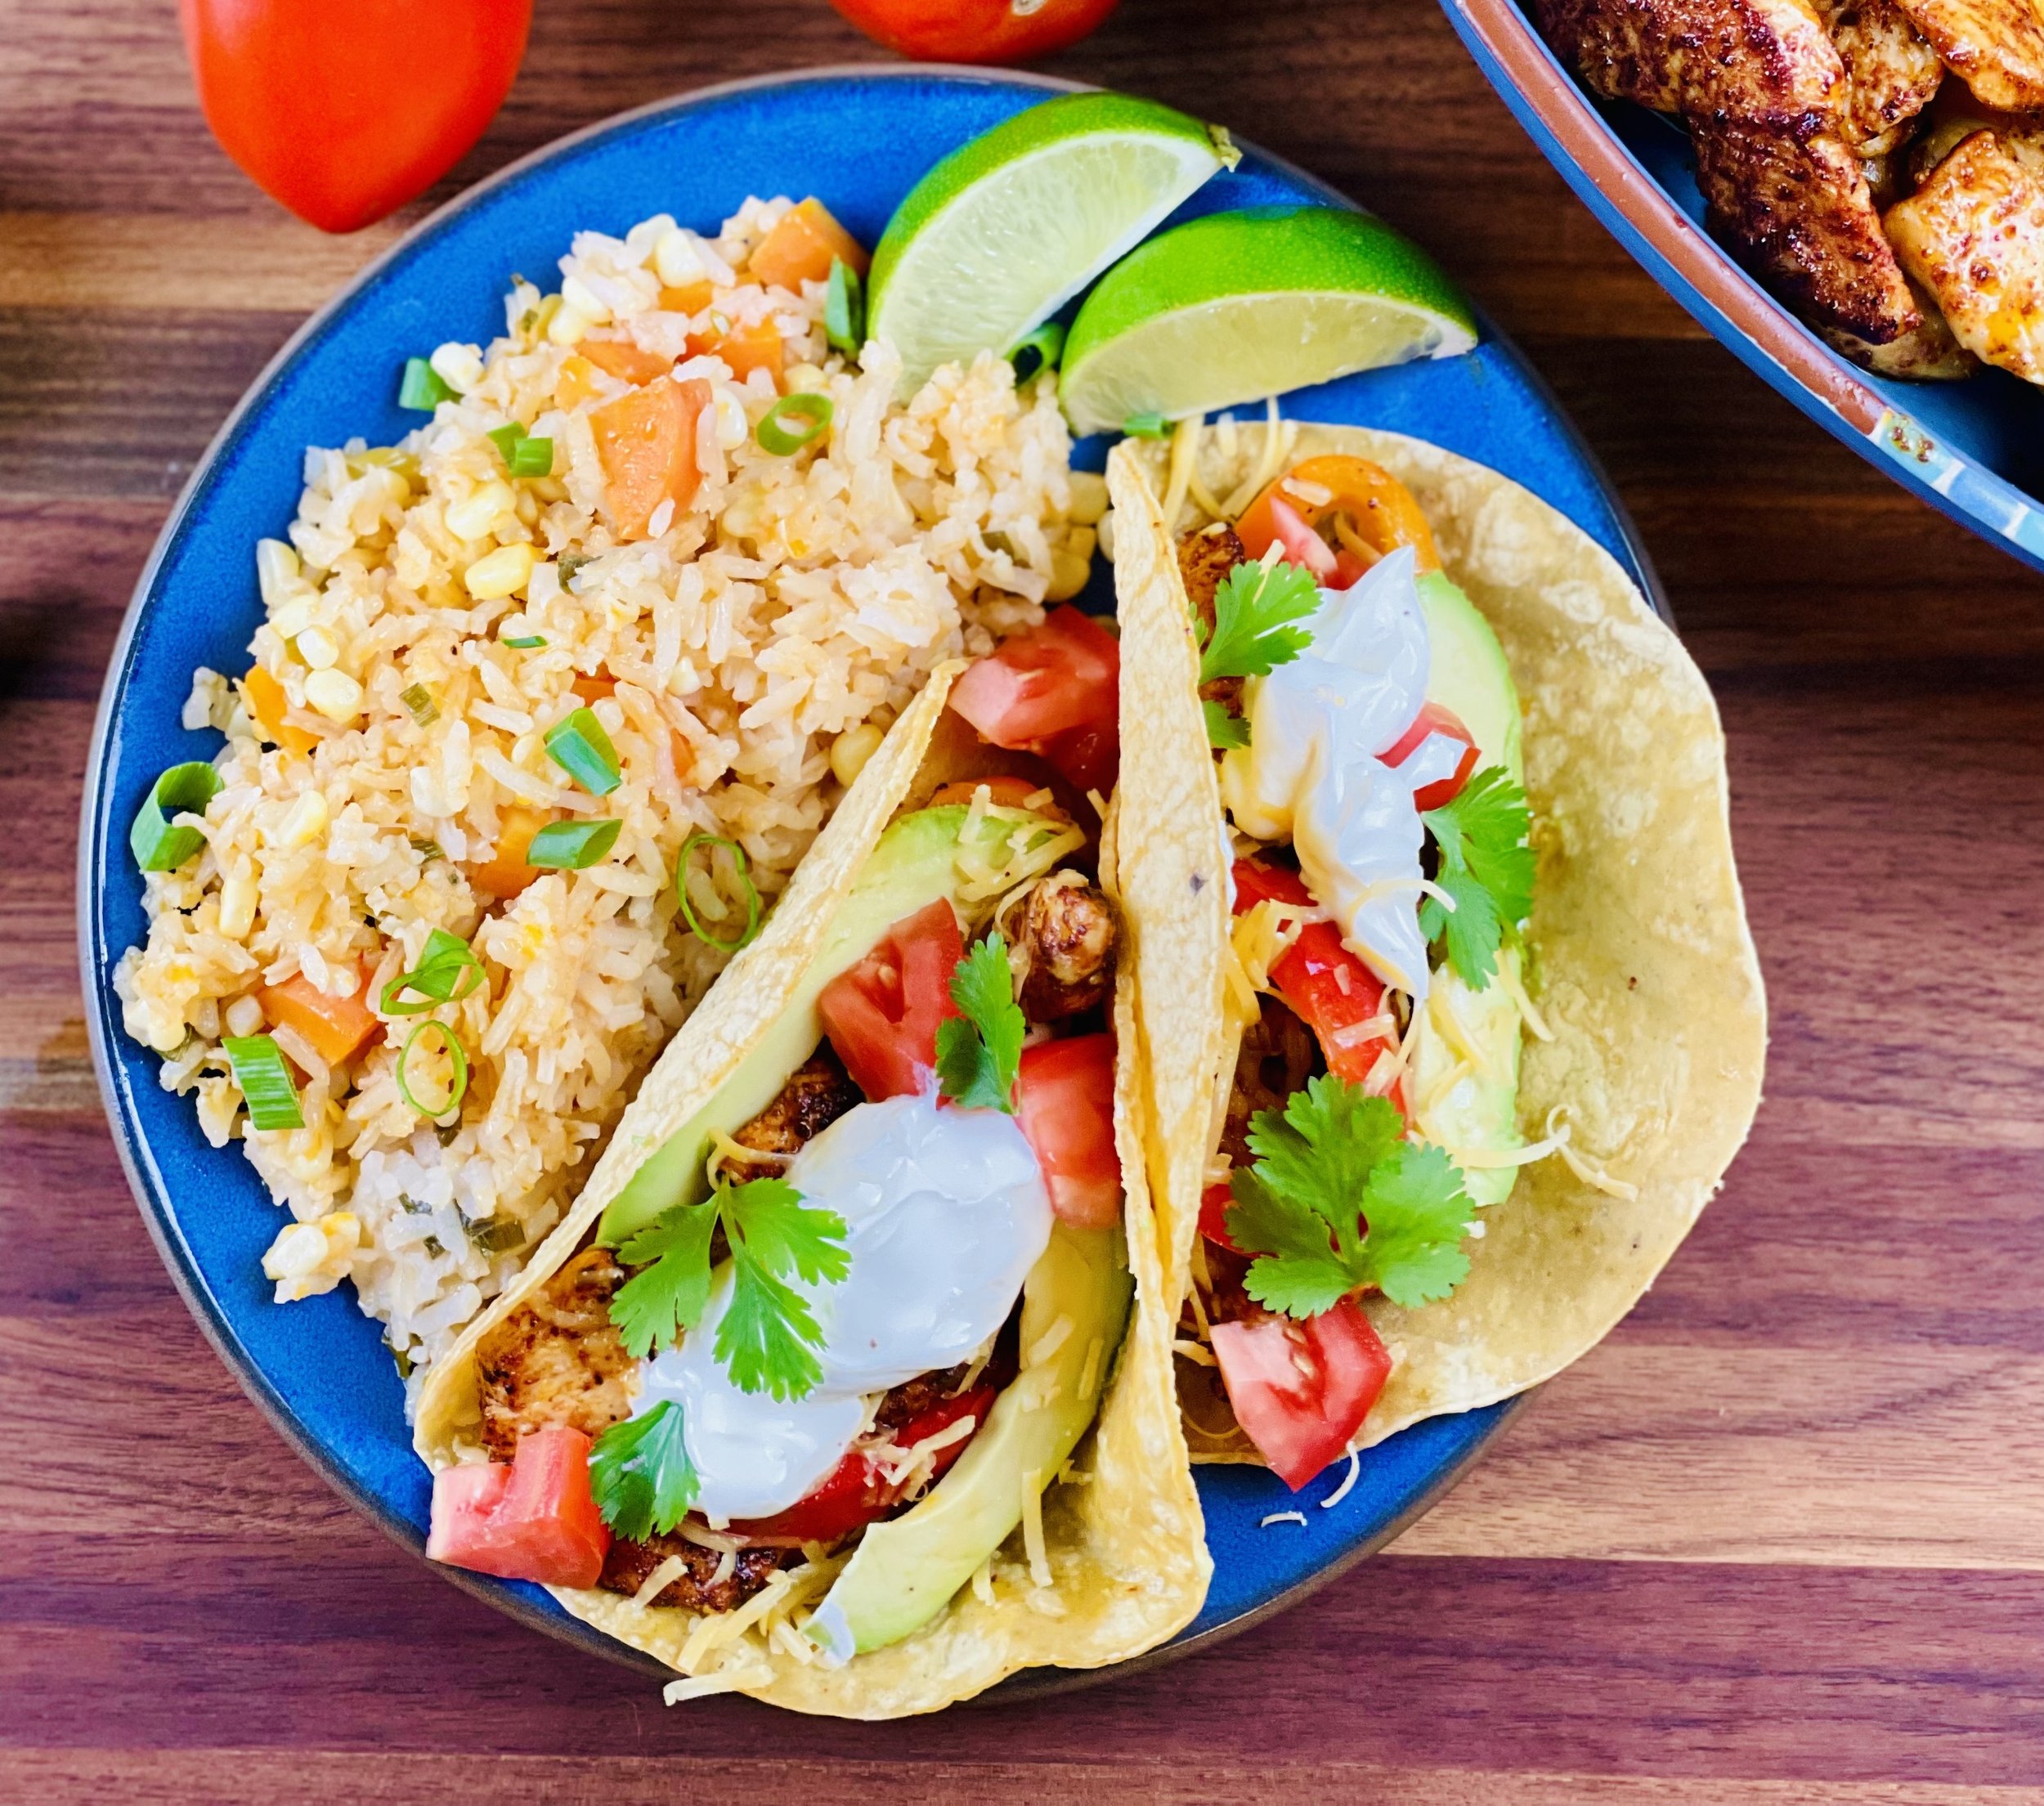
Fabulous Fajita Bowl (low FODMAP)
15 Minutes prep • 20 Minutes cook • Low FODMAP • Gluten-free • Serves 4
15 Minutes prep • 20 Minutes cook • Low FODMAP • Gluten-free • Serves 4 • Ok to make-ahead: Steps 1 - 2
Traditional fajitas are served in a flour tortilla and they rely heavily on caramelized onions to deliver their flavor so they aren’t exactly a low FODMAP item! Fajita bowls are delicious and definitely less messy to eat than a traditional fajita! And, taste challenge accepted! This recipe is incredibly flavorful and authentic without any of the FODMAPs! You can make it with chicken or shrimp or some of each. It’s pretty quick to make so don’t hesitate to make this as a delicious weeknight meal or a fun weekend dinner buffet.

Ingredients
3 tablespoons garlic-infused olive oil
2 chicken breasts, boneless and skinless, cut into thin strips across the grain
OR 1 pound shrimp, shelled, deveined, and tails removed
2 Tablespoons Smoke N Sanity Taco Seasoning* or you can use our taco seasoning
1/2 red bell pepper, sliced
1/2 yellow bell pepper, sliced
Juice of one lime
For serving:
1/2 avocado, sliced
2 Roma tomatoes, chopped
1/2 cup extra sharp cheddar cheese, grated
1/4 cup cilantro, chopped
Lactose-free sour cream
Lime wedges
Corn tortillas, heated (optional)
Directions
(1) Prepare the chicken: Remove chicken breasts from the package and lay on a rimmed plate or baking dish. Season both sides of each breast lightly with Kosher salt. Cover with plastic wrap and refrigerate until ready to use at least 4 hours before cooking.
(2) Prepare serving accompaniments: Grate the cheese, chop the tomatoes and the cilantro, and cut the limes. Set aside. Chop the carrots and the green onions, and remove the corn from the cob if you’re also making our Mexican rice.
Make-ahead note: This chicken is pretty quick to cook but the texture and flavor benefit greatly from early salting. So, salt your chicken and let it sit for at least 4 hours before you cook it (or overnight even better!)
(3) Cook the rice: Follow our Mexican rice recipe which takes about 30 minutes to prepare.
(4) Cook the peppers: Heat 1 tablespoon of the oil in a large frying pan. when hot, add the peppers. Cook, stirring frequently, for about 2 - 3 minutes. Remove from pan to a warmed serving dish.
(5) Cook the chicken: Heat the oil in a large frying pan. when hot, add about 1/3 of the chicken breast pieces. Spread out and don’t crowd in the pan so the meat cooks quickly and stays tender. Cook for about 1 minute, then flip the chicken and cook for another 30 seconds to 1 minute on the second side until the chicken is just barely cooked through. Squeeze some lime juice over the chicken. Taste and add a sprinkle of salt if needed. Remove the chicken to the warmed serving dish. Repeat in two more batches with the remaining chicken, adding oil to the pan and letting it get nice and hot before adding the next batch of chicken.
(6) Finish: When all the chicken is cooked, heat the tortillas in the microwave under a damp towel until pliable.
(7) Plate and serve: Fill each tortilla with chicken, peppers, sliced avocado, cheddar cheese, tomatoes, cilantro, and sour cream. Serve with lime wedges alongside our Mexican rice.
Eat and enjoy every bite because you can!
Traditional Variation: Add corn tortillas and have traditional fajitas that are still low FODMAP!
*This post may contain links for you to easily purchase items listed on the page. In some cases, we have provided a special discount code for IBS Game Changers so be sure to use it when you purchase an item to get the discount that has been arranged just for you! As an Amazon Associate, I earn a commission from qualifying Amazon purchases.
More Deliciously Low FODMAP™ main course recipes you might enjoy
Mexican Rice (low FODMAP)
10 Minutes prep • 20 Minutes cook • Low FODMAP • Gluten-free • Lactose-free • Serves 6
10 Minutes prep • 20 Minutes cook • Low FODMAP • Gluten-free • Lactose-free • Serves 6 • Ok to make-ahead: Steps 1 - 2
Mexican rice is a perfect accompaniment to all your favorite Mexican dishes. The challenge is making it delicious without adding garlic and onions. Challenge accepted. This rice is truly flavorful, easy to make, and will be the perfect partner for your enchiladas, fajitas, or tacos. I like to use it in place of tortillas for such things as our fabulous fajitas. Just pile the fajita fixings on the rice and you have a tostada-like meal that is fantastic, low FODMAP and completely free of flour.
Ingredients
1 1/2 cups long-grain* or Jasmine white rice*, rinsed and drained
1/8 cup garlic-infused olive oil
1/8 cup canola oil (or other mild vegetable oil)
1 teaspoon Smoke N Sanity Essence of Garlic salt*
OR 1 teaspoon salt and 1/2 teaspoon Gourmend Garlic Scape Powder*
4 green onions (green part only), chopped
1/4 cup low FODMAP tomato sauce, or 2 pureed tomatoes
1 carrot, diced
2 ears of corn, kernels removed
3 cups water or chicken broth* (or a combination of the two)
3 whole serrano peppers, stems removed, optional (they don’t add spice, just flavor!)
Additional salt if needed
Directions
(1) Prepare the rice: Rinse the rice in a fine-mesh strainer until the water runs clear. Set aside. (Rinsing rice is important as it washes away the starch that clings to the outside and will help ensure your rice ends up nice and fluffy.)
(2) Prepare the vegetables: Chop the carrots and the green onions, and remove the corn from the cob. Set aside.
Make-ahead note: At this point, you can set your ingredients aside until you’re ready to cook the rice.
(3) Brown the rice: In a large saucepan over medium-high heat, add the oil. Once hot, add the rice and stir to combine. Cook over medium heat, stirring frequently until the rice is lightly golden brown all over (about 10 minutes).
(4) Add remaining ingredients: Add the tomato sauce and green onions to the pan. Stir. Add carrots, corn, and chicken broth/water, and serrano peppers, if using. (They add a nice flavor, but no spice.).
(5) Cook the rice: Cover and bring to a boil, then reduce heat to low, and cook for about 20 minutes or until the water is completely absorbed. Remove from heat and allow to rest for 5 minutes before fluffing with a fork. Taste and add a bit of salt if needed.
(6) Plate and serve: Scoop rice generously onto plates alongside your main course. This rice is delicious with our Fabulous Fajitas or any other Mexican dish you may be making.
Eat and enjoy every bite because you can!
*This post may contain links for you to easily purchase items listed on the page. In some cases, we have provided a special discount code for IBS Game Changers so be sure to use it when you purchase an item to get the discount that has been arranged just for you! As an Amazon Associate, I earn a commission from qualifying Amazon purchases.
More Deliciously Low FODMAP™ side dish recipes you might enjoy
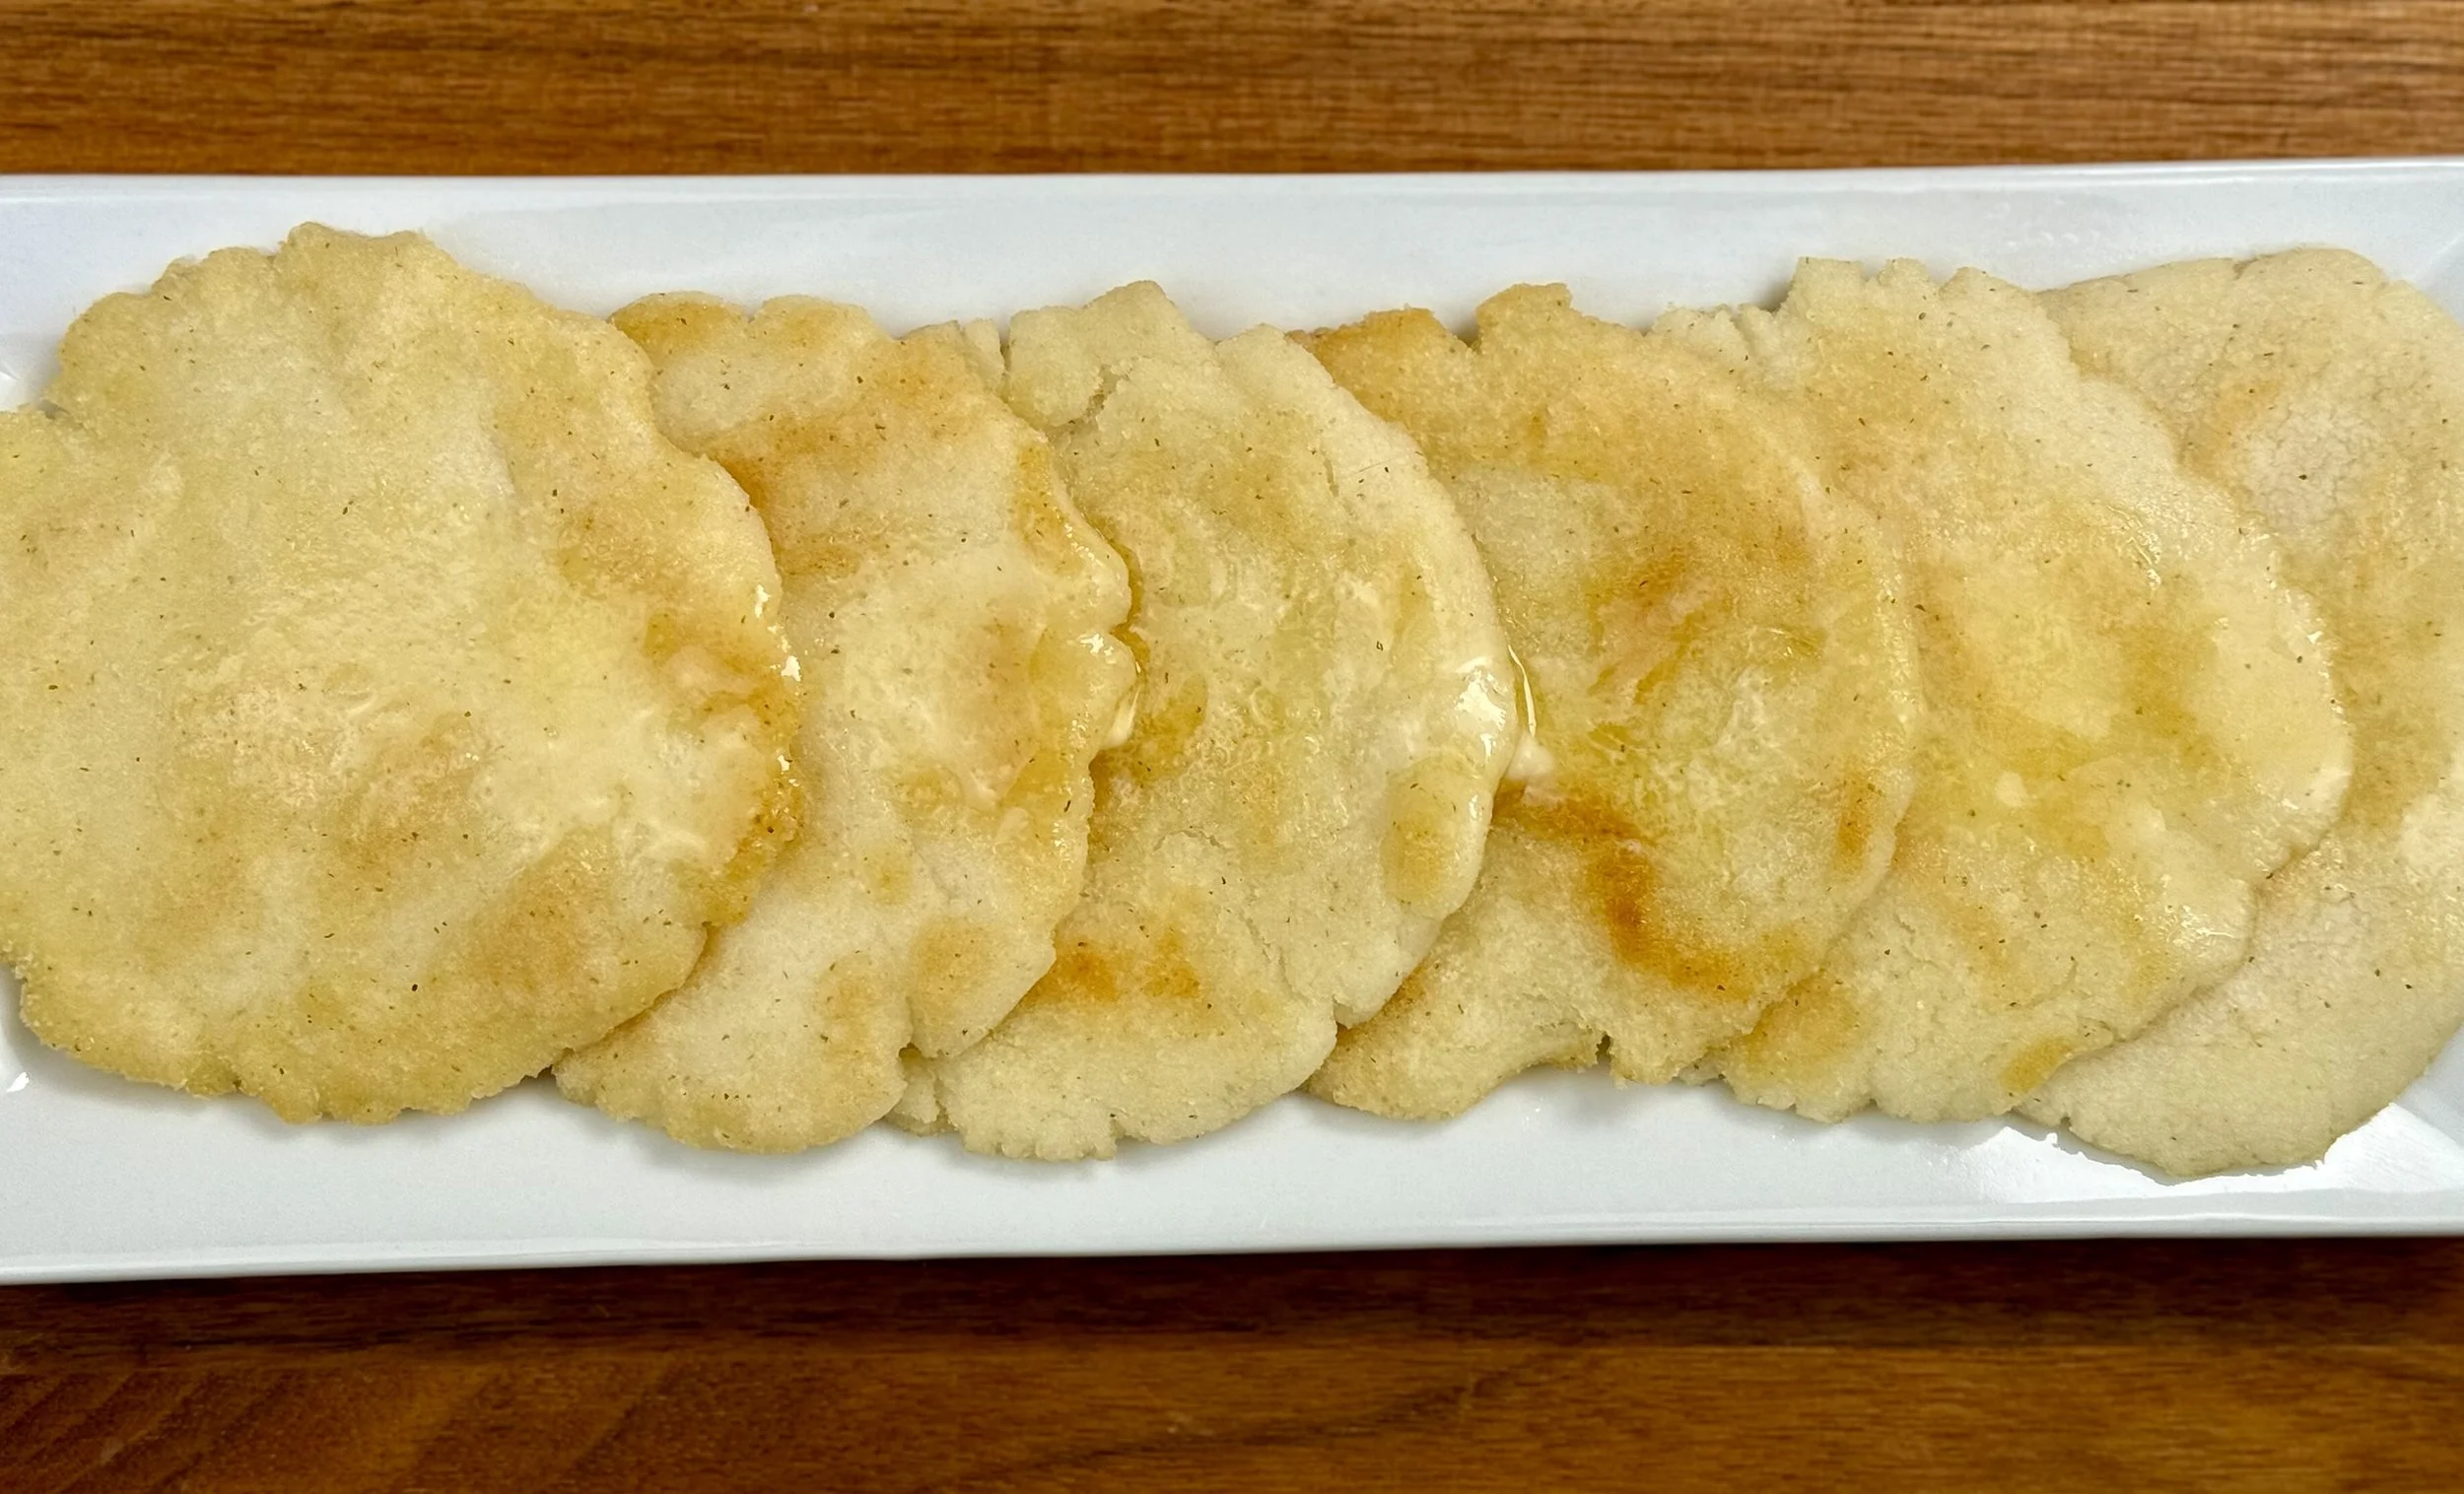
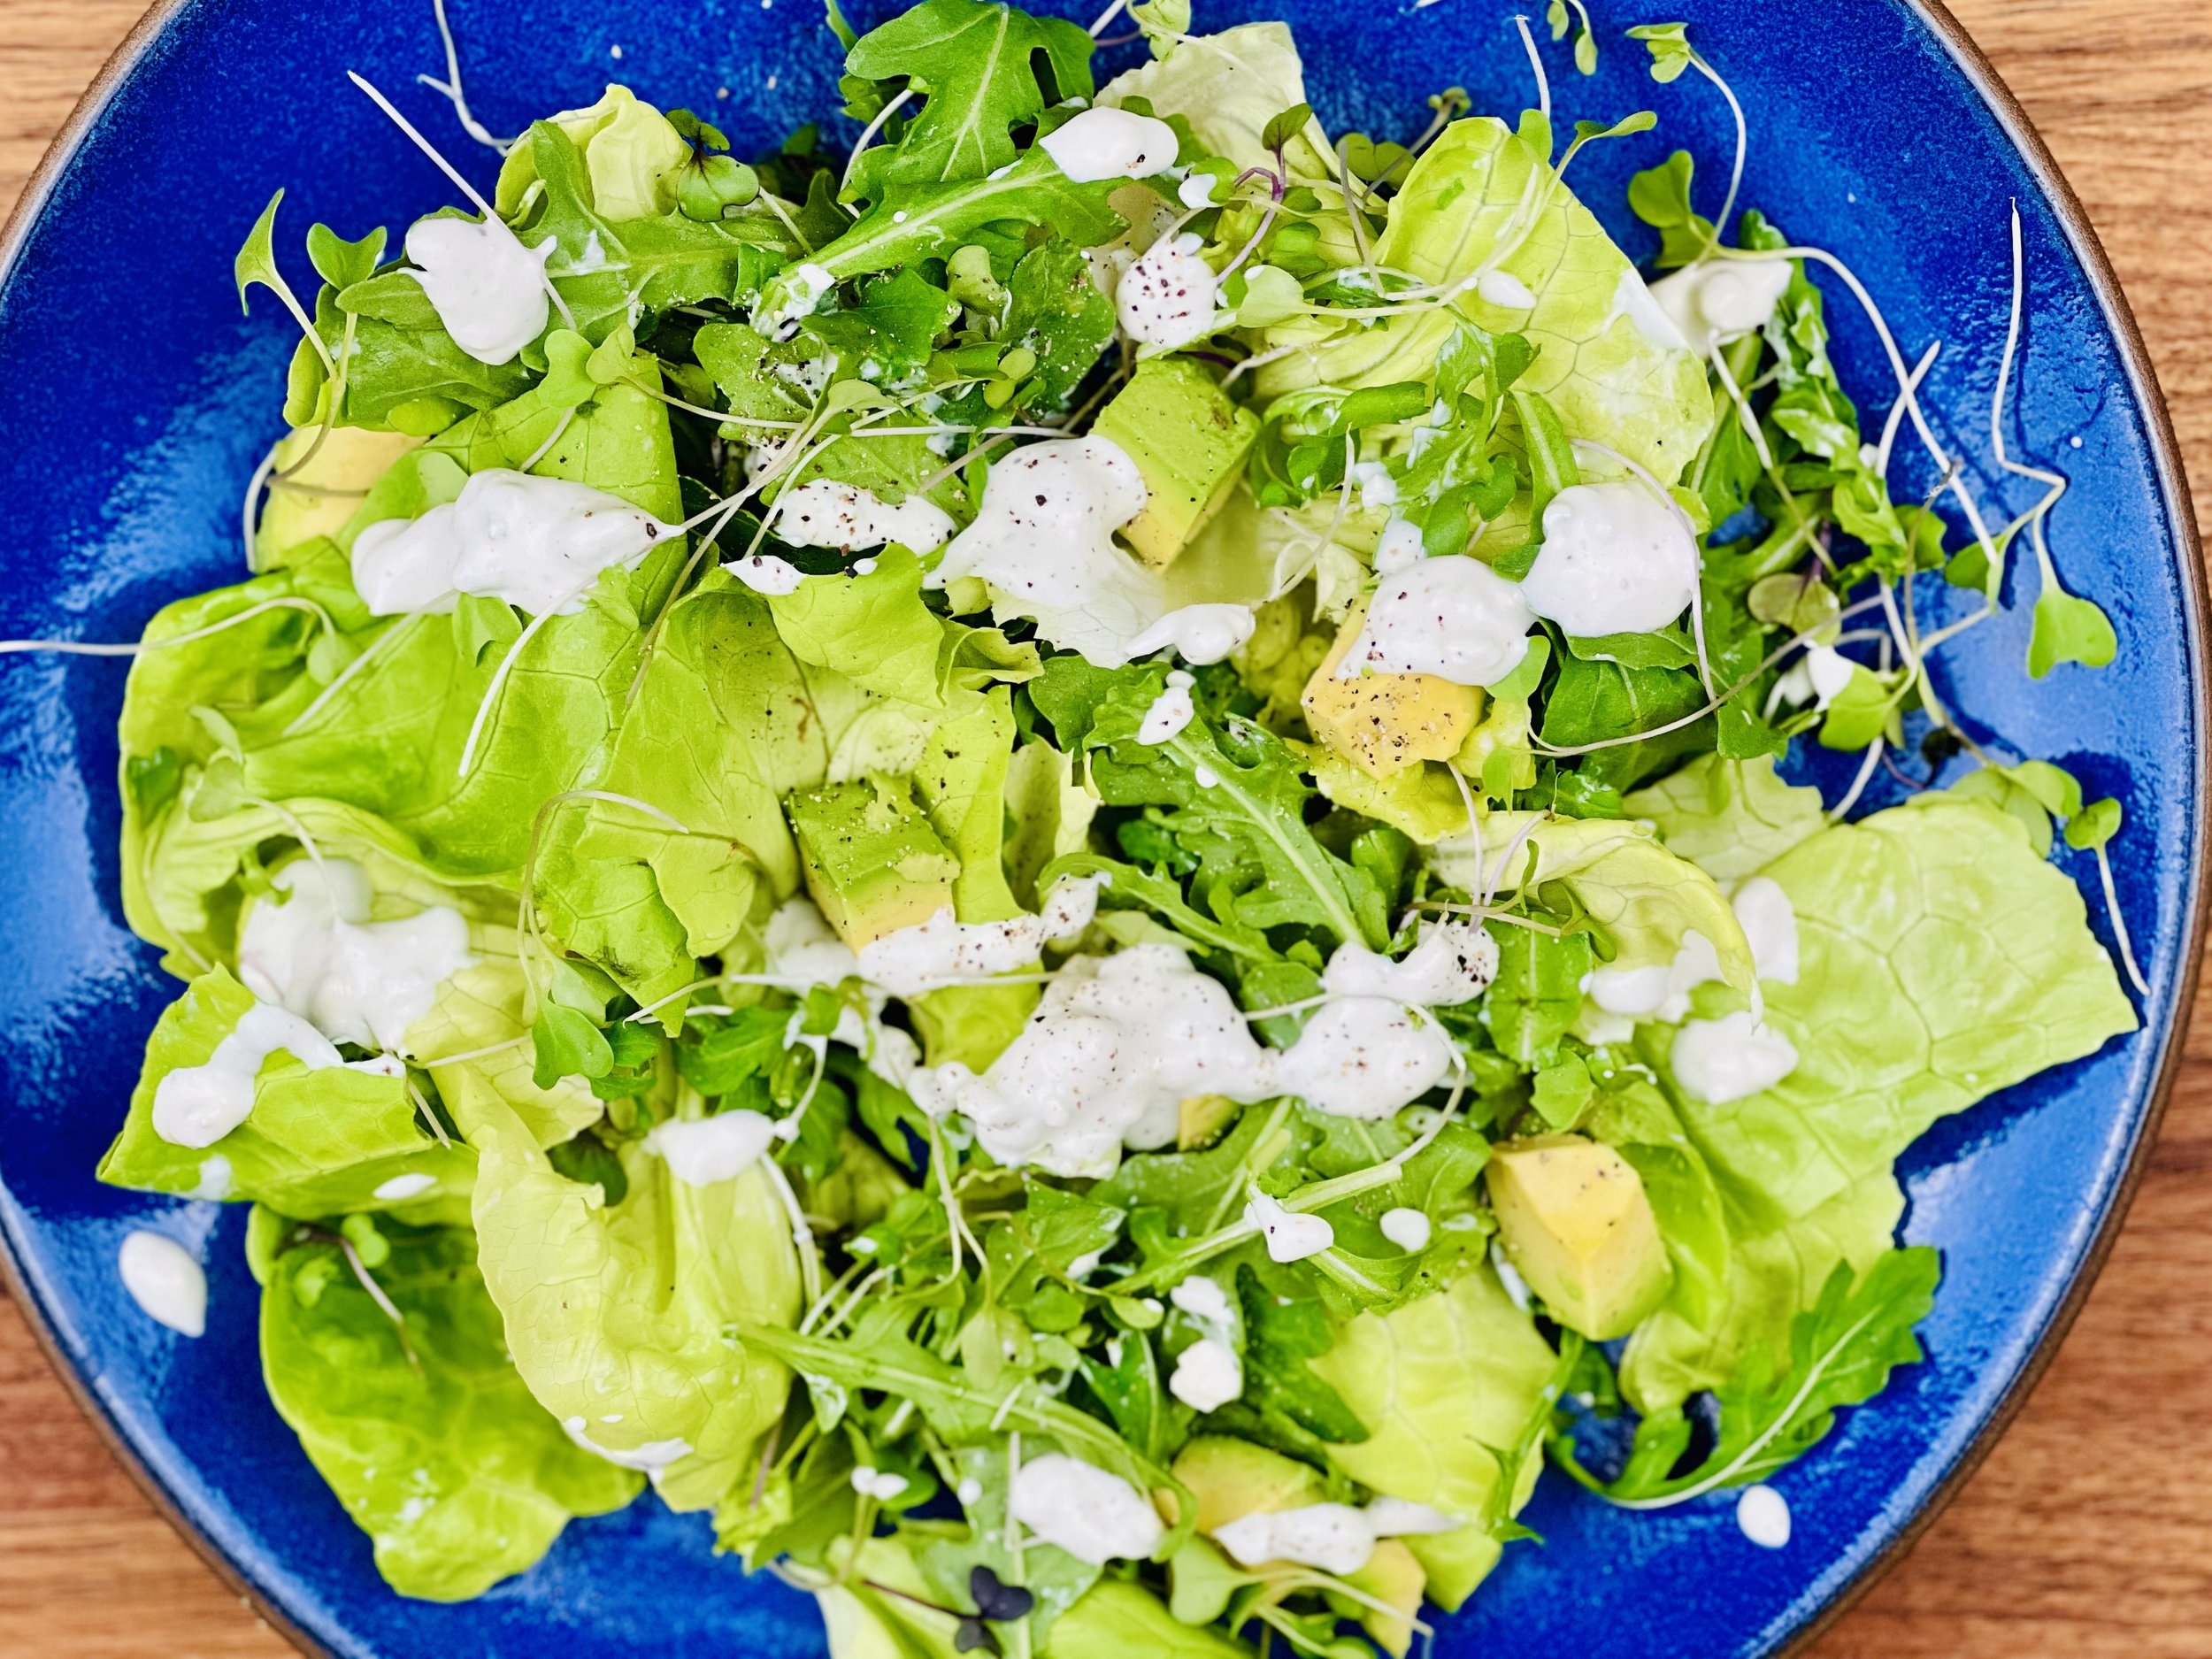
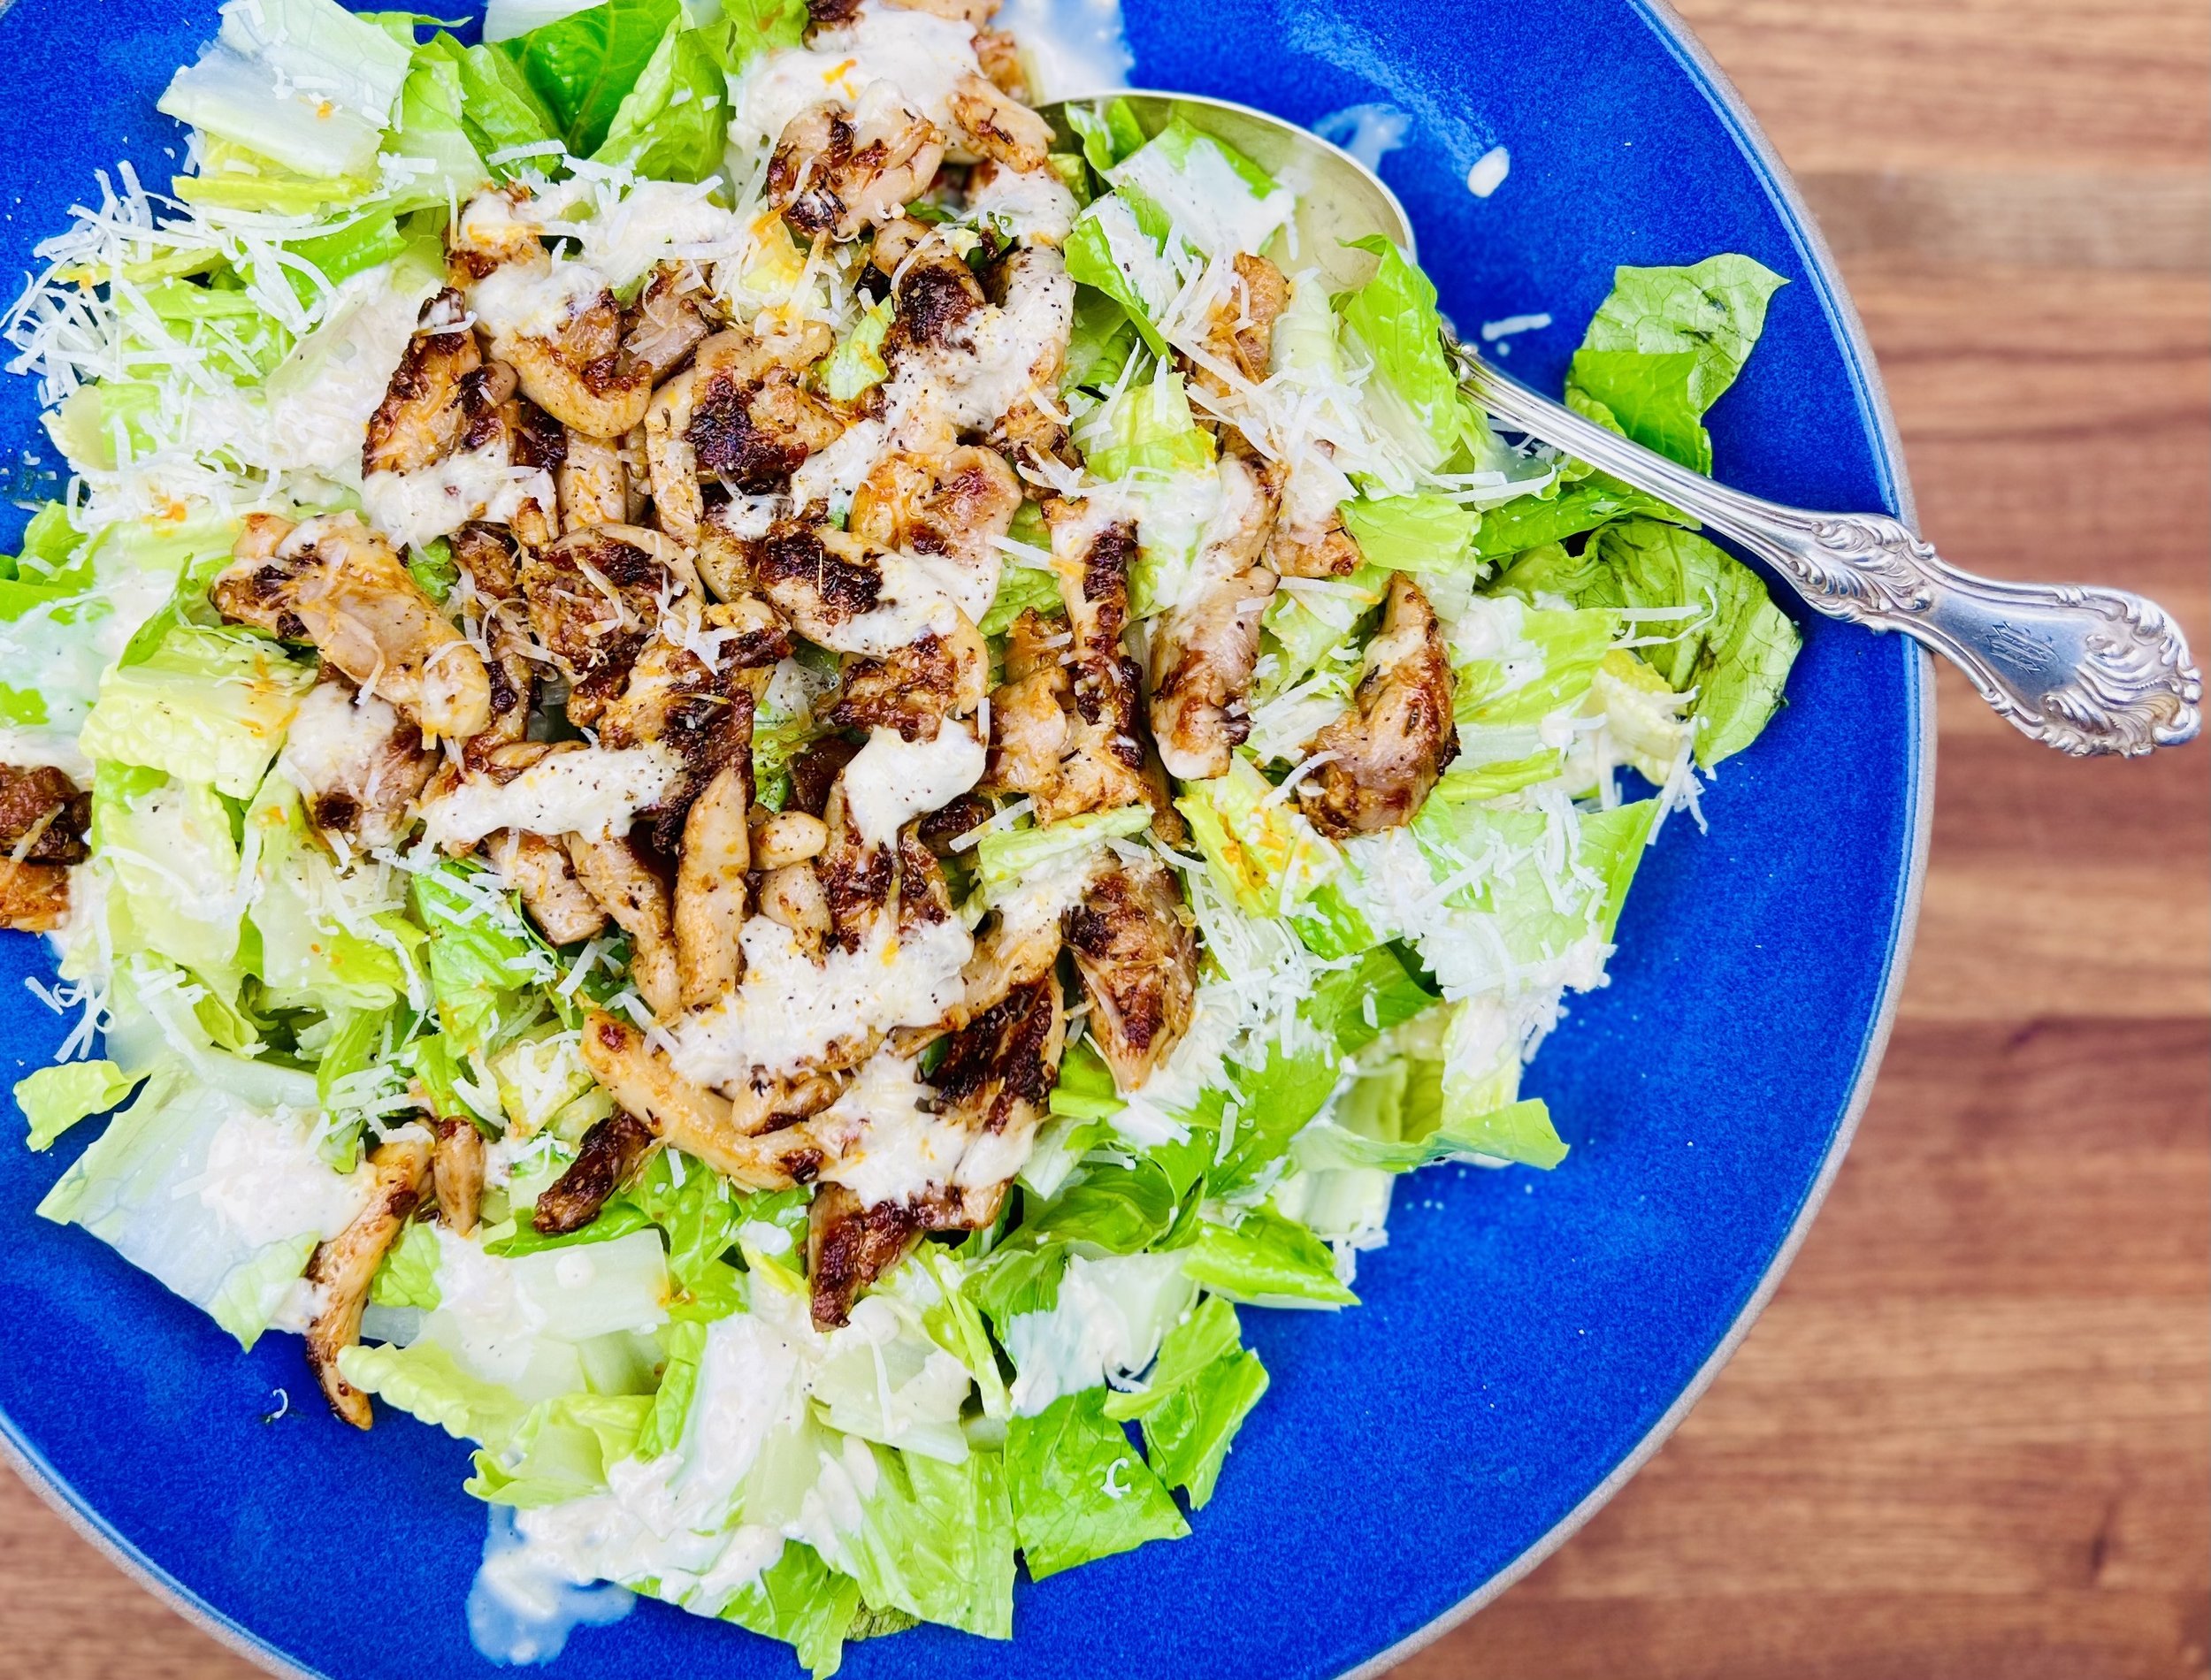
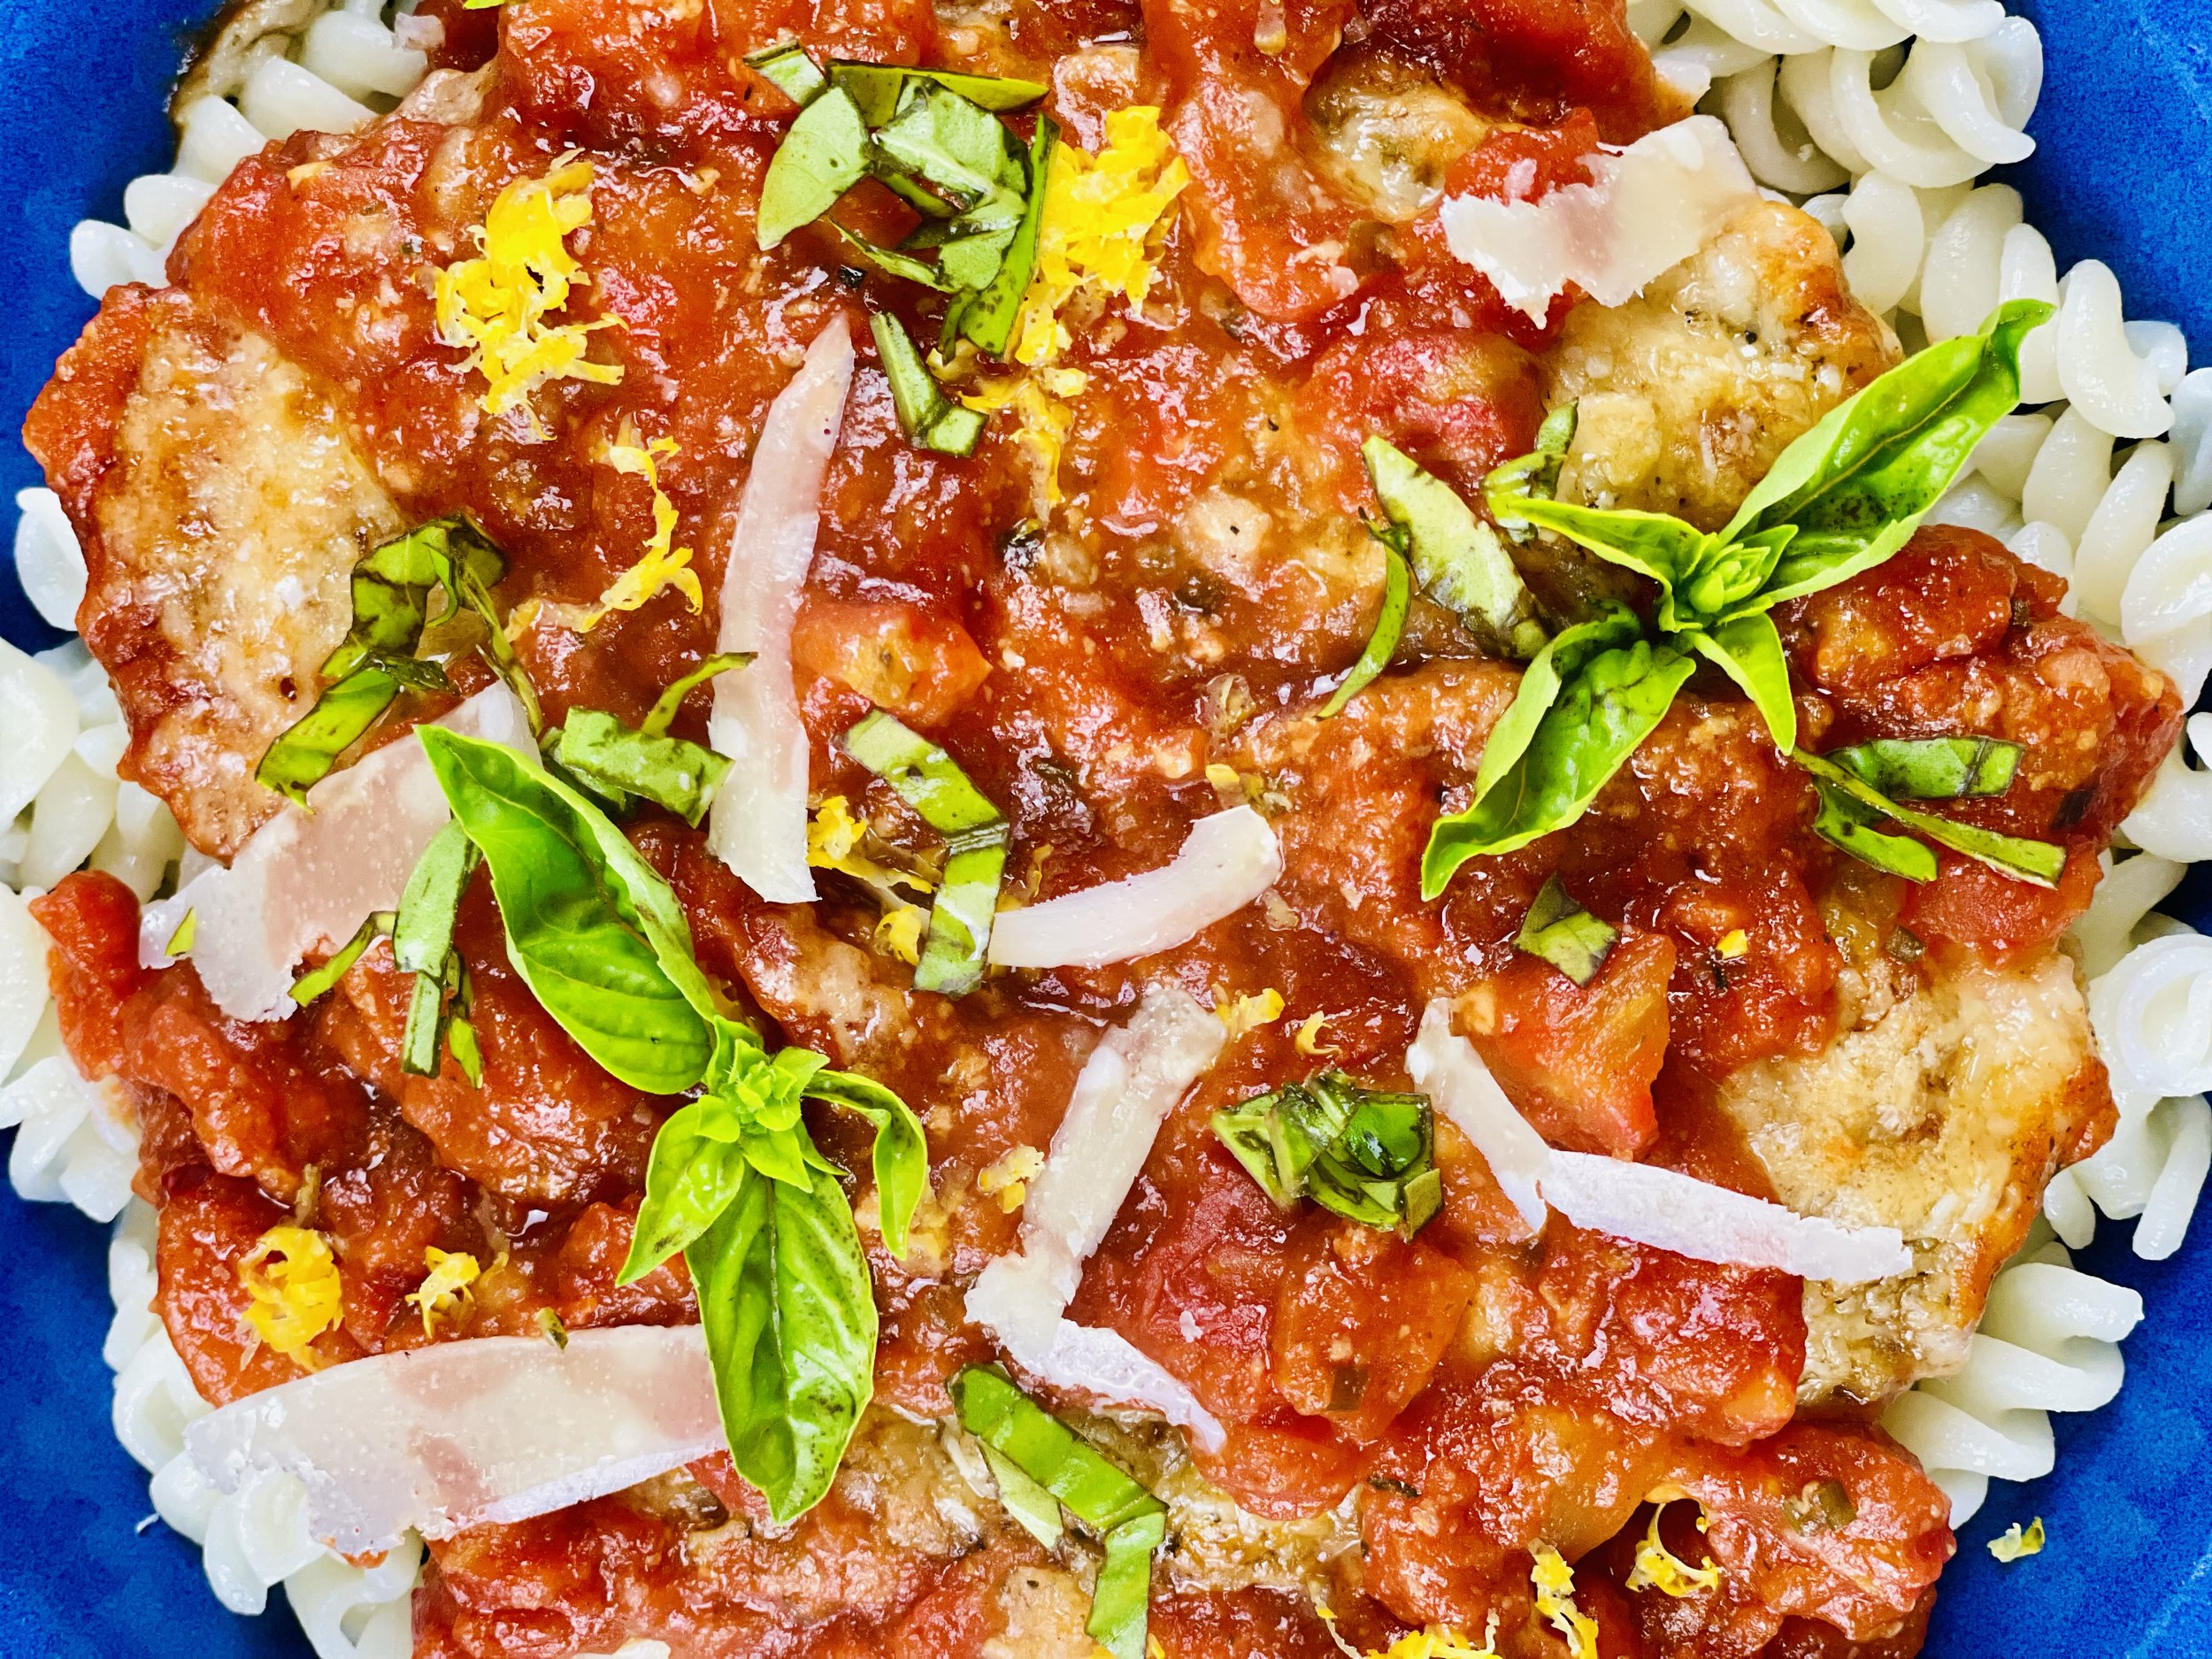
Chicken Milanese and Winter Salad (low FODMAP)
20 Minutes prep • 15 Minutes cook • Low FODMAP • Gluten-free • Serves 4
20 Minutes prep • 15 Minutes cook • Low FODMAP • Gluten-free • Serves 4 • Ok to make-ahead: Step 1
Craving crispy fried chicken? How about crispy fried chicken that has been stuffed with creamy mozzarella and tucked under a simple salad? Chicken Milanese is a feast for your senses and it’s the perfect way to enjoy this delightful combination. My recipe is low FODMAP of course, so dive on in and make it tonight!

This is an exclusive recipe just for recipe club members.
Each week I am creating and delivering one very special recipe just for my recipe club members. If you’re not yet a member, I encourage you to join! Membership in the club includes access to the complete archive of recipes with filters so it can become your virtual low FODMAP cookbook plus, I am creating and delivering one special NEW recipe every week ONLY for recipe club members. And, for my true fans, I’ll be sharing behind-the-scenes content, and updates on the progress of the new cookbook.
Your membership in the club helps me continue creating new, delicious, easy-to-make, low FODMAP recipes just for you.
As always, all recipes will emphasize simple ingredients, easy preparation, and delicious low FODMAP results. Recipes will be for everything from main courses, salads, soups, side dishes, appetizers, desserts, sauces, breakfast and lunch, and even mocktails and cocktails. Everything you need to prepare fantastic low FODMAP meals everyone will love.
Join the club. Become a Patron. Let’s keep making delicious Low FODMAP meals together.
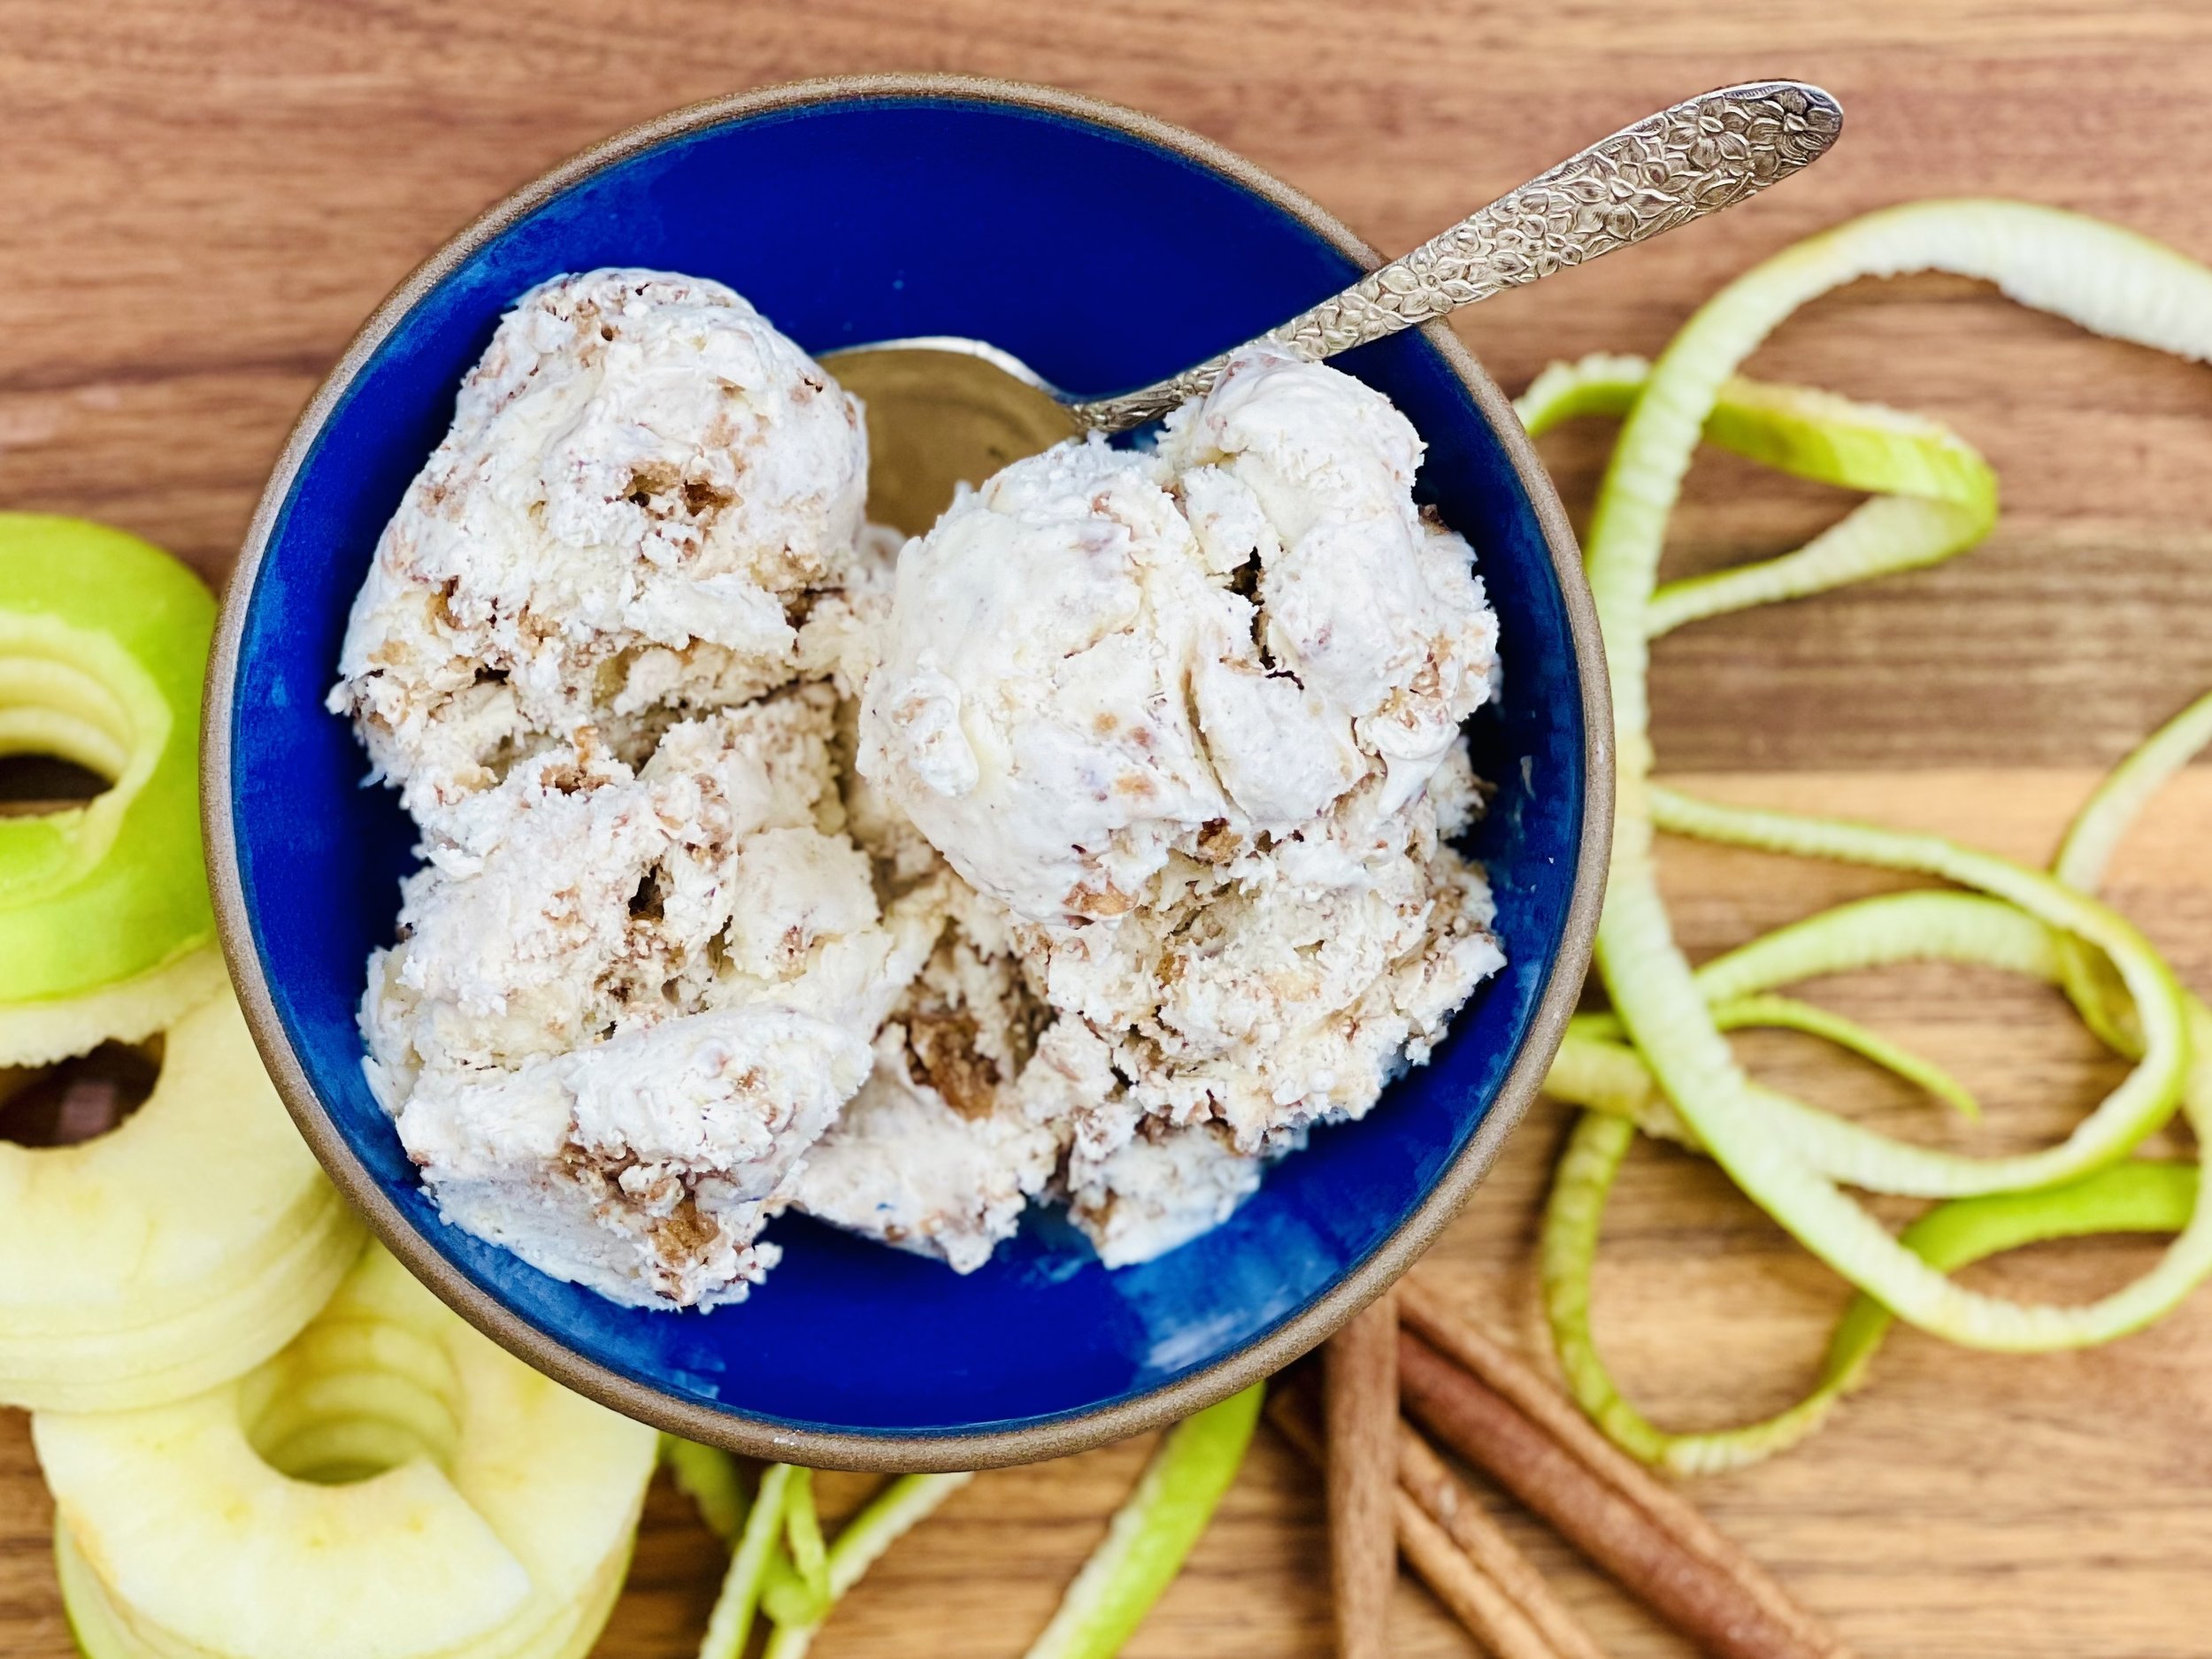
Pumpkin Spice Cake (low FODMAP)
15 Minutes prep • 30 Minutes cook • Low FODMAP • Gluten-free • Serves 8 - 12 • Ok to make-ahead: Steps 1 - 6
15 Minutes prep • 30 Minutes cook • Low FODMAP • Gluten-free • Serves 8 - 12 • Ok to make-ahead: Steps 1 - 6
Our sweet potato spice cake was so good, we had to create a pumpkin spice version too! This cake is moist, beautifully spicy, delicious, and easy to make. The batter is flexible enough to be perfect as a sheet cake, layer cake, or even cupcakes. I think you’re going to love this one!

Ingredients: Cake
2 3/4 cups gluten-free all-purpose flour (I used King Arthur Measure for Measure*)
1 3/4 teaspoons baking powder*
1/4 teaspoon baking soda*
1 teaspoon kosher salt*
2 teaspoons ground cinnamon*
3/4 teaspoon ground nutmeg*
1/2 teaspoon ground ginger*
1/4 teaspoon ground allspice*
1 cup canola oil* or other vegetable oil
3 large eggs at room temperature
1 large egg yolk at room temperature
1 1/2 cups light brown sugar*
1 cup granulated sugar*
1 (15-ounce) can pumpkin puree**
1/2 cup lactose-free sour cream
2 teaspoons pure vanilla extract*
Directions: Cake
(1) Prepare: Preheat the oven to 350 degrees F. Grease one 13x9x2-inch pan, two 9-inch round pans, or a large rimmed baking sheet for sheet cake, and line the bottom with parchment paper.
(2) Combine the dry ingredients: In a medium-sized bowl, whisk together the gluten-free flour, baking powder, salt, baking soda, and spices.
(3) Combine the wet ingredients: In the bowl of the stand mixer fitted with paddle attachment mix together the oil, sugars, and vanilla. Add the eggs and extra egg yolk, one at a time, and beat on medium speed until smooth between each addition. Add the pumpkin and the sour cream and beat until smooth.
(4) Blend the cake: Add the dry ingredients to the wet in two parts and, mix on low just until the flour is incorporated—do not over-mix.
(5) Bake the cake: Transfer the batter to the prepared pan and smooth the top with a rubber spatula. Bake for 30 to 35 minutes until a toothpick comes out with only a moist crumb or two.
(6) Finish: Let cool until easy to handle, then run a butter knife around the edges, releasing it from the pan. Invert the cake onto a cooling rack, flipping it right side up to cool to room temperature.
Make-ahead note: At this point, the cake will keep in an airtight container at room temperature for 2-3 days. Or you can prepare the cake through step 6. Cover it tightly and refrigerate for up to 2 days or freeze for up to 3 months. Bring to room temperature, make the frosting, frost, and serve. You can also freeze the frosted cake, up to 3 months. Thaw overnight in the refrigerator, bring to room temperature or serve cold.
(7) Frost the cake: When ready to frost the cake, make our best cream cheese frosting then frost.
(8) Plate and serve: Slice and serve and watch your family, friends, or guests marvel at what a moist and delicious cake you have made!
Pro tips: To bring eggs up to room temperature quickly so they blend more evenly in your batter, simply put them in a bowl of warm (not hot) water for a few minutes.
This cake would be delicious and would work well, as a layer cake (bake 25 mins), or cupcakes (bake 18-21 mins).
**Pumpkin: While you can cook down your own pumpkin, that takes a lot of time and I think the flavor and consistency of canned pumpkin work best for this recipe. I always use Libby’s brand canned pumpkin for all my pumpkin recipes because it is consistently the best taste, color, and consistency.
Ingredients: Frosting
1/2 cup (4 ounces) lactose-free cream cheese, at room temperature
2 sticks (8 ounces) unsalted butter, at room temperature
4 cups confectioners’ sugar, sifted
1/2 teaspoon kosher salt*
1 teaspoon white vinegar
1 teaspoon vanilla*
2 tablespoons heavy cream, lactose-free whole milk, or lactose-free half and half
Directions: Frosting
(1) Combine the cream cheese and butter: In the bowl of a stand mixer fitted with the paddle attachment, beat the cream cheese and butter on medium-high speed for about 5 - 7 minutes until light yellow and fluffy.
(2) Add the sugar: Turn the mixer off and sift the confectioner’s sugar into the bowl with the butter mixture. Mix on low for 2 minutes then scrape down the sides of the bowl. Continue to mix, increasing the speed to medium-high, until the frosting is light and fluffy and no lumps are visible.
(3) Finish: Add the salt, vinegar, vanilla, and heavy cream. Use the frosting immediately, or store it in the fridge until you’re ready to decorate.
(4) Frost something! Use the frosting immediately, or store it in the fridge until you’re ready to decorate.
Make-ahead note: At this point, you may refrigerate the frosting if you’re not going to use it right away. If you do refrigerate it, you may have to let it warm up a bit and then re-whip it for a minute or two in the stand mixer on low before it’s spreadable again.
Eat and enjoy every bite because you can!
*This post may contain links for you to easily purchase items listed on the page. In some cases, we have provided a special discount code for IBS Game Changers so be sure to use it when you purchase an item to get the discount that has been arranged just for you! As an Amazon Associate, I earn a commission from qualifying Amazon purchases.
More Deliciously Low FODMAP™ dessert recipes you might enjoy
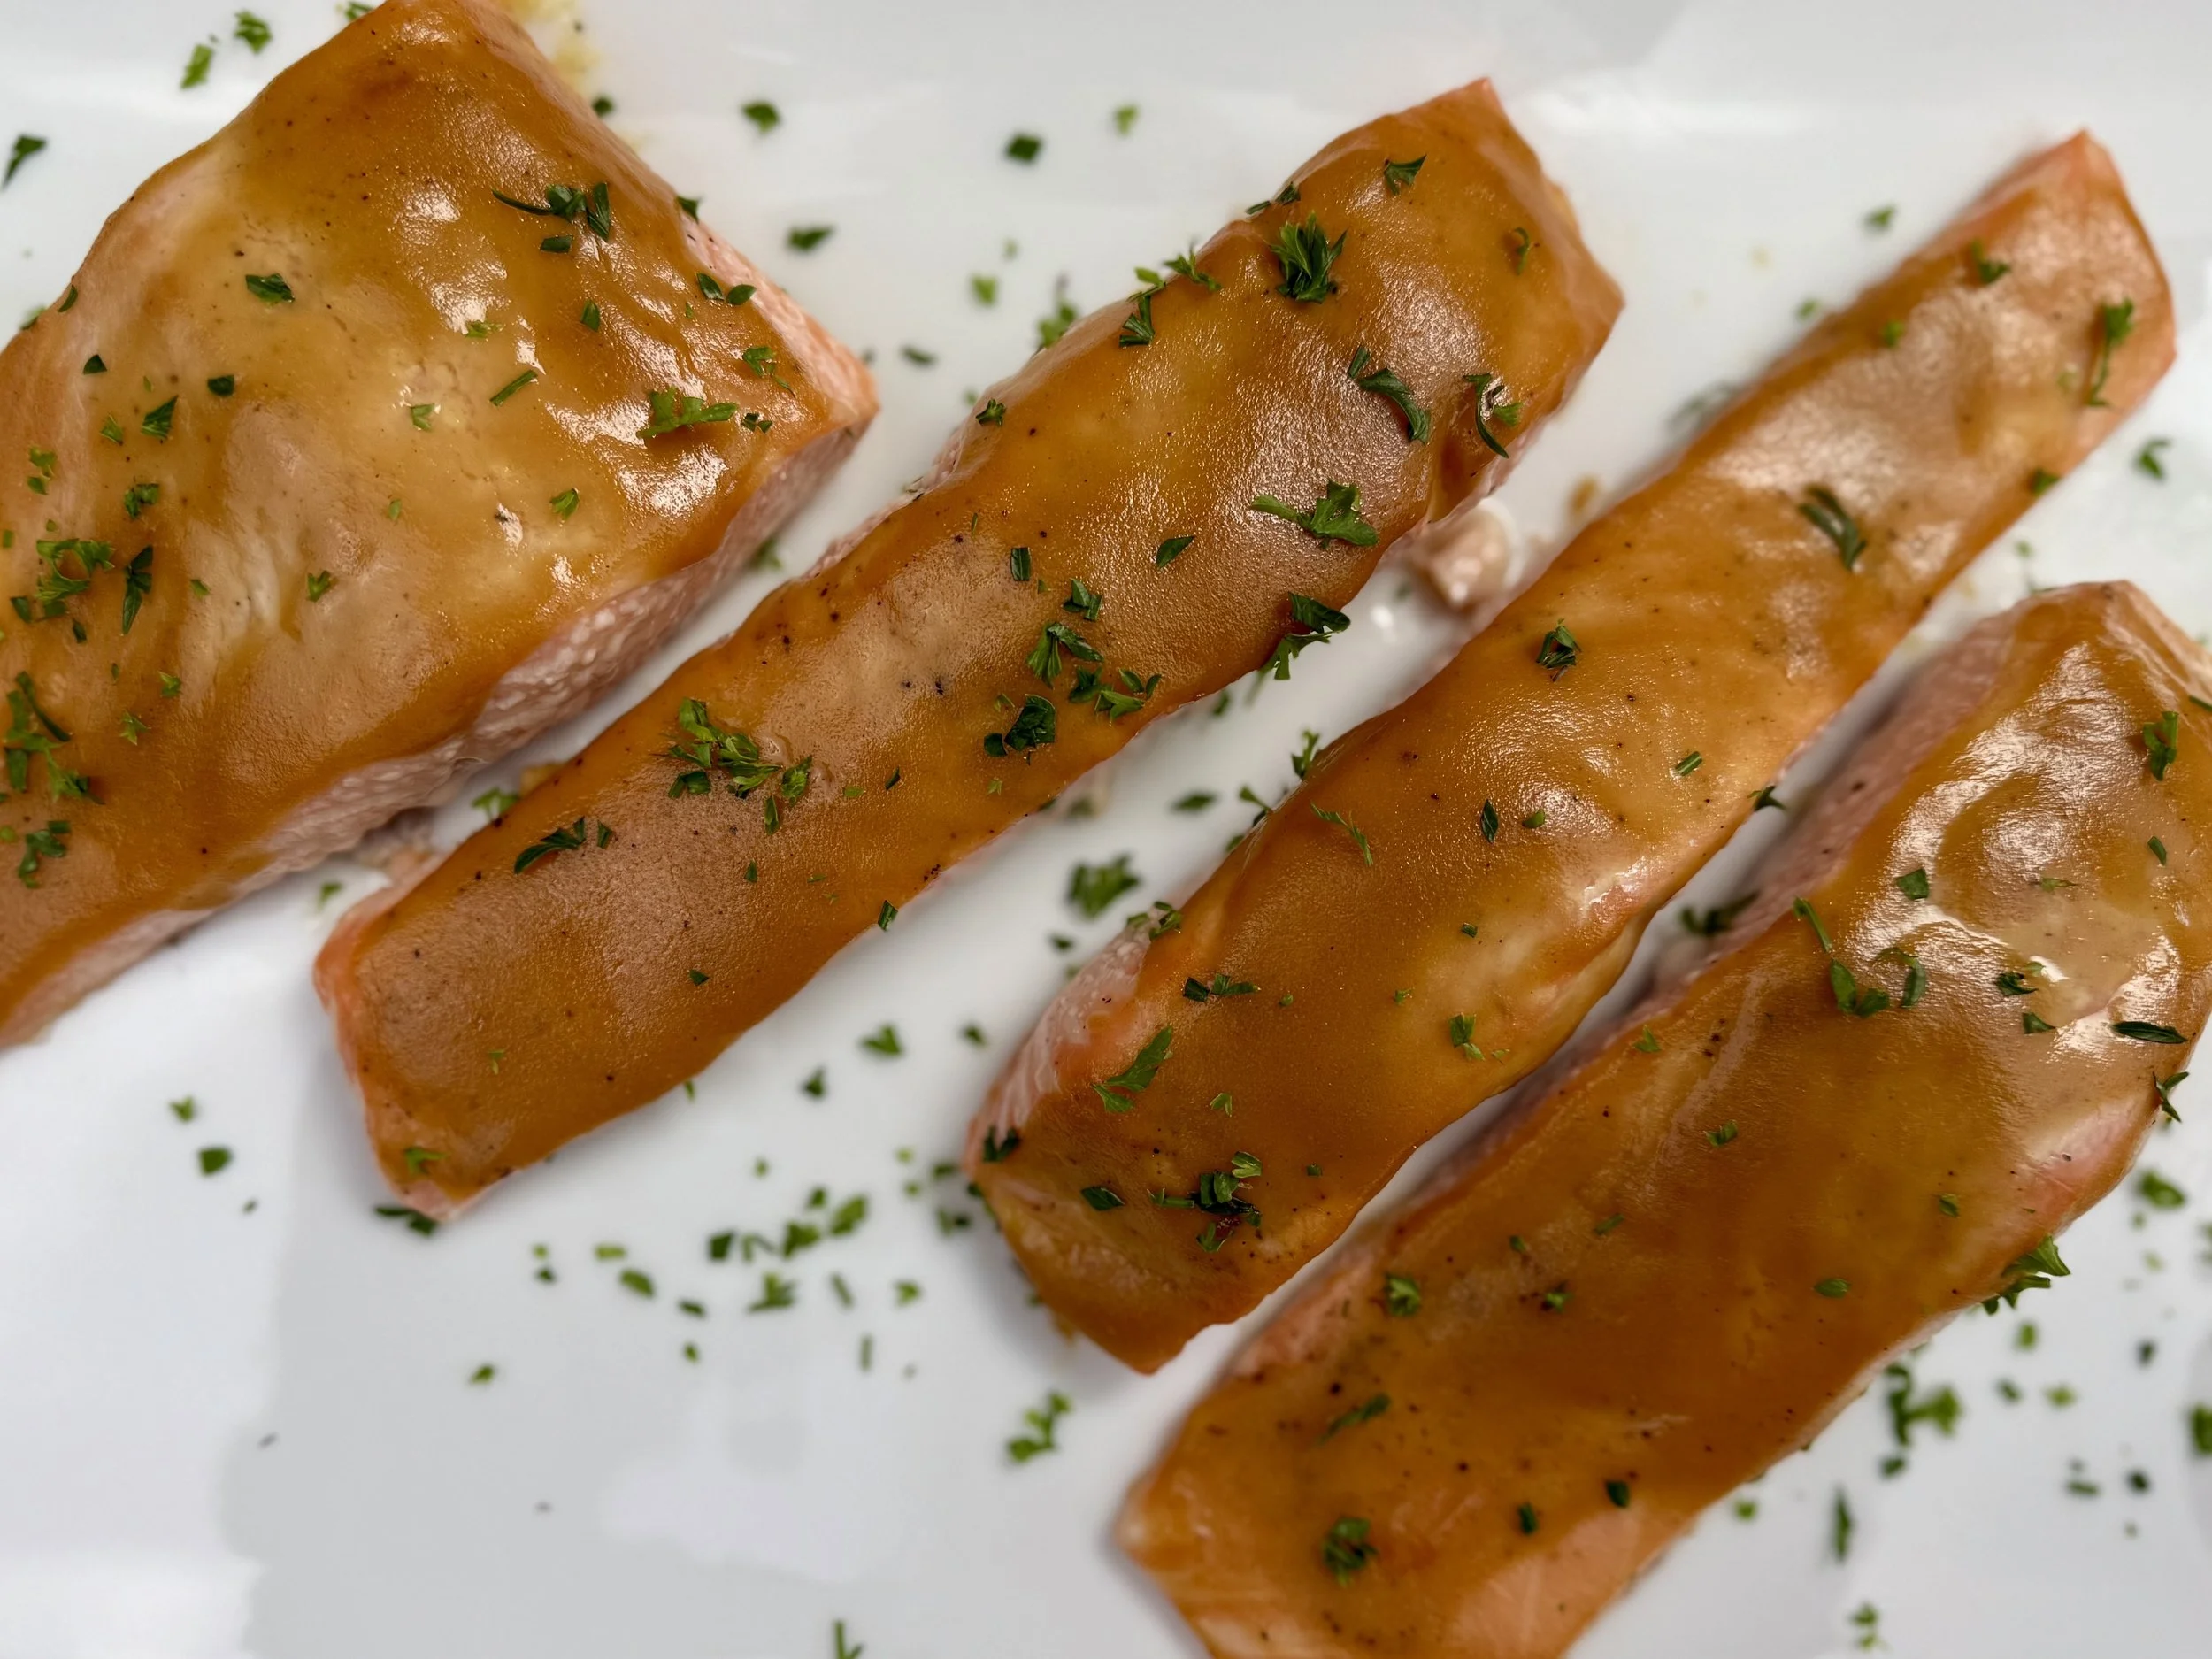
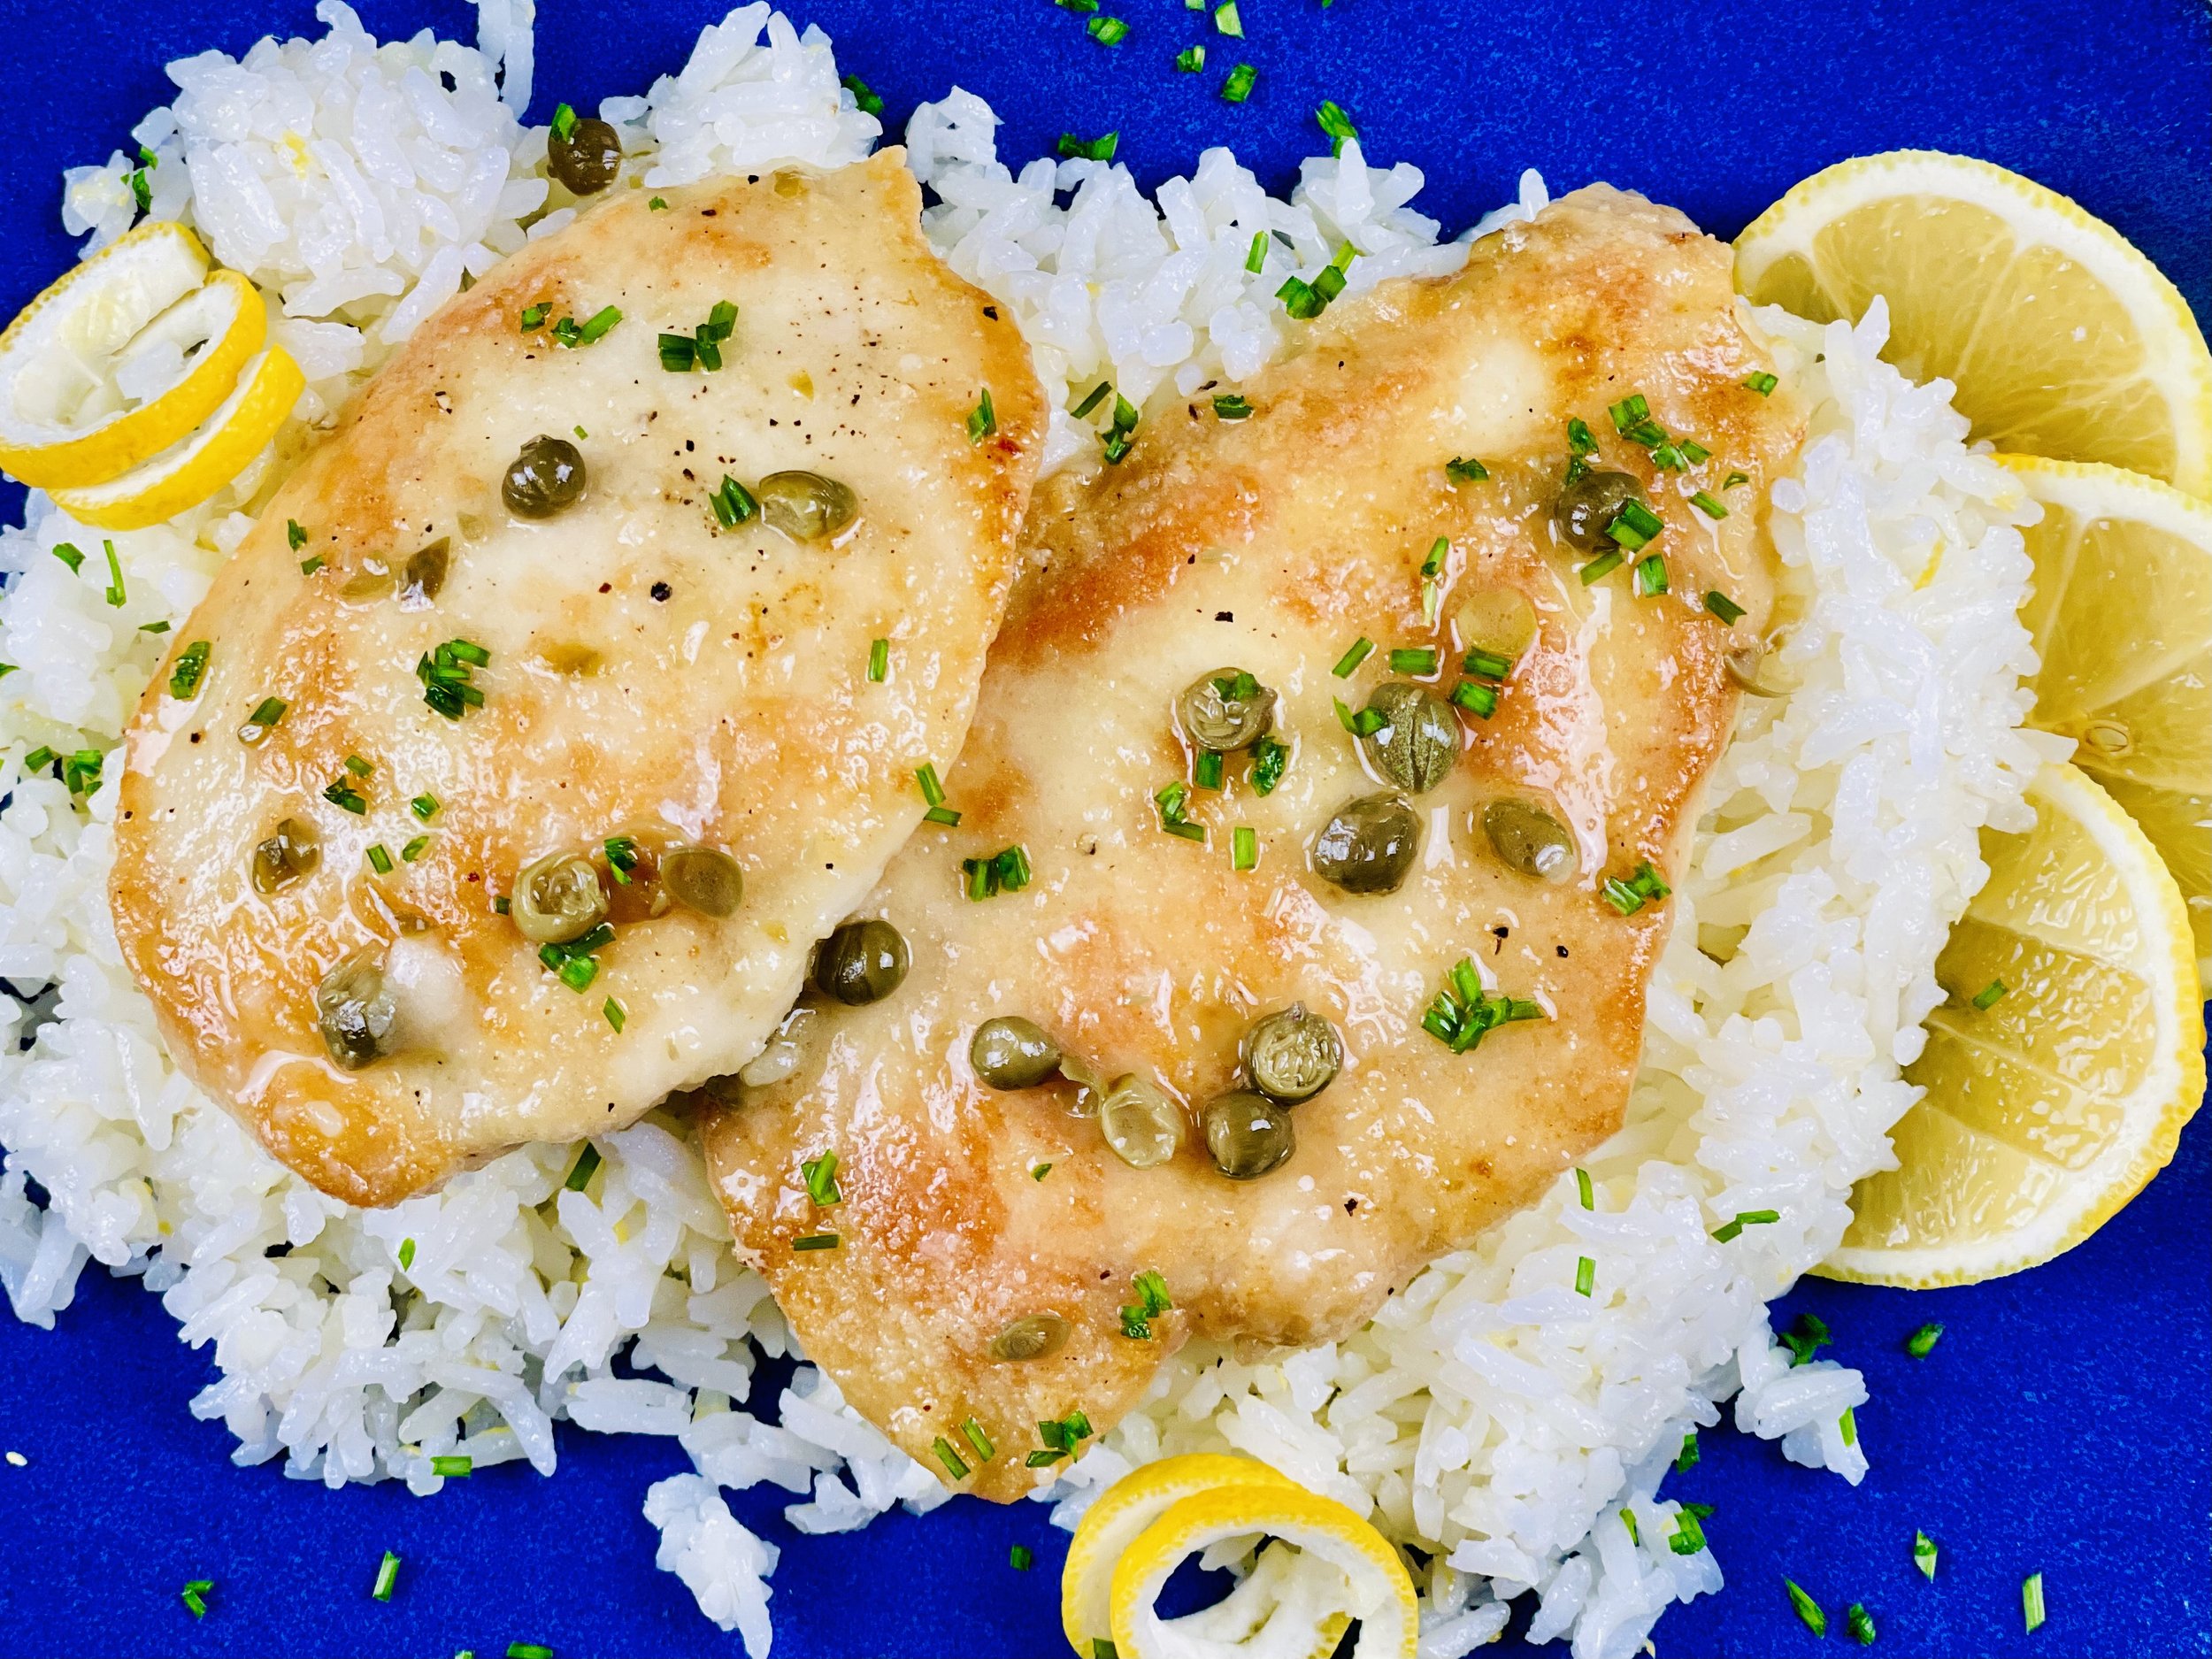
Chicken Piccata and Lemon Rice (low FODMAP)
15 Minutes prep • 15 Minutes cool • Low FODMAP • Gluten-free • Lactose-free • Makes 1 pint • Ok to make-ahead: Steps 1 - 4
15 Minutes prep • 20 Minutes cook • Low FODMAP • Gluten-free • Serves 4 • Ok to make-ahead: Step 1
This method of preparing chicken piccata renders it extremely moist, tender, and flavorful. And, especially if you take time to salt the meat ahead of time, you will end up with a meal that is every bit as good as the restaurant versions, without all the FODMAPs! I like to serve this over lemon rice so all that amazing buttery lemon sauce has somewhere to go and you won’t miss it!
Ingredients: Chicken
2 large skinless, boneless chicken breasts
½ cup gluten-free all-purpose flour* (I used King Arthur Measure for Measure)
3 tablespoons garlic-infused olive oil, divided
1/3 cup dry white wine
1 tablespoon drained capers, coarsely chopped
4 tablespoons unsalted butter, cut into pieces
2 tablespoons fresh lemon juice
Chopped chives or parsley and lemon wedges (for serving)
Ingredients: Rice
1 cup jasmine rice*
2 tablespoons of salted butter
½ teaspoon of Kosher salt
Grated rind of one lemon
Directions
(1) Prepare chicken: Slice chicken breasts in half crosswise into 4 cutlets and lightly pound the thicker pieces between sheets of plastic wrap until all pieces are a similar thickness of about ½”. Season both sides of each breast lightly with Kosher salt. Put on a plate, covered with plastic wrap and refrigerate overnight or at least 4 hours before cooking.
Make-ahead note: This chicken is pretty quick to cook but the texture and flavor benefit from early salting. So, salt your chicken and let it sit overnight or at least for about 4 hours before you cook it.
(2) Cook the rice: Cook the rice per package instructions, adding butter and salt to the water and then stirring the lemon zest in after the rice is fully cooked.
(3) Dredge chicken: Put the flour in a shallow bowl and dredge one piece of chicken at a time, tossing to coat in the flour. Shake off excess flour, transfer to a plate, and sprinkle with fresh ground pepper.
(4) Cook the chicken: Heat a large skillet over medium-high heat. When the pan is warm, add 2 tablespoons of garlic-infused olive oil and heat. Once the oil is hot, gently slide the cutlets into the pan and cook, without moving, until deeply browned on the pan side, which should take about 2 minutes. Turn them over and cook on the other side just until chicken is nearly cooked through, which should only take about 30 seconds. Transfer to a clean plate.
(5) Make the lemon butter sauce: Add the remaining 1 tablespoon of garlic-infused olive oil to the skillet and heat. Then add wine and capers to the hot oil and cook, swirling pan and scraping up any bits stuck to the bottom of the skillet, until the liquid is almost completely evaporated, about 3 minutes. Add ½ cup water, and then add the butter swirling the pan vigorously while the butter melts to help it blend with the water, about 1 minute.
(6) Finish: Return the chicken to the skillet and simmer in the sauce until the chicken is cooked through and sauce is thick enough to coat a spoon, about 2 minutes. Remove from the heat and stir in the lemon juice. Taste the sauce and season with salt if needed.
(7) Plate and serve: Plate the chicken and sauce on a bed of the lemon rice and top with chopped chives or parsley, more sauce, and with lemon wedges alongside.
Eat and enjoy every bite—because you can!
*This post may contain links for you to easily purchase items listed on the page. In some cases, we have provided a special discount code for IBS Game Changers so be sure to use it when you purchase an item to get the discount that has been arranged just for you! As an Amazon Associate, I earn a commission from qualifying Amazon purchases.
More Deliciously Low FODMAP™ main course recipes you might enjoy
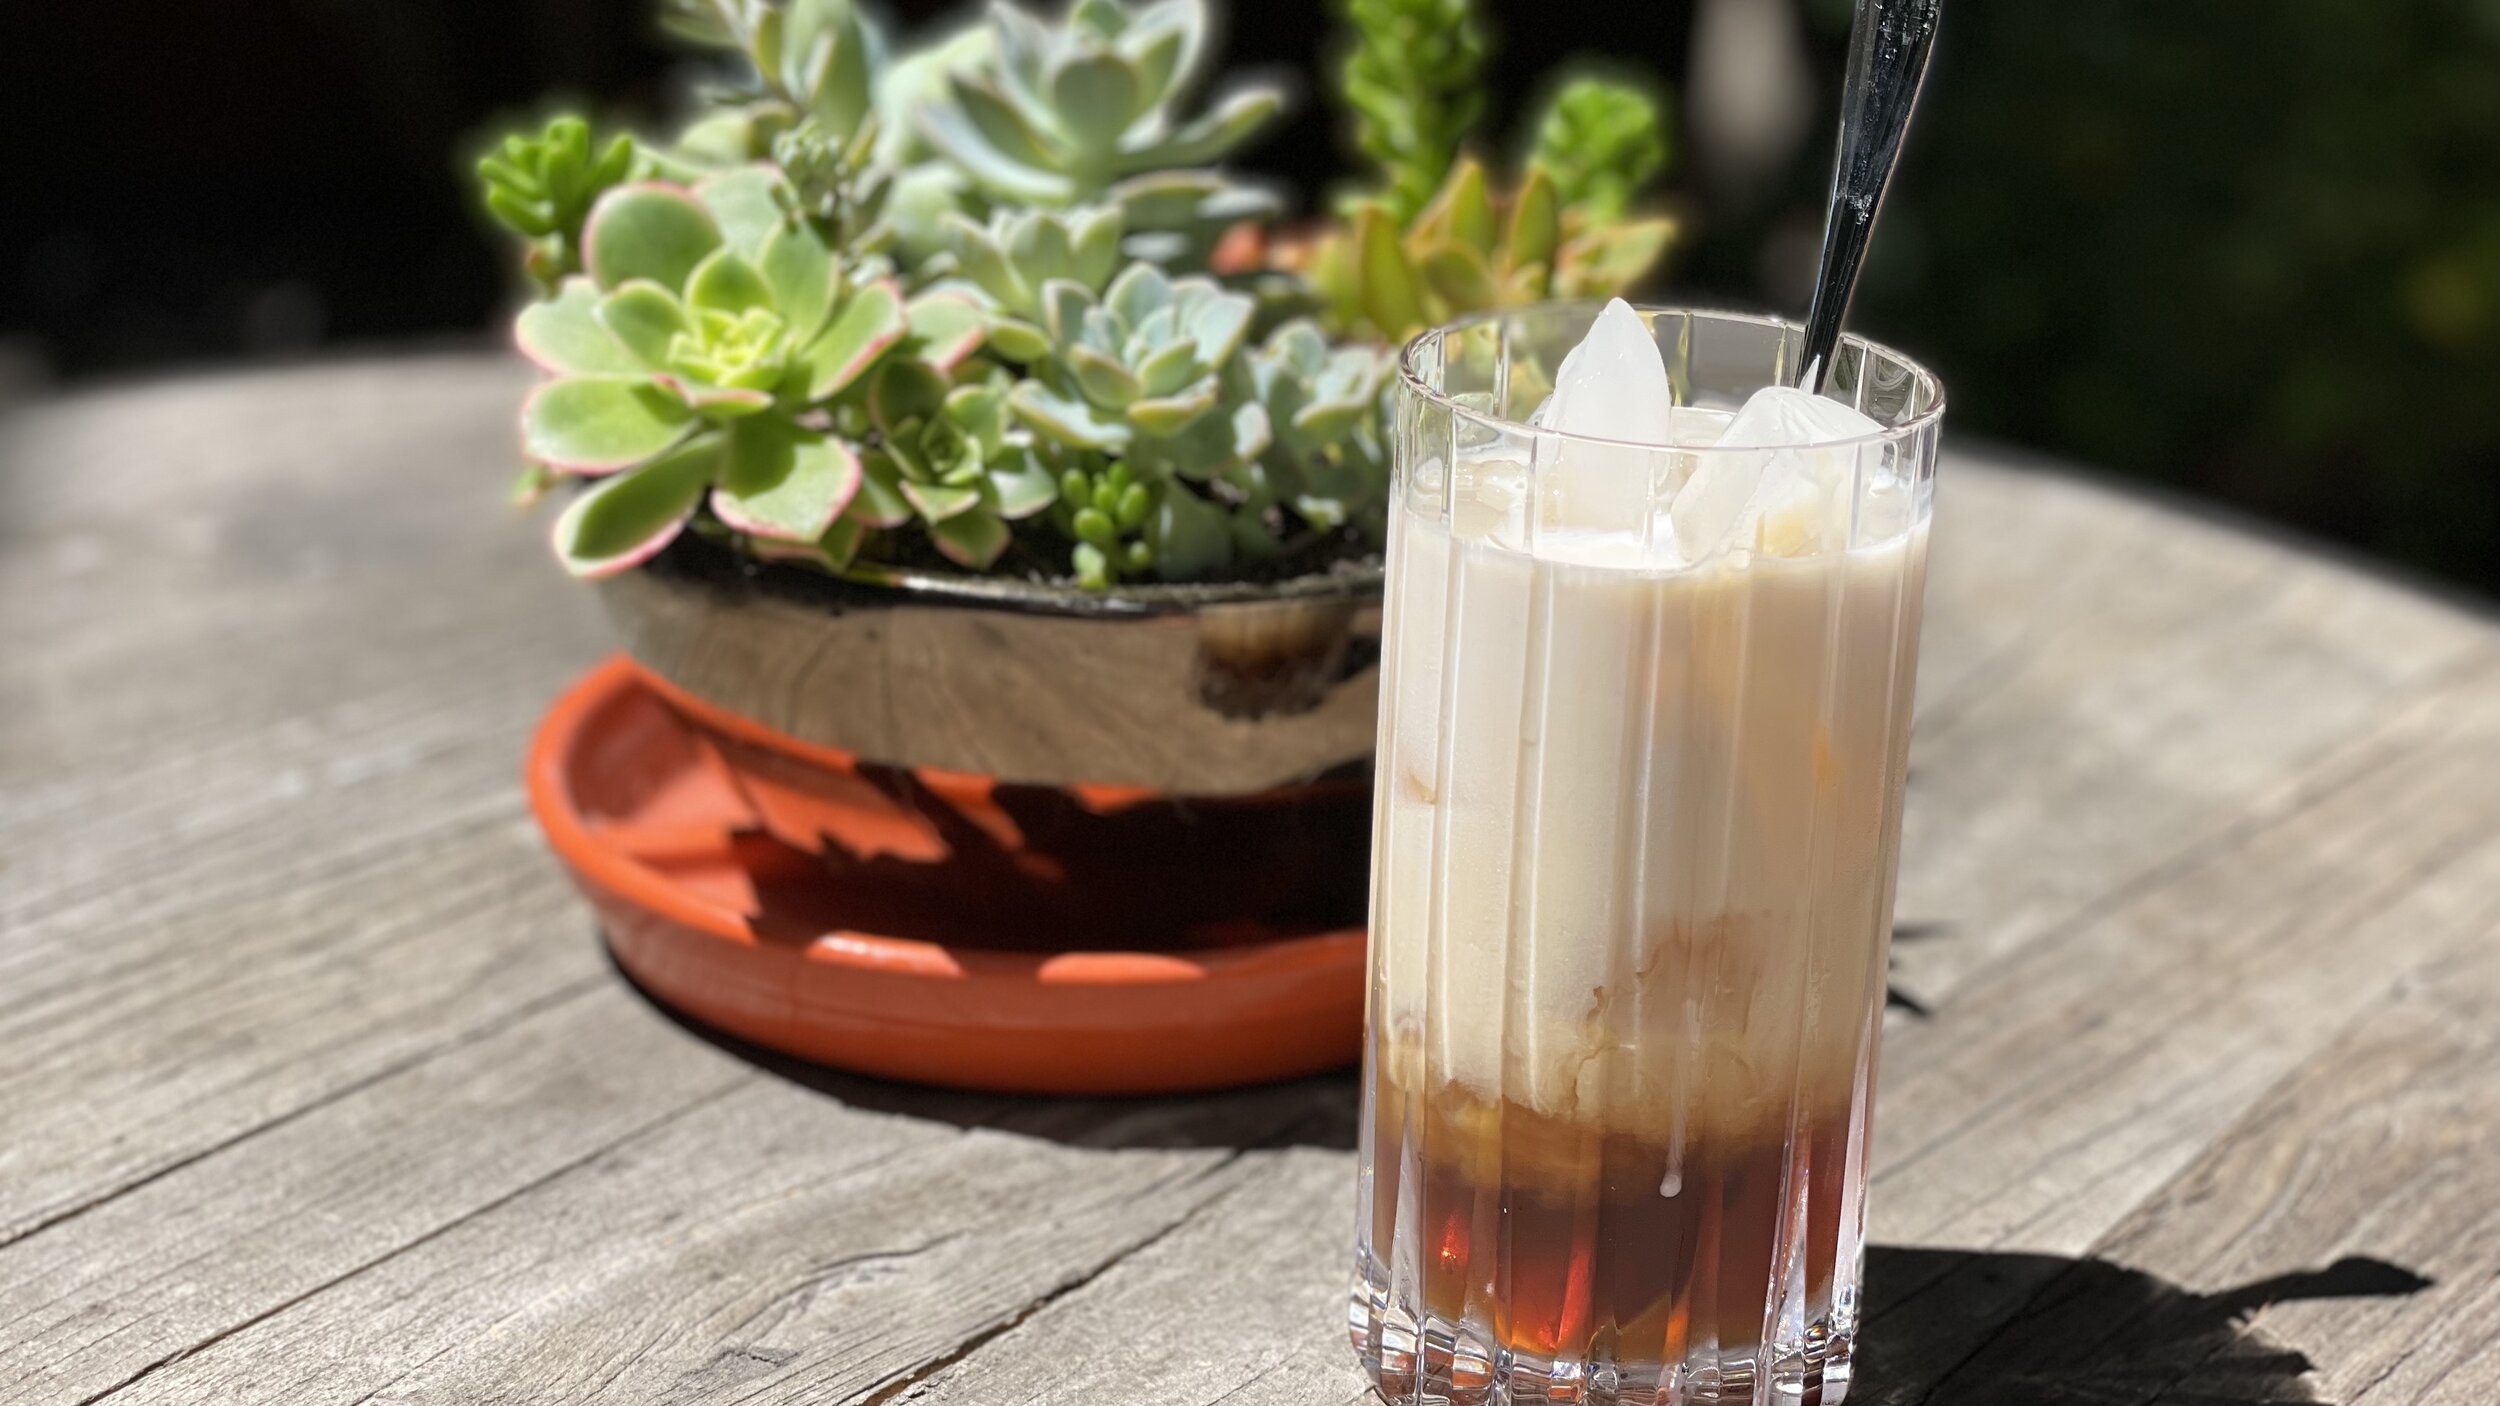
Irish Cream Cocktail (low FODMAP)
15 Minutes prep • 15 Minutes cool • Low FODMAP • Gluten-free • Lactose-free • Makes 1 pint
15 Minutes prep • 15 Minutes cool • Low FODMAP • Gluten-free • Lactose-free • Makes 1 pint • Ok to make-ahead: Steps 1 - 4
I was traveling (and eating!) in Mexico recently and at Yves’ Restaurant Bar in Ajijic, we were served a small glass of homemade Bailey’s Irish Cream after our meal. It was so refreshing and delicious, I was determined to come up with a low FODMAP version. I’m happy to say, I succeeded! This recipe captures the delicious essence of Baileys Irish Cream without the FODMAPs (caffeine, lactose, and high fructose corn syrup!) so you can enjoy it without consequences. With a little advance prep, it’s quick and easy to make and you can have it on-hand for your friends, family, and guests, to enjoy a small glass of this on the rocks after dinner. It might not take you back to Yves’ Restaurant Bar, but you will enjoy it all the same!
Ingredients
3/4 cup lactose-free unsweetened condensed milk (you can substitute additional lactose-free half and half)
1/2 cup superfine sugar (you can substitute regular white sugar instead, but don’t use confectioner’s sugar)
1/2 cup heavy cream or lactose-free half and half
1 1/2 tablespoons chocolate syrup (recipe below or you can buy low FODMAP chocolate syrup)
1/2 teaspoon instant decaf coffee granules (I used Starbucks Via Decaf Italian Roast)
1/2 teaspoon pure vanilla extract
1/2 cup Irish whiskey (I used Jameson triple casked)
Directions
(1) Make the sweetened milk: Place the condensed milk (or half and half), and sugar in a saucepan and bring to a simmer over medium heat. Cook, stirring very frequently, for a minute or two until the sugar is dissolved. Remove from heat and let cool.
(2) Make the chocolate syrup: Our recipe is below. Let cool.
(3) Combine the ingredients: To the cooled milk or cream, add the additional ½ cup of cream or half and half, instant coffee granules, chocolate syrup, and vanilla, and whisk to combine.
(4) Add the whiskey: Add the whiskey and whisk for about a few more seconds to blend.
(5) Serve: Serve in small glasses over ice.
Pro tip: Because this keeps well in the fridge, if you want to make more at one time, simply double (or triple!) the recipe.
Make-ahead note: At this point, you may transfer the homemade Irish cream into sterilized (in the dishwasher is fine) glass bottles with tight-fitting lids and store them in the refrigerator for up to 2 months. Shake well before serving.
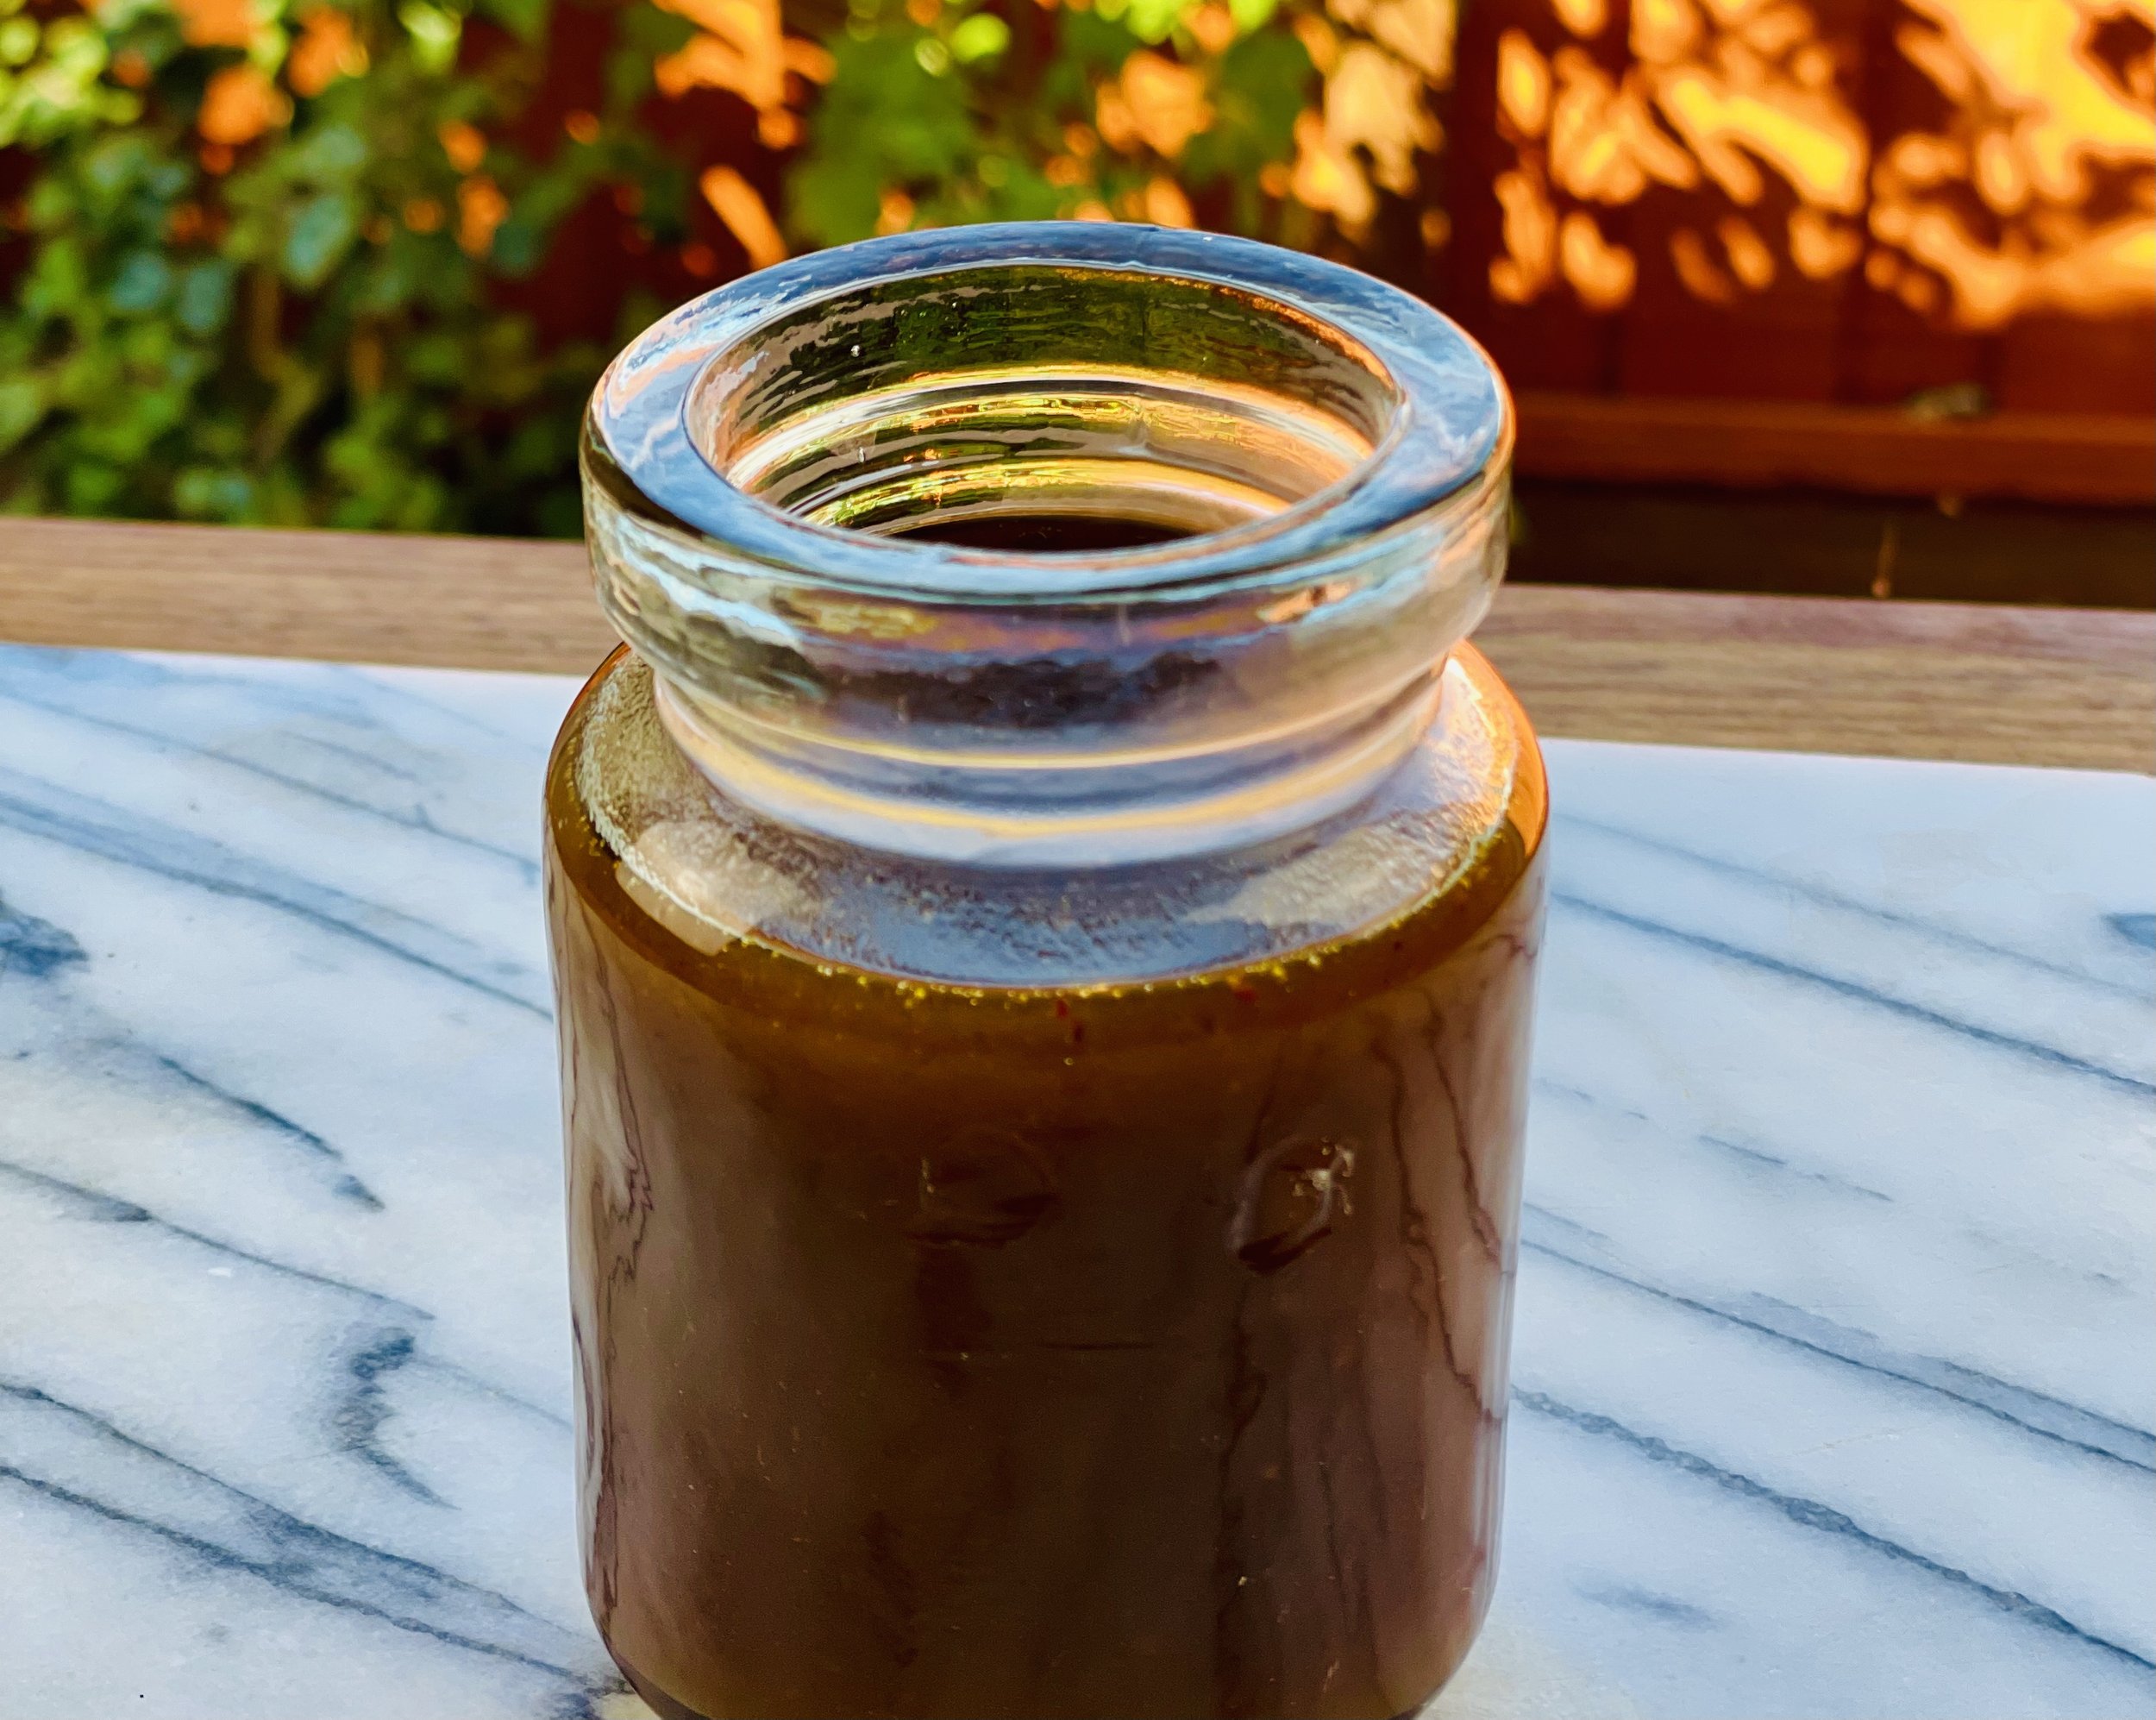
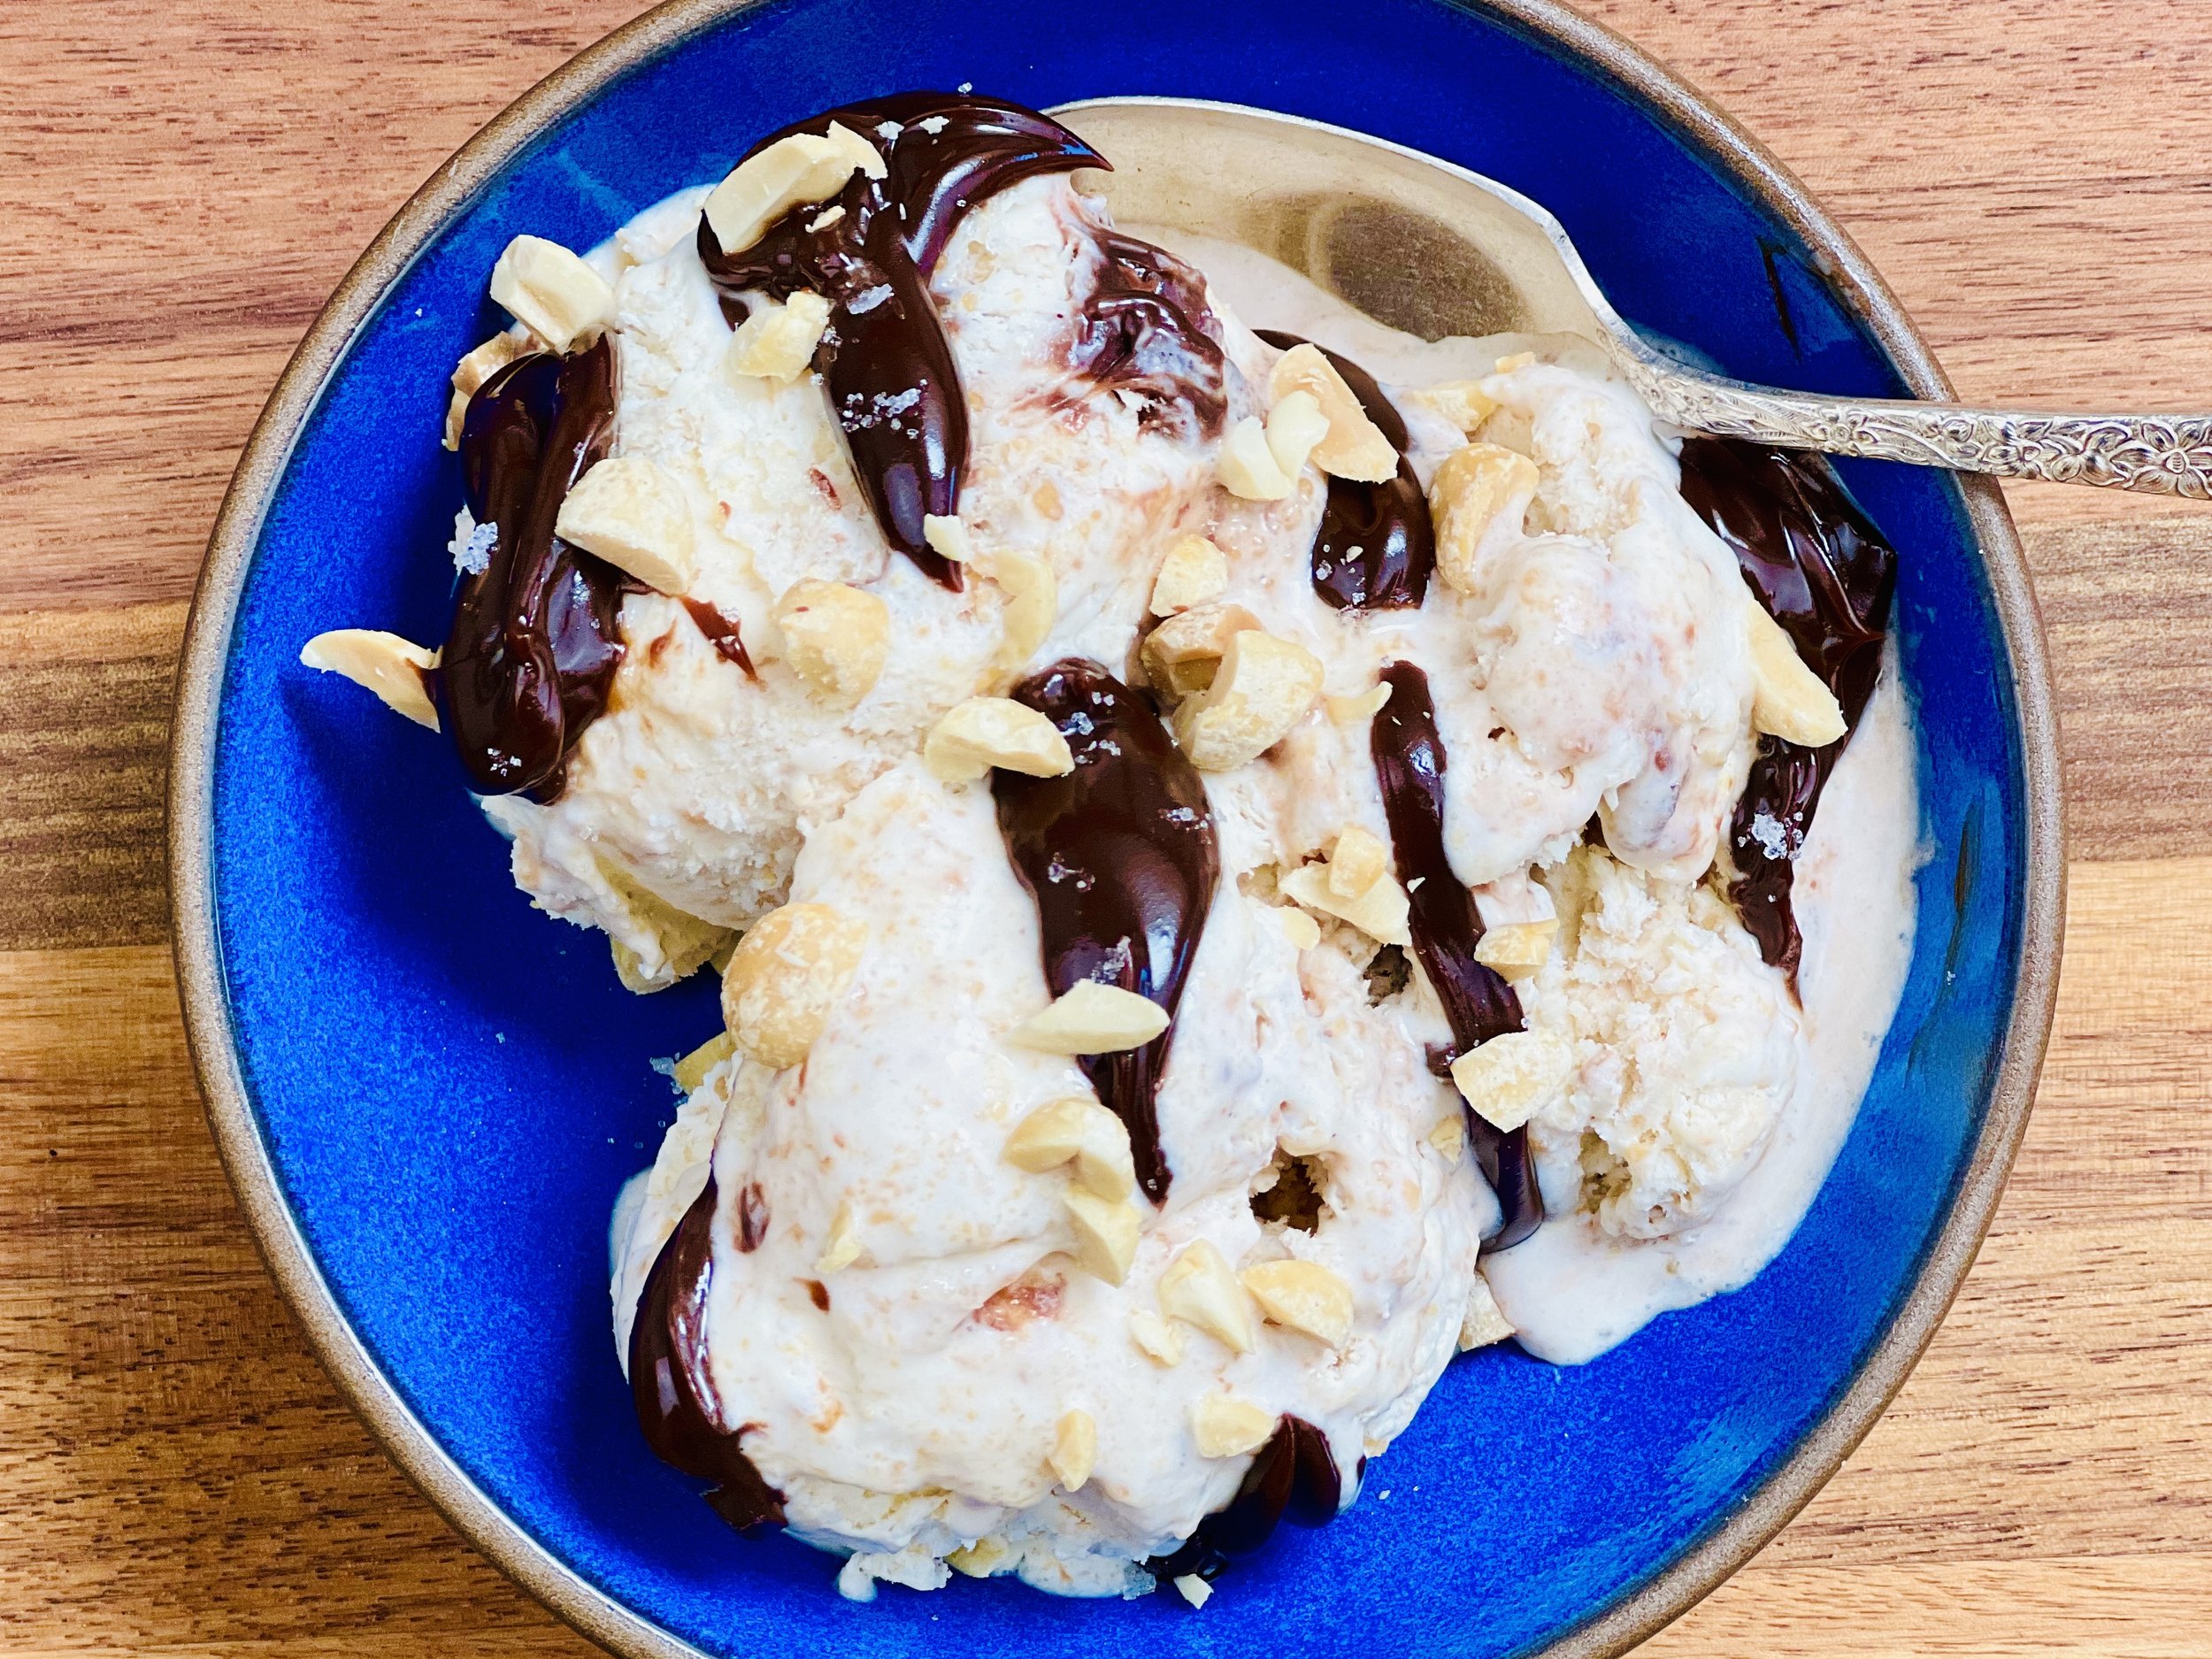
Homemade Chocolate Syrup
This recipe makes 7 ounces of chocolate sauce that may be stored in the fridge for up to 2 weeks. It’s perfect to top ice cream, make chocolate milk, or as a key ingredient in our homemade Bailey’s Irish Cream.
Ingredients
1/4 cup unsweetened cocoa powder
1/2 cup sugar or superfine sugar
Pinch kosher salt
1/4 cup cold water
3/4 teaspoon vanilla
Directions
(1) Combine the ingredients: In a cold saucepan, whisk together the cocoa and the sugar until all lumps are removed. Add the salt and the water and bring to a boil over medium to medium-high heat.
(2) Cook and cool: Reduce to a simmer, stirring constantly. Simmer for about 30 seconds and then remove from heat. Let cool and then add vanilla. Pour into a glass jar and refrigerate until needed. The chocolate sauce will thicken quite a bit as it cools.
(3) Store: This chocolate syrup may be stored in the refrigerator for up to two weeks. Simply heat it for a few seconds in the microwave to make it pourable again before serving.
*This post may contain links for you to easily purchase items listed on the page. In some cases, we have provided a special discount code for IBS Game Changers so be sure to use it when you purchase an item to get the discount that has been arranged just for you! As an Amazon Associate, I earn a commission from qualifying Amazon purchases.
More Deliciously Low FODMAP™ cocktail recipes you might enjoy
10 Minutes • Gluten-free • Low FODMAP • Serves 2 - 3