Deliciously Low FODMAP

Inspire yourself with hundreds of delicious low FODMAP recipes, tips, and tools, and enjoy the abundance that is yours even when you have IBS.
Use the buttons and filters to find something specific or browse the complete collection for inspiration.
Discover a treasure trove of recipes with my FREE recipe club! Get new ideas delivered straight to your inbox every week.
Deliciously Low FODMAP is a trademark of IBS Game Changer, LLC
Filter to find Recipes and Tools
More Filtering Options
- All 827
- Appetizer 56
- BBQ 49
- Bowl 32
- Breakfast 69
- Cocktails 13
- Collection 1 58
- Collection 10 27
- Collection 11 30
- Collection 12 27
- Collection 13 31
- Collection 14 29
- Collection 15 31
- Collection 16 34
- Collection 17 31
- Collection 18 33
- Collection 19 36
- Collection 2 32
- Collection 20 33
- Collection 21 33
- Collection 22 40
- Collection 23 63
- Collection 24 46
- Collection 3 28
- Collection 4 29
- Collection 5 30
- Collection 6 32
- Collection 7 31
- Collection 8 31
- Collection 9 32
- Condiments 6
- Crock Pot 4
- Dessert 119
- Diabetes Game Changer Exception Protocol Contains Alcohol 11
- Diabetes Game Changer Exception Protocol Contains Flour 113
- Diabetes Game Changer Exception Protocol Contains Flour AND Sugar 79
- Diabetes Game Changer Exception Protocol Contains Sugar 52
- Diabetes Game Changer First Four Weeks 405
- Dinner 371
- Drink 8
- Easter 1
- Free Guide 17
- Gluten-free 686
- Gut Microbiome 2
- Guthealth 3
- Holidays 73
- IBS Triggers 4
- Keto Friendly 178
- Lactose-Free 184
- Low Carb 22
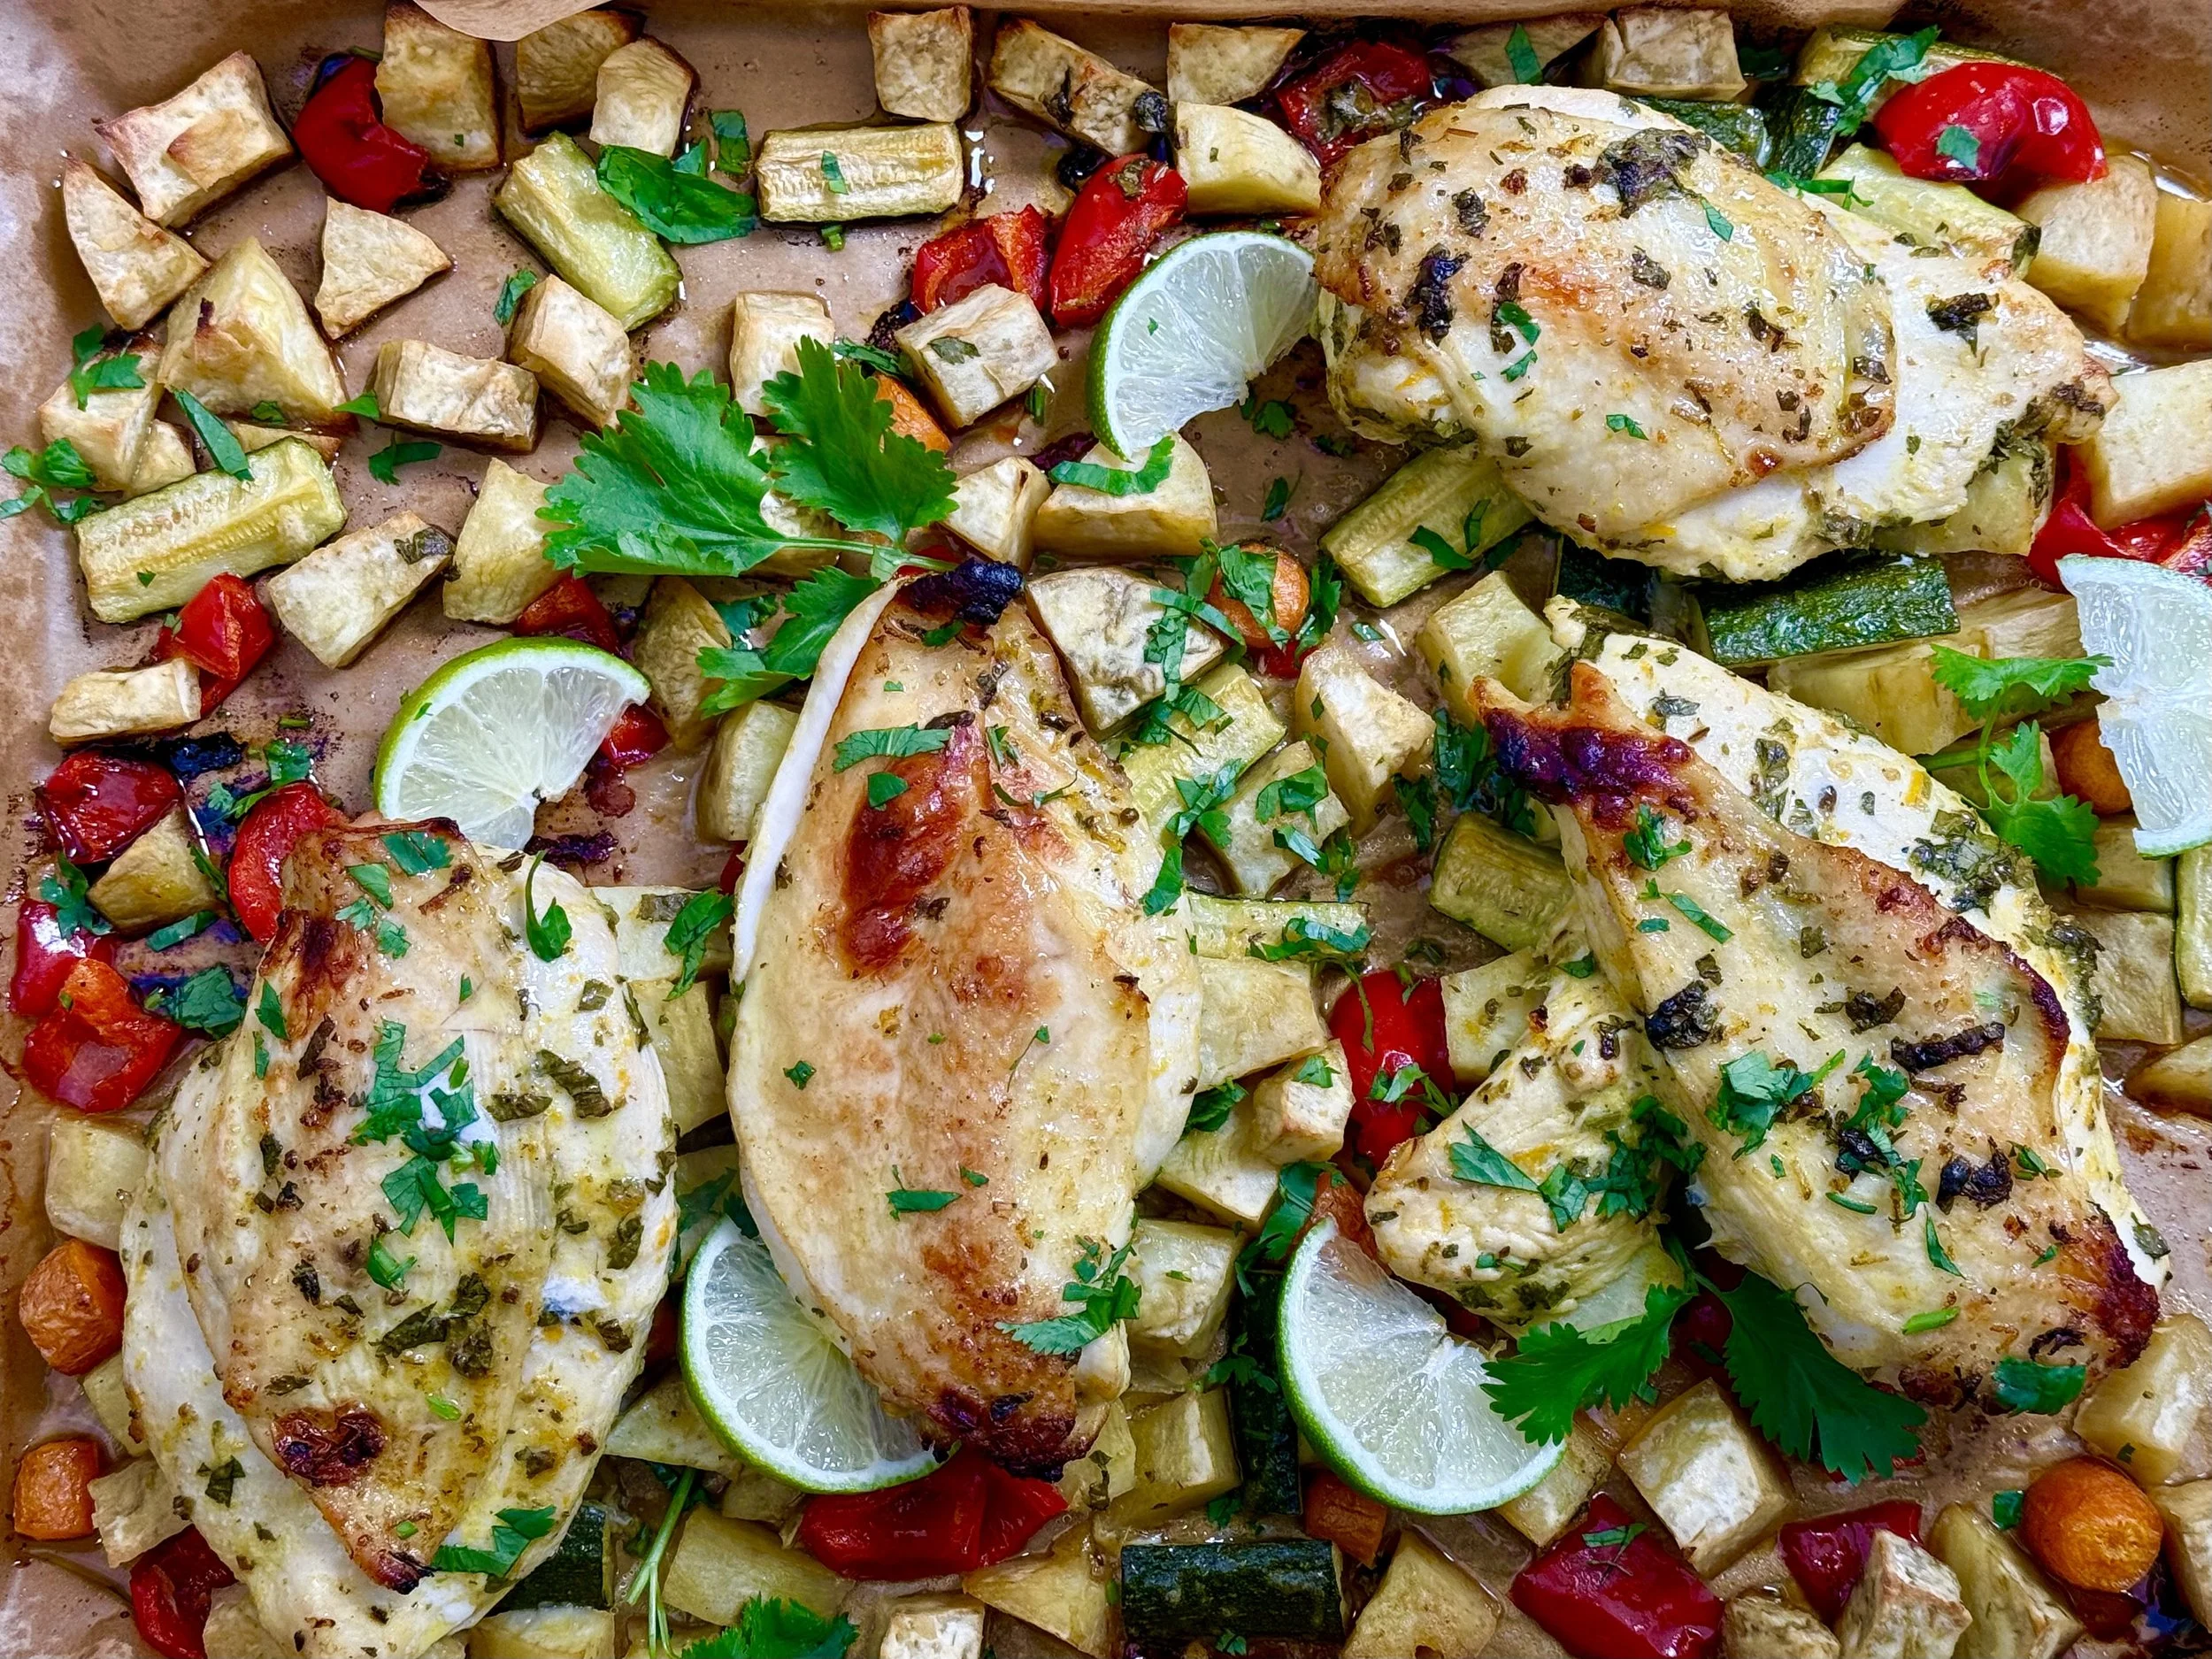
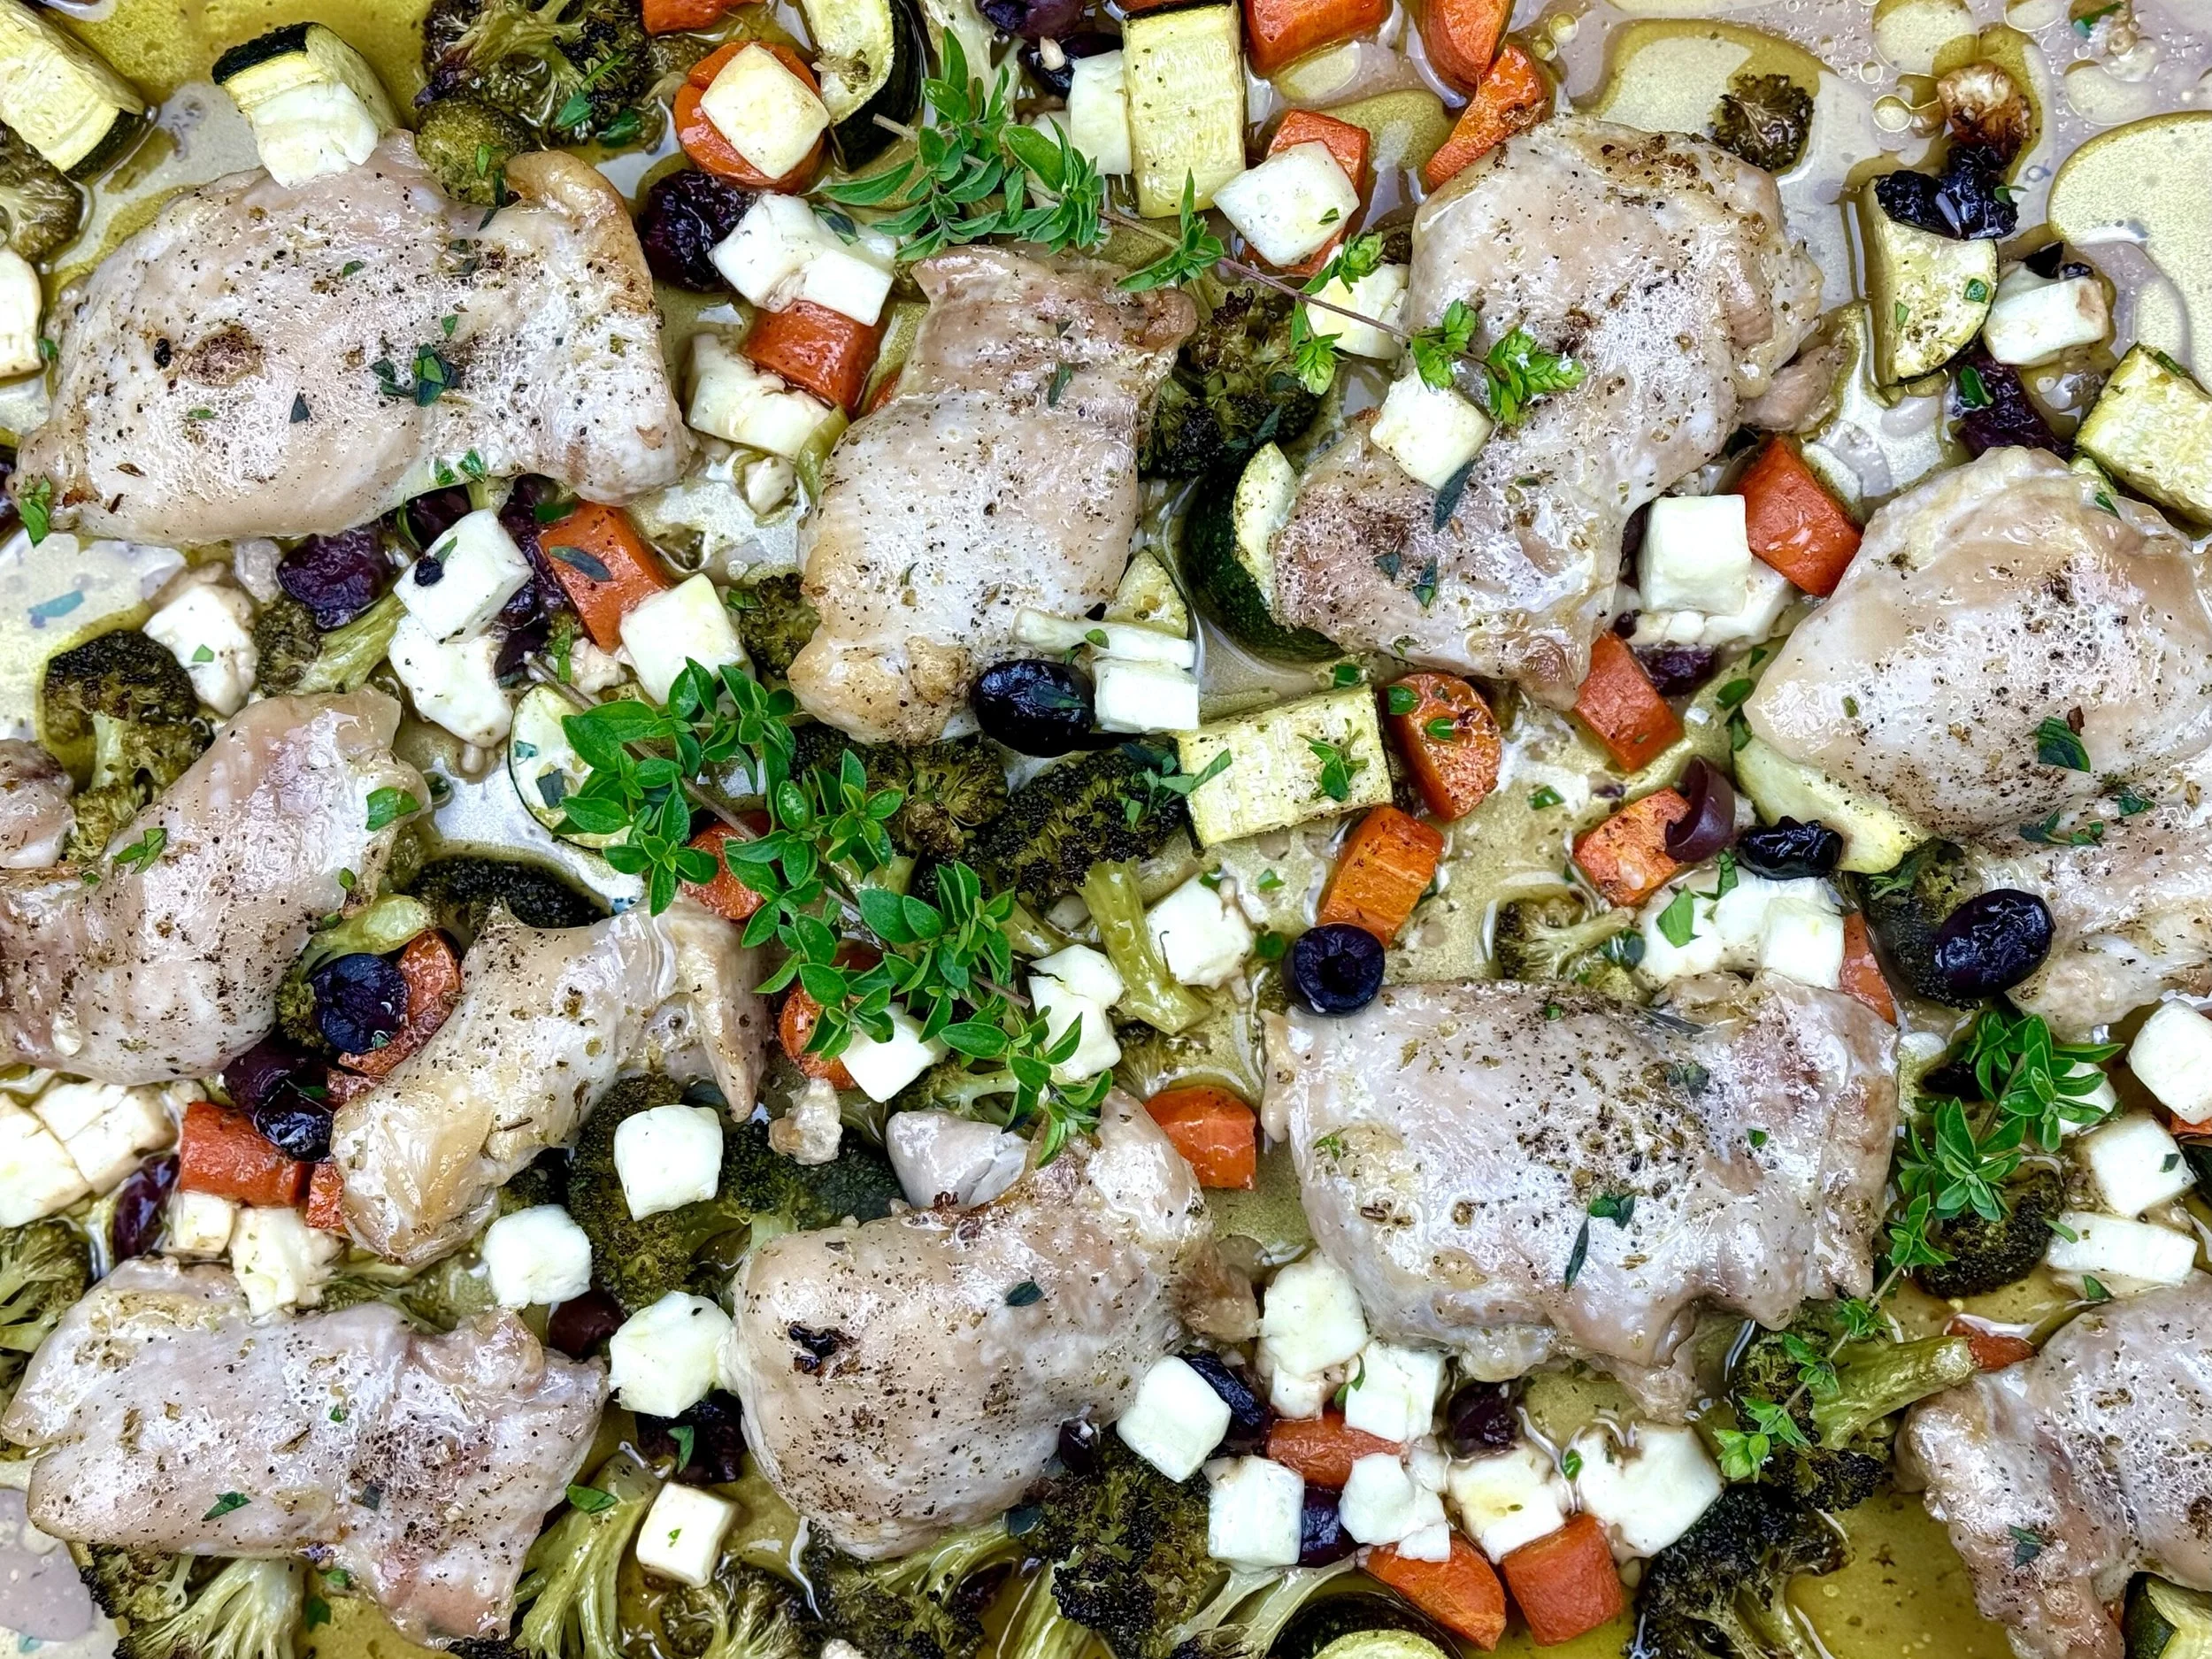
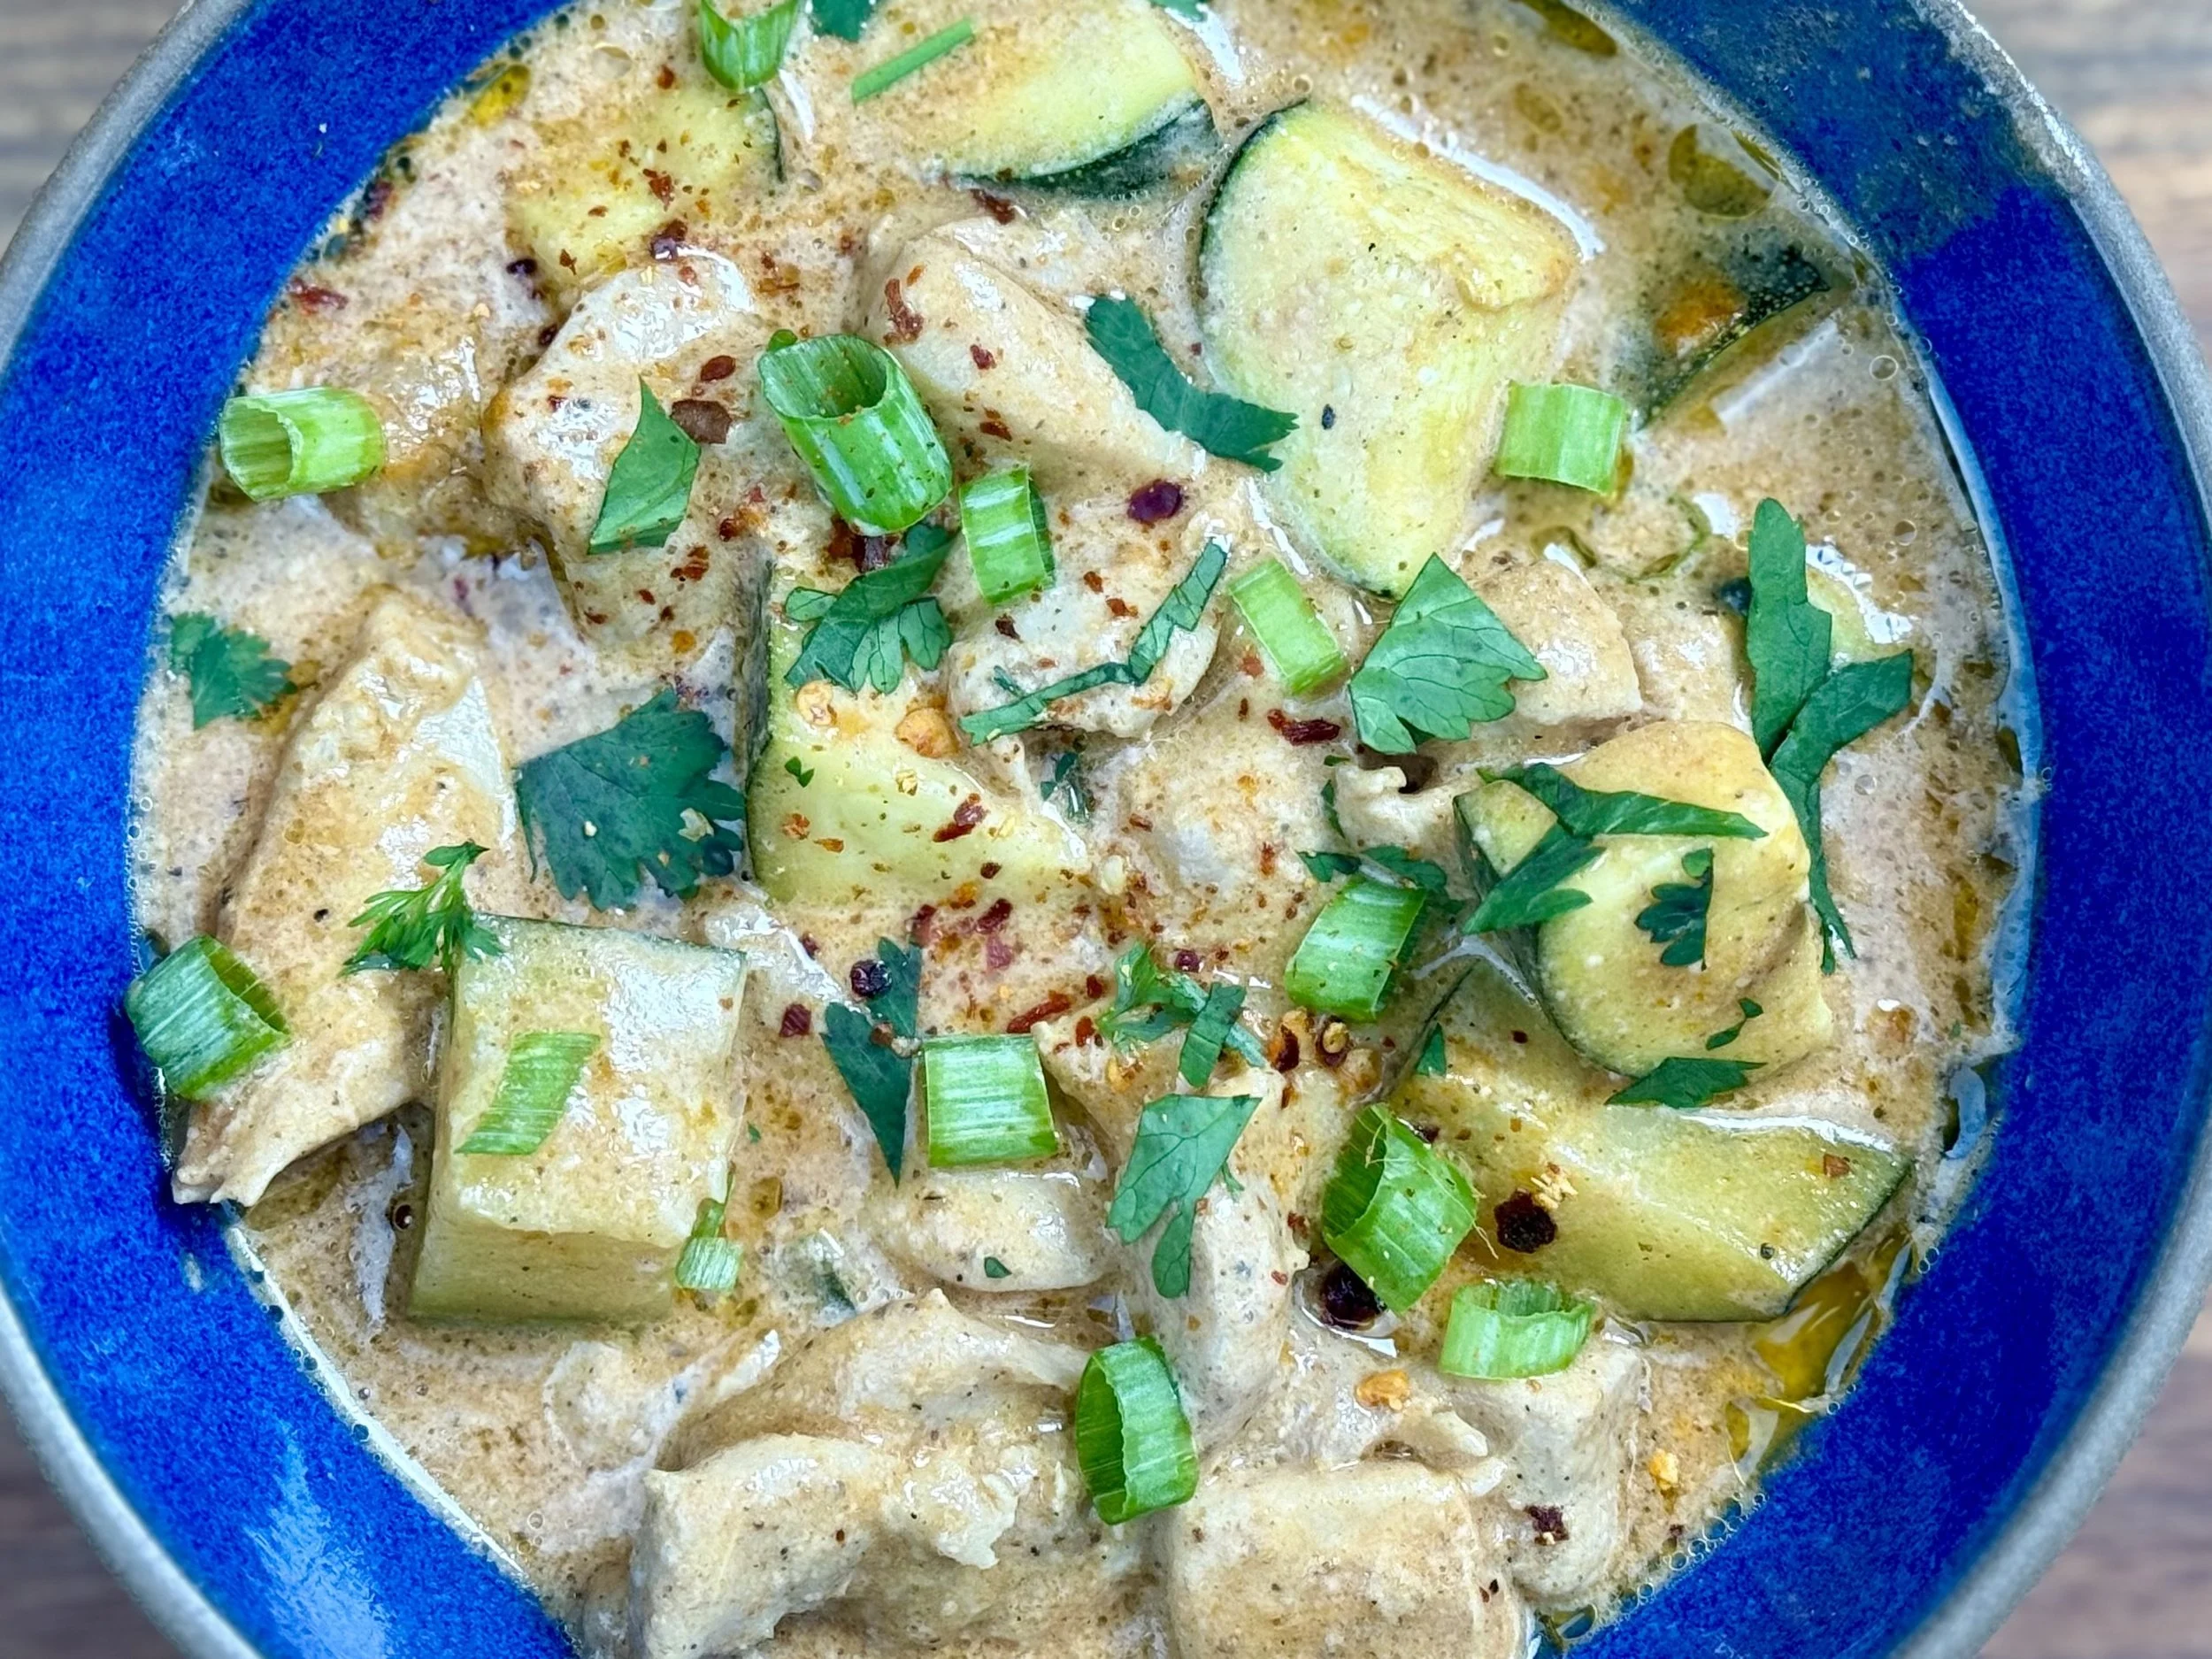
Cuban Mojo Chicken (Low FODMAP)
15 Minutes prep • 30 - 40 Minutes cook • Low FODMAP • Gluten-Free • Serves 4 - 6
15 Minutes prep • 30 - 40 Minutes cook • Low FODMAP • Gluten-Free • Serves 4 - 6 • Ok to make-ahead: Steps 1 - 2
If you’ve been craving big, bold Latin flavors since your IBS diagnosis — this one’s going to make your week. This Low FODMAP Cuban Mojo Chicken is marinated in a vibrant citrus-herb sauce, roasted golden with peppers, Zucchini, carrots, and yams, and completely gut-friendly. Weeknight dinner just got a serious upgrade.
See this new recipe in my FREE recipe club.
To streamline your search through hundreds of existing recipes, I'm moving the release of my new weekly creations to the Recipe Club on Patreon. In the club, you’ll get access to a treasure trove of low-FODMAP goodness, complete with collections and filters to use as your virtual cookbook!
Here's what awaits you in the club:
Exclusive weekly recipes: Be the first to try my latest delicious low-FODMAP creations!
Simple & Easy: My recipes continue to focus on readily available ingredients and effortless preparation, perfect for family-friendly meals (no more separate low-FODMAP meal prep!).
Hundreds of existing recipes: Gain access to my entire library of low-FODMAP recipes, all conveniently organized.
You can join for free or sign up for only $5/month. Your support fuels my passion for creating new, delicious, and easy-to-make low-FODMAP recipes just for you.
Let's go on this delicious low-FODMAP journey together.
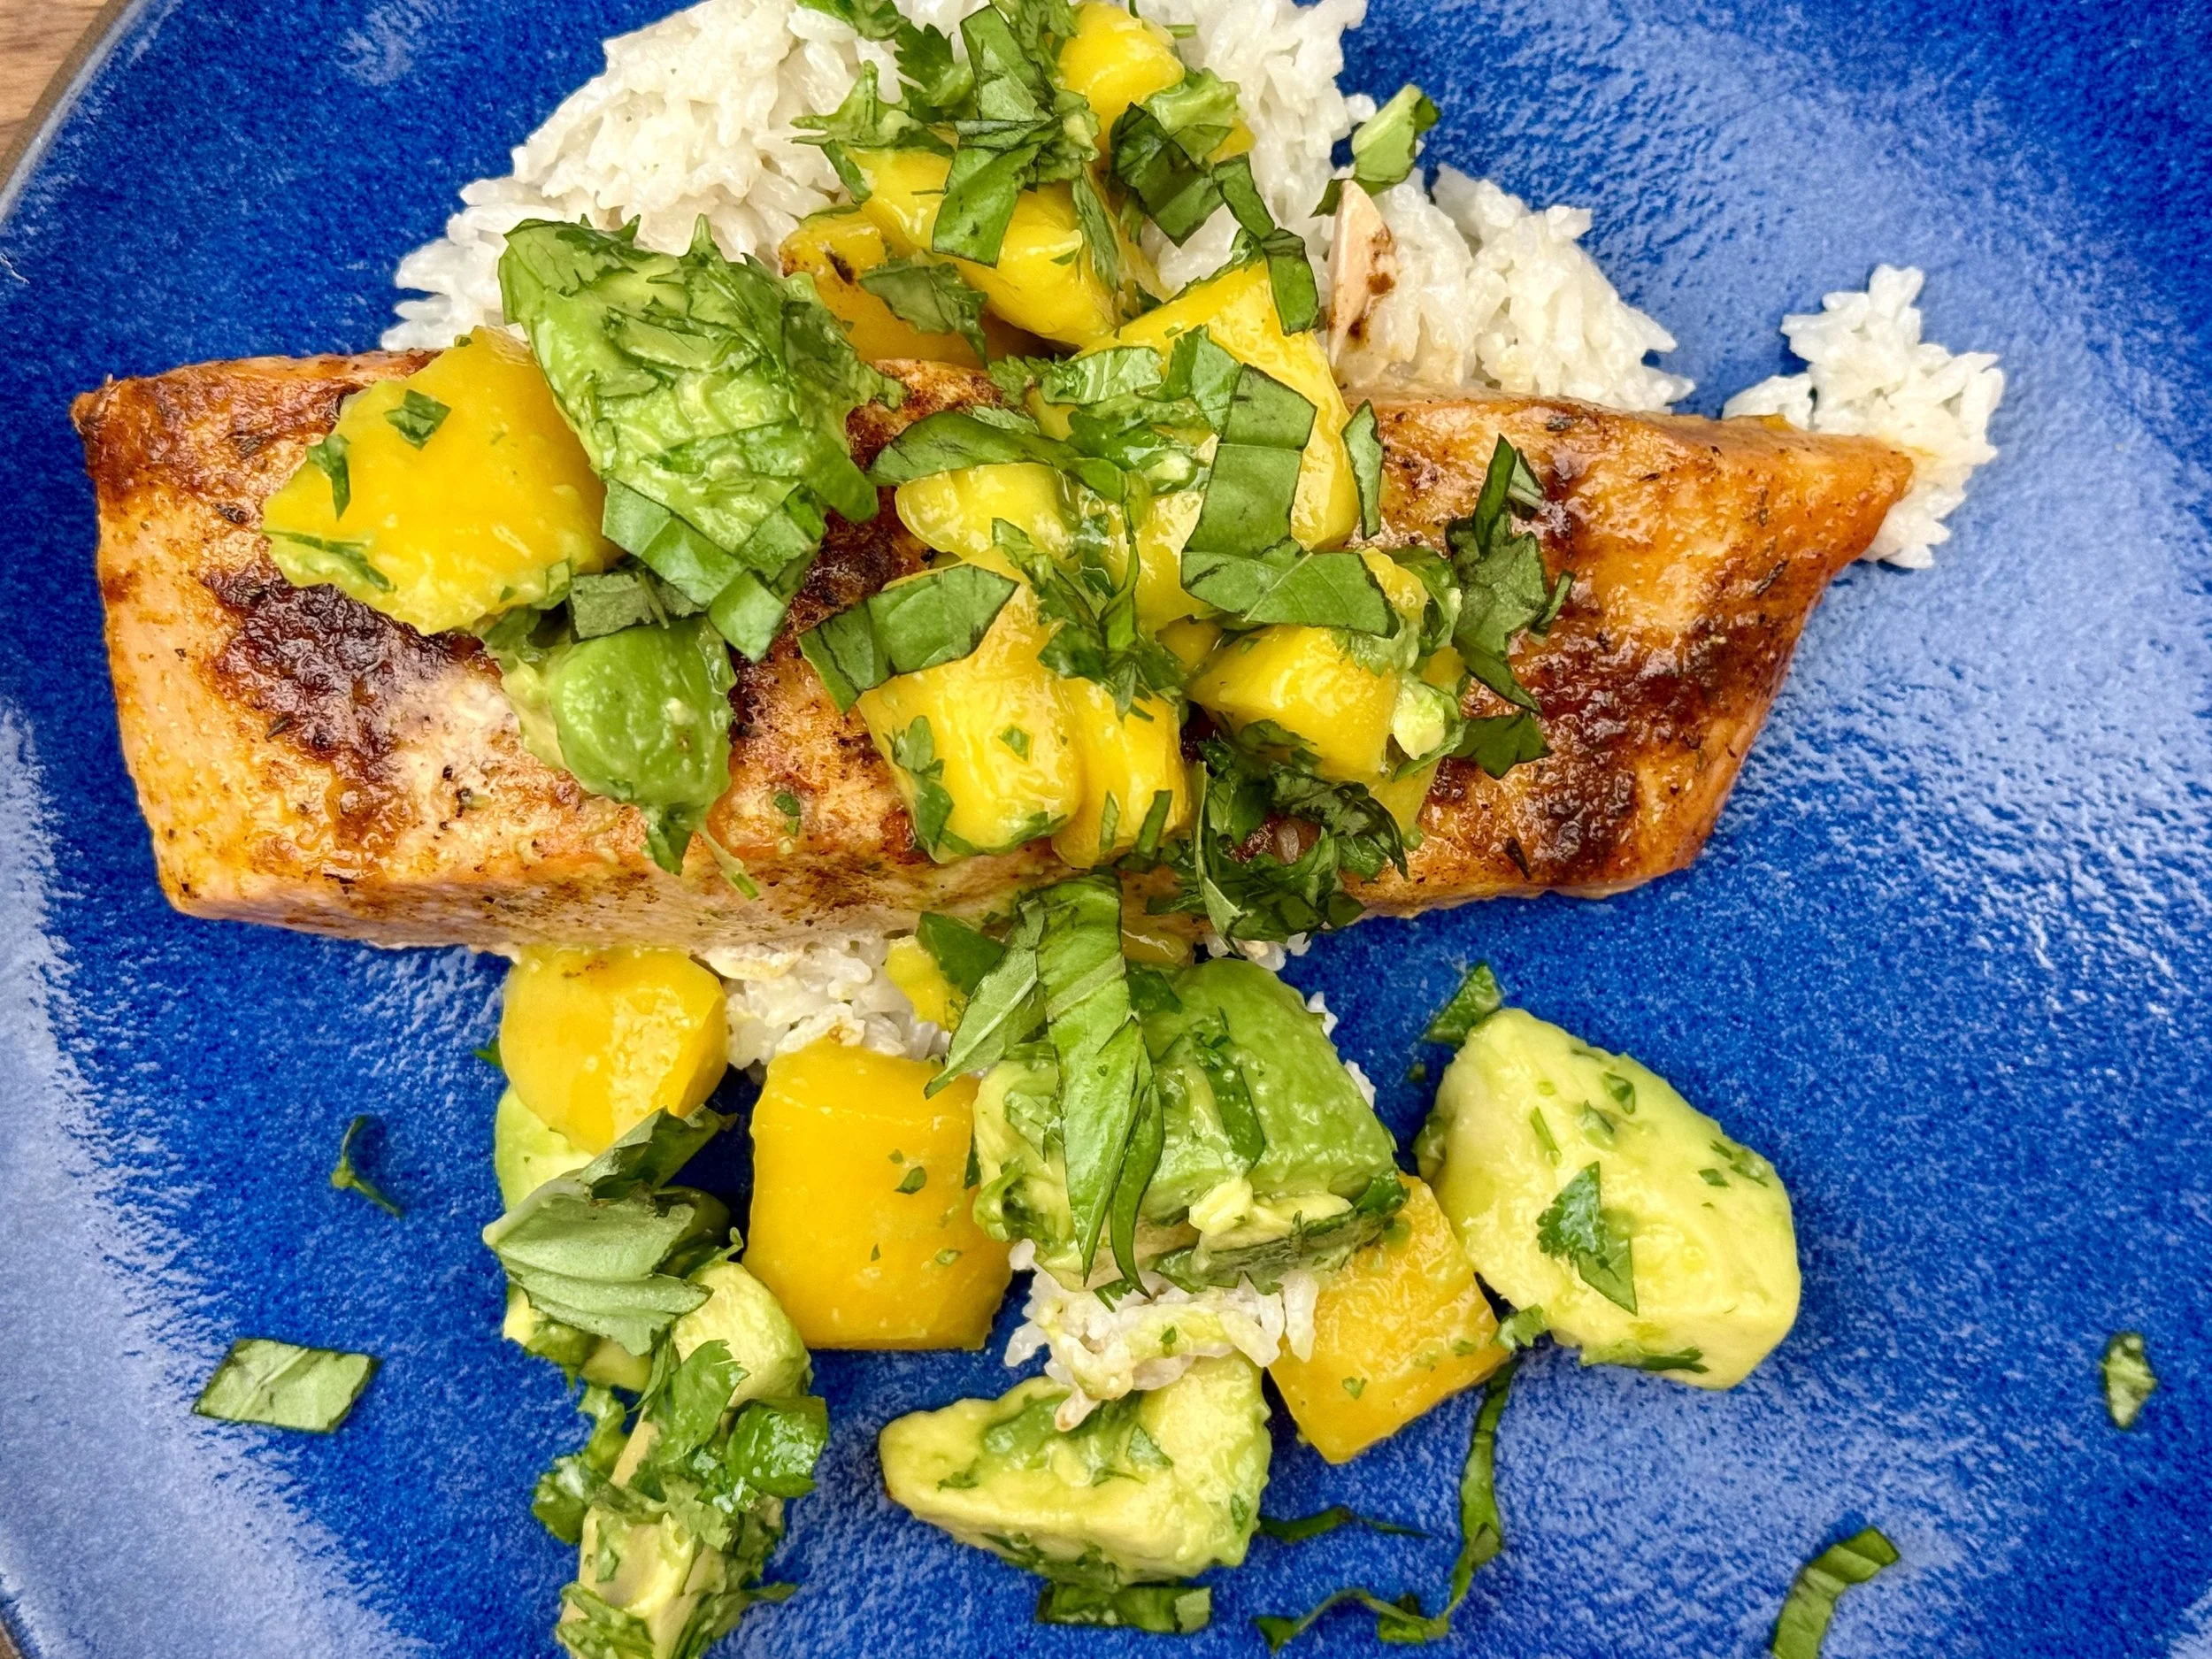
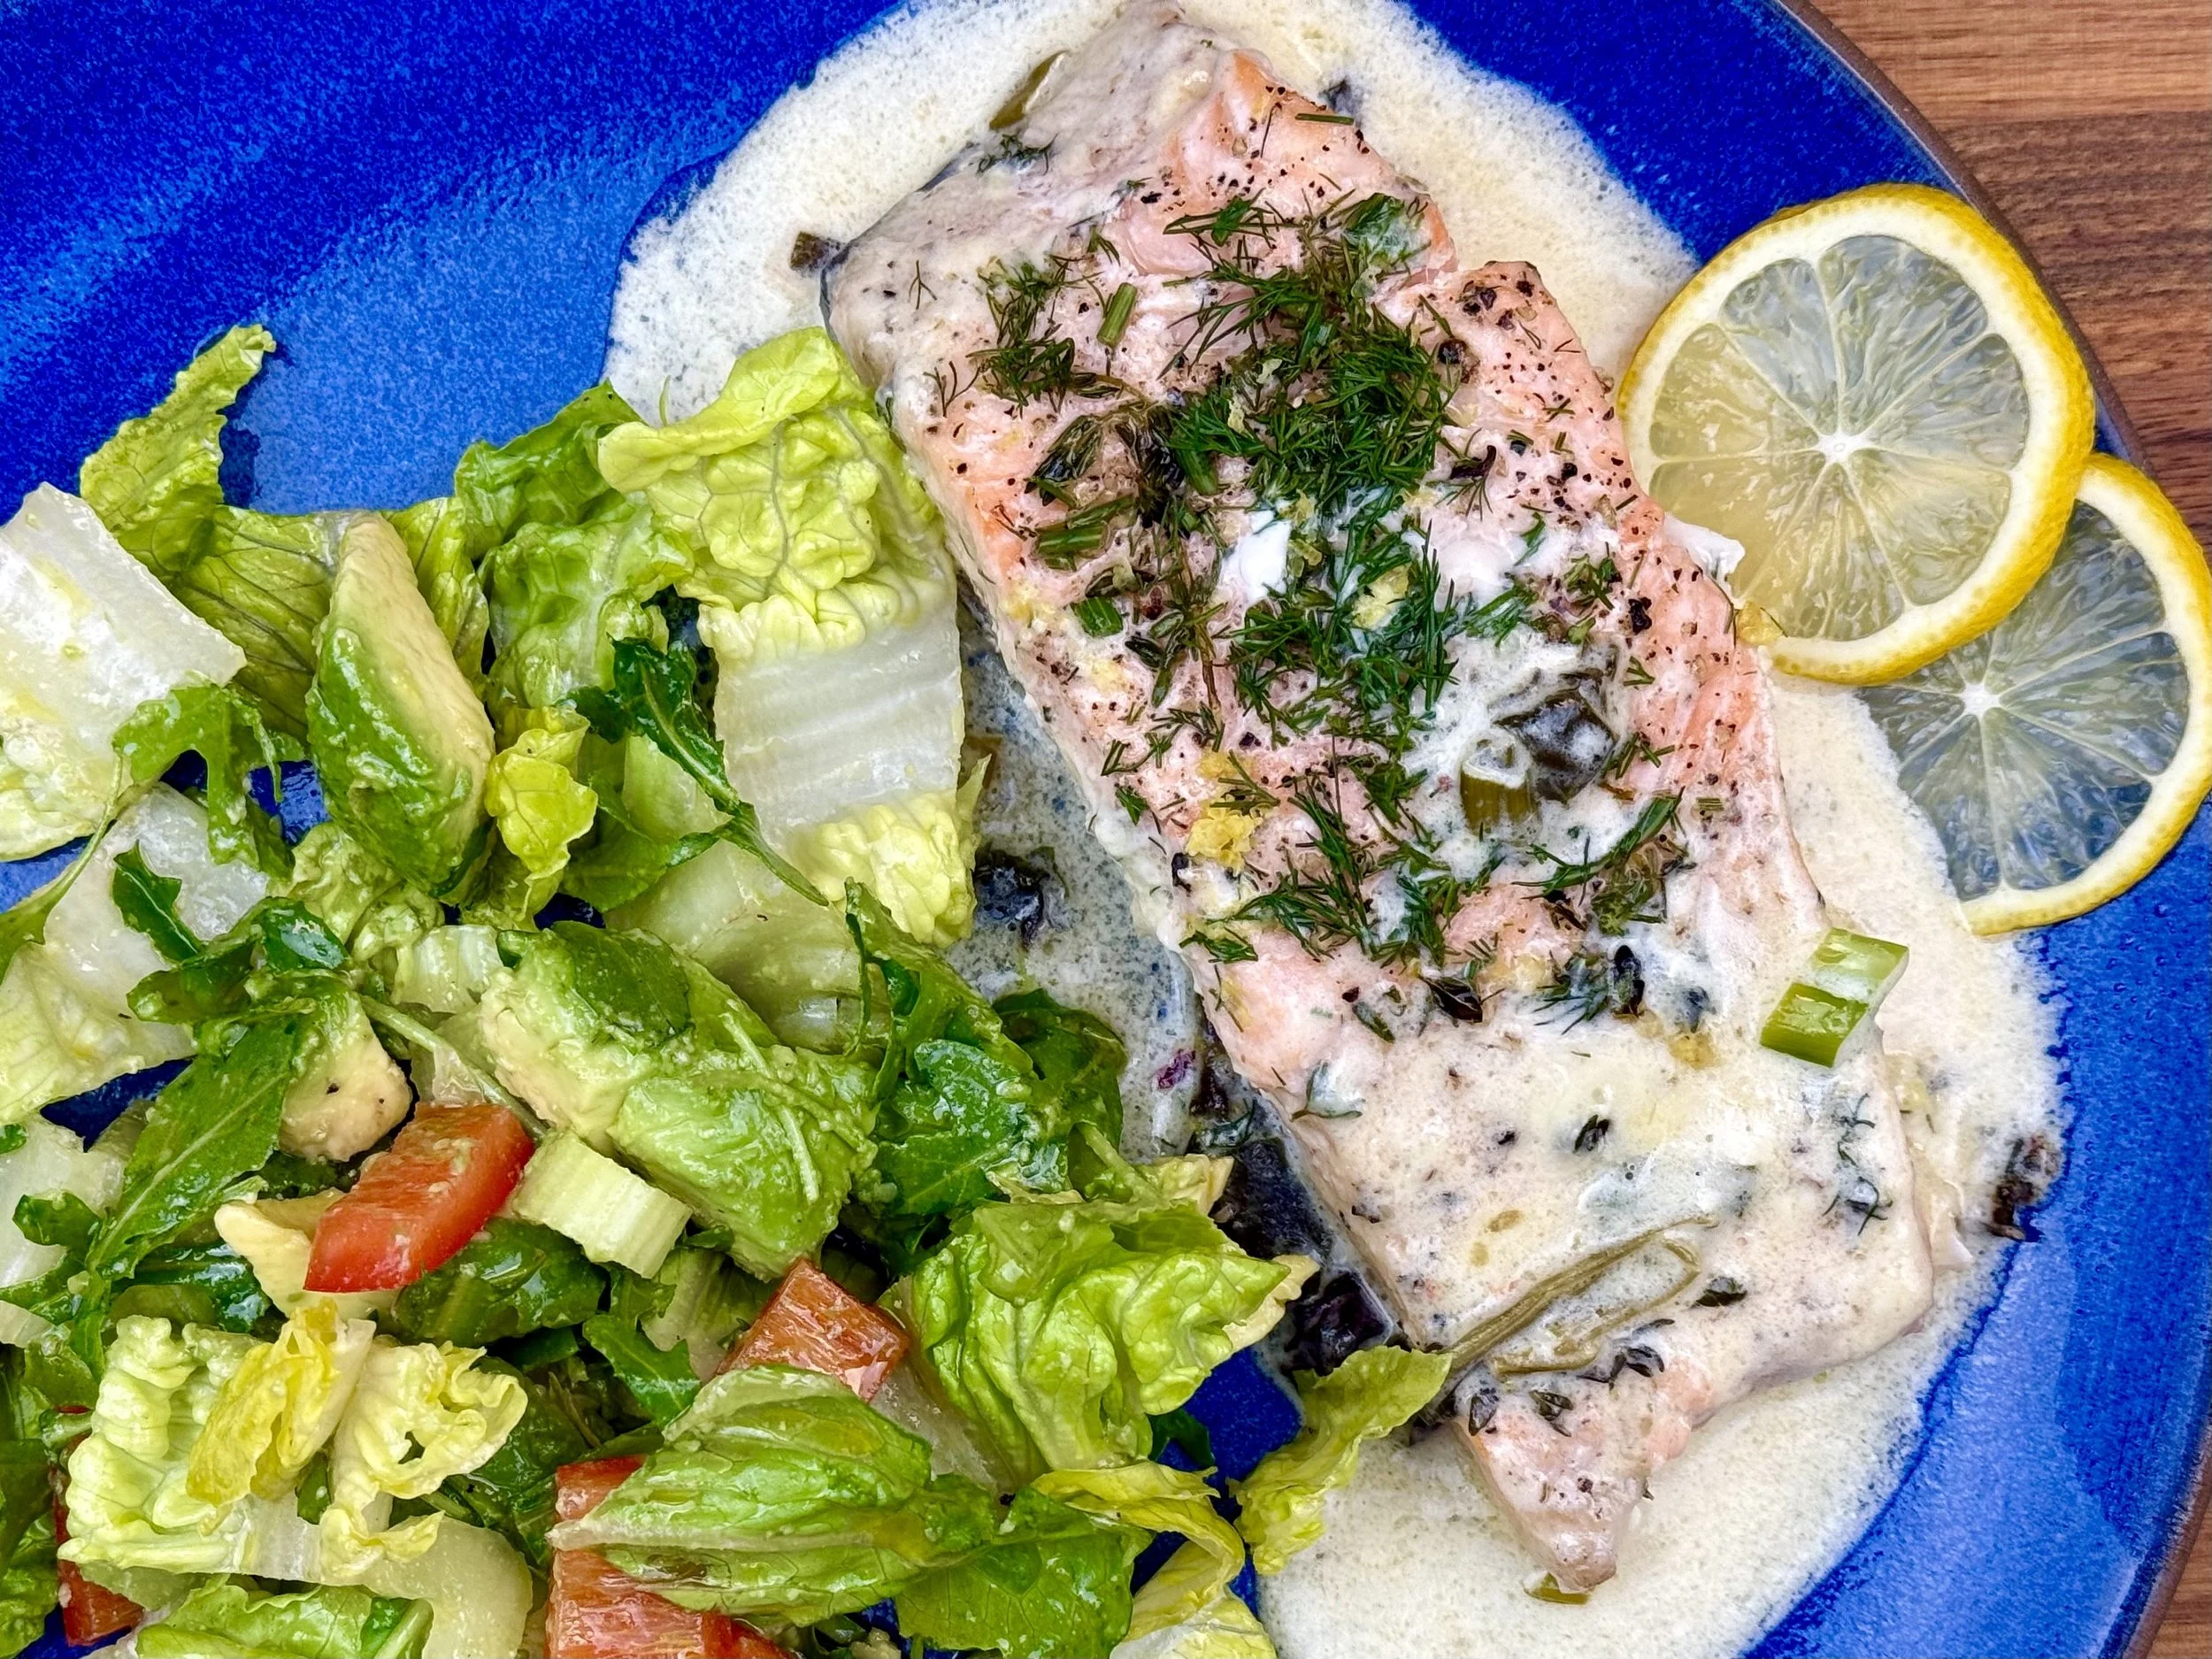
One Pan Coconut Butter Salmon (Low FODMAP)
15 Minutes prep • 15 Minutes cook • Low FODMAP • Gluten-Free • Serves 5
15 Minutes prep • 15 Minutes cook • Low FODMAP • Gluten-Free • Serves 5
This salmon is the weeknight dinner you didn't know you needed. A rich coconut milk sauce spiked with warming ginger, cumin, and paprika wraps around perfectly seared filets, while a hit of lime and fresh basil keeps everything feeling light and fresh. And that avocado mango salsa on top? It's the kind of colorful, fruity finish that makes this dish look like it came from a restaurant — not your stovetop. One pan, five salmon filets, zero gut regrets.
See this new recipe in my FREE recipe club.
To streamline your search through hundreds of existing recipes, I'm moving the release of my new weekly creations to the Recipe Club on Patreon. In the club, you’ll get access to a treasure trove of low-FODMAP goodness, complete with collections and filters to use as your virtual cookbook!
Here's what awaits you in the club:
Exclusive weekly recipes: Be the first to try my latest delicious low-FODMAP creations!
Simple & Easy: My recipes continue to focus on readily available ingredients and effortless preparation, perfect for family-friendly meals (no more separate low-FODMAP meal prep!).
Hundreds of existing recipes: Gain access to my entire library of low-FODMAP recipes, all conveniently organized.
You can join for free or sign up for only $5/month. Your support fuels my passion for creating new, delicious, and easy-to-make low-FODMAP recipes just for you.
Let's go on this delicious low-FODMAP journey together.
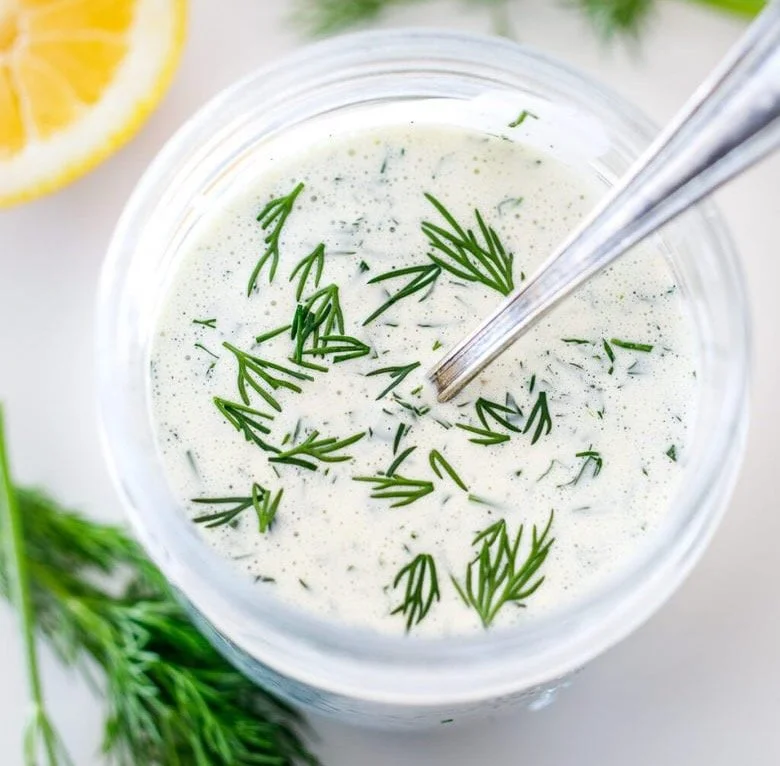
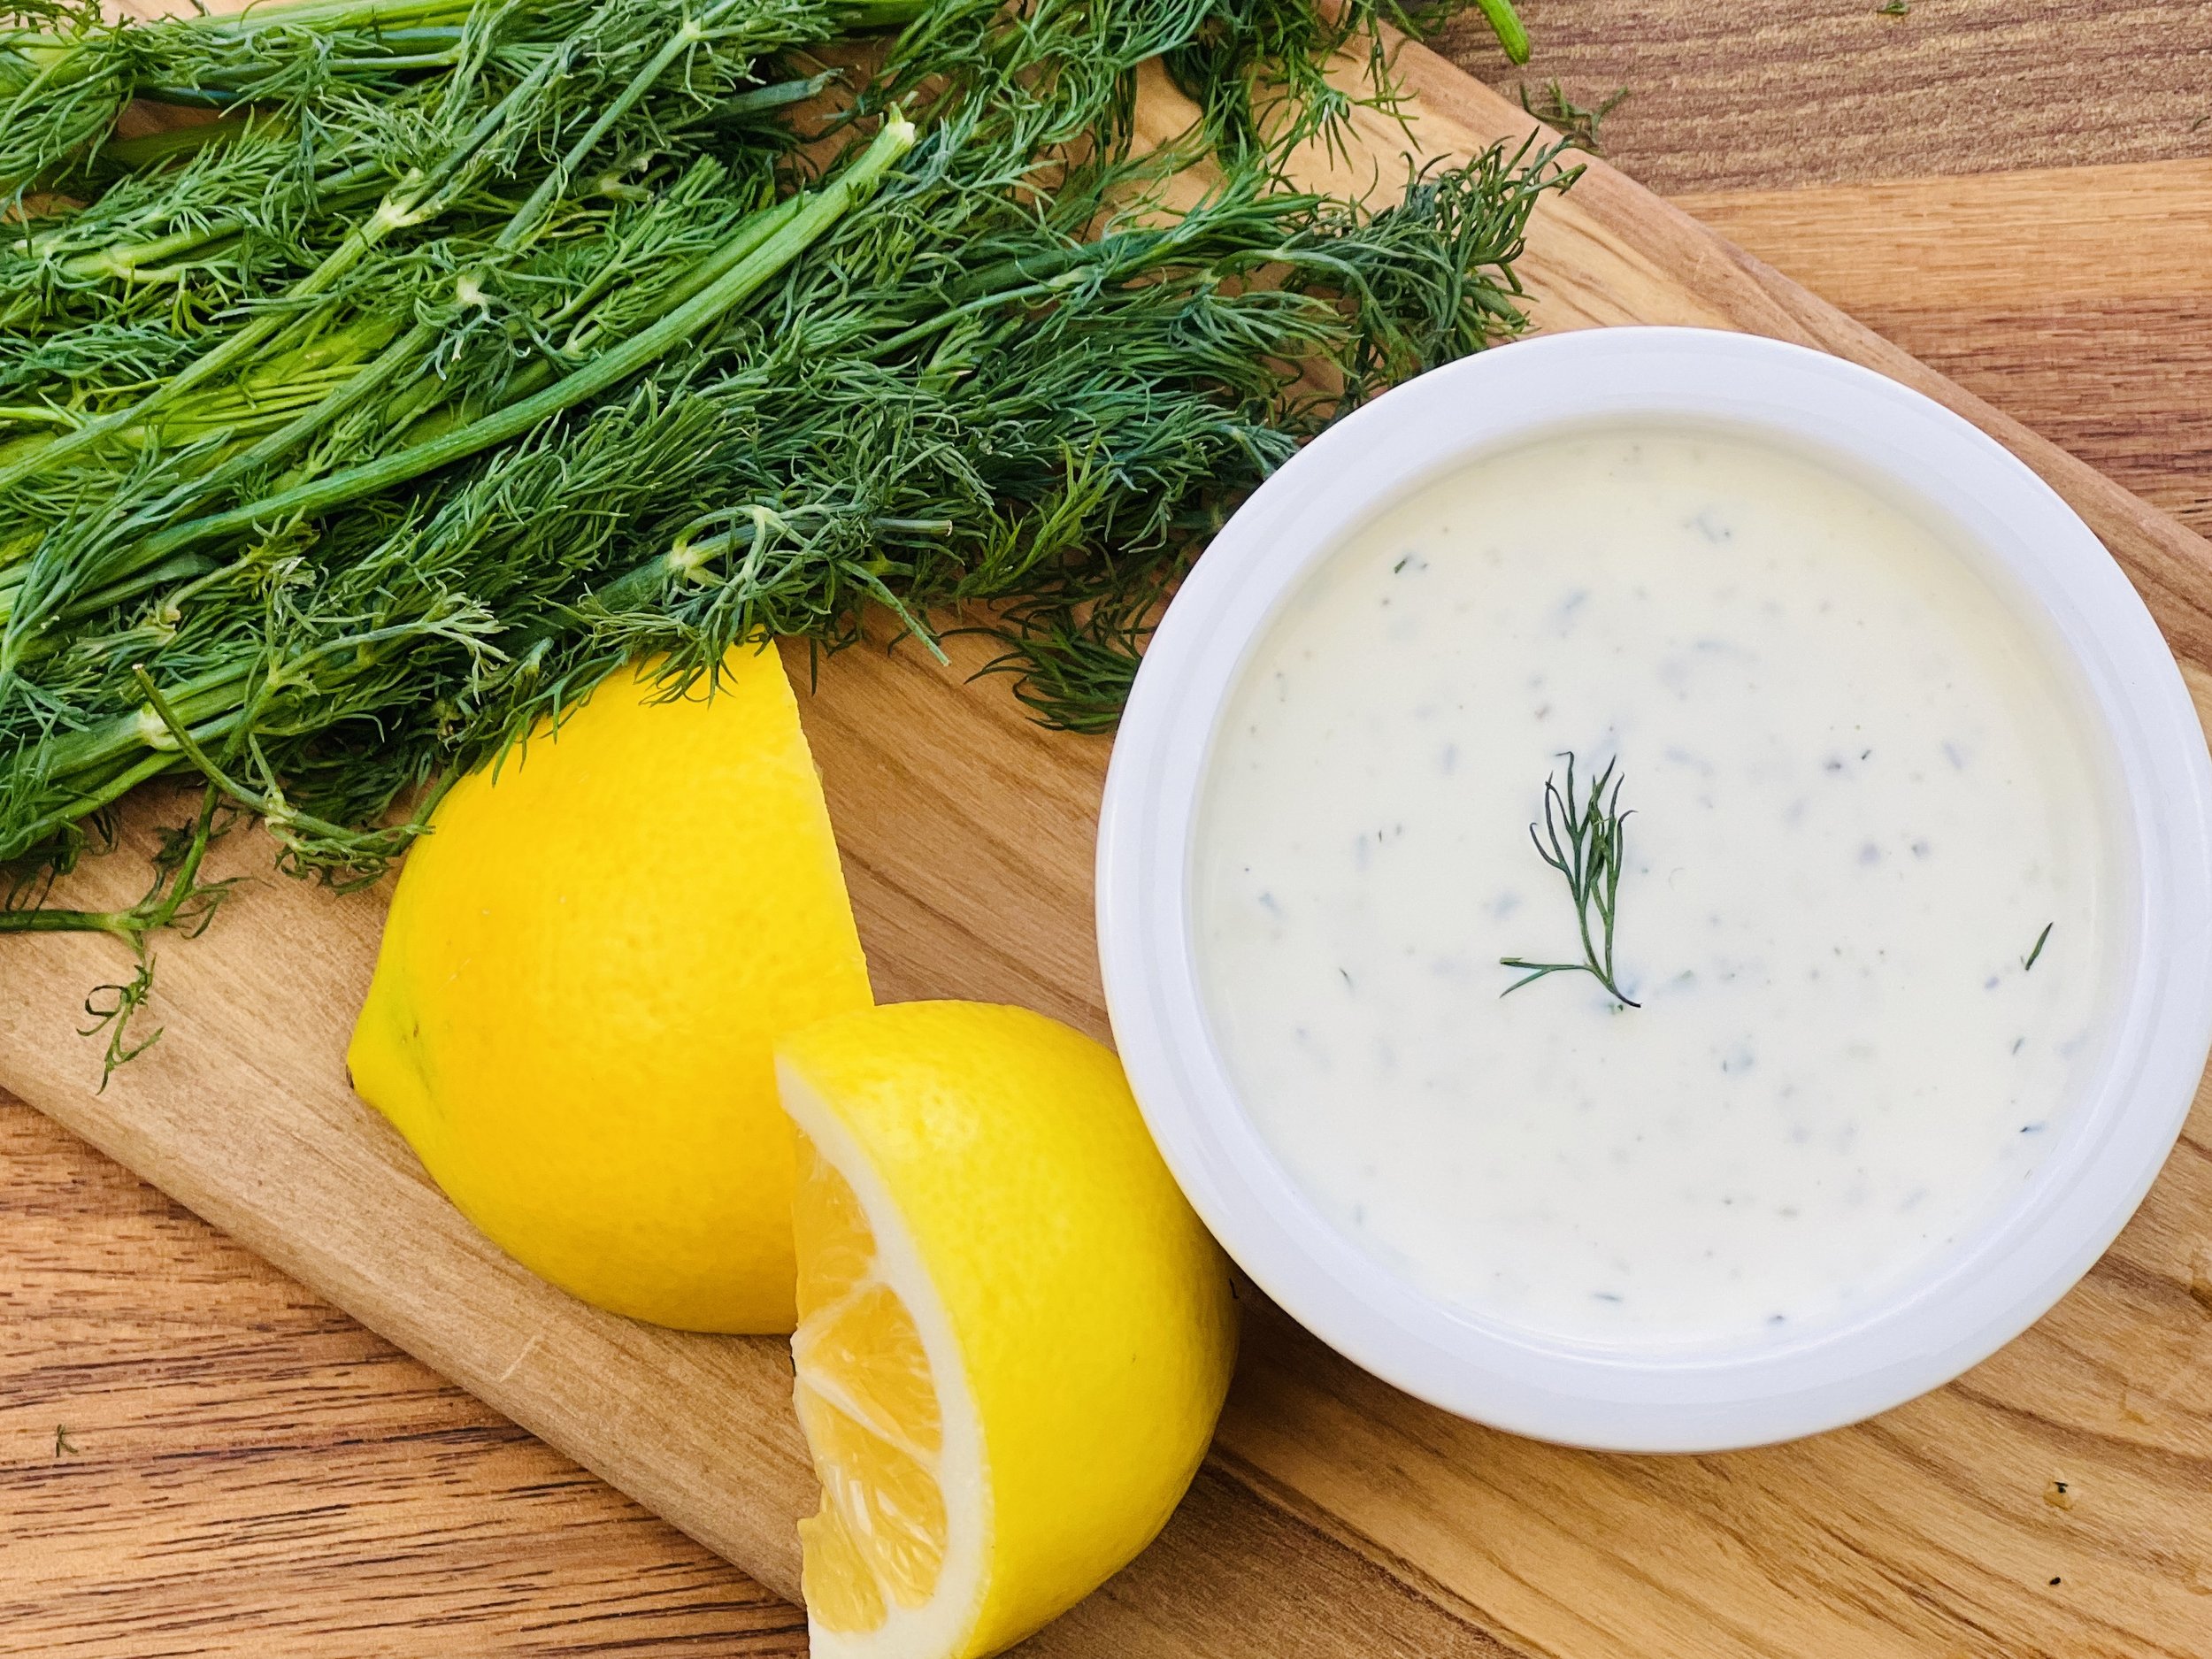
Sour Cream Dill Dressing (Low FODMAP)
10 Minutes prep • Low FODMAP • Gluten-Free • Lactose-Free • Makes 1 cup
10 Minutes prep • Low FODMAP • Gluten-Free • Lactose-Free • Makes 1 cup • Ok to make-ahead: Steps 1 - 4
This cool, herbaceous dressing is everything a salad deserves — tangy sour cream and yogurt layered with bright fresh dill, a hint of garlic (low FODMAP of course), and a splash of lemon. It comes together in minutes and tastes like it's been a favorite family recipe forever. Drizzle it over crisp greens, use it as a dip for cut veggies, or spoon it generously over roasted potatoes. Bonus: it's completely lactose-free, so everyone at the table can dig in.
See this new recipe in my FREE recipe club.
To streamline your search through hundreds of existing recipes, I'm moving the release of my new weekly creations to the Recipe Club on Patreon. In the club, you’ll get access to a treasure trove of low-FODMAP goodness, complete with collections and filters to use as your virtual cookbook!
Here's what awaits you in the club:
Exclusive weekly recipes: Be the first to try my latest delicious low-FODMAP creations!
Simple & Easy: My recipes continue to focus on readily available ingredients and effortless preparation, perfect for family-friendly meals (no more separate low-FODMAP meal prep!).
Hundreds of existing recipes: Gain access to my entire library of low-FODMAP recipes, all conveniently organized.
You can join for free or sign up for only $5/month. Your support fuels my passion for creating new, delicious, and easy-to-make low-FODMAP recipes just for you.
Let's go on this delicious low-FODMAP journey together.
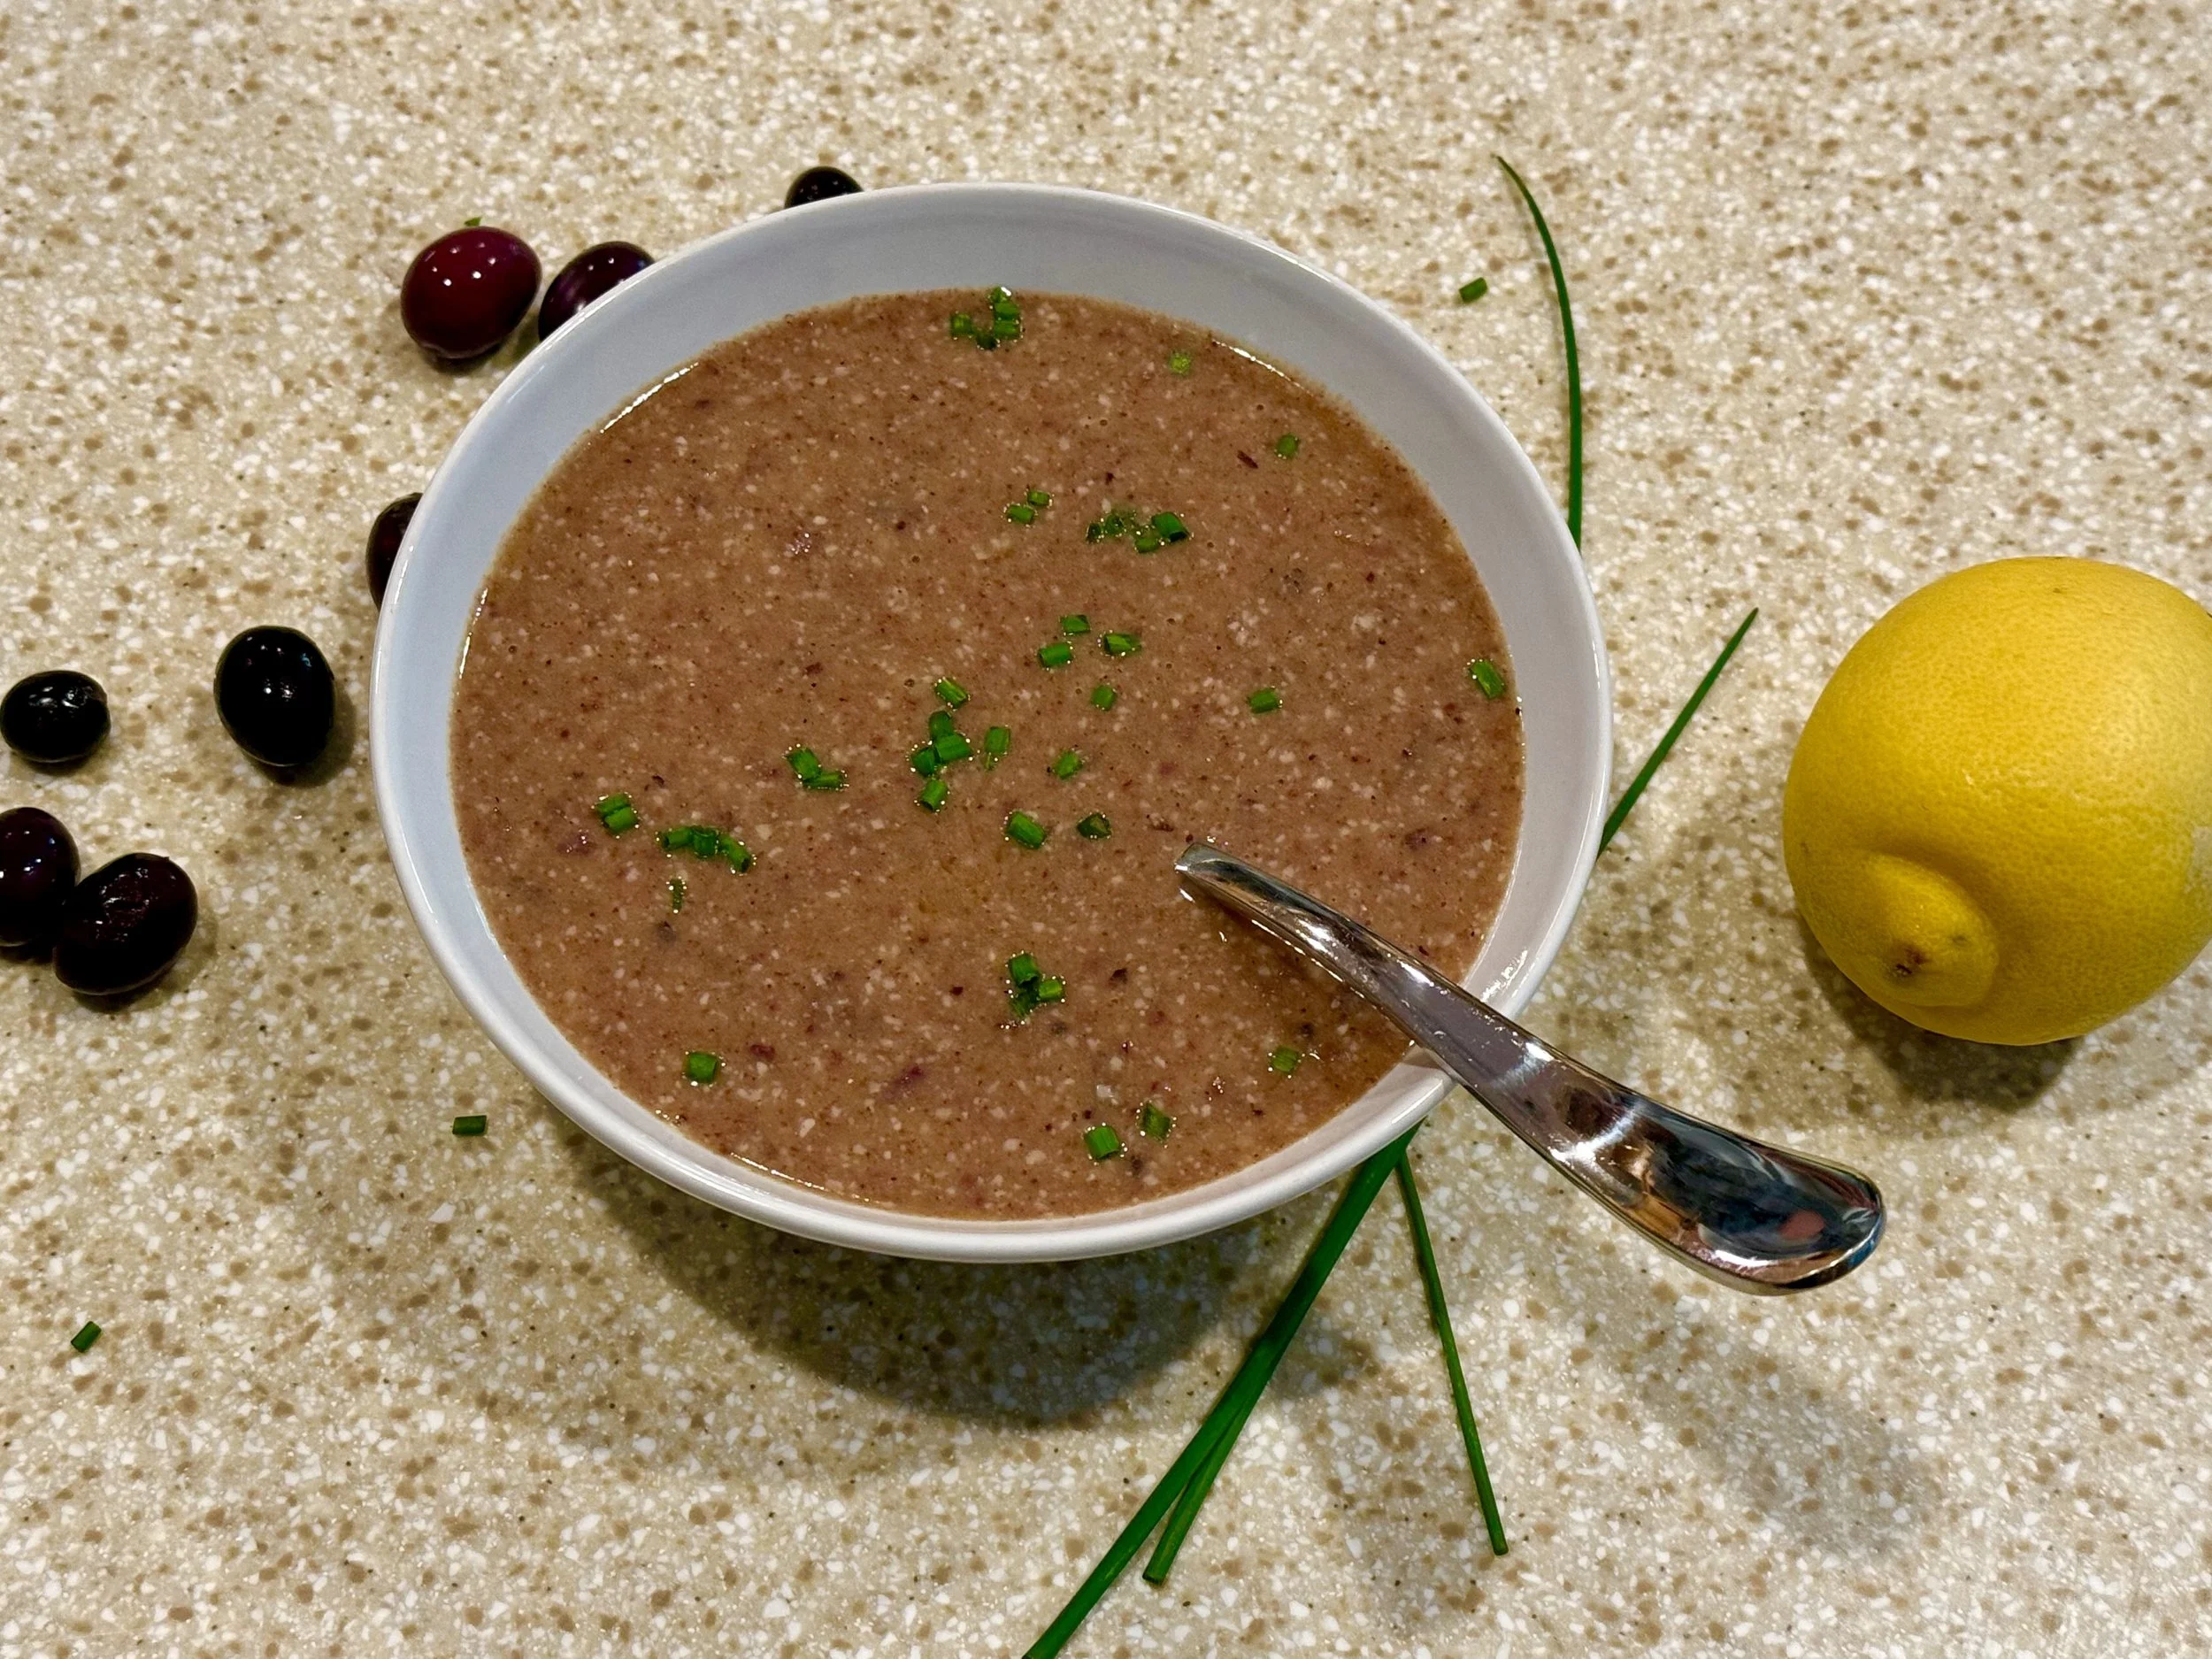
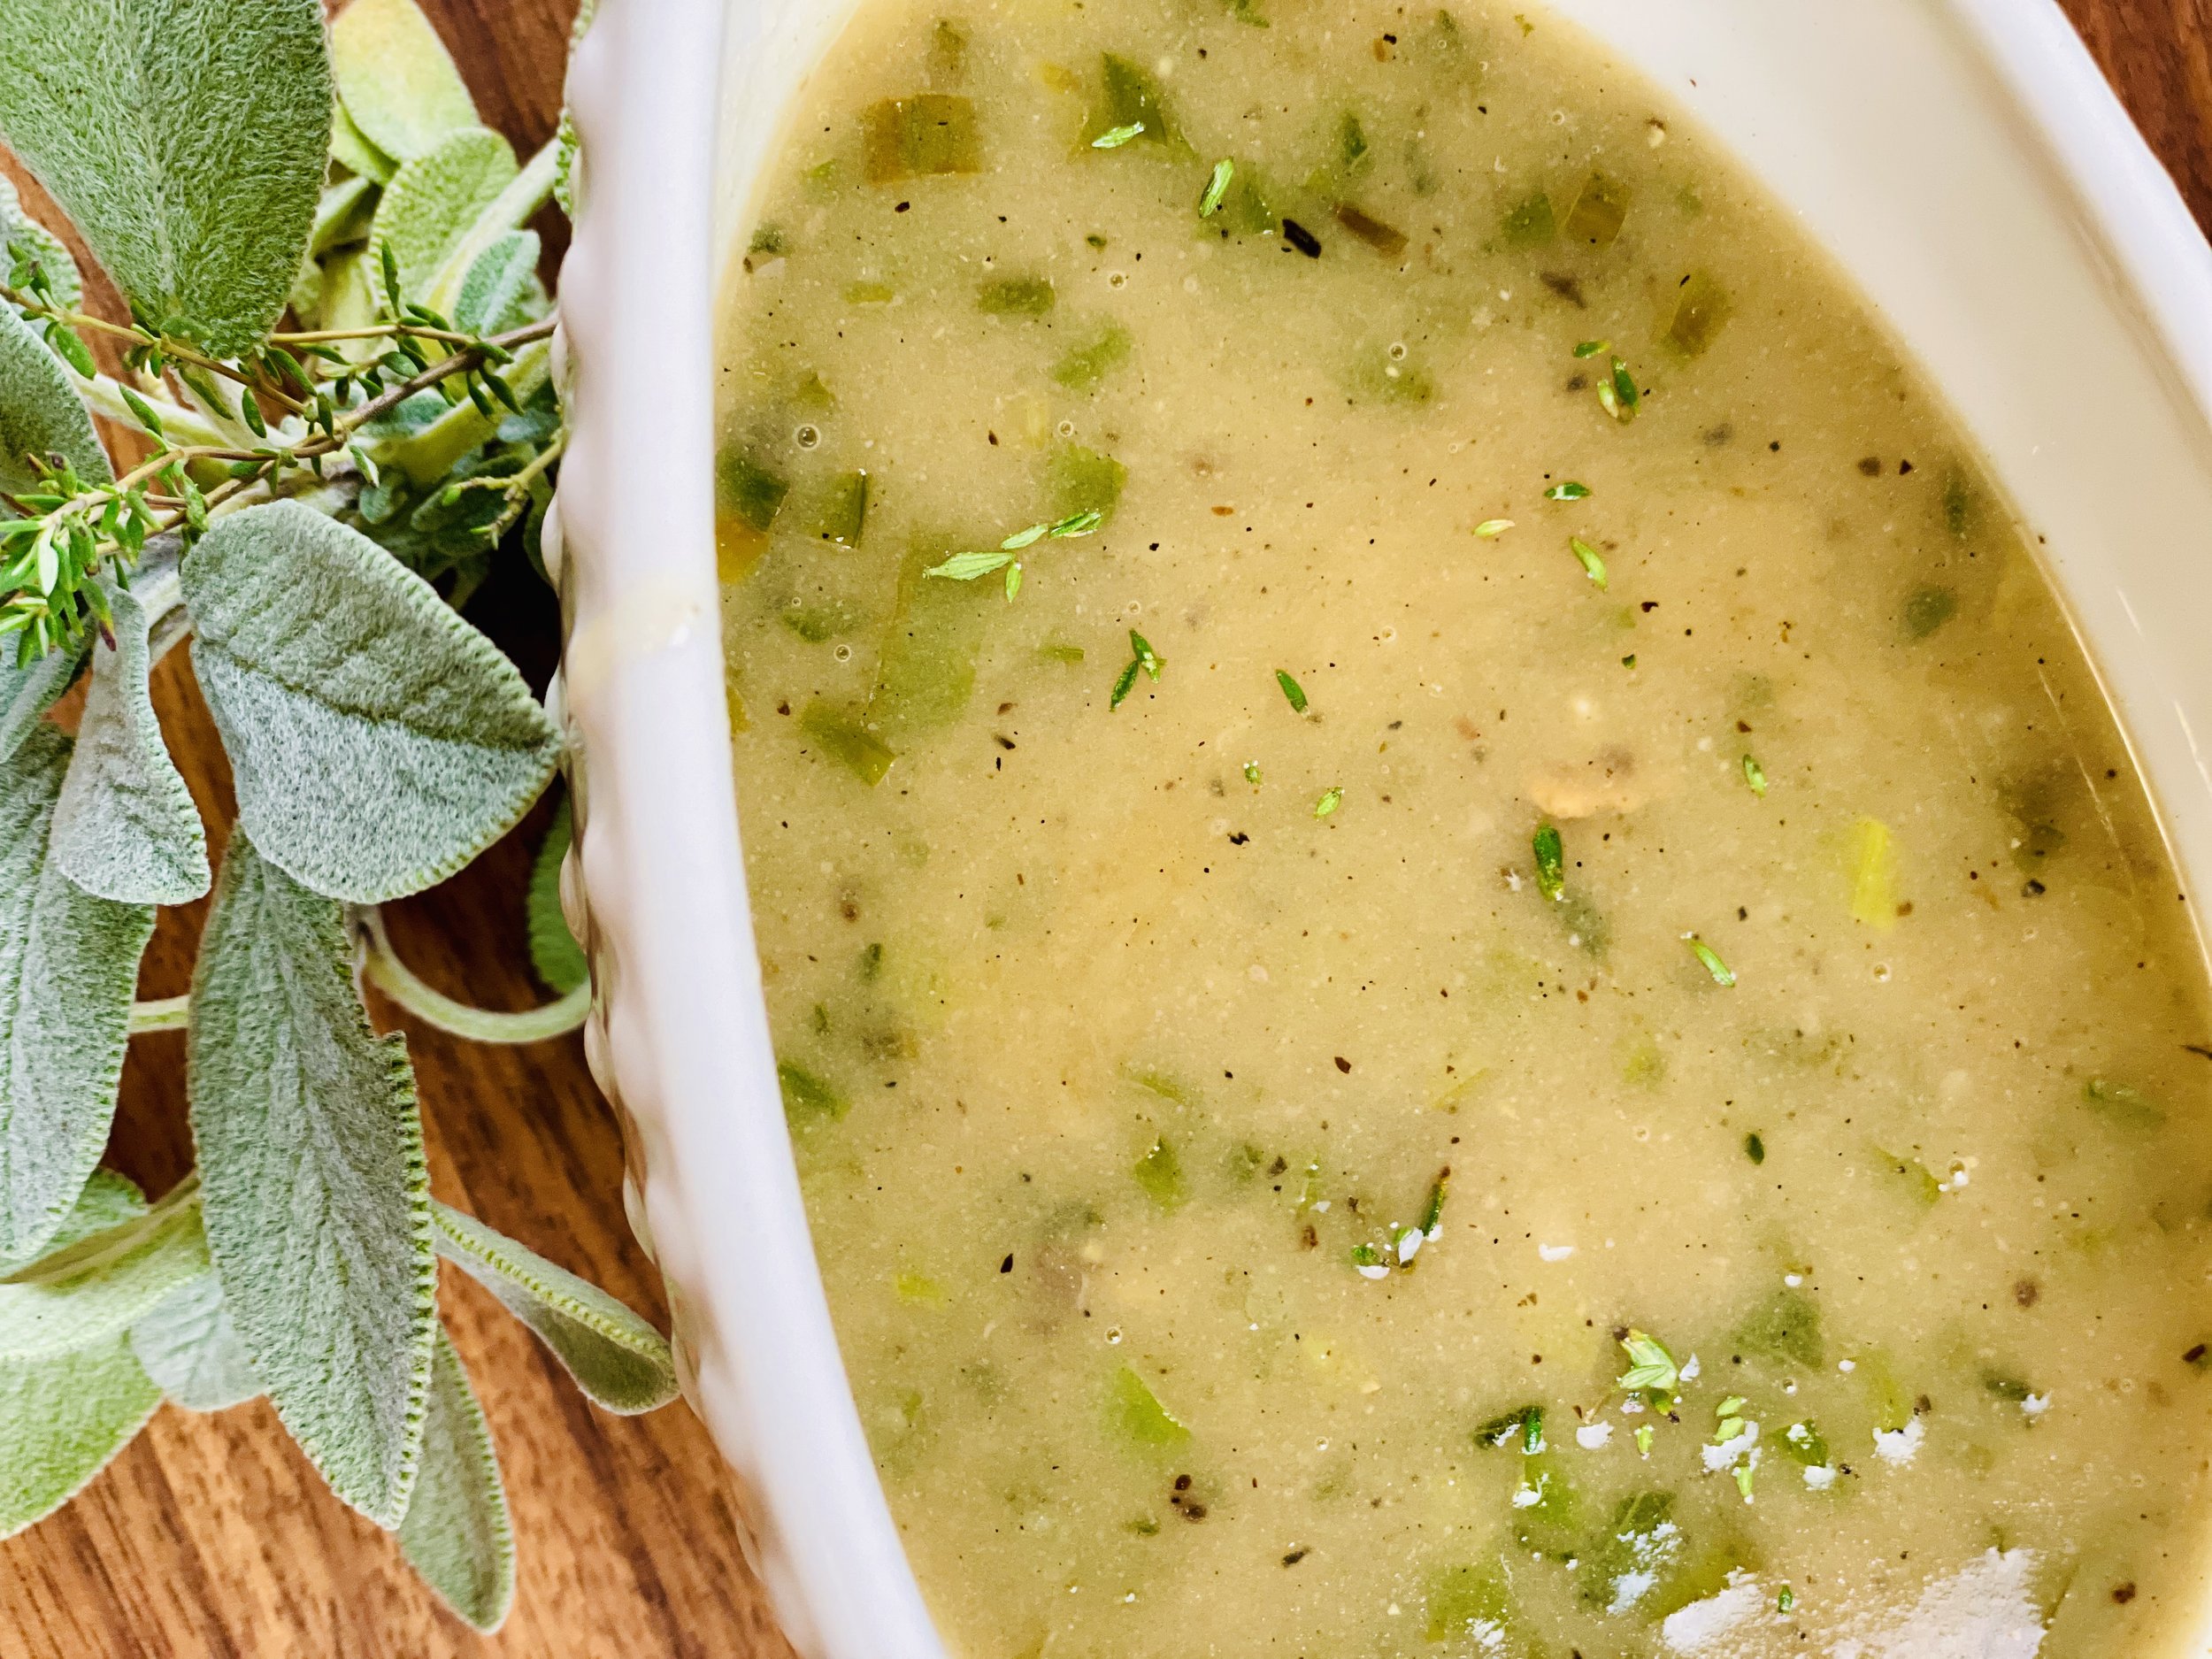
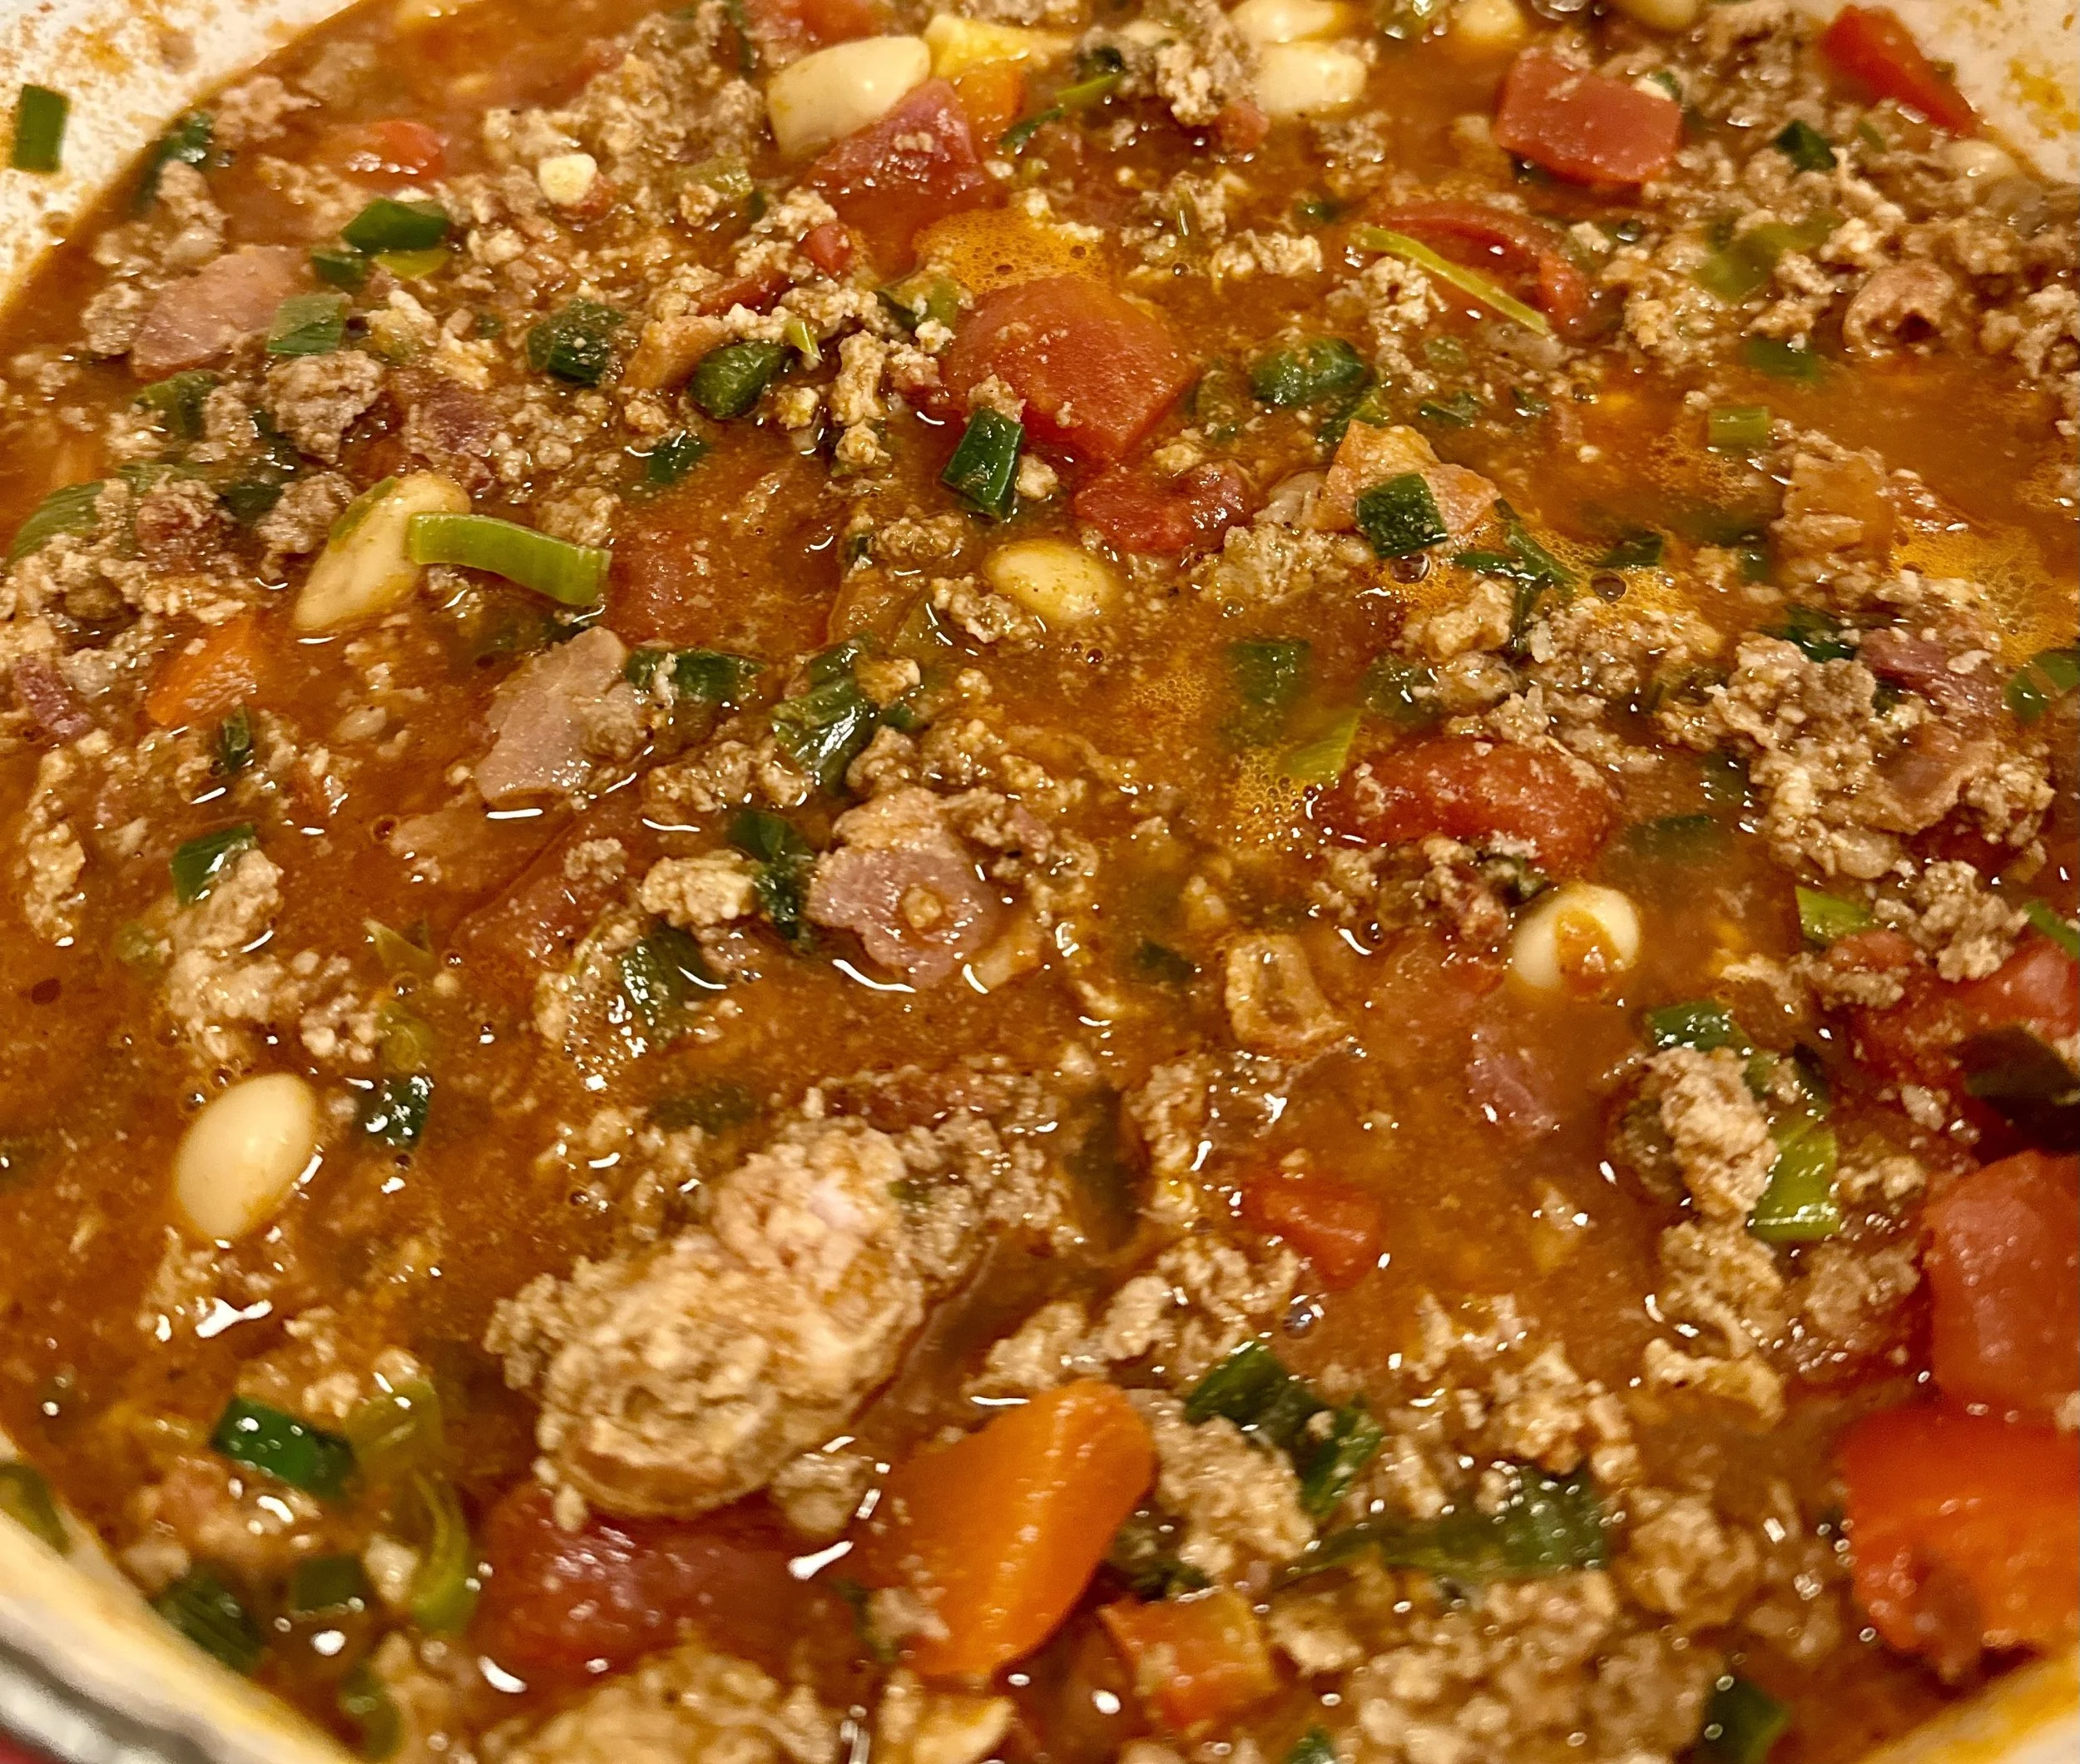
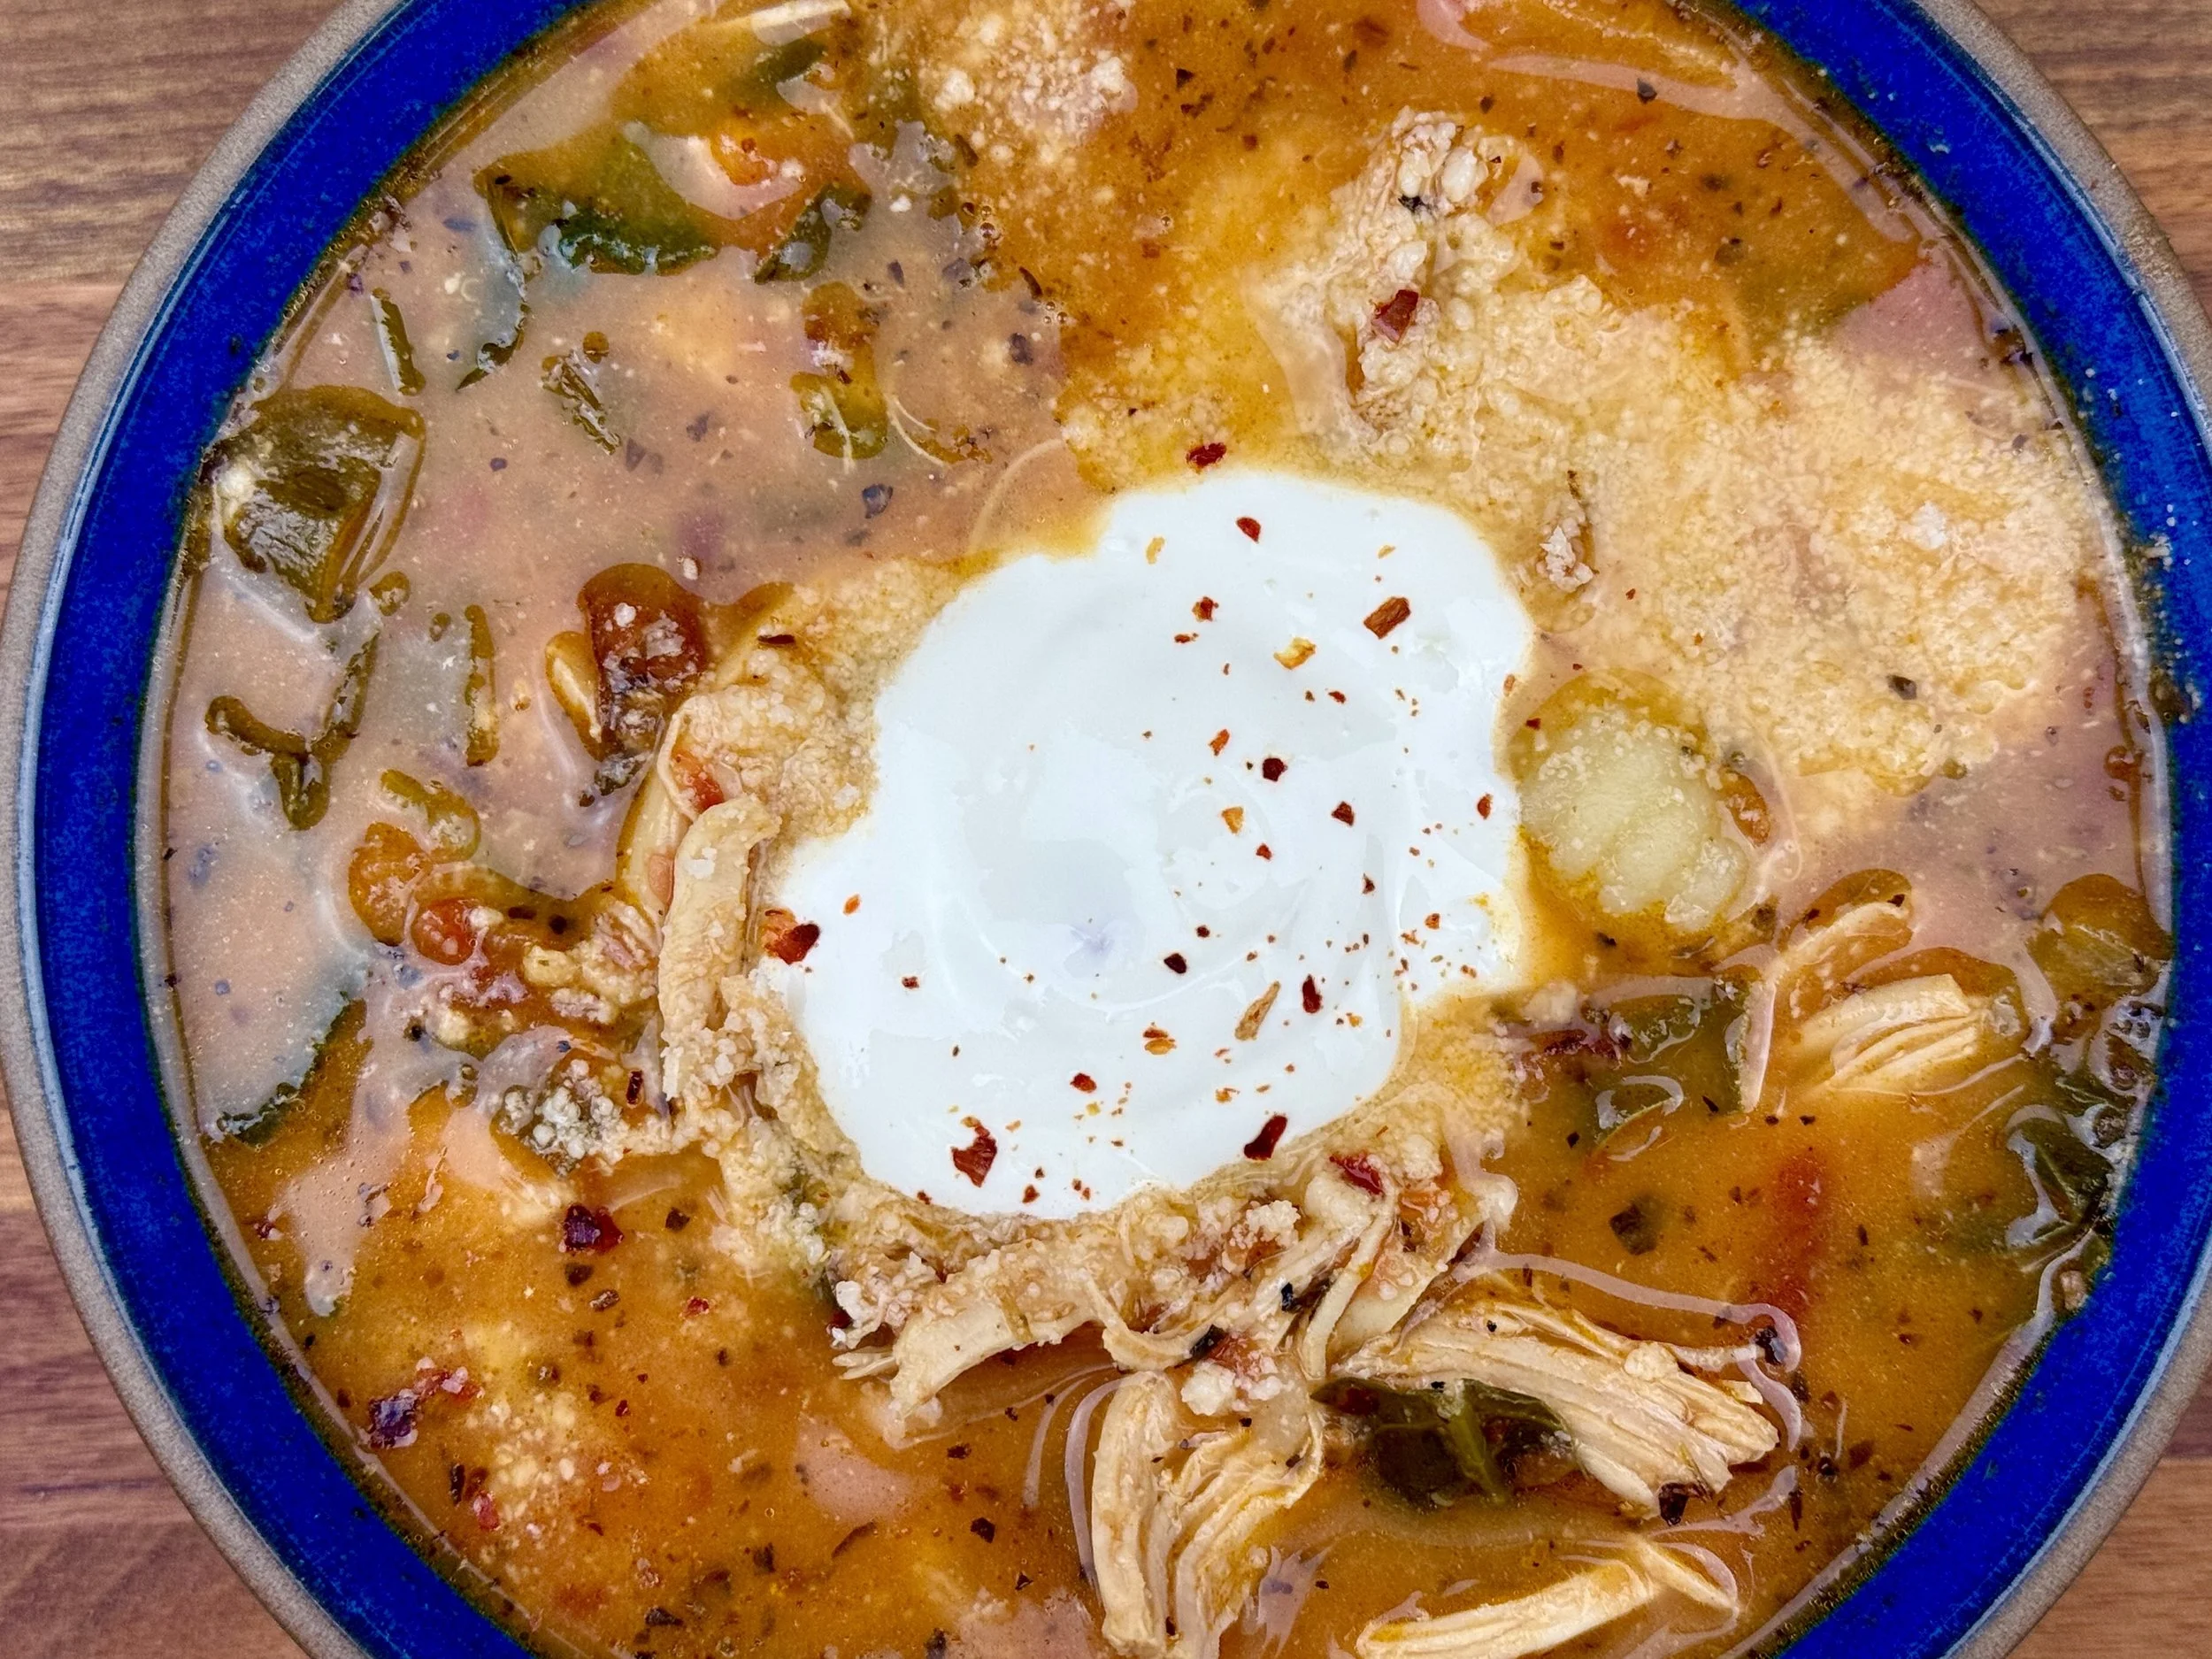
Lemon-Kissed Turkey & Greens Soup (Low FODMAP)
15 Minutes prep • 30 Minutes cook • Low FODMAP • Gluten-Free • Lactose-Free • Serves 6
15 Minutes prep • 30 Minutes cook • Low FODMAP • Gluten-Free • Lactose-Free • Serves 6
Bright, hearty, and soul-warming, this lemony white bean soup is the perfect balance of comfort and freshness. Tender turkey, creamy beans, and vibrant greens come together in a delicious broth, finished with a squeeze of lemon for a sunny, uplifting flavor. It’s a wholesome one-pot meal that’s as nourishing as it is satisfying—ideal for busy weeknights or cozy weekends.

See this new recipe in my FREE recipe club.
To streamline your search through hundreds of existing recipes, I'm moving the release of my new weekly creations to the Recipe Club on Patreon. In the club, you’ll get access to a treasure trove of low-FODMAP goodness, complete with collections and filters to use as your virtual cookbook!
Here's what awaits you in the club:
Exclusive weekly recipes: Be the first to try my latest delicious low-FODMAP creations!
Simple & Easy: My recipes continue to focus on readily available ingredients and effortless preparation, perfect for family-friendly meals (no more separate low-FODMAP meal prep!).
Hundreds of existing recipes: Gain access to my entire library of low-FODMAP recipes, all conveniently organized.
You can join for free or sign up for only $5/month. Your support fuels my passion for creating new, delicious, and easy-to-make low-FODMAP recipes just for you.
Let's go on this delicious low-FODMAP journey together.
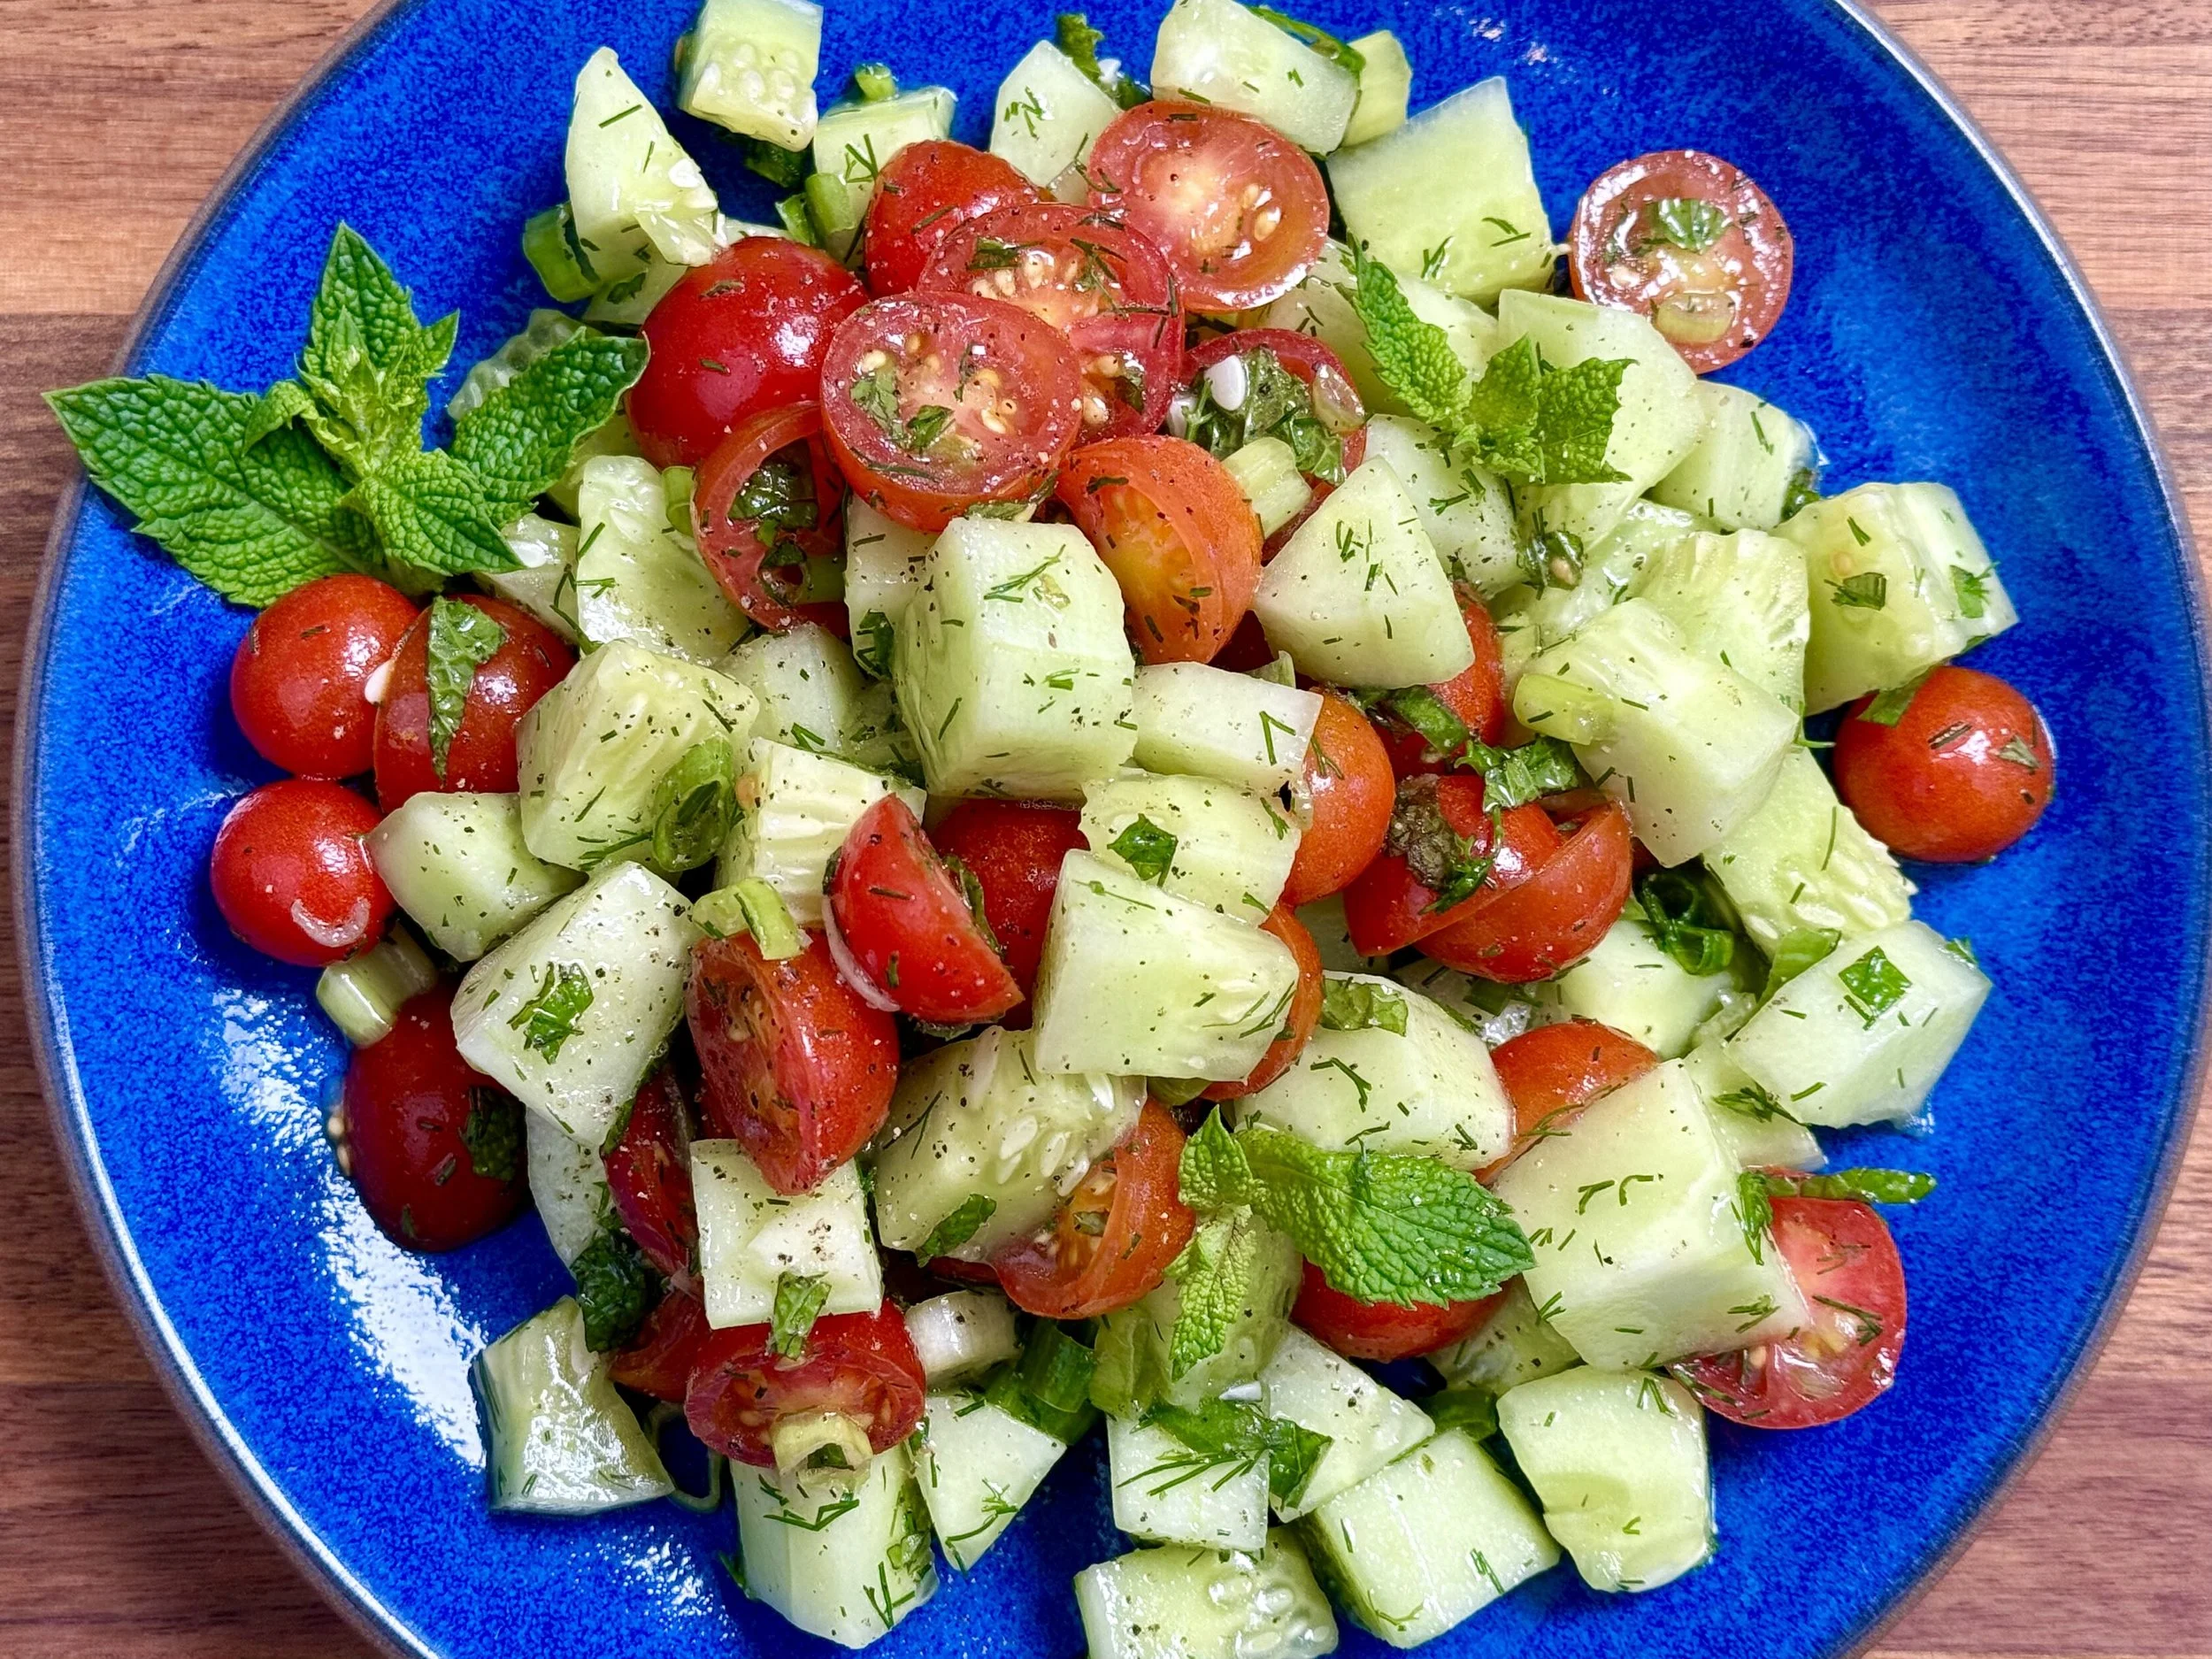
Summer Cucumber and Tomato Salad (Low FODMAP)
20 Minutes prep • Low FODMAP • Gluten-Free • Lactose-Free • Serves 6 - 8
20 Minutes Prep • 30 Minutes Chill • Low FODMAP • Gluten-Free • Lactose-Free • Serves 6 - 8 • Ok to make-ahead: Steps 1 - 4
Light, crisp, and bursting with garden-fresh flavor, this Summer Cucumber and Tomato Salad is the perfect warm-weather side dish. With juicy tomatoes, cool cucumbers, and an herby vinaigrette, it brings together the best of the season in a bowl. Whether you're hosting a backyard barbecue, packing a picnic, or just craving something refreshing, this salad is quick to toss together and endlessly versatile. It’s a simple, wholesome dish that celebrates the peak of summer produce — no cooking required.
See this new recipe in my FREE recipe club.
To streamline your search through hundreds of existing recipes, I'm moving the release of my new weekly creations to the Recipe Club on Patreon. In the club, you’ll get access to a treasure trove of low-FODMAP goodness, complete with collections and filters to use as your virtual cookbook!
Here's what awaits you in the club:
Exclusive weekly recipes: Be the first to try my latest delicious low-FODMAP creations!
Simple & Easy: My recipes continue to focus on readily available ingredients and effortless preparation, perfect for family-friendly meals (no more separate low-FODMAP meal prep!).
Hundreds of existing recipes: Gain access to my entire library of low-FODMAP recipes, all conveniently organized.
You can join for free or sign up for only $5/month. Your support fuels my passion for creating new, delicious, and easy-to-make low-FODMAP recipes just for you.
Let's go on this delicious low-FODMAP journey together.
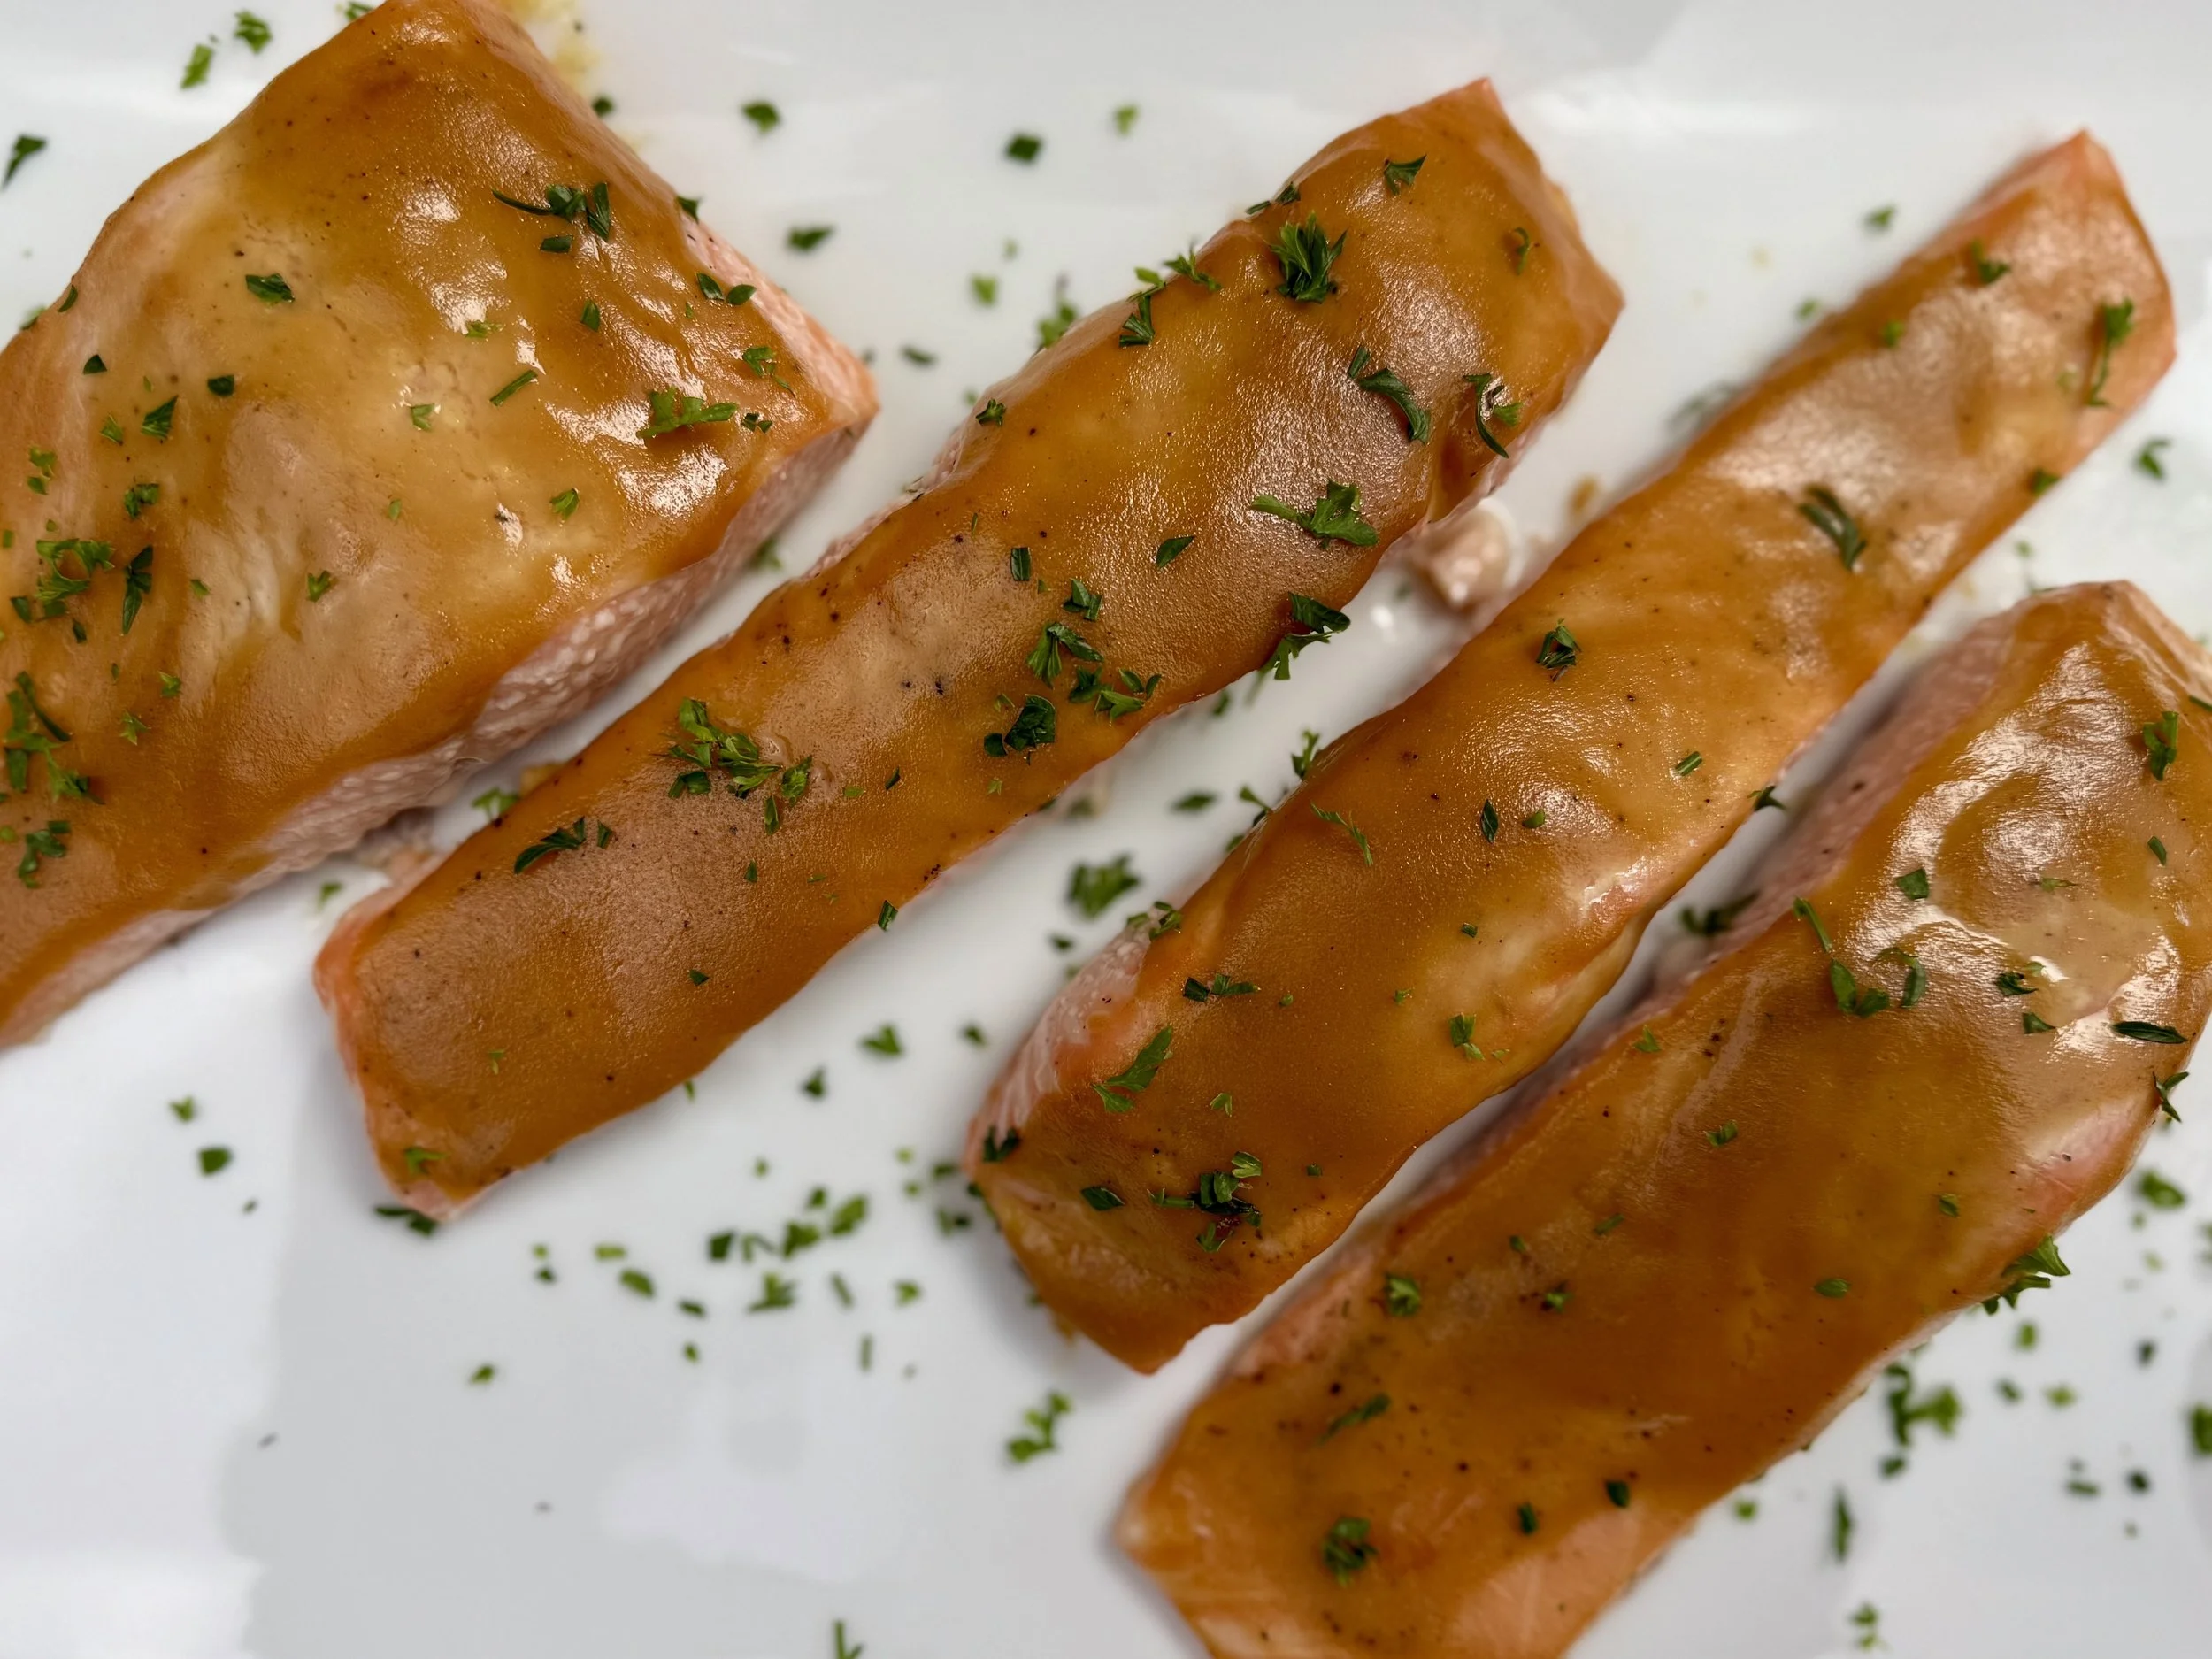
Quick Sheet Pan Dijon Salmon (Low FODMAP)
5 Minutes prep • 10 Minutes cook • Low FODMAP • Gluten-Free • Lactose-Free • Serves 4
5 Minutes prep • 10 Minutes cook • Low FODMAP • Gluten-Free • Lactose-Free • Serves 4 • Ok to make-ahead: Steps 1 - 2
Craving a healthy, delicious, and incredibly easy weeknight meal? Look no further than this Quick Sheet Pan Dijon Salmon! Sheet pan dinners are a busy cook's dream come true, offering minimal cleanup and a hands-off approach to cooking. This recipe leverages that convenience by pairing juicy salmon fillets with a sweet and savory Dijon glaze. Salmon is not only packed with omega-3s, but it's also very versatile and cooks quickly, making it an ideal choice for a speedy supper. With just a few simple ingredients and one pan, you'll have a flavorful and satisfying meal on the table in no time!
See this new recipe in my FREE recipe club.
To streamline your search through hundreds of existing recipes, I'm moving the release of my new weekly creations to the Recipe Club on Patreon. In the club, you’ll get access to a treasure trove of low-FODMAP goodness, complete with collections and filters to use as your virtual cookbook!
Here's what awaits you in the club:
Exclusive weekly recipes: Be the first to try my latest delicious low-FODMAP creations!
Simple & Easy: My recipes continue to focus on readily available ingredients and effortless preparation, perfect for family-friendly meals (no more separate low-FODMAP meal prep!).
Hundreds of existing recipes: Gain access to my entire library of low-FODMAP recipes, all conveniently organized.
You can join for free or sign up for only $5/month. Your support fuels my passion for creating new, delicious, and easy-to-make low-FODMAP recipes just for you.
Let's go on this delicious low-FODMAP journey together.
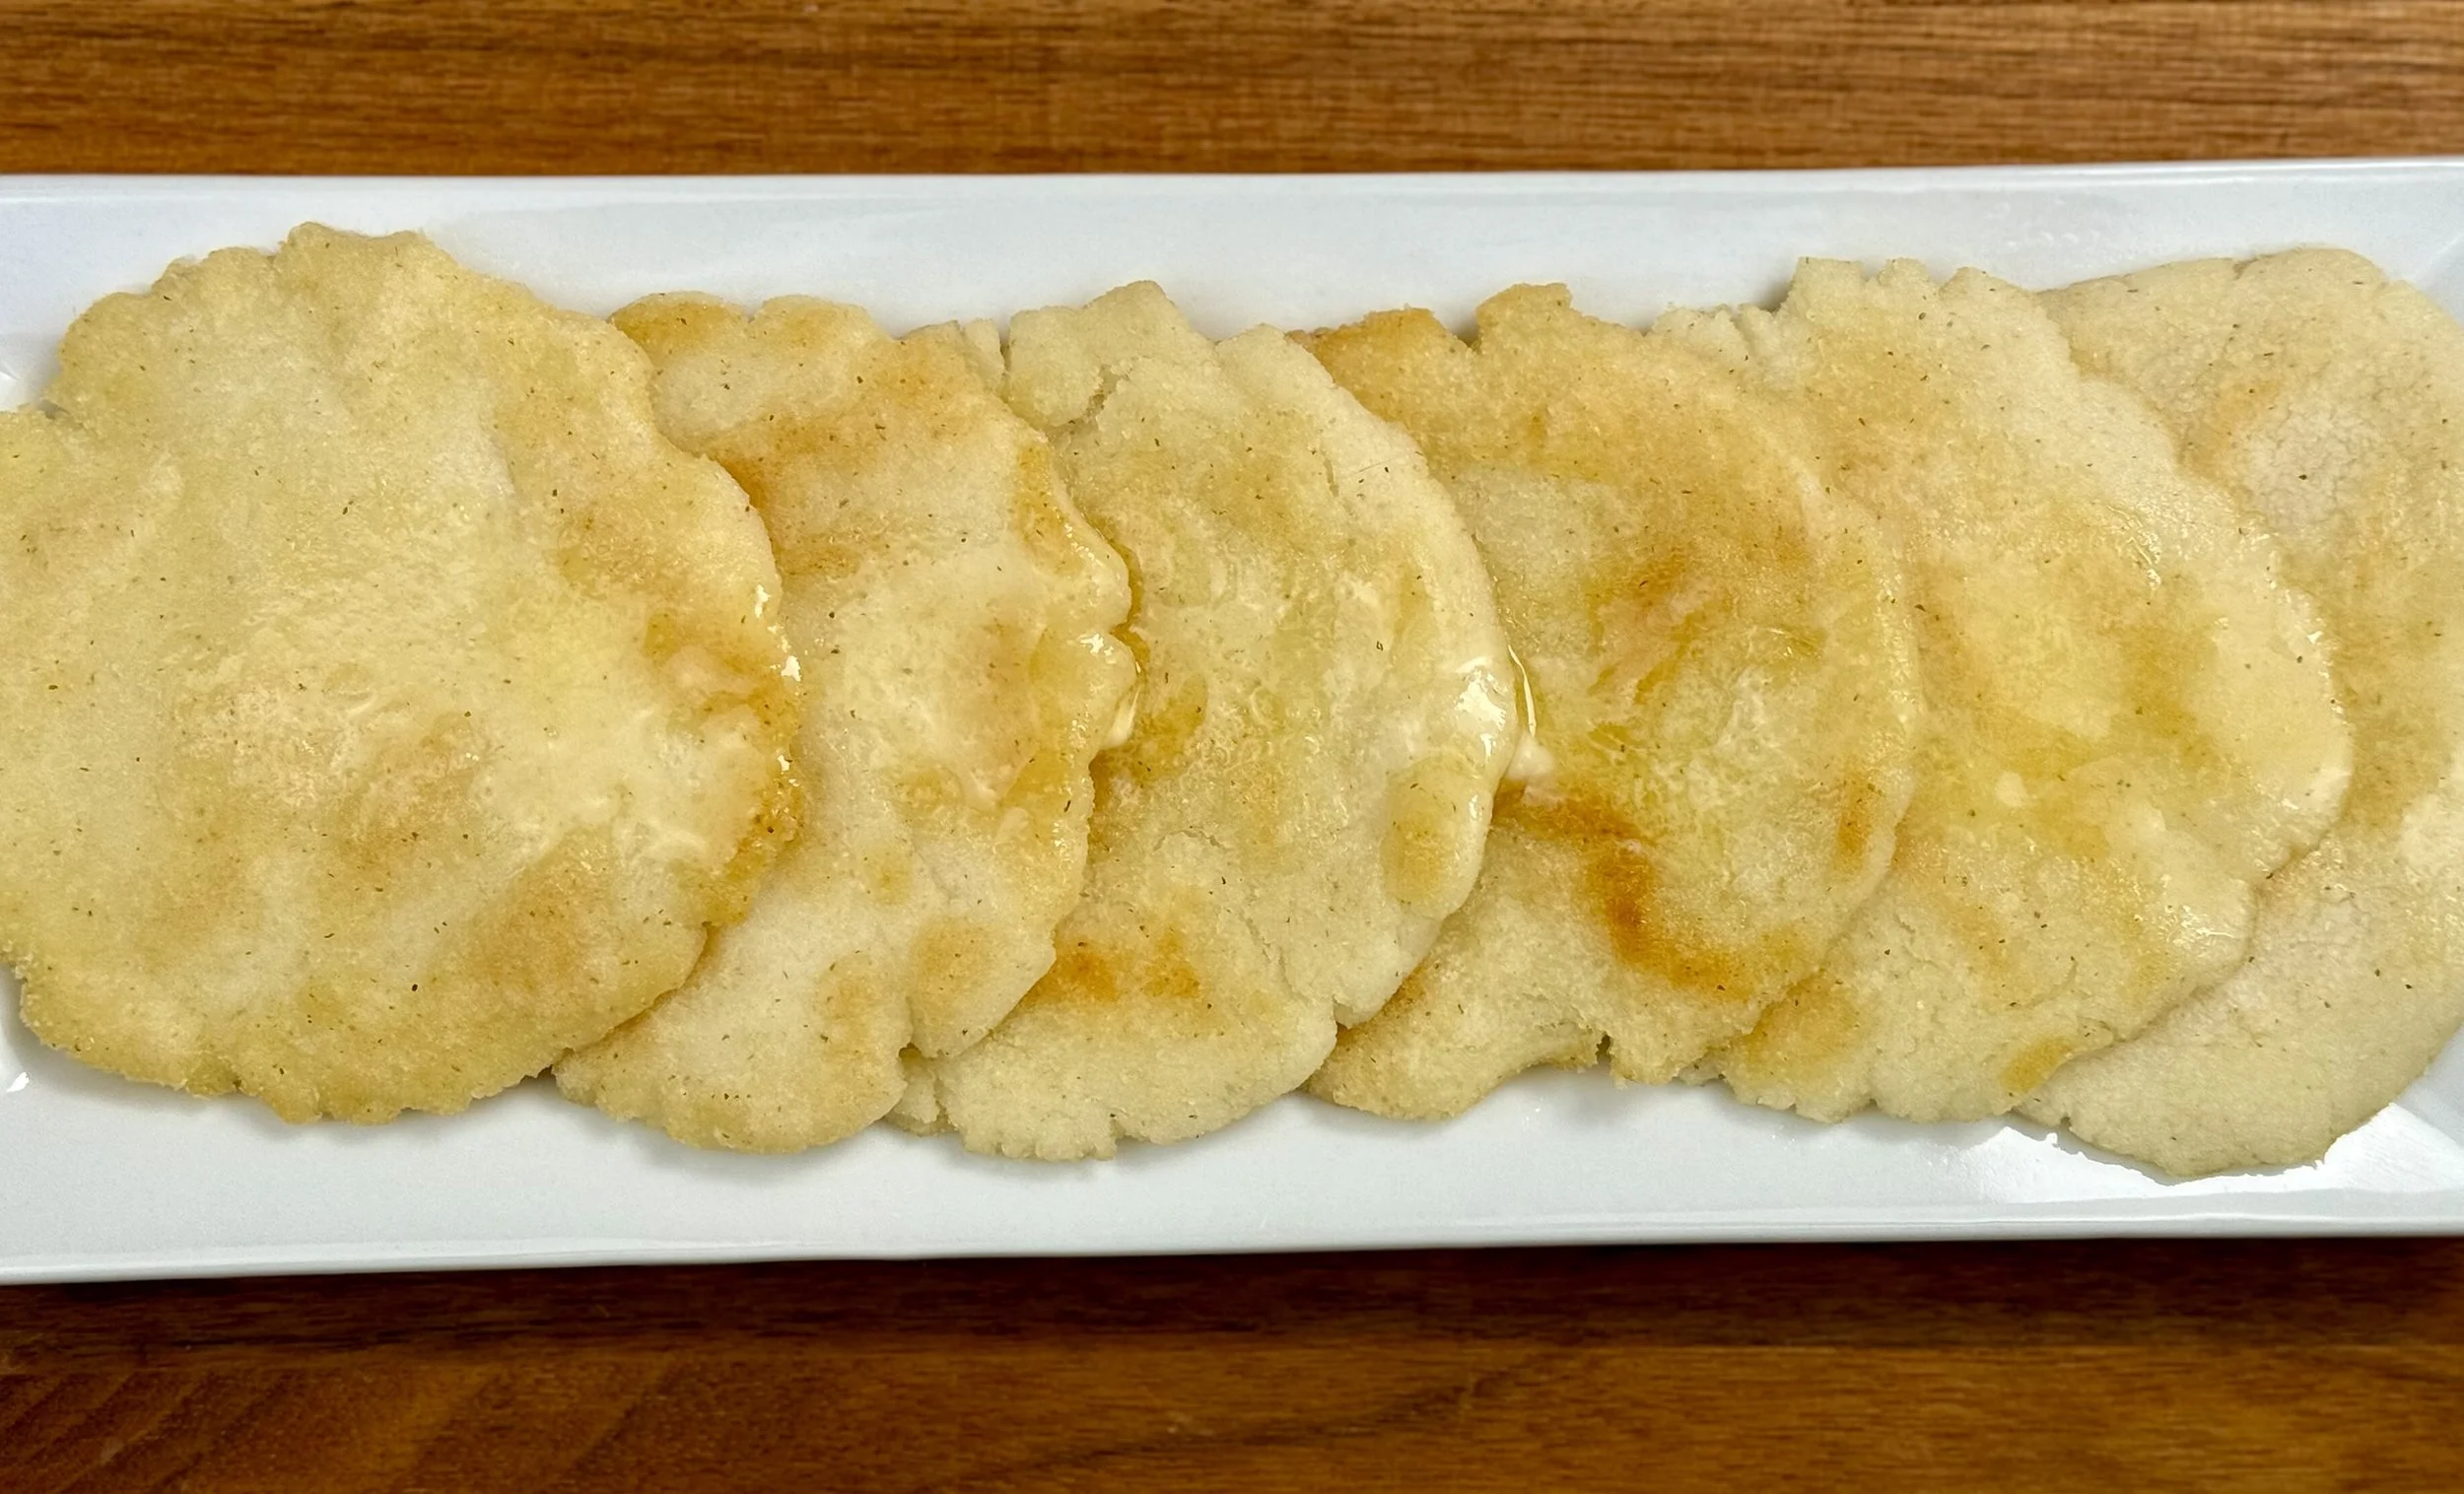
Corn Flour Arepas (Low FODMAP)
15 Minutes prep • 20 Minutes cook • Low FODMAP • Gluten-Free • Makes 12
15 Minutes prep • 20 Minutes cook • Low FODMAP • Gluten-Free • Makes 12 • Ok to make-ahead: Steps 1 - 2
Get ready to enjoy the comforting aroma of freshly cooked cornmeal, transformed into arepas that are crisp on the outside, soft on the inside, and full of flavor. Whether you're in the mood for a savory arepa filled or topped with your favorite protein, or a sweet version with butter and a spoonful of jam, this simple recipe delivers all the satisfaction, without the worry of digestive discomfort.
See this new recipe in my FREE recipe club.
To streamline your search through hundreds of existing recipes, I'm moving the release of my new weekly creations to the Recipe Club on Patreon. In the club, you’ll get access to a treasure trove of low-FODMAP goodness, complete with collections and filters to use as your virtual cookbook!
Here's what awaits you in the club:
Exclusive weekly recipes: Be the first to try my latest delicious low-FODMAP creations!
Simple & Easy: My recipes continue to focus on readily available ingredients and effortless preparation, perfect for family-friendly meals (no more separate low-FODMAP meal prep!).
Hundreds of existing recipes: Gain access to my entire library of low-FODMAP recipes, all conveniently organized.
You can join for free or sign up for only $5/month. Your support fuels my passion for creating new, delicious, and easy-to-make low-FODMAP recipes just for you.
Let's go on this delicious low-FODMAP journey together.
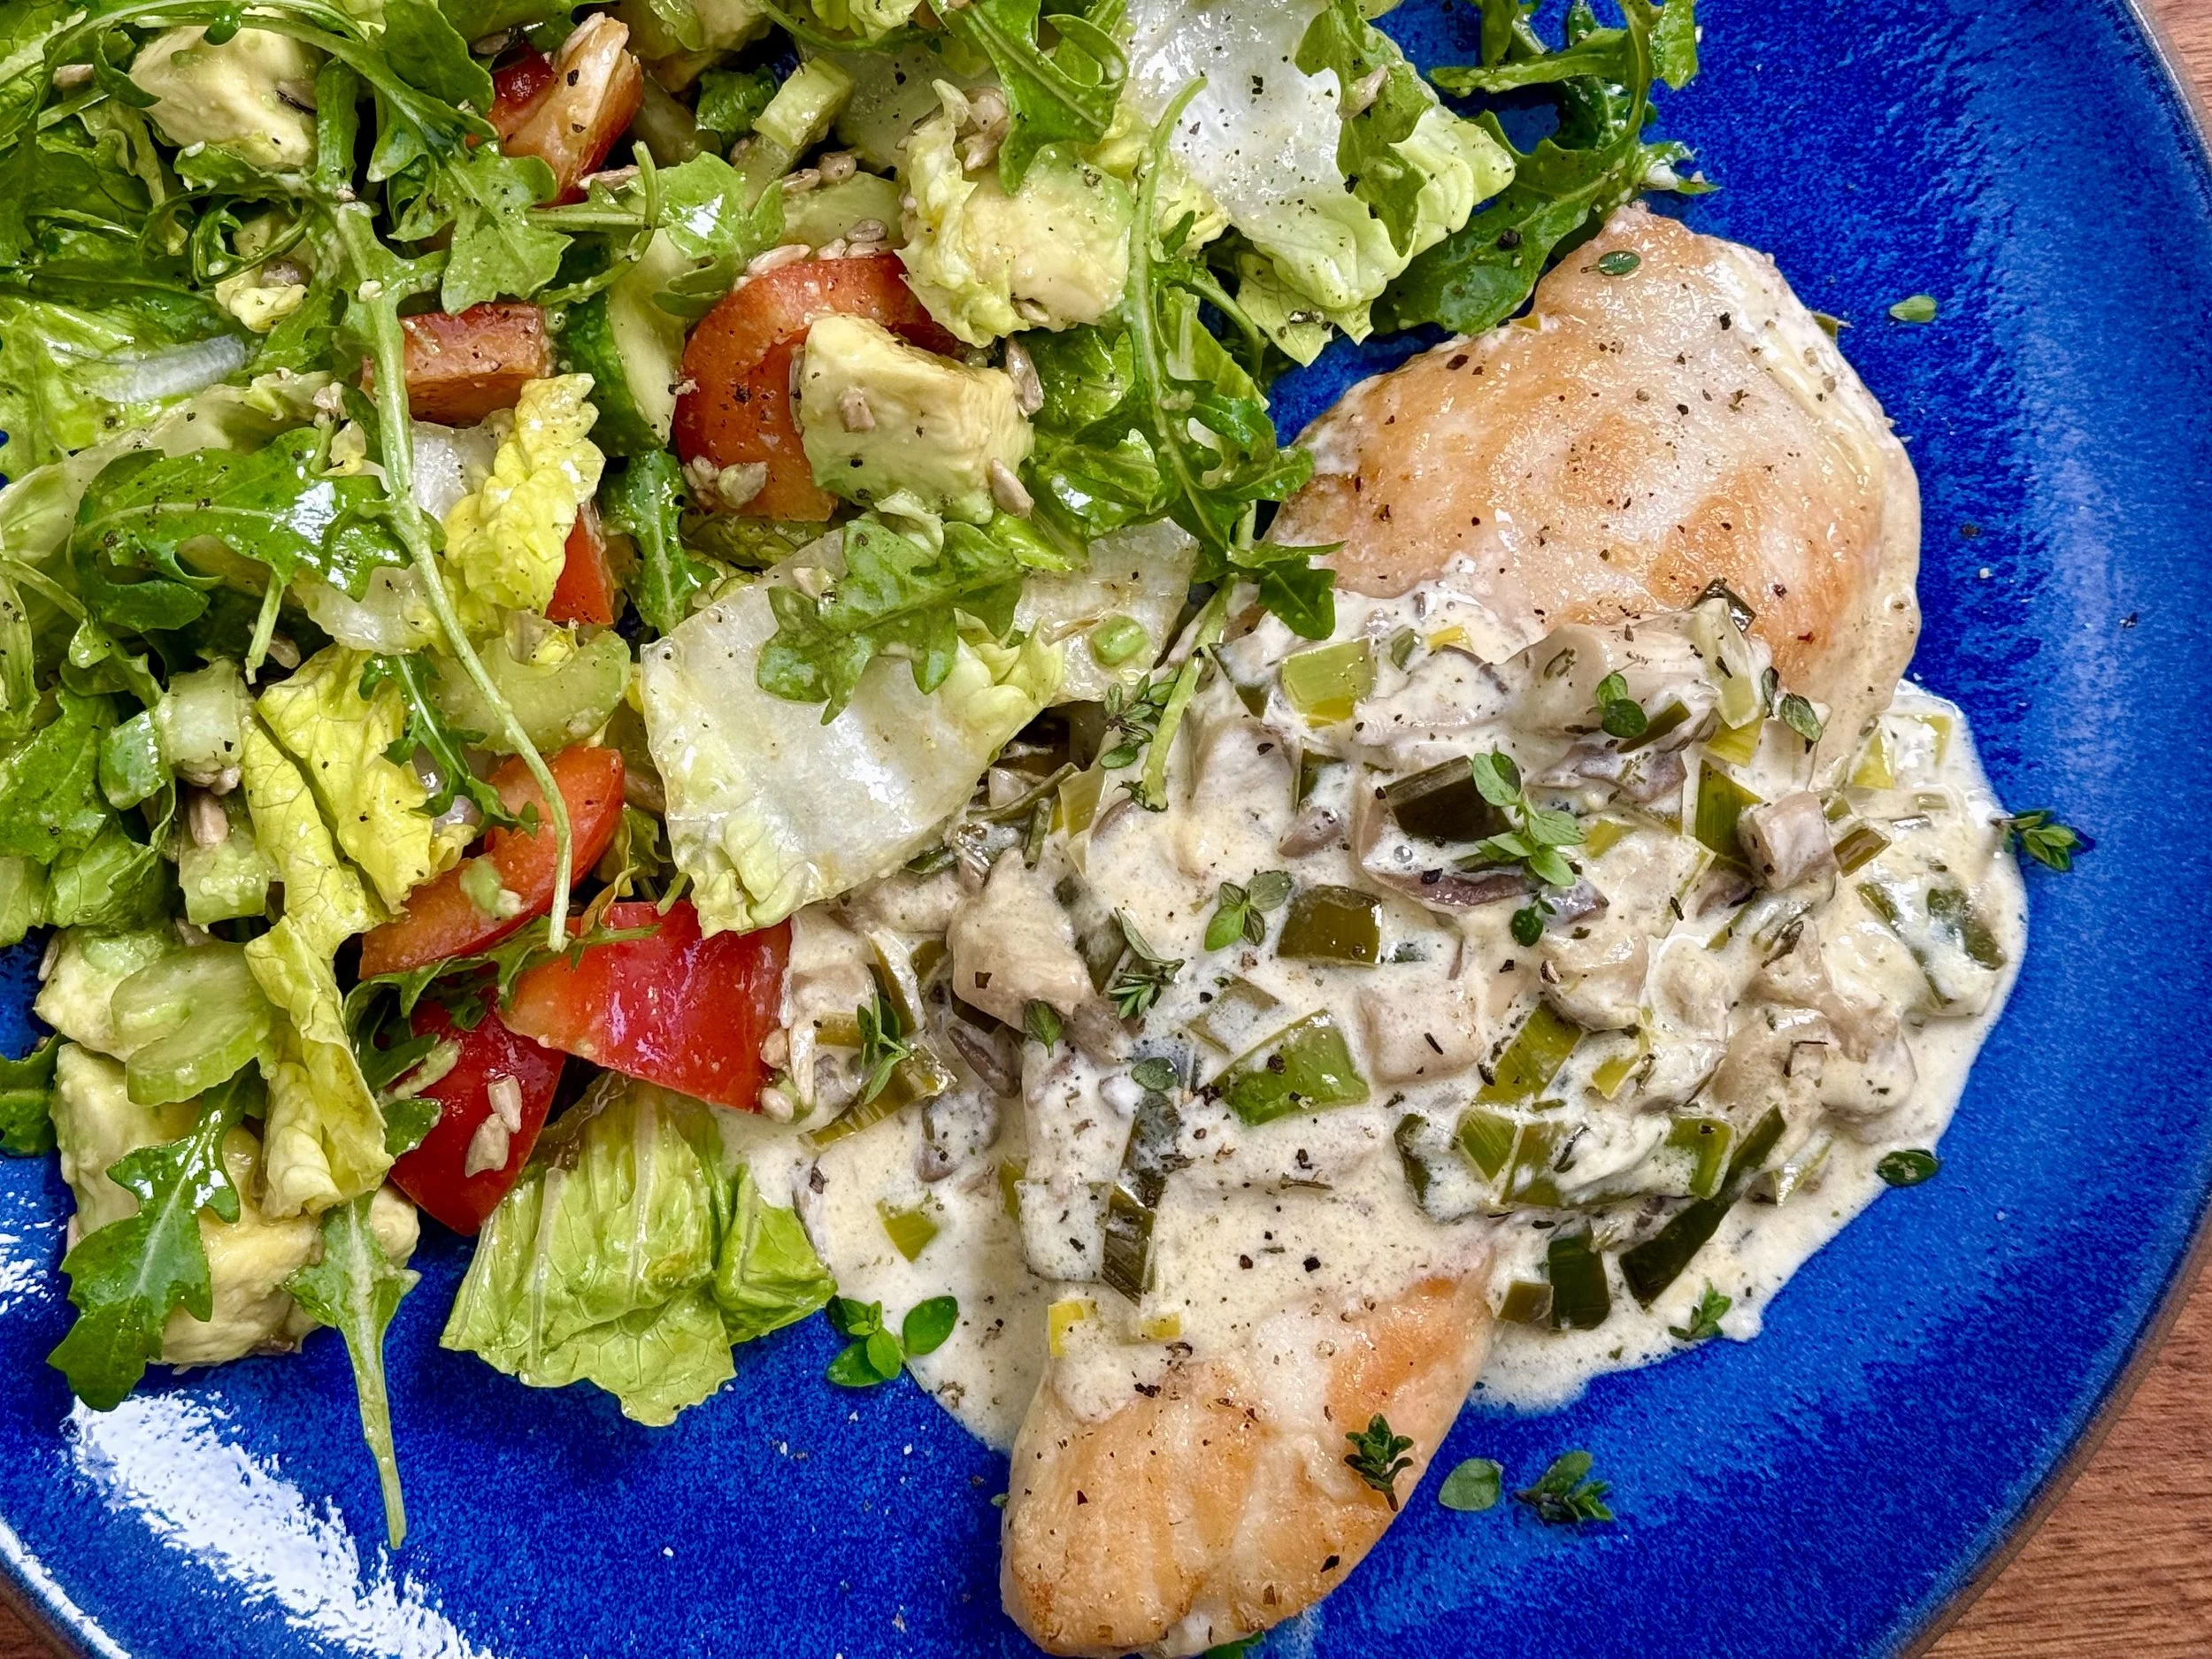
Quick Herby Chicken Salad (Low FODMAP)
10 Minutes prep • 2 Hours chill • Low FODMAP • Gluten-Free • Makes 4 cups
10 Minutes prep • 2 Hours chill • Low FODMAP • Gluten-Free • Makes 4 cups • Ok to make-ahead: Steps 1 - 4
This Quick Herby Chicken Salad is a fresh, IBS and keto-friendly meal packed with flavor and crunch. Tender chicken is mixed with an herby Dijon-lemon dressing with fresh dill, parsley, chives, and green onions, then tossed with chopped raw almonds for a satisfying bite. Serve it on crisp Romaine lettuce with lemon wedges for a light dish that comes together fast and is best made ahead. It’s perfect for lunch or dinner.

See this new recipe in my FREE recipe club.
To streamline your search through hundreds of existing recipes, I'm moving the release of my new weekly creations to the Recipe Club on Patreon. In the club, you’ll get access to a treasure trove of low-FODMAP goodness, complete with collections and filters to use as your virtual cookbook!
Here's what awaits you in the club:
Exclusive weekly recipes: Be the first to try my latest delicious low-FODMAP creations!
Simple & Easy: My recipes continue to focus on readily available ingredients and effortless preparation, perfect for family-friendly meals (no more separate low-FODMAP meal prep!).
Hundreds of existing recipes: Gain access to my entire library of low-FODMAP recipes, all conveniently organized.
You can join for free or sign up for only $5/month. Your support fuels my passion for creating new, delicious, and easy-to-make low-FODMAP recipes just for you.
Let's go on this delicious low-FODMAP journey together.
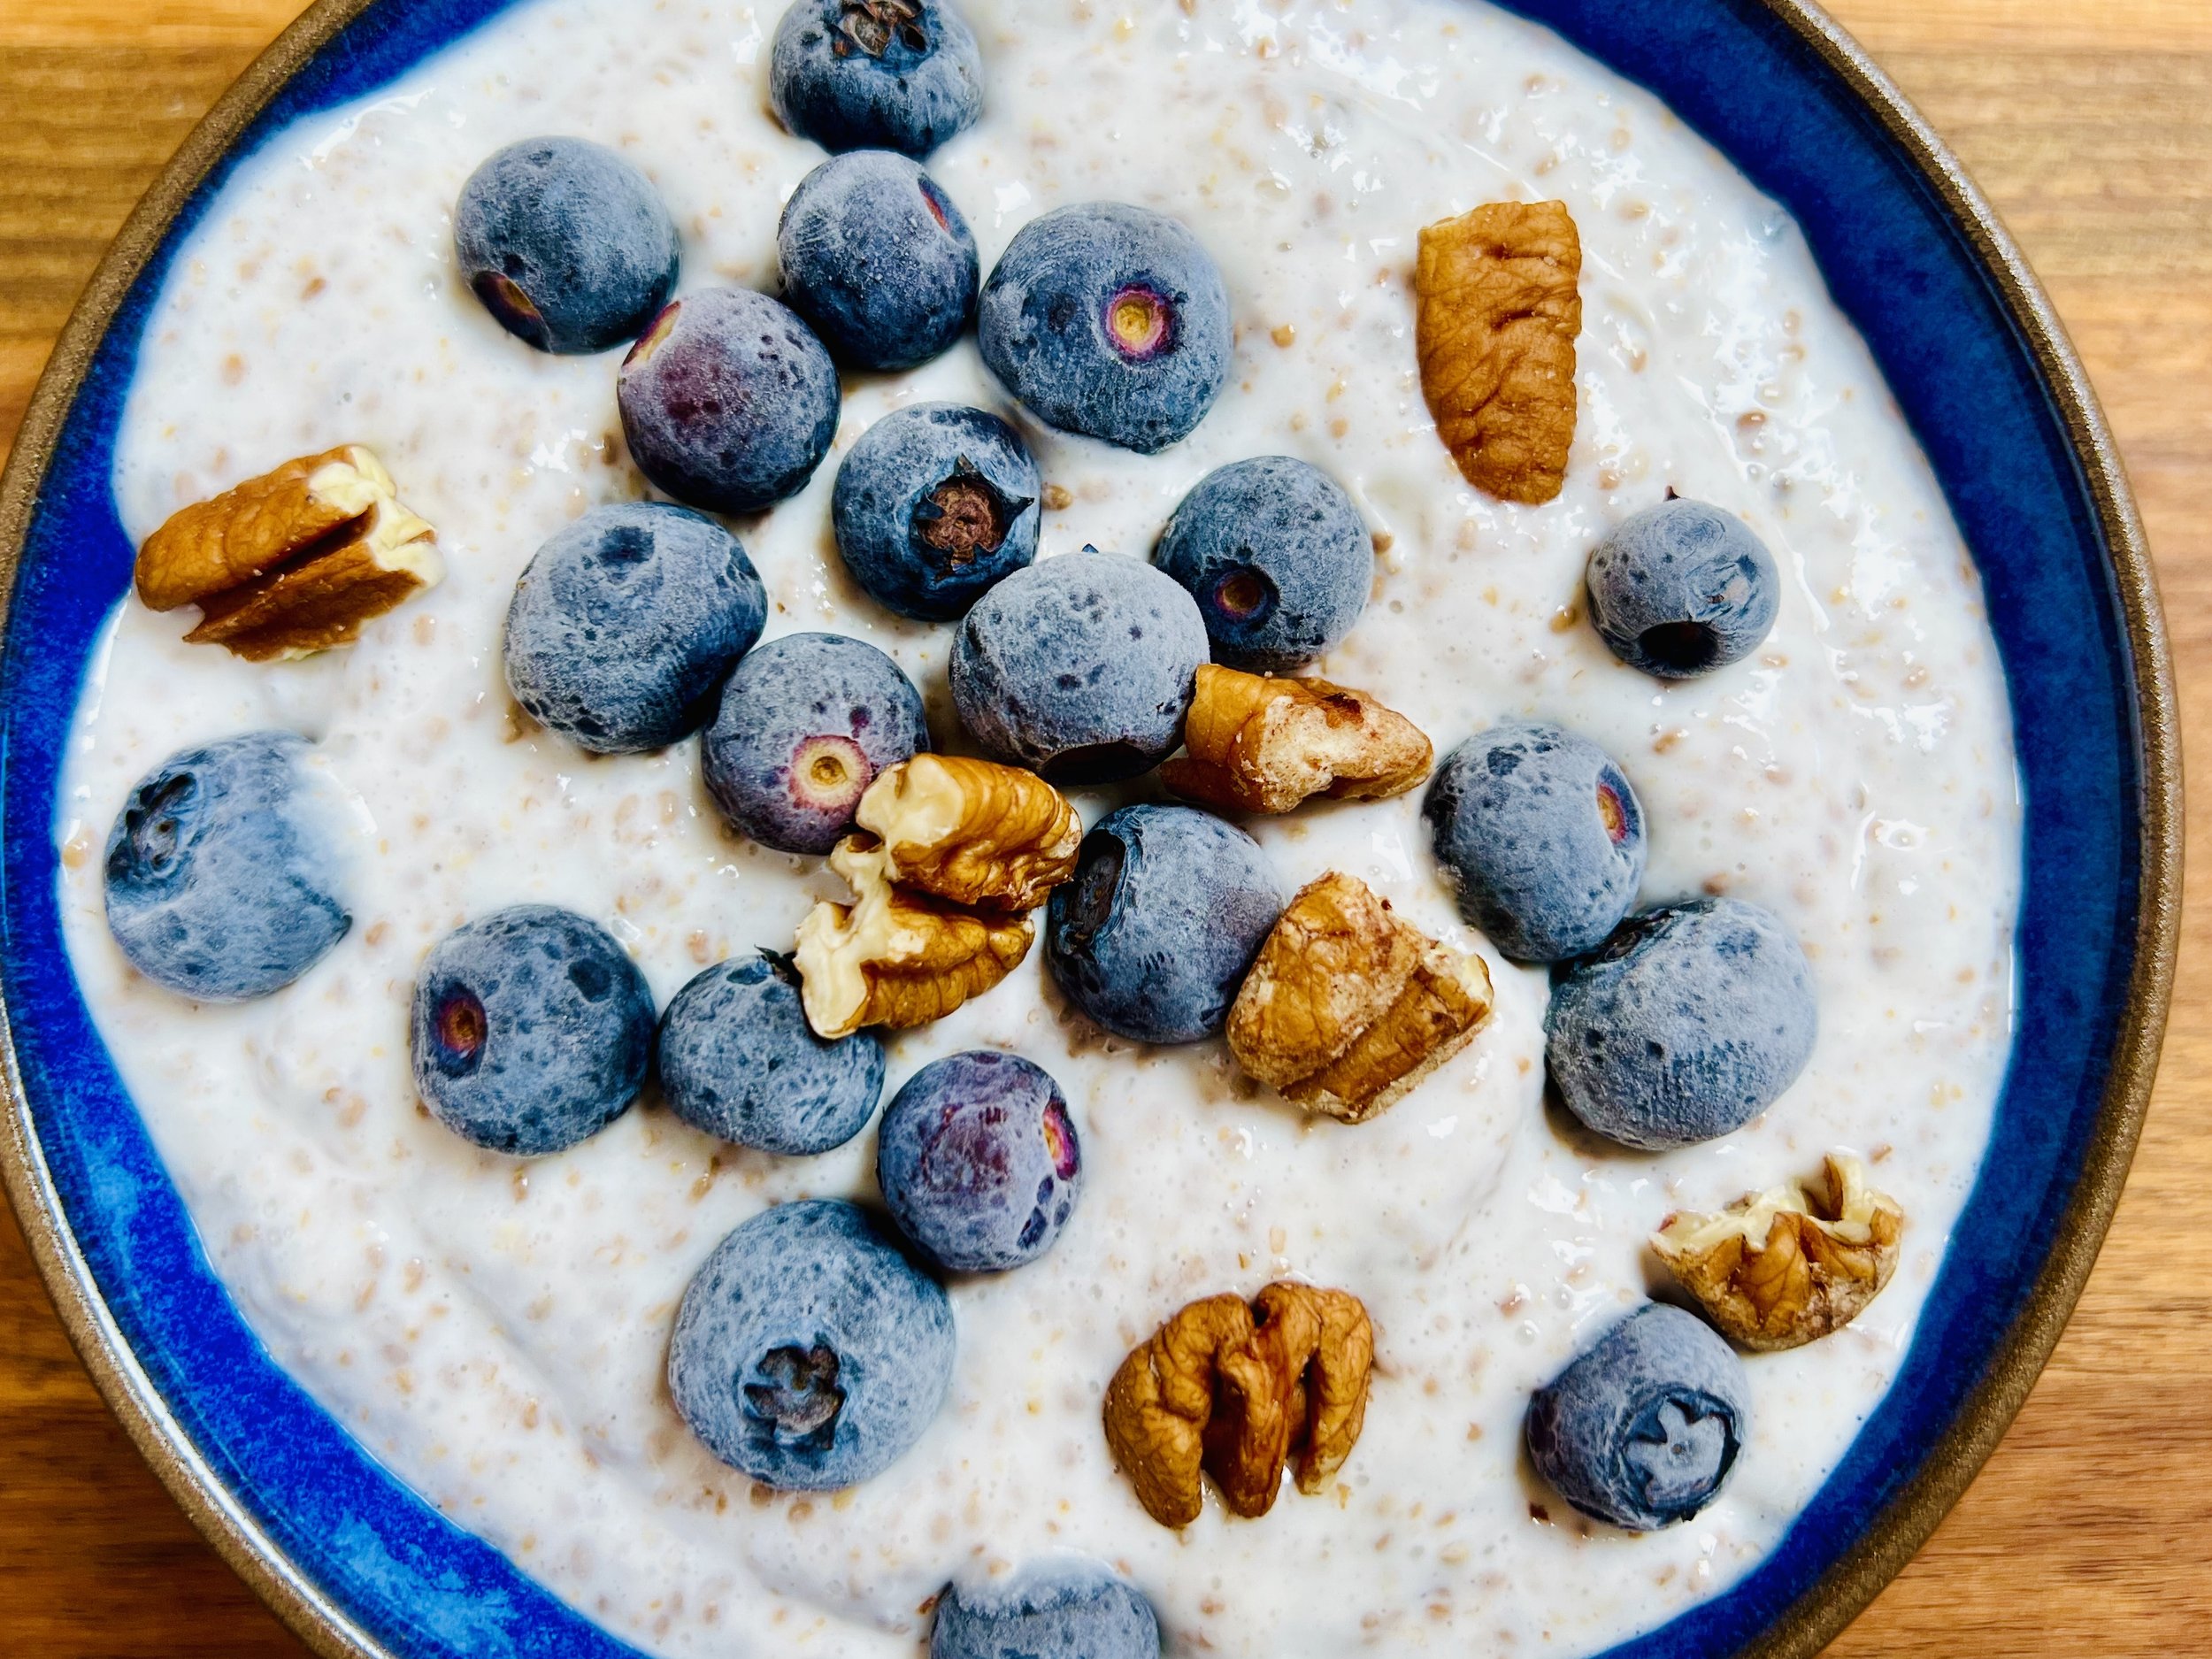
Tropical Coconut Overnight Oats (Low FODMAP)
10 Minutes prep • 5+ hours chill • Low FODMAP • Gluten-free • Lactose-free • Serves 1
10 Minutes prep • 5+ Hours chill • Low FODMAP • Gluten-Free • Vegan • Serves 1 • Ok to make-ahead: Steps 1 - 2
Start your day with a taste of the tropics with my Tropical Coconut Overnight Oats. Packed with wholesome ingredients like gluten-free rolled oats, chia seeds, and coconut milk, this recipe is both nutritious and delicious. Customize your bowl with dried cranberries, shredded coconut, and a sprinkle of seeds for added texture and flavor. Prepare it the night before for a hassle-free breakfast that's ready to enjoy in the morning. Whether you prefer it sweetened with a touch of maple syrup or served with fresh berries and nuts, these overnight oats are sure to brighten your mornings with every spoonful.
See this new recipe in my FREE recipe club.
To streamline your search through hundreds of existing recipes, I'm moving the release of my new weekly creations to the Recipe Club on Patreon. In the club, you’ll get access to a treasure trove of low-FODMAP goodness, complete with collections and filters to use as your virtual cookbook!
Here's what awaits you in the club:
Exclusive weekly recipes: Be the first to try my latest delicious low-FODMAP creations!
Simple & Easy: My recipes continue to focus on readily available ingredients and effortless preparation, perfect for family-friendly meals (no more separate low-FODMAP meal prep!).
Hundreds of existing recipes: Gain access to my entire library of low-FODMAP recipes, all conveniently organized.
You can join for free or sign up for only $5/month. Your support fuels my passion for creating new, delicious, and easy-to-make low-FODMAP recipes just for you.
Let's go on this delicious low-FODMAP journey together.
Lightly Sweet and Salty Nuts (Low FODMAP)
5 Minutes prep • 10 Minutes cook • Low FODMAP • Gluten-Free • Lactose-Free • Makes 5 cups
5 Minutes prep • 10 Minutes cook • Low FODMAP • Gluten-Free • Lactose-Free • Makes 5 cups • Ok to make-ahead: Steps 1 - 4
Craving a crunchy, flavorful snack? Look no further than these irresistible Lightly Sweet and Salty Nuts. The perfect balance of sweet and savory makes them impossible to resist. They are so easy to make, you have them ready in a jiffy. You can use other kinds of nuts instead, or in addition to, these two. I used nuts from Costco for this recipe which also made it very cost-effective.

See this new recipe in my FREE recipe club.
To streamline your search through hundreds of existing recipes, I'm moving the release of my new weekly creations to the Recipe Club on Patreon. In the club, you’ll get access to a treasure trove of low-FODMAP goodness, complete with collections and filters to use as your virtual cookbook!
Here's what awaits you in the club:
Exclusive weekly recipes: Be the first to try my latest delicious low-FODMAP creations!
Simple & Easy: My recipes continue to focus on readily available ingredients and effortless preparation, perfect for family-friendly meals (no more separate low-FODMAP meal prep!).
Hundreds of existing recipes: Gain access to my entire library of low-FODMAP recipes, all conveniently organized.
You can join for free or sign up for only $5/month. Your support fuels my passion for creating new, delicious, and easy-to-make low-FODMAP recipes just for you.
Let's go on this delicious low-FODMAP journey together.
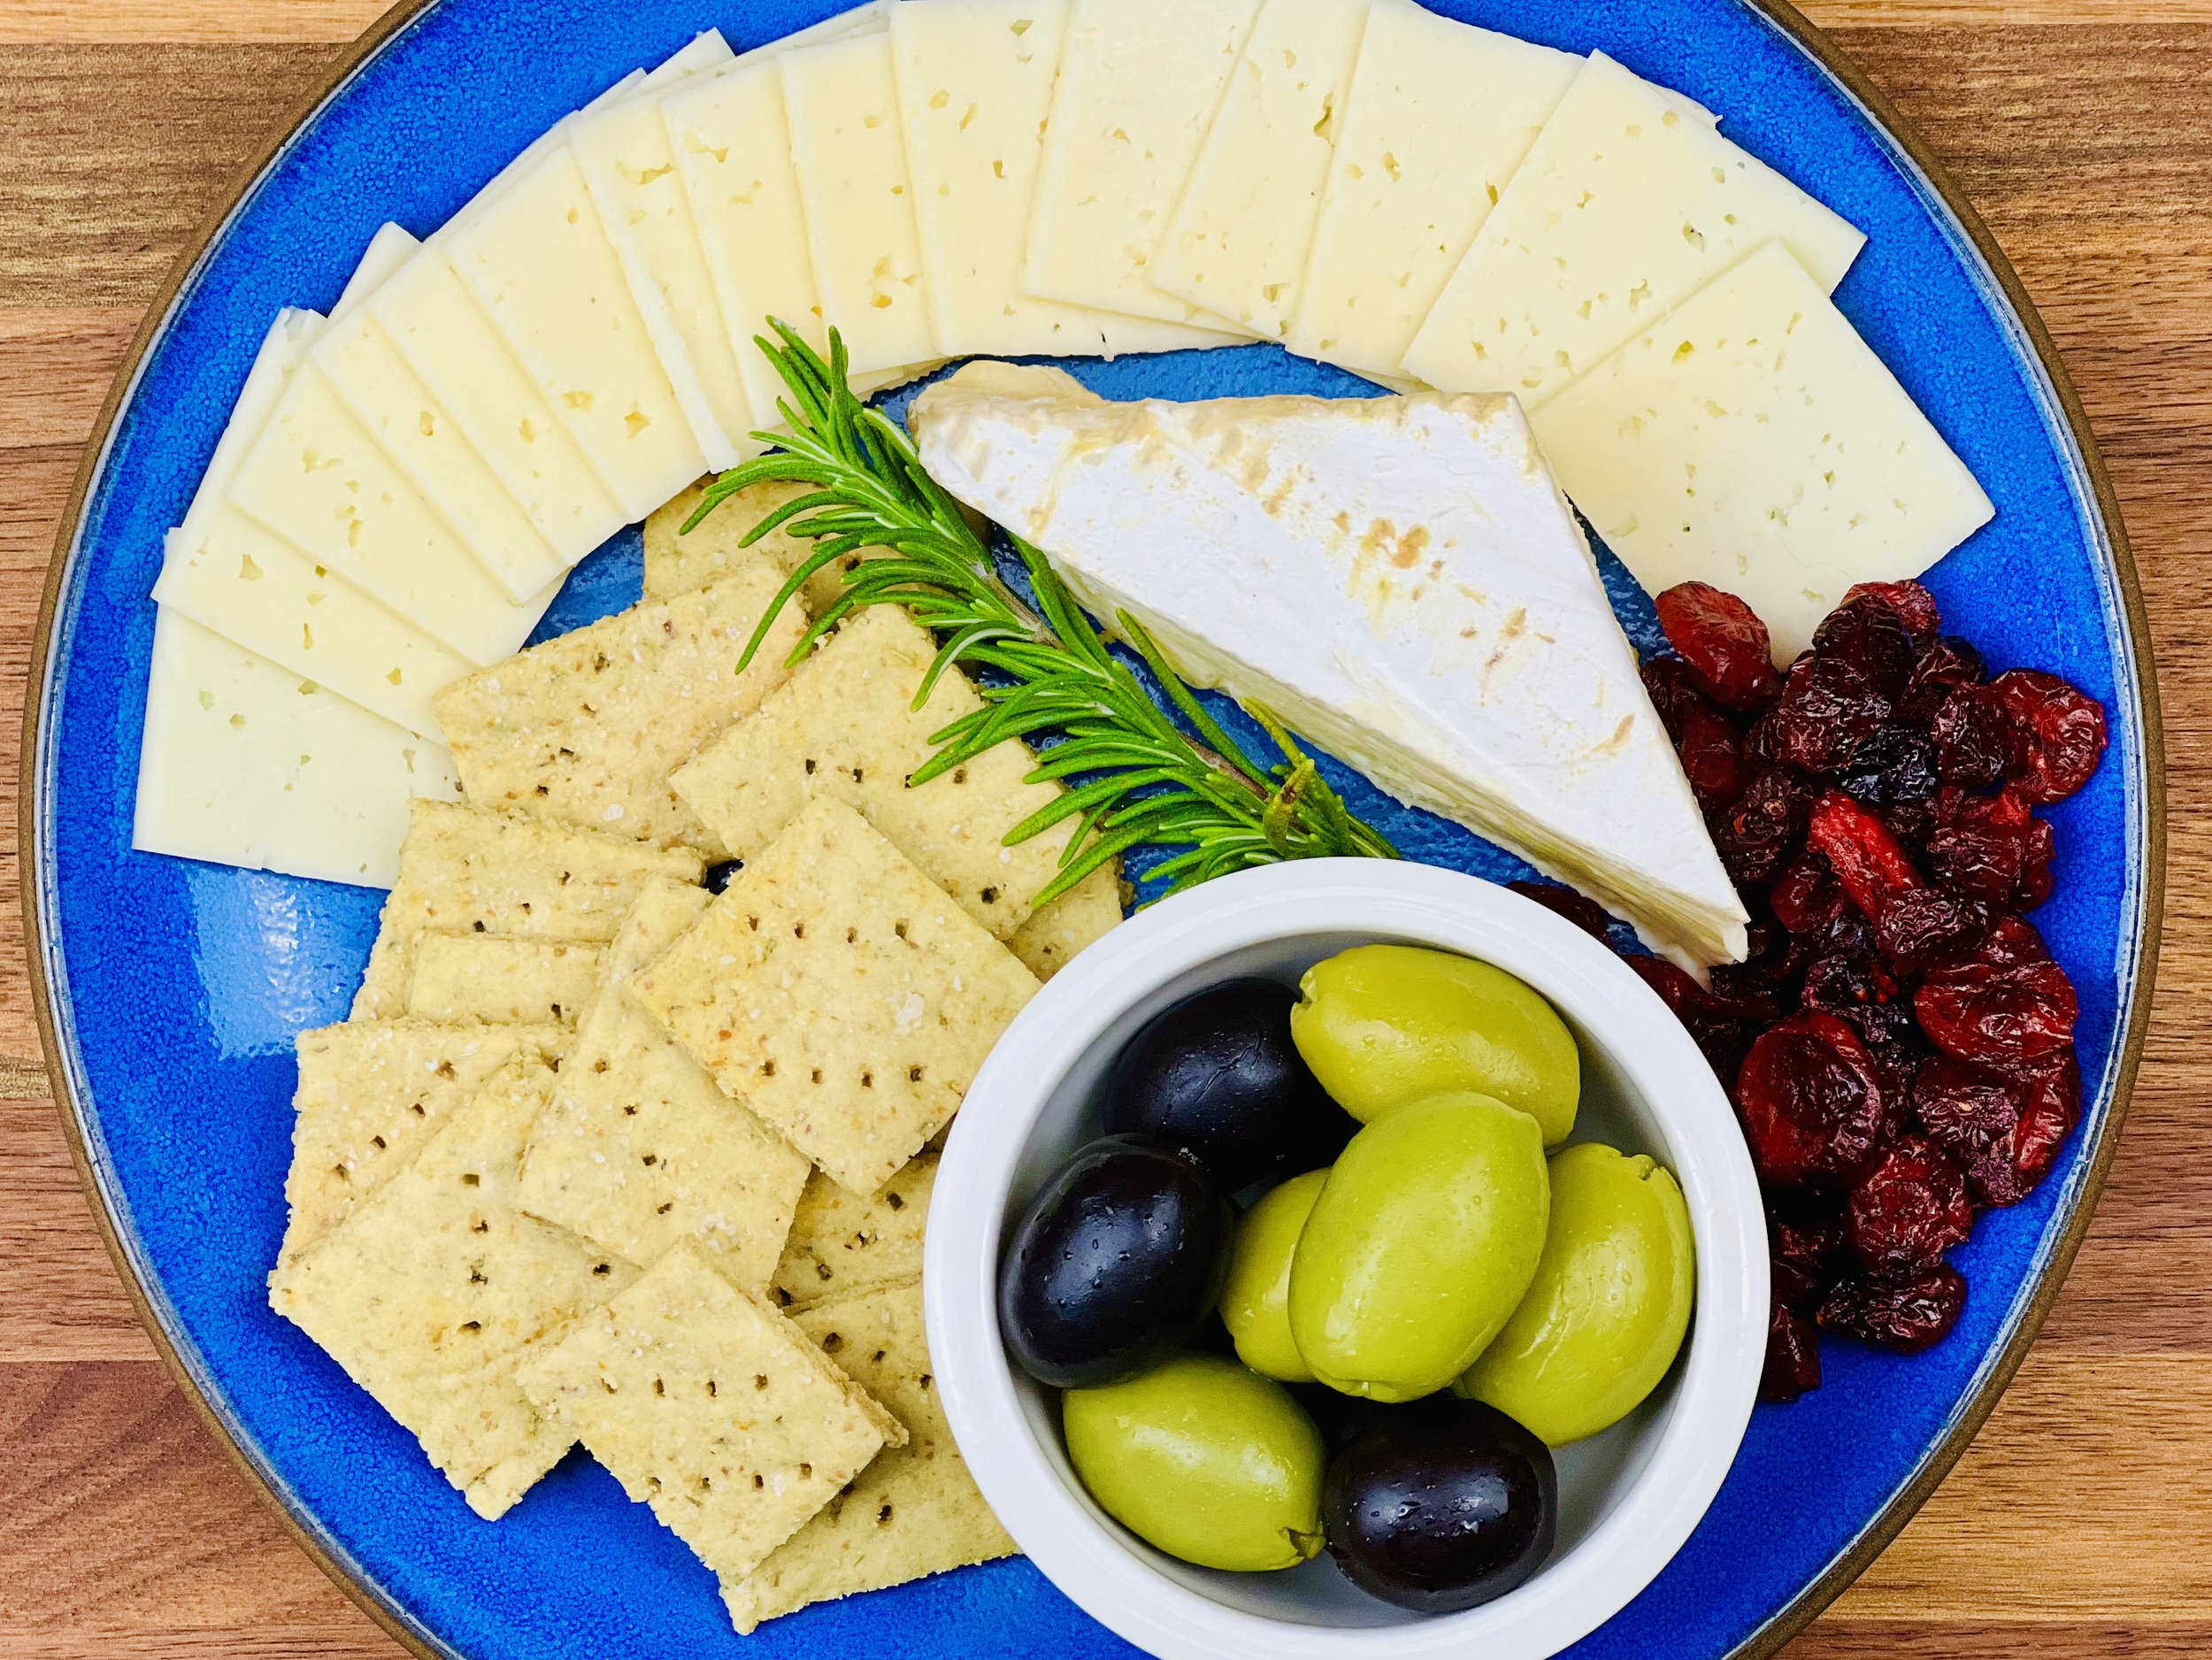
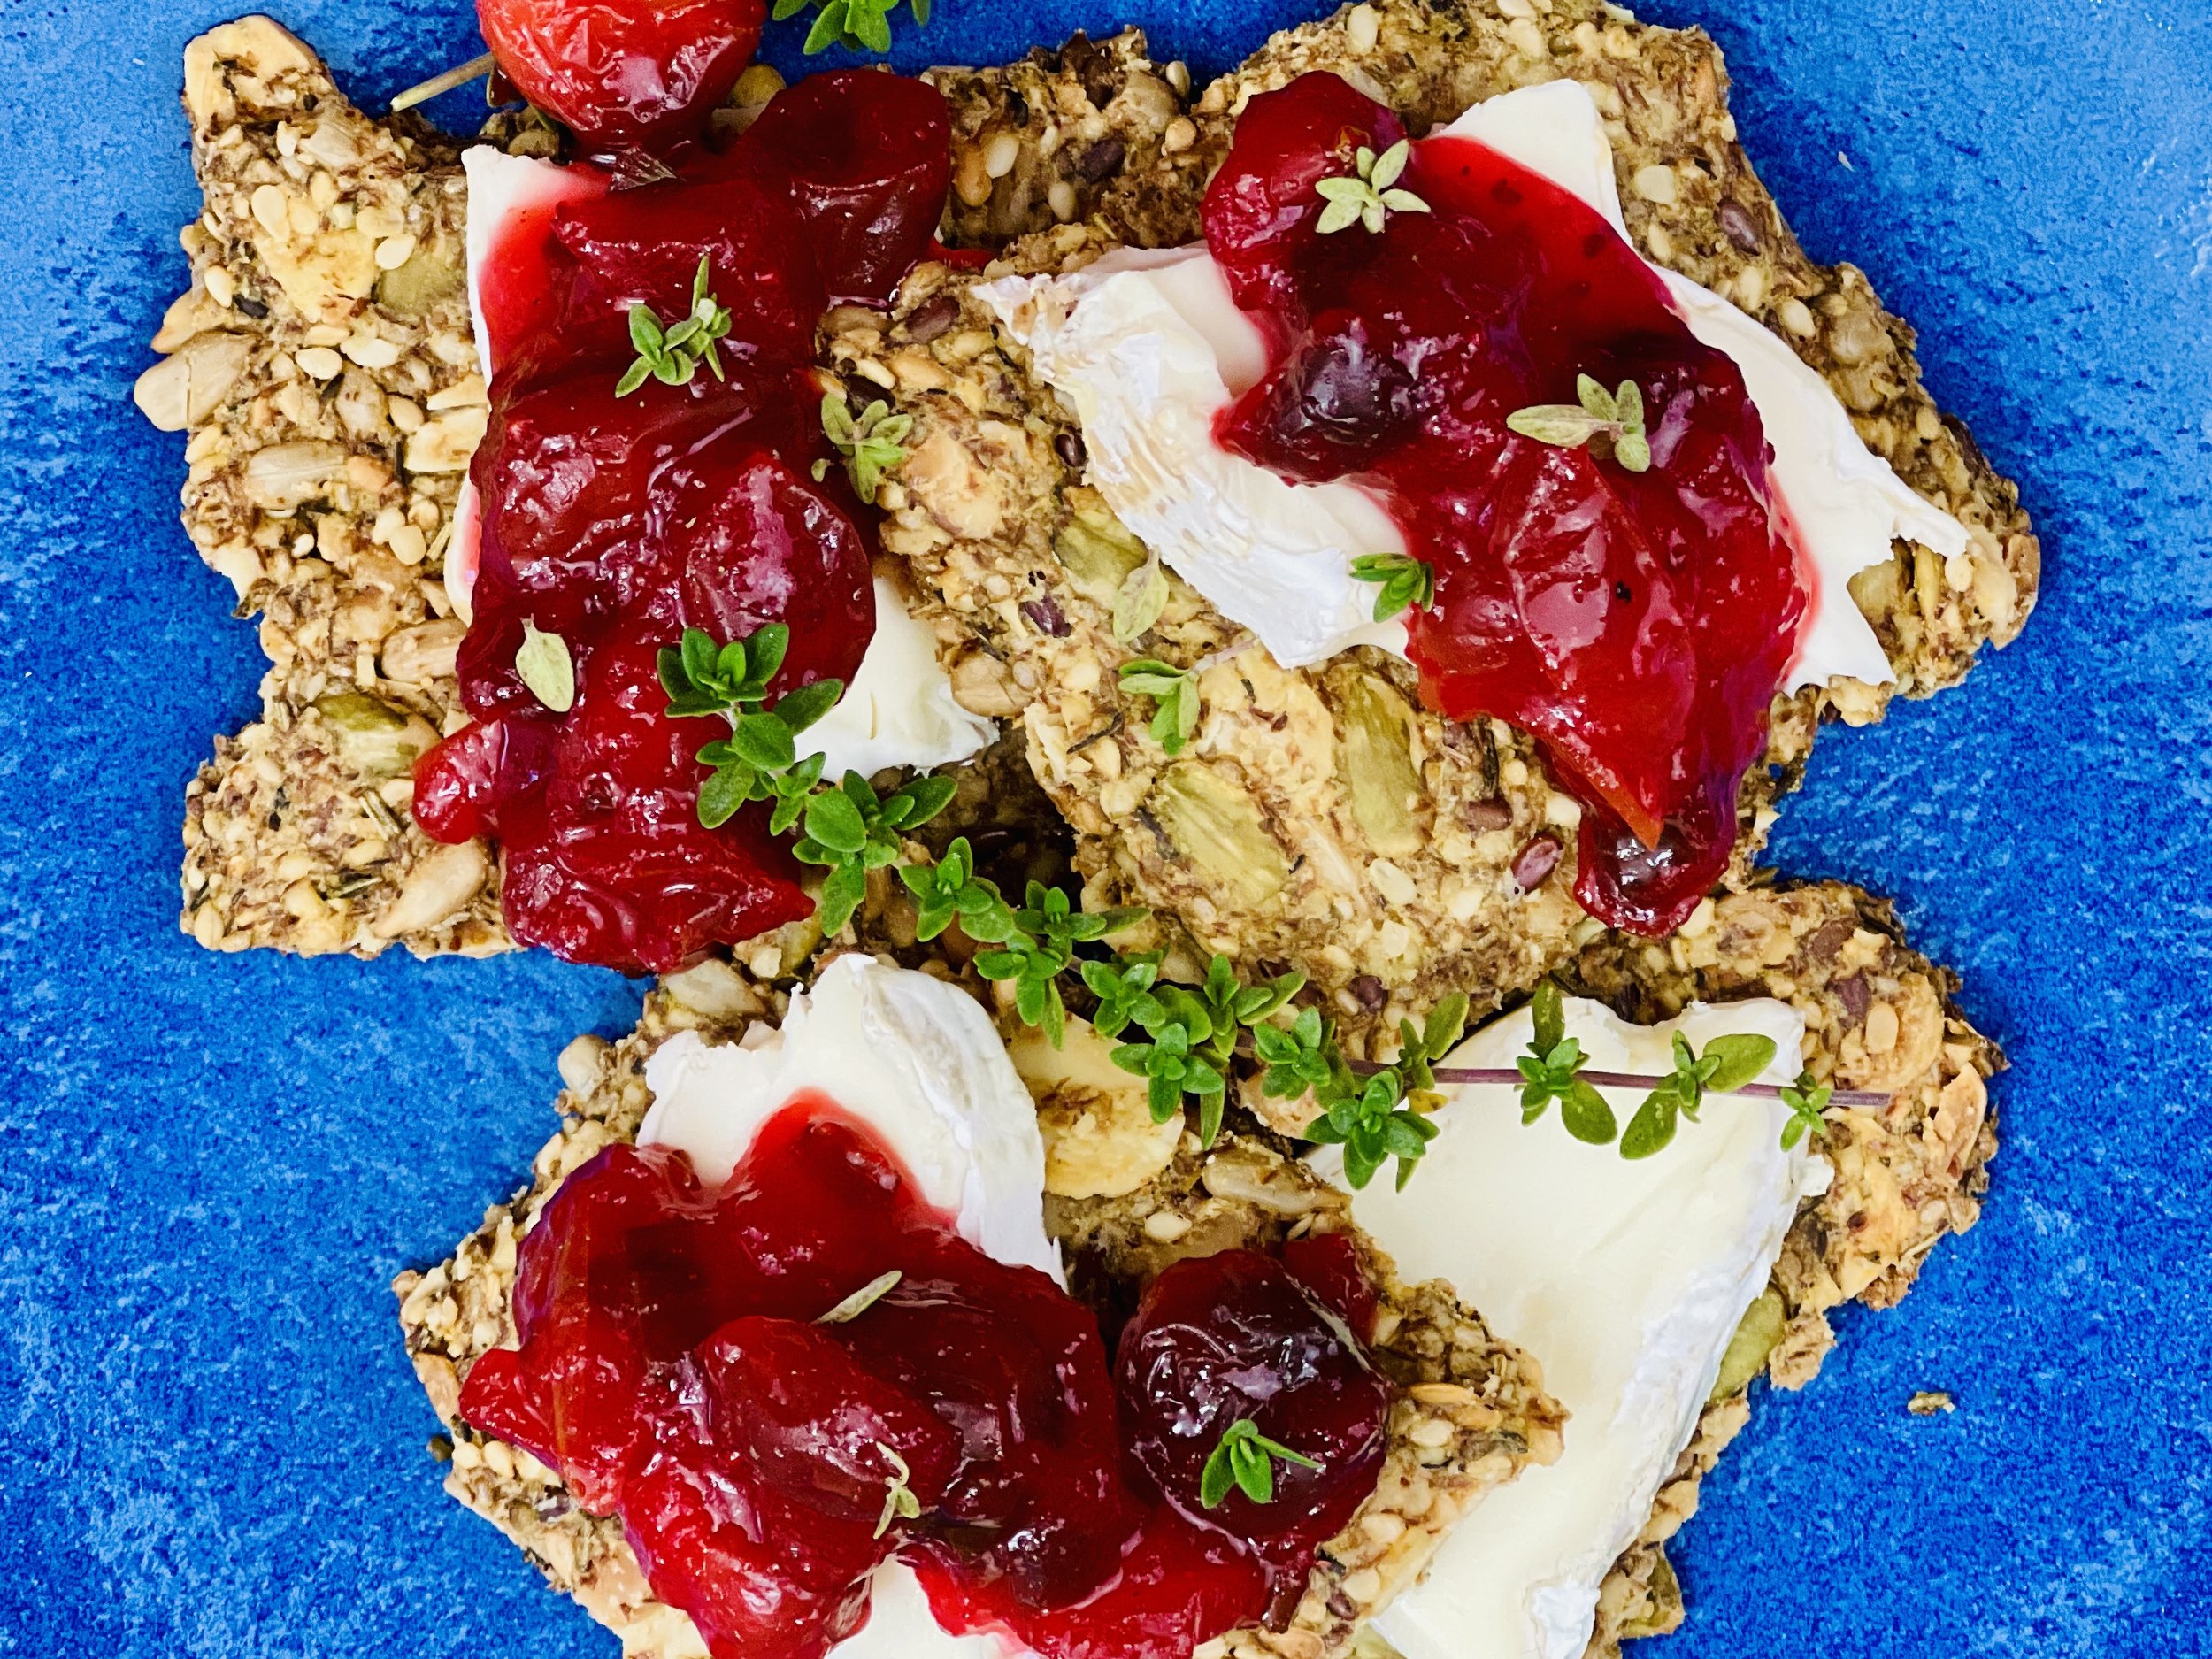
Rosemary Almond Flour Crackers (Low FODMAP)
5 Minutes prep • 20 Minutes cook • Low FODMAP • Gluten-Free • Lactose-free • Makes 36
5 Minutes prep • 20 Minutes cook • Low FODMAP • Gluten-Free • Lactose-free • Makes 36 • Ok to make-ahead: Steps 1 - 5
Craving crispy, savory crackers? These Rosemary Almond Flour Crackers are the perfect guilt-free treat! Made with almond flour, spices, and fragrant rosemary, they're naturally gluten-free and packed with flavor. They’re quick to make and perfect for a healthy snack, an appetizer, or to accompany your favorite dips and cheeses.
See this new recipe in my FREE recipe club.
To streamline your search through hundreds of existing recipes, I'm moving the release of my new weekly creations to the Recipe Club on Patreon. In the club, you’ll get access to a treasure trove of low-FODMAP goodness, complete with collections and filters to use as your virtual cookbook!
Here's what awaits you in the club:
Exclusive weekly recipes: Be the first to try my latest delicious low-FODMAP creations!
Simple & Easy: My recipes continue to focus on readily available ingredients and effortless preparation, perfect for family-friendly meals (no more separate low-FODMAP meal prep!).
Hundreds of existing recipes: Gain access to my entire library of low-FODMAP recipes, all conveniently organized.
You can join for free or sign up for only $5/month. Your support fuels my passion for creating new, delicious, and easy-to-make low-FODMAP recipes just for you.
Let's go on this delicious low-FODMAP journey together.
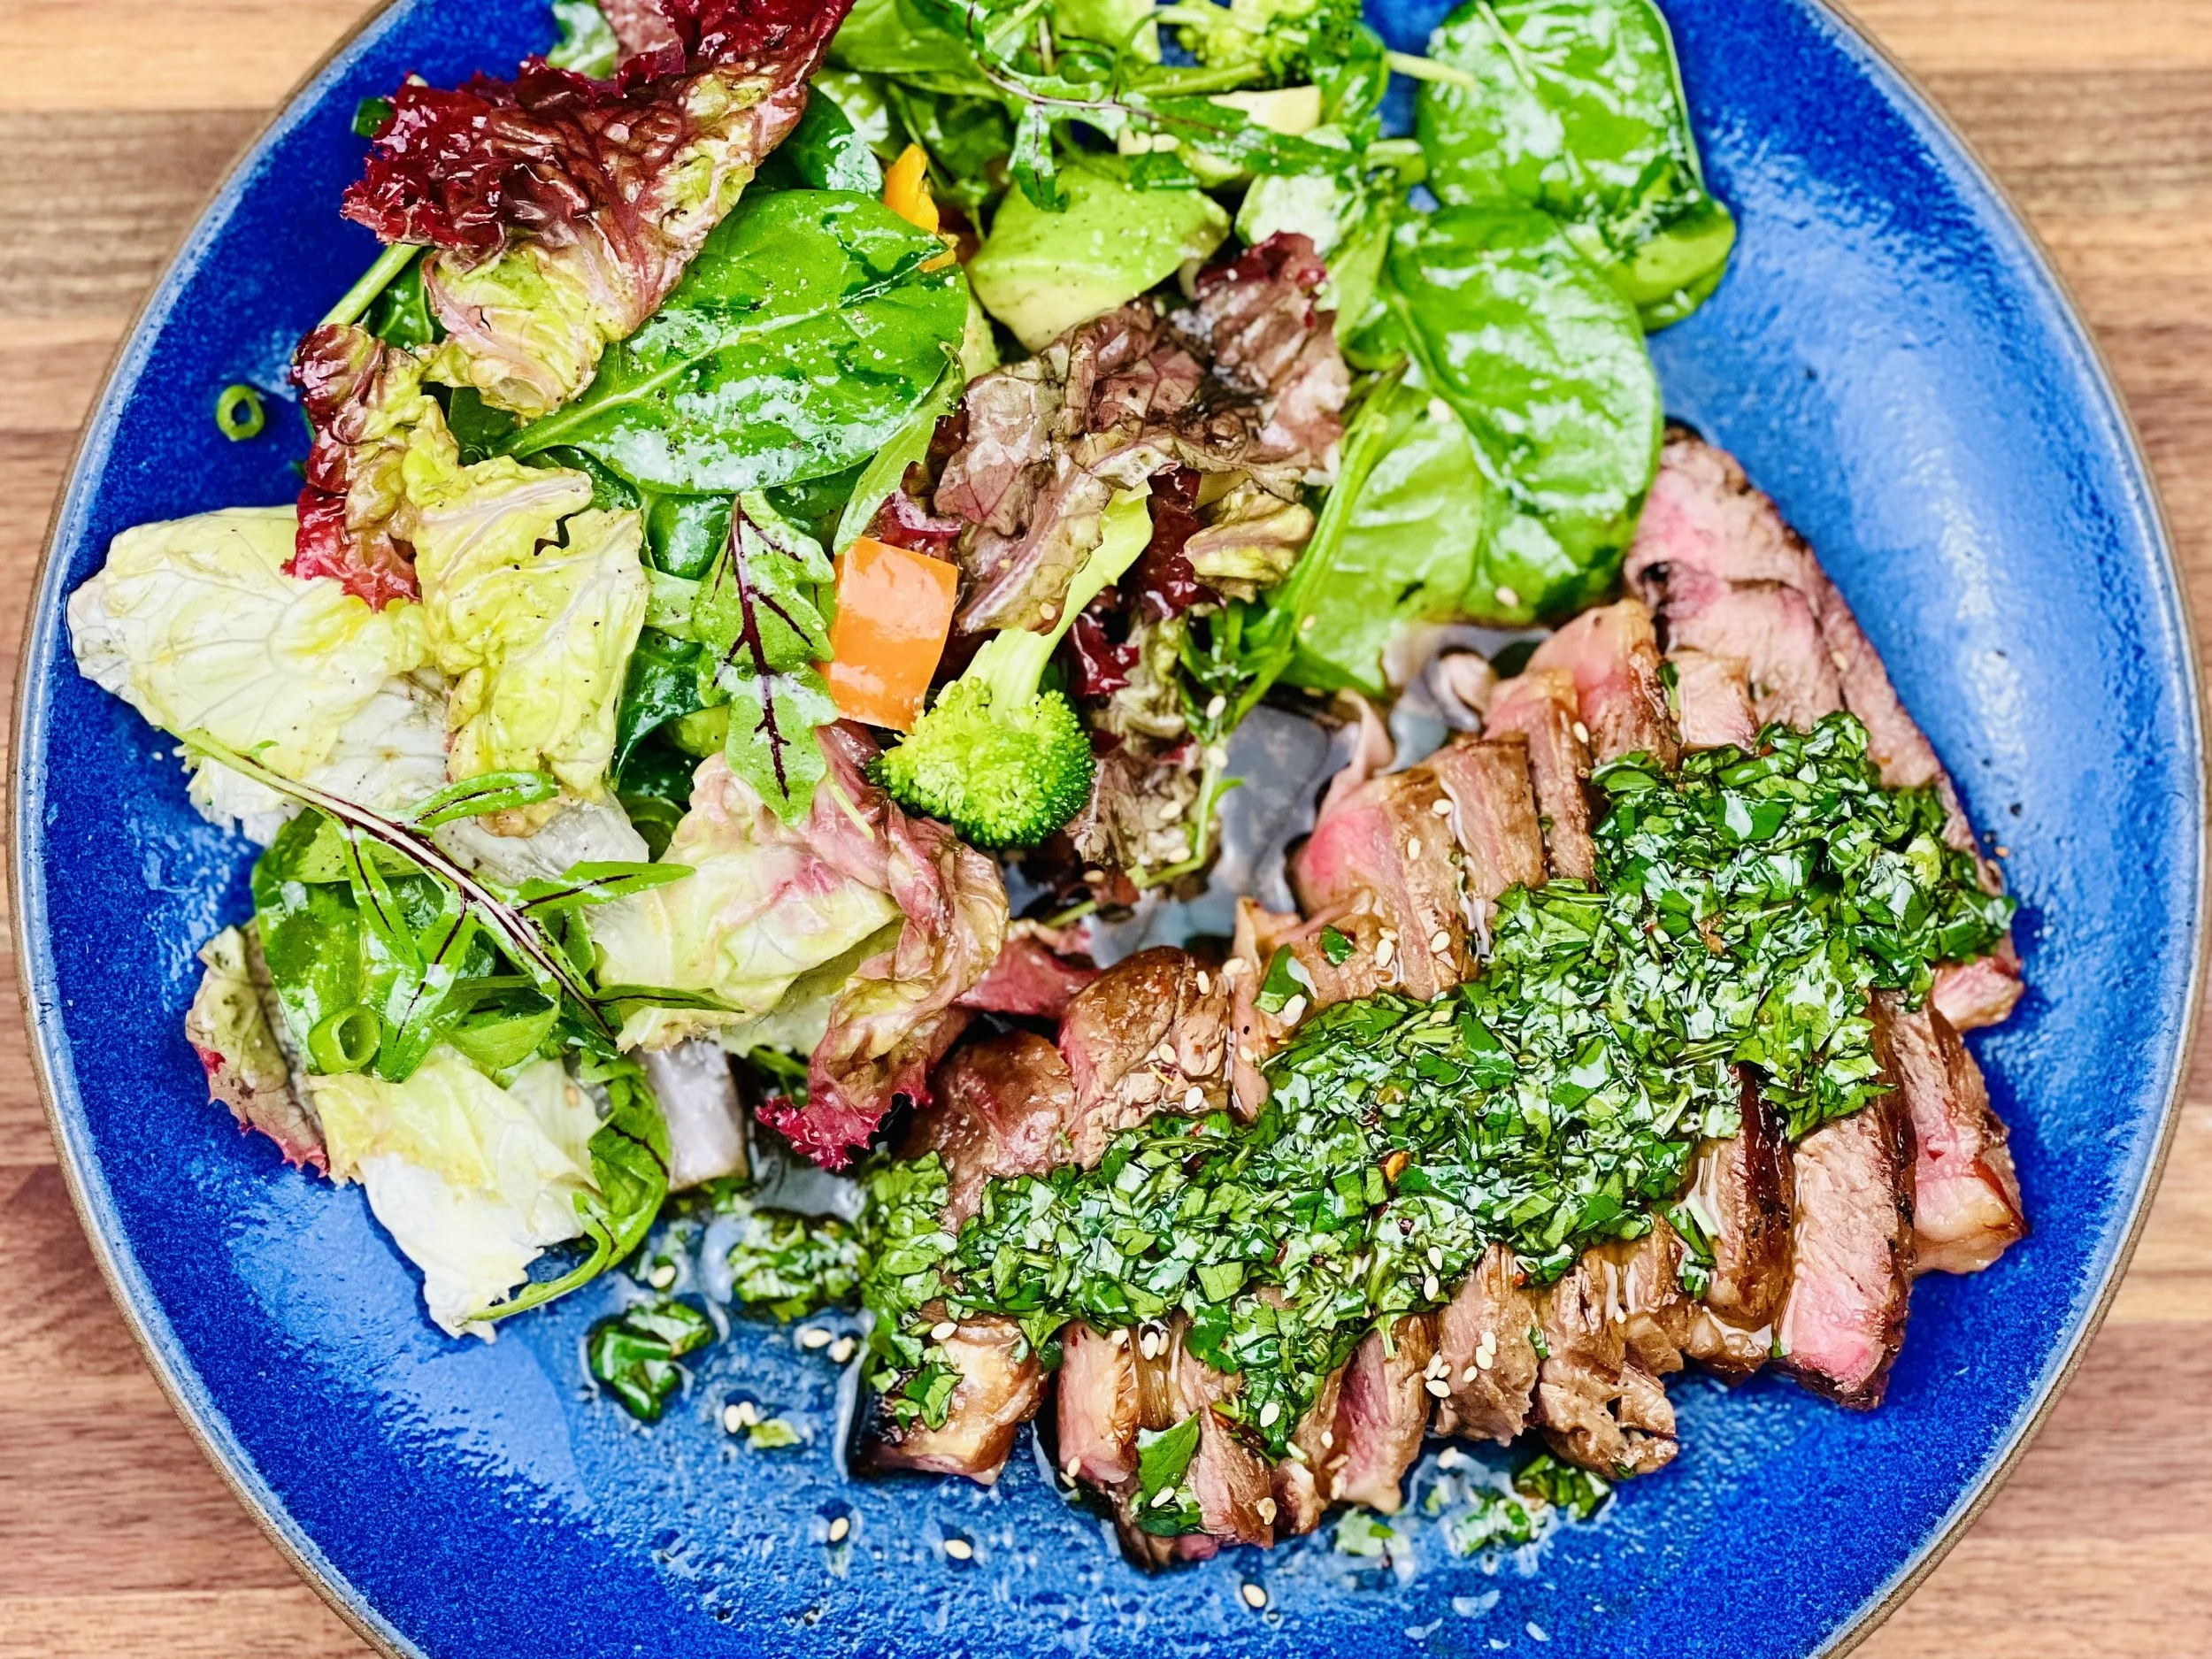
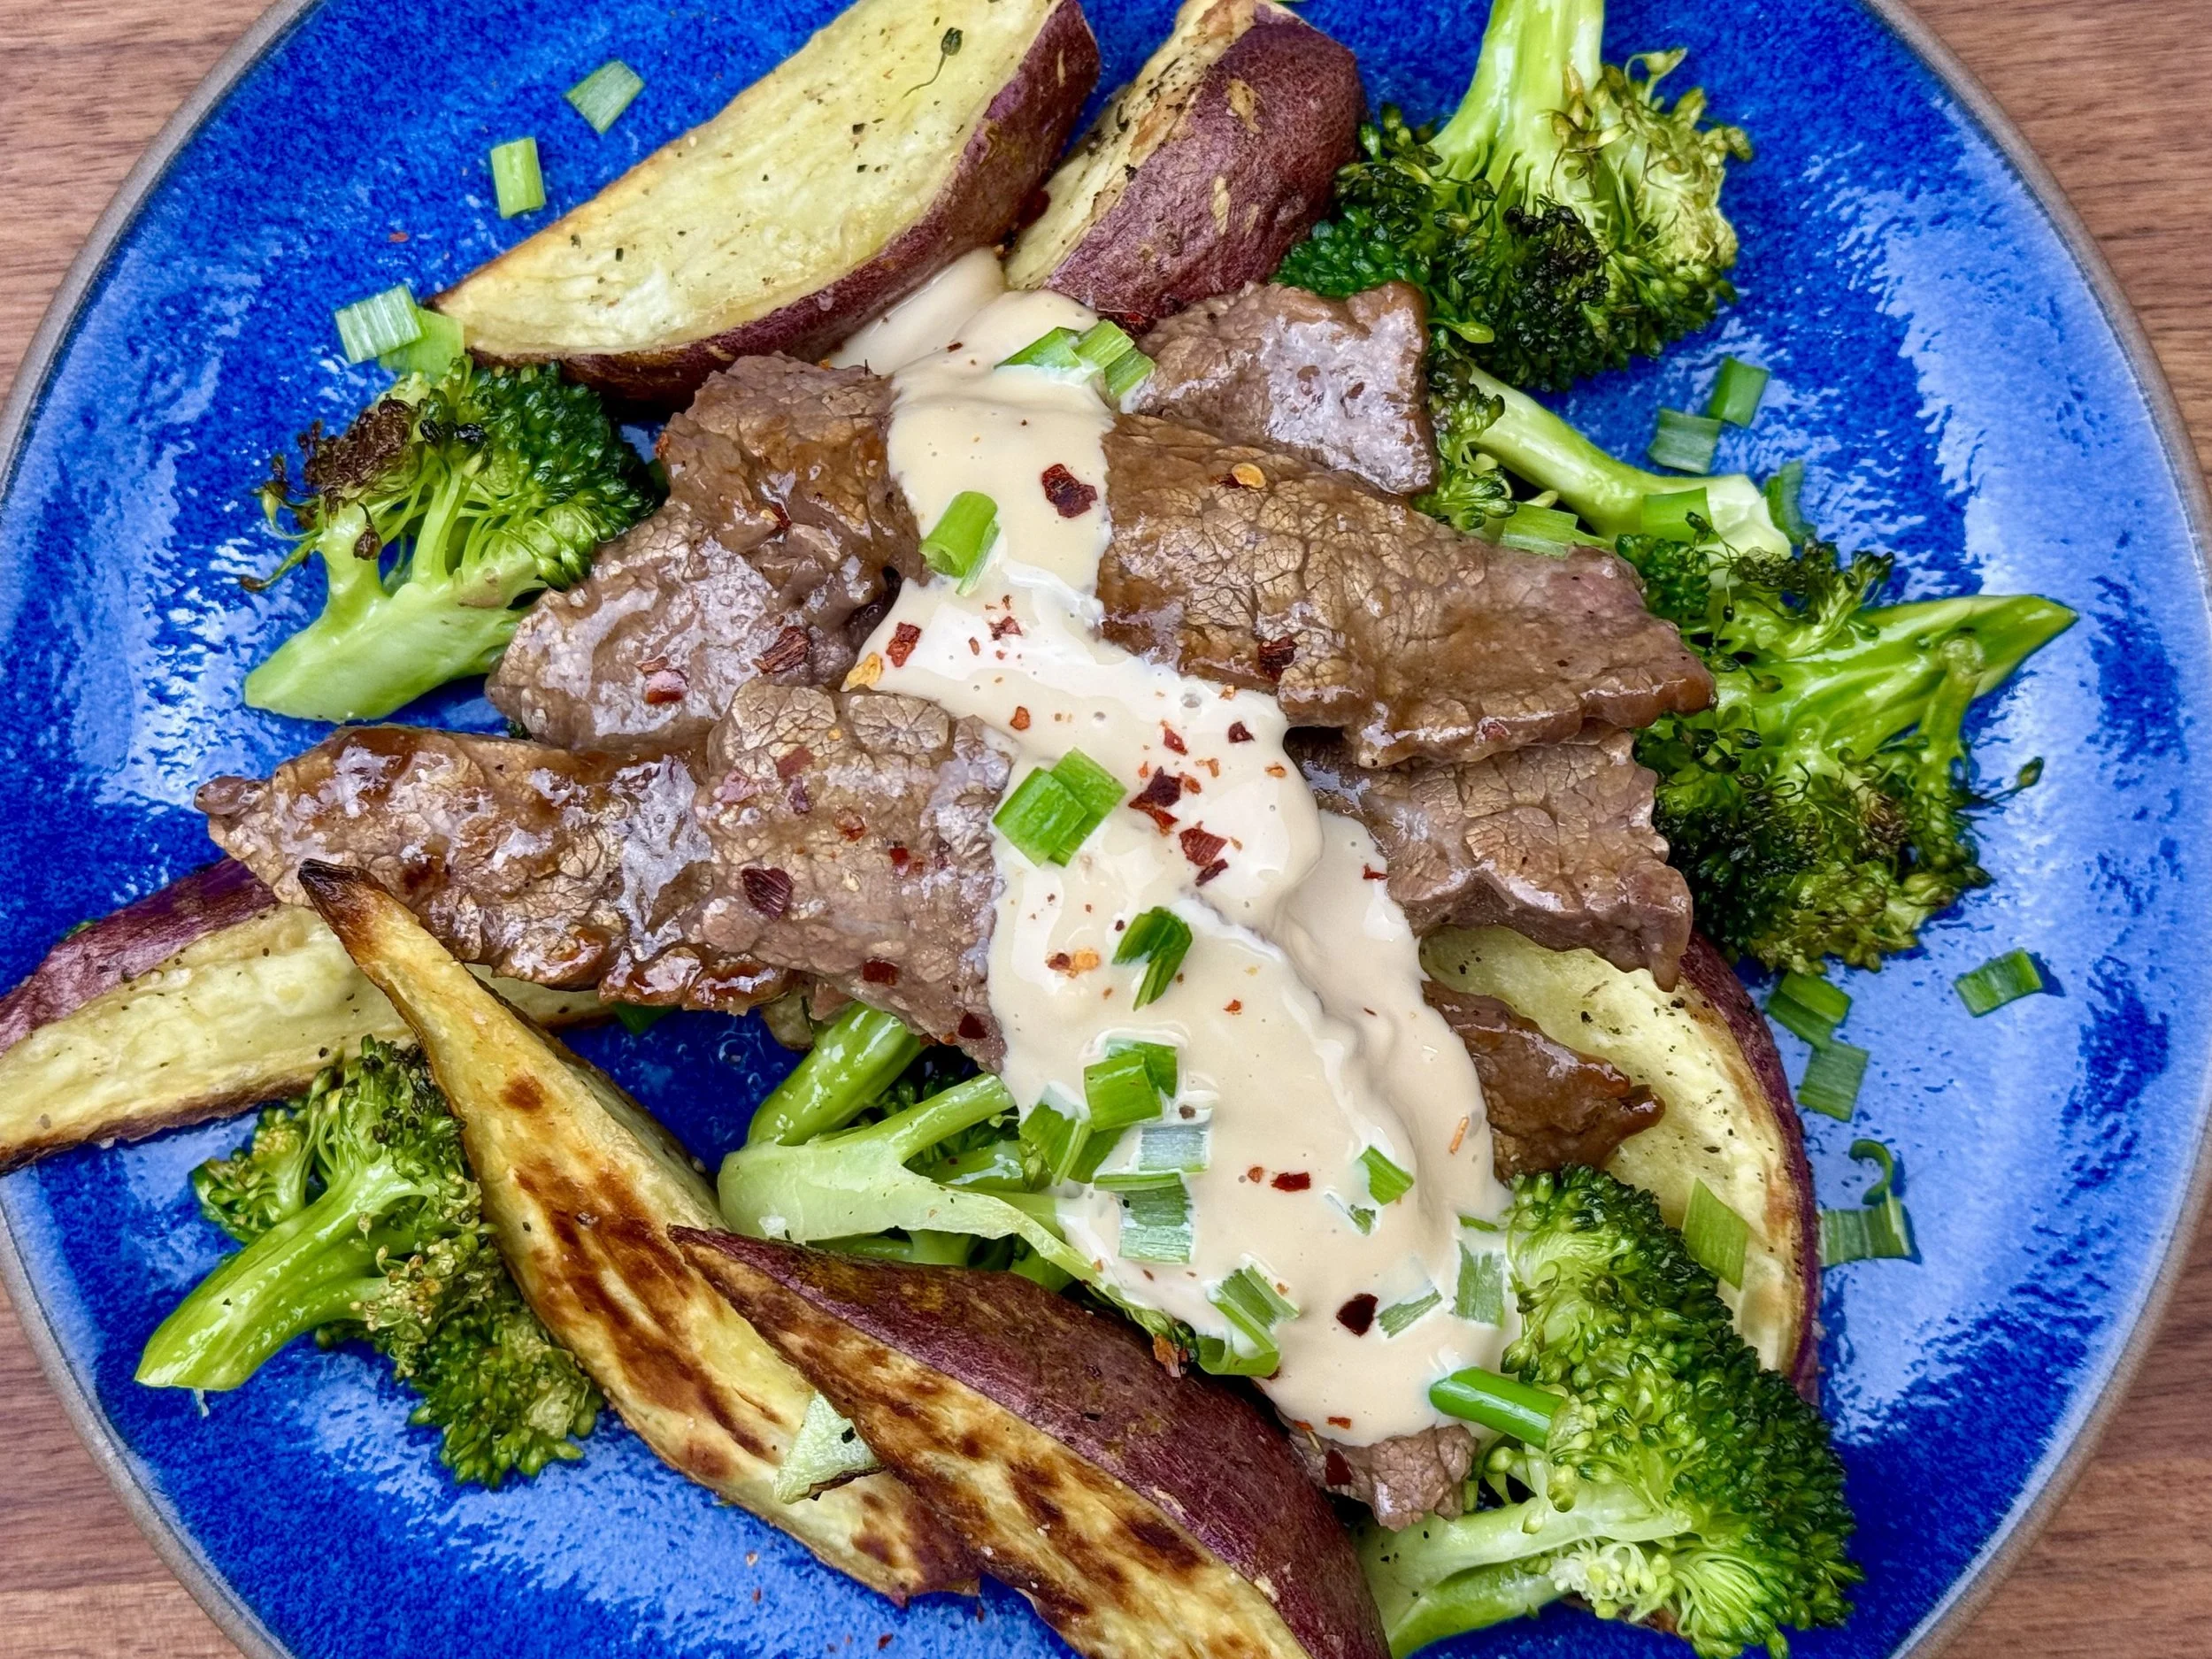
Ellie’s Korean Style Steak (Low FODMAP)
2 Hours marinate • 20 Minutes cook • Low FODMAP • Gluten-Free • Lactose-free • Serves 4
2 Hours marinate • 20 Minutes cook • Low FODMAP • Gluten-Free • Lactose-free • Serves 4 • Ok to make-ahead: Step 1
It’s time to change up your steak night with this bold and savory Korean-inspired recipe. Marinated in a sweet and savory blend of soy sauce, sesame oil, and a Low FODMAP garlic infusion, this tender steak is packed with umami flavor. Perfect for a quick weeknight dinner or a special occasion, this recipe is sure to please everyone at the table.
See this new recipe in my FREE recipe club.
To streamline your search through hundreds of existing recipes, I'm moving the release of my new weekly creations to the Recipe Club on Patreon. In the club, you’ll get access to a treasure trove of low-FODMAP goodness, complete with collections and filters to use as your virtual cookbook!
Here's what awaits you in the club:
Exclusive weekly recipes: Be the first to try my latest delicious low-FODMAP creations!
Simple & Easy: My recipes continue to focus on readily available ingredients and effortless preparation, perfect for family-friendly meals (no more separate low-FODMAP meal prep!).
Hundreds of existing recipes: Gain access to my entire library of low-FODMAP recipes, all conveniently organized.
You can join for free or sign up for only $5/month. Your support fuels my passion for creating new, delicious, and easy-to-make low-FODMAP recipes just for you.
Let's go on this delicious low-FODMAP journey together.
Cranberry Chutney (Low FODMAP)
5 Minutes prep • 15 Minutes cook • Low FODMAP • Gluten-Free • Lactose-Free • Makes 2 cups
5 Minutes prep • 15 Minutes cook • Low FODMAP • Gluten-Free • Lactose-Free • Makes 2 cups • Ok to make-ahead: Steps 1 - 4
This lightly spicy and sweet cranberry chutney is the perfect accompaniment to your holiday feast or a delightful spread for any occasion. Bursting with the vibrant flavors of cranberries, apples, and warm spices, this chutney is easy to make and even easier to love. Whether you serve it with roasted meats, cheese, and my seed crackers, or simply enjoy it on its own, this recipe is sure to become a new family favorite.
See this new recipe in my FREE recipe club.
To streamline your search through hundreds of existing recipes, I'm moving the release of my new weekly creations to the Recipe Club on Patreon. In the club, you’ll get access to a treasure trove of low-FODMAP goodness, complete with collections and filters to use as your virtual cookbook!
Here's what awaits you in the club:
Exclusive weekly recipes: Be the first to try my latest delicious low-FODMAP creations!
Simple & Easy: My recipes continue to focus on readily available ingredients and effortless preparation, perfect for family-friendly meals (no more separate low-FODMAP meal prep!).
Hundreds of existing recipes: Gain access to my entire library of low-FODMAP recipes, all conveniently organized.
You can join for free or sign up for only $5/month. Your support fuels my passion for creating new, delicious, and easy-to-make low-FODMAP recipes just for you.
Let's go on this delicious low-FODMAP journey together.
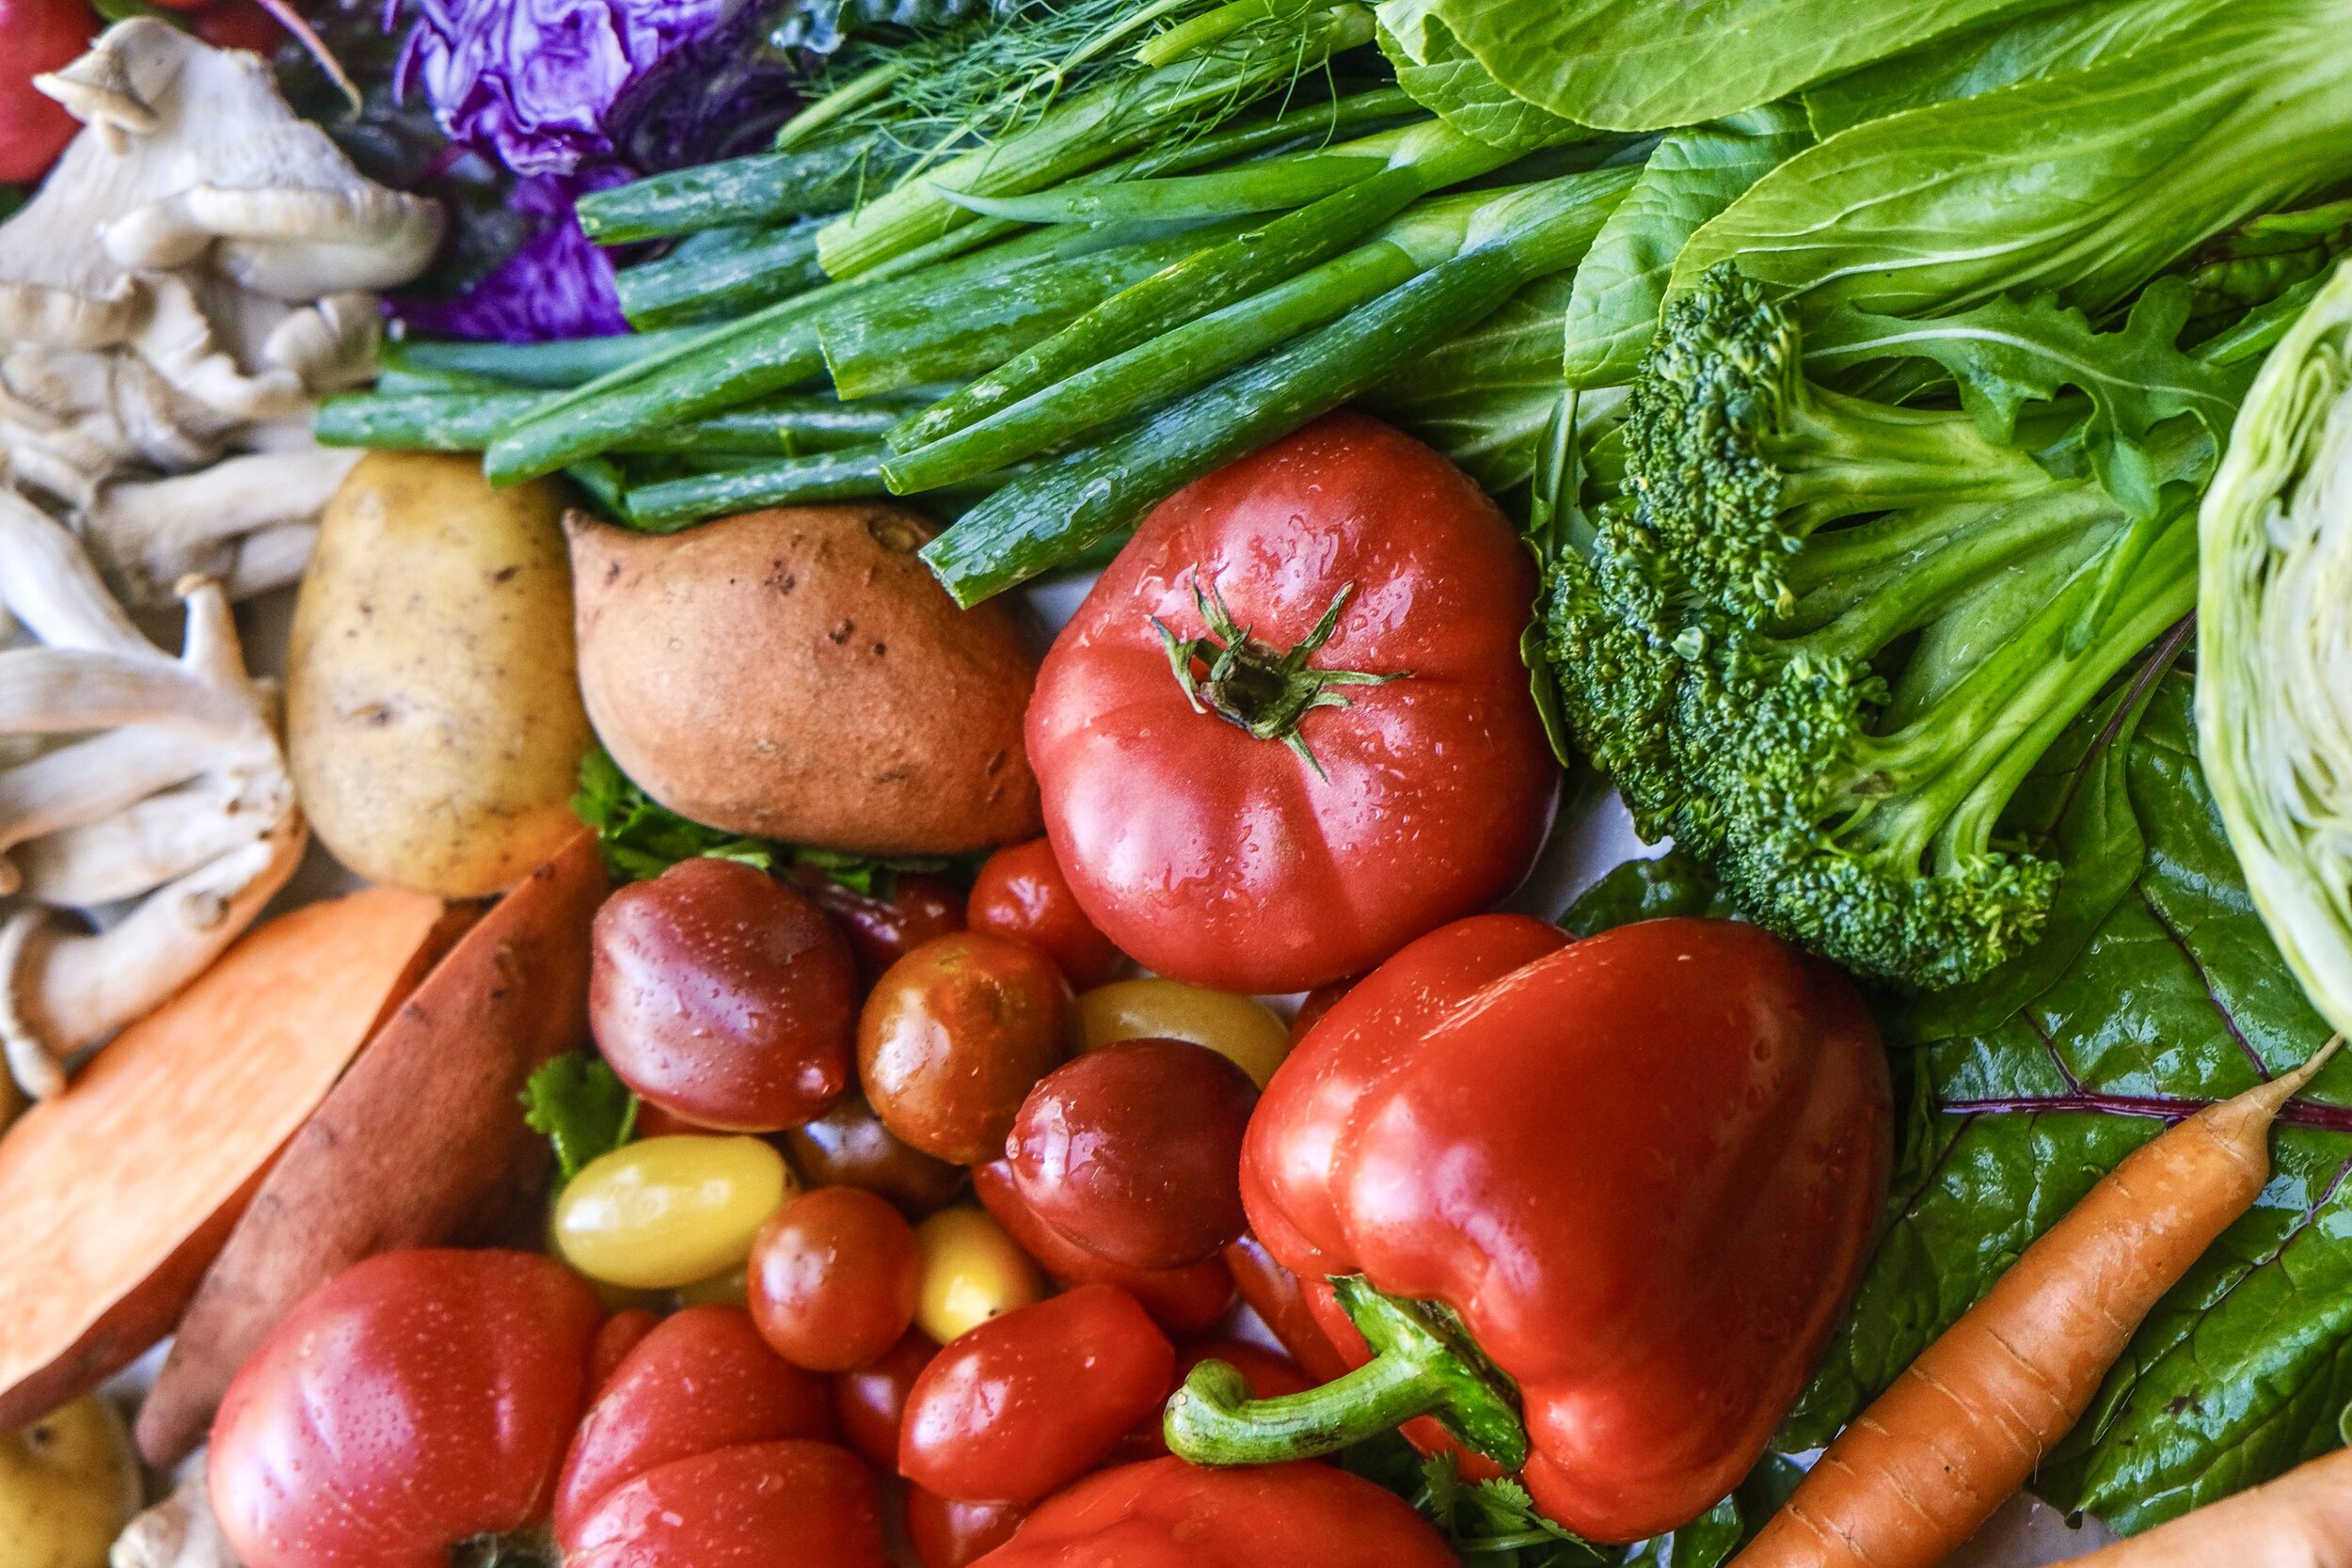
Embracing the abundance of what you CAN eat without consequences is a Game Changer
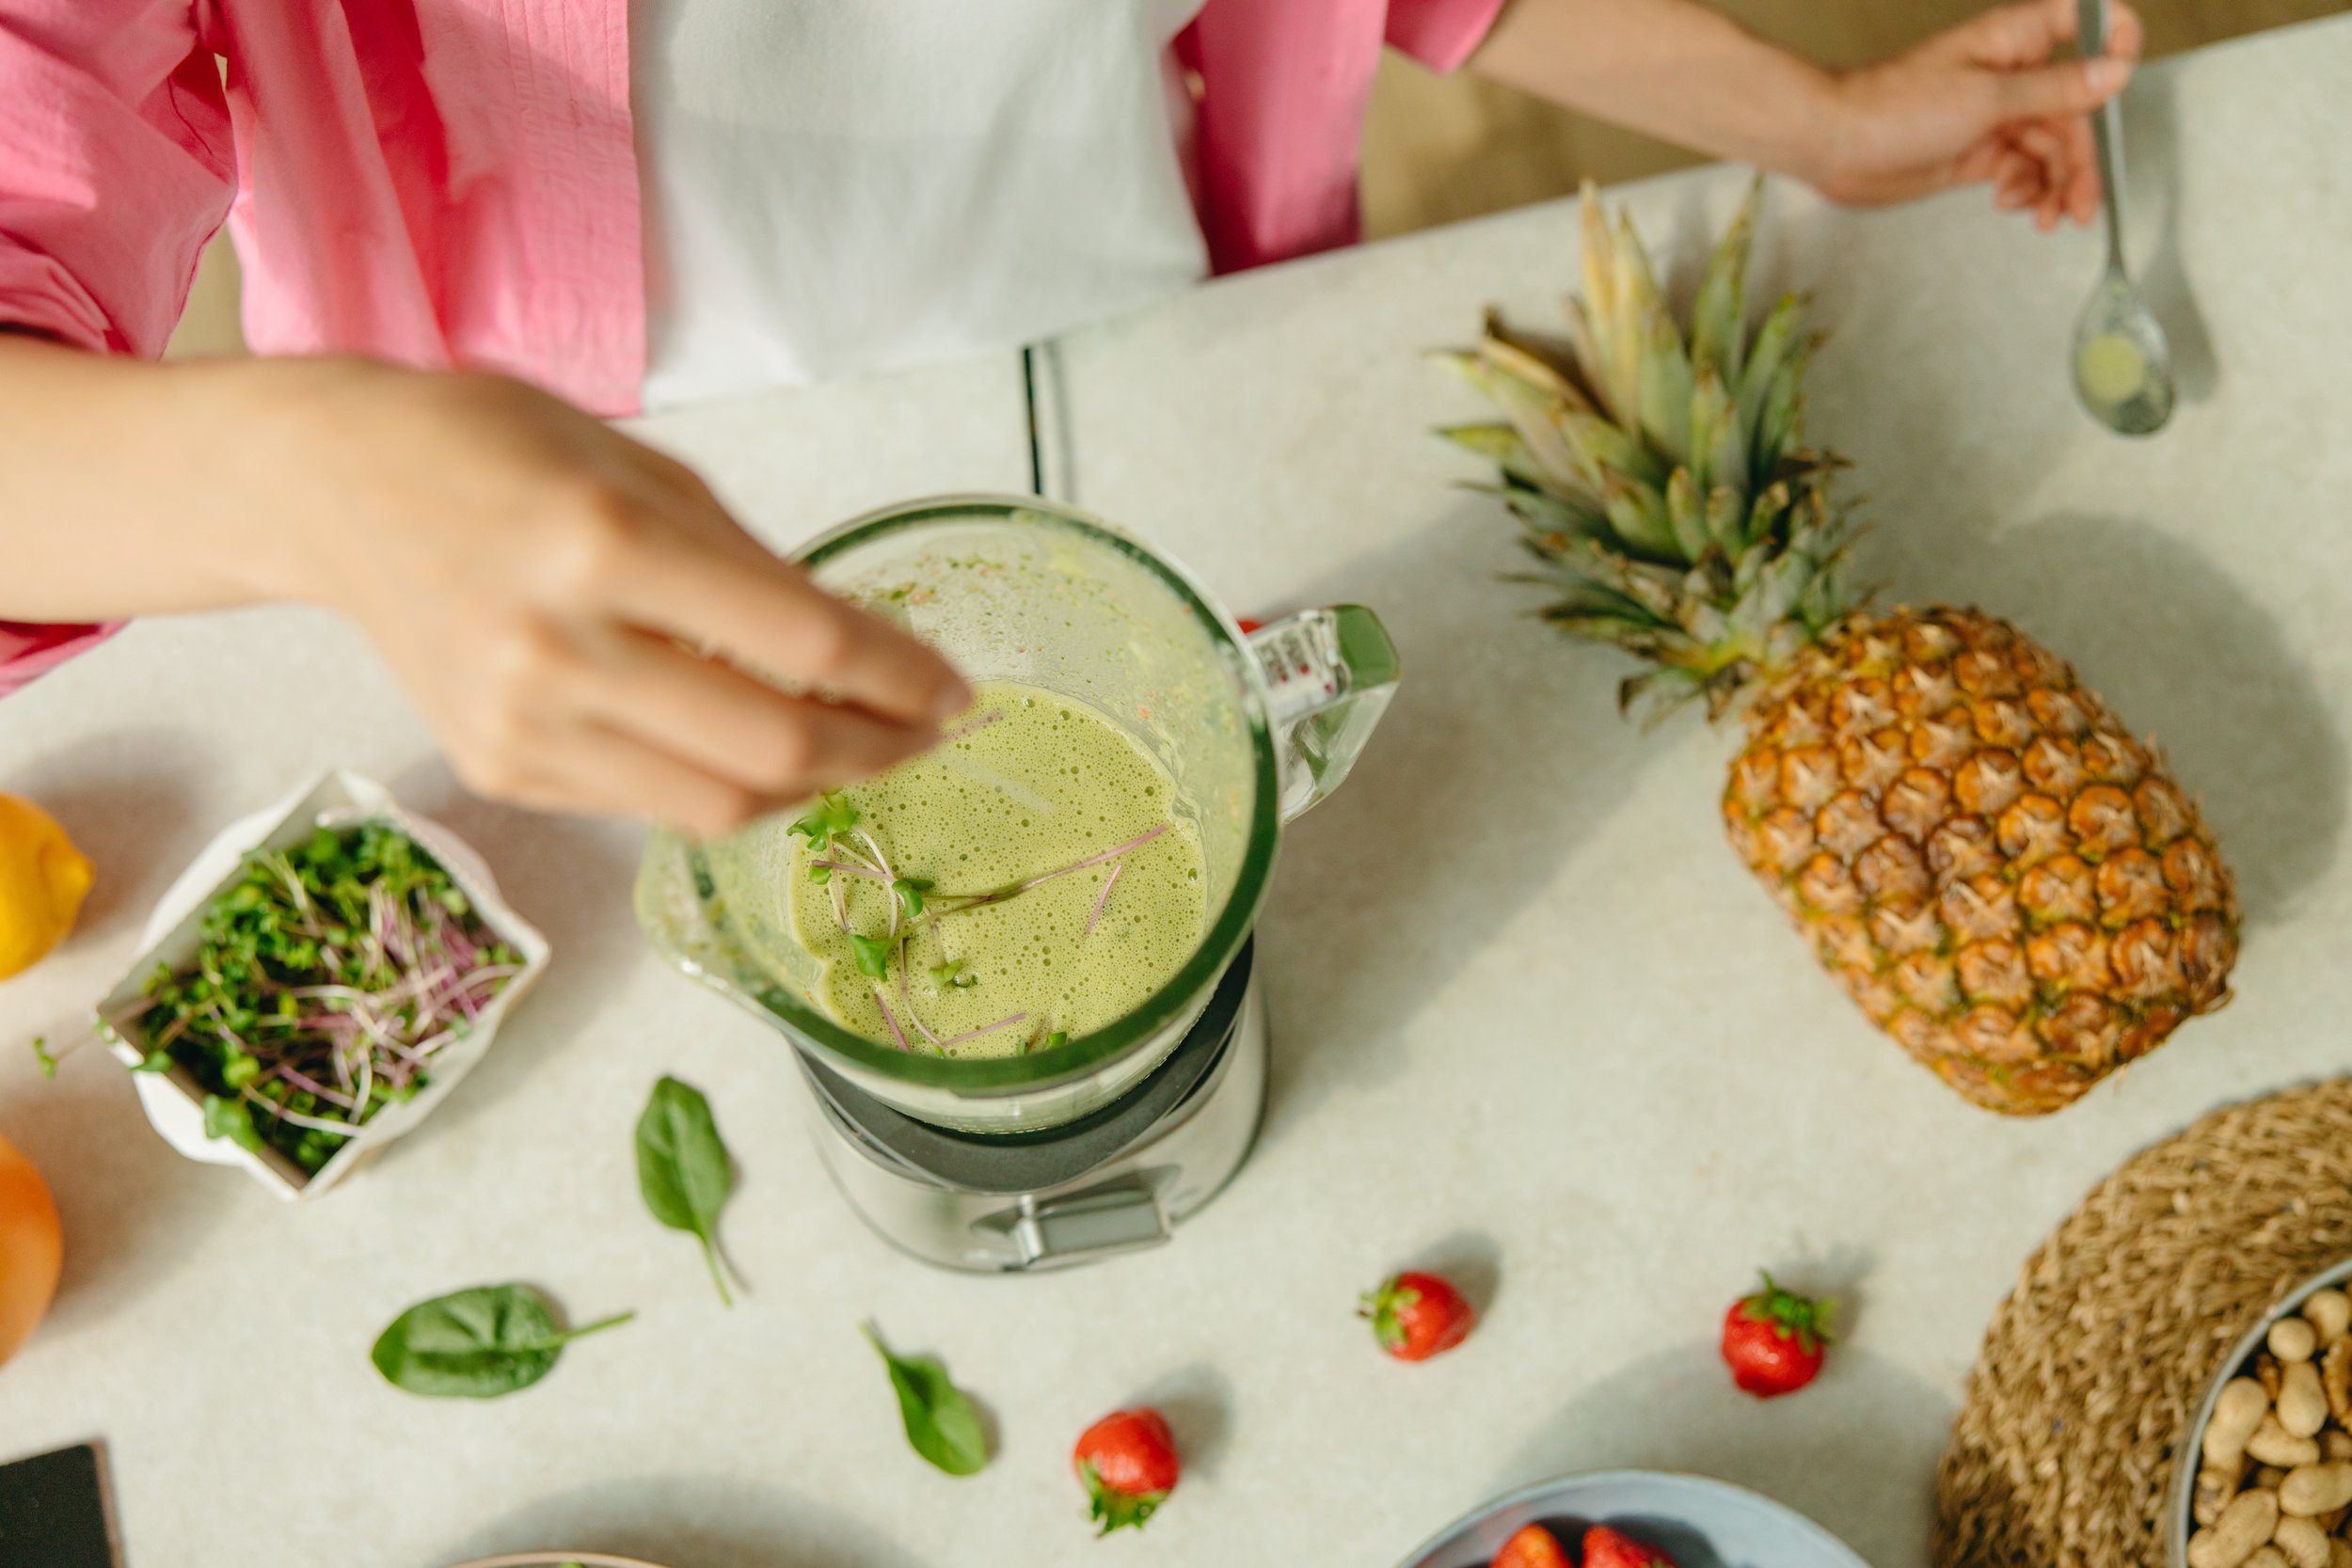
Tired of feeling restricted by food limitations?
Tired of feeling restricted by food limitations? Break free from the monotony and nourish your body and gut. Explore the vast array of foods you can enjoy with the Monash FODMAP app and my recipe club. It's time to embrace a diverse and delicious diet!
Sometimes when we have issues with food, we get stuck on thinking about all the things we can't eat. And, we end up "painting ourselves into a corner" and eating the same thing over and over again. This is monotonous and boring. And, it means you suffer, your gut biome suffers, and it can lead to "cheats" that cause major flare-ups. How can you change that cycle? Embrace the abundance of foods you CAN eat! Use the Monash app on your phone to explore foods you haven't considered. Dive into my recipe club and be a little adventurous! Make sure you have plenty of variety in every meal and snack—even if it’s not a large quantity of any one thing.

Discover new recipes in my FREE recipe club.
To streamline your search through hundreds of existing recipes, I'm moving the release of my new weekly creations to the Recipe Club on Patreon. In the club, you’ll get access to a treasure trove of low-FODMAP goodness, complete with collections and filters to use as your virtual cookbook!
Here's what awaits you in the club:
Exclusive weekly recipes: Be the first to try my latest delicious low-FODMAP creations!
Simple & Easy: My recipes continue to focus on readily available ingredients and effortless preparation, perfect for family-friendly meals (no more separate low-FODMAP meal prep!).
Hundreds of existing recipes: Gain access to my entire library of low-FODMAP recipes, all conveniently organized.
You can join for free or sign up for only $5/month. Your support fuels my passion for creating new, delicious, and easy-to-make low-FODMAP recipes just for you.
Let's go on this delicious low-FODMAP journey together.
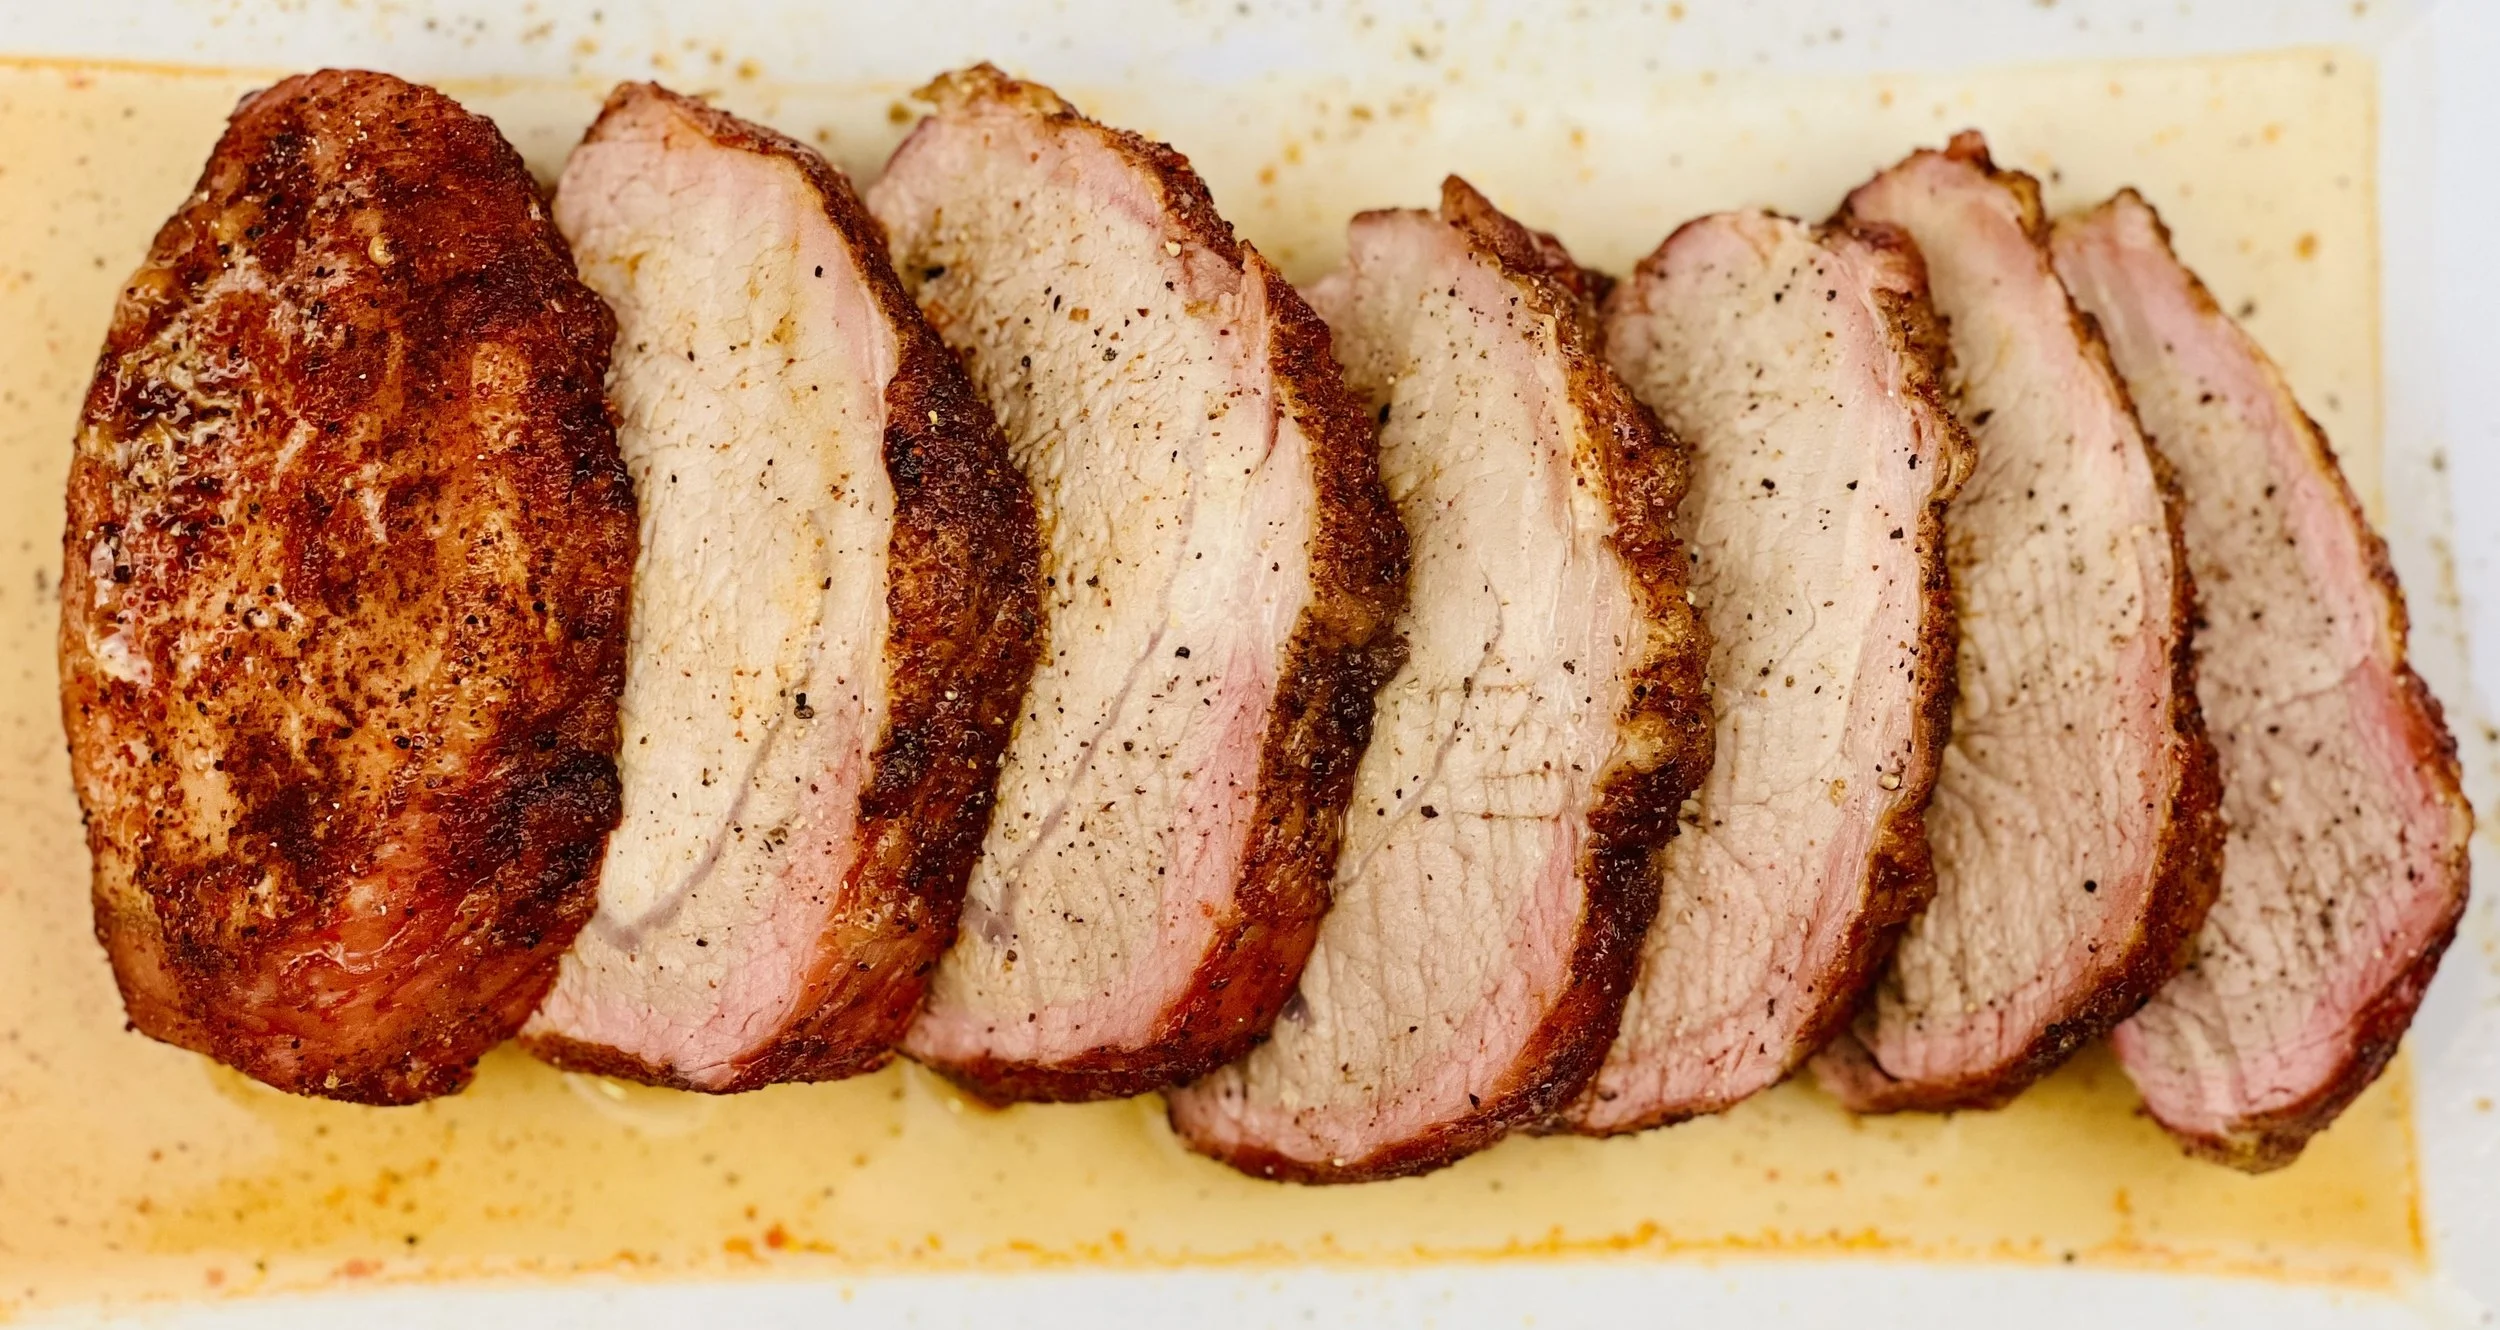
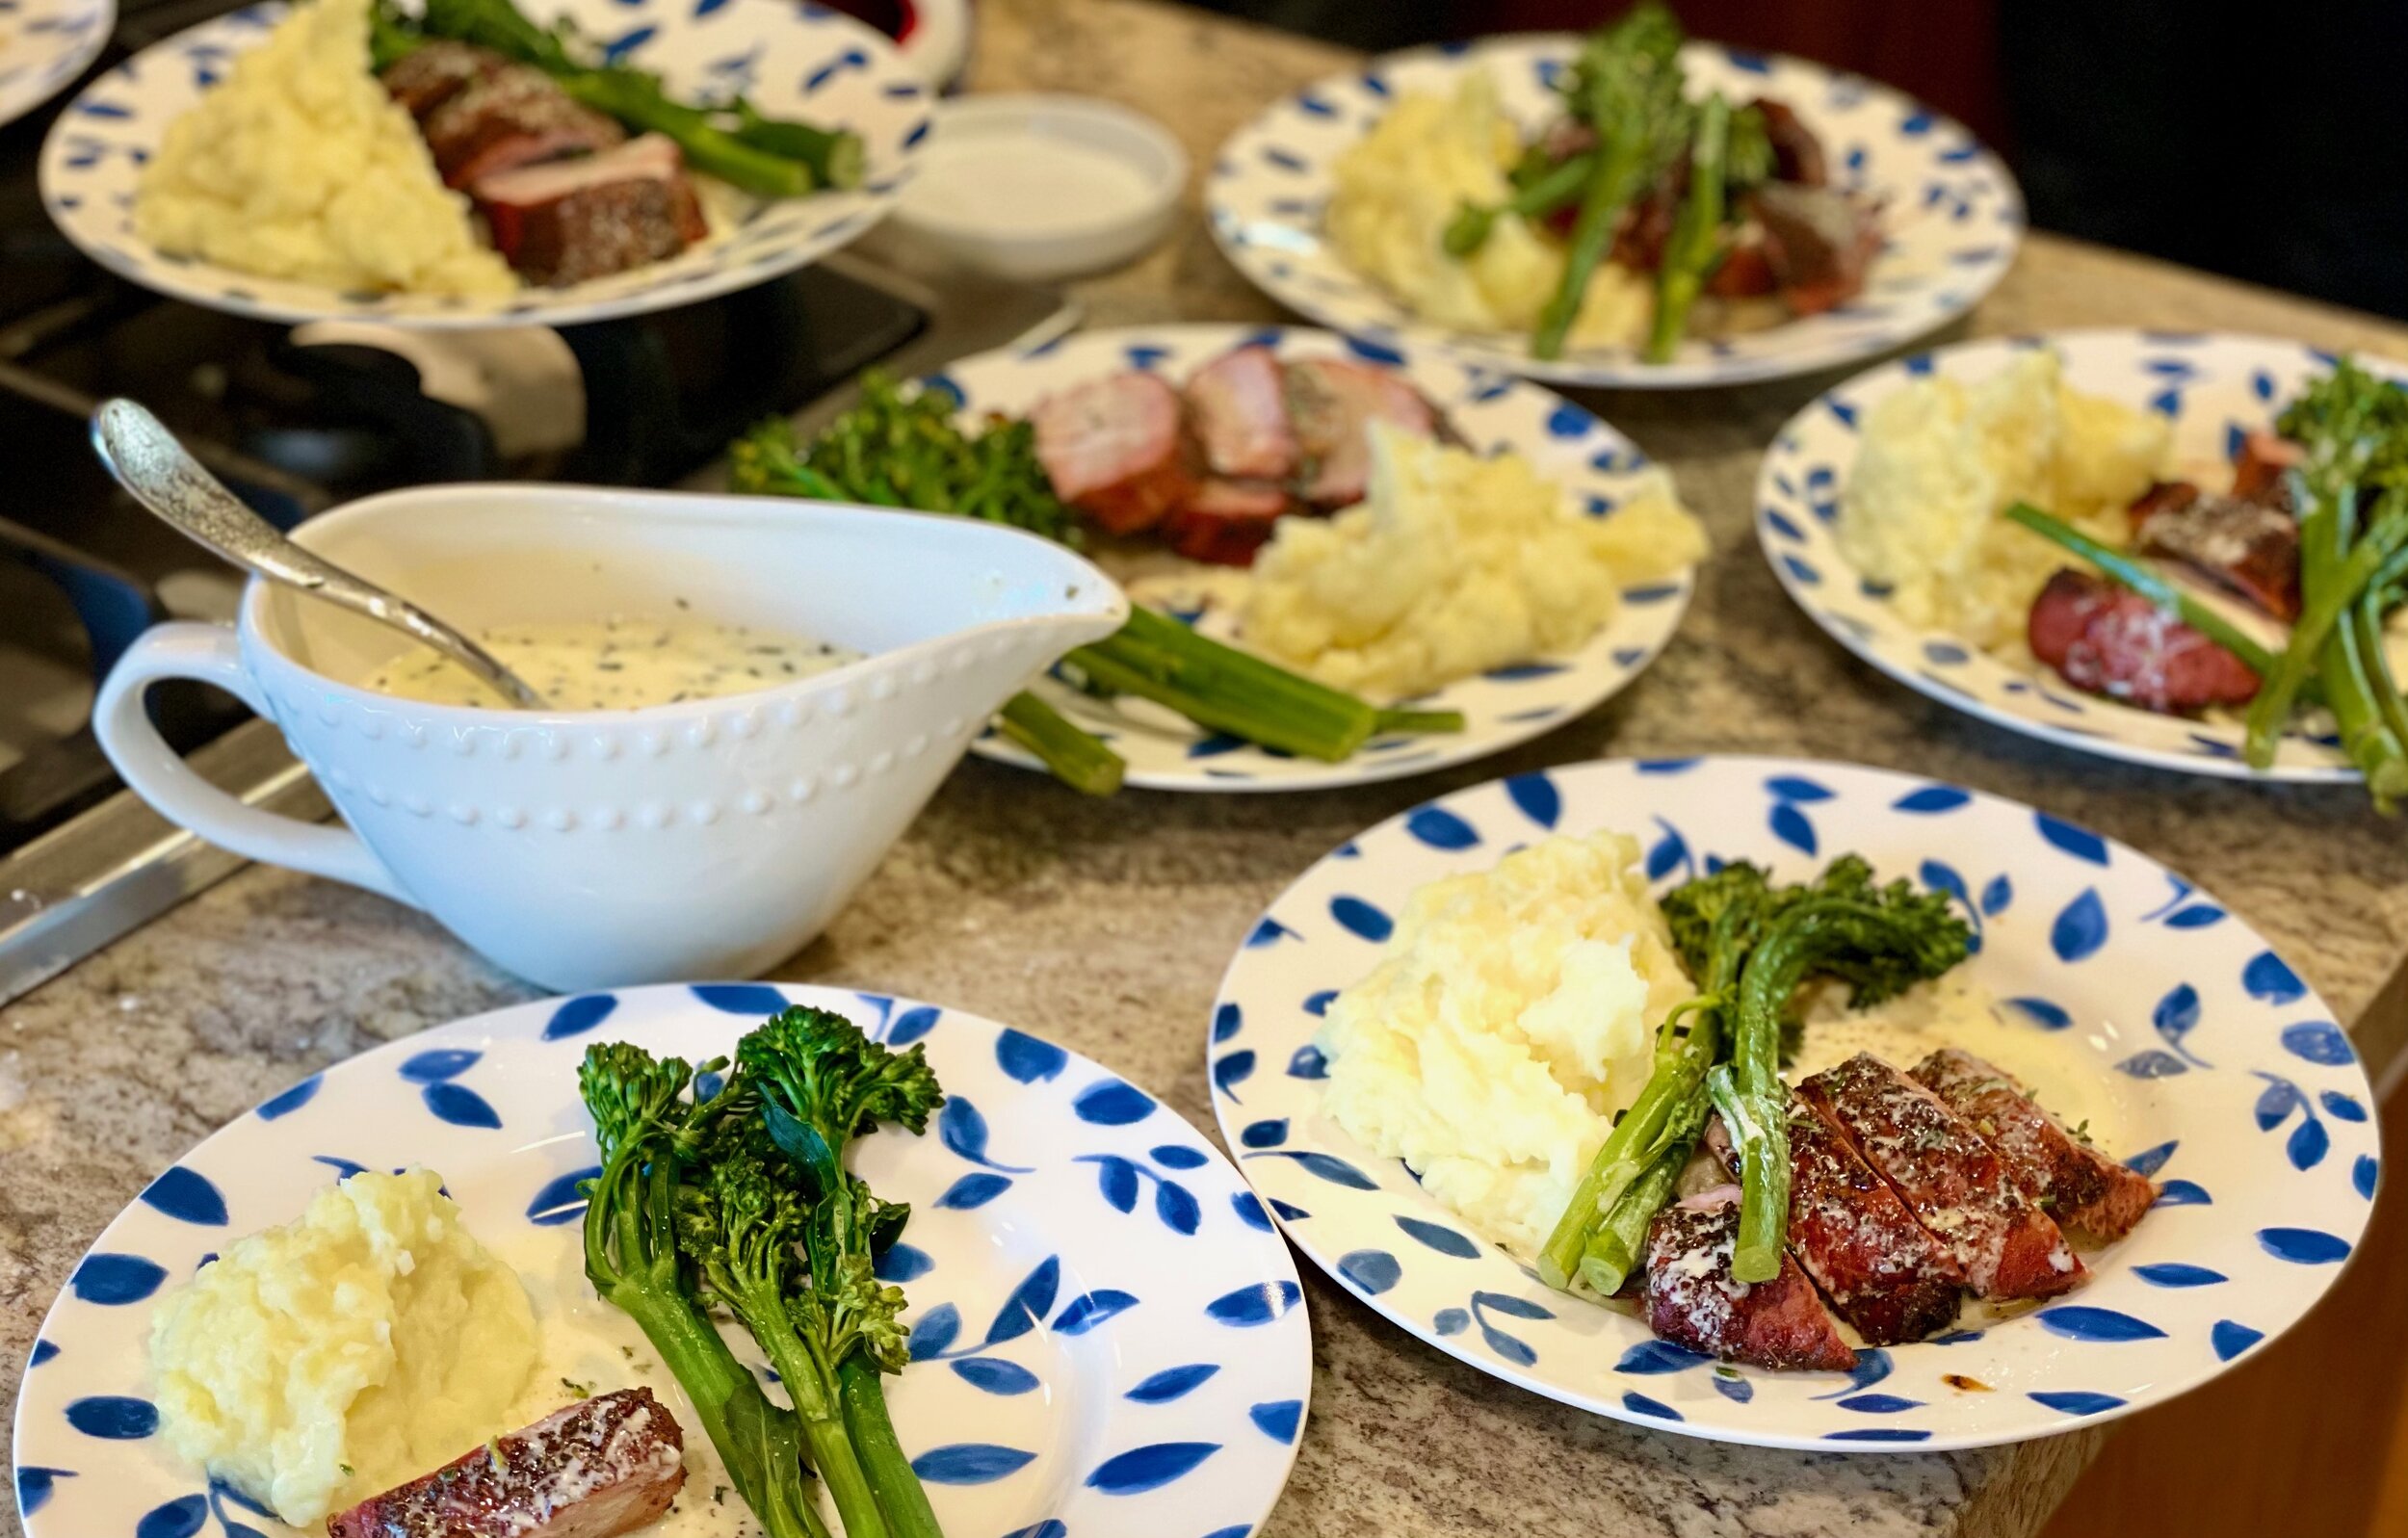
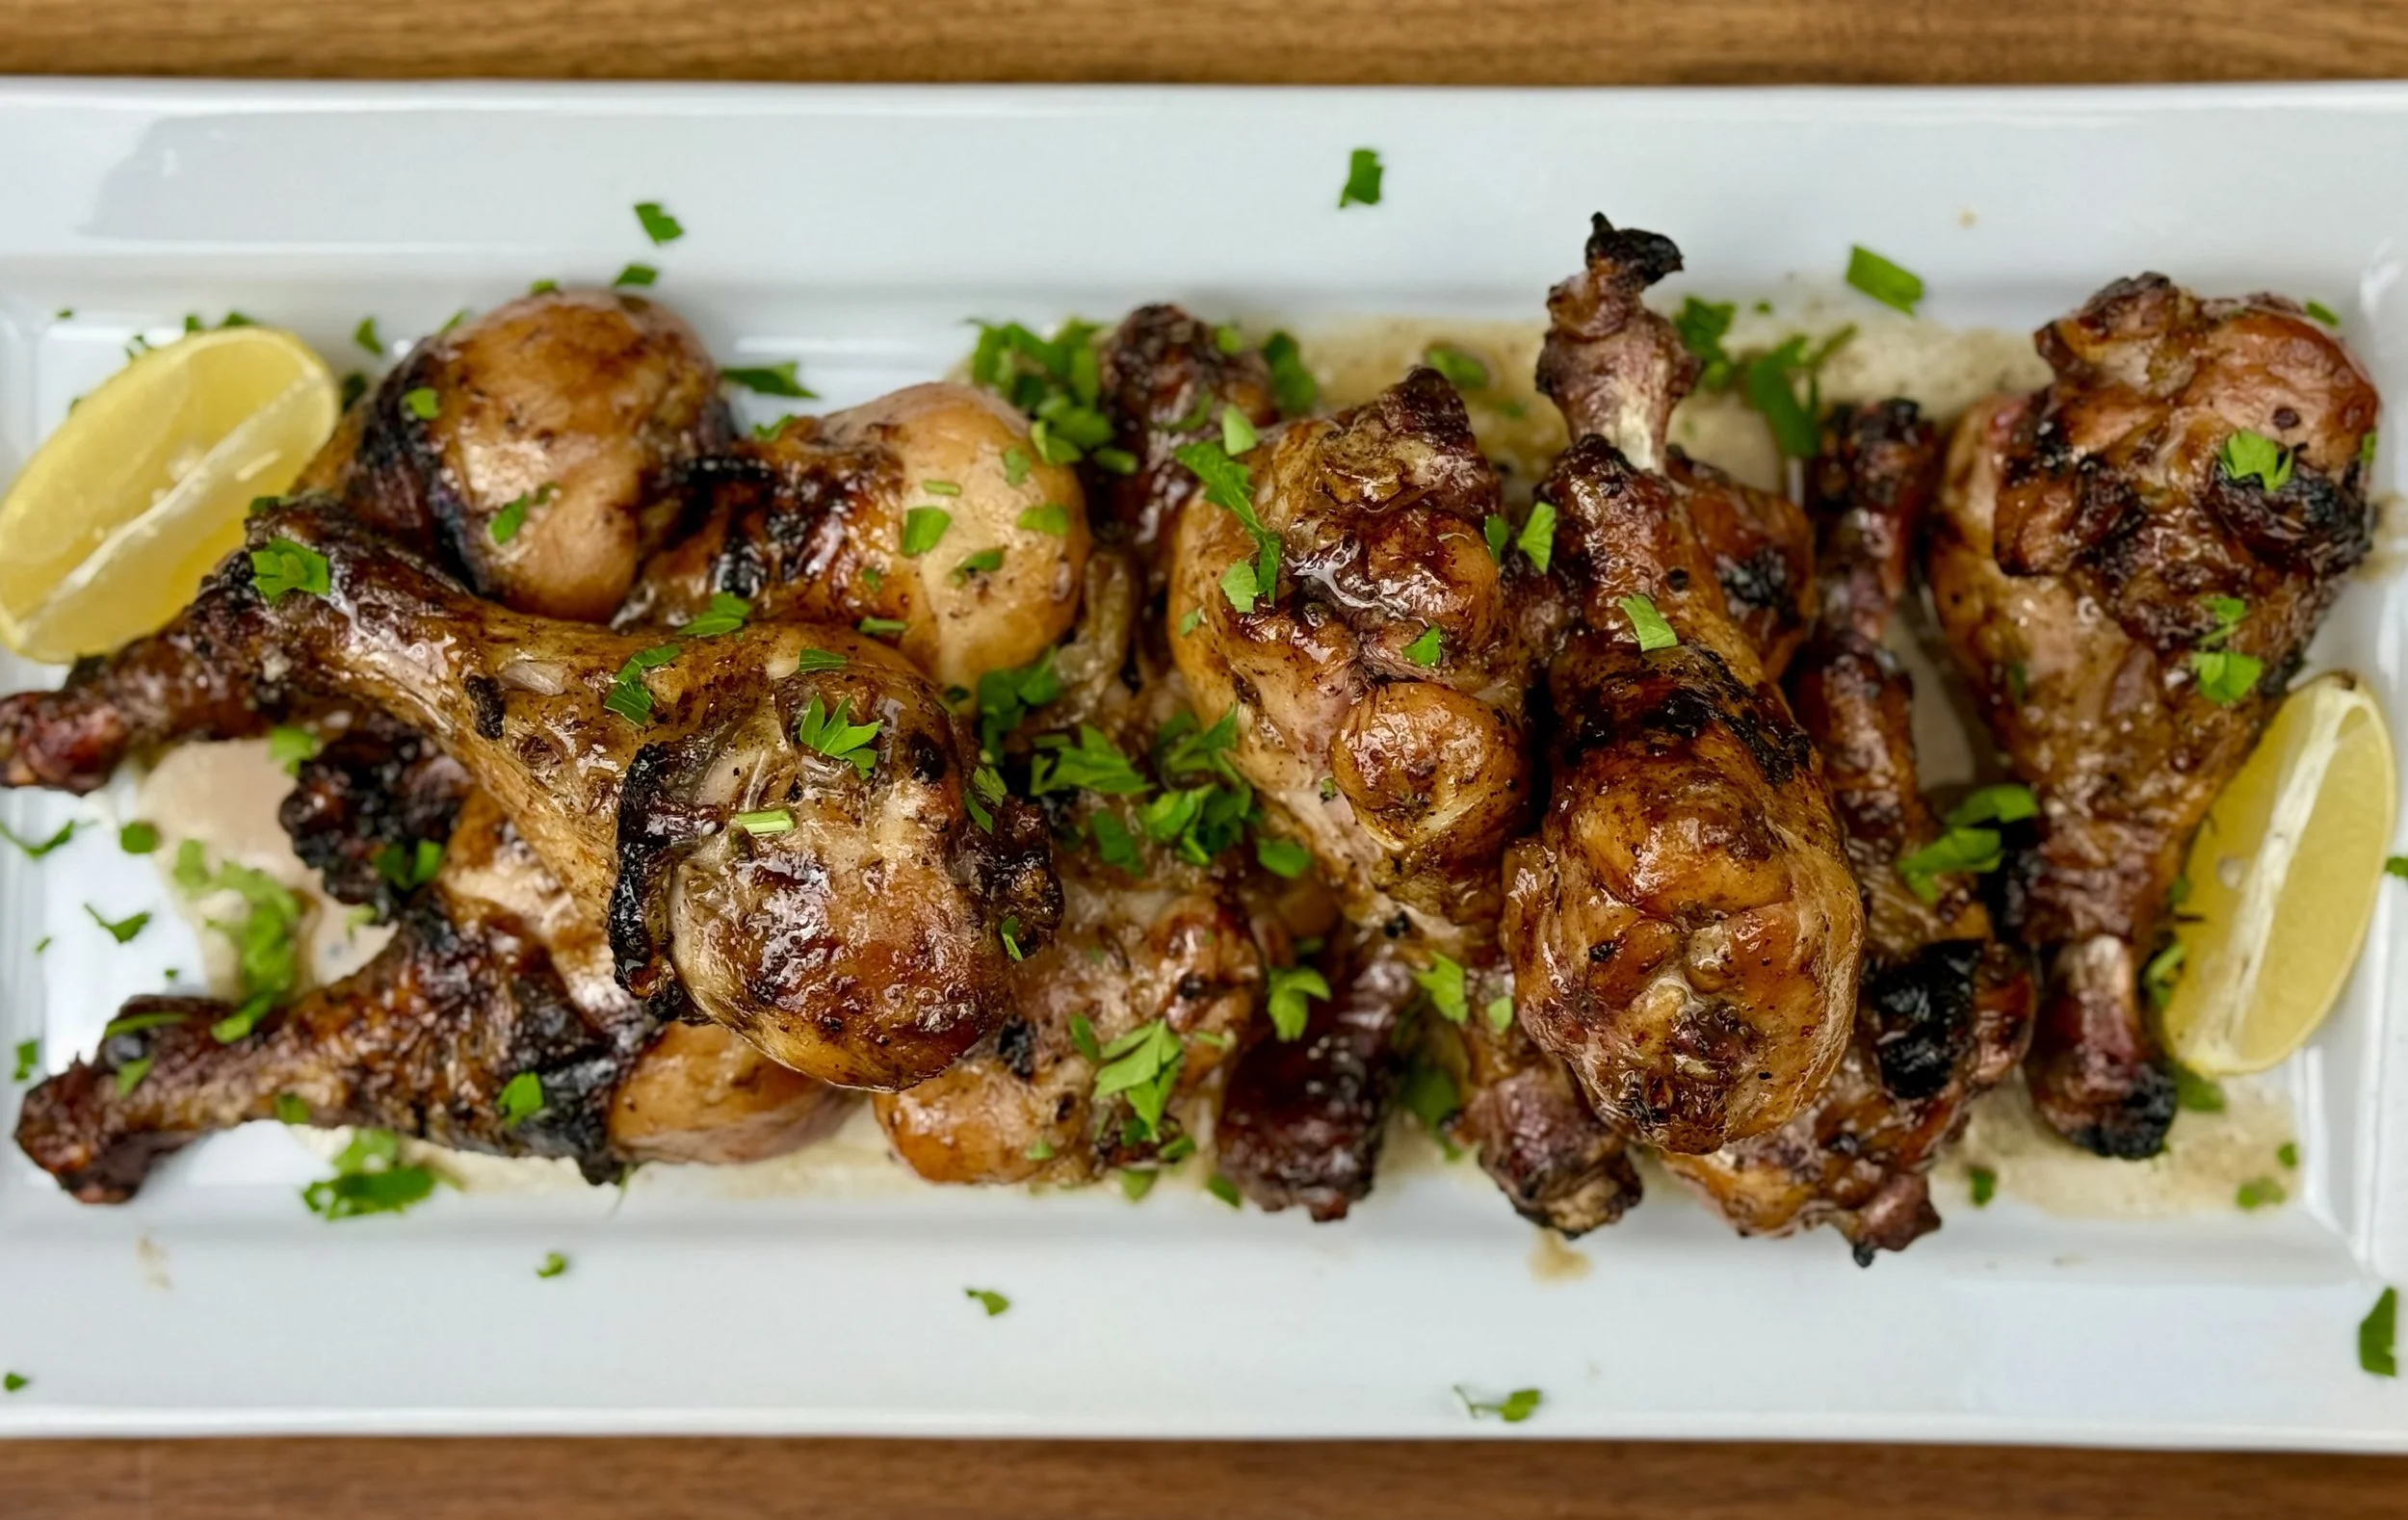
2-Ingredient Grilled Pork Loin (Low FODMAP)
5 Minutes prep • 2 Hours cook • Low FODMAP • Gluten-Free • Serves 4
5 Minutes prep • 2 Hours cook • Low FODMAP • Gluten-Free • Serves 4 • Ok to make-ahead: Steps 1 - 2
Looking to prepare a simple yet flavorful dish? This two-ingredient roasted pork loin recipe delivers on both ease and taste. With minimal effort and just a couple of key ingredients, you can achieve tender, juicy pork that's perfect for any occasion. Whether you're cooking for a weeknight dinner or a special gathering, this recipe promises a delicious outcome that will satisfy your hunger and impress your guests.
See this new recipe in my FREE recipe club.
To streamline your search through hundreds of existing recipes, I'm moving the release of my new weekly creations to the Recipe Club on Patreon. In the club, you’ll get access to a treasure trove of low-FODMAP goodness, complete with collections and filters to use as your virtual cookbook!
Here's what awaits you in the club:
Exclusive weekly recipes: Be the first to try my latest delicious low-FODMAP creations!
Simple & Easy: My recipes continue to focus on readily available ingredients and effortless preparation, perfect for family-friendly meals (no more separate low-FODMAP meal prep!).
Hundreds of existing recipes: Gain access to my entire library of low-FODMAP recipes, all conveniently organized.
You can join for free or sign up for only $5/month. Your support fuels my passion for creating new, delicious, and easy-to-make low-FODMAP recipes just for you.
Let's go on this delicious low-FODMAP journey together.
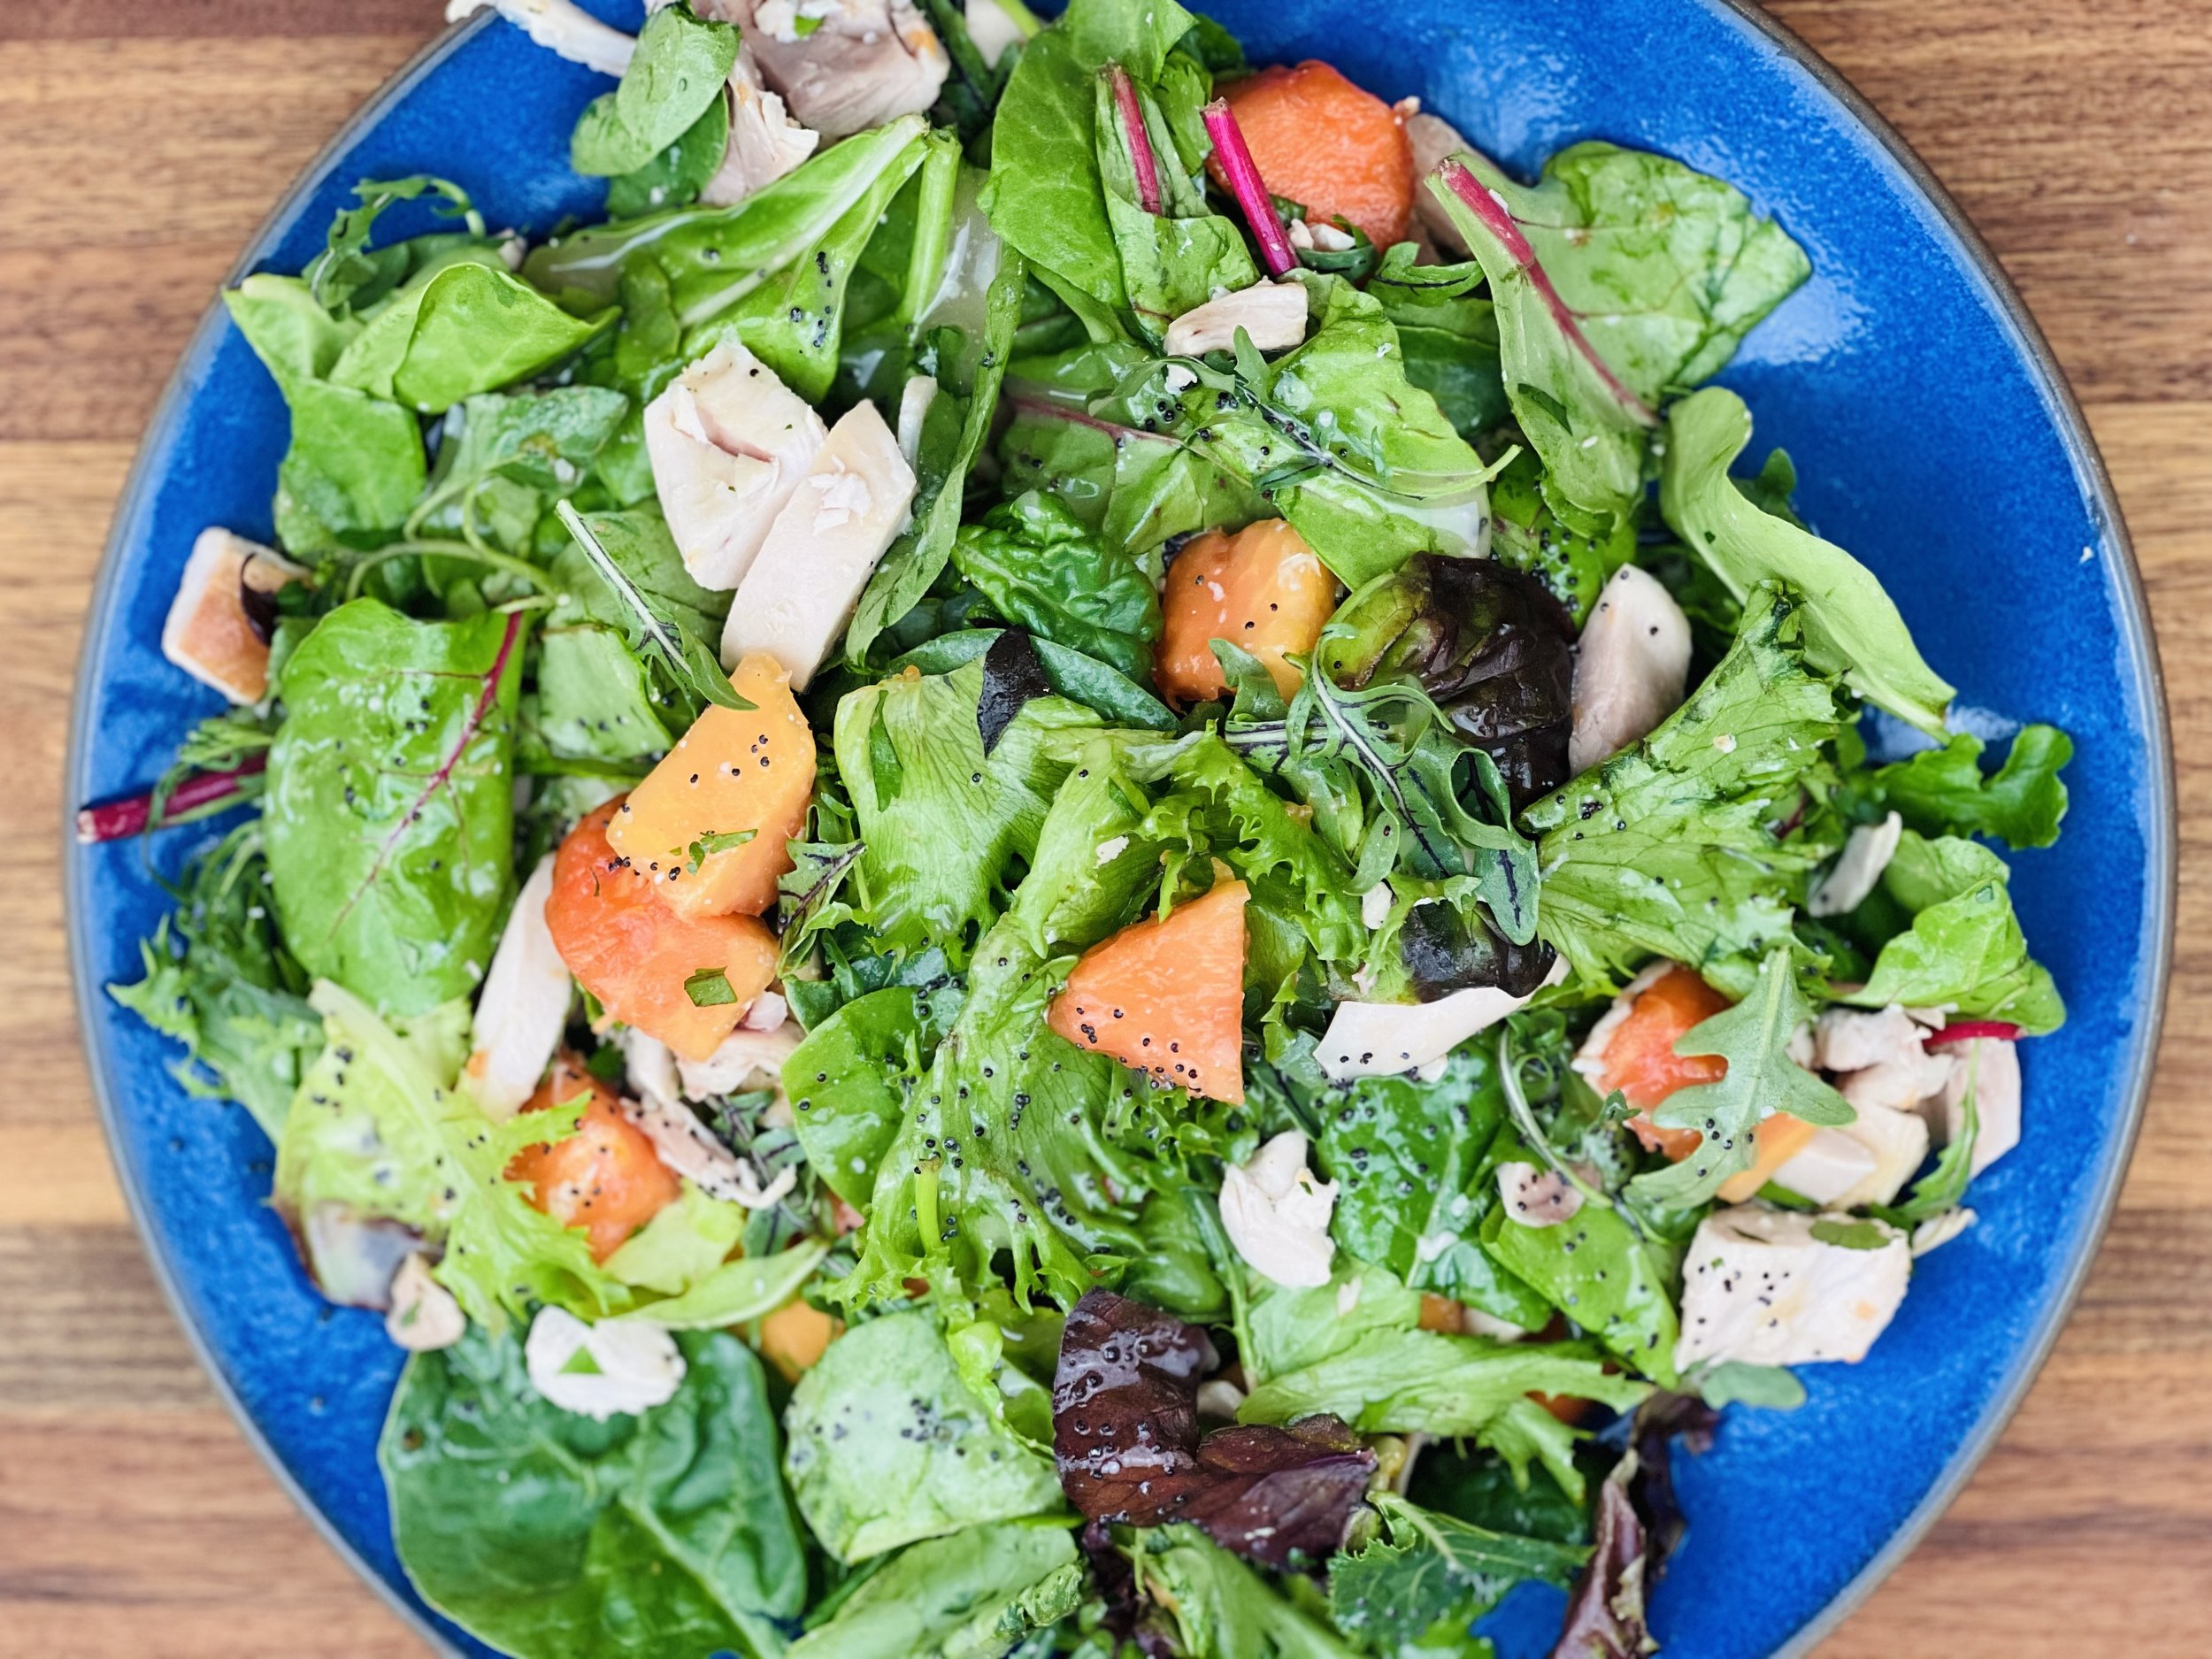
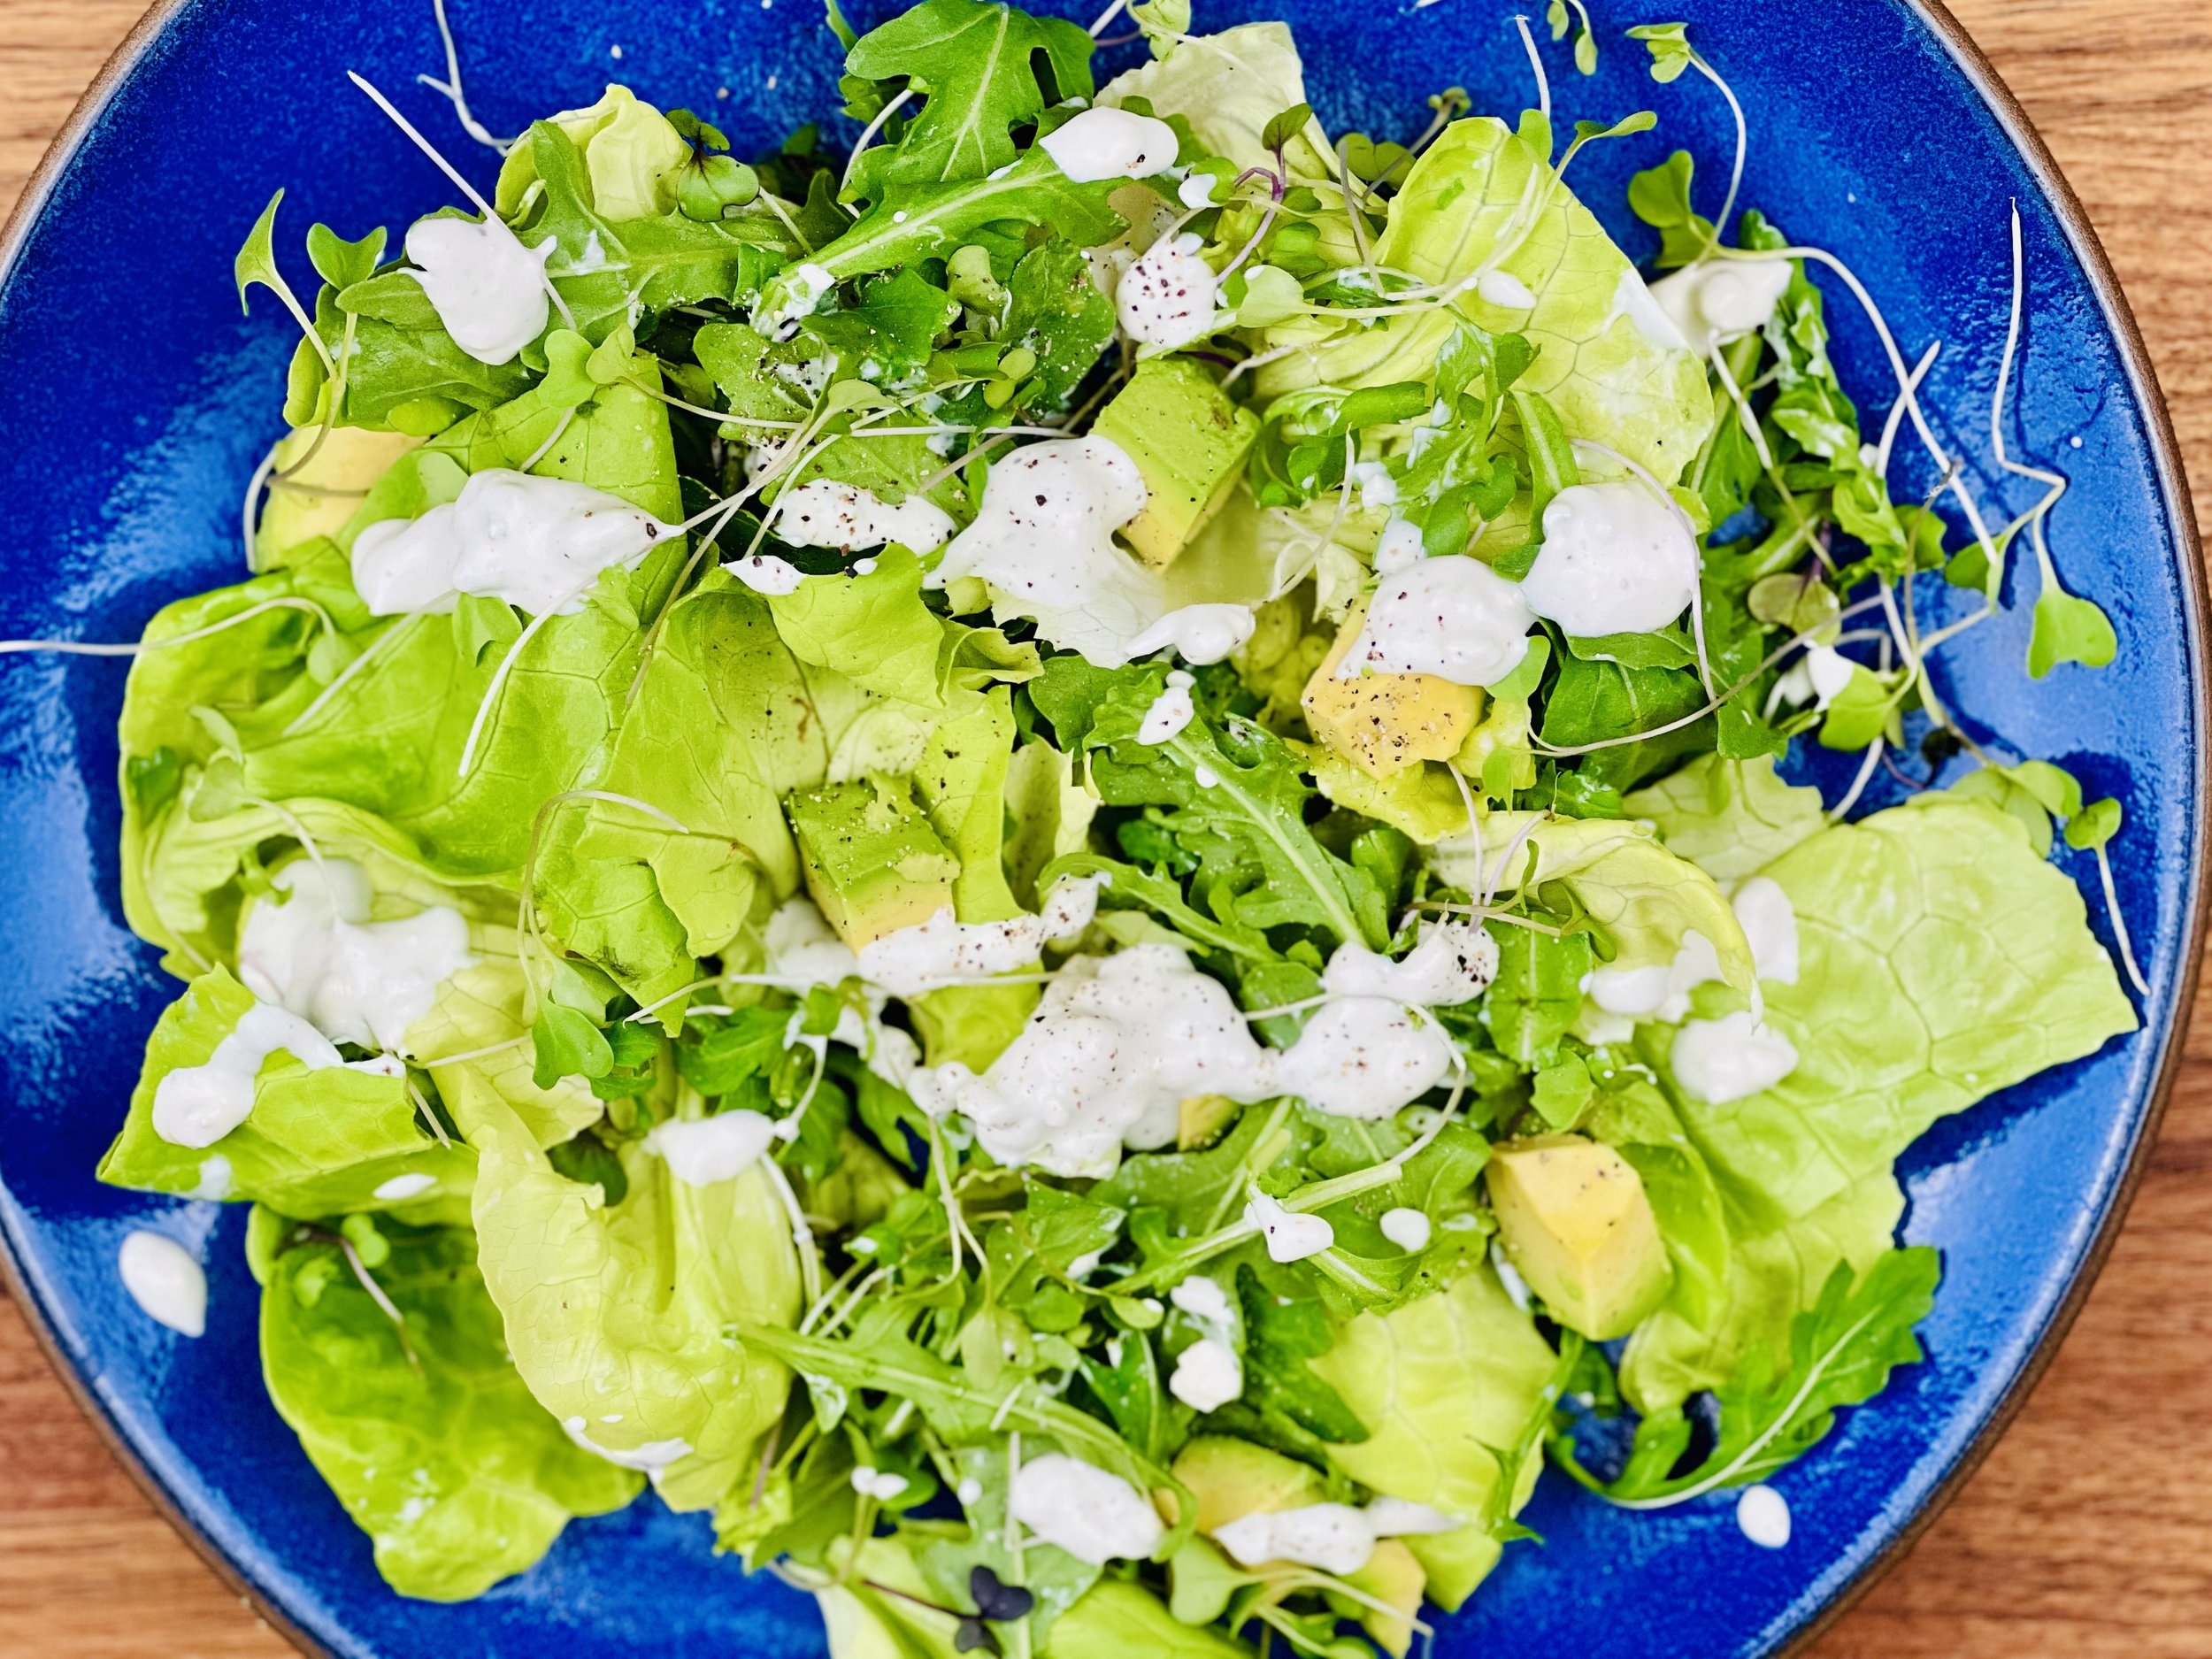
Papaya Chicken Green Salad (Low FODMAP)
20 Minutes prep • Low FODMAP • Gluten-Free • Plant forward • Serves 4
20 Minutes prep • Low FODMAP • Gluten-Free • Plant forward • Serves 4 • Ok to make-ahead: Steps 1 - 4
Craving a light and refreshing lunch or dinner you can make in a snap? Look no further than my Low-FODMAP Papaya Chicken Green Salad! This delicious salad is the perfect combination of juicy papaya, savory chicken, crisp greens, and a perfectly sweet/tangy poppyseed dressing. The best part? Papaya is naturally low-FODMAP, making it a perfect choice for those following a low-FODMAP diet.
See this new recipe in my FREE recipe club.
To streamline your search through hundreds of existing recipes, I'm moving the release of my new weekly creations to the Recipe Club on Patreon. In the club, you’ll get access to a treasure trove of low-FODMAP goodness, complete with collections and filters to use as your virtual cookbook!
Here's what awaits you in the club:
Exclusive weekly recipes: Be the first to try my latest delicious low-FODMAP creations!
Simple & Easy: My recipes continue to focus on readily available ingredients and effortless preparation, perfect for family-friendly meals (no more separate low-FODMAP meal prep!).
Hundreds of existing recipes: Gain access to my entire library of low-FODMAP recipes, all conveniently organized.
You can join for free or sign up for only $5/month. Your support fuels my passion for creating new, delicious, and easy-to-make low-FODMAP recipes just for you.
Let's go on this delicious low-FODMAP journey together.
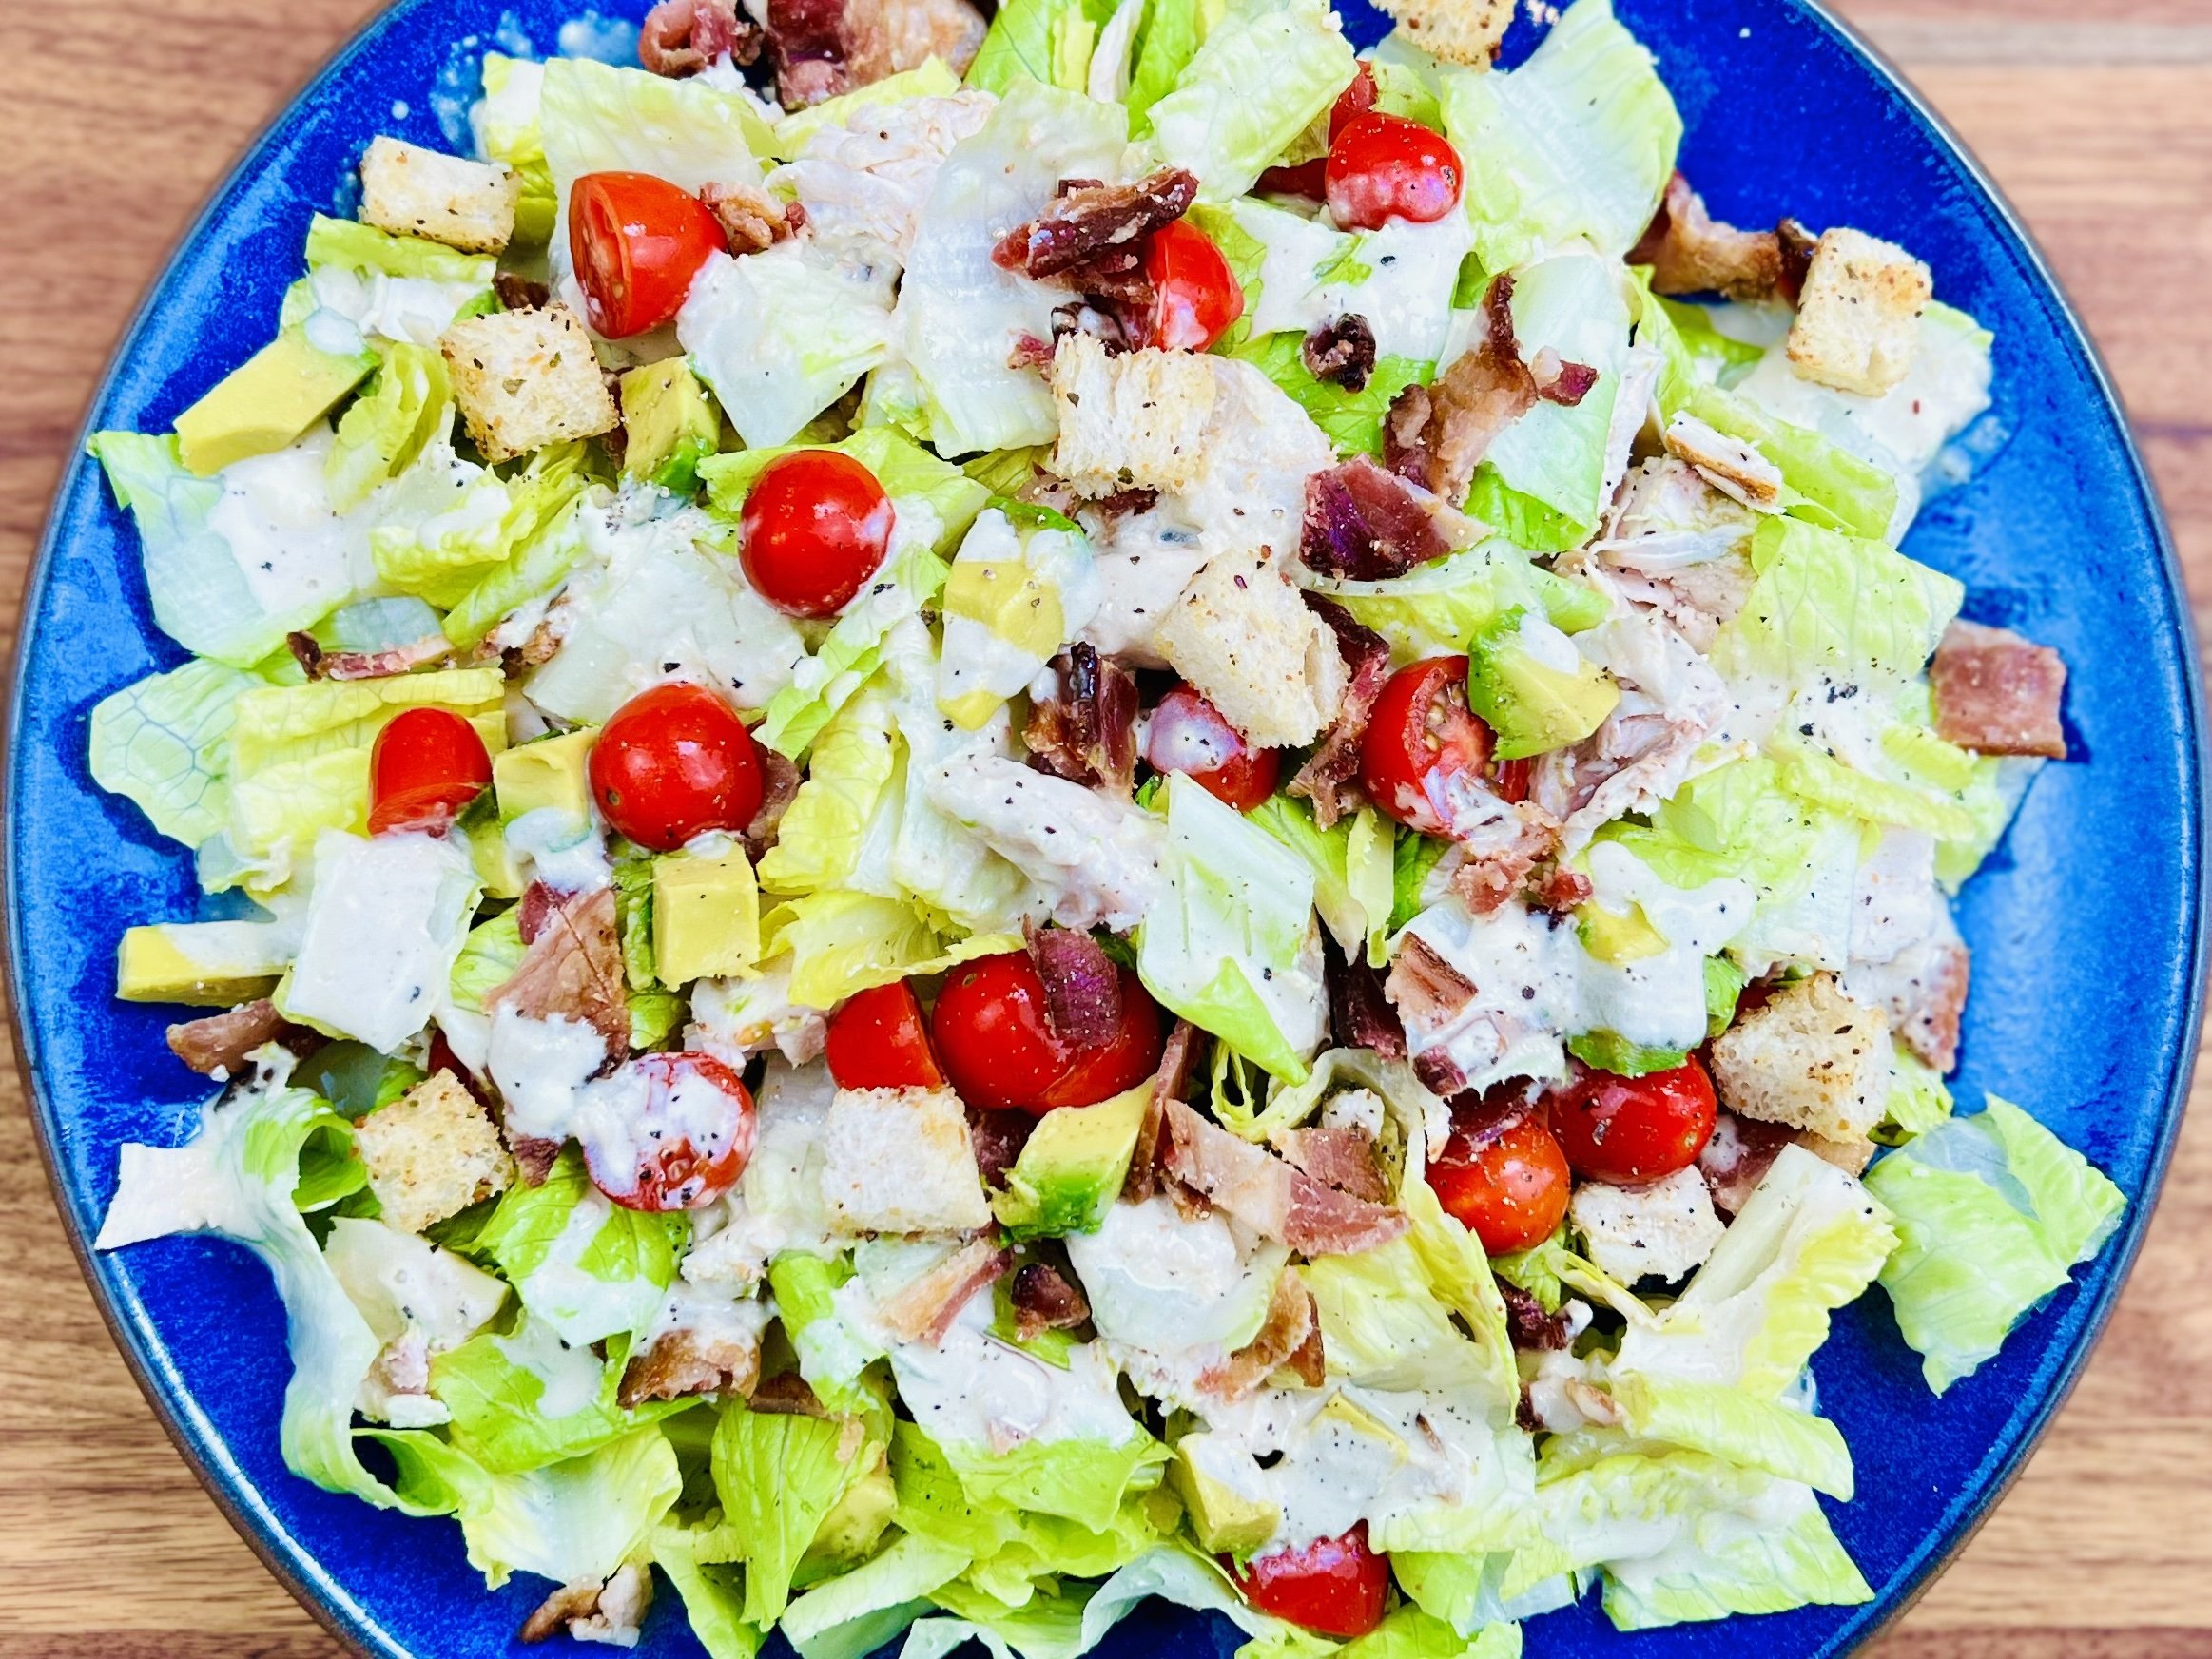
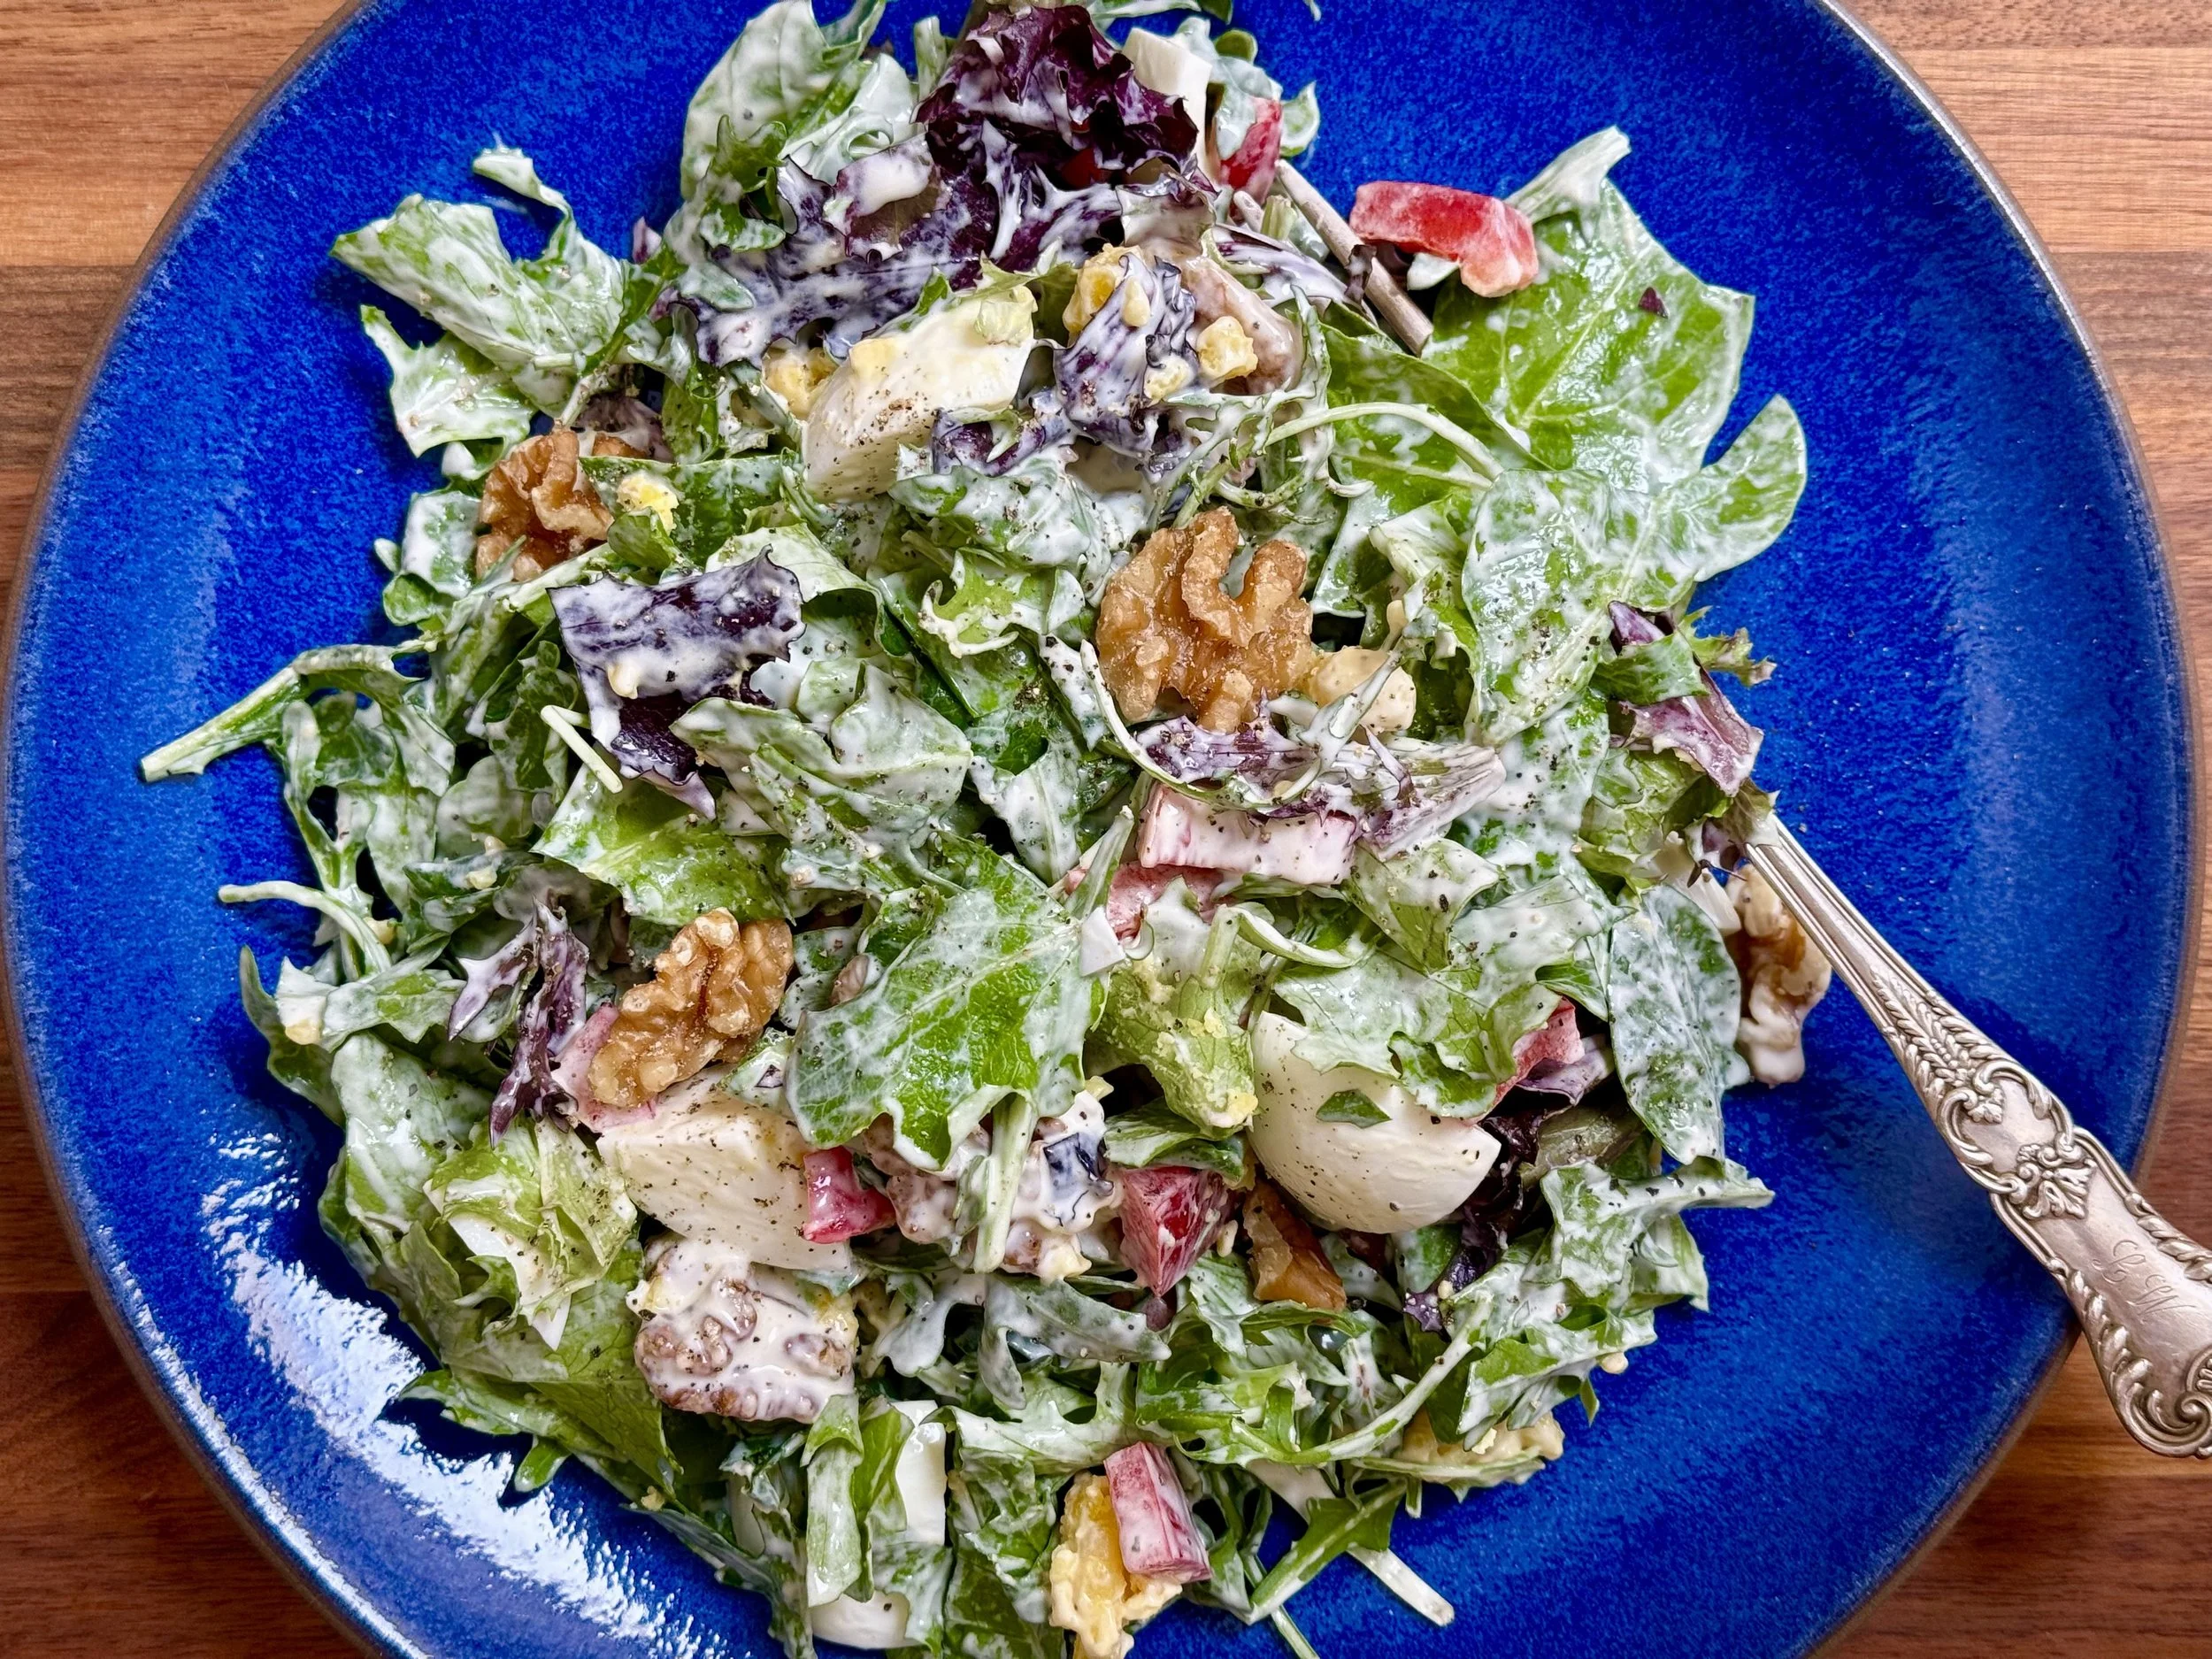
BLT Chicken Caesar Salad (Low FODMAP)
20 Minutes prep • 10 Minutes cook • Low FODMAP • Gluten-Free • Plant forward
20 Minutes prep • 10 Minutes cook • Low FODMAP • Gluten-Free • Plant forward • Serves 4 • Ok to make-ahead: Steps 1 - 4
BLTs and Caesar salads are wonderful classic flavors. Put them together with some cooked chicken and avocado in my BLT Chicken Caesar Salad and you have a delicious combination! It's perfect for a quick and easy lunch or dinner that will satisfy even the biggest appetites.
See this new recipe in my FREE recipe club.
To streamline your search through hundreds of existing recipes, I'm moving the release of my new weekly creations to the Recipe Club on Patreon. In the club, you’ll get access to a treasure trove of low-FODMAP goodness, complete with collections and filters to use as your virtual cookbook!
Here's what awaits you in the club:
Exclusive weekly recipes: Be the first to try my latest delicious low-FODMAP creations!
Simple & Easy: My recipes continue to focus on readily available ingredients and effortless preparation, perfect for family-friendly meals (no more separate low-FODMAP meal prep!).
Hundreds of existing recipes: Gain access to my entire library of low-FODMAP recipes, all conveniently organized.
You can join for free or sign up for only $5/month. Your support fuels my passion for creating new, delicious, and easy-to-make low-FODMAP recipes just for you.
Let's go on this delicious low-FODMAP journey together.
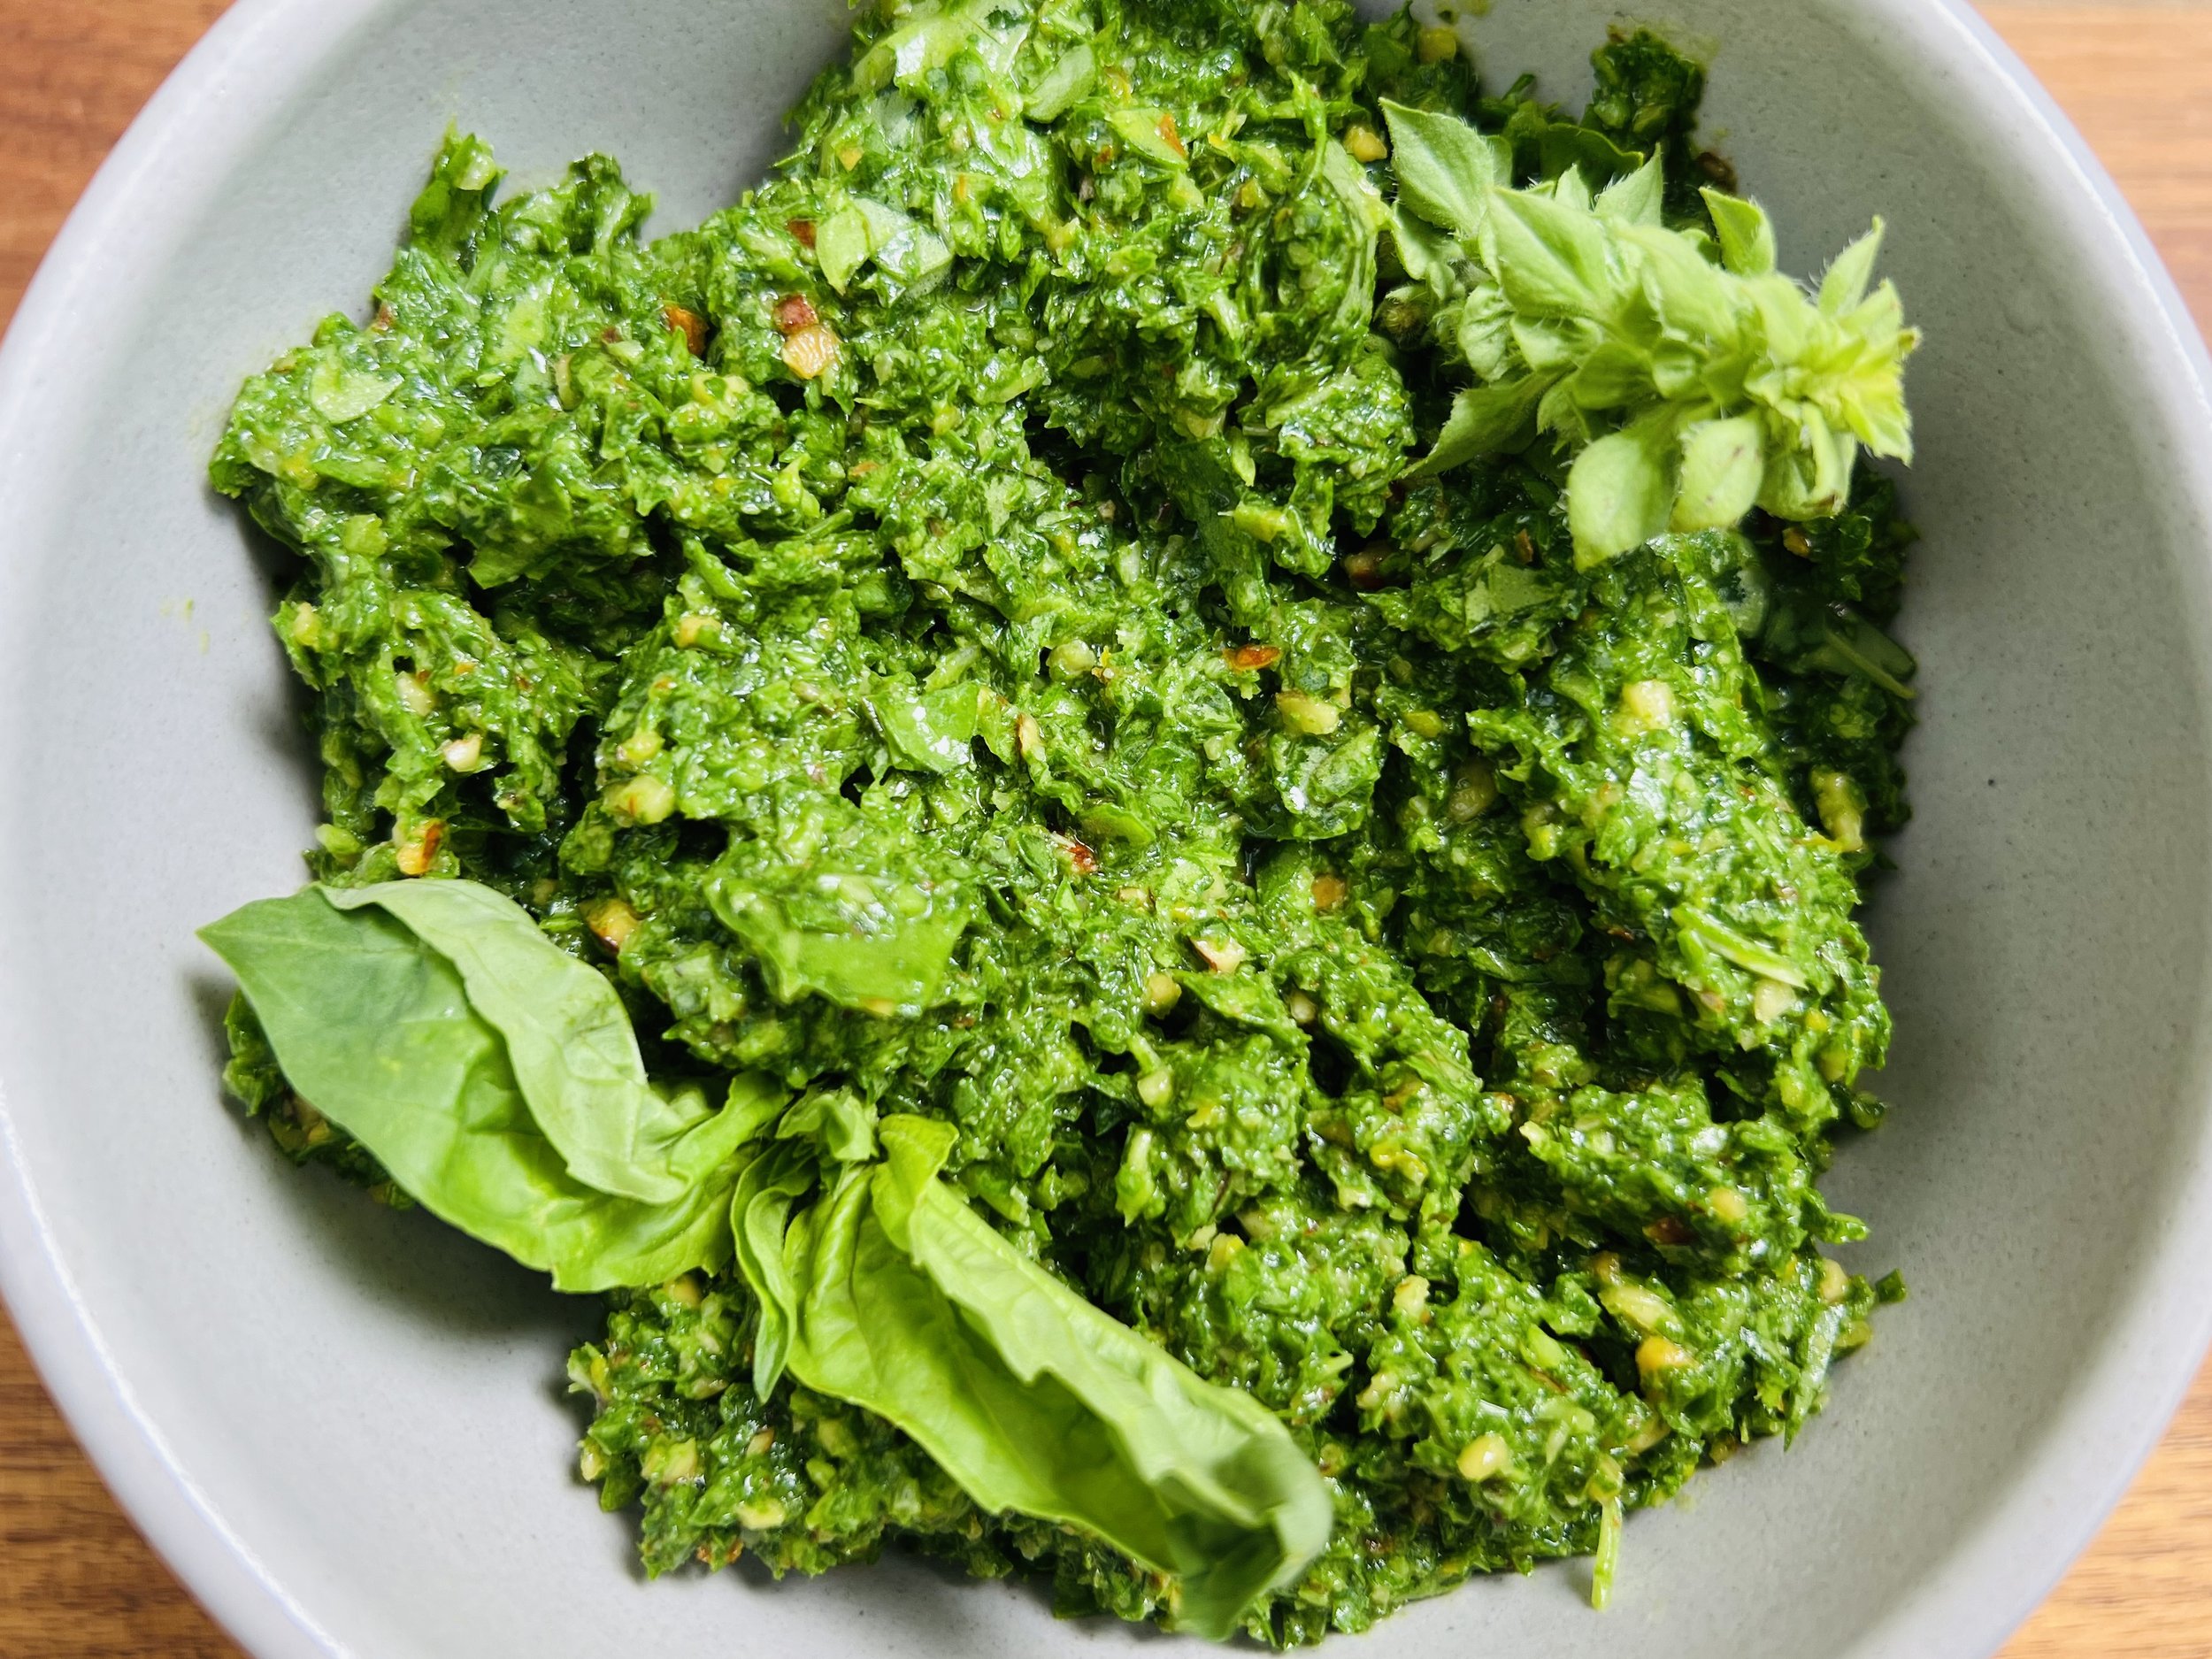
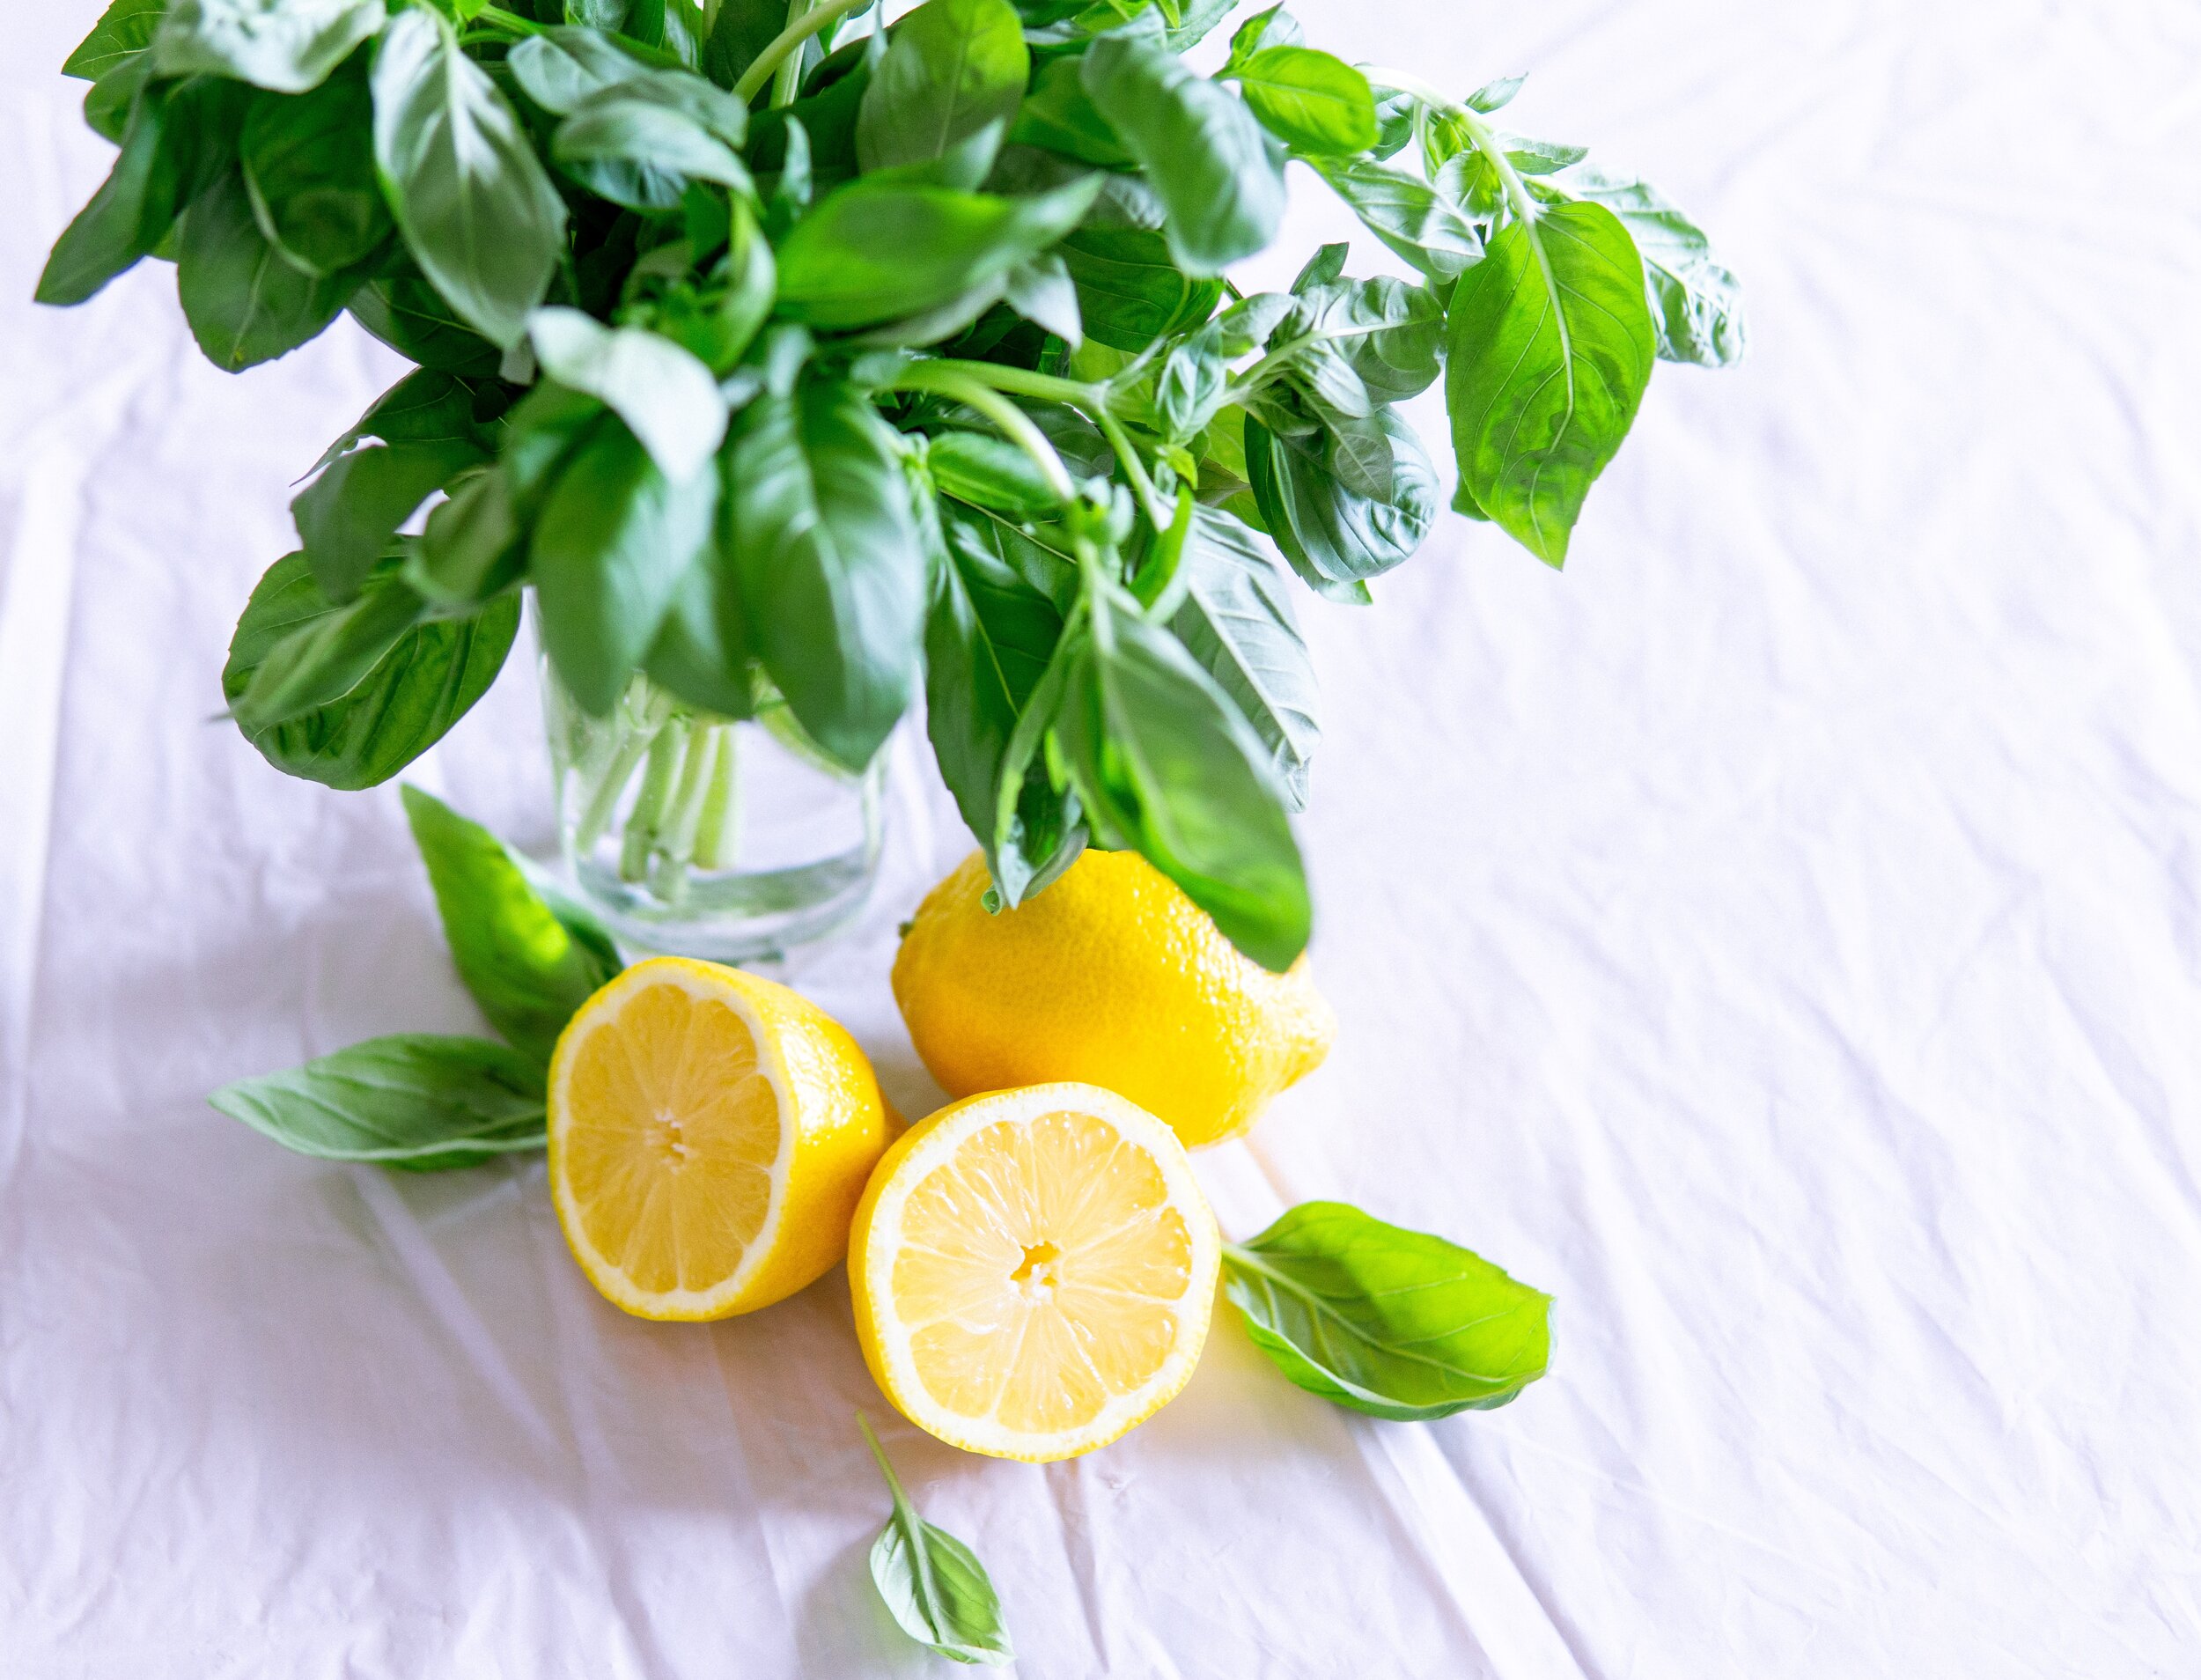
Amazing Arugula Pesto (Low FODMAP)
10 Minutes prep • Low FODMAP • Gluten-free • Lactose-free • Vegan • Makes 1 cup
10 Minutes prep • Low FODMAP • Gluten-free • Lactose-free • Vegan • Makes 1 cup • Ok to make ahead: Steps 1-2
If you know me, you know I love arugula! And this pesto is a delicious way to get more arugula in your diet. Use it in any recipe that calls for pesto. Or enjoy it as an appetizer. It’s perfect on my Seed Crackers or as a topping on gluten-free pasta or lasagna.
Ingredients
1/4 cup roasted almonds
1/2 cup fresh basil leaves, roughly chopped
1 cup arugula (packed into the cup)
1 teaspoon lemon zest
1 tablespoon fresh lemon juice
1/3–1/2 cup extra virgin olive oil (with a light taste)
1/4 teaspoon Kosher salt
1/4 teaspoon black pepper
Directions
(1) Prepare: Wash and roughly chop the basil leaves.
(2) Blend the pesto: Put all ingredients in the bowl of your food processor and pulse until just blended. Add additional oil if you want to make it looser if you like. Use less oil if you like it a bit thicker.
(3) Plate and serve: Serve as a topping for my Seed Crackers or with your favorite veggies for dipping.
Eat and enjoy every bite because you can!
Recipe note: I use Diamond Crystal Kosher salt in all my recipes because it has a wonderful flat and crisp flake that tastes delicious. It is also the least salty salt available so you can use it more liberally as a seasoning than you can table salt or sea salt. If you use another type of salt, you may need to reduce the amount so it is not over-salted.
Have a question you’d like to have answered? Email me at hello@ibsgamechanger.com
Link note: This post may contain affiliate links for you to easily purchase items that are linked. I may earn a small commission from qualifying purchases but none of this costs you a thing so feel free to use the links! In addition, for some items, I have provided a special discount code for IBS Game Changers so be sure to use the code when you purchase an item to get the discount that has been arranged just for you.
More Deliciously Low FODMAP™ sauce recipes


Coconut Cacao Granola (Low FODMAP)
10 Minutes prep • 20 Minutes cook • Low FODMAP • Gluten-free • Lactose-free • Vegan • Makes 6 cups
10 Minutes prep • 20 Minutes cook • Low FODMAP • Gluten-free • Lactose-free • Vegan • Makes 6 cups • Ok to make ahead: Steps 1-3
Your gut biome loves cacao (the “real deal” when it comes to chocolate) and coconut and so many nuts and seeds. So why not put them all together and make them delicious? This chocolatey granola might just make you a convert and you may never go back to “plain old” granola again! It’s very easy to make, oh so delicious, and it stores well for up to 6 weeks (if you don’t eat it all before then.)
Ingredients
3 cups gluten-free rolled oats
2 cups nuts and/or seeds, I used sliced almonds, pumpkin seeds, sesame seeds, and flax seeds (pecans or walnuts would be good too)
1 cup unsweetened shredded coconut
1/4 cup chopped dried cranberries (optional)
2 tablespoons chia seeds (white or black)
1/4 cup cacao powder
1/3 cup cacao nibs
1 teaspoon cinnamon
1 1/2 teaspoons Kosher salt
1/3 cup maple syrup
1/3 cup coconut oil (melted)
2 teaspoons vanilla extract
Directions
(1) Prepare: Preheat oven to 325 degrees F.
(2) Mix dry ingredients: In a large bowl, combine oats, nuts, seeds, coconut, cranberries, chia seeds, flax seeds, sesame seeds, cacao powder, cacao nibs, cinnamon, and salt together. Stir to mix evenly.
(3) Mix liquid ingredients: In a small bowl or measuring cup, combine the maple syrup, coconut oil, and vanilla. Heat on the stove or in the microwave just to melt the coconut oil. Stir to blend, then pour over the dry ingredients and stir well to coat.
(4) Bake: Spread out in one even layer in a roasting pan or on a rimmed baking sheet. (I like using the roasting pan because it’s easier to stir halfway through when you have a pan with higher sides.) Bake for 10 minutes, then use a spatula to stir and rotate the mixture (so nothing gets too brown). Bake for another 10 minutes. Remove from the oven and let cool completely.
(5) Plate and serve: This granola is delicious on its own but if you like, you may serve it with yogurt or milk and fresh berries.
Eat and enjoy every bite because you can!
Recipe note: I use Diamond Crystal Kosher salt in all my recipes because it has a wonderful flat and crisp flake that tastes delicious. It is also the least salty salt available so you can use it more liberally as a seasoning than you can table salt or sea salt. If you use another type of salt, you may need to reduce the amount so it is not over-salted.
Have a question you’d like to have answered? Email me at hello@ibsgamechanger.com
Link note: This post may contain affiliate links for you to easily purchase items that are linked. I may earn a small commission from qualifying purchases but none of this costs you a thing so feel free to use the links! In addition, for some items, I have provided a special discount code for IBS Game Changers so be sure to use the code when you purchase an item to get the discount that has been arranged just for you.
More Deliciously Low FODMAP™ breakfast recipes


Sheet Pan Asian Meatballs with Roasted Gnocchi (Low FODMAP)
15 Minutes prep • 25 Minutes cook • Low FODMAP • Gluten-free • Lactos-free • Serves 4
15 Minutes prep • 25 Minutes cook • Low FODMAP • Gluten-free • Lactose-free • Serves 4 • Ok to make ahead: Step 1
Roasted gnocchi turns out crispy and chewy all at the same time. Delicious! It’s a great foundation for these Asian meatballs as the gnocchi cooks in the seasoned drippings from the meat and the flavors blend and build on each other. The addition of chopped mushrooms in the roasting pan with the gnocchi adds a wonderful depth of flavor. Adding spinach in the last few minutes of roasting means you’ve got a perfect one-pan meal. Simple enough for a weeknight dinner but fancy enough to make for company.

Ingredients: Roasted Gnocchi
1 pound oyster mushrooms, chopped
1 package (12 - 18 ounces) potato gnocchi
6 tablespoons extra virgin olive oil
5 ounces (about 5 packed cups) baby spinach, washed and long stems removed
Ingredients: Meatballs
2 tablespoons peeled and minced ginger
1 tablespoon gluten-free low sodium soy sauce sauce
1 bunch green onions, green part only, chopped
1 teaspoon freshly ground black pepper
1/2 teaspoon Smoke N Sanity Essence of Garlic Salt (use code IBSGC15 for 15% discount)
1/2 cup pork panko (or other gluten-free panko)
1 pound grass-fed ground pork
Directions
(1) Prepare: Preheat the oven to 425 degrees F. Line a large rimmed baking sheet with parchment paper. Chop the mushrooms, ginger, and green onion greens. Wash and remove the stems from the spinach.
(2) Prepare the gnocchi: In a bowl, toss the mushrooms, gnocchi, and 5 tablespoons of the olive oil. Spread evenly on the prepared backing sheet.
(3) Prepare the meatballs: In a large bowl, combine all the meatball ingredients and use your hands to mix it together evenly.
(4) Shape the meatballs: Roll the meat mixture into 12 balls (about 2 inches in diameter) and arrange with some space between them on top of the gnocchi and mushrooms.
(5) Roast: Put the pan in the oven and roast for 20 minutes.
(6) Prepare the spinach: Meanwhile, toss the spinach with the remaining 1 tablespoon of olive oil. When the meatballs and gnocchi have roasted for 20 minutes, remove the pan from the oven. Spread the spinach evenly over the top of the meatballs and gnocchi. Return to the oven and roast for another 5 minutes until the spinach is tender and wilted.
(7) Plate and serve: Serve on plates or in bowls making sure every plate gets a little of everything.
Eat and enjoy every bite because you can!
Have a question you’d like to have answered? Email me at hello@ibsgamechanger.com
Link note: This post may contain affiliate links for you to easily purchase items that are linked. I may earn a small commission from qualifying purchases but none of this costs you a thing so feel free to use the links! In addition, for some items, I have provided a special discount code for IBS Game Changers so be sure to use the code when you purchase an item to get the discount that has been arranged just for you.
More Deliciously Low FODMAP™ main course recipes


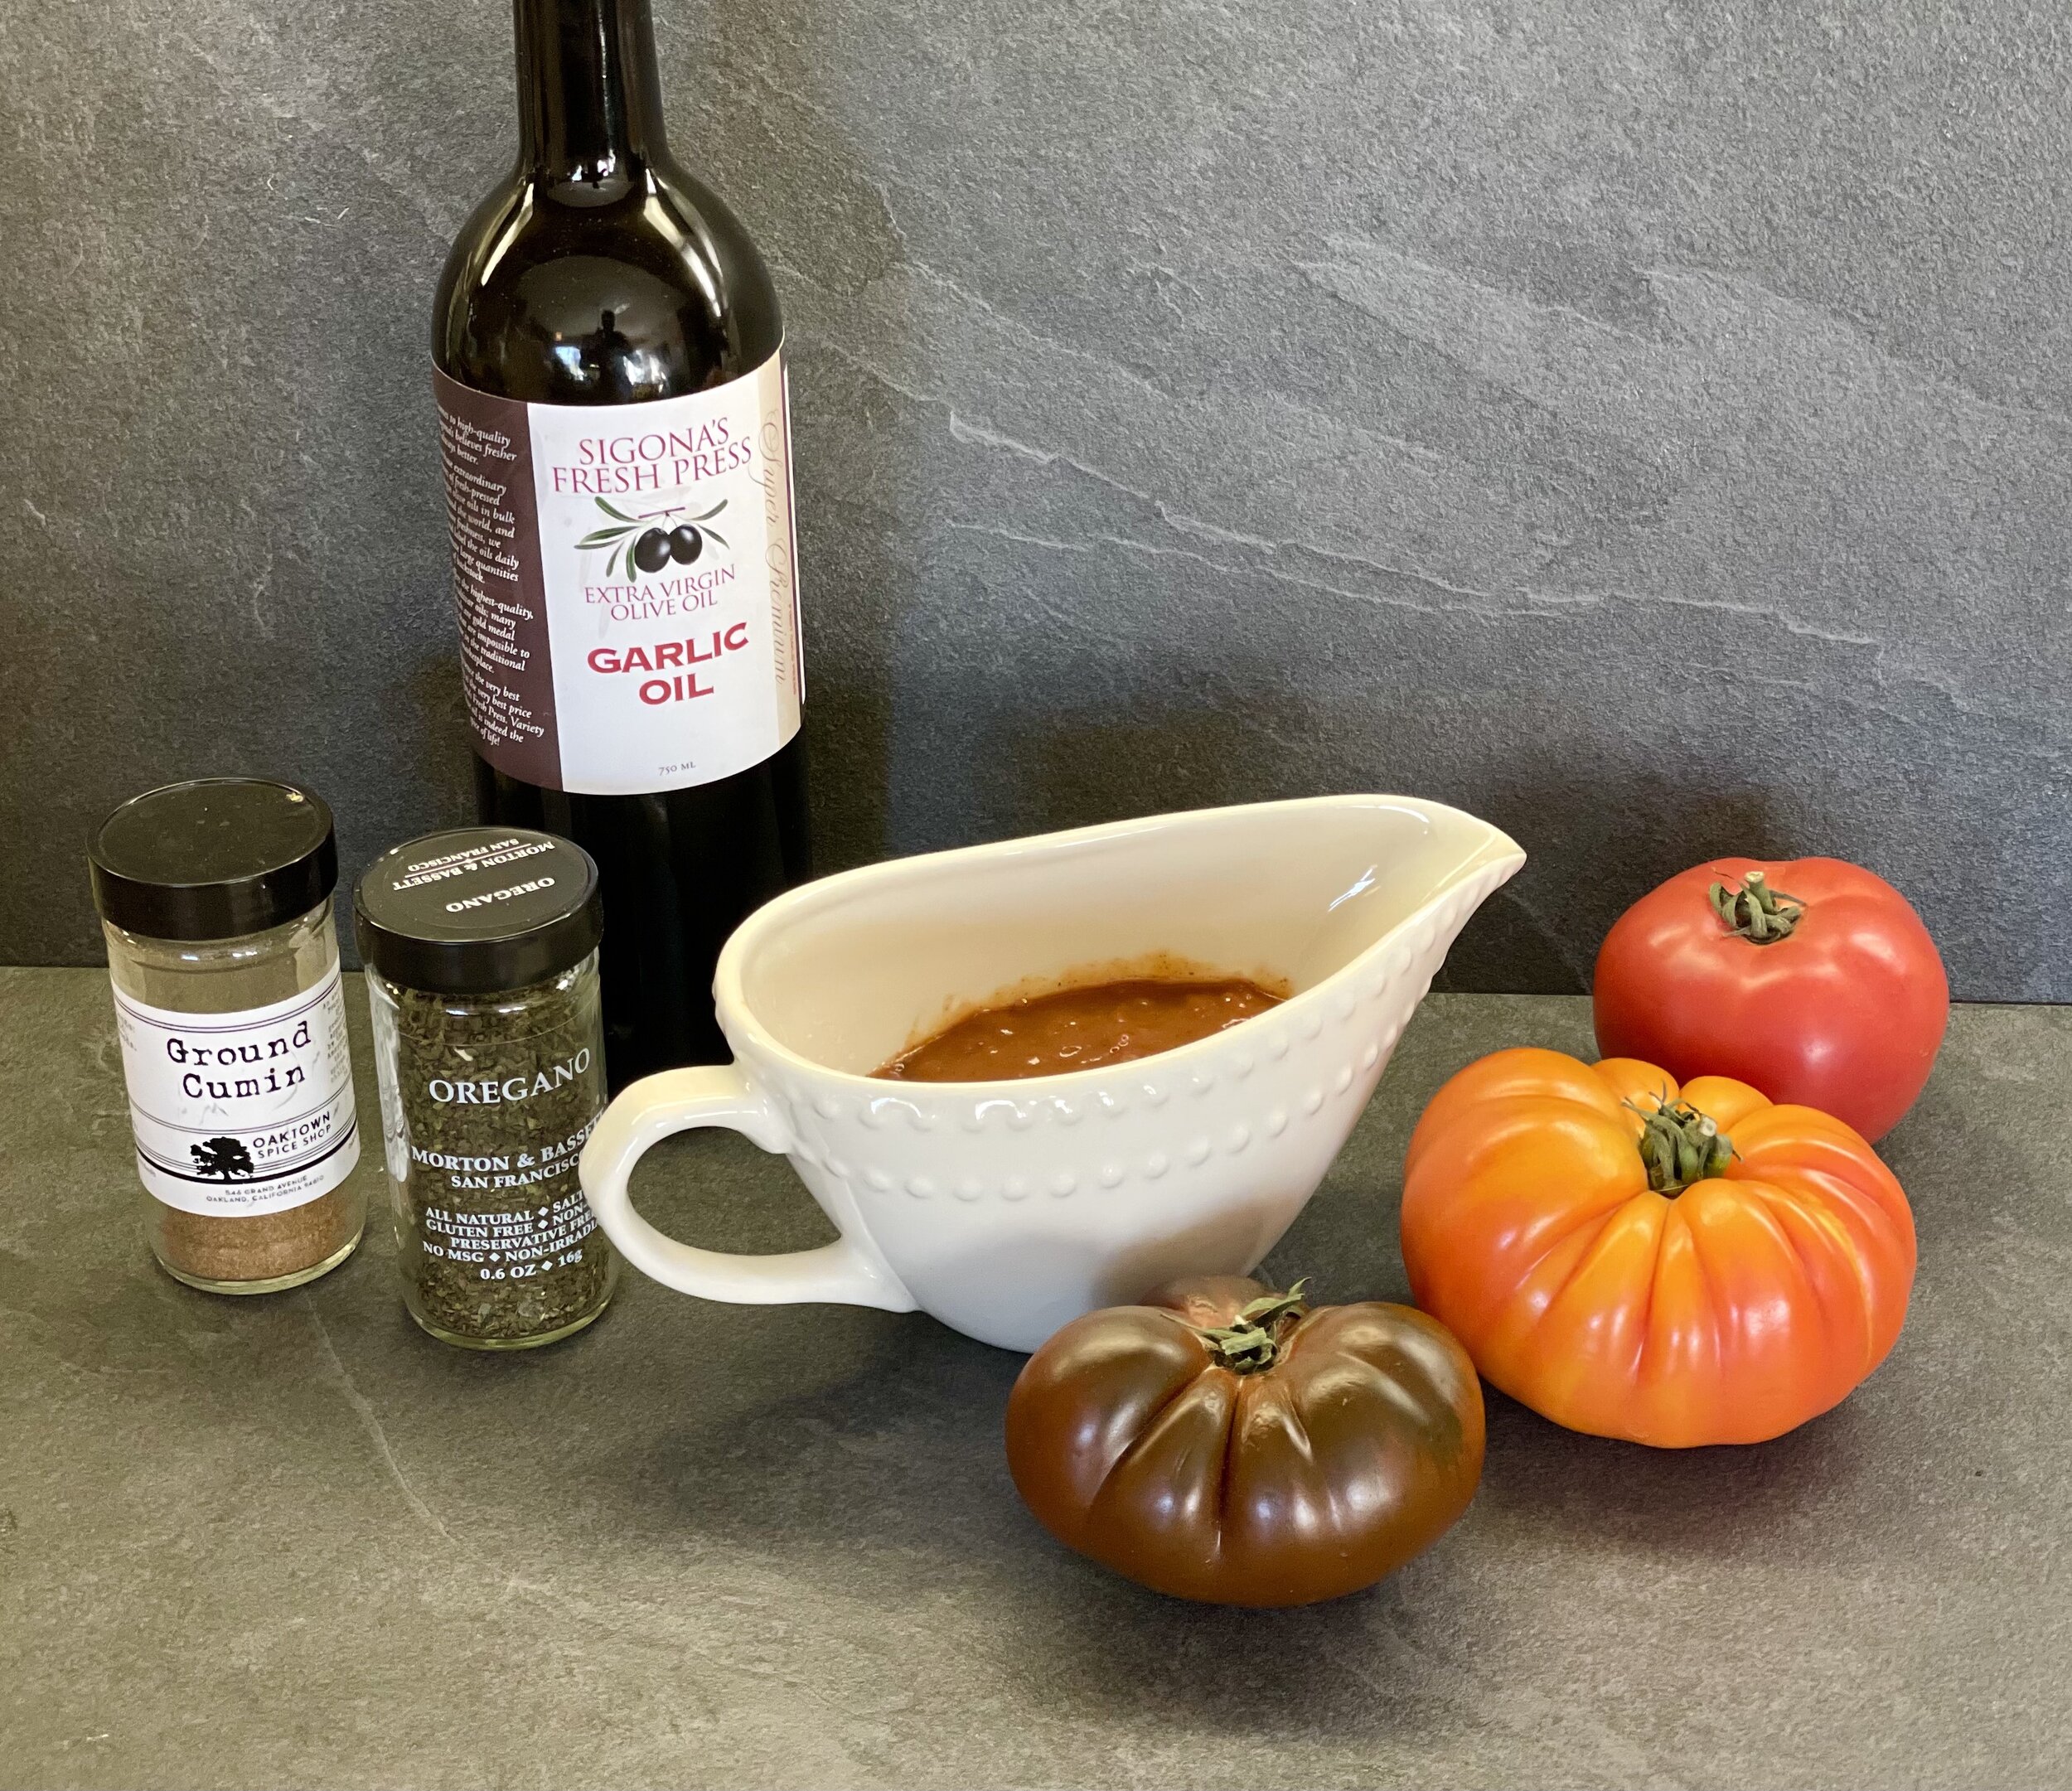
5 Minutes prep • 2 Hours simmer • Low FODMAP • Gluten-free • Lactose-free • Makes 2 cups