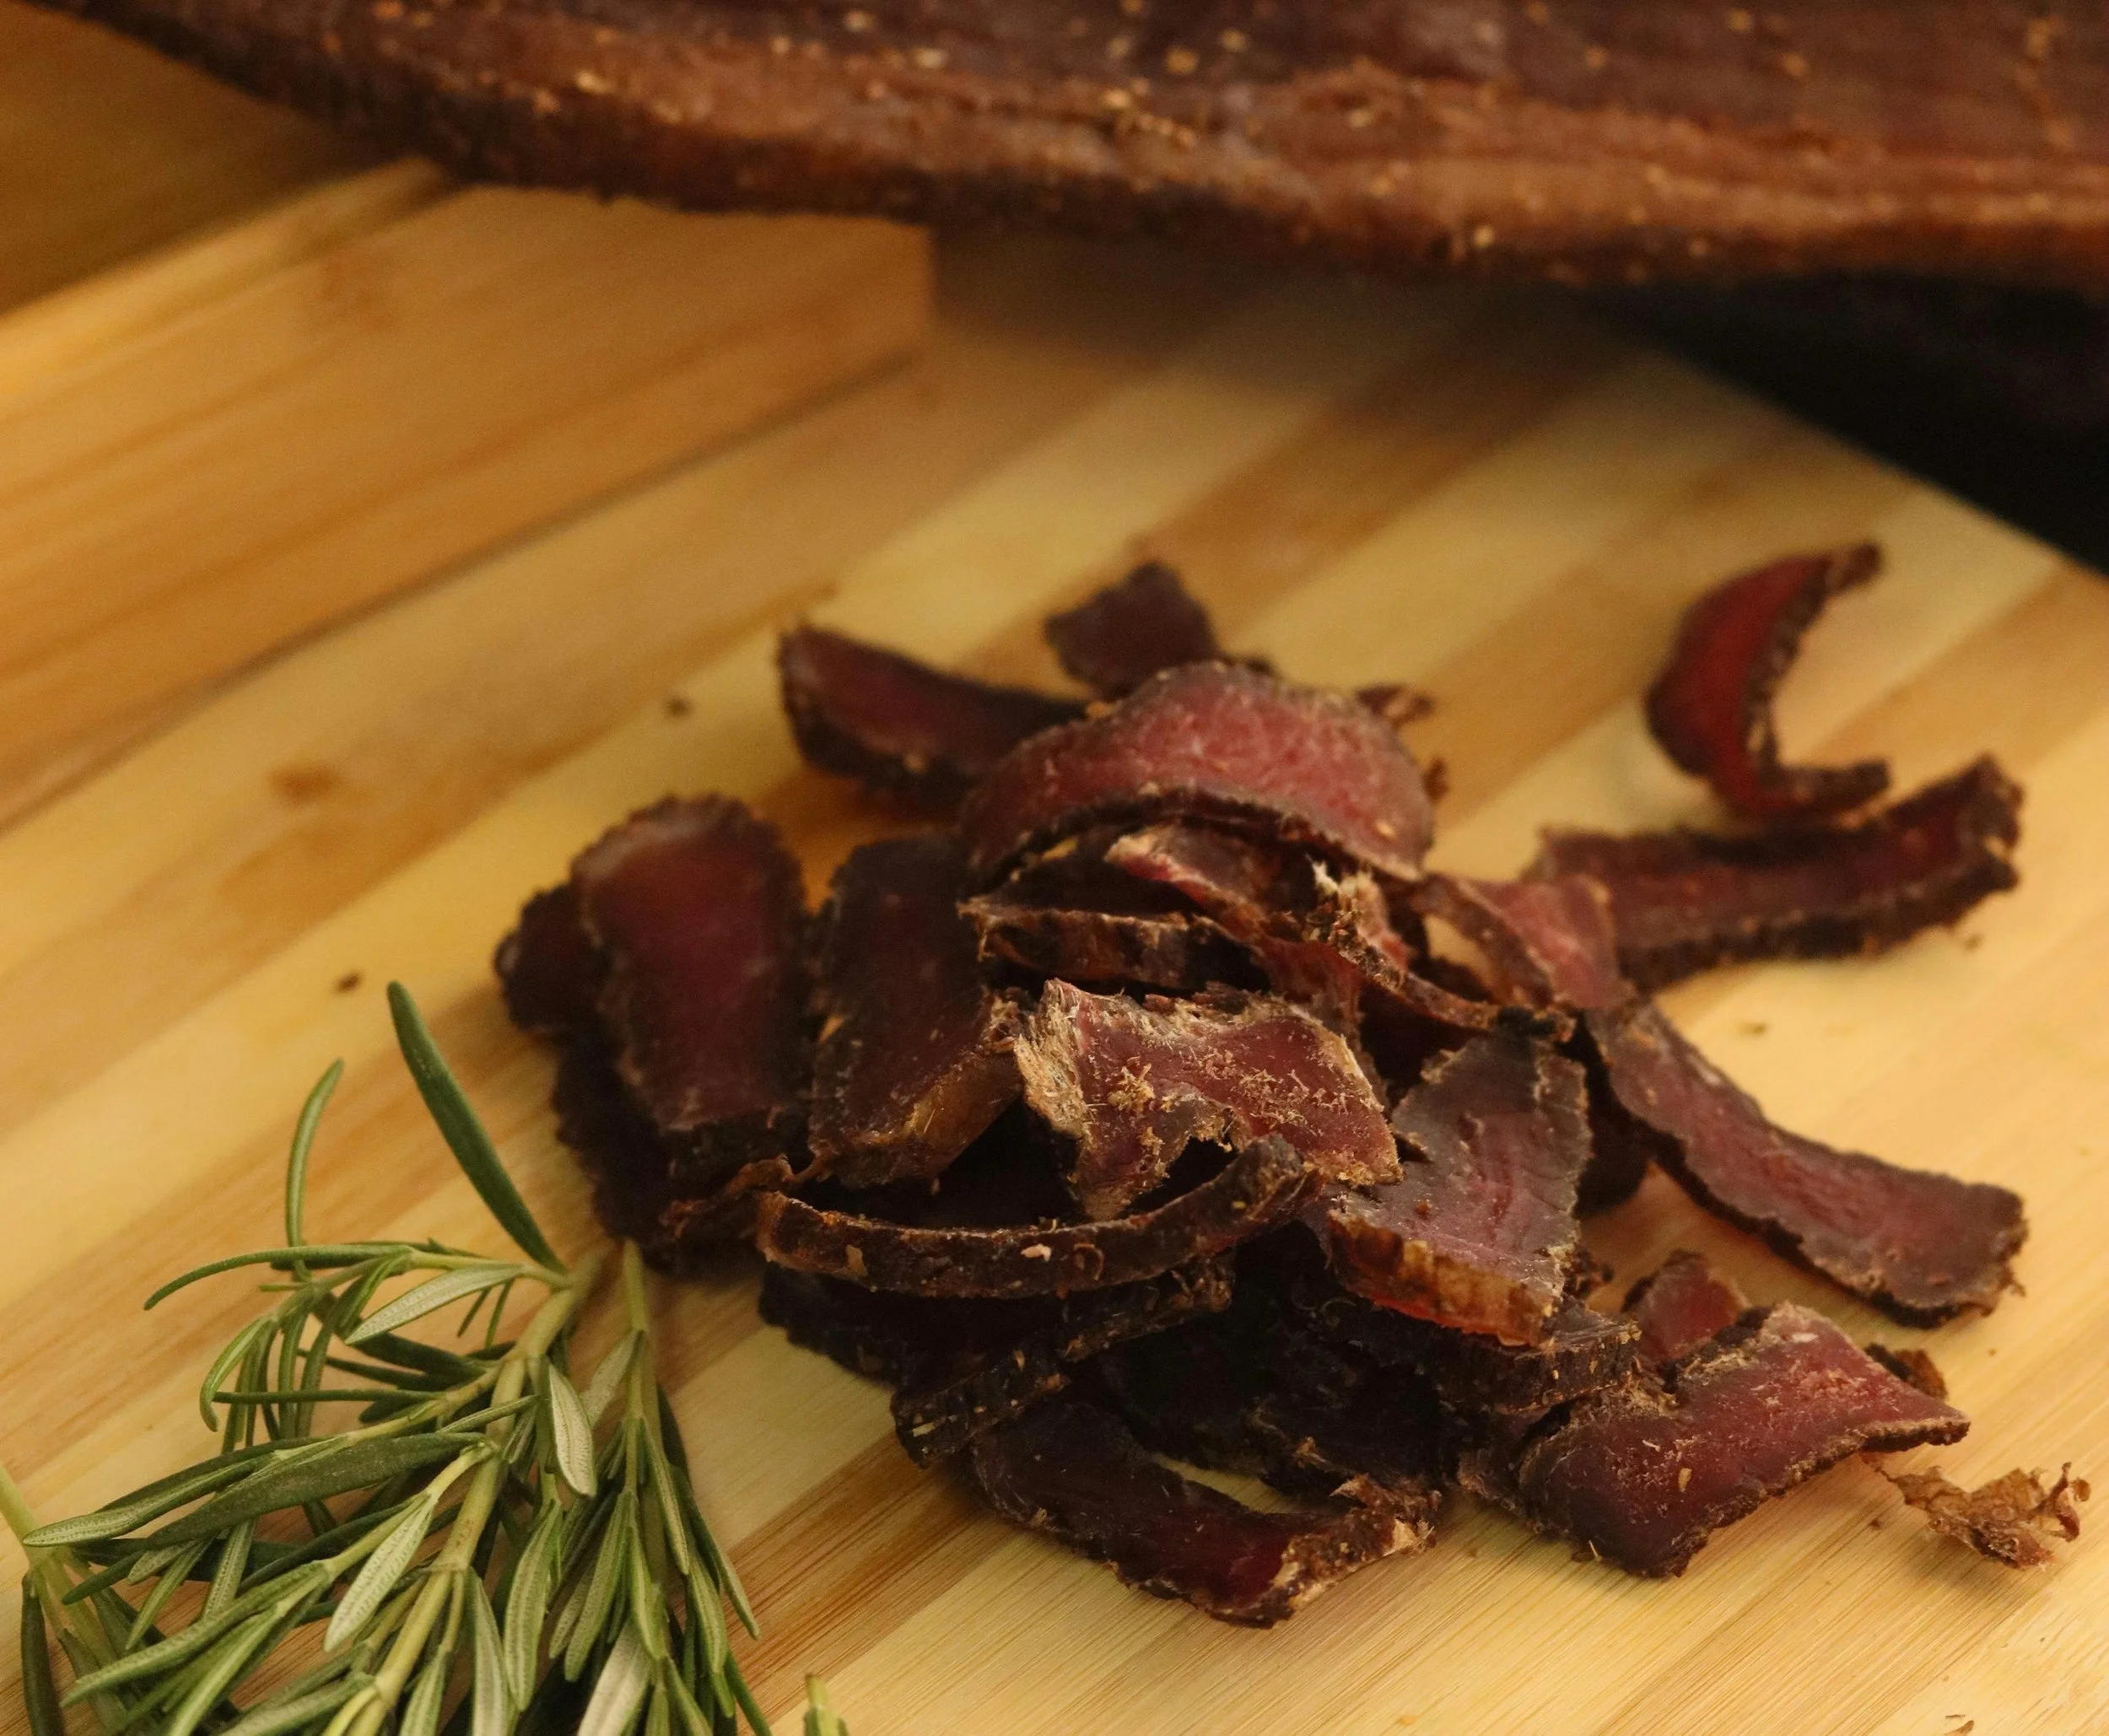
Deliciously Low FODMAP

Inspire yourself with hundreds of delicious low FODMAP recipes, tips, and tools, and enjoy the abundance that is yours even when you have IBS.
Use the buttons and filters to find something specific or browse the complete collection for inspiration.
Discover a treasure trove of recipes with my FREE recipe club! Get new ideas delivered straight to your inbox every week.
Deliciously Low FODMAP is a trademark of IBS Game Changer, LLC
Filter to find Recipes and Tools
More Filtering Options
- All 827
- Appetizer 56
- BBQ 49
- Bowl 32
- Breakfast 69
- Cocktails 13
- Collection 1 58
- Collection 10 27
- Collection 11 30
- Collection 12 27
- Collection 13 31
- Collection 14 29
- Collection 15 31
- Collection 16 34
- Collection 17 31
- Collection 18 33
- Collection 19 36
- Collection 2 32
- Collection 20 33
- Collection 21 33
- Collection 22 40
- Collection 23 63
- Collection 24 46
- Collection 3 28
- Collection 4 29
- Collection 5 30
- Collection 6 32
- Collection 7 31
- Collection 8 31
- Collection 9 32
- Condiments 6
- Crock Pot 4
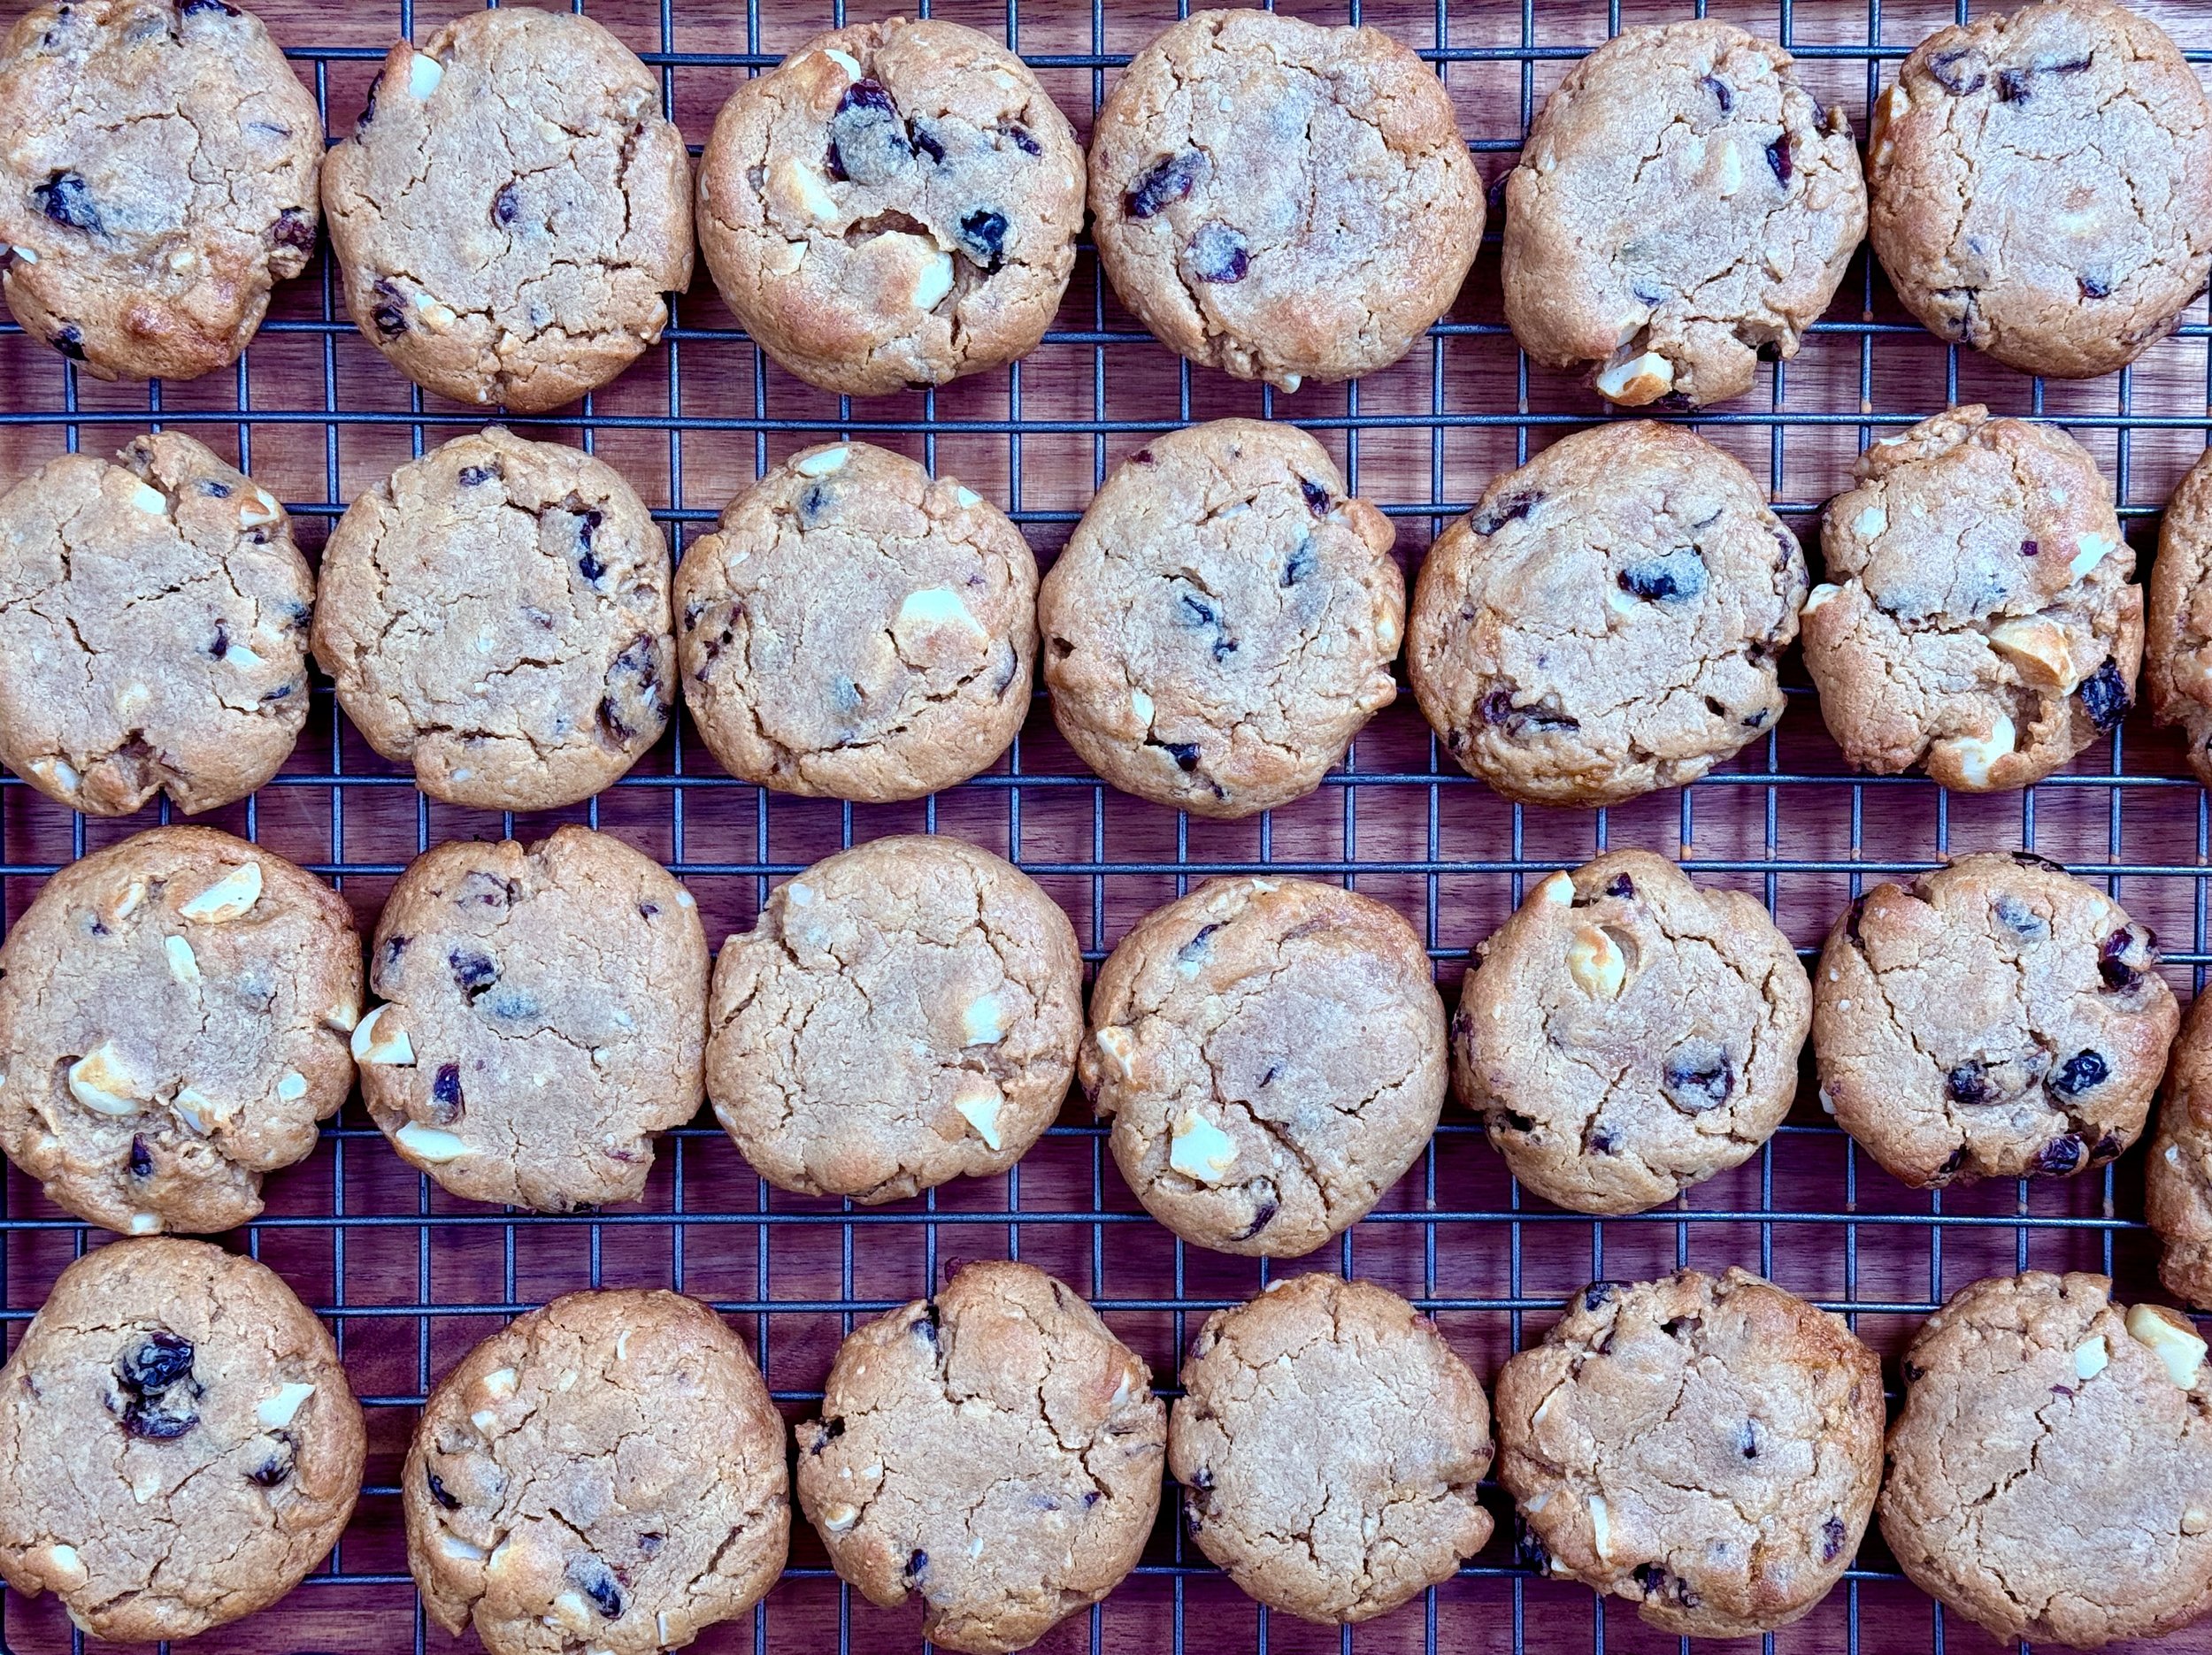
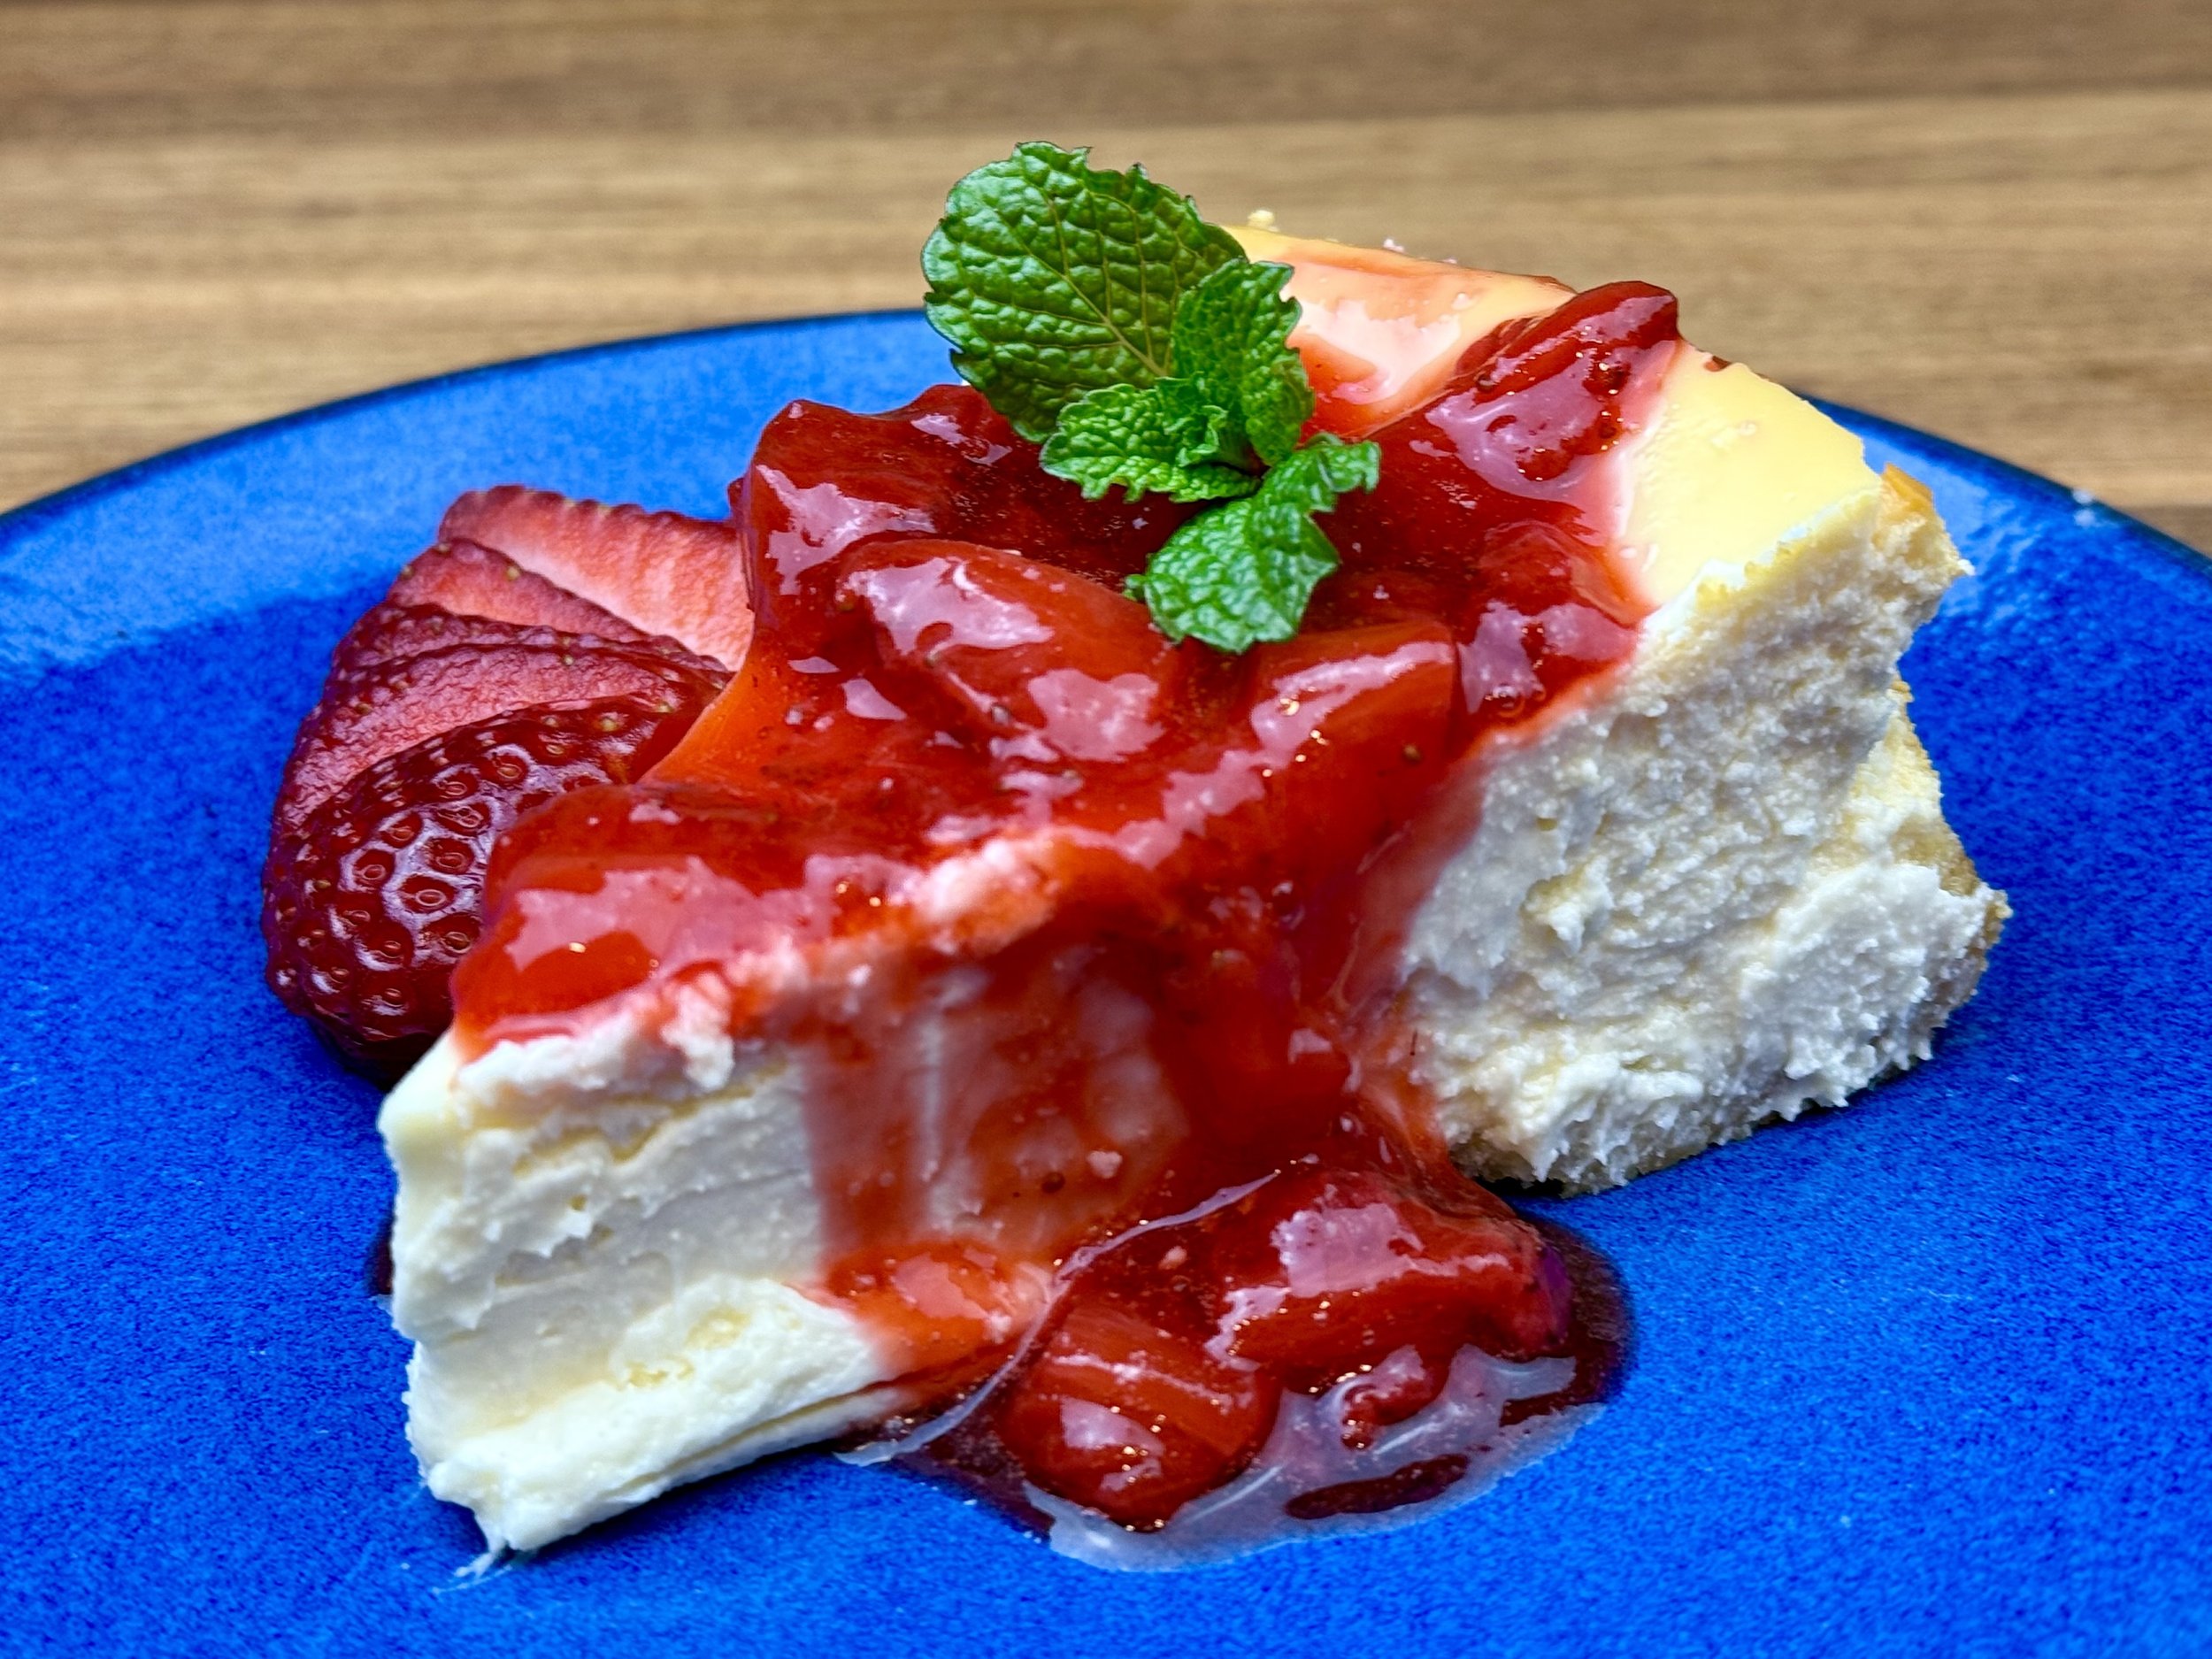
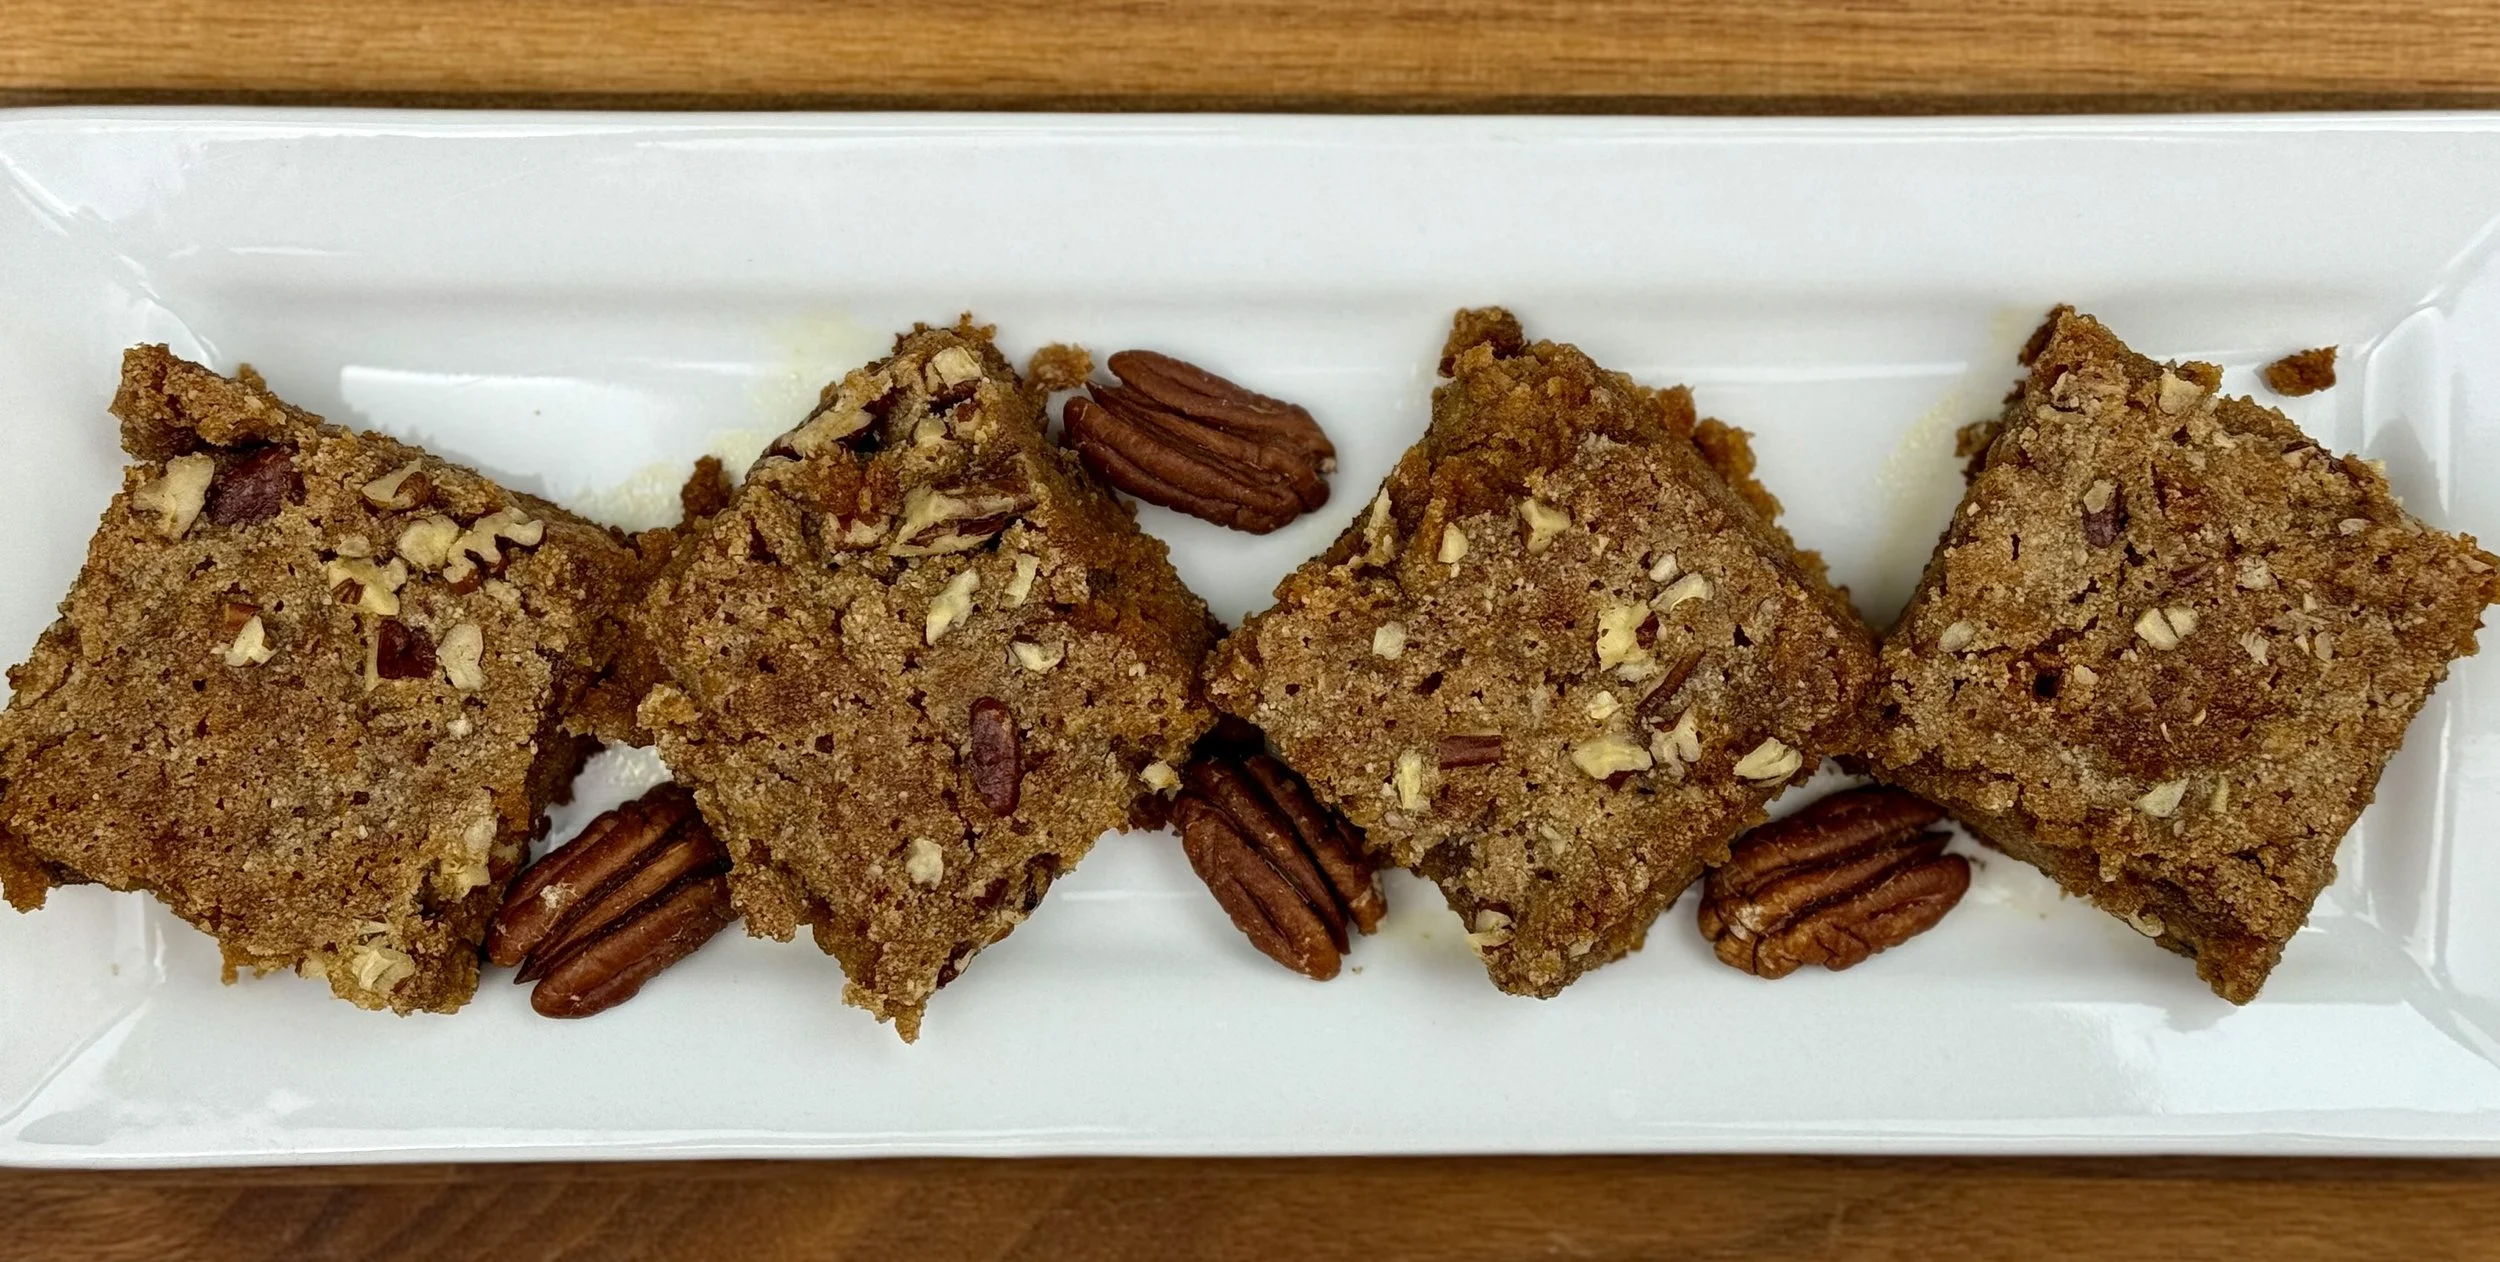
- Dessert 119
- Diabetes Game Changer Exception Protocol Contains Alcohol 11
- Diabetes Game Changer Exception Protocol Contains Flour 113
- Diabetes Game Changer Exception Protocol Contains Flour AND Sugar 79
- Diabetes Game Changer Exception Protocol Contains Sugar 52
- Diabetes Game Changer First Four Weeks 405
- Dinner 371
- Drink 8
- Easter 1
- Free Guide 17
- Gluten-free 686
- Gut Microbiome 2
- Guthealth 3
- Holidays 73
- IBS Triggers 4
- Keto Friendly 178
- Lactose-Free 184
- Low Carb 22
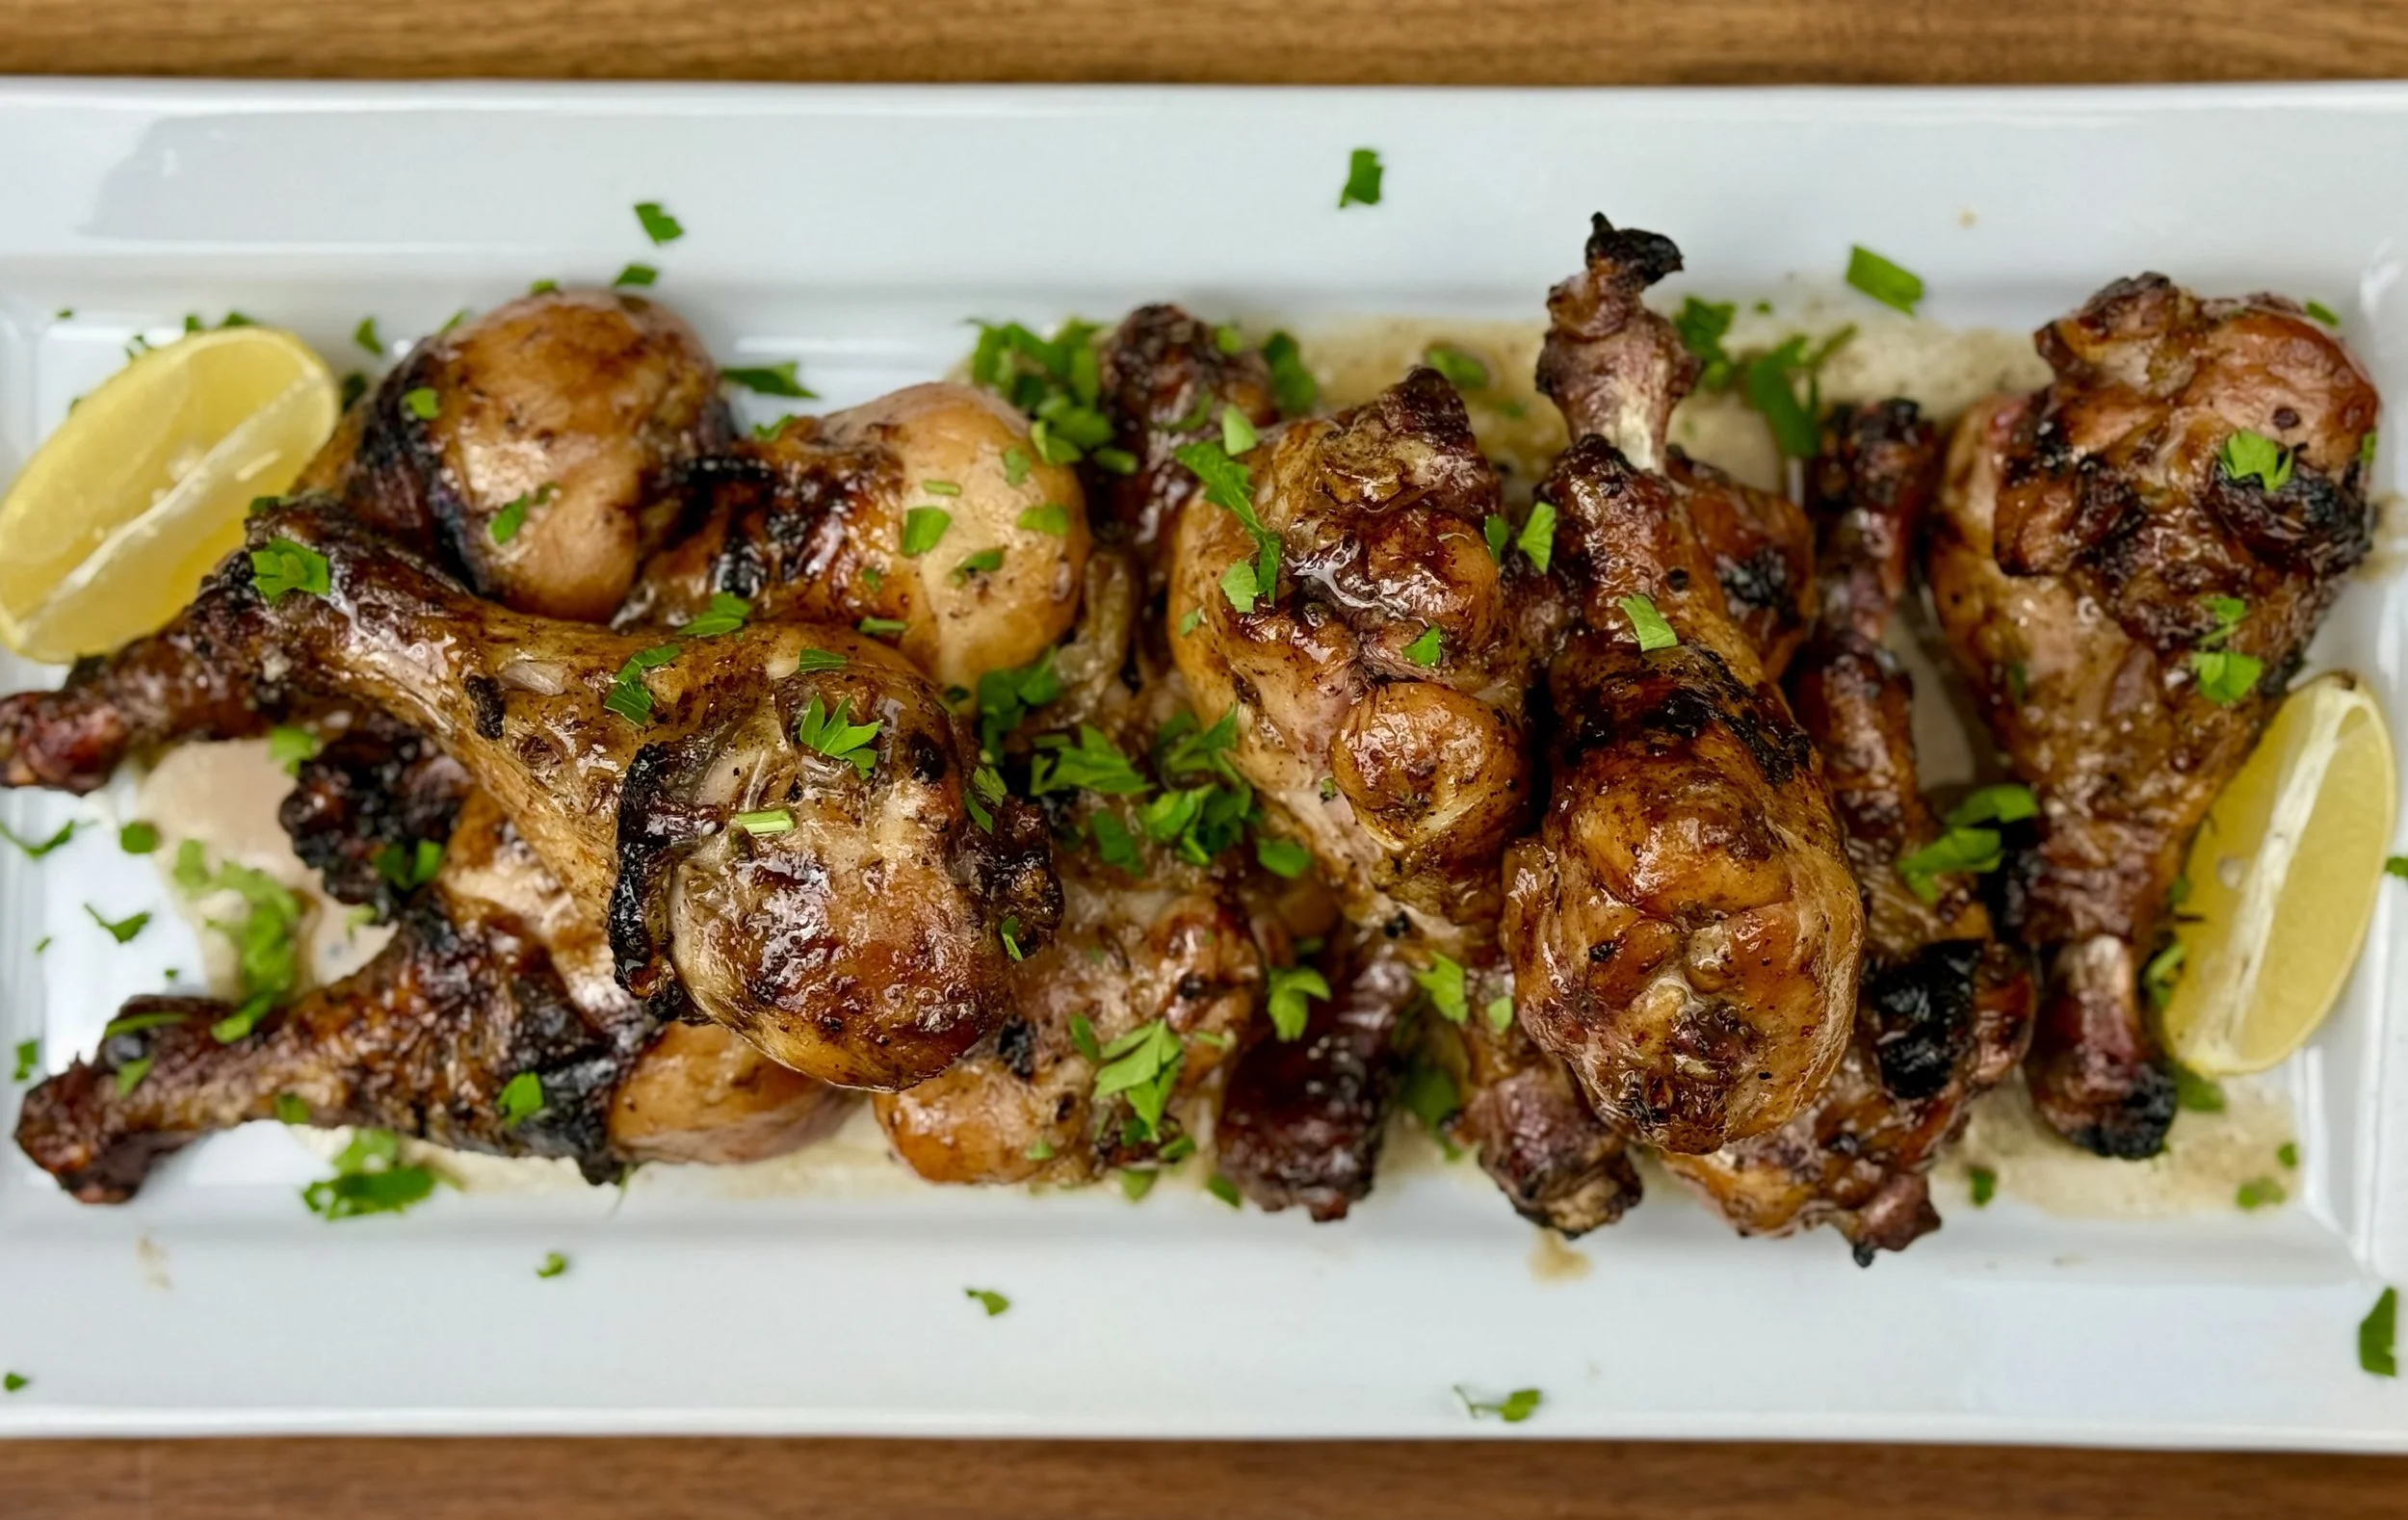
Game Day Smoky Lemon Pepper Chicken Legs (Low FODMAP)
10 Minutes prep • 40 Minutes cook • Low FODMAP • Gluten-Free • Makes 12
10 Minutes prep • 40 Minutes cook • Low FODMAP • Gluten-Free • Makes 12 • Ok to make-ahead: Steps 1 - 7
Your game day tailgate needs food that can handle sitting in a cooler, tastes amazing at any temperature, and doesn't require plates or utensils. These smoky lemon pepper chicken legs check every single box. The bright citrus and cracked pepper cut through the rich smokiness, creating bold flavors that hold up whether you're eating them hot off the grill or cold in the parking lot.
Smoking chicken legs keeps them ridiculously juicy with crispy, flavorful skin that stays perfect even hours later. No reheating required, no mess, no fuss - just grab one and get back to cheering on your team. They're the kind of tailgate food that makes people wander over from other parking spots, asking what smells so good.
Low FODMAP tailgate MVP: Prep them the night before, toss them in the cooler, and you've got crowd-pleasing protein that won't leave anyone feeling sluggish before kickoff.
See this new recipe in my FREE recipe club.
To streamline your search through hundreds of existing recipes, I'm moving the release of my new weekly creations to the Recipe Club on Patreon. In the club, you’ll get access to a treasure trove of low-FODMAP goodness, complete with collections and filters to use as your virtual cookbook!
Here's what awaits you in the club:
Exclusive weekly recipes: Be the first to try my latest delicious low-FODMAP creations!
Simple & Easy: My recipes continue to focus on readily available ingredients and effortless preparation, perfect for family-friendly meals (no more separate low-FODMAP meal prep!).
Hundreds of existing recipes: Gain access to my entire library of low-FODMAP recipes, all conveniently organized.
You can join for free or sign up for only $5/month. Your support fuels my passion for creating new, delicious, and easy-to-make low-FODMAP recipes just for you.
Let's go on this delicious low-FODMAP journey together.
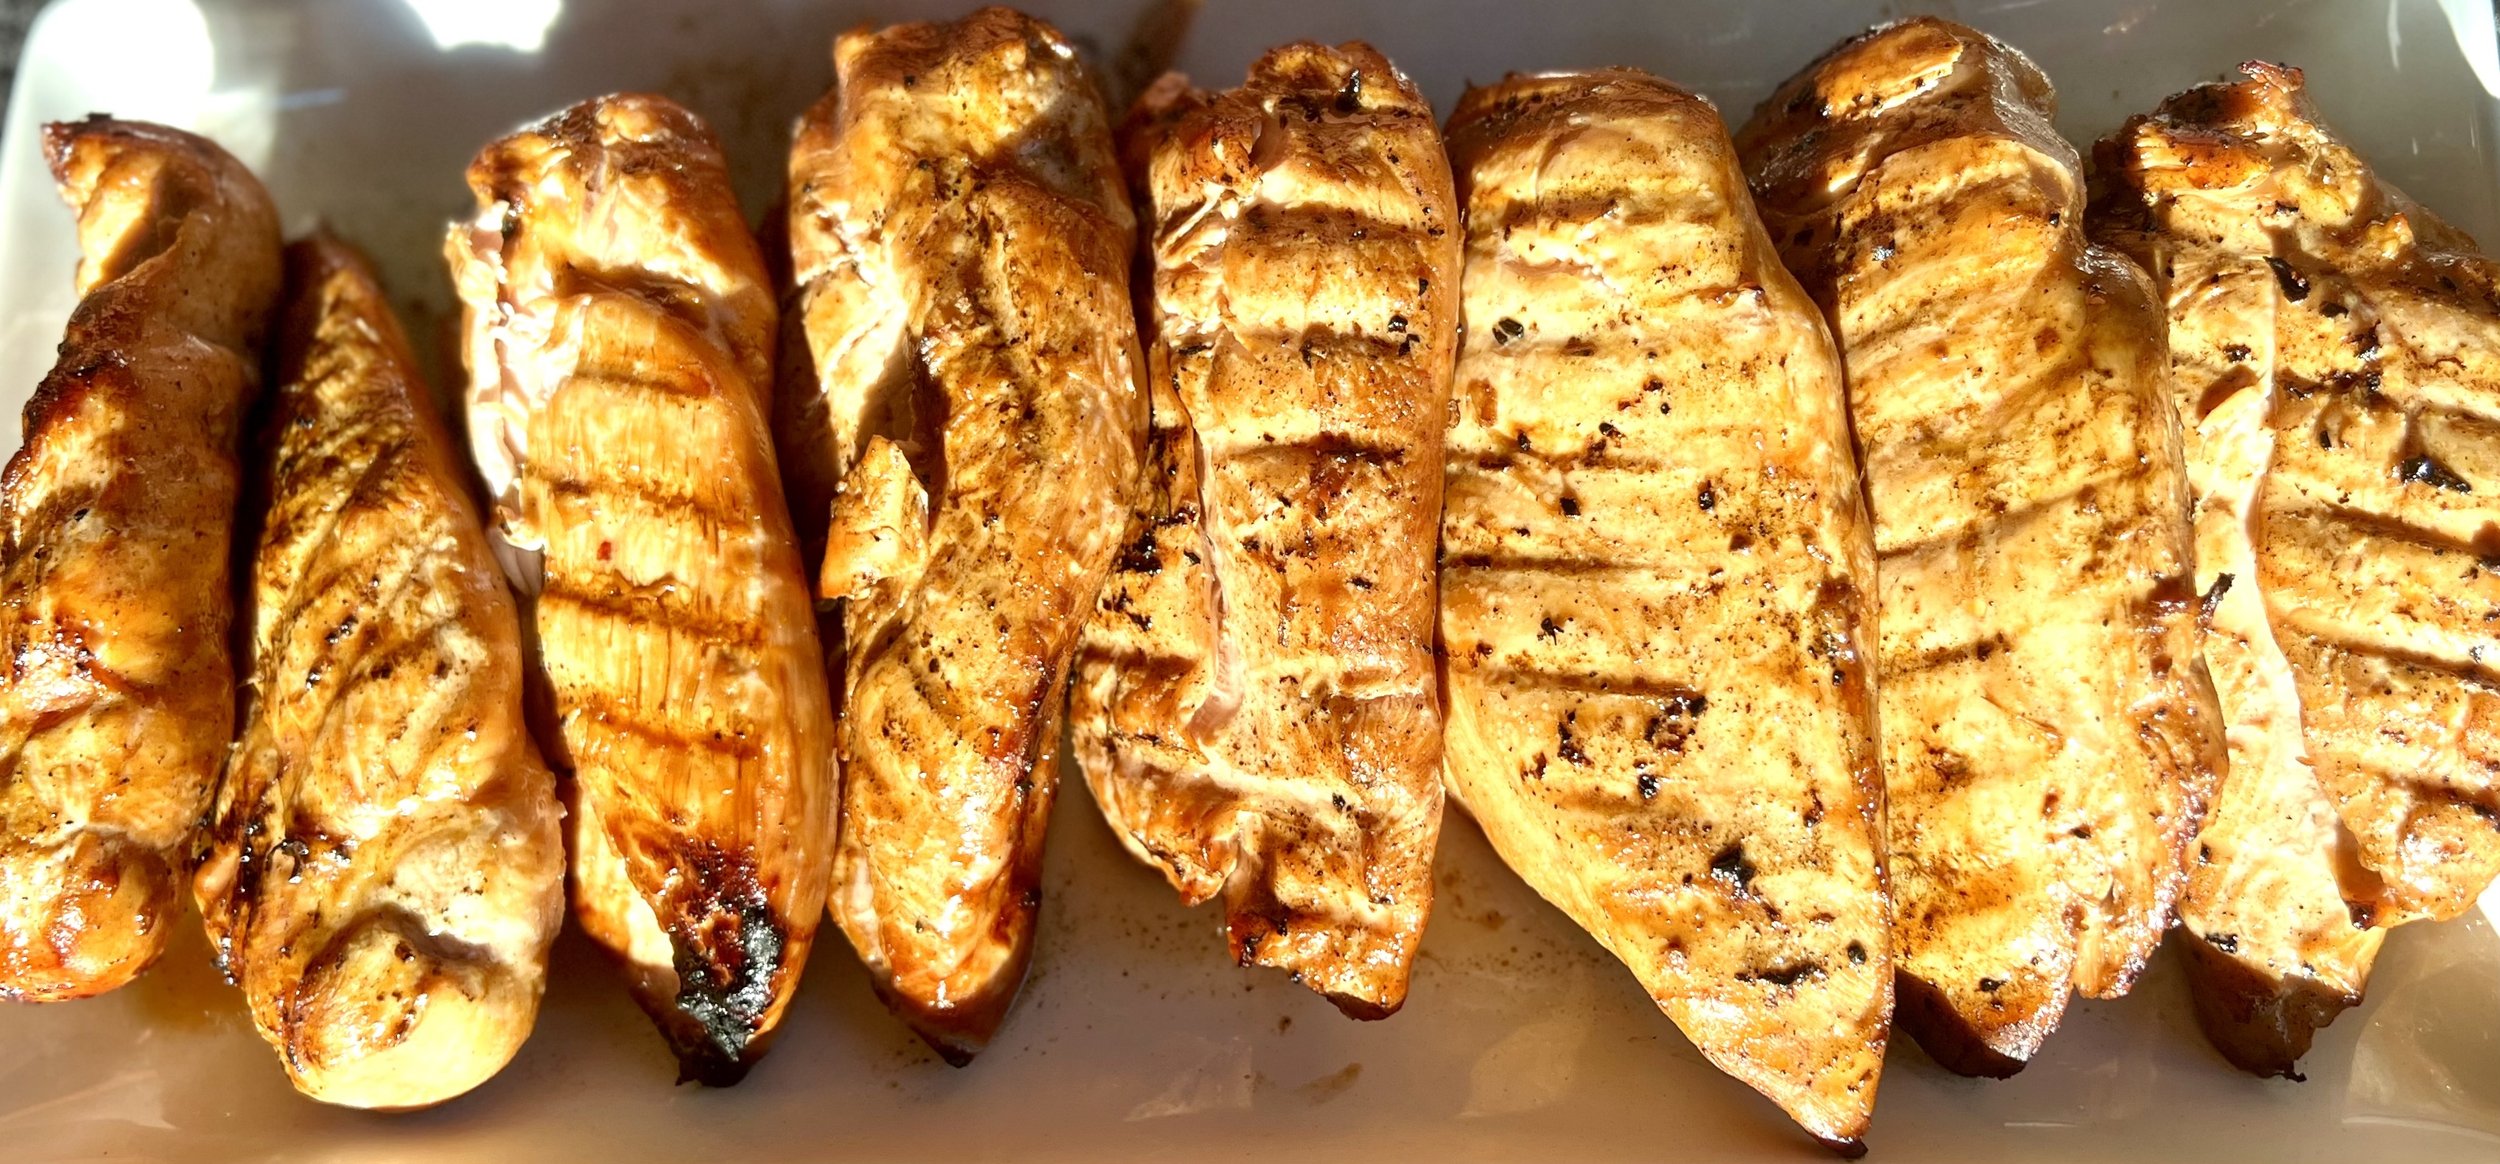
Crisp and Tangy Chicken Wings (Low FODMAP)
10 Minutes prep • 40 Minutes cook • Low FODMAP • Gluten-Free • Makes 32 pieces
10 Minutes prep • 40 Minutes cook • Low FODMAP • Gluten-Free • Makes 32 pieces • Ok to make-ahead: Step 1
Let's talk about one of life's great injustices: most wing sauces are absolutely loaded with garlic and onion, making them a complete no-go when you're managing IBS. But here's the thing - you don't need FODMAPs to create wings that are perfectly crisp on the outside and packed with tangy, finger-licking flavor.
These beauties get their crispiness from a simple baking technique (using a Traeger grill – or other pellet grill) while the seasoning delivers that perfect tangy lemony punch using gut-friendly ingredients like olive oil, lemon juice, and Smoke n Sanity’s Essence of Garlic Salt. The result? Wings that taste so good, no one will ever guess they're IBS-friendly.
See this new recipe in my FREE recipe club.
To streamline your search through hundreds of existing recipes, I'm moving the release of my new weekly creations to the Recipe Club on Patreon. In the club, you’ll get access to a treasure trove of low-FODMAP goodness, complete with collections and filters to use as your virtual cookbook!
Here's what awaits you in the club:
Exclusive weekly recipes: Be the first to try my latest delicious low-FODMAP creations!
Simple & Easy: My recipes continue to focus on readily available ingredients and effortless preparation, perfect for family-friendly meals (no more separate low-FODMAP meal prep!).
Hundreds of existing recipes: Gain access to my entire library of low-FODMAP recipes, all conveniently organized.
You can join for free or sign up for only $5/month. Your support fuels my passion for creating new, delicious, and easy-to-make low-FODMAP recipes just for you.
Let's go on this delicious low-FODMAP journey together.
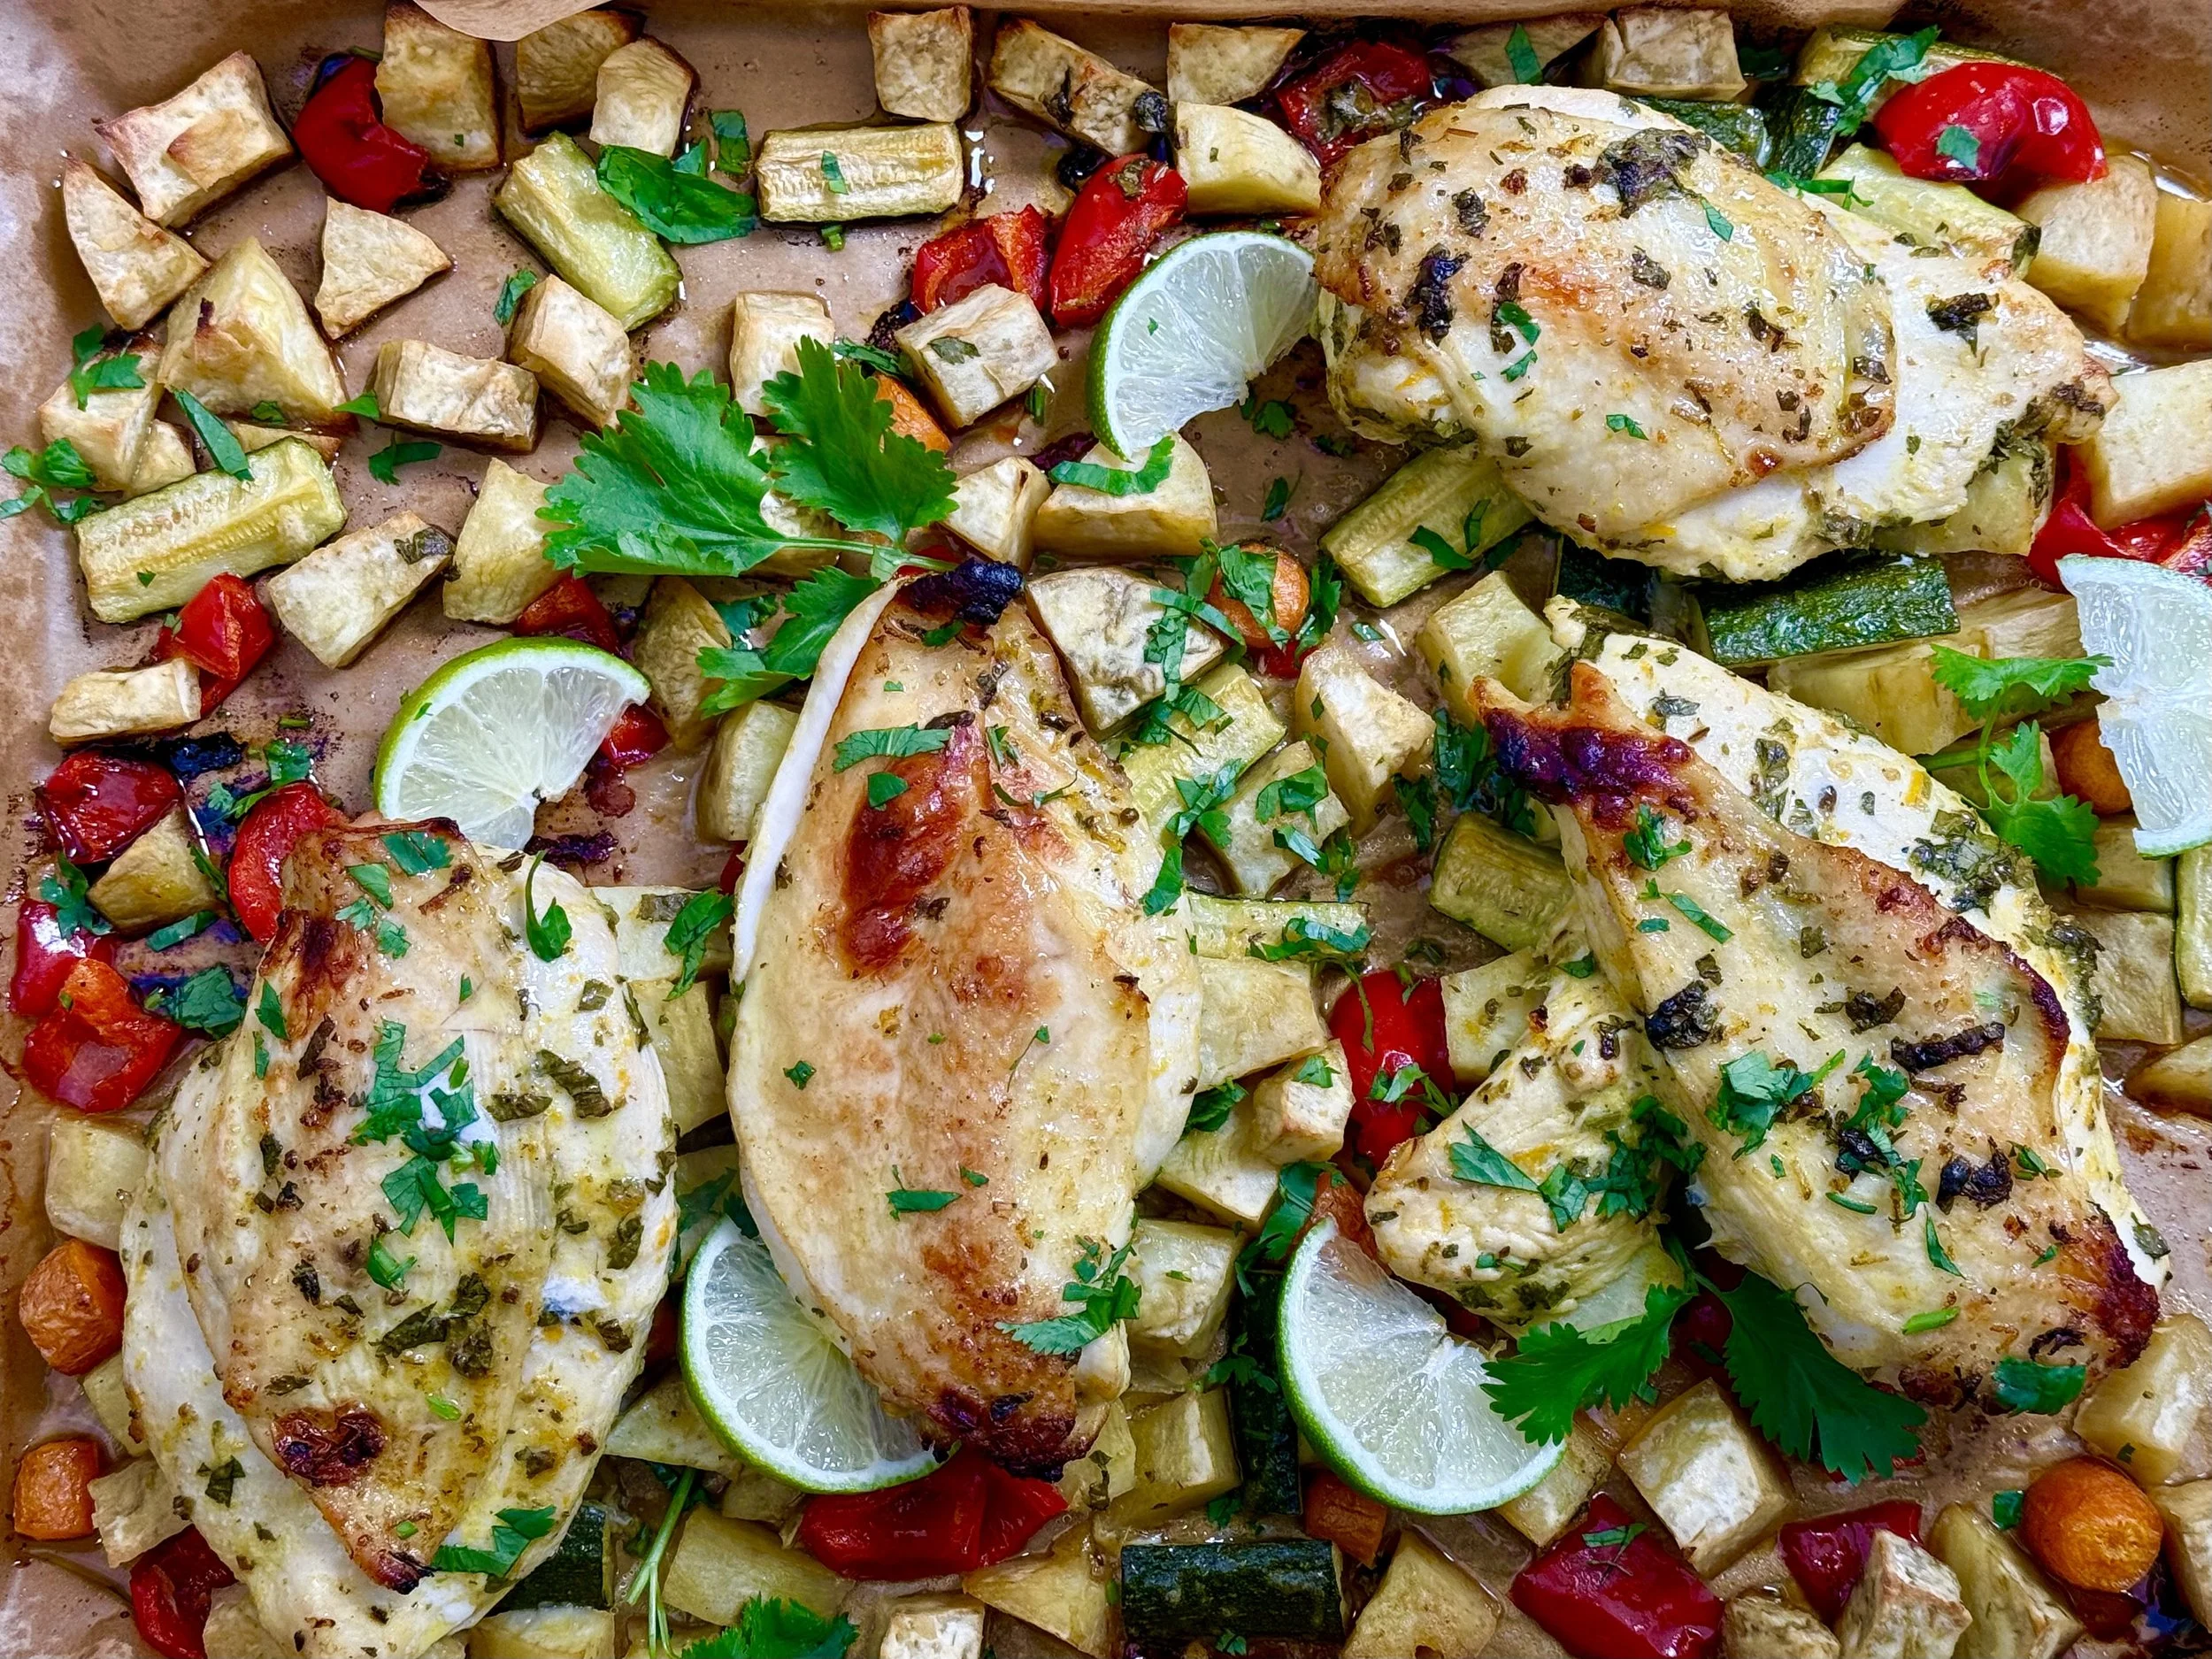
Grilled Satay-Style Chicken (Low FODMAP)
20 Minutes prep • 2 - 8 hours Marinate • 30 Minutes cook • Low FODMAP • Gluten-Free • Serves 4 - 6
20 Minutes prep • 2 - 8 hours Marinate • 30 Minutes cook • Low FODMAP • Gluten-Free • Serves 4 - 6 • Ok to make-ahead: Steps 1 - 2
Think tender, smoky chicken thighs that taste like they just strolled out of a street food stall in Bangkok — bold, aromatic, and dripping with flavor. A delicious marinade of coconut milk, spices, and a hit of rice vinegar does all the heavy lifting while you do literally anything else. Then it’s straight onto the grill for those charred, golden edges and a juicy center that makes you question why you ever settled for boring chicken. This isn’t just dinner — it’s a weeknight vacation.
See this new recipe in my FREE recipe club.
To streamline your search through hundreds of existing recipes, I'm moving the release of my new weekly creations to the Recipe Club on Patreon. In the club, you’ll get access to a treasure trove of low-FODMAP goodness, complete with collections and filters to use as your virtual cookbook!
Here's what awaits you in the club:
Exclusive weekly recipes: Be the first to try my latest delicious low-FODMAP creations!
Simple & Easy: My recipes continue to focus on readily available ingredients and effortless preparation, perfect for family-friendly meals (no more separate low-FODMAP meal prep!).
Hundreds of existing recipes: Gain access to my entire library of low-FODMAP recipes, all conveniently organized.
You can join for free or sign up for only $5/month. Your support fuels my passion for creating new, delicious, and easy-to-make low-FODMAP recipes just for you.
Let's go on this delicious low-FODMAP journey together.
Bacon Feta Basil Turkey Burgers (Low FODMAP)
10 Minutes prep • 15 Minutes cook • Low FODMAP • Gluten-Free • Serves 4
10 Minutes prep • 15 Minutes cook • Low FODMAP • Gluten-Free • Serves 4 • Ok to make-ahead: Steps 1 - 3
If you're looking for a burger recipe that’s bursting with fresh flavors and a delightful twist on a classic, these Bacon Feta Basil Turkey Burgers are just the thing! Ground turkey serves as the perfect base, while crumbled feta adds a tangy flavor to every bite. Tomato, basil, and green onion greens bring a delightful freshness that pairs beautifully with the smoky crispness of bacon. These burgers are perfect for grilling season or an easy weeknight dinner, and they bring Mediterranean-inspired goodness to your plate in just a few simple steps. Serve them with a lettuce wrap or gluten-free bun along with your favorite toppings, and get ready to enjoy every bite!
See this new recipe in my FREE recipe club.
To streamline your search through hundreds of existing recipes, I'm moving the release of my new weekly creations to the Recipe Club on Patreon. In the club, you’ll get access to a treasure trove of low-FODMAP goodness, complete with collections and filters to use as your virtual cookbook!
Here's what awaits you in the club:
Exclusive weekly recipes: Be the first to try my latest delicious low-FODMAP creations!
Simple & Easy: My recipes continue to focus on readily available ingredients and effortless preparation, perfect for family-friendly meals (no more separate low-FODMAP meal prep!).
Hundreds of existing recipes: Gain access to my entire library of low-FODMAP recipes, all conveniently organized.
You can join for free or sign up for only $5/month. Your support fuels my passion for creating new, delicious, and easy-to-make low-FODMAP recipes just for you.
Let's go on this delicious low-FODMAP journey together.
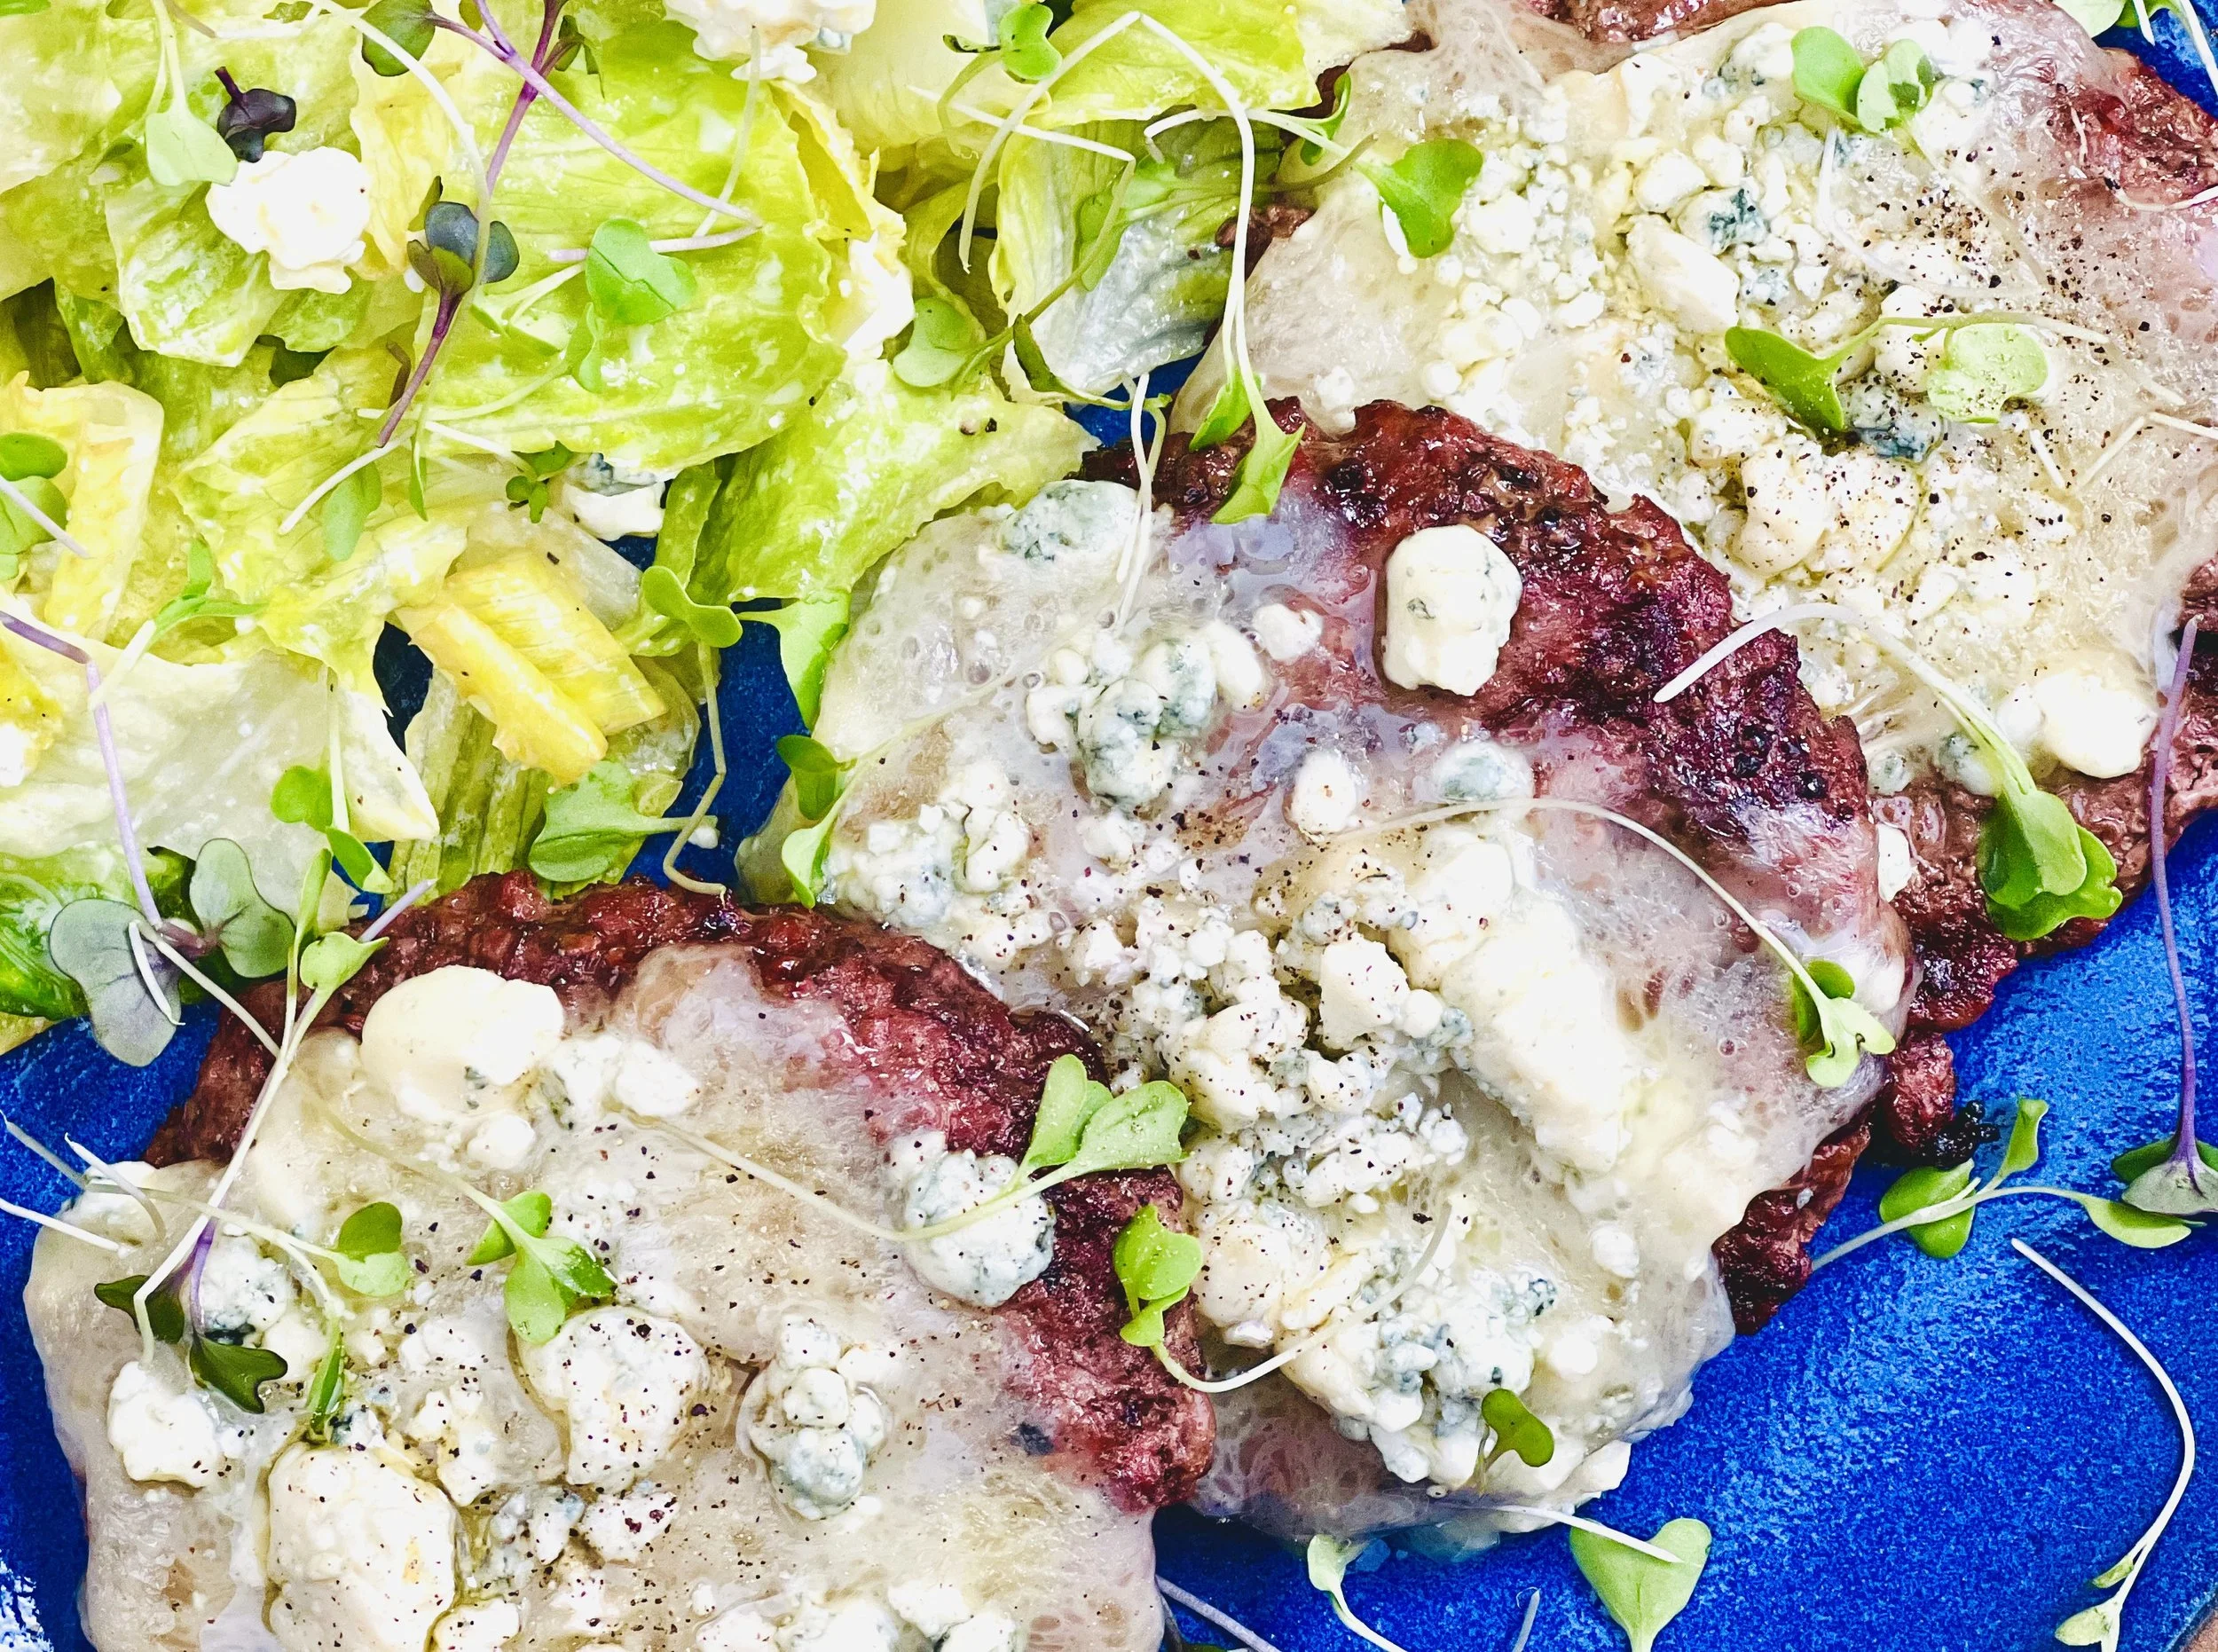
Brie and Blue Burgers (Low FODMAP)
5 Minutes prep • 10 Minutes cook • Low FODMAP • Gluten-Free • Serves 4
5 Minutes prep • 10 Minutes cook • Low FODMAP • Gluten-Free • Serves 4
When you use really flavorful cheese, a little goes a long way! In this recipe, I combined a couple of slices of double cream brie with a sprinkle of blue cheese crumbles for a simple, yet rich and incredibly flavorful combination. These burgers were excellent straight off the grill and still delicious when heated up as a leftover for lunch the next day.
See this new recipe in my FREE recipe club.
To streamline your search through hundreds of existing recipes, I'm moving the release of my new weekly creations to the Recipe Club on Patreon. In the club, you’ll get access to a treasure trove of low-FODMAP goodness, complete with collections and filters to use as your virtual cookbook!
Here's what awaits you in the club:
Exclusive weekly recipes: Be the first to try my latest delicious low-FODMAP creations!
Simple & Easy: My recipes continue to focus on readily available ingredients and effortless preparation, perfect for family-friendly meals (no more separate low-FODMAP meal prep!).
Hundreds of existing recipes: Gain access to my entire library of low-FODMAP recipes, all conveniently organized.
You can join for free or sign up for only $5/month. Your support fuels my passion for creating new, delicious, and easy-to-make low-FODMAP recipes just for you.
Let's go on this delicious low-FODMAP journey together.
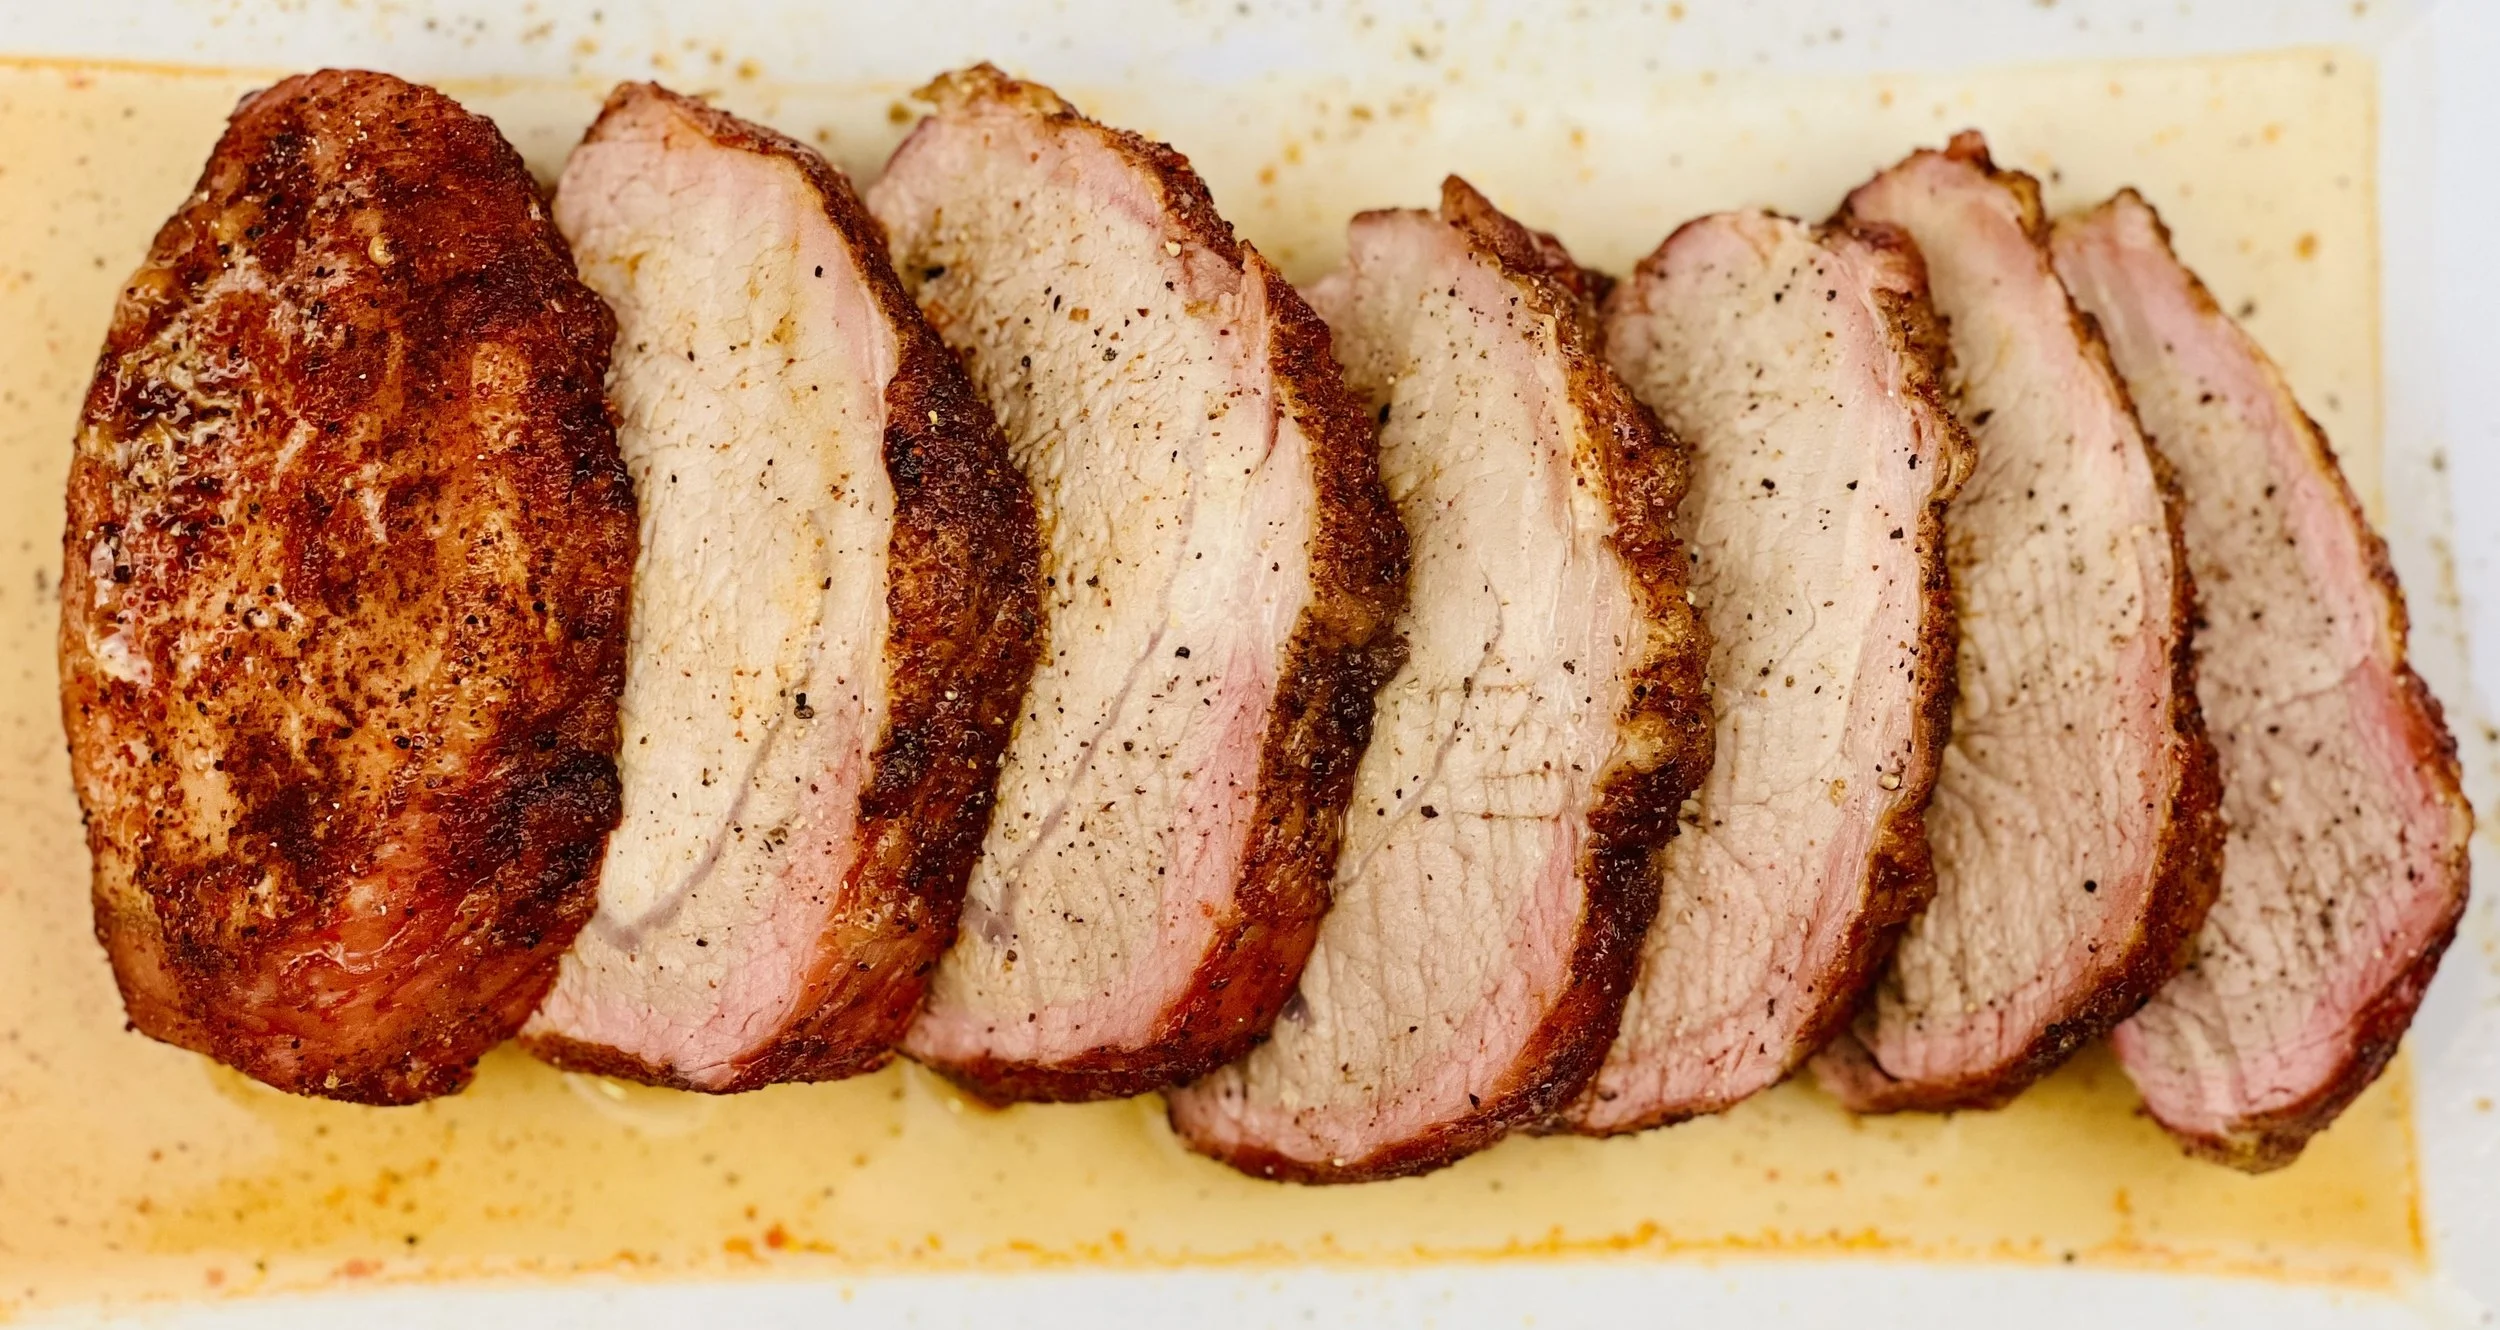
2-Ingredient Grilled Pork Loin (Low FODMAP)
5 Minutes prep • 2 Hours cook • Low FODMAP • Gluten-Free • Serves 4
5 Minutes prep • 2 Hours cook • Low FODMAP • Gluten-Free • Serves 4 • Ok to make-ahead: Steps 1 - 2
Looking to prepare a simple yet flavorful dish? This two-ingredient roasted pork loin recipe delivers on both ease and taste. With minimal effort and just a couple of key ingredients, you can achieve tender, juicy pork that's perfect for any occasion. Whether you're cooking for a weeknight dinner or a special gathering, this recipe promises a delicious outcome that will satisfy your hunger and impress your guests.
See this new recipe in my FREE recipe club.
To streamline your search through hundreds of existing recipes, I'm moving the release of my new weekly creations to the Recipe Club on Patreon. In the club, you’ll get access to a treasure trove of low-FODMAP goodness, complete with collections and filters to use as your virtual cookbook!
Here's what awaits you in the club:
Exclusive weekly recipes: Be the first to try my latest delicious low-FODMAP creations!
Simple & Easy: My recipes continue to focus on readily available ingredients and effortless preparation, perfect for family-friendly meals (no more separate low-FODMAP meal prep!).
Hundreds of existing recipes: Gain access to my entire library of low-FODMAP recipes, all conveniently organized.
You can join for free or sign up for only $5/month. Your support fuels my passion for creating new, delicious, and easy-to-make low-FODMAP recipes just for you.
Let's go on this delicious low-FODMAP journey together.
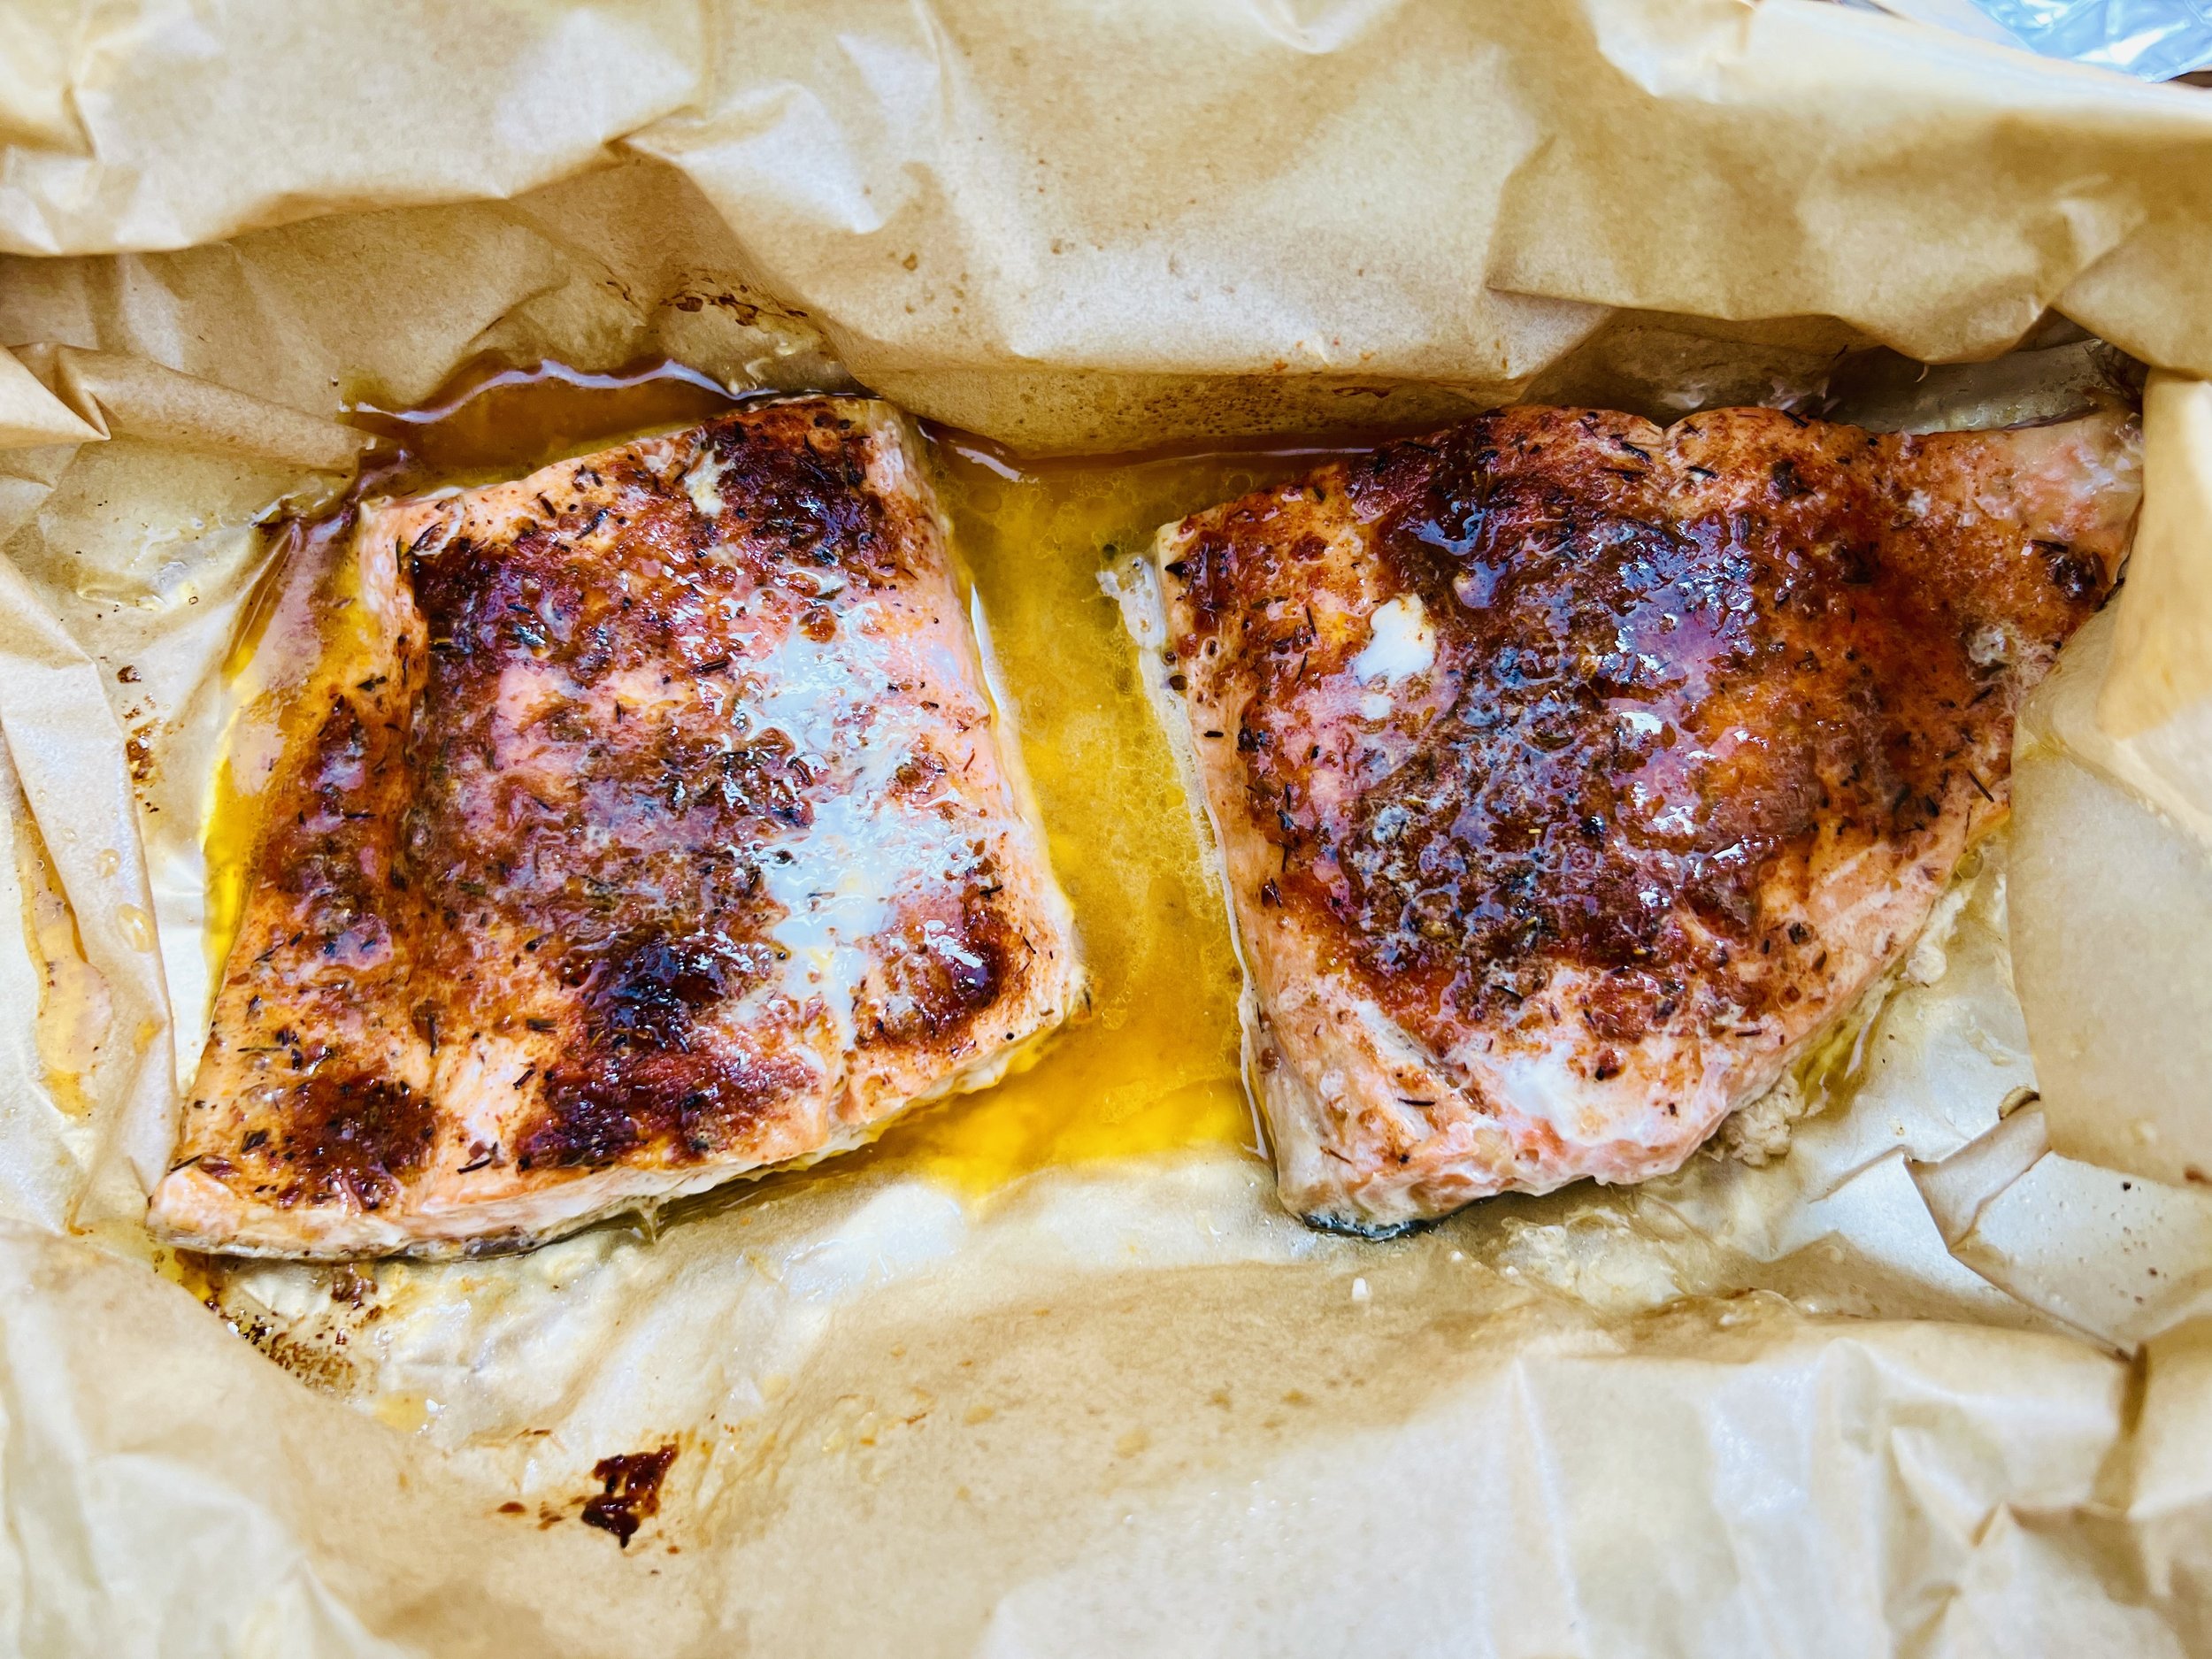
3-Ingredient Grilled Cajun Salmon (Low FODMAP)
5 Minutes prep • 14 - 18 Minutes cook • Low FODMAP • Gluten-Free • Serves 2
5 Minutes prep • 14 - 18 Minutes cook • Low FODMAP • Gluten-Free • Serves 2 • Ok to make-ahead: Steps 1 - 2
Craving a delicious, yet simple dinner? Look no further than this 3-ingredient, Cajun Salmon that you can whip up in no time. With its bold Cajun seasoning, flaky salmon, and buttery juices, this dish is sure to impress your pickiest guests. Perfect for a weeknight meal or a family gathering, this recipe is so easy to make and delivers big on flavor.
See this new recipe in my FREE recipe club.
To streamline your search through hundreds of existing recipes, I'm moving the release of my new weekly creations to the Recipe Club on Patreon. In the club, you’ll get access to a treasure trove of low-FODMAP goodness, complete with collections and filters to use as your virtual cookbook!
Here's what awaits you in the club:
Exclusive weekly recipes: Be the first to try my latest delicious low-FODMAP creations!
Simple & Easy: My recipes continue to focus on readily available ingredients and effortless preparation, perfect for family-friendly meals (no more separate low-FODMAP meal prep!).
Hundreds of existing recipes: Gain access to my entire library of low-FODMAP recipes, all conveniently organized.
You can join for free or sign up for only $5/month. Your support fuels my passion for creating new, delicious, and easy-to-make low-FODMAP recipes just for you.
Let's go on this delicious low-FODMAP journey together.
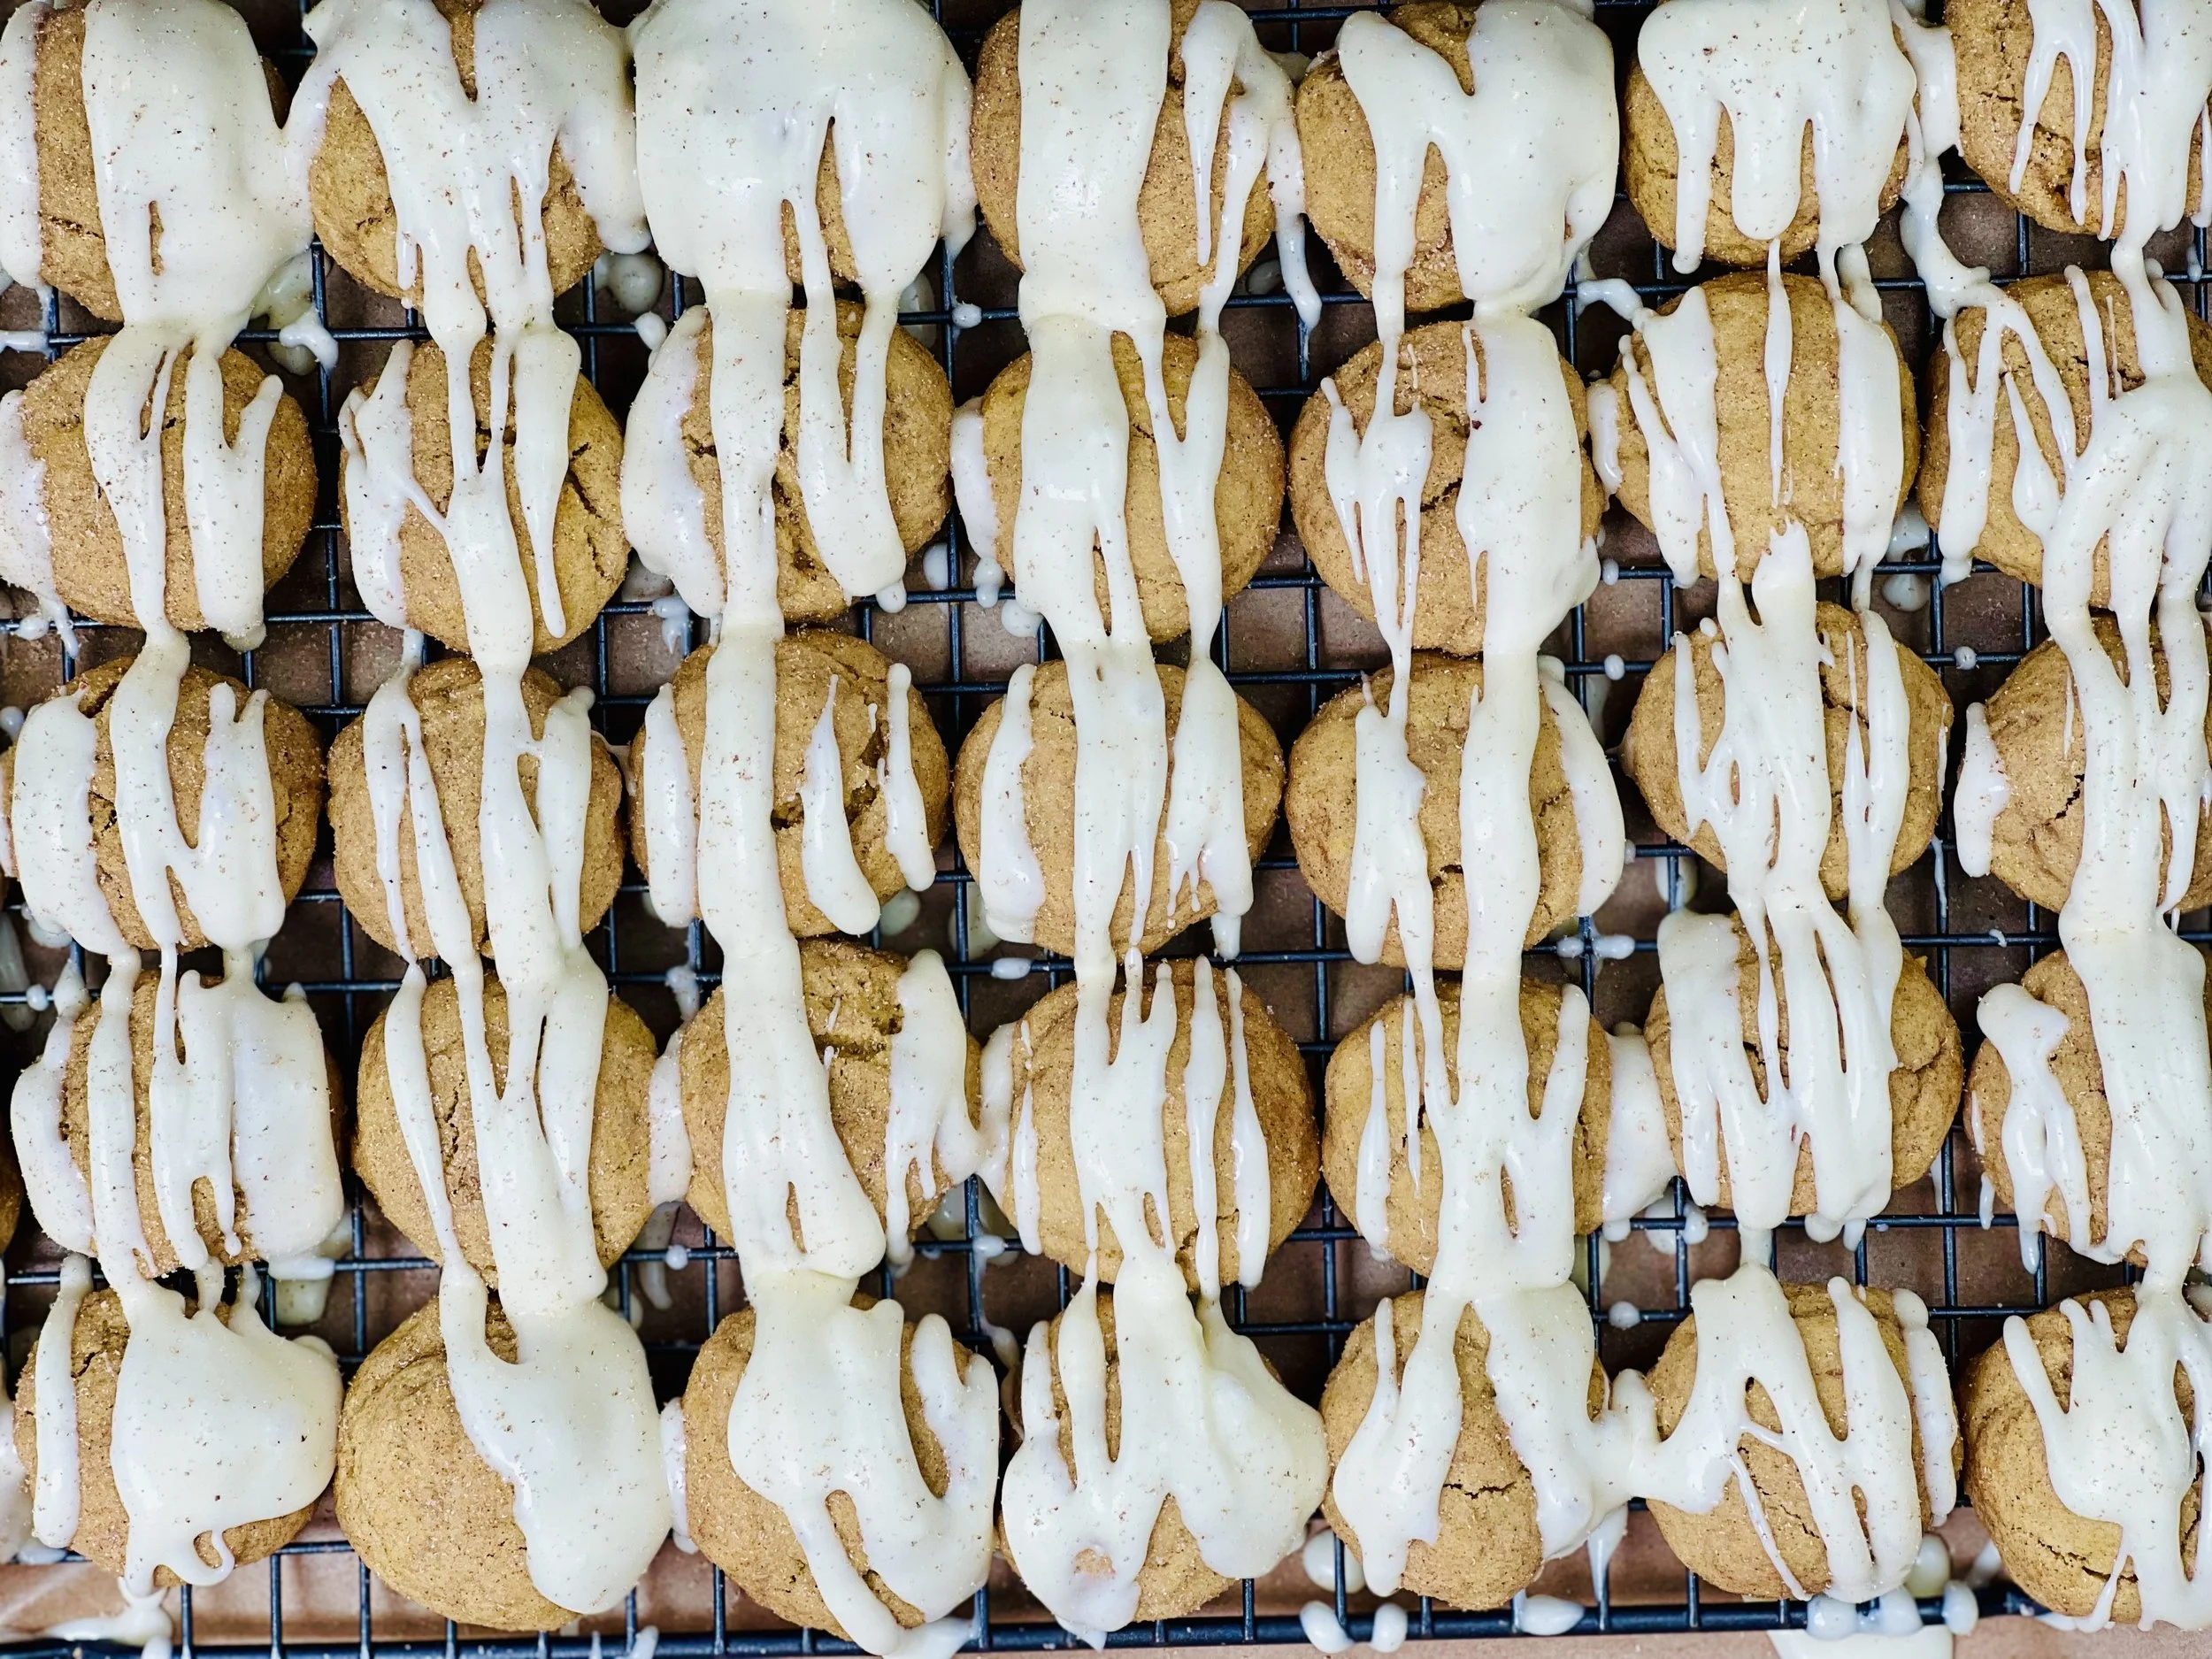
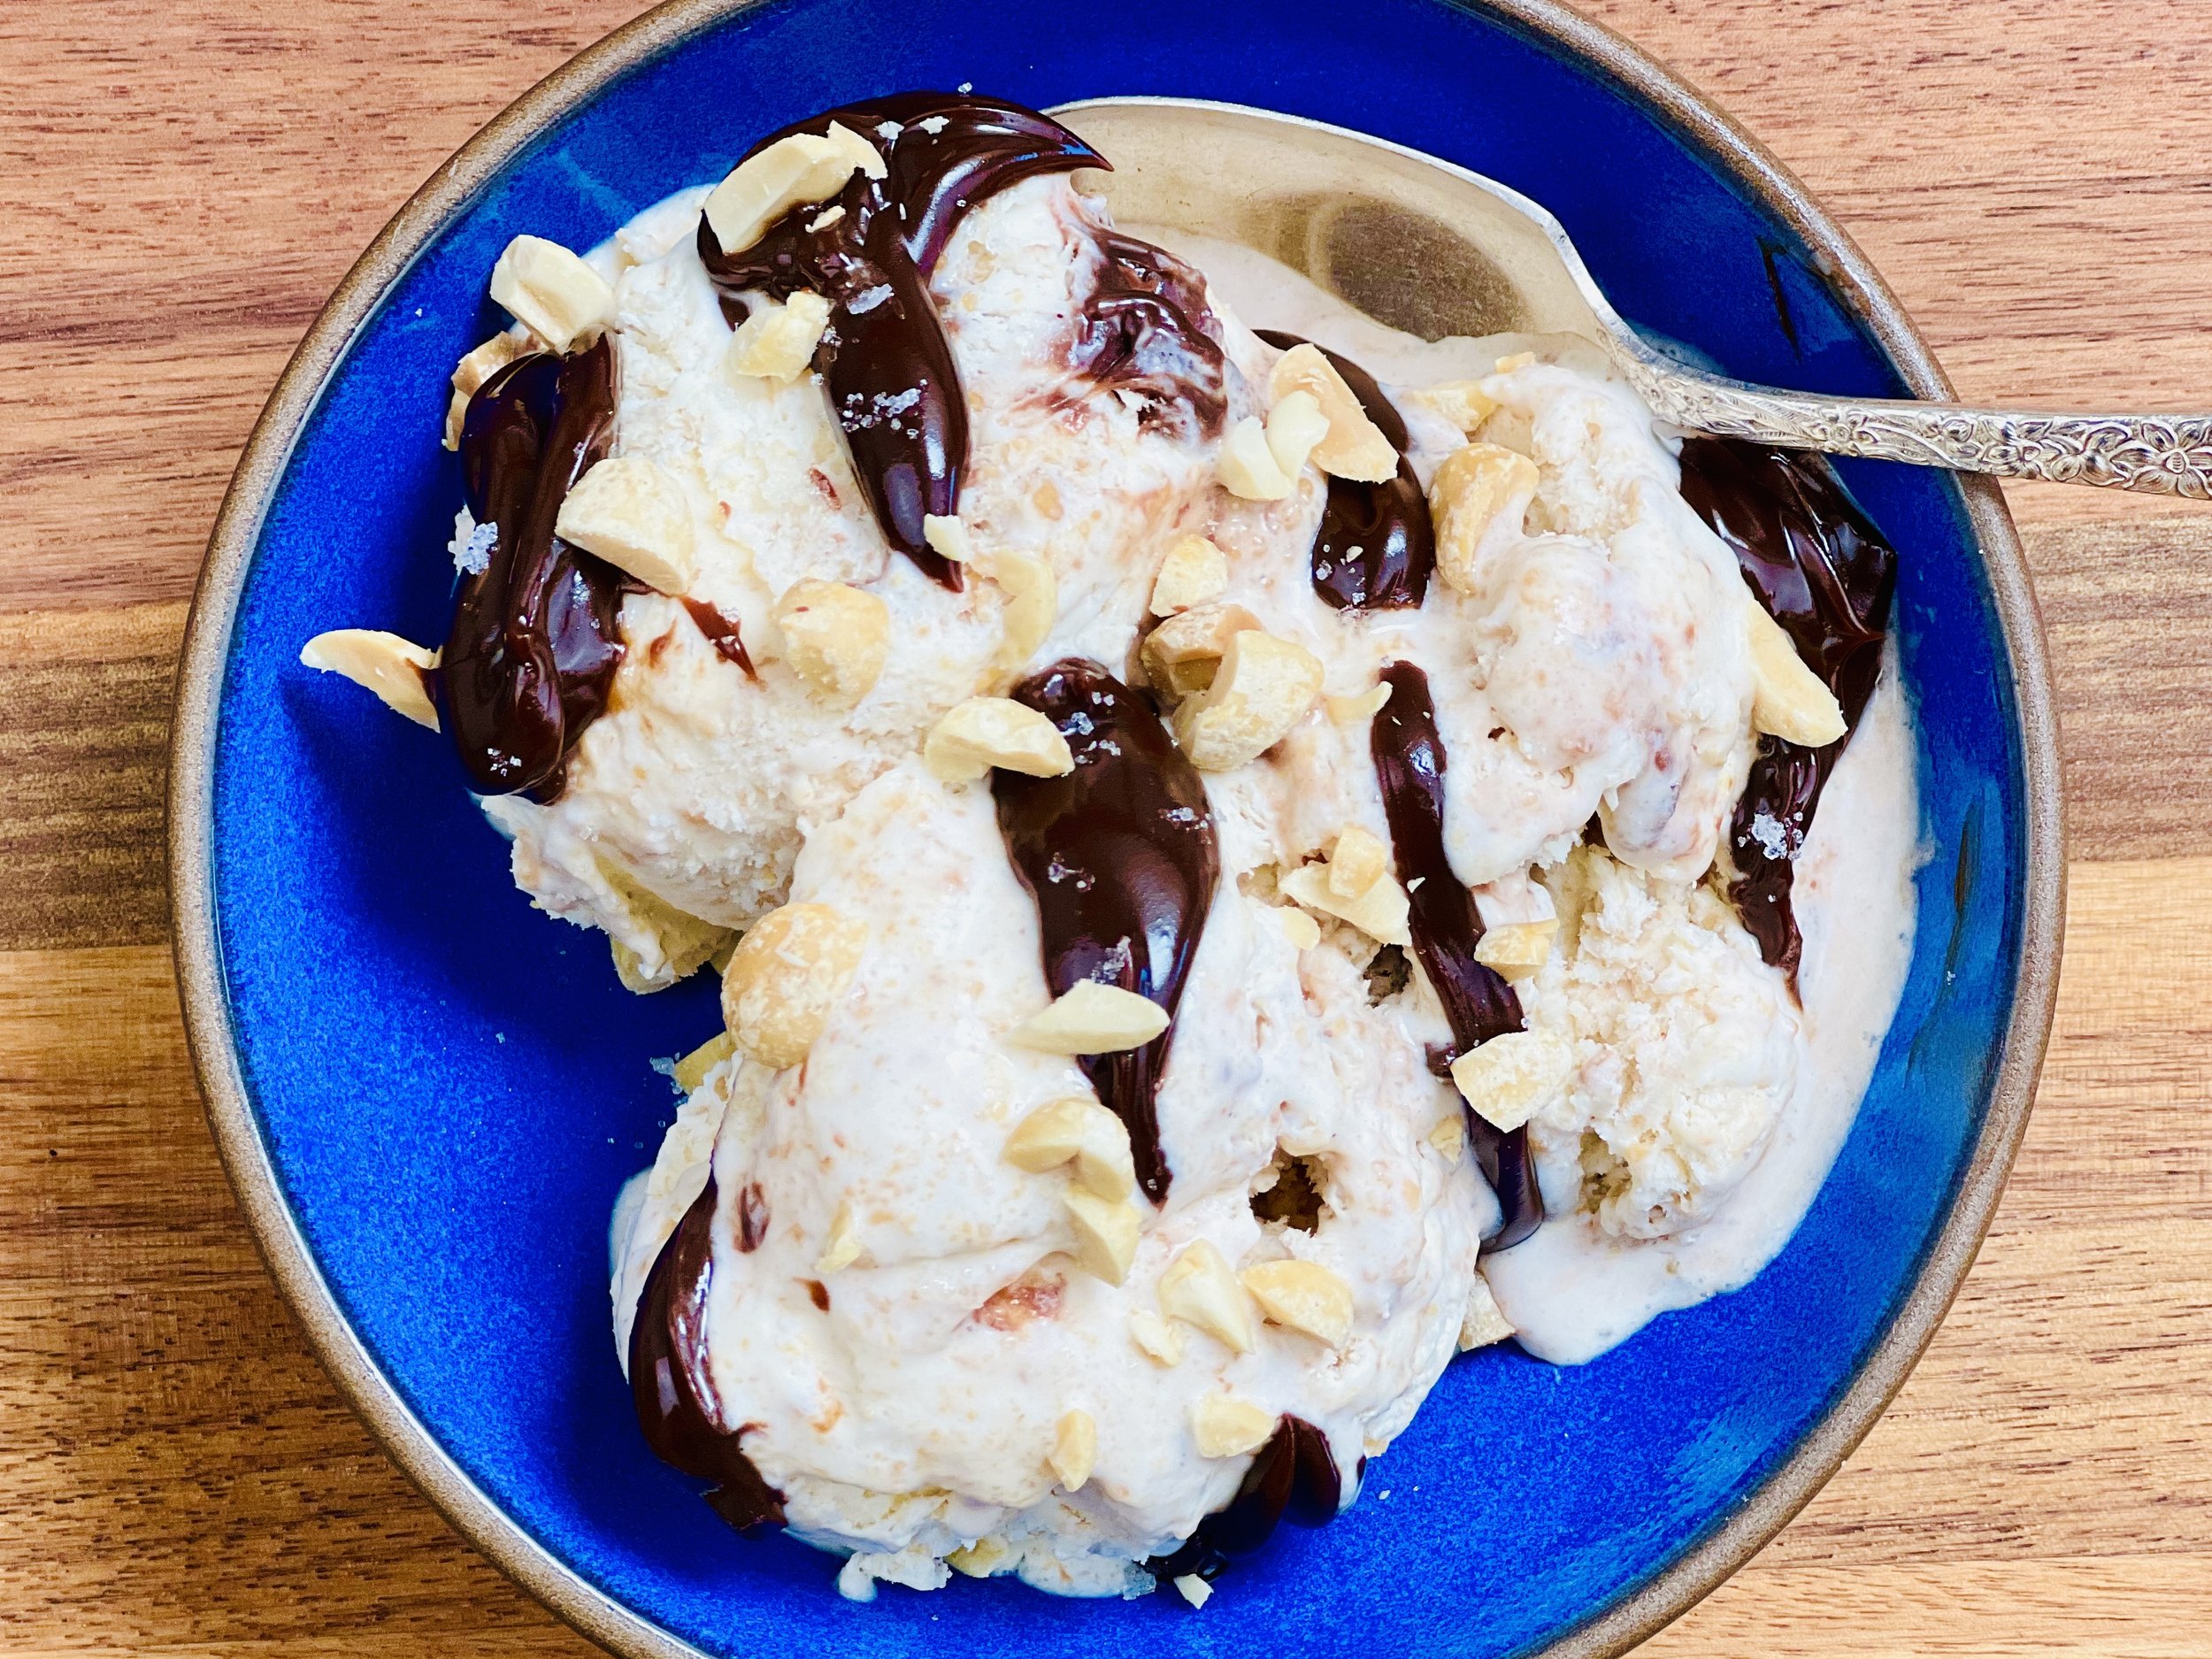
Perfect Peanut Butter Ice Cream (Low FODMAP)
15 Minutes prep • 6 Hours Chill • Low FODMAP • Gluten-free • Serves 8 - 10
15 Minutes prep • 6 Hours Chill • Low FODMAP • Gluten-free • Serves 8 - 10 • Ok to make ahead: Steps 1-3
Do you love peanut butter? Have you ever wished you could turn that love of peanut butter into an ice cream? Look no further. This is it! Made with just three basic ingredients, and no churning required, this incredible ice cream comes together in a flash. Plus, you have the freedom to customize it with your favorite mix-ins, such as fudge ribbon, chopped peanuts, chocolate chips, or anything your heart desires. So, get ready to whip up a batch of peanut butter paradise.
See this new recipe in my FREE recipe club.
To streamline your search through hundreds of existing recipes, I'm moving the release of my new weekly creations to the Recipe Club on Patreon. In the club, you’ll get access to a treasure trove of low-FODMAP goodness, complete with collections and filters to use as your virtual cookbook!
Here's what awaits you in the club:
Exclusive weekly recipes: Be the first to try my latest delicious low-FODMAP creations!
Simple & Easy: My recipes continue to focus on readily available ingredients and effortless preparation, perfect for family-friendly meals (no more separate low-FODMAP meal prep!).
Hundreds of existing recipes: Gain access to my entire library of low-FODMAP recipes, all conveniently organized.
You can join for free or sign up for only $5/month. Your support fuels my passion for creating new, delicious, and easy-to-make low-FODMAP recipes just for you.
Let's go on this delicious low-FODMAP journey together.
More Deliciously Low FODMAP™ dessert recipes


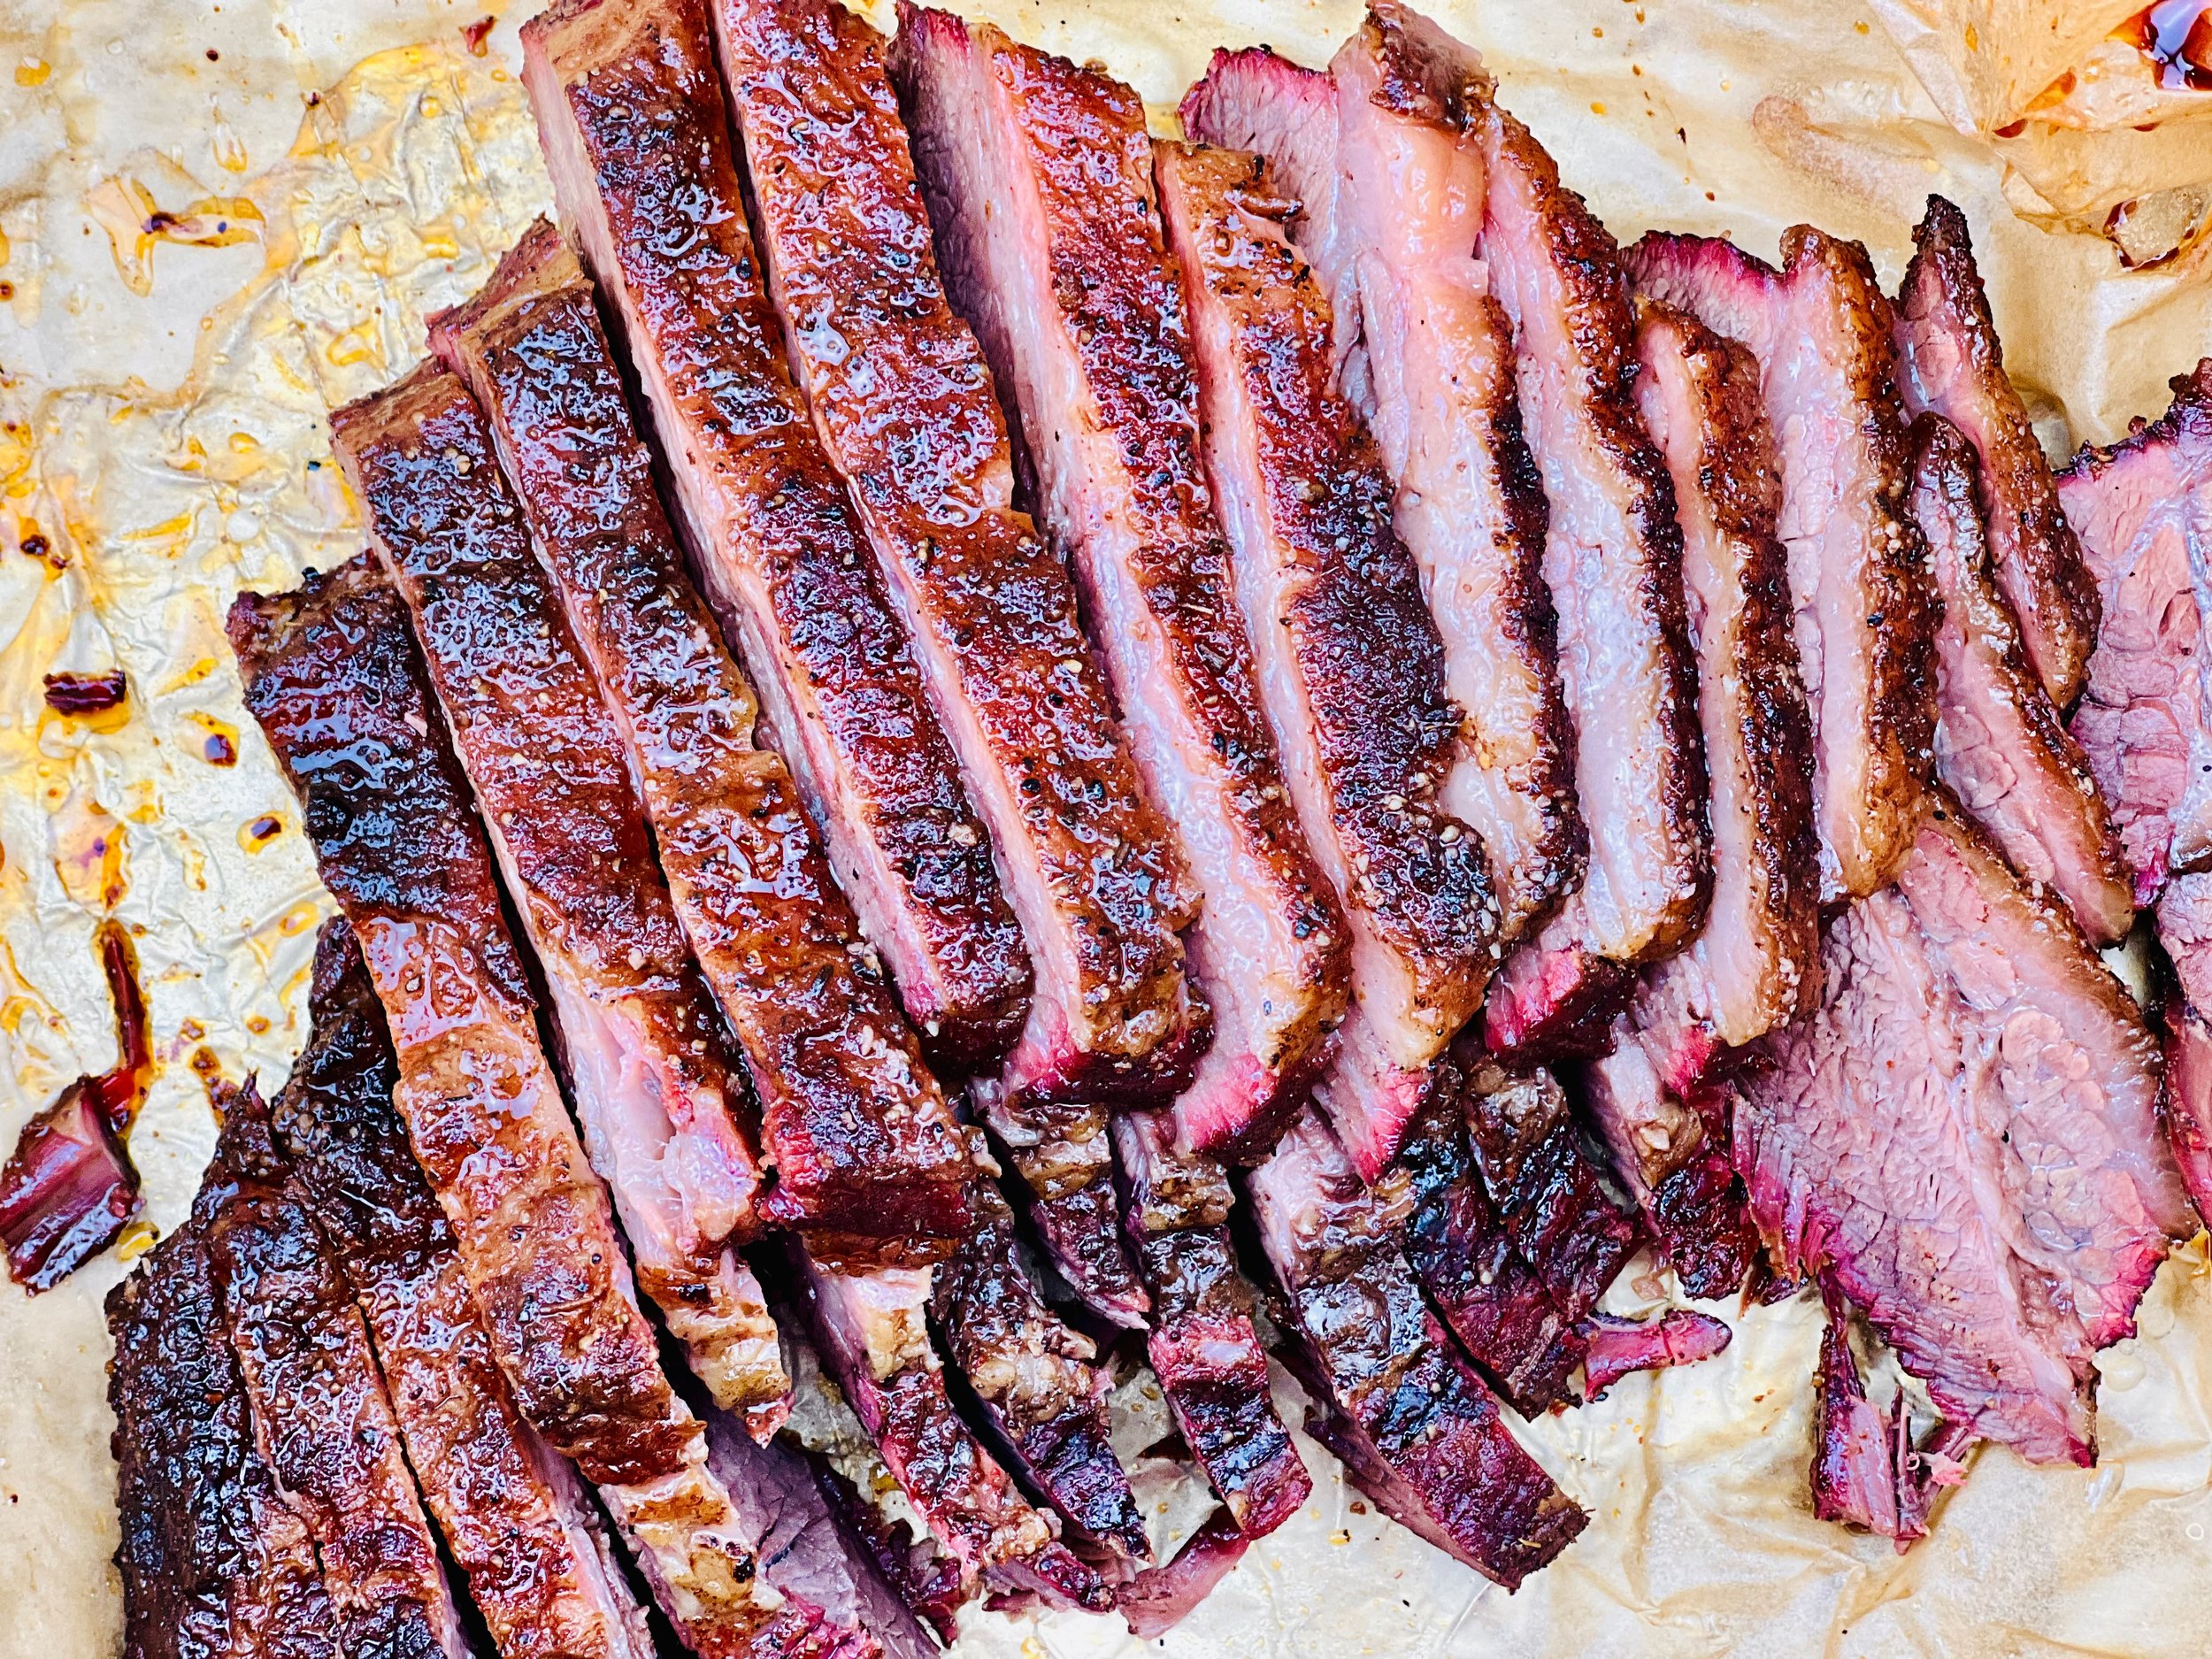
Rib Cook-Off Worthy Baby Back Ribs (Low FODMAP)
20 Minutes prep • 4 Hours cook • Low FODMAP • Gluten-Free • Serves 6
20 Minutes prep • 4 Hours cook/rest • Low FODMAP • Gluten-Free • Serves 6 • Ok to make-ahead: Steps 1 - 5
Get ready to take home the prize with these delicious ribs! This recipe transforms a few pantry staples into competition-worthy ribs. Forget complicated marinades and long ingredient lists. Here's the secret to unbelievably tender, fall-off-the-bone ribs: simple seasonings, buttery goodness, and a little bit of the irresistible sweetness of brown sugar. Get ready to impress with melt-in-your-mouth ribs that are bursting with flavor. This easy recipe will help you get the perfect ribs every time.
See this new recipe in my FREE recipe club.
To streamline your search through hundreds of existing recipes, I'm moving the release of my new weekly creations to the Recipe Club on Patreon. In the club, you’ll get access to a treasure trove of low-FODMAP goodness, complete with collections and filters to use as your virtual cookbook!
Here's what awaits you in the club:
Exclusive weekly recipes: Be the first to try my latest delicious low-FODMAP creations!
Simple & Easy: My recipes continue to focus on readily available ingredients and effortless preparation, perfect for family-friendly meals (no more separate low-FODMAP meal prep!).
Hundreds of existing recipes: Gain access to my entire library of low-FODMAP recipes, all conveniently organized.
You can join for free or sign up for only $5/month. Your support fuels my passion for creating new, delicious, and easy-to-make low-FODMAP recipes just for you.
Let's go on this delicious low-FODMAP journey together.
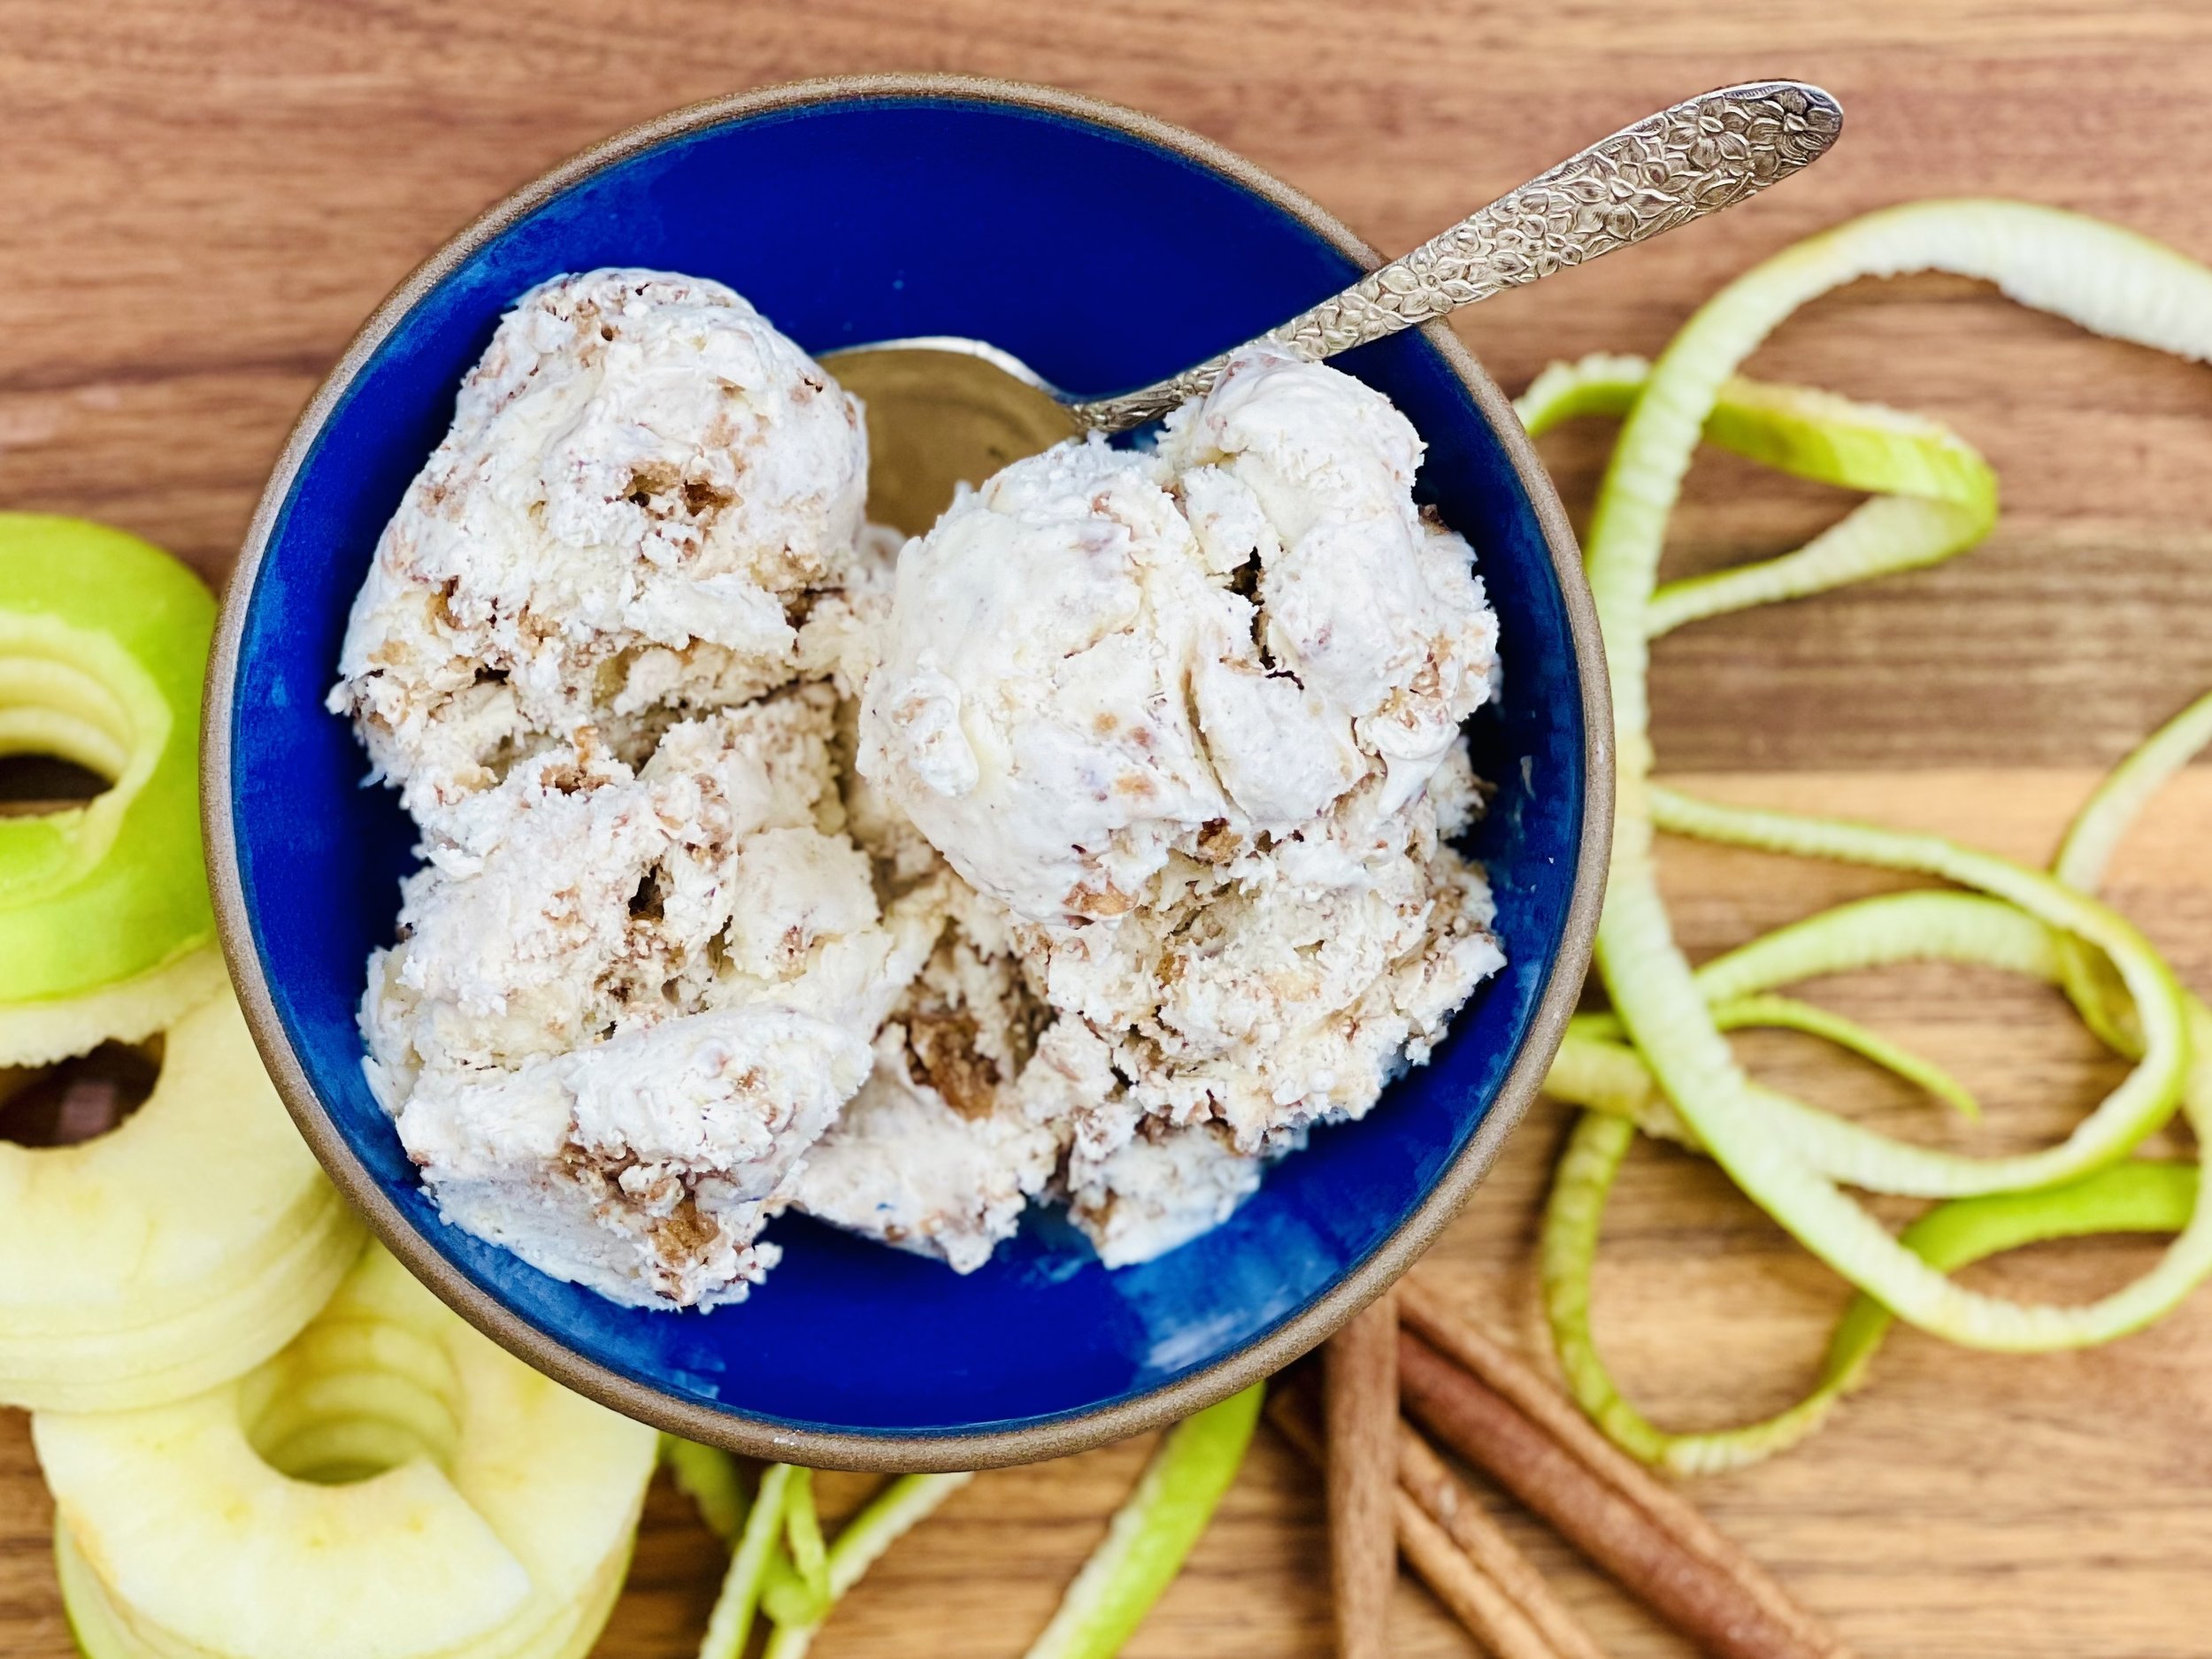
Amazing Apple Pie Ice Cream (Low FODMAP)
30 Minutes prep • 6 Hours Chill • Low FODMAP • Gluten-free • Serves 10
30 Minutes prep • 6 Hours Chill • Low FODMAP • Gluten-free • Serves 10 • Ok to make ahead: Steps 1-5
Calling all apple pie lovers! This isn't your average ice cream. This no-churn delight is bursting with the flavor of spiced apples, creamy vanilla ice cream, and crunchy sweet oatmeal clusters. This recipe captures all the delightful flavors of a classic apple pie a la mode in a refreshing frozen treat. Even better, by maximizing the flavor and minimizing the amount of apples used, you can enjoy a full serving of this recipe even while following a low-FODMAP diet. Get ready to experience the taste of apple pie in every delicious bite.
See this new recipe in my FREE recipe club.
To streamline your search through hundreds of existing recipes, I'm moving the release of my new weekly creations to the Recipe Club on Patreon. In the club, you’ll get access to a treasure trove of low-FODMAP goodness, complete with collections and filters to use as your virtual cookbook!
Here's what awaits you in the club:
Exclusive weekly recipes: Be the first to try my latest delicious low-FODMAP creations!
Simple & Easy: My recipes continue to focus on readily available ingredients and effortless preparation, perfect for family-friendly meals (no more separate low-FODMAP meal prep!).
Hundreds of existing recipes: Gain access to my entire library of low-FODMAP recipes, all conveniently organized.
You can join for free or sign up for only $5/month. Your support fuels my passion for creating new, delicious, and easy-to-make low-FODMAP recipes just for you.
Let's go on this delicious low-FODMAP journey together.
More Deliciously Low FODMAP™ dessert recipes
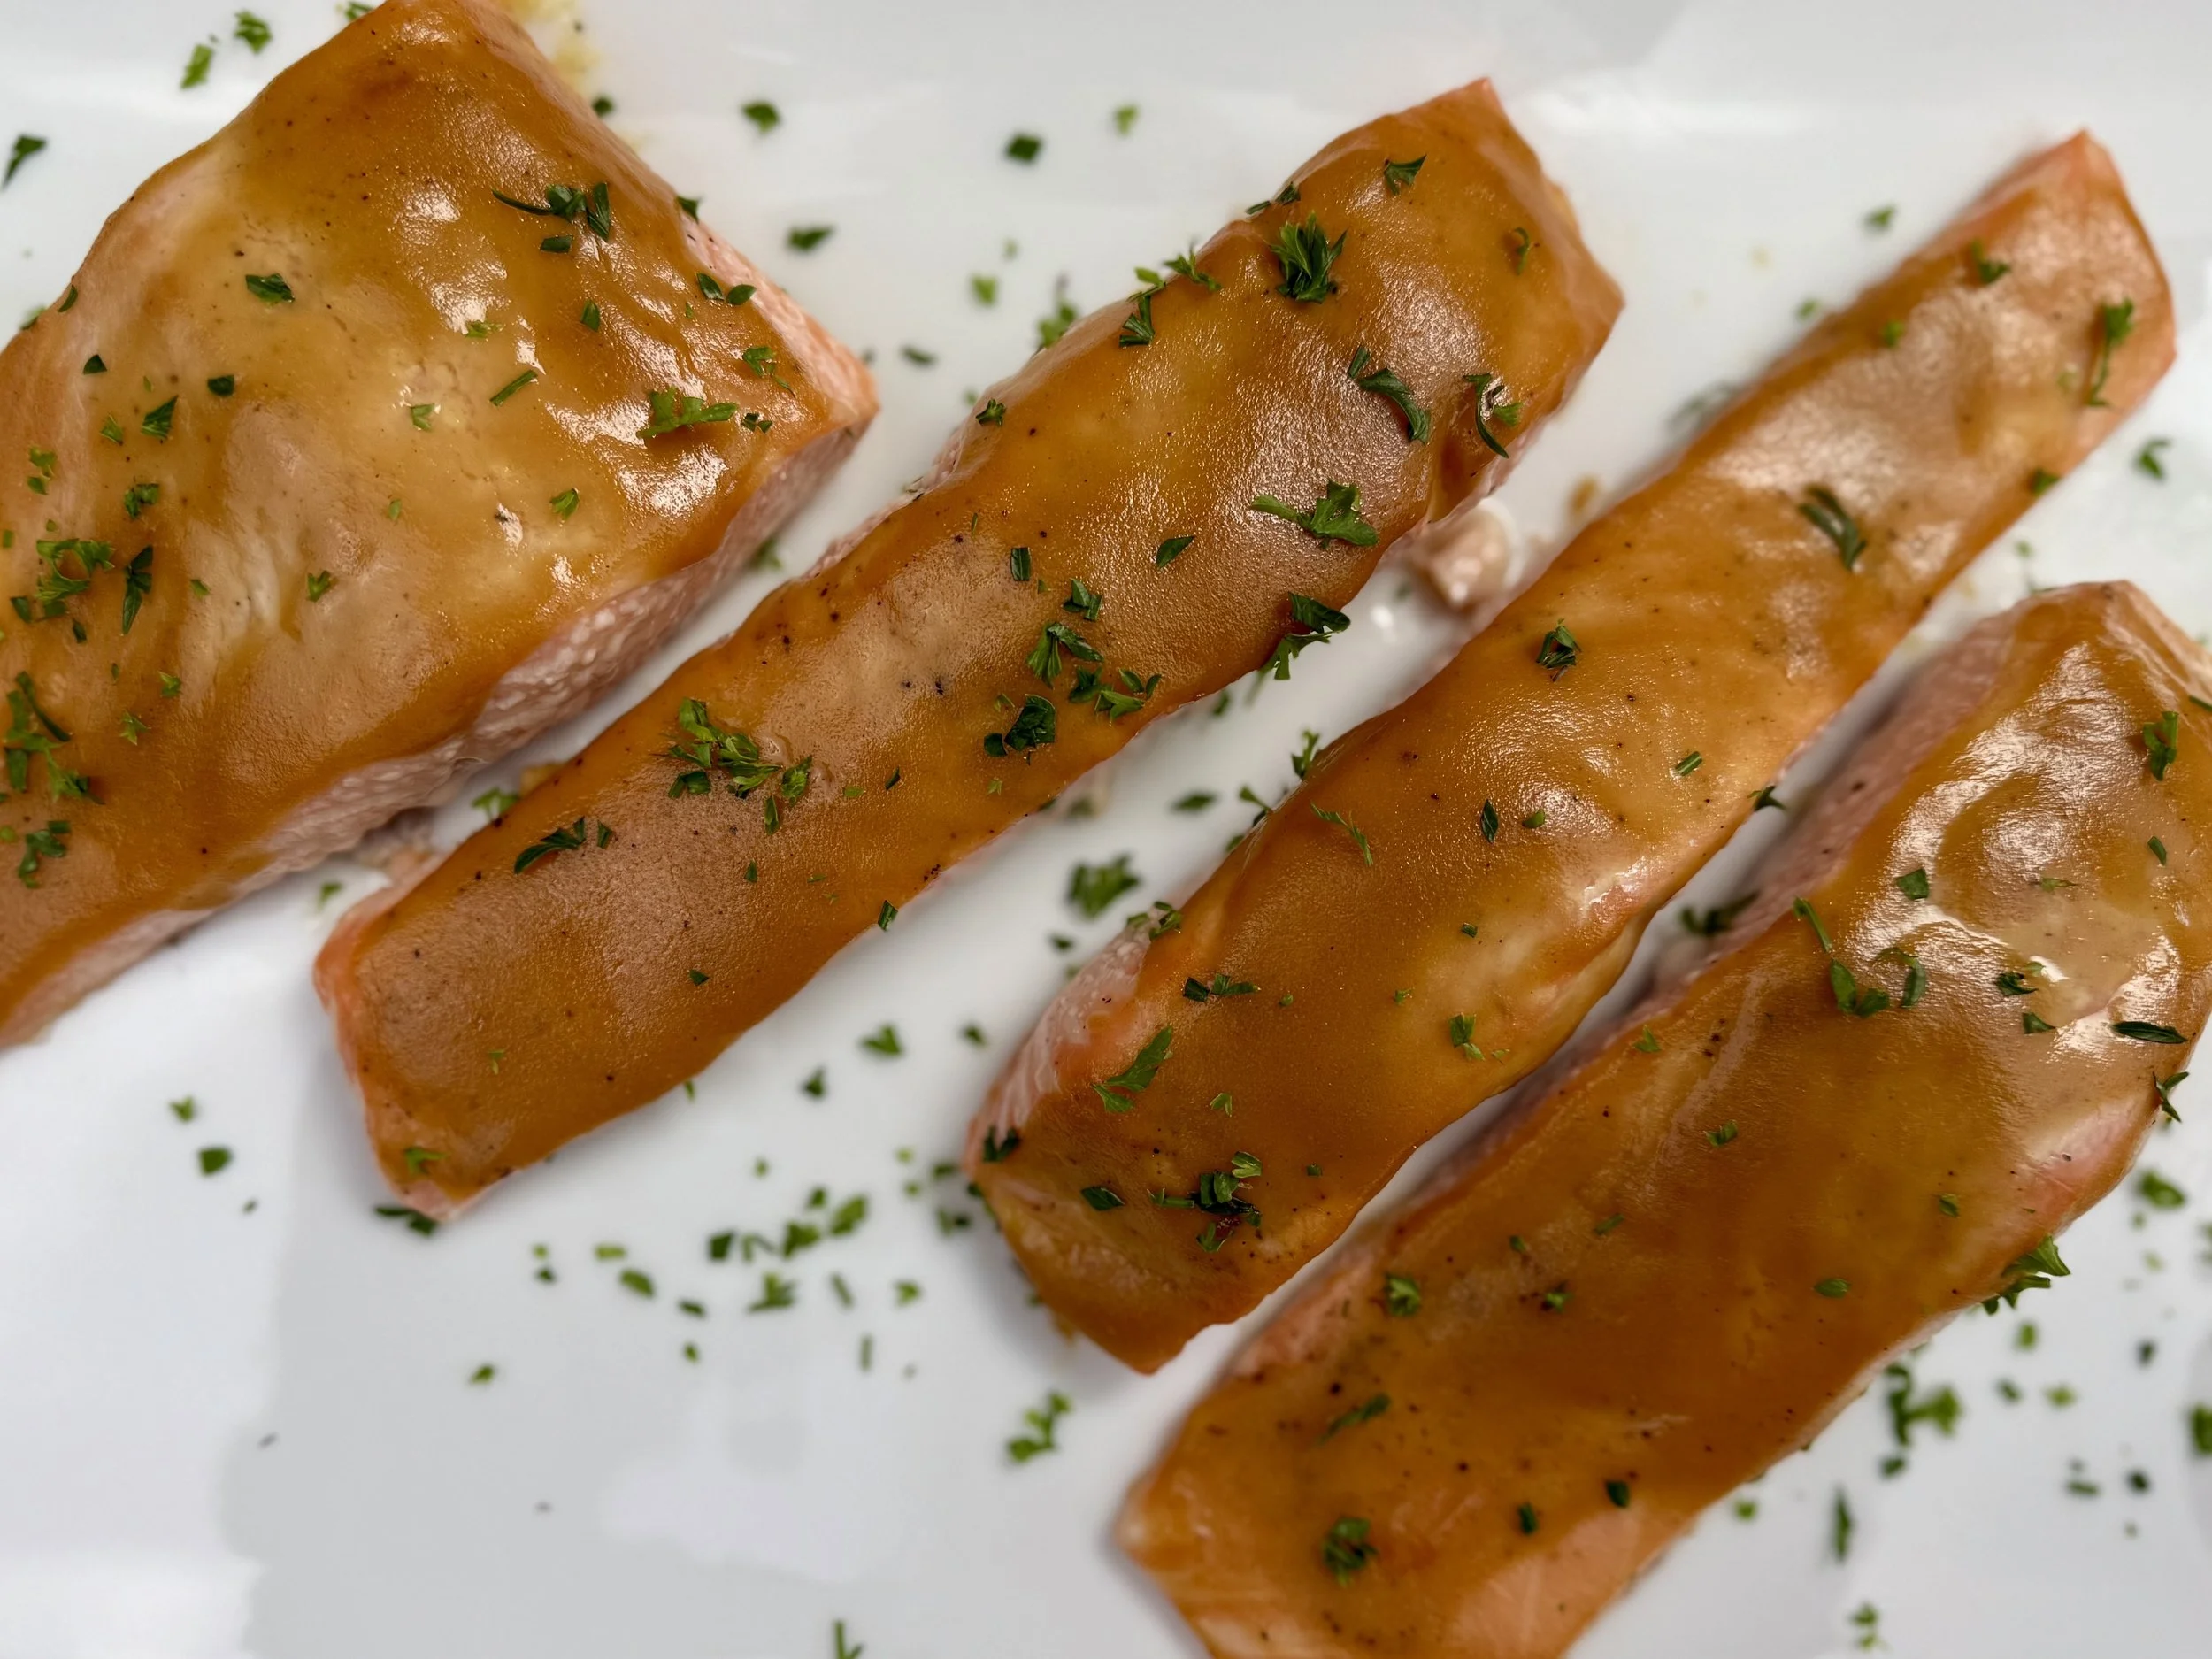
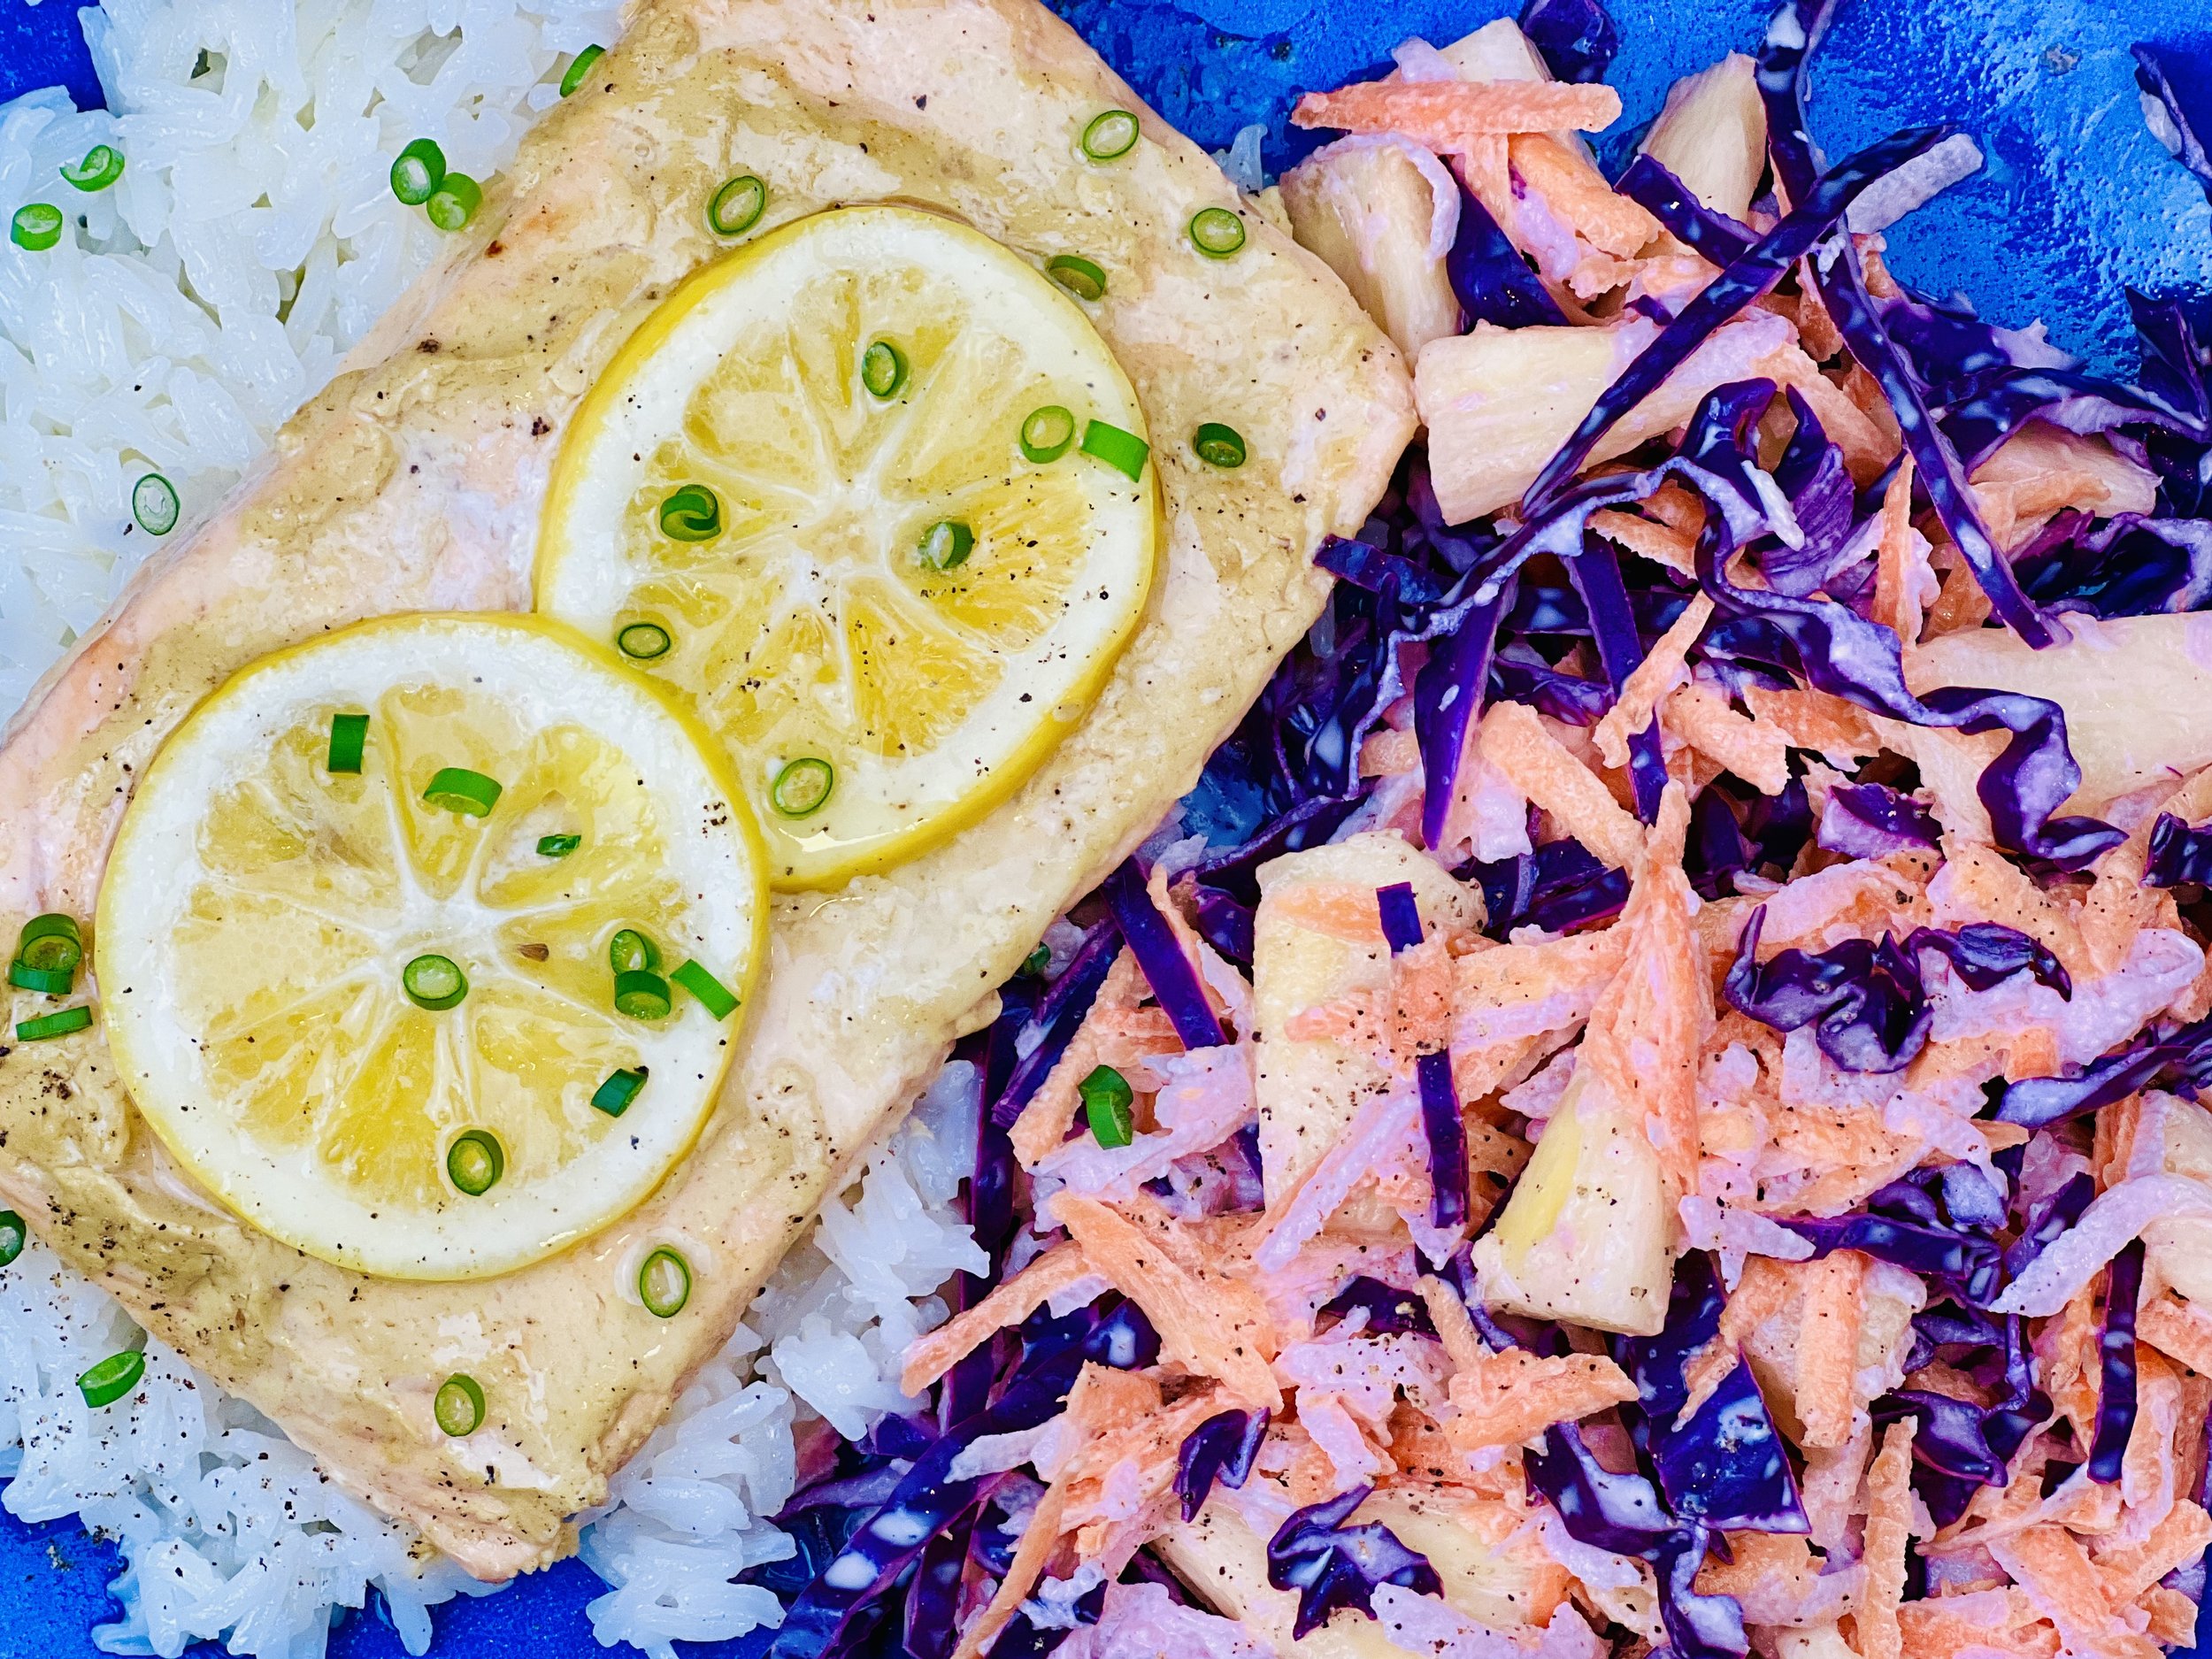
Tropical BBQ Salmon with Mango Salsa and Coconut Rice (Low FODMAP)
20 Minutes prep • 10 Minutes cook • Low FODMAP • Gluten-Free • Serves 2
20 Minutes prep • 10 Minutes cook • Low FODMAP • Gluten-Free • Serves 2 • Ok to make-ahead: Steps 1 - 3
Get ready to elevate your summer dining with this simple BBQ salmon recipe! This dish brings together the fresh flavors of the tropics, featuring a delicious mango salsa and fragrant coconut rice, all complemented by a creamy sauce and perfectly seasoned salmon. Whether you're hosting a backyard BBQ or looking for a fresh weeknight dinner, this recipe is sure to become a favorite.
See this new recipe in my FREE recipe club.
To streamline your search through hundreds of existing recipes, I'm moving the release of my new weekly creations to the Recipe Club on Patreon. In the club, you’ll get access to a treasure trove of low-FODMAP goodness, complete with collections and filters to use as your virtual cookbook!
Here's what awaits you in the club:
Exclusive weekly recipes: Be the first to try my latest delicious low-FODMAP creations!
Simple & Easy: My recipes continue to focus on readily available ingredients and effortless preparation, perfect for family-friendly meals (no more separate low-FODMAP meal prep!).
Hundreds of existing recipes: Gain access to my entire library of low-FODMAP recipes, all conveniently organized.
You can join for free or sign up for only $5/month. Your support fuels my passion for creating new, delicious, and easy-to-make low-FODMAP recipes just for you.
Let's go on this delicious low-FODMAP journey together.
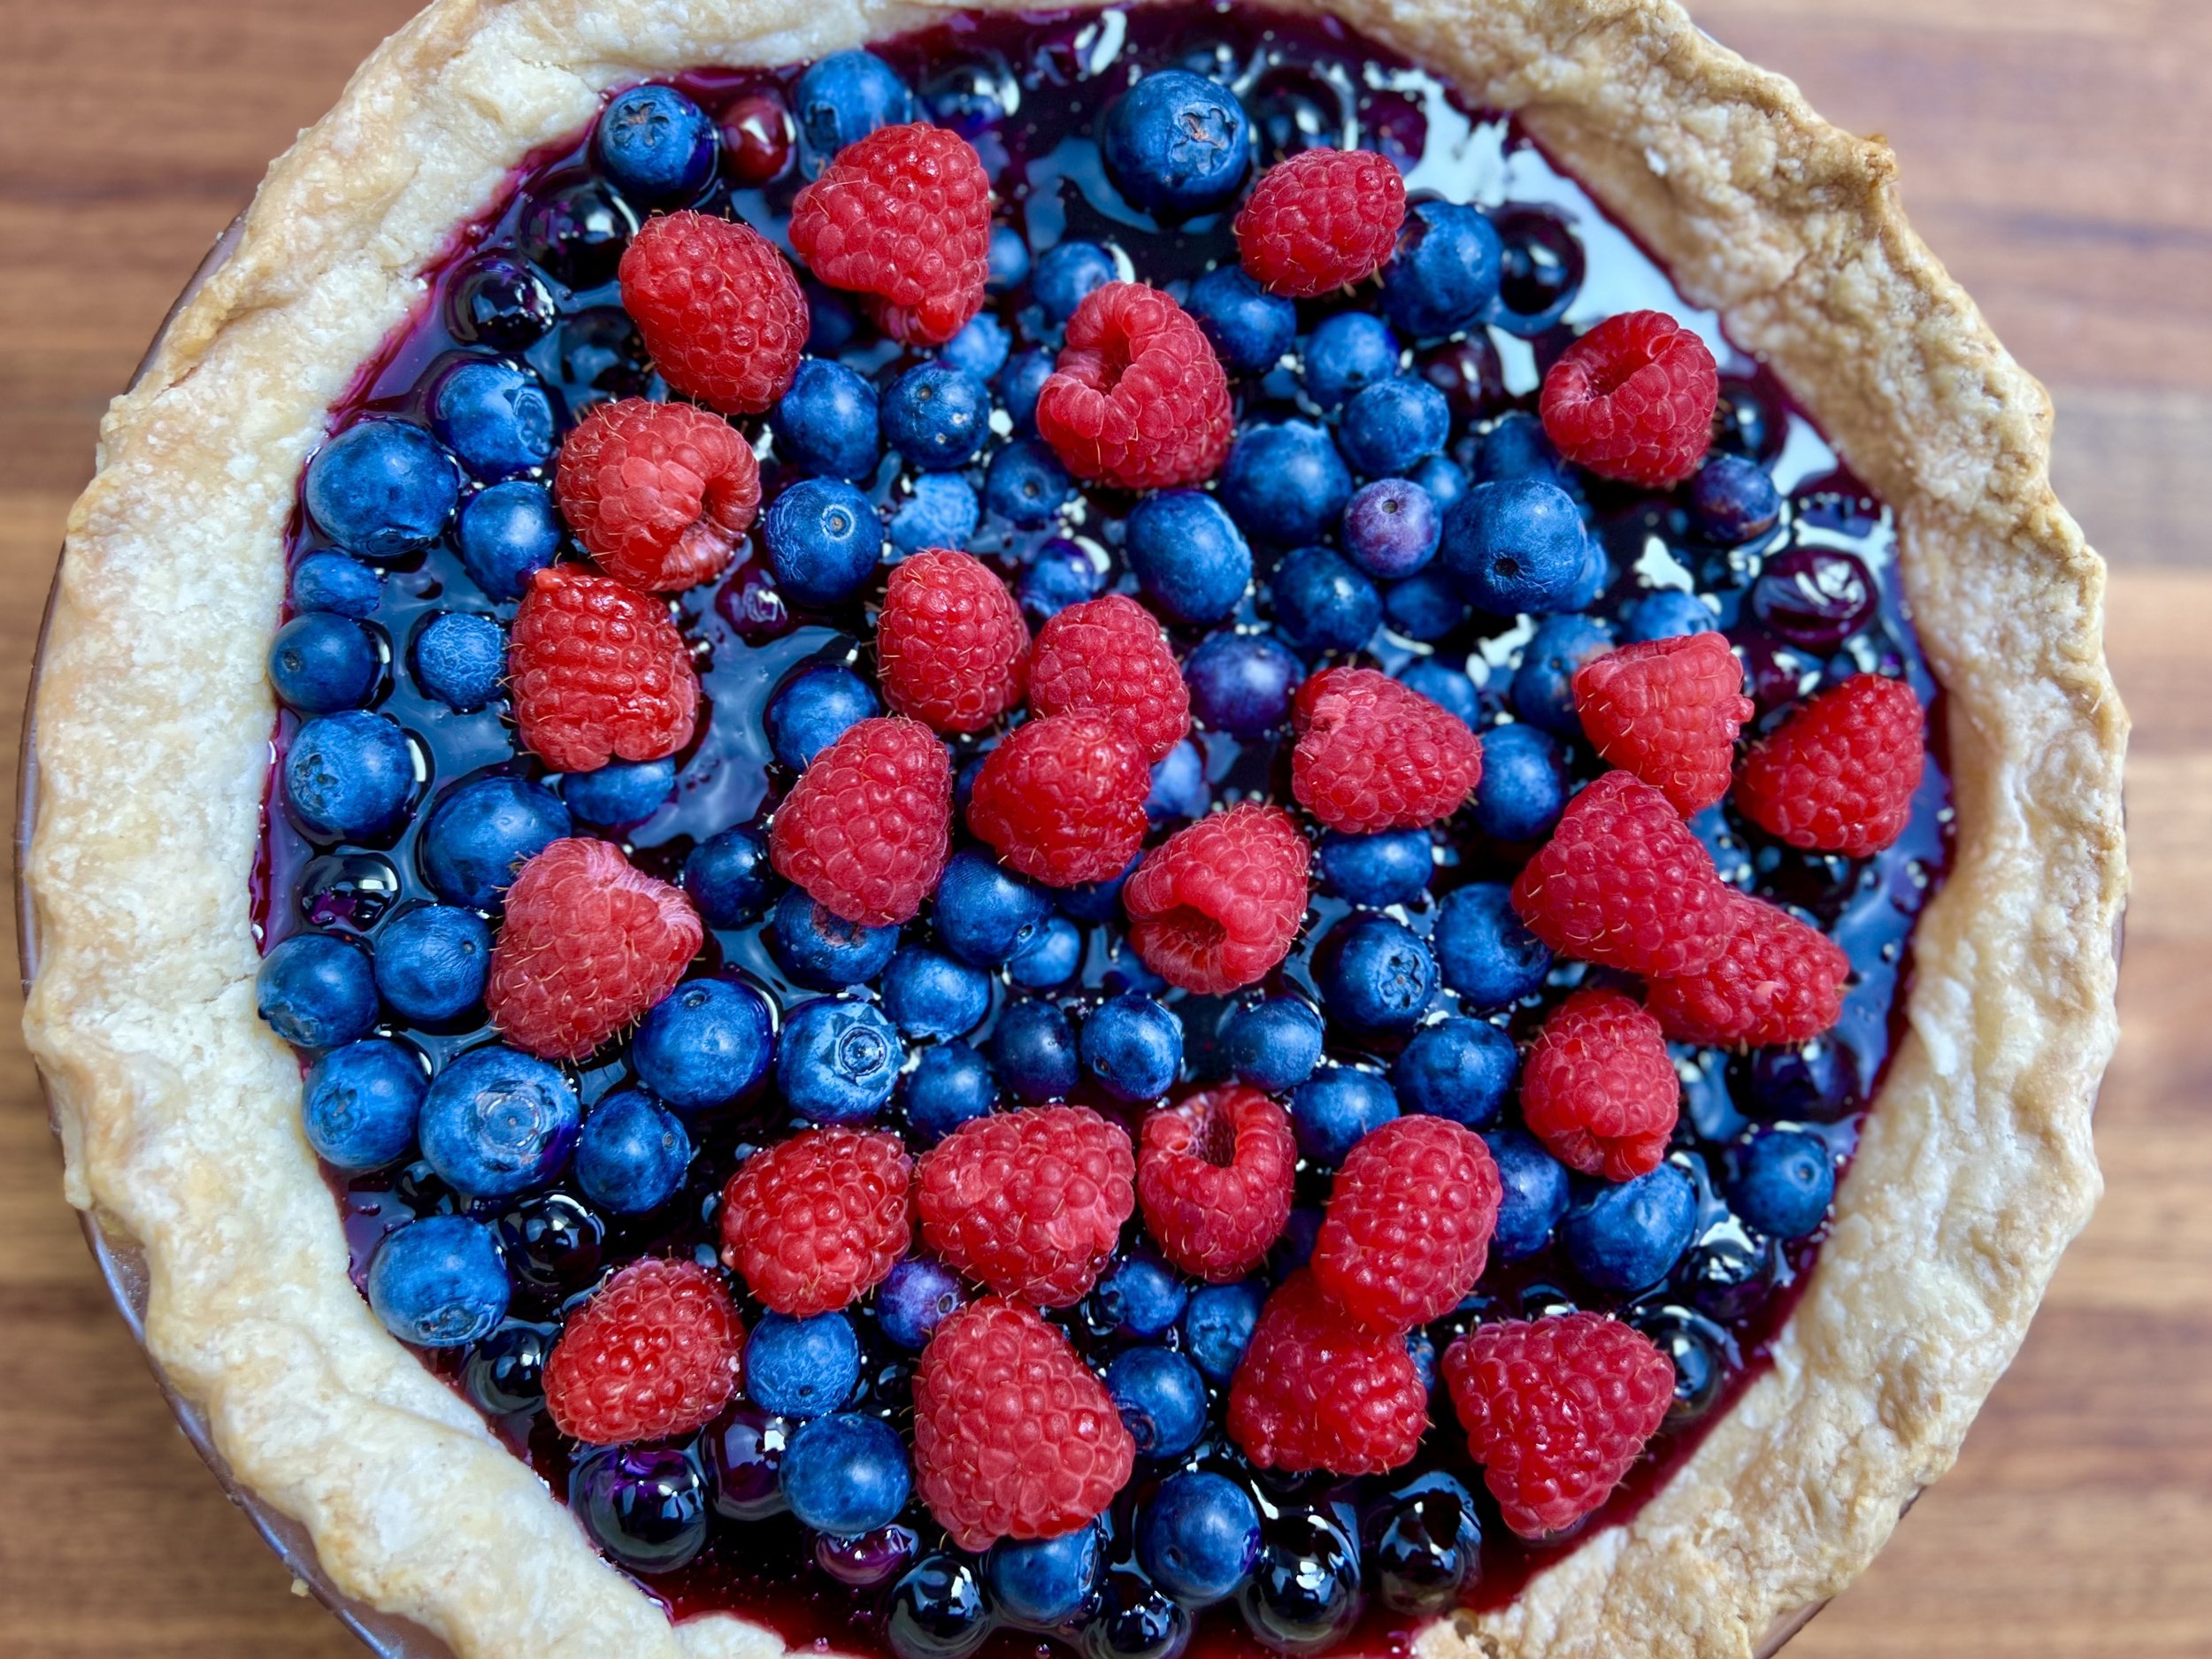
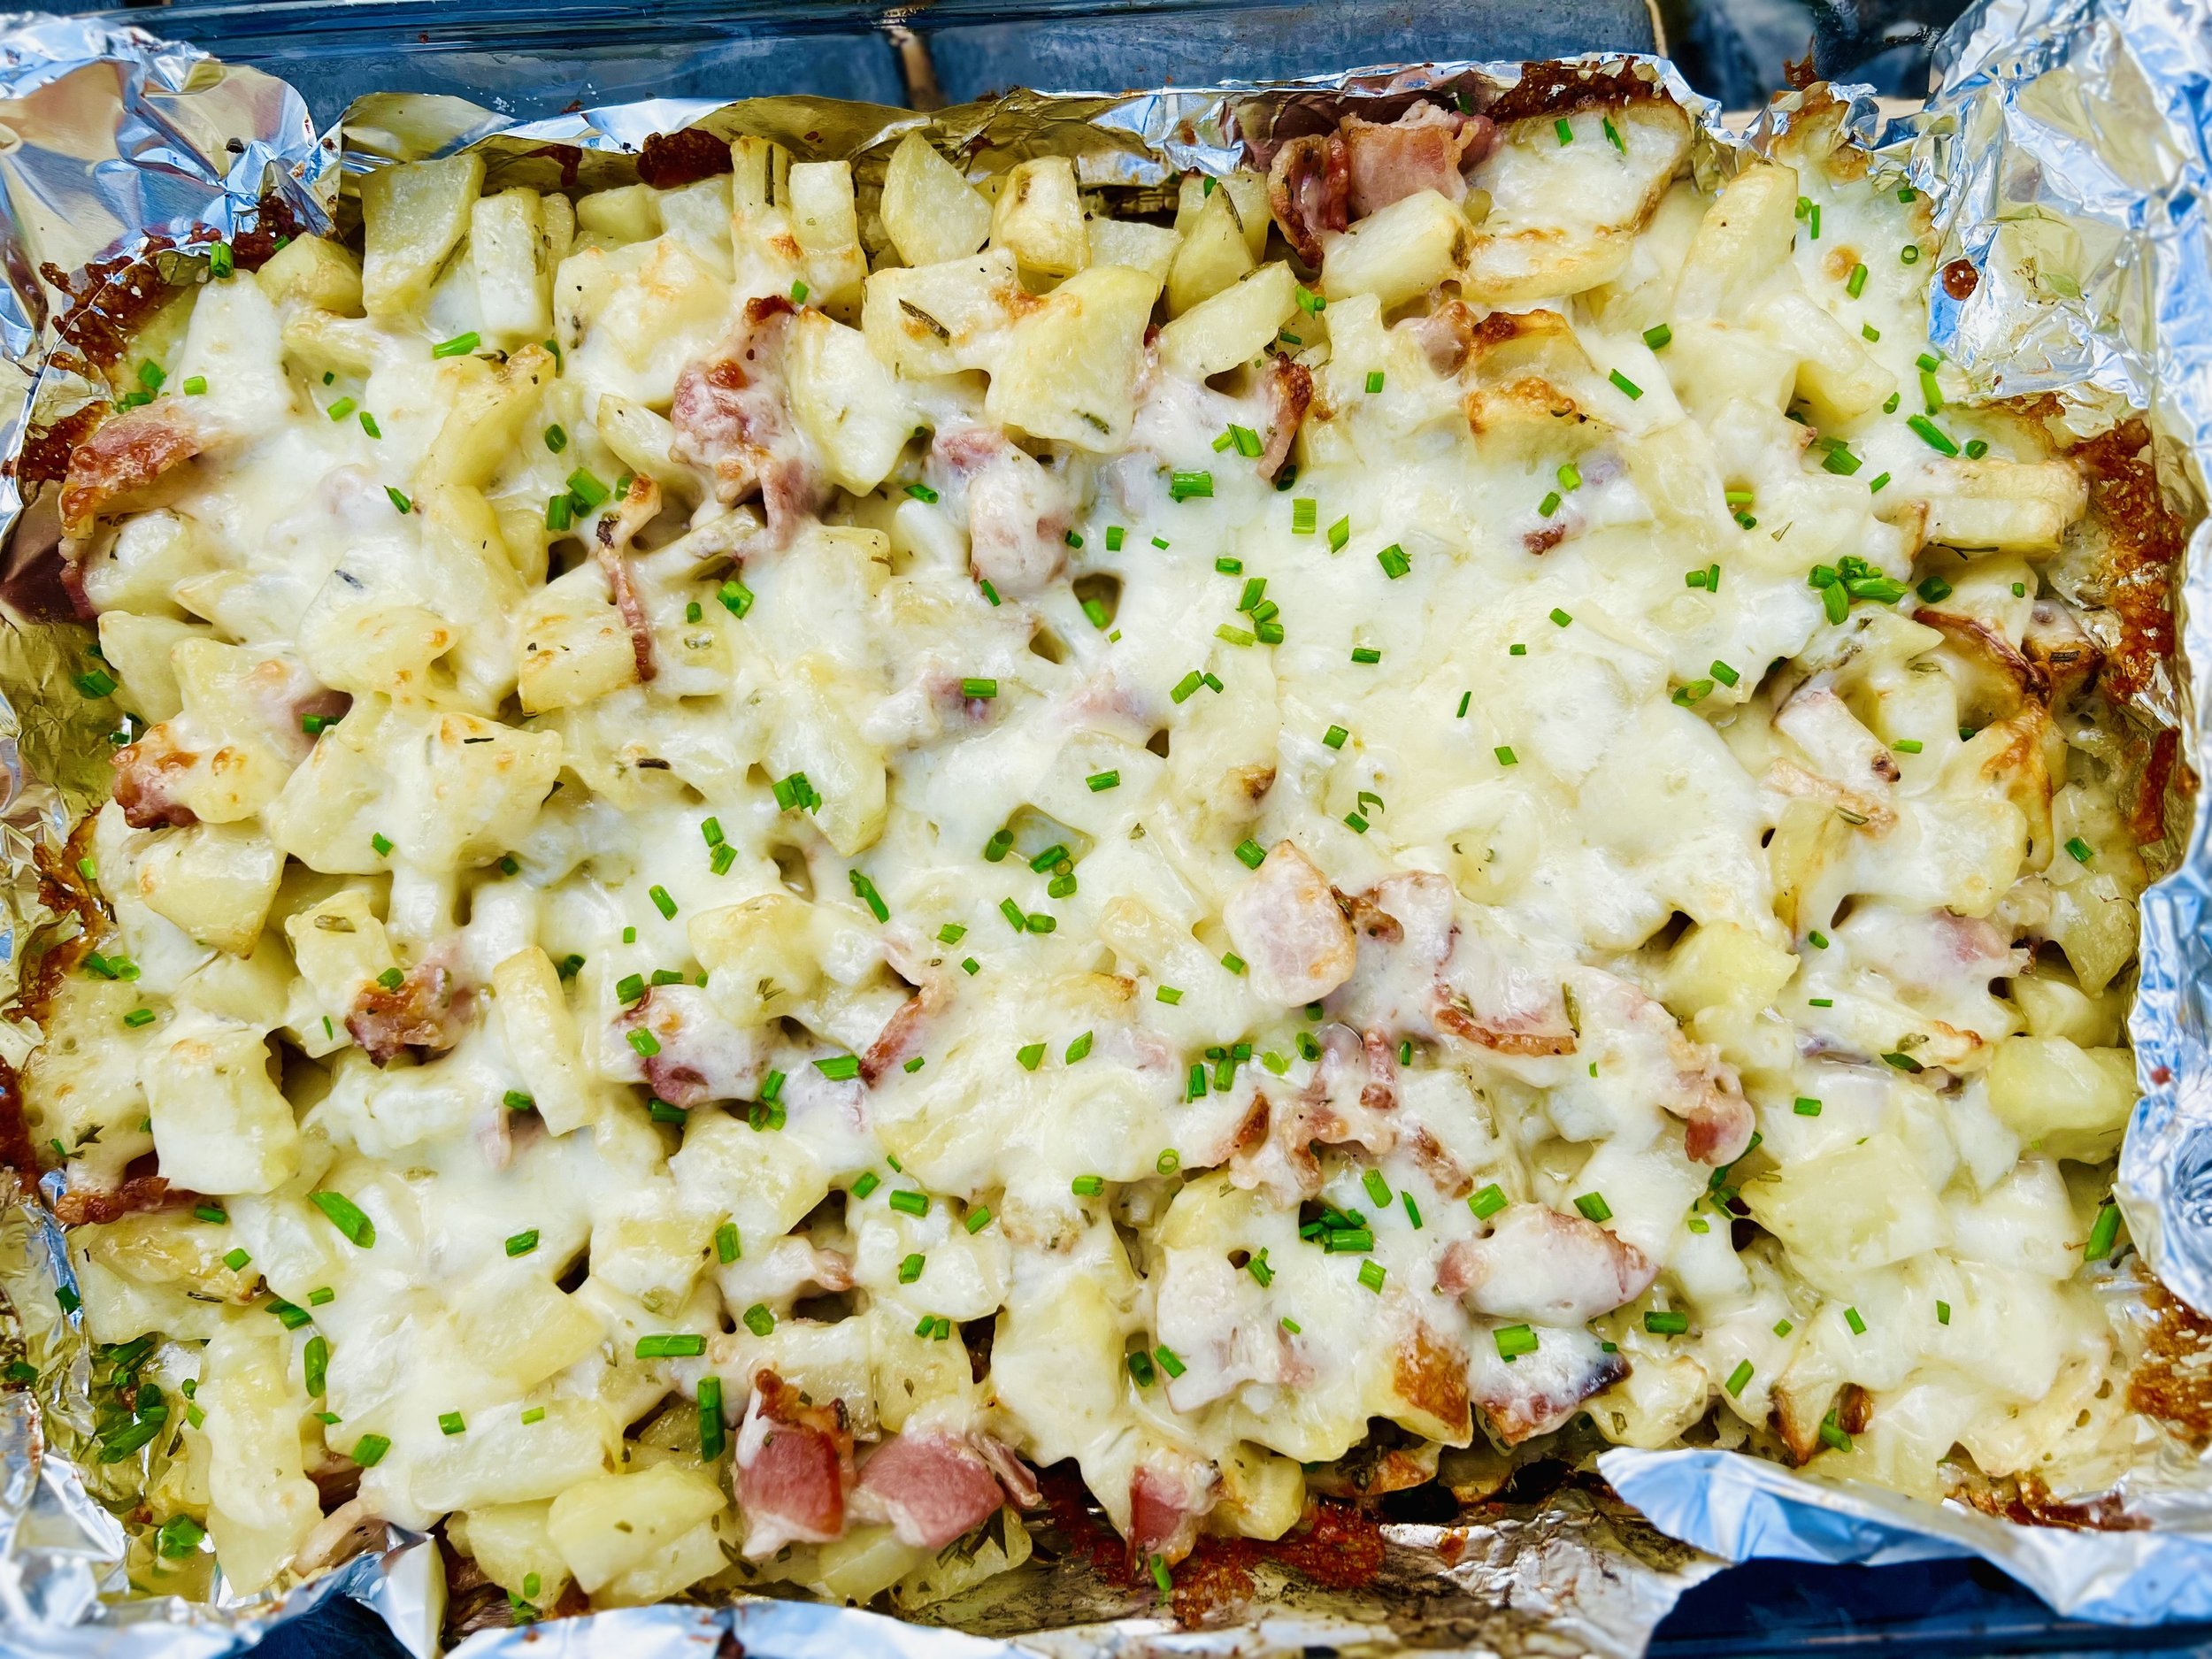
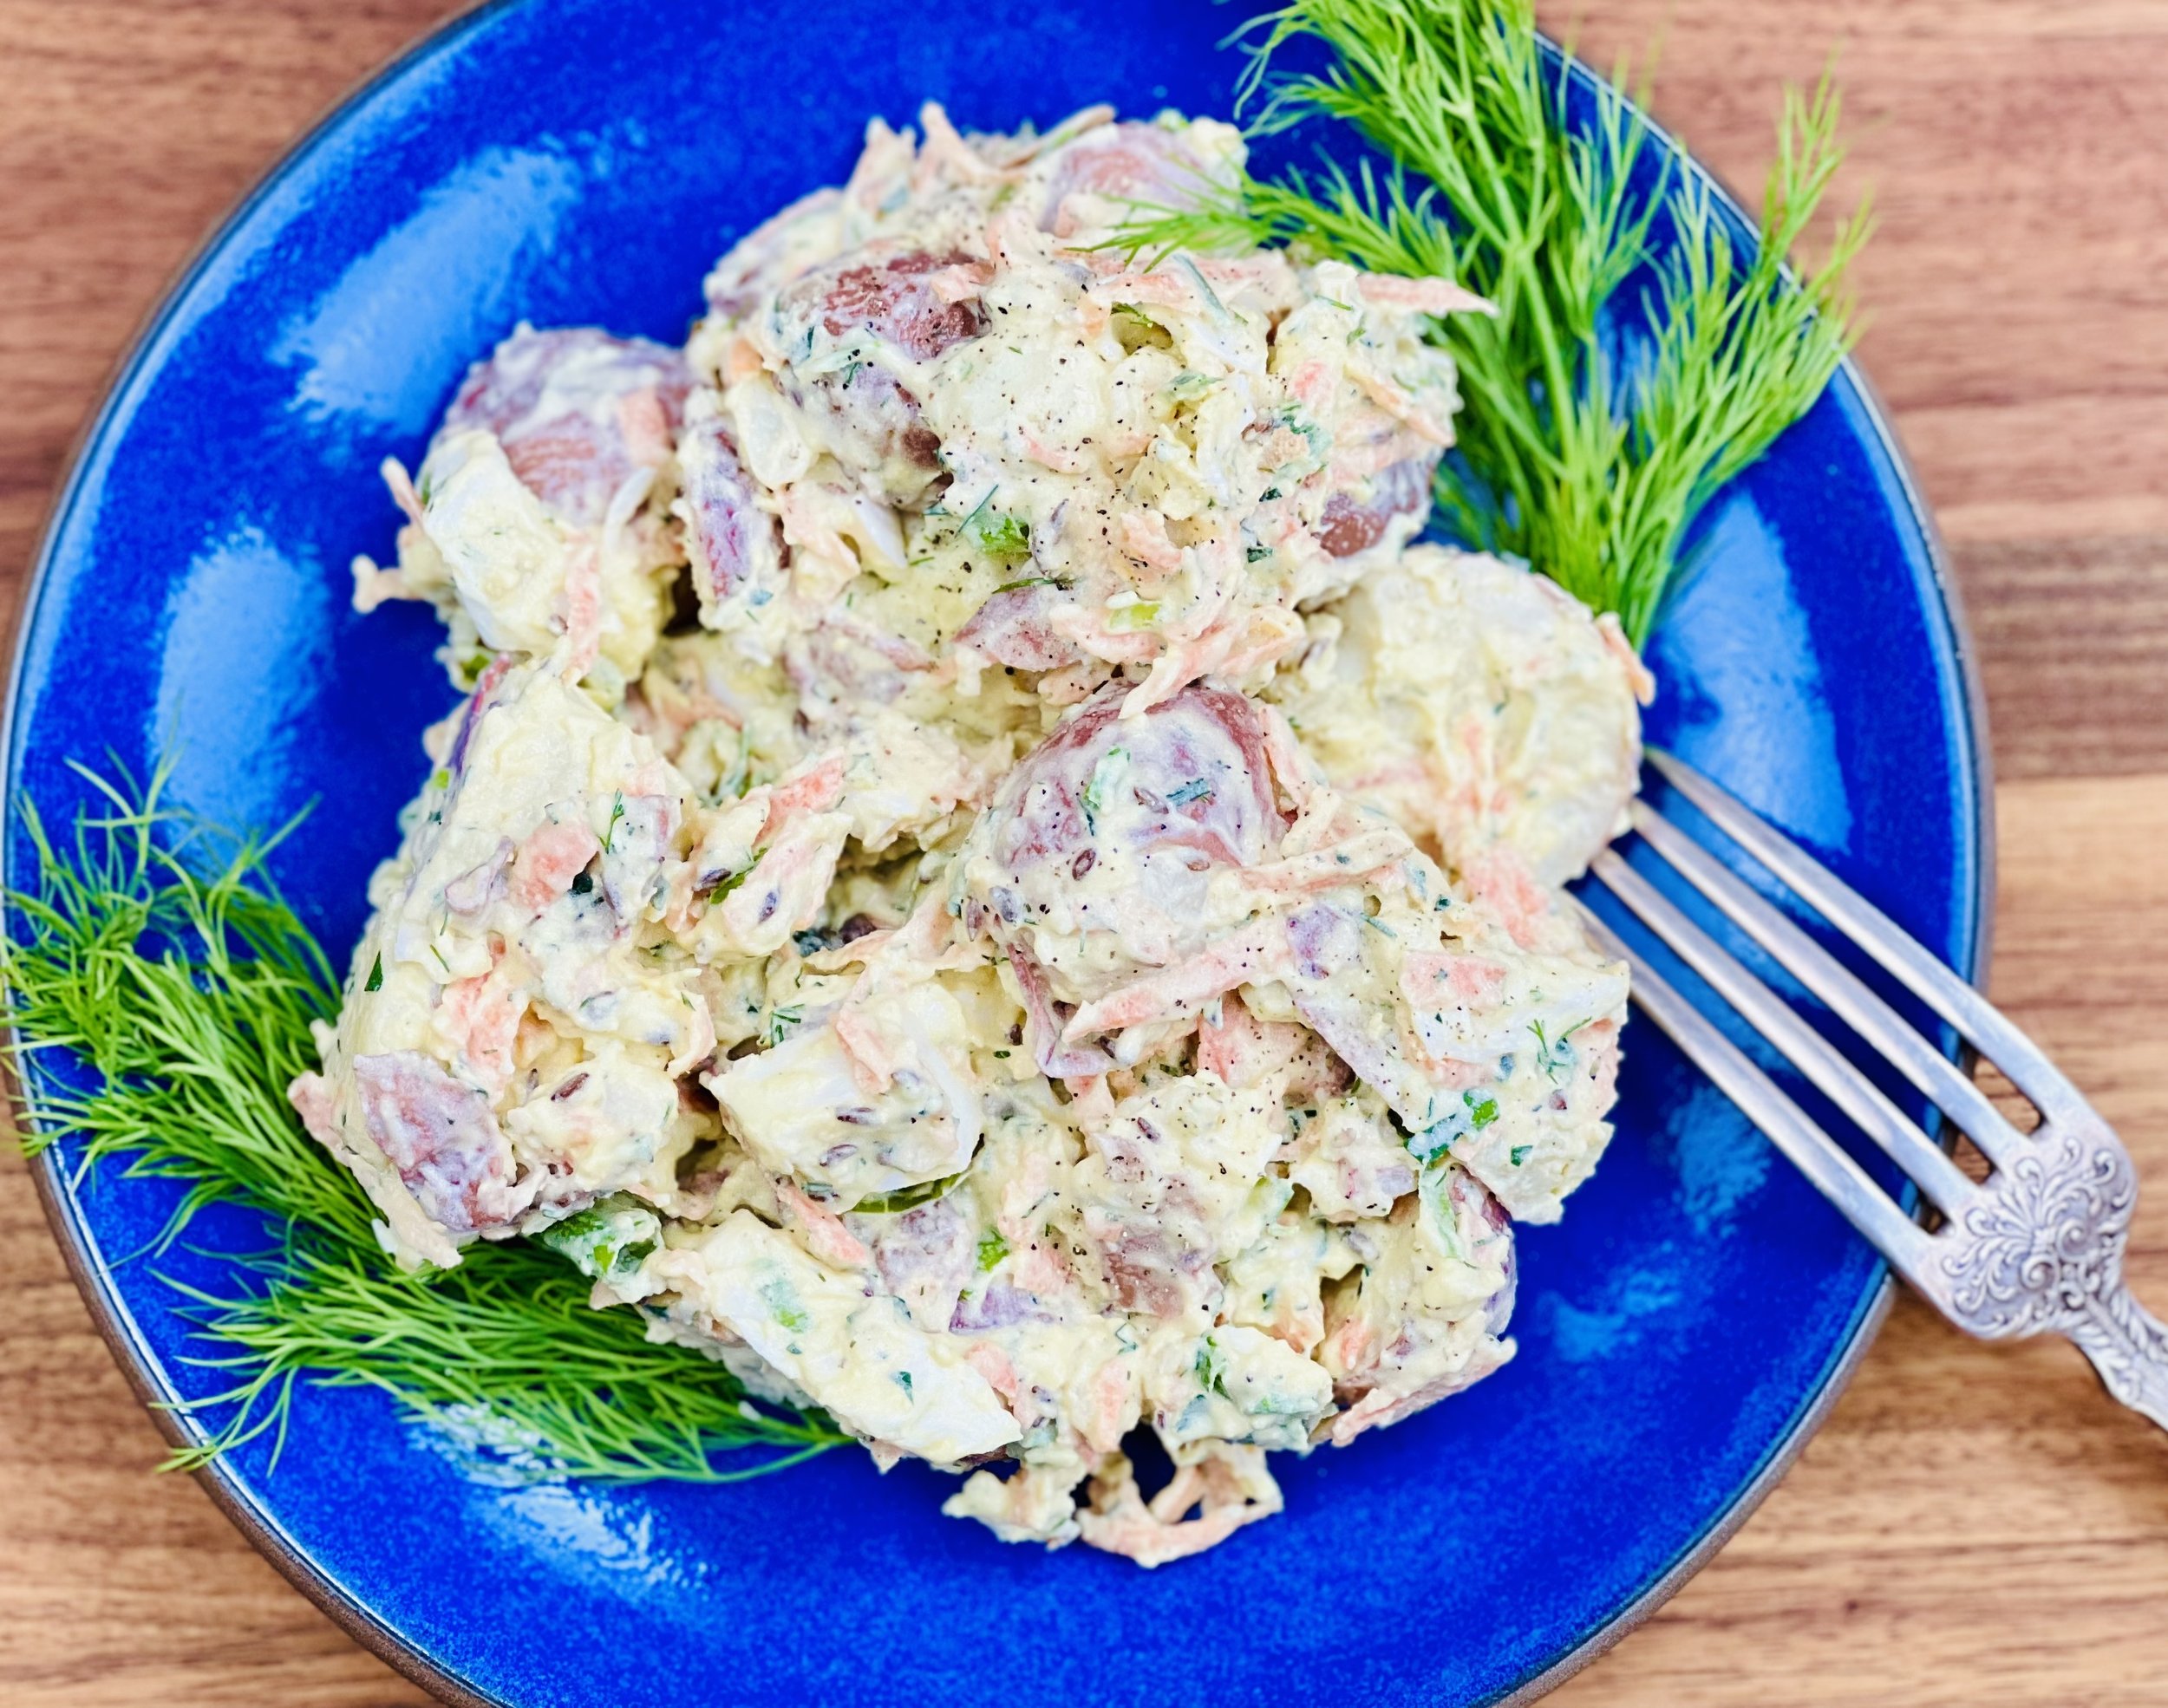
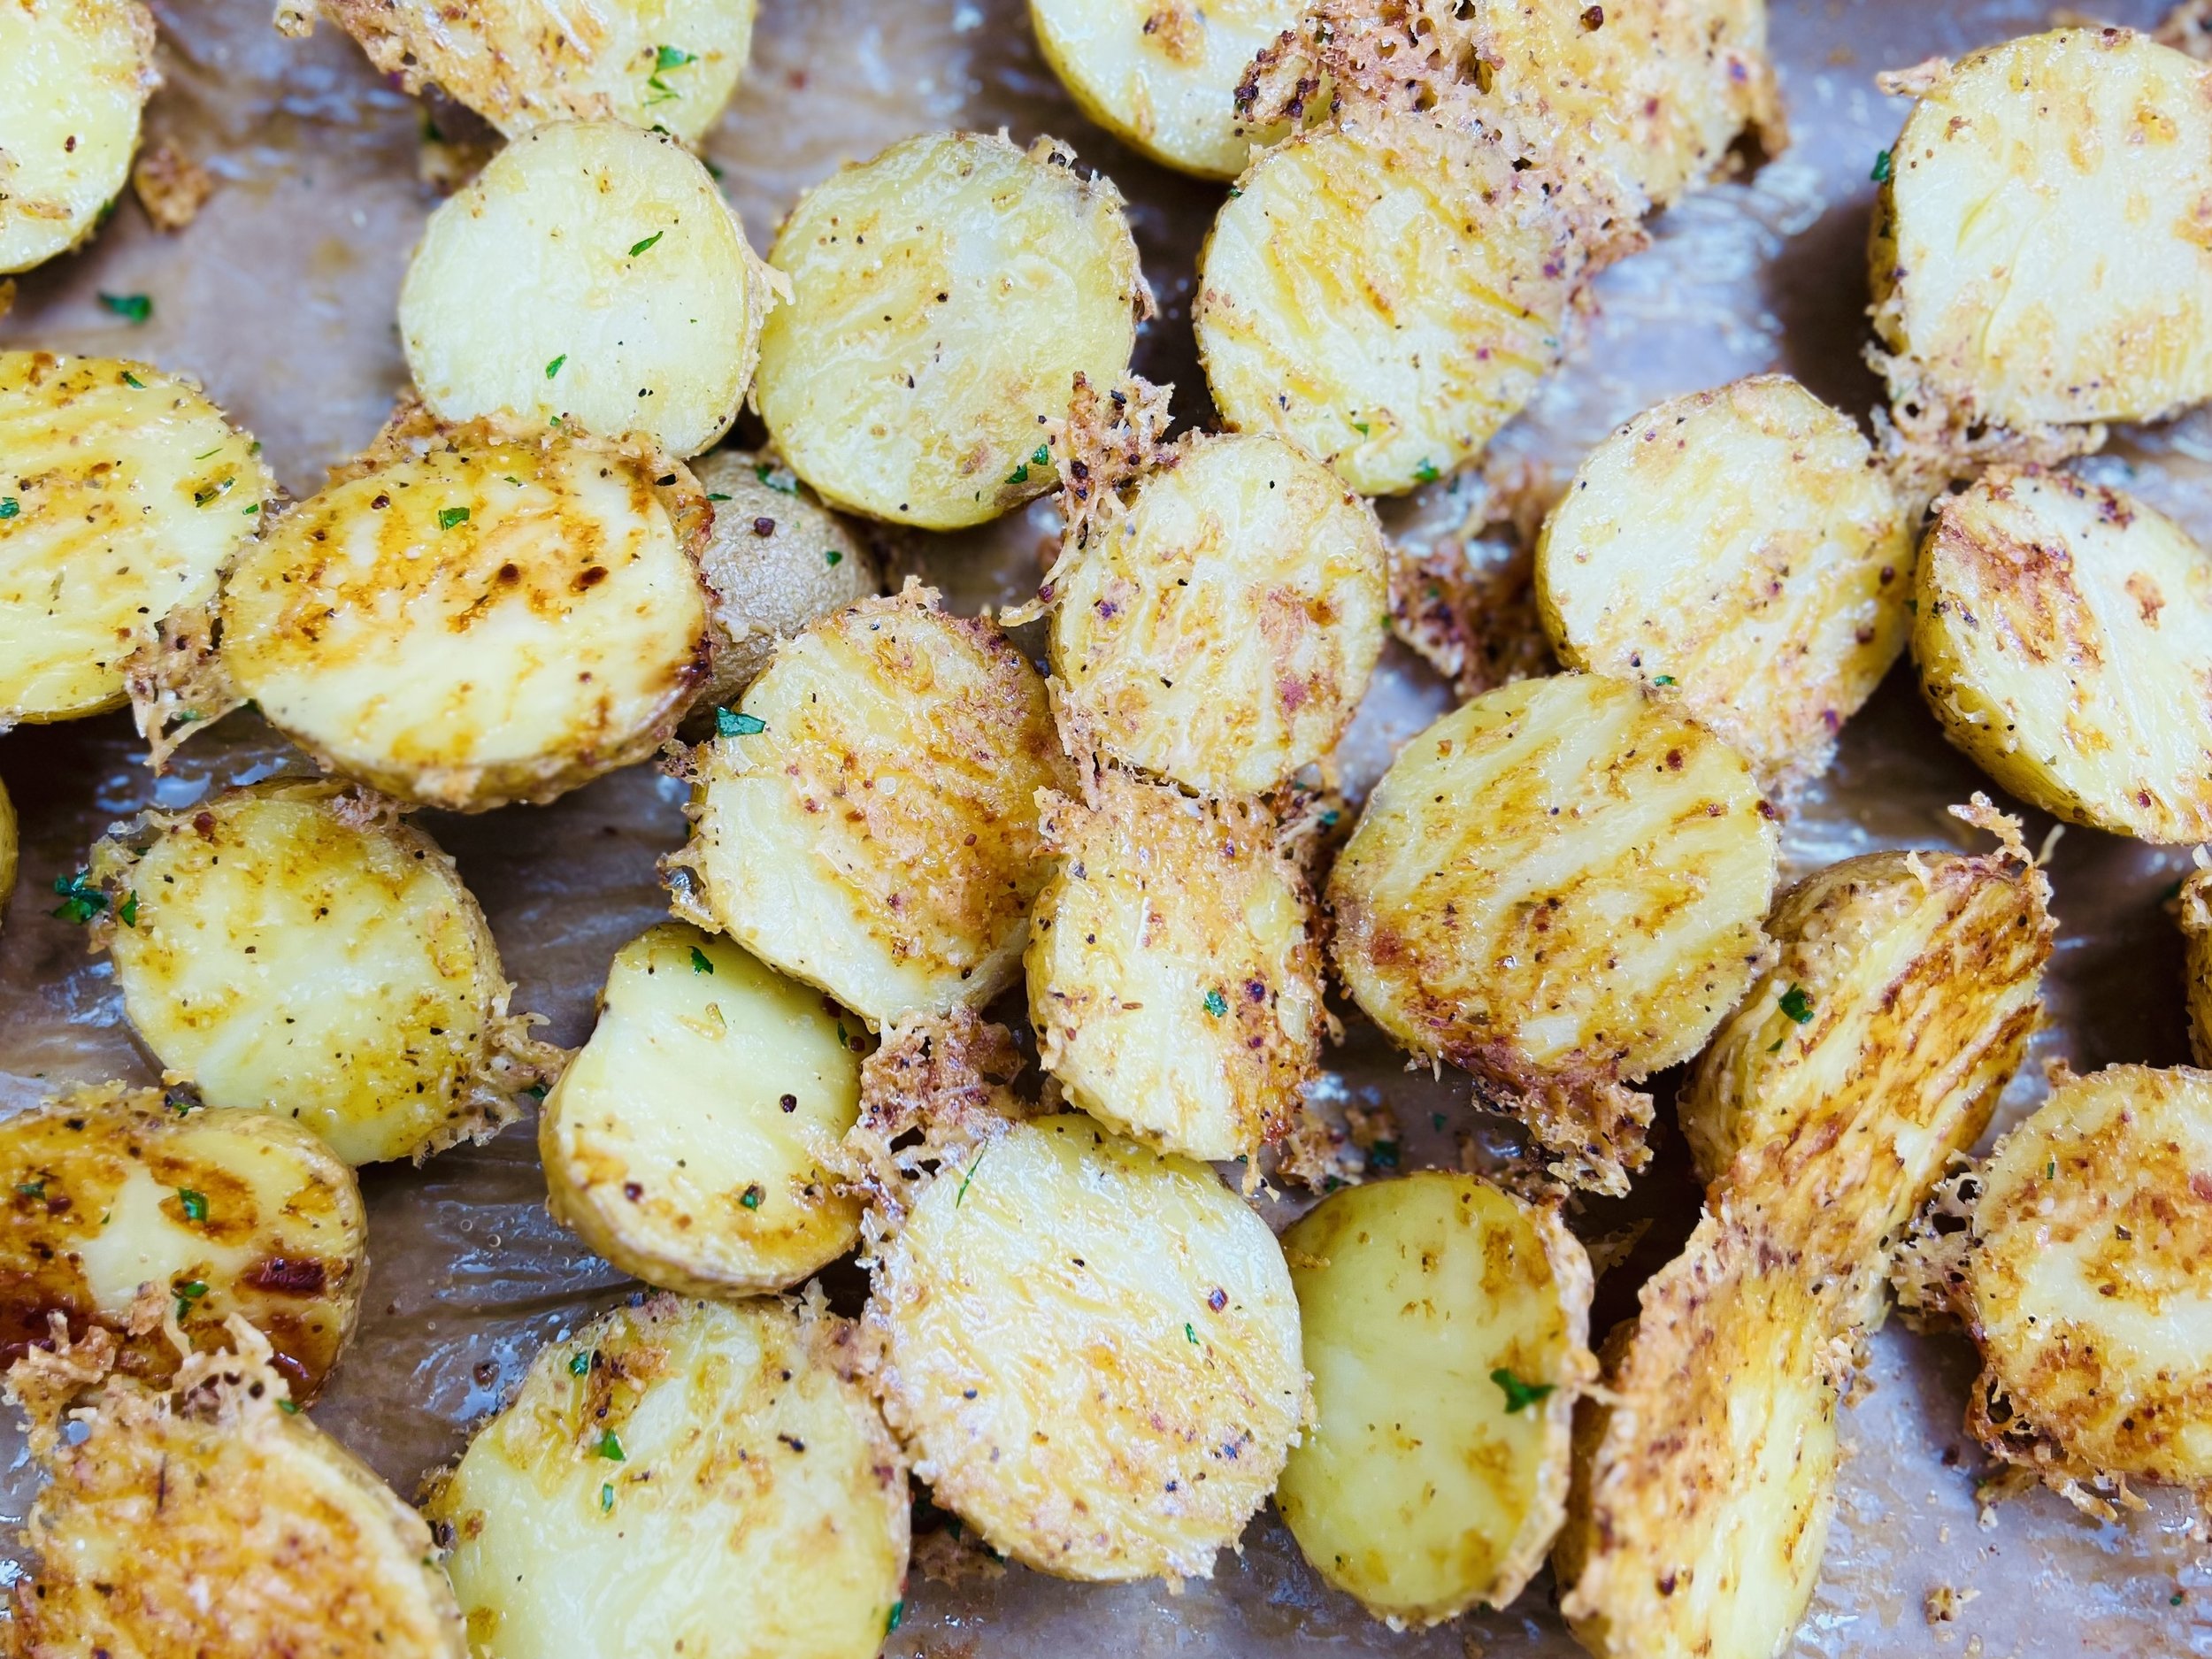
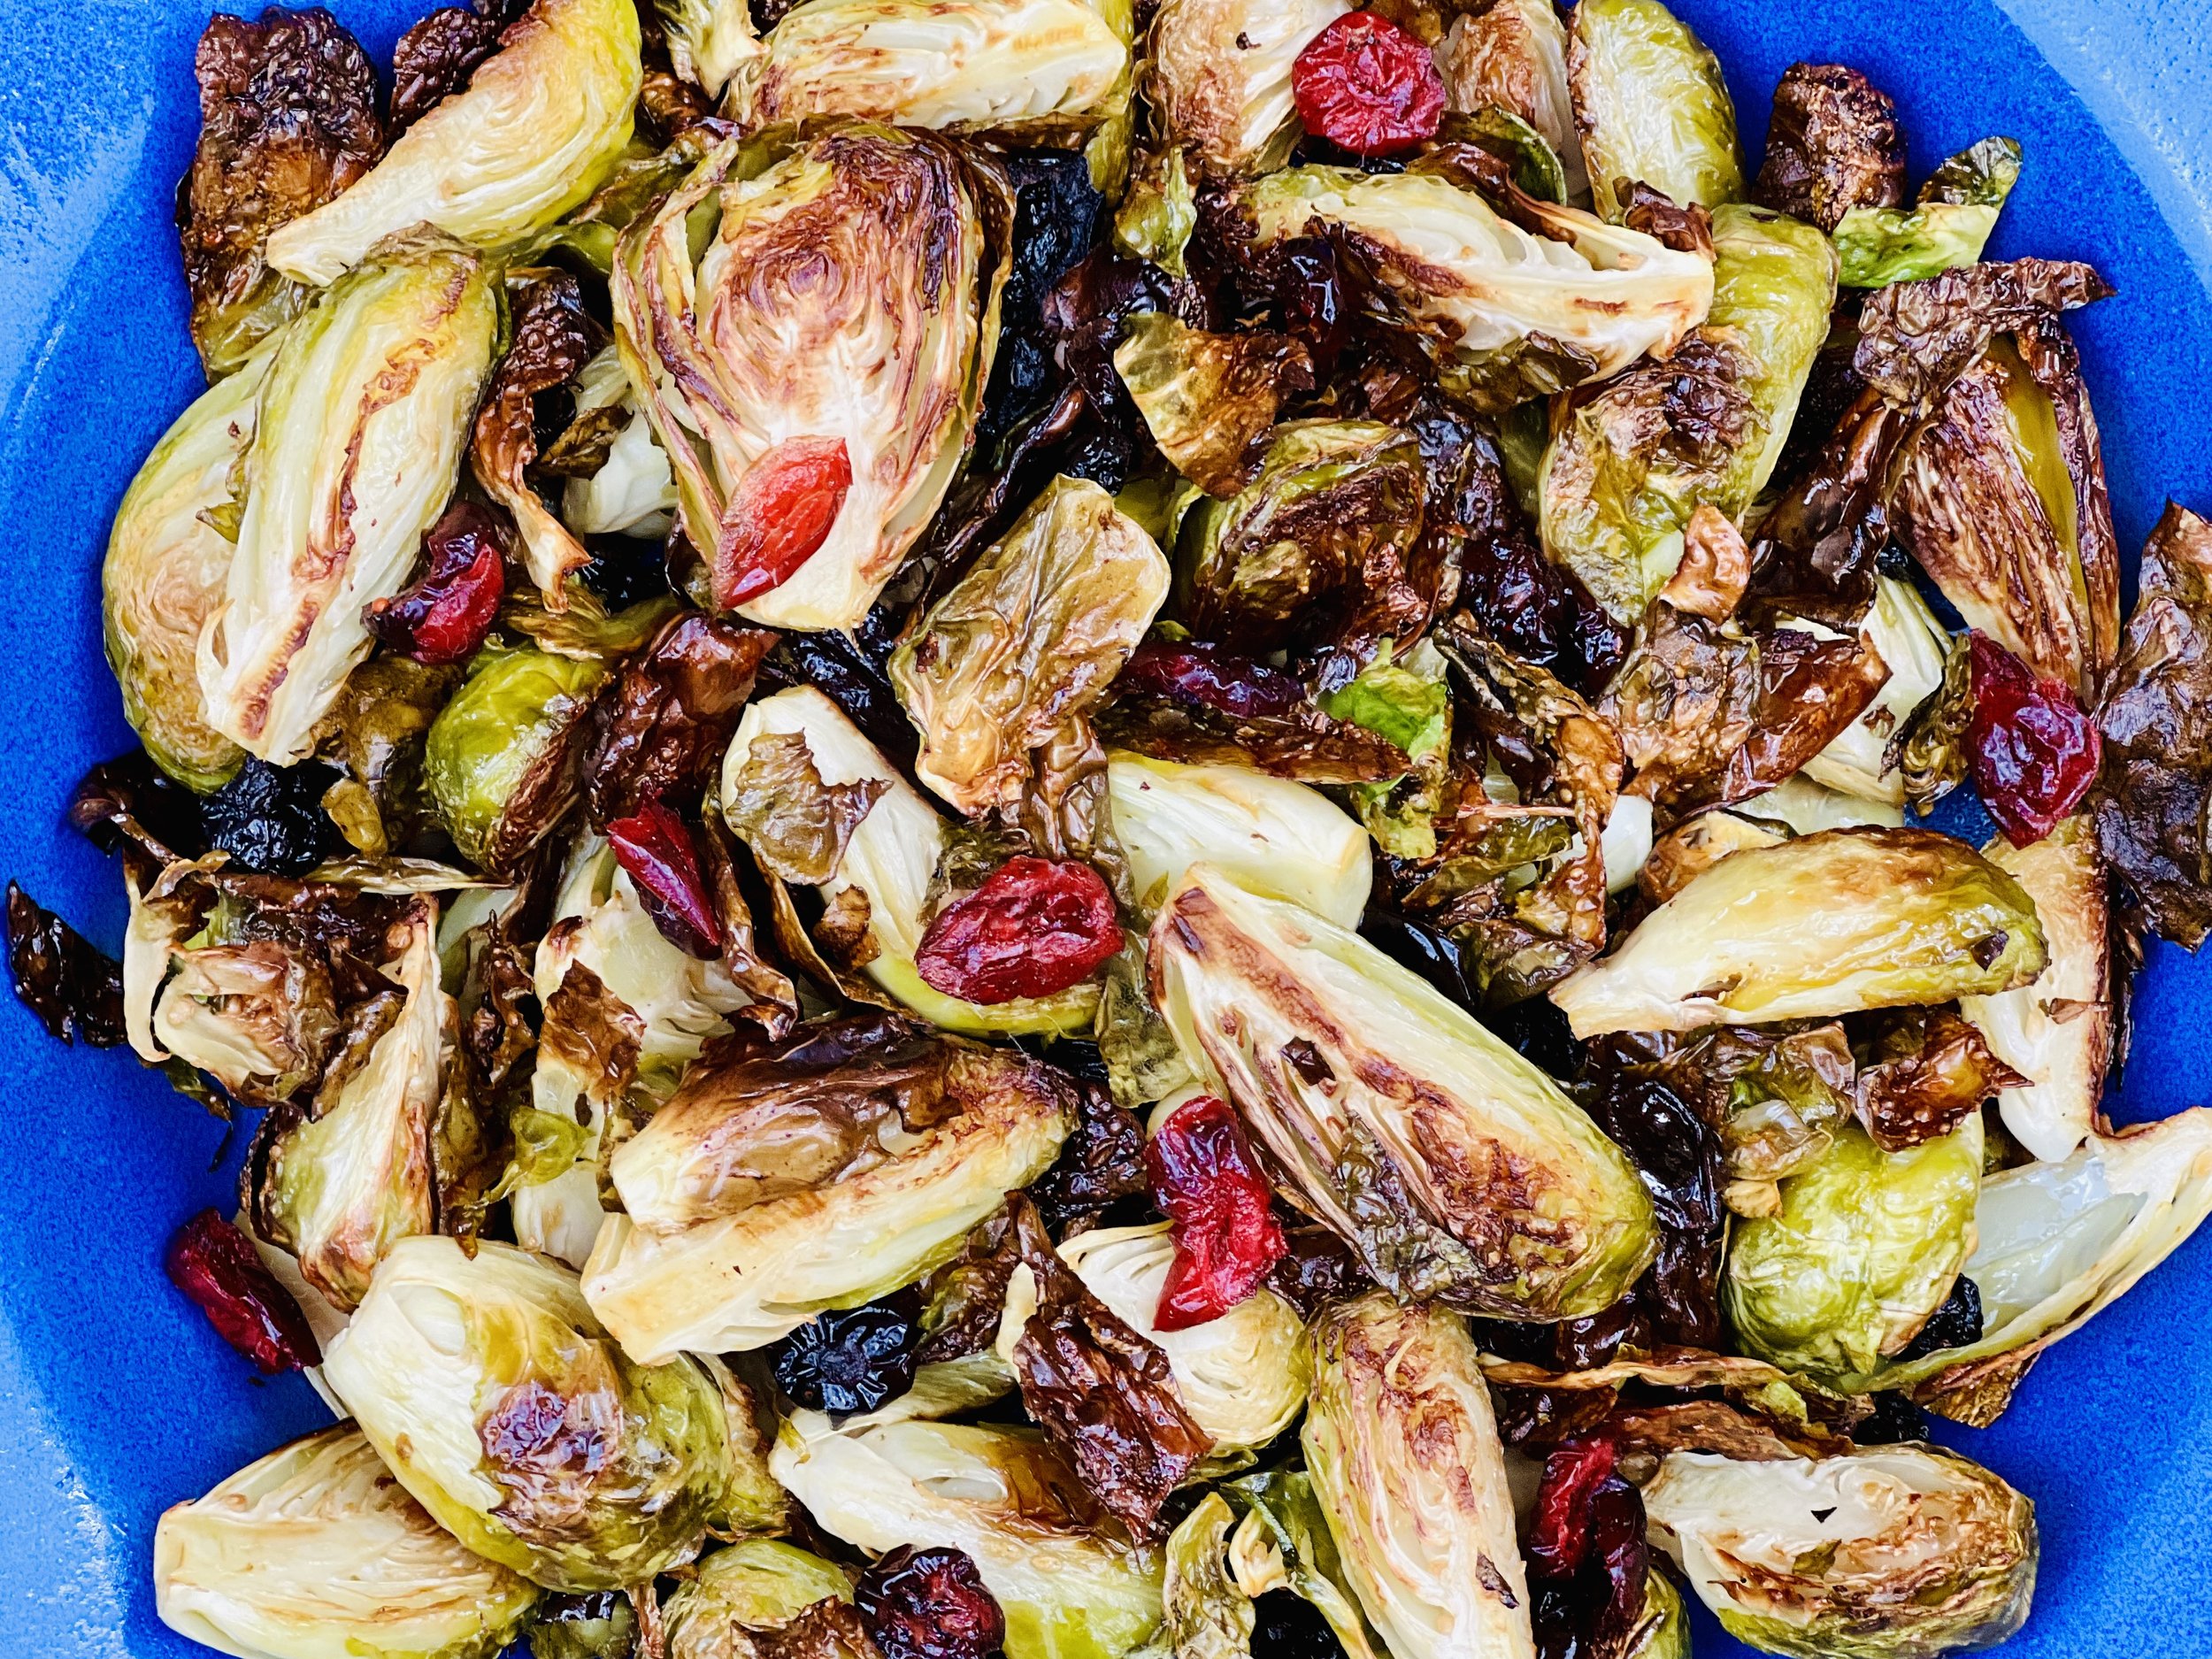
Patriotic Potato Salad (Low FODMAP)
30 Minutes prep • 2 hours chill • Low FODMAP • Gluten-free • Serves 8
30 Minutes prep • 2 hours chill • Low FODMAP • Gluten-free • Serves 8 • Ok to make ahead: Steps 1-4
I have loved this potato salad since Sheila Lukins and Julee Rosso published it decades ago in their Silver Palate Good Times Cookbook. I have made very slight modifications to the recipe for all of you to enjoy. It’s a wonderful potato salad for any occasion, and it’s even better the next day so it’s a great make-ahead time saver. The name came from the fact that the salad creates a confetti effect that anticipates a celebration.
Ingredients
14 small new red potatoes, scrubbed clean
6 hard-cooked eggs, peeled and quartered
1 - 2 medium-sized carrots, peeled and grated
1 bunch green onions, green part only (chopped)
3 tablespoons fresh dill, chopped
2 tablespoons fresh parsley, chopped
1 tablespoon caraway seeds
3/4 teaspoon Kosher salt
1/2 teaspoon freshly ground black pepper
3/4 cup lactose-free sour cream
3/4 cup mayonnaise
Directions
(1) Prepare: Hard boil the eggs. Wash potatoes and cut larger potatoes in half so they are all about the same size. Peel and grate the carrot(s). Chop the green onion greens.
(2) Cook the potatoes: Heat a medium-size saucepan of water to boiling. Add the potatoes and cook just until tender, 20-25 minutes. Drain, cool, and cut in half.
(3) Make the salad: Combine the eggs, potatoes, carrots, and green onion greens in a large bowl. Add the dill, parsley, caraway seeds, salt, and pepper and gently toss to combine.
(4) Blend and add the sauce: Mix the sour cream and mayonnaise and gently fold into the potato mixture.
(5) Finish: Refrigerate the salad several hours before serving to allow flavors to blend.
(6) Plate and serve: Stir, taste, and add a bit more salt if needed. Serve alongside any grilled meat or fish.
Eat and enjoy every bite because you can!
Recipe note: I use Diamond Crystal Kosher salt in all my recipes because it has a wonderful flat and crisp flake that tastes delicious. It is also the least salty salt available so you can use it more liberally as a seasoning than you can table salt or sea salt. If you use another type of salt, you may need to reduce the amount so it is not over-salted.
Have a question you’d like to have answered? Email me at hello@ibsgamechanger.com
Link note: This post may contain affiliate links for you to easily purchase items that are linked. I may earn a small commission from qualifying purchases but none of this costs you a thing so feel free to use the links! In addition, for some items, I have provided a special discount code for IBS Game Changers so be sure to use the code when you purchase an item to get the discount that has been arranged just for you.
More Deliciously Low FODMAP™ side dish recipes


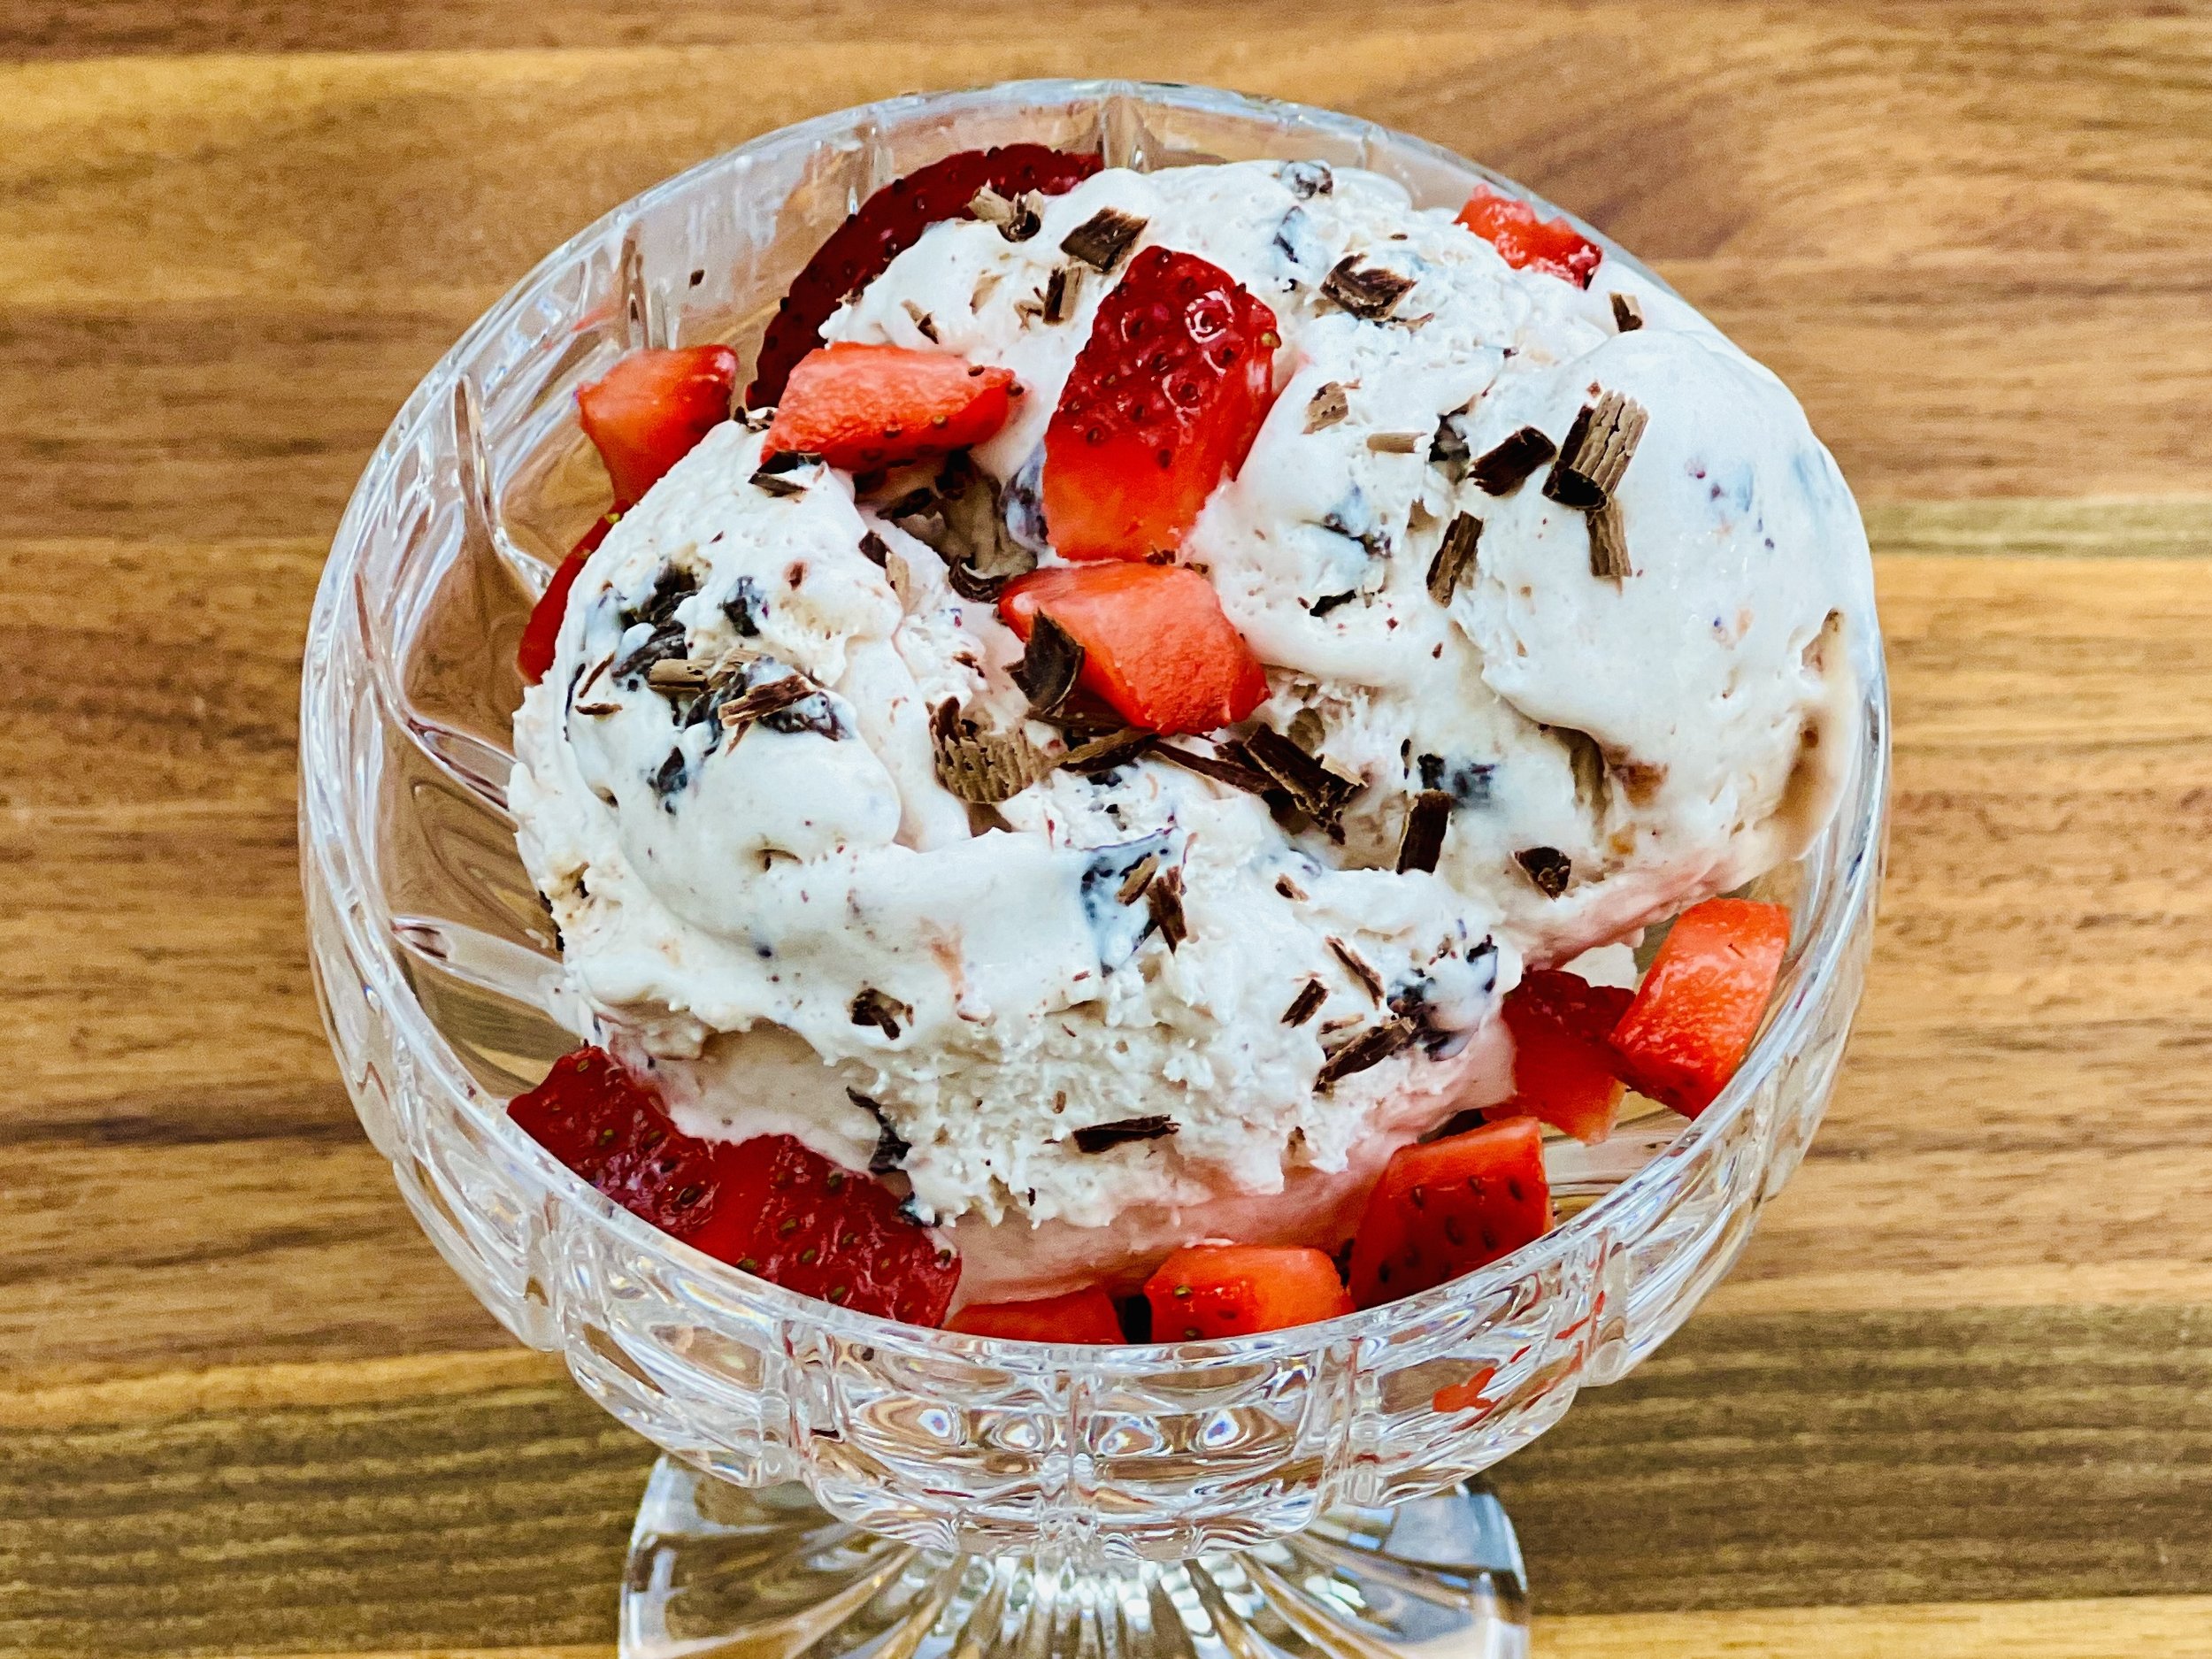
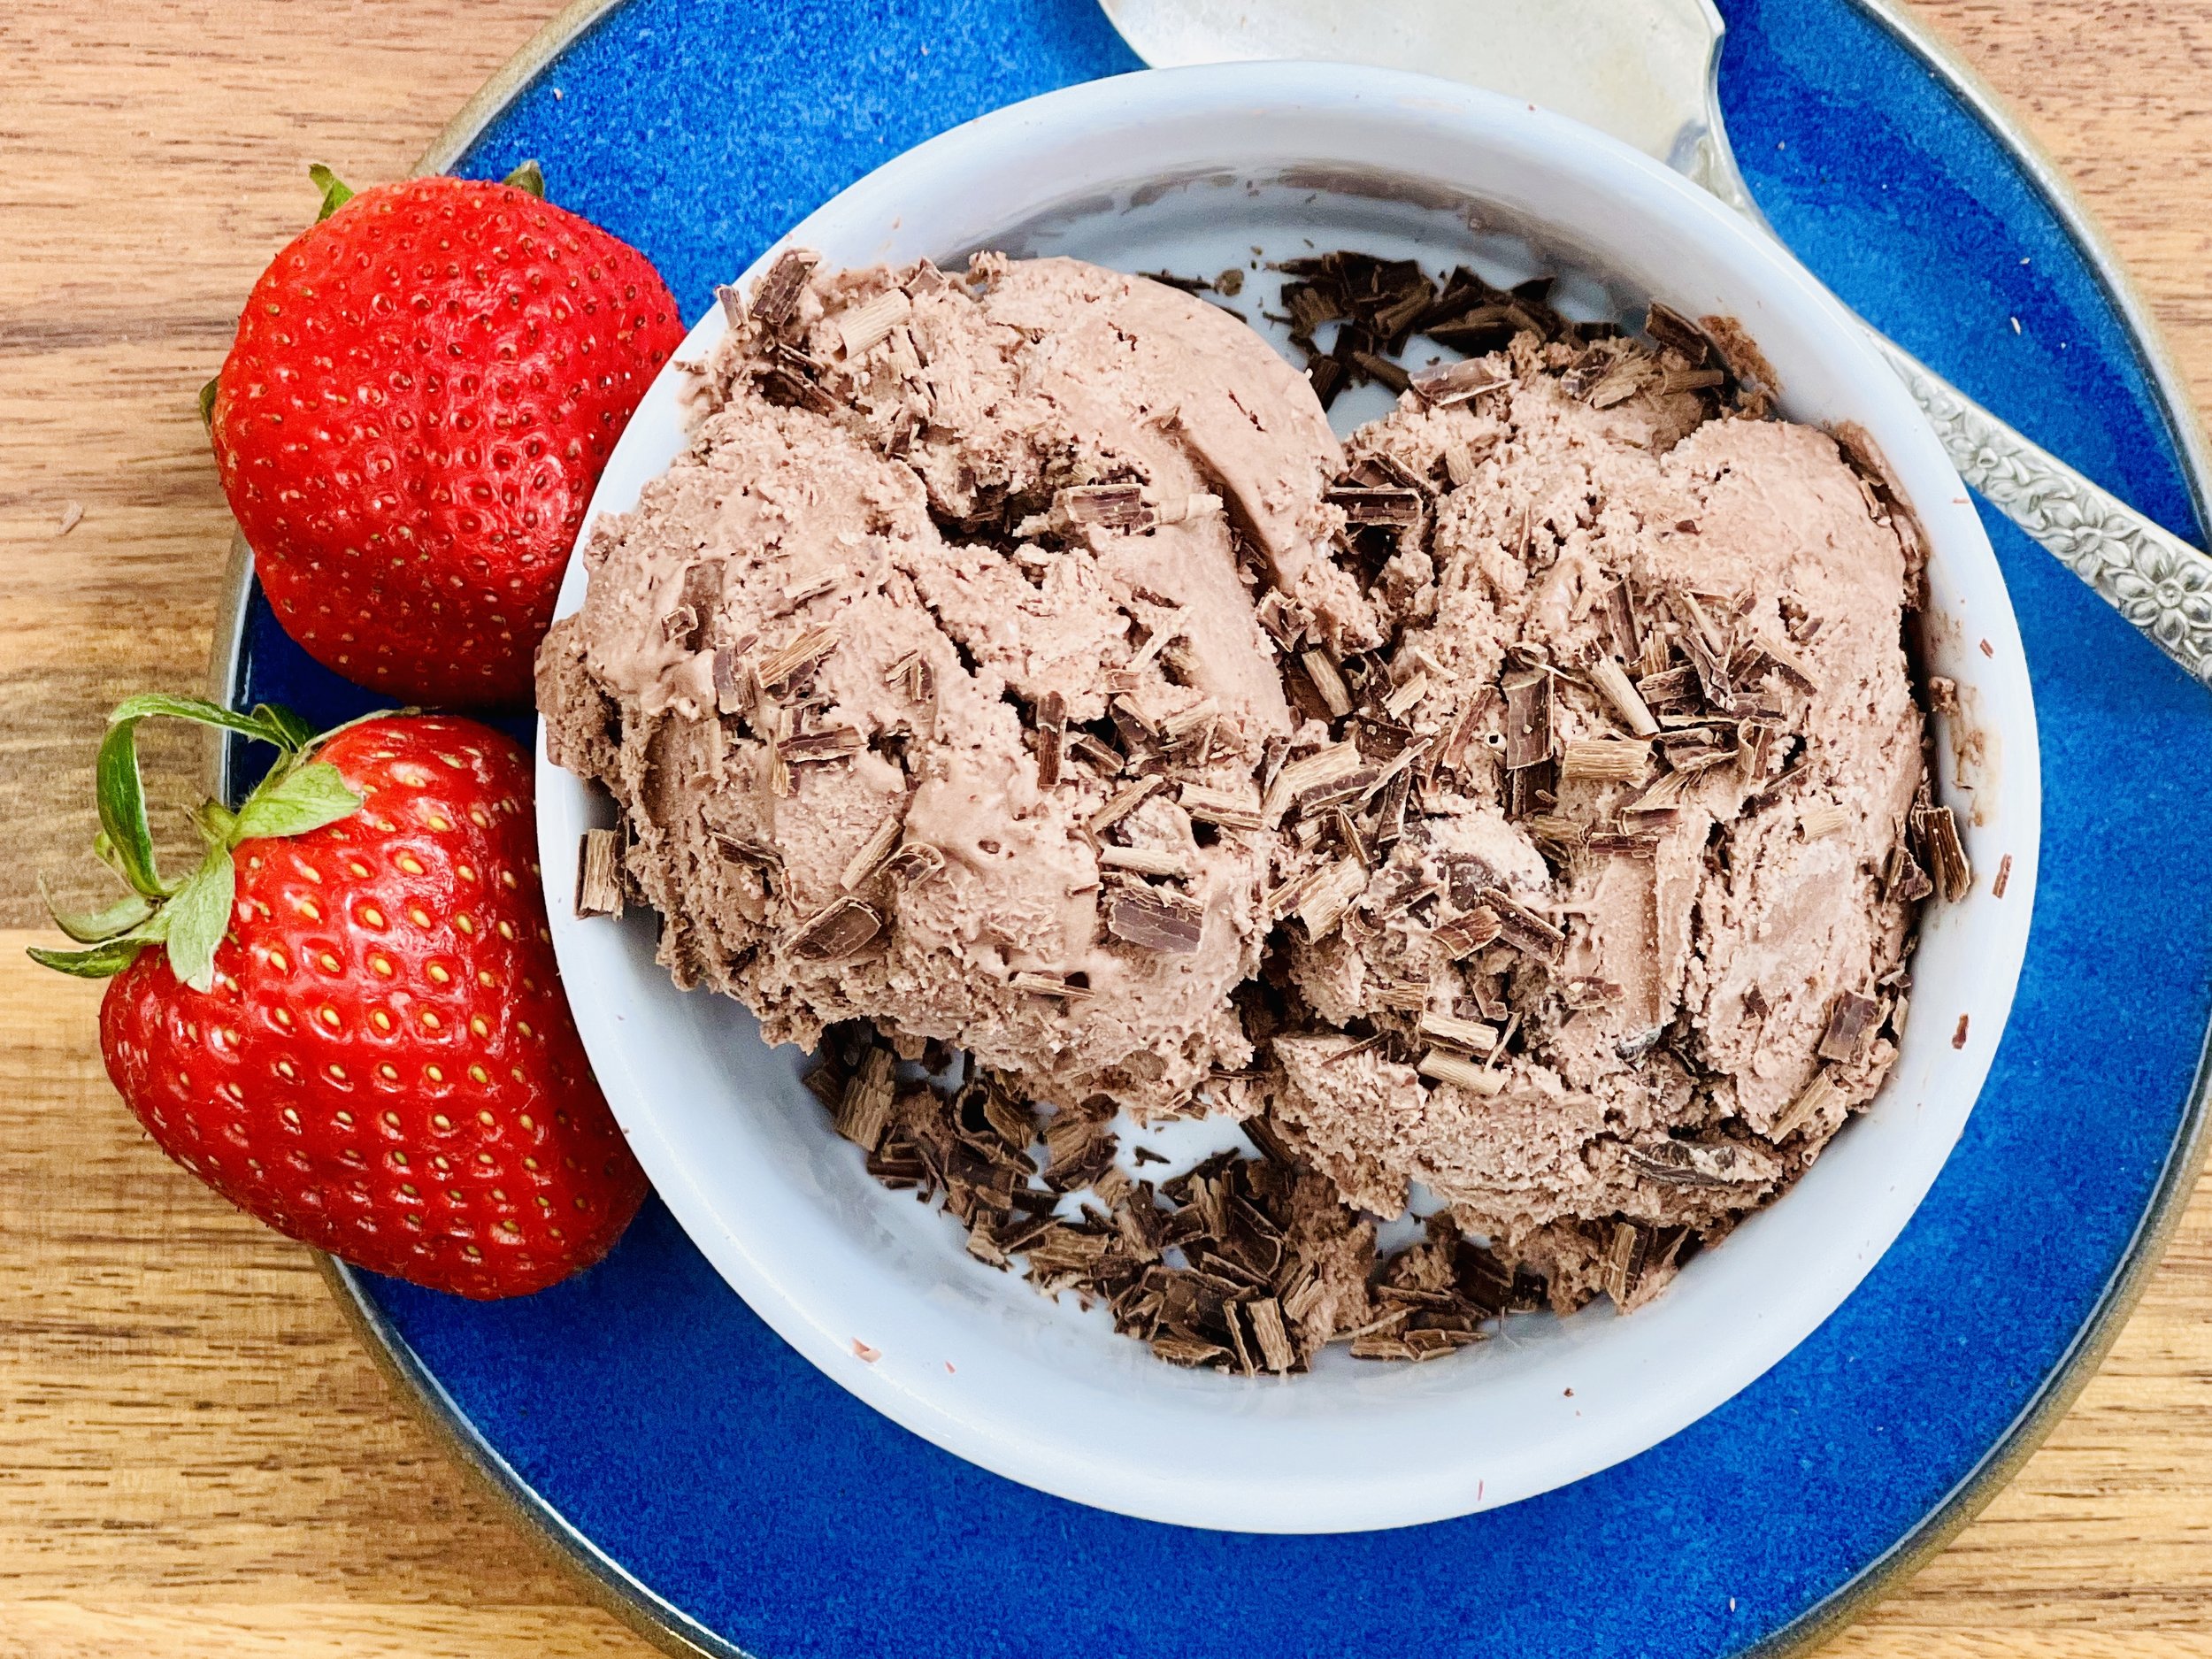
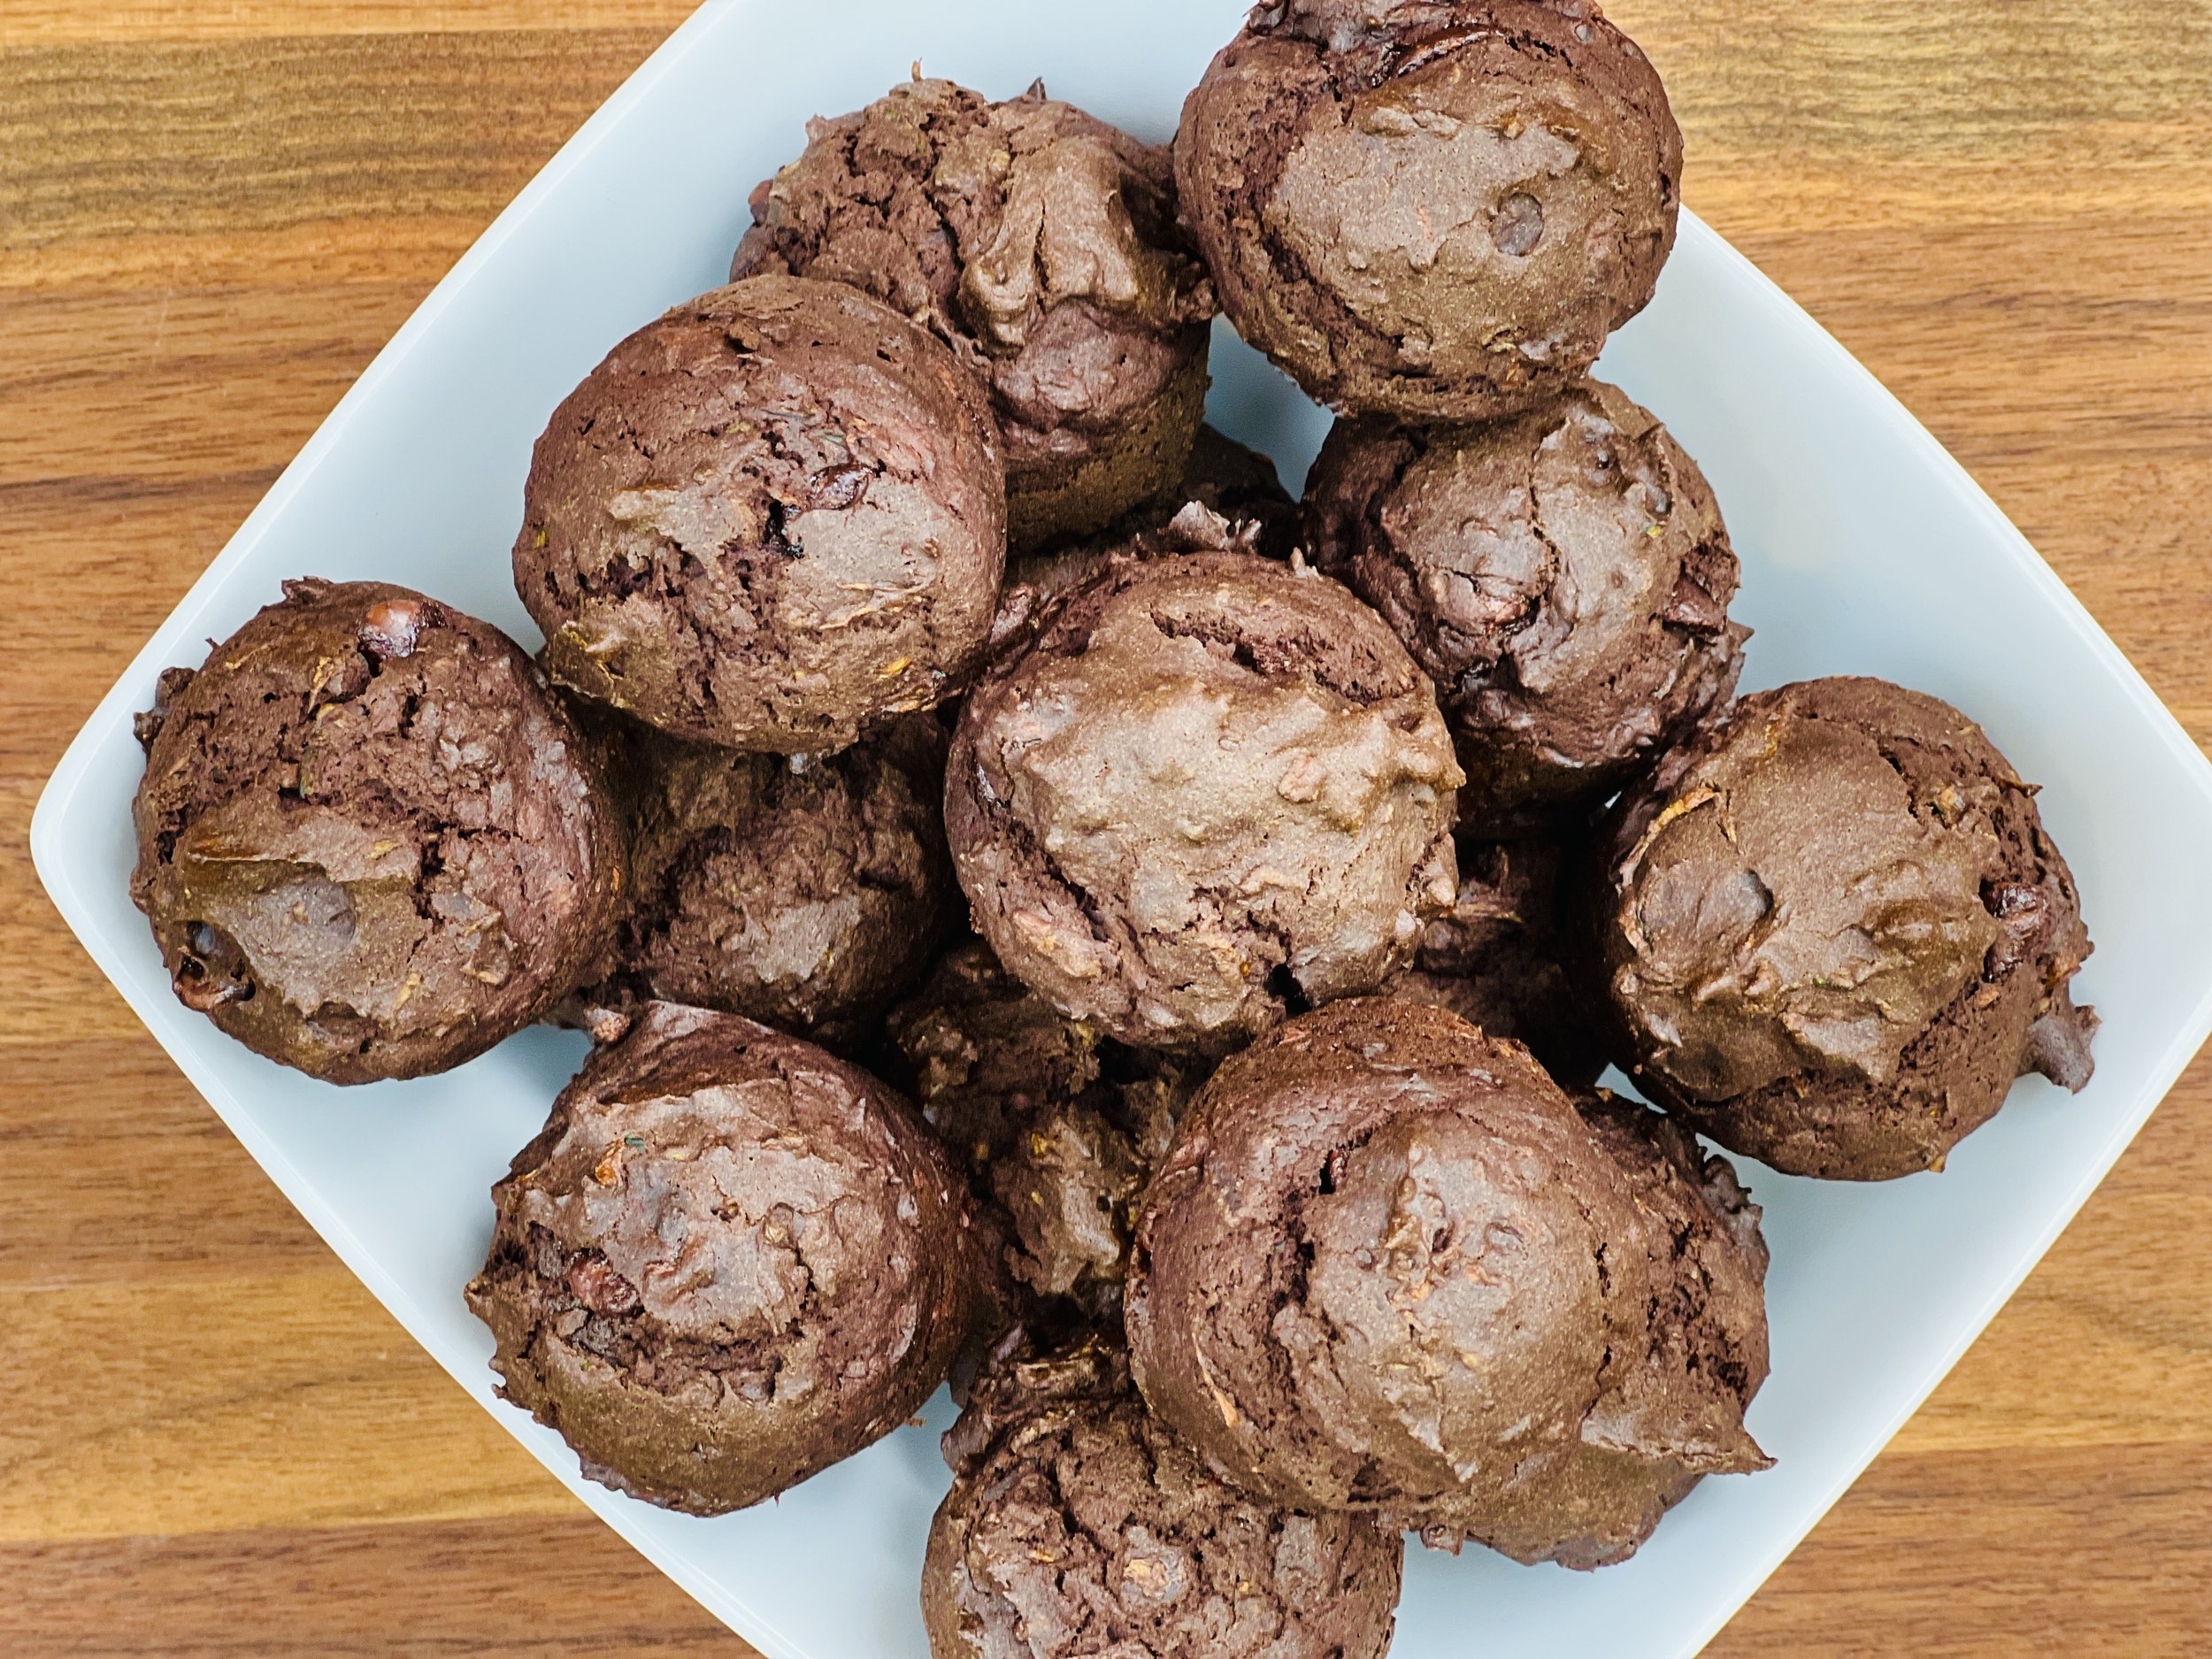
Chocolate Kissed Strawberry Ice Cream (Low FODMAP)
10 Minutes prep • 6 Hours Chill • Low FODMAP • Gluten-free • Serves 9
10 Minutes prep • 6 Hours Chill • Low FODMAP • Gluten-free • Serves 9 • Ok to make ahead: Steps 1-4
Are you looking for a simple yet amazing finish to your next BBQ or dinner? This no-churn homemade ice cream delivers! It’s the perfect combination of vivid strawberry flavor, blended with decadent dark chocolate chunks, all swirled into a luxuriously creamy base. With just five ingredients and minimal prep, you'll be savoring your new favorite ice cream in no time.
See this new recipe in my FREE recipe club.
To streamline your search through hundreds of existing recipes, I'm moving the release of my new weekly creations to the Recipe Club on Patreon. In the club, you’ll get access to a treasure trove of low-FODMAP goodness, complete with collections and filters to use as your virtual cookbook!
Here's what awaits you in the club:
Exclusive weekly recipes: Be the first to try my latest delicious low-FODMAP creations!
Simple & Easy: My recipes continue to focus on readily available ingredients and effortless preparation, perfect for family-friendly meals (no more separate low-FODMAP meal prep!).
Hundreds of existing recipes: Gain access to my entire library of low-FODMAP recipes, all conveniently organized.
You can join for free or sign up for only $5/month. Your support fuels my passion for creating new, delicious, and easy-to-make low-FODMAP recipes just for you.
Let's go on this delicious low-FODMAP journey together.
More Deliciously Low FODMAP™ dessert recipes
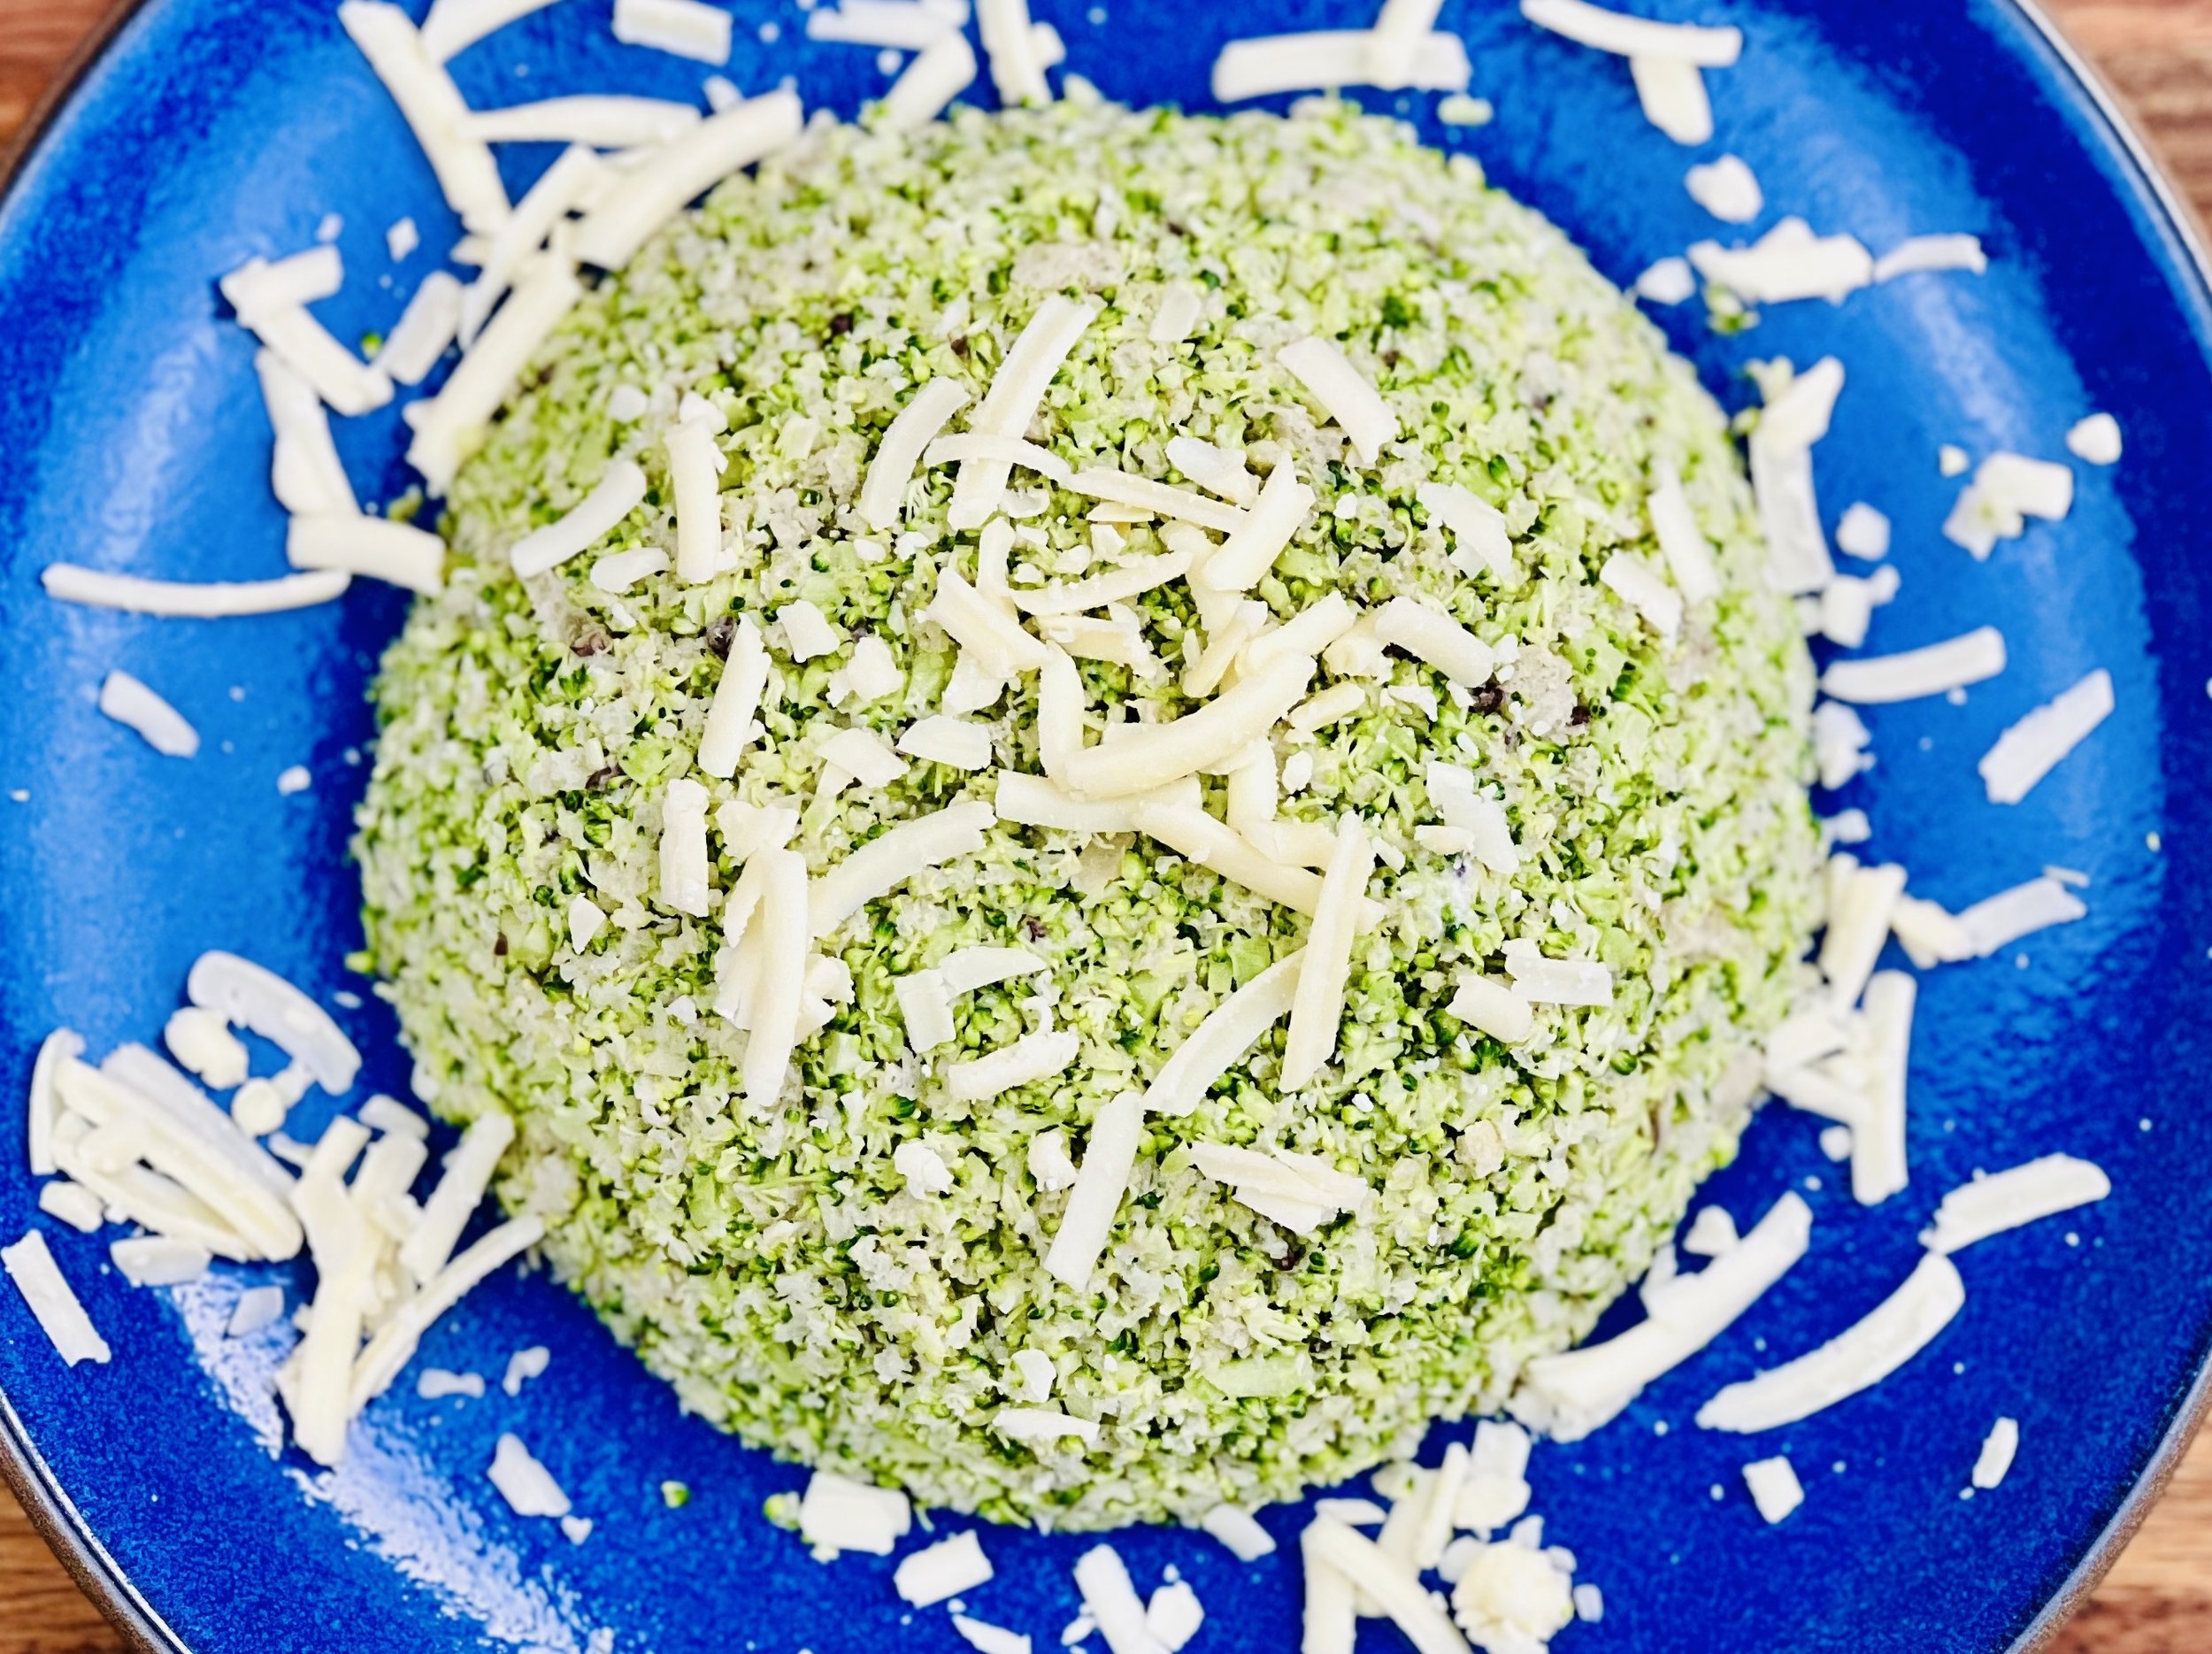
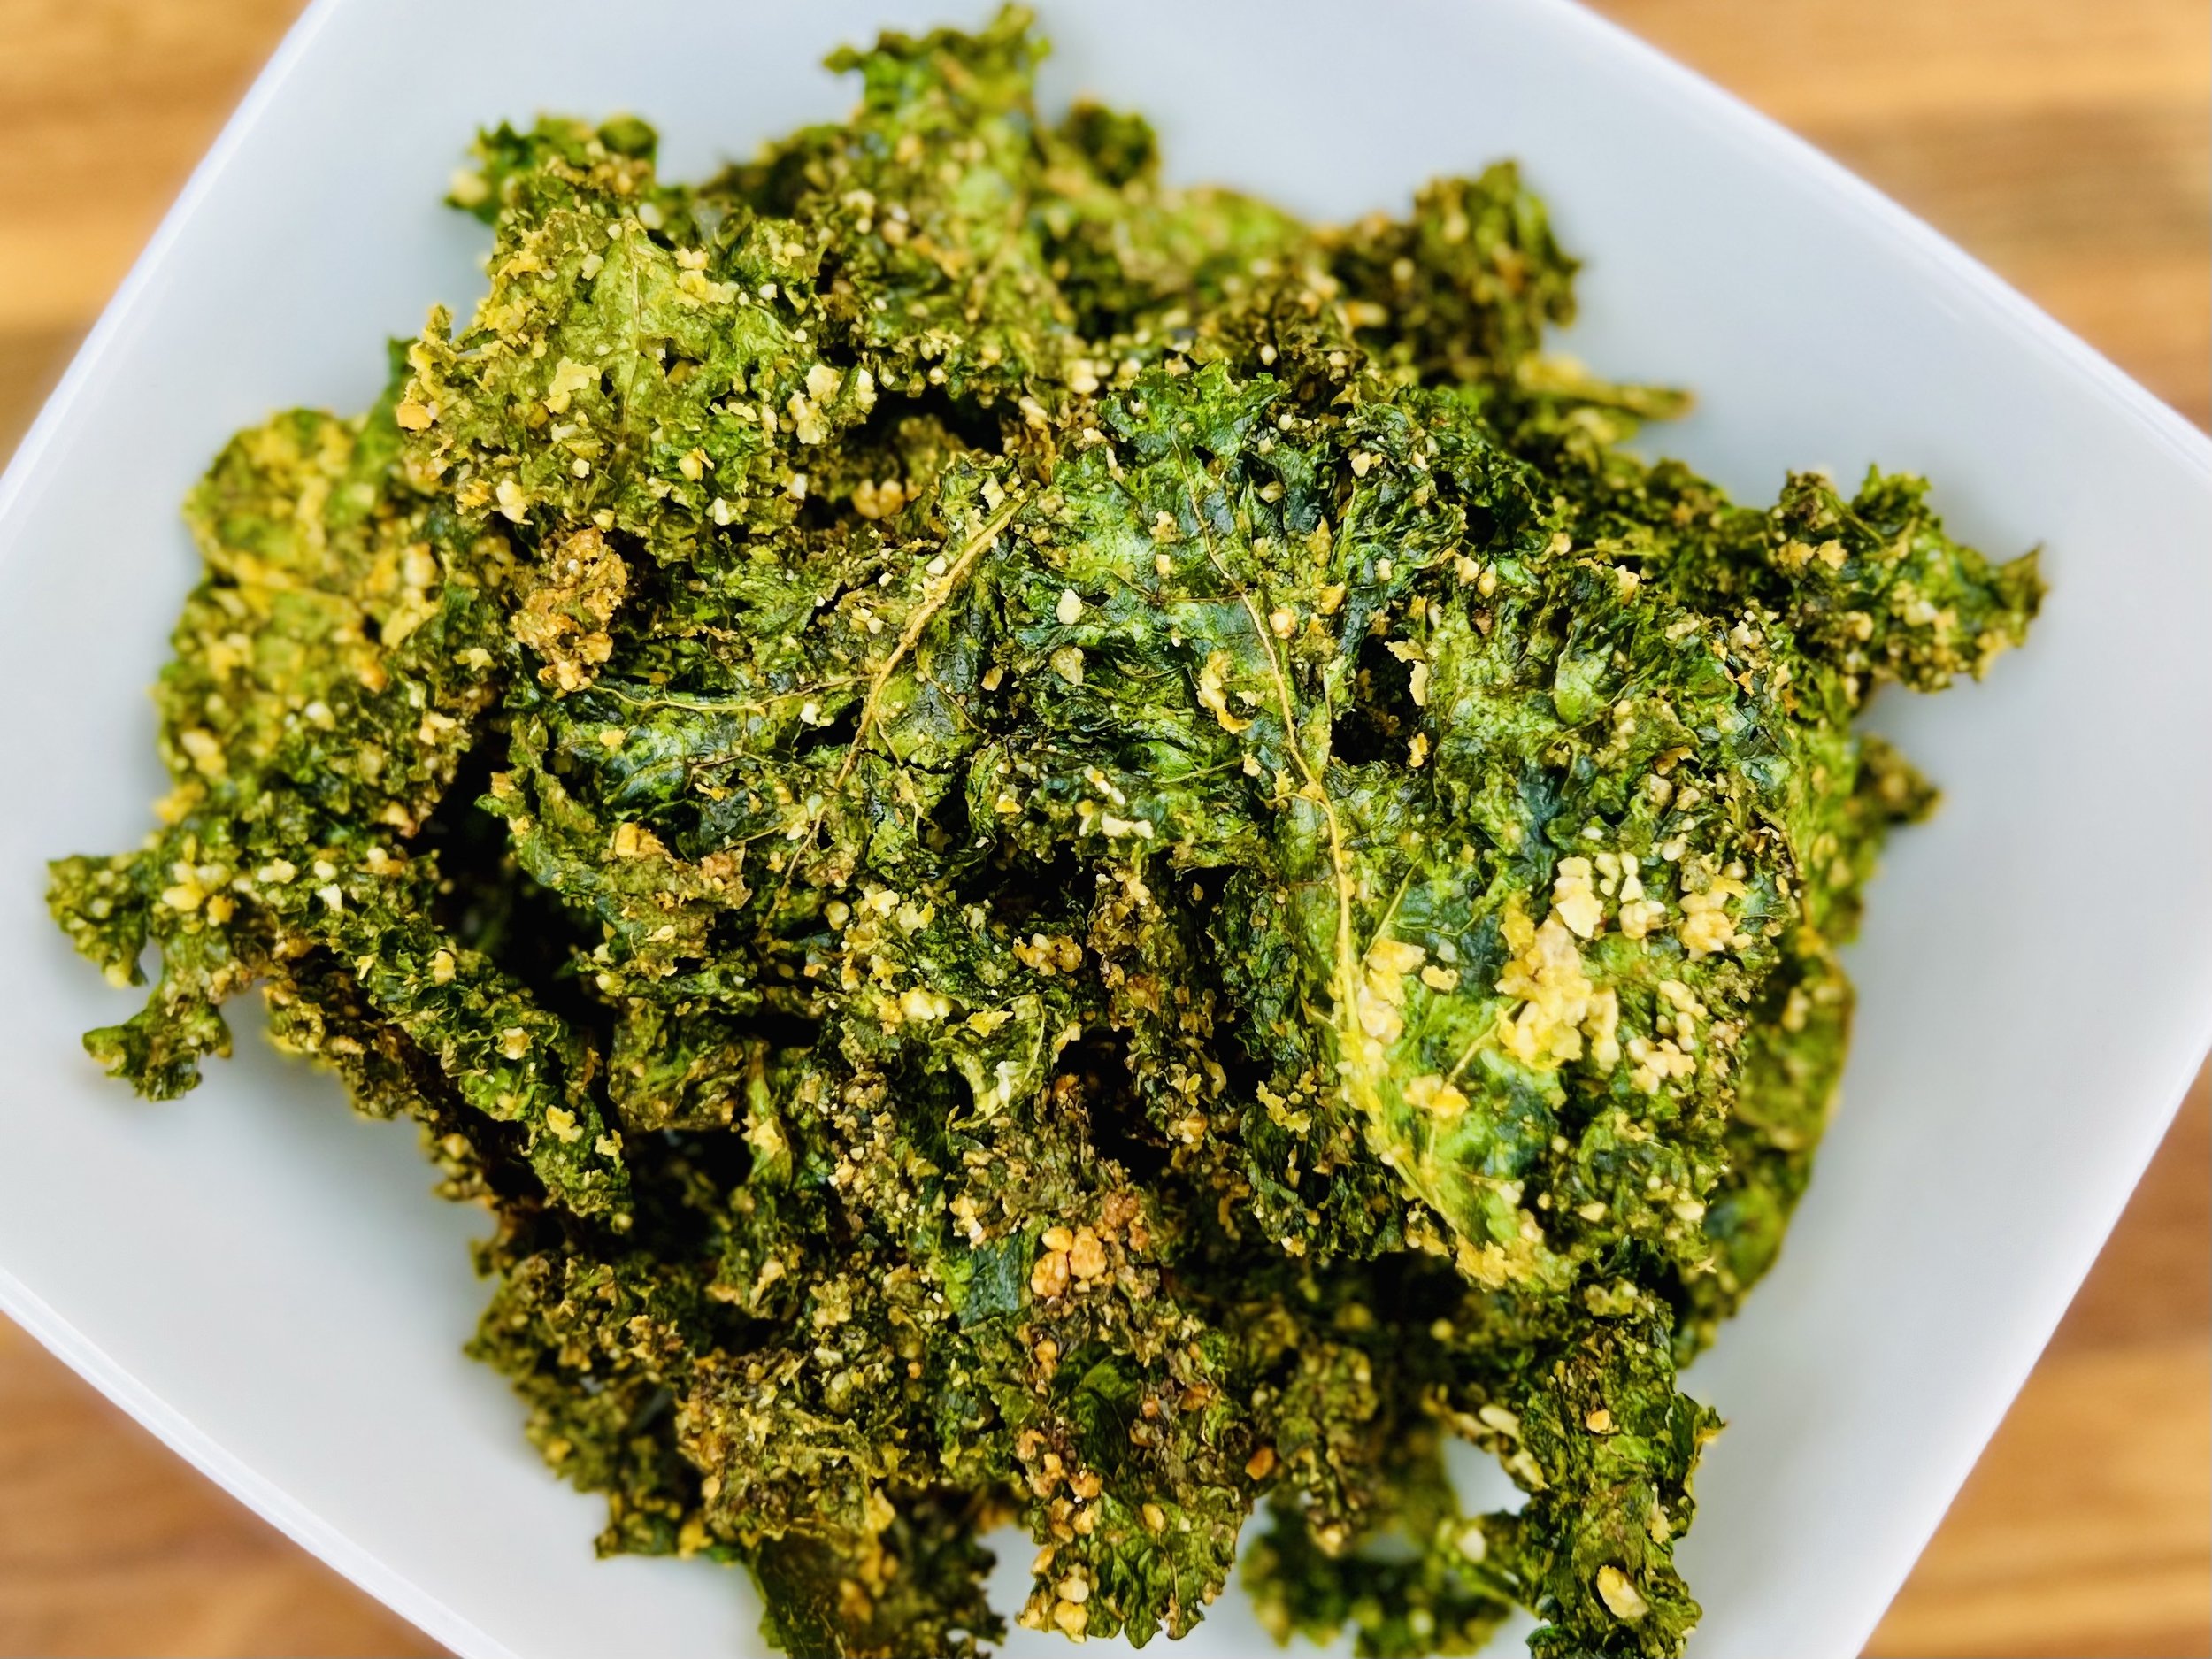
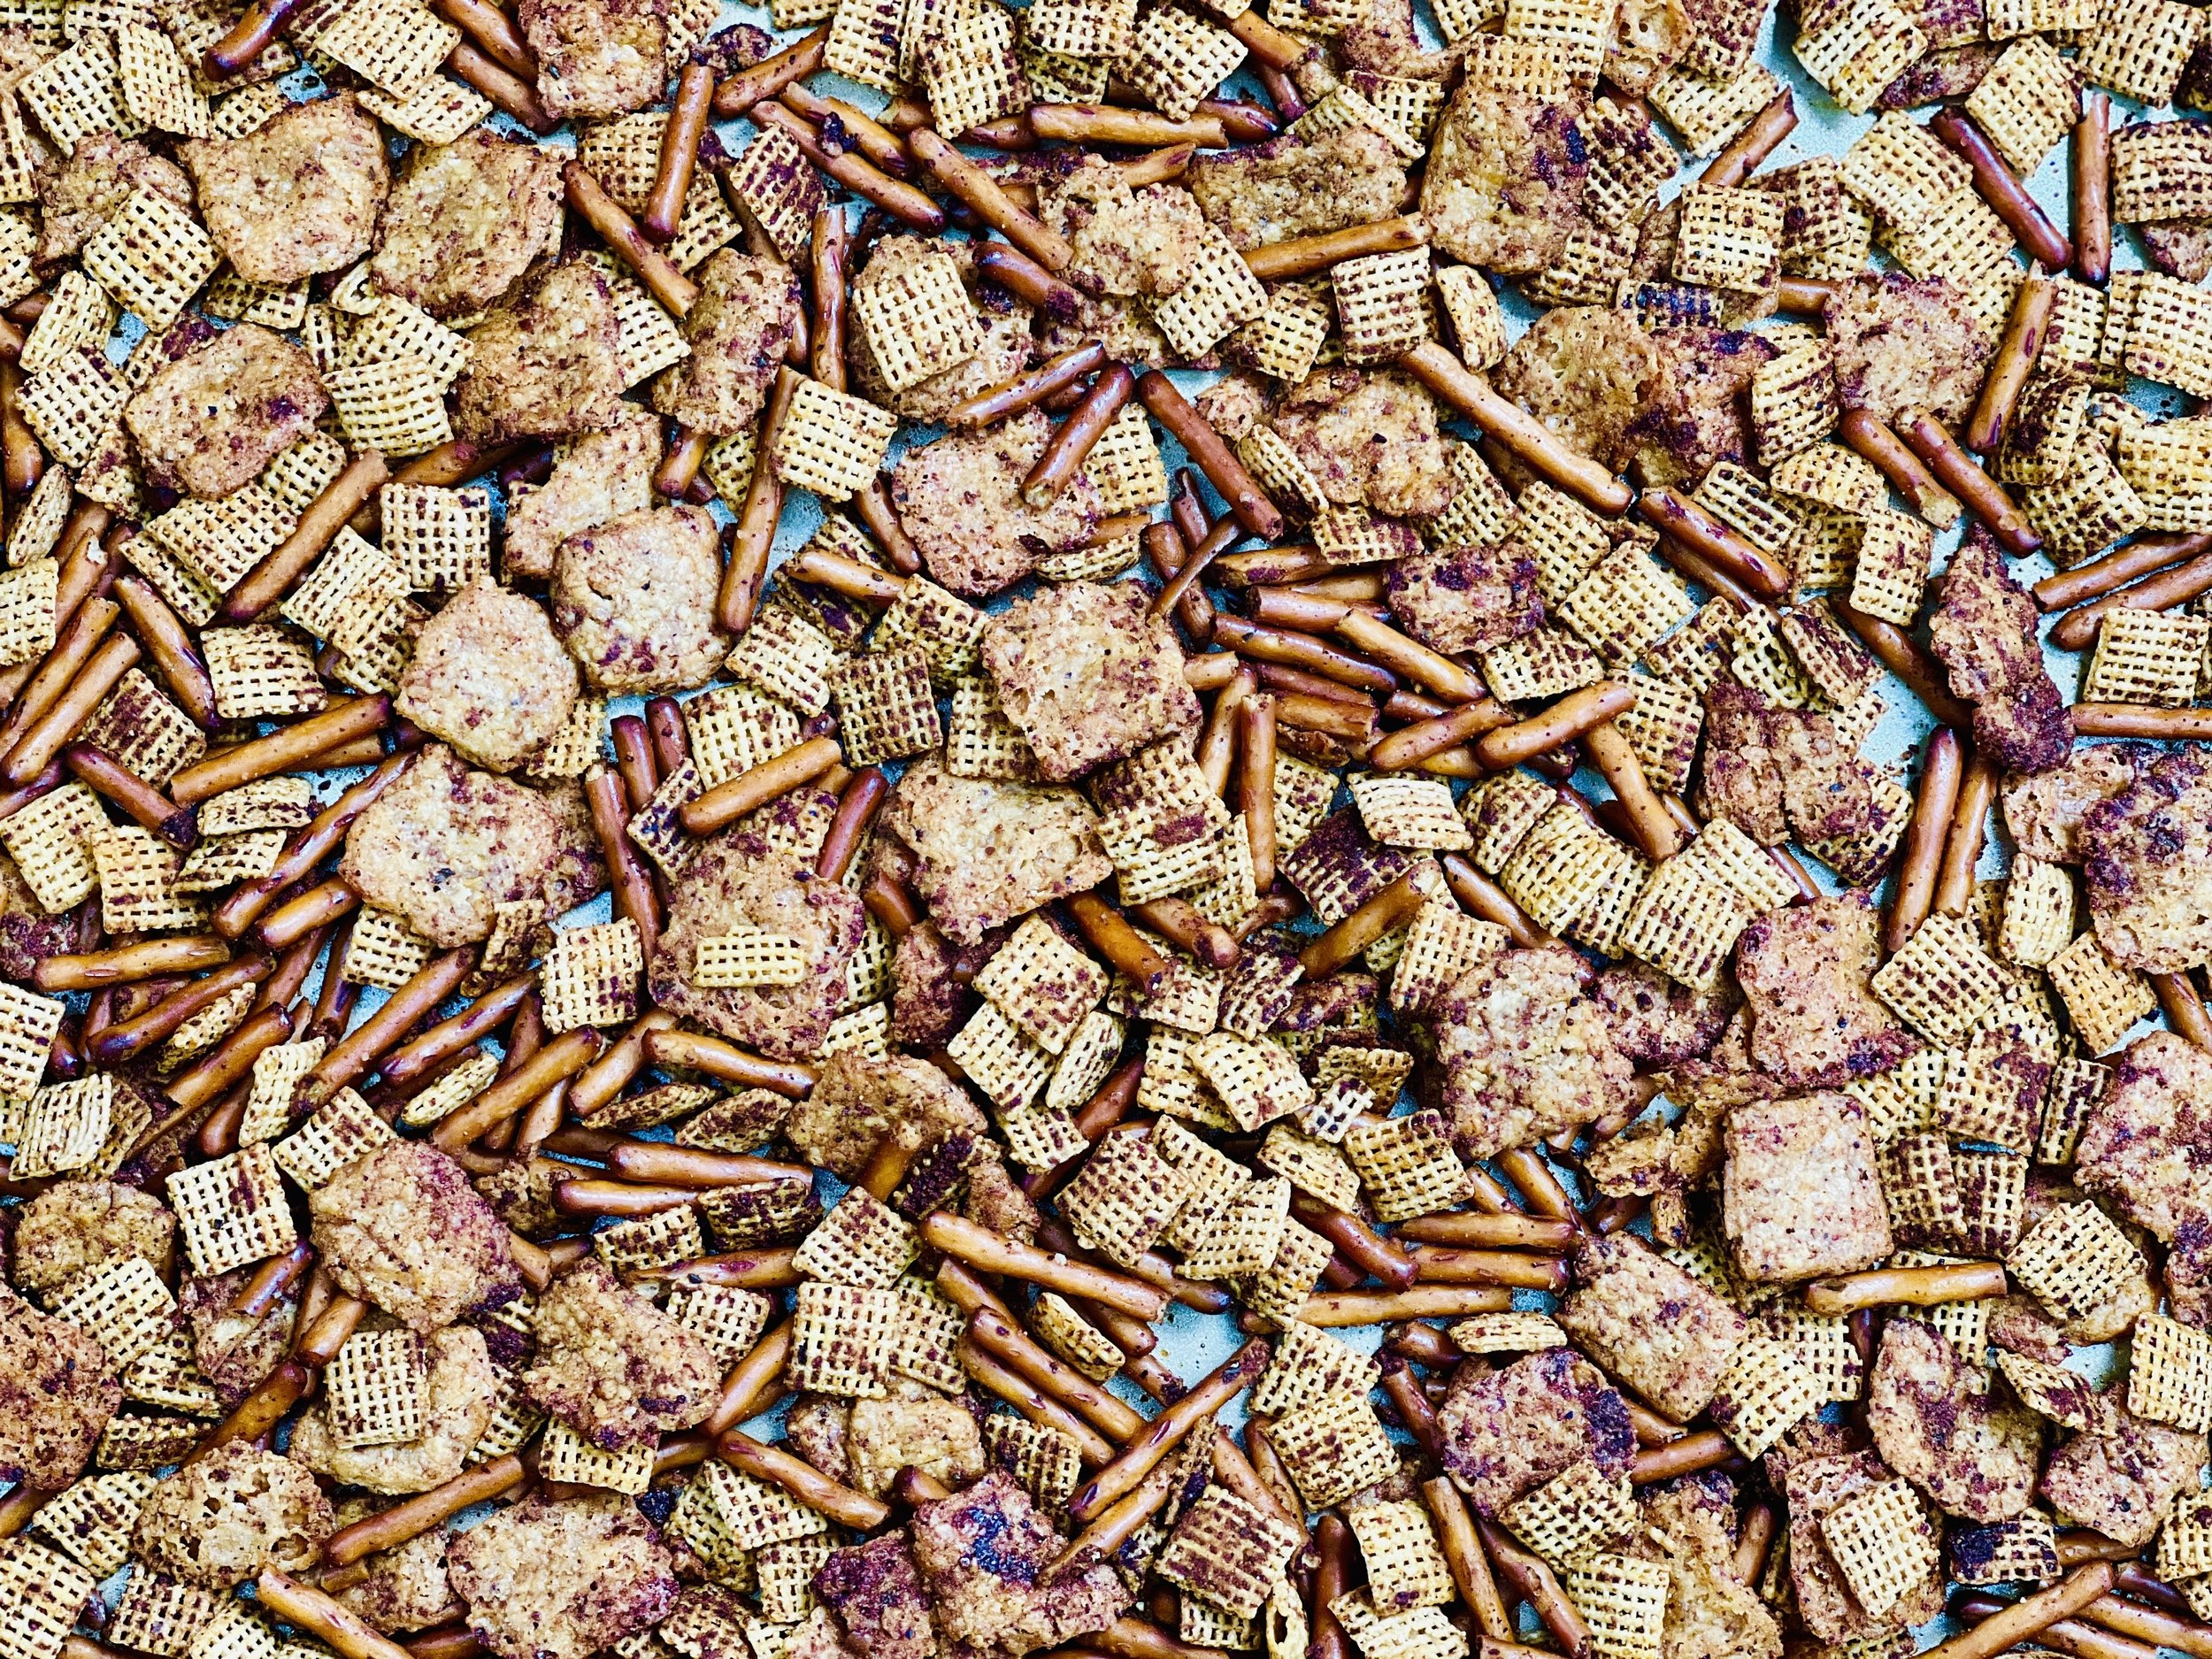
Buttery BBQ Snack Mix (Low FODMAP)
10 Minutes prep • 35 Minutes cook • Low FODMAP • Gluten-free • Serves 8
10 Minutes prep • 35 Minutes cook • Low FODMAP • Gluten-free • Serves 8 • Ok to make ahead: Steps 1-4
Get ready to roll out an especially delicious snack mix for your next barbecue or potluck. Featuring my “Squarefish” Cheesey Cracker Crisps, it’s loaded with flavor the whole family will love. Crisp, crunchy, buttery, with just the right amount of spice, this snack mix is like the classic Chex Mix, only better!
Ingredients
6 tablespoons salted butter, melted
2 tablespoons Smoke N Sanity Garlic Parmesan Seasoning (Use code IBSGC15 for 15% discount)
1 tablespoon smoked paprika
2 teaspoons chili powder
2 tablespoons Smoke N Sanity Essence of Garlic Salt (Use code IBSGC15 for 15% discount)
1/4 teaspoon cayenne
1/2 teaspoon light brown sugar
1 teaspoon each Kosher salt and black pepper
3 cups gluten-free salted mini pretzel twists or pretzel sticks cut in half
3 cups Squarefish Cheesy Crackers (or sub additional rice chex and pretzels)
2 cups Rice Chex Ceareal
1 cup roasted and salted peanuts (optional)
Directions
(1) Prepare: Make my “Squarefish” Cheesy Cracker Crisps (if using). Preheat the oven to 300 degrees F.
(2) Blend the seasonings: In a large bowl, combine the melted butter, SnS Garlic Parmesan Seasoning, smoked paprika, chili powder, dill, essence of garlic salt, cayenne, brown sugar, Kosher salt, and pepper. Stir well to blend.
(3) Add the crackers/cereal: Add the pretzels, cheese crackers, and Chex cereal, tossing well for about 3 minutes or until the mixture is evenly coated. Spread the mix evenly over a rimmed baking sheet.
(4) Bake: Transfer to the oven and bake for 30-35 minutes. Toss 1-2 times throughout cooking. Once cooked, remove from the oven and stir the peanuts in, if using.
(5) Plate and serve: Serve immediately, or store in an airtight container for up to 1 week.
Eat and enjoy every bite because you can!
Recipe note: I use Diamond Crystal Kosher salt in all my recipes because it has a wonderful flat and crisp flake that tastes delicious. It is also the least salty salt available so you can use it more liberally as a seasoning than you can table salt or sea salt. If you use another type of salt, you may need to reduce the amount so it is not over-salted.
Have a question you’d like to have answered? Email me at hello@ibsgamechanger.com
Link note: This post may contain affiliate links for you to easily purchase items that are linked. I may earn a small commission from qualifying purchases but none of this costs you a thing so feel free to use the links! In addition, for some items, I have provided a special discount code for IBS Game Changers so be sure to use the code when you purchase an item to get the discount that has been arranged just for you.
More Deliciously Low FODMAP™ snack recipes


Easy No-Churn Chocolate Ice Cream (Low FODMAP)
15 Minutes prep • 4 Hours chill • Low FODMAP • Gluten-free • Serves 4 - 6
15 Minutes prep • 4 Hours chill • Low FODMAP • Gluten-free • Serves 4 - 6 • Ok to make ahead: Steps 1-2
Chocolate ice cream this creamy and rich is hard to find. Unless you make it yourself! This recipe comes together quickly and simply with two kinds of chocolate and real cream. These simple ingredients are the key to making it the best and easiest chocolate ice cream around. It needs a bit of chill time so it’s ideal to make it the night before you want to serve it. Eat it as is, or serve it with any of your favorite low FODMAP toppings.
Ingredients
2 cups heavy cream
1/2 cup superfine sugar (this is baking sugar, not confectioners sugar; you can substitute white sugar but it doesn’t dissolve as fast)
1/3 cup Dutch process cacao (I used Ghirardelli)
2 ounces bittersweet or semi-sweet chocolate, chopped (I used Ghirardelli 70% Extra Bittersweet)
1 teaspoon vanilla extract
1 pinch Kosher salt
Directions
(1) Prepare the ice cream: Put all ingredients, except the chopped chocolate, together in the bowl of your stand mixer fitted with the whisk attachment. Whisk until soft peaks form. Don’t keep whipping past the soft peaks stage. You’re not making whipped cream. Fold the chopped chocolate into the blended cream mixture.
(2) Freeze the ice cream: Put the whipped mixture into a container with some depth to it, cover tightly, and freeze until firm (about 3 - 4 hours or overnight).
Make-ahead note: At this point, the ice cream can be stored in an airtight container in the freezer for up to 4 weeks.
(3) Plate and serve: Remove and thaw for 2 - 3 minutes before scooping so the ice cream is nice and creamy.
Eat and enjoy every bite because you can!
Recipe note: I use Diamond Crystal Kosher salt in all my recipes because it has a wonderful flat and crisp flake that tastes delicious. It is also the least salty salt available so you can use it more liberally as a seasoning than you can table salt or sea salt. If you use another type of salt, you may need to reduce the amount so it is not over-salted.
Have a question you’d like to have answered? Email me at hello@ibsgamechanger.com
Link note: This post may contain affiliate links for you to easily purchase items that are linked. I may earn a small commission from qualifying purchases but none of this costs you a thing so feel free to use the links! In addition, for some items, I have provided a special discount code for IBS Game Changers so be sure to use the code when you purchase an item to get the discount that has been arranged just for you.
More Deliciously Low FODMAP™ dessert recipes
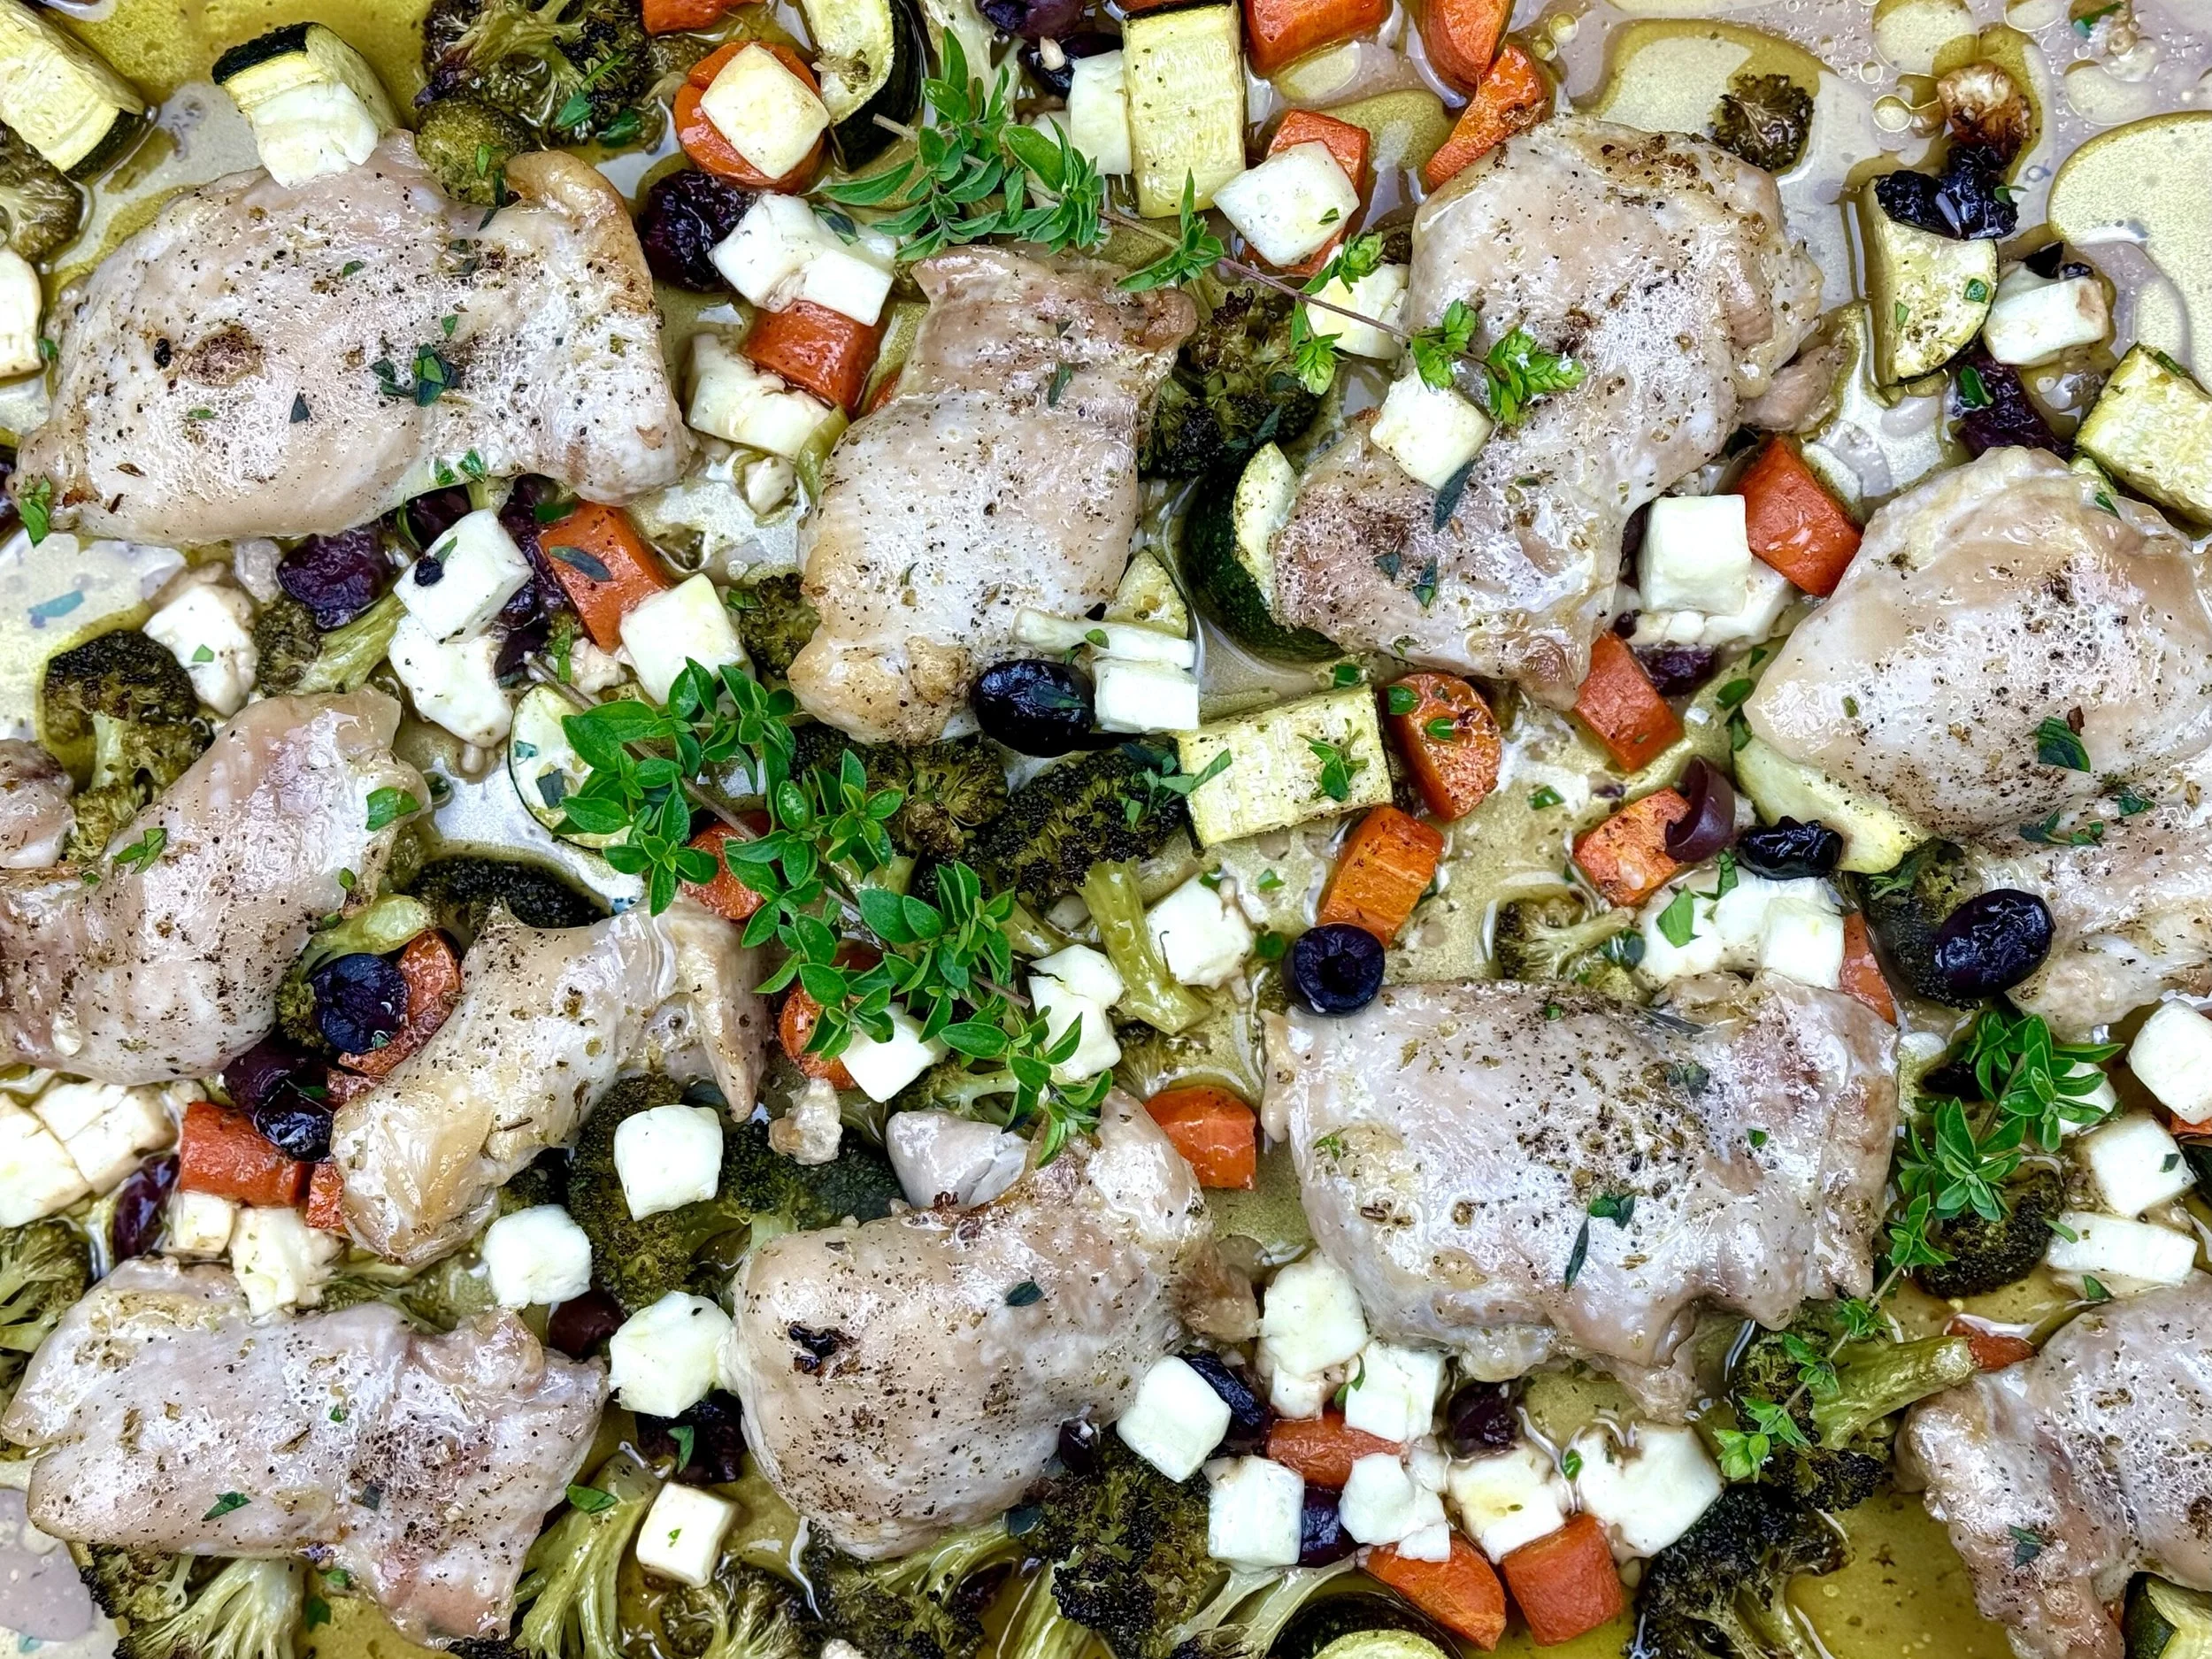
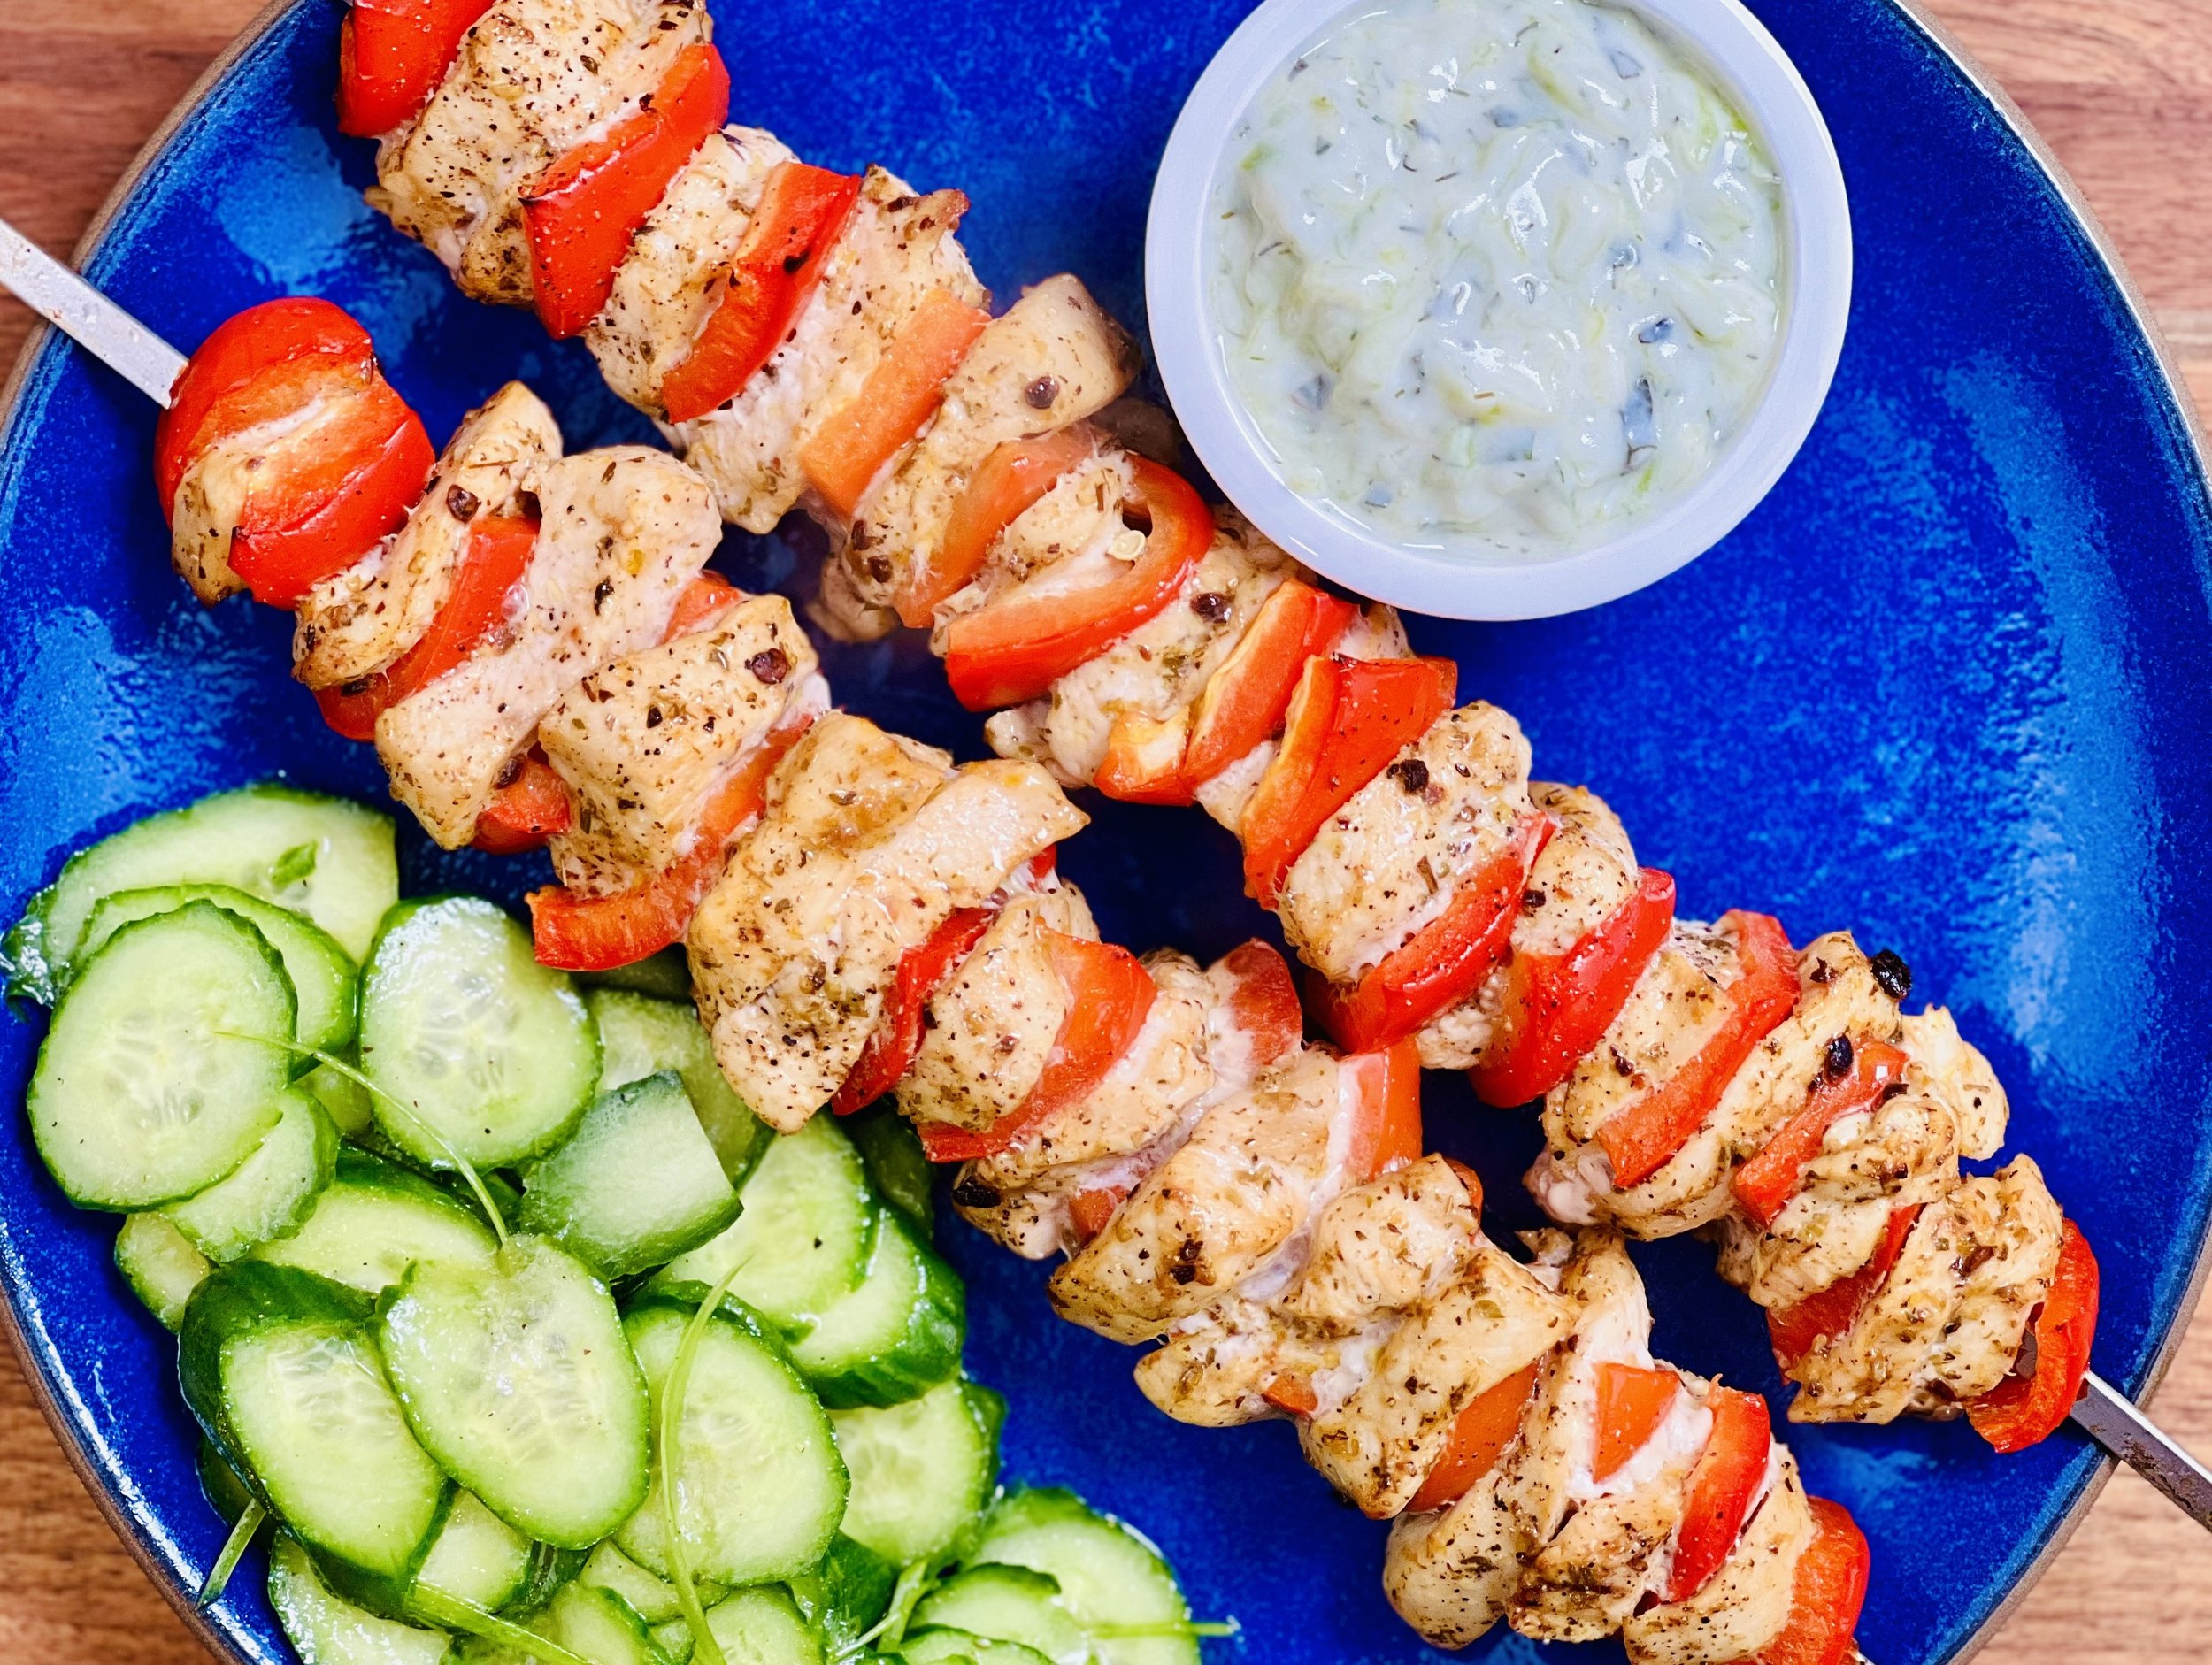
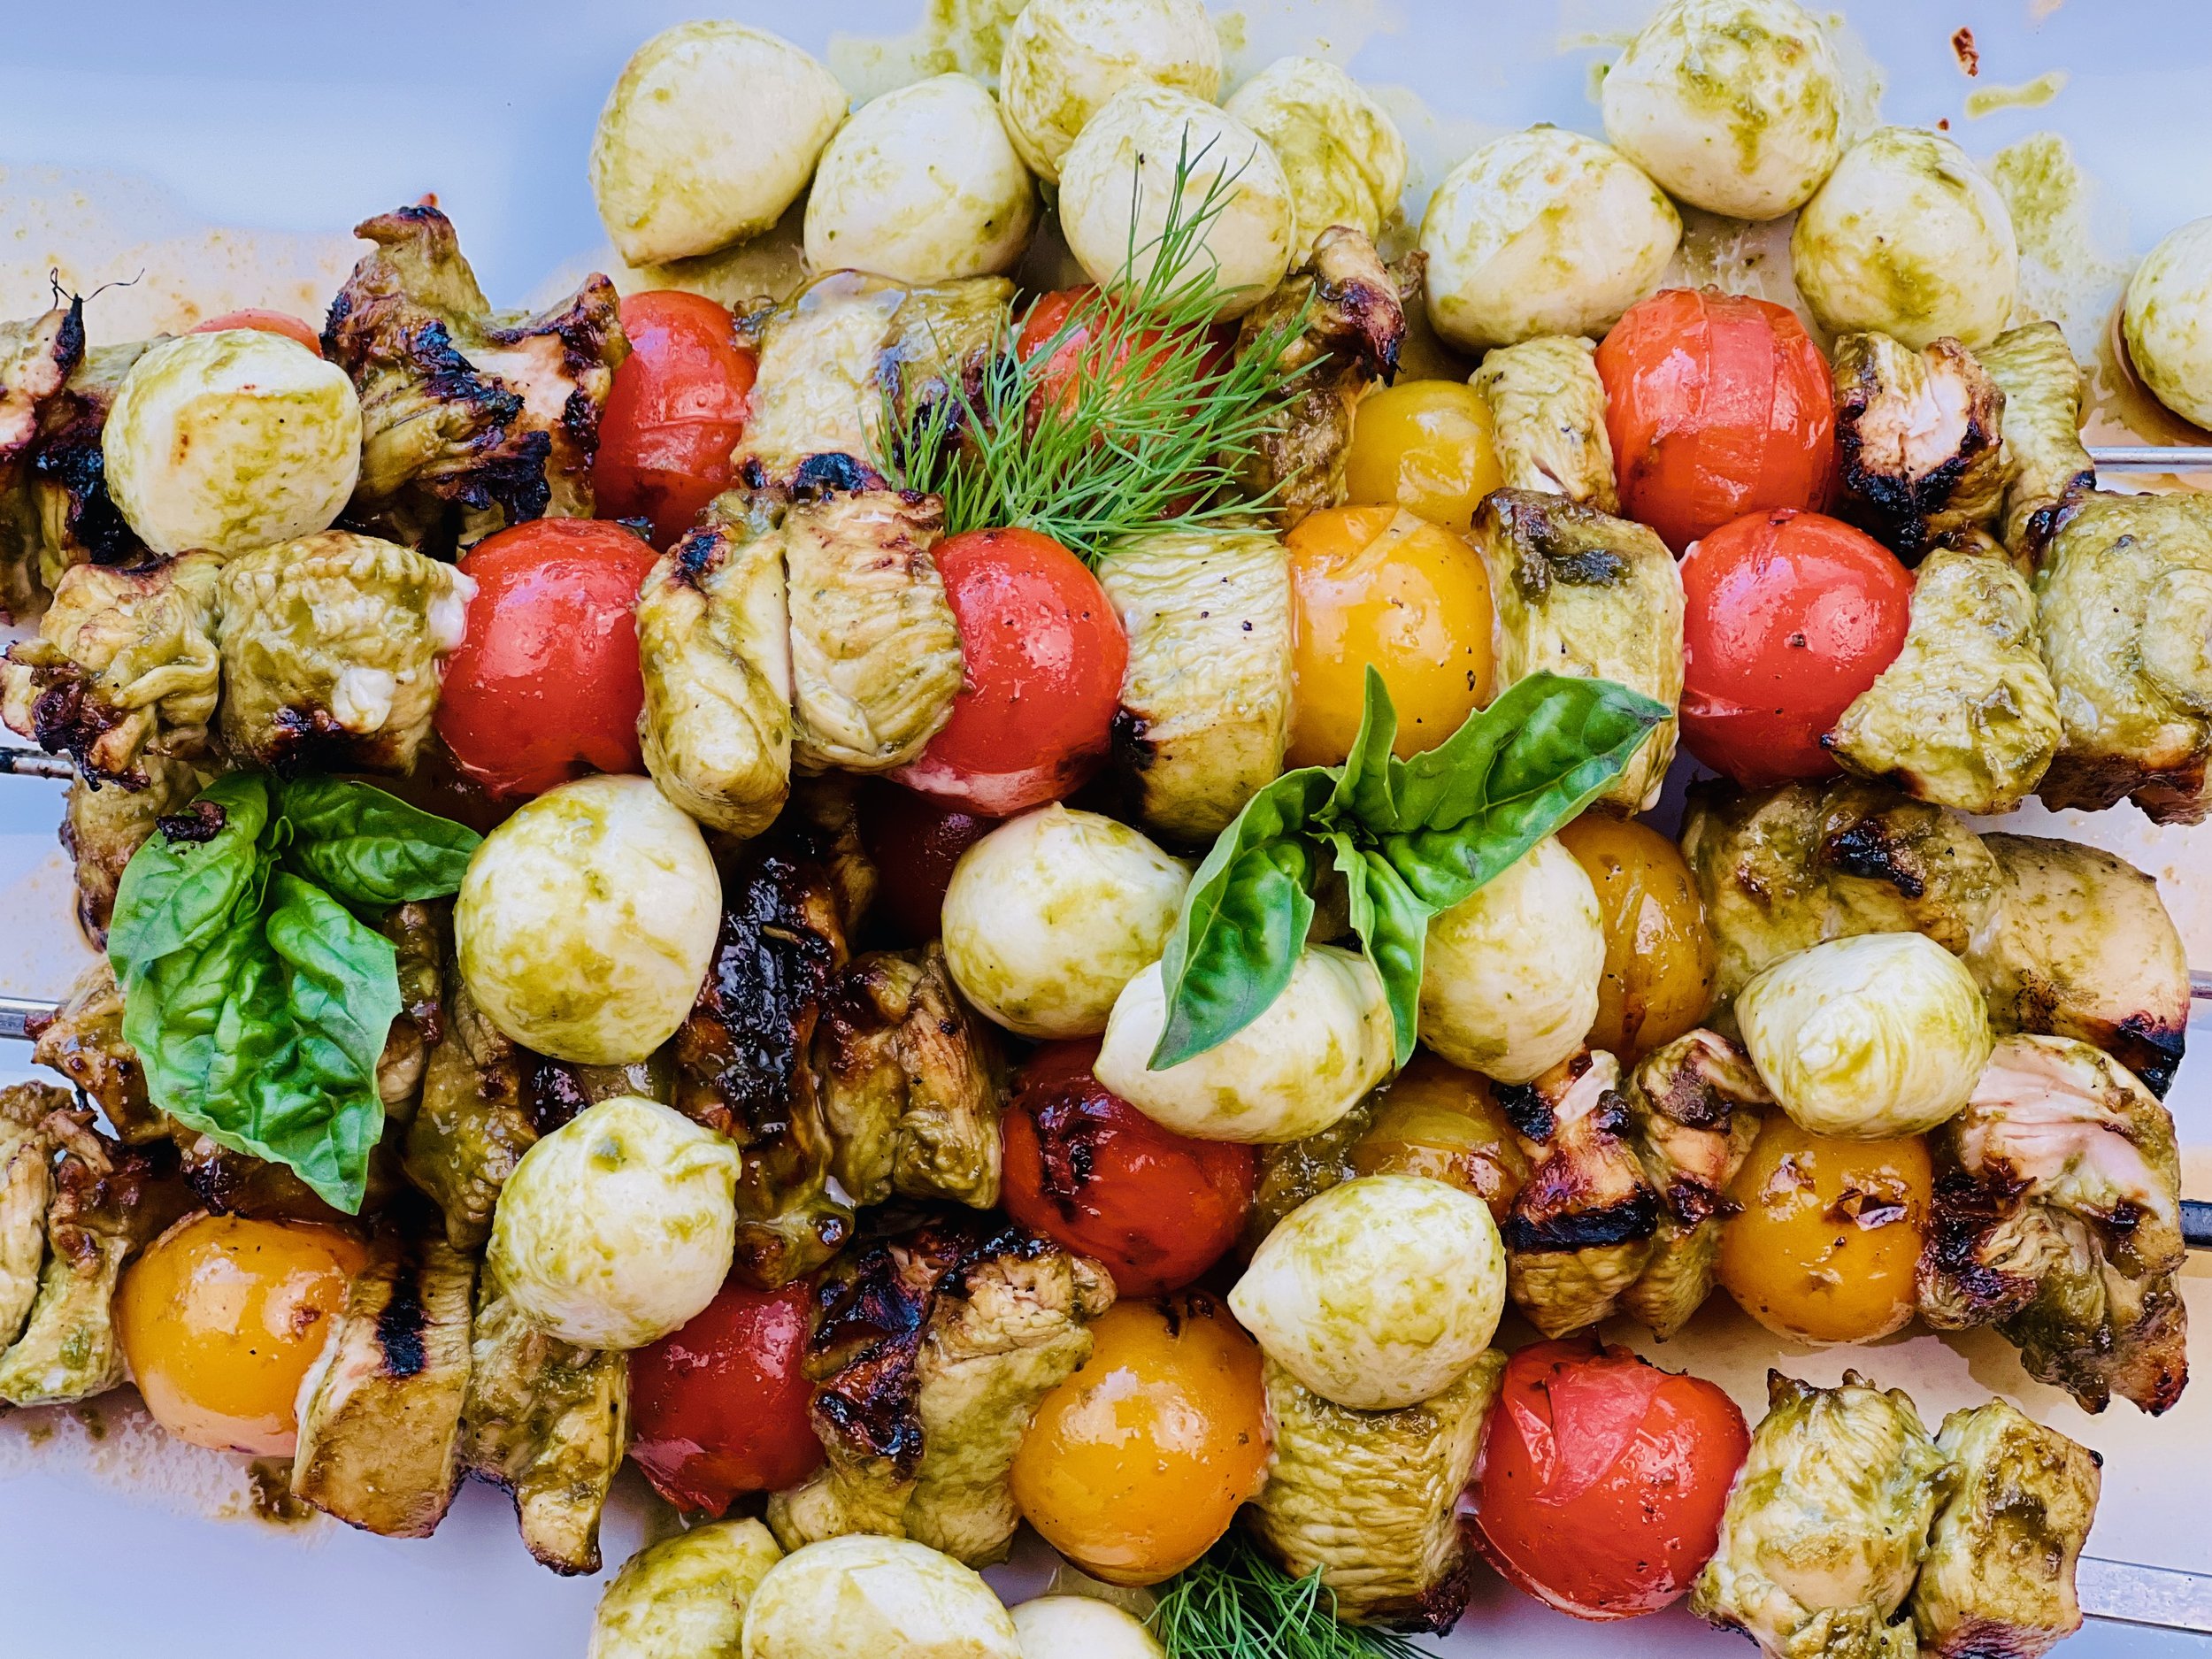
Mediterranean Chicken Skewers (Low FODMAP)
10 Minutes prep • 20 Minutes cook • Low FODMAP • Gluten-free • Serves 4 n skewers for your family and friends. They are sure to be a hit.
10 Minutes prep • 20 Minutes cook • Low FODMAP • Gluten-free • Serves 4 • Ok to make ahead: Steps 1-3
Delicious and tender, Greek seasoned chicken skewers you can grill in the oven. Top with my Tzatziki sauce and a side salad and you’ve got a delicious and healthy meal. Change up the vegetables you put on the skewers according to what you have on hand (zucchini and summer squash would work great). If you marinate the chicken ahead of time you’ll get the best flavor, but 10 minutes of marination is enough if you’re pressed for time. Make these quick and easy chicken skewers for your family and friends. They are sure to be a hit.
Ingredients
1/2 cup garlic-infused olive oil
2 teaspoons dried oregano
1/2 teaspoon crushed chipotle chilis or chipotle chile powder
1 teaspoon maple syrup
1 tablespoon low-FODMAP hot sauce
1 tablespoon lemon zest
1/2 teaspoon Kosher salt
1/4 teaspoon black pepper
1 1/2 - 2 pounds boneless, skinless chicken breasts, cut into bite-size pieces
My Delicious Low FODMAP Tzatziki sauce for serving
Directions
(1) Prepare the chicken: This step is optional but results in a more flavorful and tender chicken. Remove chicken from the package, and put it in one layer on a rimmed plate or baking dish. Season both sides of each piece lightly with Kosher salt (about 1/4 - 1/2 teaspoon per side). Cover the dish with plastic wrap and refrigerate until ready to use, ideally about 4 hours before cooking or overnight.
(2) Prepare: Make the Tzatziki sauce a day ahead if you have time, if not just make it before you start prepping the meal. Make the marinade. Cut the chicken and toss in a bowl with the marinade, stirring to combine. Let sit for 10 minutes or several hours if you have time. Preheat the oven to 425 degrees F. Line a rimmed baking sheet with parchment paper (for easy clean-up)
(3) Prepare the skewers: Load the skewers, alternating chicken and vegetables so they come out approximately even. Arrange the skewers on the prepared baking sheet.
(4) Bake: Bake for 20 minutes, until lightly charred and cooked through (165 degrees F on an instant-read thermometer)
(5) Plate and serve: Serve with plenty of my Tzatziki sauce and a side salad.
Eat and enjoy every bite because you can!
Recipe note: I use Diamond Crystal Kosher salt in all my recipes because it has a wonderful flat and crisp flake that tastes delicious. It is also the least salty salt available so you can use it more liberally as a seasoning than you can table salt or sea salt. If you use another type of salt, you may need to reduce the amount so it is not over-salted.
Have a question you’d like to have answered? Email me at hello@ibsgamechanger.com
Link note: This post may contain affiliate links for you to easily purchase items that are linked. I may earn a small commission from qualifying purchases but none of this costs you a thing so feel free to use the links! In addition, for some items, I have provided a special discount code for IBS Game Changers so be sure to use the code when you purchase an item to get the discount that has been arranged just for you.
More Deliciously Low FODMAP™ main course recipes


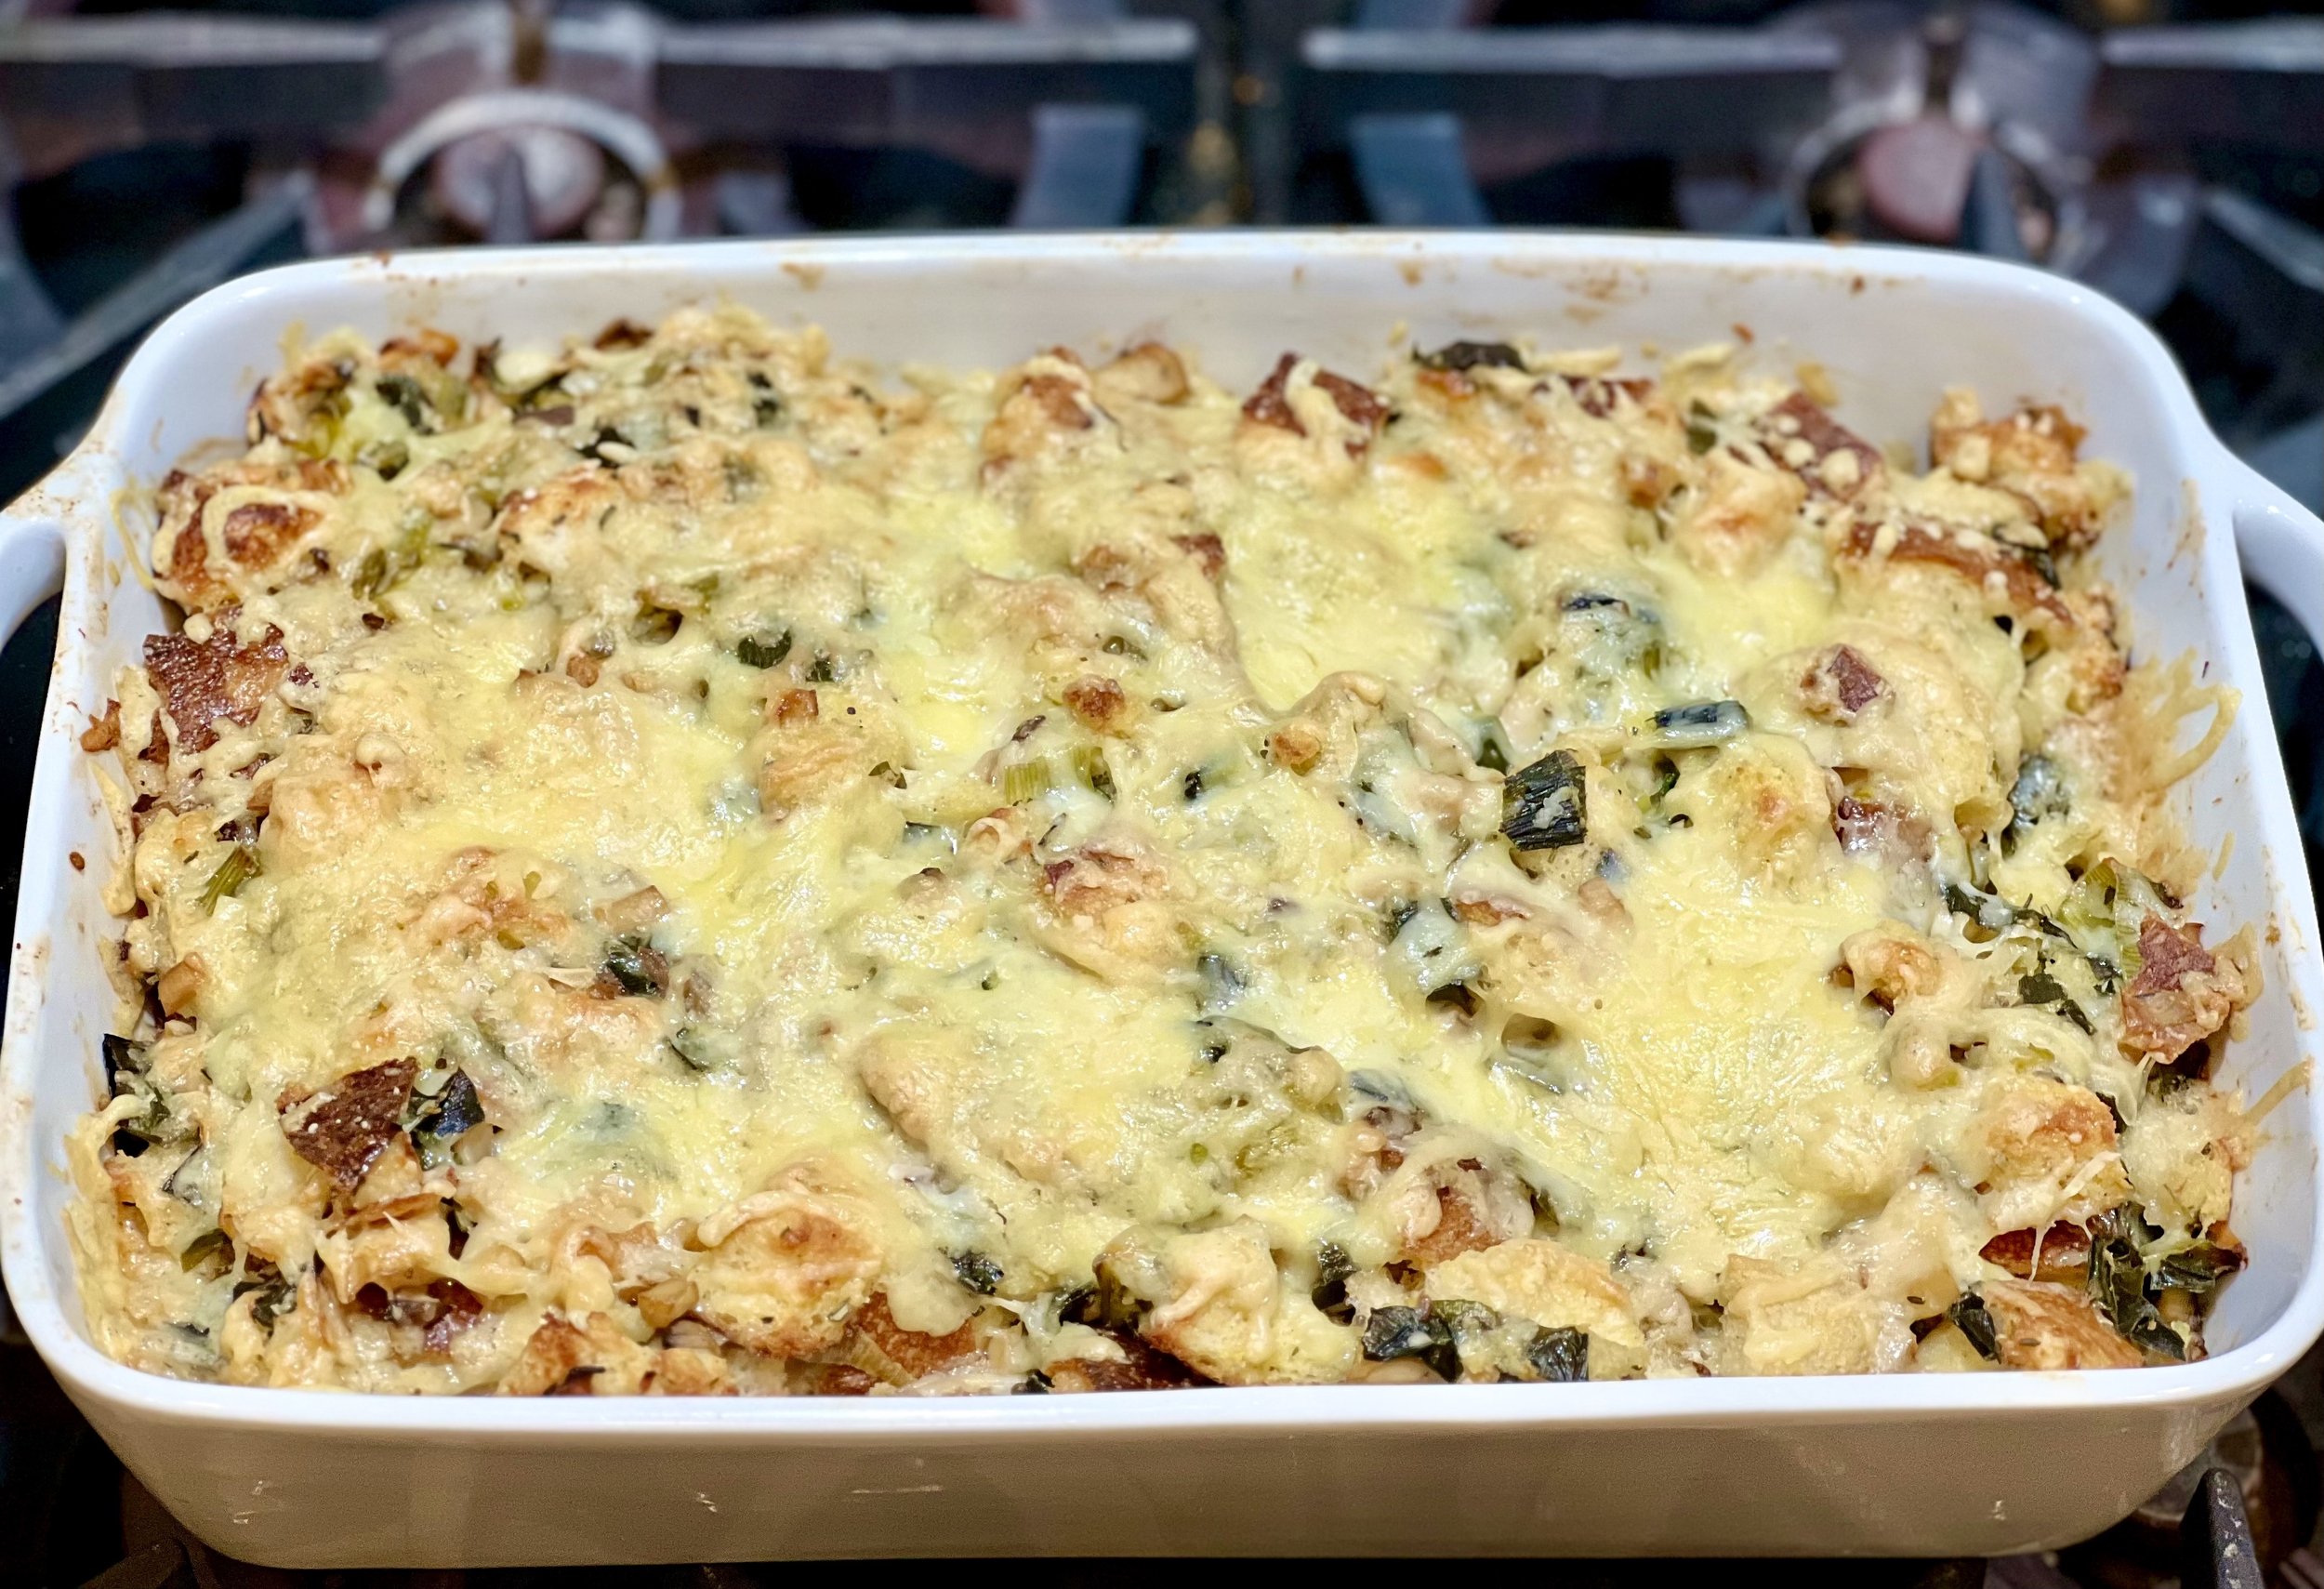
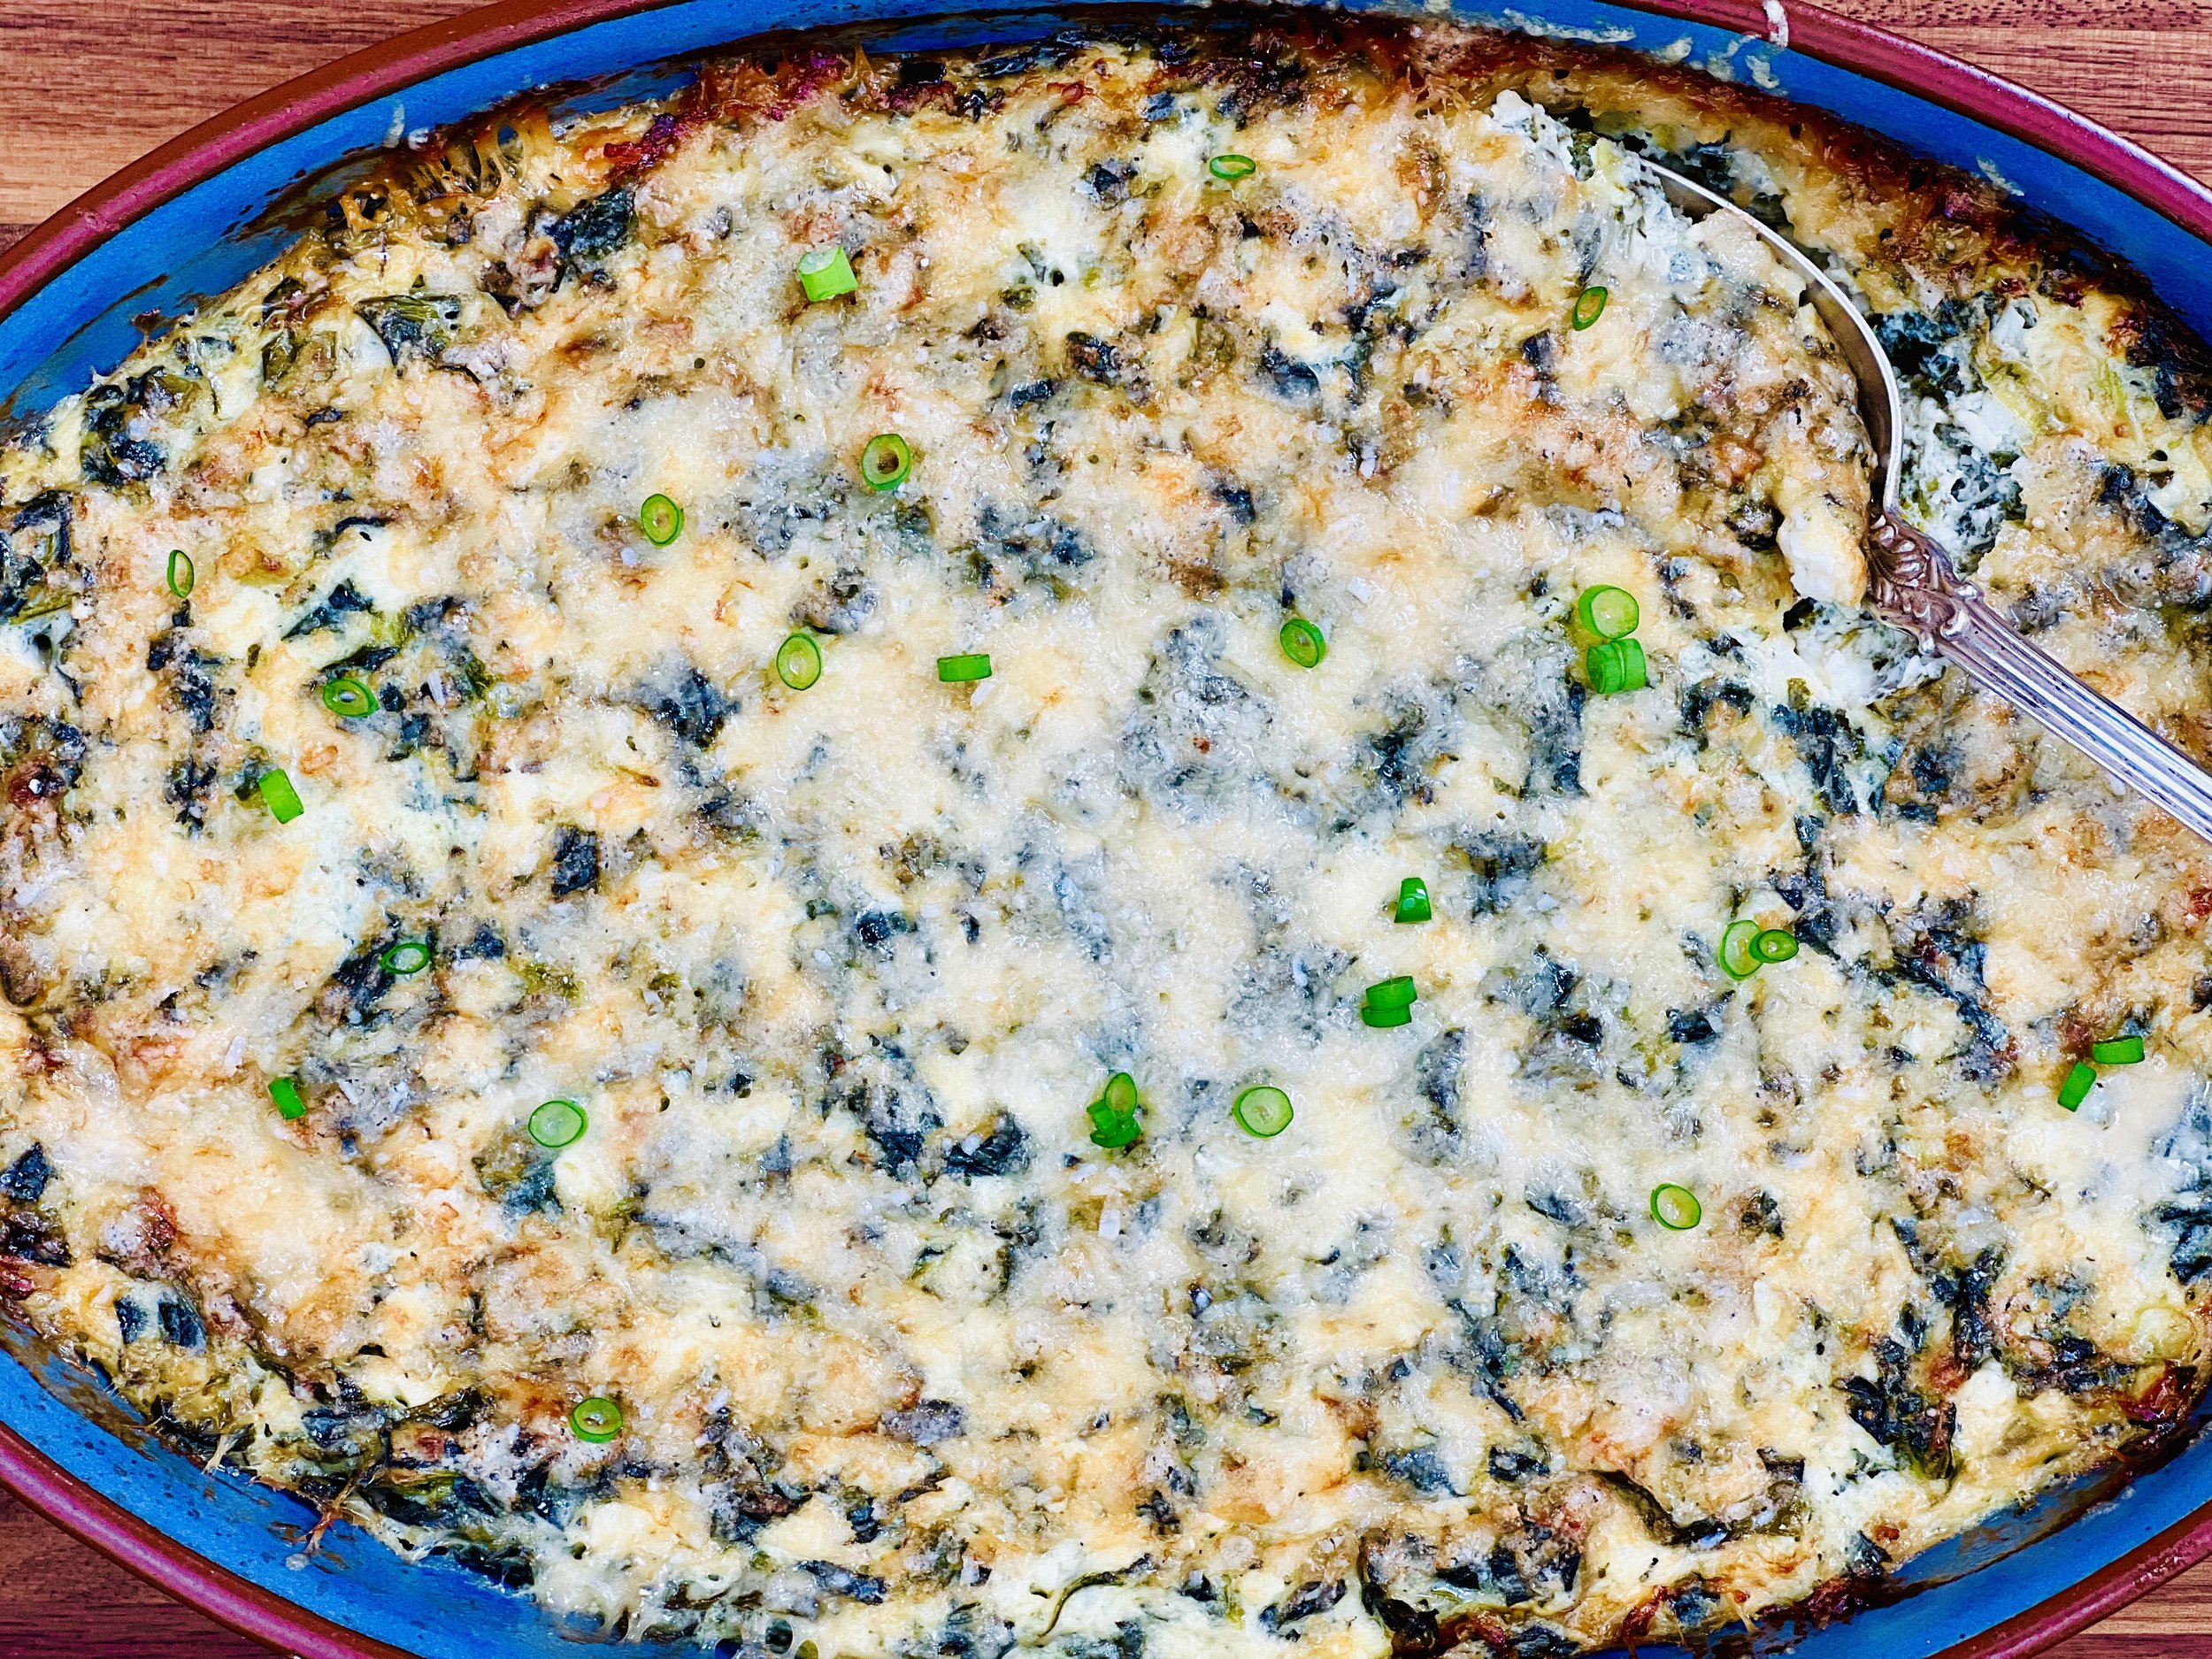
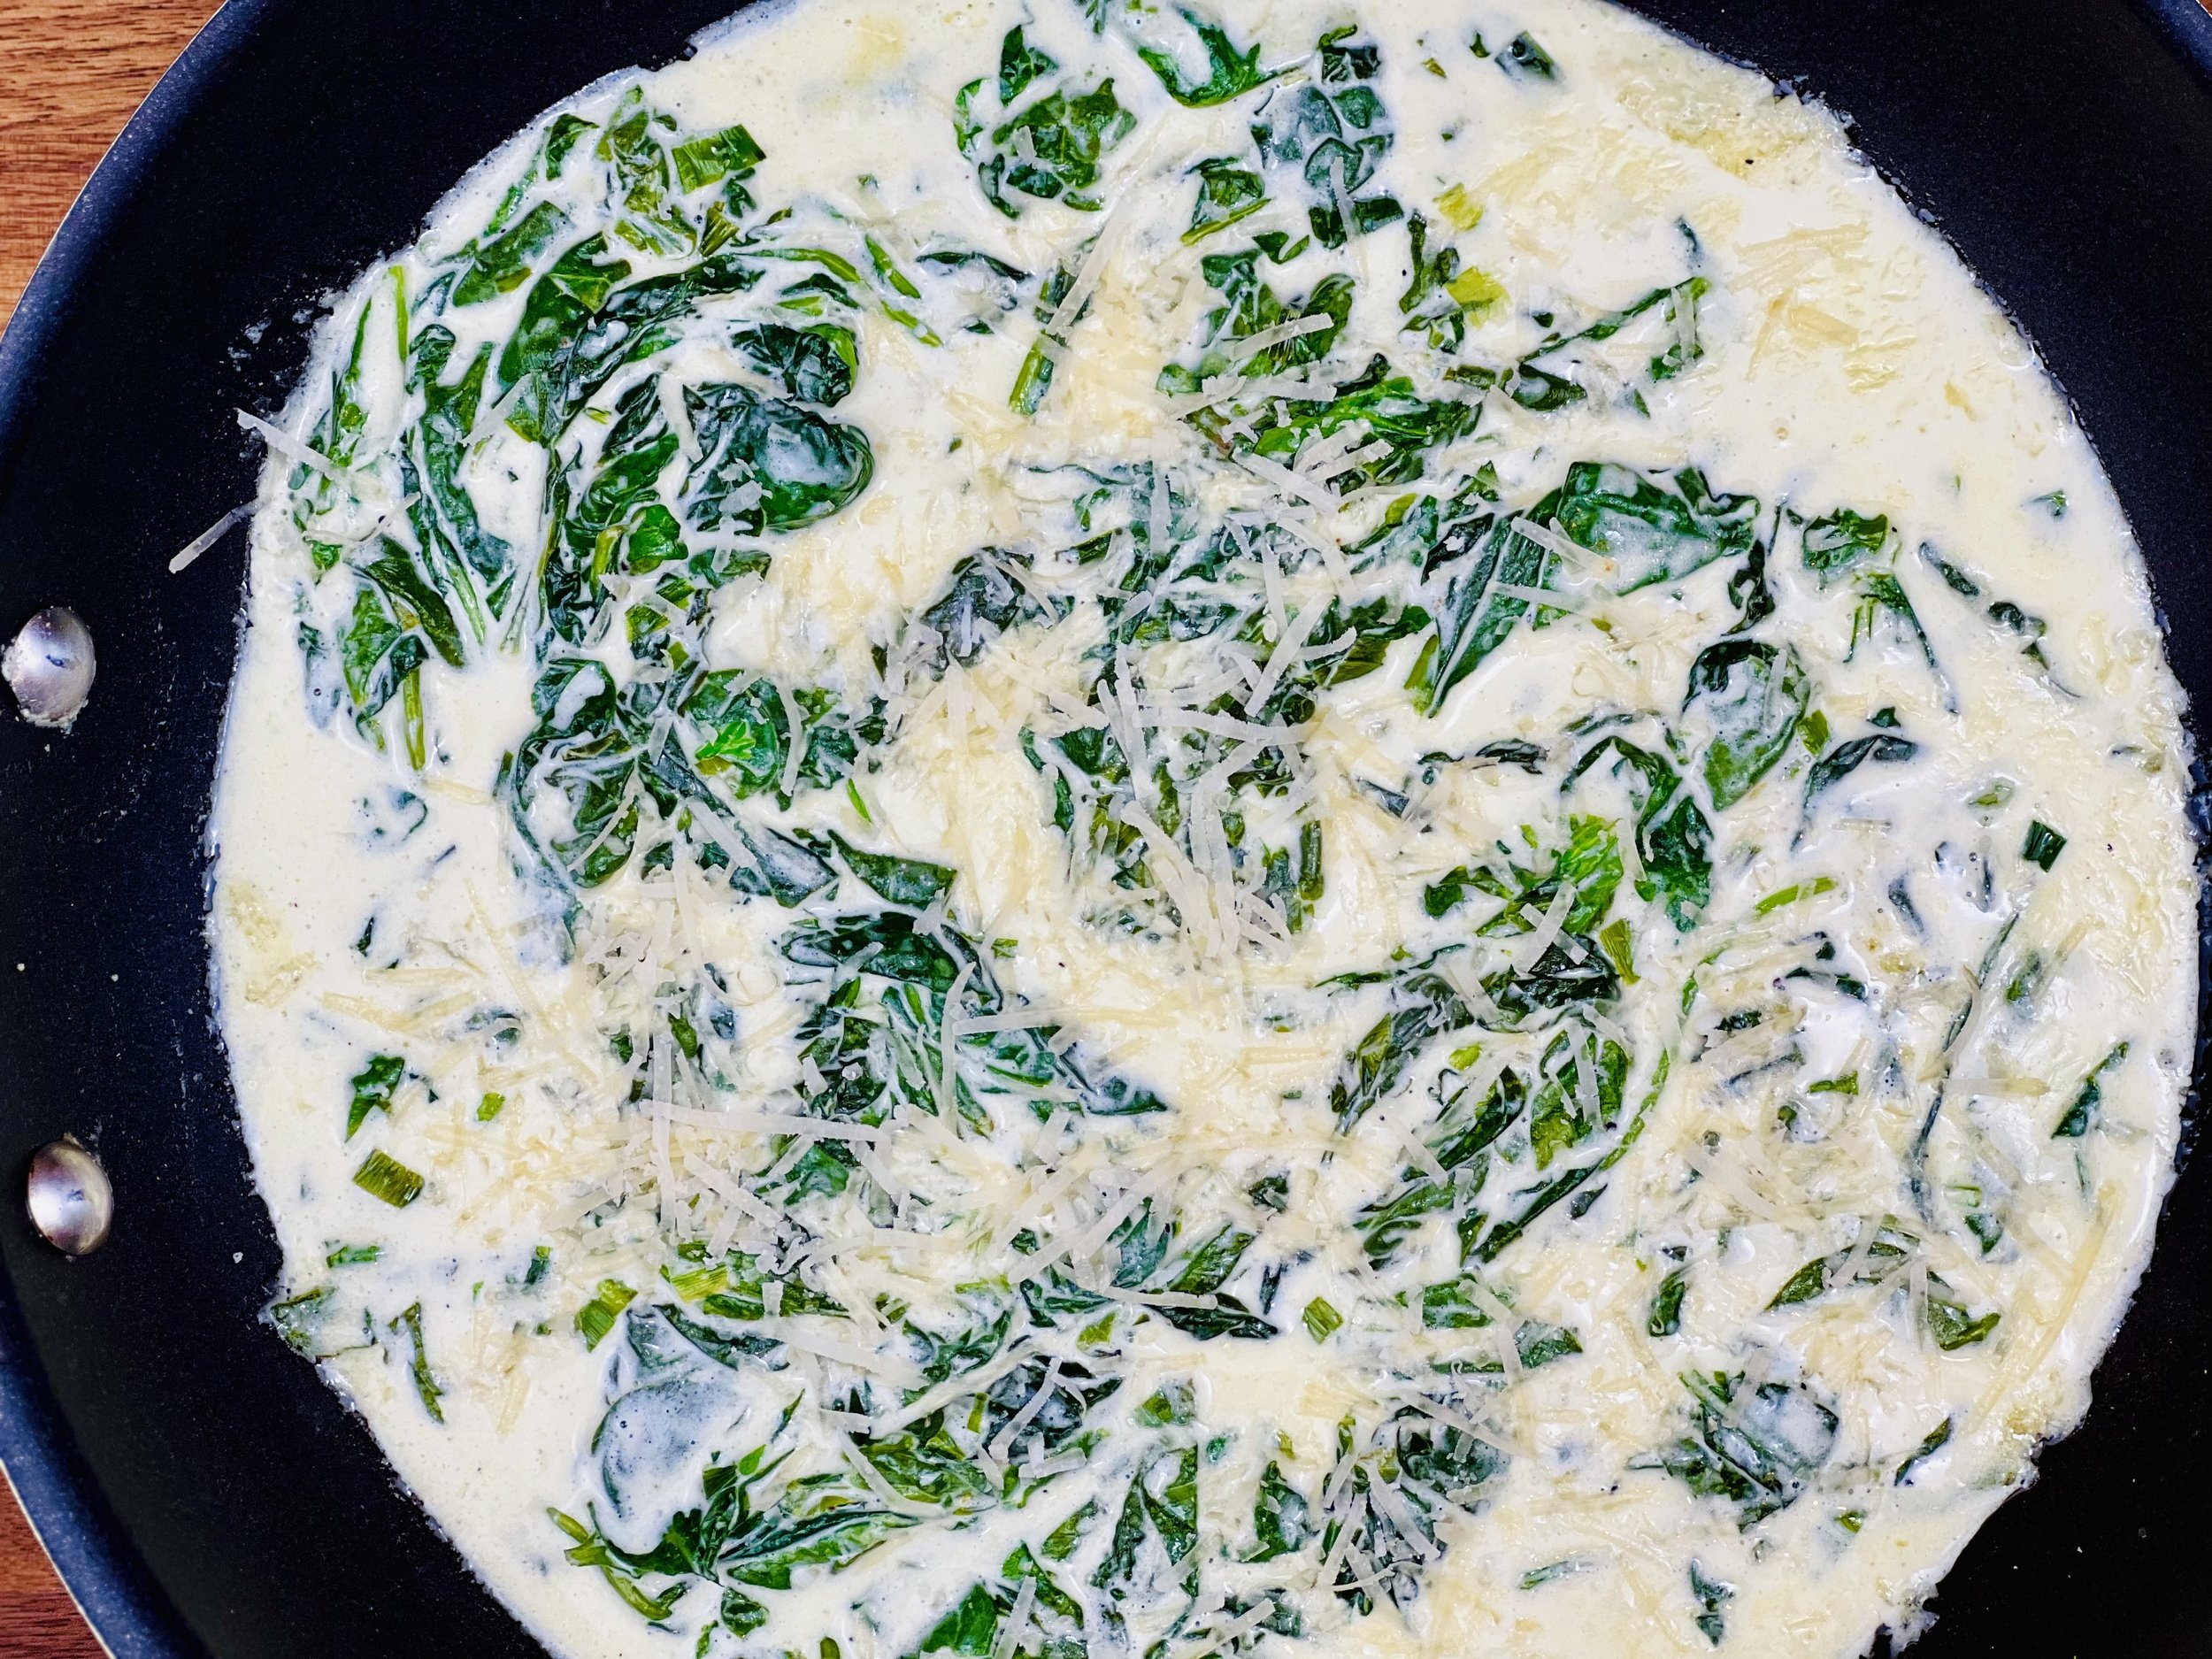
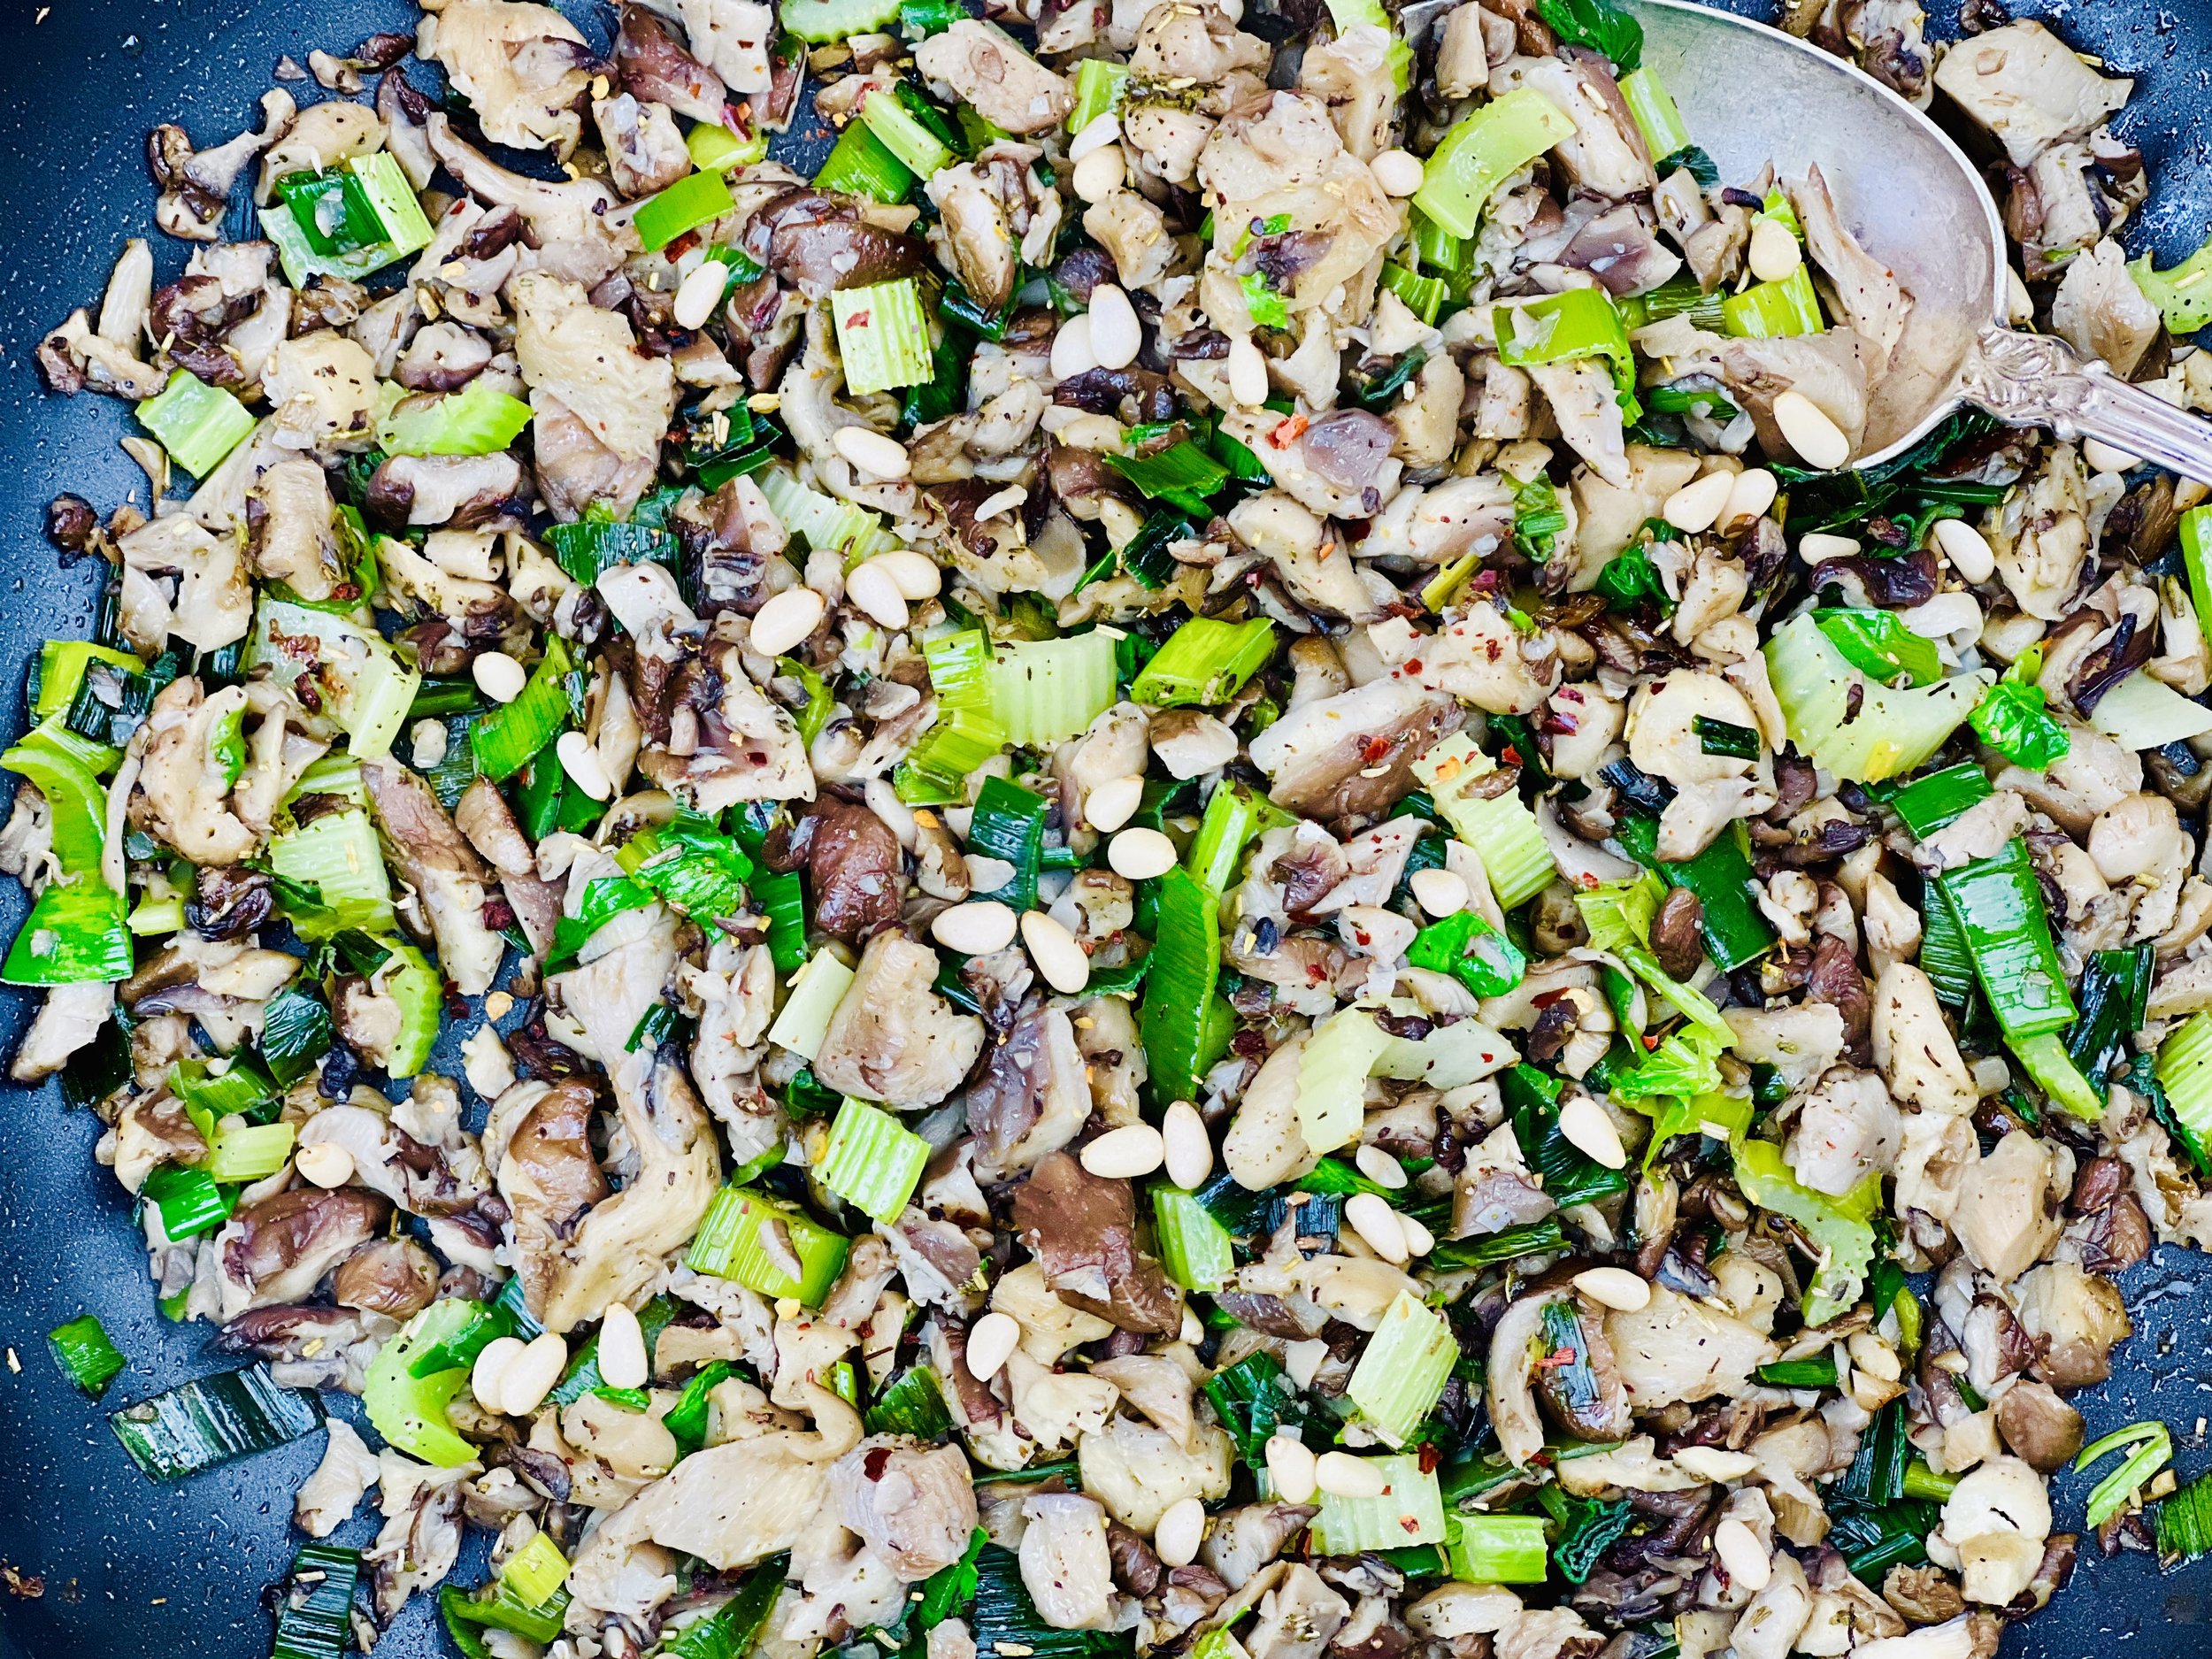
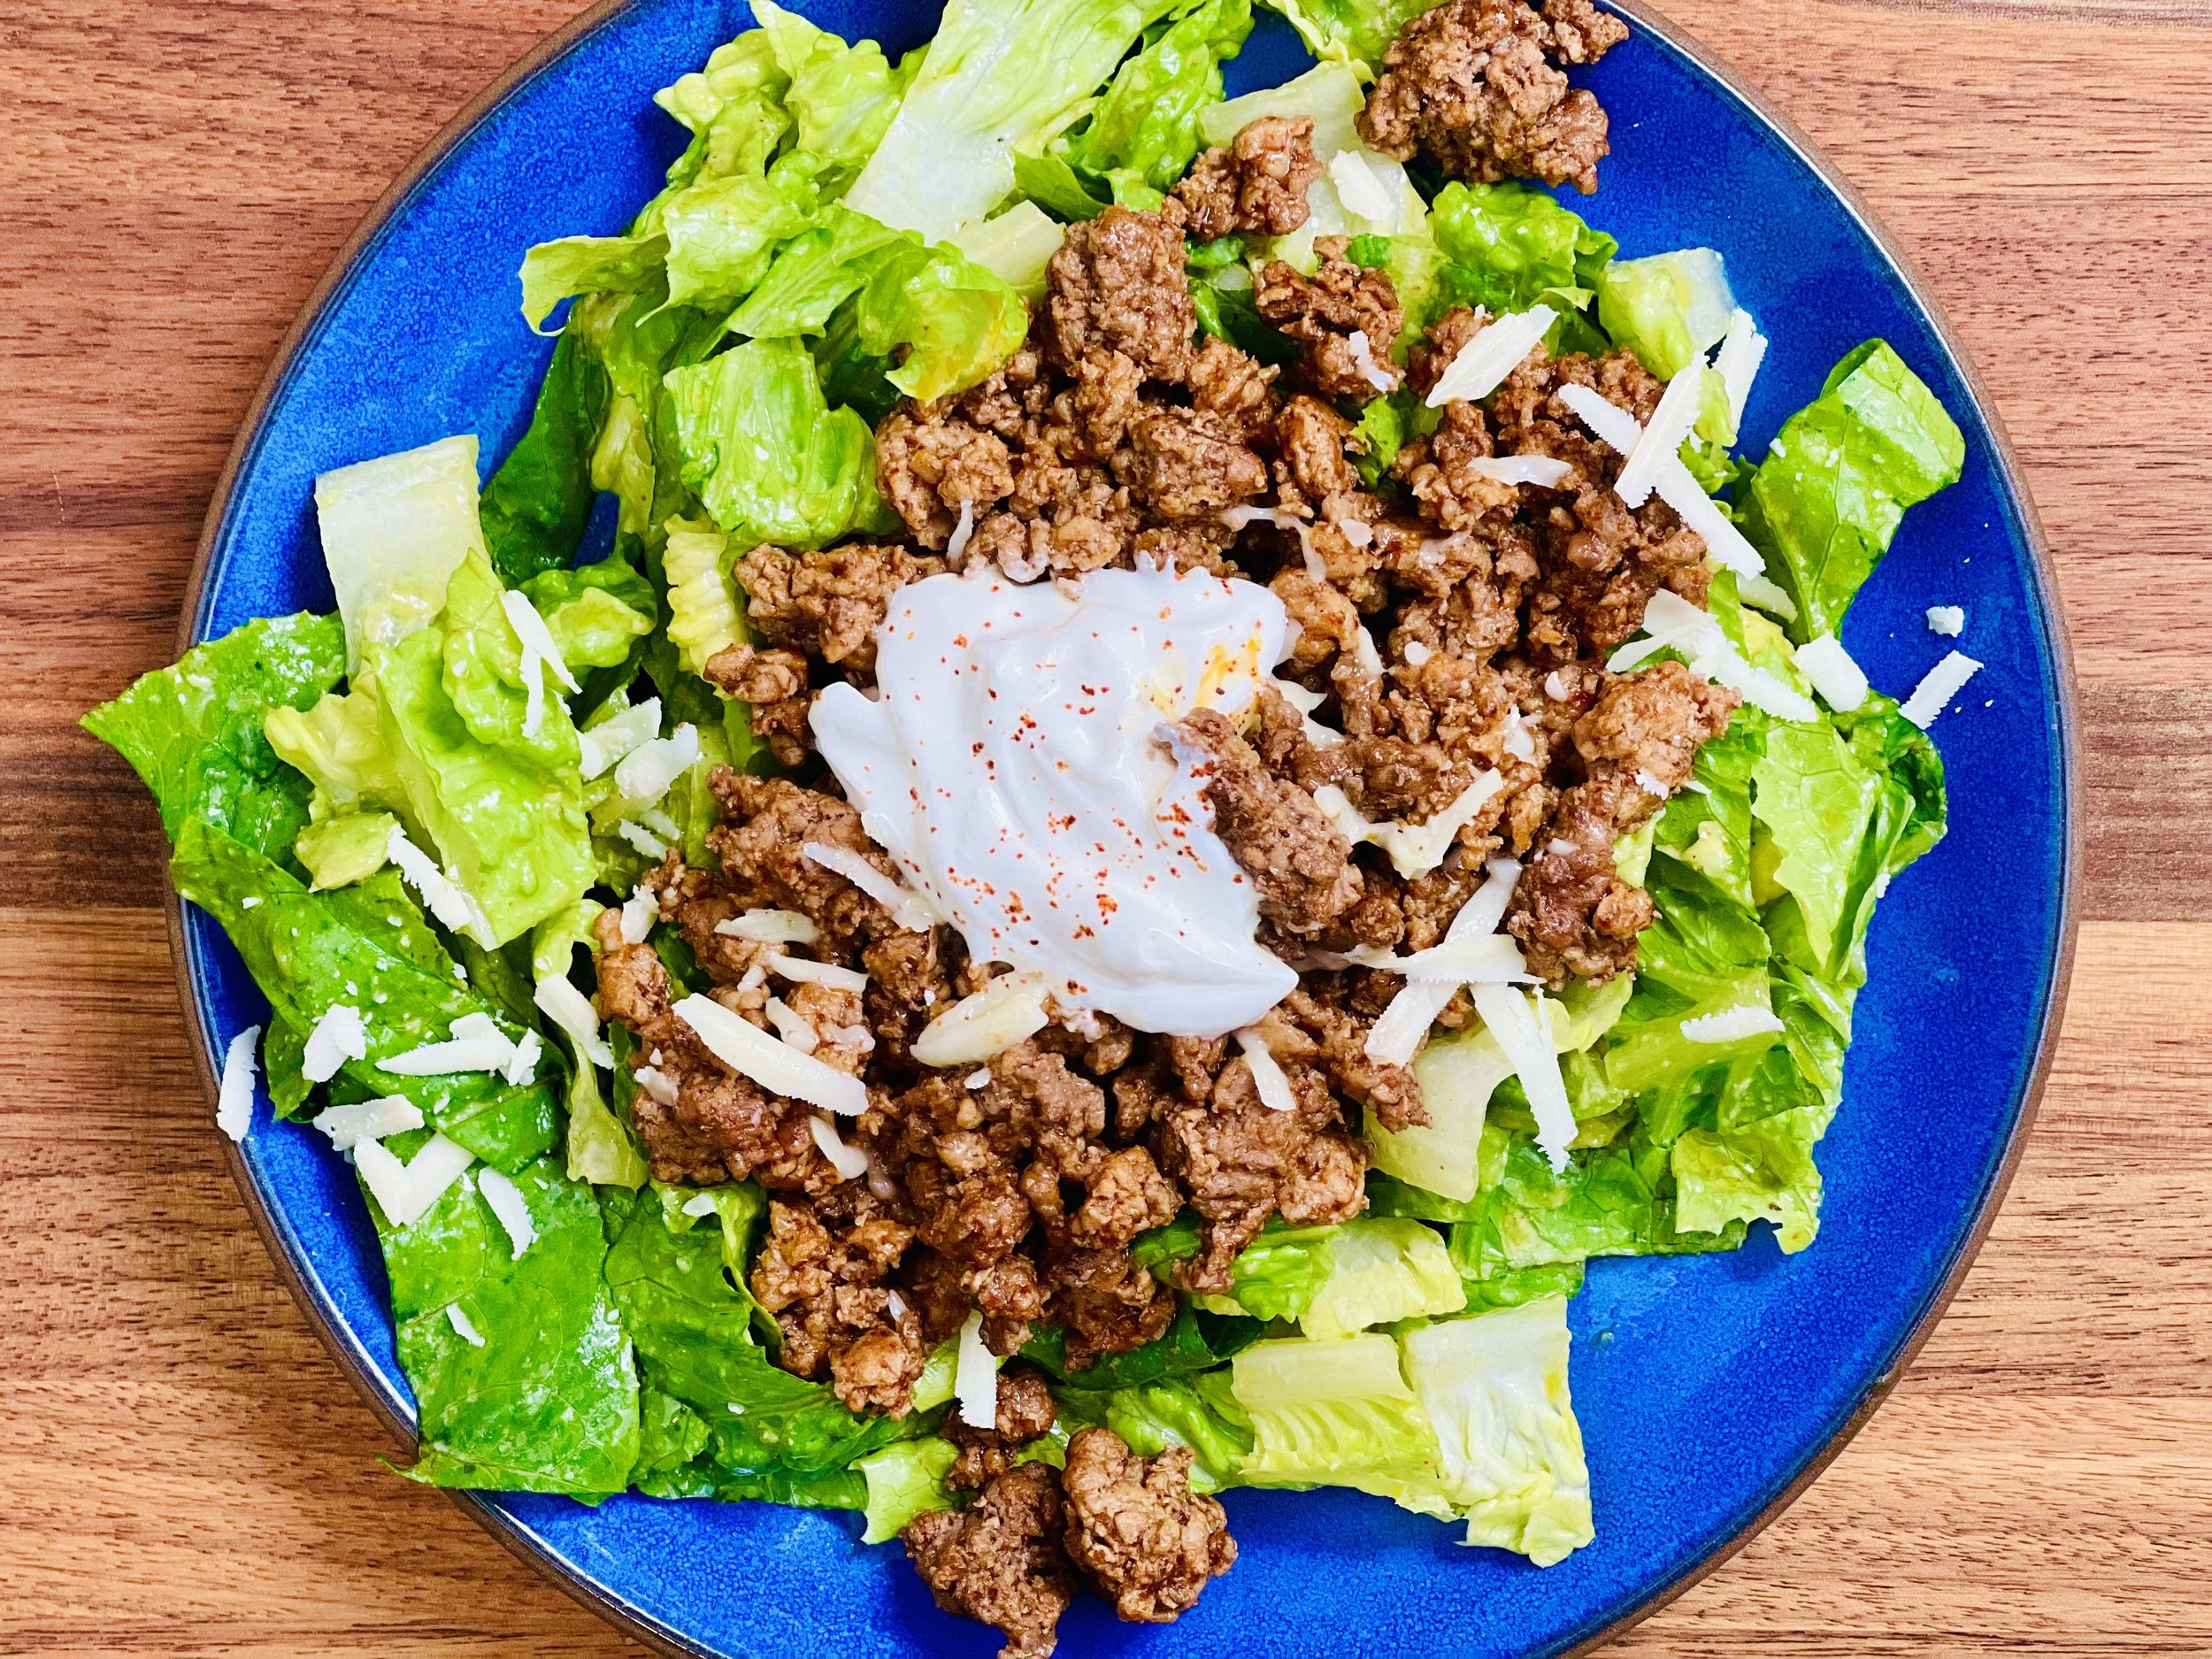
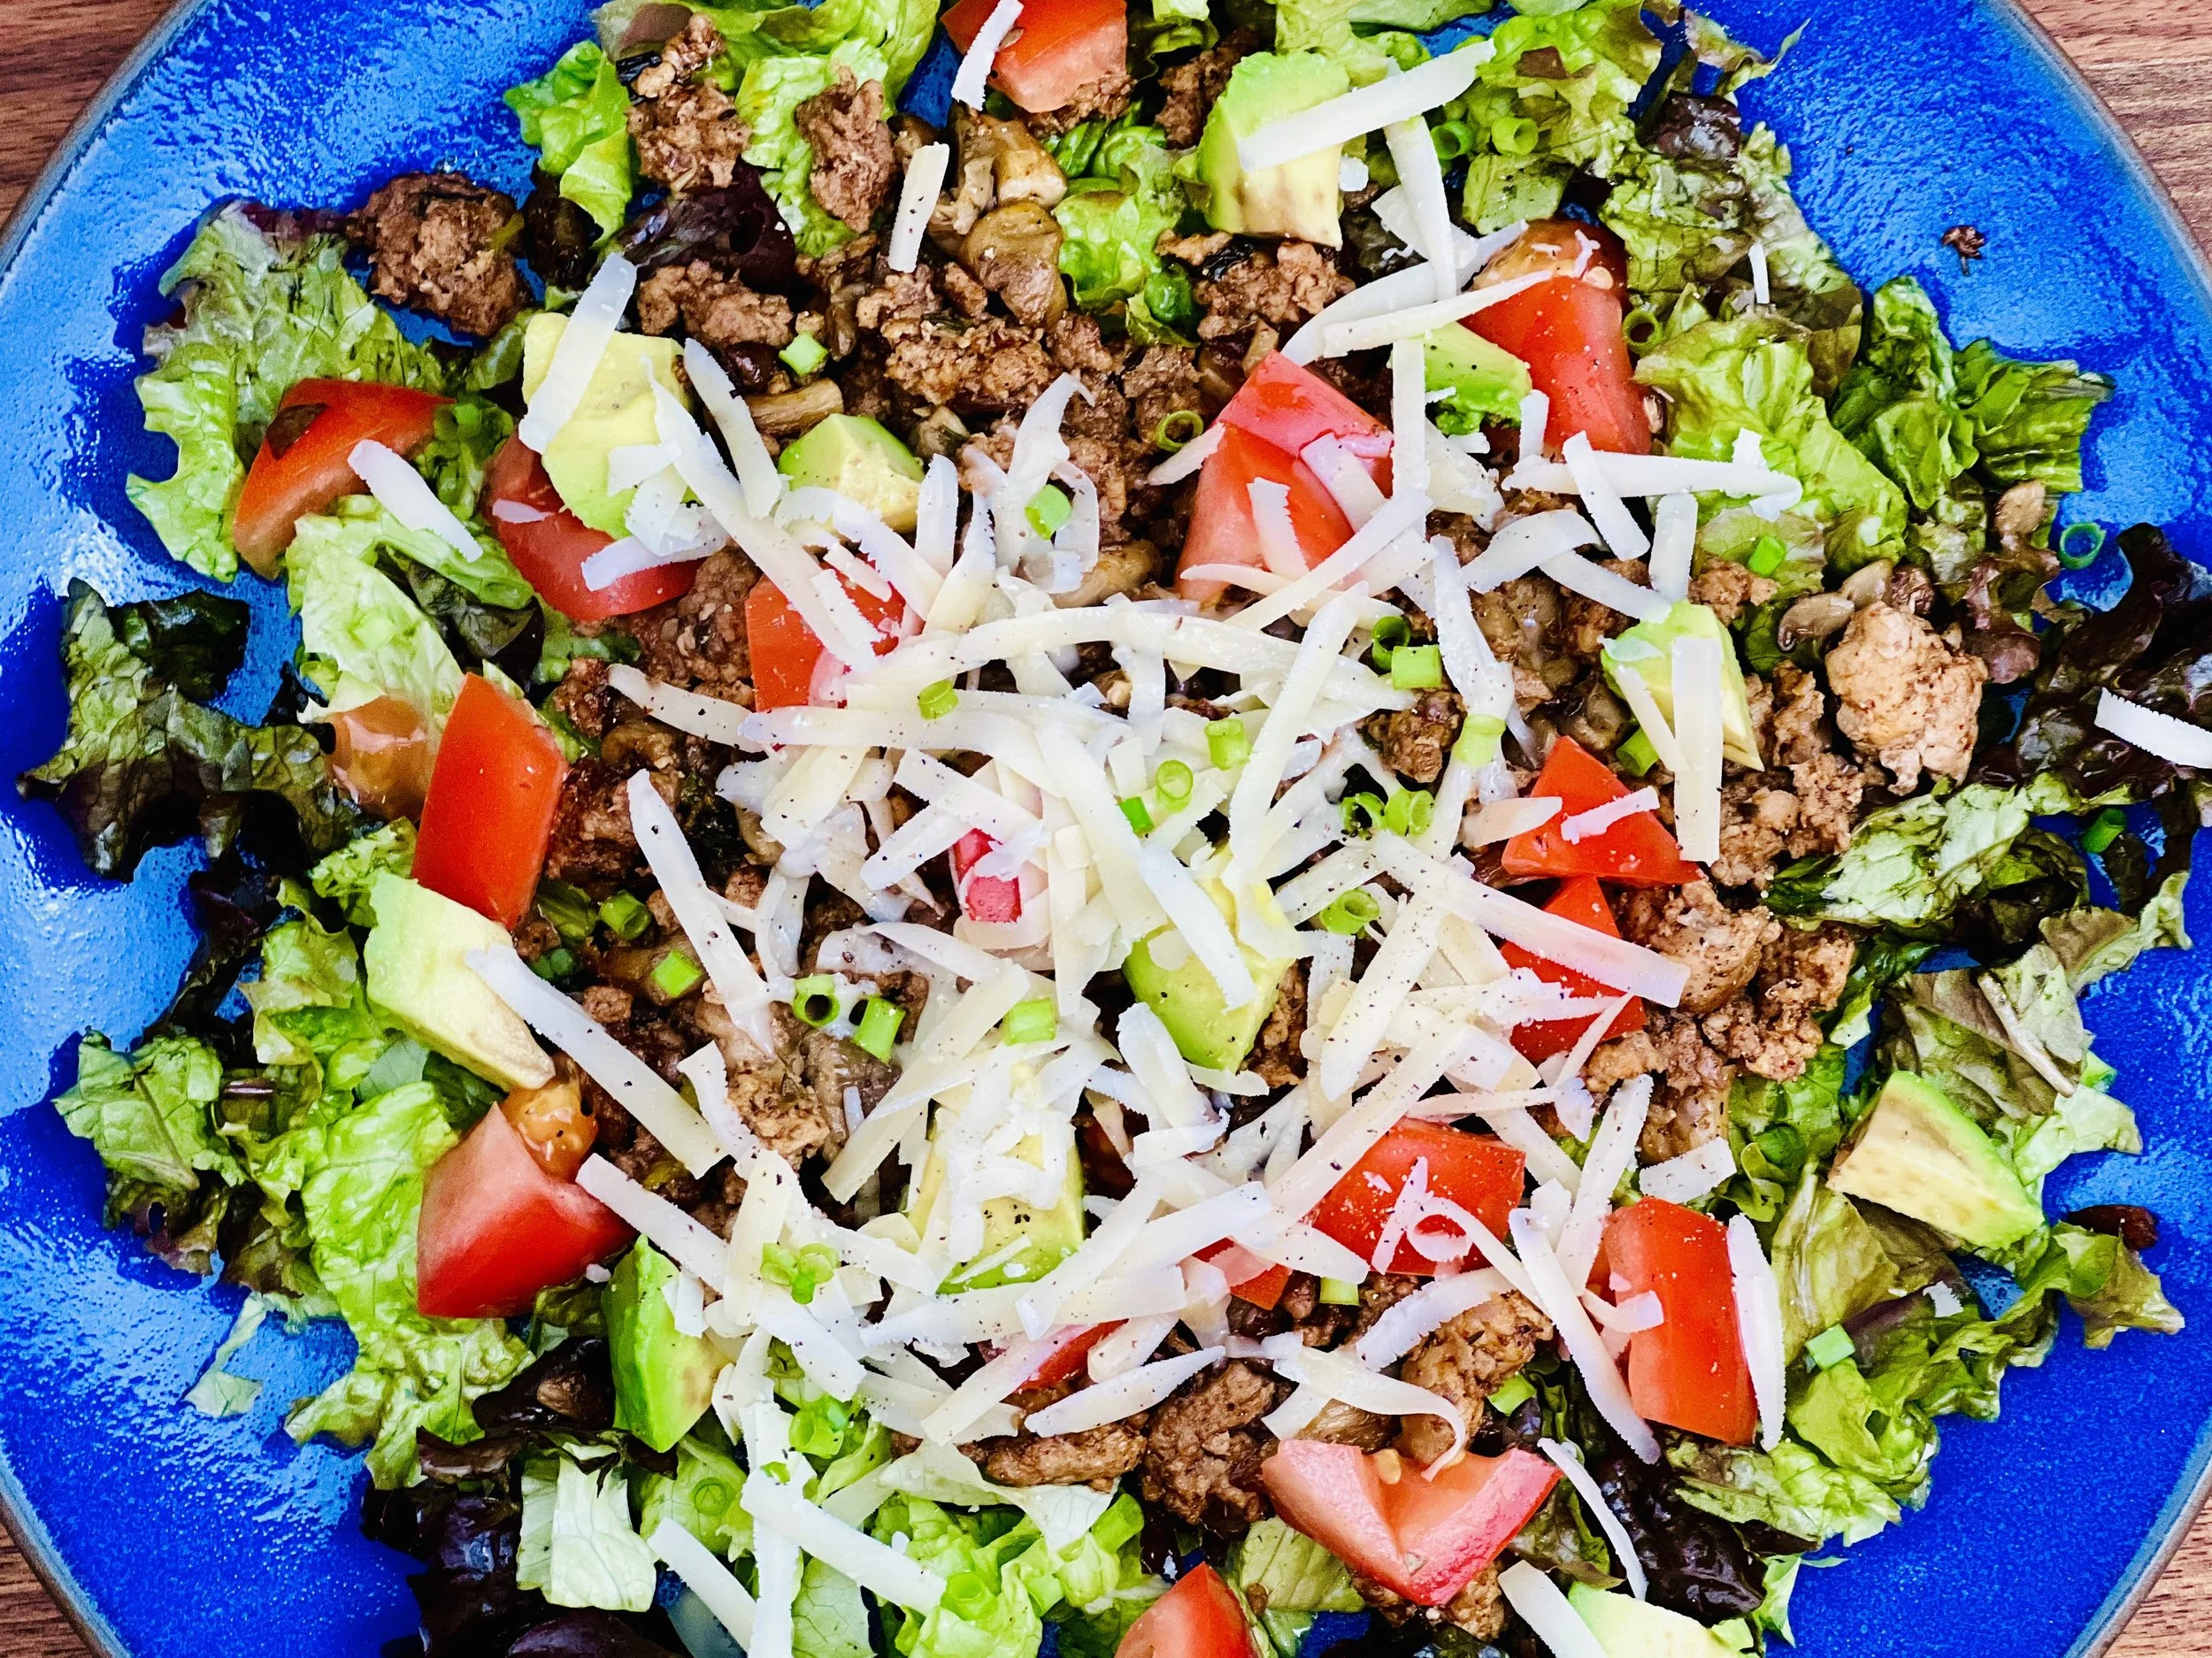
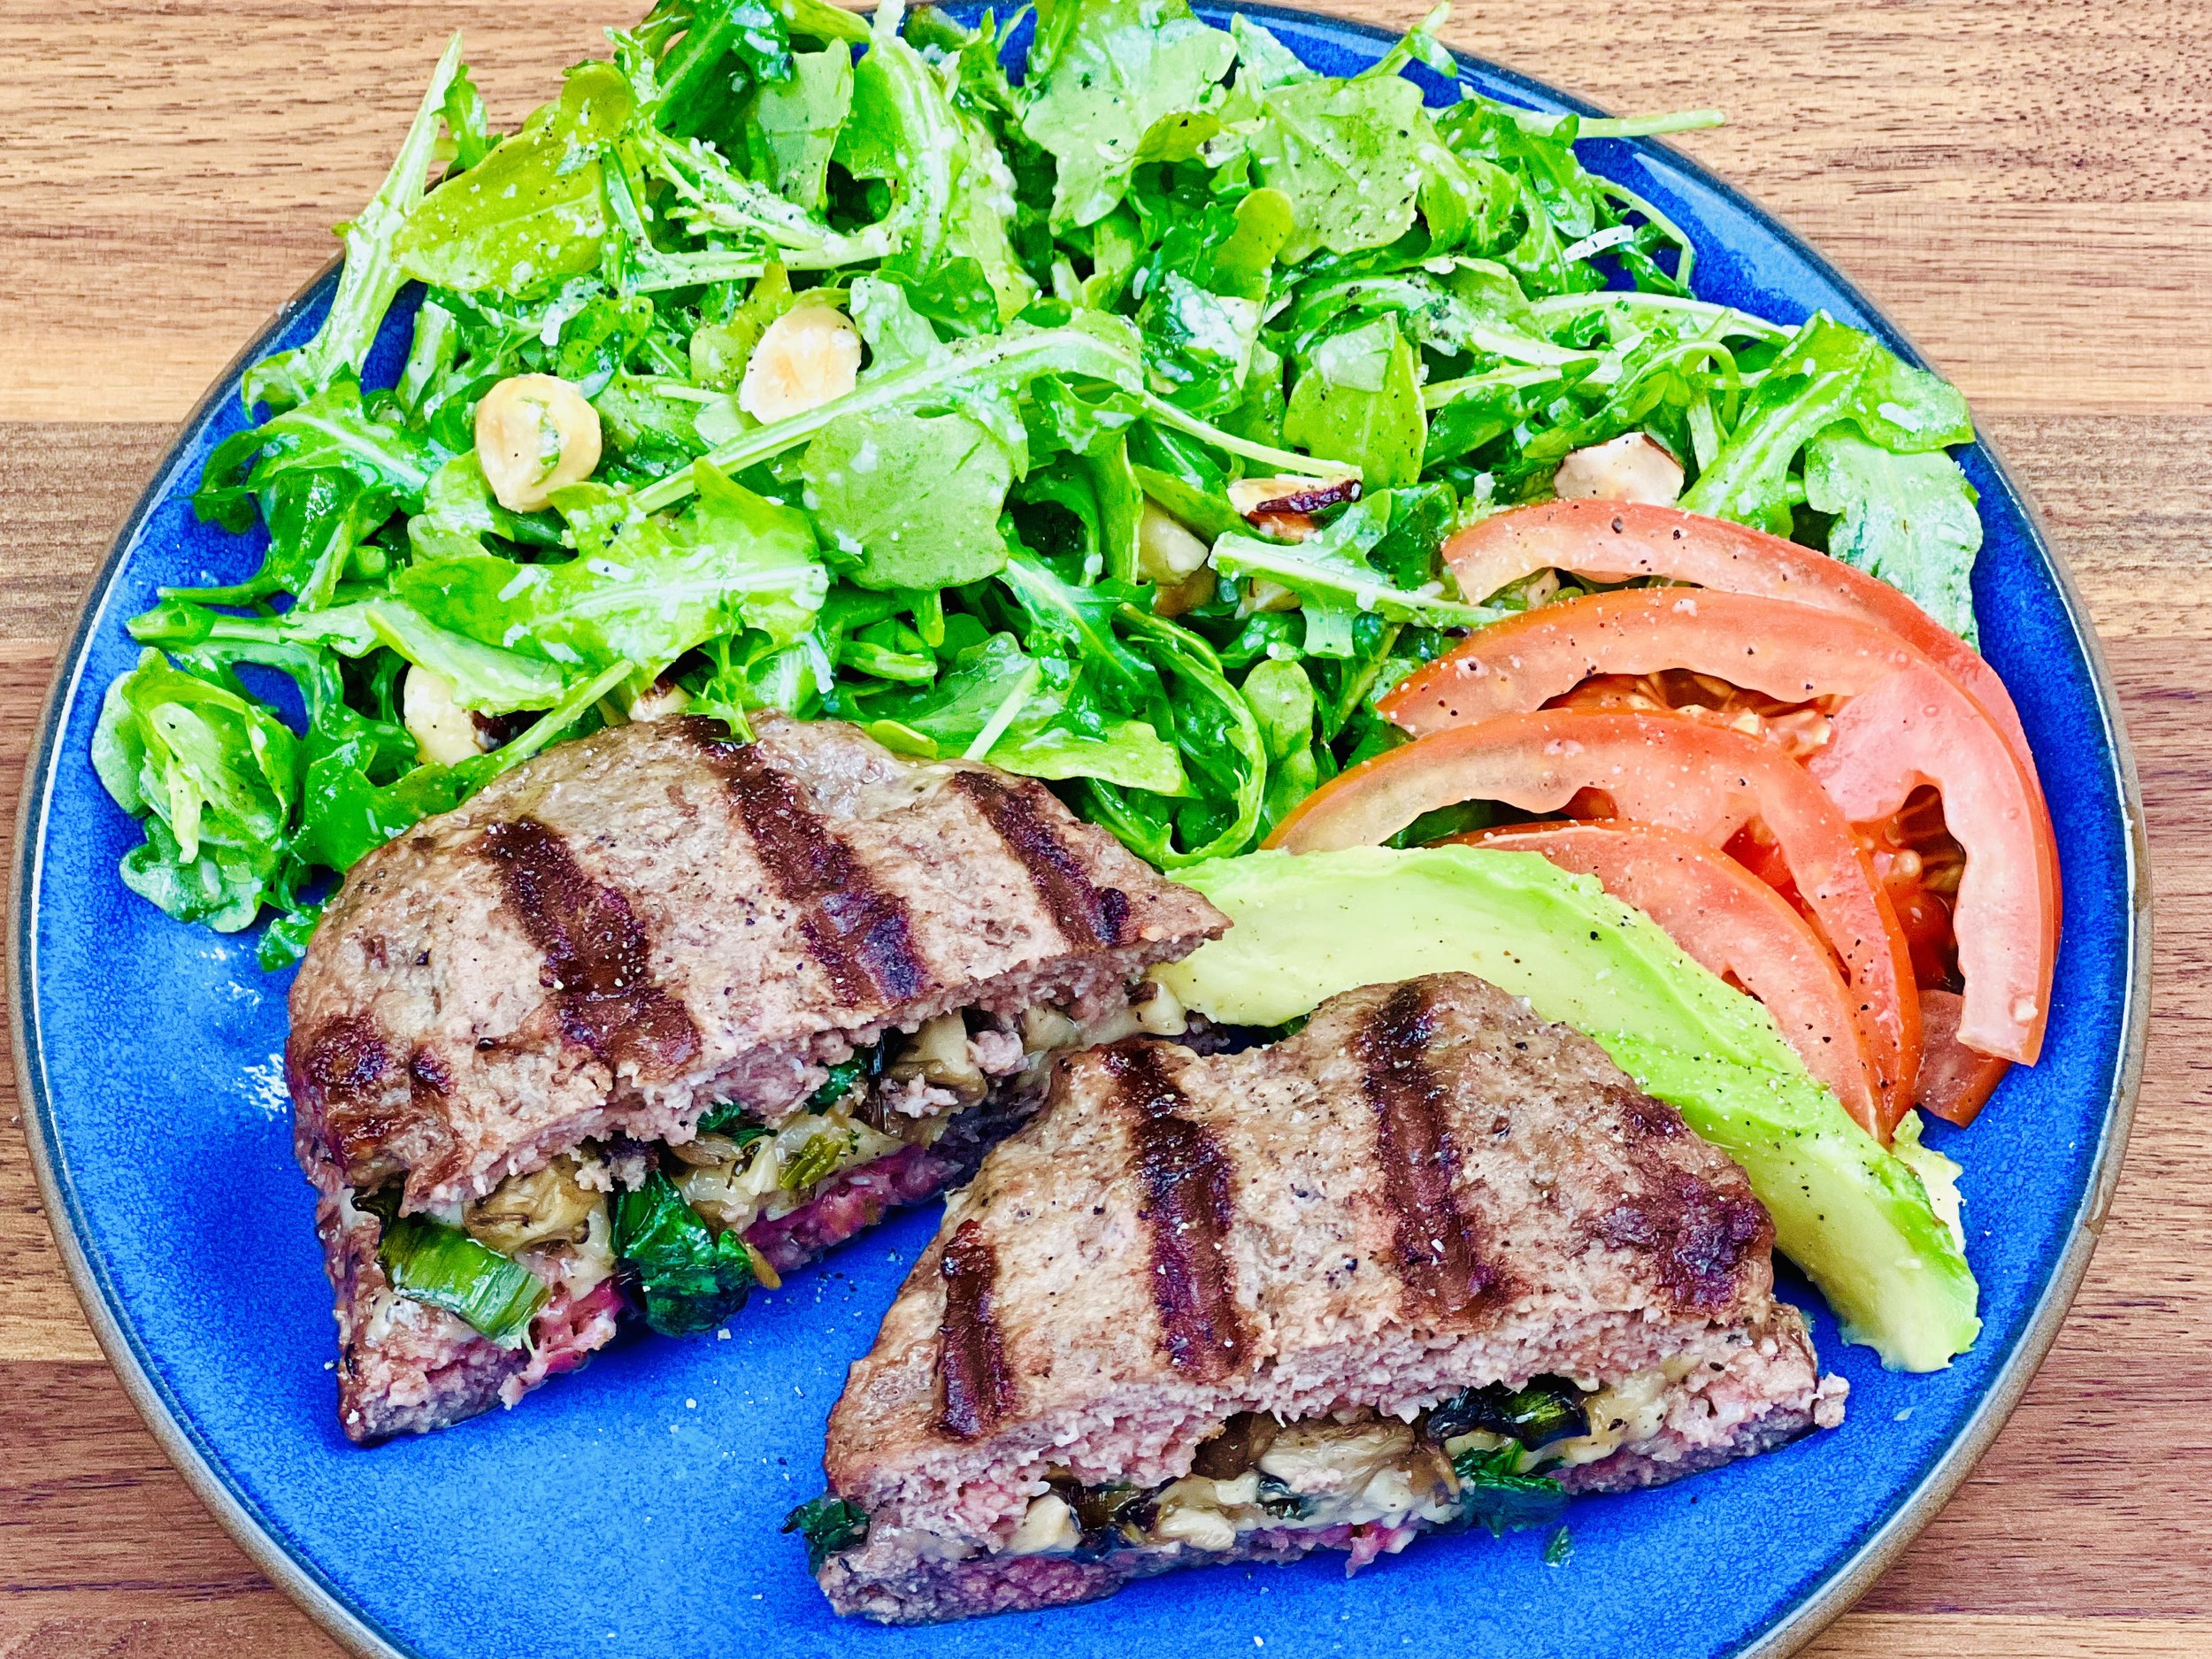
Sarah’s Super Stuffed Burgers (Low FODMAP)
20 Minutes prep • 12 Minutes cook • Low FODMAP • Gluten-free • Serves 2 - 4
20 Minutes prep • 12 Minutes cook • Low FODMAP • Gluten-free • Serves 2 - 4 • Ok to make ahead: Steps 1-4
This is one of those recipes that changes everything. Once you’ve had one of these stuffed burgers, well, you won’t want a burger any other way! The flavors blend and build and deliver a fantastic hamburger experience! While you may add a bun or lettuce wrap and all the fixings, you really don’t need to. This burger is great on its own. And, it’s low FODMAP, low Net Carb, Low Net Starch, and Keto Friendly! Give this recipe a try, but only if you’re ready to change your burger game…forever!
Ingredients
2 tablespoons garlic-infused olive oil
2 teaspoons dry thyme
1/2 cup chopped leek greens
1 1/2 cups chopped oyster mushrooms
1 cup baby spinach, roughly chopped and long stems removed
1 teaspoon Kosher salt
1/2 teaspoon black pepper
1 pound grass-fed, organic ground beef (I used 20% fat)
1/2 cup grated sharp white cheddar cheese (or gruyere, smoked gouda, or other strong-flavored cheese)
1/2 avocado, sliced (optional for serving)
1 vine-ripened tomato, sliced (optional for serving)
Directions
(1) Prepare: Chop the leeks and mushrooms, and grate the cheese. Preheat your grill to high for 15 minutes (if using a grill).
(2) Cook the veggies: Put a medium skillet over medium-high heat. When hot, add the olive oil. When the oil is hot, add the dry thyme and let it sizzle for about 30 seconds. Add the leek greens, mushrooms, salt, and pepper. Cook, stirring every so often for about 15 minutes until the mushrooms begin to brown and the leek greens are nice and soft. Add the spinach and cook another 2 - 3 minutes until the spinach is wilted and cooked down. Remove from the heat and let cool a bit.
(3) Prepare the meat: While the veggies are cooking, you can prepare the meat. Sprinkle the meat with salt and pepper and blend together with your hands. Form the meat into four equally sized patties (round, square, or rectangle). Flatten the pieces until they are about 1/2 inch thick.
(4) Fill the burgers: Put 1/4 cup cheese and about 1/2 the vegetable mixture in the middle of two of the patties. Lay the other patties on top, then pinch the edges all around to make a good seal.
(5) Cook the burgers: Brush the patties with olive oil and lay oil-side down directly on the preheated grill. Turn the grill down to medium-high. Brush the top of each patty with oil. Cook for about 6 minutes on each side. Remove from the grill and let rest for a couple of minutes before serving. If cooking on the stove, use a covered skillet and cook 6 minutes per side.
(6) Plate and serve: Use a serrated knife to cut each stuffed burger in half, exposing the delicious melty middle. A light eater may only want half, but a bigger eater will be happy to devour the whole thing. Serve alongside one of my green salads.
Eat and enjoy every bite because you can!
Recipe note: I use Diamond Crystal Kosher salt in all my recipes because it has a wonderful flat and crisp flake that tastes delicious. It is also the least salty salt available so you can use it more liberally as a seasoning than you can table salt or sea salt. If you use another type of salt, you may need to reduce the amount so it is not over-salted.
Have a question you’d like to have answered? Email me at hello@ibsgamechanger.com
Link note: This post may contain affiliate links for you to easily purchase items that are linked. I may earn a small commission from qualifying purchases but none of this costs you a thing so feel free to use the links! In addition, for some items, I have provided a special discount code for IBS Game Changers so be sure to use the code when you purchase an item to get the discount that has been arranged just for you.
More Deliciously Low FODMAP™ main course recipes
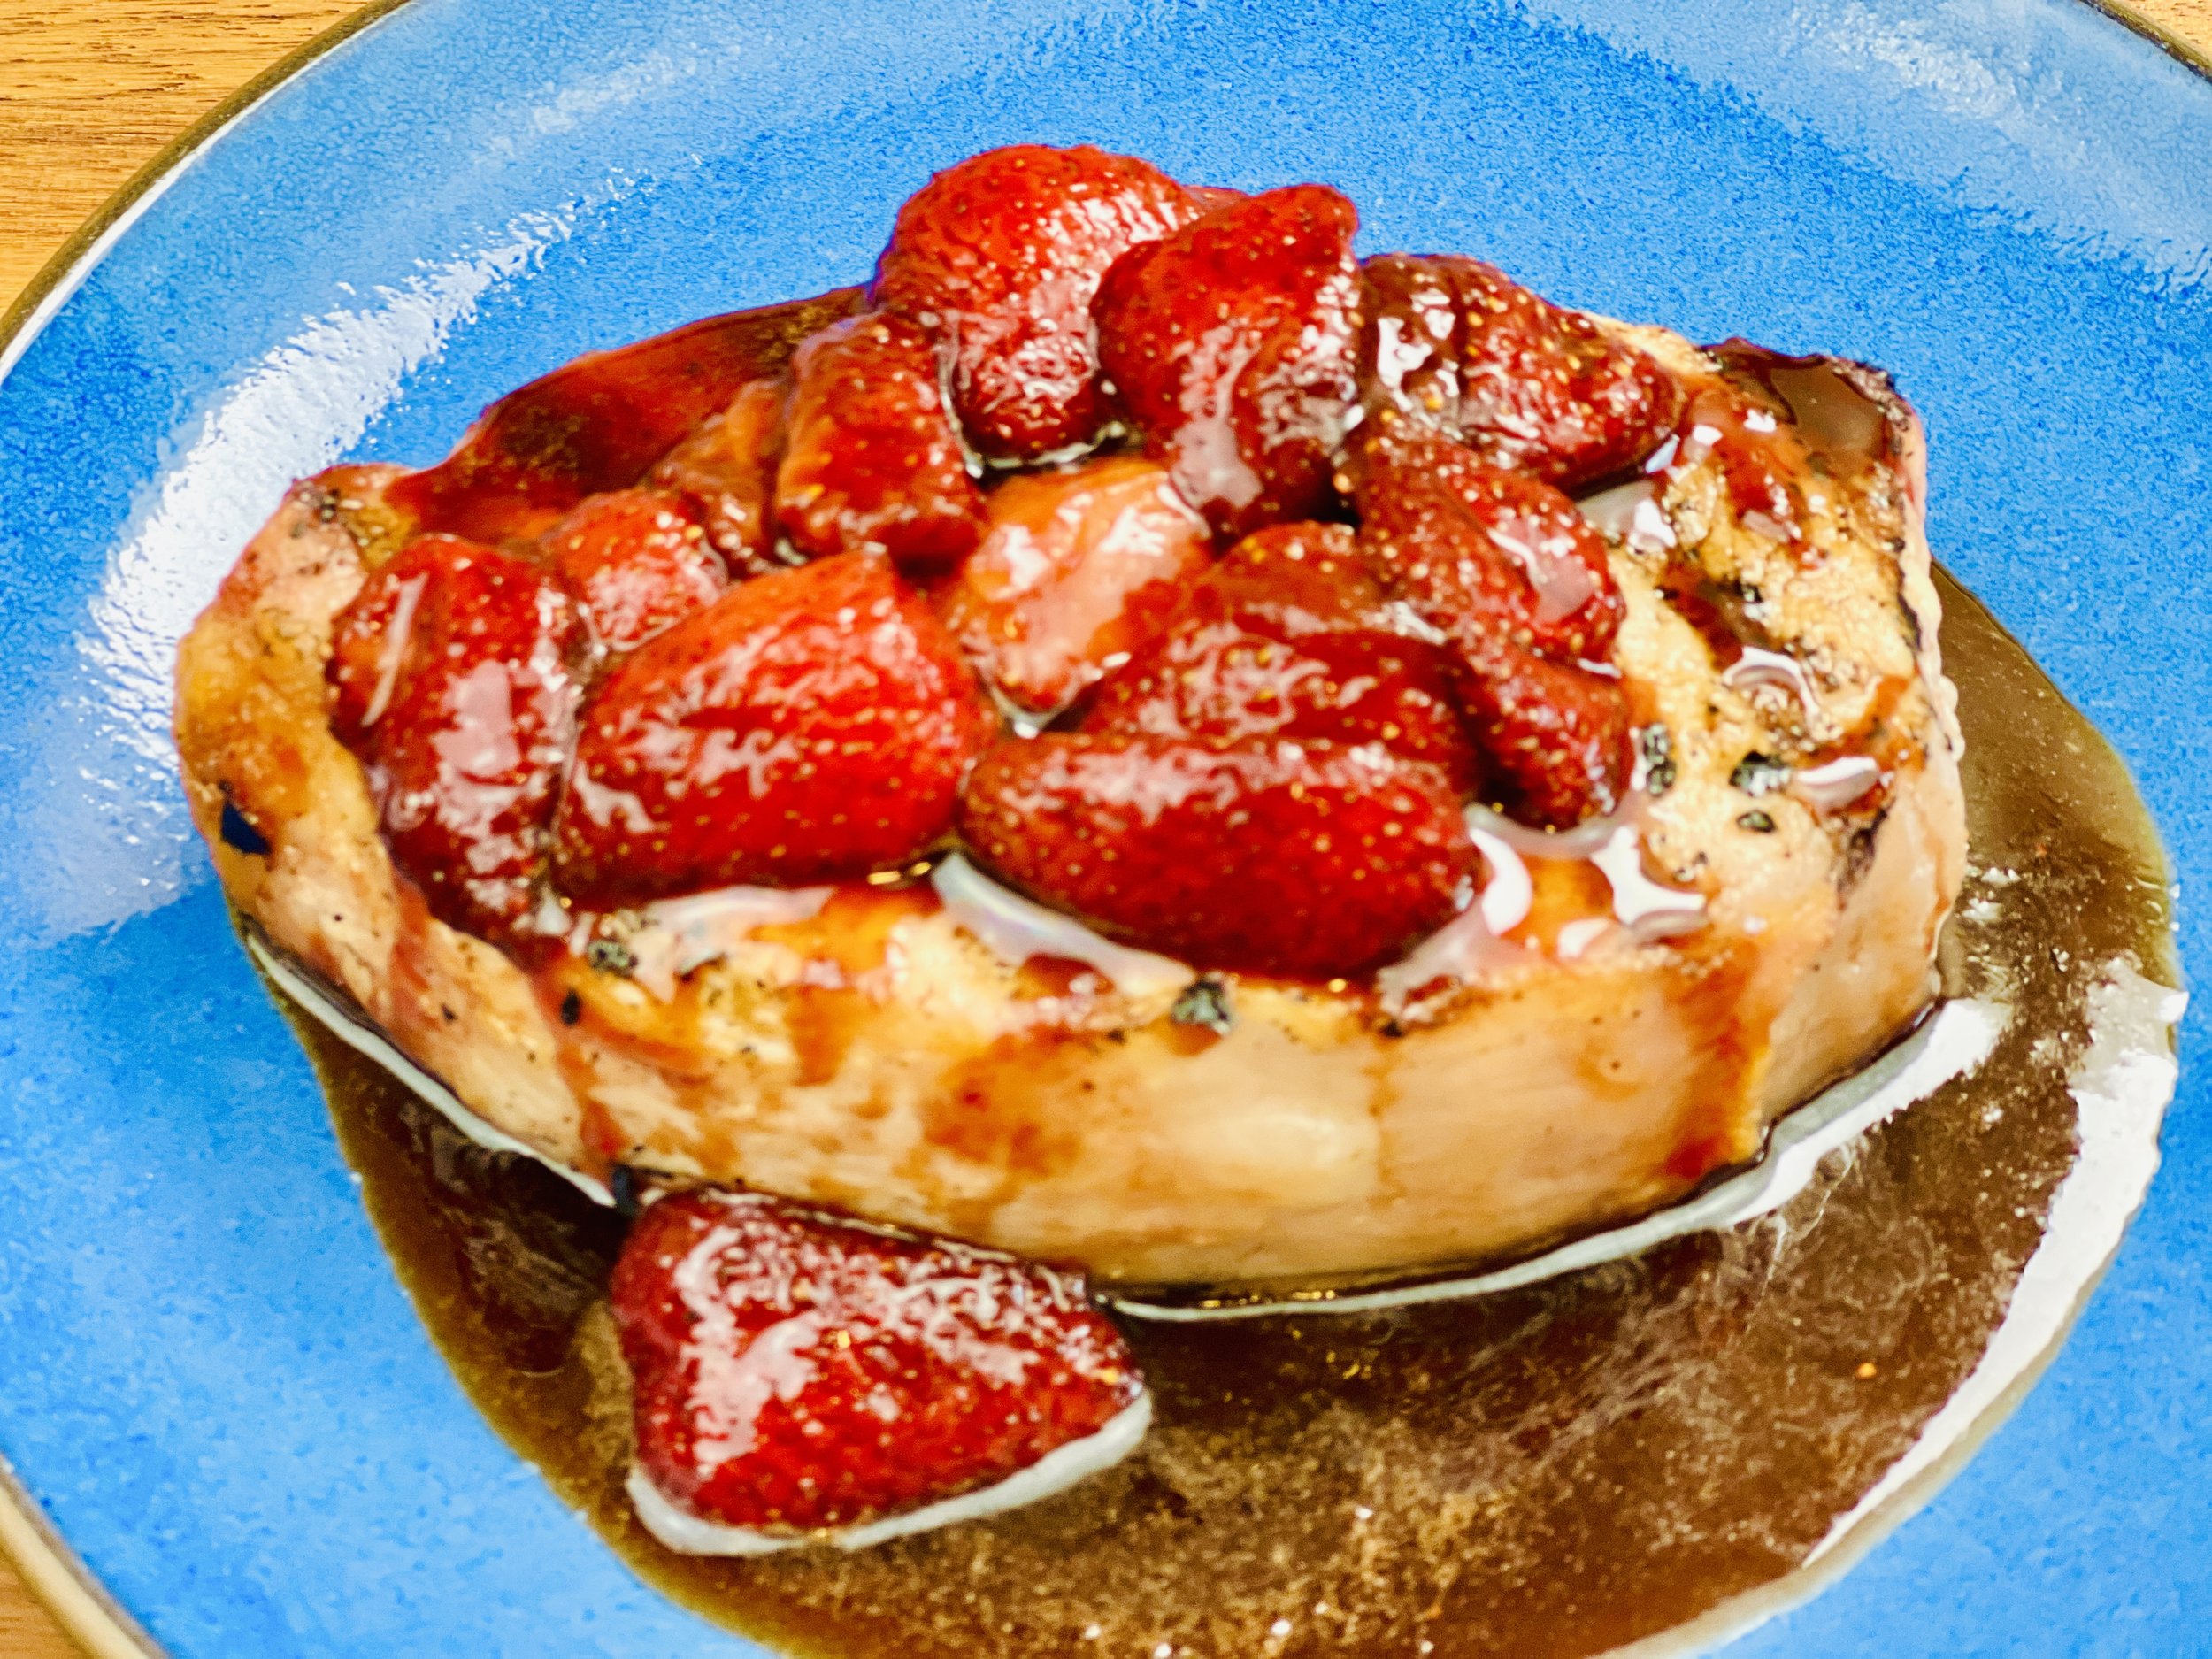
Pork Chops with Strawberry Balsamic Reduction (Low FODMAP)
10 Minutes prep • 15 Minutes cook • Low FODMAP • Gluten-Free • Lactose-free
10 Minutes prep • 15 Minutes cook • Low FODMAP • Gluten-Free • Lactose-free • Serves 4 • Ok to make ahead: Steps 1-2
Pork is wonderful when it’s balanced with sweet fruit, most commonly apples. This recipe combines sweet strawberries and rich balsamic vinegar which turns out to be an excellent combination with pork. If you cook the chops on the stove, then you retain the juice from cooking the meat to incorporate into the sauce—which is delicious! But you can also grill the chops and make the sauce separately. If you have any leftovers, they make a wonderful addition to a salad. Just chop the chilled meat and strawberries and toss them in!
Ingredients: Pork Chops
Four (8-ounce) boneless or bone-in pork chops, about 1 inch thick
1 tablespoon extra-virgin olive oil
1 teaspoon Kosher salt
1/2 teaspoon black pepper
Ingredients: Strawberry Balsamic Reduction
2 cups (about 20 strawberries), hulled and roughly chopped
1/4 cup balsamic vinegar
2 teaspoons firmly packed light or dark brown sugar
1/4 teaspoon freshly ground black pepper
Directions
(1) Prepare the meat: This step is optional but results in more flavorful and tender meat. Remove the pork from the package, and put it in one layer on a rimmed plate or baking dish. Season both sides of each piece lightly with Kosher salt (about 1/4 teaspoon per side). Cover the dish with plastic wrap and refrigerate until ready to use, ideally about 4 hours before cooking or overnight.
(2) Prepare: Season the pork chops on both sides with pepper and salt if you didn’t pre-salt the meat. Chop the strawberries.
(3) Cook the chops: You may grill the chops, or cook them on the stove. For the stove, put a large skillet over medium-high heat. When the pan is hot, add the olive oil. When the oil is heated, add the pork chops in a single layer and cook for 4 minutes. Flip the chops and continue cooking until the second side is browned and the pork is cooked to an internal temperature of 145 degrees F on an instant-read thermometer, about 6 minutes more. (Keep an eye on the temperature as the cooking time will vary depending on the thickness of the chops.) Transfer the chops to a warmed serving plate and cover to keep warm.
For the grill, heat the grill to medium-high. Put the chops directly on the grill. Turn after 4 minutes. Watch the temperature of the meat and remove the chops from the grill as soon as the internal temperature reaches 145 degrees F. Transfer the chops to a warmed serving plate and cover to keep warm.
(3) Make the strawberry balsamic reduction: Return the skillet to medium heat and add the strawberries, balsamic vinegar, and brown sugar. Cook, stirring frequently until the mixture has thickened, 6 to 8 minutes more. Taste and season well with black pepper. If you cooked the chops on the grill, just use a saucepan or frying pan to make the sauce. You won’t have the juices from cooking the meat, but it will still be delicious!
(4) Plate and serve: Pour the strawberry sauce over the chops and serve warm alongside one of my delicious salads.
Eat and enjoy every bite because you can!
Recipe note: I use Diamond Crystal Kosher salt in all my recipes because it has a wonderful flat and crisp flake that tastes delicious. It is also the least salty salt available so you can use it more liberally as a seasoning than you can table salt or sea salt. If you use another type of salt, you may need to reduce the amount so it is not over-salted.
Have a question you’d like to have answered? Email me at hello@ibsgamechanger.com
Link note: This post may contain affiliate links for you to easily purchase items that are linked. I may earn a small commission from qualifying purchases but none of this costs you a thing so feel free to use the links! In addition, for some items, I have provided a special discount code for IBS Game Changers so be sure to use the code when you purchase an item to get the discount that has been arranged just for you.
More Deliciously Low FODMAP™ main course recipes
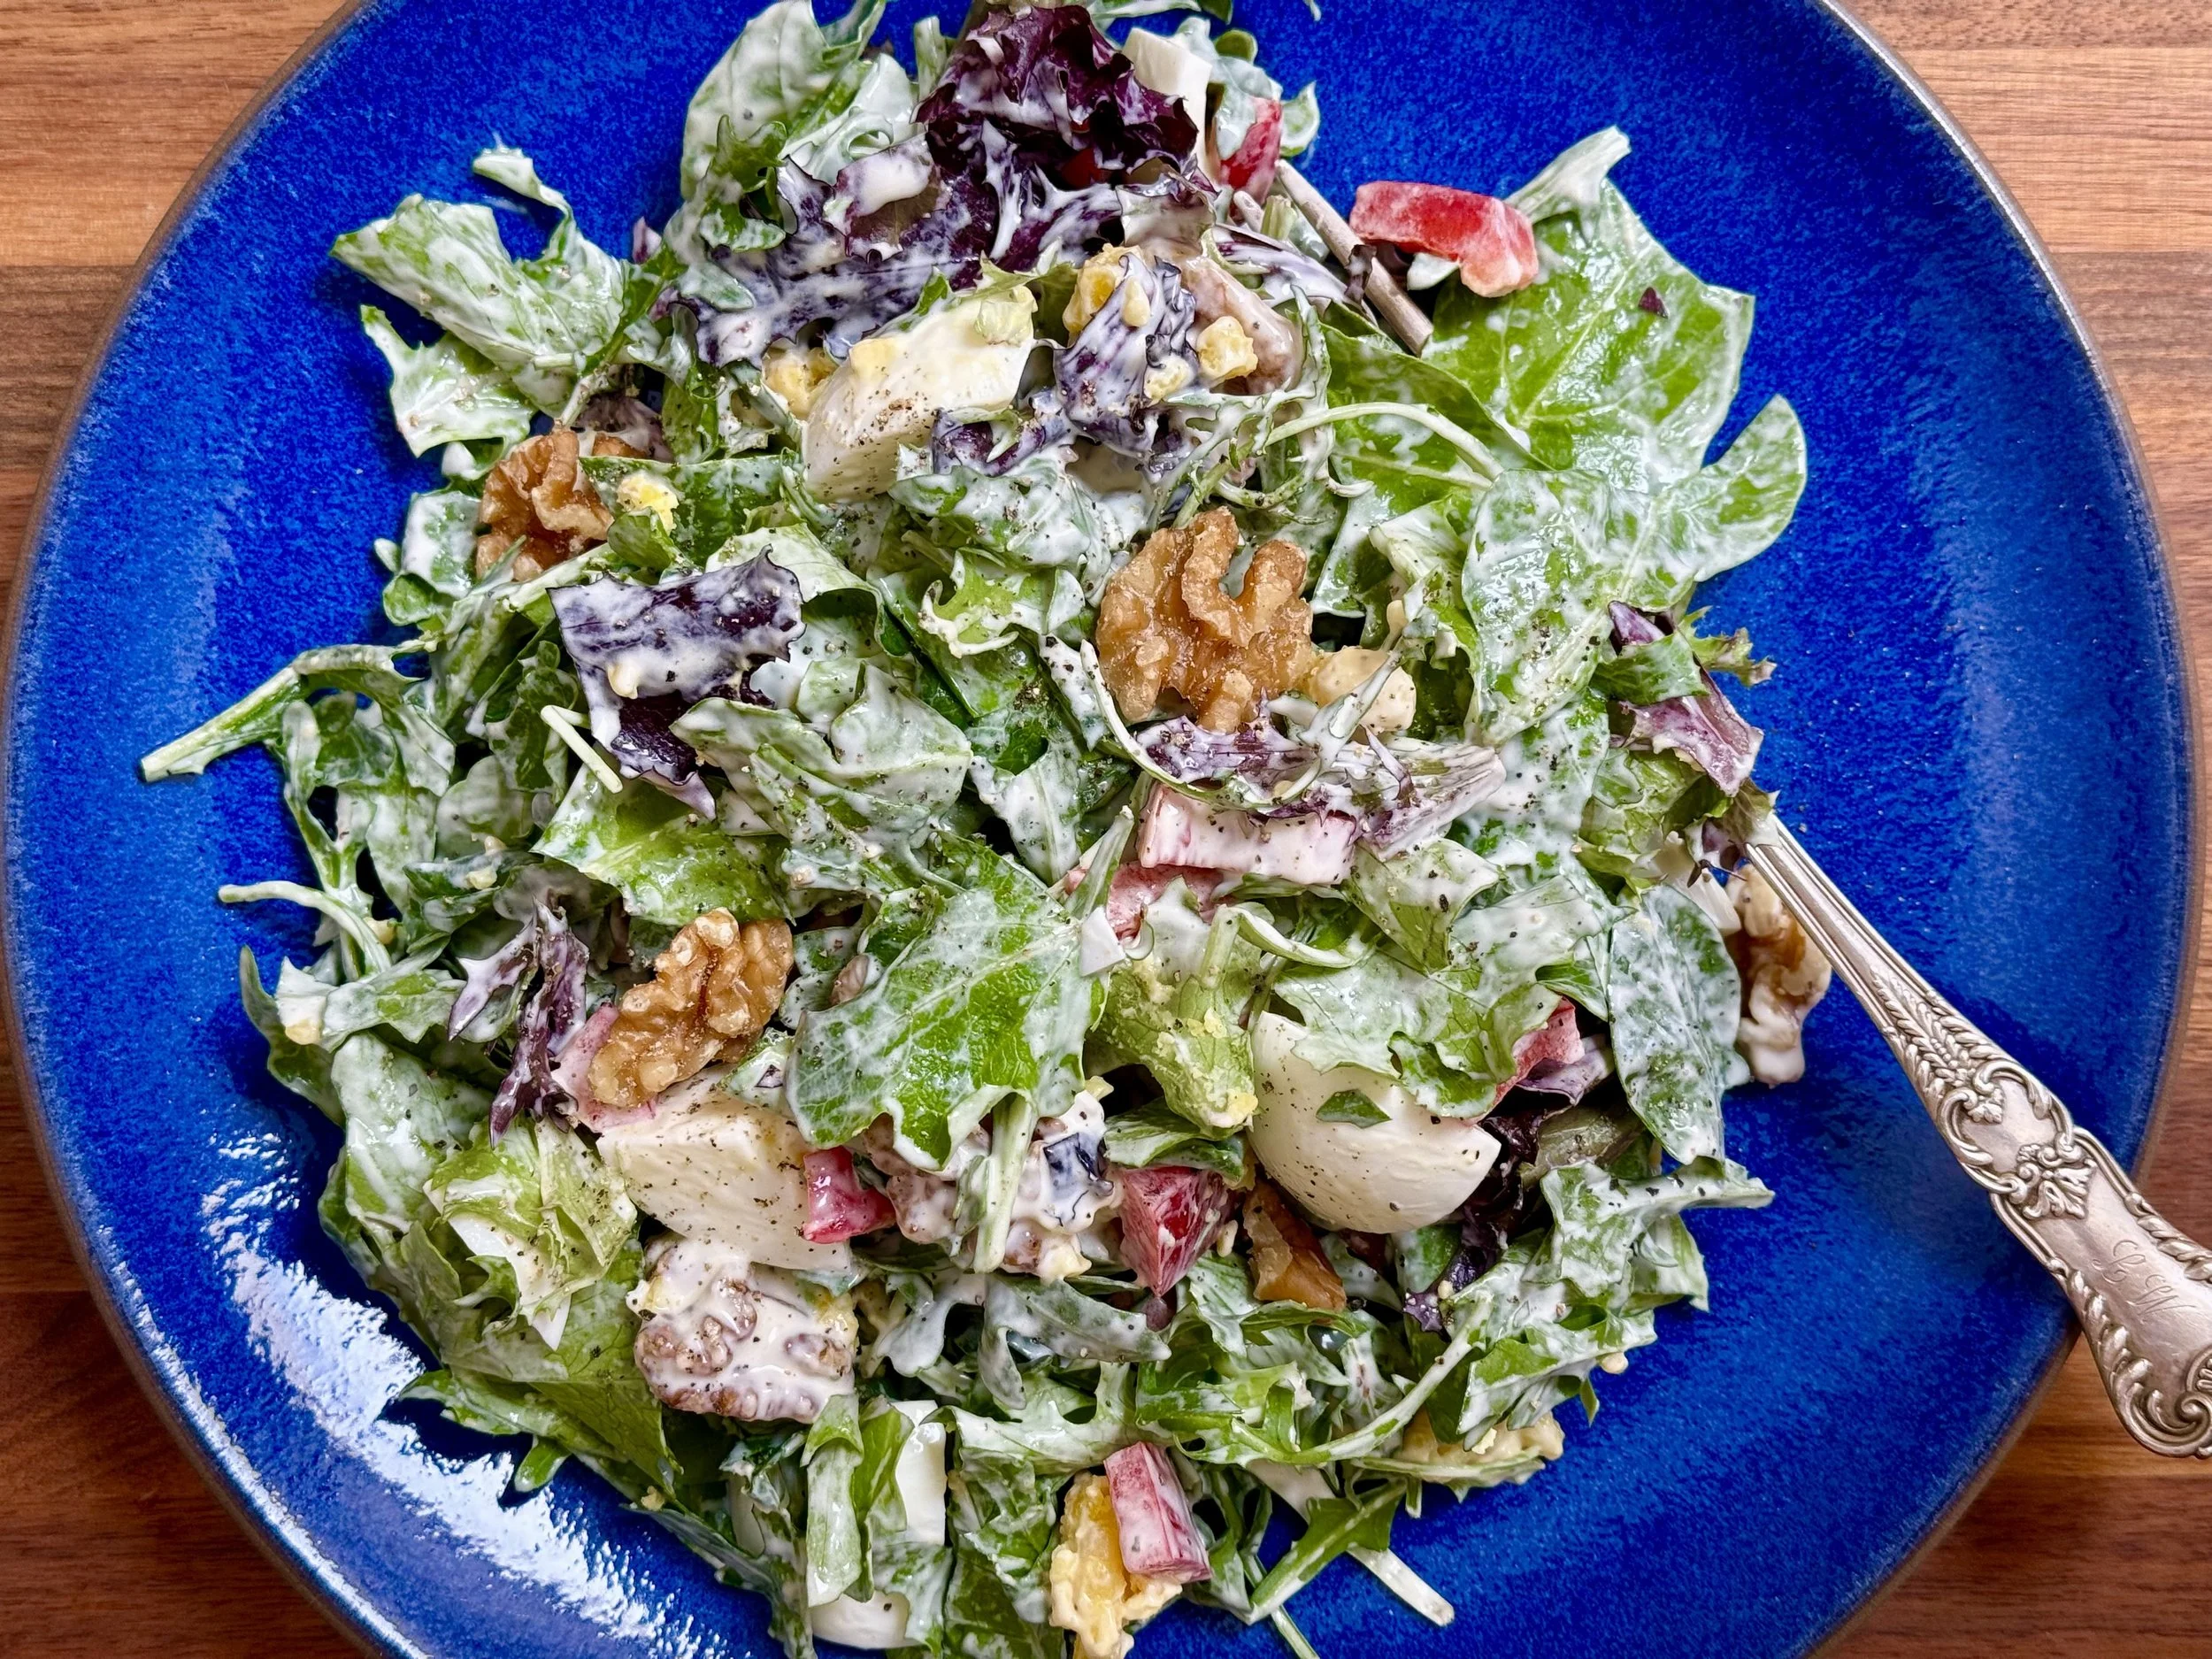
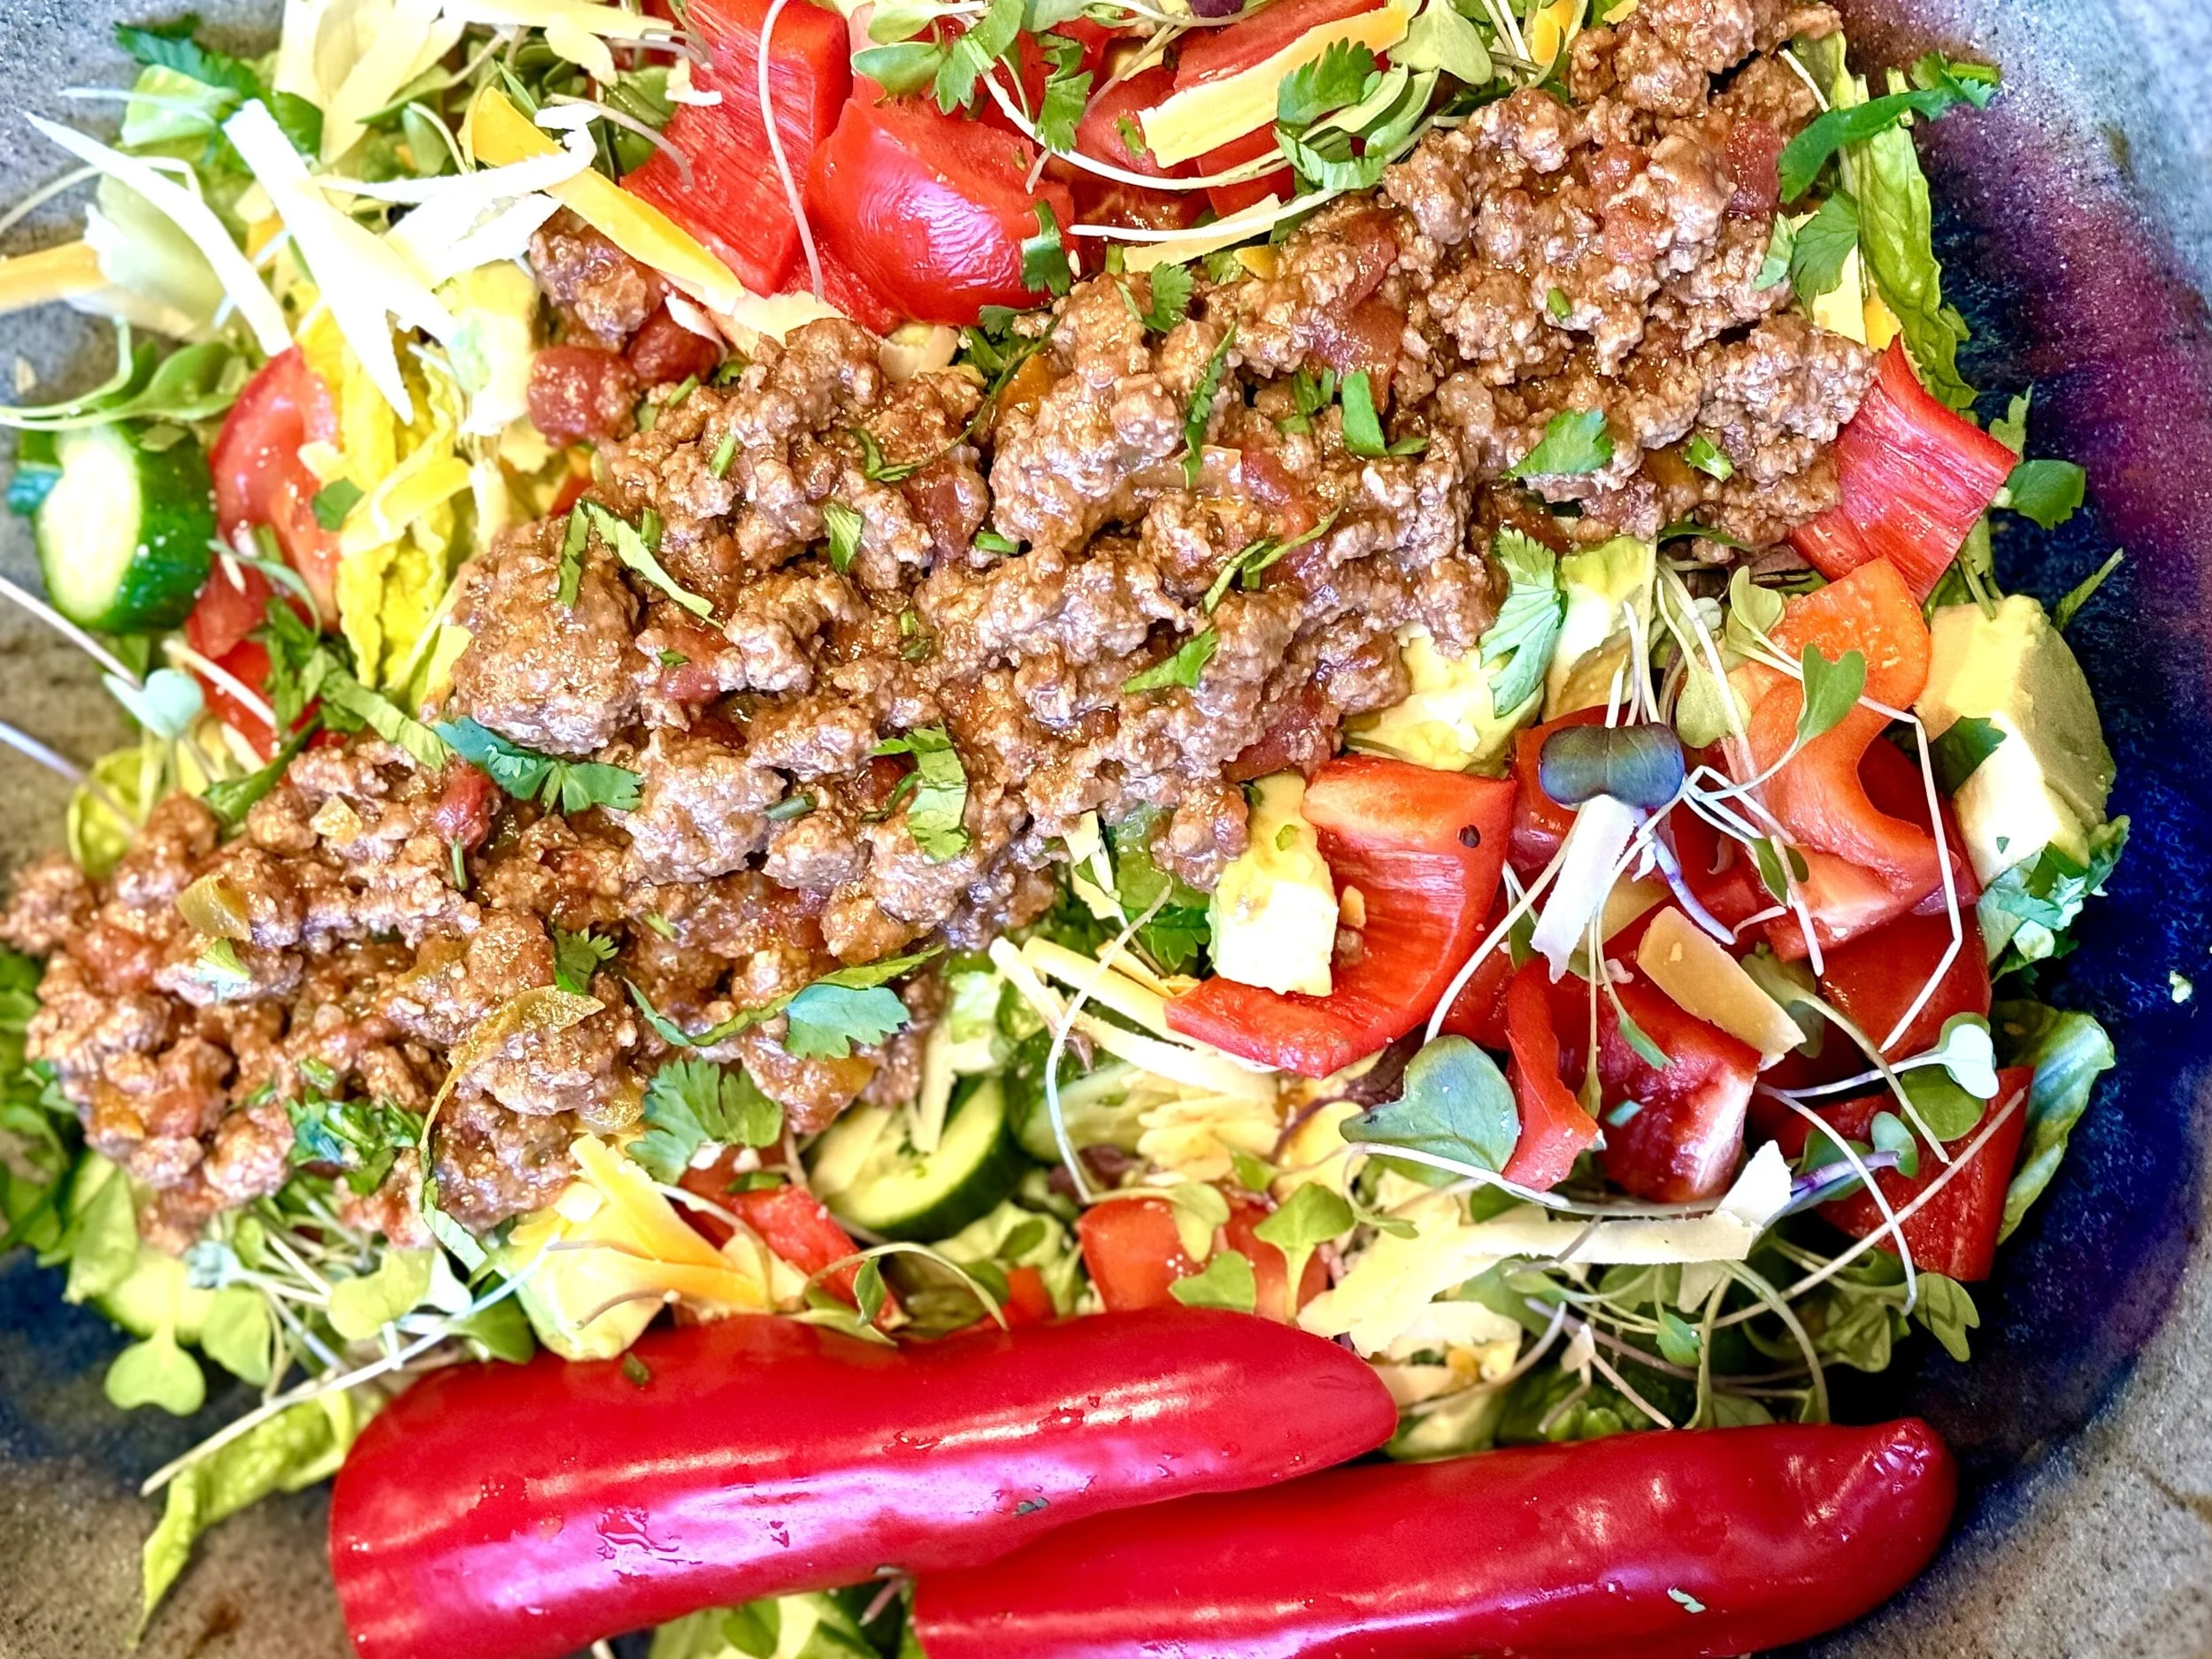
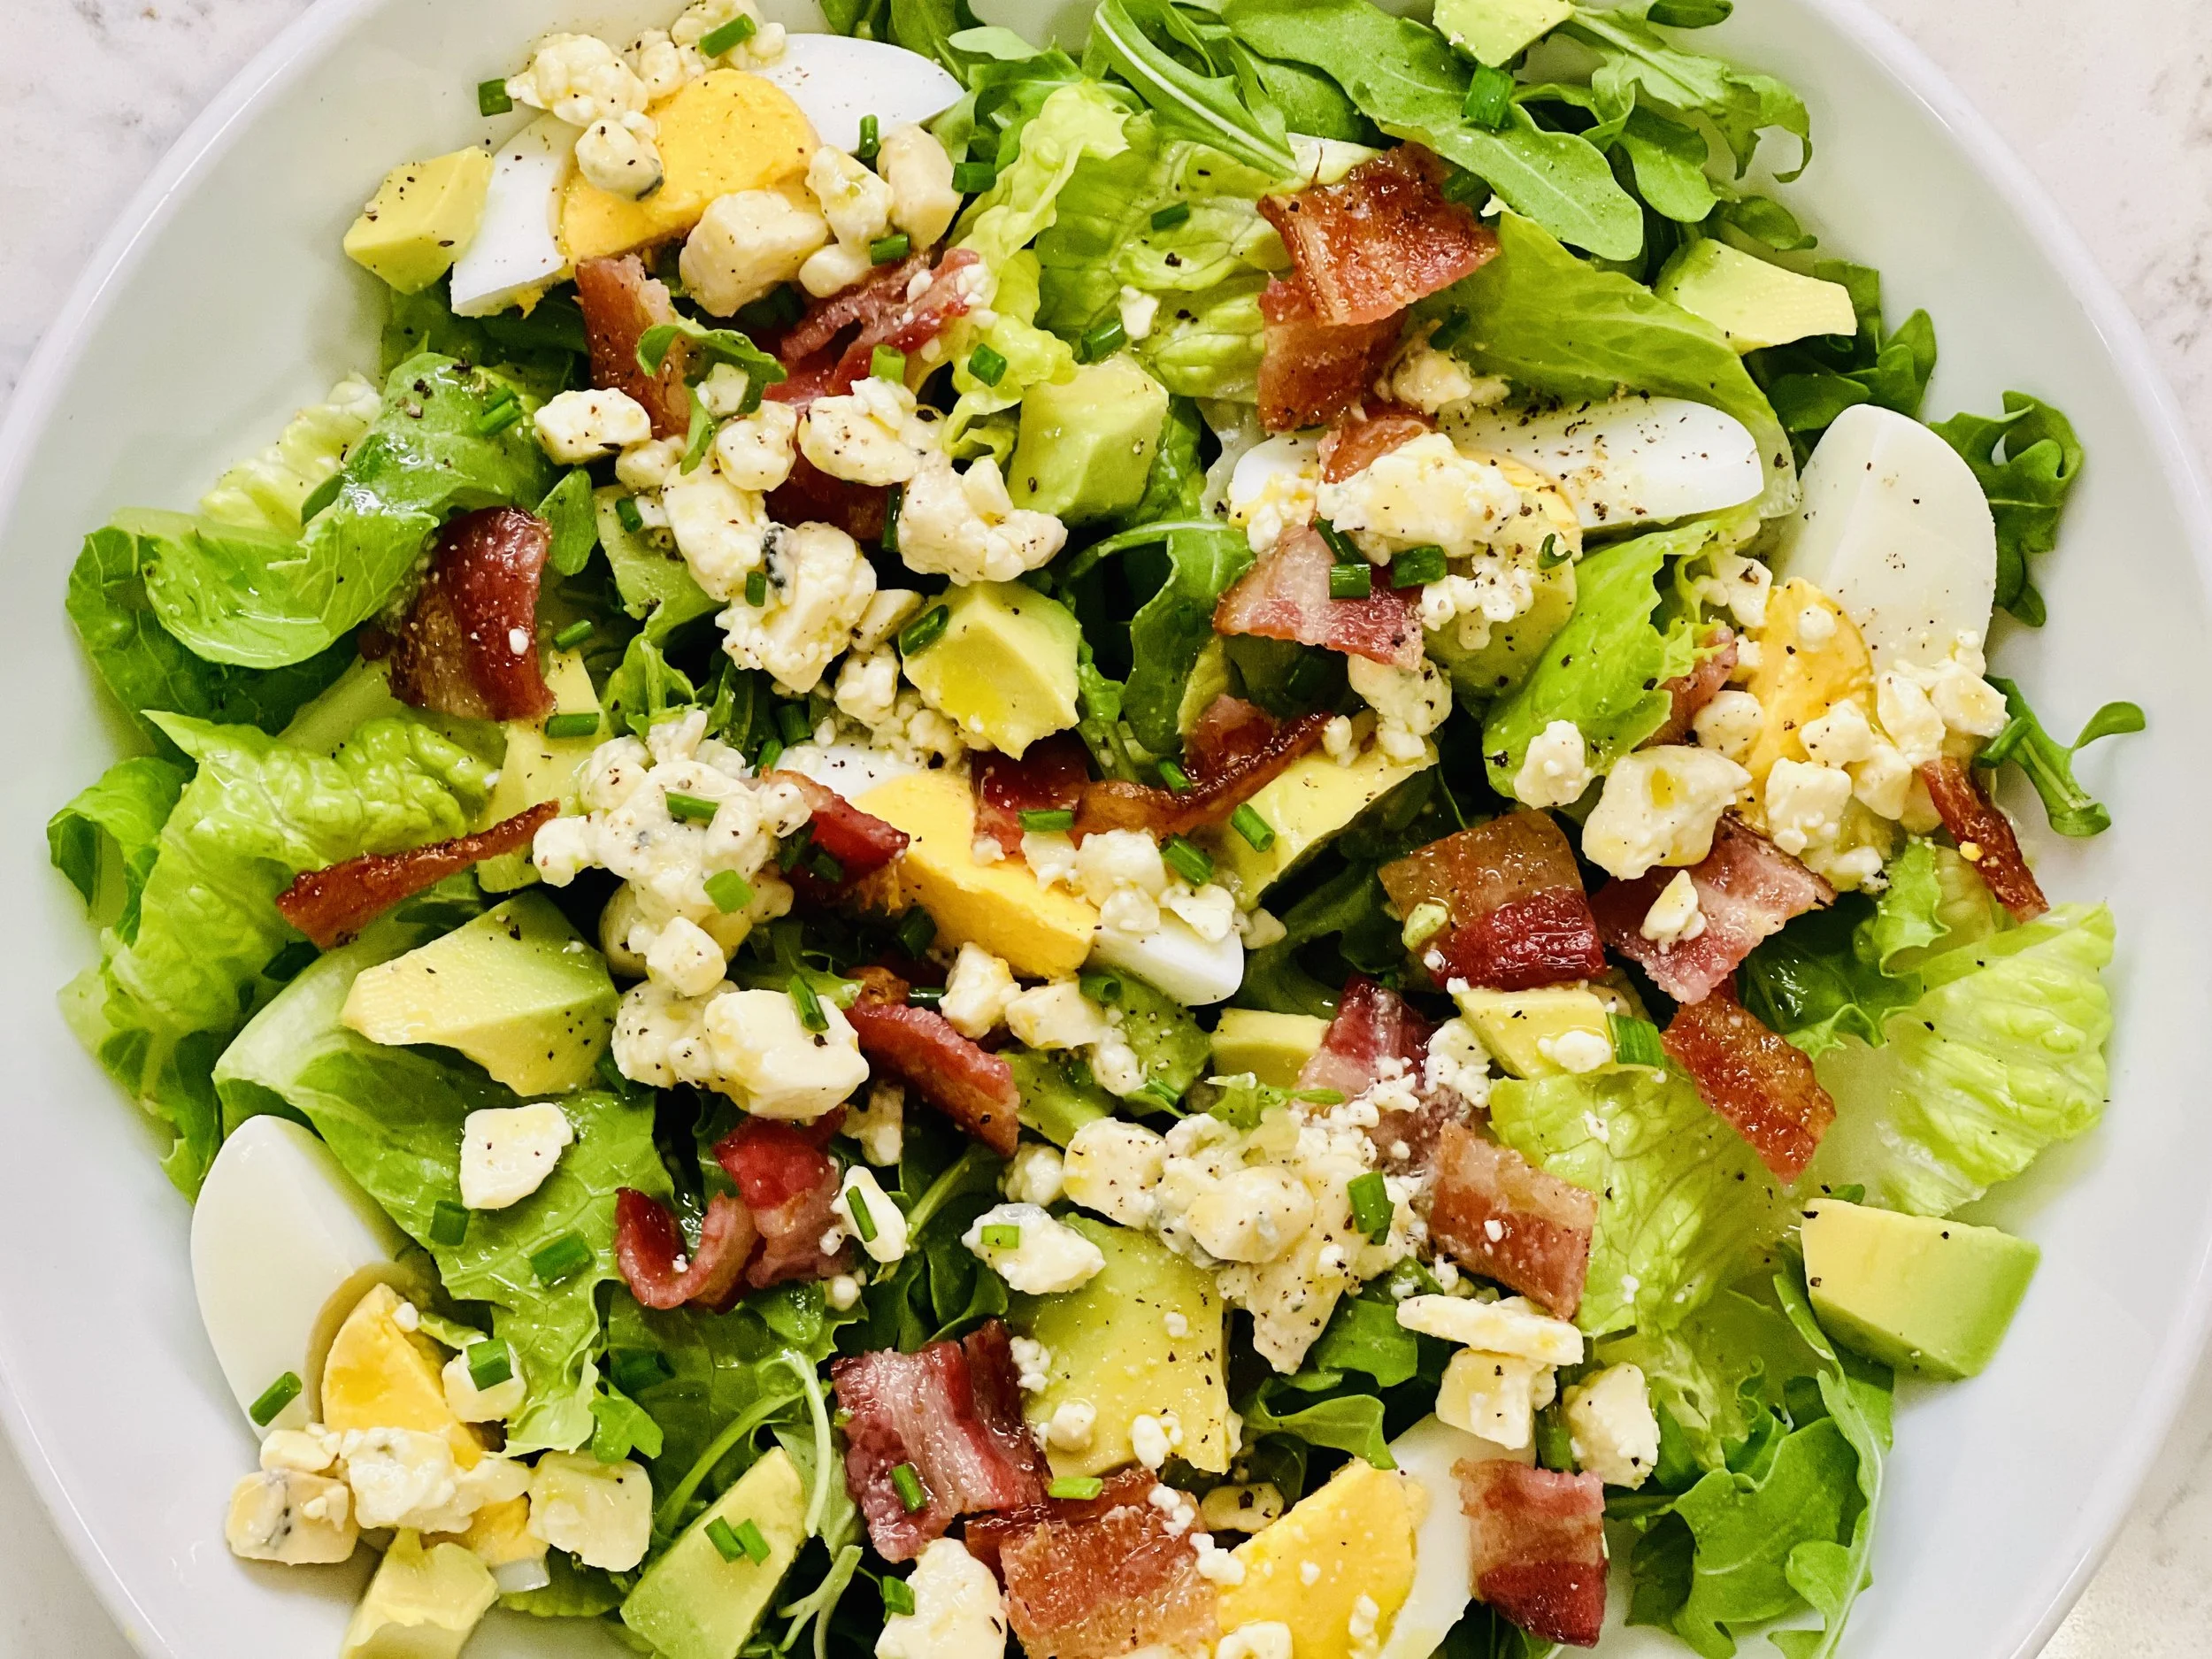
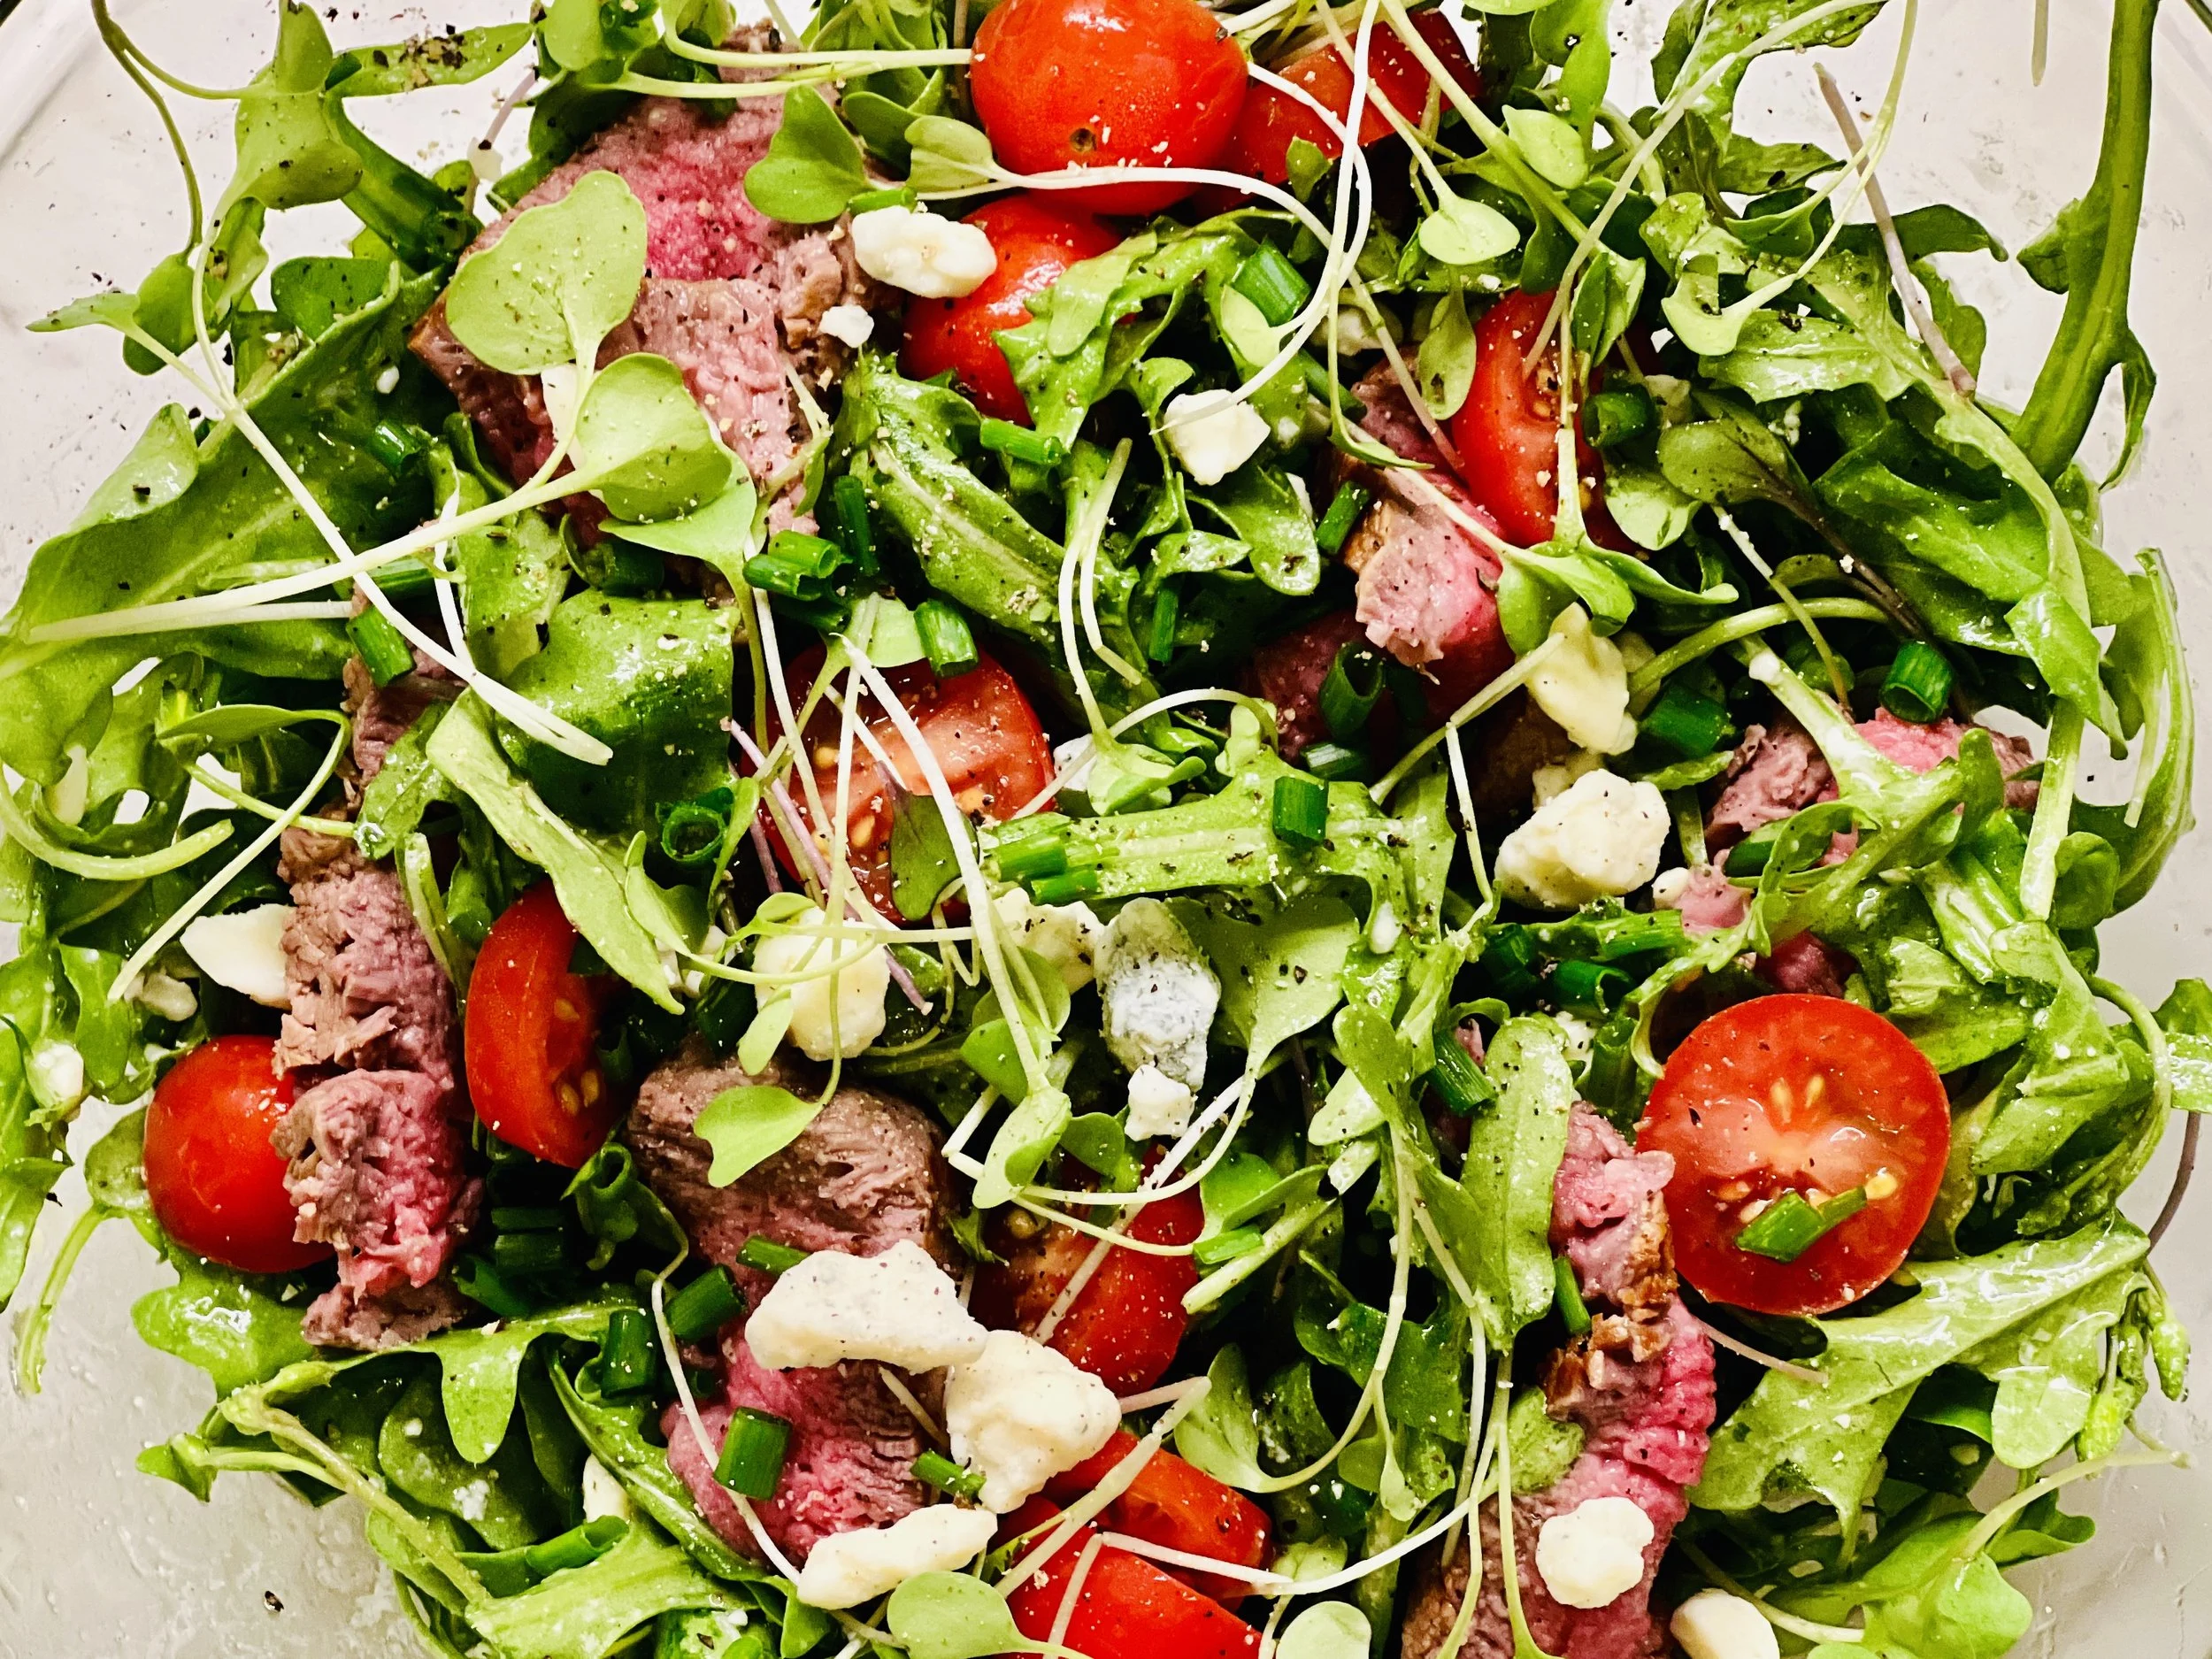
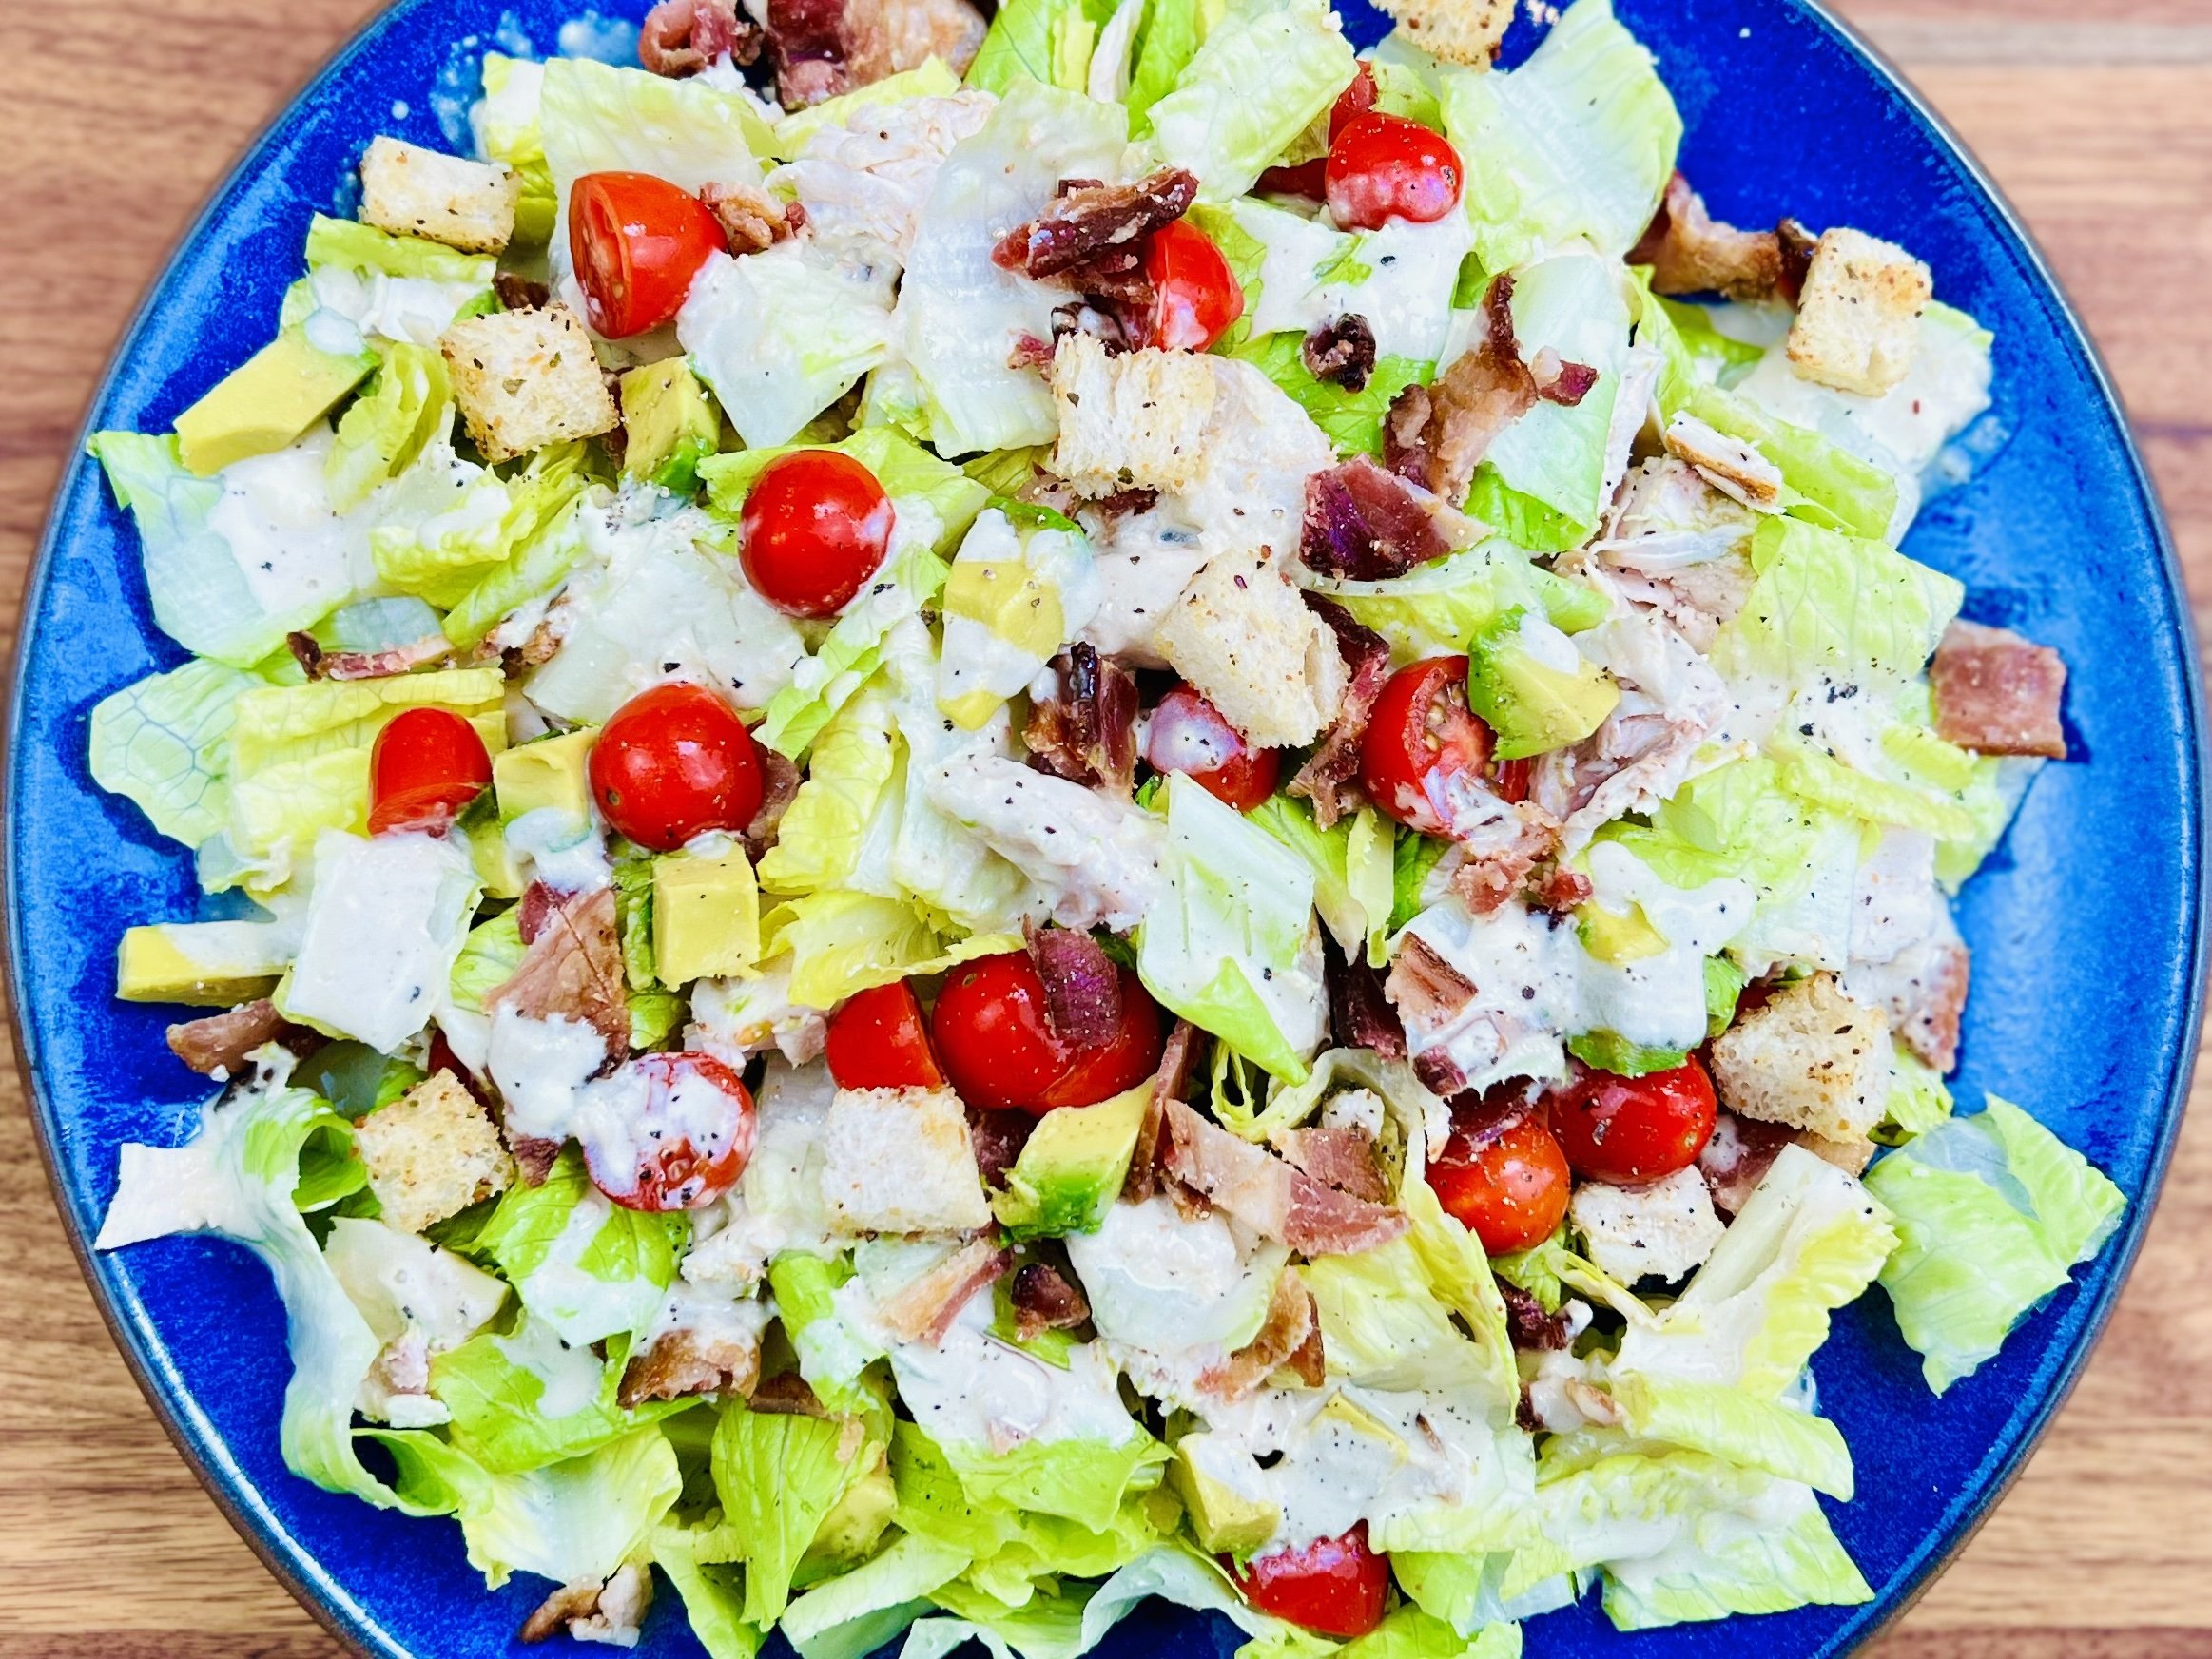
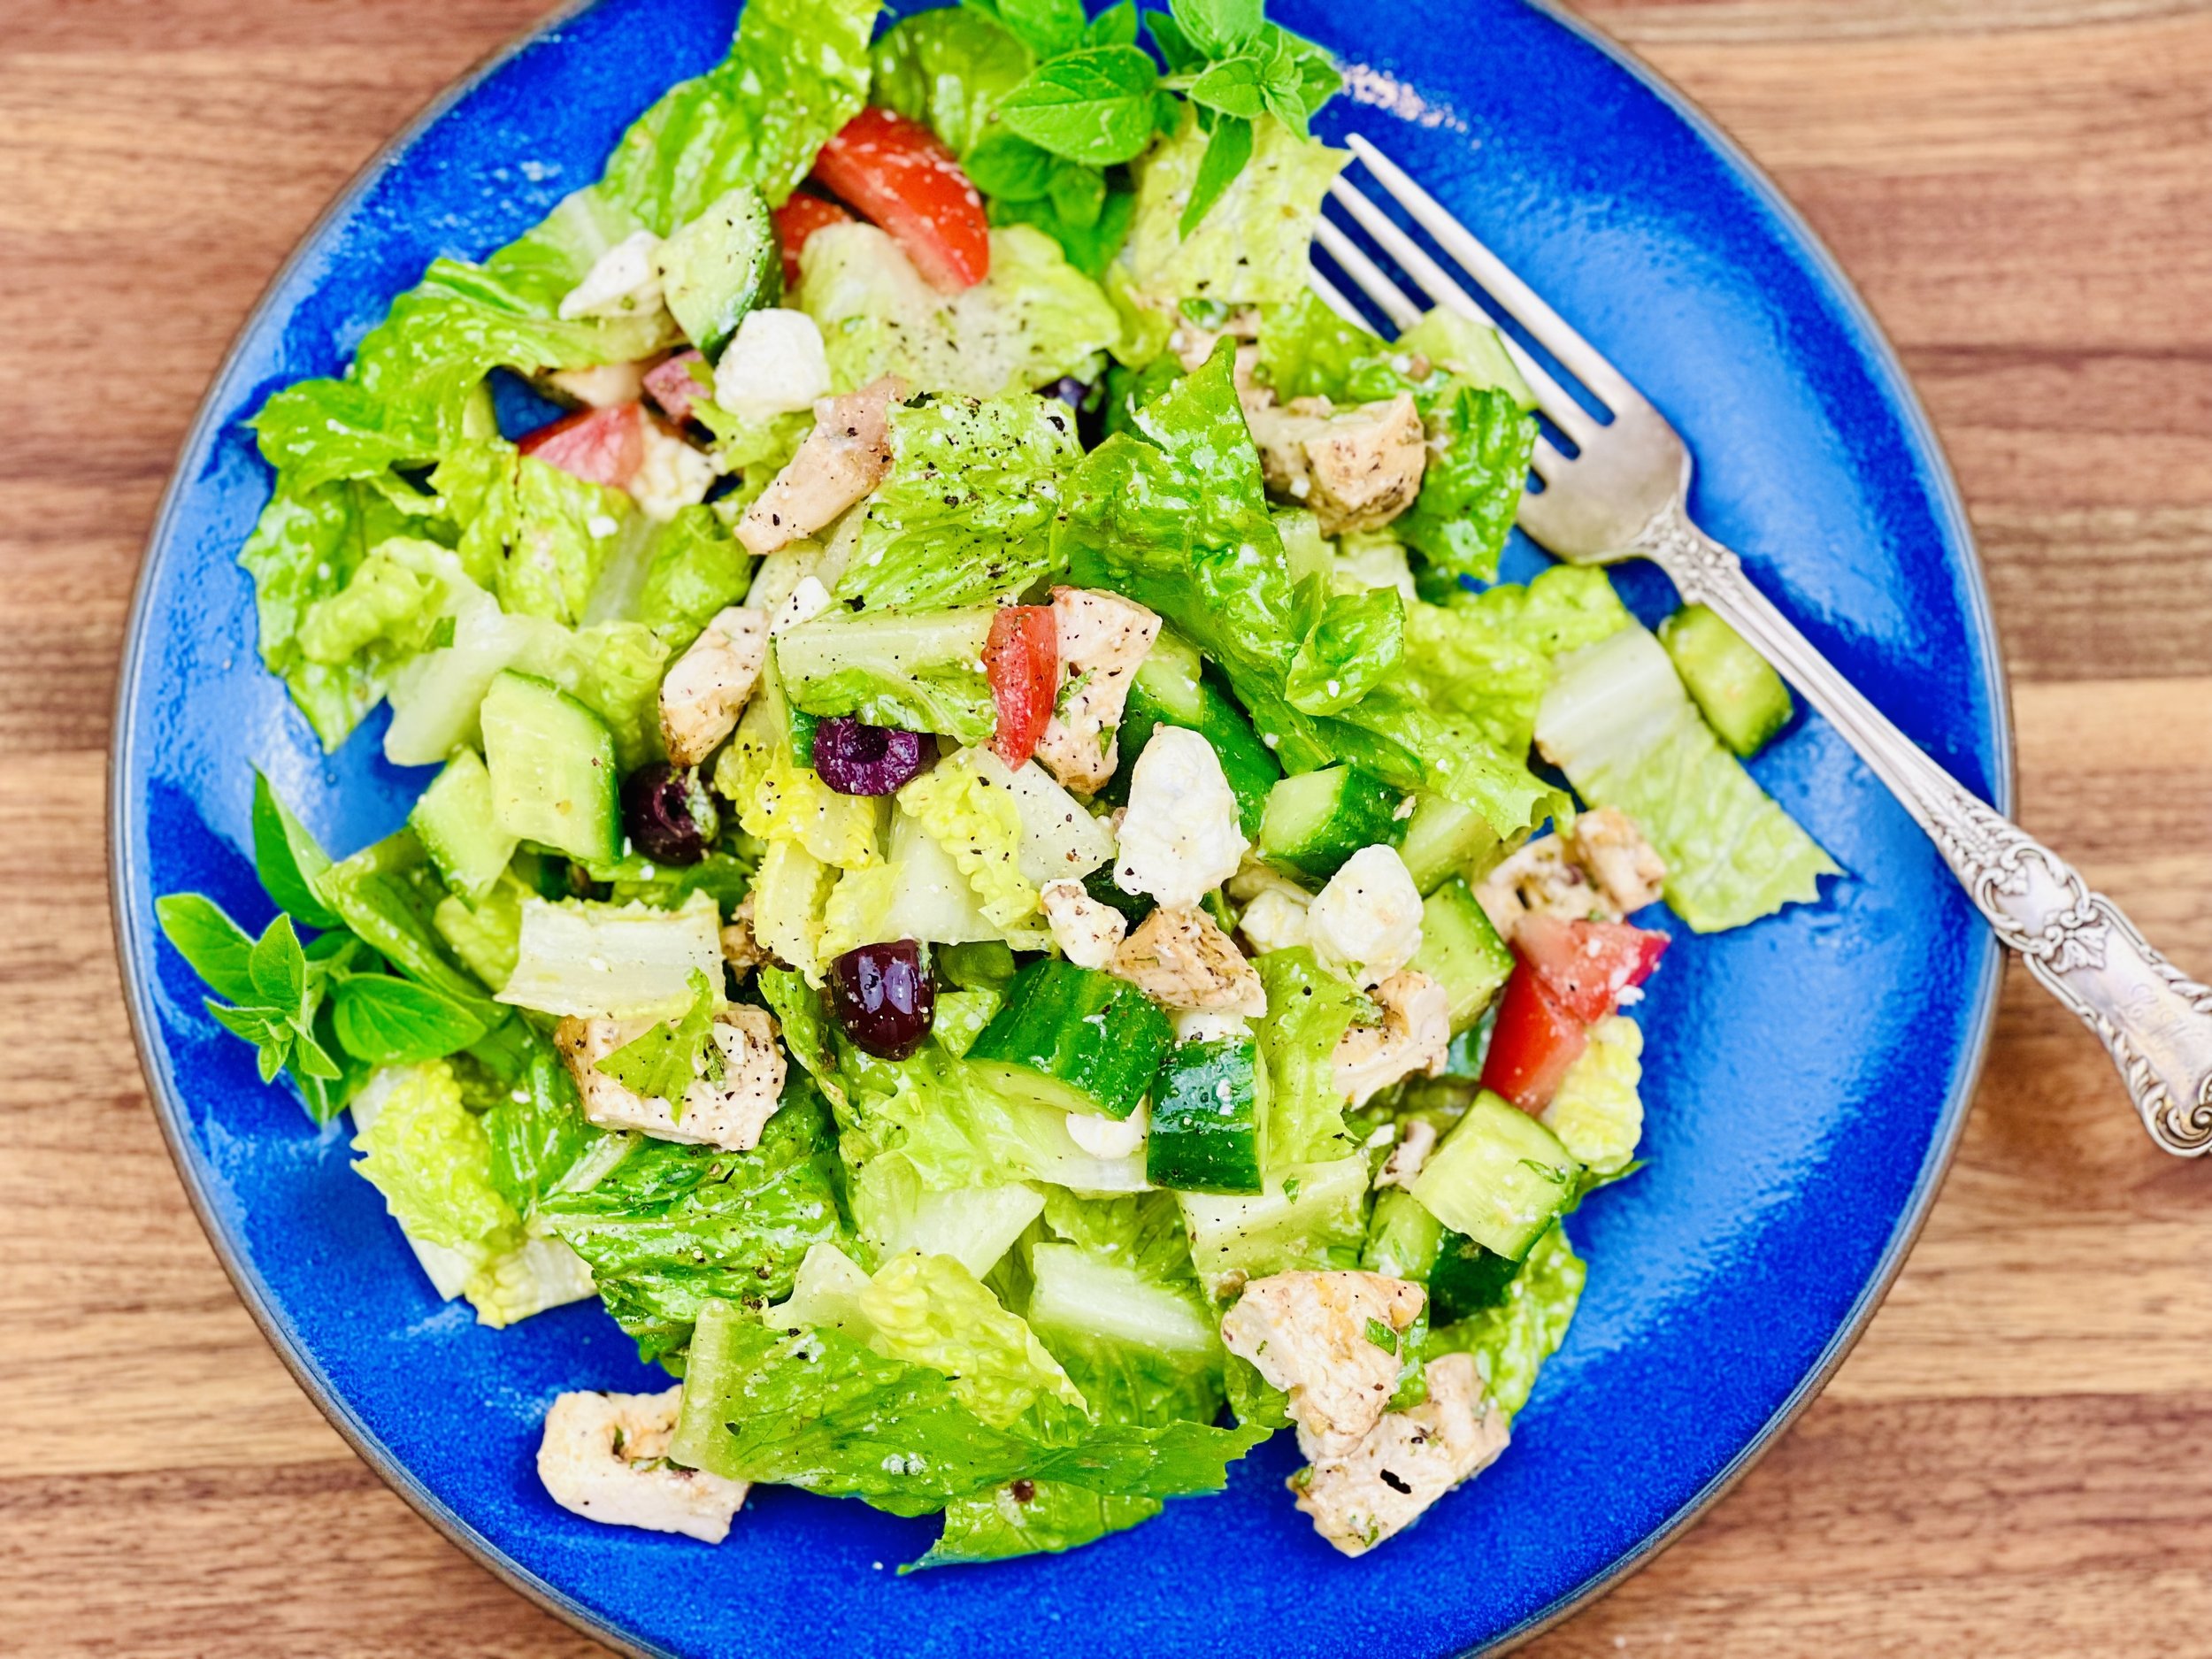
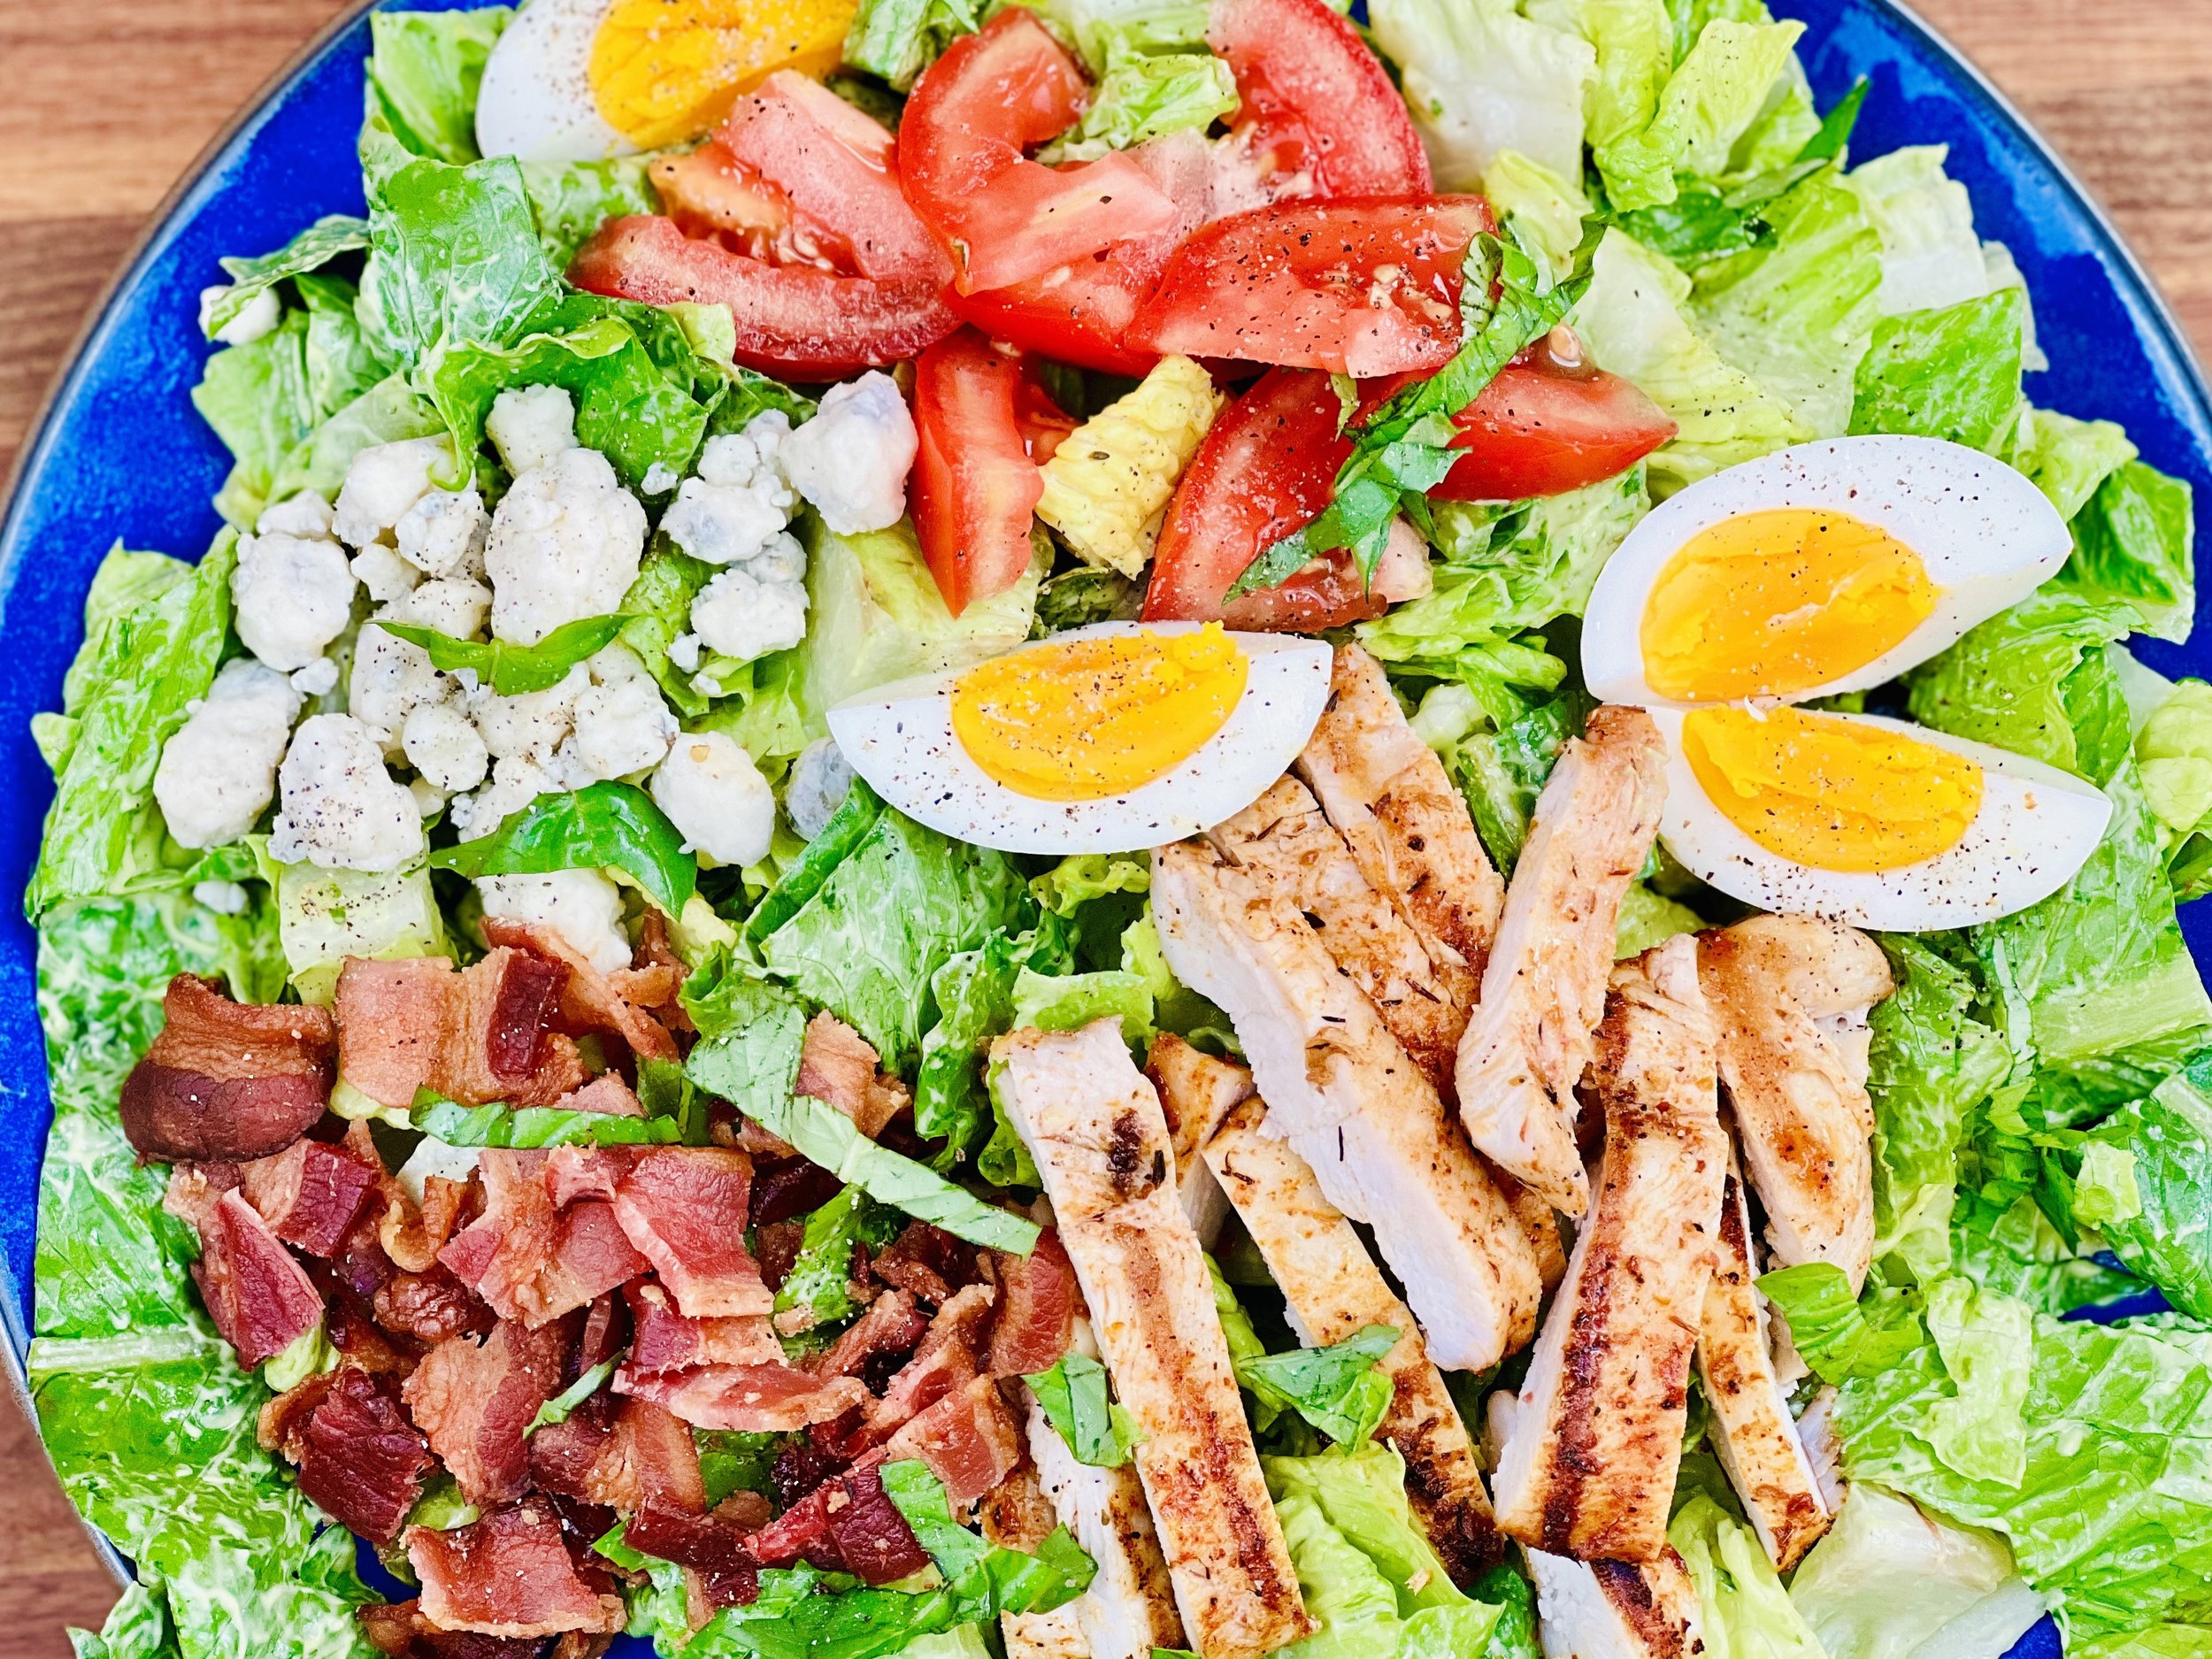
Chicken Cobb Salad with Creamy Avocado Dressing (Low FODMAP)
20 Minutes prep • 10 Minutes cook • Low FODMAP • Gluten-free • Serves 4
20 Minutes prep • 10 Minutes cook • Low FODMAP • Gluten-free • Serves 4 • Ok to make ahead: Steps 1-6
This salad is simple to make, beautiful to look at, and has the most delicious creamy avocado dressing! It’s a perfect main course dinner for a warm summer evening, or a wonderful hearty side for your next barbecue. Make extra Avocado Caesar dressing because it’s so creamy, flavorful, and thick, it makes a great dip for veggies and crackers as well.
Ingredients: Salad
1 pound boneless skinless chicken breasts
2 tablespoons Smoke N Sanity Cajun Creole or Lemon Pepper Seasoning
1 tablespoon extra virgin olive oil
6 cups shredded lettuce
1/2 cup fresh basil leaves
1 cup chopped fresh tomatoes or cherry tomatoes, sliced
1/2 cup crumbled blue cheese
6 strips of bacon, cooked and crumbled
4 hard-boiled eggs, quartered
Ingredients: Avocado Caesar Dressing
1/2 avocado, chopped
3 tablespoons heavy cream, plus more to thin the dressing if needed
3 tablespoons mayonnaise
2 teaspoons lemon juice
1/4 cup fresh basil, chopped, plus more for serving
1/2 teaspoon Smoke N Sanity Essence of Garlic Salt
1/4 teaspoon Kosher salt
1/4 teaspoon black pepper
Directions
(1) Cook the bacon: Preheat the oven to 400 degrees F. Line a rimmed baking sheet with foil and lay out the bacon slices so they aren’t crowded together. Bake 8-10 minutes, until the bacon is crisping, watch closely so it doesn’t burn. Remove from the oven and lay on paper towels to cool. Once cool, chop the bacon and set aside.
(2) Hard boil the eggs: Put the eggs in a saucepan and just cover with cold water. Bring the water to a boil on the stove. Turn the heat off and cover the pan. Let the eggs sit in the pan to cook in the hot water for about 10 minutes (longer if you like a very firm yolk). Pour off the hot water and run cold water over the eggs until they are cooled. The fresher the eggs, the harder they are to peel after boiling so use eggs that you have had for a little while if you can!
(3) Slice the chicken: You can buy “thin cut” chicken, or slice it horizontally yourself. This will help the seasoning reach more of the chicken and it will cook quite fast on the grill.
(4) Marinate and grill the chicken: In a bowl, toss the chicken with olive oil and cajun or lemon pepper seasoning. Set aside until you’re ready to cook. Set your grill, grill pan, or skillet to medium-high. Grill the chicken until lightly charred and cooked through, turning halfway through cooking, about 10 minutes. Remove from the heat and let rest on a cutting board while you make the rest of the salad.
(5) Make the dressing: While the chicken is cooking, combine all ingredients in a blender or in a compact food processor and blend until creamy, adding more cream or lactose-free whole milk to thin the dressing if needed. Taste and adjust the salt and pepper as needed.
(6) Slice the chicken: Cut the chicken into bite-size pieces and chop the bacon into crumbles.
Make-ahead note: At this point, you may set everything aside in the refrigerator until you’re ready to plate and serve.
(7) Finish: In a large bowl, toss the greens and basil with the dressing.
(8) Plate and serve: Put 1/4 of the dressed greens on each plate, then arrange the chicken, tomatoes, cheese, bacon, and eggs on top. Drizzle with additional dressing if you like. Sprinkle with chopped fresh basil and a few grinds of black pepper.
Eat and enjoy every bite because you can!
Recipe note: I use Diamond Crystal Kosher salt in all my recipes because it has a wonderful flat and crisp flake that tastes delicious. It is also the least salty salt available so you can use it more liberally as a seasoning than you can table salt or sea salt. If you use another type of salt, you may need to reduce the amount so it is not over-salted.
Have a question you’d like to have answered? Email me at hello@ibsgamechanger.com
Link note: This post may contain affiliate links for you to easily purchase items that are linked. I may earn a small commission from qualifying purchases but none of this costs you a thing so feel free to use the links! In addition, for some items, I have provided a special discount code for IBS Game Changers so be sure to use the code when you purchase an item to get the discount that has been arranged just for you.
More Deliciously Low FODMAP™ salad recipes


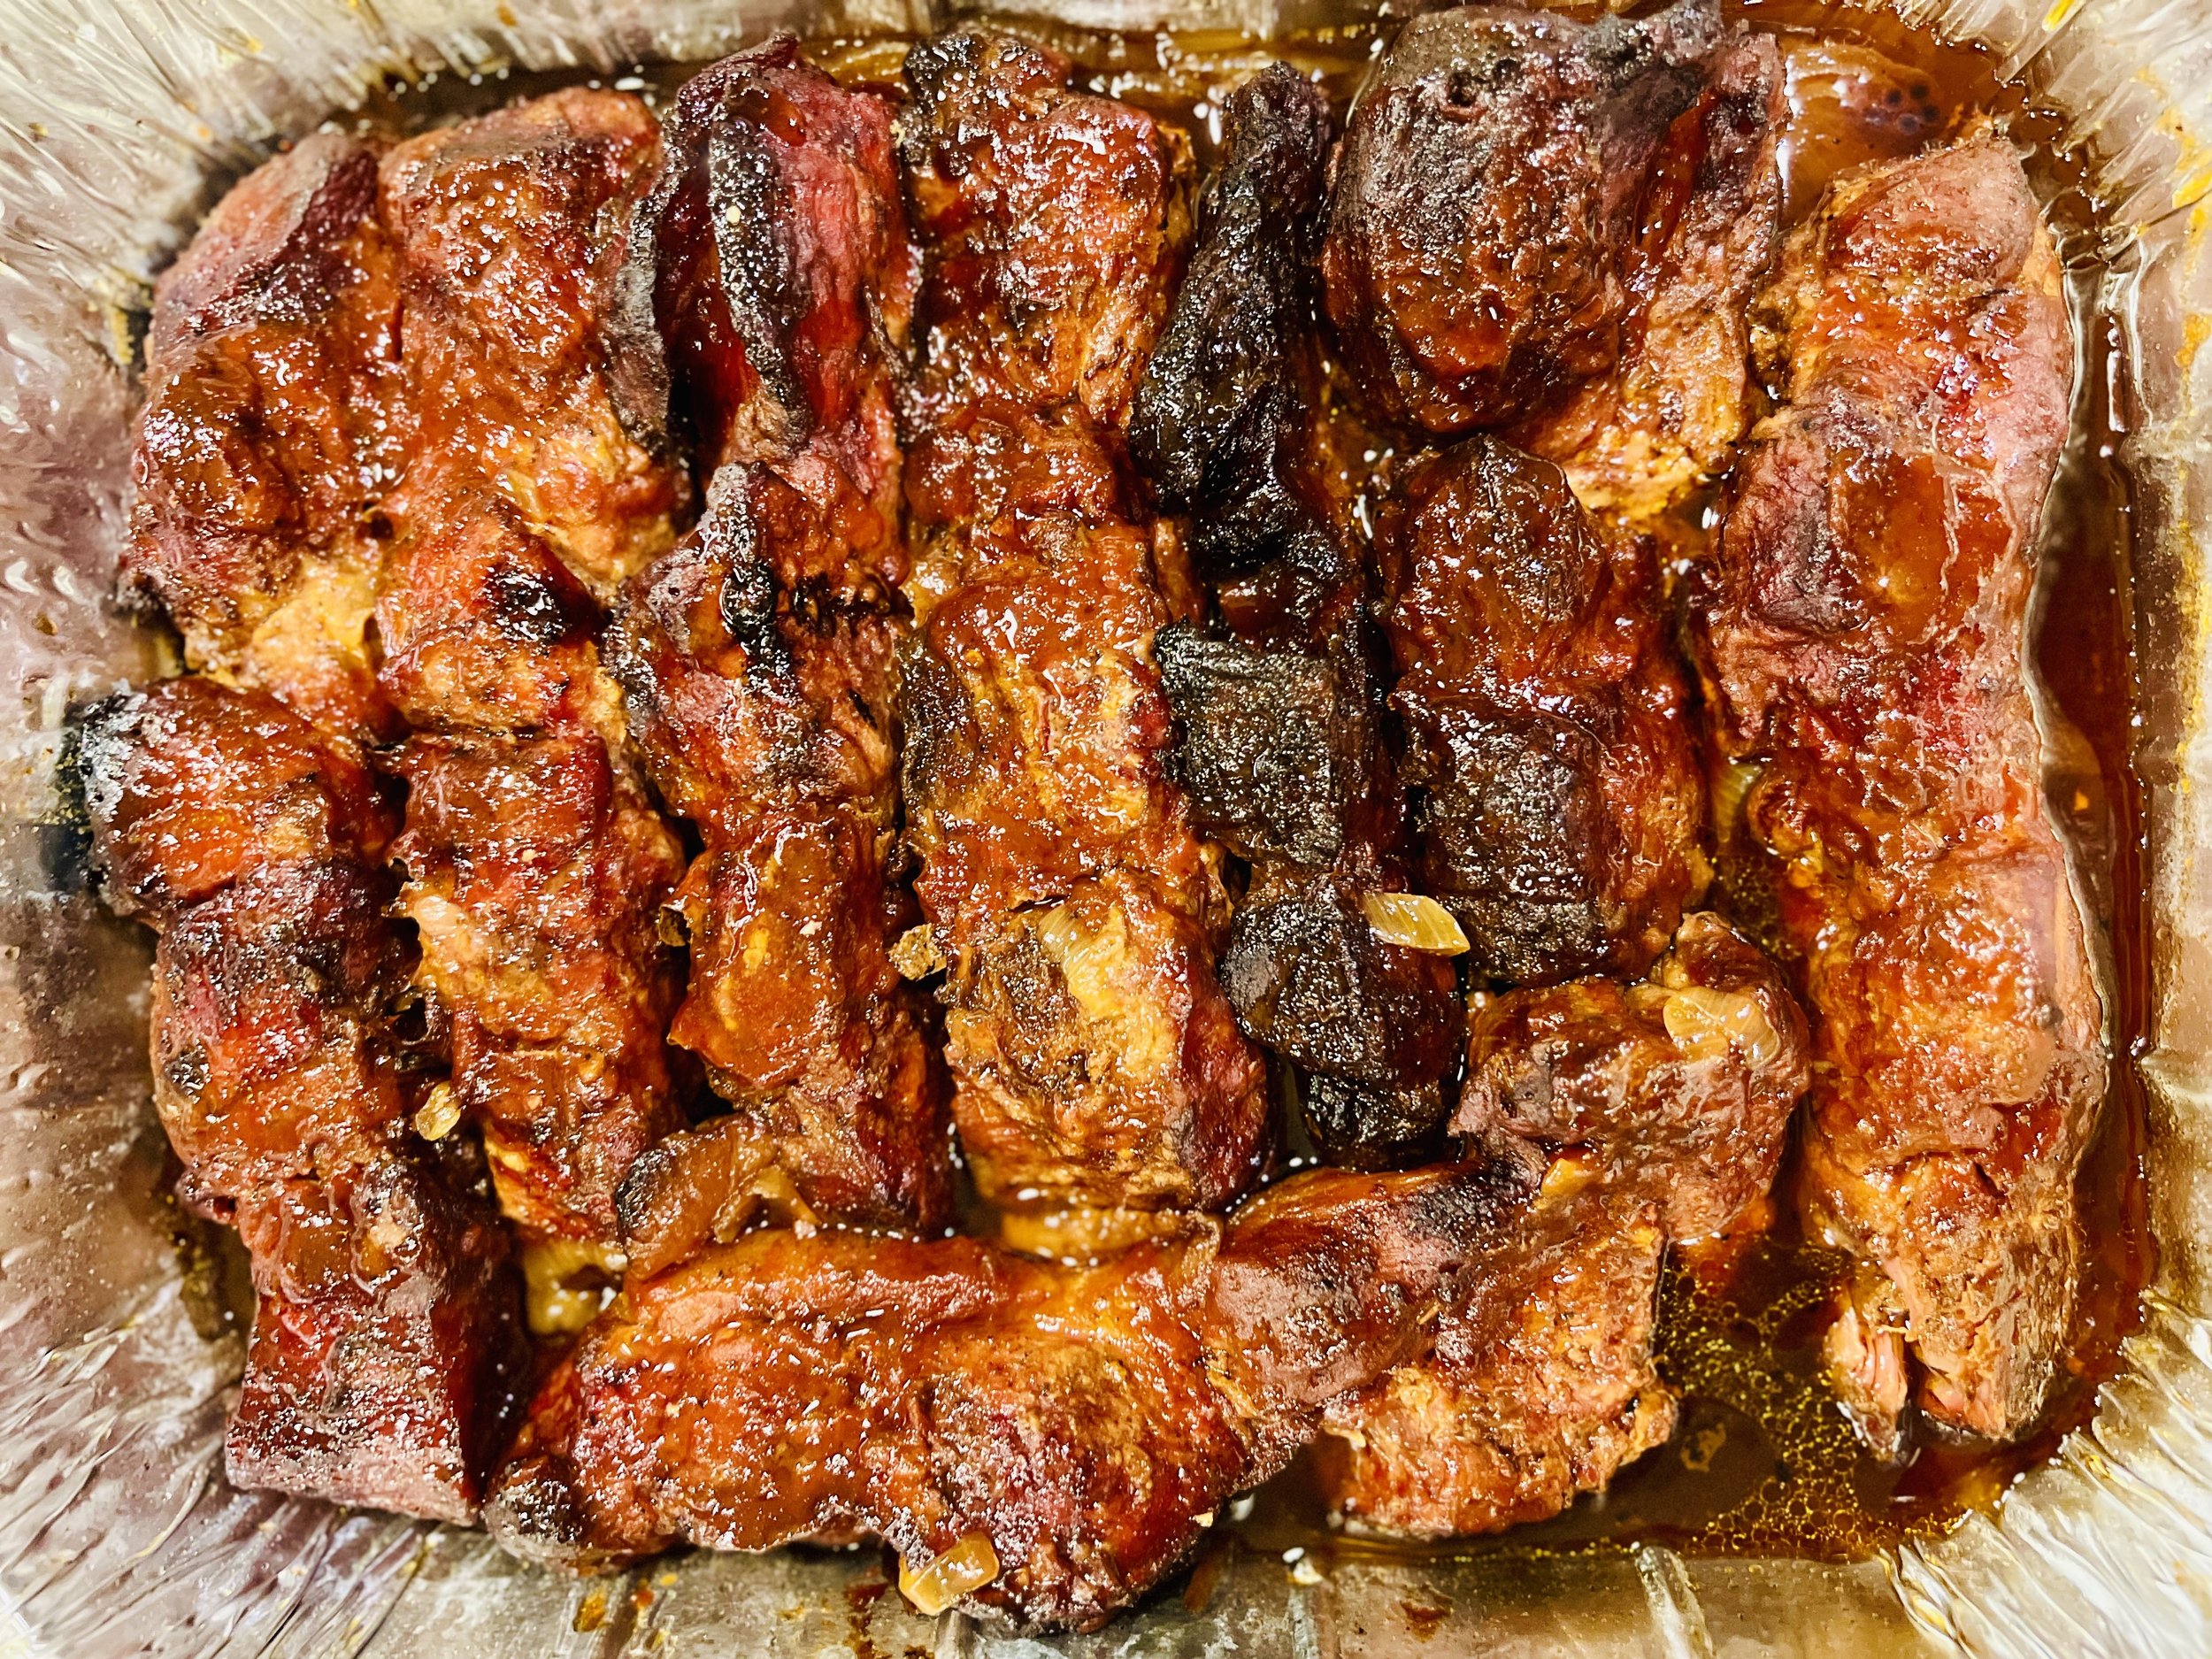
Smoked Country Style Boneless Pork Ribs (Low FODMAP)
15 Minutes prep • 7 hours cook • Low FODMAP • Gluten-free • Lactose-free • Serves 4 - 6
15 Minutes prep • 7 hours cook • Low FODMAP • Gluten-free • Lactose-free • Serves 4 - 6 • Ok to make ahead: Steps 1-6
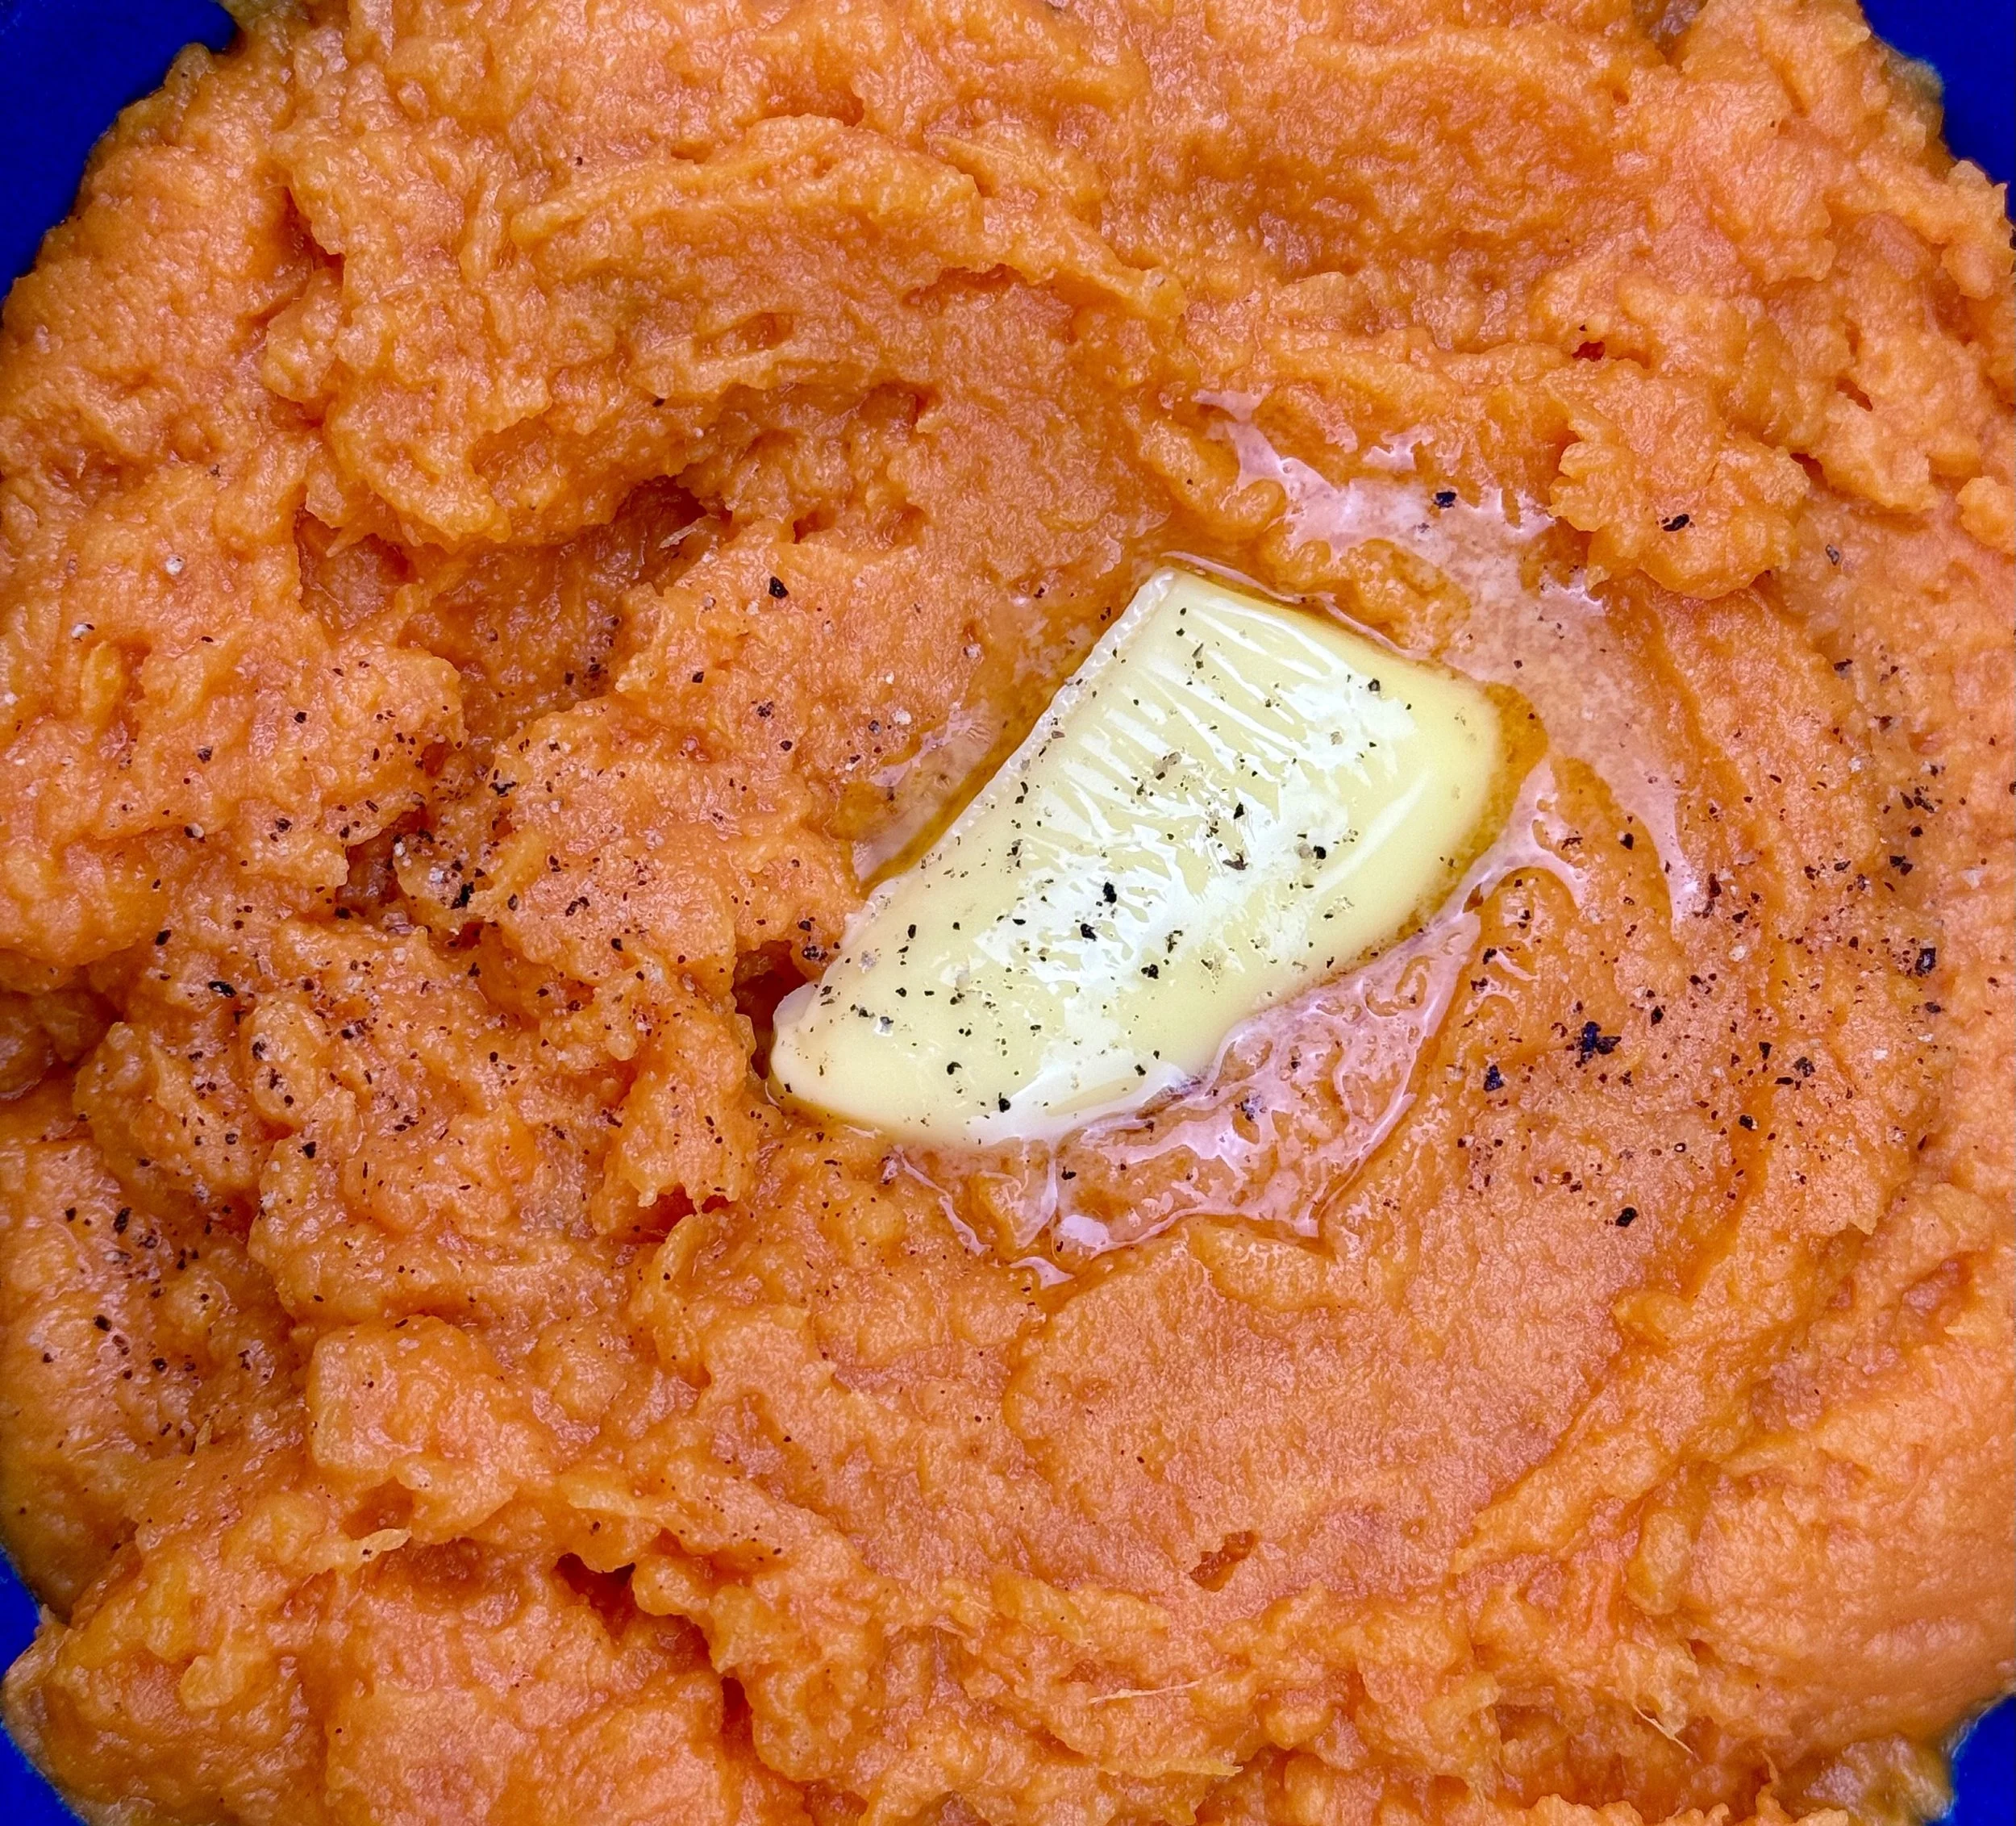
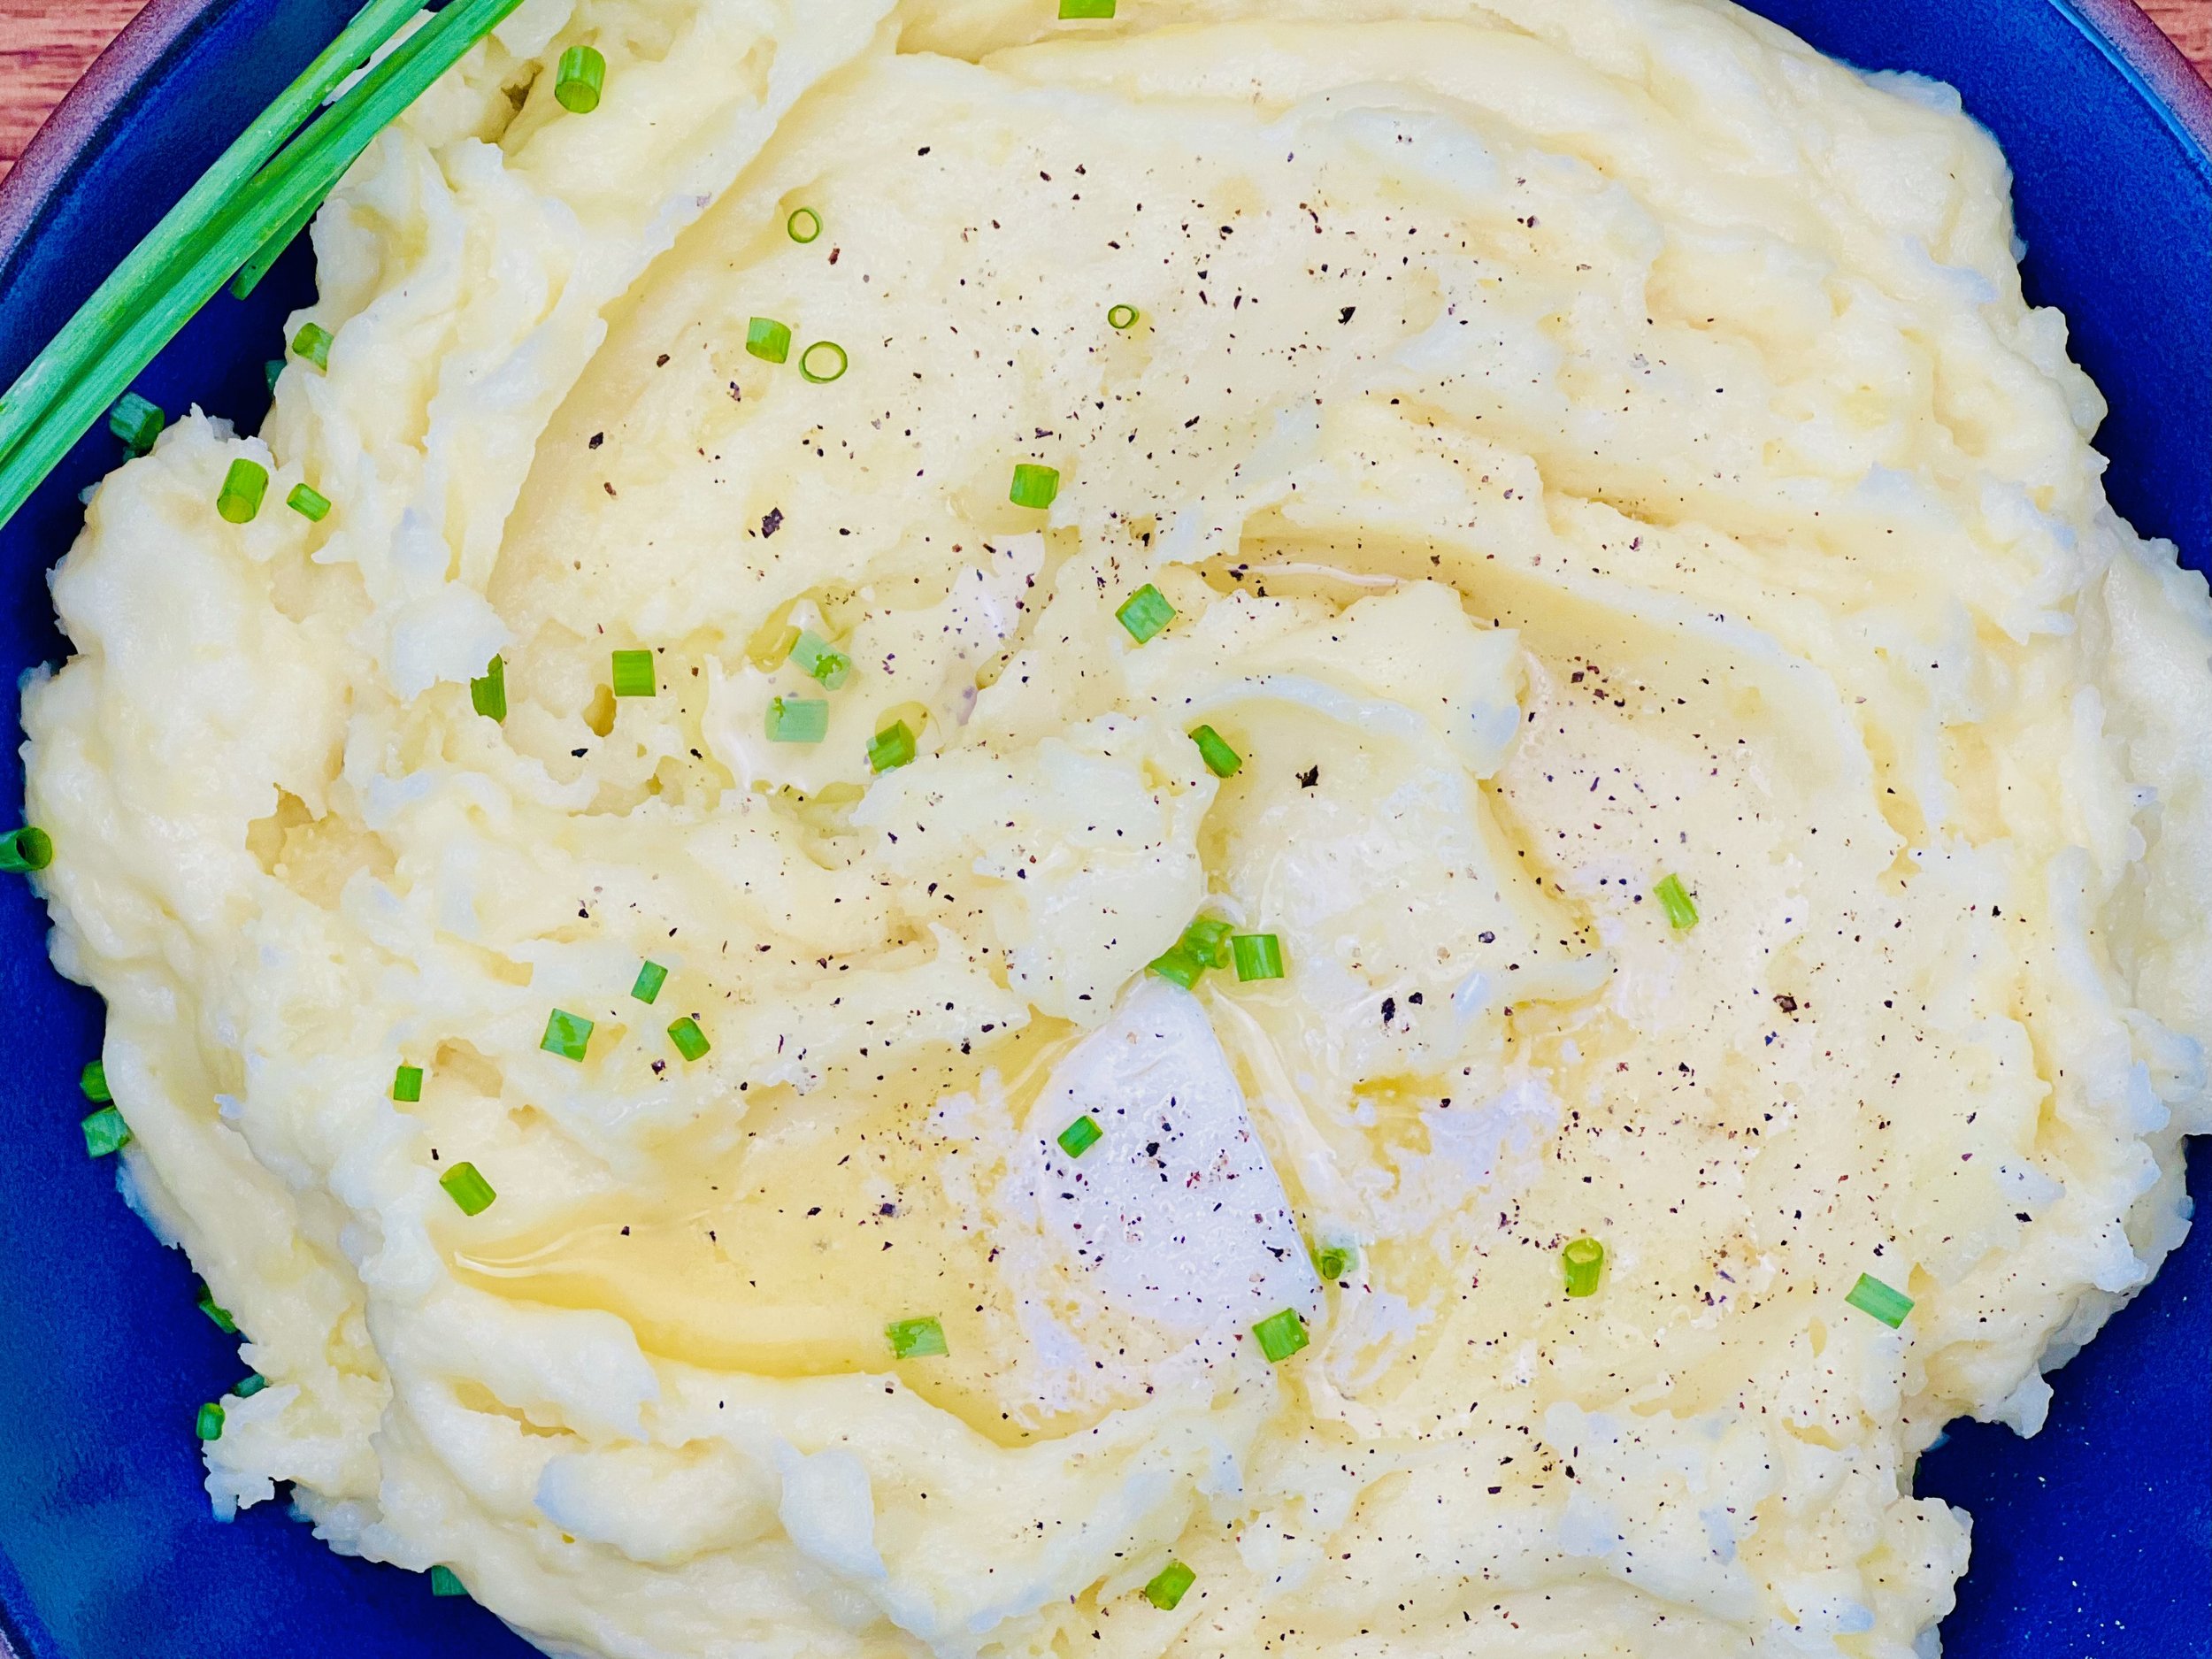
Country-style ribs can be the most tender and delicious cut of meat if you give them plenty of time to cook. And, because they’re boneless, they’re much easier (and less messy) to eat than traditional ribs. This recipe consists of two parts: The first is the slow cook on the Traeger pellet grill to bring the meat up to temperature and add the smoky flavor, and the second part is the braise to ensure the meat is tender and delicious. It’s worth the time to cook these ribs right! They do reheat beautifully in the oven so consider making these a day ahead and reheat to serve if you don’t have time to cook them on the day you plan to serve them. They pair wonderfully with my Buttery Mashed Yukon Gold Potatoes or Mushroom Pilaf (for a super low-carb option).
Ingredients
One package of country-style pork ribs (about 3 pounds)
2 - 3 tablespoons mustard (I used Dijon)
3 - 4 tablespoons of your favorite BBQ rub (I used Smoke N Sanity Triple S All Purpose Seasoning, use code IBSGC15 for 15% discount)
One cup of beef or chicken broth (I used Whole Foods Organic 365 chicken broth)
1 tablespoon apple cider vinegar
½ - 1 whole yellow onion, sliced (optional if tolerated)
1/2 cup of your favorite low FODMAP bbq sauce (I used: Smoke N Sanity Sweet and Sassy BBQ sauce, use code IBSGC15 for 15% discount)
Directions
(1) Prepare: Preheat your Traeger (or other pellet grill) to 250 degrees F. Remove the country-style pork ribs from the package and pat dry. Rub each of the ribs with mustard. Liberally sprinkle the bbq rub on all sides of each rib section
(2) Smoke the ribs: Place ribs directly on the preheated grill, fat side up if evident, and cook until the internal temp reaches 155 degrees. This takes 3- 4 hours. When the internal temperature is reached, remove the ribs to the braising pan and follow the braising directions (below).
Braising Directions
(3) Prepare the braise: Add the beef or chicken broth and the apple cider vinegar to the bottom of the braising pan. (I used an aluminum foil pan for easy cleanup. Use a pan small enough to be sure the braising liquid surrounds but doesn’t cover the meat completely. It’s ok for the ribs to be touching each other while braising). If you can tolerate a bit of onion, slice up ½ to 1 whole yellow onion and put the onion slices in the pan with the braising liquid (if you can’t tolerate any onion, leave it out, the ribs will still be delicious!)
(4) Braise the ribs: After the ribs reach 155 degrees F, remove them and place them in the braising pan. Pour the BBQ sauce over the ribs and cover the braising pan tightly with foil and place it back on the grill. Cook at 250 degrees for another 2 – 3 hours or until the internal temperature reaches 170 degrees F and the meat is tender and easily pulls apart with a fork.
(5) Finish: Remove from the smoker and allow the meat to rest for 10 - 15 minutes before serving.
(6) Plate and serve: To serve, spoon the pan juices over the ribs and serve the ribs over my Buttery Mashed Yukon Gold Potatoes or Mushroom Pilaf (for a super low-carb option). Add a salad or a cooked veggie side and you’ve got a perfect meal!
(7) Storage: Store leftovers (with the braising juices!) in an airtight container in the refrigerator. Reheat in a 300-degree oven for about 20 – 30 minutes. These reheat beautifully so consider making these a day ahead and reheat to serve.
Eat and enjoy every bite because you can!
Have a question you’d like to have answered? Email me at hello@ibsgamechanger.com
Link note: This post may contain affiliate links for you to easily purchase items that are linked. I may earn a small commission from qualifying purchases but none of this costs you a thing so feel free to use the links! In addition, for some items, I have provided a special discount code for IBS Game Changers so be sure to use the code when you purchase an item to get the discount that has been arranged just for you.
More Deliciously Low FODMAP™ BBQ recipes


15 Minutes • Gluten-free • Lactose-free • Low FODMAP