Deliciously Low FODMAP

Inspire yourself with hundreds of delicious low FODMAP recipes, tips, and tools, and enjoy the abundance that is yours even when you have IBS.
Use the buttons and filters to find something specific or browse the complete collection for inspiration.
Discover a treasure trove of recipes with my FREE recipe club! Get new ideas delivered straight to your inbox every week.
Deliciously Low FODMAP is a trademark of IBS Game Changer, LLC
Filter to find Recipes and Tools
More Filtering Options
- All 827
- Appetizer 56
- BBQ 49
- Bowl 32
- Breakfast 69
- Cocktails 13
- Collection 1 58
- Collection 10 27
- Collection 11 30
- Collection 12 27
- Collection 13 31
- Collection 14 29
- Collection 15 31
- Collection 16 34
- Collection 17 31
- Collection 18 33
- Collection 19 36
- Collection 2 32
- Collection 20 33
- Collection 21 33
- Collection 22 40
- Collection 23 63
- Collection 24 46
- Collection 3 28
- Collection 4 29
- Collection 5 30
- Collection 6 32
- Collection 7 31
- Collection 8 31
- Collection 9 32
- Condiments 6
- Crock Pot 4
- Dessert 119
- Diabetes Game Changer Exception Protocol Contains Alcohol 11
- Diabetes Game Changer Exception Protocol Contains Flour 113
- Diabetes Game Changer Exception Protocol Contains Flour AND Sugar 79
- Diabetes Game Changer Exception Protocol Contains Sugar 52
- Diabetes Game Changer First Four Weeks 405
- Dinner 371
- Drink 8
- Easter 1
- Free Guide 17
- Gluten-free 686
- Gut Microbiome 2
- Guthealth 3
- Holidays 73
- IBS Triggers 4
- Keto Friendly 178
- Lactose-Free 184
- Low Carb 22
The Beginner’s Guide to Intermittent Fasting
For those of us with IBS, intermittent fasting can be a strategy to give our gut more time to rest, and more time to be free of discomfort. Sound intriguing?
Ever wonder where we learned “breakfast is the most important meal of the day?” It was from the breakfast food manufacturers! This idea was invented in the 18th century and, even though it has been proven to be a myth, the breakfast food manufacturers have spent many billions of dollars reinforcing the message so we will buy their products. For those of us with IBS, intermittent fasting can be a strategy to give our gut more time to rest, and more time to be free of discomfort. Sound intriguing?
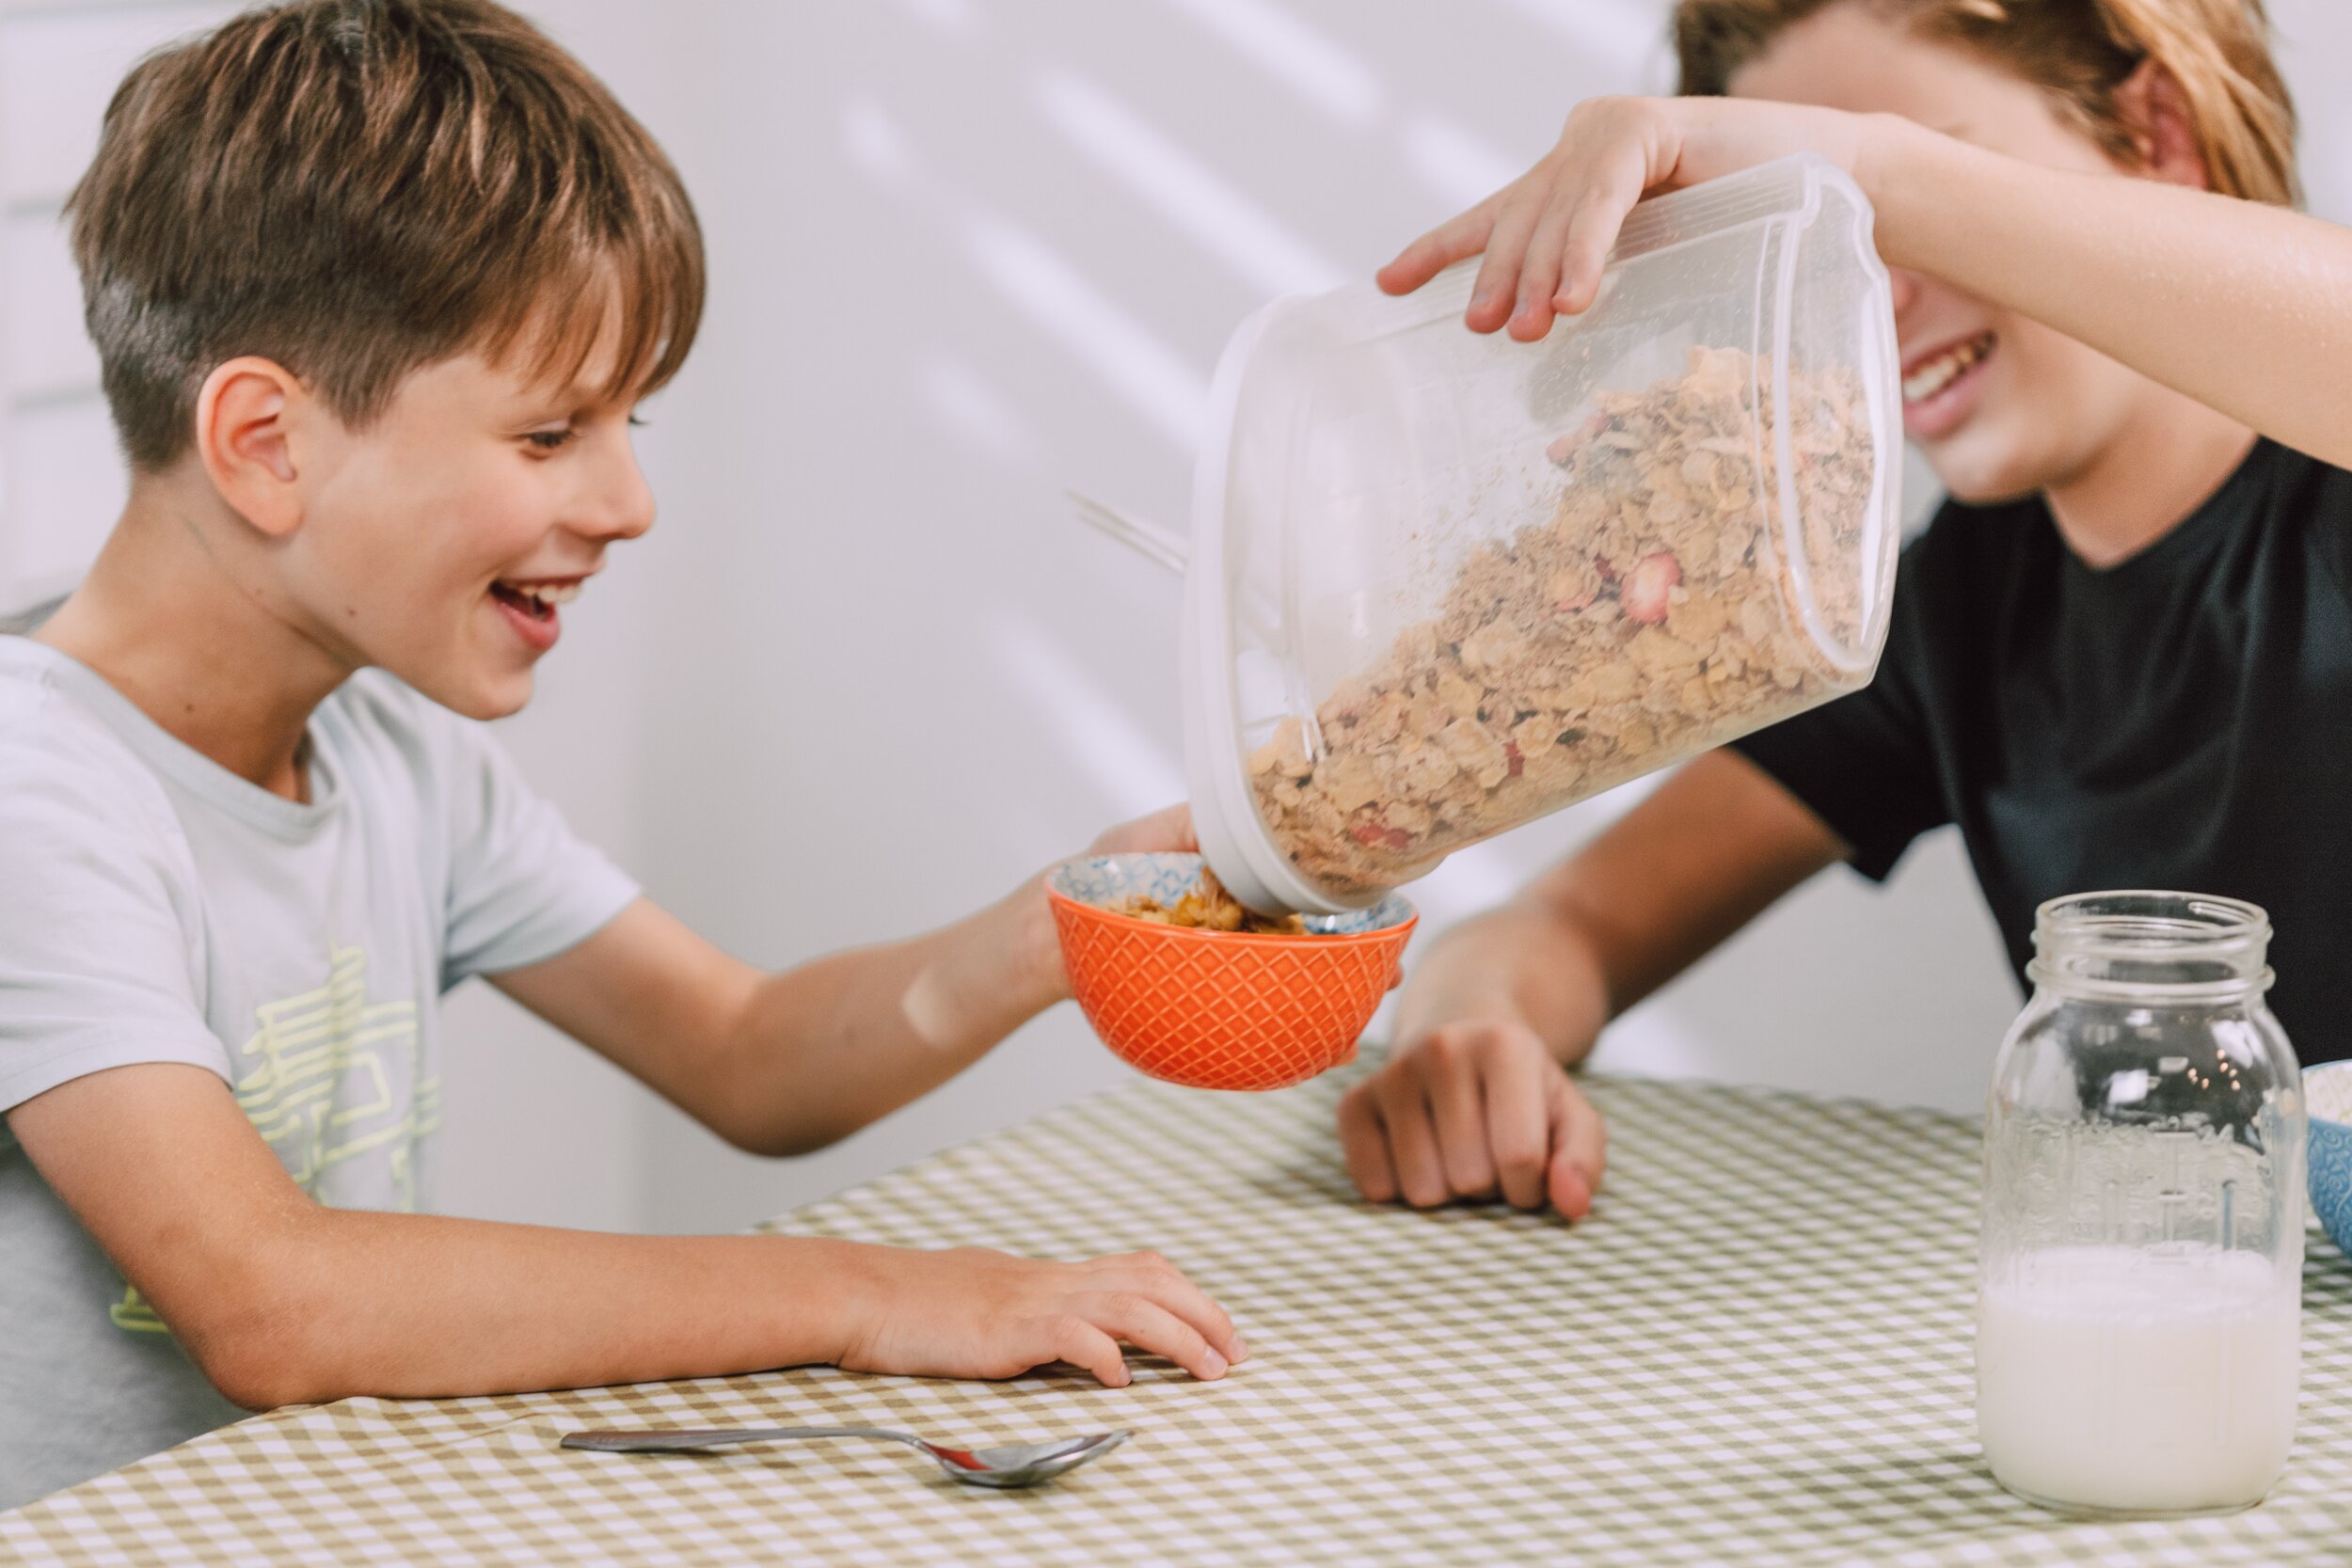
Ever feel like eating first thing in the morning is exactly the wrong thing for your gut? You are probably right! Every time we introduce calories to our system (even in the form of a drink) it has to take action. And that means rest and recovery time is over. If we eat meals and snacks all day long, that means the only rest we give our gut is during the night. For most of us, this isn’t enough time to rest and recover from the work of digesting all day.
Once I learned the facts about frequent meals and intermittent fasting, I decided to give it a try myself. It was a game-changer for me. Now, I don’t eat until after noon. Then I eat lunch and dinner. That means my gut gets to rest from when I finish dinner to when I break my fast after noon the next day. This is usually about 16 hours. The longer rest time works wonders for my gut and more than that, my mind is clear and focused from the moment I wake up until the moment I decide it's time to have my first meal of the day. It's a phenomenal experience every day. Once you get used to it, it's easy and oh so freeing.
Before I learned about intermittent fasting, I thought I had to eat very frequently and that I'd get weak, light-headed and grumpy if I didn't. That turns out to be 100% NOT true! The old days of carrying snacks and bringing my own meals are gone. Now, if there’s nothing to eat or nothing to eat that won’t trigger my IBS I can relax knowing my body will take care of me. It’s an incredibly empowering feeling.
A fast is better than a bad meal. ~Irish Proverb
It may not be right for everyone, but if you’re wondering if it might be right for you, give it a try. But first, check out this very practical Beginner's Guide to Intermittent Fasting to learn more. This guide was produced by my sister site, Diabetes Game Changer, and it’s a simple explanation full of very appropriate information for all of us with IBS who are thinking of adding intermittent fasting to our daily routine.
More IBS Game Changer Tips and Tools you might find helpful


Smoke N Sanity low FODMAP seasonings hit the spot!
Delicious, easy to use, and easy to love! As you know, easy and delicious are two of our favorite words.

IBS Game Changers get 10% off using the code IBSGC10
You'll notice we've started using Smoke N Sanity low FODMAP seasonings for extra flavor in some of our recipes. That's because, they're delicious, easy to use, and easy to love! As you know, easy and delicious are two of our favorite words. Some of our favorites from the Smoke N Sanity seasoning collection include:
Essence of Garlic Salt - I use this one the most. It has become a real staple in my FODMAP-friendly pantry.
Essence of Onion Salt - Another great pantry staple when you're avoiding onions.
Lemon Pepper - We used this in our 25-Minute Lemon Pepper Chicken this week.
Supper Club Ranch - We love this with our Chipotle Chicken Crunch Wraps.
Cajun Creole Seasoning - This is wonderful in our Creamy Cajun pasta.
Garlic Parmesan - You'll find this in our Garlic Parmesan Seed Crackers.
And some good basics just to have on hand...
Triple S All Purpose Seasoning
This post may contain affiliate links so you can easily purchase items listed on the page. In some cases we have provided a special discount code for IBS Game Changers so be sure to use it!
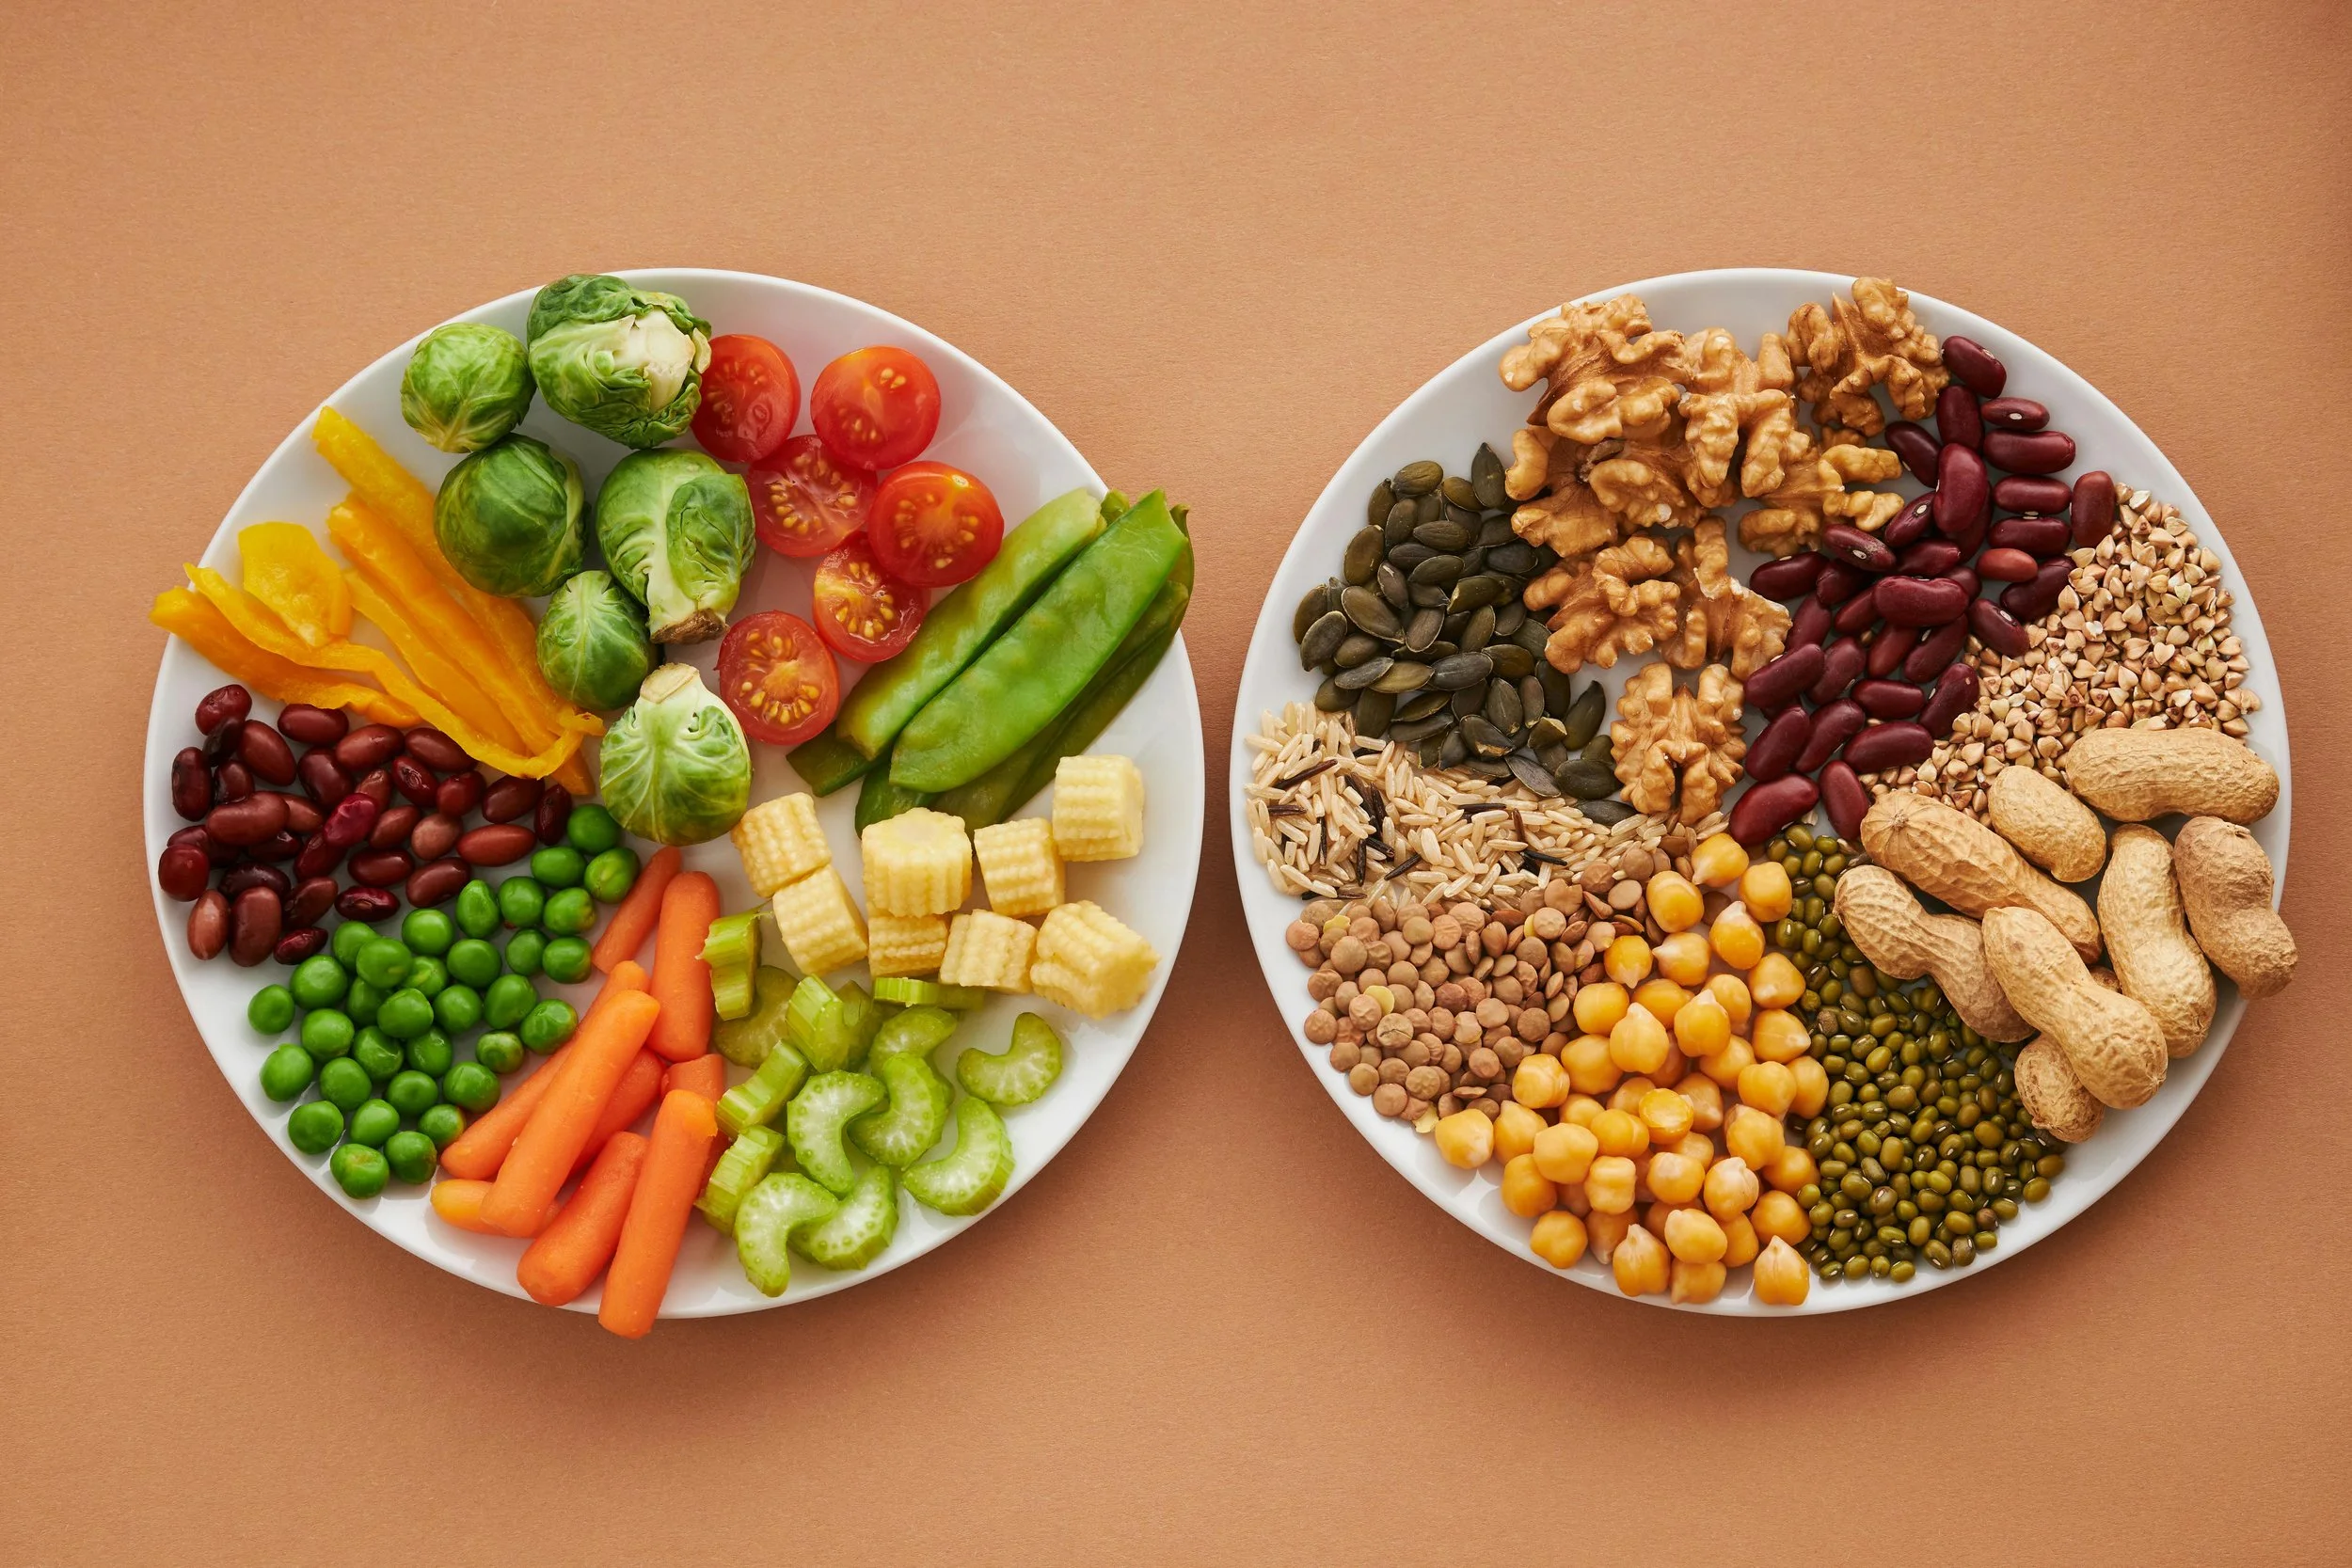
Why snacking may be your gut’s worst enemy (especially when you have IBS!)
Learn why: what and how often we eat plays a significant role in IBS symptoms.
I am very pleased to share this guest post written by my amazing sister, Sarah Aitken, RN, MS, WHNP/FNP, of Diabetes Game Changer. Sarah has done extensive research to determine the effect of snacking on our gut and she has considered reasons, other than the specific foods we eat, that might be causing our IBS symptoms to flare up.
Did you know, what and how often we eat plays a significant role in our IBS symptoms? Snacking may even be the culprit behind an imbalanced gut microbiome, a state of chronic inflammation, and even leaky gut syndrome.

Your body was designed to function optimally when it has significant periods of time away from digestion. When we eat frequently throughout the day, our cells get no downtime during which to clean out debris and our gut biome gets no chance to establish a healthy colony.
Sarah’s article is easy to read and will help you understand your gut biome and how to keep it healthy so it can work FOR you not against you. Her conclusions are quite important for each of us to consider as we explore our own personal IBS profile.
More IBS Game Changer Tips and Tools you might find useful
Blueberry power crumble
60 minutes (mostly cooking time) • Gluten-free • Dairy-free • Very low sugar • Low FODMAP • Makes 8 servings
60 minutes (mostly cooking time) • Gluten-free • Dairy-free • Very low sugar • Low FODMAP • Makes 8 servings • This crumble matches the sweet tang of blueberries with the hearty nuttiness of oatmeal, pumpkin seeds, and sunflower seeds to make it not only a perfect breakfast but also delicious with a dollop of whipped coconut cream for dessert! Make them ahead and pop them in the microwave when you’re ready to enjoy them.

INGREDIENTS:
2 cups fresh blueberries (low FODMAP serving size for blueberries is 1/4 cup)
1 tablespoon lemon juice
1 teaspoon lemon zest
2-3 tablespoon maple syrup
1 tablespoon arrowroot (or corn starch)
1½ cups gluten-free rolled oats
3 tablespoon raw pumpkin seeds
3 tablespoon raw sunflower seeds
1 tablespoon white chia seeds
⅓ cup coconut oil
Pinch of sea salt
INSTRUCTIONS:
Preheat oven to 375 degrees F.
In a bowl, combine blueberries, lemon juice, lemon rind, maple syrup, and arrowroot (or corn starch) or arrowroot. Mix together and set aside.
In a food processor pulse sunflower seeds and pumpkin seeds until they become finely chopped. Add oats, chia seeds, salt, and coconut oil, pulse until the mixture becomes moist and crumbly.
Lightly oil your ramekins or baking dish with coconut oil and put the blueberries in the bottom of the dish. Place crumble mixture on top of blueberries in the baking dish, until the entire top is covered with the crumble mixture.
Cook for 40 minutes or until the top just starts to brown and the blueberries are bubbling. Let cool for 10-15 minutes and enjoy! Alternatively cool and refrigerate for up to 3 days and heat before serving for the best flavor.
PRO TIP: This “breakfast crumble” makes a great dessert when paired with a scoop of lactose-free vanilla ice cream or a dollop of our real whipped cream or whipped coconut cream.
This recipe contains affiliate links so you can easily purchase items listed on the page. This is for your information and convenience. If you purchase through this link, I may earn a commission but there is no additional cost to you. Please read my disclosure for more information.
Fully loaded twice baked potatoes (low FODMAP)
2 hours (mostly cooking time) • Gluten-free • Low FODMAP • Serves 4
2 hours (mostly cooking time) • Gluten-free • Low FODMAP • Serves 4 • These twice-baked potatoes feature a lemon sour cream you’ll want to use on everything! The flavors of this loaded baked potato come together in a rich, filling, and delicious blend. Plan on ½ potato per person and serve with a salad such as our lemony Arugula salad.

INGREDIENTS:
2 - 4 slices of bacon
2 medium-sized Russet potatoes, scrubbed and dried (leave the peel on)
1 tablespoon garlic-infused olive oil
Kosher salt
Freshly ground black pepper
1 1/2 cups lactose-free sour cream (or lactose-free Greek yogurt)
1 tablespoon freshly squeezed lemon juice, plus more as needed to taste
1 cup finely chopped green onions (green part only), divided into 3/4 cup and 1/4 cup
½ cup fresh-grated Parmesan
½ cup grated extra sharp cheddar
DIRECTIONS:
Preheat oven to 400°F and line a rimmed baking sheet with foil.
Lay bacon slices close together on the foil and cook until crisp (about 10 minutes).
Cool bacon on paper towels then chop into small pieces and set aside. You may also cook your bacon on the stove or in the microwave. I just find this method the simplest and the least messy!
Make-ahead tip: you can make the bacon ahead of time and refrigerate until needed.
Adjust oven temperature to 475°F and line a rimmed baking sheet with parchment.
Poke potatoes all over with a fork to allow the steam to escape as they cook. Rub the skins with 1 tablespoon oil, then sprinkle with salt and pepper. Place on a parchment-lined baking sheet and cook for 45 to 50 minutes, until skins are crispy and you can insert a knife into the center with very little resistance beyond the skin. Make-ahead tip: You can bake your potatoes a few hours in advance, and just let them sit at room temperature until you’re ready to proceed.
While the potatoes are baking, prepare the sour cream. In a large mixing bowl, whisk together 1/2 teaspoon salt, lemon juice, and sour cream. Taste, and adjust seasoning accordingly with more salt and/or lemon juice as needed. Reserve 1/4 cup of the sour cream mixture for garnish—leave the rest in the large mixing bowl for use when the potatoes come out of the oven.
Once the potatoes are ready to come out, remove them from the oven and turn the oven temperature down to 375°F.
Let the potatoes cool for a couple of minutes until you can handle them. Cut each in half lengthwise, and scoop out most of the softened flesh, leaving about 1/4-inch around the inner peels, and transfer the potato flesh to the large mixing bowl with the sour cream in it. Leave the potato skins on the baking sheet.
Add 3/4 cup chopped green onions and 1/2 cup Parmesan to the bowl. Mix the potato flesh with the sour cream, green onions, and Parmesan until everything is smooth and combined (don’t overmix or it will become gluey). Taste and add additional salt, if needed to make the flavors “pop.” Spoon the mashed potato mixture back into the potato skins, sprinkle the tops with the cheddar and remaining Parmesan, and bake for 15 to 20 minutes, until cheese on top of potatoes is fully melted and bubbling.
Remove the potatoes from the oven and add the bacon pieces to the top. Broil for about 1 minute until the cheese starts to crisp.
To serve, top each potato half with a dollop of reserved sour cream, a sprinkling of chopped scallions, and a dusting of fresh-ground black pepper (optional).
Variations:
Add cooked broccoli (tops only) or sautéed oyster mushrooms to the potato mixture before you put it back in the skin for baking.
Use Japanese sweet potatoes instead of Russet potatoes. Or do one of each! (Just keep the mashed potatoes mixtures separate so as not to blend the flavors)
Use your imagination!
Original recipe inspired by Food52.
This recipe contains affiliate links so you can easily purchase items listed on the page. This is for your information and convenience. If you purchase through this link, I may earn a commission but there is no additional cost to you. Please read my disclosure for more information.
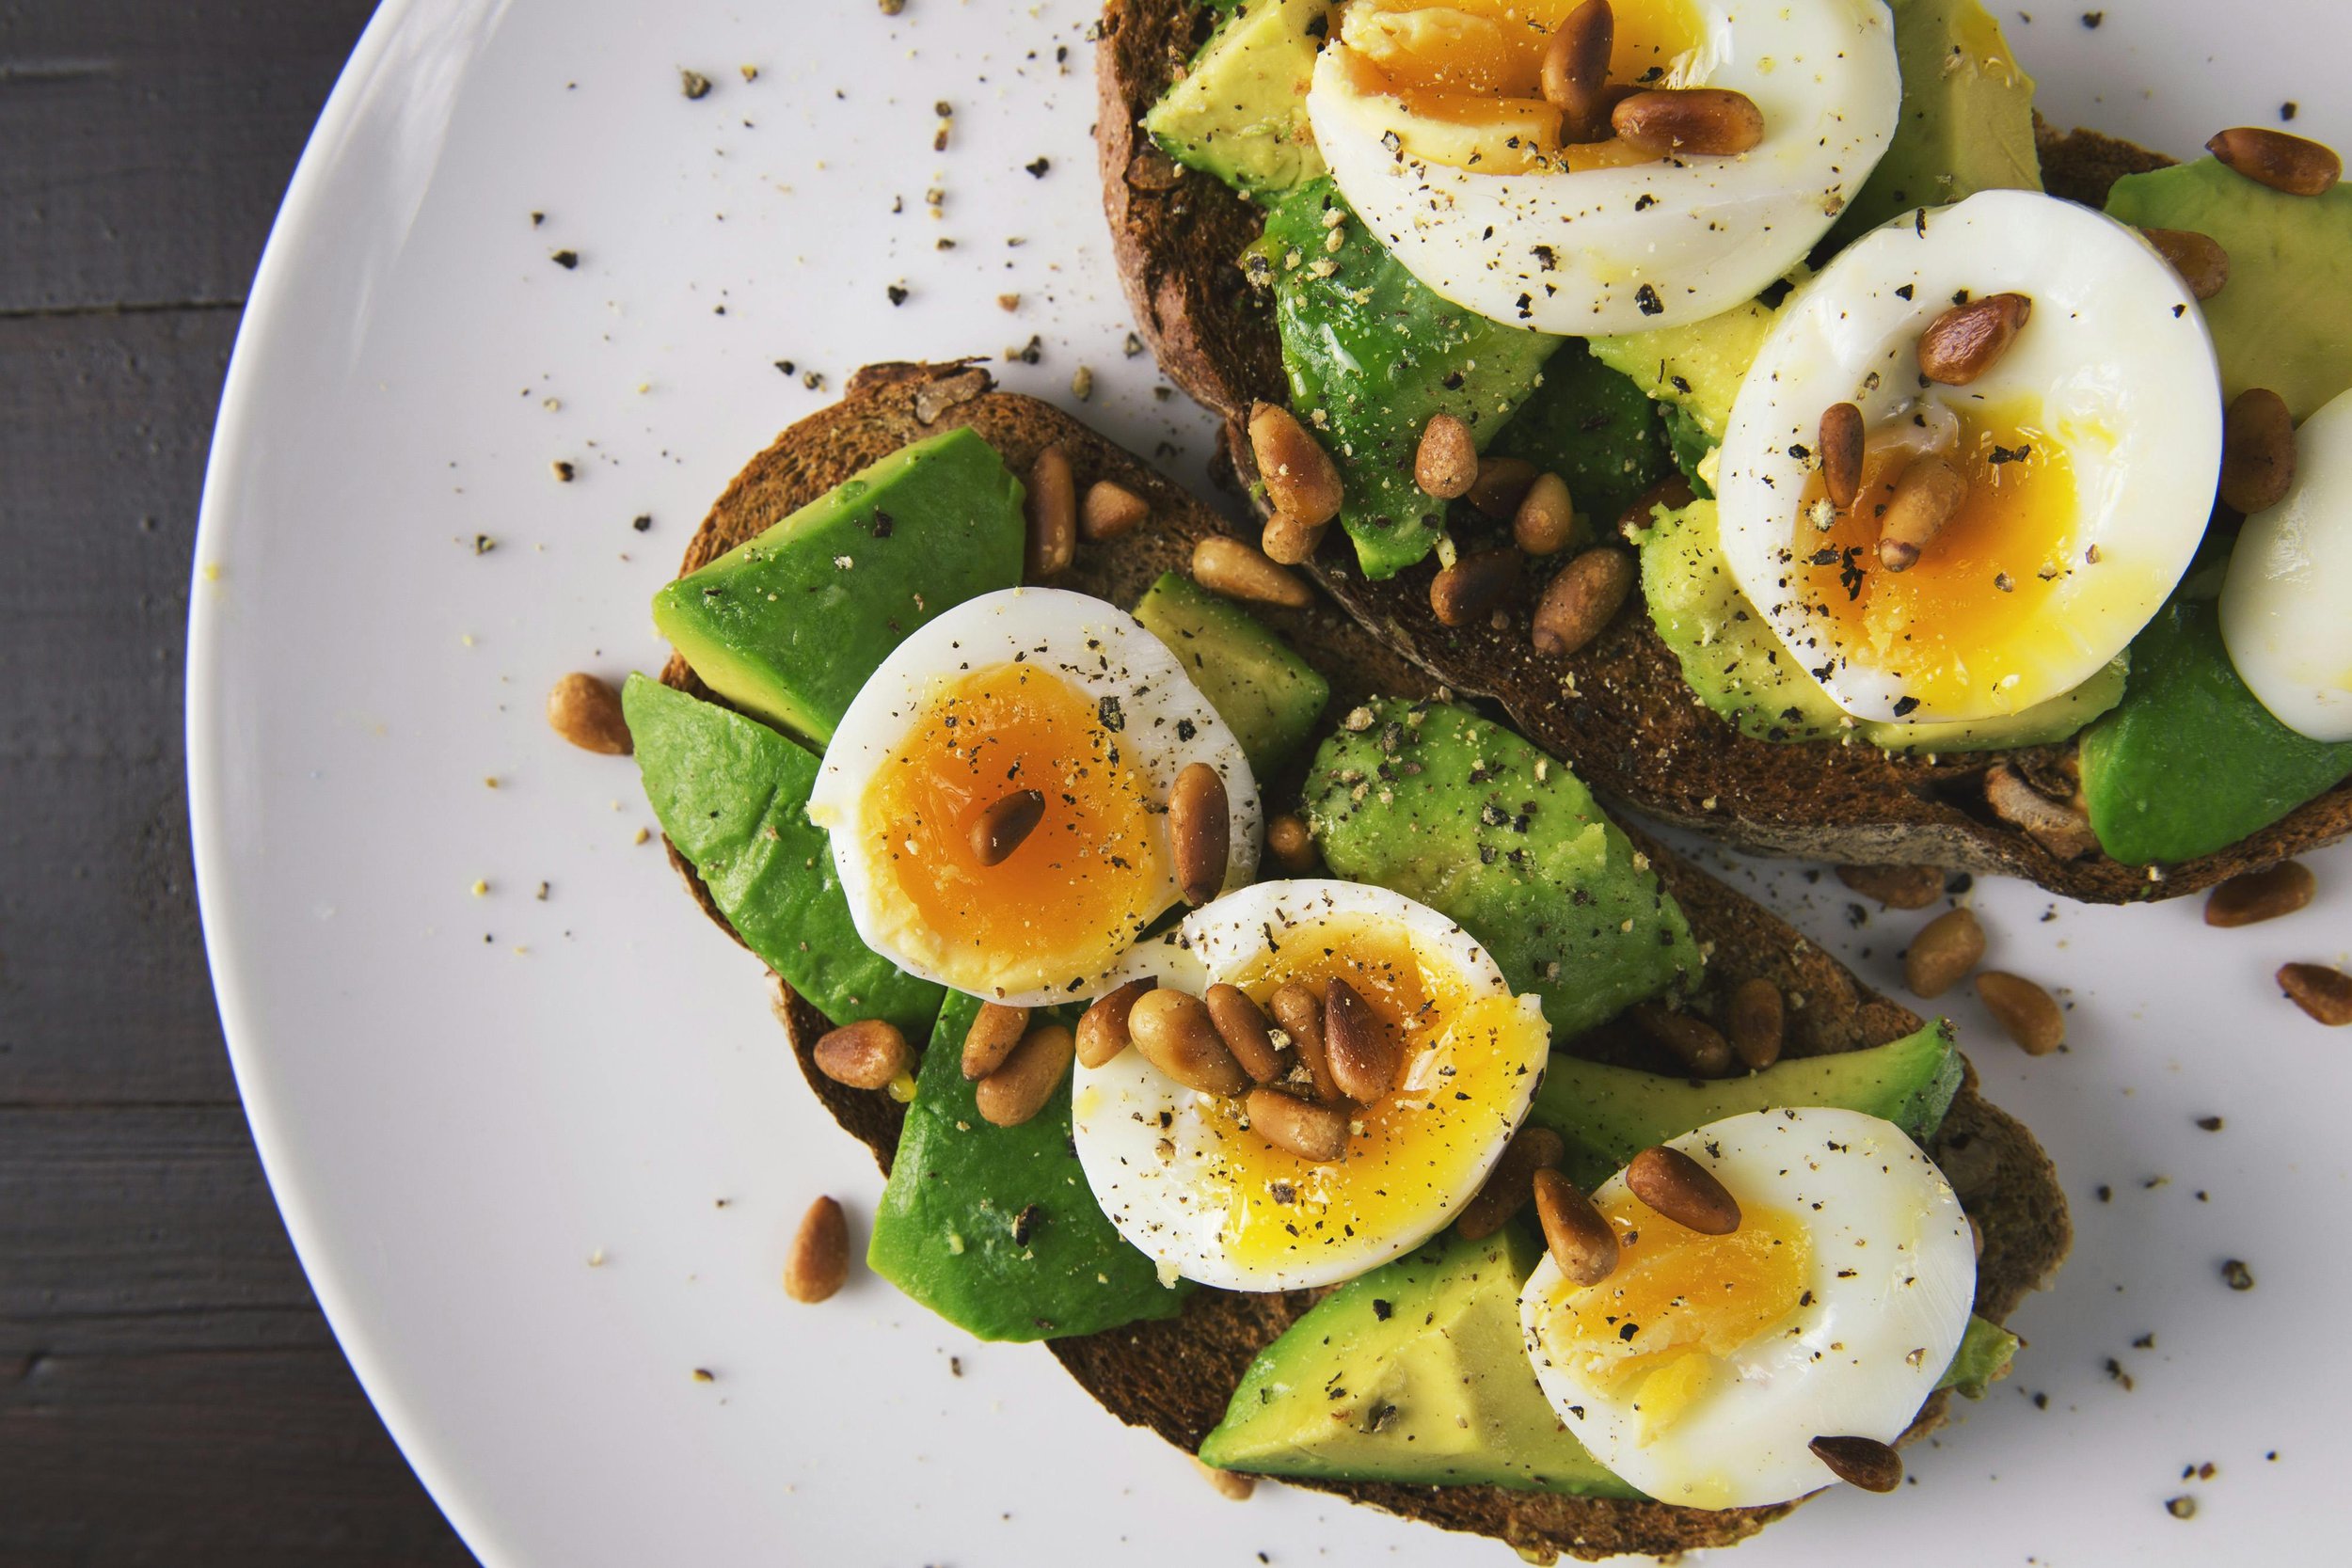
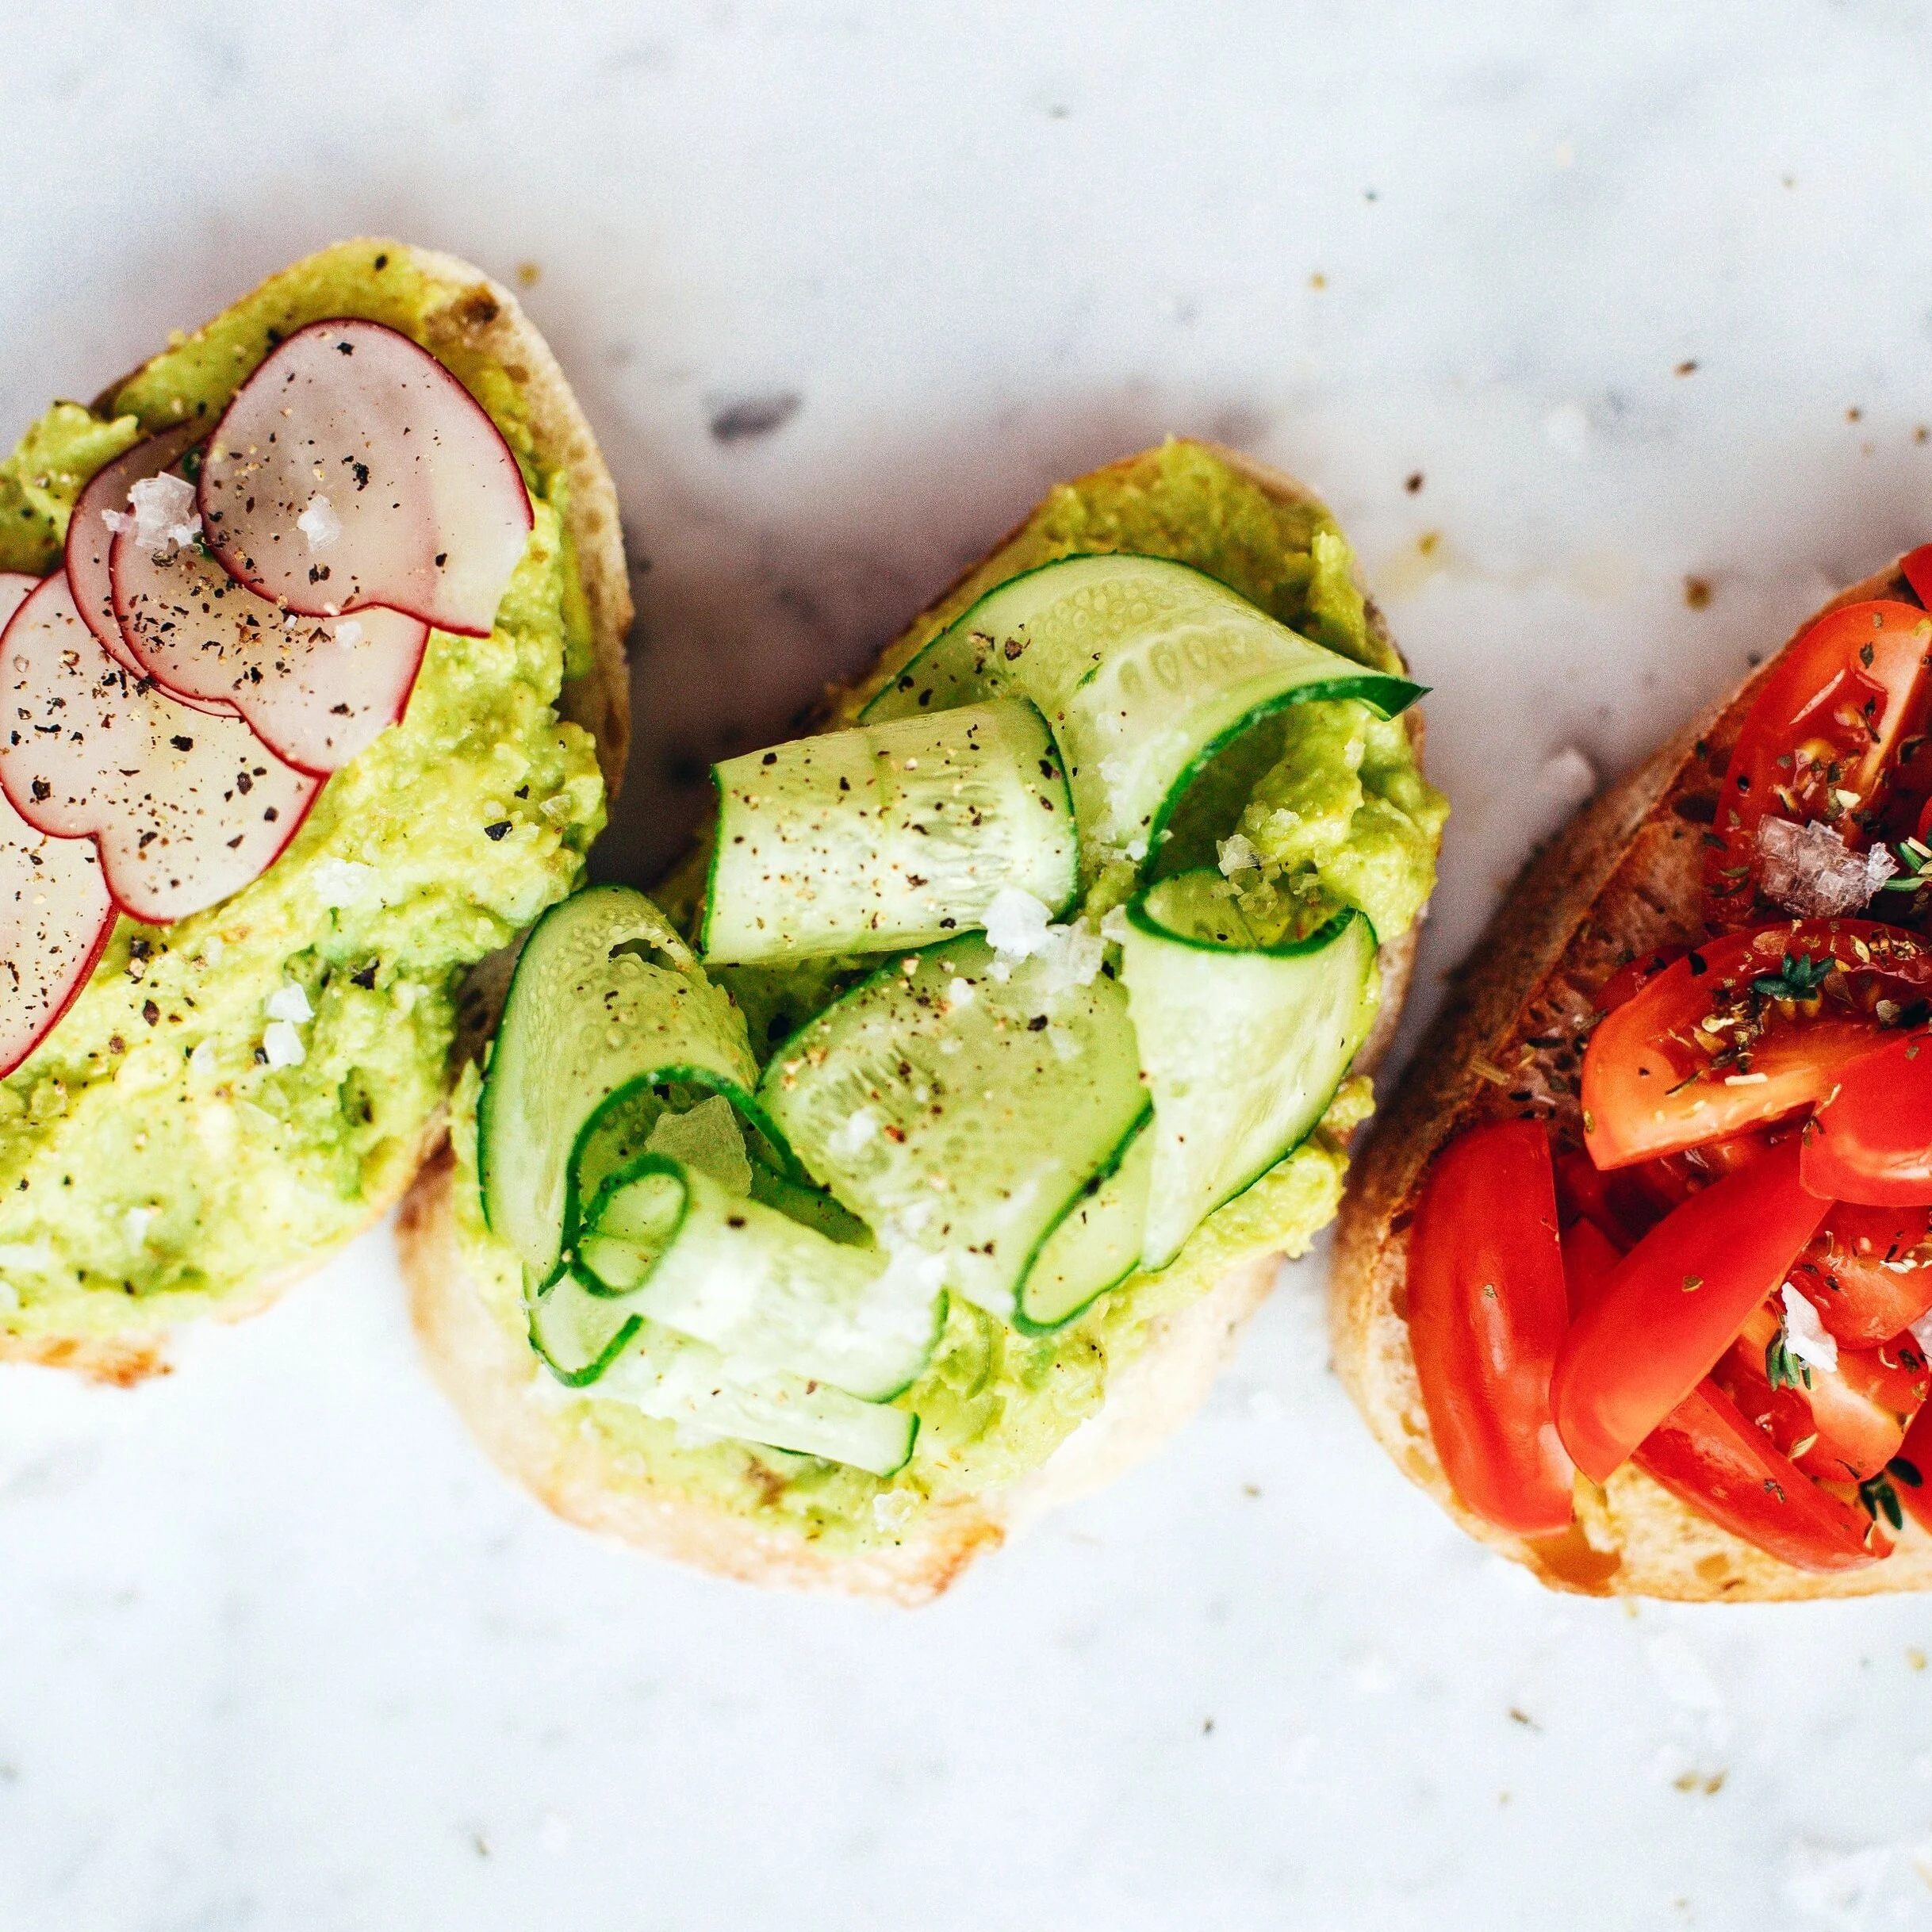
FODMAP friendly avocado toast
20 Minutes • Low FODMAP • Serves as many as you like
20 Minutes • Low FODMAP • Serves as many as you like • Oh yes. That’s right. It’s what’s for breakfast. Or lunch. Or even dinner! We’ve added a thin layer of brie cheese to the traditional avocado toast and it’s a game changer!
INGREDIENTS (note, I have not included many quantities in this recipe as they are mostly “to-taste” and will vary depending on how many pieces of toast you’re making. I encourage you to be creative!)
Sourdough bread - sliced (for a no-bread alternative use Rice cake “thins”)
Triple cream brie cheese
Avocado (keep in mind 1/8 of an avocado is a low FODMAP serving)
Mini Persian cucumbers sliced very thinly (use a Mandoline if you have one)
Cherry tomatoes - quartered
Radishes - sliced thinly
Fresh thyme or basil - chopped
Lime juice
Freshly ground black pepper
Cumin (optional but very good!)
Feta cheese crumbled
Optional extras: Pepitas, chives, green onions, bacon, egg (poached, soft boiled, scrambled, over easy…) use your imagination!
DIRECTIONS:
Toast your sourdough bread (or layout your rice cake thins) and spread a thin layer of brie cheese on the toast while it’s hot so it melts down into the toast a bit.
For each whole avocado, mash the avocado with the juice of 1/2 lime, 1/2 teaspoon cumin (optional), salt, and pepper to taste, and spread the mashed avocado on the toasted sourdough or rice cake and brie.
Variation 1: Toss the cherry tomatoes with olive oil and balsamic vinegar. Pile them on your avocado toast. Sprinkle with fresh thyme or basil, feta cheese, flaky salt, and freshly ground black pepper.
Variation 2: Pile the thinly sliced cucumbers on your avocado toast. Sprinkle with feta cheese, flaky salt, and freshly ground black pepper.
Variation 3: Thinly slice your radishes and lay them on your avocado toast. Sprinkle with feta cheese, flaky salt, and freshly ground black pepper.
Variation 4: Top with eggs (prepared to your choice) and a sprinkling of homemade bacon bits (cook your own bacon and crumble it up!)
The possibilities for low FODMAP avocado toast are endless! Use your imagination. Try things out.
This recipe contains affiliate links so you can easily purchase items listed on the page. This is for your information and convenience. If you purchase through this link, I may earn a commission but there is no additional cost to you. Please read my disclosure for more information.
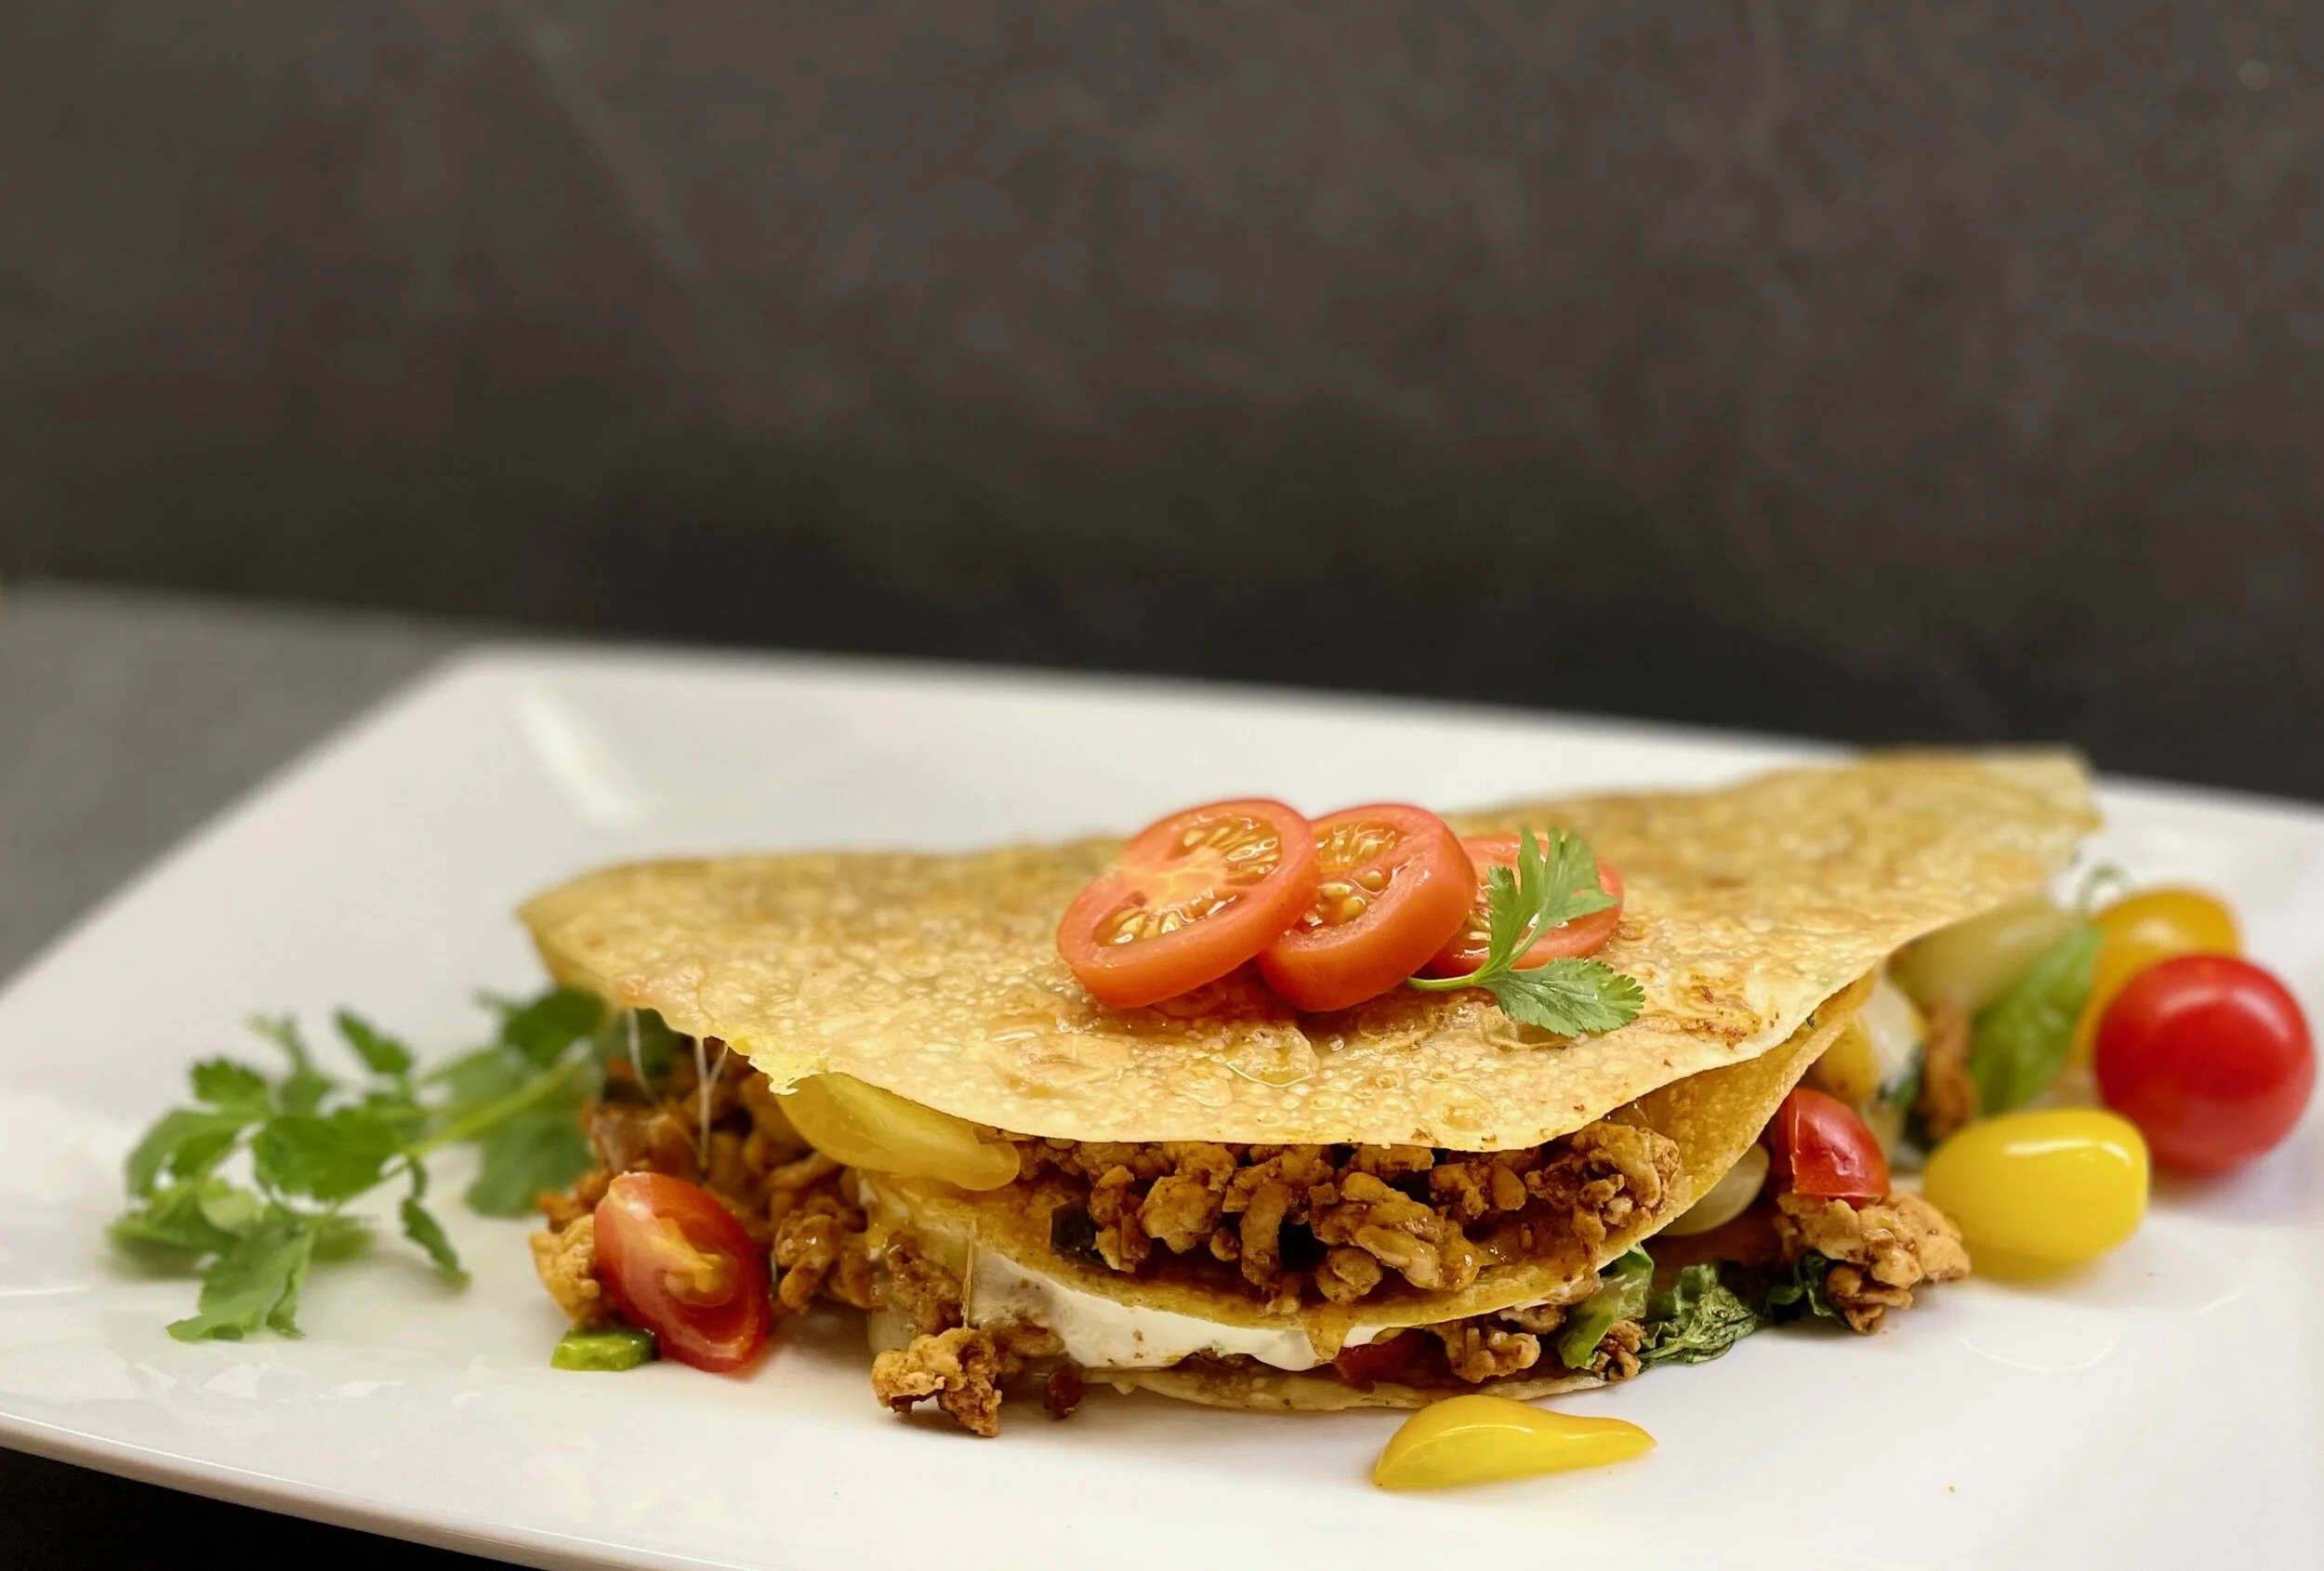
Crunchy taco wrap
45 minutes • Gluten-free • Low FODMAP • Serves 4 - 6
45 minutes • Gluten-free • Low FODMAP • Serves 4 - 6 • Craving crunchy tacos? This is a delicious, crunchy, combination taco/tostada that will surely become a family favorite. Even more delicious with our fresh low FODMAP salsa.
INGREDIENTS:
FOR THE TACO MEAT
2 tablespoons garlic-infused olive oil
4 green onions (green part only) chopped
1 pound ground chicken, turkey, beef, or bison
2 teaspoons chili powder
2 teaspoons smoked paprika
1 1/2 teaspoons ground cumin
1/4-1/2 teaspoon crushed red pepper flakes (to your taste)
1/2 teaspoon dried oregano
1 teaspoon kosher salt (or 1 teaspoon Smoke n Sanity Essence of Garlic Salt)
FOR THE ASSEMBLY
4 corn tortillas
1 cup shredded sharp cheddar cheese
1/2 cup cubed Monterey Jack cheese
1 poblano or jalapeño pepper, seeded and finely chopped
4 large (burrito size) gluten-free and low FODMAP tortillas (I like brown rice tortillas)
1/4 cup lactose-free sour cream
1 - 2 cups shredded romaine lettuce
1 cup cherry tomatoes, chopped
Serve with any/all of the following: fresh cilantro or chives, avocado mashed with lime, and our fresh salsa.
INSTRUCTIONS:
Preheat the oven to 400° F.
In a large skillet, heat the olive oil over high heat. When the oil shimmers, add the ground meat and green onions. Cook, breaking up the meat as it cooks until the chicken is browned, about 5 minutes. Add the chili powder, paprika, cumin, red pepper flakes, oregano, and salt or garlic salt. Add 3/4 cup water. Reduce the heat to medium and simmer until the sauce has thickened slightly around the chicken, about 10 minutes. Remove from the heat.
Meanwhile, make the tostadas. Line the corn tortillas up on a cookie sheet pan and rub lightly on one side with olive oil. Transfer to the oven and bake for 6 minutes. Flip, and bake another 4-5 minutes, until crisp. While warm, sprinkle with sea salt and lime zest for extra flavor.
To assemble, warm a large tortilla for 20 seconds in the microwave, then brush with water to dampen. Lay flat on a surface. On one side, layer the meat, a sprinkle of cheddar, a few cubes of Monterey Jack, and a sprinkle of chopped peppers. Add 1 corn tortilla on top, spread with sour cream, lettuce, tomatoes, and cilantro or chives. Fold the large tortilla in half (folding or breaking the corn tortilla in half too). Repeat with the remaining wraps.
Heat a drizzle of olive oil in a skillet, add 1 crunchy taco wrap and cook 2-3 minutes per side until crisp and golden brown.
Cut each “taco” in half for serving. Serve warm with any amount of desired toppings, fresh cilantro or chives, avocado mashed with lime, and our fresh salsa.
This recipe contains affiliate links so you can easily purchase items listed on the page. This is for your information and convenience. If you purchase through this link, I may earn a commission but there is no additional cost to you. Please read my disclosure for more information.
Best fresh salsa (IBS-friendly too)
20 Minutes • Gluten-free • Dairy-free • Low FODMAP • Makes about 1.5 cups
20 Minutes • Gluten-free • Dairy-free • Low FODMAP • Makes about 1.5 cups. This salsa is our family favorite — even over more traditional salsa that includes onion and garlic. We use it on all things Tex-Mex and even over eggs for breakfast!

INGREDIENTS:
1-2 Jalapeno peppers – seeded and finely chopped (wear gloves while you seed and chop or wash hands well before you touch anything else)
5 ripe tomatoes chopped – heirloom are nice for flavor and color or choose fresh “on the vine” for good flavor
1 cup chopped fresh cilantro (or chives if you hate cilantro)
2 green onions (green part only) chopped
½ teaspoon ground cumin
¼ teaspoon cayenne pepper (less if you want a less spicy version)
1 teaspoon chili powder
2 tablespoons lime juice
FOR THE PINEAPPLE VERSION:
1/2 cup fresh pineapple chopped
FOR THE “CON QUESO” VERSION (don’t use pineapple in this version):
1 pound sharp cheddar cheese (grated)
¼ cup lactose-free milk
DIRECTIONS:
In a food processor, place seeded jalapeno, roughly chopped tomatoes, green onions, chopped cilantro, cumin, chili powder, and lime juice. Process using pulse setting just until an evenly chunky texture is obtained. Stir in the pineapple if using.
For the Con Queso version: grate cheese and combine with milk. Cook over medium heat, stirring occasionally, 7-10 minutes, or until cheese is melted. Add salsa and mix until well combined. Serve with tortilla chips, low FODMAP veggies, or over your favorite low FODMAP dish.
This recipe contains affiliate links so you can easily purchase items listed on the page. This is for your information and convenience. If you purchase through this link, I may earn a commission but there is no additional cost to you. Please read my disclosure for more information.
Creamy Thai chicken and rice noodle soup
30 Minutes • Gluten-free • Dairy-free • Low FODMAP • Serves 4
30 Minutes • Gluten-free • Dairy-free • Low FODMAP • Serves 4 • This creamy Thai chicken and rice noodle soup is easy to make in 30 minutes so it’s a perfect weeknight dinner. It’s also so good you’ll want it for lunch the next day—so make sure there’s enough!

INGREDIENTS:
1 1/2 pounds boneless skinless chicken thighs or breasts, cubed
1 tablespoon ground turmeric
2 teaspoons ground ginger
Black pepper
5 tablespoons gluten-free, low sodium soy sauce
1 teaspoon maple syrup
3 tablespoons garlic-infused olive oil
Greens such as 4 baby bok choy, 3 cups spinach or 1 bunch kale, chopped
4 green onions (green part only), chopped
1-inch fresh ginger, peeled and grated
1/4 cup fresh Thai basil, chopped (ok to substitute cilantro)
Low FODMAP Thai Curry Paste:
1/4 teaspoon crushed red pepper flakes
1/2 teaspoon salt (or Smoke n Sanity Essence of Onion Salt)
Zest of one lime
1 teaspoon coriander
3 tablespoons garlic-infused olive oil
2 (13.5 ounce) cans full-fat coconut milk
8 ounces rice noodles, thick or thin, or steamed white rice if you prefer
Lime juice, sliced limes, and additional herbs for serving
DIRECTIONS:
Toss the chicken with turmeric, ground ginger, a pinch of pepper, 2 tablespoons of the soy sauce, maple syrup, and 1 tablespoon garlic-infused olive oil. Let sit in the refrigerator for 5 minutes.
Heat 2 tablespoons oil in a large Dutch oven or braiser over medium-high heat. Add the chicken and sear until browned, about 3 minutes, stirring 2-3 times. Toss in the chopped greens and cook 2 minutes more, until just charred on the edges. Transfer everything to a plate.
To the same Dutch oven, add 2 tablespoons oil, the green onions, fresh ginger, and cilantro/basil, cook 2 minutes, then stir in the low FODMAP Thai curry paste. Cook until fragrant, about 2 minutes. Stir in the coconut milk and 3 tablespoons of soy sauce. Slide the chicken and greens back into the sauce. Simmer over medium heat until the sauce thickens slightly, about 5 minutes.
Meanwhile, cook noodles or rice according to package directions.
Divide the noodles or rice between bowls and ladle the chicken and sauce over the top. Add to each bowl as desired the herbs and lime juice.
Original recipe inspired by Tieghan Gerard of Half Baked Harvest
This recipe contains affiliate links so you can easily purchase items listed on the page. This is for your information and convenience. If you purchase through this link, I may earn a commission but there is no additional cost to you. Please read my disclosure for more information.
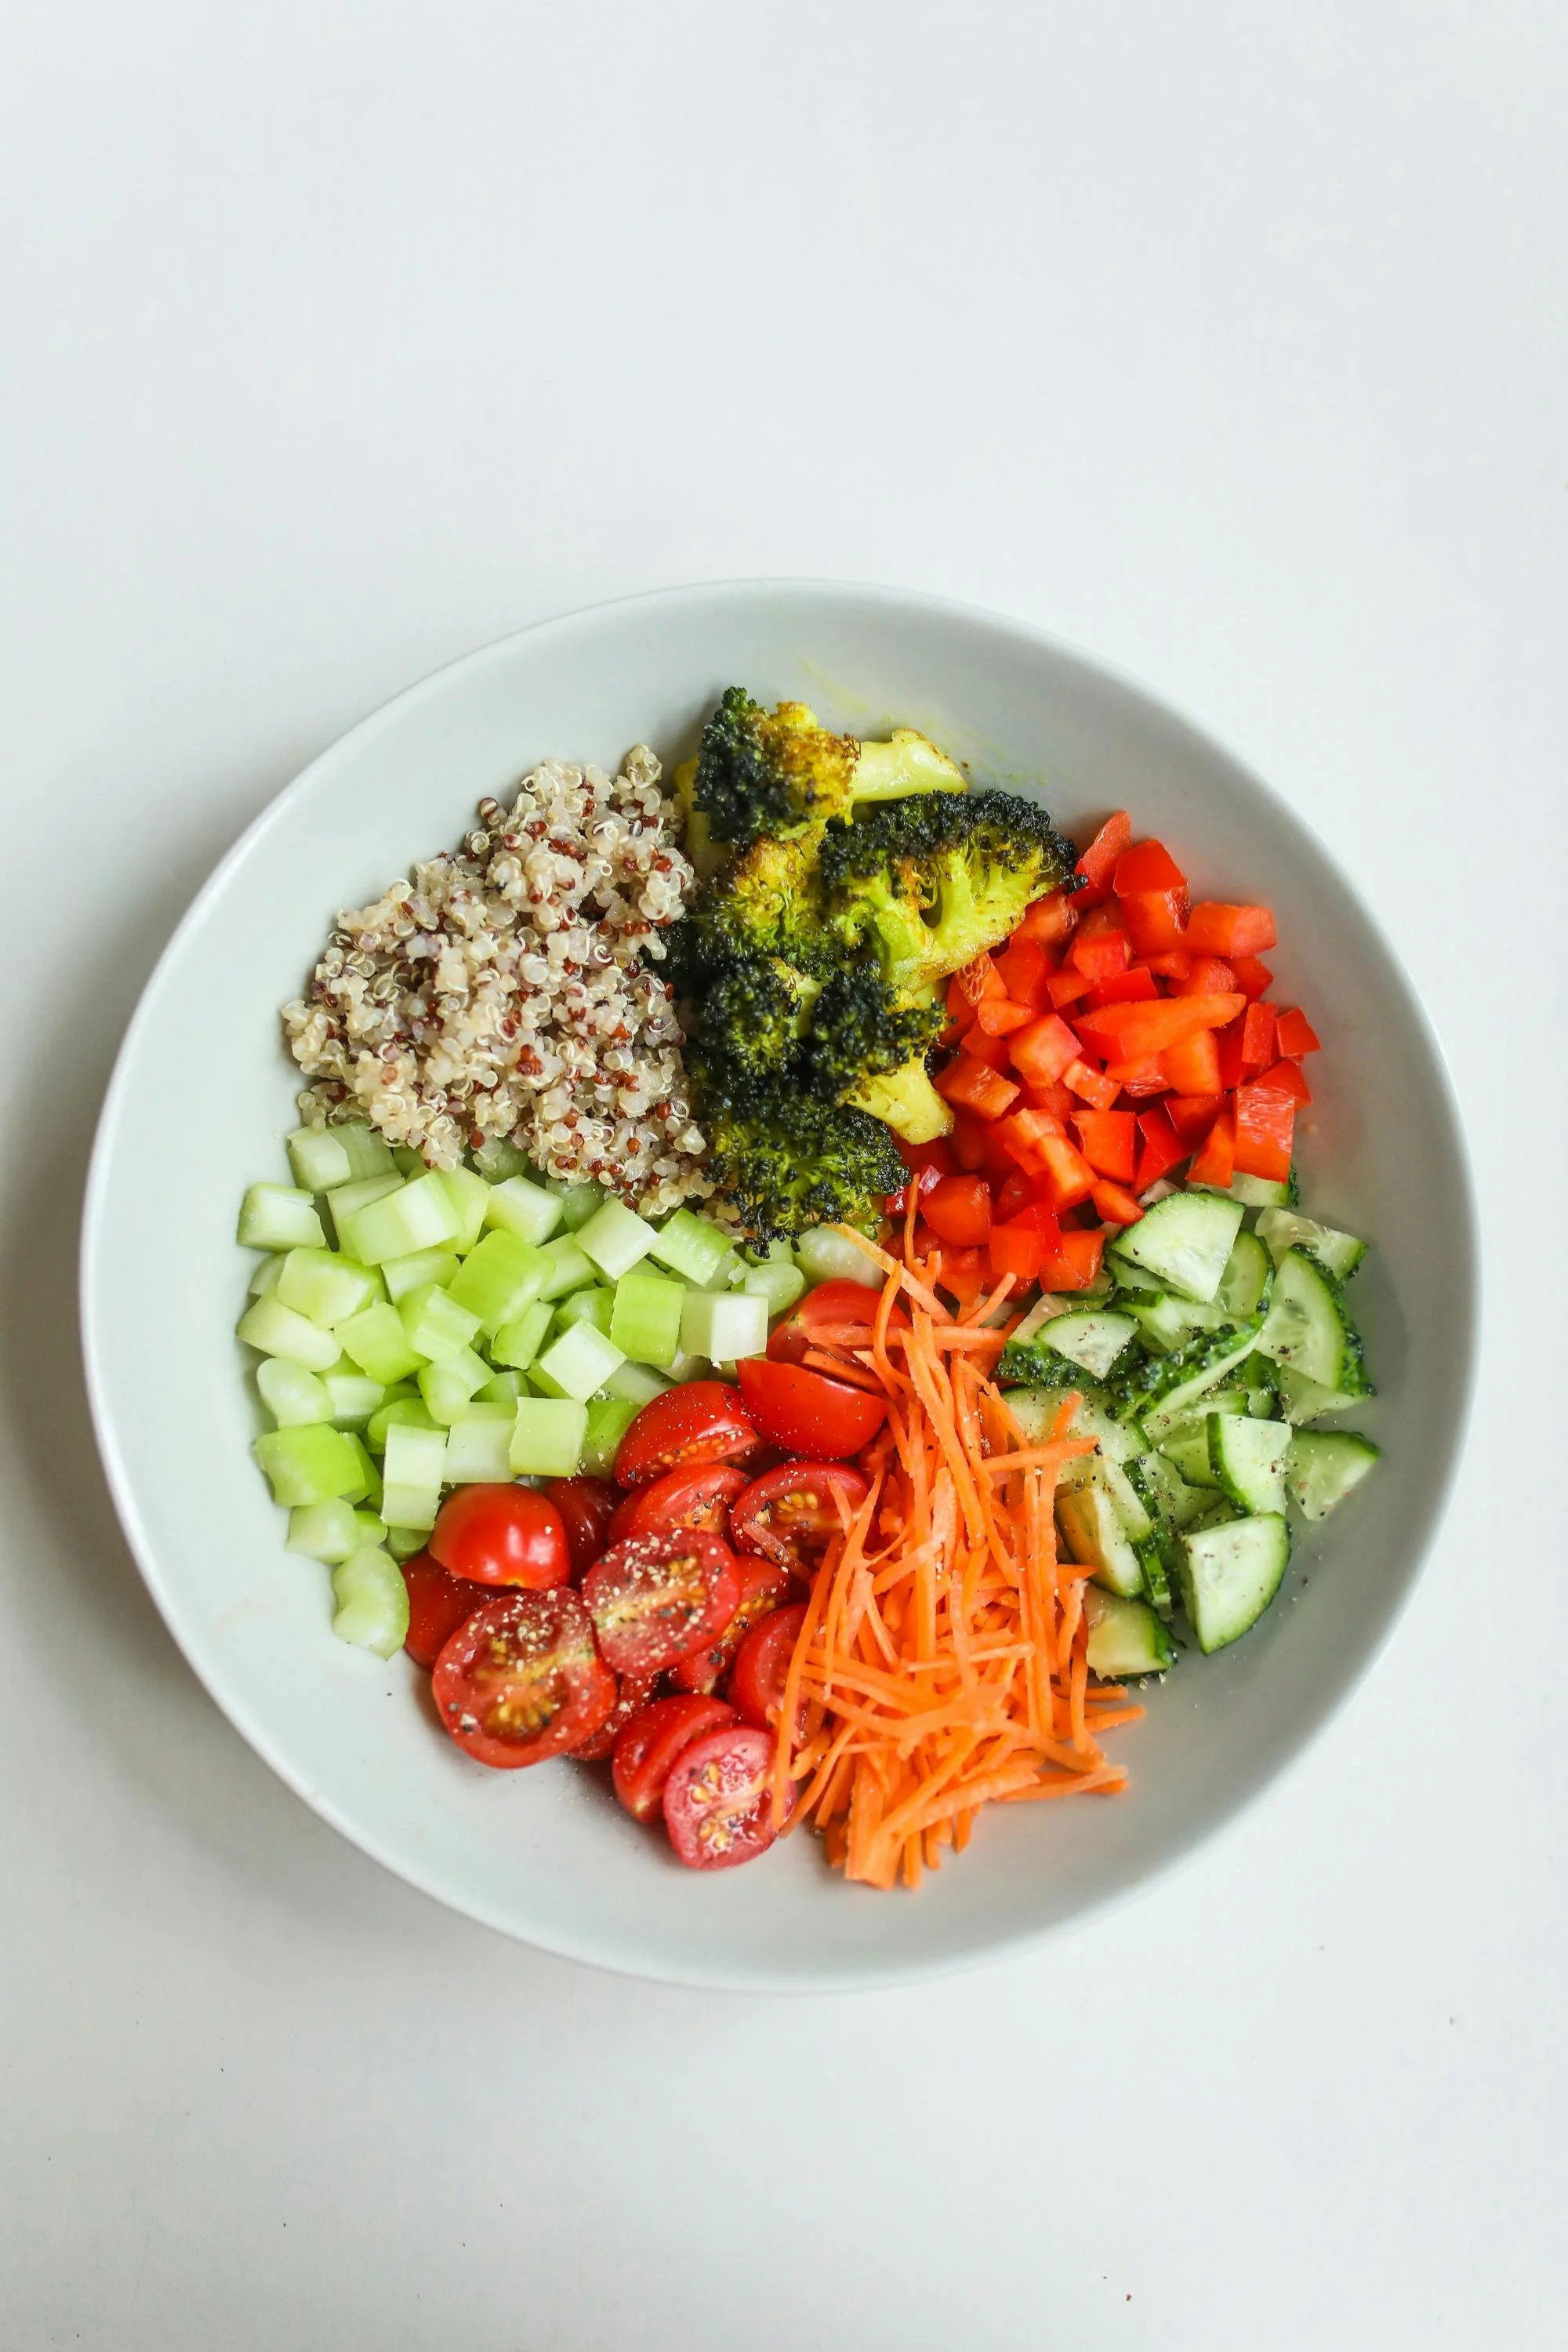
Low FODMAP Chef’s salad
20 Minutes • Gluten-free • Low FODMAP • Serves 4
20 Minutes • Gluten-free • Low FODMAP • Serves 4 • This is one of my favorite lunchtime salads because it’s hearty, filling, and energizing so you won’t get the afternoon sleepies. It also makes an excellent light dinner choice. Of course, you can omit the turkey to make it vegetarian and add other low FODMAP veggies you might have on hand. Watch your serving size as too many raw vegetables may be hard to digest when you have IBS.

SALAD INGREDIENTS:
4 cups romaine lettuce, washed and torn into bite-size pieces
4 mini Persian cucumbers – peeled and sliced thickly
4 carrots – peeled and sliced diagonally
Handful of cherry tomatoes
1 cup cooked turkey or chicken cut into bite-size chunks
1/3 cup fresh basil – chiffonade (sliced thinly)
1/2 cup pumpkin seeds (pepitas) – roasted and salted - see our recipe here
1/2 cup walnuts – raw halved
1/2 avocado - cut into chunks
Hard-boiled eggs – peeled and quartered - optional
Blue cheese or gorgonzola crumbles - optional
DRESSING INGREDIENTS:
1/3 cup extra virgin olive oil
1 tablespoon red wine vinegar
1/2 teaspoon Coleman’s dry mustard
Salt and Pepper to taste
DRESSING DIRECTIONS:
Mix all ingredients together in a small jar and shake to combine. Adjust the salt and pepper to taste.
SALAD DIRECTIONS:
Wash and spin the lettuce as dry as possible. If you’re not putting the salad together right away, put the clean lettuce in a plastic bag with a paper towel in it. Squeeze as much air out as you can and seal the bag and put it in the refrigerator. Your lettuce will be crisp, clean, and dry when you’re ready for it.
Add the cucumbers, carrots, cherry tomatoes, fresh basil, walnuts, pepitas, and turkey and toss to combine.
Prepare the dressing and add just enough to lightly coat the lettuce and toss again.
Add the avocado, and cheese crumbles and turn the salad gently to combine.
Put the salad on plates and set quartered eggs alongside. You may add some salt and pepper to the eggs and serve.
This recipe contains affiliate links so you can easily purchase items listed on the page. This is for your information and convenience. If you purchase through this link, I may earn a commission but there is no additional cost to you. Please read my disclosure for more information.
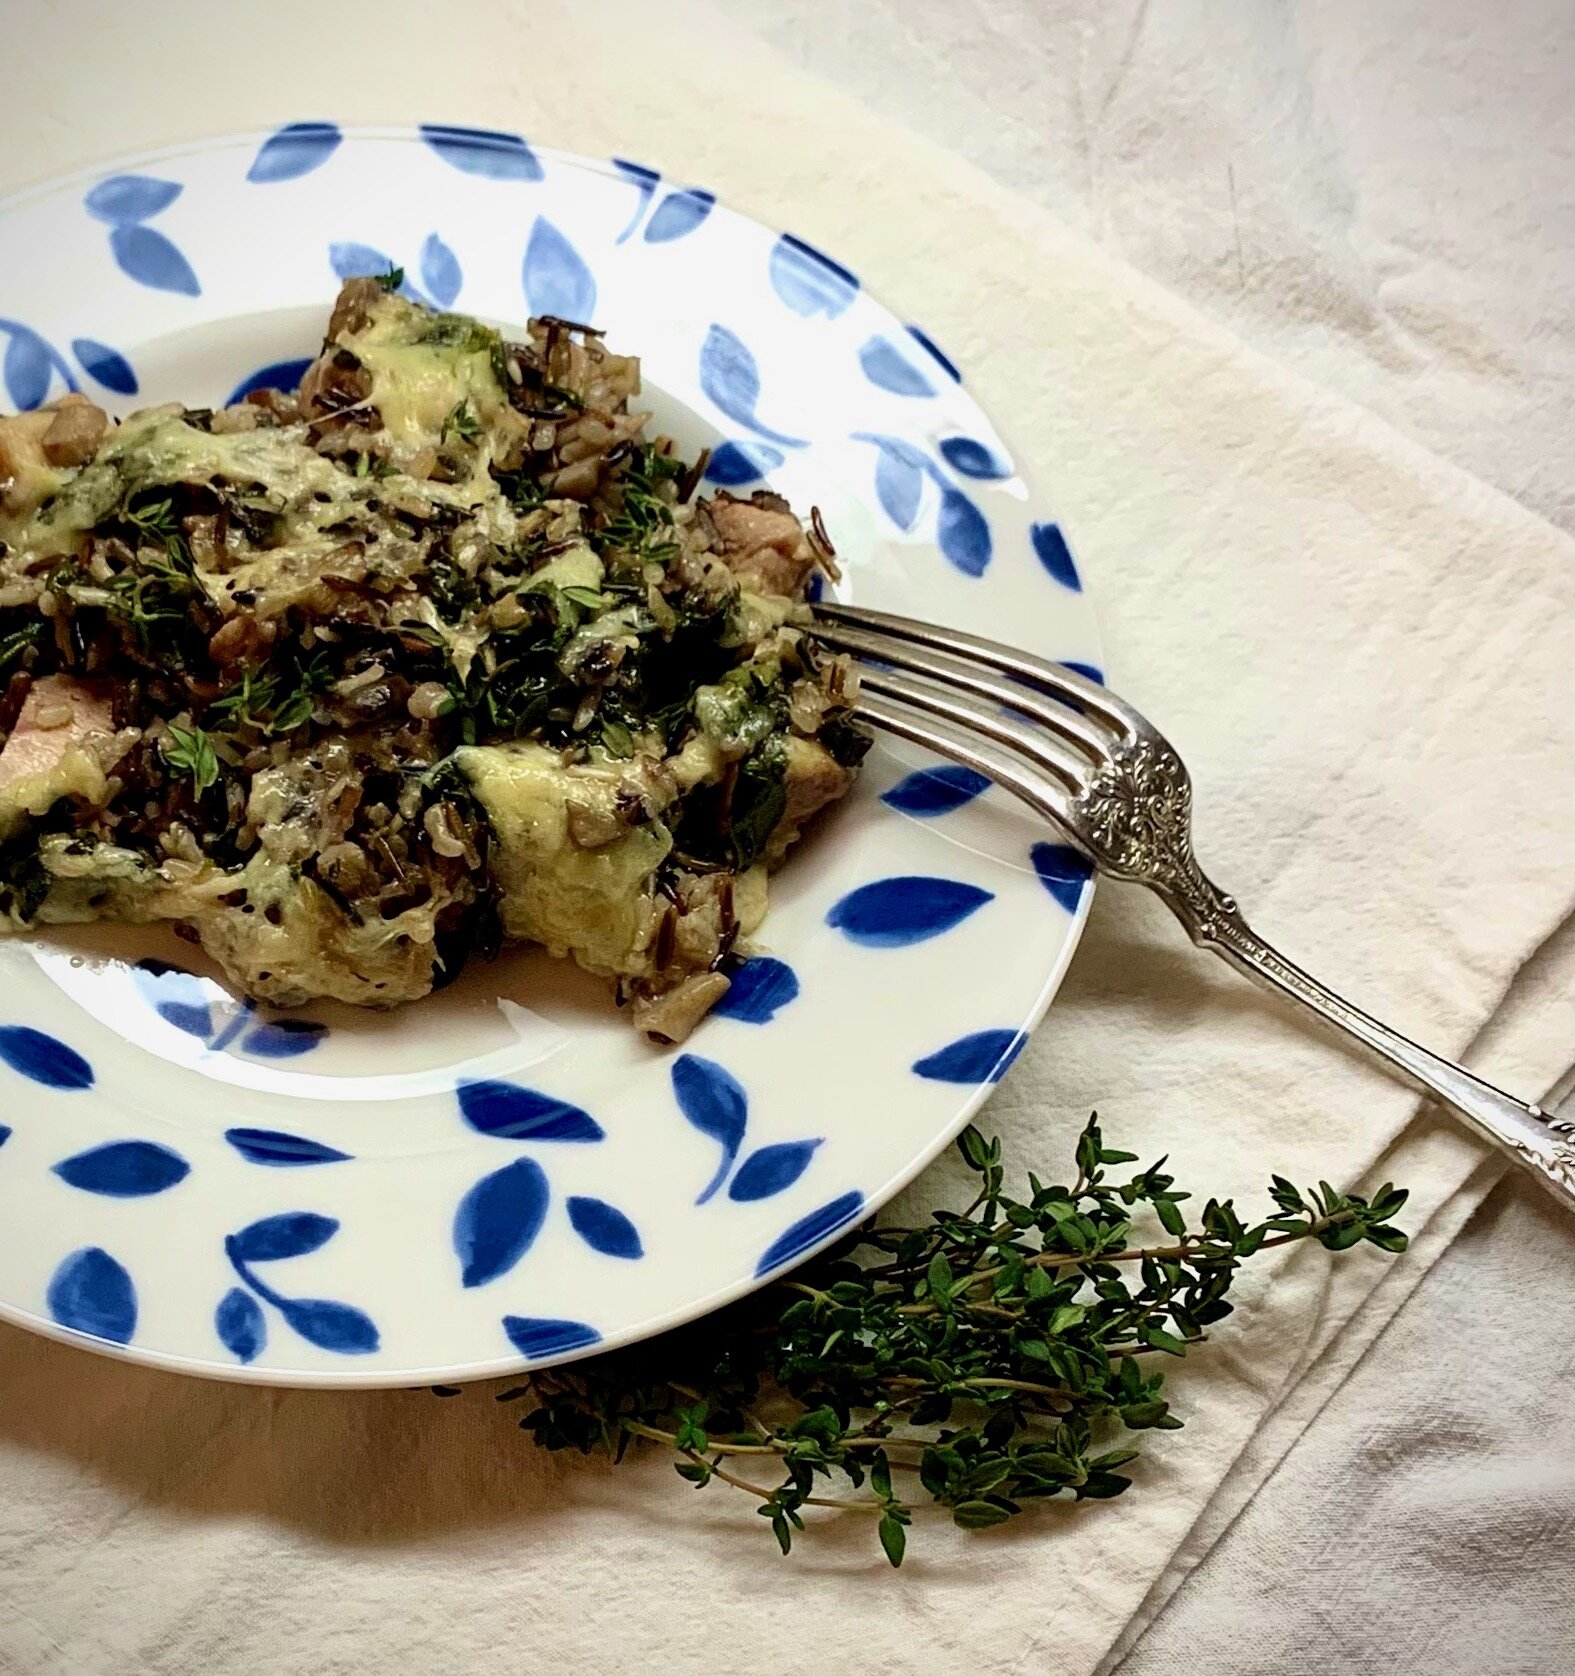
Wild rice, mushrooms, spinach, and chicken - the perfect one pan meal
90 Minutes (mostly cooking time) • Gluten-free • Low FODMAP • Serves 4
90 Minutes (mostly cooking time) • Gluten-free • Low FODMAP • Serves 4 • This wild rice, mushroom, spinach, and chicken one-pan meal is healthy, filling, and delicious.

INGREDIENTS:
2 tablespoons butter
1 tablespoon garlic-infused olive oil
2 leeks (green part only) chopped
Kosher salt and pepper
6 ounces oyster mushrooms
2 tablespoons fresh chopped thyme, plus more for serving
2 1/2 cups low FODMAP chicken broth
1/2 cup white wine or more low FODMAP chicken broth
2 cups wild rice*
1 - 1 1/2 pounds boneless skinless chicken breasts, cut into bite-size pieces
2 cups baby spinach
1 1/2 cups shredded Gruyère cheese
DIRECTIONS:
Melt the butter and olive oil in a large, oven-safe skillet over medium heat. Add the leek greens and cook for about 3 minutes to soften. Season with salt and pepper. Add the mushrooms, cook another 3 minutes or until the mushrooms start to brown/caramelize. Stir in the thyme and cook another minute longer.
Pour in the 2 cups chicken broth and the wine and bring to a boil over high heat. Stir in the rice and chicken, bring back to a boil, then cover, and reduce the heat to low. Simmer for 45-55 minutes or until the rice is fully cooked, if needed, add the remaining 1/2-1 cup broth during cooking if the rice gets a bit dry before it’s fully cooked. Remove from the heat and stir in the spinach.
Preheat the oven to 400 degrees F.
Sprinkle the cheese over top of the rice and transfer it to the oven. Bake for 10-15 minutes or until the cheese has melted. Remove from the oven and serve with additional fresh thyme.
* Rice is a great staple food on the low FODMAP diet. To date, Monash University has tested white, brown, basmati, and red rice, and each is low FODMAP in 1 cup servings of cooked rice. Based on the other rice results, my guess is that jasmine, wild or black rice would also test low FODMAP. If you are on a low FODMAP elimination diet and you want to be extra “safe”, I would recommend waiting to test your individual tolerance for wild rice until after the elimination phase. In this case, you can substitute one of the other tested types of rice for wild rice in this recipe.
This recipe contains affiliate links so you can easily purchase items listed on the page. This is for your information and convenience. If you purchase through this link, I may earn a commission but there is no additional cost to you. Please read my disclosure for more information.
Coconut chocolate chip cookie bars
30 Minutes • Gluten-free • Lactose-free • Low FODMAP • Makes 12 bars
30 Minutes • Gluten-free • Lactose-free • Low FODMAP • Makes 12 bars • These delicious low FODMAP coconut chocolate chip cookie bars are so good they won’t last long! The milk chocolate and coconut blend together to make your sweet tooth happy and the oatmeal gives it heartiness, so they make a satisfying snack.
INGREDIENTS
2 1/2 cups gluten-free oatmeal
1 1/2 cups all-purpose gluten-free flour such as Bob’s Red Mill or Cup4Cup
1/2 cup light brown sugar
1/2 cup granulated sugar
½ cup unsweetened shredded coconut
1 teaspoon baking soda
1/2 teaspoon kosher salt
1 cup melted coconut oil
2 large eggs
1 tablespoon vanilla extract
1 1/2 cups milk chocolate chips (I like Guittard)
1/2 teaspoon fleur de sel or other flaky salt
DIRECTIONS:
Preheat the oven to 350 degrees F. Line a 9x13 inch baking dish with parchment paper.
In a large mixing bowl or the bowl of a stand mixer, mix the oatmeal, flour, brown sugar, granulated sugar, coconut, baking soda, salt, coconut oil, eggs, and vanilla. Beat until the dough is moist and all the ingredients are combined. The dough may be oily. Mix in the chocolate chips.
Press the dough into the prepared baking dish. If the chips are bunched up, spread them out as you spread the dough in the pan. Transfer to the oven and bake 18-20 minutes or until the edges are set and the bars are golden. Sprinkle with fleur de sel or another flaky salt.
Let cool and then cut into bars. Store at room temperature in an air-tight container.
Bars are best slightly warm so pop each bar in the microwave for 20 seconds before eating for the best flavor and texture.
This recipe contains affiliate links so you can easily purchase items listed on the page. This is for your information and convenience. If you purchase through this link, I may earn a commission but there is no additional cost to you. Please read my disclosure for more information.
Steak tacos with Mexican “frites” and cilantro lime cream
45 Minutes (after marinating the meat) • Gluten-free • Low FODMAP • Serves 4
45 Minutes (after marinating the meat) • Gluten-free • Low FODMAP • Serves 4 • For this recipe, you can grill the steak, cook it in your crockpot or instant pot, or even cook it on the stovetop. Just season it first and make sure you end up with thin flavorful slices. These tacos are easy and delicious!

INGREDIENTS:
2 pounds flank steak
1 tablespoon chili powder
1 teaspoon salt (or 1 teaspoon Smoke n Sanity lof FODMAP onion salt)
1 teaspoon smoked paprika
2 tablespoons garlic-infused olive oil
Zest and juice of 1 lime
1/2 cup gluten-free beer, such as Stone Delicious IPA (or water)
8 gluten-free corn tortillas
1/4 cup canola or vegetable oil to cook the tortillas
Serve with any/all of these additional items: sliced avocado, feta cheese, jalapeños, and shredded lettuce.
MEXICAN “FRITES”
4 potatoes, washed and cut into ¼-inch-thick matchsticks (leave the skin on)
3 tablespoon garlic-infused olive oil
1 teaspoon chili powder
1 teaspoon smoked paprika
1 teaspoon salt (or to taste)
CILANTRO LIME CREAM
Zest and juice of 1 lime
1/2 cup lactose-free sour cream
1/2 cup fresh cilantro, finely chopped (or fresh chopped chives)
2 green onions (green part only), finely chopped
1/2 teaspoon garlic scape powder and 1/2 teaspoon salt (or 1/2 teaspoon Smoke n Sanity low FODMAP garlic salt)
Avocado, feta cheese, jalapeños, cilantro or chives, and shredded lettuce to serve.
DIRECTIONS:
Place the steak in a 9x13 inch pan or Ziploc bag. Combine the chili powder, paprika, pinch of salt, garlic-infused olive oil, lime juice, and zest. Rub the seasonings into the steak. Add the beer. Marinate 30 minutes or in the fridge as long as overnight.
Preheat your grill or grill pan to high. (Or place in hot pot or crockpot and cook per appliance directions for flank steak.)
Remove the steak from its marinade and sear the steak for 5-8 minutes on one side and then flip and sear another 5 minutes or until your desired doneness is reached. Remove the steak from the grill and allow to rest 10 minutes. Slice steak thinly against the grain.
Meanwhile, make the Cilantro Lime Cream sauce. Combine all ingredients in a bowl and mix until combined. Season with salt. Set aside in the fridge.
Make the fries to be done when you are ready to eat (so they are hot).
Preheat the oven to 425 degrees F.
Toss the potatoes in a large bowl or Ziploc bag with the olive oil, chili powder, paprika, and a large pinch of salt
Line one or two rimmed baking sheets with parchment. Place the potatoes on the parchment-lined baking sheets. Spread the fries in one even layer. Do not overcrowd the pan, if needed, divide the fries between 2 baking sheets. Transfer to the oven and bake for 15-20 minutes, then flip the fries and bake for 10 minutes more until cooked through.
While the fries are cooking, prepare your tortillas. You may just heat them in a damp towel in the microwave. Or, heat 1 tablespoon of oil in a non-stick frying pan. When hot, cook one tortilla for about 30-45 seconds on each side so it starts to brown but remains a bit pliable. Remove from the pan and fold the tortilla over the handle of a wooden spoon (to create a rounded fold) then set on paper towels and proceed with the next tortilla until all are cooked and ready.
Stuff the steak into the prepared tortillas with fries, avocado, cilantro lime cream, lettuce, feta, and more cilantro. Enjoy every bite.
Pro tip: If you don’t like cilantro you may substitute chopped chives for the cilantro in this recipe. If you don’t like steak, you can substitute chicken. They will still be delicious!
This recipe contains affiliate links so you can easily purchase items listed on the page. This is for your information and convenience. If you purchase through this link, I may earn a commission but there is no additional cost to you. Please read my disclosure for more information.
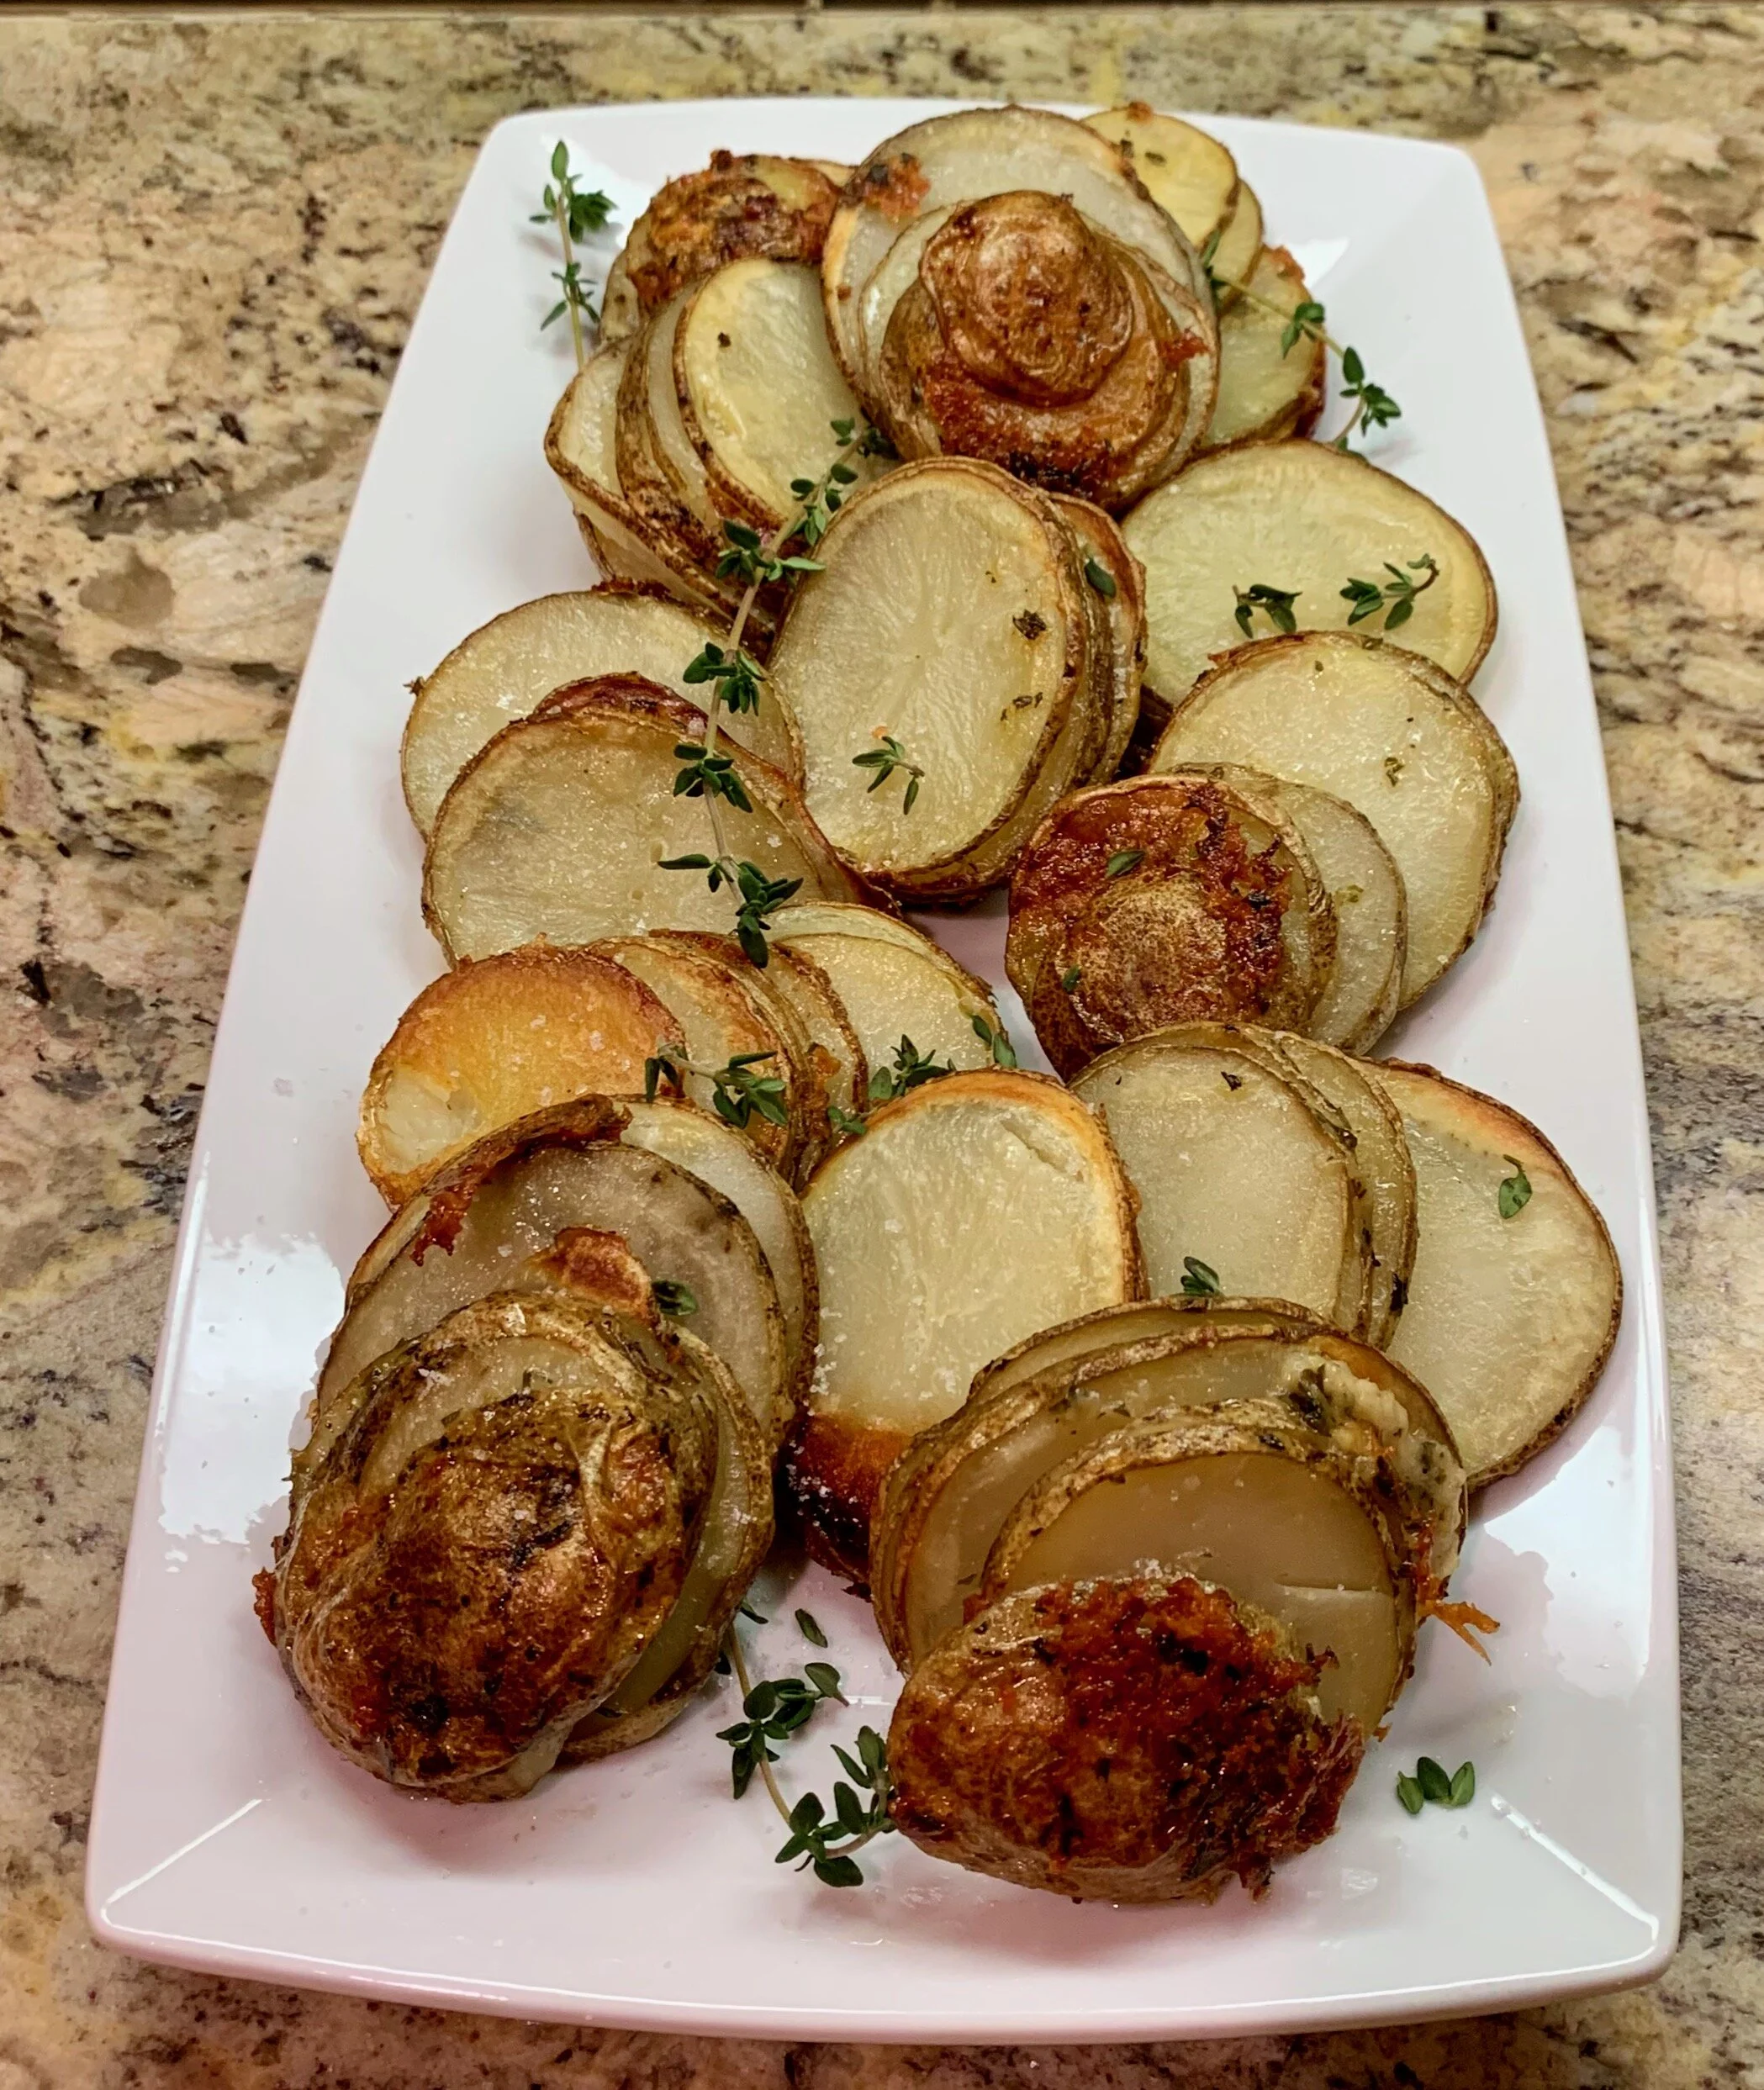
Thyme and gruyere potato stacks
90 Minutes (mostly cook time) • Gluten-free • Low FODMAP • Serves 8
90 Minutes (mostly cook time) • Gluten-free • Low FODMAP • Serves 8 • This delicious, crispy potato dish will quickly replace any other “scalloped” potato side dish you've been making. It takes a little handwork to make, but the result is worth the effort.
INGREDIENTS:
6 medium Russet or Idaho potatoes, cut into 1/8-inch-thick slices
¼ cup salted butter, melted
¼ cup garlic-infused olive oil
¼ cup chopped fresh oregano
2 tablespoons chopped fresh thyme
1/2 cup grated parmesan cheese
1/2 cup shredded gruyere cheese or extra sharp cheddar
Kosher salt and black pepper to taste
DIRECTIONS:
Preheat the oven to 400° F. Lightly grease a 12-cup muffin tin.
Wash and cut the potatoes using a mandoline or very sharp knife into 1/8-inch slices.
In a large bowl, stir together the butter, olive oil, oregano, thyme, both cheeses, and a large pinch of both salt and pepper. Add the potatoes and toss well to coat. Stack the potatoes and make sure some of the butter/cheese mixture is between each slice. Layer the potatoes evenly among the prepared muffin tin, stacking the layers all the way to the top. The potatoes will shrink down as they cook.
Cover with foil and place on a baking sheet. Transfer to the oven and bake for 30 minutes. Remove the foil and continue cooking another 20-25 minutes or until the potatoes are tender and golden. Run a butter knife around the edges of each stack to release them. Serve immediately, sprinkled with a little sea salt.
Print recipe here.
Original recipe inspired by Tieghan Gerard of Half Baked Harvest
This recipe contains affiliate links so you can easily purchase items listed on the page. This is for your information and convenience. If you purchase through this link, I may earn a commission but there is no additional cost to you. Please read my disclosure for more information.
Spinach, mushroom, brie risotto
30 Minutes • Gluten-free • Low FODMAP • Serves 4
30 Minutes • Gluten-free • Low FODMAP • Serves 4 • This creamy risotto with spinach, mushrooms, fresh thyme, and brie makes an excellent vegetarian main course (made with veggie broth) or a delicious side dish. And, of course, it’s low FODMAP so it’s good for everyone.

INGREDIENTS:
5 cups low FODMAP chicken broth plus one additional cup if needed (or use low FODMAP vegetable broth)
3 tablespoons garlic-infused olive oil
2 tablespoons salted butter
2 cups Japanese sushi rice or arborio rice
1 cup dry white wine, such as Pinot Grigio or Sauvignon Blanc
2 tablespoons fresh-squeezed lemon juice
1/2 cup freshly grated parmesan cheese
8 ounces brie, slightly frozen, rind removed and chopped
12 – 16 ounces oyster mushrooms, chopped
4 cups baby spinach, washed and chopped roughly
1 teaspoon dry thyme
Salt and pepper
1 - 2 tablespoons fresh thyme for garnish
DIRECTIONS:
In a saucepan or microwave-safe dish, heat the chicken broth until steaming.
Heat 2 tablespoons garlic-infused olive oil and 2 tablespoons butter in a large pot or Dutch oven set over medium-high heat. Stir in the rice, cook until lightly golden and toasted, 2-3 minutes. Add the wine and 1 teaspoon salt, continue to cook for 3-4 minutes, or until the wine has absorbed into the rice. Stir in 5 cups warmed broth and bring to a boil over high heat, cover, reduce the heat to low, and simmer for 15 minutes.
After 15 minutes, stir in the remaining up to 1 cup broth (to get the consistency you prefer) and the grated parmesan. Stir until thickened, about 2-3 minutes. Add the brie, cooked mushrooms, and fresh thyme. Stir to combine, then remove from the heat. If the risotto gets too thick, add additional warm broth to thin. It should be creamy, but with just a touch of liquid. Taste, and adjust seasoning with salt.
While the risotto cooks, make the mushrooms. Heat the remaining 1 tablespoon garlic-infused olive oil in a medium skillet over medium heat. Saute the mushrooms until softened, about 3 minutes. Add the spinach in the last 30 seconds and stir just to wilt. Remove from the heat and stir the sauteed vegetables into the rice mixture.
To serve, divide the risotto in bowls with fresh thyme and additional parmesan cheese sprinkled over the top.
This recipe contains affiliate links so you can easily purchase items listed on the page. This is for your information and convenience. If you purchase through this link, I may earn a commission but there is no additional cost to you. Please read my disclosure for more information.
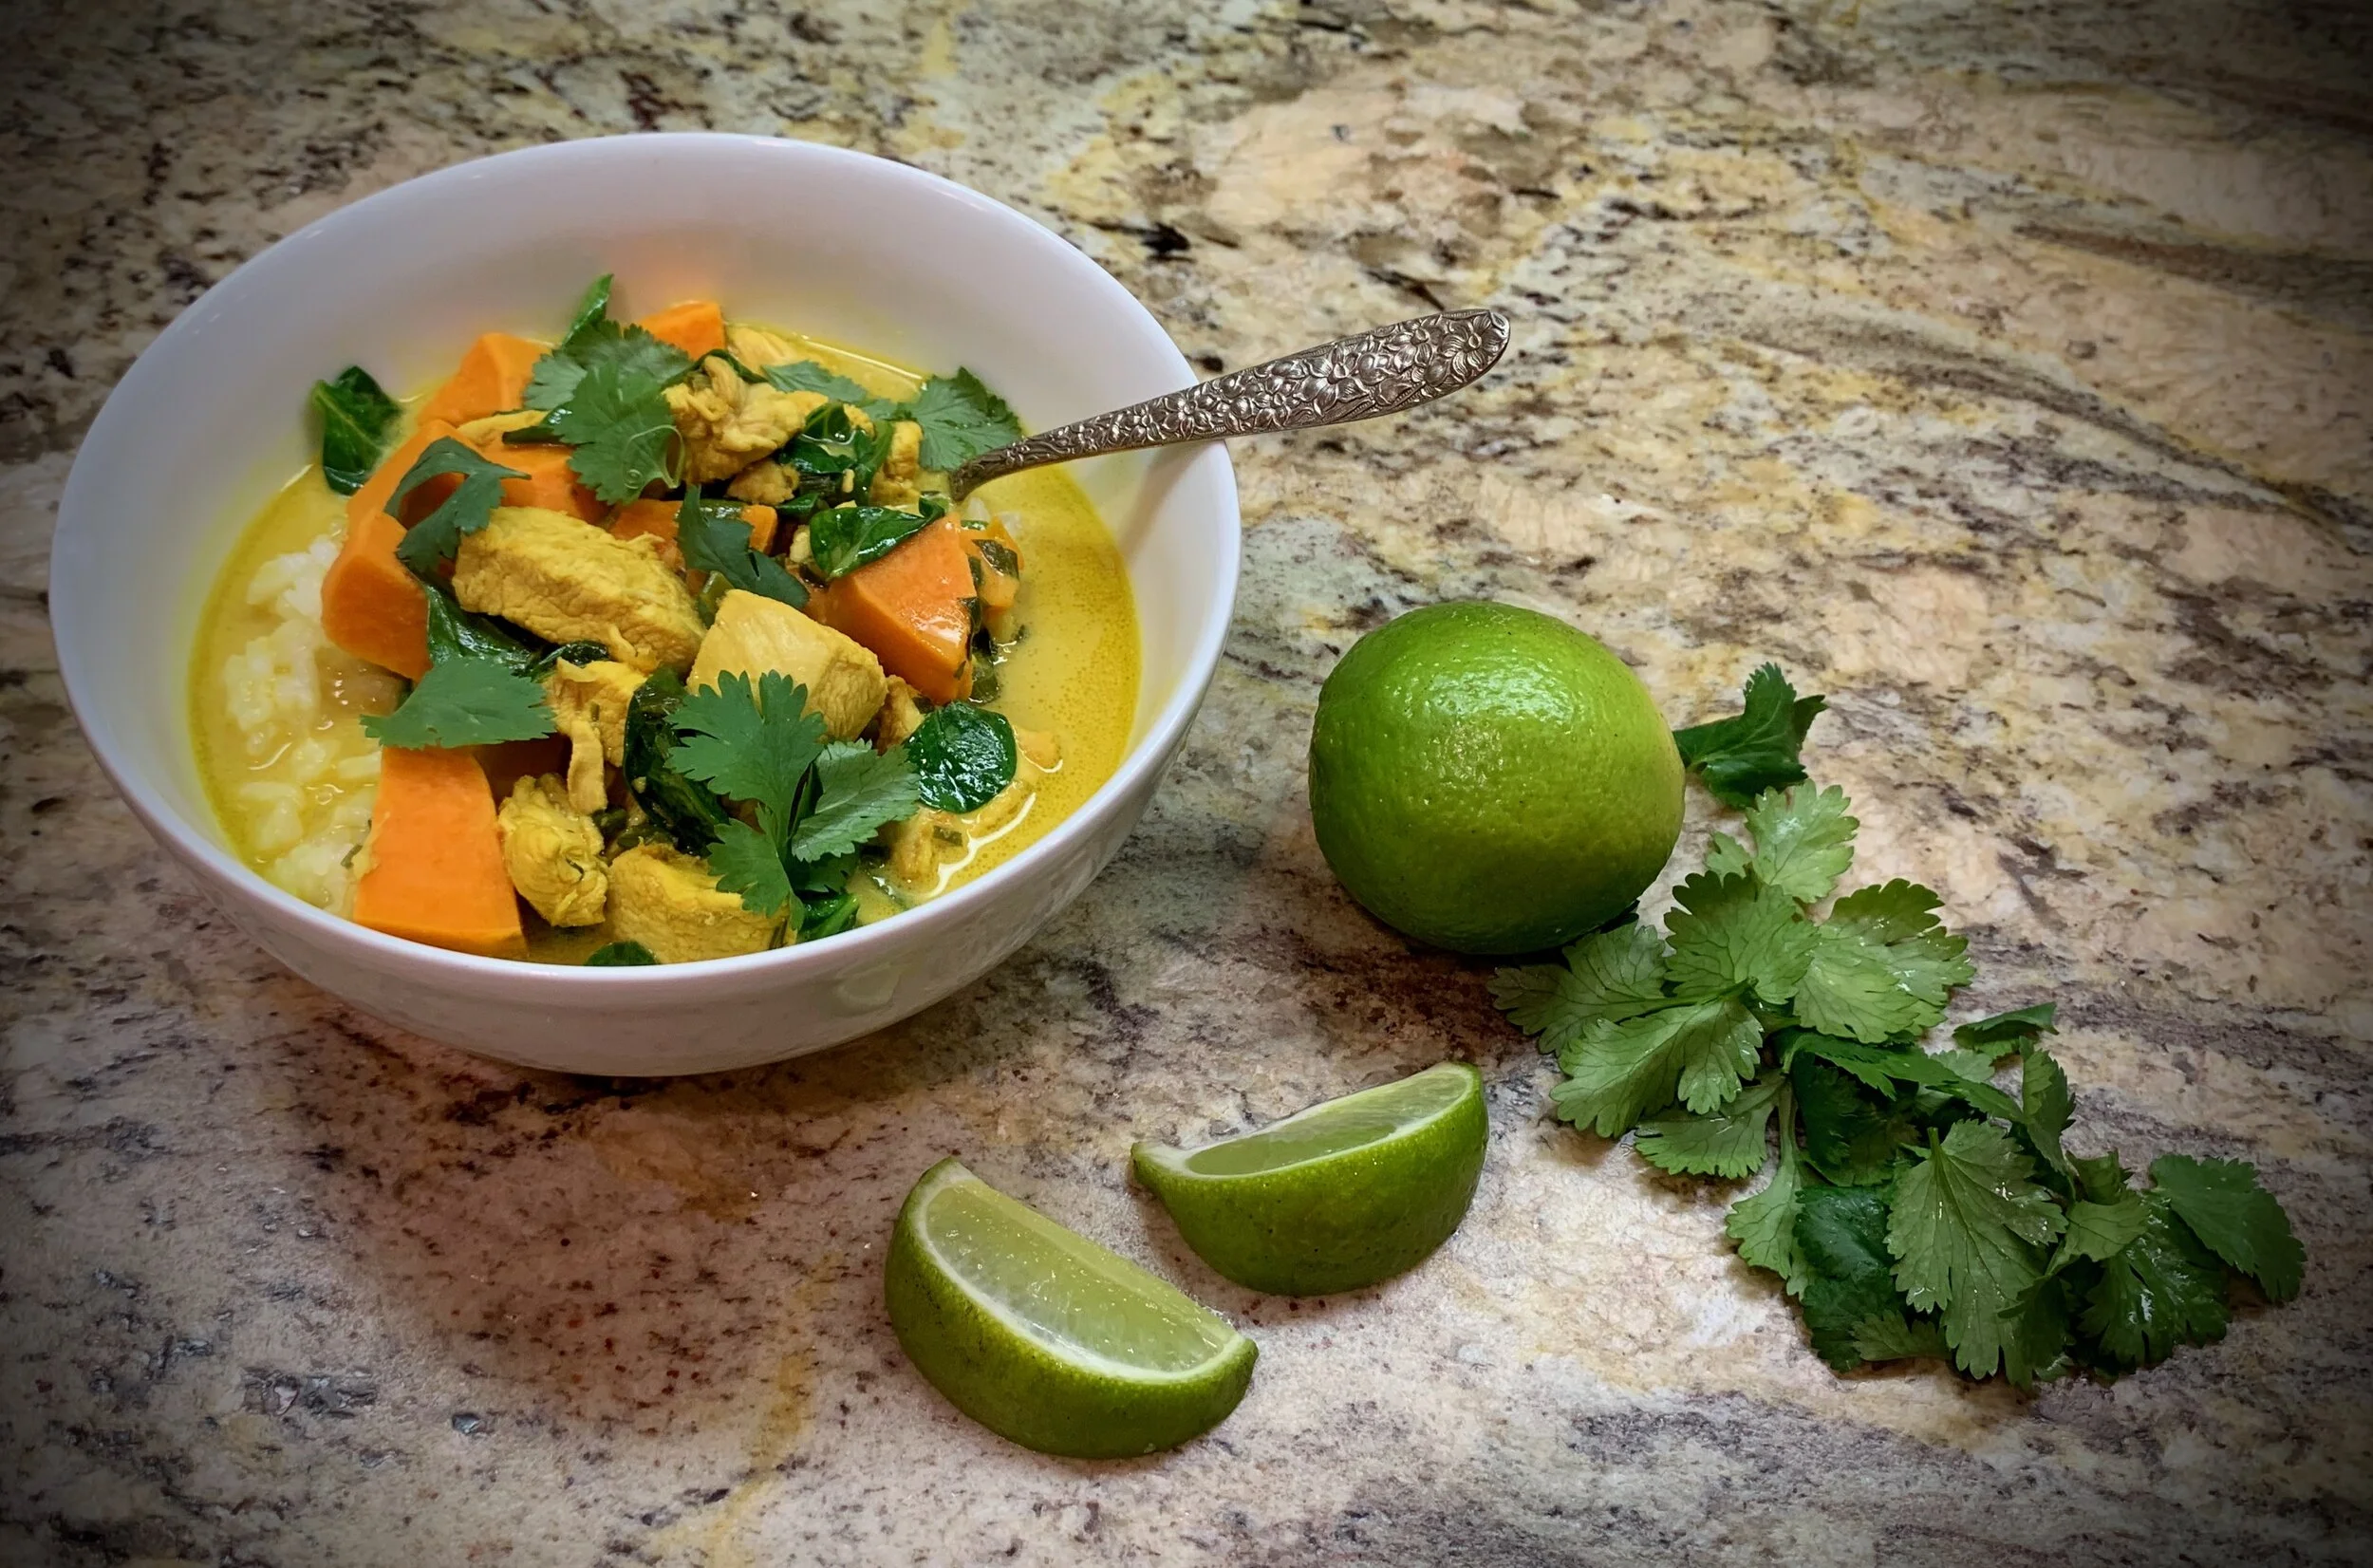
Thai chicken and sweet potato soup
30 Minutes • Gluten-free • Dairy-free • Low FODMAP • Serves 6
30 Minutes • Gluten-free • Dairy-free • Low FODMAP • Serves 6 •This beautiful and delicious low FODMAP soup fuses the flavors of Thailand and India to delight your palate and your belly. The braised chicken, tender sweet potatoes, and spinach are blended with coconut milk and served over rice for the perfect one-dish meal. Best of all? You can make it in 30 minutes!
INGREDIENTS
1 1/2 pounds boneless skinless chicken breasts (or use chicken thighs if you prefer dark meat)
1 tablespoon ground turmeric
2 teaspoons ground ginger
3 tablespoons garlic-infused olive oil
6 green onions (green part only) chopped
1-inch fresh ginger, peeled and grated
1/4 teaspoon cayenne pepper (use more or less to your taste)
1/2 cup fresh cilantro, chopped plus more for serving
1 medium sweet potato, peeled and cut into 1-inch chunks
1-2 cups low FODMAP chicken broth
1 can (13.5 ounces) canned coconut milk
2 tablespoons gluten-free soy sauce
2 cups fresh baby spinach
Juice of 2 limes
2 cups cooked rice, for serving
DIRECTIONS:
Put your rice on to cook so it will be done when your soup is done.
Cube and toss the chicken with turmeric, ground ginger, and 1 tablespoon garlic-infused olive oil. Let sit while you prepare your other ingredients.
Heat 2 tablespoons oil in a large Dutch oven or pot over medium-high heat. Add the chicken and sear until all sides are lightly browned, about 2 minutes. Add the green onions, ginger, cayenne, and cilantro, cook 1 minute, then add the chopped sweet potato.
Add 1 cup broth, coconut milk, and soy sauce. Bring just to a boil, then reduce the heat to low. Partially cover and simmer for 20-30 minutes, or until the potatoes are cooked through. If the soup is too thick, add additional broth. Stir in the spinach and lime juice. Season to taste with salt.
Serve the chicken and sauce over rice. Top with fresh cilantro and enjoy.
Original recipe inspired by Tieghan Gerard of Half Baked Harvest
This recipe contains affiliate links so you can easily purchase items listed on the page. This is for your information and convenience. If you purchase through this link, I may earn a commission but there is no additional cost to you. Please read my disclosure for more information.
Baked hot/sweet chicken tenders (low FODMAP)
45 Minutes • Gluten-free • Low FODMAP • Serves 4 - 6
45 Minutes • Gluten-free • Low FODMAP • Serves 4 - 6 • These chicken tenders aren’t just for kids and we know you love them too! Baked with a crunchy pretzel coating and served with a hot/sweet sauce, these "grown-up" chicken tenders make a great appetizer or even a main course paired with a hearty salad. We’ve used Smoke n Sanity’s seasonings that are Monash University low FODMAP certified for this recipe, but we have also provided a pantry-staple alternative for this seasoning.

INGREDIENTS:
1/4 cup Dijon mustard
1/4 cup lactose-free sour cream
2 tablespoons maple syrup
2 pounds boneless chicken tenders or chicken breast cut into small fillets
4 cups finely crushed gluten-free salted pretzels
2 teaspoons Smoke n Sanity Triple S Low FODMAP seasoning
OR: 1 teaspoon chili powder, 1/2 teaspoon smoked paprika, and 1/2 teaspoon black pepper
Garlic-infused extra virgin olive oil for brushing
Ranch dressing for serving (optional - recipe below)
INGREDIENTS HOT/SWEET SAUCE:
1/4 cup maple syrup
3 tablespoons salted butter
1/4-1/2 teaspoon cayenne pepper (use more or less to your taste)
1 teaspoon Smoke n Sanity Triple S Low FODMAP seasoning
OR: 1/2 teaspoon chili powder, 1/4 teaspoon smoked paprika and 1/4 teaspoon pepper
Kosher salt
DIRECTIONS:
In a bowl, whisk together the mustard, sour cream, and maple syrup. Add the chicken and toss well to coat.
Preheat the oven to 425 degrees F. Line a baking sheet with parchment.
Add the pretzel crumbs, Smoke n Sanity seasoning (or paprika, chili powder, and pepper) to a medium-sized bowl. Stir to combine.
Remove each piece of chicken from the honey mustard, and dredge through the pretzel crumbs, pressing gently to adhere. Place on the prepared baking sheet. Repeat until all the chicken has been used. Make sure not to crowd your pan, if necessary use two baking sheets. Lightly brush/drizzle the chicken with olive oil. Transfer to the oven and bake for 15-20 minutes or until the chicken is cooked through.
Meanwhile, make the hot/sweet sauce and ranch dip (if using).
Serve the chicken topped with flaky salt, hot/sweet sauce, and ranch dip.
HOT/SWEET SAUCE:
Melt together the maple syrup, butter, cayenne, Smoke n Sanity seasoning (or paprika, chili powder, and pepper), and a pinch of salt.
RANCH DIP:
1/2 cup lactose-free sour cream
1 teaspoon Smoke n Sanity SPG seasoning
Stir to combine. Let sit for 15 minutes and stir again before serving.

This recipe contains affiliate links so you can easily purchase items listed on the page. This is for your information and convenience. If you purchase through this link, I may earn a commission but there is no additional cost to you. Please read my disclosure for more information.
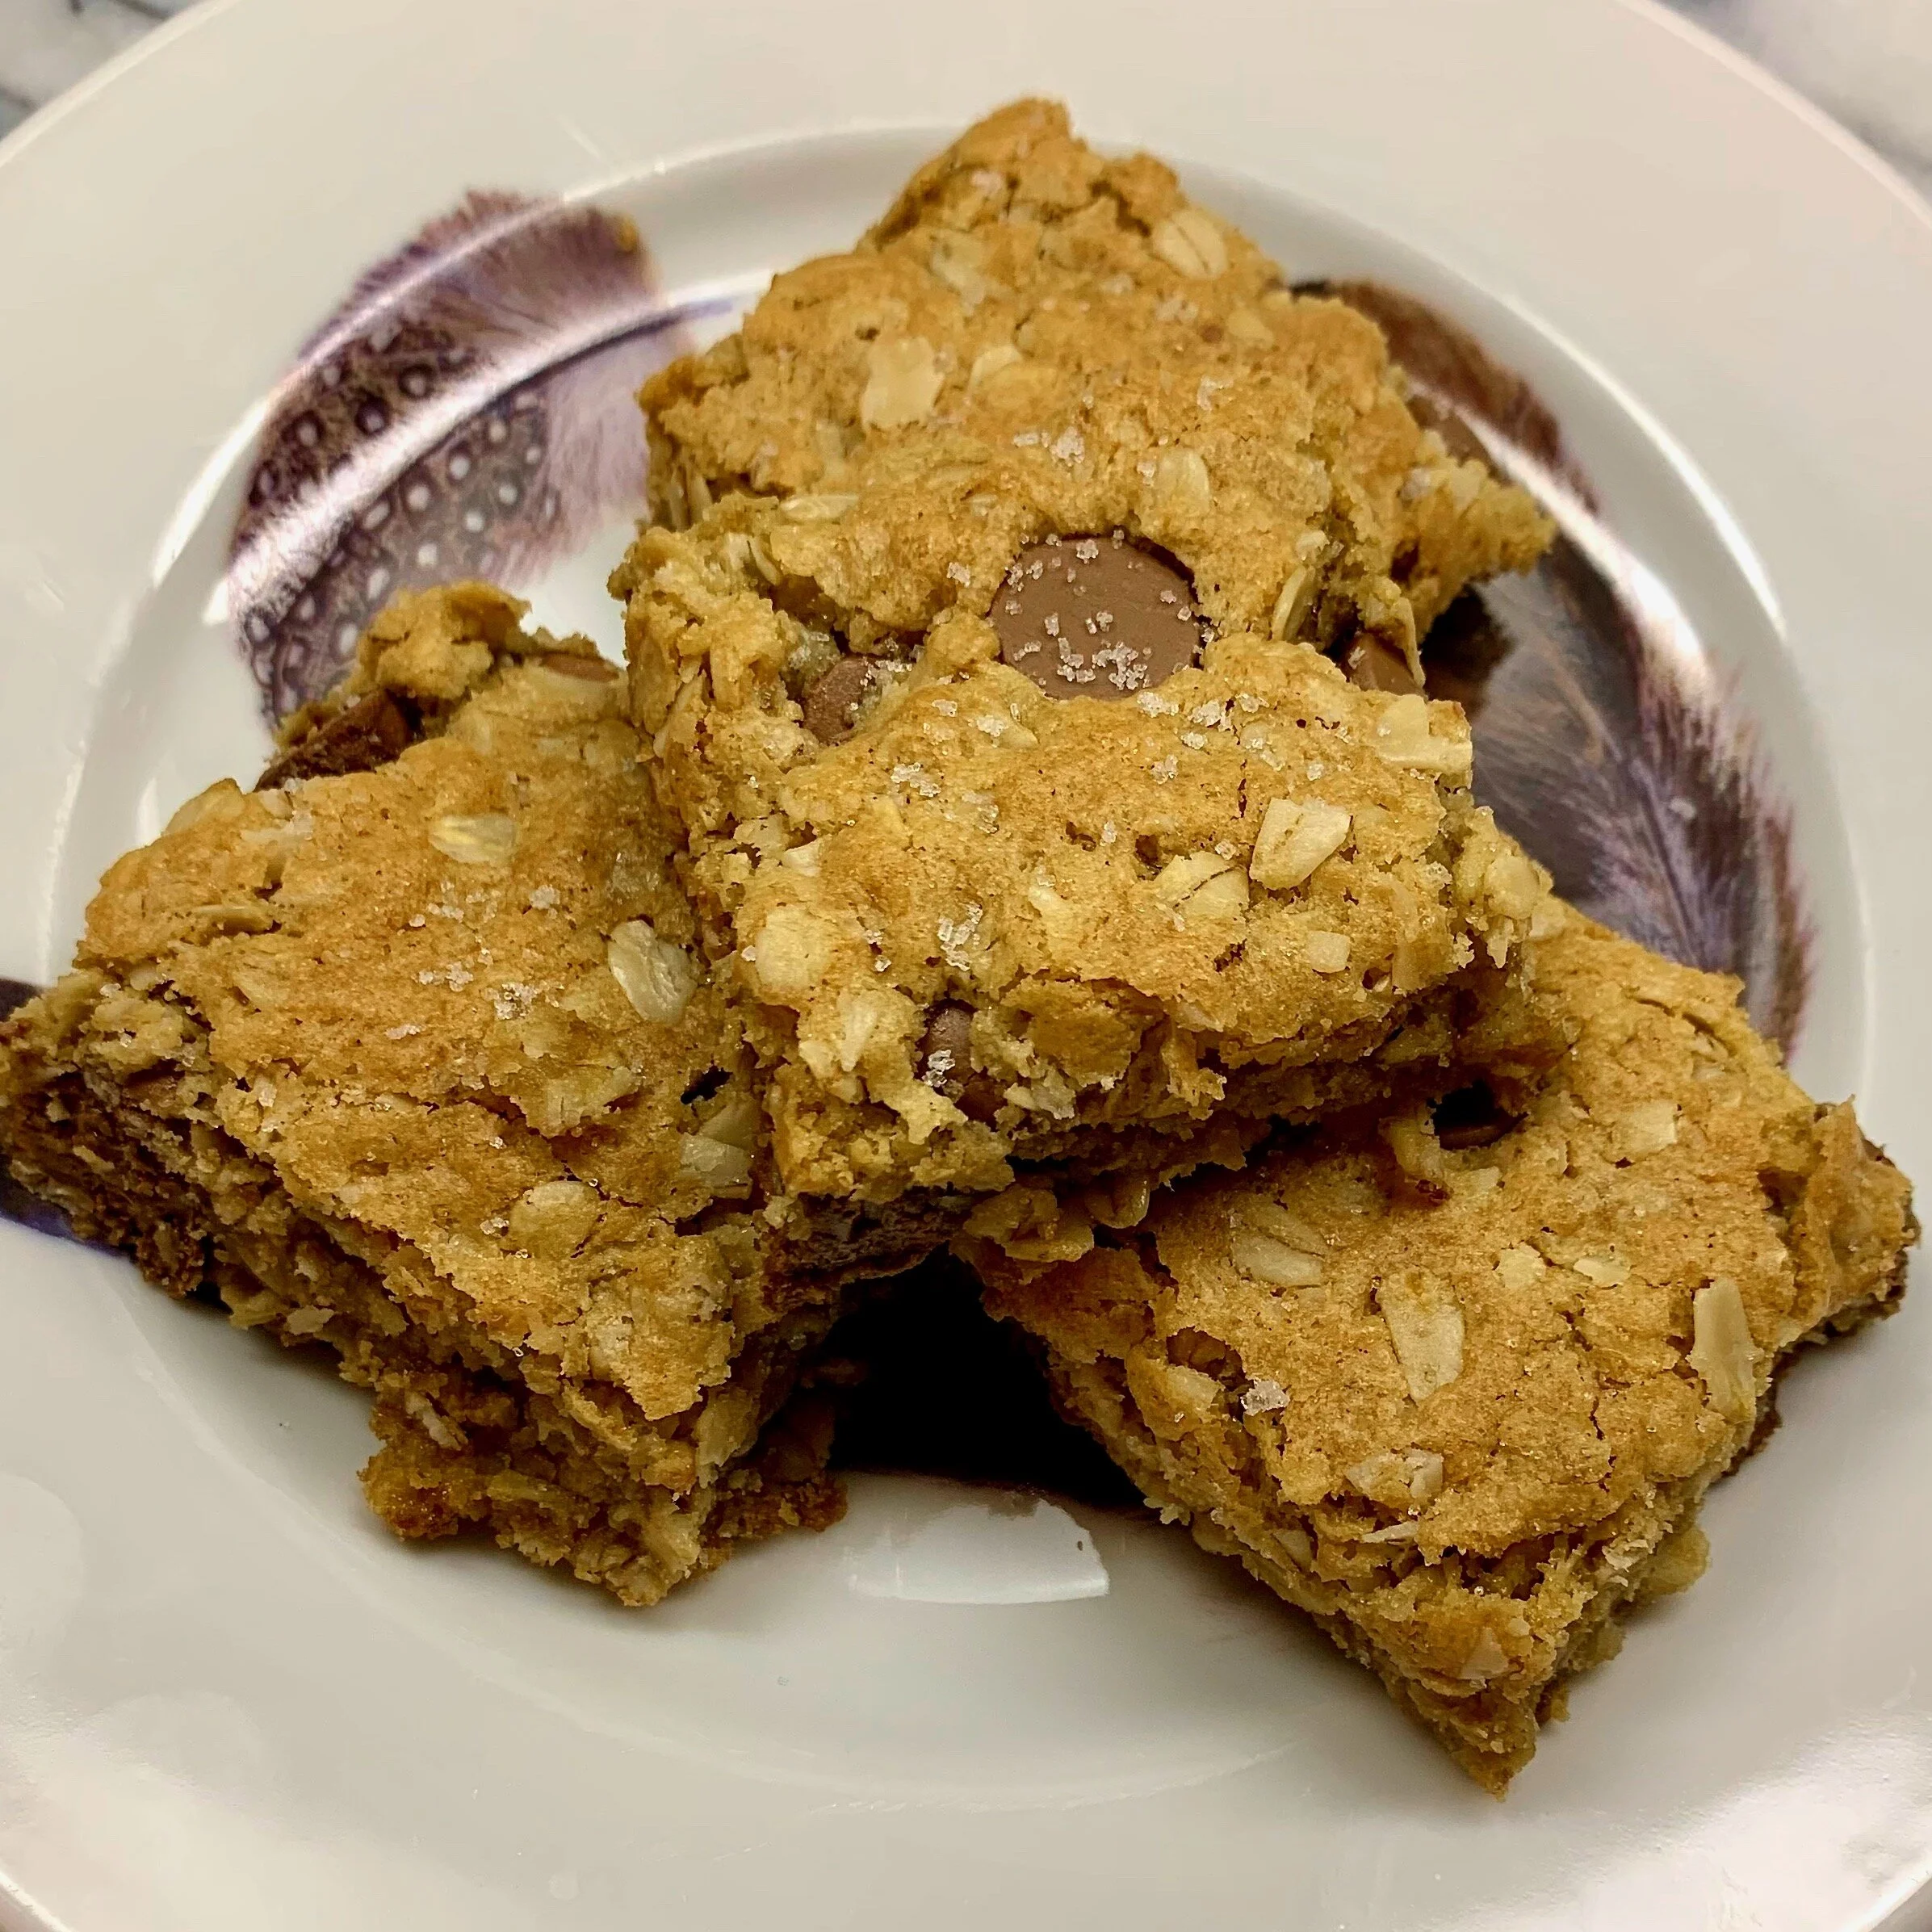
Oatmeal dark chocolate chip cookie bars
30 Minutes • Gluten-free • Lactose-free • Low FODMAP • Serves 12 - 16
30 Minutes • Gluten-free • Lactose-free • Low FODMAP • Serves 12 - 16 • Make these in 30 minutes. Really! They’re that easy. These hearty gluten-free oatmeal cookie bars will satisfy your chocolate sweet tooth.

INGREDIENTS
2 1/2 cups gluten-free oatmeal
1 1/2 cups all-purpose gluten-free flour such as Bob’s Red Mill or Cup4Cup
1/2 cup light brown sugar
1/2 cup granulated sugar
1 teaspoon baking soda
1/2 teaspoon kosher salt
1 cup melted coconut oil
2 large eggs
1 tablespoon vanilla extract
1 1/2 cups dark chocolate chips
1 cup peanuts, pecans, or walnuts (chopped - optional)
1/2 teaspoon fleur de sel or other flaky salt
DIRECTIONS:
Preheat the oven to 350 degrees F. Line a 9x13 inch baking dish with parchment paper.
In a large mixing bowl or the bowl of a stand mixer, mix the oatmeal, flour, brown sugar, granulated sugar, baking soda, salt, coconut oil, eggs, and vanilla. Beat until the dough is moist and all the ingredients are combined. The dough will be crumbly. Mix in the chocolate chunks.
Press the dough into the prepared baking dish. It may seem a bit stiff. Wet your hands to press it out into an even layer in the pan. Transfer to the oven and bake 18-20 minutes or until the edges are set and the bars are golden. As soon as you take the bars out of the oven, sprinkle with fleur de sel or another flaky salt.
Let cool for about 5 minutes and then cut into bars. Cool to room temperature at room temperature in an air-tight container.
Bars are best slightly warm so pop each bar in the microwave for 20 seconds before eating for the best flavor and texture.
Original recipe inspired by Tieghan Gerard of Half Baked Harvest.
This recipe contains affiliate links so you can easily purchase items listed on the page. This is for your information and convenience. If you purchase through this link, I may earn a commission but there is no additional cost to you. Please read my disclosure for more information.
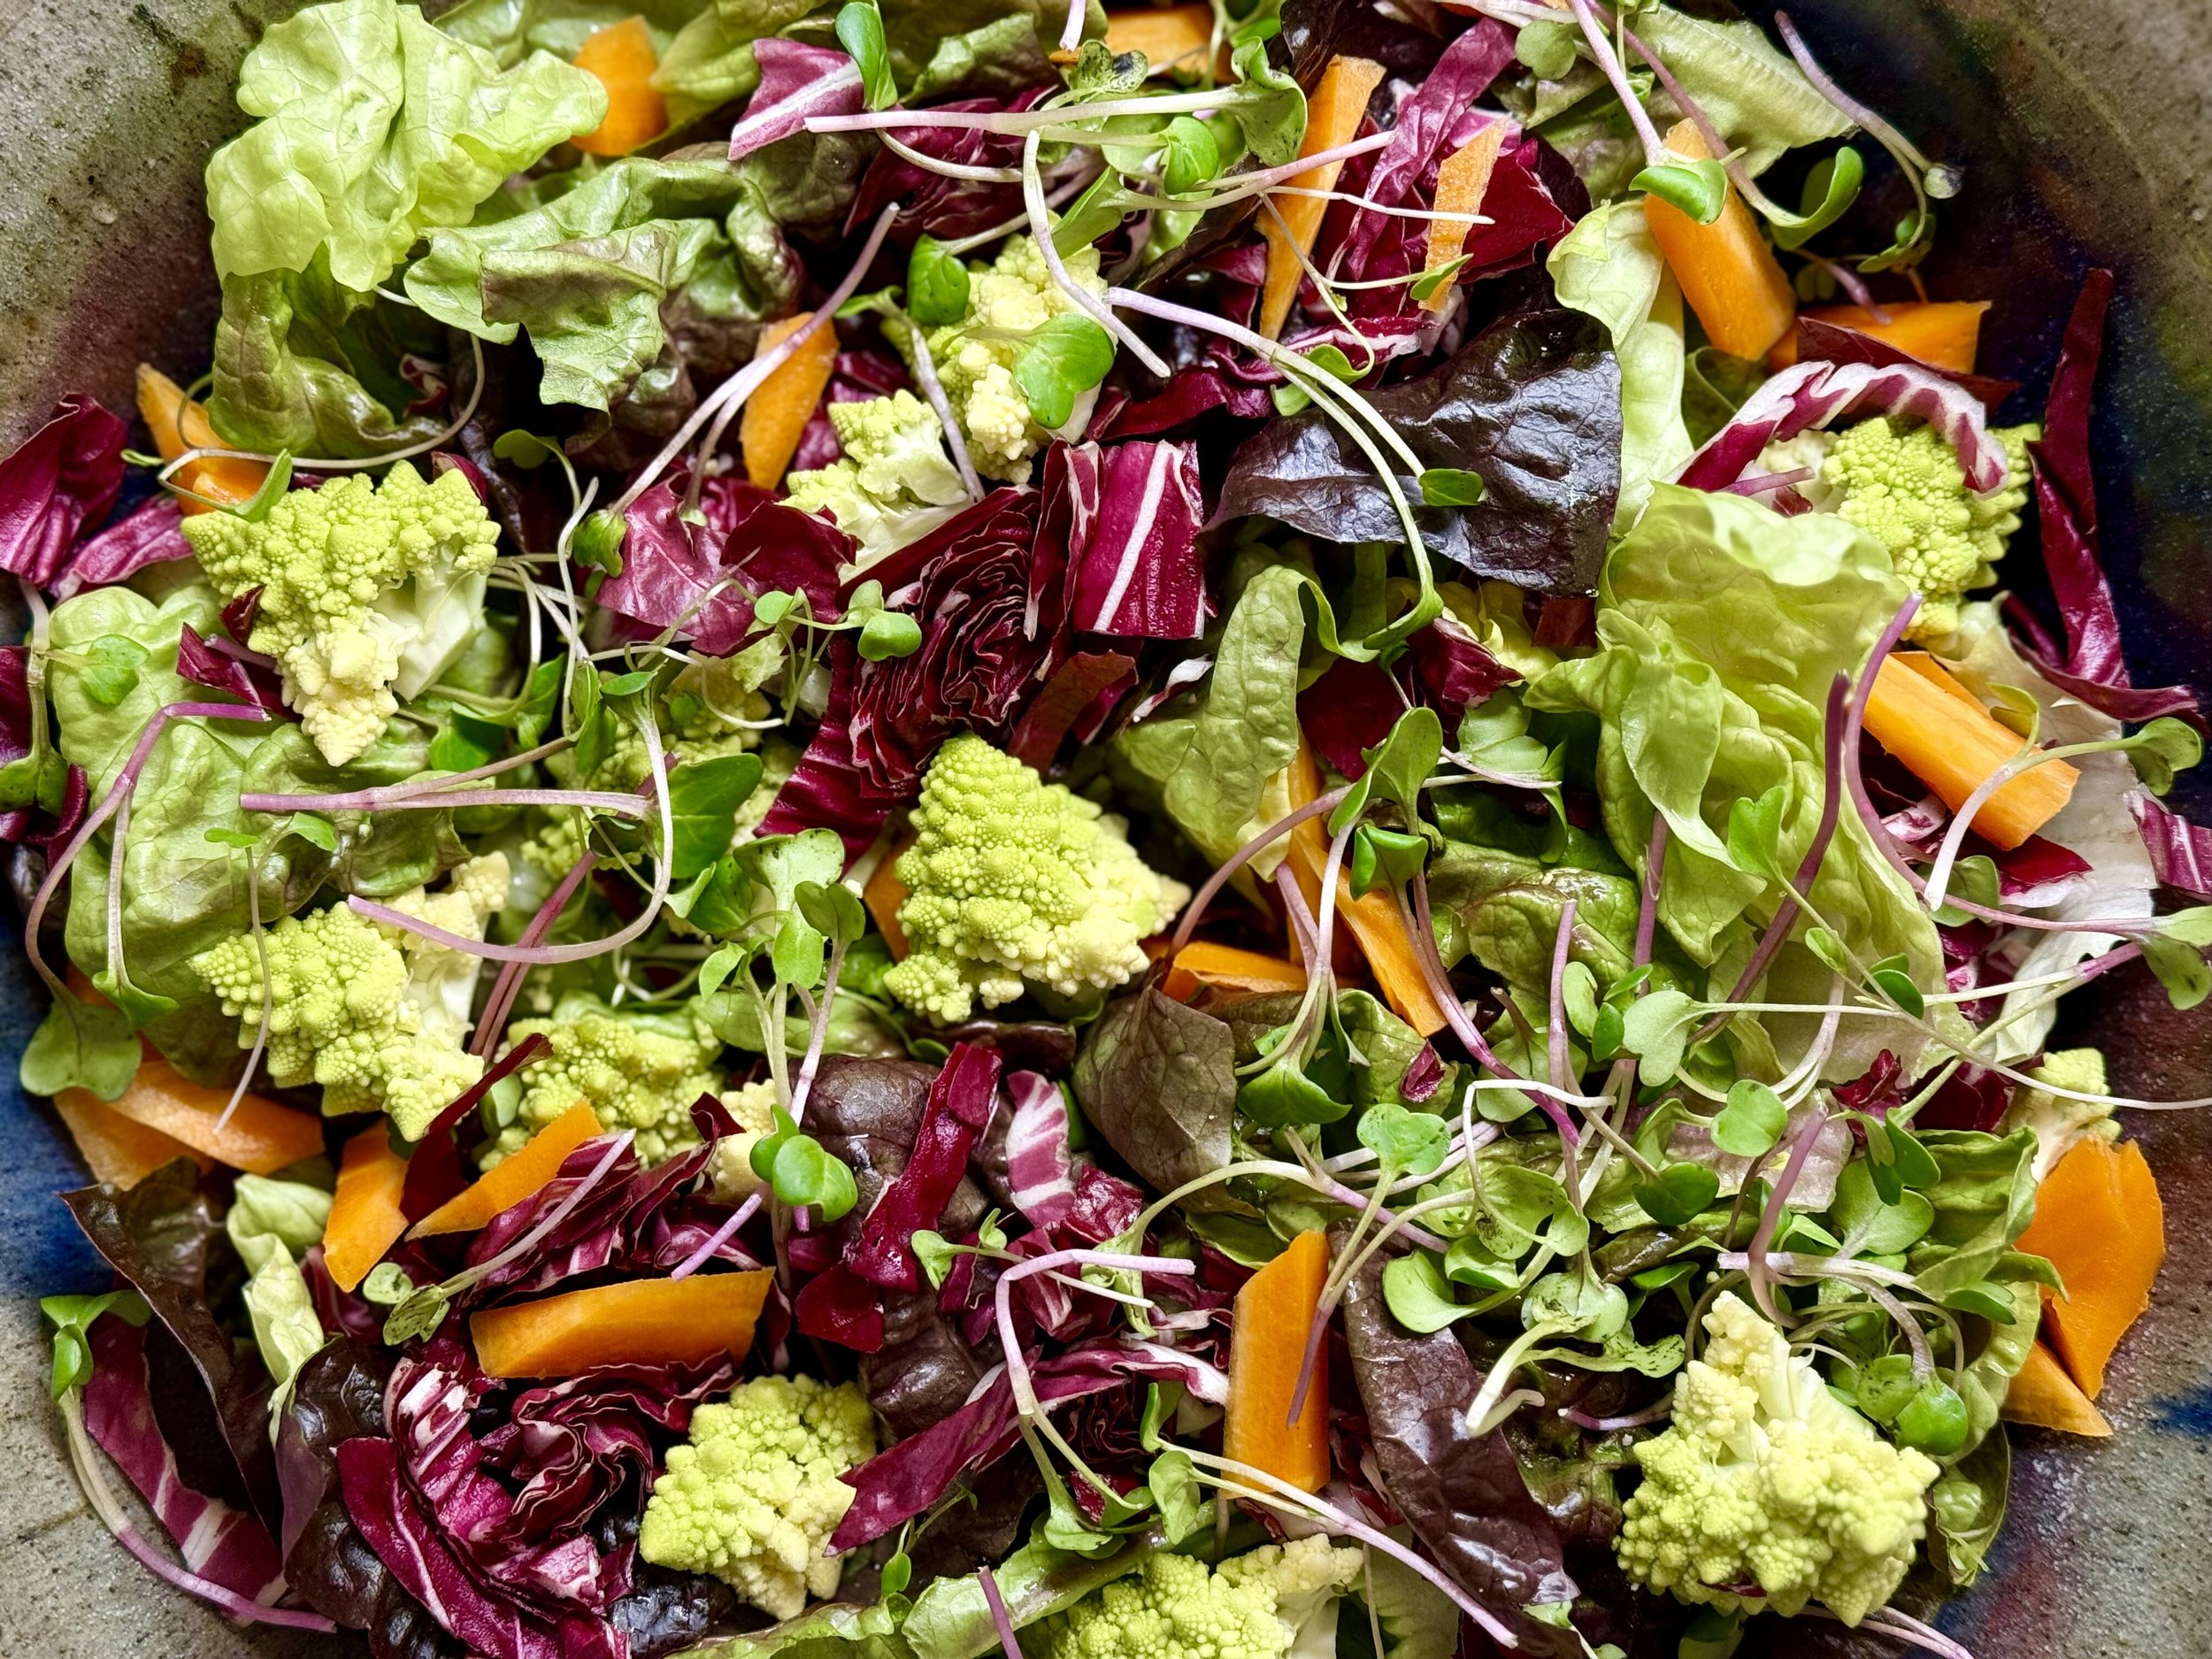
Hearty green salad (low FODMAP)
30 Minutes • Gluten-free • Low FODMAP • Serves 6
30 Minutes • Gluten-free • Low FODMAP • Serves 6 • This salad is hearty enough to be a vegetarian meal all on its own. Or, you can add alternative proteins such as chicken, salmon, or steak for an even heartier meal. It’s so pretty, it can be a beautiful centerpiece for your dinner table. Adjust the ingredients to match the size of your gathering.
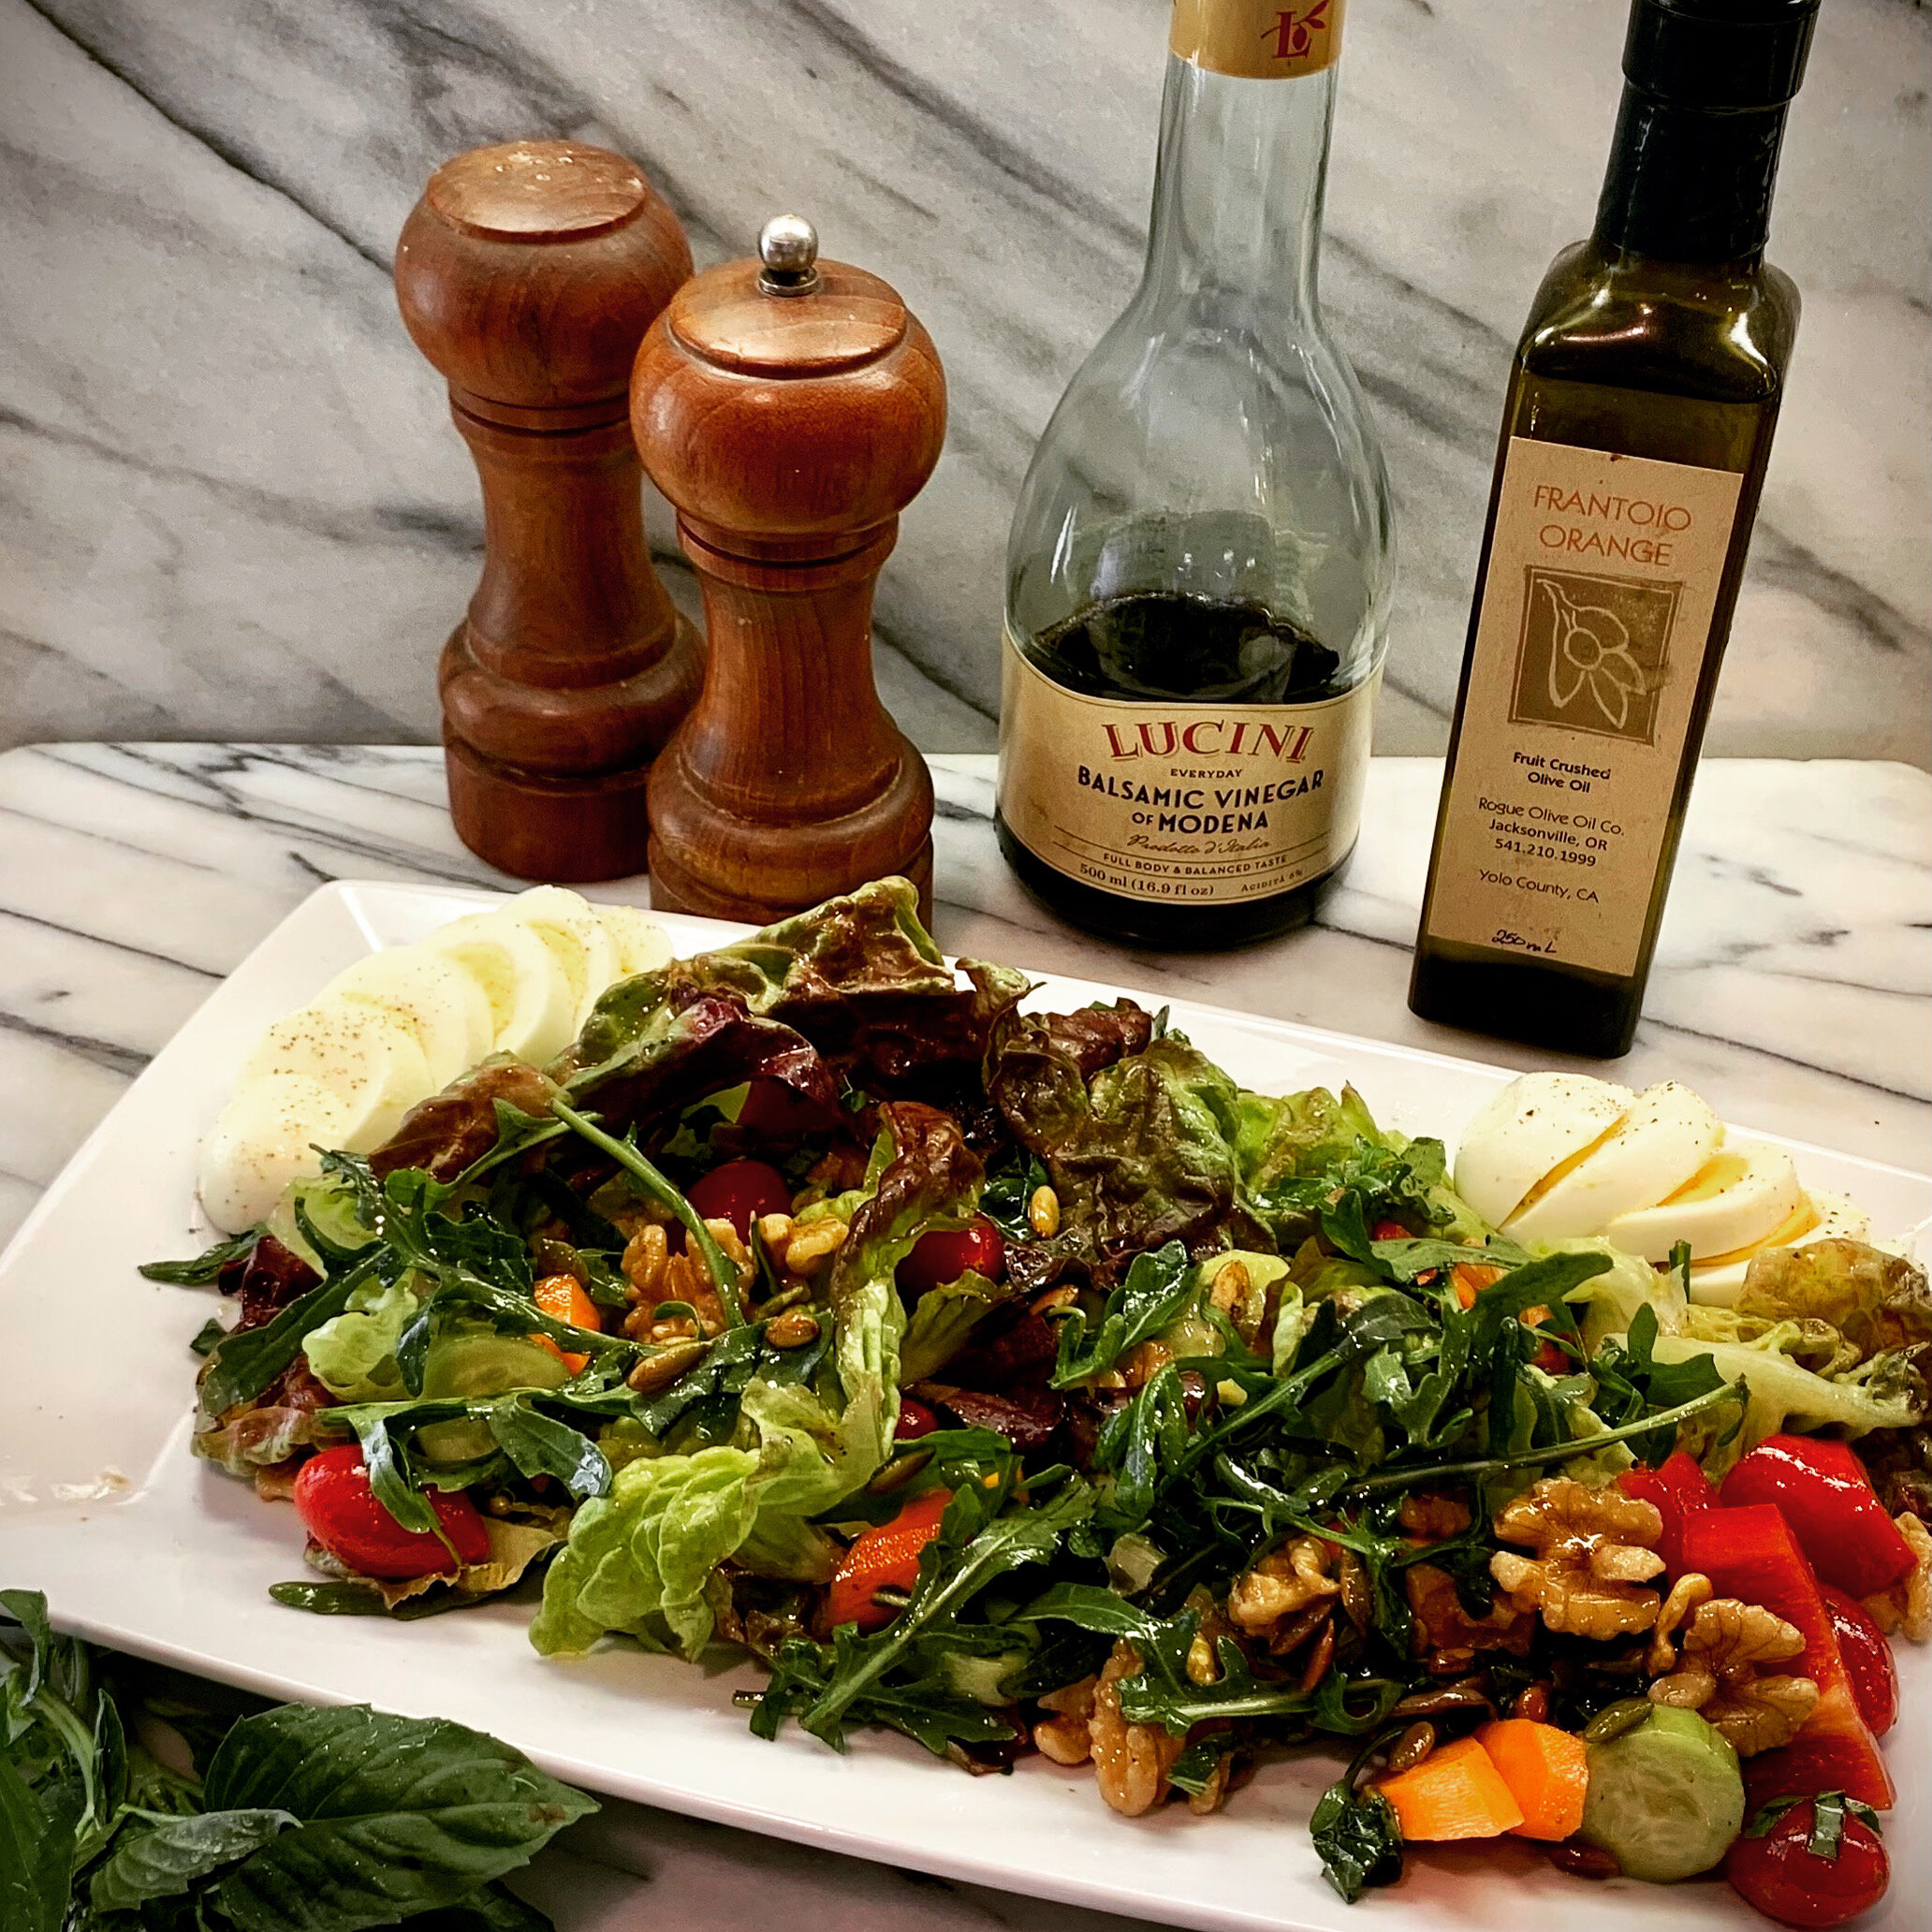
SALAD INGREDIENTS:
2 cups baby arugula
2 cups red or green butter lettuce
4 mini Persian cucumbers – peeled and sliced thickly
4 carrots – peeled and sliced diagonally
Handful of cherry tomatoes
1 bell pepper (red or orange) - diced
1/3 cup fresh basil – chiffonade (sliced thinly)
1/2 cup pumpkin seeds (pepitas) – roasted and salted - see our recipe here
1/2 cup walnuts – raw halved
Hard-boiled eggs – peeled and sliced (or alternate protein of your choice) - optional
DRESSING INGREDIENTS:
1/3 cup extra virgin olive oil
1 tablespoon balsamic vinegar
Salt and Pepper to taste
DRESSING DIRECTIONS:
Mix all ingredients together in a small jar and shake to combine. Adjust the salt and pepper to taste.
SALAD DIRECTIONS:
Combine the arugula and butter lettuce in a large bowl.
Add the cucumbers, carrots, cherry tomatoes, bell pepper, fresh basil, walnuts, and pepitas and toss to combine.
Prepare the dressing and add just enough to lightly coat the lettuce and toss again.
Put the salad on plates and set sliced eggs alongside. Add some salt and pepper to the eggs and serve.
This recipe contains affiliate links so you can easily purchase items listed on the page. This is for your information and convenience. If you purchase through this link, I may earn a commission but there is no additional cost to you. Please read my disclosure for more information.
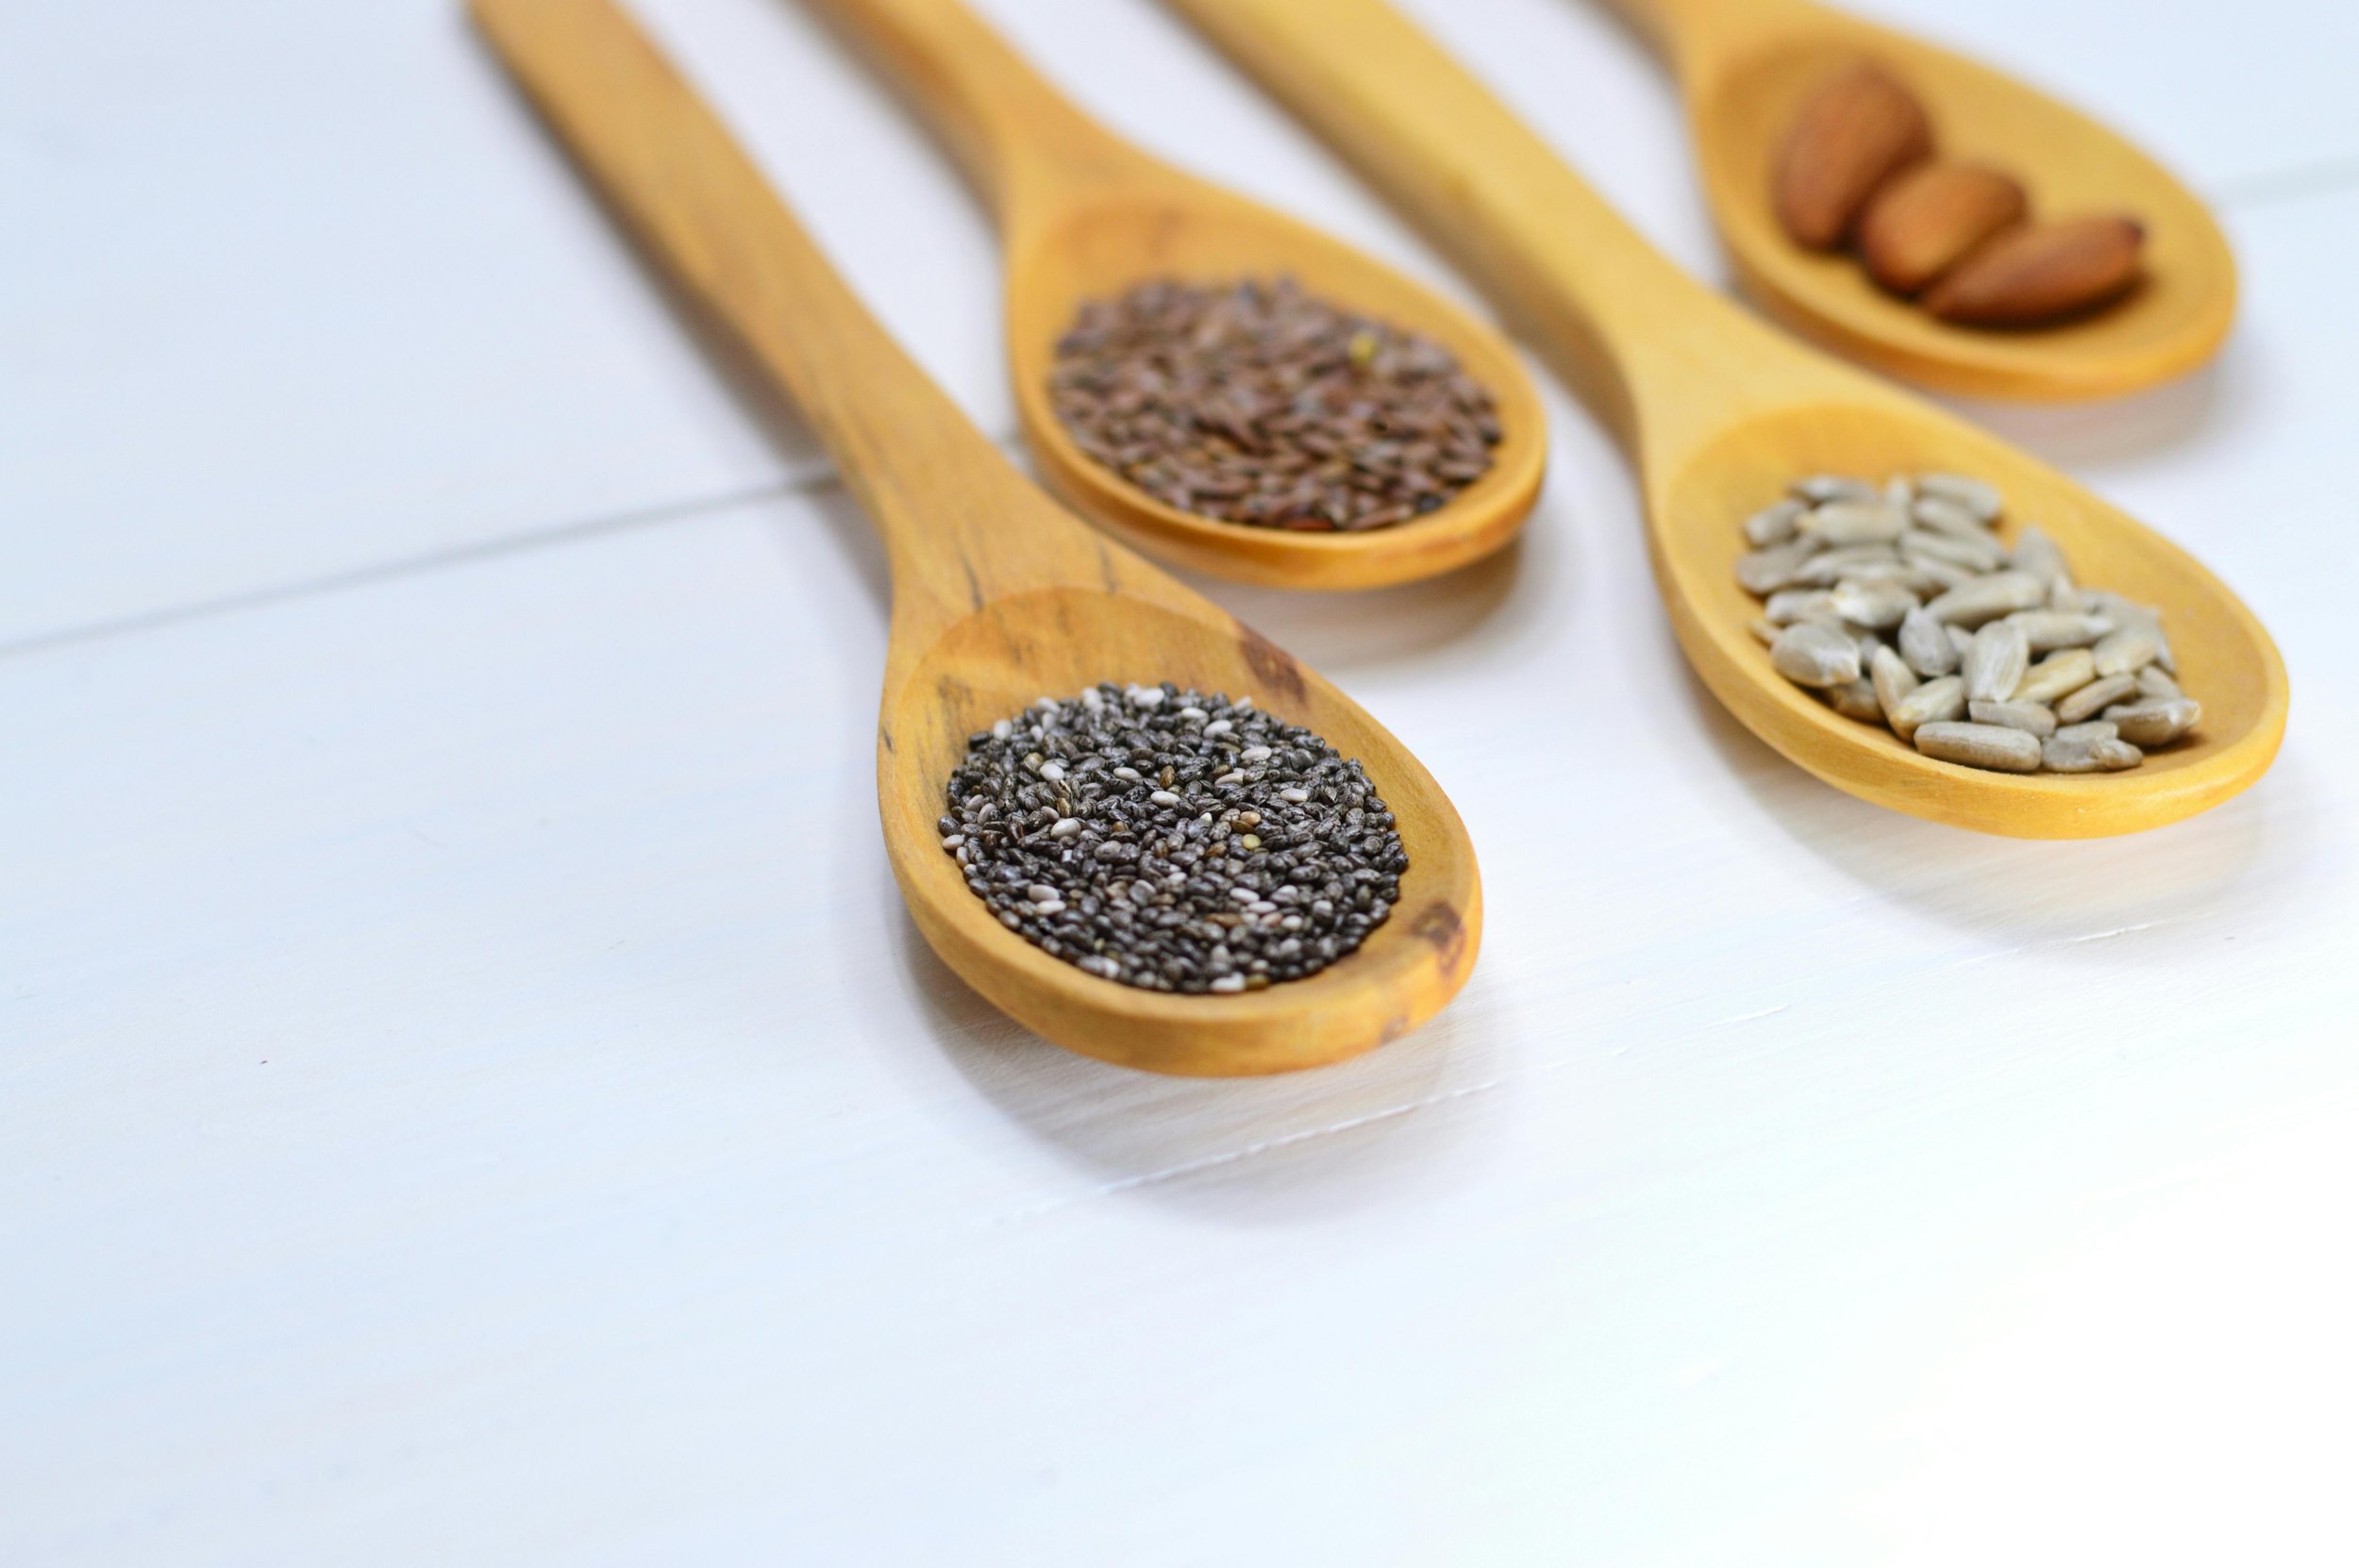
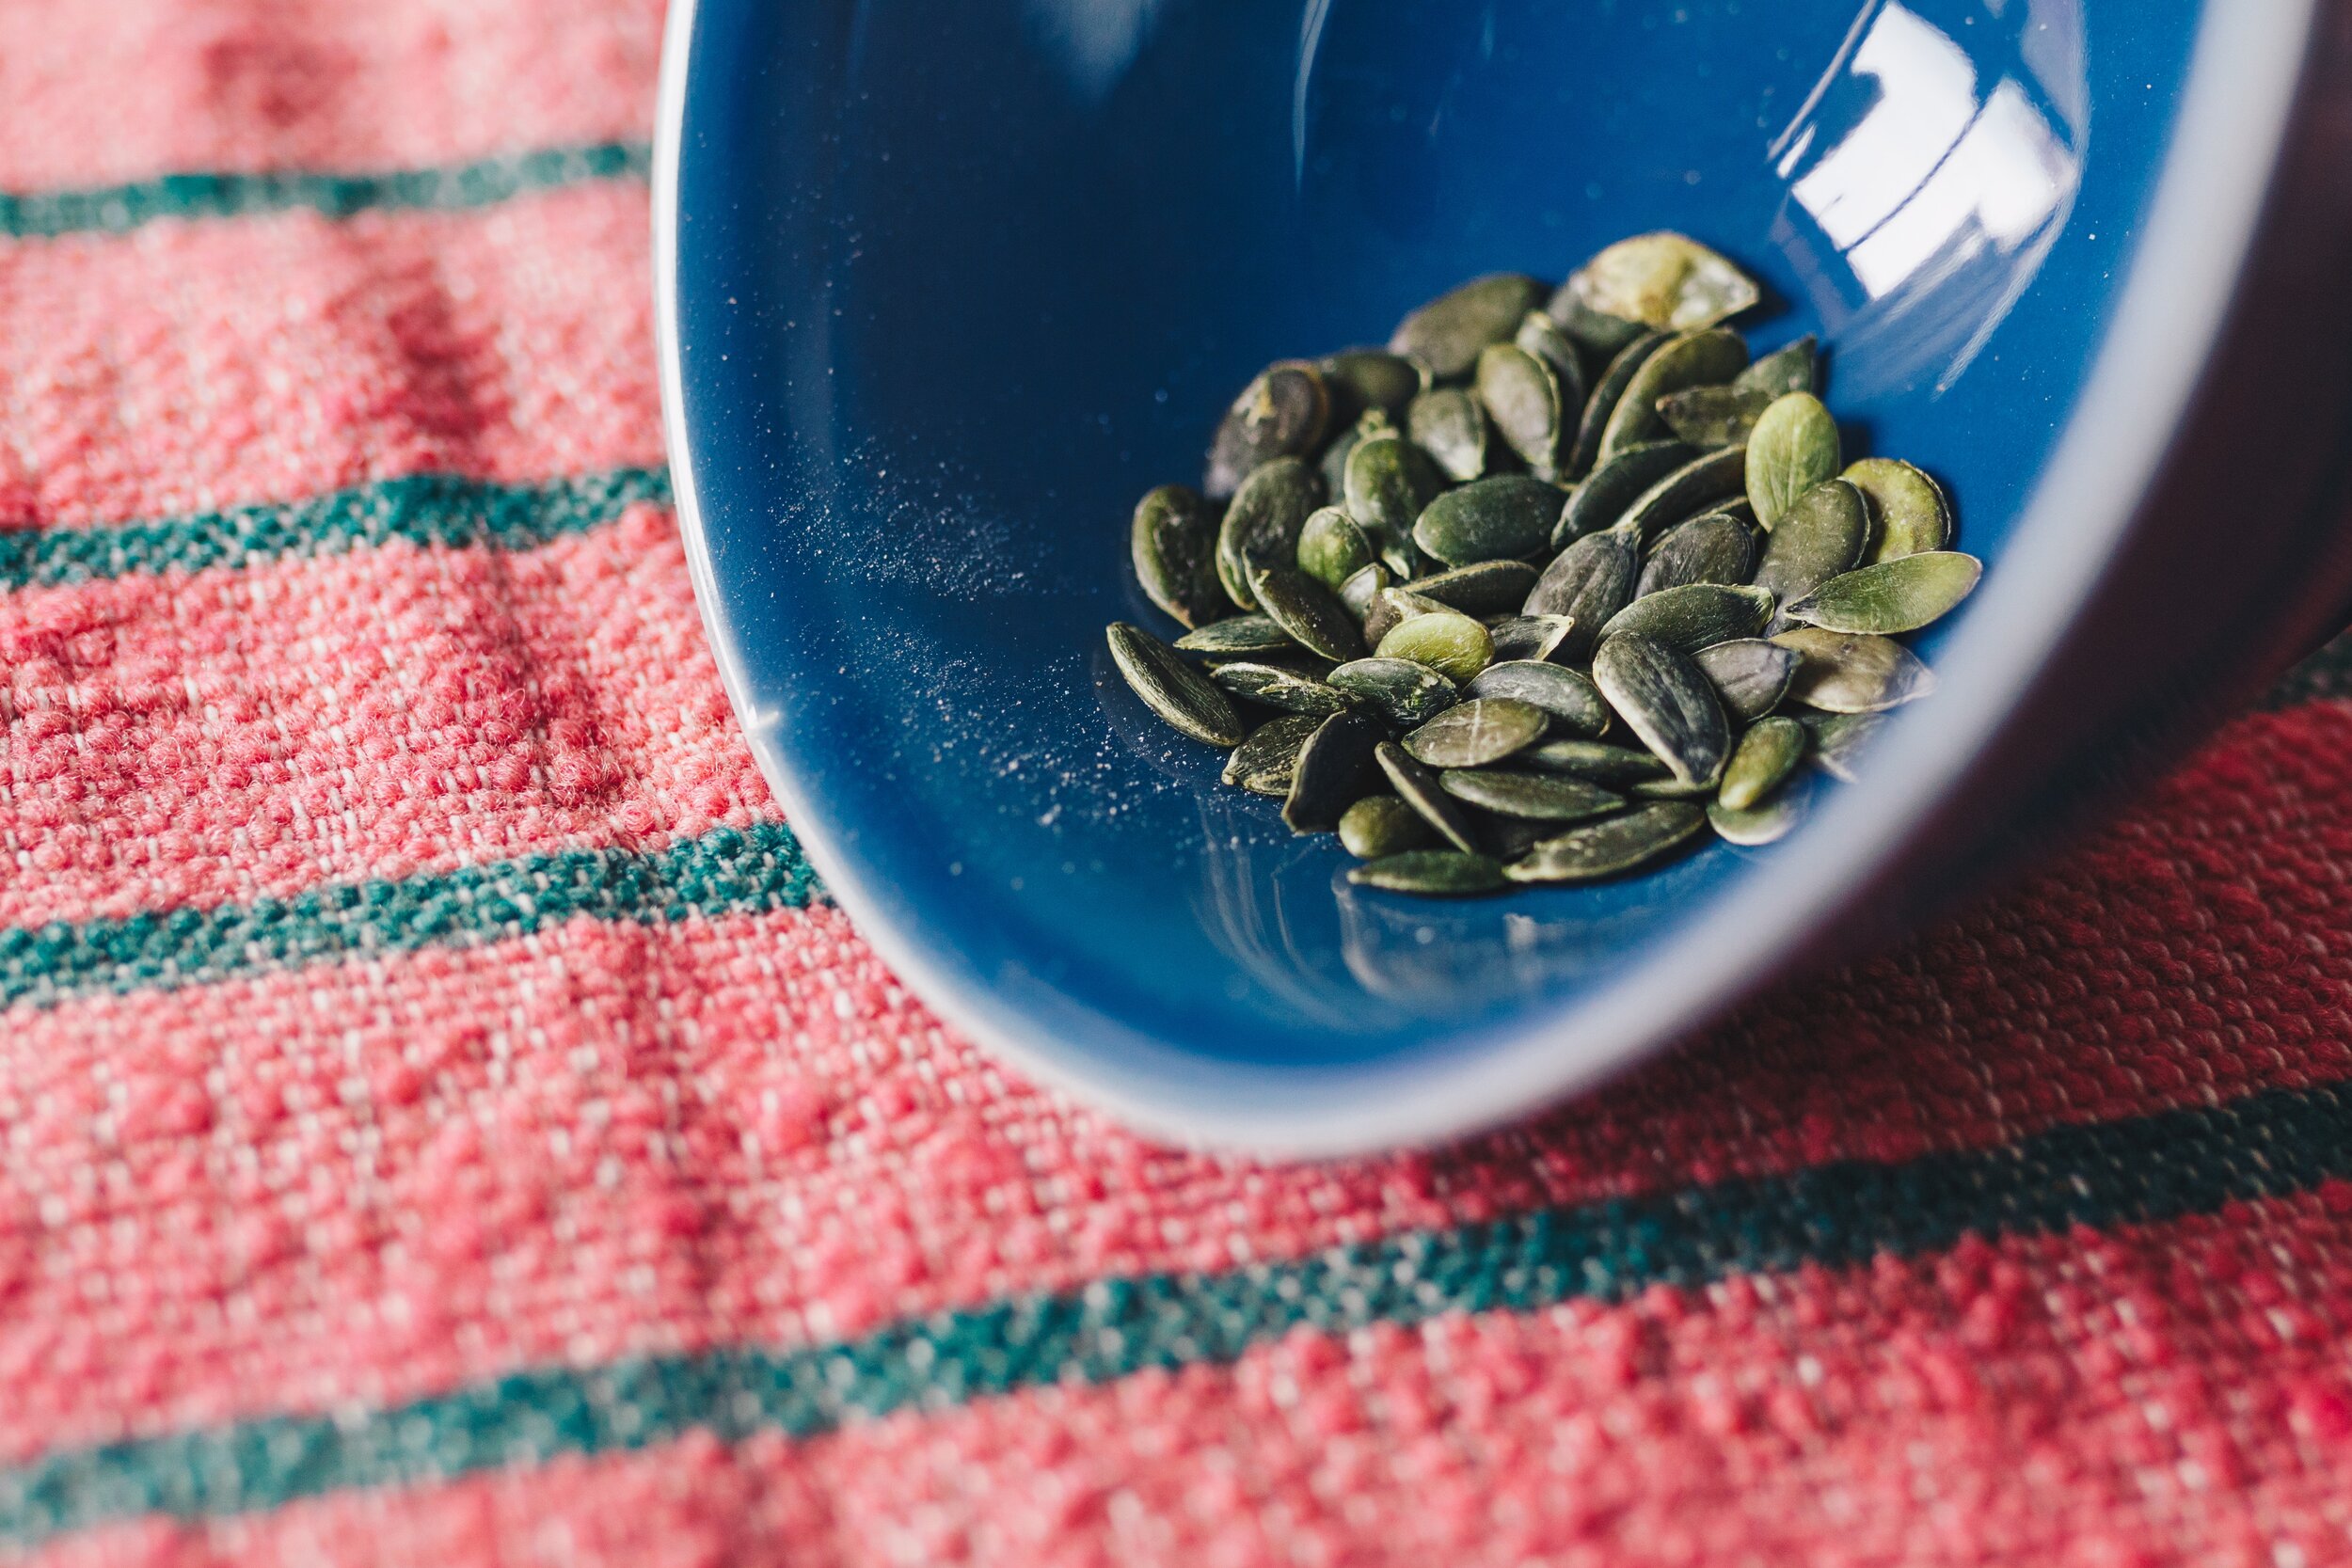
Roasted Pepitas (pumpkin seeds)
15 Minutes • Gluten-free • Lactose-free • Low FODMAP
15 Minutes • Gluten-free • Lactose-free • Low FODMAP • These are a delicious way to add protein and crunch to salads, scrambles, or even soup. You can also enjoy them plain or with other roasted nuts. Keep in mind one low FODMAP serving of pumpkin seeds is 2 Tablespoons so don’t go crazy – even though they’re so good you’ll want to!
INGREDIENTS:
2 cups raw pumpkin seeds (without the shell – they should look GREEN, not WHITE)
2 tablespoons extra virgin olive oil
Salt to taste
DIRECTIONS:
Heat oil over medium-high heat.
Add pumpkin seeds and stir to coat all seeds in oil.
Keep stirring frequently until seeds begin to pop (you’ll hear them!) and start to brown lightly.
Keep roasting until quite a few are lightly browned. This should take about 3 – 5 minutes depending on how hot your stove is and how large your frying pan is.
Remove from heat, sprinkle with salt and stir to combine. Keep stirring until the pan cools and popping stops so none of the seeds burn on the hot pan.
Cool and store in an air-tight container for up to 2 weeks.
This recipe contains affiliate links so you can easily purchase items listed on the page. This is for your information and convenience. If you purchase through this link, I may earn a commission but there is no additional cost to you. Please read my disclosure for more information.