Deliciously Low FODMAP

Inspire yourself with hundreds of delicious low FODMAP recipes, tips, and tools, and enjoy the abundance that is yours even when you have IBS.
Use the buttons and filters to find something specific or browse the complete collection for inspiration.
Discover a treasure trove of recipes with my FREE recipe club! Get new ideas delivered straight to your inbox every week.
Deliciously Low FODMAP is a trademark of IBS Game Changer, LLC
Filter to find Recipes and Tools
More Filtering Options
- All 784
- Appetizer 54
- BBQ 49
- Bowl 32
- Breakfast 68
- Cocktails 13
- Collection 1 58
- Collection 10 27
- Collection 11 30
- Collection 12 27
- Collection 13 31
- Collection 14 29
- Collection 15 31
- Collection 16 34
- Collection 17 31
- Collection 18 33
- Collection 19 36
- Collection 2 32
- Collection 20 33
- Collection 21 33
- Collection 22 40
- Collection 23 62
- Collection 24 5
- Collection 3 28
- Collection 4 29
- Collection 5 30
- Collection 6 32
- Collection 7 31
- Collection 8 31
- Collection 9 32
- Condiments 6
- Crock Pot 4
- Dessert 114
- Diabetes Game Changer Exception Protocol Contains Alcohol 11
- Diabetes Game Changer Exception Protocol Contains Flour 113
- Diabetes Game Changer Exception Protocol Contains Flour AND Sugar 79
- Diabetes Game Changer Exception Protocol Contains Sugar 52
- Diabetes Game Changer First Four Weeks 401
- Dinner 361
- Drink 8
- Easter 1
- Free Guide 17
- Gluten-free 643
- Gut Microbiome 2
- Guthealth 3
- Holidays 70
- IBS Triggers 4
- Keto Friendly 157
- Lactose-Free 181
- Low Carb 2
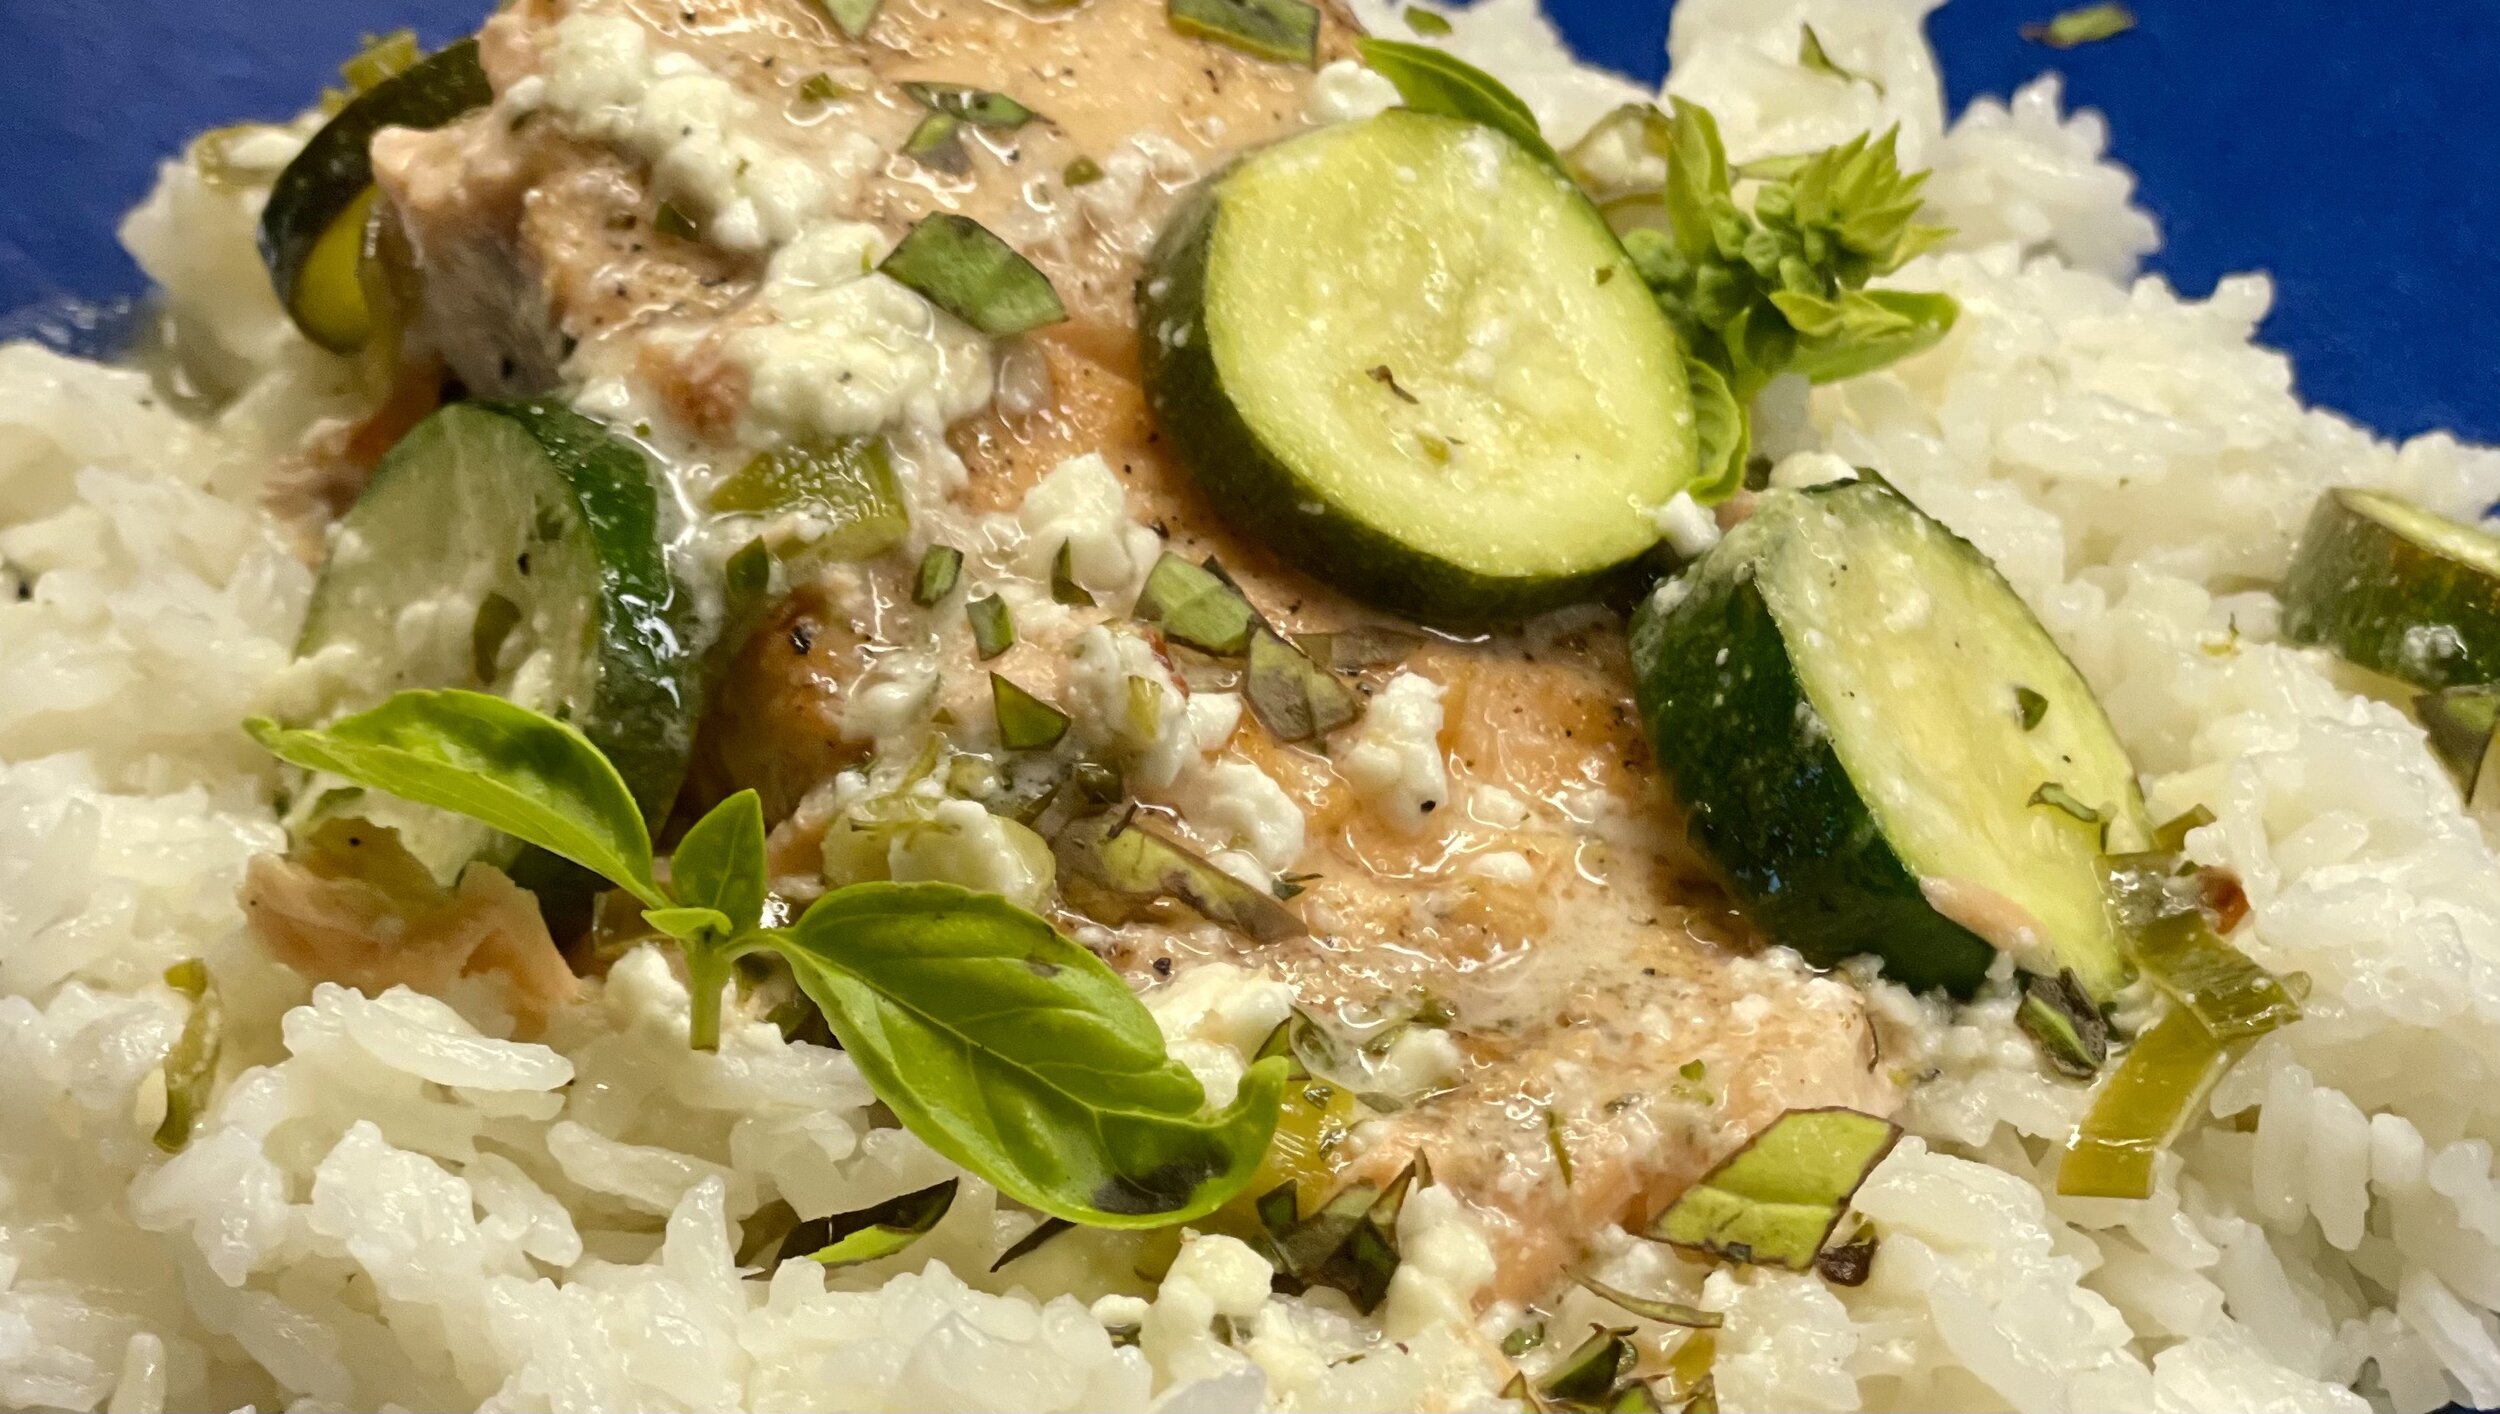
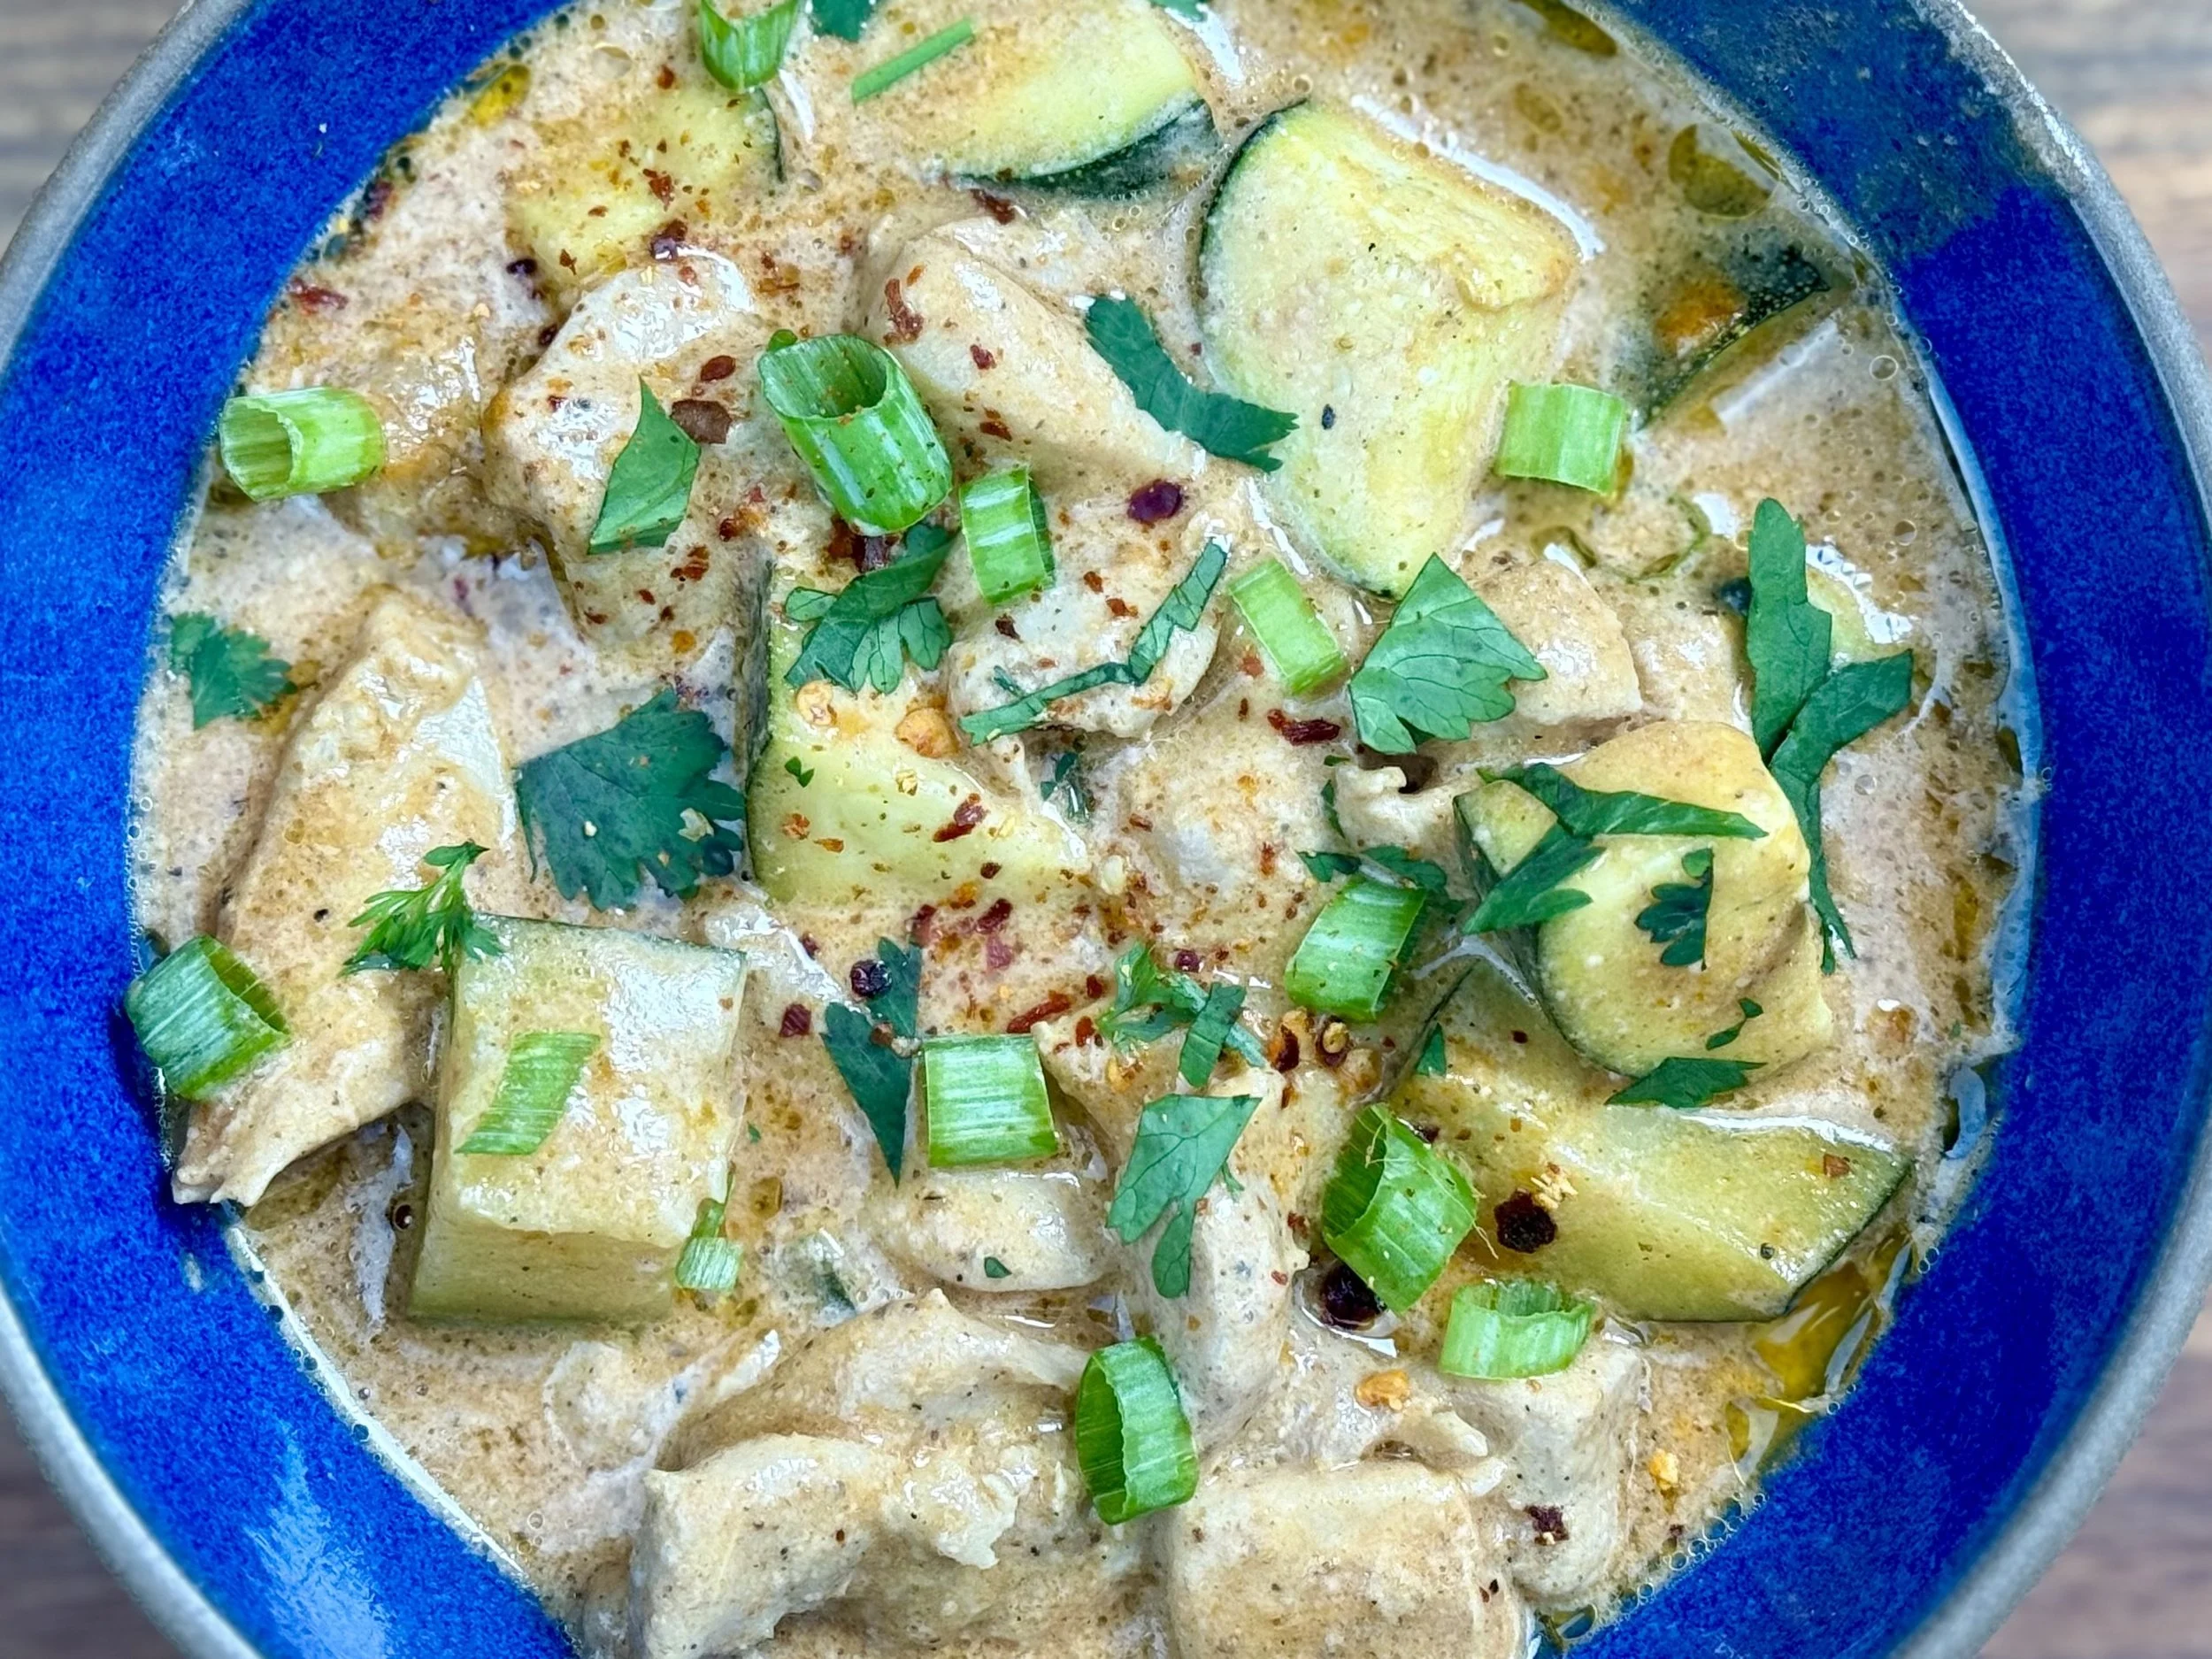
Grilled salmon with herbed feta cream (low FODMAP)
30 minutes • Low FODMAP • Gluten-free • Serves 4
30 minutes • Low FODMAP • Gluten-free • Serves 4 • This salmon is creamy, flavorful, and elegant, and also very easy to make! I made it on the grill but you could also cook it on the stove if you prefer. It makes a perfect meal with our Best Coconut Rice. The fresher the fish, the better the flavor and texture of course.
Ingredients
2 salmon filets, 1/2 pound each (skin on if possible)
Kosher salt and black pepper
2 tablespoons garlic-infused olive oil
2 tablespoons salted butter
2 medium zucchinis, sliced
6 green onions (green part only), thinly sliced
1 tablespoon fresh thyme, chopped
Pinch crushed red pepper flakes
1 cup canned full-fat coconut milk or heavy cream
3/4 cup crumbled feta cheese
Juice from 1 lemon
1/2 teaspoon Smoke N Sanity Essence of Garlic Salt (use code IBSGC10 for a 10% discount)
Fresh basil and thyme, for serving
Directions
Prepare our Best Coconut Rice and preheat your grill to medium-high.
Meanwhile, season the salmon with salt and pepper and cook on the grill or on the stove (both directions are below).
Grill directions: Lay a piece of foil on the grill grate and turn up the edges to catch the oil and the juices. Drizzle some olive oil on the foil and spread it around then lay your fish, skin side up on the foil. Cook for about 5 minutes, then flip to skin side down. Cook for another 5-10 minutes (depending on the thickness of your filets) just until the fish is cooked to your liking (I think lightly opaque throughout is ideal). When done, use a spatula to remove the fish from the skin and put it on a warm plate.
Stovetop directions: Heat the olive oil in a large skillet over medium heat. Add the salmon, skin side up, and cook for 2-3 minutes, until the salmon is crisp. Flip and continue cooking for another 2-3 minutes, or until the salmon is cooked to your liking (I think lightly opaque throughout is ideal). When done, use a spatula to remove the fish from the skin and put it on a warm plate.
In a skillet (use the same skillet if you’re cooking on the stove), add the butter, zucchini, and green onions and cook until the onions are fragrant about 1 minute. Add the thyme, and crushed red pepper flakes, cook another 1-2 minutes. Stir in the coconut milk (or cream) and crumbled feta. Season the sauce with Essence of Garlic salt and freshly ground pepper. Bring to a simmer over medium heat, stirring frequently to break up the feta until sauce is more smooth and creamy, about 5 minutes.
Stir in the lemon juice. Remove from the heat and slide the salmon back into the sauce to warm.
To serve, mound some rice on a plate or in a bowl. Lay on a piece of salmon, then spoon the sauce and zucchini over the top. Serve topped with fresh basil and thyme.
Eat and enjoy every bite because you can!
This post may contain affiliate links so you can easily purchase items listed on the page. In some cases, we have provided a special discount code for IBS Game Changers so be sure to use it when you purchase an item to get the discount that has been arranged just for you!
More Deliciously Low FODMAP™ main courses you might enjoy


Quick lunch: Fruit and nuts (low FODMAP)
5 Minutes • Low FODMAP • Gluten-free • Lactose-free • Serves 1 to many
5 Minutes • Low FODMAP • Gluten-free • Lactose-free • Serves 1 to many • Tired of the same old thing for lunch? Looking for a quick “grab and go” option? Sometimes all you need is a little inspiration from nature. Fruit and nuts are wonderful choices for this. What’s in season that’s on your low FODMAP list? Grab a piece of low FODMAP fruit and some nuts and voila! You have the perfect grab-and-go lunch.
Ingredients
Low FODMAP servings of some fruits are listed below.
1 tangerine
1 orange
1 cup of grapes
1 banana (firm/no spots)
10 strawberries
Low FODMAP servings of some nuts are listed below. You can pick one or cut your serving size down and pick two or three varieties.
32 peanuts
20 macadamia nuts
10 pecan halves
10 walnut halves
10 almonds
Directions
See what’s in season. Check what’s in your pantry. Use your imagination. Having a lean and efficient lunch is a great way to save time, and keep your mind sharp so you can stay awake and alert all day long. Save the heavier stuff for dinner time when you’re going to be going to sleep anyway.
You can pick one or cut your serving size down and pick two or three varieties. It’s important to keep as much variety in your diet as you can tolerate but don’t go overboard on the fruit as eating raw fruit can be problematic for some of us with IBS. Keep your portion size to one piece of fruit per meal and assess your body’s response. Then adjust the next time you have this for lunch.
Eat and enjoy every bite because you can!
More Deliciously Low FODMAP™ lunches you might enjoy


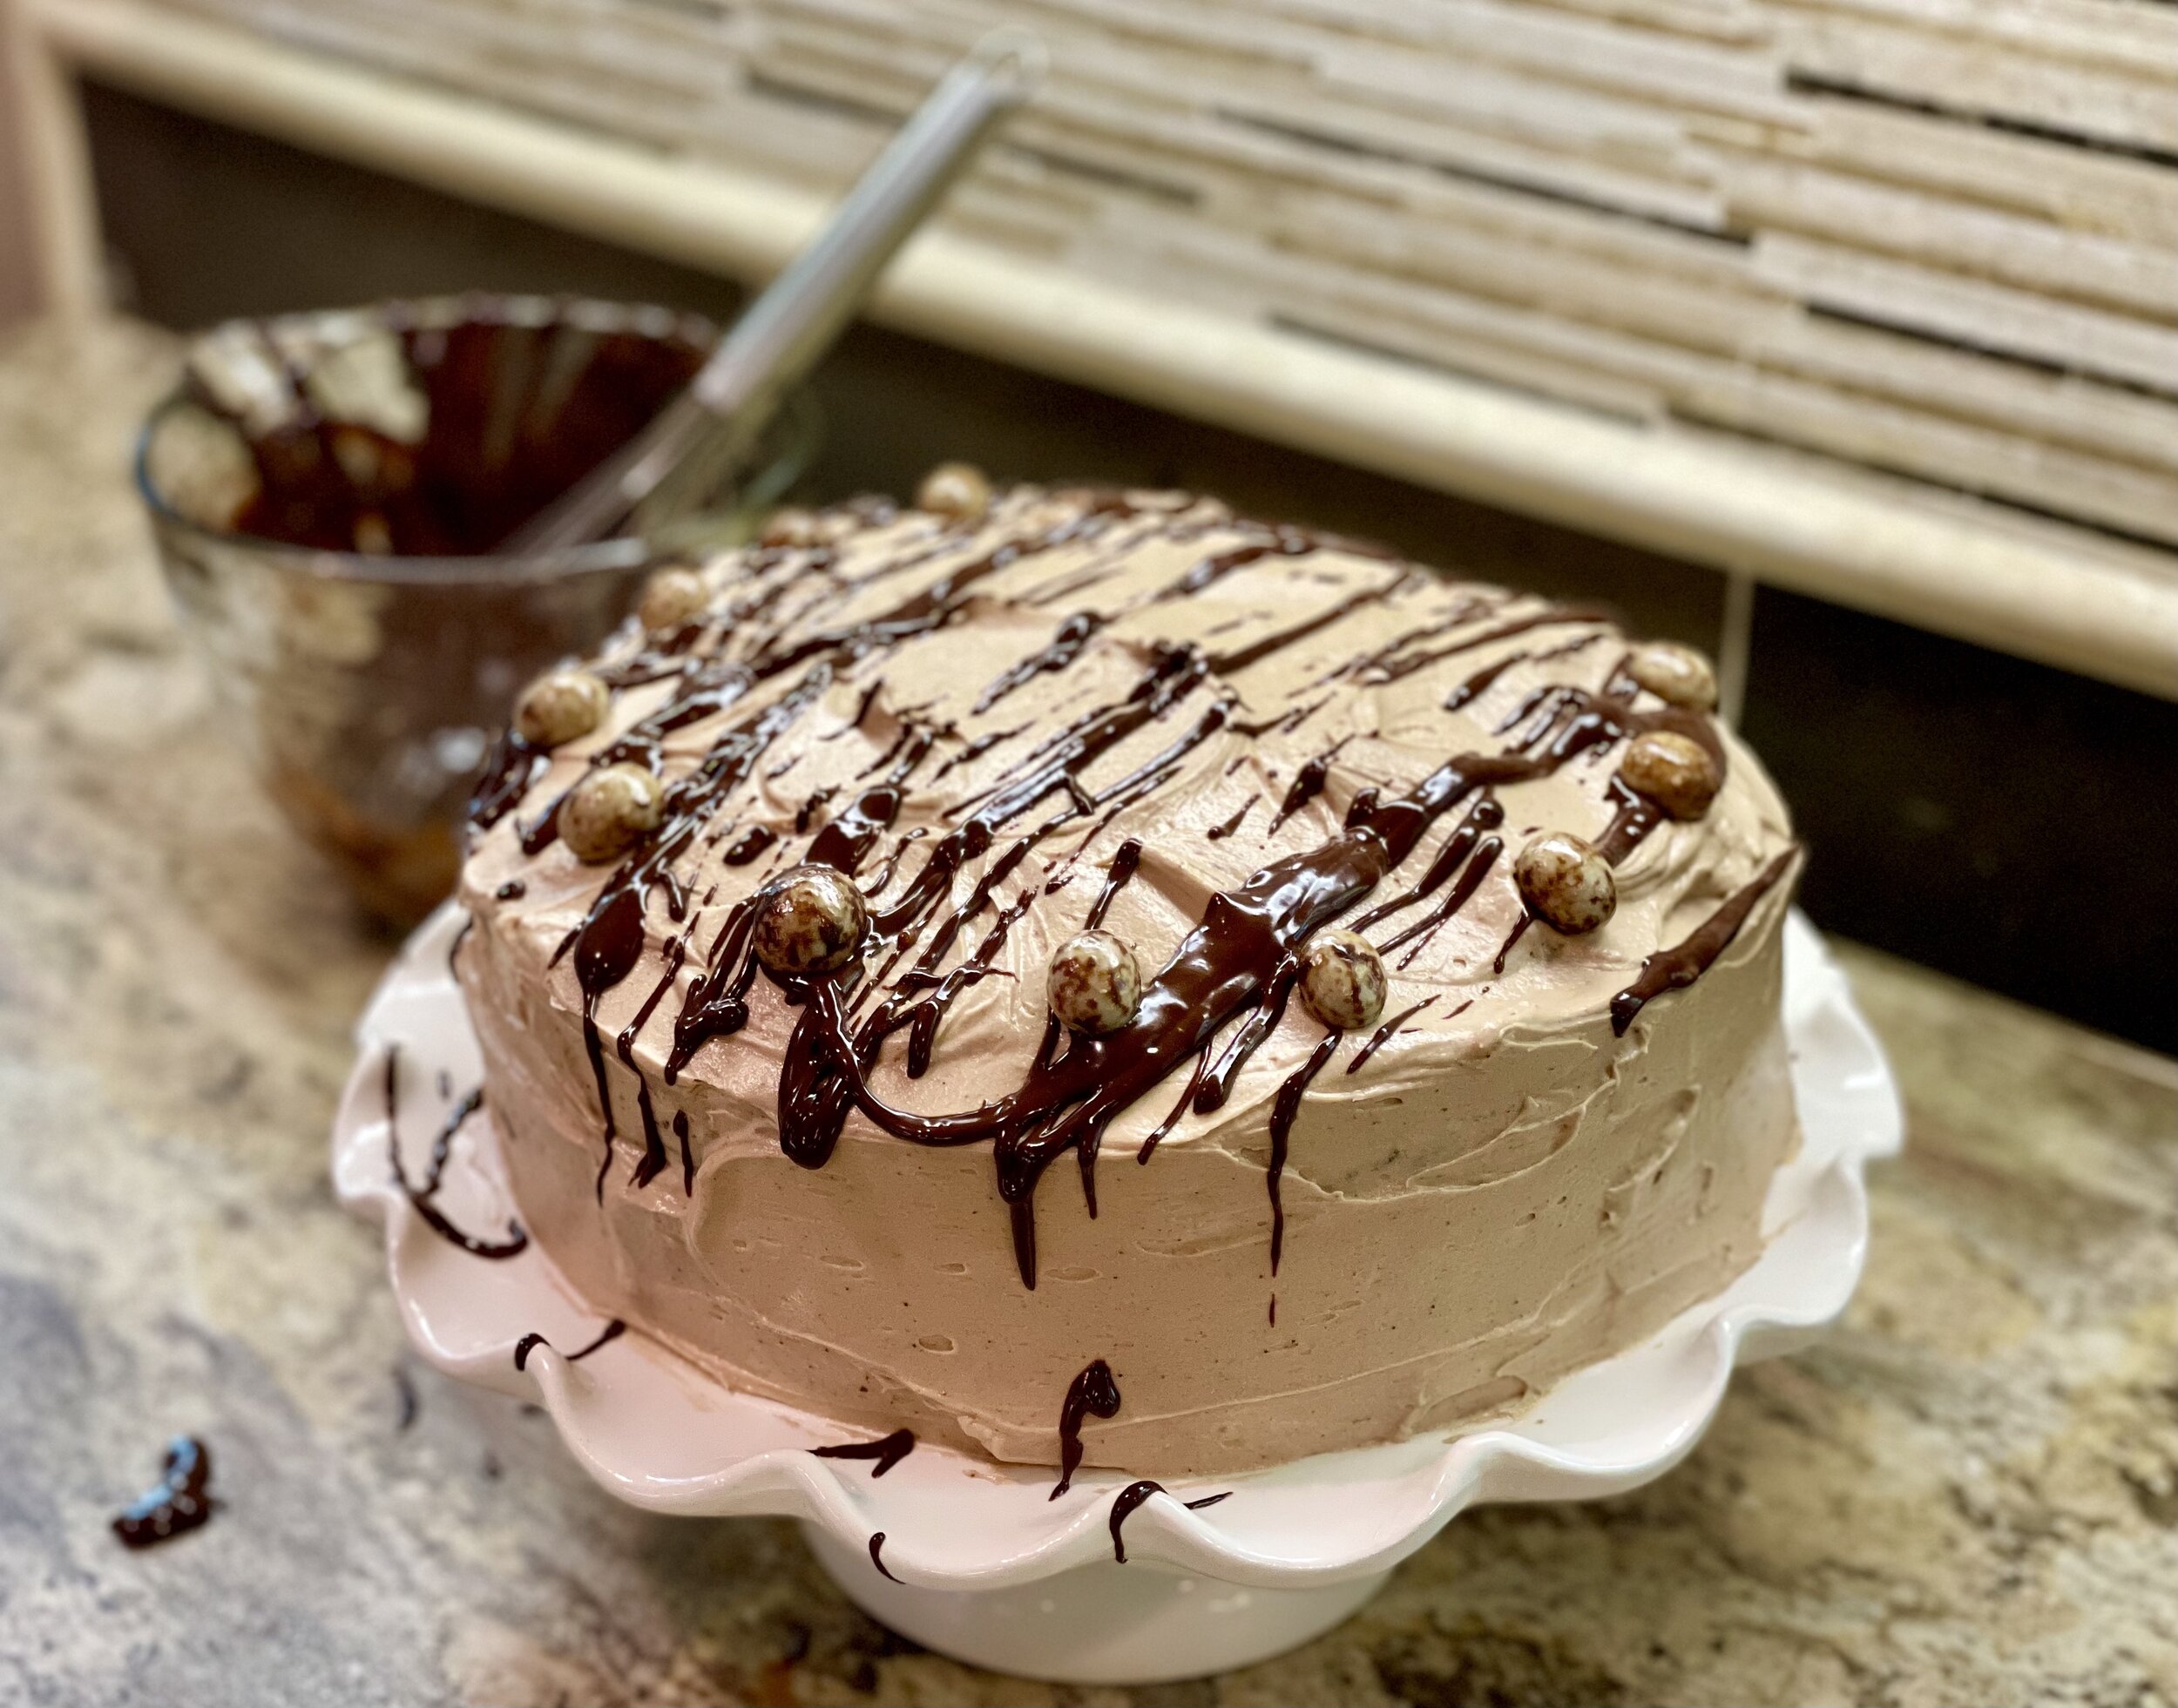
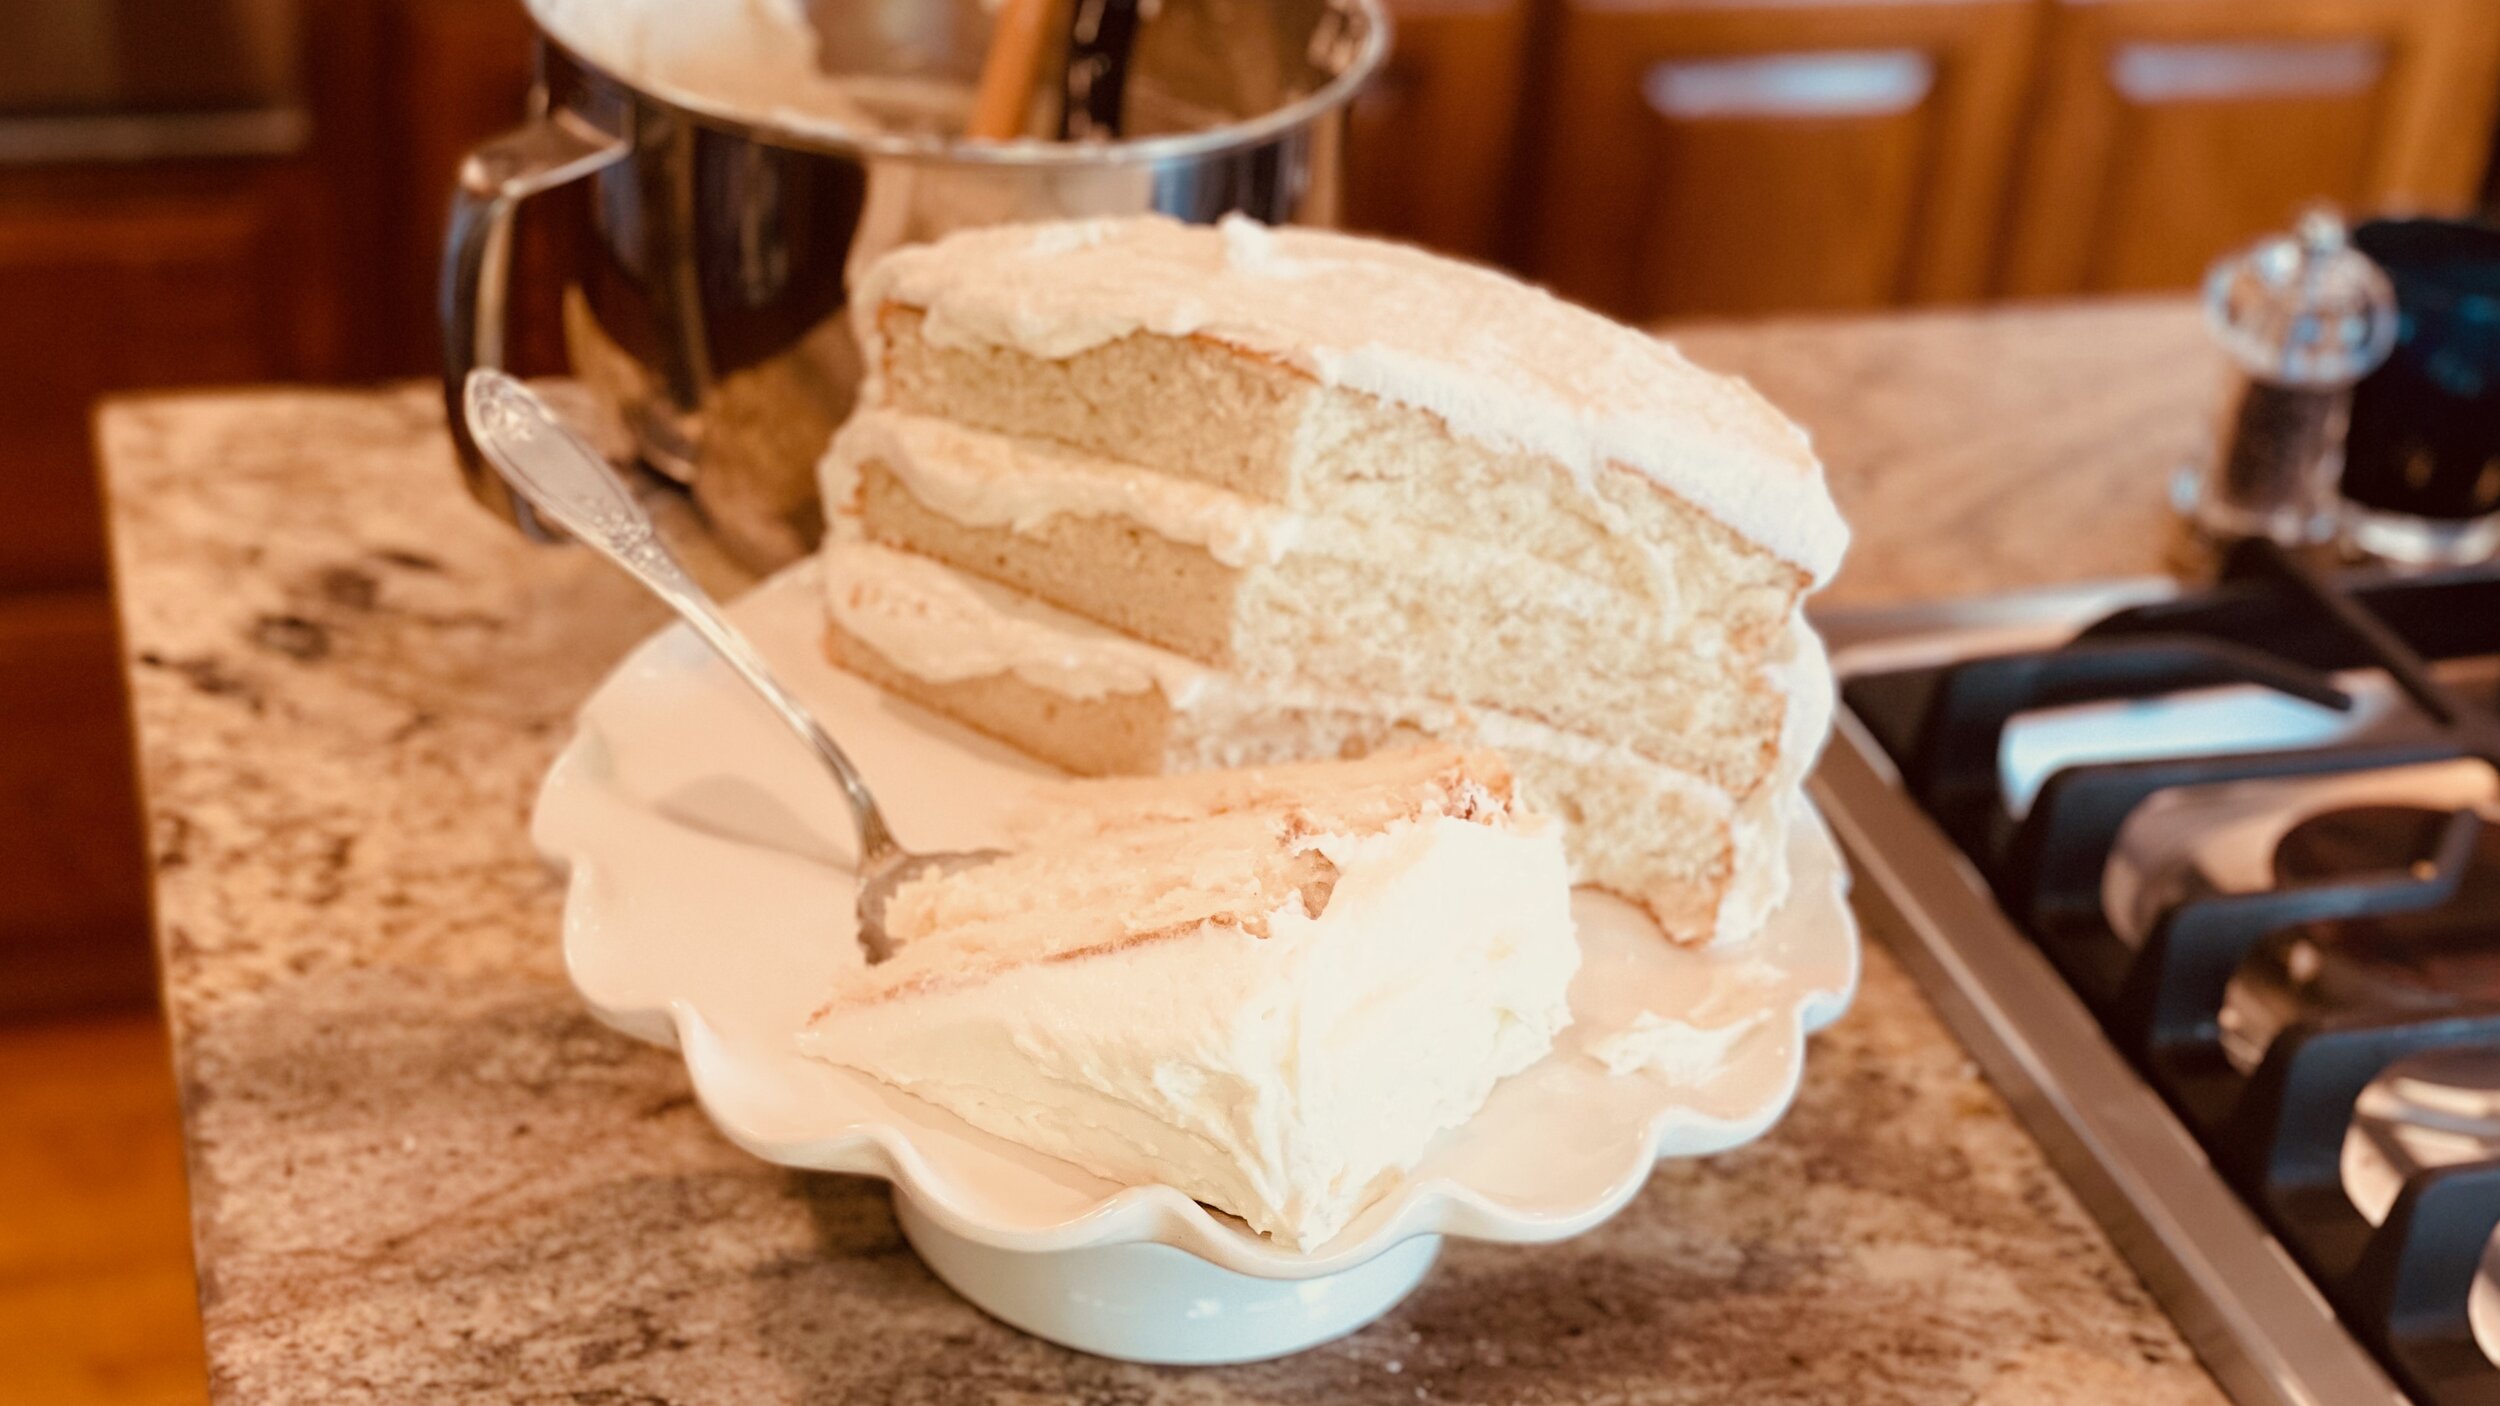
Mocha chocolate cake (low FODMAP)
60 minutes • Gluten-free • Low FODMAP • Serves 12
60 minutes • Gluten-free • Low FODMAP • Serves 12 • This mocha chocolate cake recipe is the result of a search for the perfect mocha chocolate cake. And it has been found! It’s super moist, and the mocha flavor is intense and smooth. You can make this cake with three elegant tiers or use slightly larger pans and make only two tiers. Be sure to measure carefully and sift your ingredients for the best texture to your sponge.
Ingredients: Cake
3 cups gluten-free all-purpose flour
2 ⅔ cups granulated sugar
3 tbsp nice quality (fresh) cocoa powder
1 tsp kosher salt
1 tbsp baking soda
1 ½ tsp baking powder
½ cup sour cream
1/2 cup lactose-free whole milk mixed with 1 tablespoon white vinegar to sour (let sit for 5 minutes)
3 eggs large
1 1/4 cups decaf coffee hot, strong
1/2 cup water
3/4 cup canola oil
Ingredients: Mocha buttercream
2 sticks unsalted butter
1 pound (about 4 cups) powdered sugar
1 1/2 teaspoons nice quality (fresh) cocoa powder
1 1/2 teaspoons decaf espresso powder (I use decaf Starbucks Via - one packet)
1 1/2 teaspoons vanilla
1 1/2 tablespoons heavy cream
1/4 teaspoon salt
Ingredients: Dark chocolate ganache
1/2 cup dark chocolate, chopped
1/4 cup heavy cream
Directions: Cake
Preheat oven to 350F.
Butter and flour three 9-inch cake pans. I recommend laying a circle of parchment on the bottom of each pan after you grease and flour the pans to help release the cake without breakage.
Sift together the dry ingredients (including the sugar) into the bowl of a stand mixer and mix to combine.
Combine the wet ingredients in a large bowl and whisk together then add the combined wet ingredients to the dry ingredients in the bowl of the stand mixer.
Mix on low to combine then turn up to level 2 and mix for two minutes.
Distribute batter evenly in the three pans and bake for 35-40 minutes at 350 degrees F or until a toothpick inserted in the center comes out clean. I recommend rotating the pans halfway through the bake for a more even bake.
Allow cakes to cool for 5 minutes, then invert onto wire racks to cool fully.
Directions: Mocha Buttercream
Sift the confectioners’ sugar, salt, cocoa, and espresso powder into a bowl.
Whip the butter for about 5 minutes in the stand mixer using a paddle attachment.
Beat in the sugar mixture slowly.
Add vanilla and drizzle in the cream while beating until desired consistency is reached. If you want the buttercream to have a stronger espresso taste, add more espresso powder.
Directions: Ganache
Warm the cream and pour over the chocolate. Set aside for a few minutes then whisk together. If there are a few bits of unmelted chocolate just microwave it for 10 seconds and whisk again.
Directions: Assembly
Spread a layer of buttercream on the first layer of cake then add a swirl of the ganache.
Lay the second layer of cake on and repeat the process.
Add the third layer and cover the cake with buttercream and smooth the surface.
Drizzle ganache on top of the cake and allow to set.
For a little extra appeal, you may put a chocolate-covered espresso bean where each piece will be sliced from the cake.
Serve with decaf coffee or lactose-free milk.
Eat and enjoy every bite—because you can!
This post may contain affiliate links so you can easily purchase items listed on the page. In some cases we have provided a special discount code for IBS Game Changers so be sure to use it!
More Deliciously Low FODMAP™ desserts you might enjoy


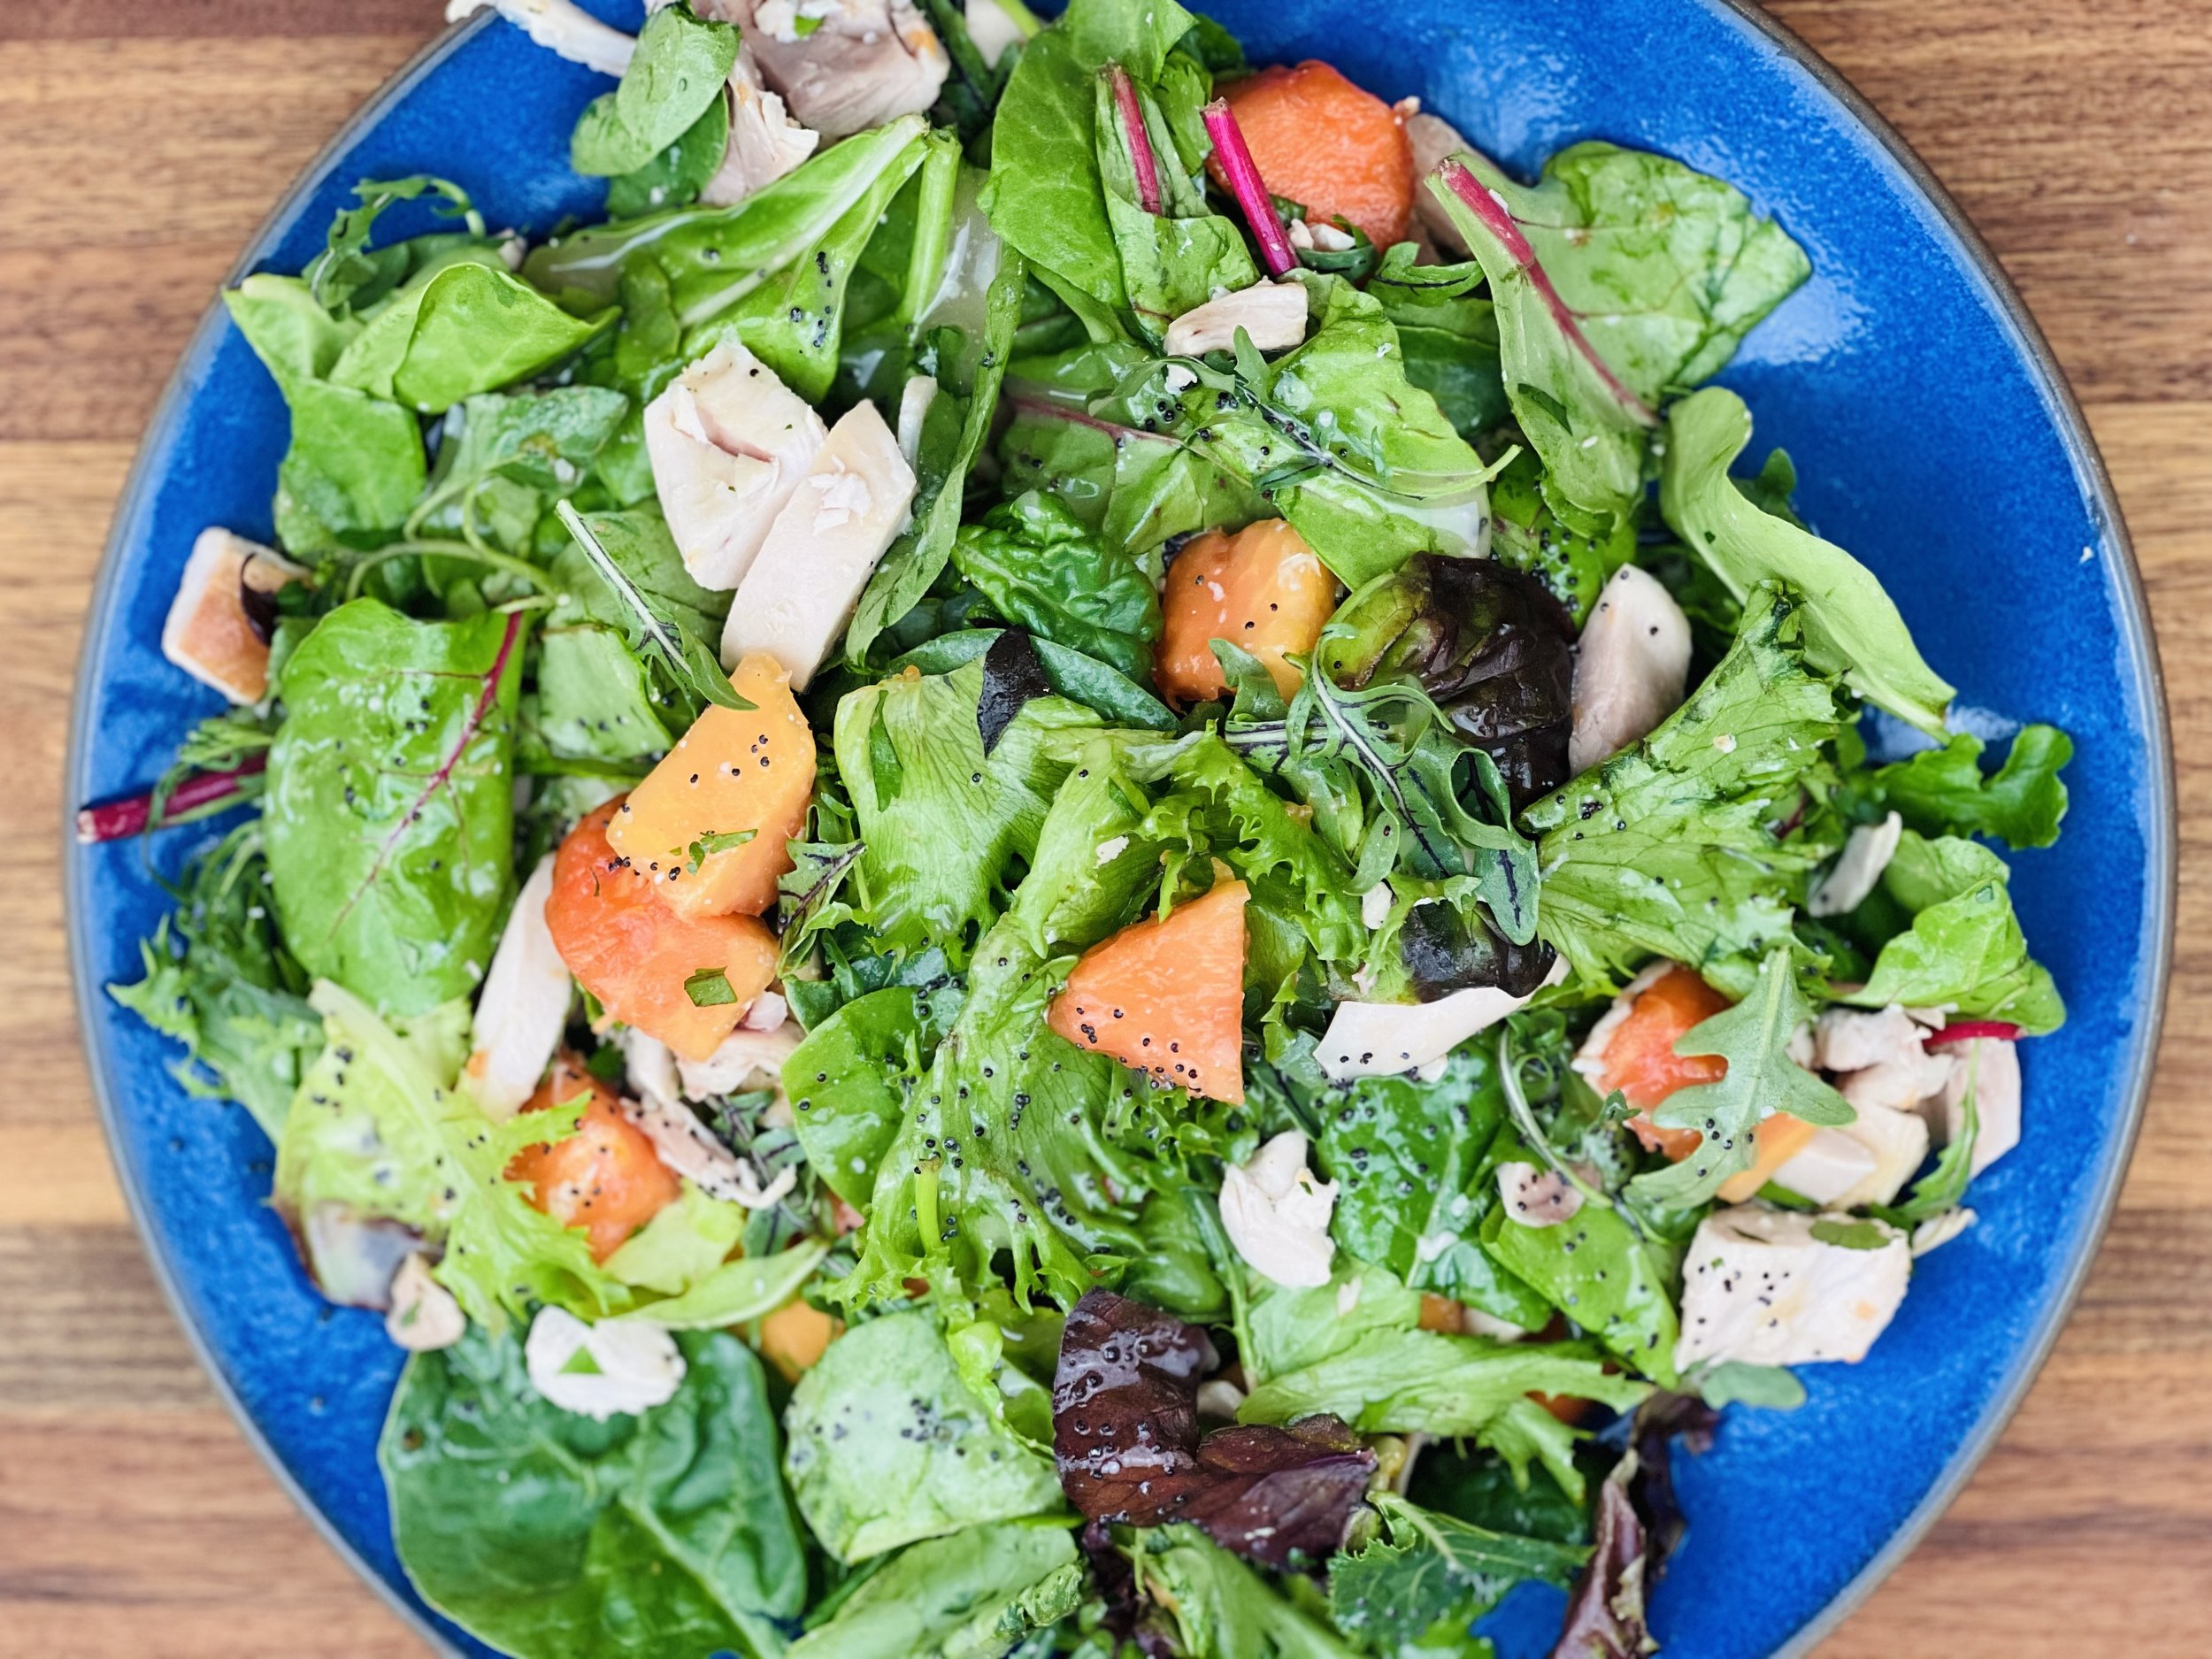
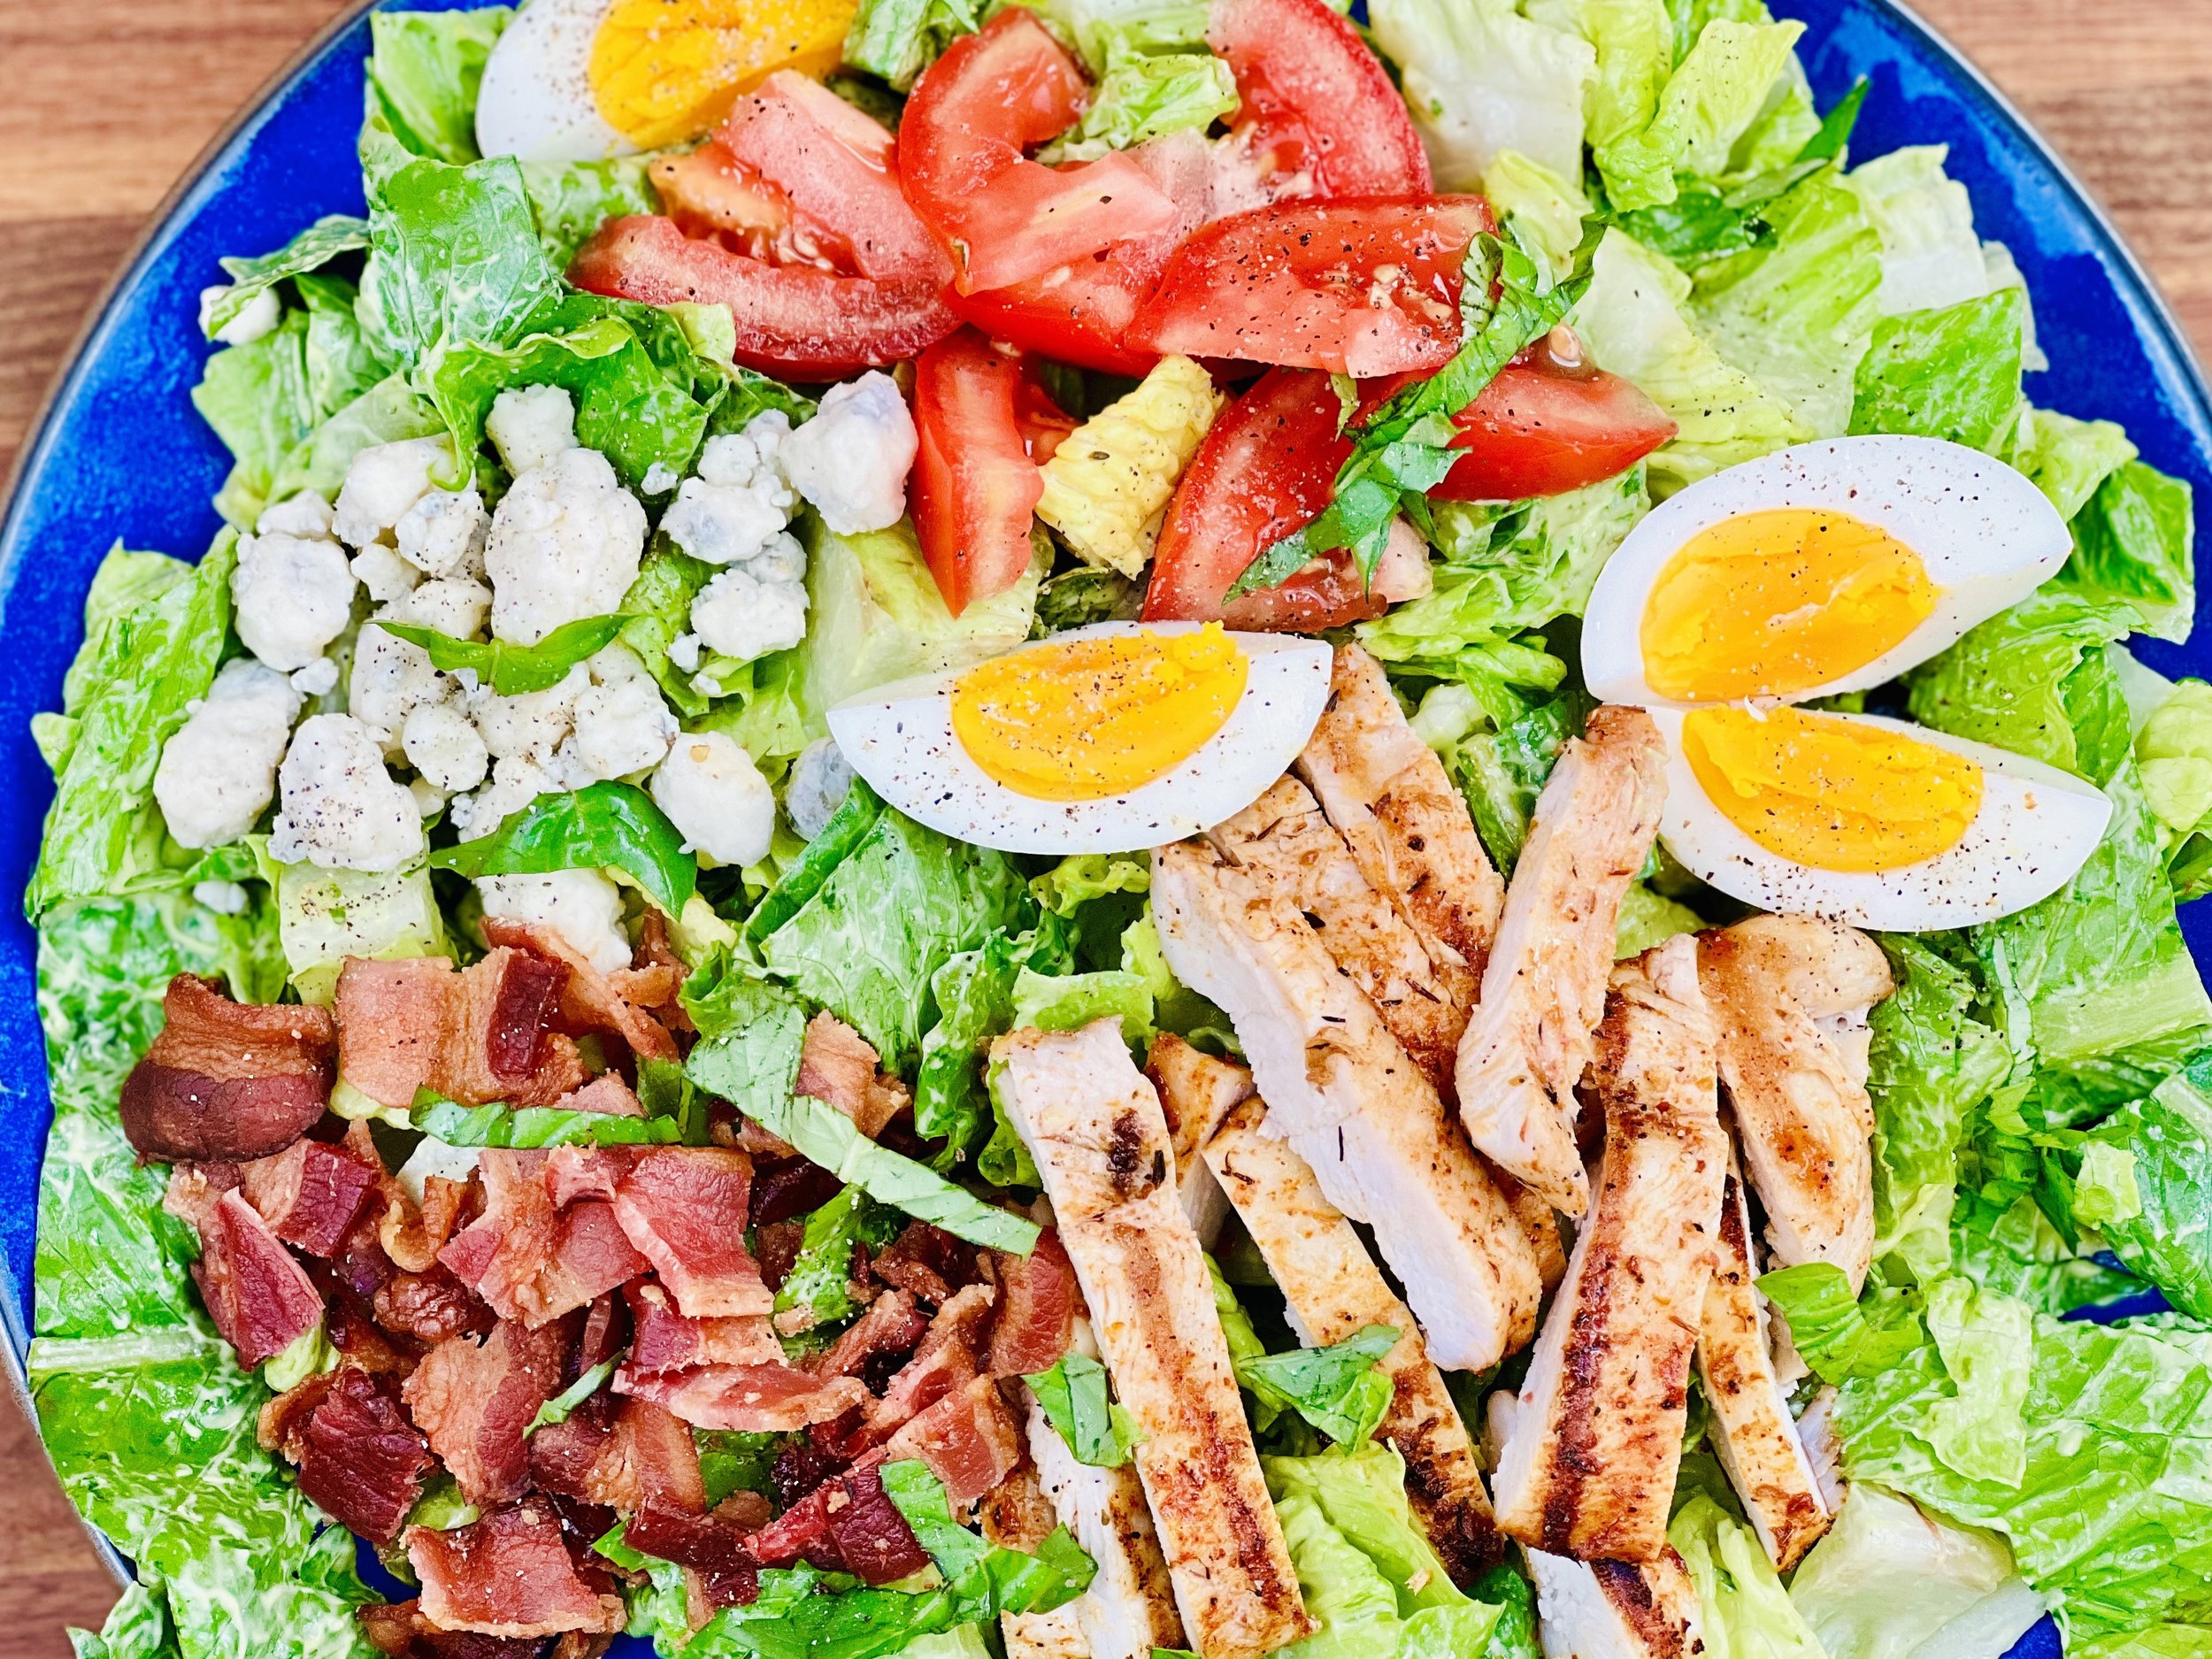
Grilled lemon chicken and orzo salad (low FODMAP)
40 Minutes • Low FODMAP • Gluten-free • Serves 4
40 Minutes • Low FODMAP • Gluten-free • Serves 4 • Grilled chicken and bell peppers give this hearty pasta salad a wonderful flavor and it’s a nice twist on traditional pasta salad. Served hot or cold, it’s a versatile main course or robust side.

Ingredients: Dressing
1/3 cup garlic-infused olive oil
3 tablespoons maple syrup
1 tablespoon grainy mustard
2 tablespoons Dijon mustard
Juice of 1 lemon
2 tablespoons white balsamic vinegar
1/2 cup mixed herbs, chopped (rosemary, oregano, basil)
1 teaspoon Smoke N Sanity Essence of Garlic Salt (use code IBSGC10 for 10% discount)
OR 1/2 teaspoon salt and 1/2 teaspoon Gourmend Garlic Scape powder (use code IBSGC15 for 15% discount)
Pinch of red pepper flakes
Black pepper and additional salt if needed
Ingredients: Salad
3/4 pound boneless skinless chicken breast cut into cubes for grilling
1 bell pepper, quartered
1 pound dry gluten-free orzo pasta
1 cup cubed cheddar cheese
1/4 cup crumbled blue cheese (optional but very good!)
2 cups shredded red leaf or butter lettuce
6 slices cooked bacon, crumbled
Directions:
Preheat oven to 400 degrees F.
Line a rimmed baking sheet with foil and lay the bacon slices out flat on the foil. Cook about 10 minutes in the oven until the bacon has reached your desired crispness. Remove from the oven and put the bacon slices on paper towels to drain and cool. Set aside. (Easy cleanup: Once the fat has cooled on the foil you can toss the foil out—fat and all! Such a tidy way to make bacon.)
To make the dressing: Combine all ingredients in a glass jar and shake or whisk until smooth. Taste and adjust the salt and pepper as needed.
In a medium-size bowl, combine the chicken with about 1/3 of the dressing. Let sit for 10 minutes.
Put a large pot of salted water over high heat and bring to a boil for the orzo.
Meanwhile preheat your grill, grill pan, or skillet to medium-high heat and thread the cubed chicken on kabob skewers.
Grill the chicken until it’s lightly charred and cooked through, turning halfway through cooking, about 10 to 12 minutes. At the same time, grill the quartered bell pepper directly on the grill, until lightly charred, then chop.
Add the orzo to the boiling water and cook per package instructions until al dente. Drain and return to the pan you cooked it in. Add the cubed cheddar cheese, and another 1/3 of the dressing, toss to combine. Add the chicken, chopped grilled peppers, lettuce, tomatoes, and bacon, tossing to combine and adding more dressing to your taste.
Season the salad with freshly cracked pepper and salt. Serve warm or cold with the crumbled blue cheese sprinkled over the top.
Pro Tip: Add cherry tomatoes or roasted corn to this salad for additional flavor and color.
This post may contain affiliate links so you can easily purchase items listed on the page. In some cases we have provided a special discount code for IBS Game Changers so be sure to use it!
More Deliciously Low FODMAP™ salads you might enjoy


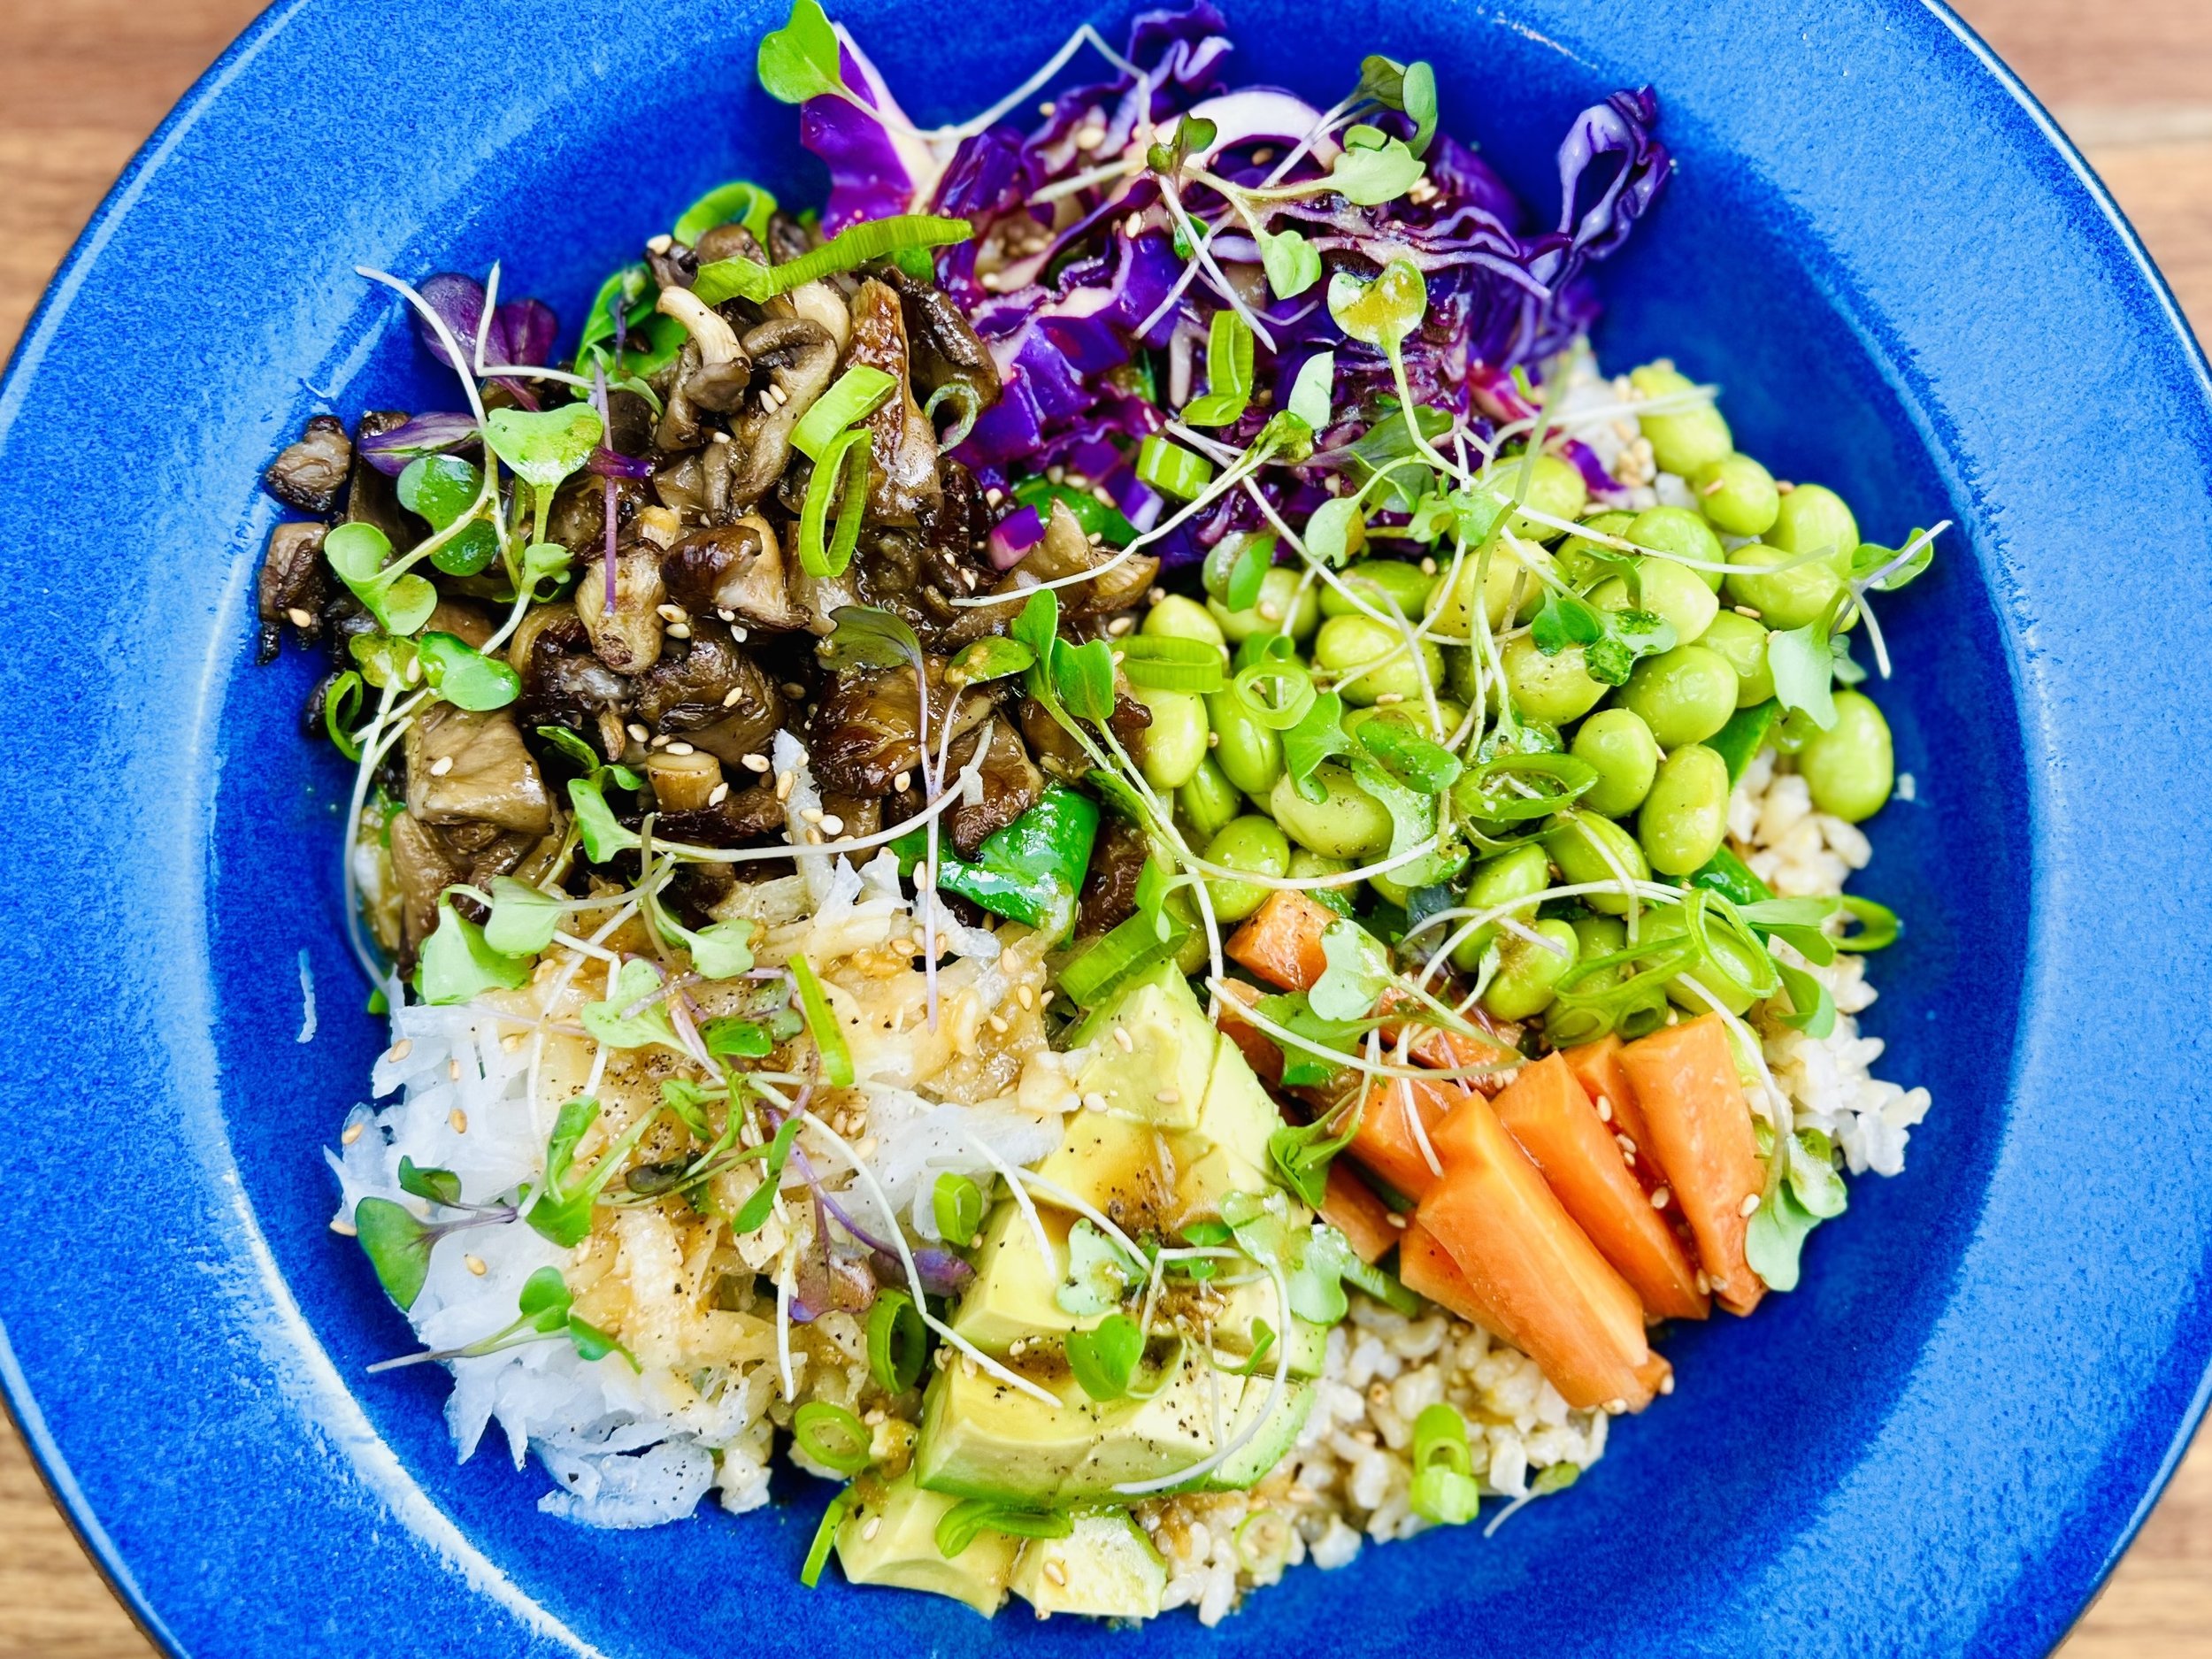
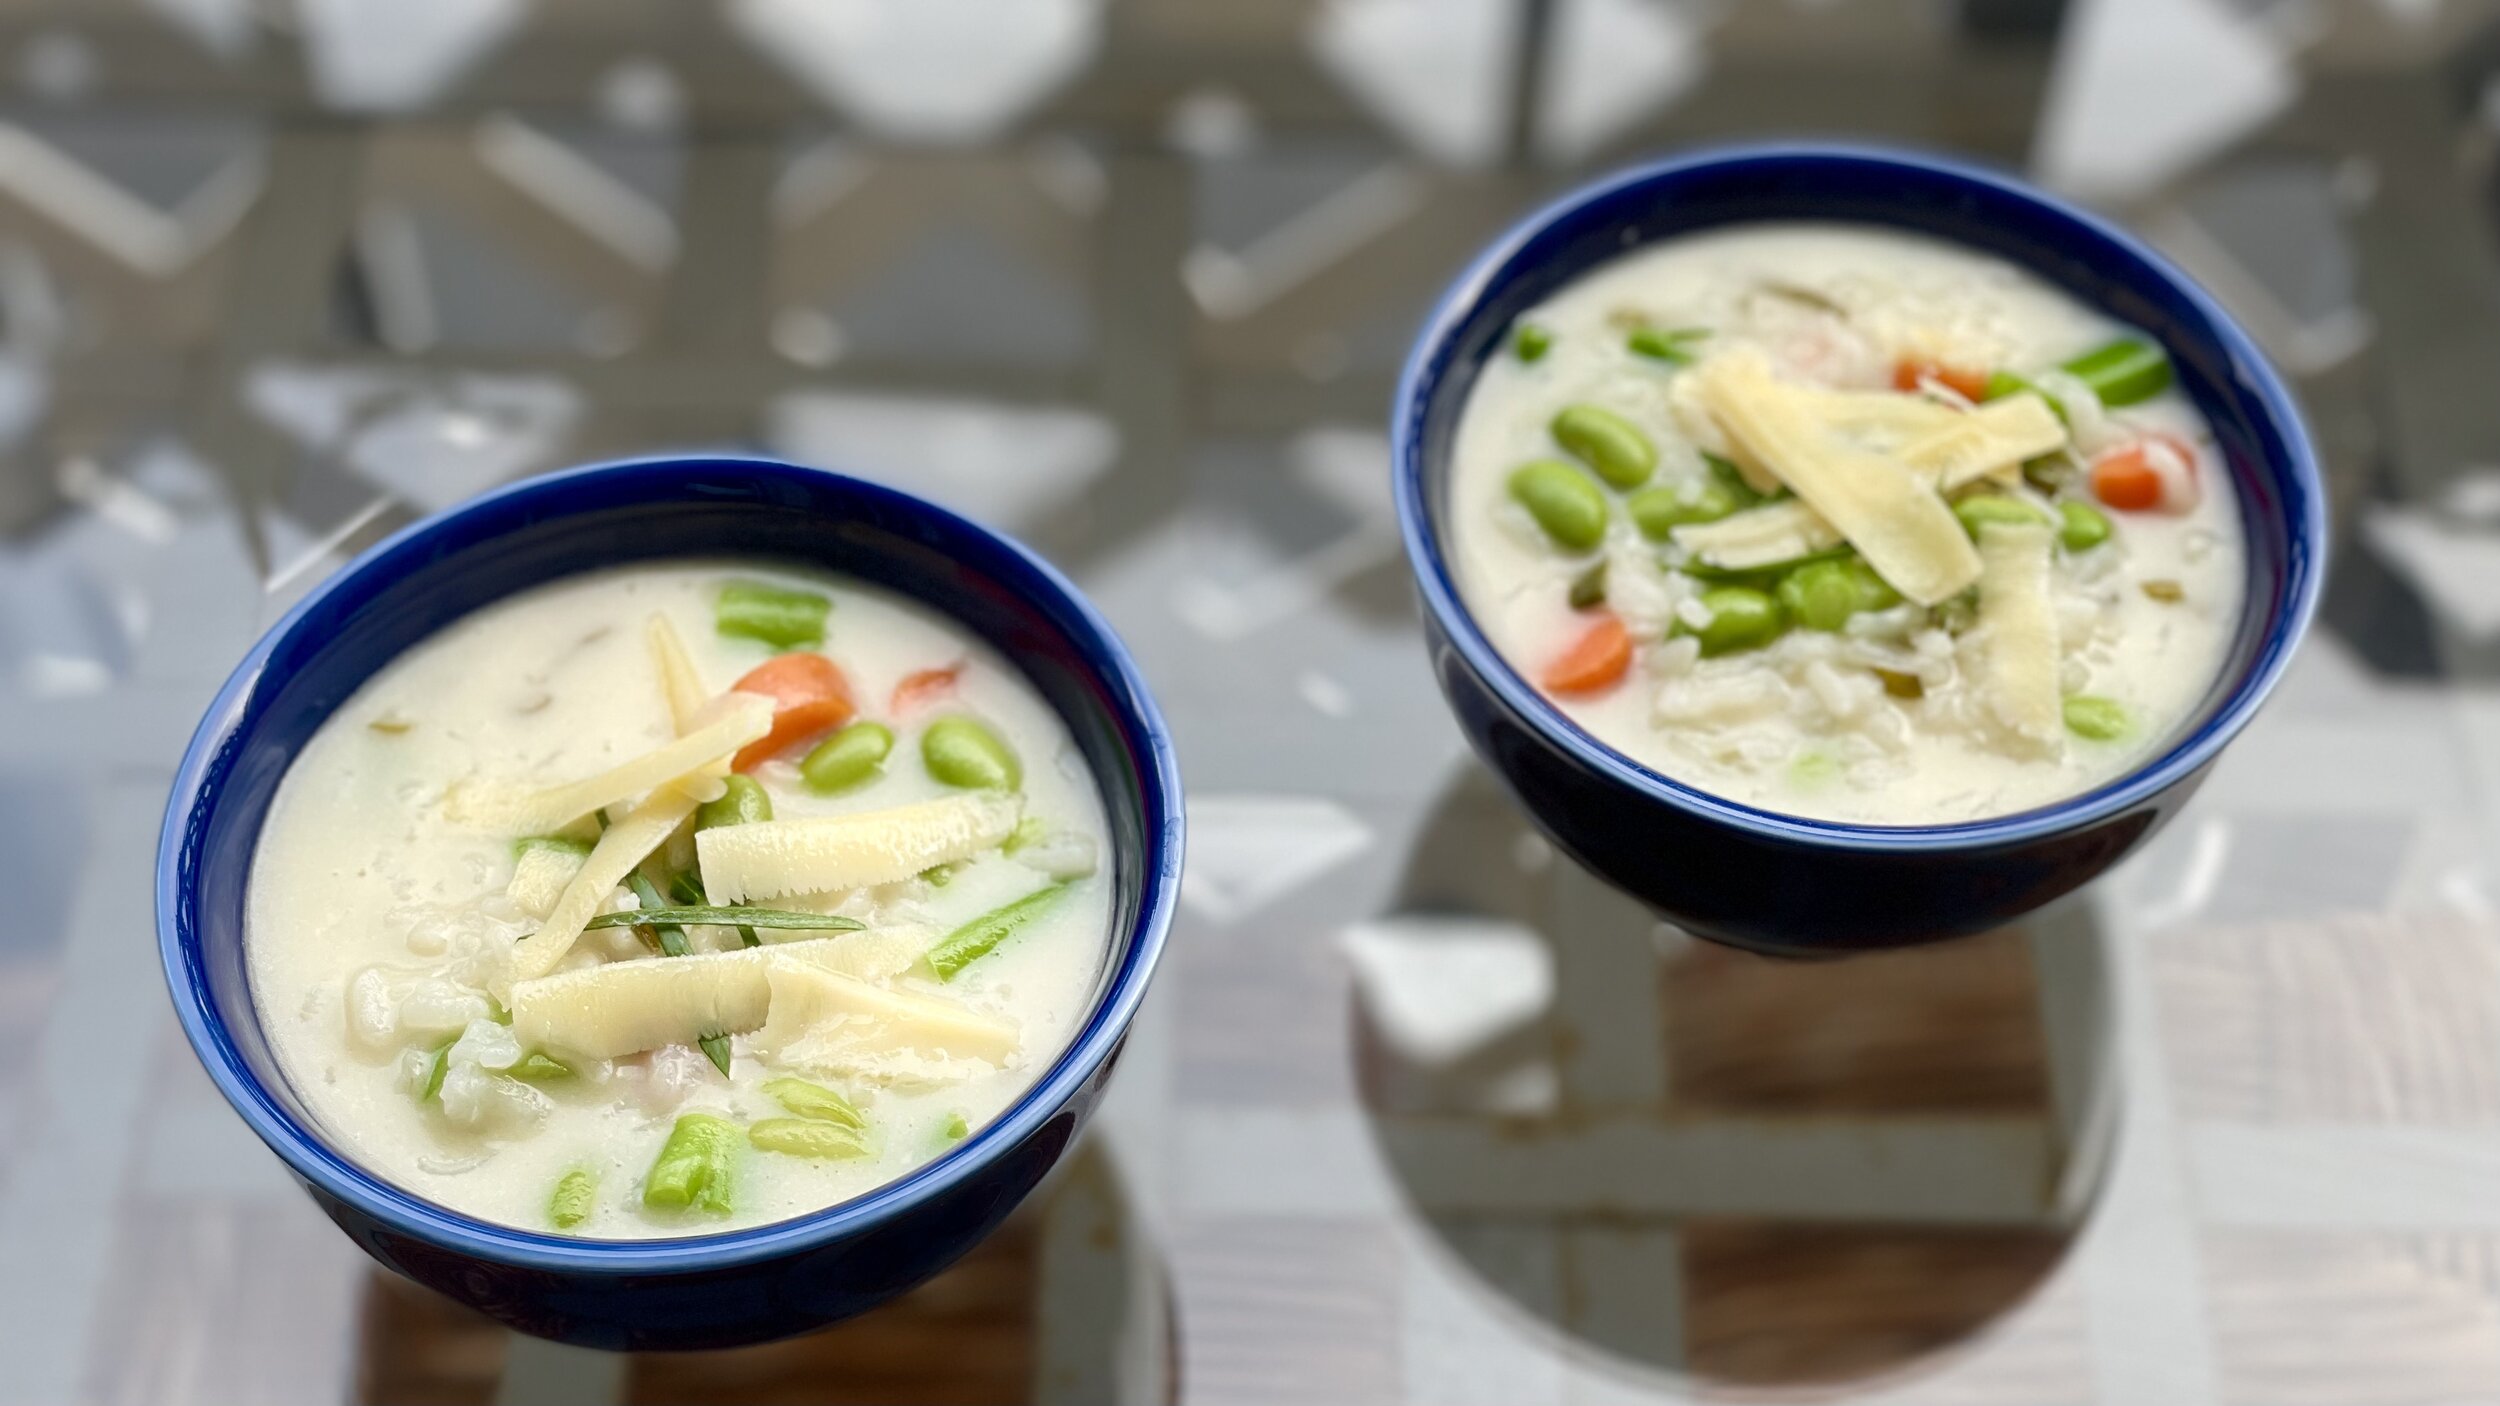
Quick creamy vegetable risotto (low FODMAP)
15 Minutes Prep • 30 Minutes Cook • Gluten-free • Vegetarian • Low FODMAP • Serves 6
15 Minutes Prep • 30 Minutes Cook • Gluten-free • Vegetarian • Low FODMAP • Serves 6 • This risotto is quick and creamy, beautiful and delicious! It’s packed full of good veggies combined with the creamy risotto so the whole family will be asking for more! Broccolini is a great low FODMAP veggie as long as you stick to the stalks only (broccolini tops are high FODMAP and should be avoided on a low FODMAP diet). When you cut the stalks up they have the look and feel of asparagus so you can enjoy “asparagus” in your risotto without any consequences!
Ingredients
1 cup broccolini (stems only), chopped
12 ounces frozen edamame
1 cup chopped carrots (use the freshest carrots you can find—the ones with the tops on—for best flavor)
8 cups low FODMAP vegetable or chicken broth plus more to thin the risotto as needed
2 cups Arborio rice
4 tablespoons unsalted butter
4 green onions (green part only), finely chopped
1 cup white wine (I like to use Sauvignon Blanc)
8 ounces grated sharp white cheddar cheese
1 cup grated Parmesan cheese, plus shavings for garnish
Directions
Bring a large pot of salted water to a boil, then toss in the frozen edamame and let the water return to a simmer, then add the chopped carrots, and broccolini stalks. Cook for 3 - 5 minutes just until the vegetables are tender then strain and run under cold water to stop cooking. Set aside.
Pour the vegetable or chicken broth into a small saucepan and bring it to a gentle simmer and keep warm over low heat.
In a wide-bottomed, high-sided pan (I just use the same pot from cooking the broccolini), melt butter and sauté green onions for a minute or two until tender. Stir in the drained rice until each grain is butter-slicked. Add the wine and cook to reduce, stirring constantly.
Once the alcohol has evaporated, lower the heat and slowly ladle in 8 cups of the hot stock (one or two ladlefuls at a time), stirring until fully absorbed by the rice between each addition. Keep adding and stirring until the rice is al dente, about 18 to 20 minutes.
When cooked to your liking, stir in the broccolini, edamame, carrots, and grated cheeses. Add more hot broth if needed to loosen the risotto up a bit. Season to taste with salt and pepper.
Serve garnished with fresh-ground black pepper and Parmesan shavings (optional but pretty)
Eat and enjoy every bite because you can!
This post may contain affiliate links so you can easily purchase items listed on the page. There is no increased cost to you for purchasing items through these links so feel free to use them!
More Deliciously Low FODMAP™ main courses you might enjoy
Amaretto white cake with Marzipan buttercream (low FODMAP)
60 Minutes • Gluten-free • Lactose-free • Low FODMAP • Serves 8 - 12
60 Minutes • Gluten-free • Very low lactose • Low FODMAP • Serves 8 - 12 • My client challenged me to make a white cake that was almond-flavored. Challenge accepted. Amaretto white cake with marzipan buttercream was born! If you love the taste of Amaretto you are going to adore this cake. It’s moist and delicious and the flavors are delicate but distinct.
Ingredients: Amaretto white cake
8 tablespoons unsalted butter, at room temp or slightly softened but not melted
1/2 cup coconut oil, softened but not melted
1 3/4 cups granulated sugar
2 3/4 cups gluten-free flour blend (I used King Arthur Measure for Measure but Bob’s Red Mill Cup for Cup would also work fine)
1 tablespoon baking powder
3/4 teaspoon salt
2 teaspoons Amaretto
1 teaspoon almond extract
6 large egg whites
1/2 cup lactose-free milk
1/3 cup lactose-free sour cream
Ingredients: Marzipan buttercream
1 cup butter, softened (or 1 1/2 cups butter and omit the marzipan)
7 ounces marzipan, cut into cubes plus 4 teaspoons cold water (to soften the marzipan) - optional
5 cups powdered sugar, sifted
1/3 cup coconut cream (or you can substitute real cream)
1/2 teaspoon almond extract (if not using marzipan, use one full teaspoon almond extract)
1/4 teaspoon salt
Directions
Preheat oven to 325 degrees F. Grease two 9-inch or three 8-inch round cake pans and lay a circular sheet of parchment on the bottom of each pan so you can easily remove the cakes from the pans.
Whisk together the gluten-free flour, baking powder, and salt in a small bowl and set aside.
In the bowl of a stand mixer, cream together butter, coconut oil, and sugar until very light and fluffy, about 5 minutes. Add the egg whites, one at a time. Allow each egg white to incorporate before adding the next. After adding the last egg white, add the vanilla and almond extract. Mix the batter for 45 seconds. It should appear very light and fluffy--almost like frosting.
Reduce speed to low. Add about 1/3 of the flour, followed by the sour cream. Then, alternate between the remaining flour and milk, allowing each to almost incorporate before adding the next. After the last addition of milk, mix the batter until smooth, about 45 seconds.
Use a flexible rubber spatula to scrape the bottom of the bowl. If any dry flour comes to the surface, gently mix it into the batter.
Divide the batter evenly among the cake pans. Smooth the batter evenly into each pan with the back of a spoon.
Bake until the cakes are set and a cake tester inserted into the middle comes out with only a few crumbs attached about 20 - 25 minutes. The color will look very pale. Only the edge will turn a light golden brown.
Allow cakes to cool in the pan for 10 minutes and turn out onto a wire rack to cool completely before frosting.
Directions: Marzipan Butter Cream
Break your marzipan into pieces and put it into a bowl. Add the water (4 tsp) and knead the water into the marzipan until most of the water has been absorbed into the marzipan (this is to soften the marzipan so it's easier to beat into the buttercream).
In the large bowl of your stand mixer, beat the butter until light and creamy, about 2 minutes on medium speed.
Add powdered sugar, coconut cream (or heavy cream) almond extract, and salt. Turn the mixer to low and mix untill the ingredients are incorporated.
Once the ingredients are combined, add the softened marzipan and beat until fully combined then increase speed to medium-high and mix until light and fluffy, about 2 minutes.
Check the consistency of your buttercream. If it's a little too thick then add a little milk (no more than a tsp at a time) and mix to combine. If frosting seems too thin, add an additional two tablespoons of powdered sugar. Keep adding a little more until the consistency is right.
Assemble and Frost the Cake
Spread a generous (about 3/4 cup) amount of frosting on top of the first layer. Repeat with the remaining one or two layers. Spread a layer of frosting evenly on top of the cake. Then, frost the sides. Slice and serve.
Eat and enjoy every bite—because you can!
More Deliciously Low FODMAP™ desserts you might enjoy
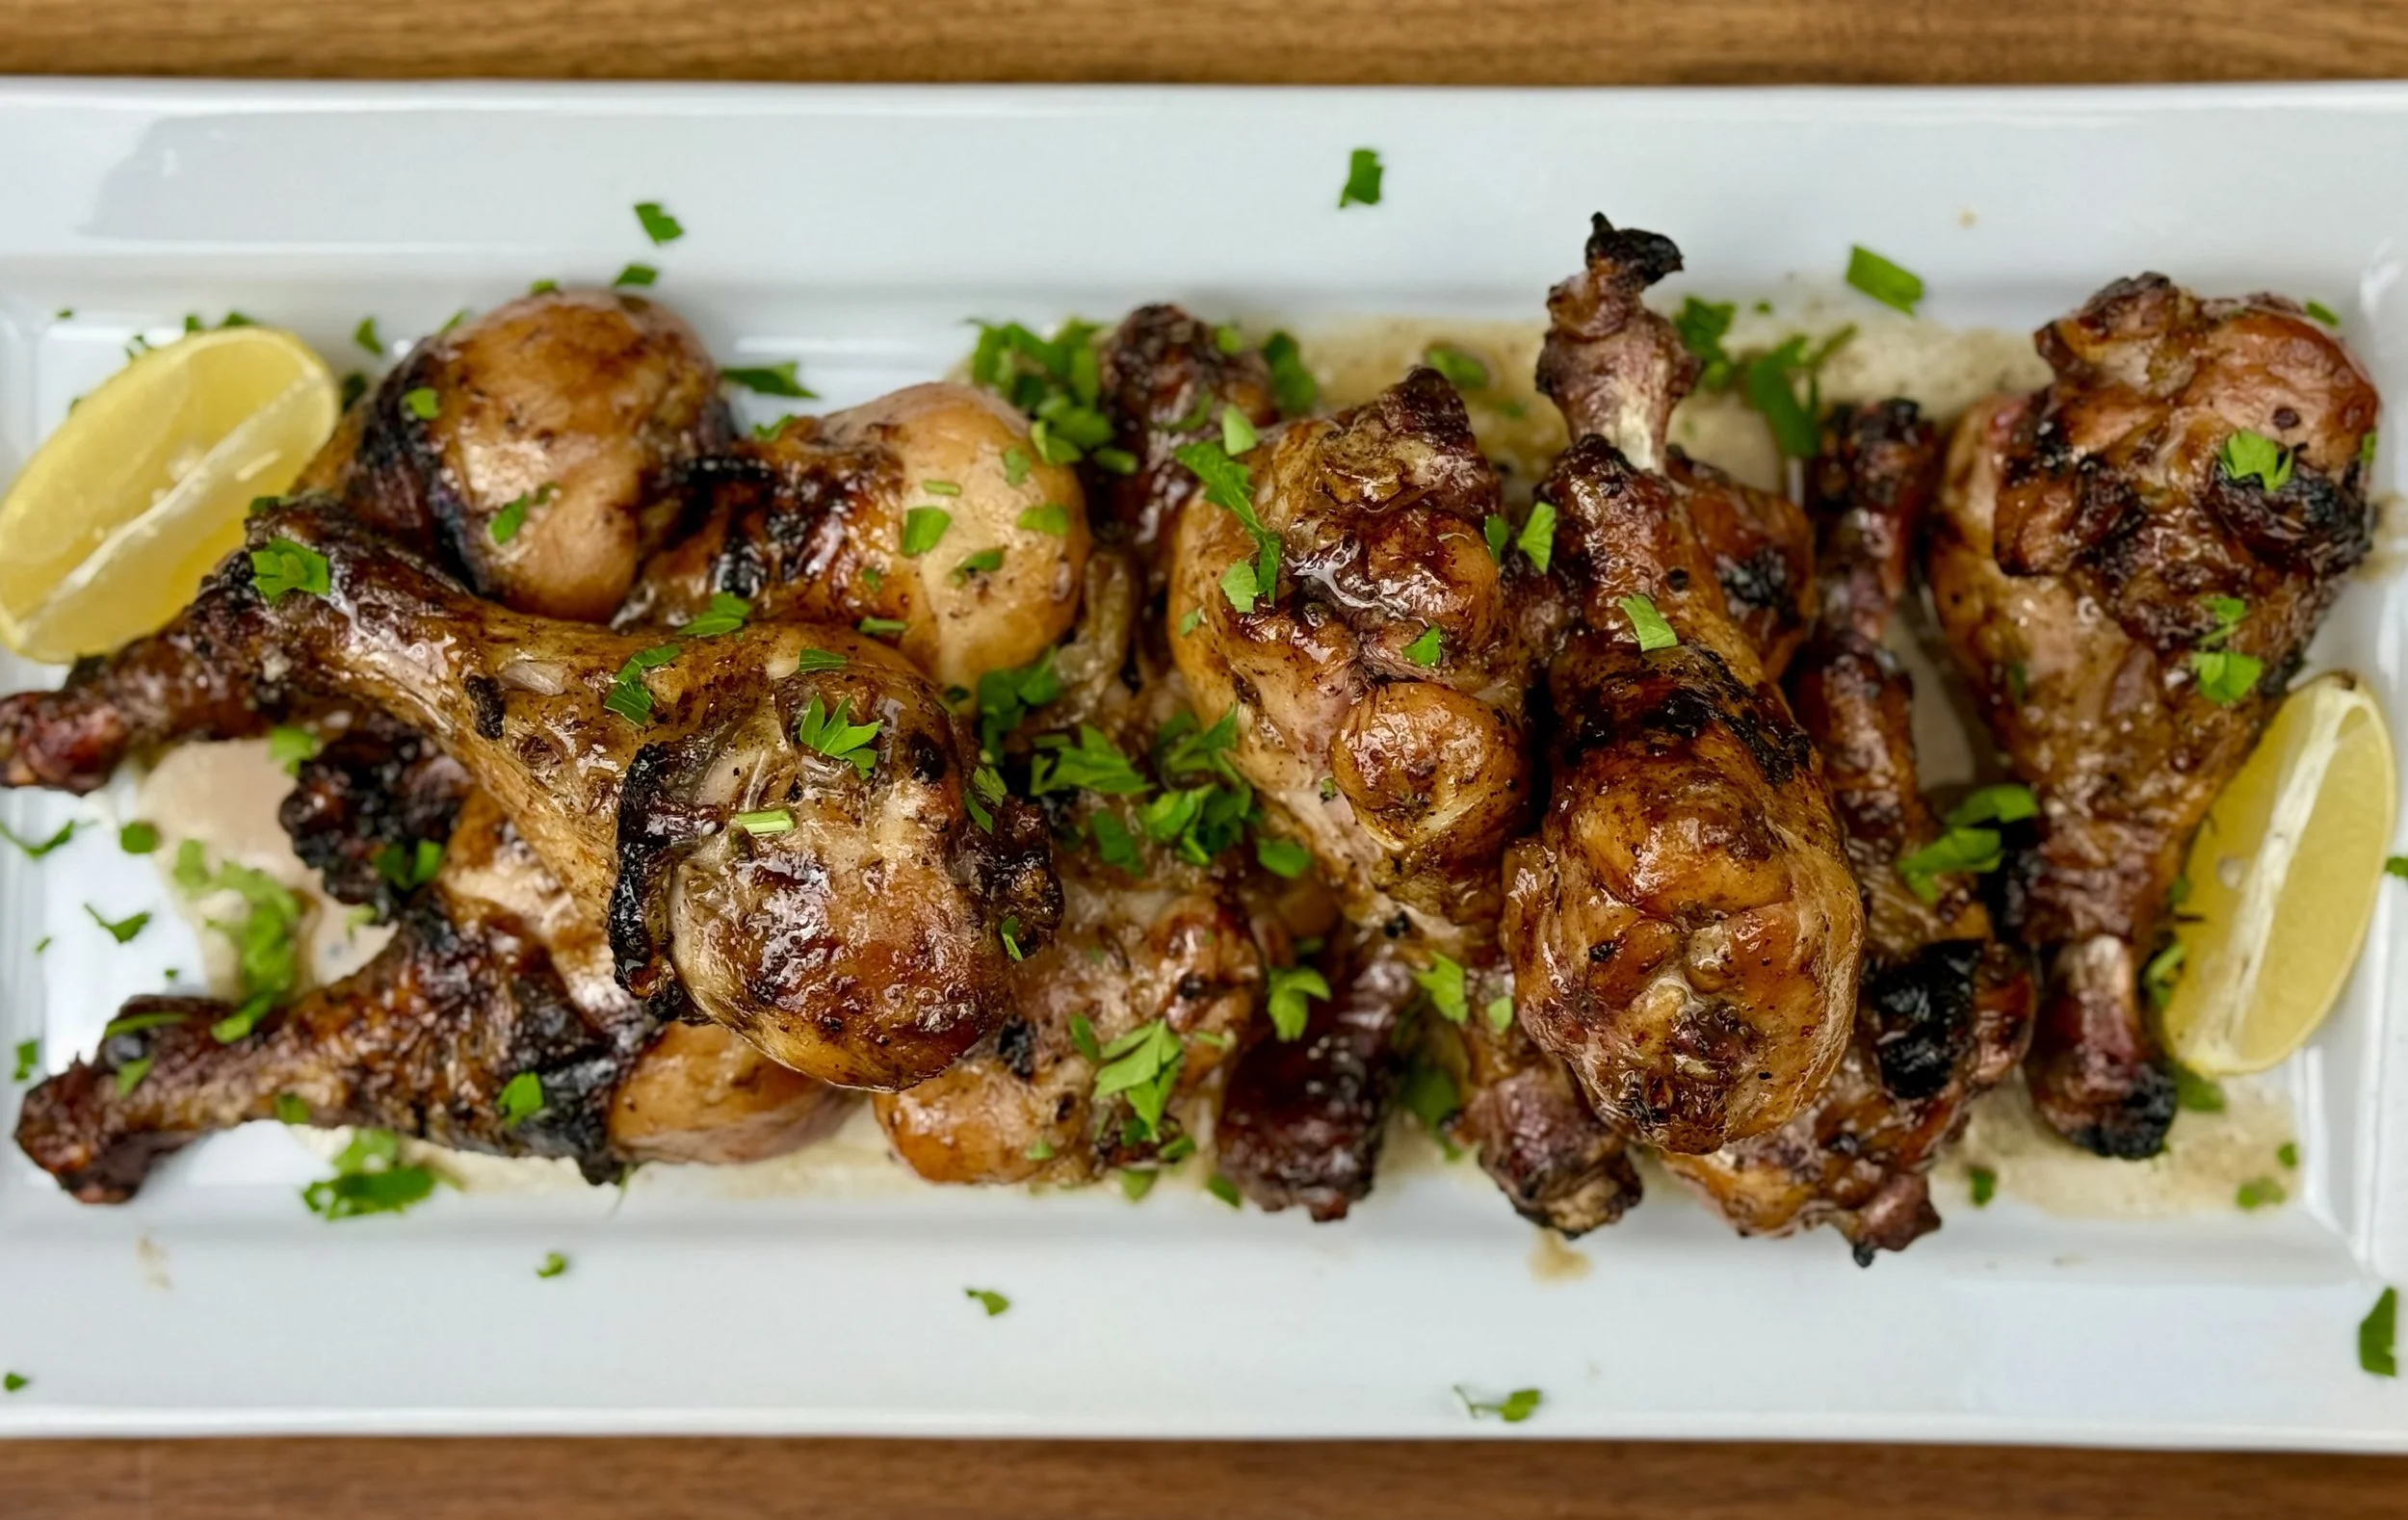
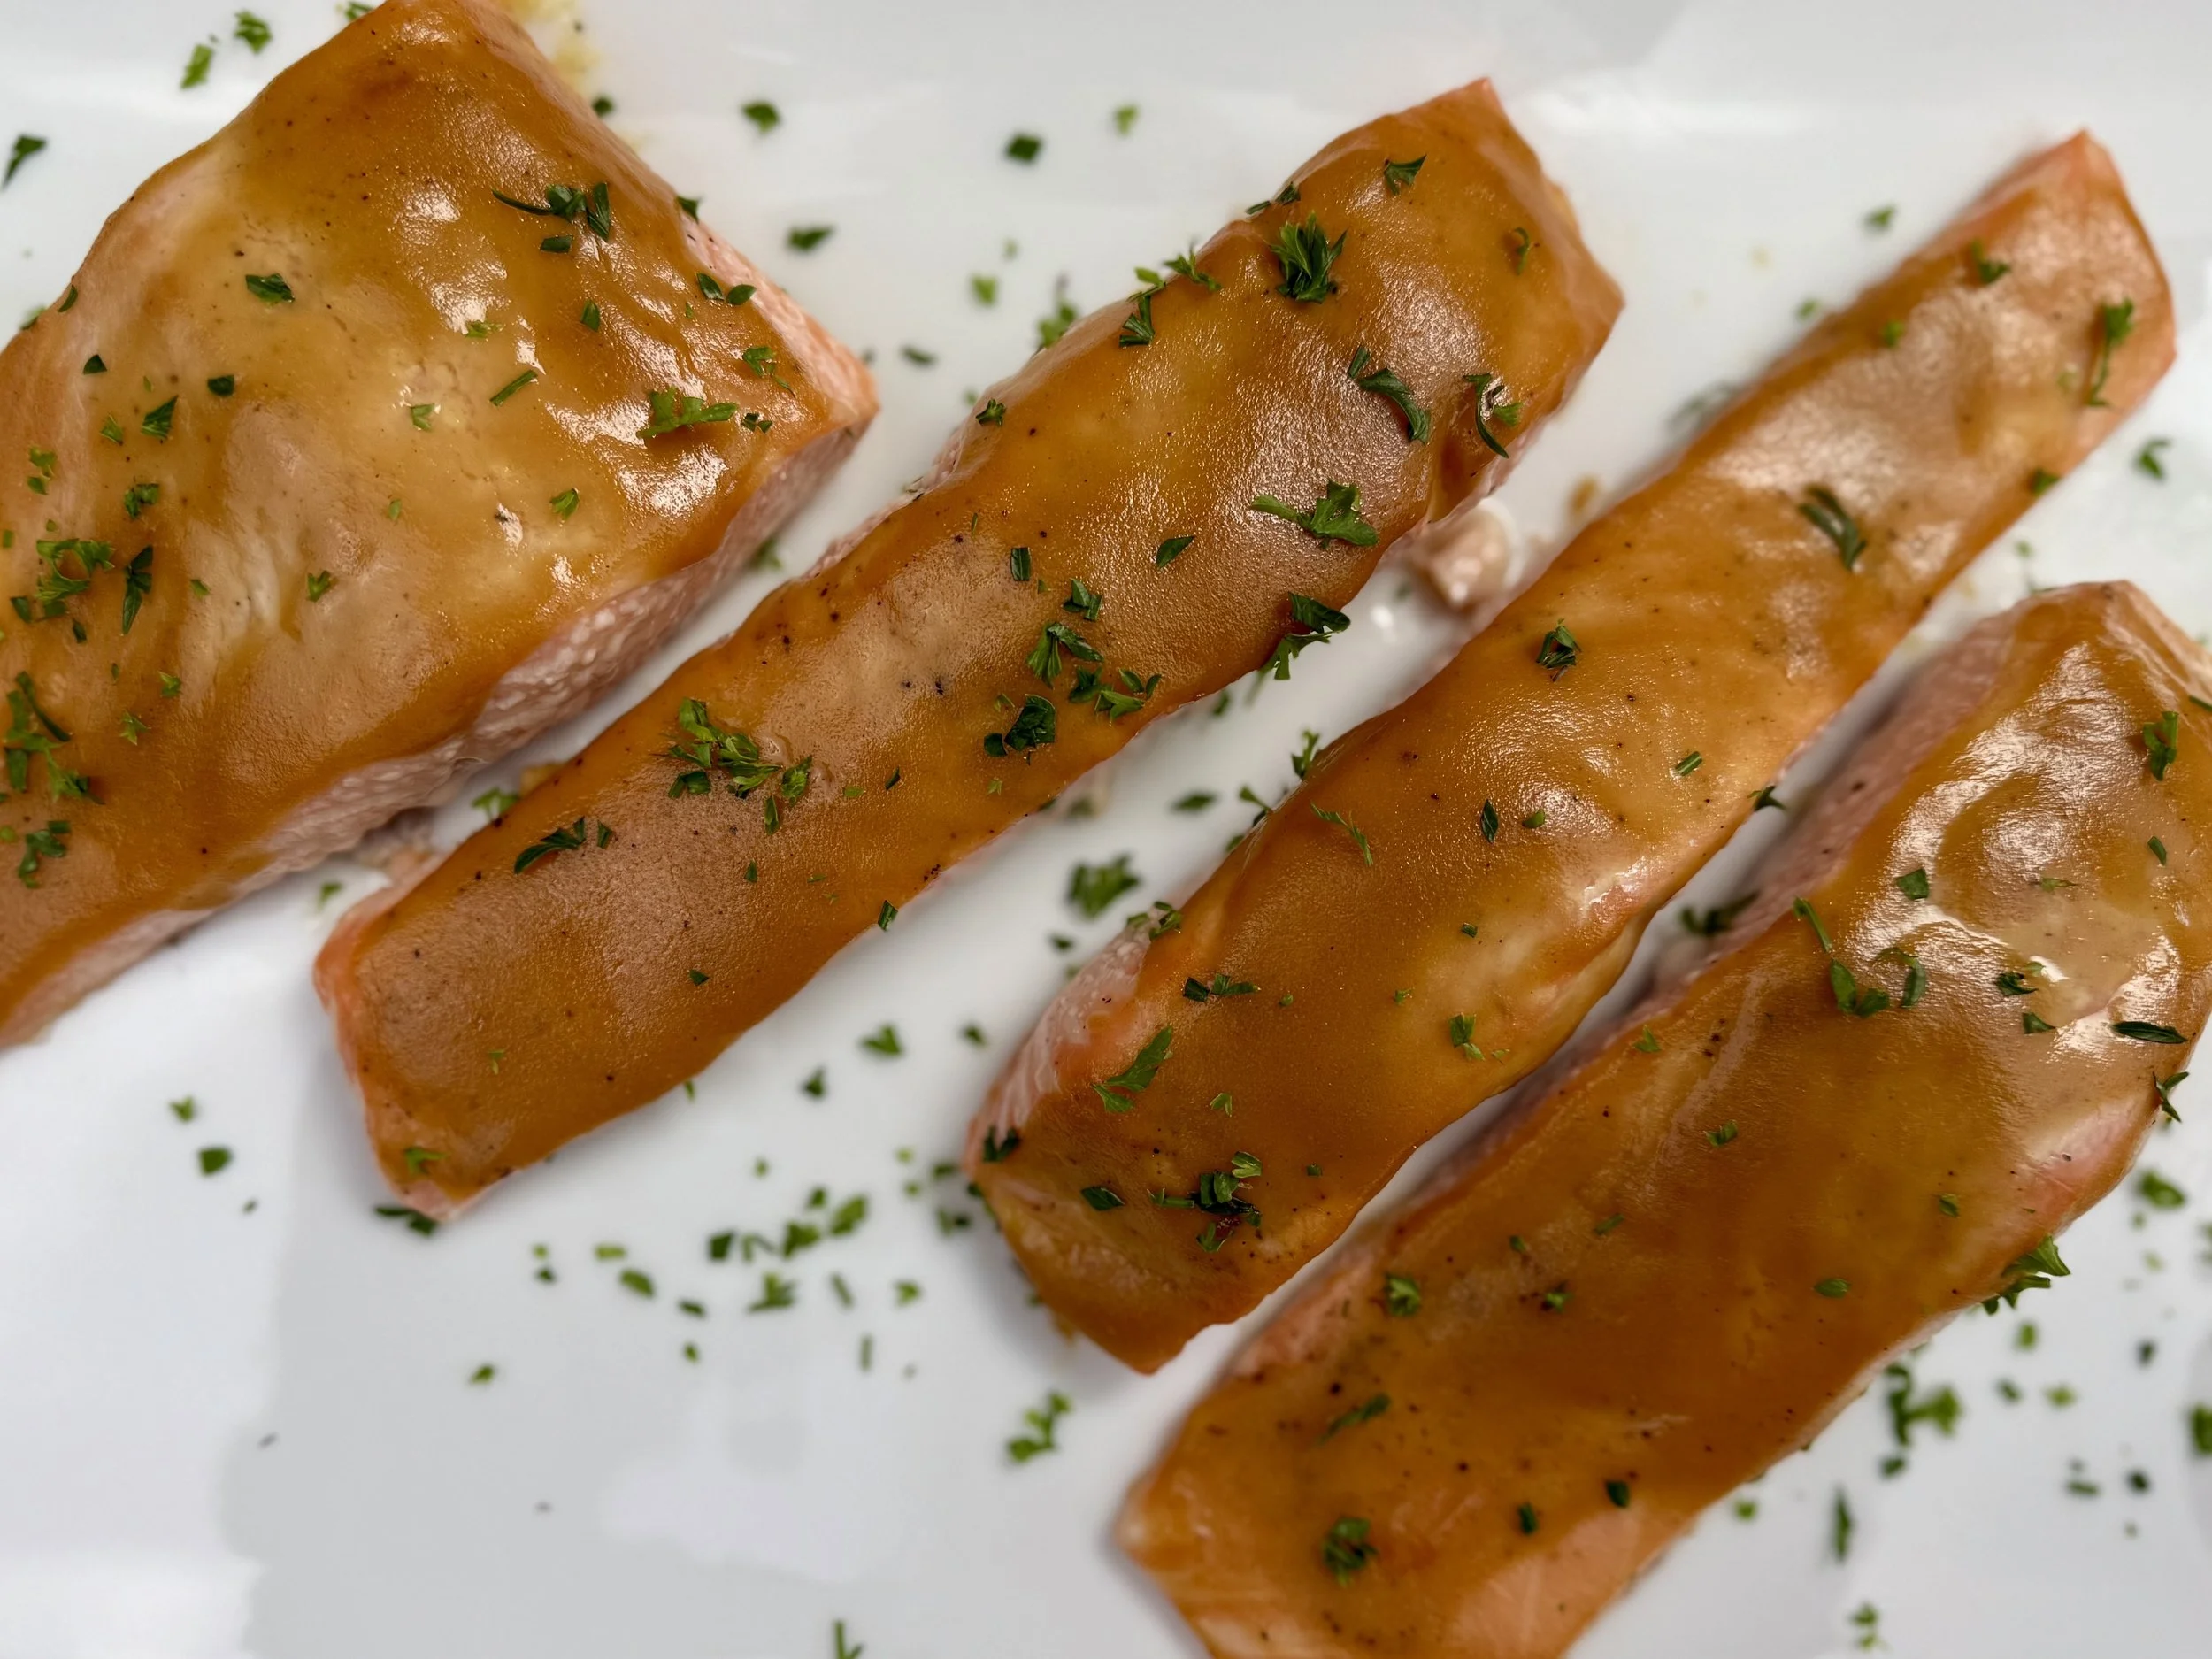
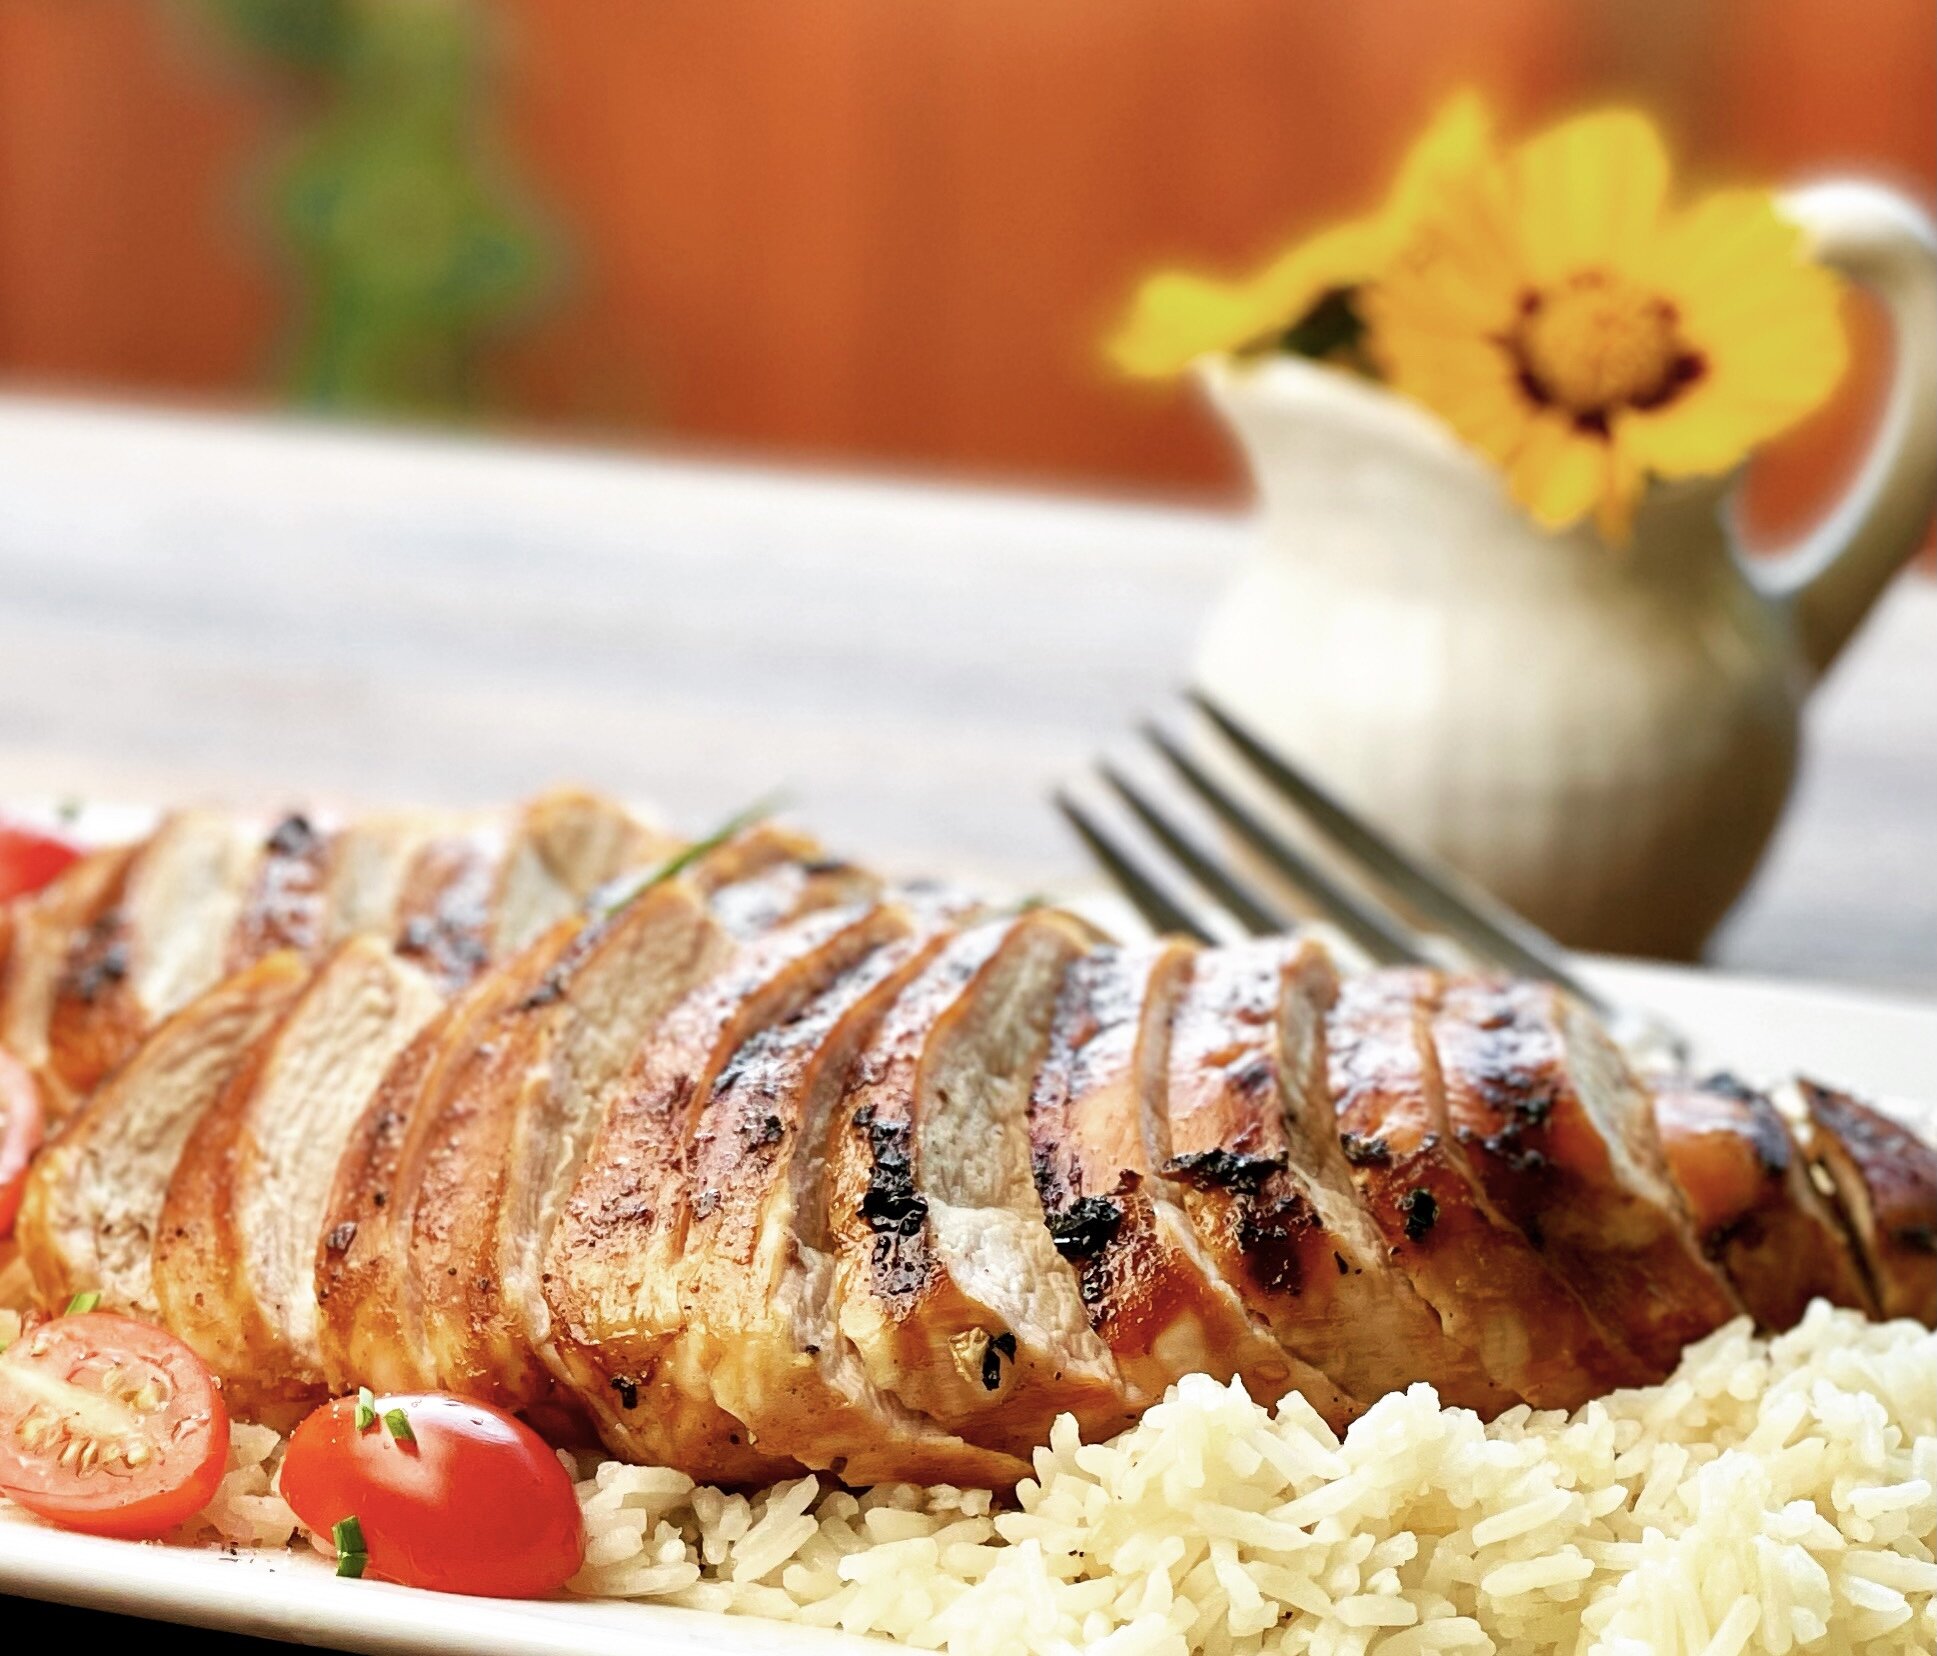
Smoked or grilled teriyaki chicken breasts (low FODMAP)
15 Minutes prep • 25 Minutes cook • Gluten-free • Lactose-free • low FODMAP • Serves 2
15 Minutes prep • 25 Minutes cook • Gluten-free • Lactose-free • low FODMAP • Serves 2 • Smoke N Sanity’s newest low FODMAP seasoning was the inspiration for this recipe. A little garlic-infused olive oil and their Teriyaki seasoning (use code IBSGC10 for 10% off) are really all you need for perfectly moist and flavorful chicken breasts. I’ve added a few other things to bring out even more flavor because I just can’t resist. These can be made on the smoker or the grill — the key is monitoring the internal temperature of the chicken so it doesn’t get dry.
Ingredients
2 boneless, skinless chicken breasts
1 tablespoon garlic-infused olive oil
2 tablespoons Smoke N Sanity Teriyaki Seasoning (use code IBSGC10 for a 10% discount)
1 cup Jasmine rice steamed
1 3/4 cups low FODMAP chicken broth
1 tablespoon butter
1 cup cherry tomatoes, sliced in half
Optional for serving:
Chopped chives, a generous squeeze of lemon, salt, and pepper to taste.
Directions
Pat the chicken breasts dry on both sides and drizzle each side with a little olive oil.
Sprinkle the teriyaki seasoning on top of the chicken breasts liberally. Allow to rest in the fridge for 15 minutes, or up to 30 minutes (place plastic wrap over the top if over 15 minutes of rest time.)
Heat your smoker on the “smoke” or “super smoke” setting with the lid open for 5 minutes. Turn the heat to 350 degrees F and close the lid for 15 minutes while it warms up. Or preheat your grill to 350 degrees F.
Put the chicken, spiced side down on the grill, and liberally season the underside of the chicken. Cook for 12-13 minutes with the lid closed.
Turn the chicken over and cook another 10-12 minutes or until cooked to 165-170 degrees F.
Remove the chicken from the grill and lay it on a cutting board with foil over the top. Let the chicken rest for 3-5 minutes before slicing.
Slice and serve over rice with sliced cherry tomatoes on the side. Optionally sprinkle each chicken breast with chopped chives, a generous squeeze of lemon, salt, and pepper to taste.
Eat and enjoy every bite because you can!
Pro tips: Serve with our Sweet and Smoky Barbeque Sauce for even more flavor.
Serve with out best coconut rice as an alternative.
More Deliciously Low FODMAP™ main courses you might enjoy
20-minute chicken and vegetable stir fry (low FODMAP)
20 minutes • Gluten-free • Dairy-free • Low FODMAP • Serves 4 • This is my go-to recipe when I have to get dinner on the table in 20 minutes. The challenge is to get everything washed, chopped, sliced, and cooked in the time it takes to cook the rice—and it works! The end result is warm, delicious, comforting, and nutritious. You cook it in one pan so the clean-up is quick too. It’s a perfect weeknight meal. If you’re lucky enough to have some leftover, it makes a great breakfast or lunch stir-fried with an egg the next day.
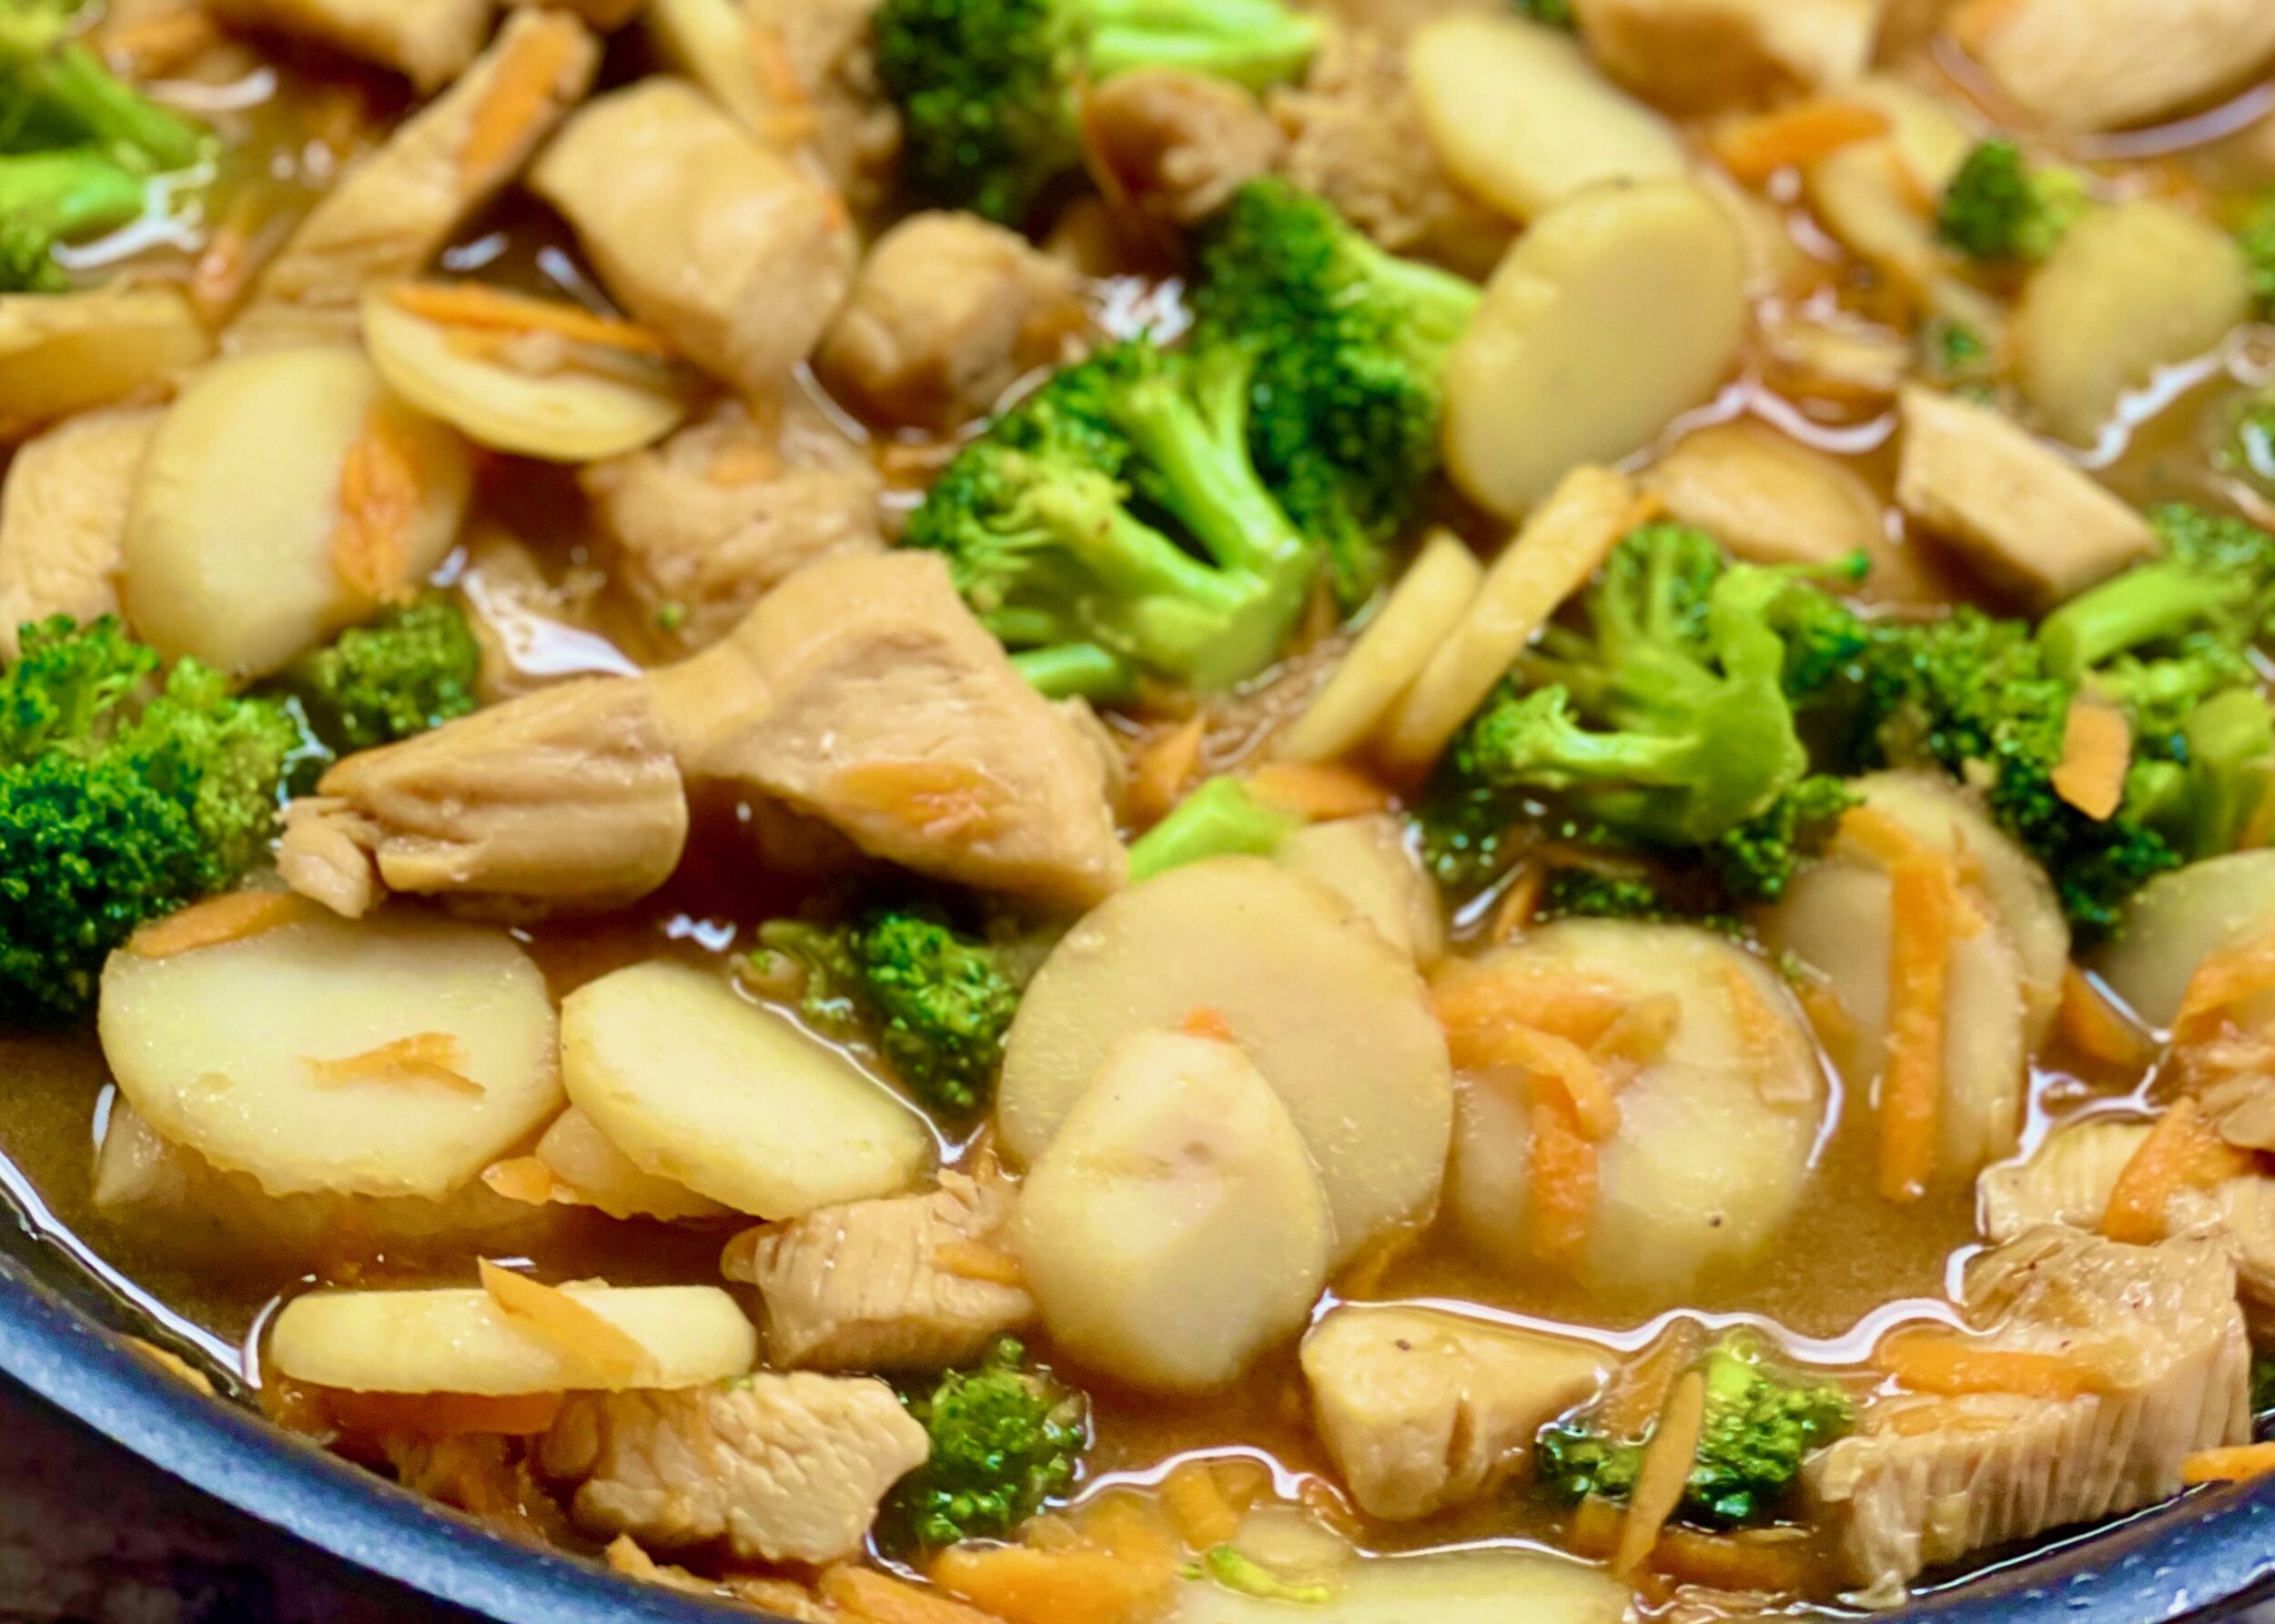
Prepped and cooked in 20 minutes, this one-pan low FODMAP chicken and vegetable stir fry is a perfect weeknight meal.
Ingredients
1 cup jasmine rice (or whatever white rice you prefer—brown rice is great but takes longer to cook)
1 3/4 cups low FODMAP chicken broth (I like Whole Foods Organic 365 brand)
1 tablespoon butter or toasted sesame oil
1 1/2 pounds boneless, skinless chicken - cut into bite-size pieces
1/4 cup gluten-free, low sodium soy sauce (plus more for serving)
1-2 inch piece fresh ginger, grated (I like a lot of ginger in this recipe)
2 tablespoons garlic-infused olive oil
2 heads broccoli (florets only)
1 can sliced water chestnuts, drained
2 carrots grated
1 tablespoon corn starch or arrowroot
1/4 cup water
Peanuts (roasted and salted) - optional for serving
Directions
Put rice, chicken broth, and butter or toasted sesame oil in a saucepan. Bring to boil. Cover, and reduce heat to the lowest possible setting and cook for 20 minutes. (You may also cook your rice in water but the chicken broth adds protein and flavor to the rice that is quite wonderful.)
Meanwhile, cut chicken into bite-size pieces. Put in a bowl with soy sauce, ginger, and a good grinding of pepper and set aside.
Cut broccoli florets into bite-size pieces and grate carrots.
Heat 1 tablespoon of garlic-infused olive oil in a medium to large frying pan over medium-high heat. When oil shimmers add marinated chicken a few pieces at a time (so the pan stays hot while you’re adding the chicken). Make sure the chicken fits in the pan in one layer so it cooks quickly and doesn’t steam.
Cook until all chicken pieces are just cooked through (don’t overcook or it will get tough). The timing on this depends on how large your “bite-size” pieces are but it should only take a couple of minutes on each side.
Remove chicken from pan and set aside.
In the same pan, add 1 tablespoon of garlic-infused olive oil and heat. When the oil shimmers, add the broccoli and toss to coat broccoli with oil. Continue cooking until broccoli starts to soften (about 3-5 minutes). Add 1/4 cup hot water, cover, and let broccoli steam for a couple more minutes just until fork-tender but still bright green.
Add the chicken back to the pan with the grated carrots and water chestnuts. Heat through. Add another 1/4 cup hot water. When the sauce begins to boil, combine the cornstarch with a couple of tablespoons of cold water then mix it into the sauce. The sauce will thicken pretty quickly. If it gets too thick, add some very hot water.
Check the taste and add more soy sauce, and a good grinding of black pepper to suit your taste.
Divide the rice into bowls and spoon the chicken and vegetables over the top. Spoon on a little of the sauce from the pan and a sprinkling of roasted peanuts if desired.
Done. 20 minutes!
Eat and enjoy every bite because you can!
More Deliciously Low FODMAP™ main courses you might enjoy
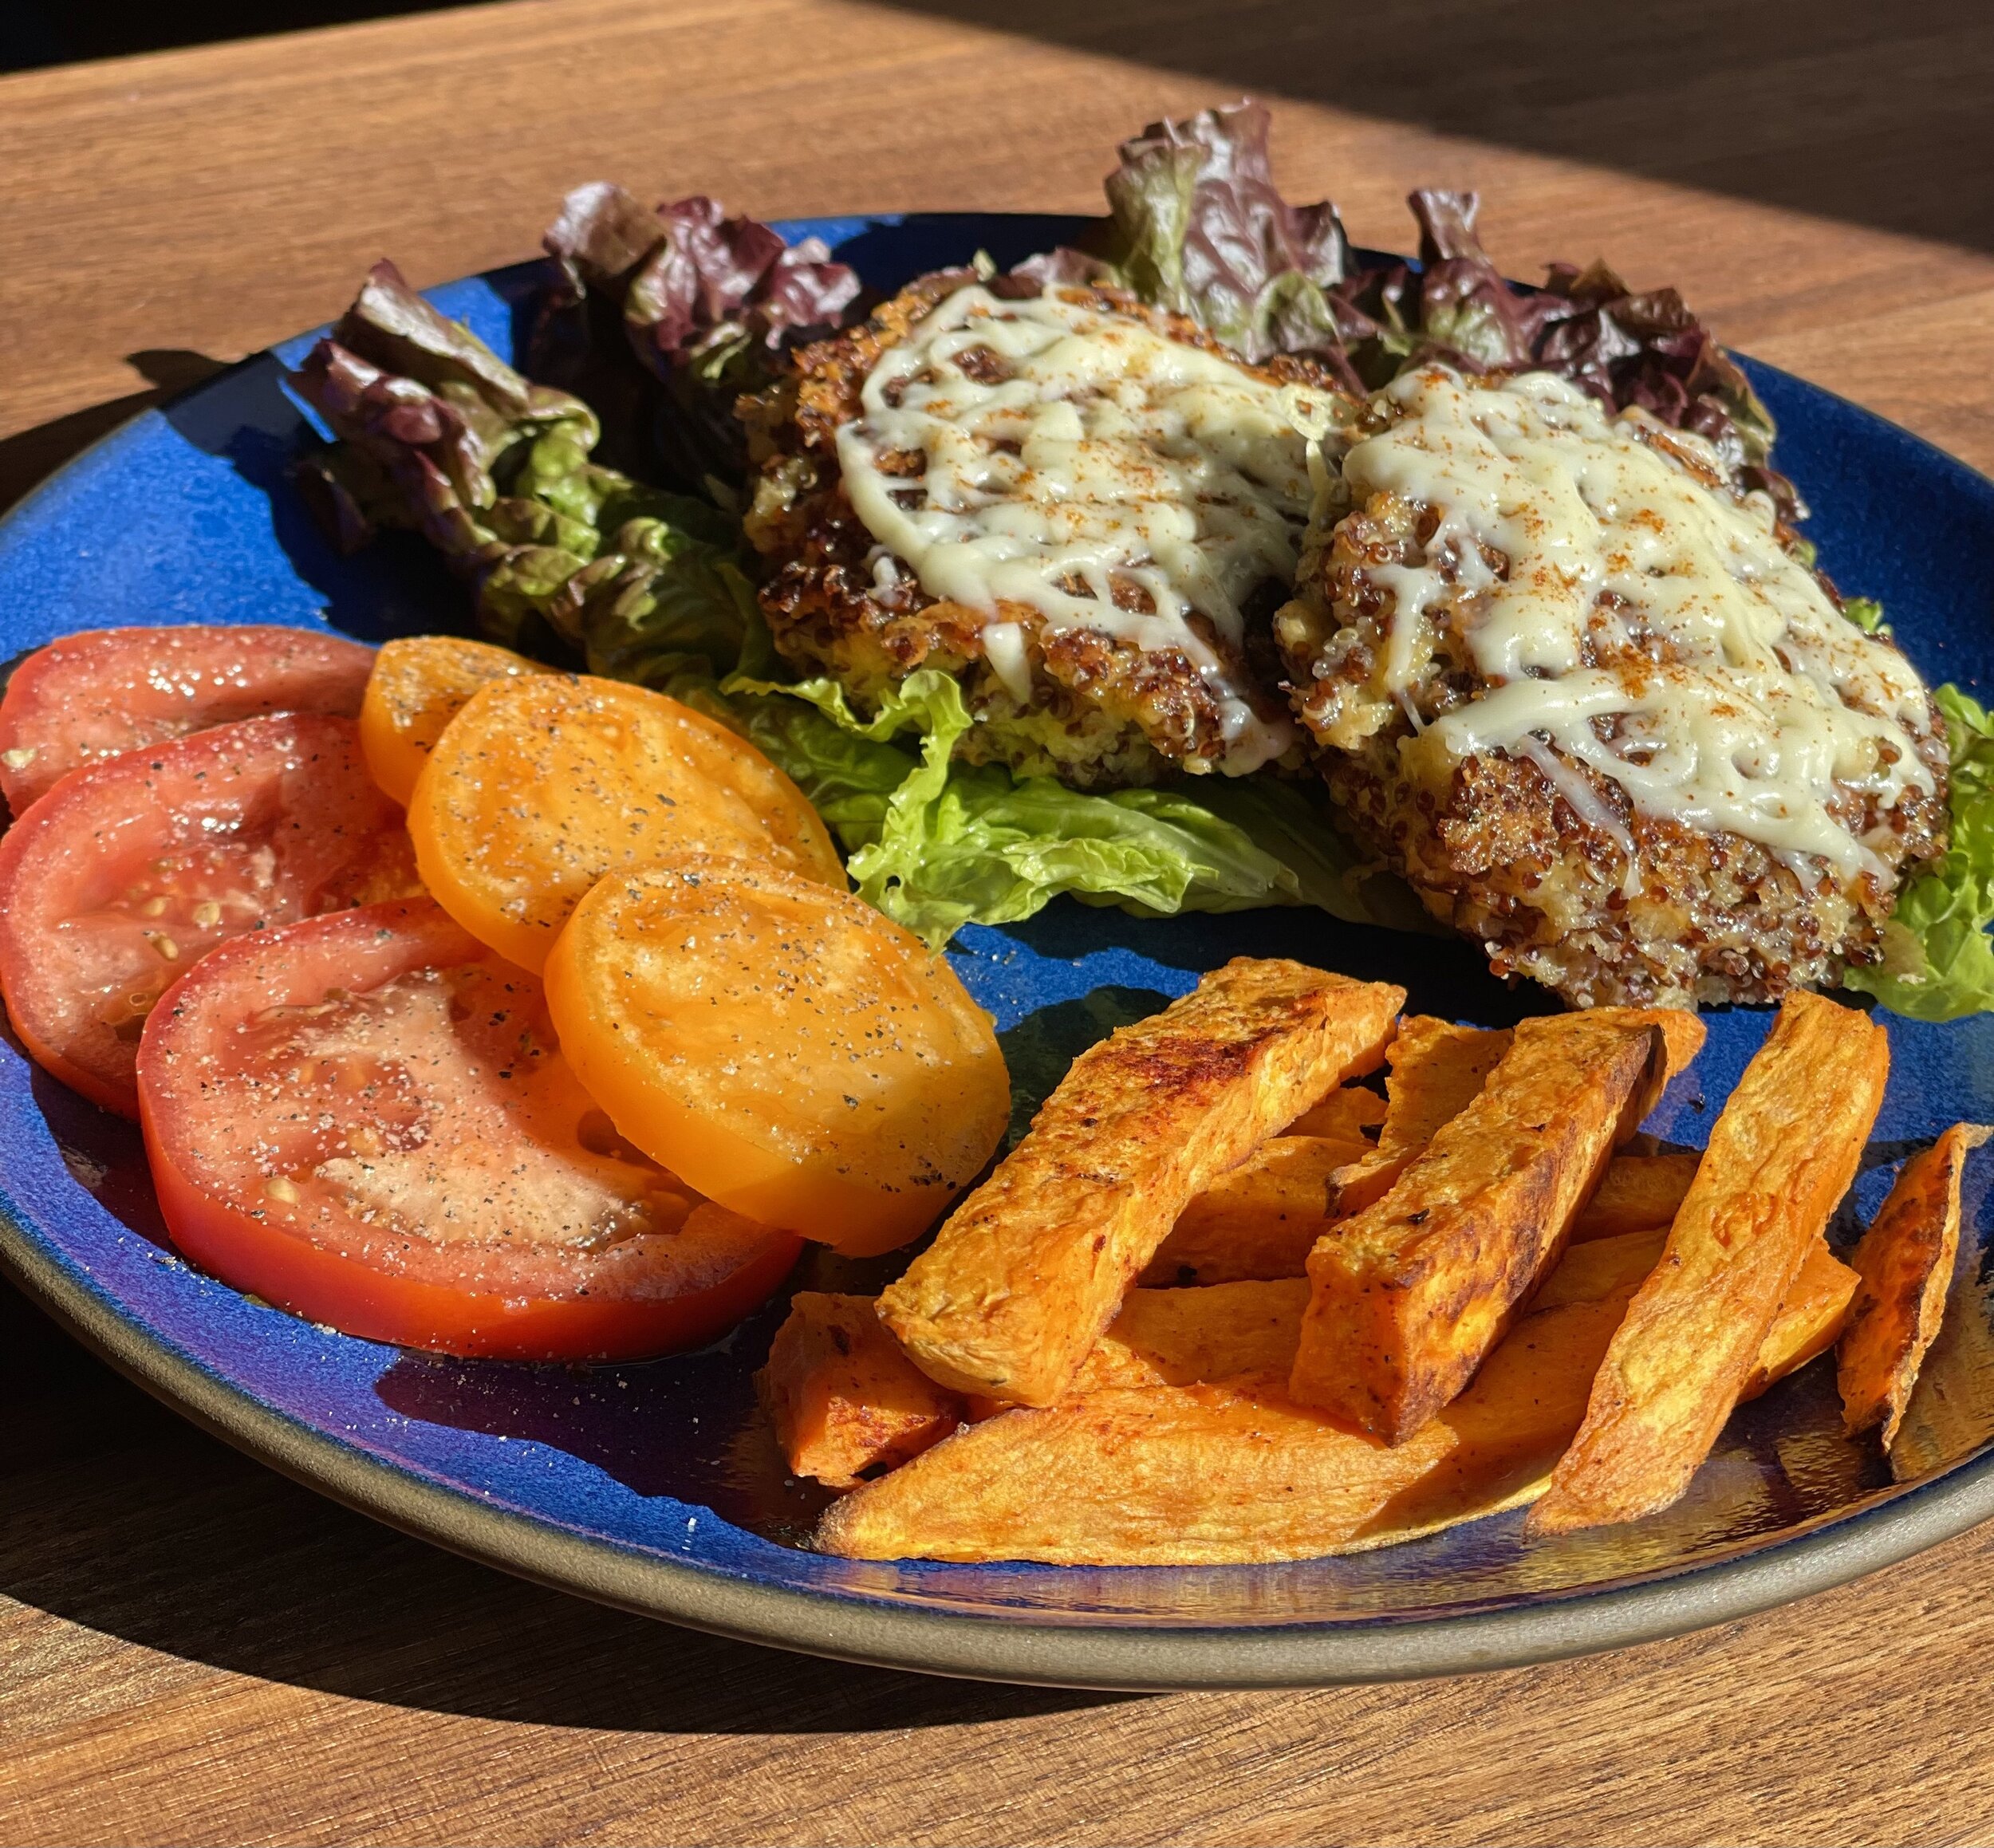
Quinoa burgers and sweet potato fries (low FODMAP)
30 minutes prep • 45 minutes cook • Vegetarian • Gluten-free • Low FODMAP • Serves 6
30 minutes prep • 45 minutes cook • Vegetarian • Gluten-free • Low FODMAP • Serves 6 • These crispy, satisfying, burgers are so flavorful and hearty, they’re not just for vegetarians! Combined with sweet potato fries and some fresh lettuce and tomatoes, they’re a delightful summer meal the whole family will enjoy.
Ingredients: Quinoa burgers
2 cups cooked quinoa (I like to use red quinoa but you can use any color you like)
1/2 cup gluten-free Panko bread crumbs
1 large egg plus 2 egg whites, lightly beaten
1 teaspoon chipotle chili powder
1 teaspoon Smoke N Sanity Essence of Garlic Salt (Use code IBSGC10 for a 10% discount)
OR ½ teaspoon Gourmend Garlic Scape Powder and ½ teaspoon salt (Use code IBSGC15 for a 15% discount)
Fresh ground black pepper
1 cup shredded sharp cheddar cheese
1/2 cup shredded gruyere or Swiss cheese
Lettuce leaves, sliced tomatoes, and avocado slices for serving (optional)
Ingredients: Sweet potato fries
4 sweet potatoes, cut into matchsticks
4 tablespoons extra virgin olive oil
1 teaspoon chipotle chili powder
1/2 teaspoon smoked paprika
Directions
To make the fries. Preheat the oven to 425 degrees F. Place the sweet potatoes on a large baking sheet and toss with olive oil, chili powder, paprika, and a large pinch each of salt and pepper. Spread the fries in an even layer. Do not overcrowd the pan, if needed, divide the fries between 2 baking sheets Transfer to the oven and bake for 15-20 minutes, then flip and bake for 15-20 minutes more. You want the sweet potatoes to be tender, yet crisp.
In a medium bowl, combine the quinoa, Panko, eggs, essence of garlic salt, chili powder, cheddar cheese, and a good grinding of black pepper. Form the mix into 5-6 equal burgers. Place on a plate, cover, and transfer to the fridge.
To cook the burgers use a large skillet and heat a drizzle of olive oil over medium-high heat. When the oil shimmers, add the burgers and cook until golden and crisp, about 5 minutes per side. During the last minute of cooking add the Gruyere or Swiss cheese, cover, and cook 2-3 minutes, until the cheese has melted.
To serve, place each burger on a lettuce leaf, top or side with sliced tomatoes and sweet potato fries. If desired, add sliced avocado.
Eat and enjoy every bite because you can!
Pro Tip: Cook the quinoa ahead to make these in a snap.
This post may contain affiliate links so you can easily purchase items listed on the page. In some cases we have provided a special discount code for IBS Game Changers so be sure to use it!
More Deliciously Low FODMAP™ main courses you might enjoy
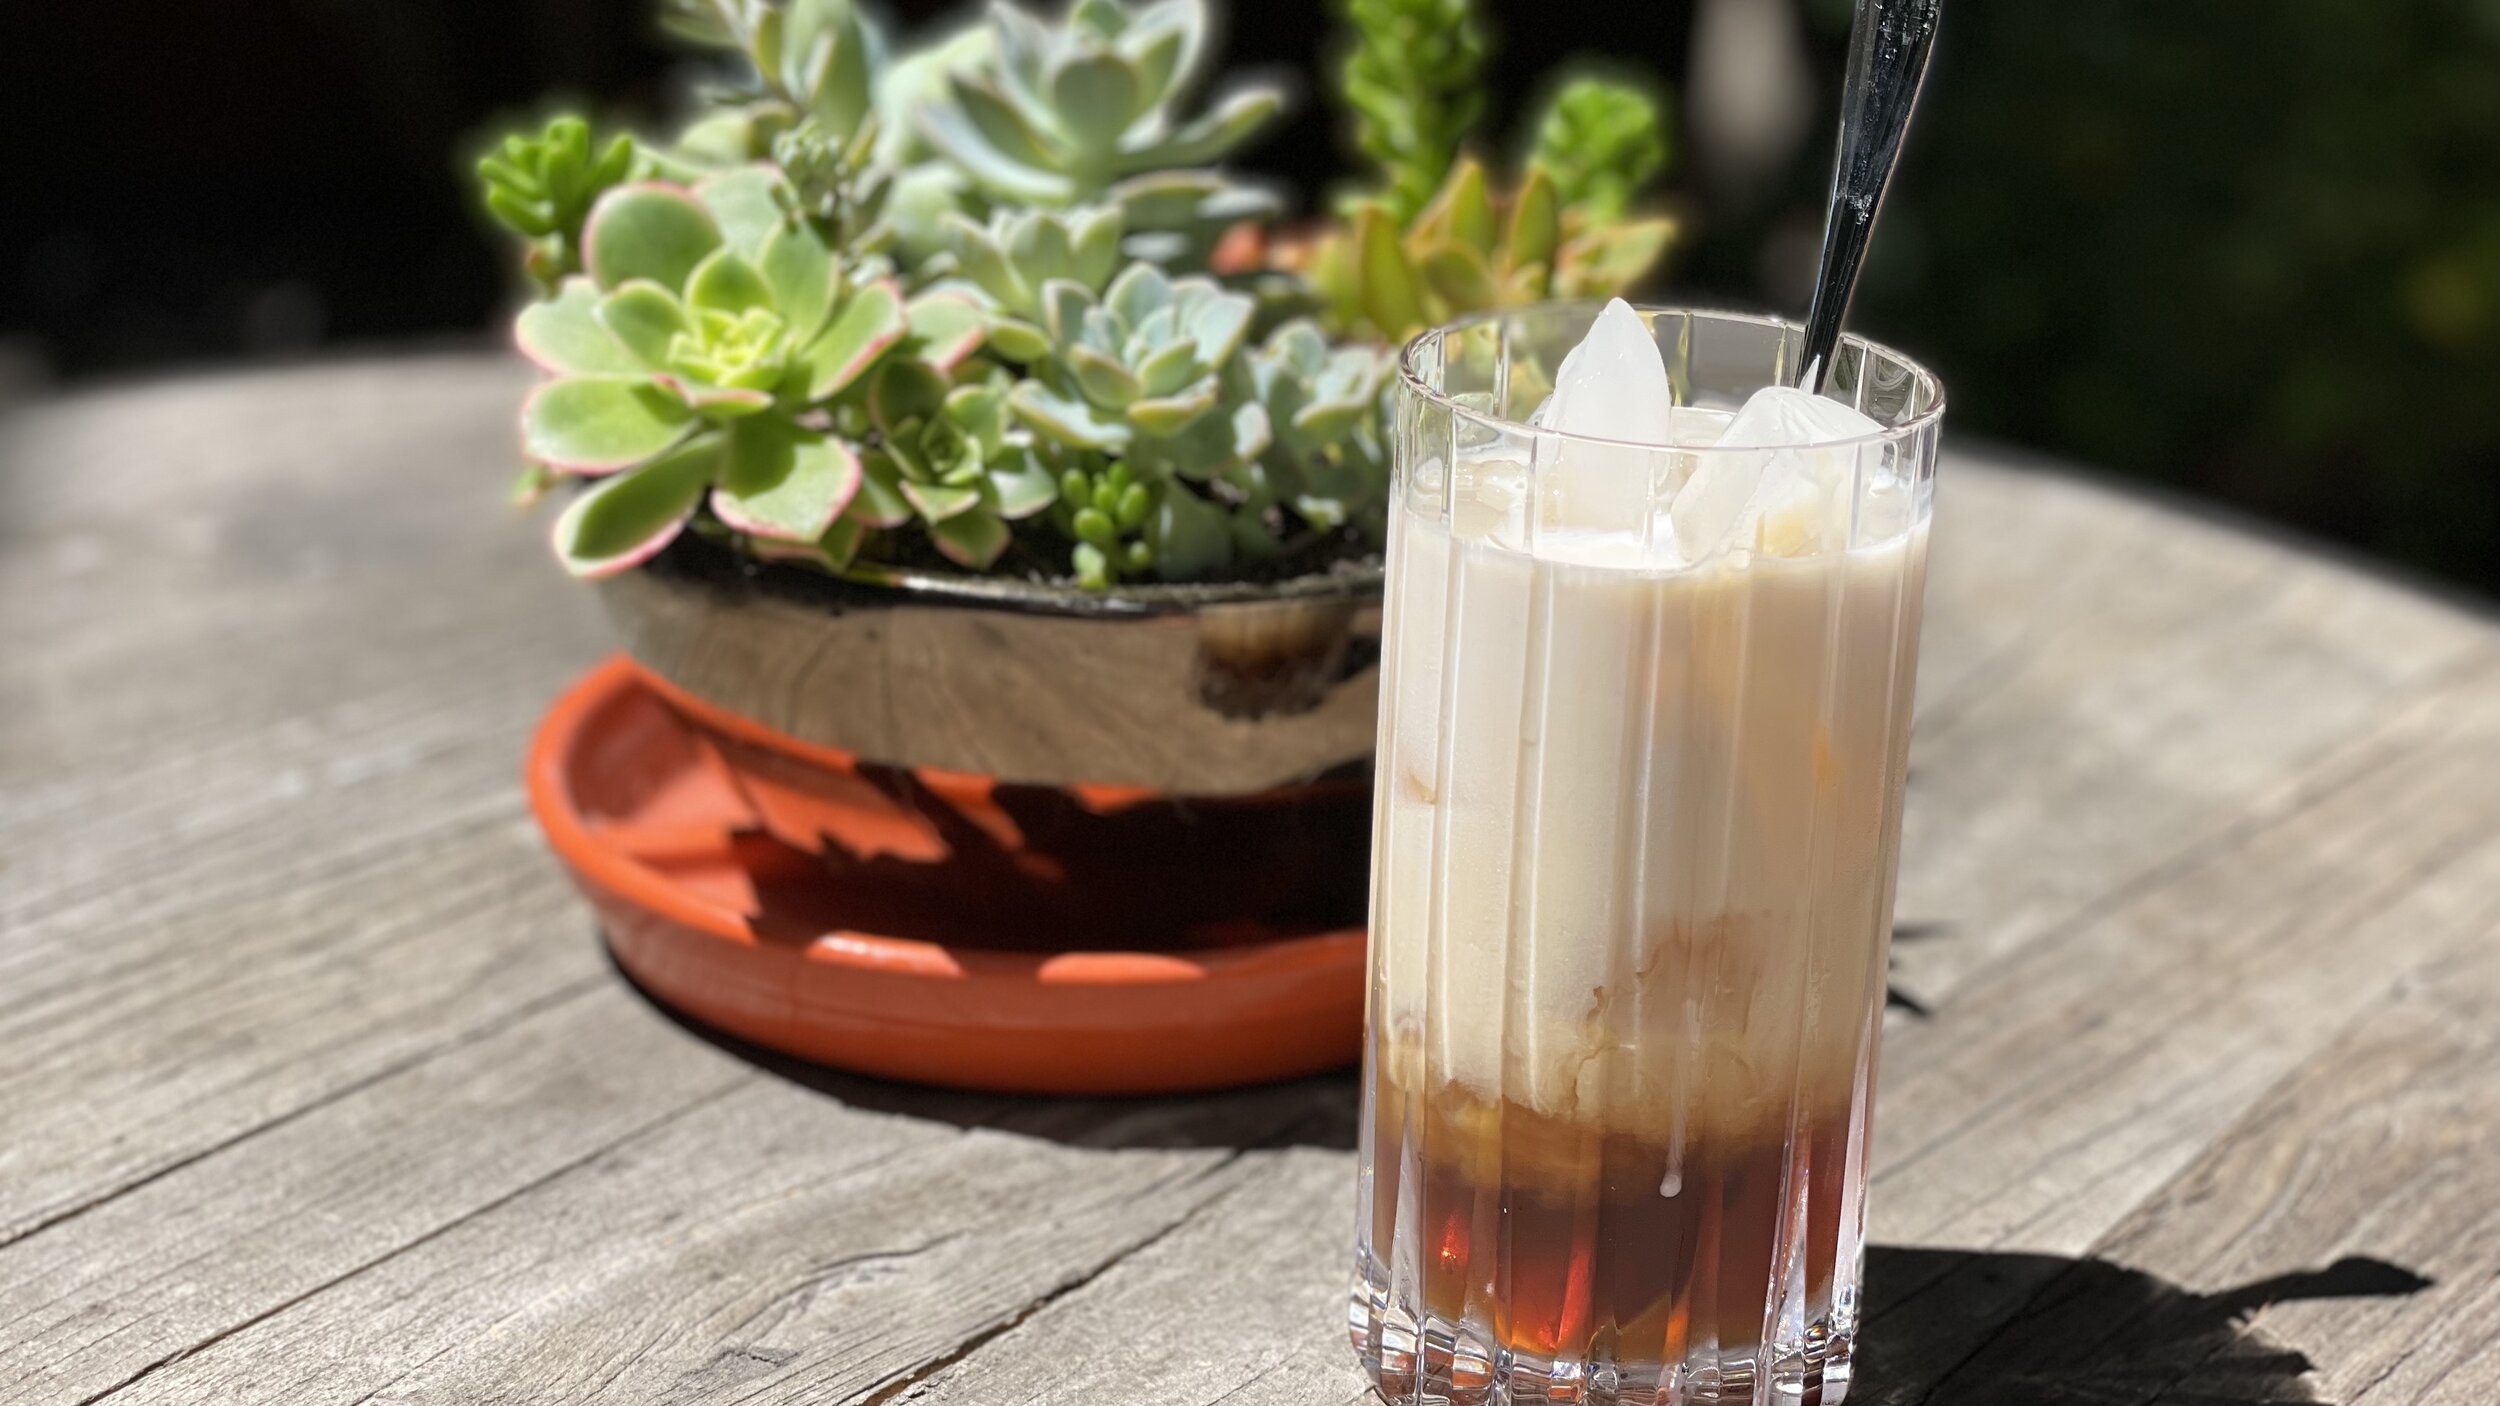
Thai iced tea (low FODMAP)
10 minutes prep • 30 minutes steep and cool • gluten-free • low FODMAP • Serves 6
10 minutes prep • 30 minutes steep and cool • gluten-free • low FODMAP • Serves 6 • Thought your days of enjoying a delicious glass of Thai iced tea were over? Now you can make your own and you’ll never have to miss it again! This recipe is simple and intensely fragrant and flavorful—just like you would expect it to be in the best Thai restaurant. You can mix it with lactose-free whole milk or half and half—depending on your taste. All versions will be delicious!
Ingredients
4 cups water
4 decaffeinated black tea bags
1/2 - 3/4 cup granulated sugar (depending on how sweet you like it)
1 green cardamom pod, smashed
1 cup lactose-free whole milk or lactose-free half and half
Ice
Directions
Bring water to boil and add the tea bags, sugar, star anise, smashed cardamom pod, and cloves.
Stir until all the sugar dissolves. Gently boil tea for about 3 minutes. Remove from heat and allow tea to steep and cool for at least 30 minutes. The more concentrated the tea flavor, the better the Thai tea tastes. I think it tastes best if you allow the tea to steep and cool for about 2 hours.
Remove the tea bags and spoon out the star anise, cardamom pod, and cloves (or strain to remove). If tea is still warm, you’ll want to refrigerate it so it will be well chilled. You can make the tea ahead of time and keep it in the fridge until you’re ready to serve.
Fill highball glasses with ice and pour in your cooled Thai tea leaving about 1/3 of the glass to fill in with whole milk or half and half. If you use milk, you may want to add 2-3 tablespoons of half and half or heavy cream for a creamier flavor.
Drink and enjoy every sip because you can!
Pro tip: As I learned on a skiing trip in Jackson Hole Wyoming, Thai iced tea can be spiked with vanilla vodka and the result is a delightful creamy cocktail.
More Deliciously Low FODMAP™ drinks you might enjoy


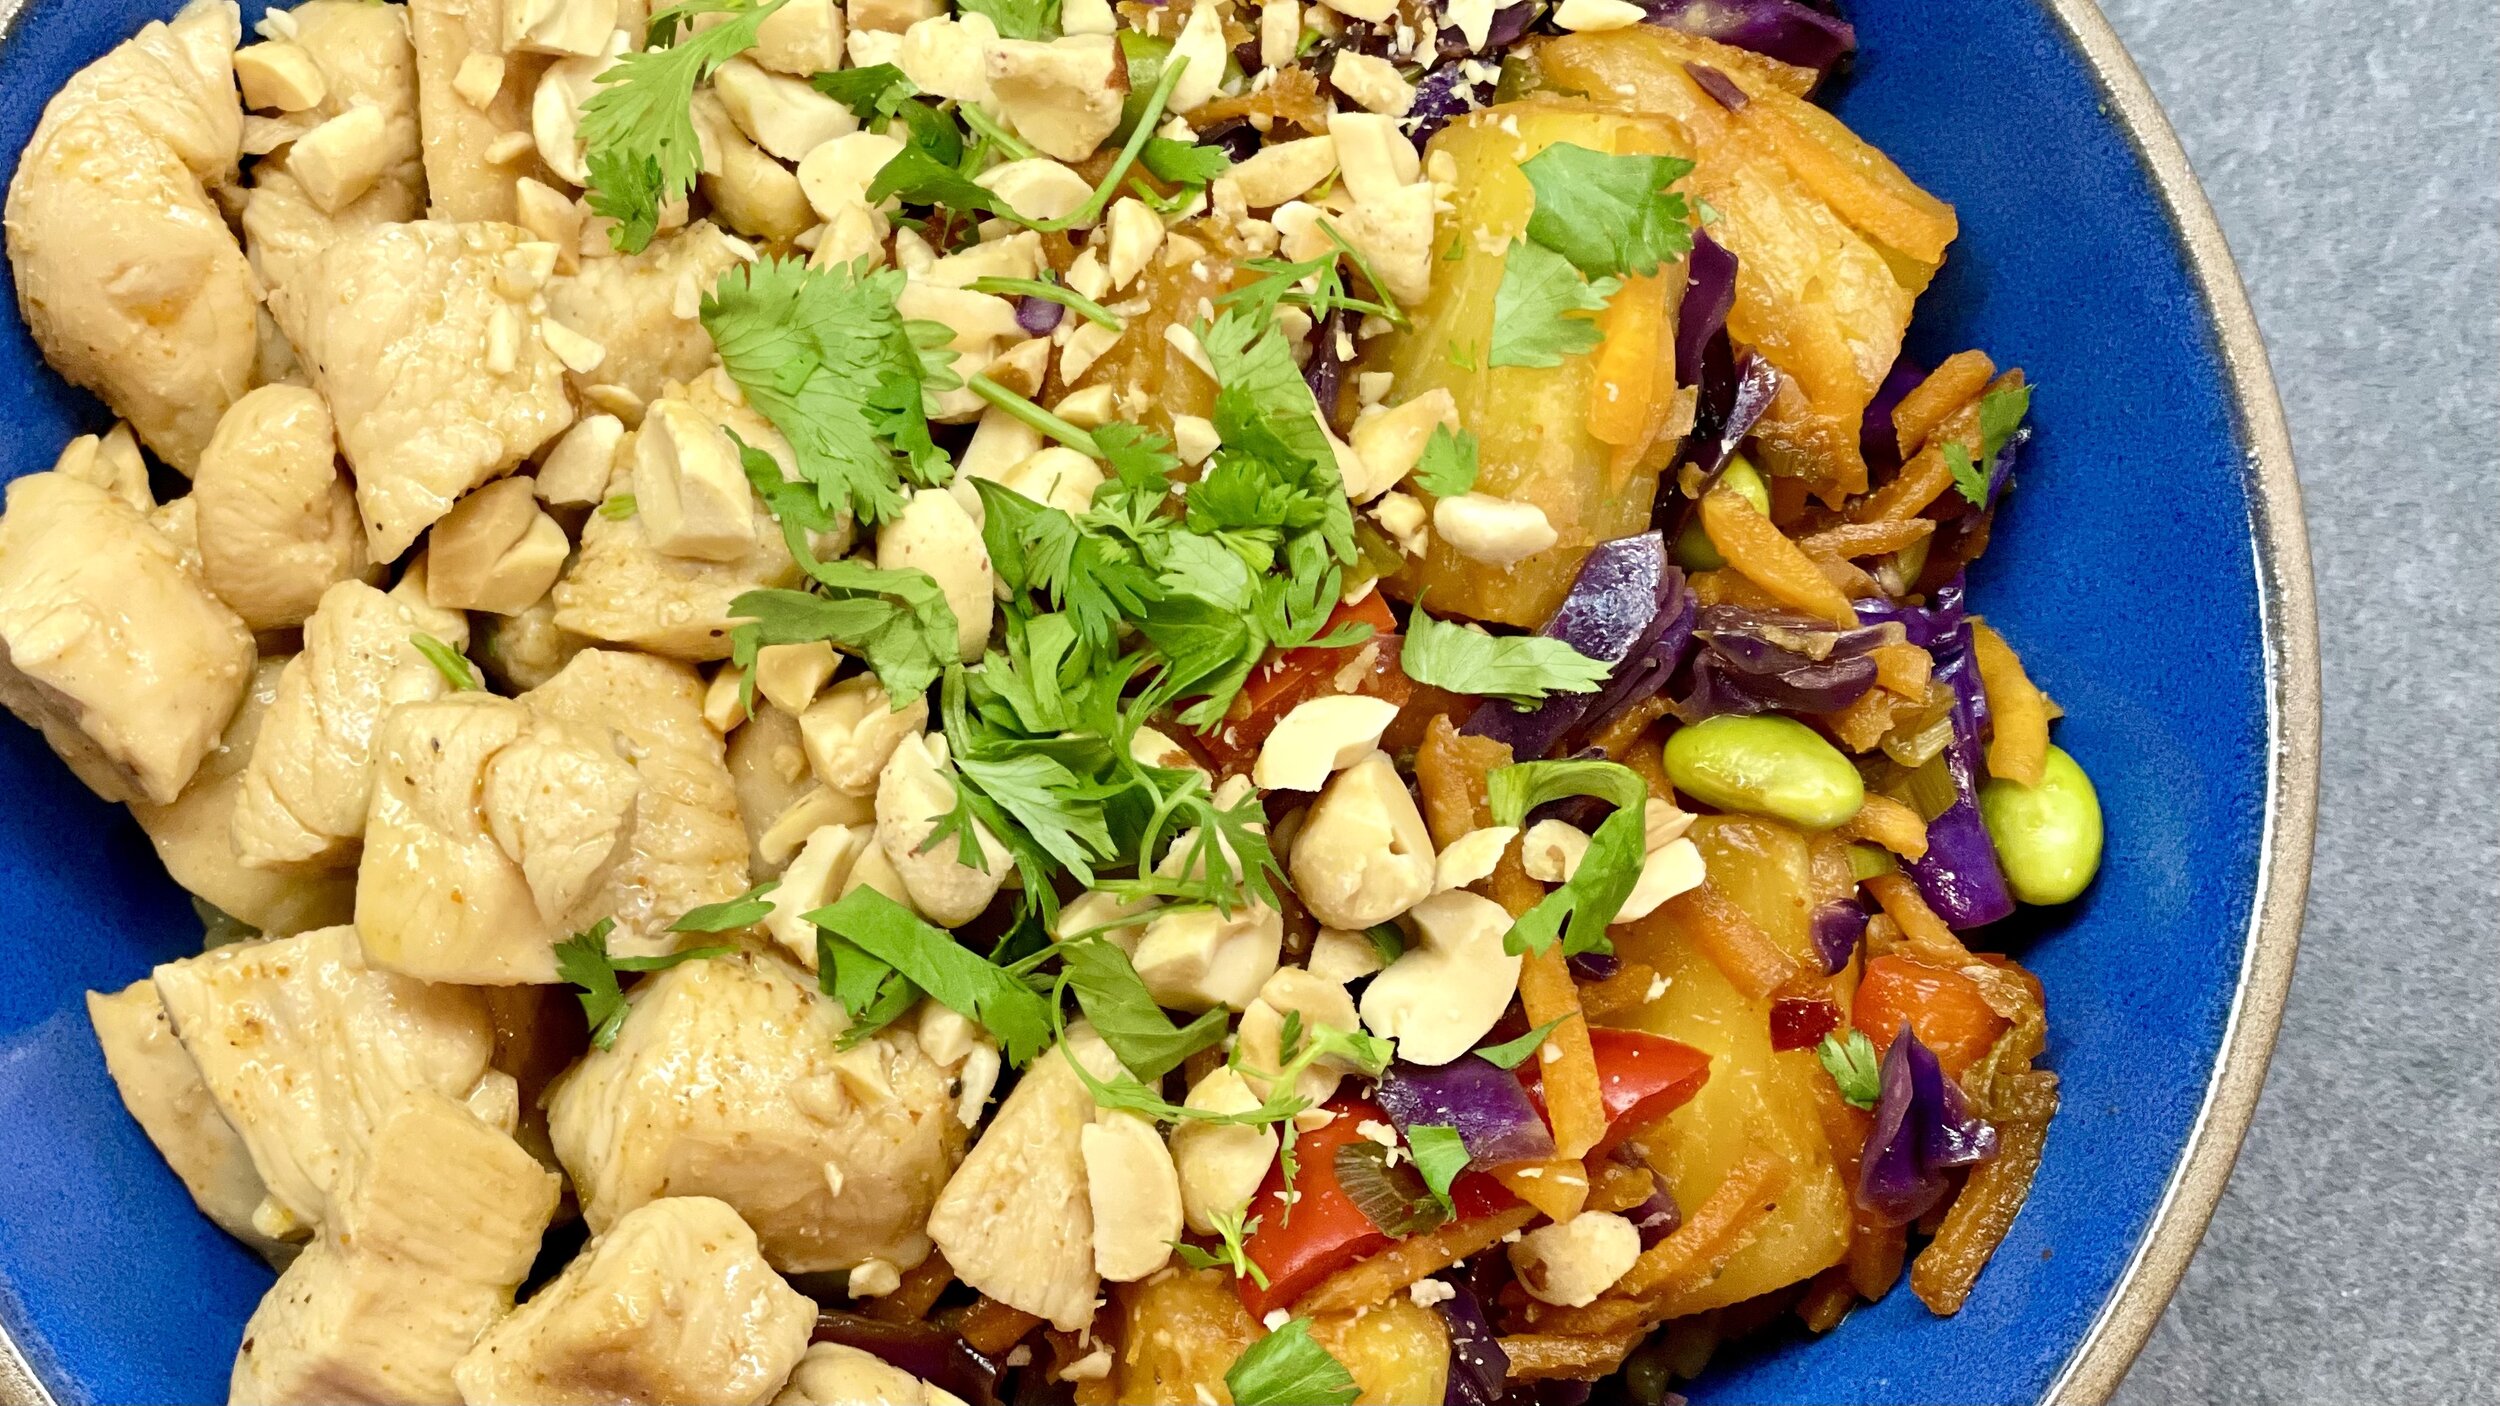
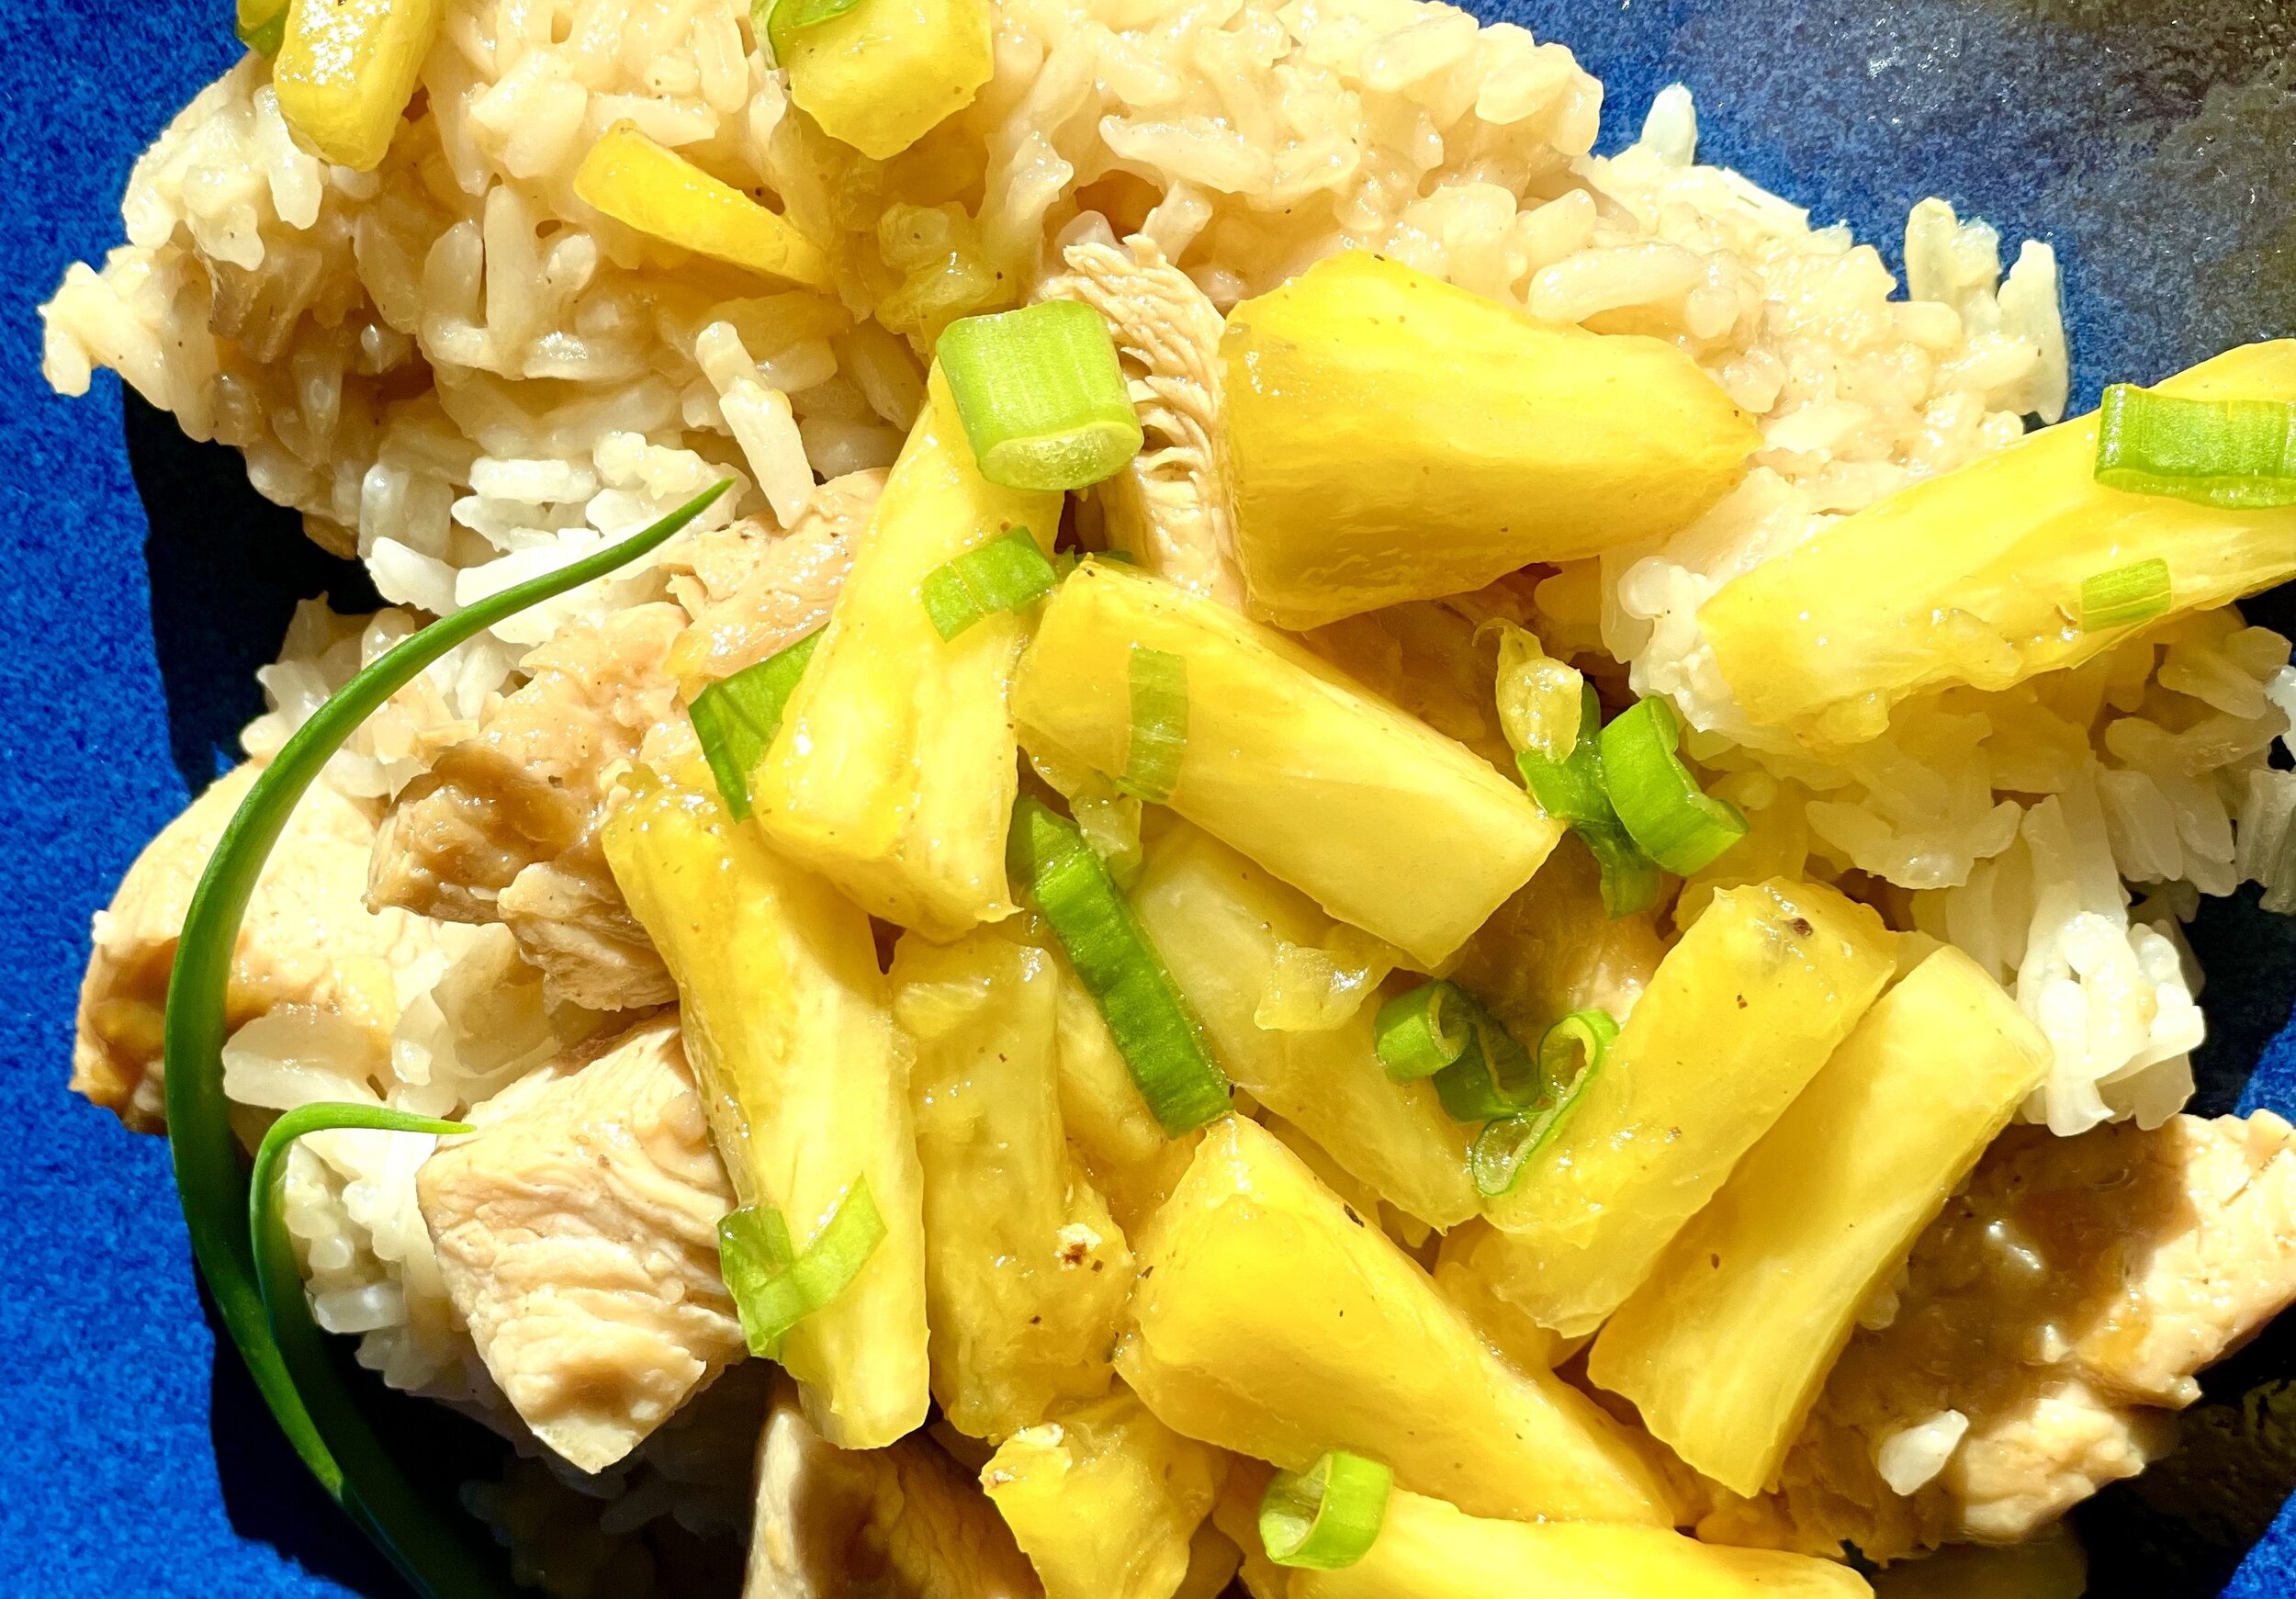
Thai pineapple fried rice (low FODMAP)
60 minutes • Gluten-free • Lactose-free • Low FODMAP • Serves 4
60 minutes • Gluten-free • Lactose-free • Low FODMAP • Serves 4 • To carry on our Thai themed dishes, we have developed an amazing Thai pineapple fried rice that is hearty, fresh, colorful, delicious, and easy to make. The perfect combination!
Ingredients: Rice
1 cup uncooked short-grain brown or mixed wild rice
1 teaspoon toasted sesame oil
1 3/4 cups water or low FODMAP chicken broth (I like Whole Foods Organic 365 brand)
1 tablespoon butter
Pinch of salt
Ingredients: Chicken
2 large boneless skinless chicken breasts, cut into small bite-size pieces
2 tablespoons gluten-free low sodium soy sauce
Pinch red pepper flakes
2 tablespoons toasted sesame oil
2 teaspoons chili powder
2 teaspoons Smoke N Sanity Essence of Garlic Salt (use code IBSGC10 for 10% discount)
Fresh ground black pepper
Ingredients: Veggies and fried rice
1 tablespoon toasted sesame oil
1 ½ cups fresh cubed pineapple
1/2 tablespoon freshly grated ginger
1 bunch green onions (green part only) chopped
1 red bell pepper, diced
3 cups thinly-sliced red cabbage
1/2 cup shredded carrots
1/2 cup frozen shelled edamame
1 tablespoon chili powder
2 tablespoons gluten-free low sodium soy sauce, plus more to taste
1/3 cup coarsely chopped peanuts
For serving: Fresh cilantro, extra green onions, and, extra peanuts, coarsely chopped.
Directions
To make the rice: Add rice and toasted sesame oil to a medium pot and place over medium heat. Toast rice for 2 minutes with the oil to enhance the flavor and texture. After 2 minutes, add water or broth and salt and stir. Allow water to come to a boil, then turn heat to low, cover, and cook for 45-55 minutes. Remove from heat and allow to sit in pan covered for 10 minutes, then fluff with a fork. The rice should be slightly chewy but still soft.
While the rice cooks, you can chop and prep your chicken and veggies. Cut up the chicken, combine with the soy sauce and red pepper flakes, set it aside in the fridge until the rice is close to being done. Cut pineapple and cut or grate veggies as indicated
To cook the chicken: Heat sesame oil in large frying pan. Add chili powder and cook for about a minute to bloom the seasoning. Cook chicken in one layer in your pan over high heat. While cooking, sprinkle on the essence of garlic salt, and a few grinds of black pepper, Cook until JUST cooked through to maintain tenderness. When all chicken is cooked, set aside and keep warm while you cook the veggies.
Wipe clean the same large skillet you used to cook the chicken, then add in 1 tablespoon of toasted sesame oil and place over medium-high heat. Add in pineapple, ginger, green onion, and red bell pepper. Saute for 4-6 minutes until pineapple starts to turn slightly golden brown on the edges.
Next add in the remaining veggies: red cabbage, carrots, and edamame. Saute for 3-5 more minutes, stirring frequently. Transfer all of the veggies to a large plate or bowl and keep warm.
Now it’s time to fry up the rice! Add the remaining 1 tablespoon of toasted sesame oil to the same pan and place over medium heat. Add in your cooked rice and saute, stirring frequently for 2-4 minutes. Add soy sauce and stir to combine. Taste and adjust seasonings as necessary.
Serve in bowls with the rice, chicken, and veggies, garnished with cilantro, green onions, and additional chopped peanuts.
Eat and enjoy every bite because you can!
Pro Tip: Make the rice ahead to save time. Change it up and make this with our best coconut rice instead of brown rice. You can also be creative with the vegetables if you want more carrot or you want to add water chestnuts for example.
This post may contain affiliate links so you can easily purchase items listed on the page. In some cases we have provided a special discount code for IBS Game Changers so be sure to use it!
More Deliciously Low FODMAP™ main courses you might enjoy
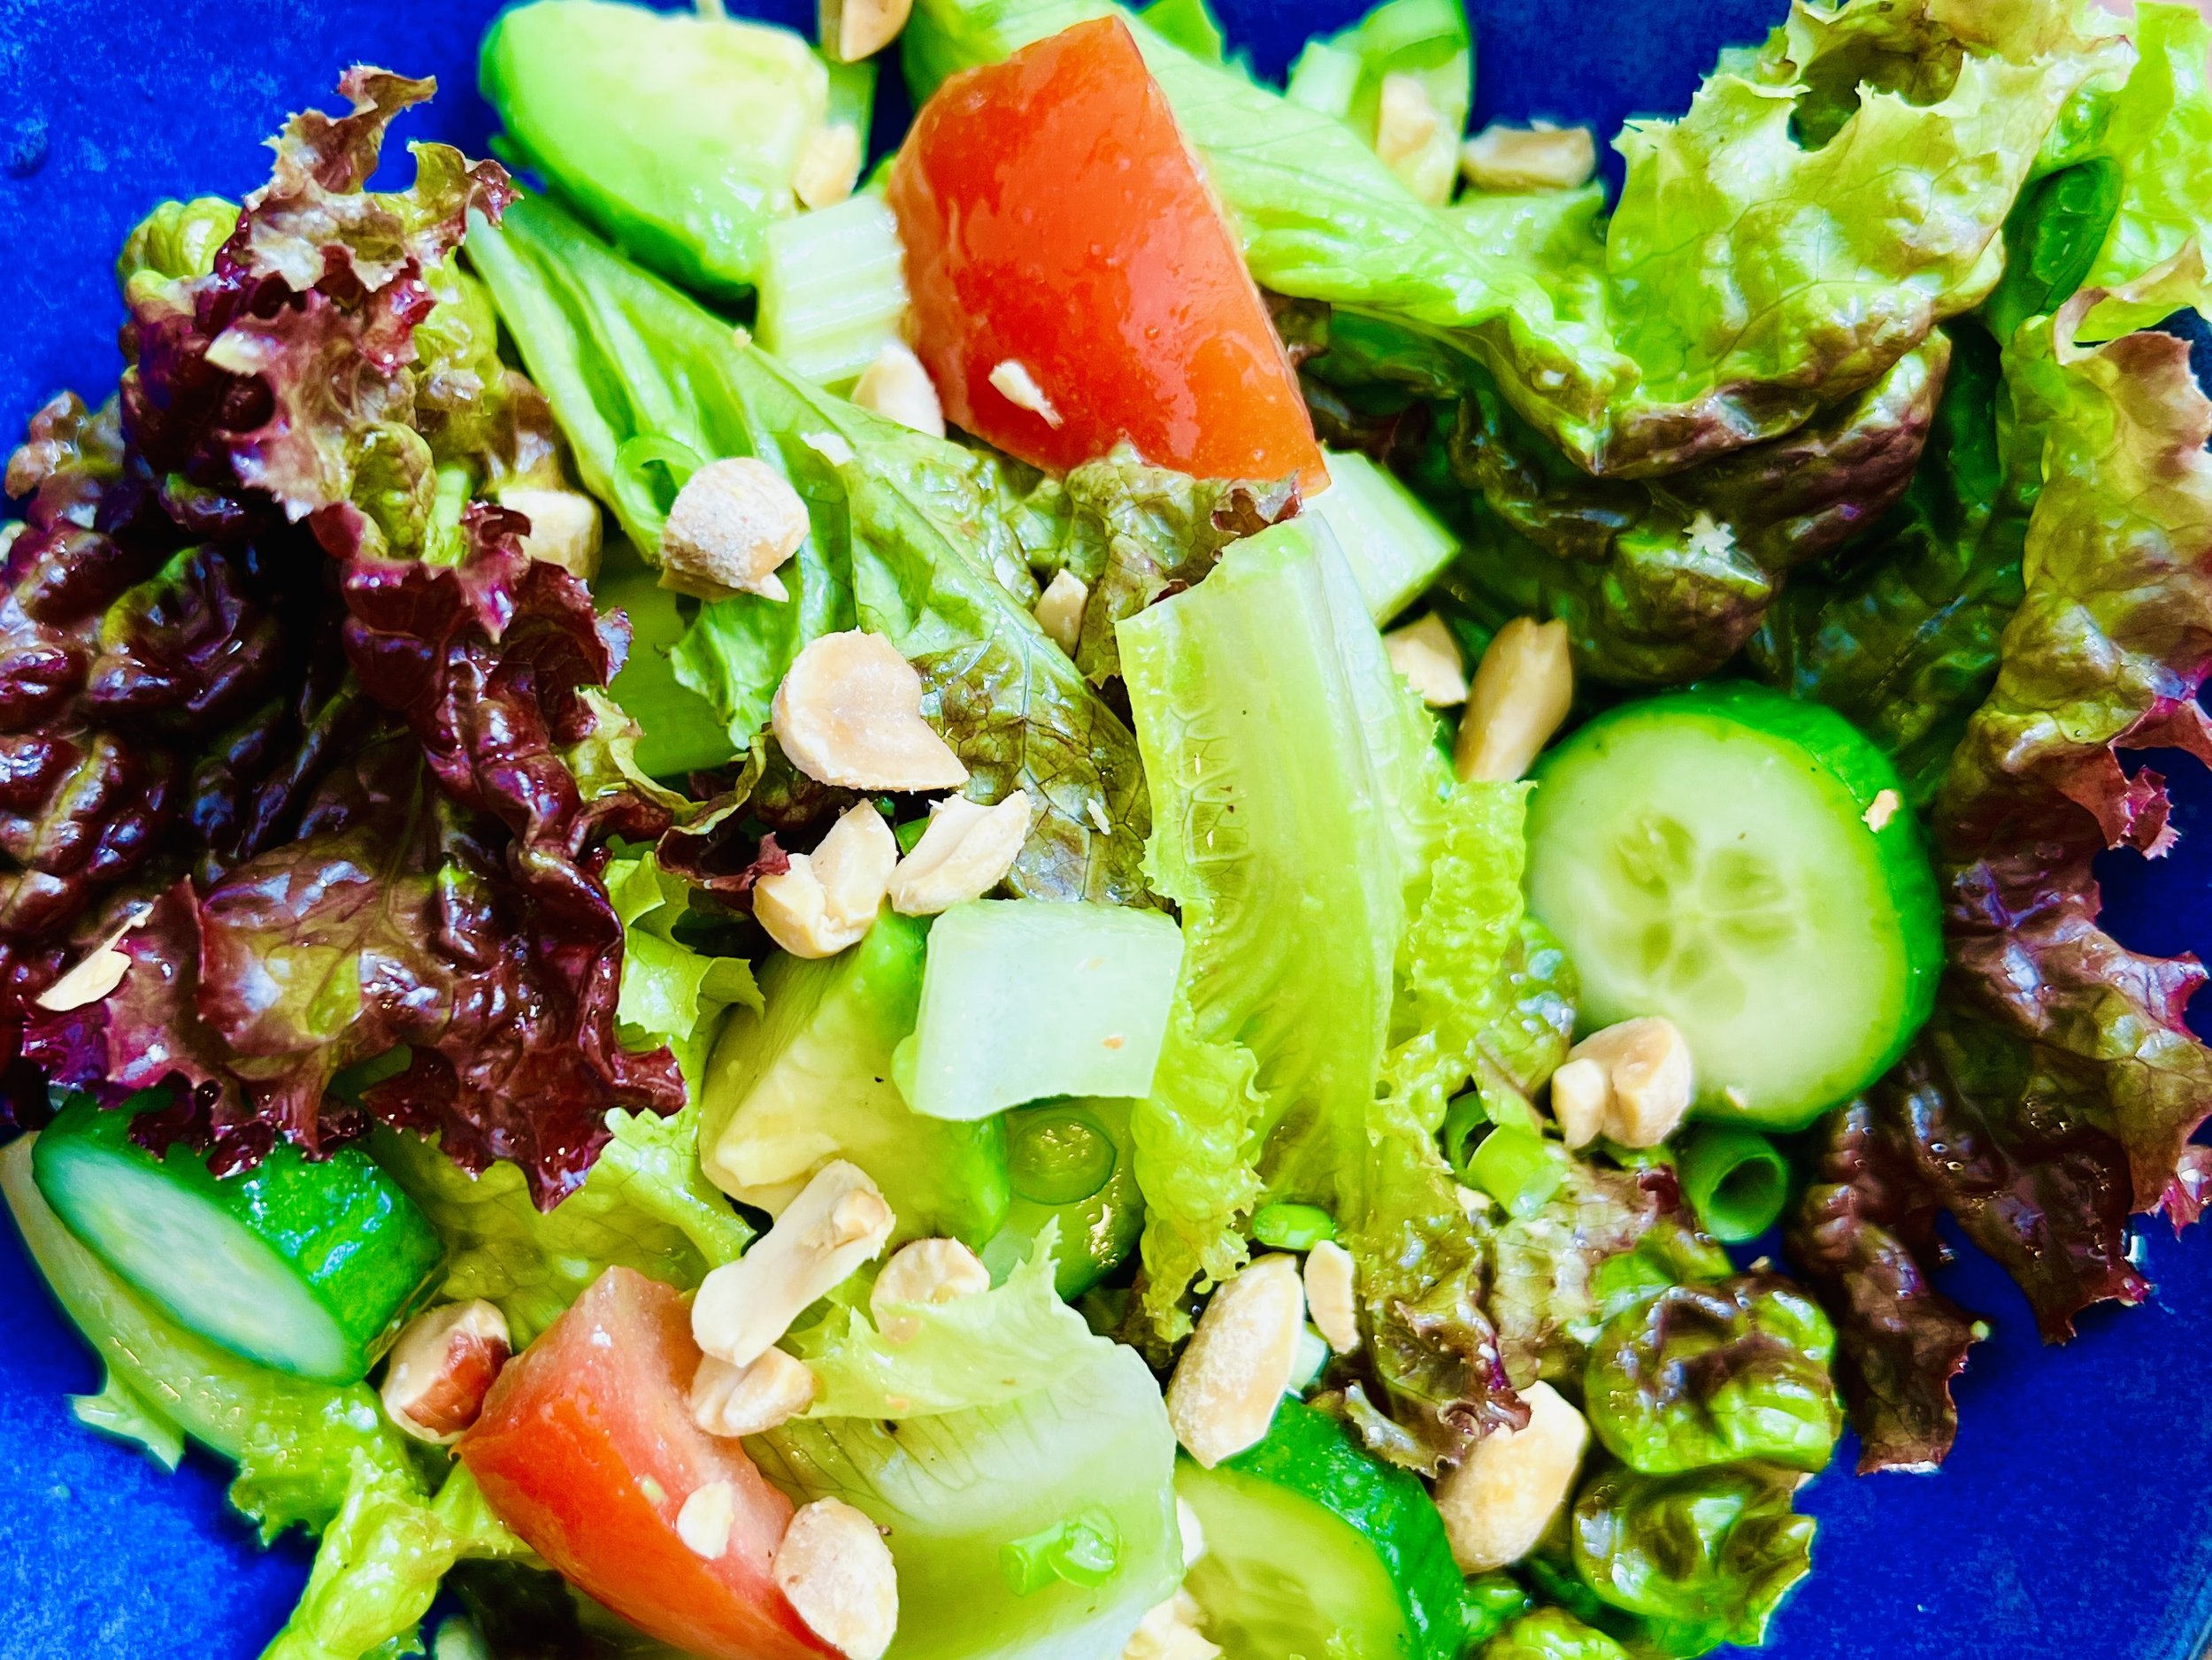
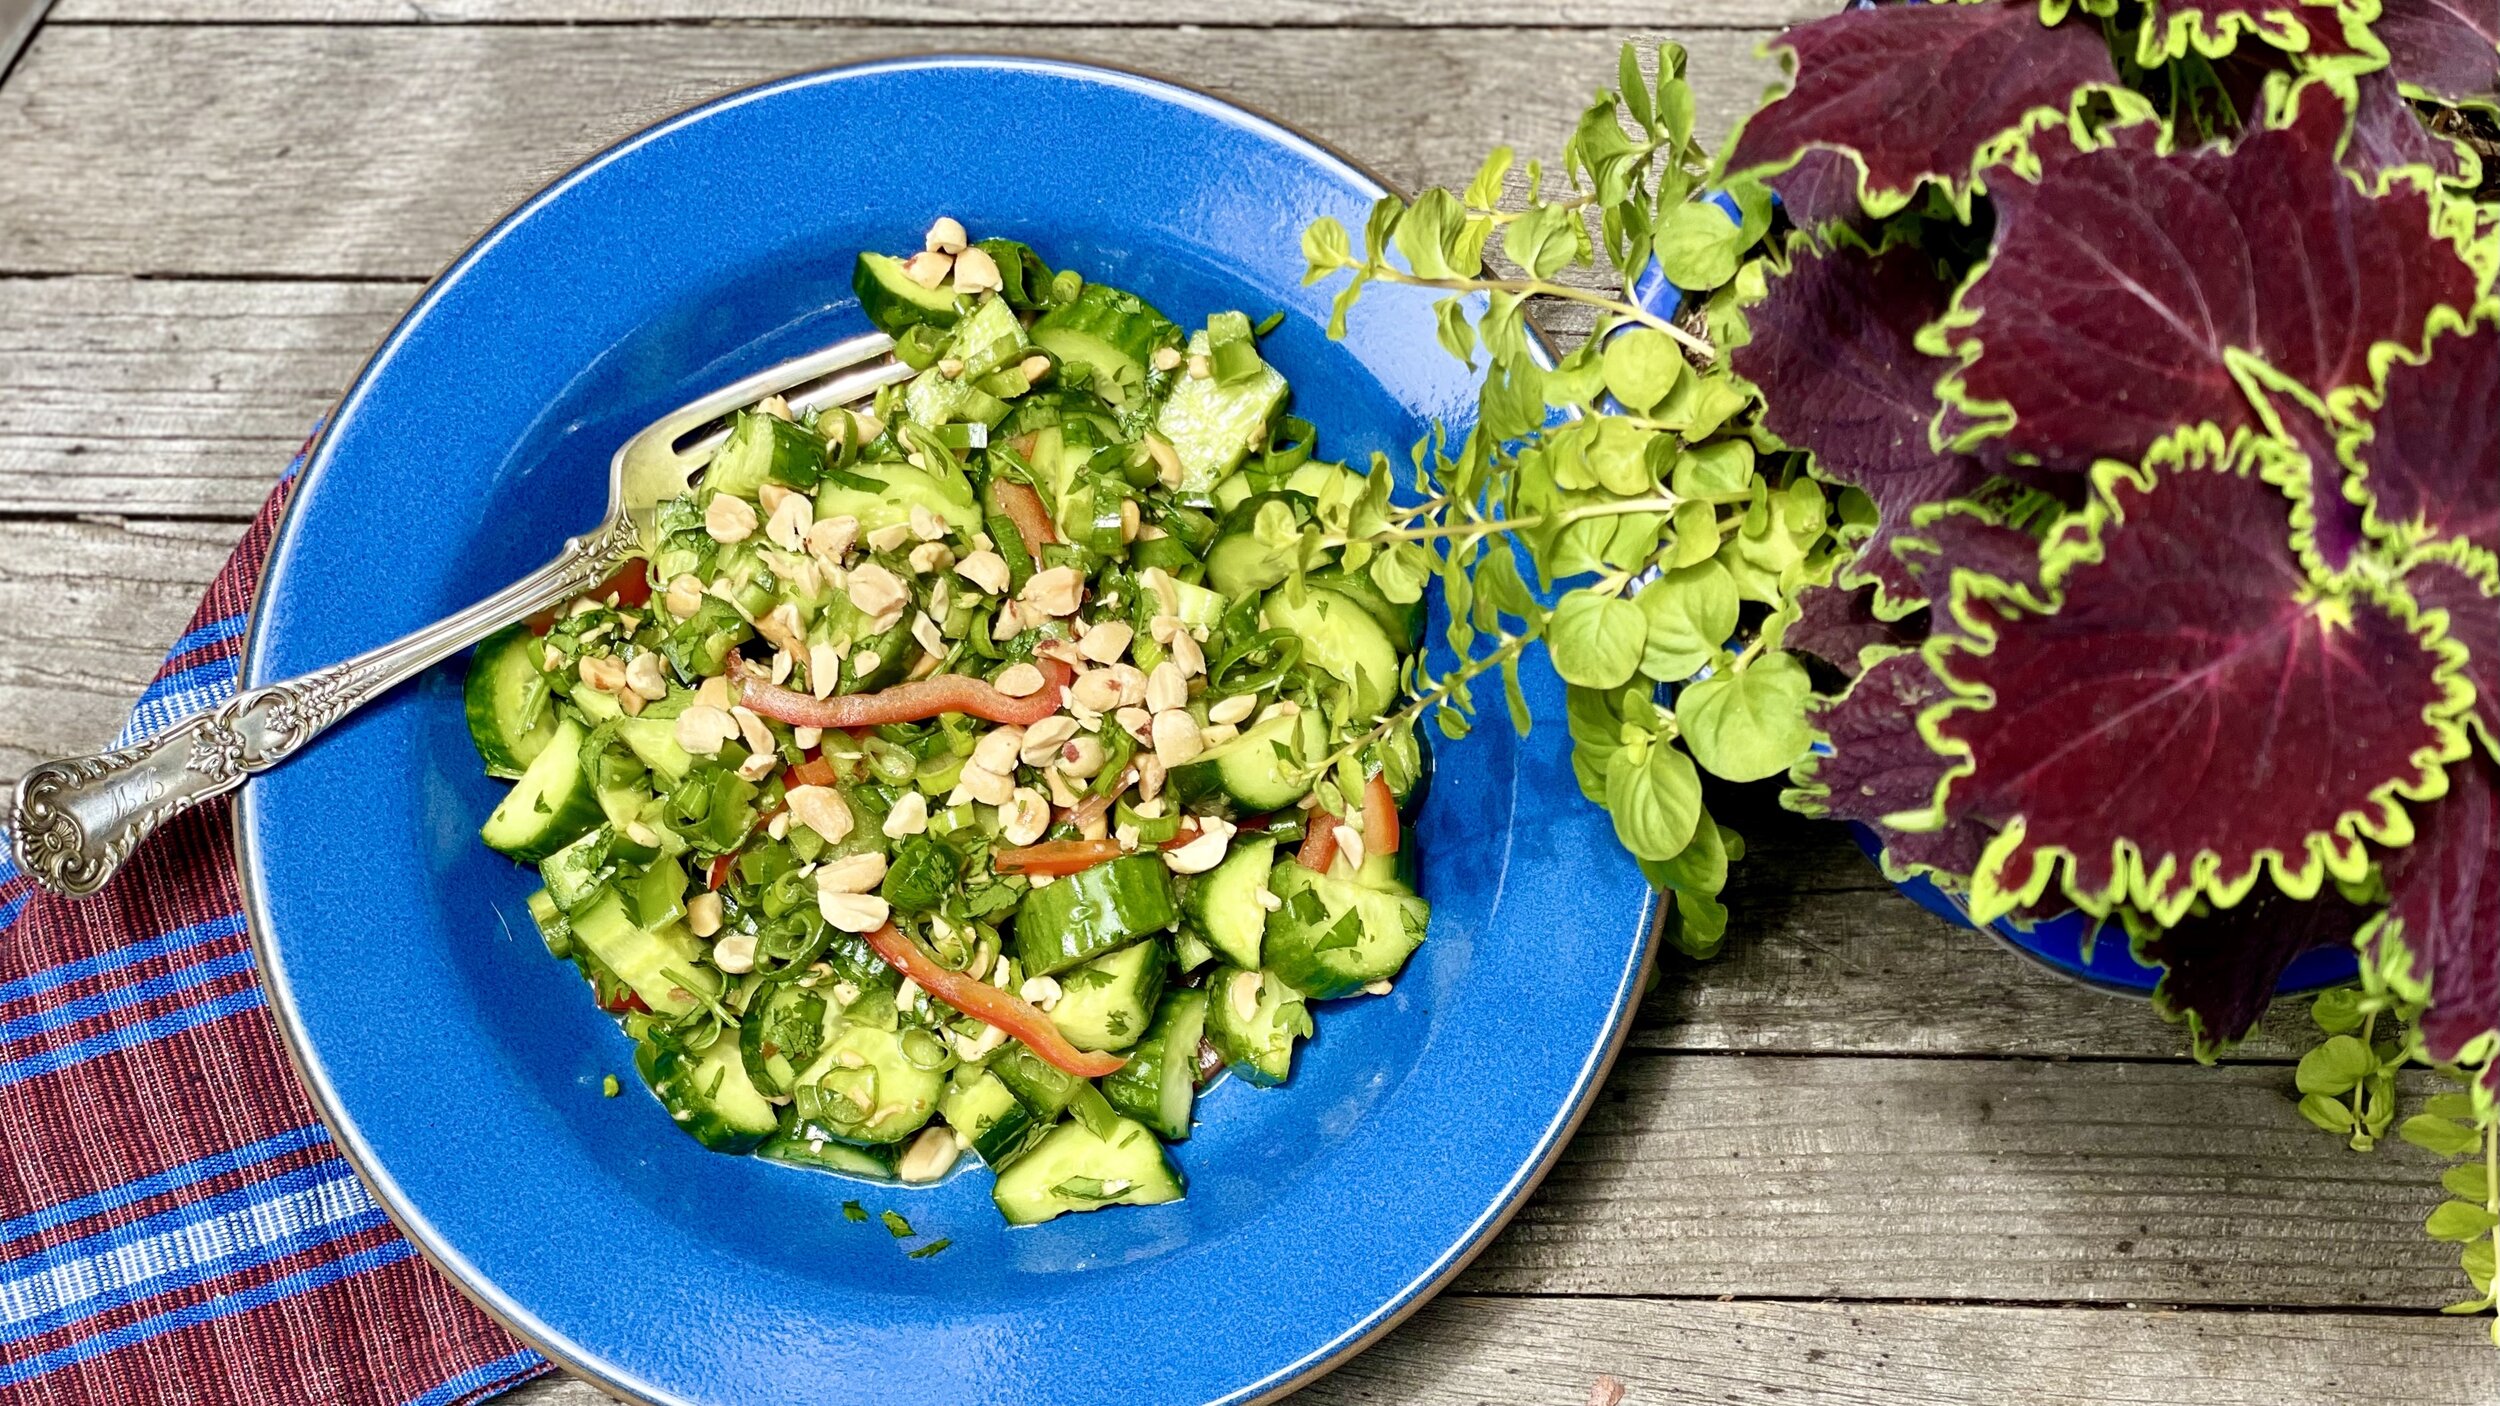
Thai cucumber salad (low FODMAP)
20 Minutes • Low FODMAP • Gluten-free • Lactose-free • Vegetarian • Serves 4
20 Minutes • Low FODMAP • Gluten-free • Lactose-free • Vegetarian • Serves 4 • This delicious crisp salad has a bit of spice that pairs wonderfully with the sweet tang of the dressing. Enjoy this salad on its own or as the perfect side dish for our pineapple chicken and coconut rice.
Ingredients: Salad
5 green onions (green part only), thinly sliced
6 Persian cucumbers or 2 large English cucumbers, halved lengthwise and sliced crosswise about 1/4-inch thick
1/3 cup packed chopped fresh cilantro
1/2 cup salted peanuts
1 large jalapeño pepper, seeded and minced
1 red bell pepper, thinly sliced
1/4 teaspoon salt (optional)
Ingredients: Dressing
1/4 cup fresh lime juice, from 2-3 limes
2 tablespoons garlic-infused olive oil
1-1/2 tablespoons gluten-free soy sauce
2 tablespoons maple syrup
Directions
In a large bowl, combine the cucumbers, cilantro, green onions, peanuts, and jalapeño pepper. Set aside.
Make the dressing: combine the lime juice, garlic-infused olive oil, soy sauce, and maple syrup in a small bowl or jar and whisk or shake until combined. Pour the dressing over the salad and toss to combine. Taste and add salt if necessary.
Eat and enjoy every bite because you can!
This post may contain affiliate links so you can easily purchase items listed on the page. In some cases we have provided a special discount code for IBS Game Changers so be sure to use it!
More Deliciously Low FODMAP™ salads you might enjoy
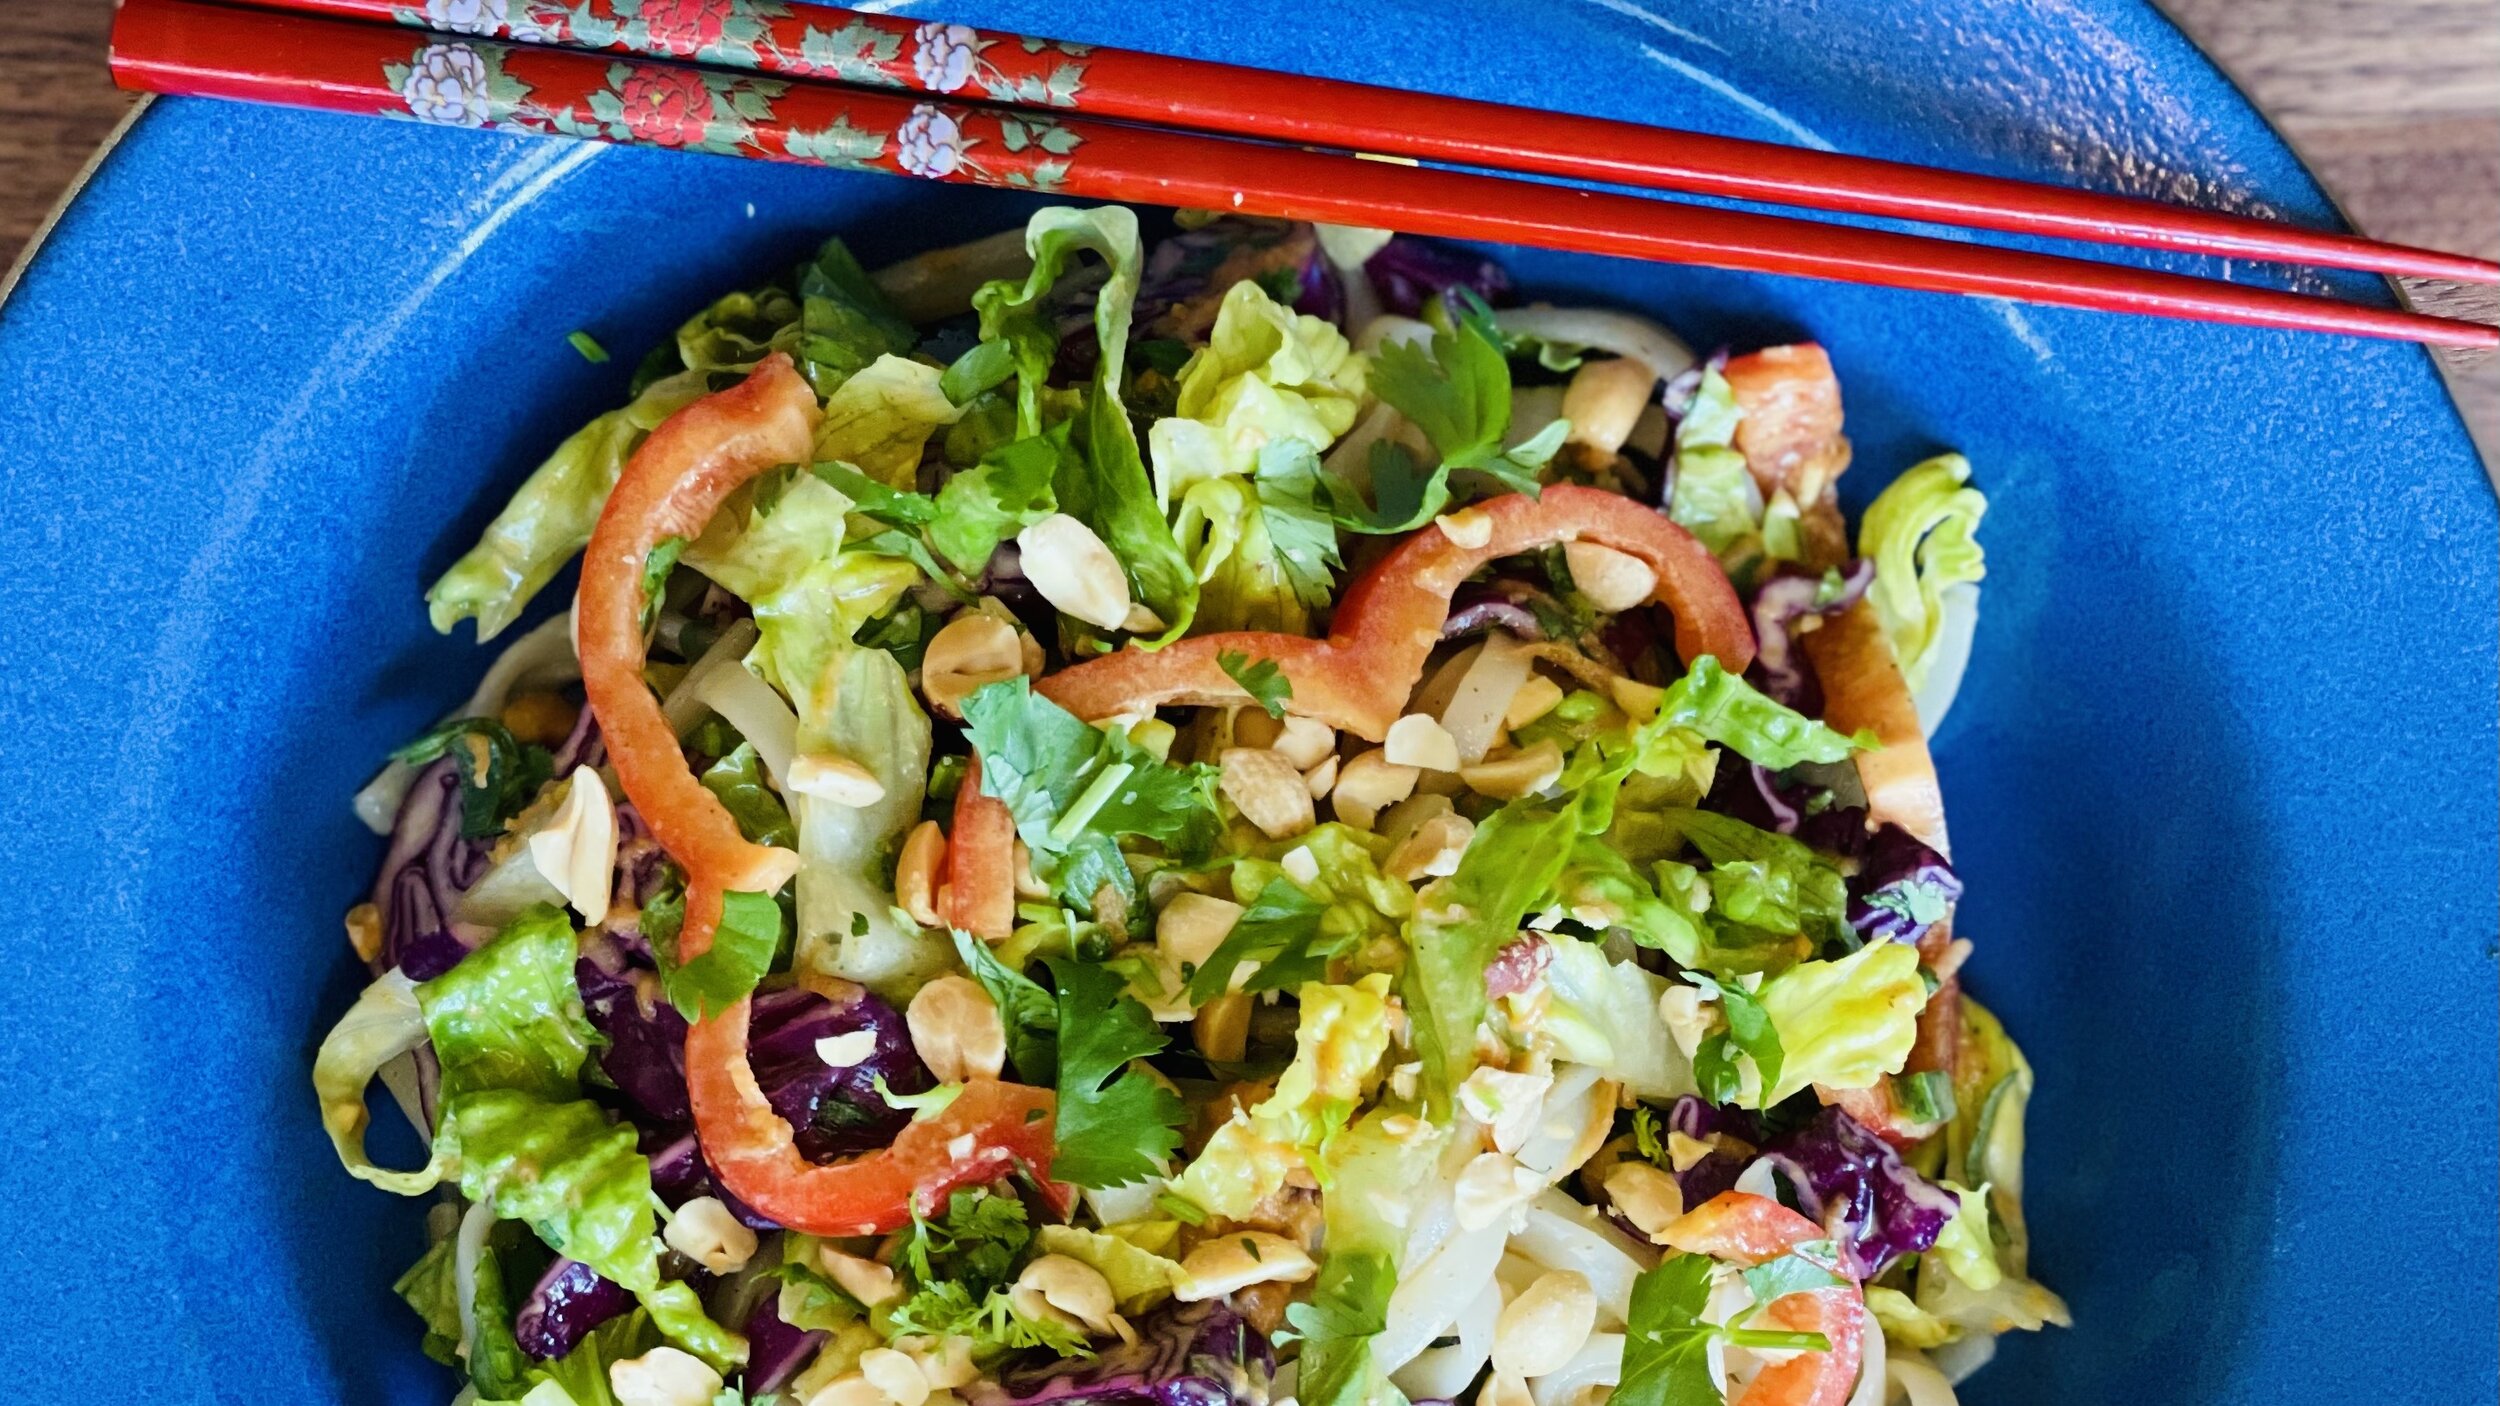
Thai noodle salad with peanut dressing (low FODMAP)
30 minutes • Low FODMAP • Gluten-free • Lactose-free • Vegetarian • Serves 4
20 minutes • Low FODMAP • Gluten-free • Lactose-free • Vegetarian • Serves 4 • This fresh and crunchy salad is full of flavor, texture, and color. The combination of rice noodles, vegetables, and Thai peanut sauce is delicious. And best of all, you can make this salad in under 30 minutes so you can enjoy it any night of the week.
Ingredients: Salad
2 cups romaine lettuce, thinly sliced
2 cups red cabbage, thinly sliced
1 large red bell pepper, thinly sliced
1 large carrot (about 1/2 cup), shredded
1/4 cup chopped cilantro, plus more for serving
1/4 cup green onions (green part only), chopped, plus more for serving
1/4 cup roasted peanuts, roughly chopped, plus more for serving
8 ounces dry pad Thai rice noodles
Ingredients: Dressing
1/3 cup creamy peanut butter
3 tablespoons lime juice
3 tablespoons water
3 tablespoons brown sugar
4 teaspoons rice vinegar
2 Tablespoons gluten-free low sodium soy sauce
1 teaspoon toasted sesame oil
1/2 teaspoon Gourmend garlic scape powder (get 15% discount with code IBSGC15)
1 teaspoon minced ginger
Pinch red pepper flakes
Directions
Cook the rice noodles according to package directions. Rinse in cold water, drain and set aside to cool.
If noodles stick together, rinse them in cool water to separate.
While the noodles cook and cool, prepare the vegetables.
In a large serving bowl combine:
Romaine lettuce, red cabbage, and bell pepper cut into 1/4-inch strips the short way.
Add shredded carrot, chopped cilantro, thinly-sliced green onions, and roughly chopped roasted peanuts.
Make the peanut dressing:
In a pint jar, mix together peanut butter, lime juice, water, brown sugar, rice vinegar, soy sauce, sesame oil, ginger, garlic scape powder, and chili flakes and shake until smooth.
Assemble the salad:
Add the rice noodles to the bowl with the vegetables, herbs, and peanuts. Pour half of the dressing over the salad and toss to combine.
Serve with additional cilantro, green onions, and chopped peanuts. (You can serve the remaining dressing on the side as well.)
Eat and enjoy every bite because you can!
This post may contain affiliate links so you can easily purchase items listed on the page. In some cases we have provided a special discount code for IBS Game Changers so be sure to use it!
More Deliciously Low FODMAP™ salads you might enjoy
Pineapple chicken and coconut rice (low FODMAP)
30 Minutes • Low FODMAP • Gluten-free • Lactose-free • Serves 4
30 Minutes • Low FODMAP • Gluten-free • Lactose-free • Serves 4 • Pineapple and summer are a great combination and this quick tropical chicken is a marvelous dinner with our best coconut rice. We used pineapple in the marinade to make the chicken nice and tender but don’t marinate too long - 15 minutes is just right.
Ingredients
3 packed tablespoons dark brown sugar
2 tablespoons rice vinegar
2 tablespoons gluten-free low sodium soy sauce
2 tablespoons olive oil, plus more for cooking
2 teaspoons Smoke N Sanity Essence of Garlic Salt (use code IBSGC10 for a 10% discount)
OR 1 teaspoon kosher salt and 1 teaspoon Gourmend garlic scape powder (use code IBSGC15 for a 15% discount)
1/8 teaspoon ground cayenne pepper
1/2 teaspoon freshly ground black pepper
1 cup diced fresh pineapple (1/2-inch chunks)
4 green onions (green part only) chopped
2 tablespoons finely chopped fresh cilantro (or chives if you don’t like cilantro)
2 tablespoons finely grated fresh pineapple, including accumulated juices
1 1/2 pounds boneless, skinless chicken breasts, cut into 1 1/2-inch chunks
Cooked coconut rice, for serving
Directions
To make the marinade: In a large bowl, stir together the brown sugar, rice vinegar, soy sauce, 2 tablespoons of the olive oil, essence of garlic salt or salt, garlic scape powder, ground cayenne, and black pepper.
To make the pineapple salsa: Transfer 1 tablespoon of the marinade mixture to a separate medium bowl and add the diced pineapple, green onions, and cilantro or chives. This is your pineapple salsa; toss until well mixed and set aside.
Add the grated pineapple and its juices to the marinade mixture in the large bowl, then add the chicken and toss to coat. Set aside to marinate at room temperature for 15 minutes (and no longer).
Once the chicken is done marinating, heat a large nonstick skillet over medium-high heat and add enough olive oil to lightly coat the bottom of the pan. Add the chicken pieces in a single layer (leaving any marinade behind) so that they don’t touch and let cook until the bottoms are browned, 2 to 3 minutes. Continue cooking, stirring occasionally, until browned on all sides and no longer pink on the inside, 4 to 5 minutes more.
Serve the chicken over our best coconut rice (or plain steamed rice if you prefer) and top with the pineapple salsa.
Eat and enjoy every bite because you can!
More Deliciously Low FODMAP™ main courses you might enjoy
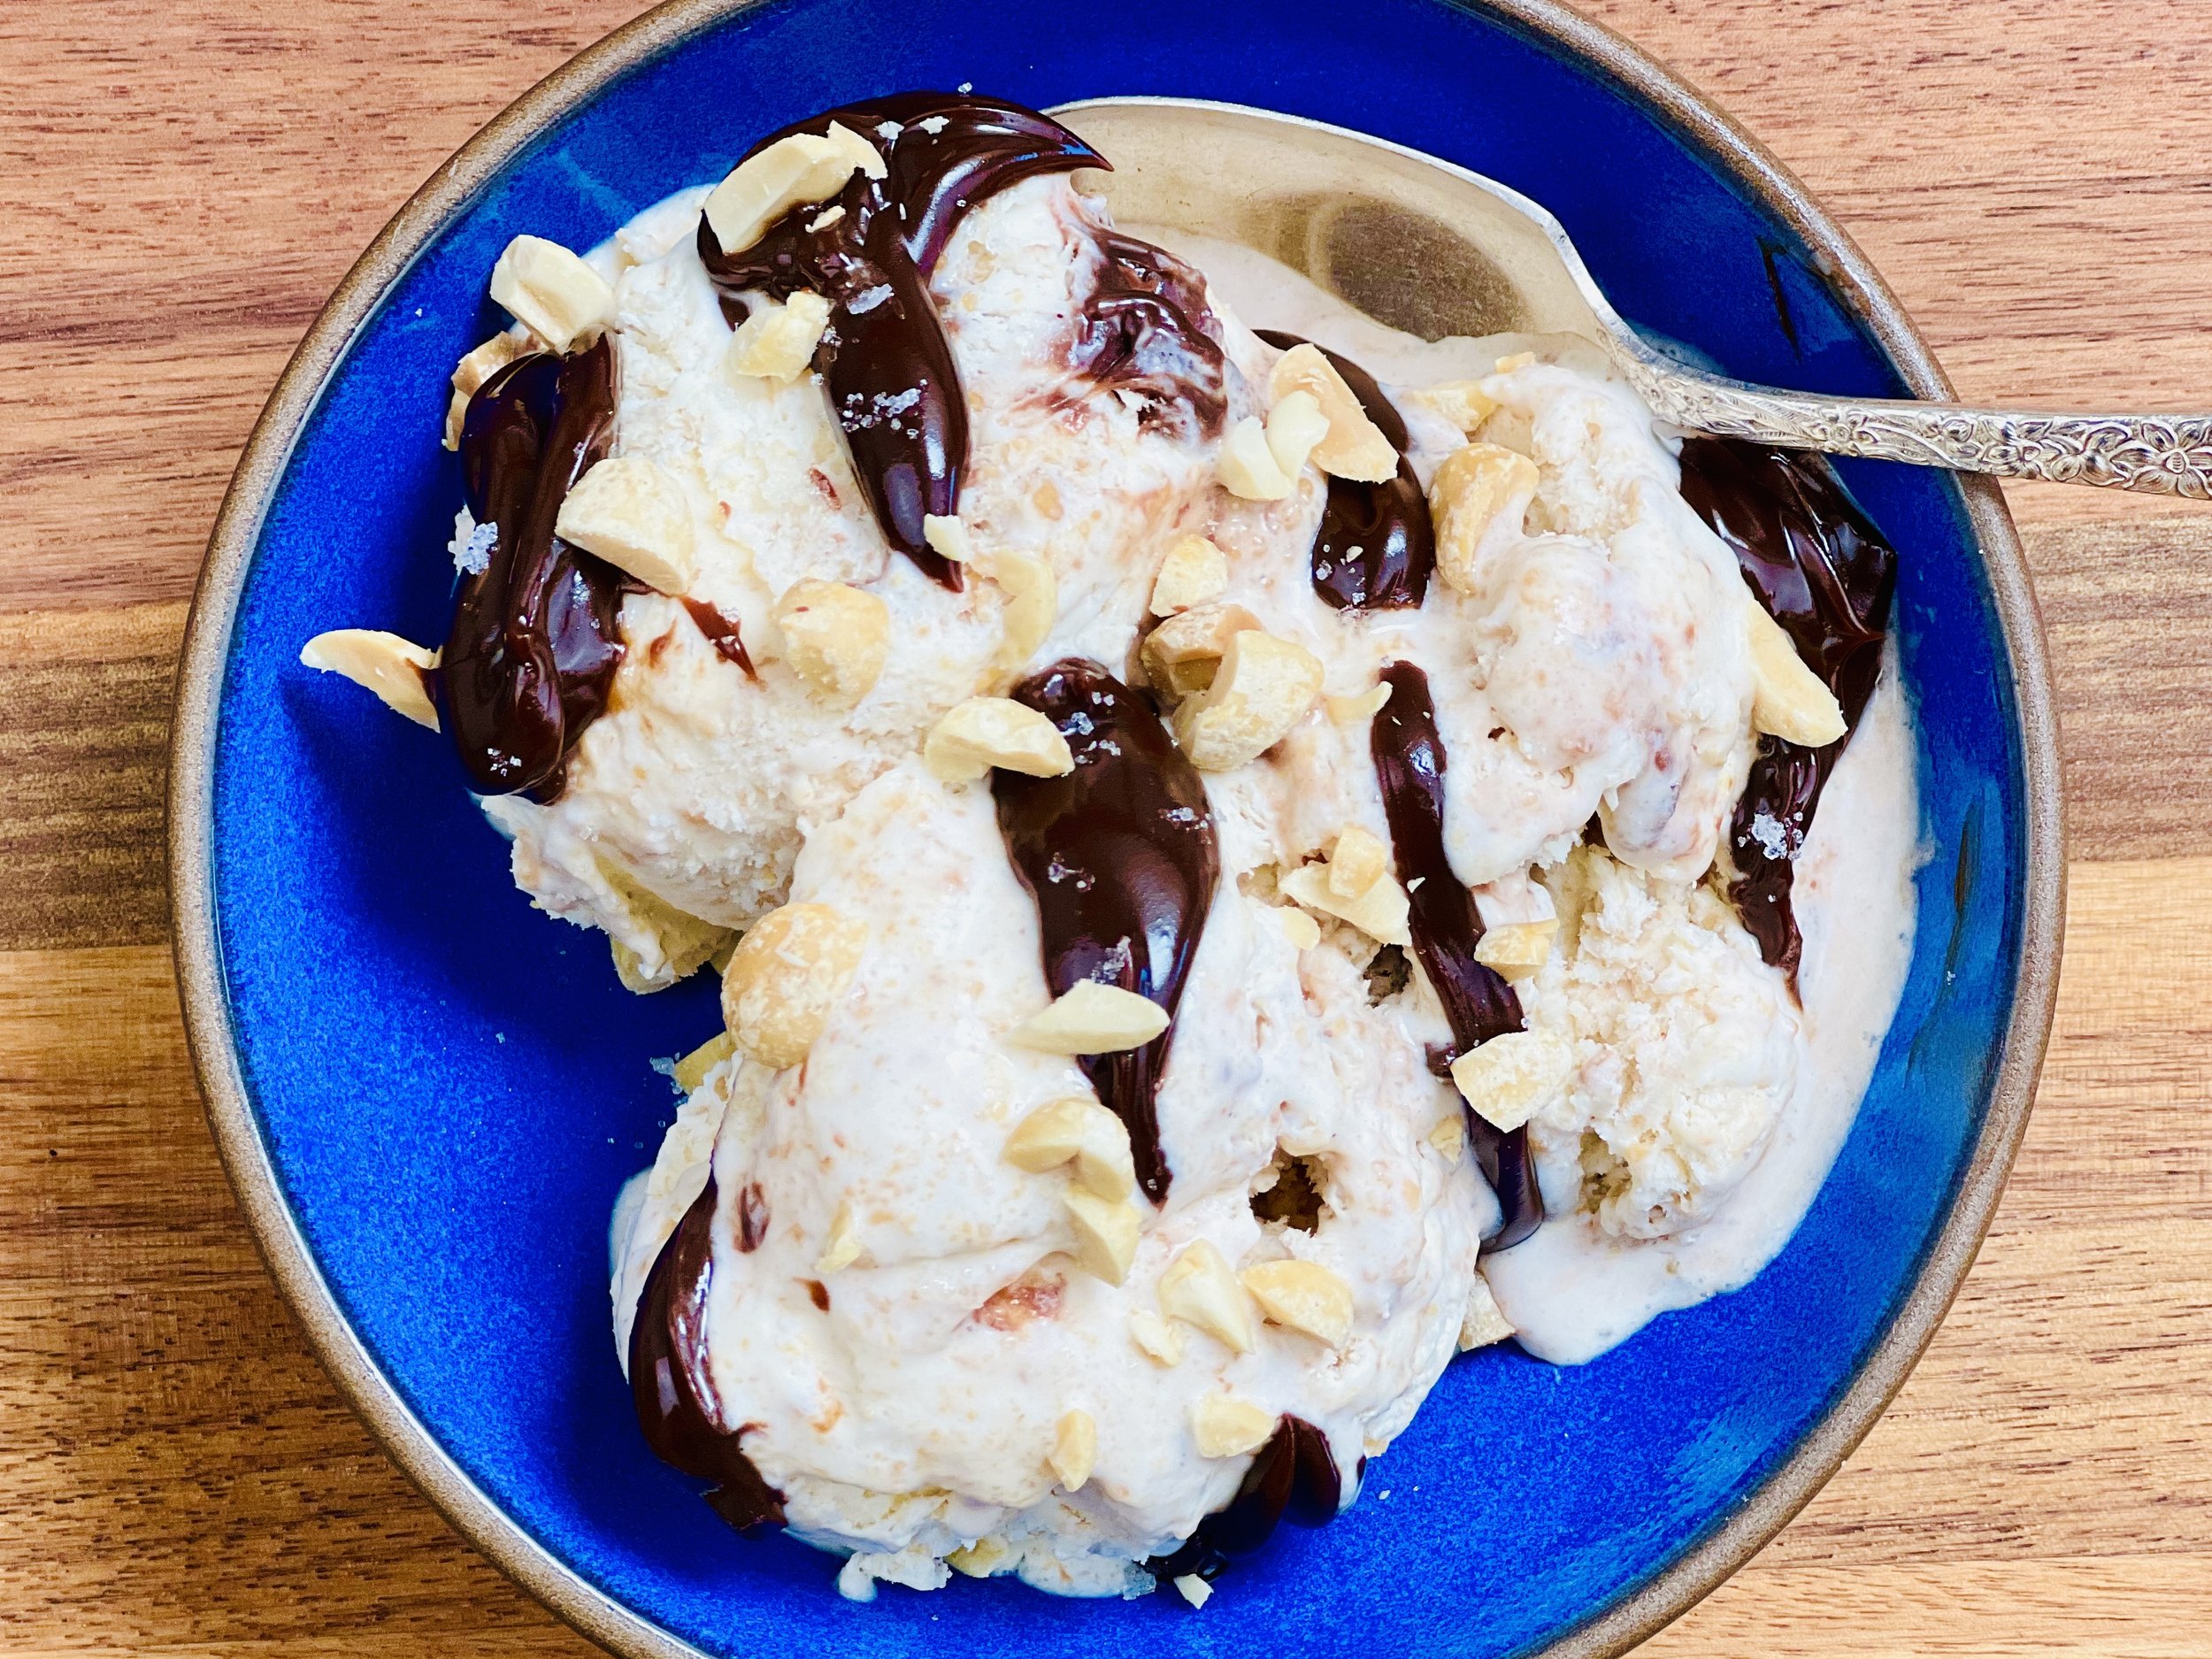
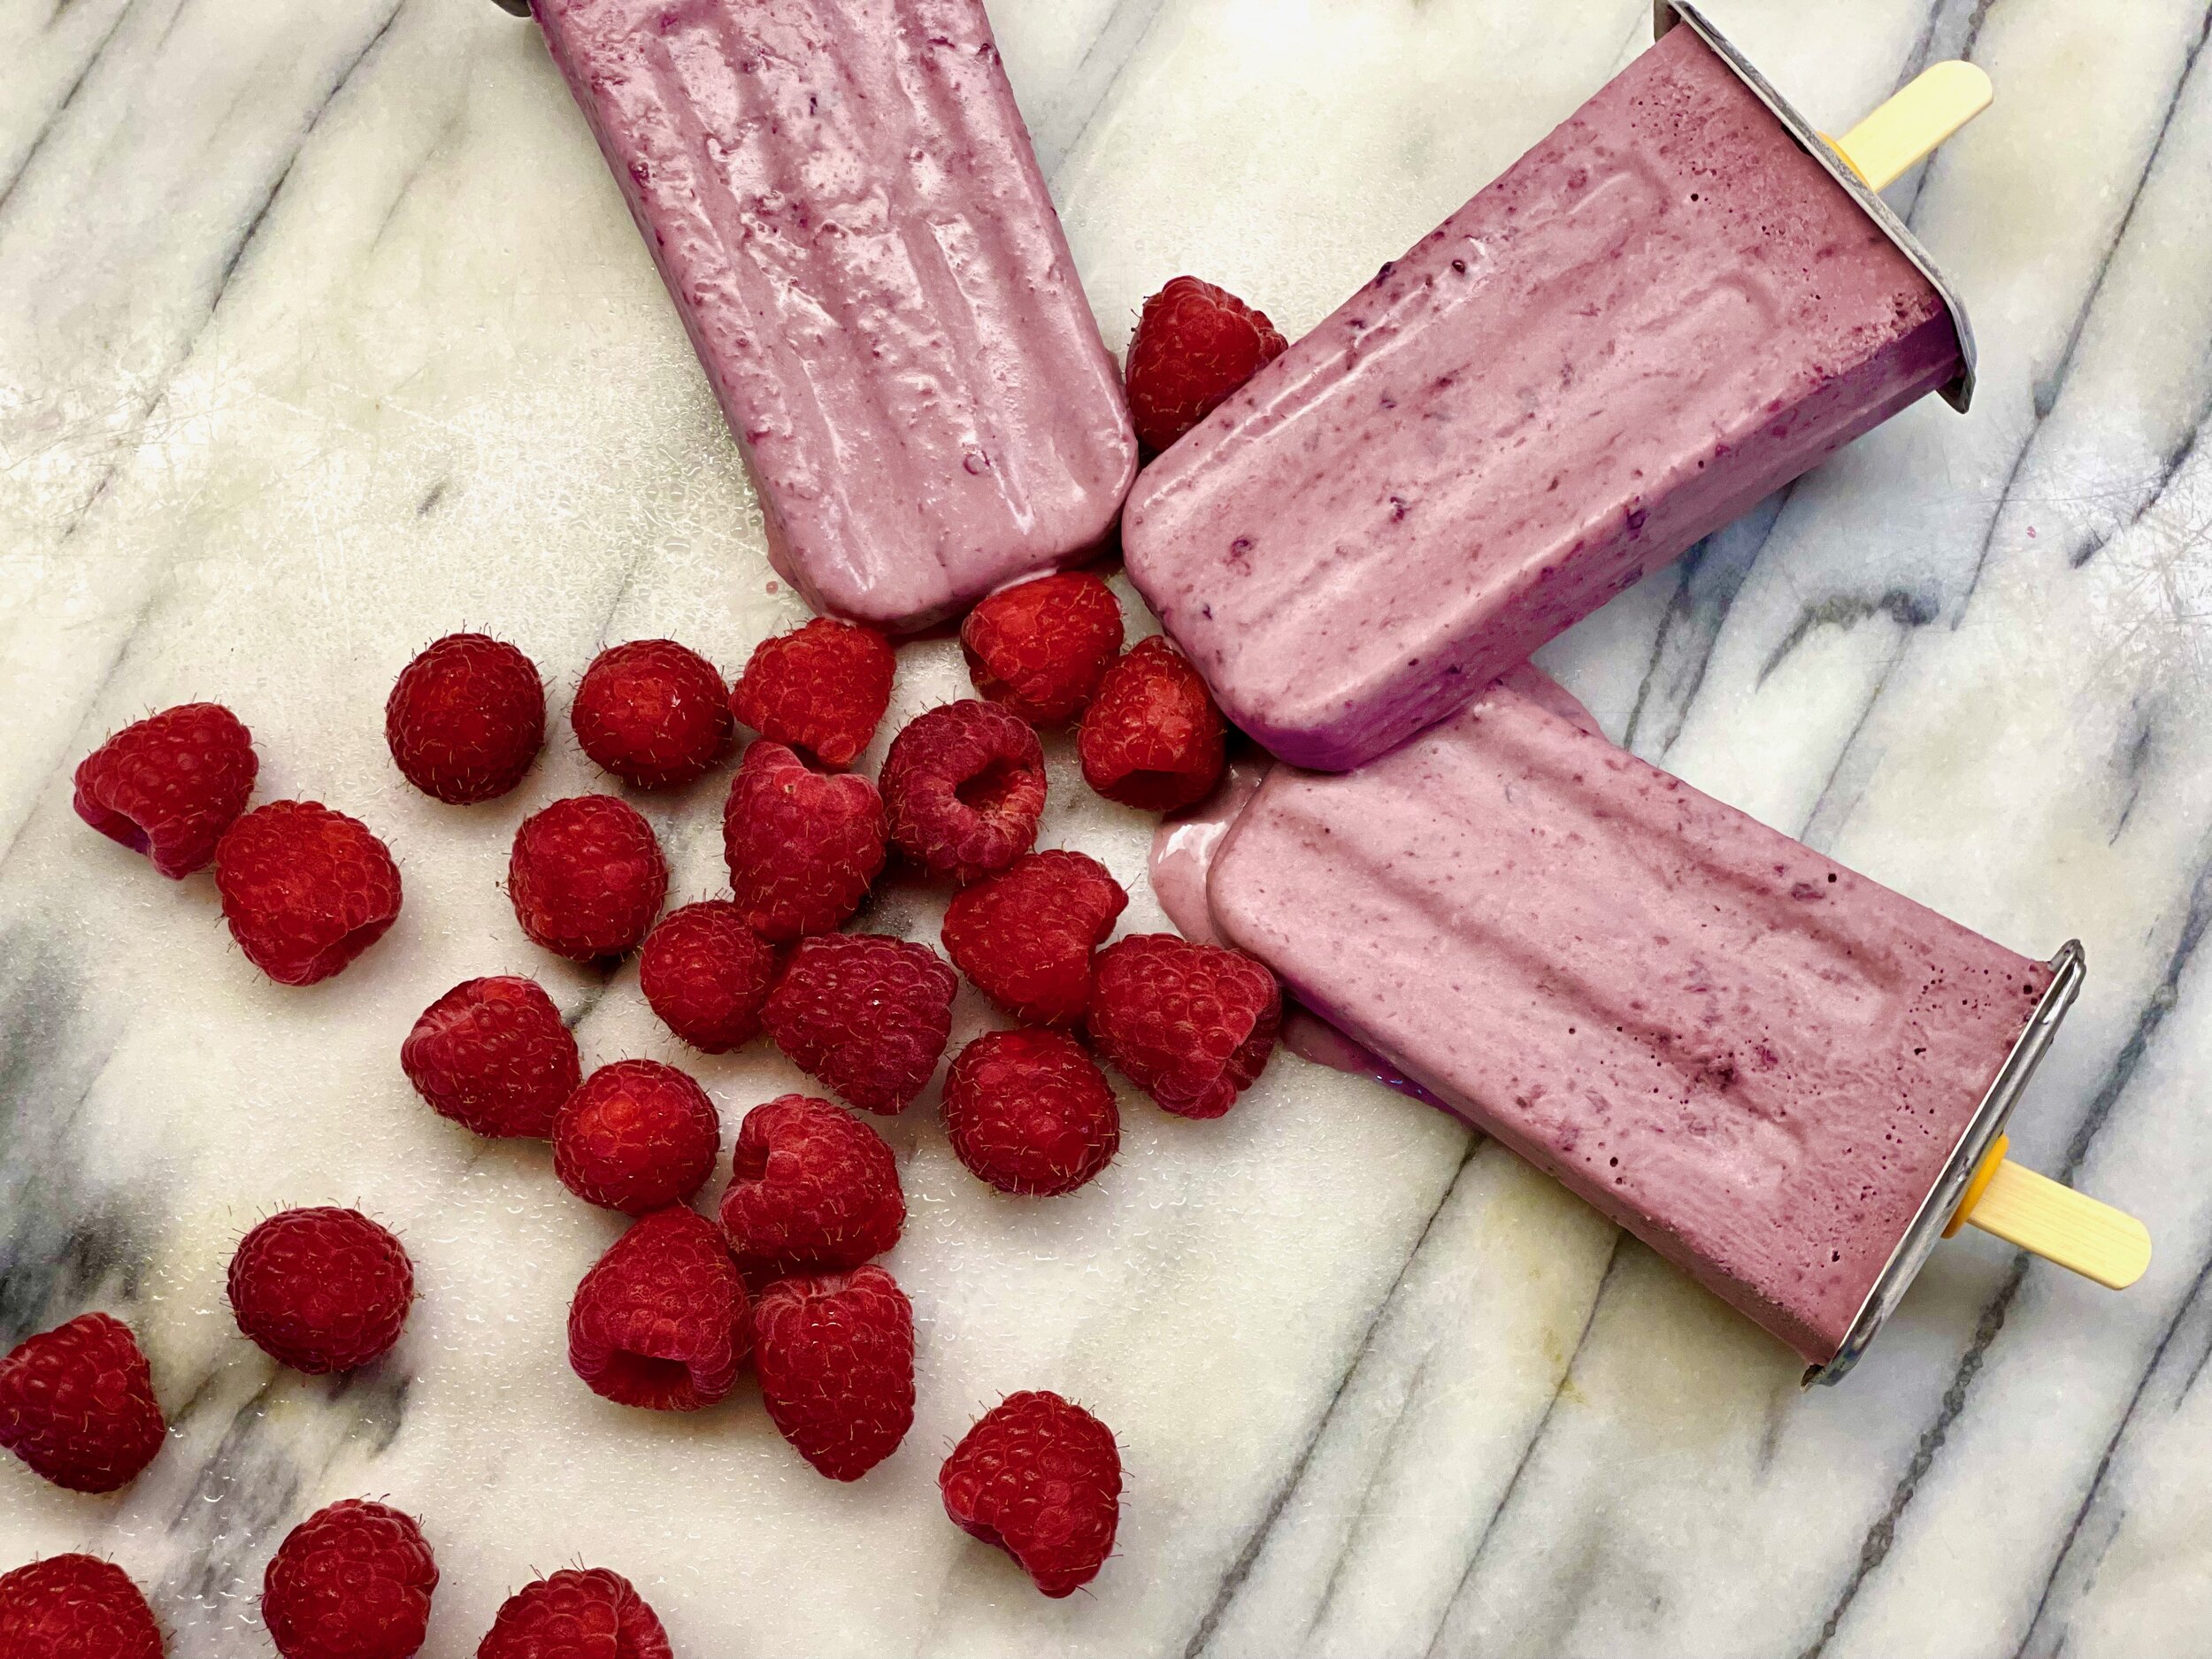
Raspberry creamsicles (low FODMAP)
10 minutes prep • 5-8 hours freeze (depending on how large your popsicle molds are) • Low FODMAP • Gluten-free • Makes 6 popsicles
10 minutes prep • 5-8 hours freeze (depending on how large your popsicle molds are) • Low FODMAP • Gluten-free • Makes 6 popsicles • These creamy raspberry bars are the perfect summer treat. They’re easy to make and the simple ingredients mean the flavors are wonderfully intense. Get ready to delight your palate with a raspberry creamsicle!
Ingredients
1 cup heavy cream
1 cup coconut cream
3/4 cup low FODMAP raspberry jam or compote (if you can’t find raspberry jam without high fructose corn syrup, it’s easy to make your own compote-see recipe below)
Pinch of salt
Directions
Combine heavy cream, coconut cream, jam or compote, and salt in a large measuring cup or bowl and whisk to combine.
Fill your popsicle molds with the mixture and put them in the freezer for at least 5 hours — longer if your molds are very wide.
To un-mold, briefly run the mold under warm water until the creamsicle is released when you give it a gentle pull.
Eat and enjoy every bite because you can!
Pro Tip: I love this stainless steel popsicle mold because it’s easy to use, easy to clean, all reusable pieces, and you can pick out one popsicle at a time.
Berry Compote
A compote is not designed to “set” like jam so it’s quick to make and works beautifully in recipes where you want a jammy flavor without all the fuss of making jam!
Ingredients
2 cups fresh or frozen berries
1 cup granulated sugar (more or less to your taste)
Directions
Defrost frozen berries in the refrigerator.
Put the fresh or thawed berries in a saucepan and cook over medium-low heat until the fruit is soft and has released some juice. (There is no need to include water while boiling, as the berries have plenty of moisture themselves.) Stir consistently to prevent sticking and scorching.
Add the granulated sugar in a slow stream, stirring as you add until the sugar disappears. Increase the heat to medium and bring the fruit and sugar to a boil. At this point, you can strain the compote through a sieve or cheesecloth to remove some or all of the seeds. Return the liquid to a saucepan and bring to a boil. Then boil for 12 to 15 minutes, stirring occasionally. Turn off the heat and let the compote cool before using it. (The compote can be spooned into a jar and refrigerated for a week or two.)
Eat and enjoy every bite because you can!
This post may contain affiliate links so you can easily purchase items listed on the page. In some cases we have provided a special discount code for IBS Game Changers so be sure to use it!
More Deliciously Low FODMAP™ desserts you might enjoy
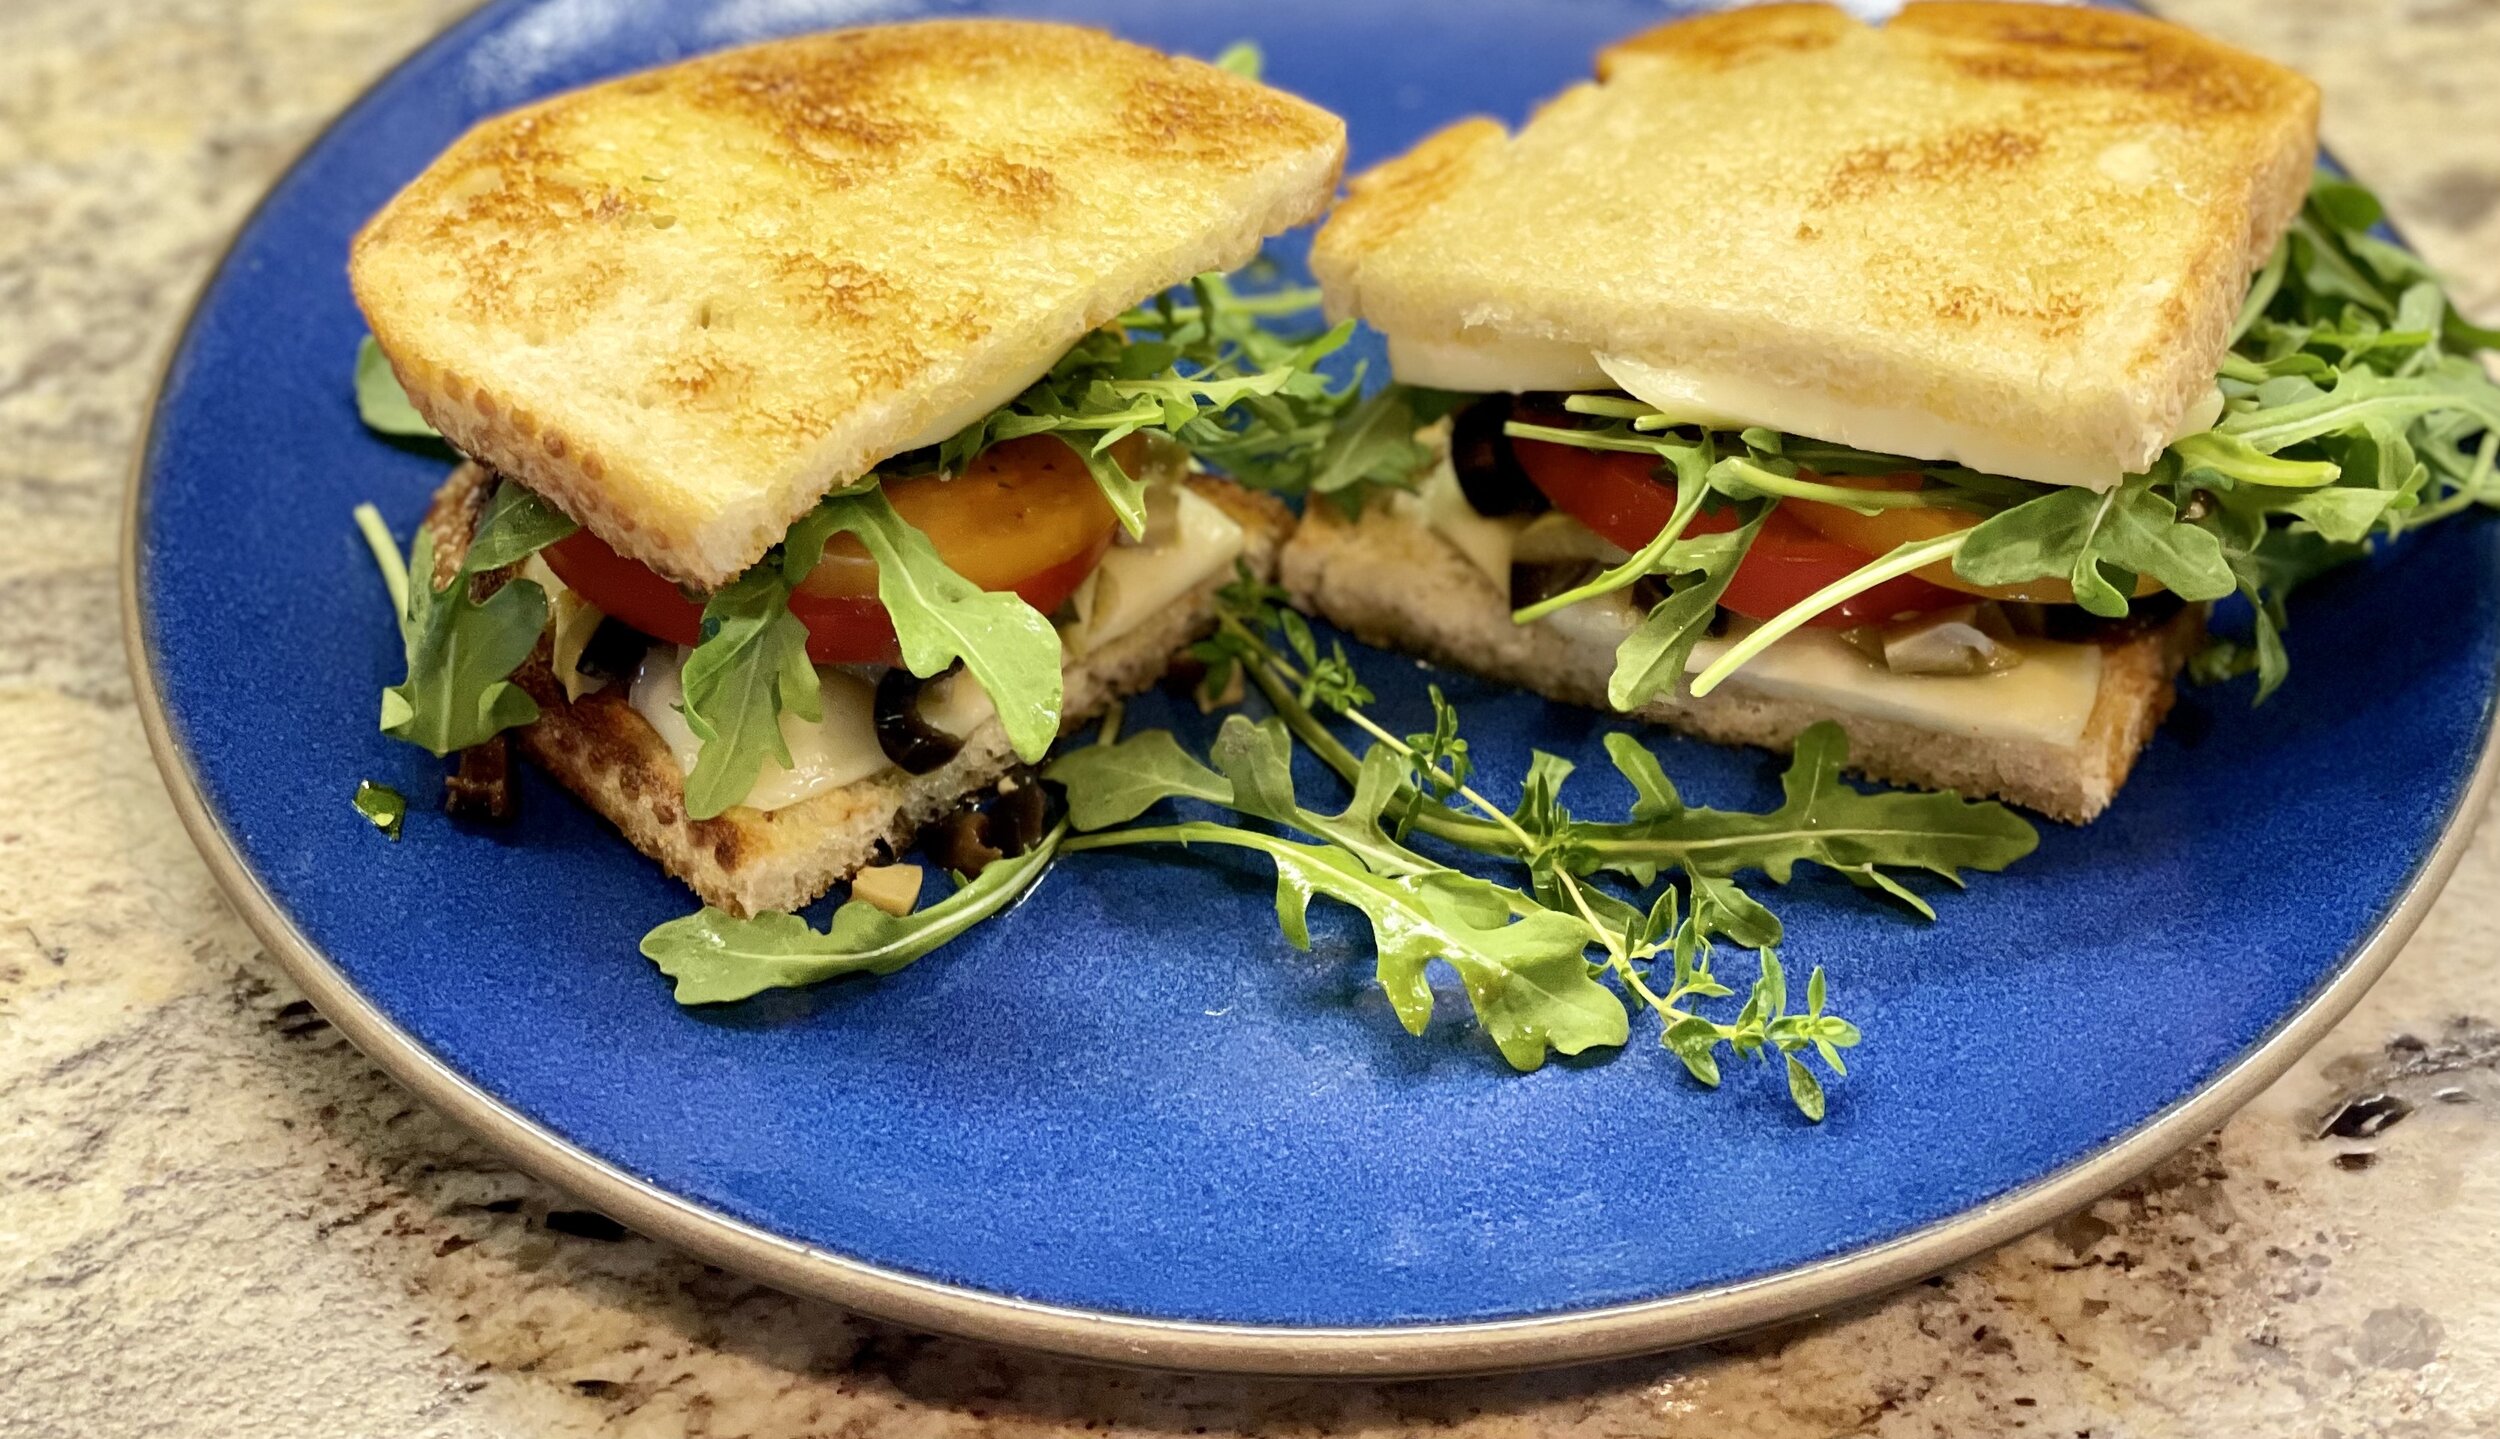
Veggie antipasto sandwich (low FODMAP)
15 minutes • Low FODMAP • Vegetarian • Makes 2 sandwiches
15 minutes • Low FODMAP • Vegetarian • Makes 2 sandwiches • Combine the delicious tang of antipasto flavors with crisped sourdough and creamy brie for a truly delicious sandwich. It might be a bit messy but you’ll be glad when you roll up your sleeves and dive in.
Ingredients: Vinaigrette
1/3 cup garlic-infused olive oil
3 tablespoons balsamic vinegar
1 tablespoon maple syrup
juice of 1 lemon
2 tablespoons chopped fresh basil
1 tablespoon chopped fresh thyme
Ingredients: Sandwich
4 slices of traditional sourdough bread (no yeast or vinegar in the ingredients)
2 tablespoons garlic-infused olive oil
1/2 cup pitted mixed olives, chopped
1 - 2 heirloom tomatoes, sliced thickly
8 ounces of brie, sliced and rind removed
2 cups baby arugula
Directions
Set your oven on broil.
To make the vinaigrette. Combine all ingredients in a glass jar and shake or whisk until blended. Taste and adjust the salt and pepper.
Lay the bread slices on a baking sheet. Brush lightly with garlic-infused olive oil. Put in the oven for about two minutes until golden and crispy (watch carefully so they don’t burn!)
Remove from oven, flip the slices and brush lightly with garlic-infused olive oil. Put back in the oven for about one minute to crisp slightly. Then add the slices of brie to the toasted bread and pop back in the oven to melt slightly (about a minute).
Remove from the oven and drizzle two of the four toasted slices with a bit of the vinaigrette. Then, layer on the olives and heirloom tomatoes. Sprinkle the arugula over the top and then drizzle generously with more of the vinaigrette (to taste). Add the second toasted sourdough slice to the top and gently push down on the sandwich.
At this point, you can slice the sandwich and serve or wrap the sandwich tightly and place it in the fridge for up to 1 day.
Eat and enjoy every bite because you can!
More Deliciously Low FODMAP™ main courses you might enjoy
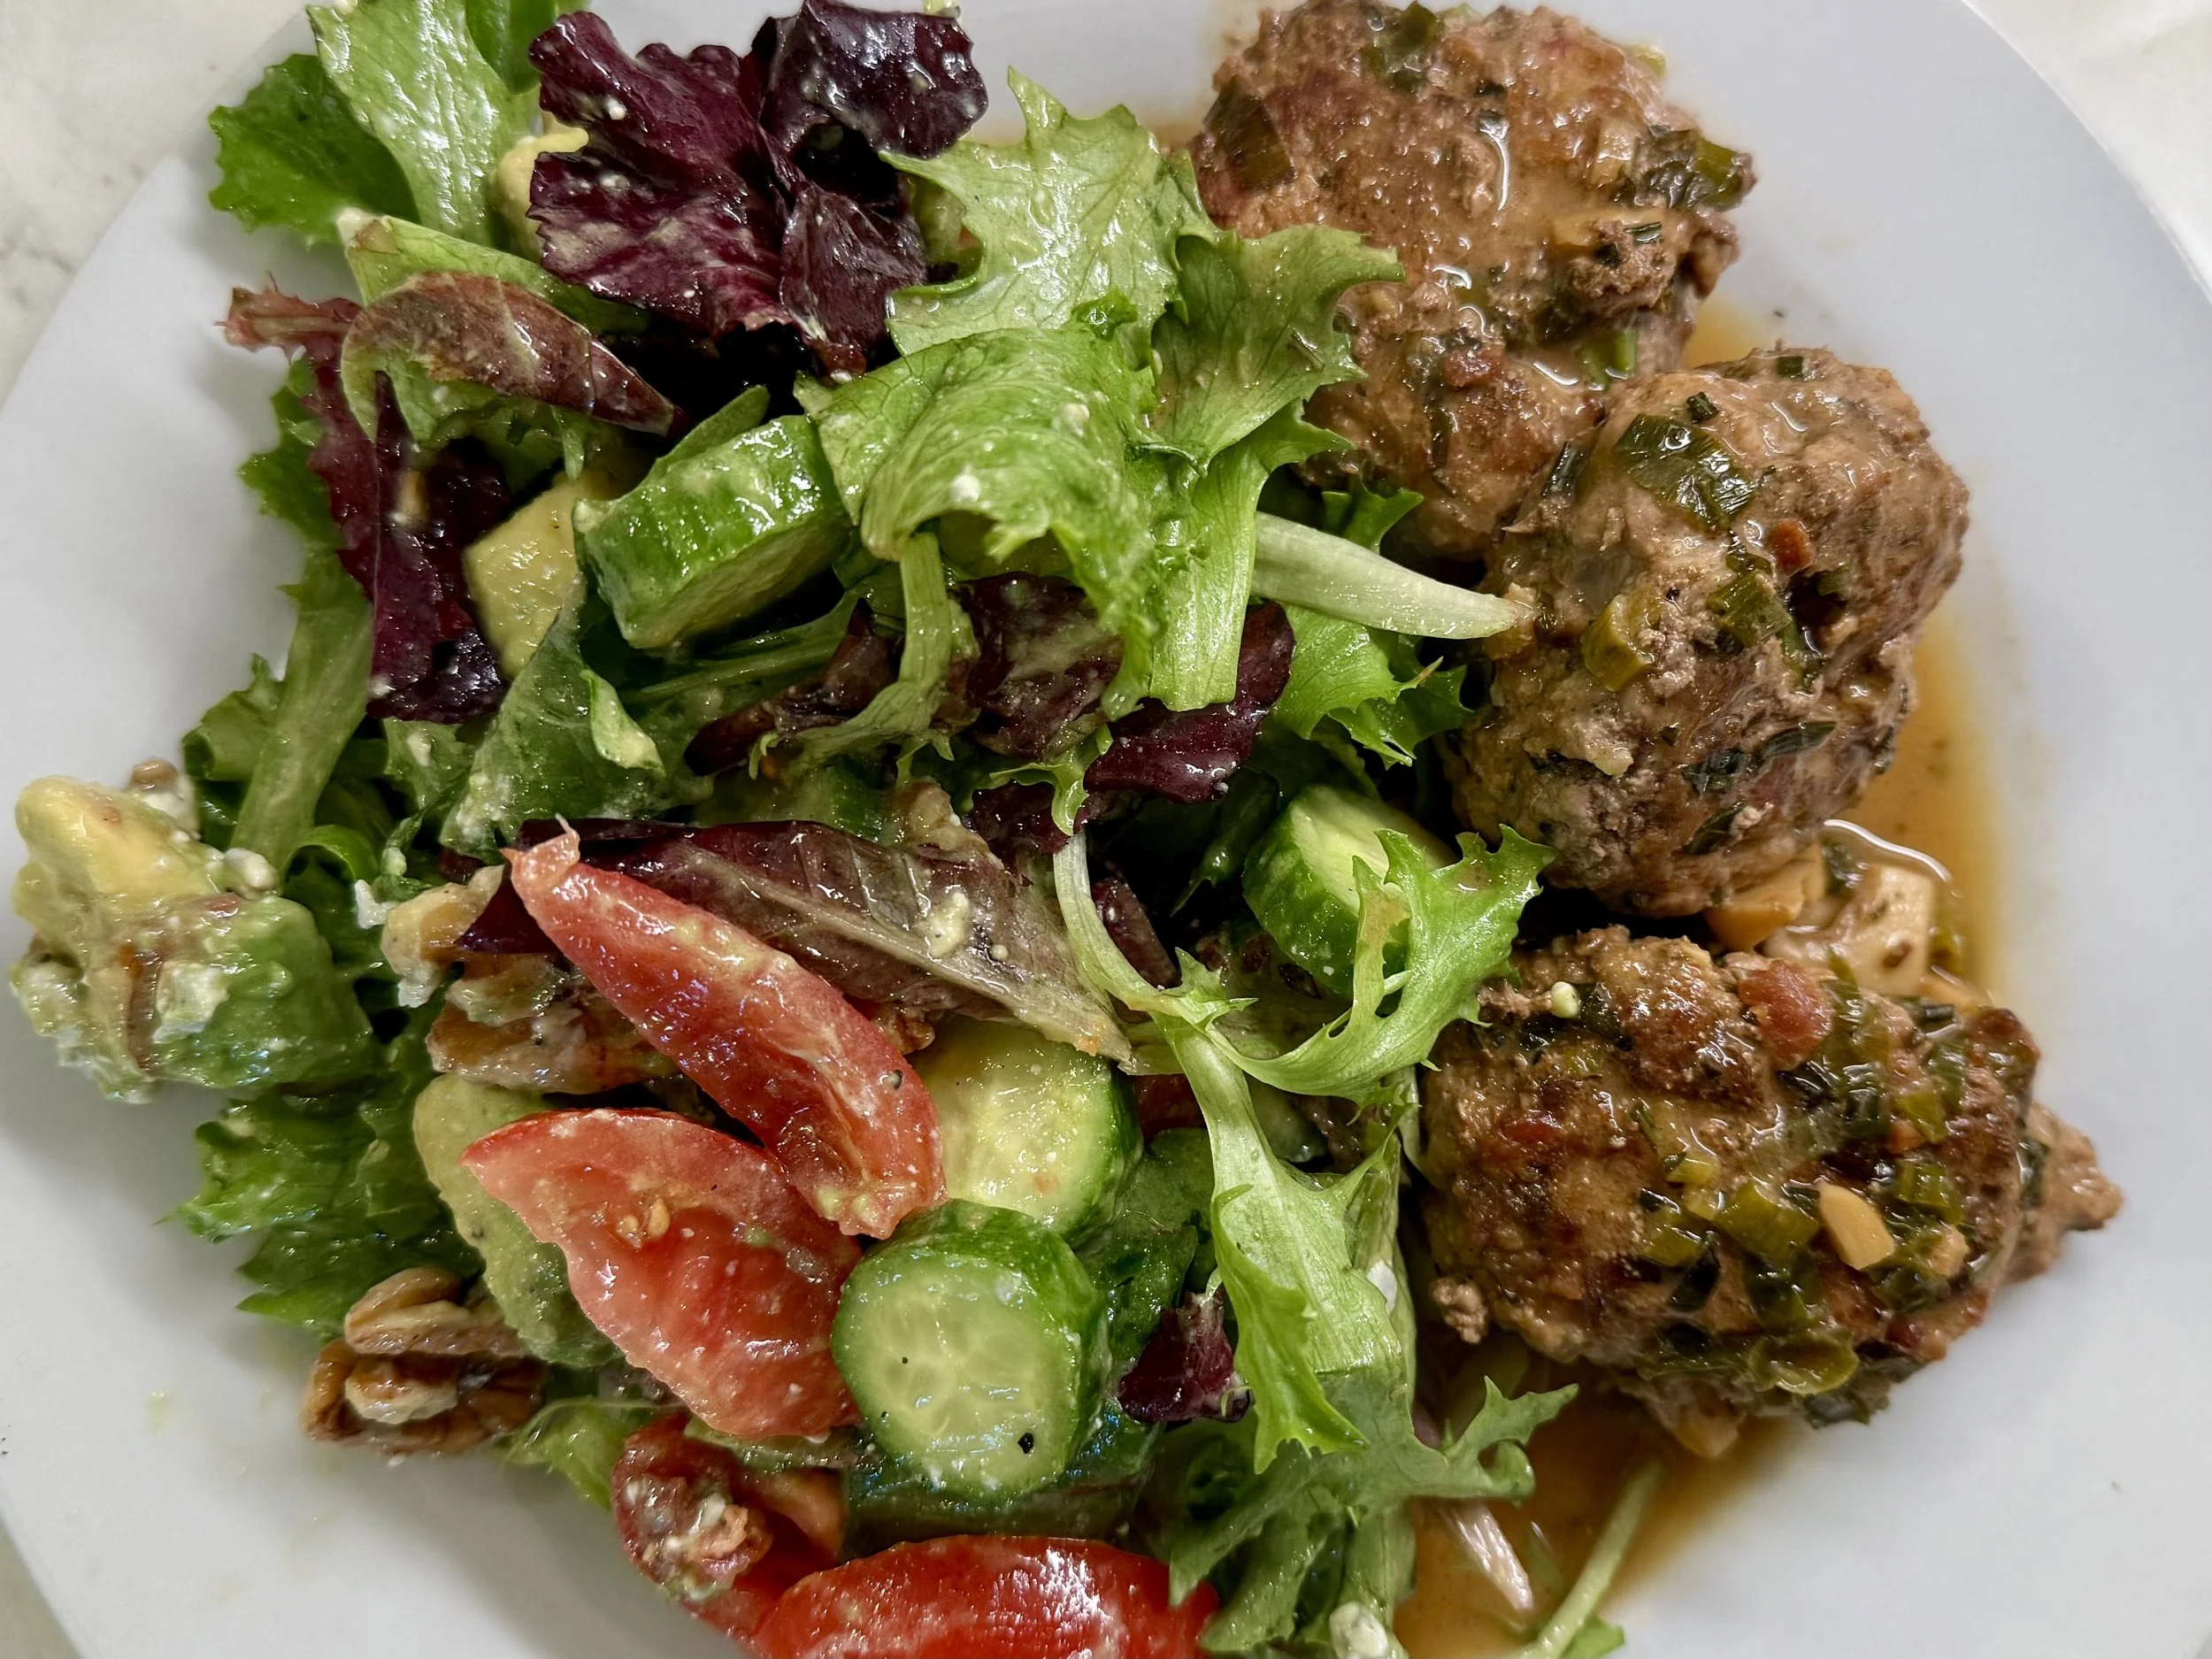
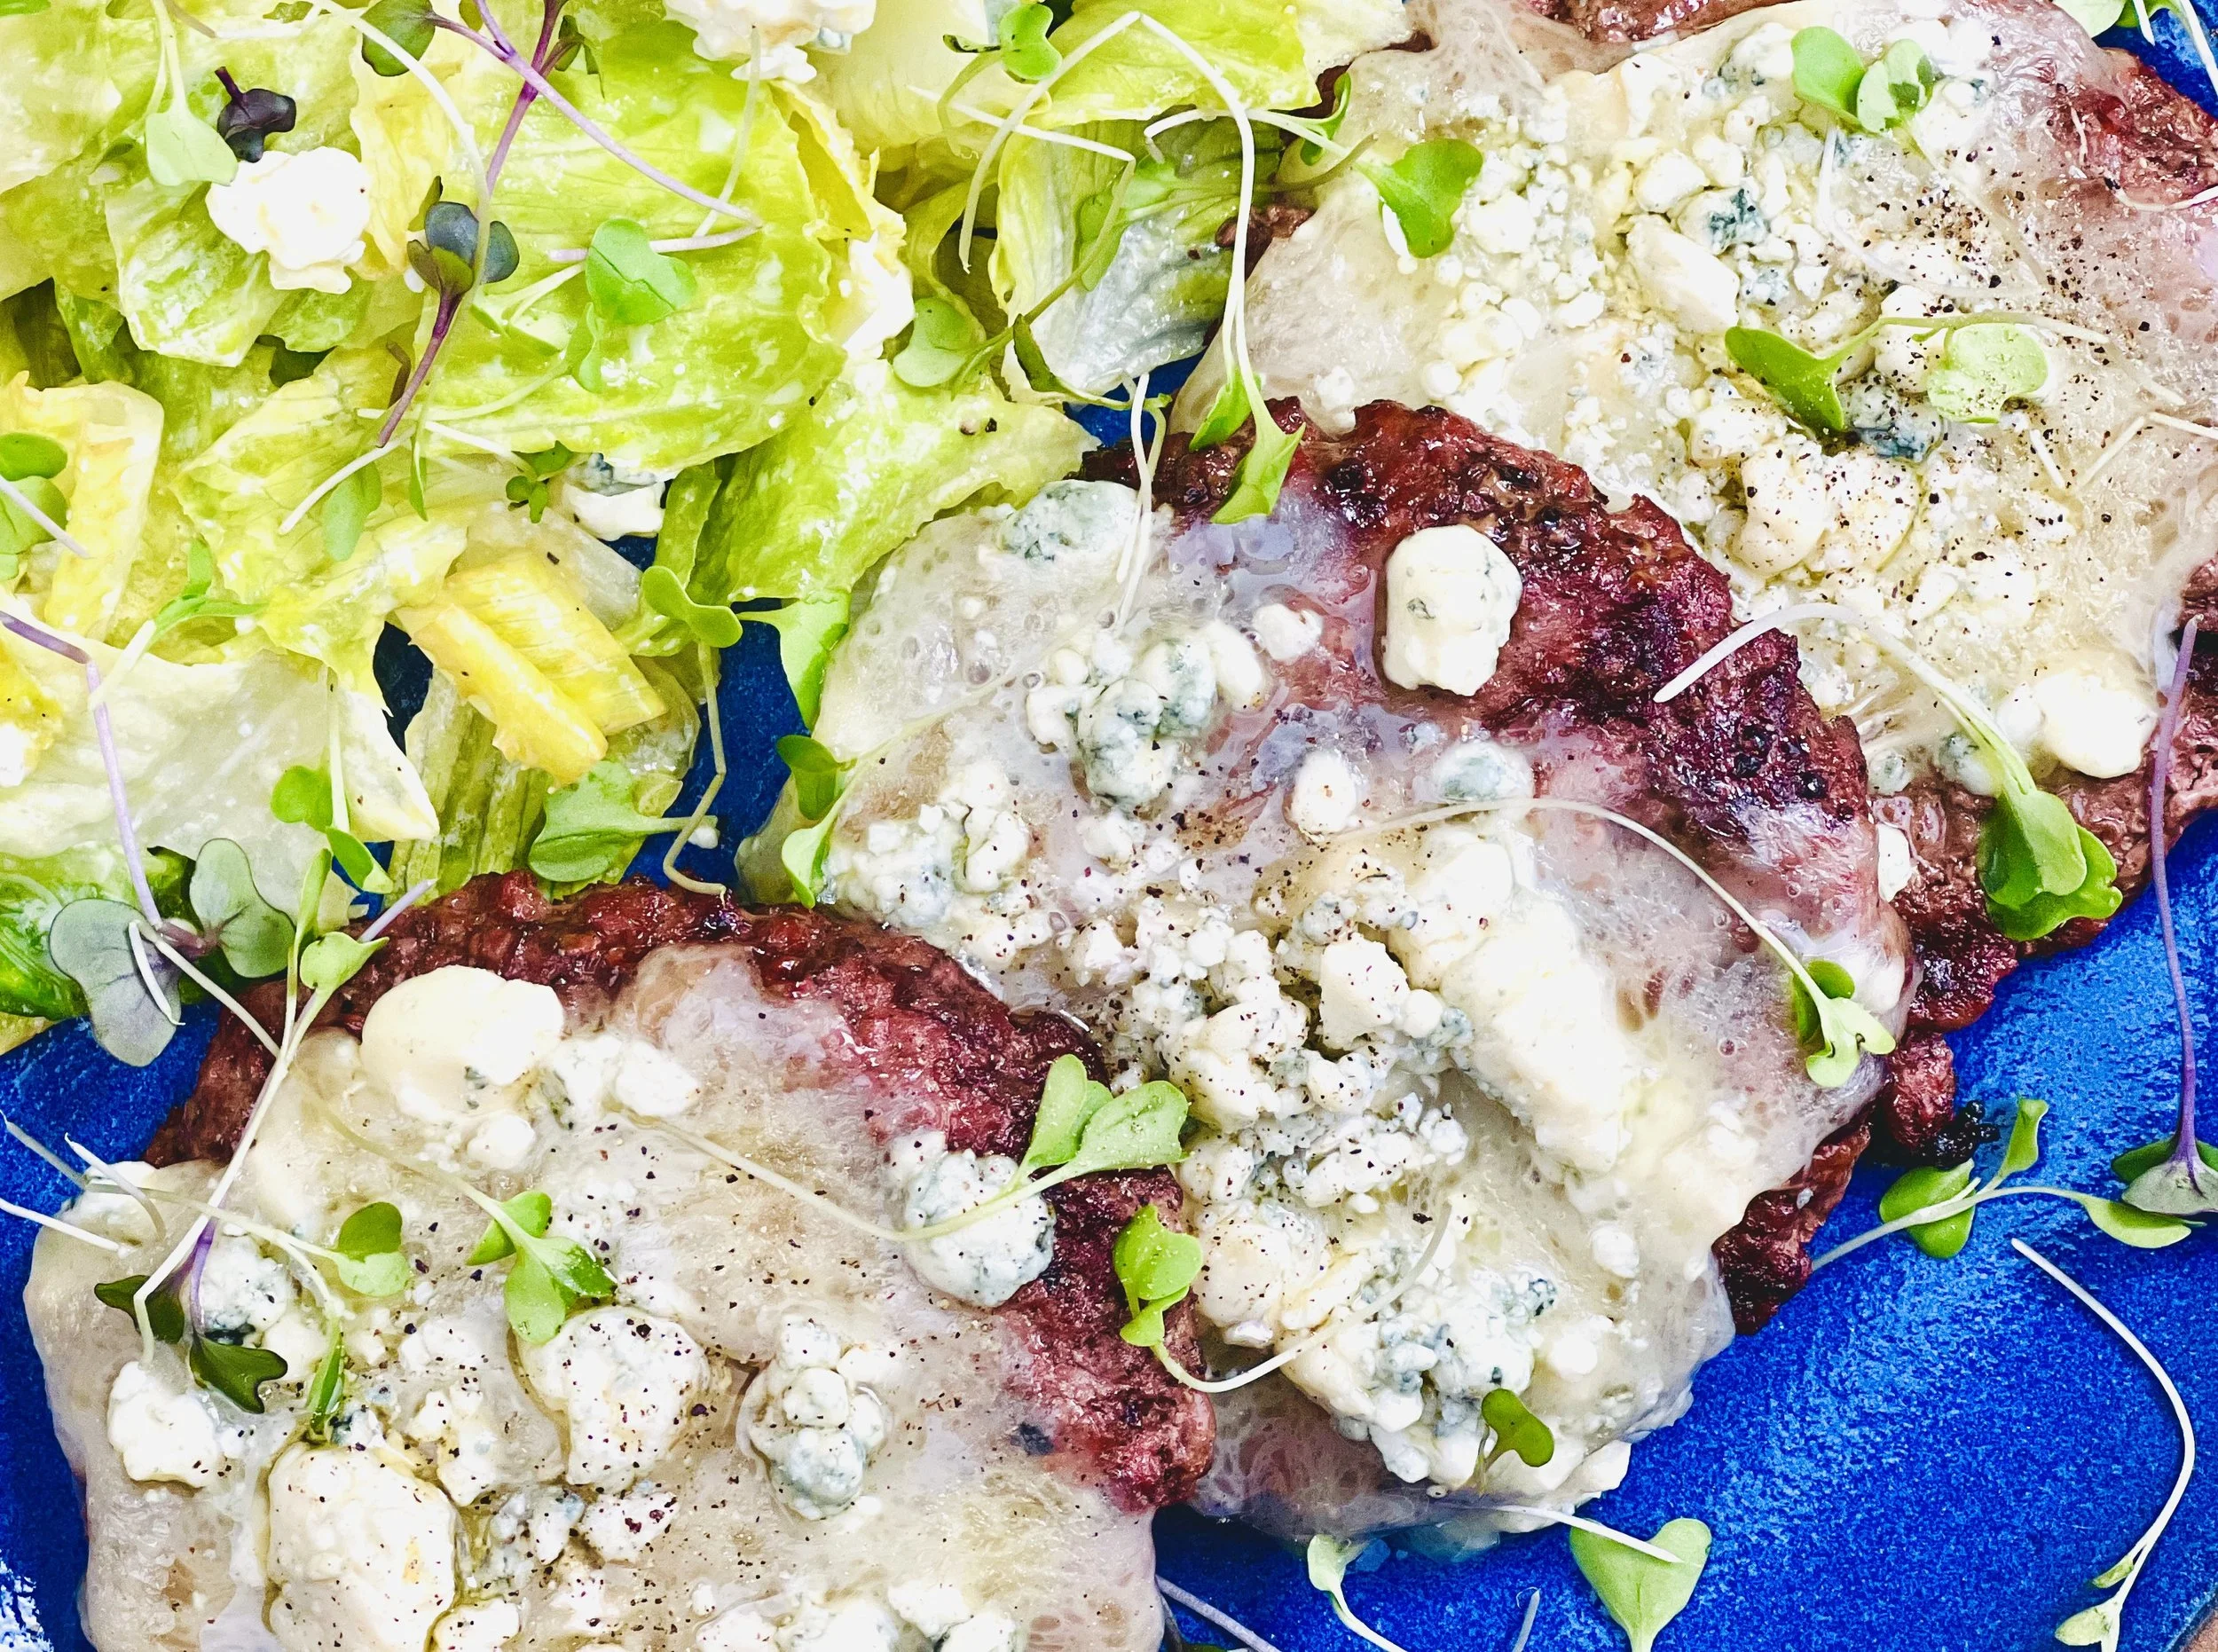
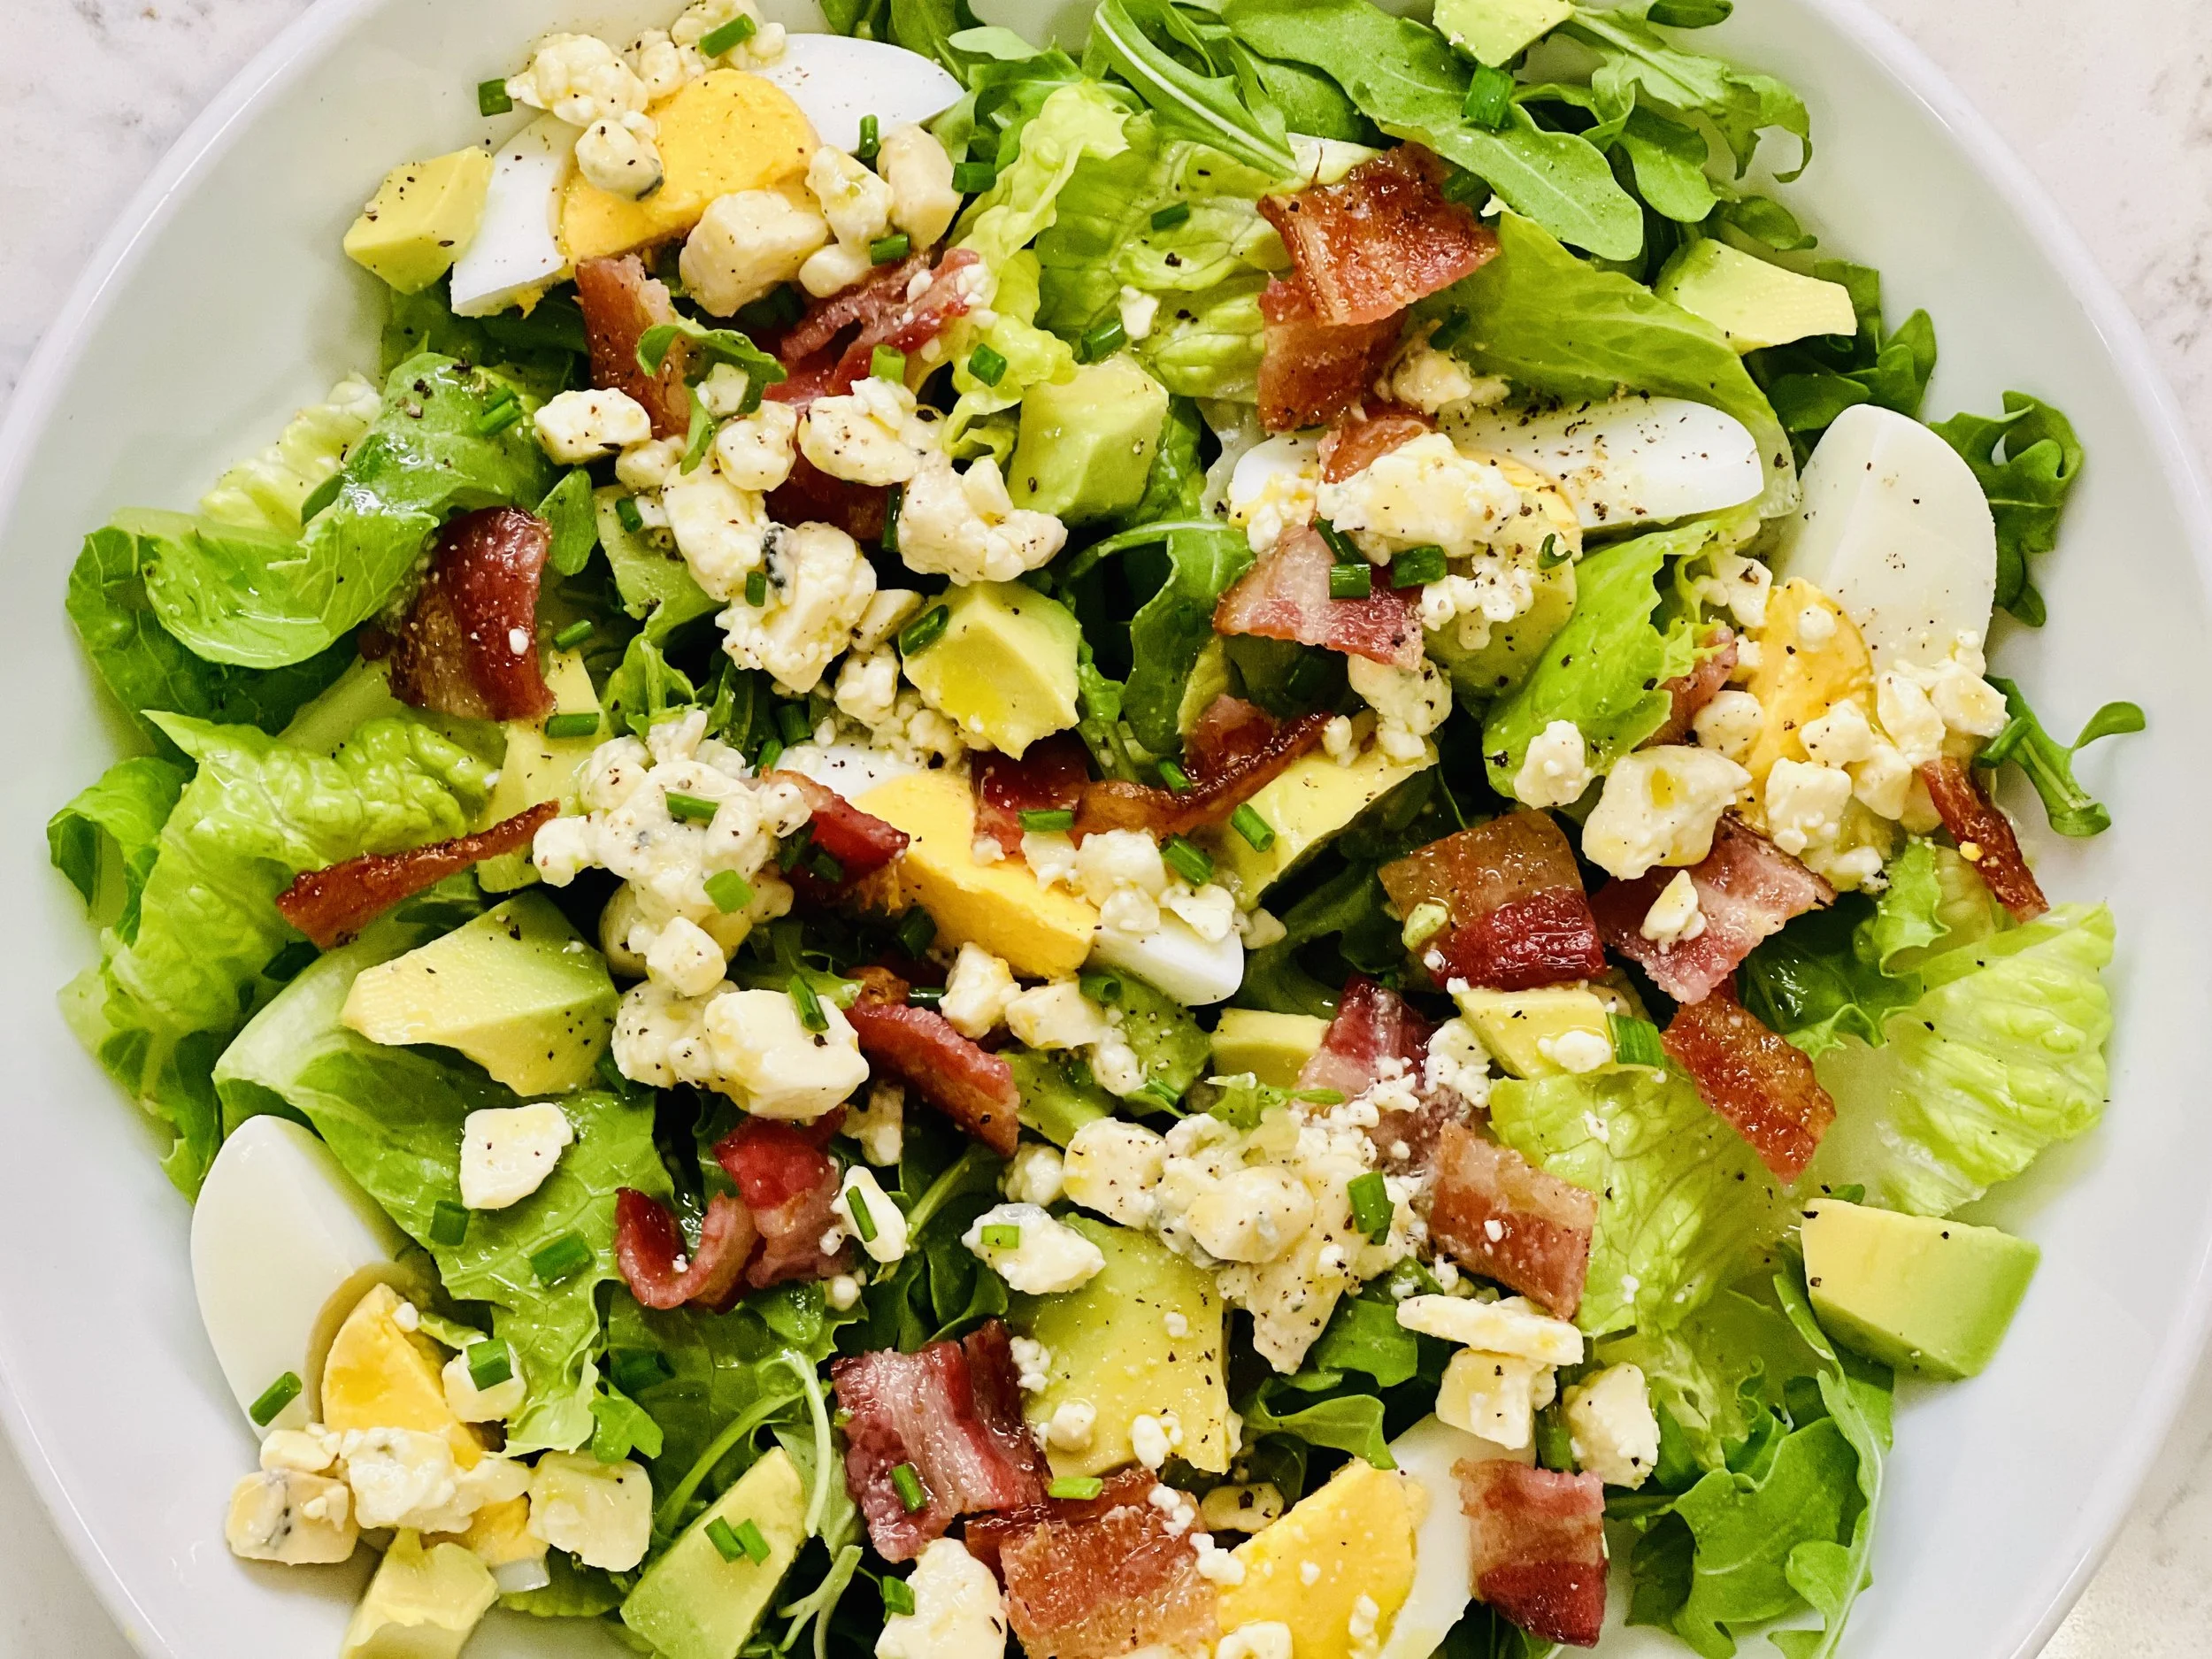
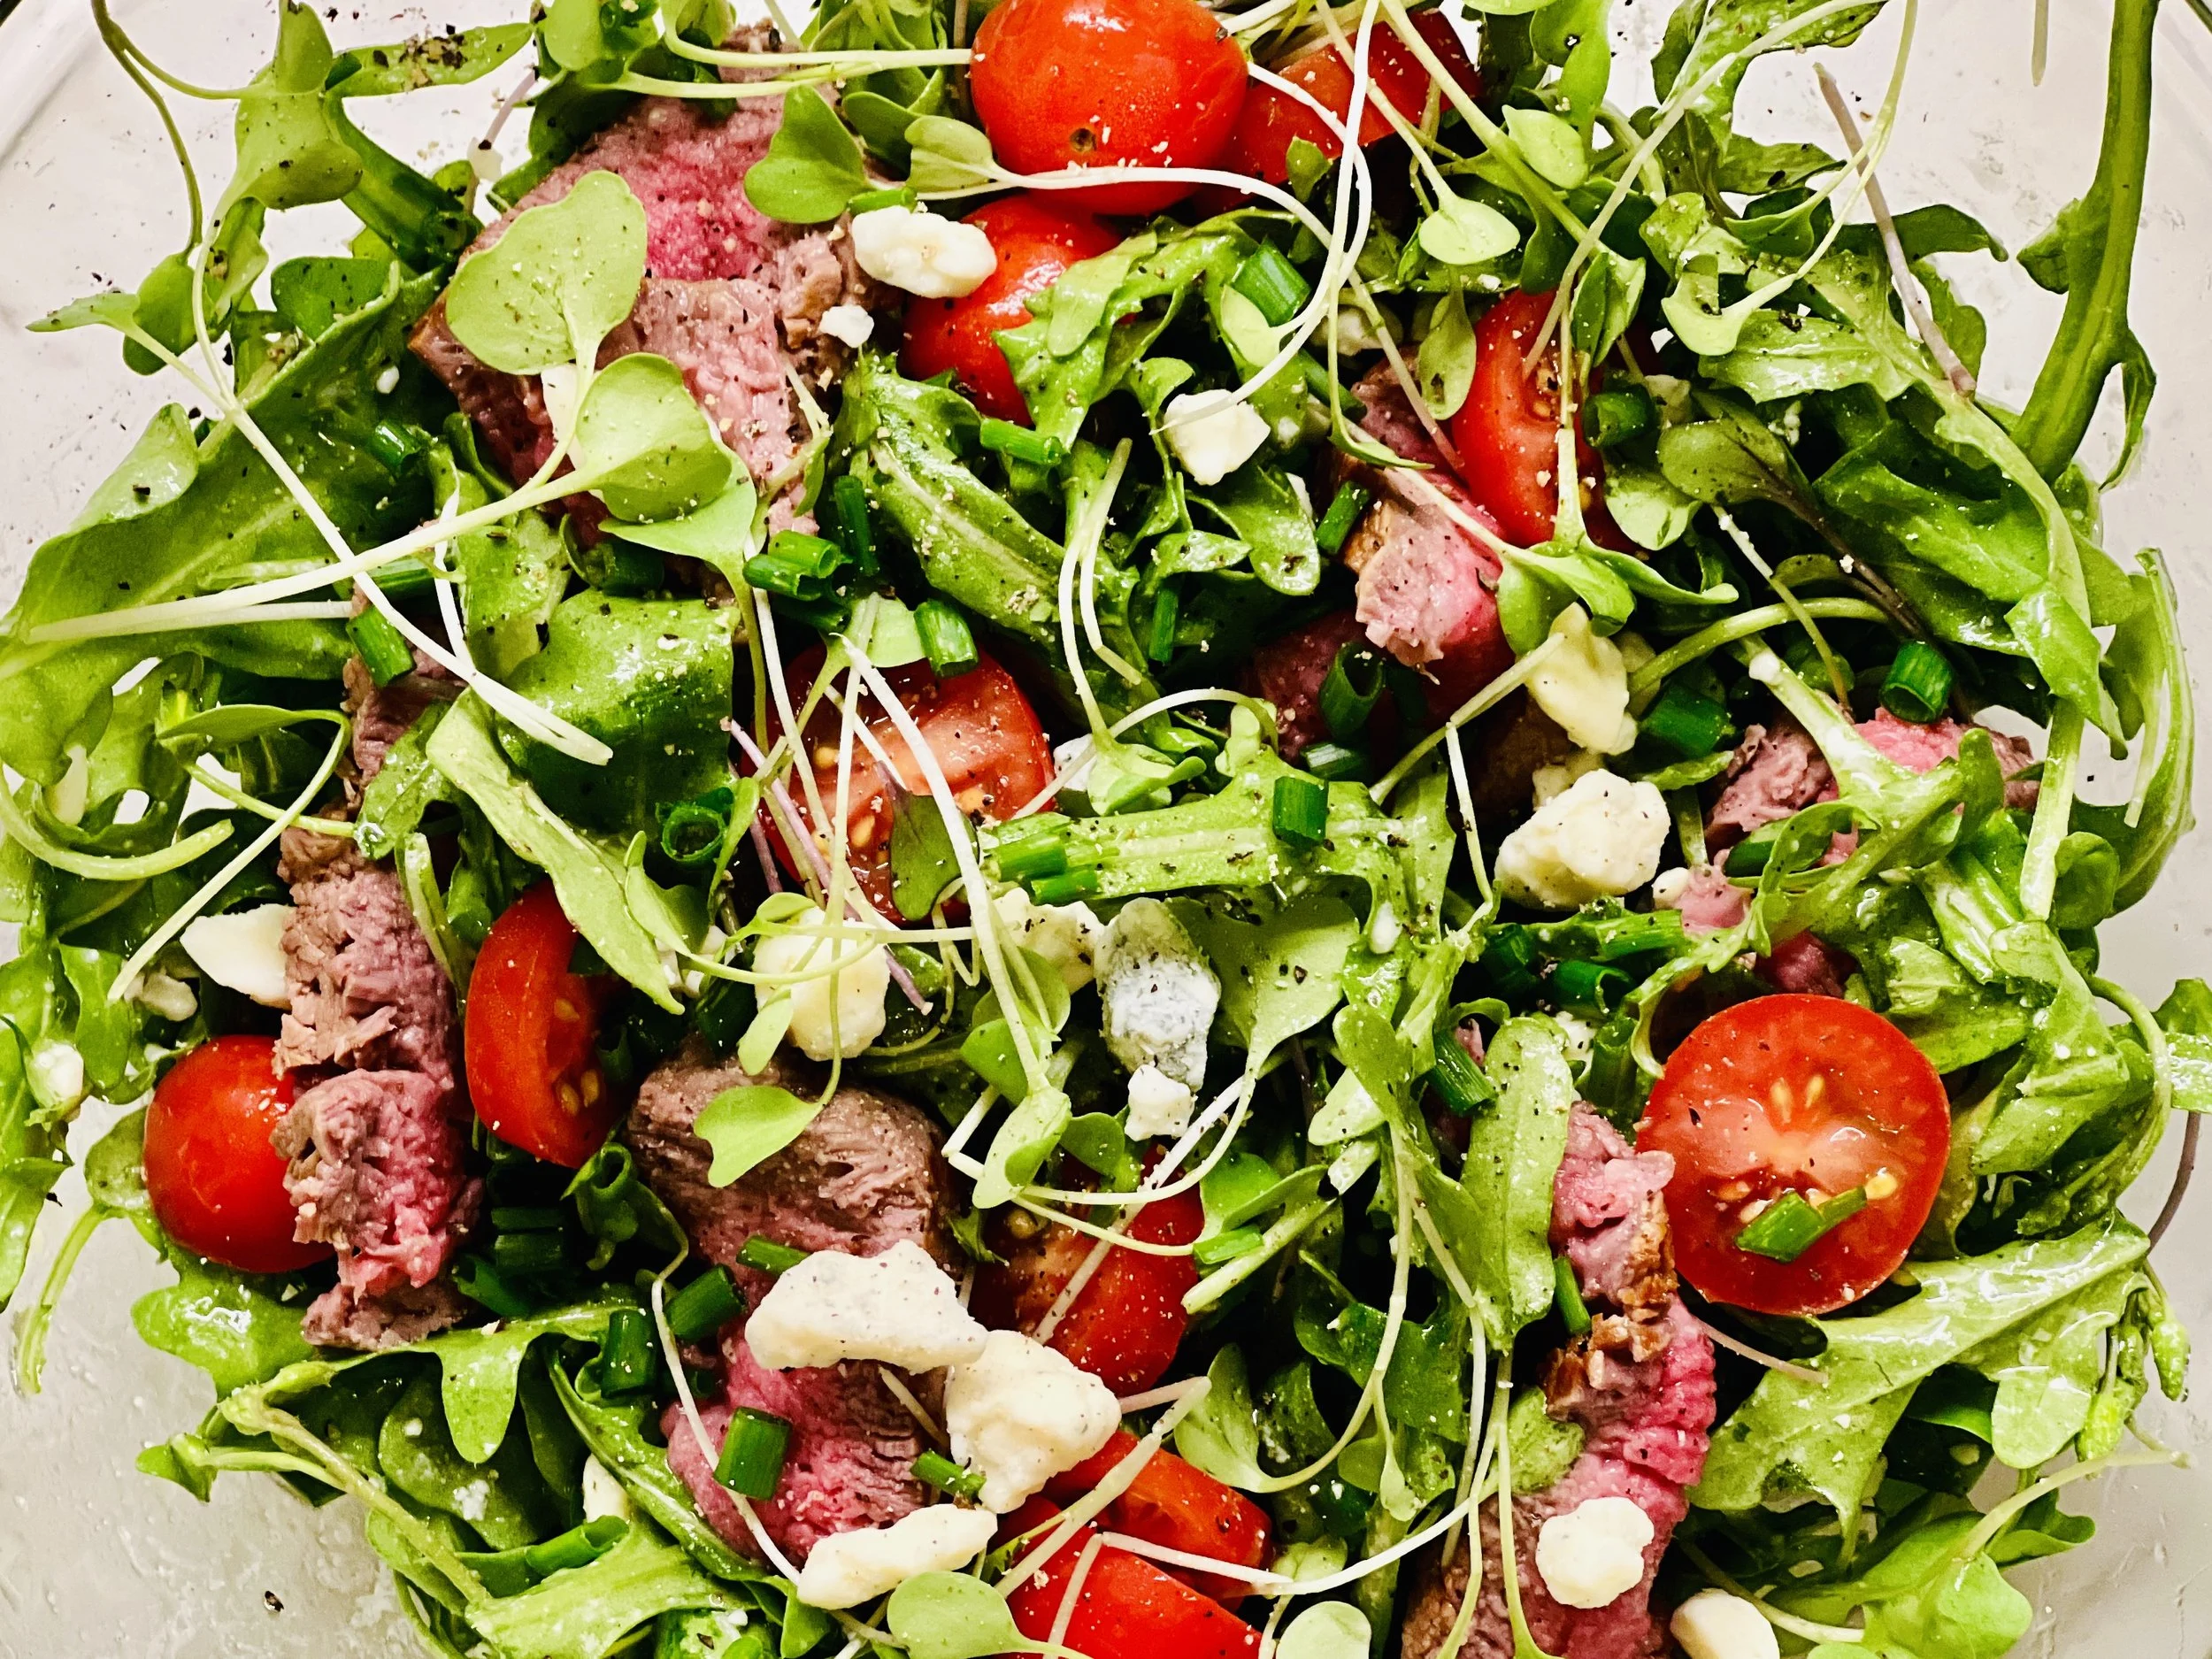
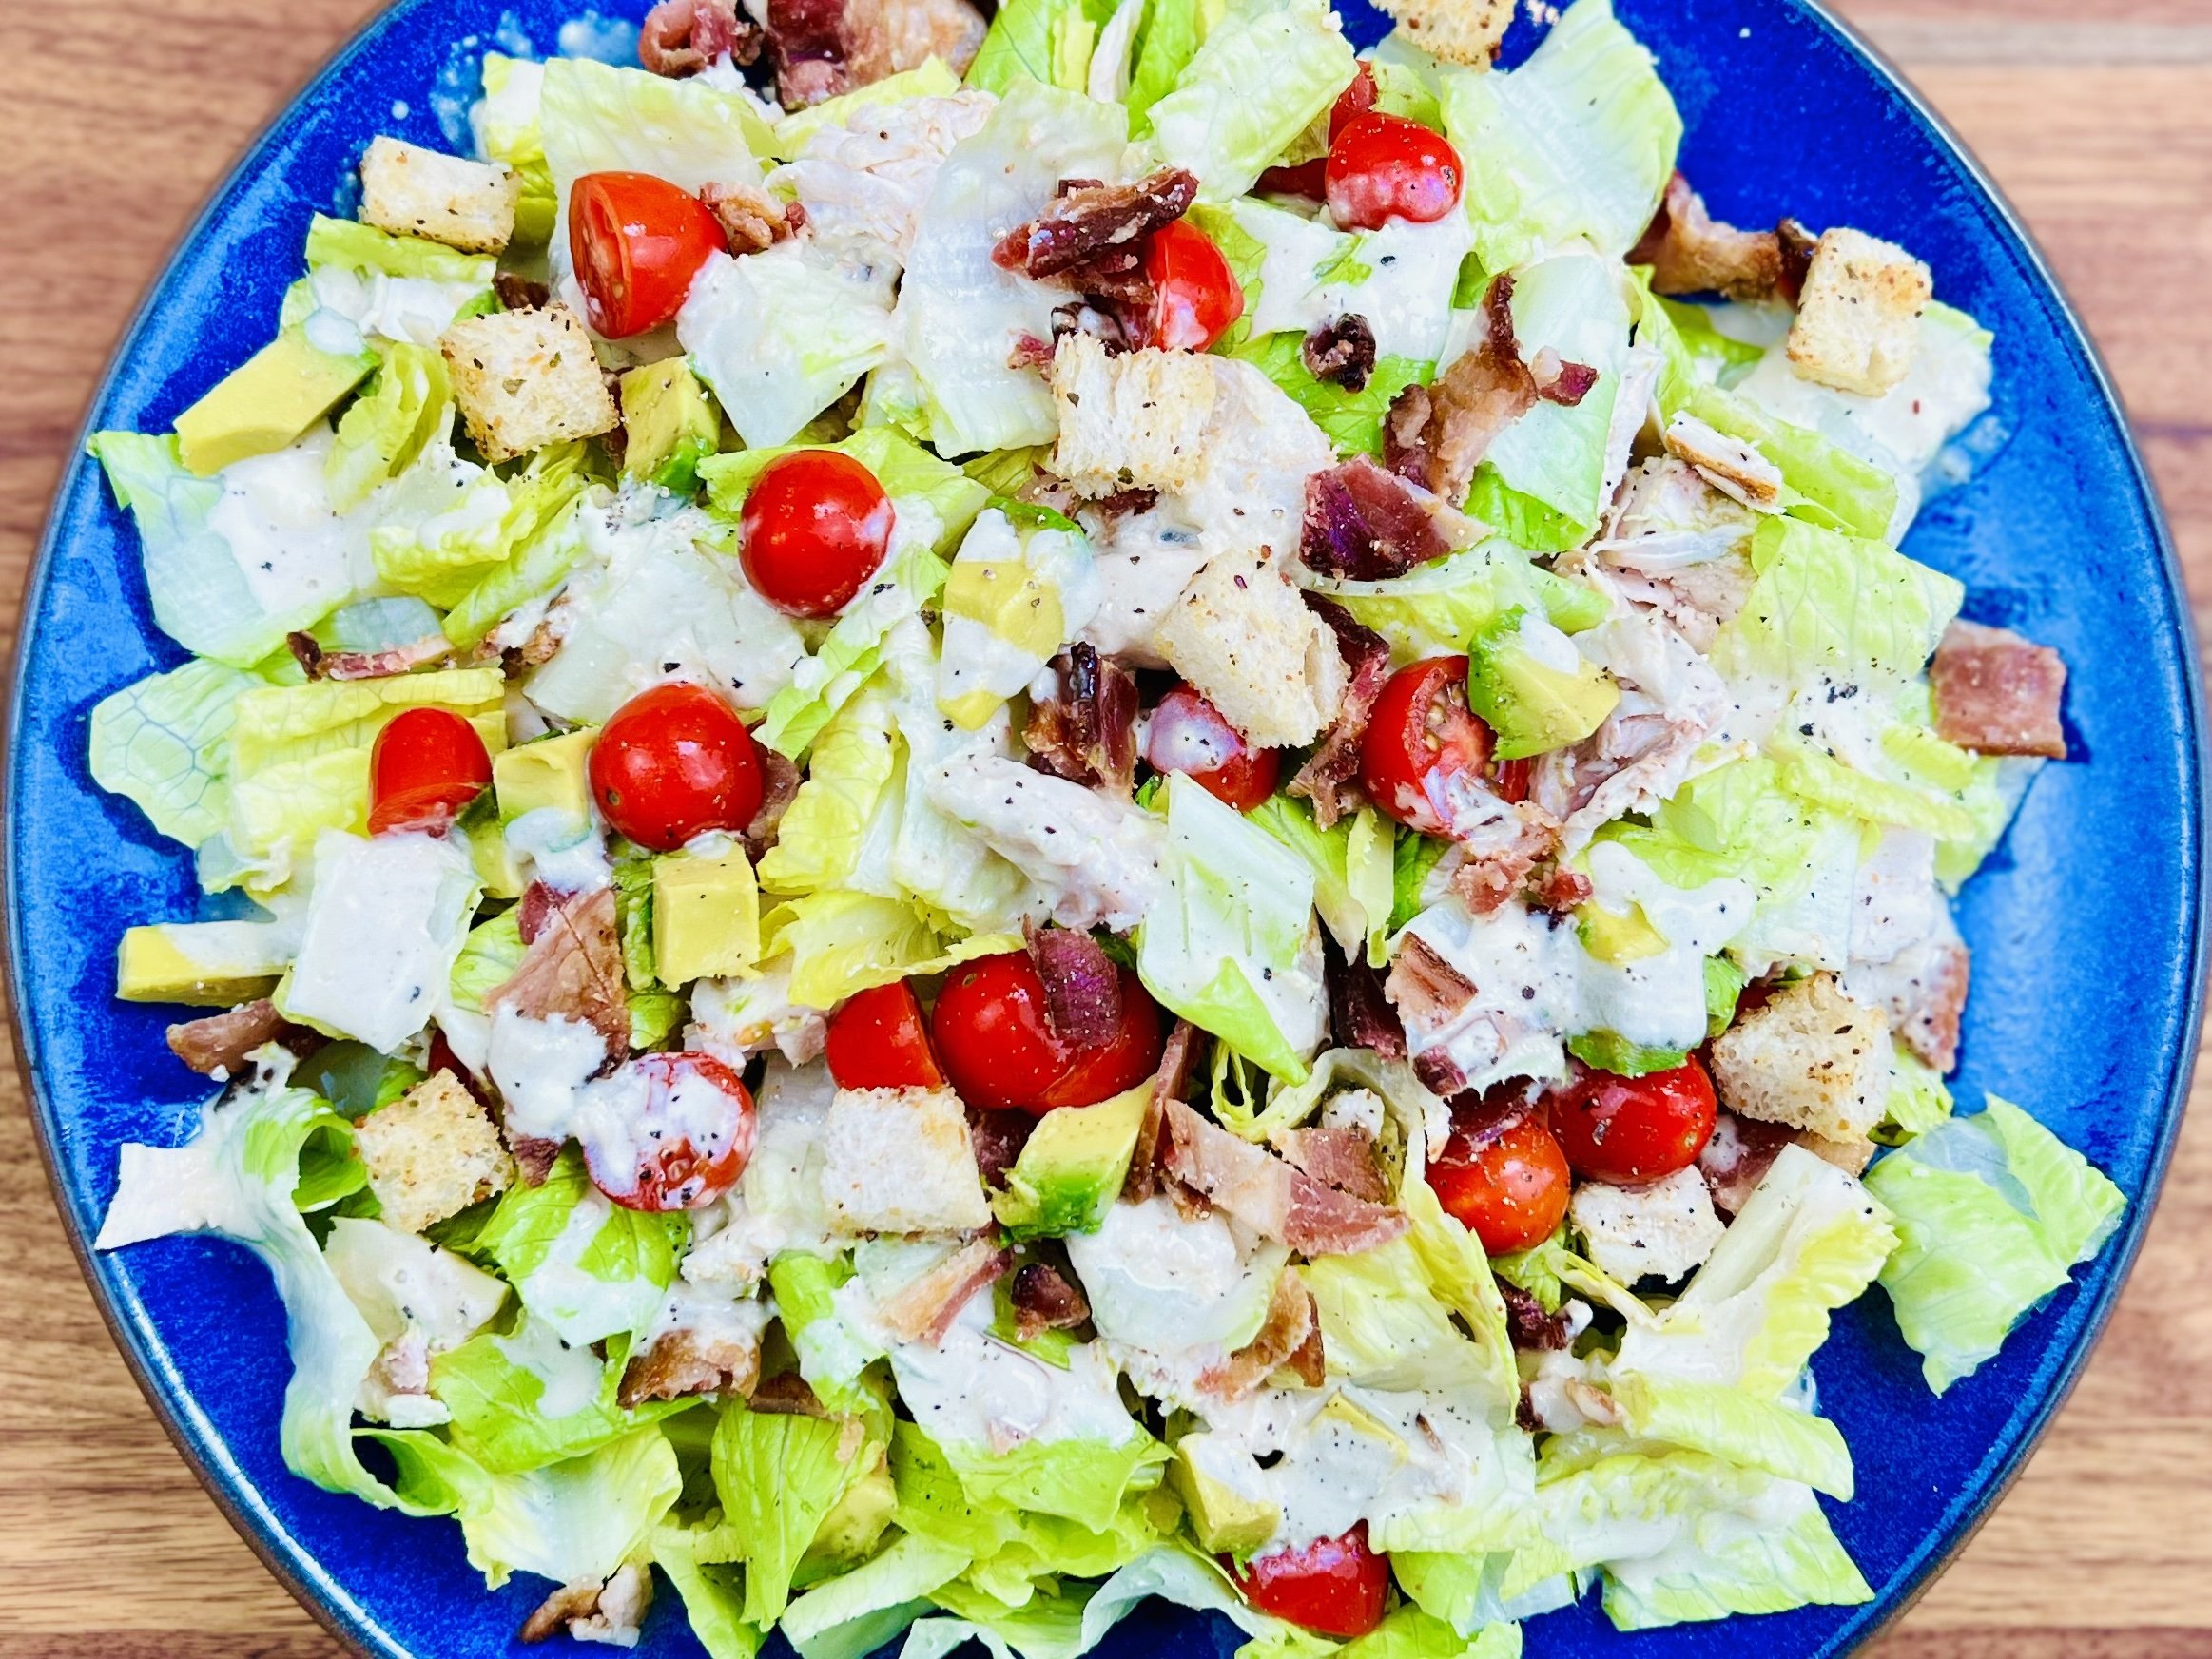
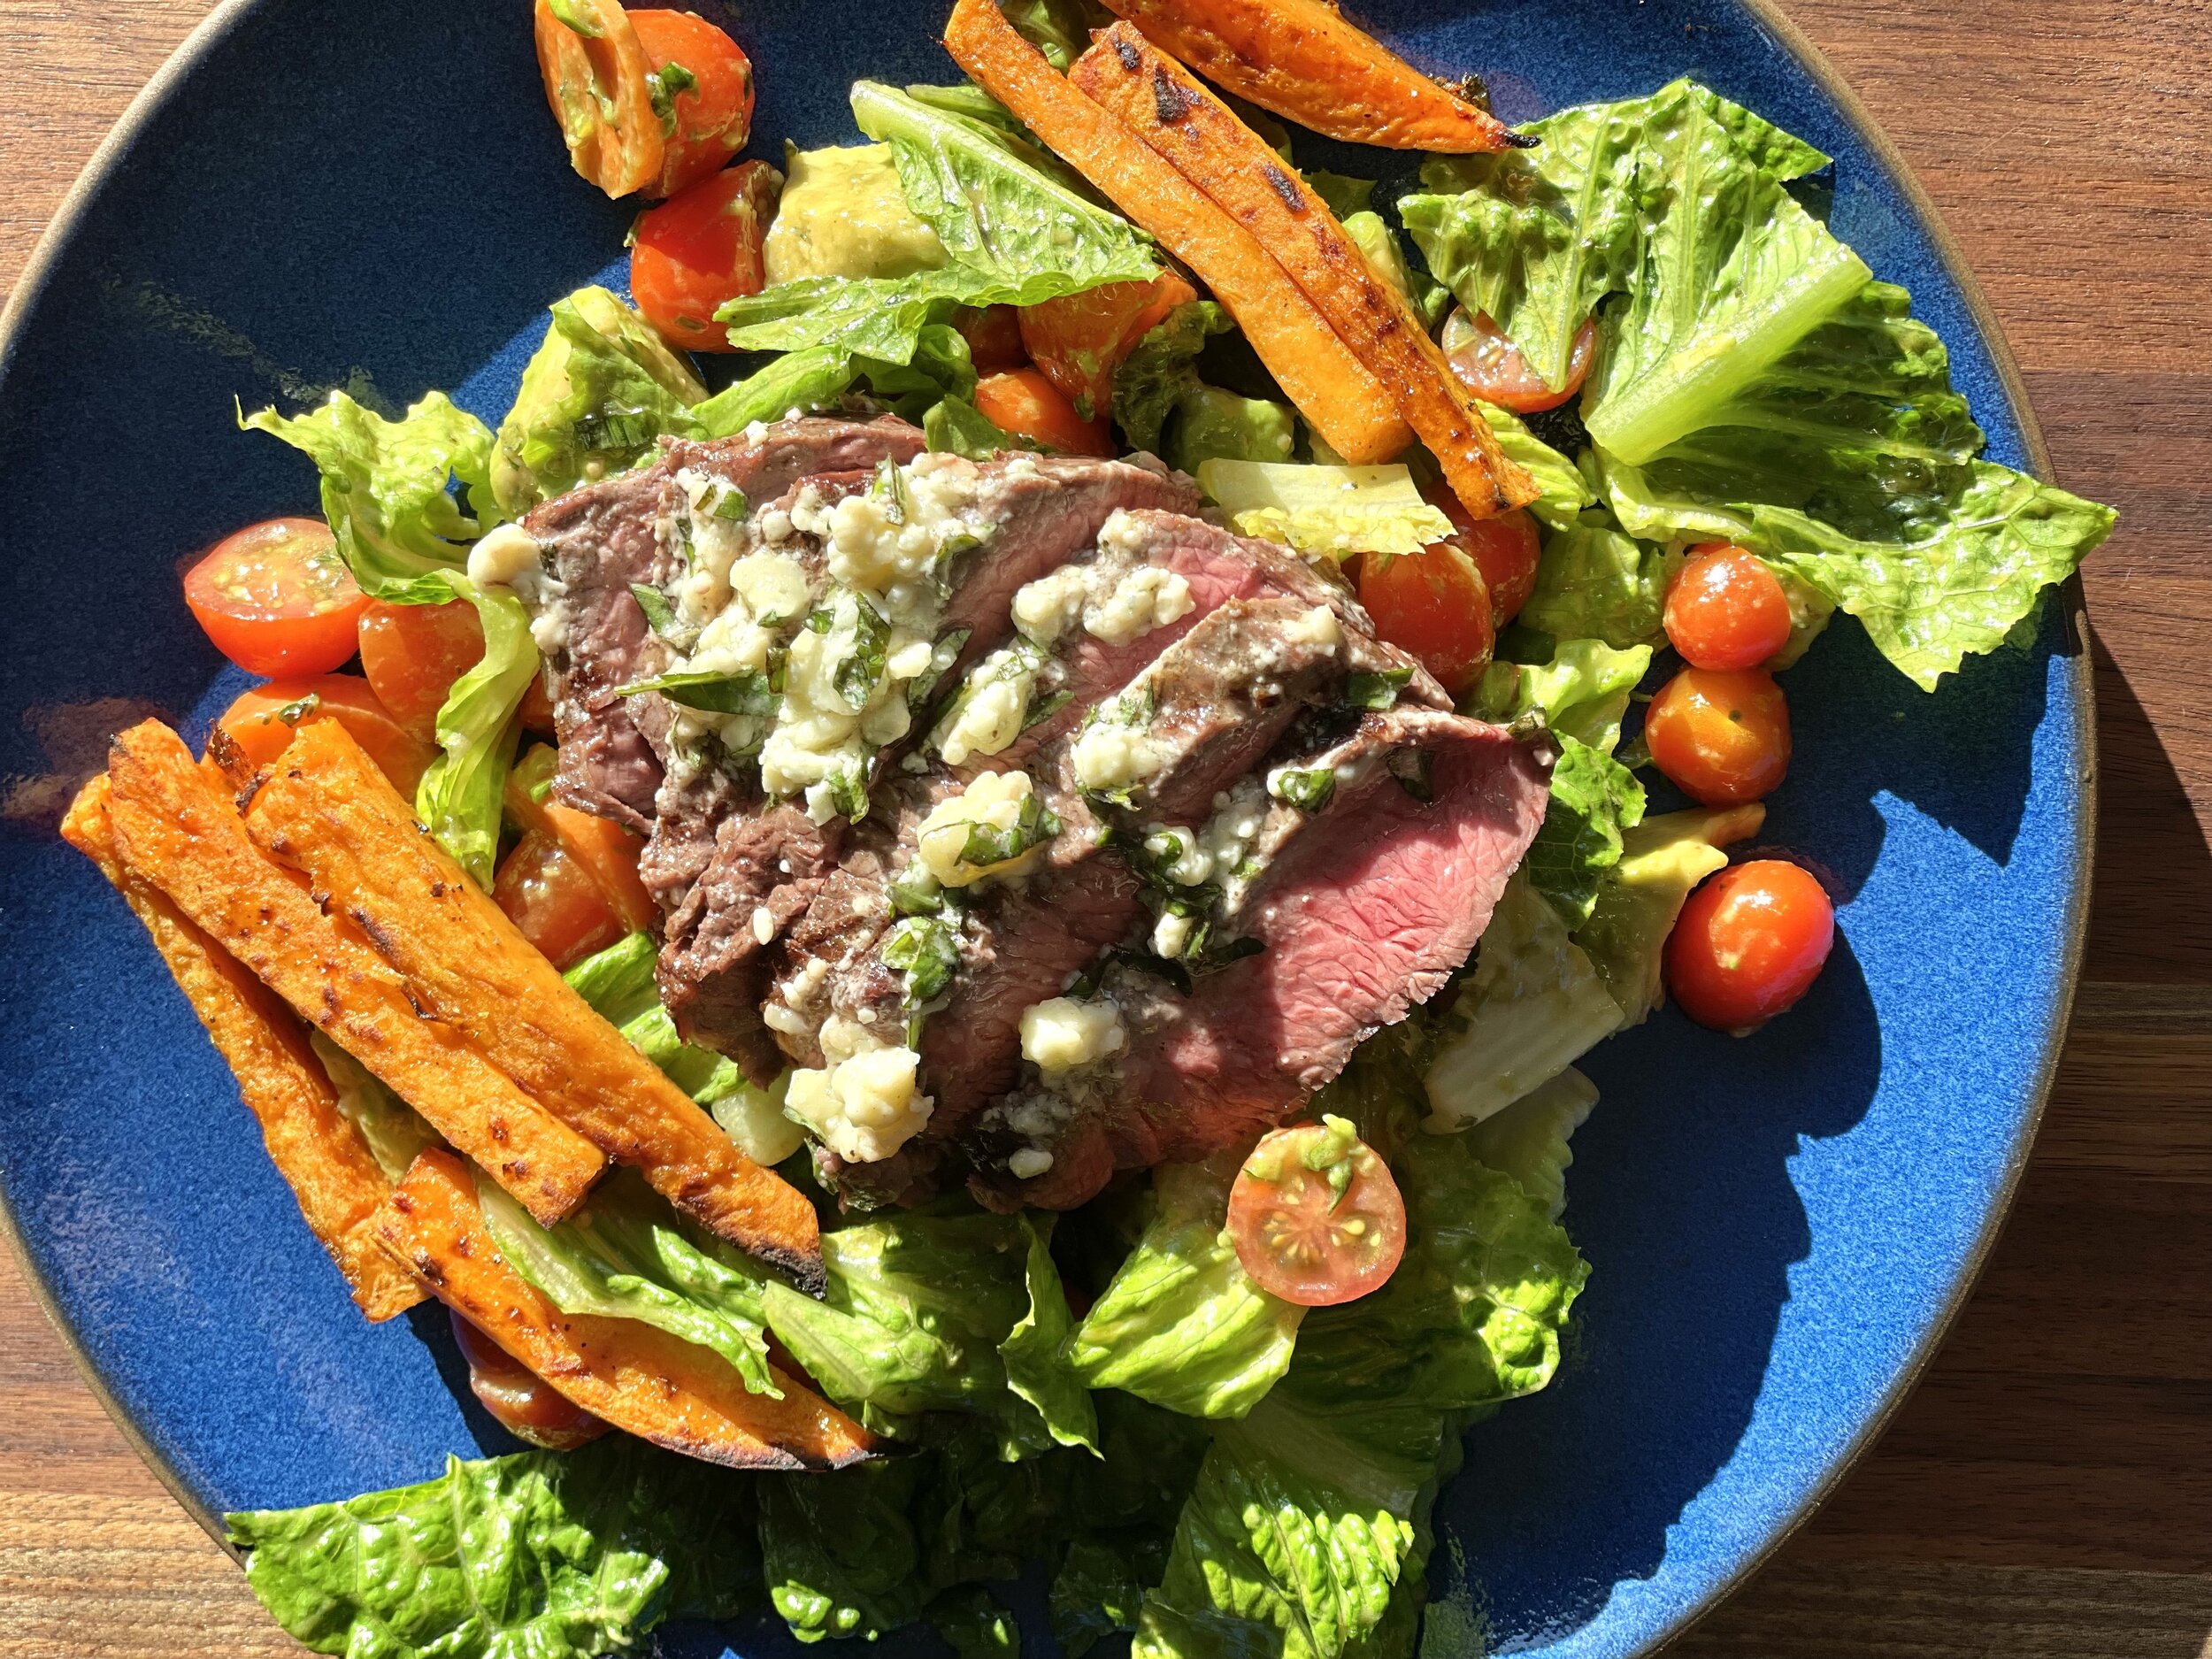
Steak salad with gorgonzola butter and sweet potato fries (low FODMAP)
20 minutes prep • 40 minutes cook • Gluten-free • Low FODMAP • Serves 6
20 minutes prep • 40 minutes cook • Gluten-free • Low FODMAP • Serves 6 • Serve this simple yet rich and flavorful salad any night of the week. It’s beautiful and hearty enough to hit the spot all the way around the table. The gorgonzola (or blue cheese) compound butter is simply delicious with the steak.
Ingredients
3 small-medium sweet potatoes, cut into matchsticks (1/2 sweet potato is a low FODMAP serving)
4 tablespoons extra virgin olive oil
1 teaspoon chipotle chili powder (or regular chili powder will also work)
Kosher salt and fresh ground black pepper
1 1/2 pound flank steak or chateaubriand
6 cups shredded romaine lettuce
2 cups cherry tomatoes, halved
1/2 avocado, chopped
4 tablespoons salted butter, at room temperature
3-4 ounces gorgonzola or blue cheese, crumbles
2 tablespoons chopped fresh basil
Dijon Balsamic Vinaigrette
1/4 cup extra virgin olive oil
2 tablespoons balsamic vinegar
2 teaspoon maple syrup
1 teaspoon Dijon mustard
1 spring onion (green part only) or about 4 green onions (green part only) finely chopped
1 - 2 tablespoons fresh thyme, chopped
Kosher salt, fresh ground black pepper, and red pepper flakes to taste
Directions
To make the fries. Preheat the oven to 425 degrees F. Place the sweet potatoes in a large mixing bowl and toss with 3 tablespoons olive oil, the chipotle chili powder, and a large pinch each of salt and pepper. Spread the fries in an even layer on a large rimmed baking sheet. Transfer to the oven and bake for 15-20 minutes, then flip and bake for 15-20 minutes more until tender and a bit crisp.
To make the vinaigrette. Combine all ingredients in a glass jar or measuring cup and shake or whisk until combined. Taste and adjust the salt, pepper, and red pepper flakes.
For the compound butter, combine the butter, gorgonzola, or blue cheese crumbles, and basil in a small bowl.
To make the steak. Remove the steaks from the fridge 15 minutes prior to grilling. Preheat the grill or a grill pan to high heat. Rub the steak with 1 tablespoon olive oil and season generously with salt and pepper. Sear until your desired doneness is reached, about 5-8 minutes for medium-rare, per side. Remove the steak and spread the butter over the steak while it’s still hot from the grill, then let it rest for 5 - 10 minutes. Slice against the grain.
For the salad, combine the romaine, tomatoes, avocado, and dressing in a large salad bowl. Toss to combine.
Plate the salad and top with sweet potato fries and steak.
Eat and enjoy every bite because you can!
This post may contain affiliate links so you can easily purchase items listed on the page. In some cases we have provided a special discount code for IBS Game Changers so be sure to use it!
More Deliciously Low FODMAP™ salads you might enjoy
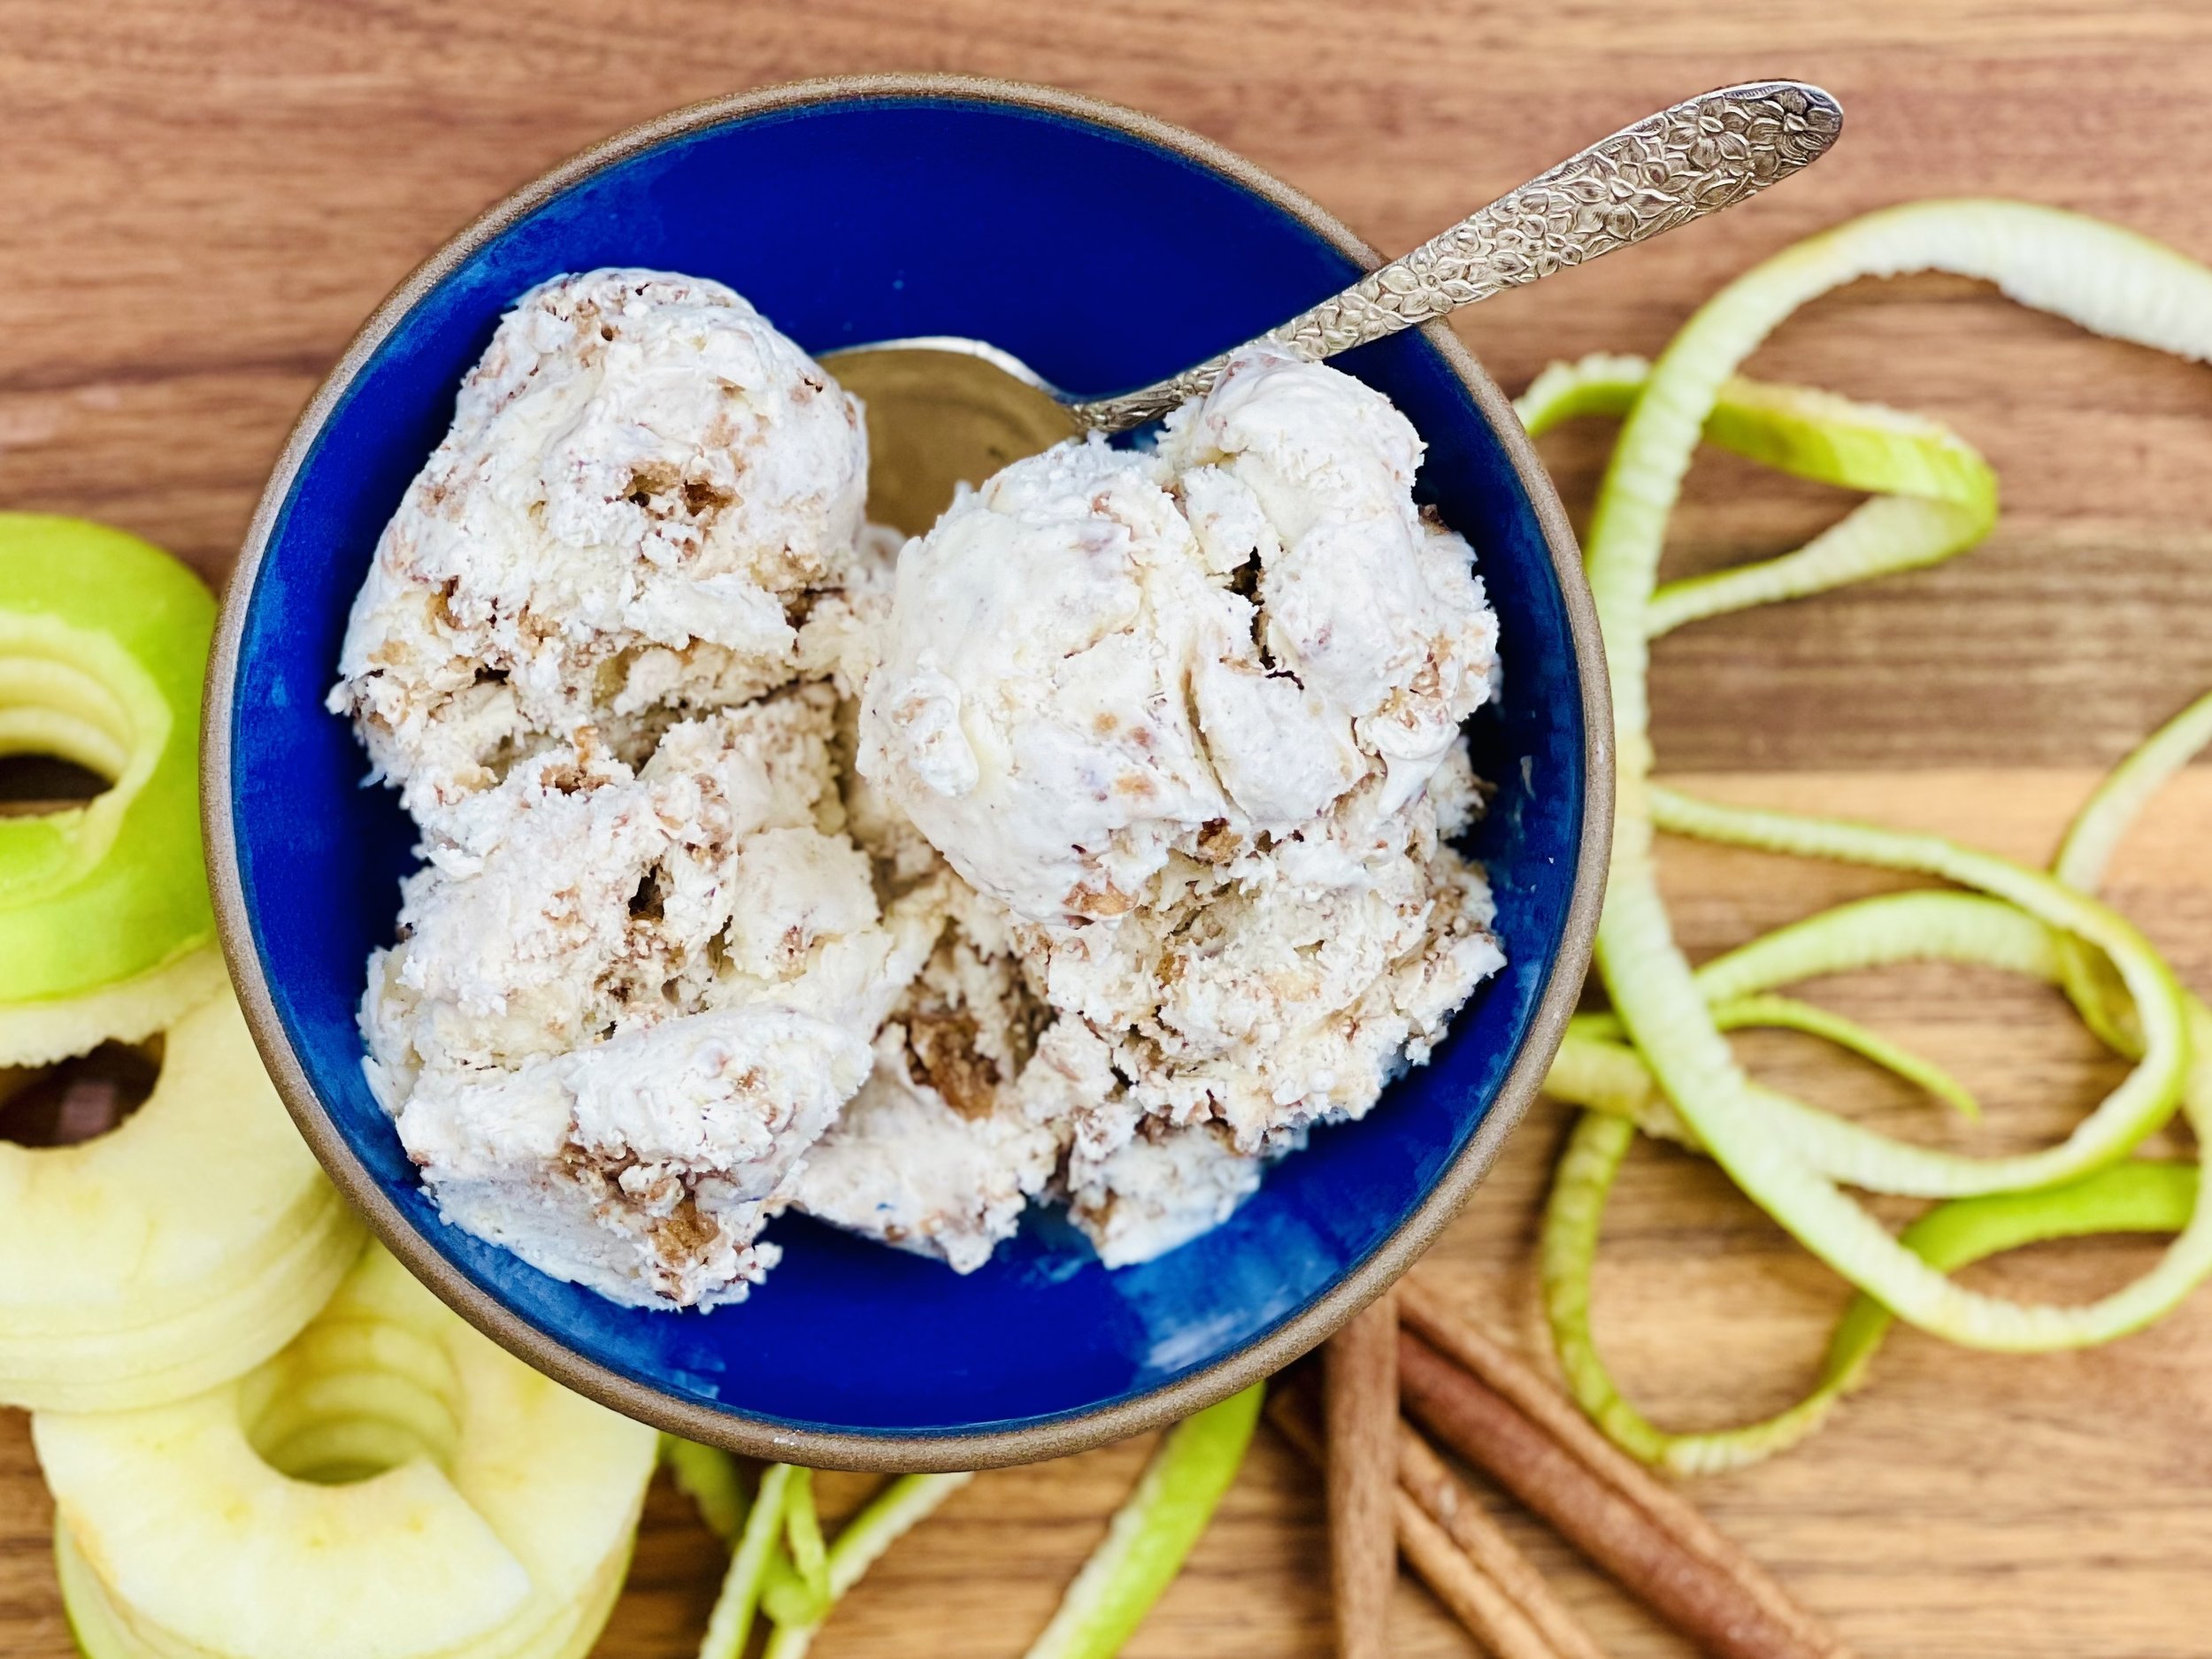
Creamy coconut popsicles (low FODMAP)
10 minutes prep • 5 - 8 hours freeze (depending on how large your popsicle molds are) • Low FODMAP • Gluten-free • Makes 6 popsicles
10 minutes prep • 5 - 8 hours freeze (depending on how large your popsicle molds are) • Low FODMAP • Gluten-free • Makes 6 popsicles • With only 5 ingredients, these amazing popsicles are better than the best creamy coconut popsicle I have ever had. So yummy and yet so simple to make! You do need to plan ahead just a little because they need some time to freeze!
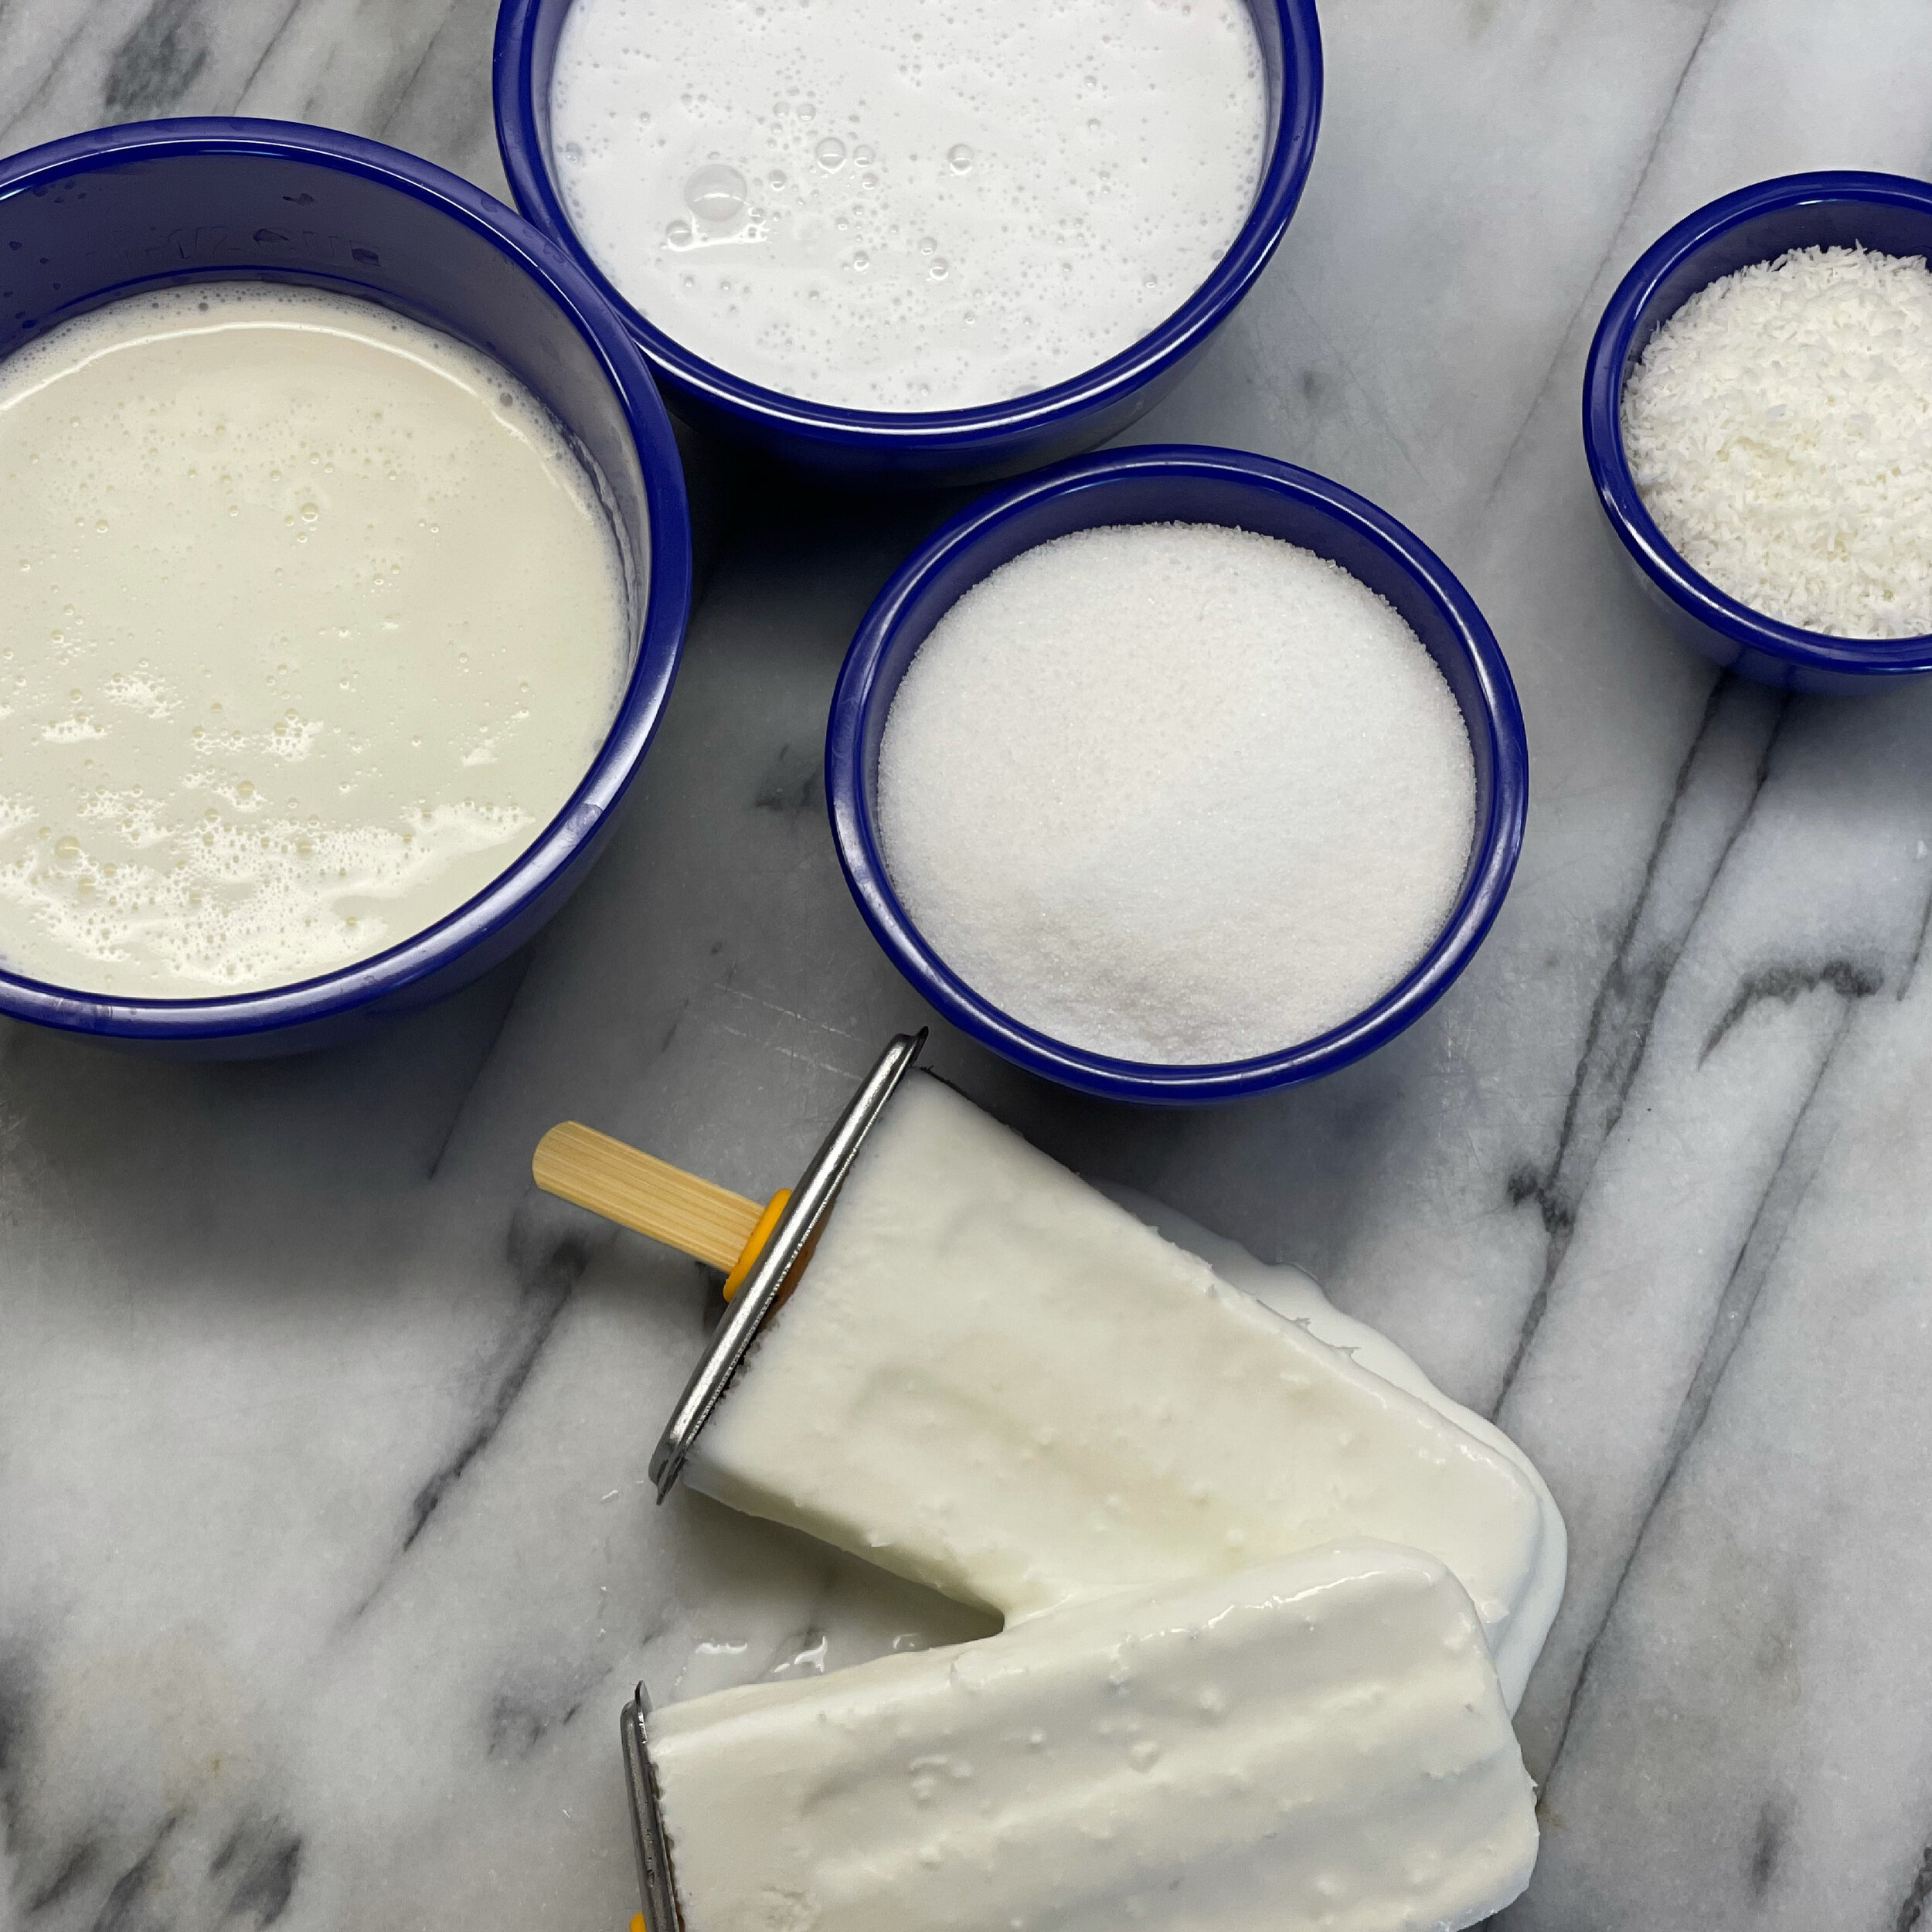
Ingredients
1 cup heavy cream
1/2 cup sugar
1 cup coconut cream (unsweetened) - 1/4 cup is low FODMAP serving
1/4 cup finely shredded unsweetened coconut
Pinch of salt
Directions
Put the heavy cream in a small saucepan with the sugar and the salt. Heat over medium heat stirring until the sugar and salt dissolve. Set aside to cool.
When cool, stir in the coconut cream and shredded coconut until the mixture is smooth.
Fill your popsicle molds with the mixture and put them in the freezer for at least 5 hours — longer if your molds are very wide.
To un-mold, briefly dip the mold in hot water a few times until the popsicle is released.
Eat and enjoy every bite because you can!
Pro Tip: I love this stainless steel popsicle mold because it’s easy to use, easy to clean, all reusable pieces, and you can pick out one popsicle at a time.
This post may contain affiliate links so you can easily purchase items listed on the page. In some cases we have provided a special discount code for IBS Game Changers so be sure to use it!
More Deliciously Low FODMAP™ desserts you might enjoy
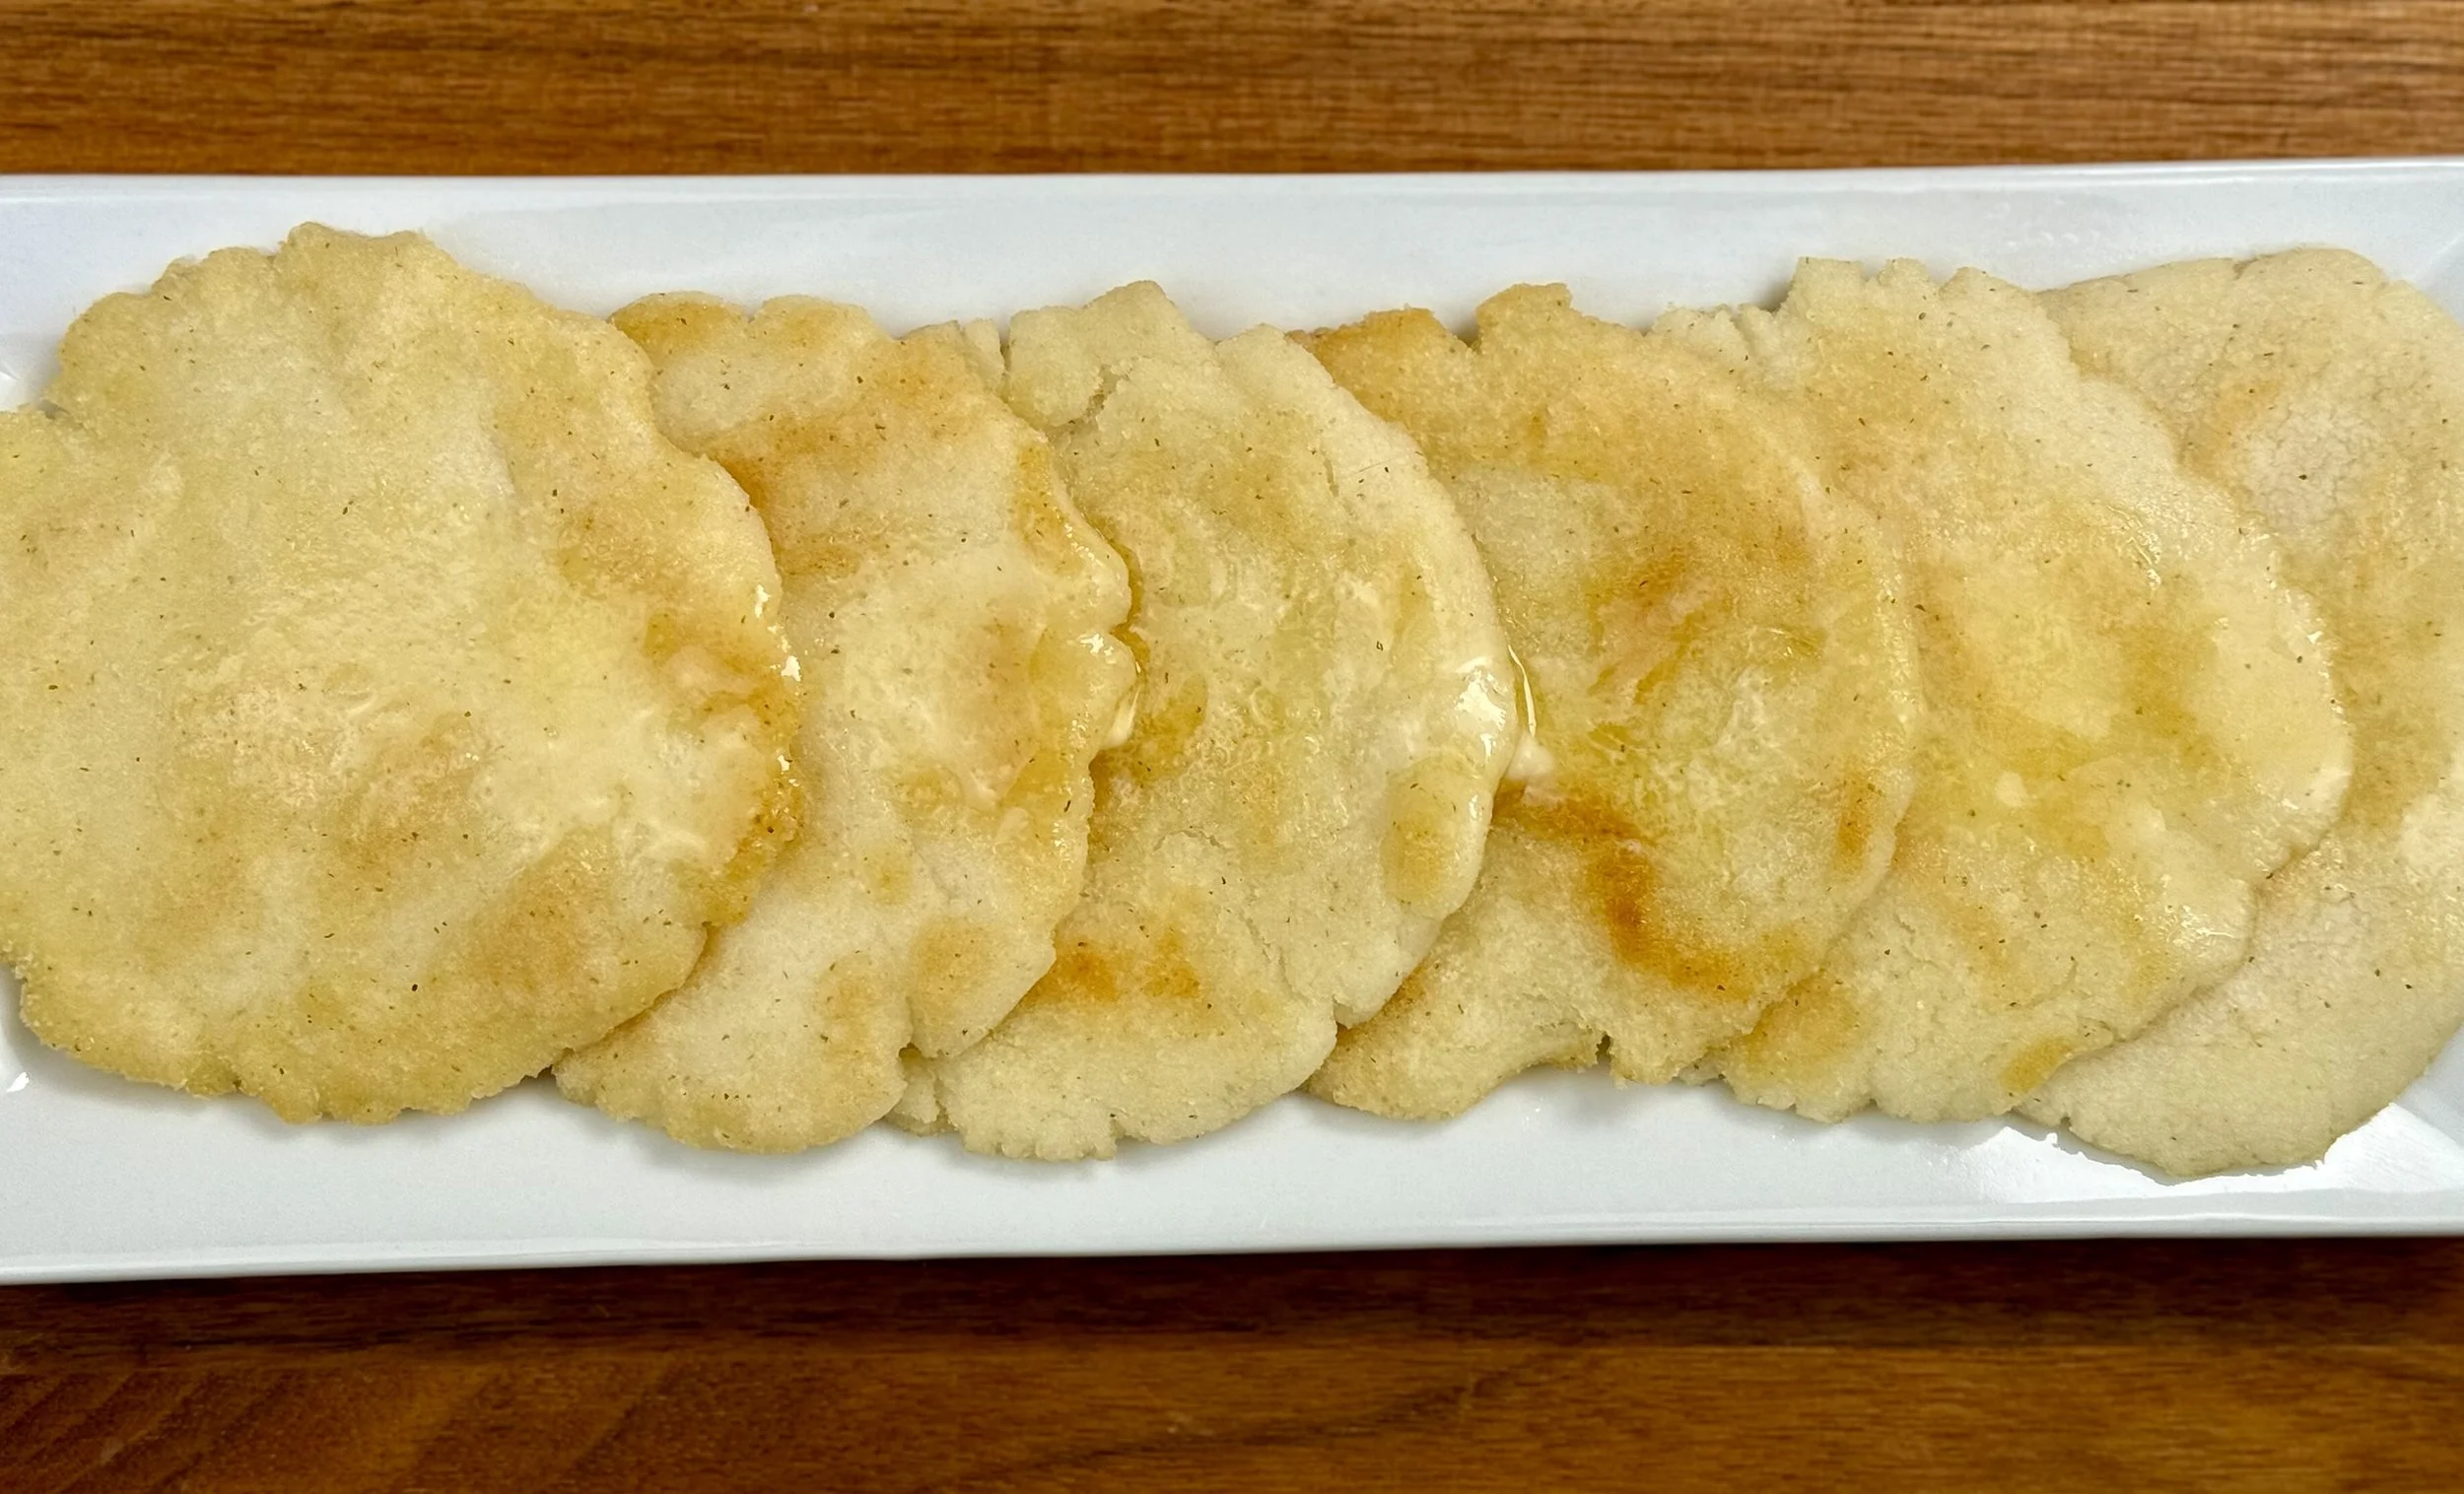
Quick lunch: Crackers and…(low FODMAP)
5 minutes • Low FODMAP • Gluten-free • Vegetarian • Serves 1 or many
5 minutes • Low FODMAP • Gluten-free • Vegetarian • Serves 1 or many • Sometimes a “snack” can make the perfect simple lunch. Crackers are great with cheese. But have you tried topping a cracker with brie cheese and a walnut half or a macadamia nut? Or lactose-free cream cheese, smoked salmon, and capers? Be creative! You might surprise yourself.
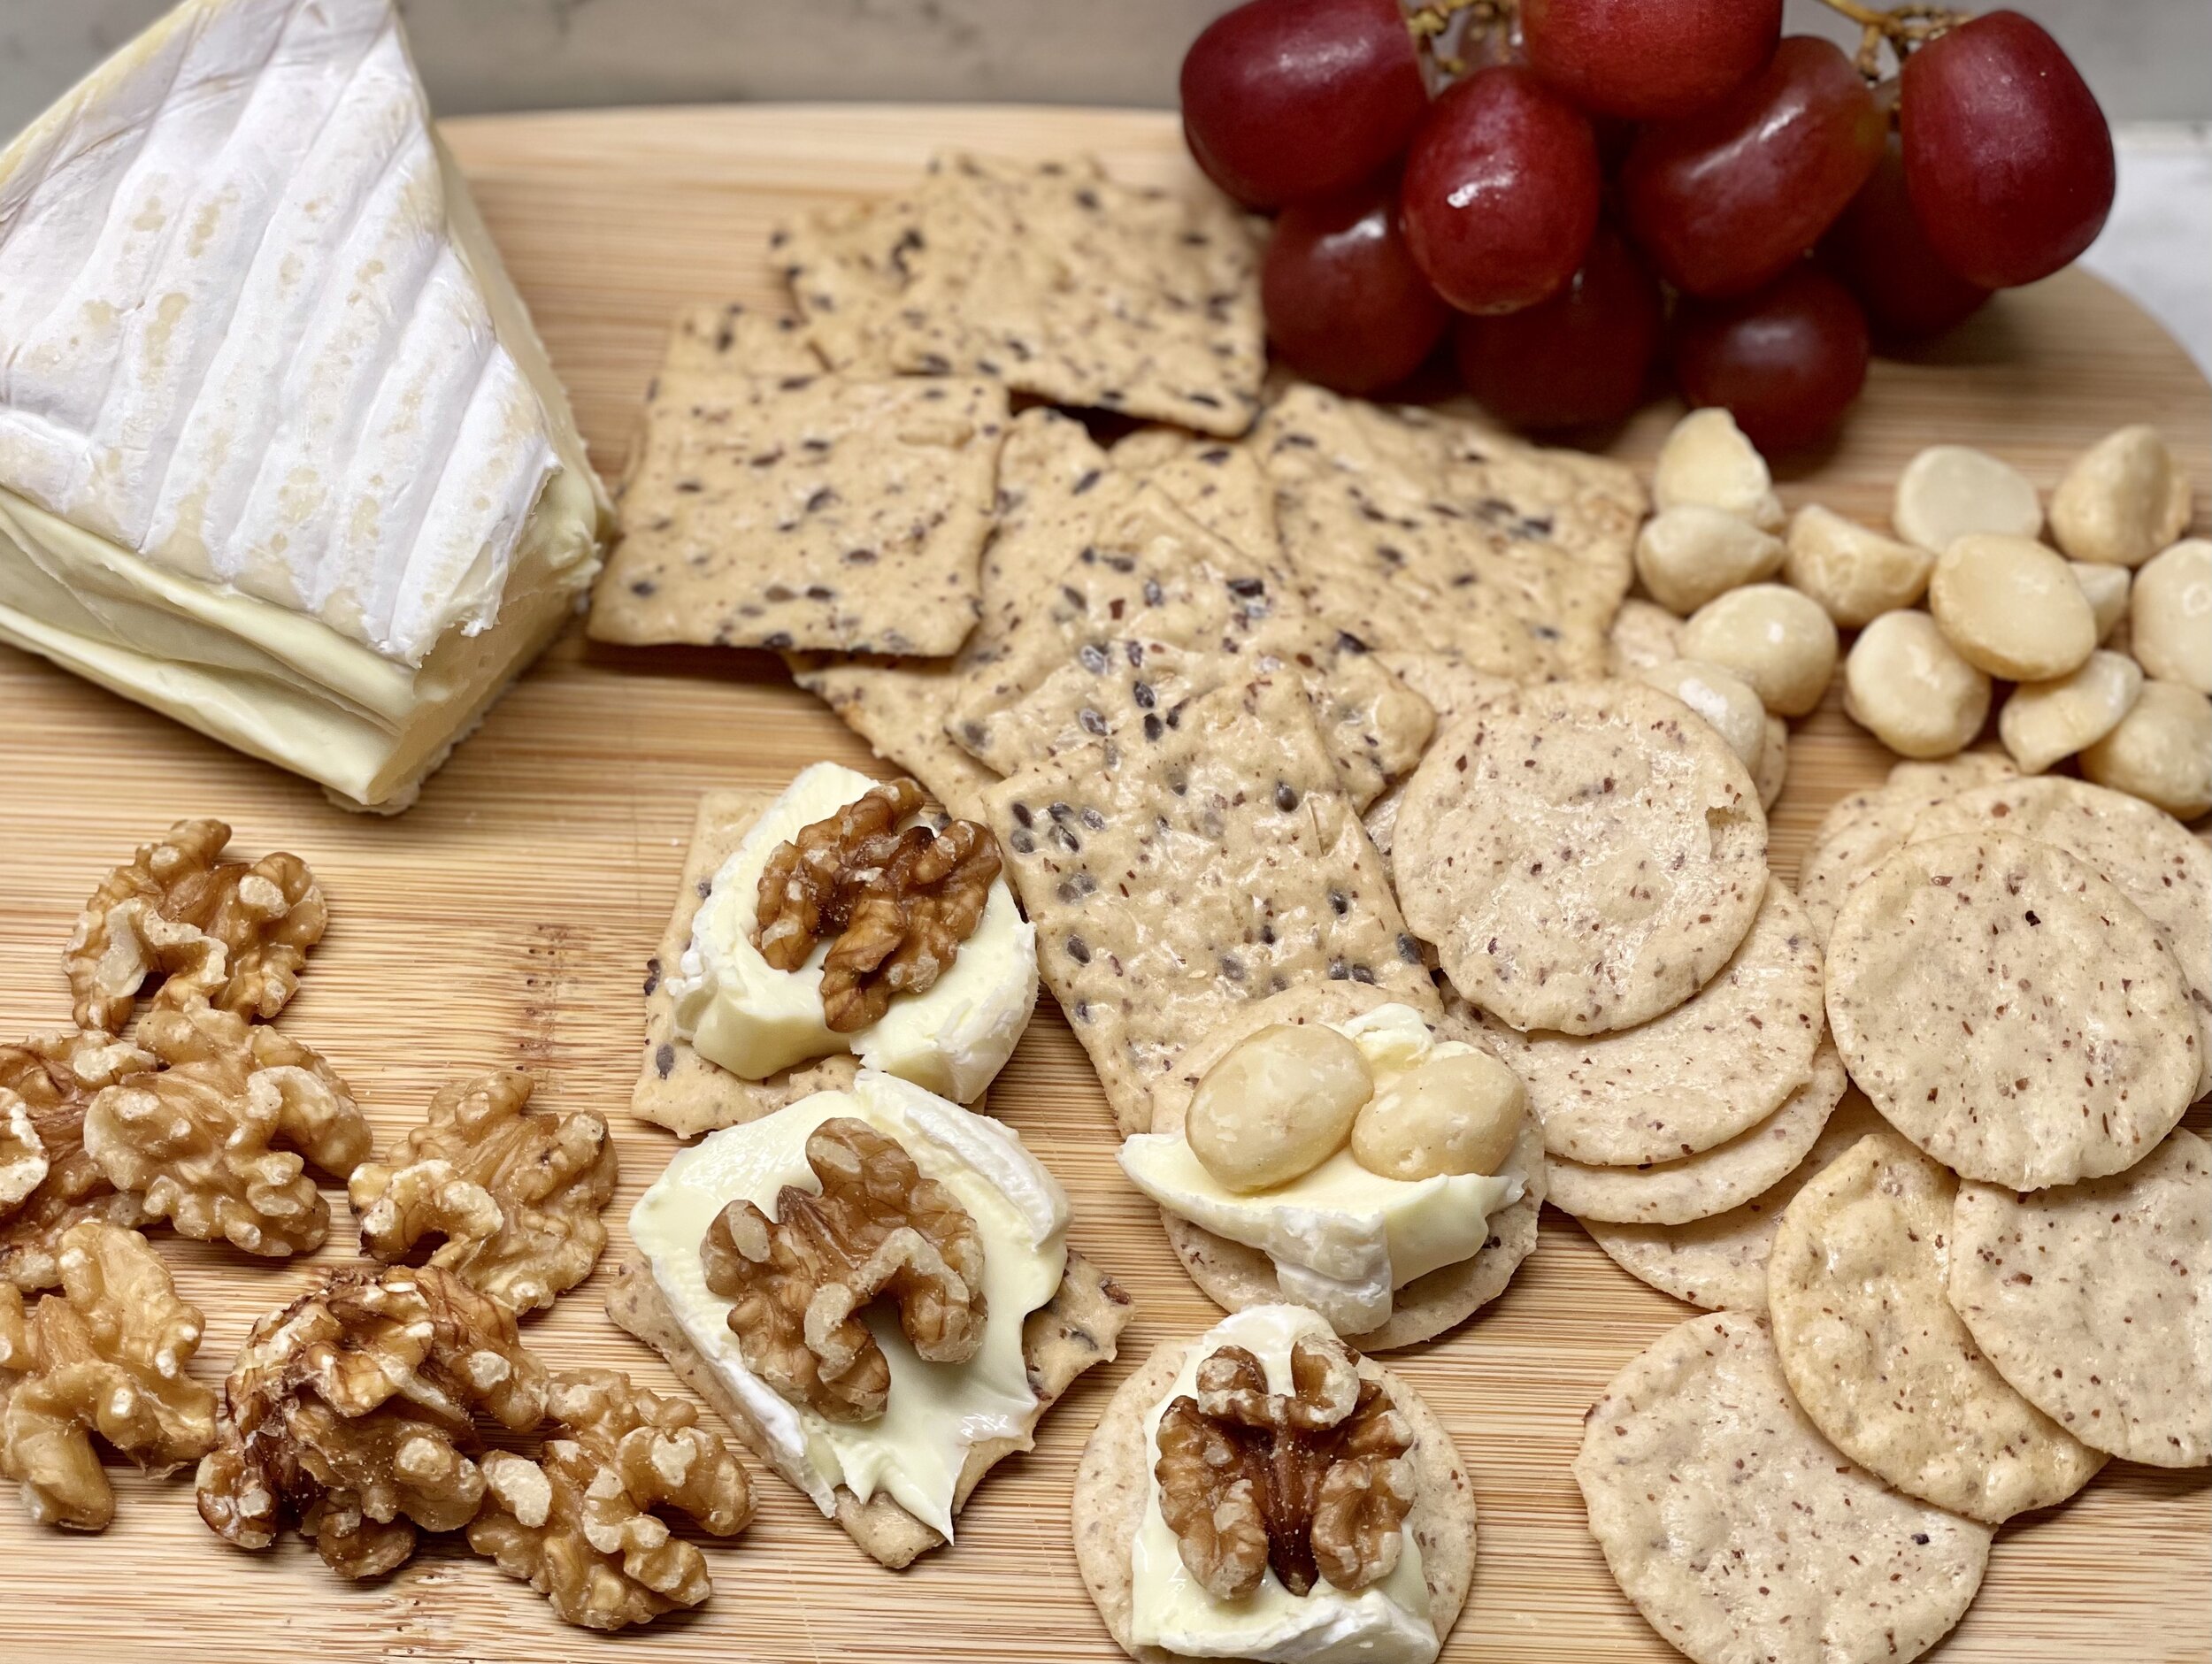
Ingredients
Triple cream brie cheese
Walnut halves
Macadamia nuts roasted and salted
Grapes
Low FODMAP crackers - I like our amazing garlic parmesan seed crackers or use your favorite low FODMAP crackers from the store such as Blue Diamond Artisan Nut Thins with Flax Seeds or Blue Diamond Almond Nut Thins
Directions
Bring brie to room temperature for the best flavor and texture.
Spread a chunk of brie on a cracker and add a walnut or macadamia nut.
Serve with a handful of grapes.
Eat and enjoy every bite because you can!
Pro Tip: You can use our amazing garlic parmesan seed crackers to avoid any flour, or use your favorite low FODMAP crackers from the store. A couple of good examples are Blue Diamond Artisan Nut Thins with Flax Seeds or Blue Diamond Almond Nut Thins but there are other low FODMAP crackers out there. You can use the Spoonful app to help identify them or just read the labels and avoid those containing garlic or onion powder, high fructose corn syrup, or other high FODMAP ingredients.
This post may contain affiliate links so you can easily purchase items listed on the page. There is no increased cost to you for purchasing items through these links so feel free to use them!
More Deliciously Low FODMAP™ lunch ideas you might enjoy
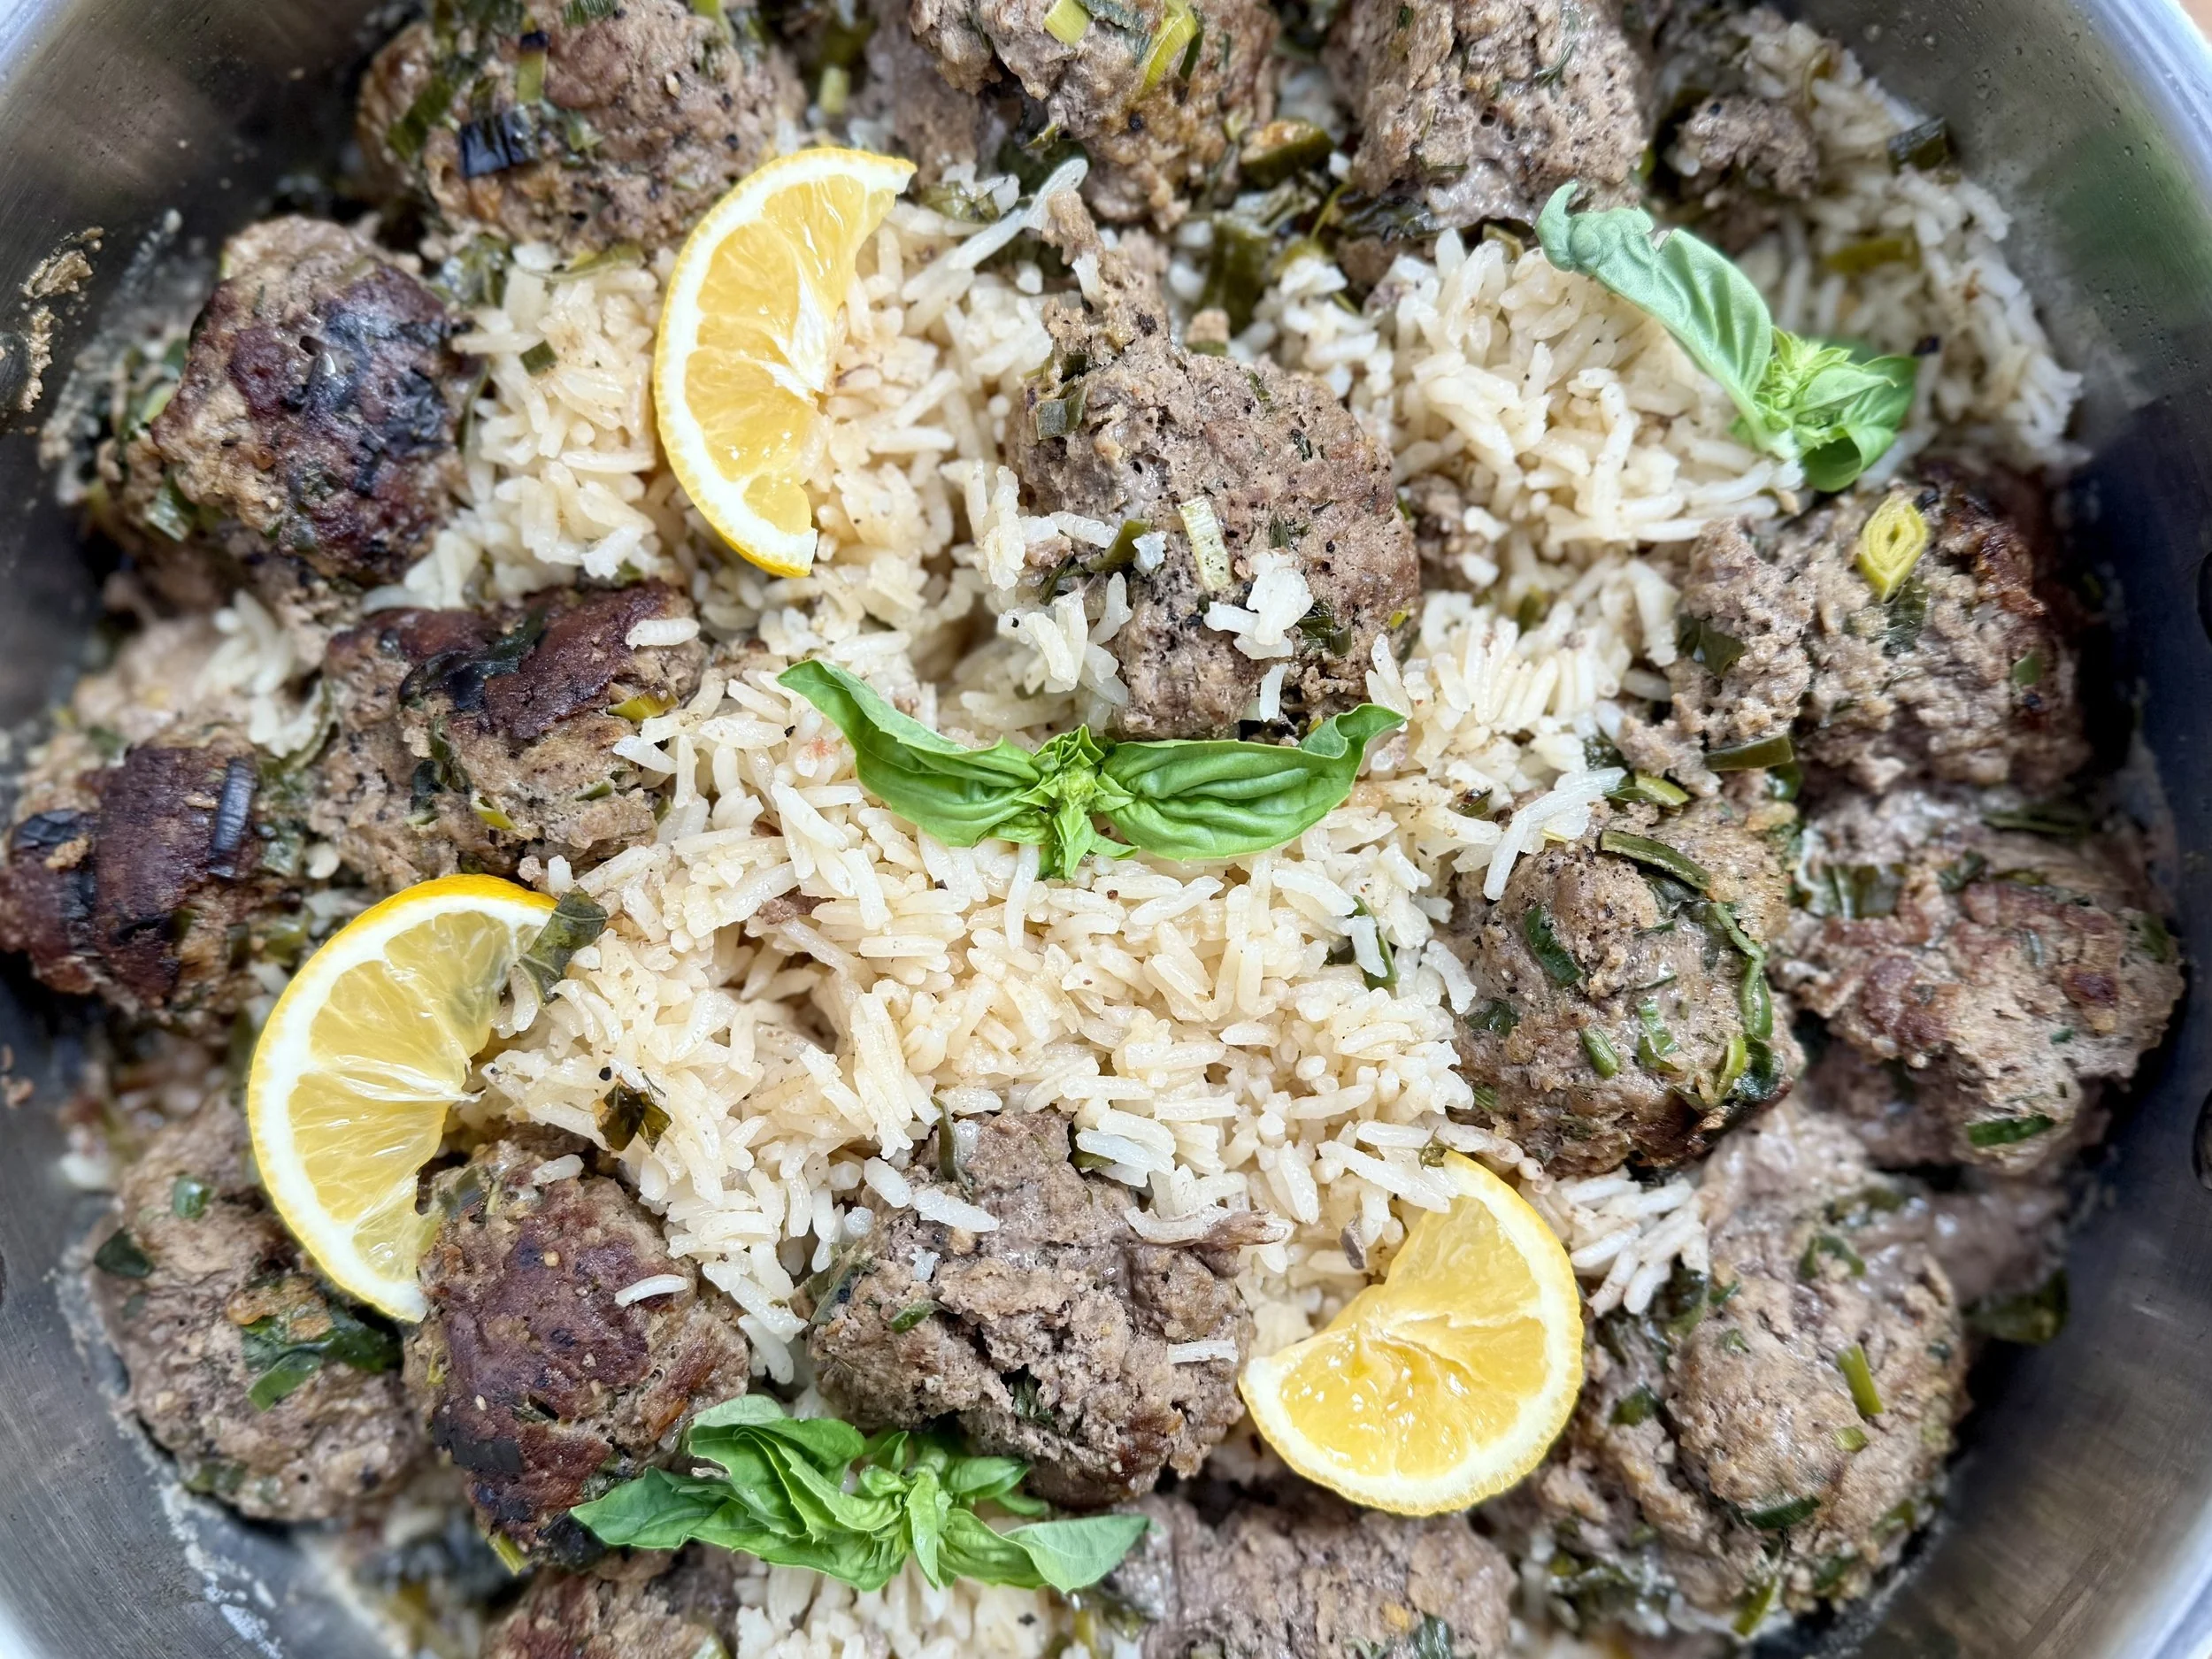
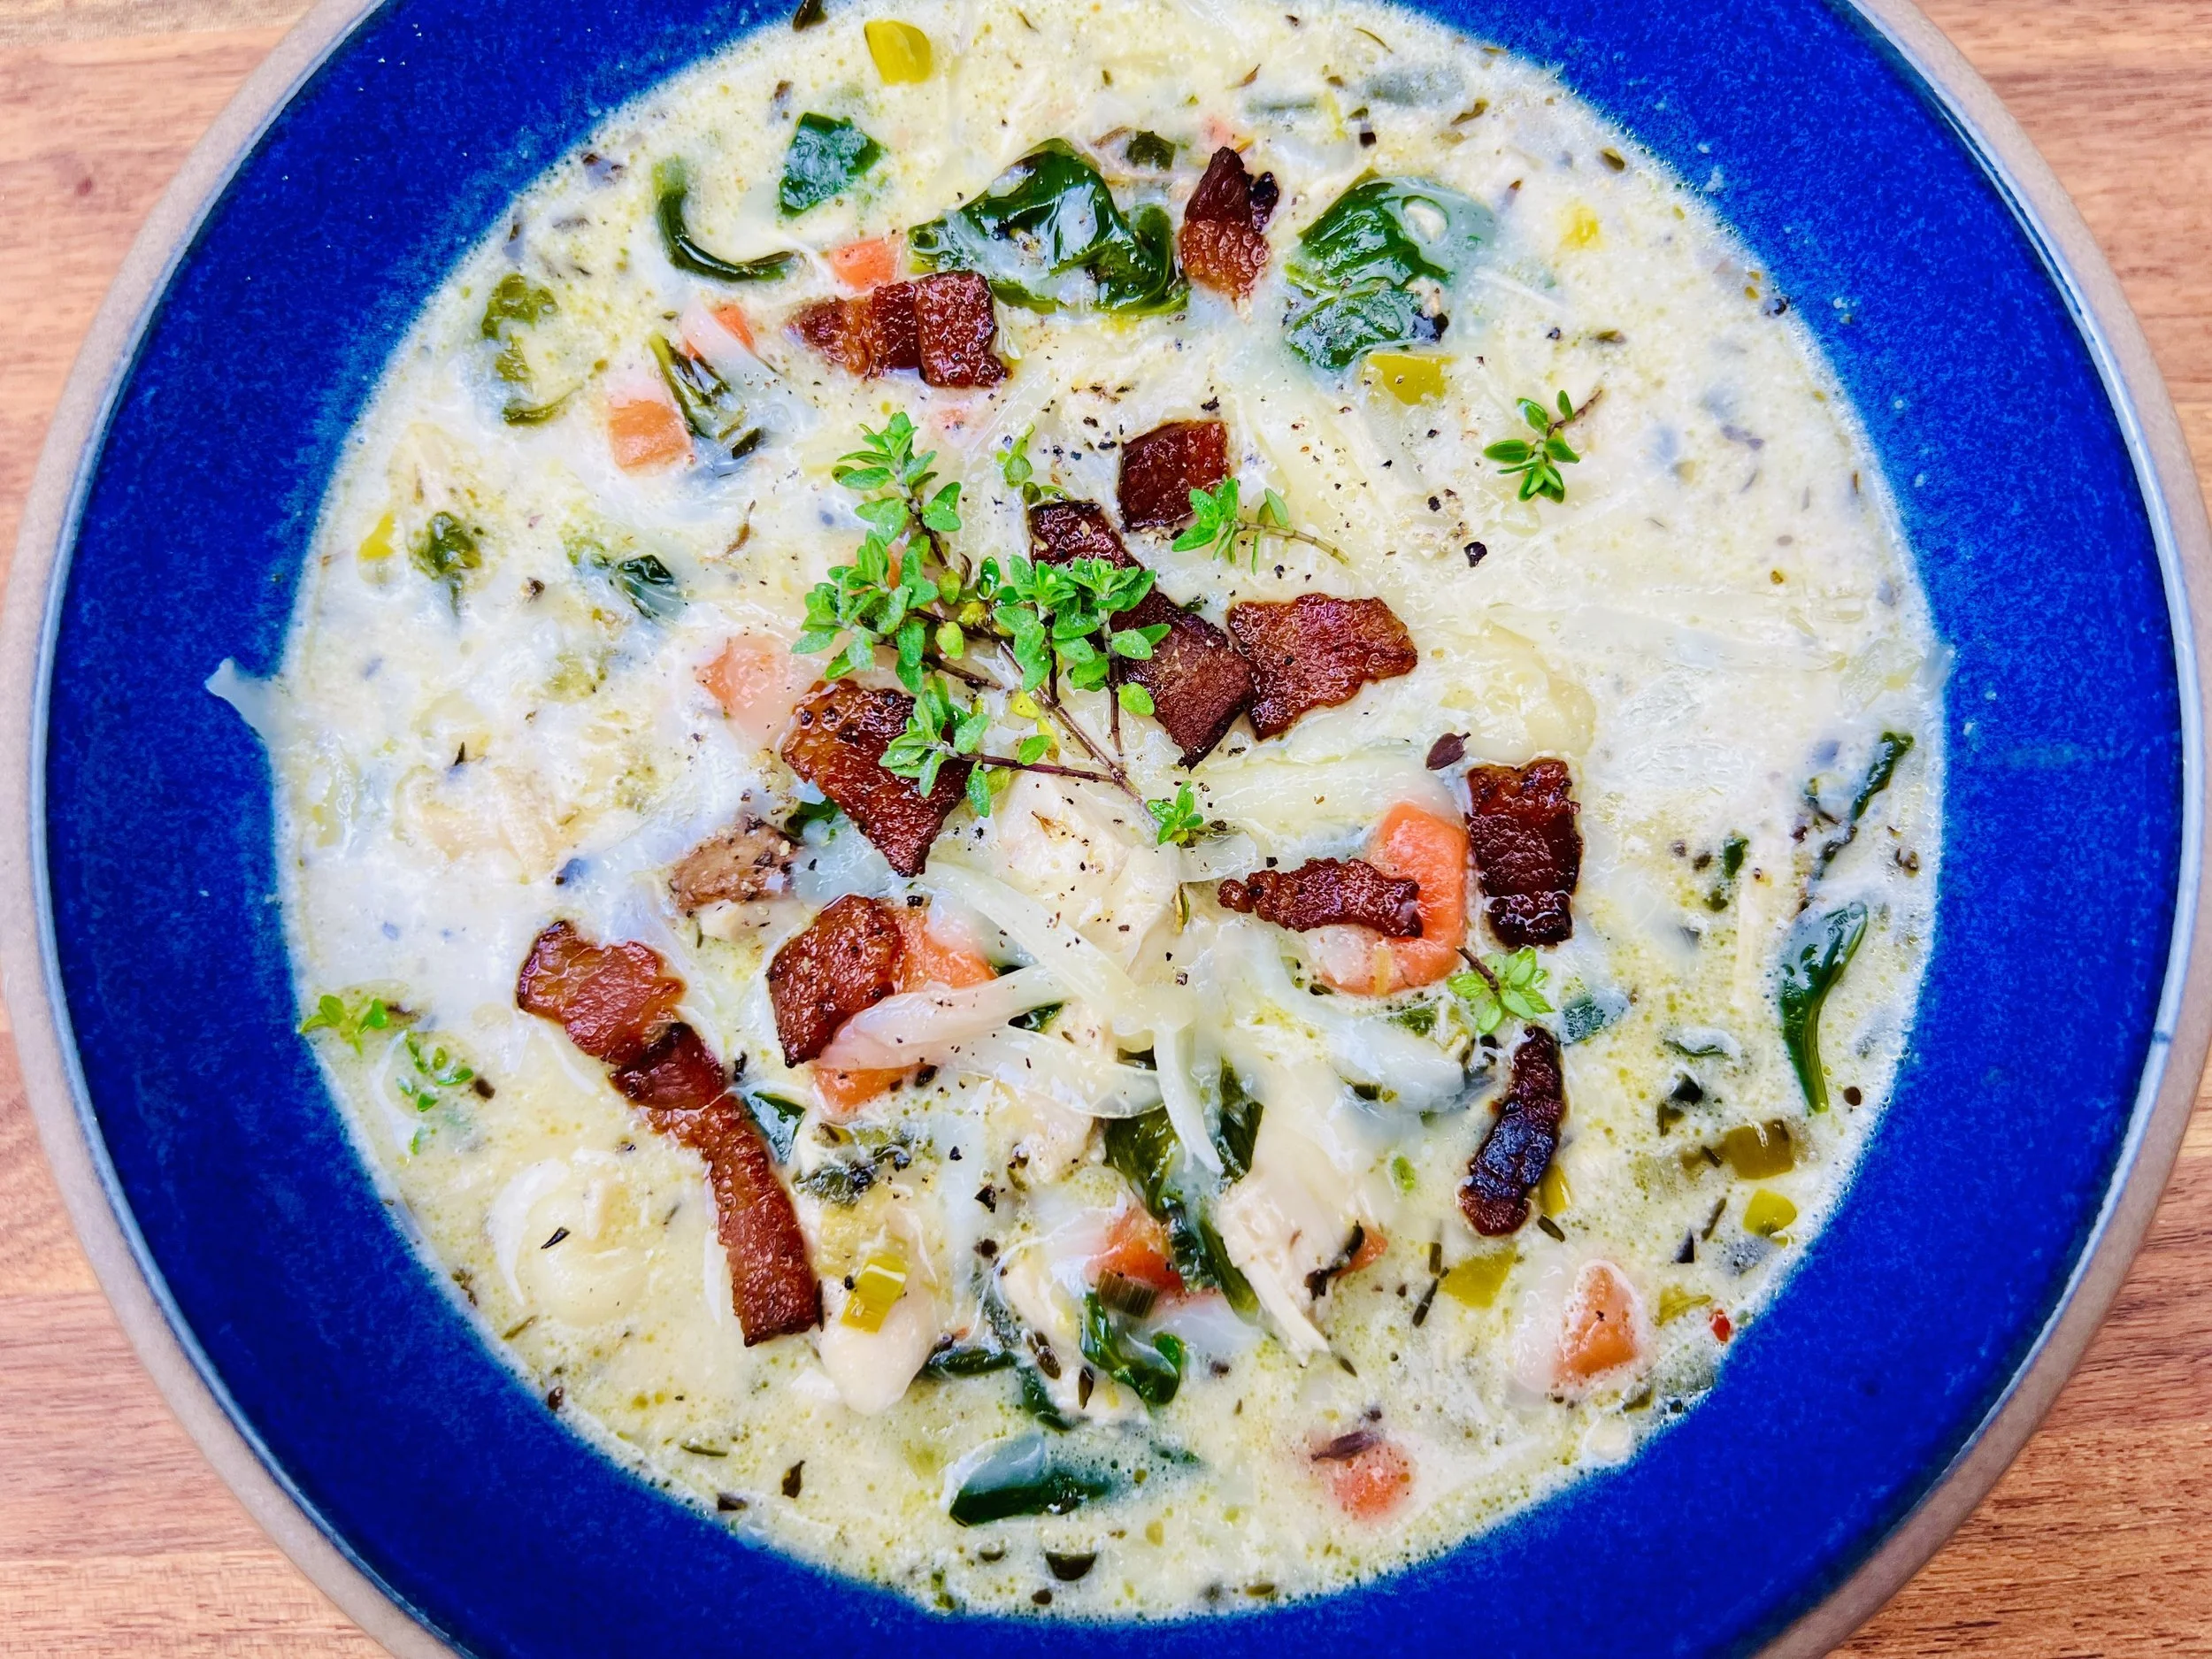
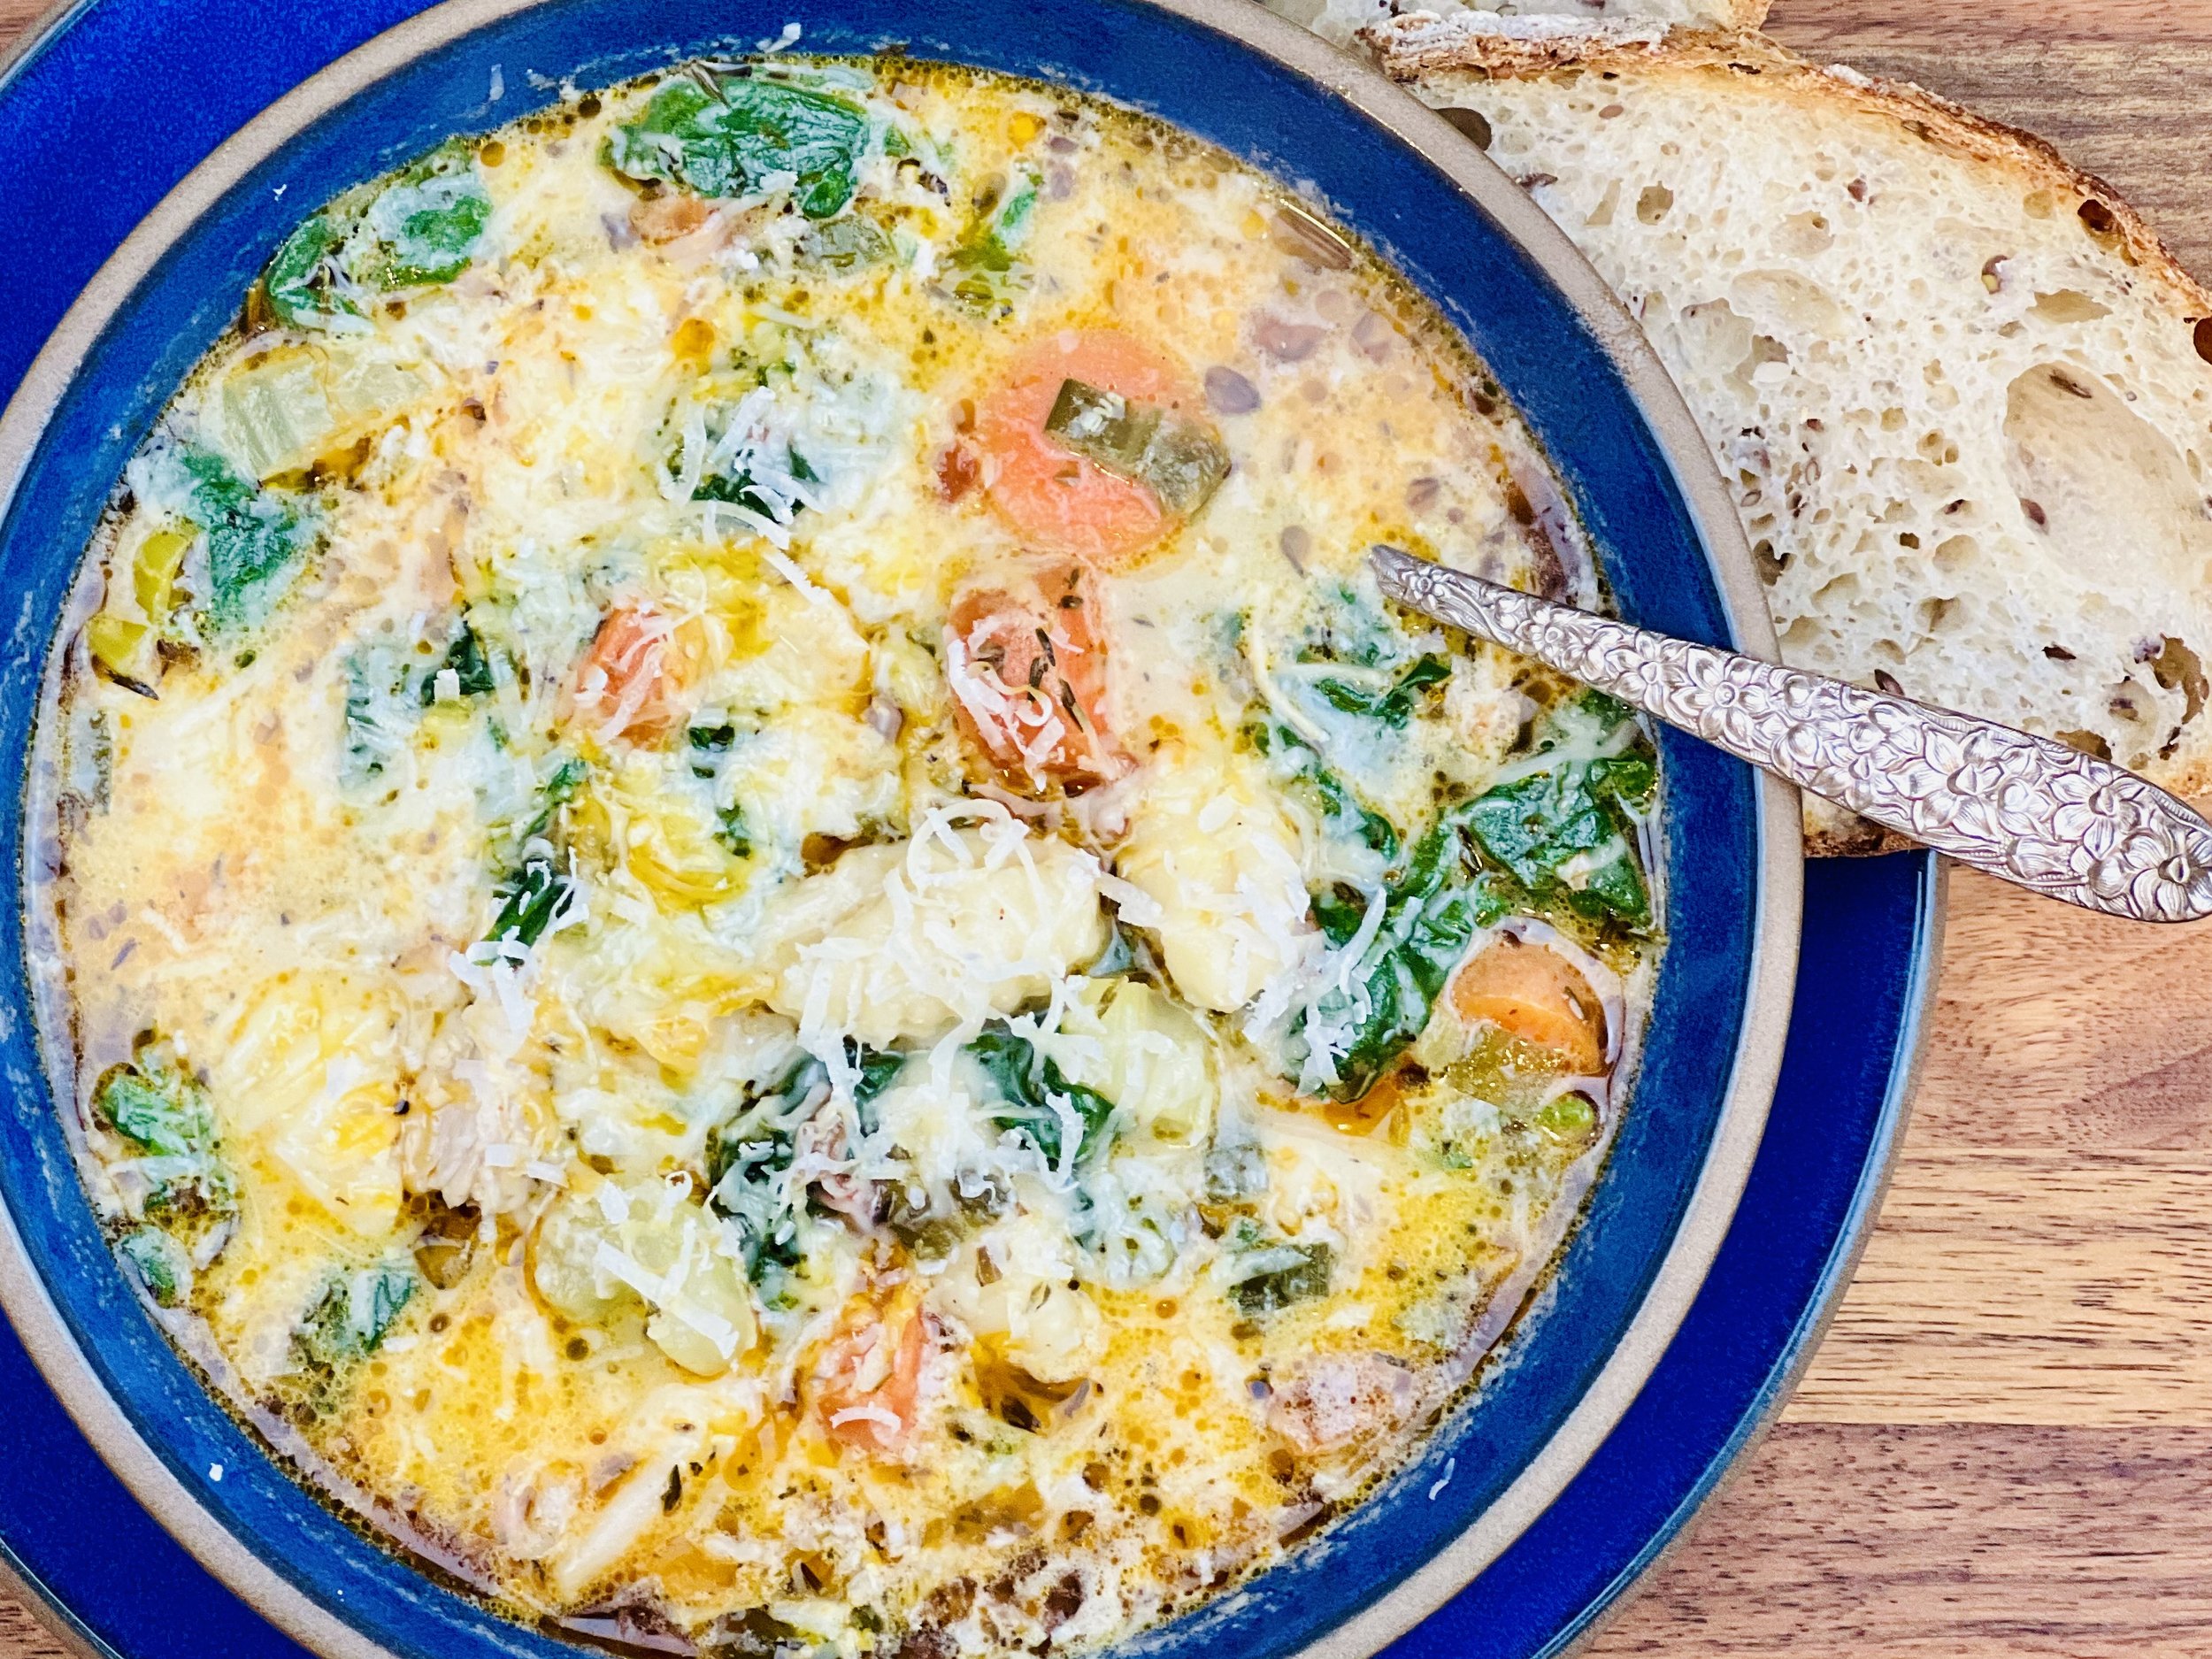
White cheddar and chicken risotto with baby greens (low FODMAP)
45 Minutes • Gluten-free • Low FODMAP • Serves 4 - 6
45 Minutes • Gluten-free • Low FODMAP • Serves 4 - 6 • This is an incredibly creamy risotto that combines beautifully with the sauteed chicken and baby greens. It makes an excellent main course or a delicious side dish. Bring it to a potluck and you’ll be the star of the show.
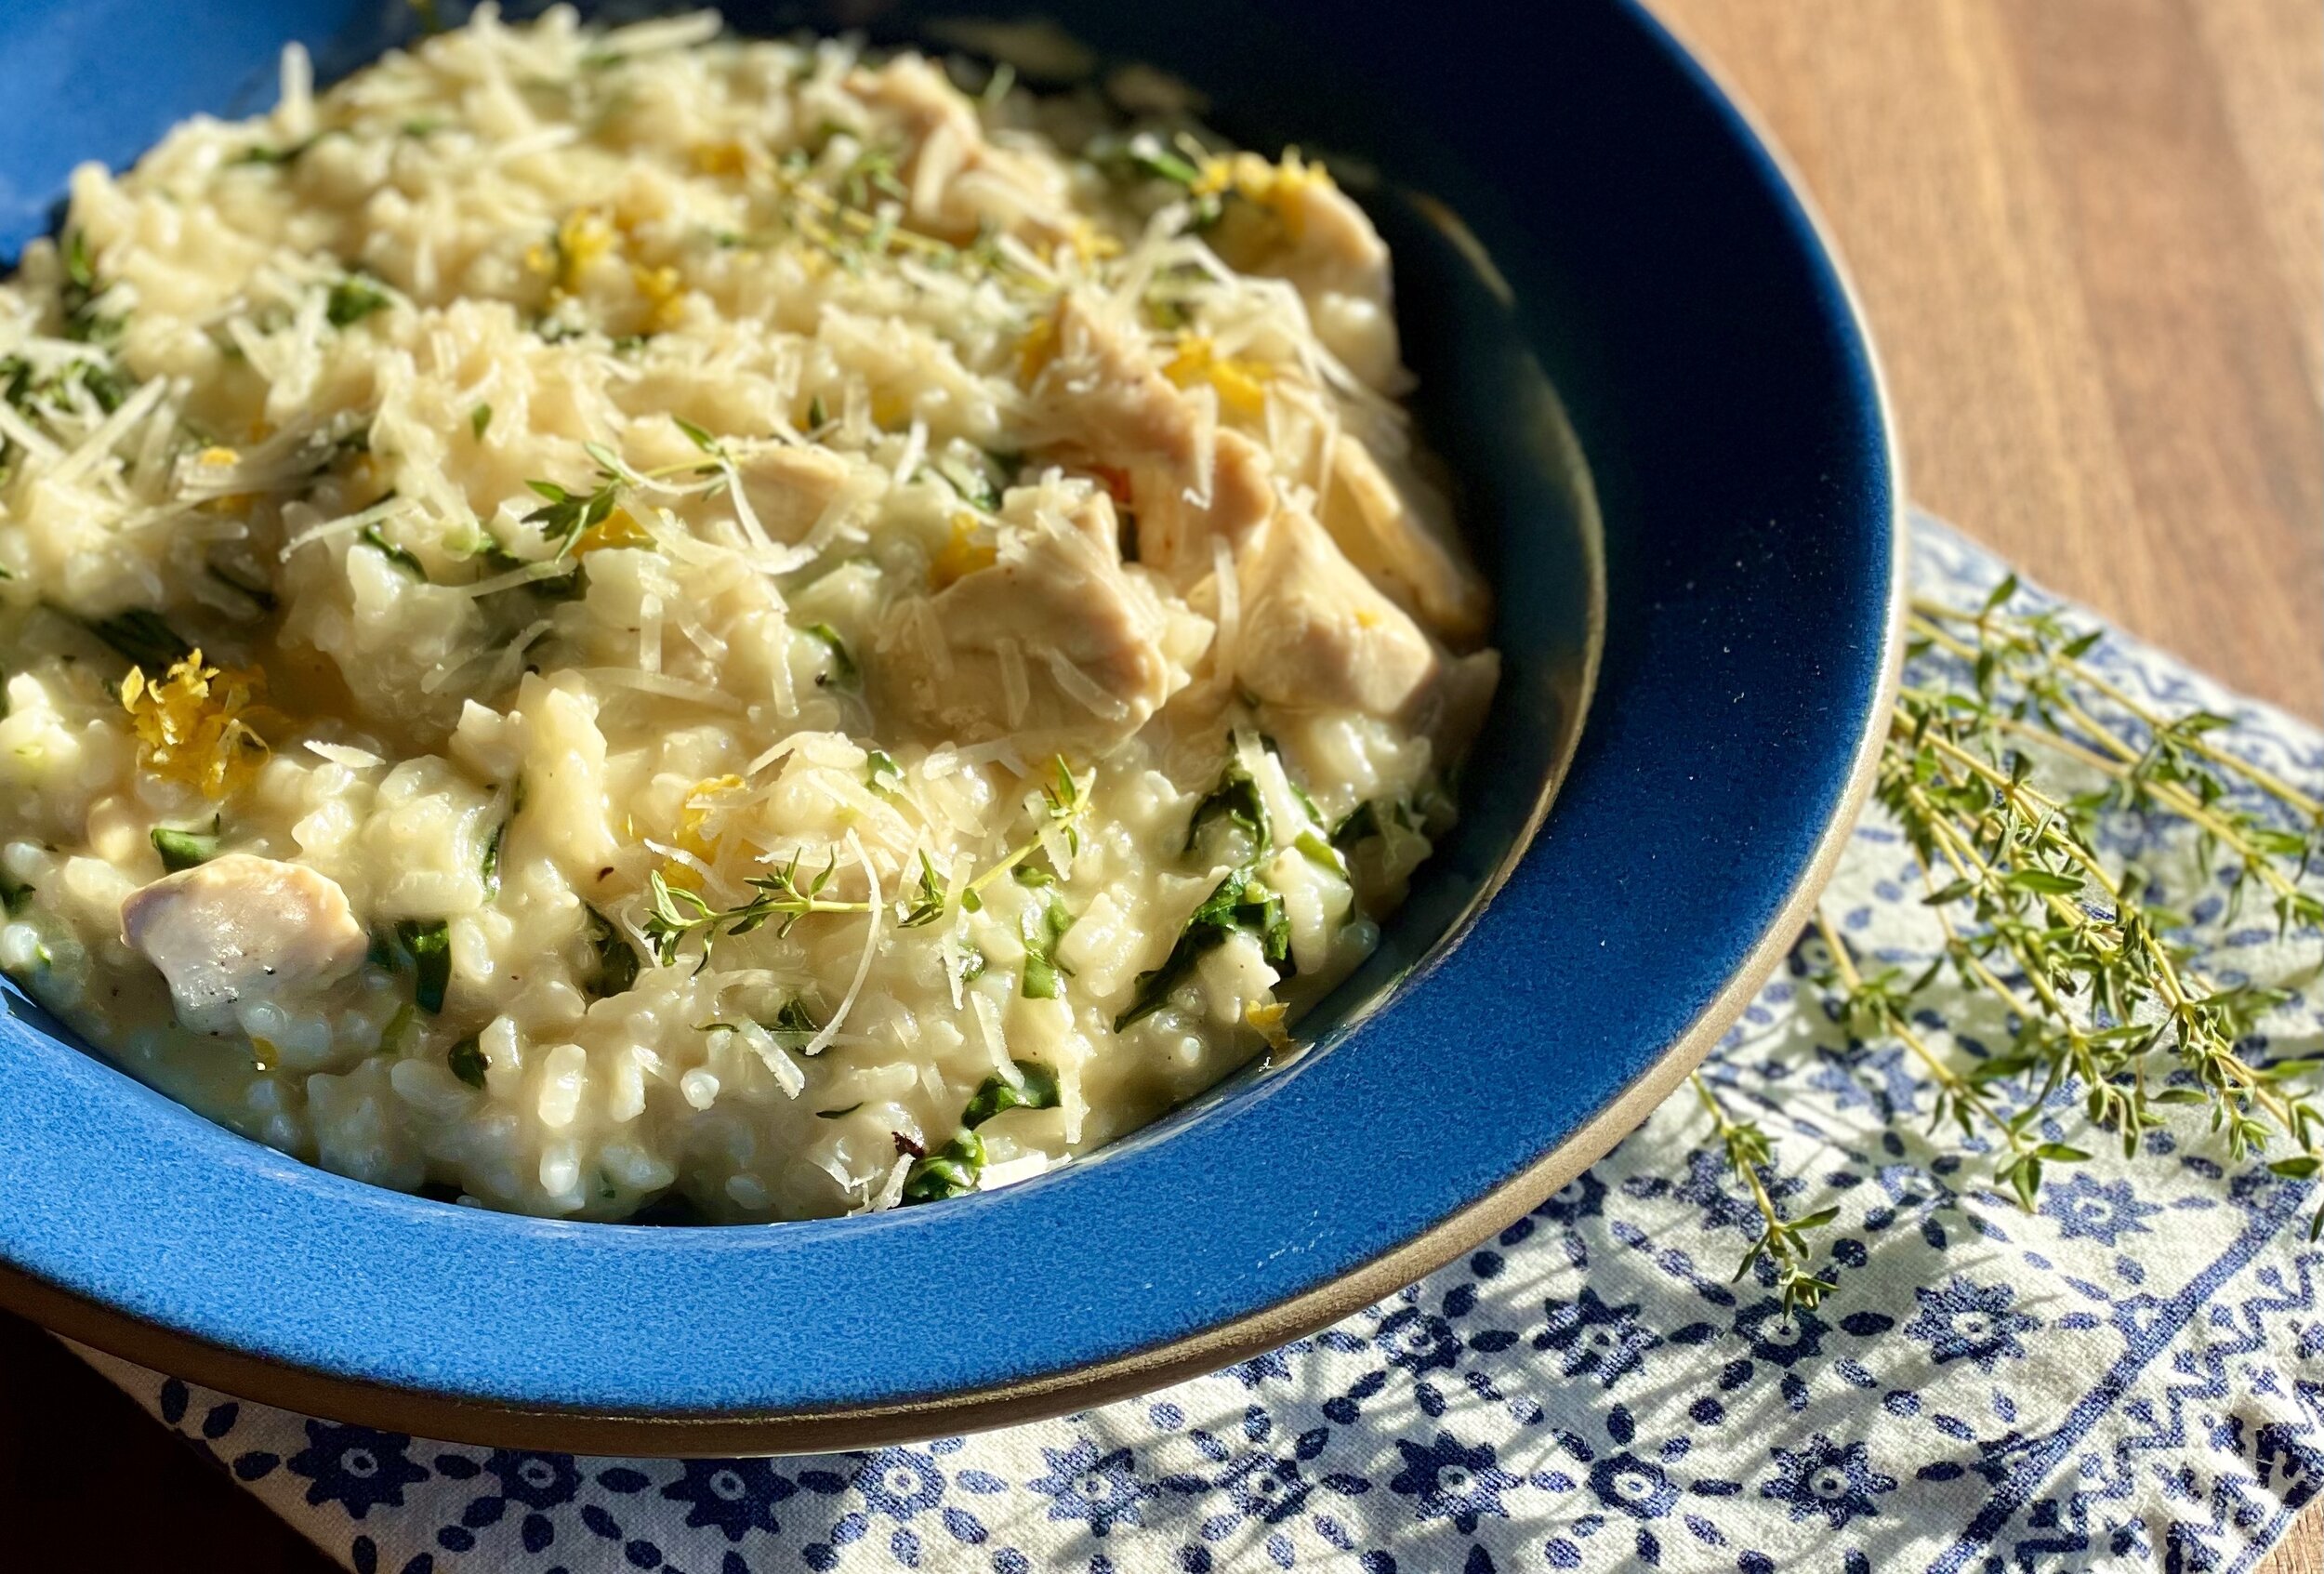
Ingredients
1 chicken breast, thinly sliced in bite-size pieces
2 teaspoons Smoke N Sanity Lemon Pepper (optional but very delicious-get 10% off with code IBSGC10)
Kosher salt and pepper
2 tablespoons garlic-infused olive oil
5 cups low FODMAP chicken broth plus up to one additional cup if needed (I like Whole Foods Organic 365 brand)
1 tablespoon garlic-infused olive oil
2 tablespoons salted butter
2 cups arborio rice or Japanese sushi rice
1 cup dry white wine, such as Pinot Grigio, Chardonnay, or Sauvignon Blanc
1 teaspoon kosher salt
1 tablespoon lemon zest, plus 3 tablespoons lemon juice
1/2 cup freshly grated parmesan cheese plus more for serving
8 ounces extra-sharp white cheddar cheese, grated
4 cups baby greens (such as kale, spinach, arugula, and/or bok choy) washed and chopped roughly
2 tablespoons fresh thyme leaves, chopped
Directions
Slice the chicken and season with lemon pepper (if using), salt, and pepper.
Heat 2 tablespoons of garlic-infused olive oil in a large skillet over medium-high heat. When the oil shimmers add the chicken in one layer and cook until chicken is just cooked through, 1 to 2 minutes per side depending on the thickness of your slices. Transfer cooked chicken to a plate and set aside.
In a saucepan or microwave-safe bowl, heat the chicken broth until steaming.
Heat 2 tablespoons butter in a large pot or Dutch oven set over medium-high heat. Stir in the rice, cook until lightly golden and toasted, 2-3 minutes. Add the wine and 1 teaspoon salt, continue to cook for 2-3 minutes, or until the wine has mostly absorbed into the rice. Stir in 5 cups of the warmed broth and bring to a boil over high heat, cover, reduce the heat to low, and simmer for 15 minutes.
After 15 minutes, stir in the additional warmed broth (to get the consistency you prefer), the lemon juice, and the grated parmesan. Stir for a minute or two until thickened. Add the grated cheddar, lemon juice, lemon zest, and thyme. Stir to combine, then remove from the heat. If the risotto is too thick, add additional warm broth to thin to your desired consistency. It should be creamy, but with just a touch of liquid. Taste, and adjust seasoning with salt.
While the risotto cooks, make the greens. Heat the remaining 1 tablespoon olive oil in a medium skillet over medium-high heat. Sauté the greens until softened, about 3 minutes. Remove from the heat and stir the sauteed greens into the rice mixture along with the cooked chicken.
To serve, divide the risotto into bowls sprinkled with additional parmesan cheese.
Eat and enjoy every bite because you can!
This post may contain affiliate links so you can easily purchase items listed on the page. In some cases we have provided a special discount code for IBS Game Changers so be sure to use it!
More Deliciously Low FODMAP™ main courses you might enjoy
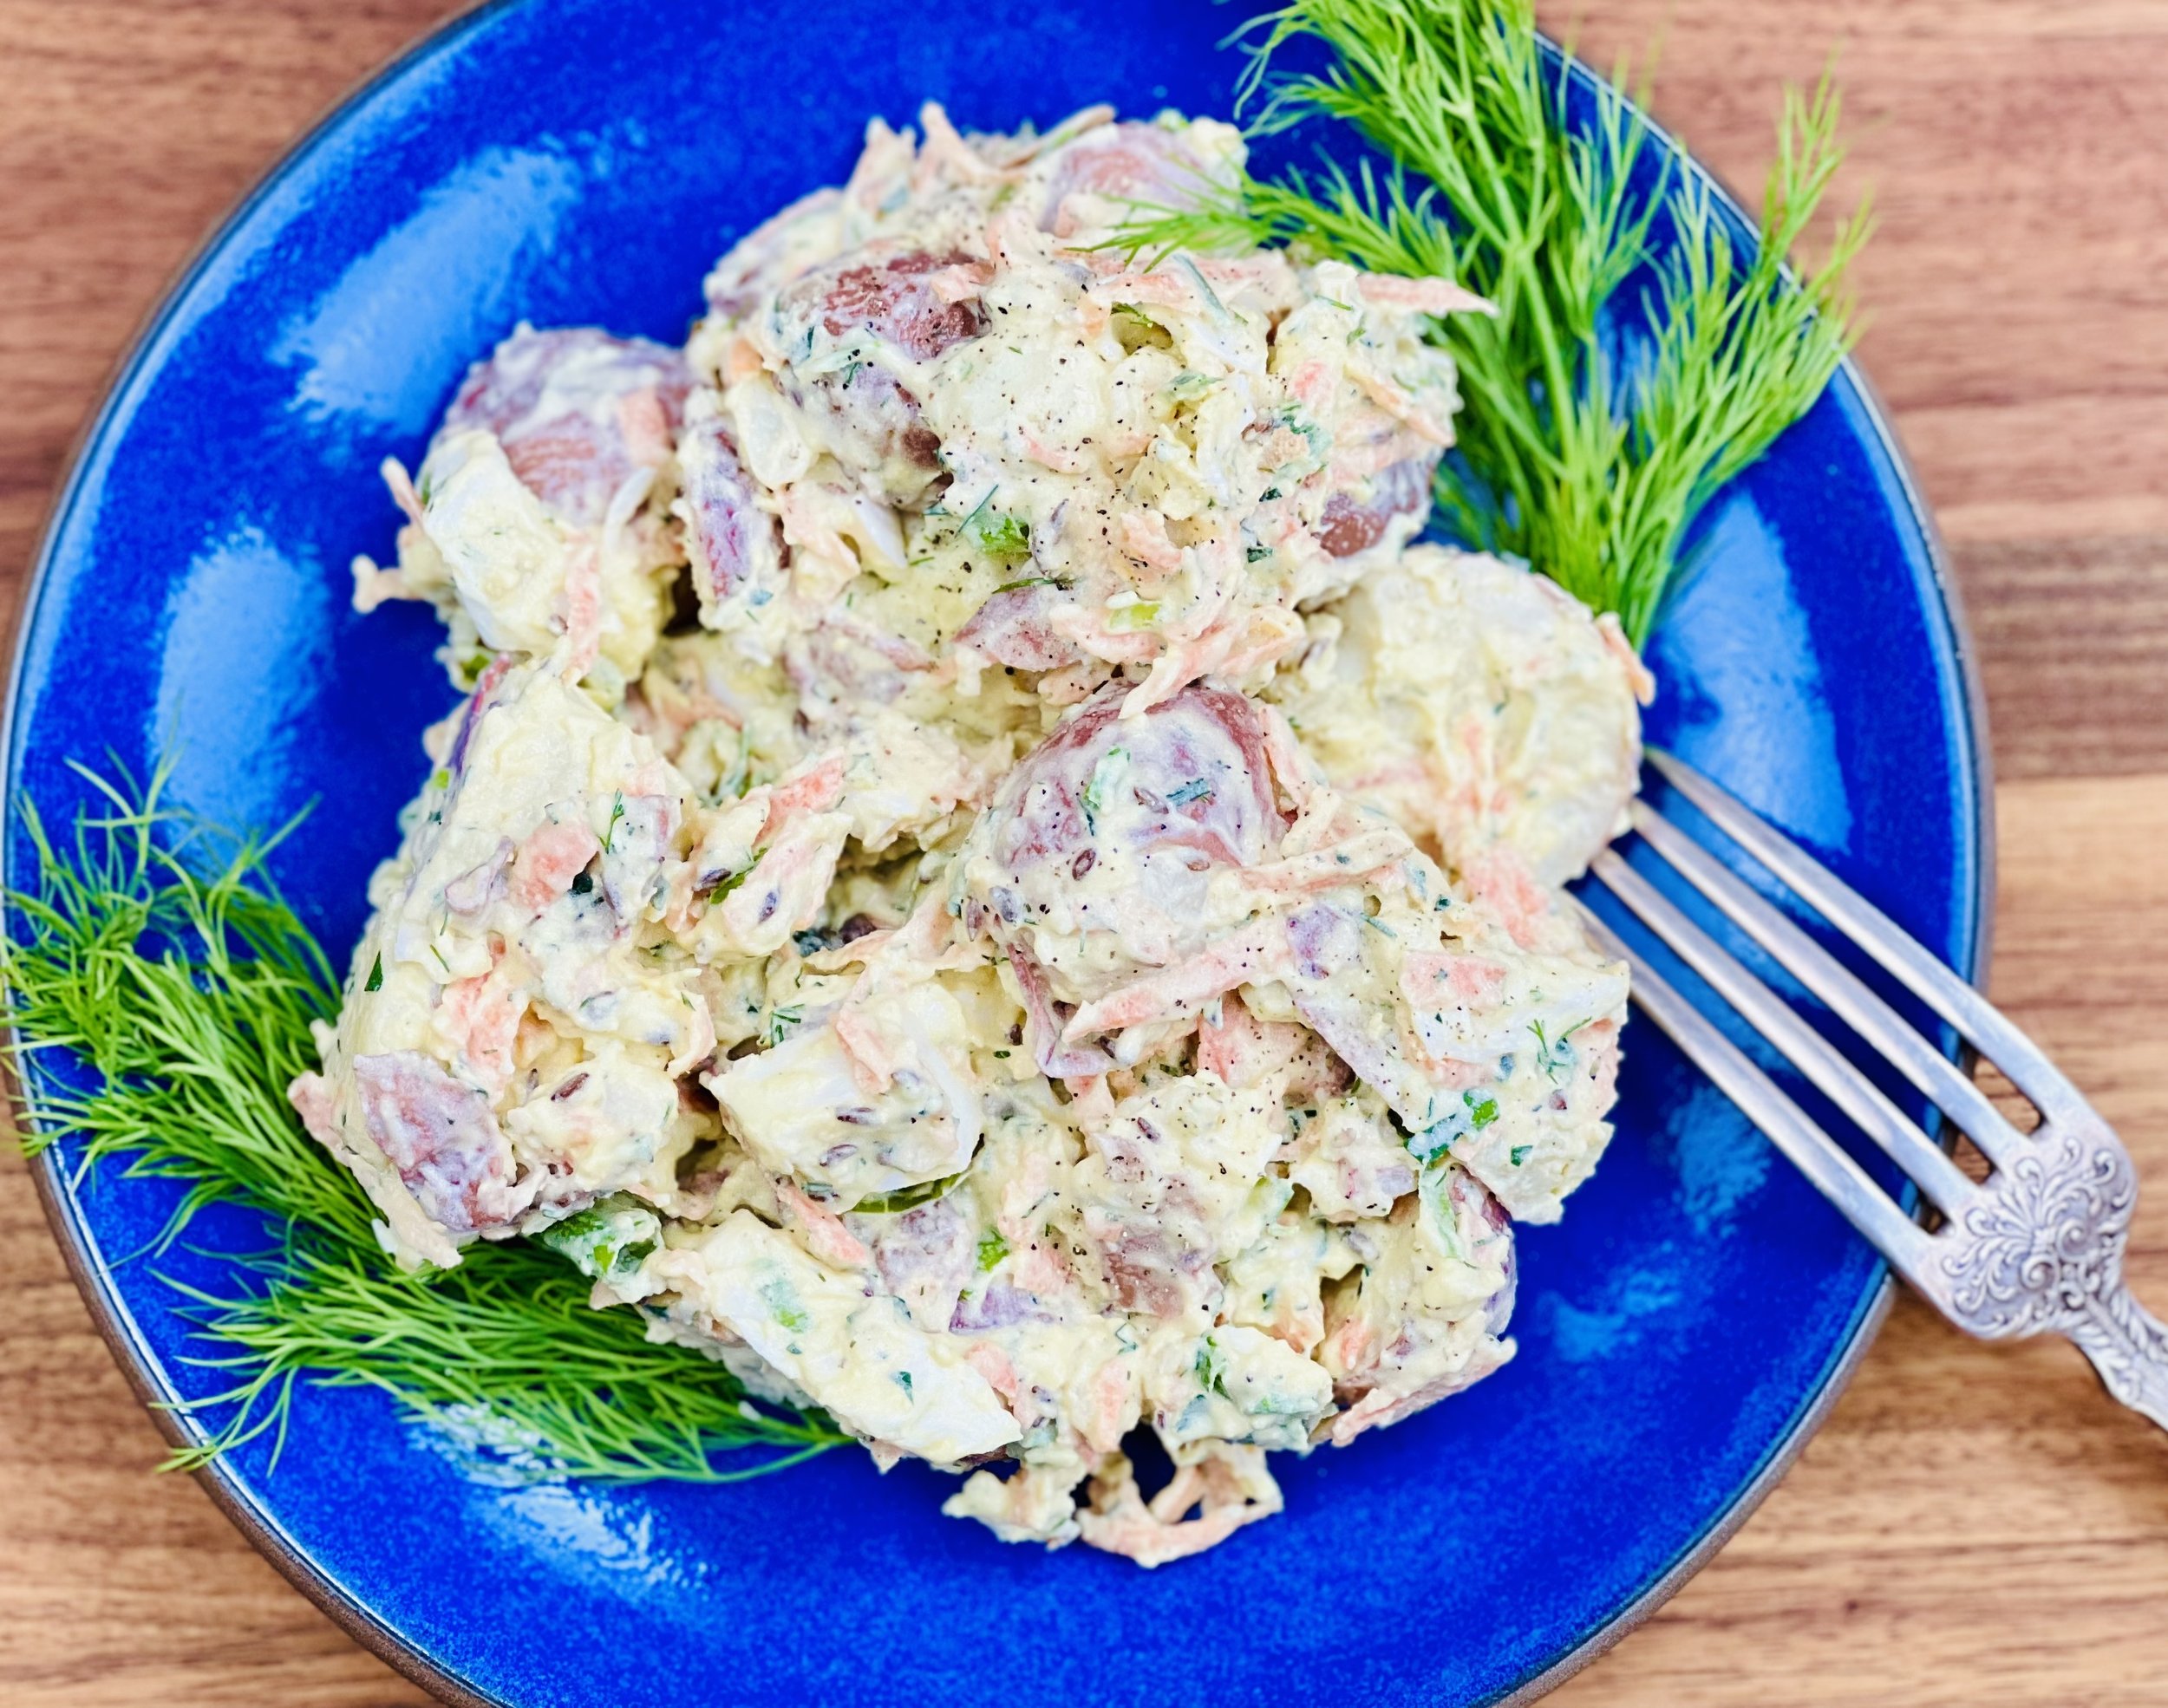
10 Minutes • Gluten-free • Low FODMAP • Serves 2 - 3