Deliciously Low FODMAP
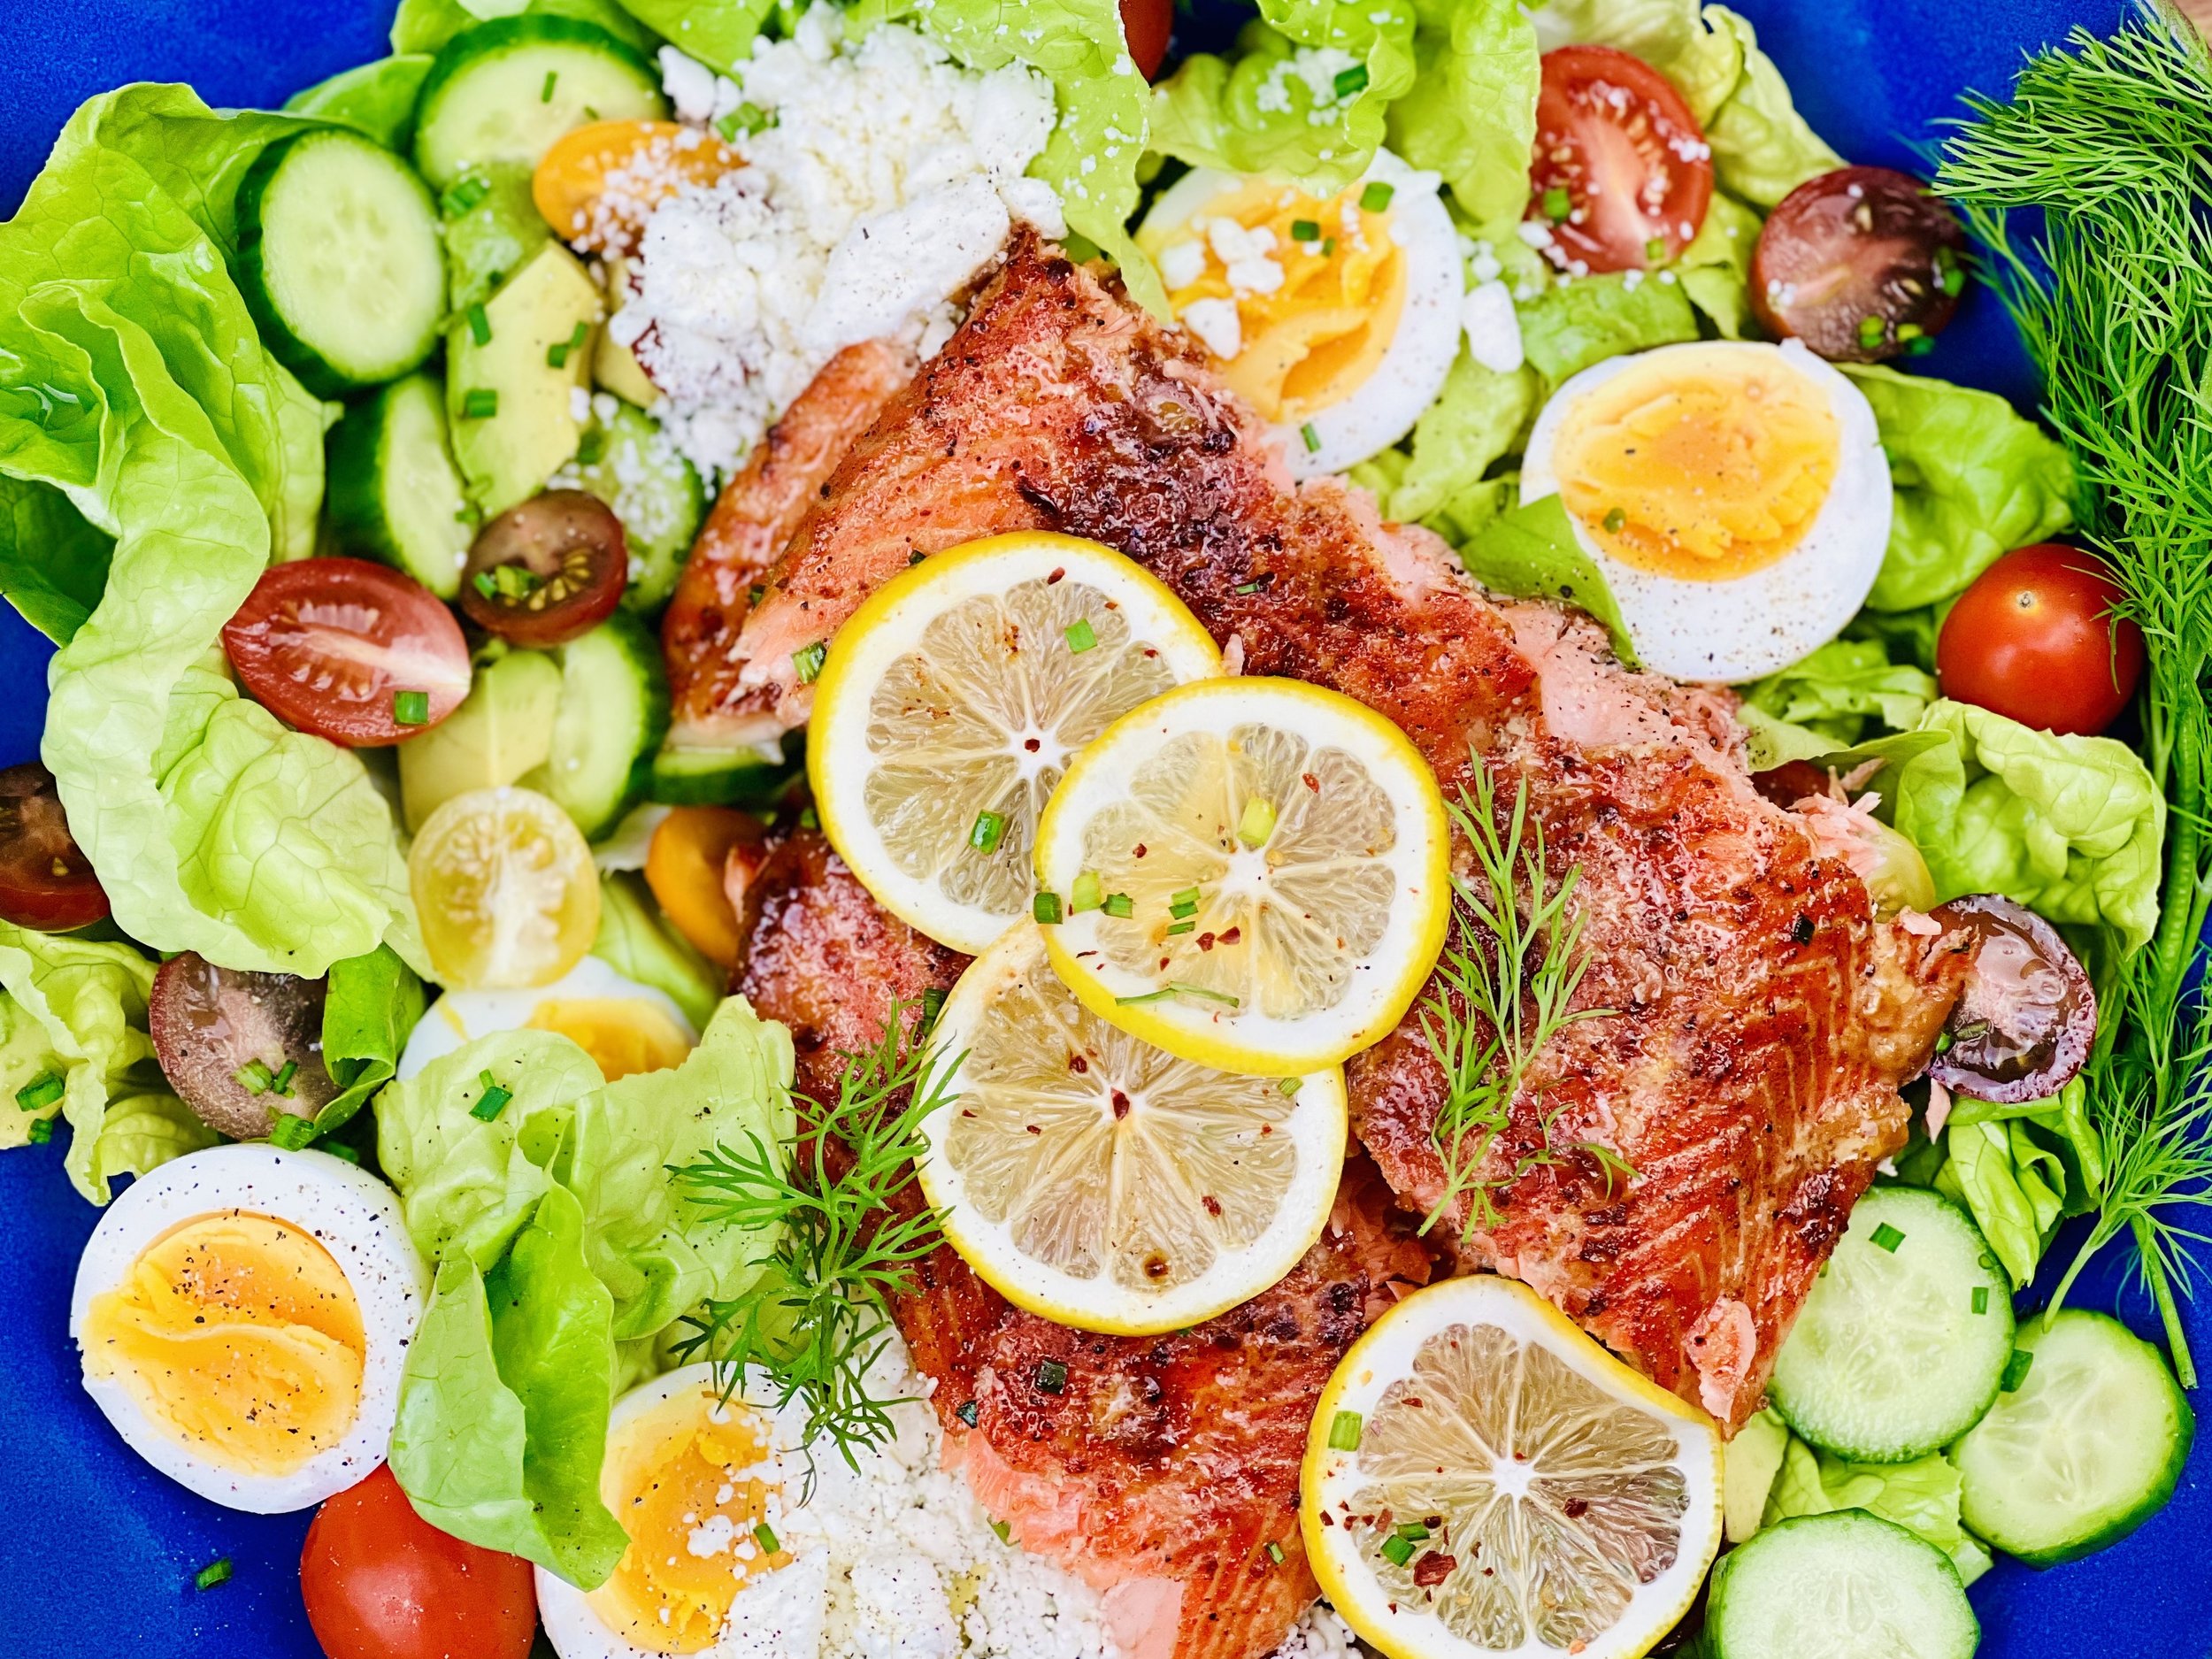
Inspire yourself with hundreds of delicious low FODMAP recipes, tips, and tools, and enjoy the abundance that is yours even when you have IBS.
Use the buttons and filters to find something specific or browse the complete collection for inspiration.
Discover a treasure trove of recipes with my FREE recipe club! Get new ideas delivered straight to your inbox every week.
Deliciously Low FODMAP is a trademark of IBS Game Changer, LLC
Filter to find Recipes and Tools
More Filtering Options
- All 829
- Appetizer 56
- BBQ 49
- Bowl 32
- Breakfast 69
- Cocktails 13
- Collection 1 58
- Collection 10 27
- Collection 11 30
- Collection 12 27
- Collection 13 31
- Collection 14 29
- Collection 15 31
- Collection 16 34
- Collection 17 31
- Collection 18 33
- Collection 19 36
- Collection 2 32
- Collection 20 33
- Collection 21 33
- Collection 22 40
- Collection 23 63
- Collection 24 48
- Collection 3 28
- Collection 4 29
- Collection 5 30
- Collection 6 32
- Collection 7 31
- Collection 8 31
- Collection 9 32
- Condiments 6
- Crock Pot 4
- Dessert 119
- Diabetes Game Changer Exception Protocol Contains Alcohol 11
- Diabetes Game Changer Exception Protocol Contains Flour 113
- Diabetes Game Changer Exception Protocol Contains Flour AND Sugar 79
- Diabetes Game Changer Exception Protocol Contains Sugar 52
- Diabetes Game Changer First Four Weeks 405
- Dinner 372
- Drink 8
- Easter 1
- Free Guide 17
- Gluten-free 688
- Gut Microbiome 2
- Guthealth 3
- Holidays 74
- IBS Triggers 4
- Keto Friendly 180
- Lactose-Free 184
- Low Carb 24
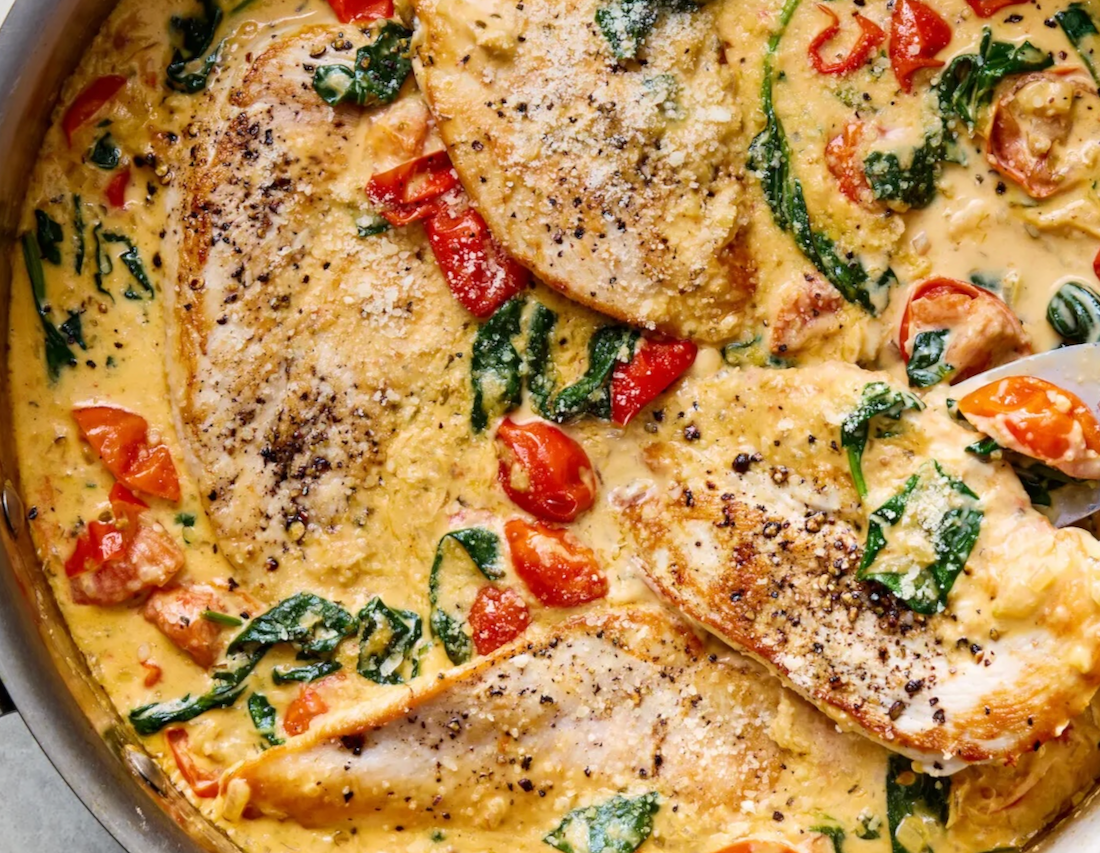
One Pan Creamy Low-FODMAP Tuscan-Style Chicken
10 Minutes prep • 30 Minutes cook • Low FODMAP • Gluten-Free • Serves 4 - 6
10 Minutes prep • 30 Minutes cook • Low FODMAP • Gluten-Free • Serves 4 - 6 • Ok to make-ahead: Steps 1 - 4
This one-pan wonder is the weeknight dinner your taste buds — and your gut — have been waiting for. Tender golden chicken simmers in a rich, creamy Tuscan-style sauce loaded with juicy cherry tomatoes, wilted spinach, and melty cheese. It comes together in under 40 minutes, uses a single pan, and is low-FODMAP. Soak up this amazing sauce with my Creamy Mashed Cauliflower or my Buttery Mashed Yukon Gold Potatoes.
See this new recipe in my FREE recipe club.
To streamline your search through hundreds of existing recipes, I'm moving the release of my new weekly creations to the Recipe Club on Patreon. In the club, you’ll get access to a treasure trove of low-FODMAP goodness, complete with collections and filters to use as your virtual cookbook!
Here's what awaits you in the club:
Exclusive weekly recipes: Be the first to try my latest delicious low-FODMAP creations!
Simple & Easy: My recipes continue to focus on readily available ingredients and effortless preparation, perfect for family-friendly meals (no more separate low-FODMAP meal prep!).
Hundreds of existing recipes: Gain access to my entire library of low-FODMAP recipes, all conveniently organized.
You can join for free or sign up for only $5/month. Your support fuels my passion for creating new, delicious, and easy-to-make low-FODMAP recipes just for you.
Let's go on this delicious low-FODMAP journey together.
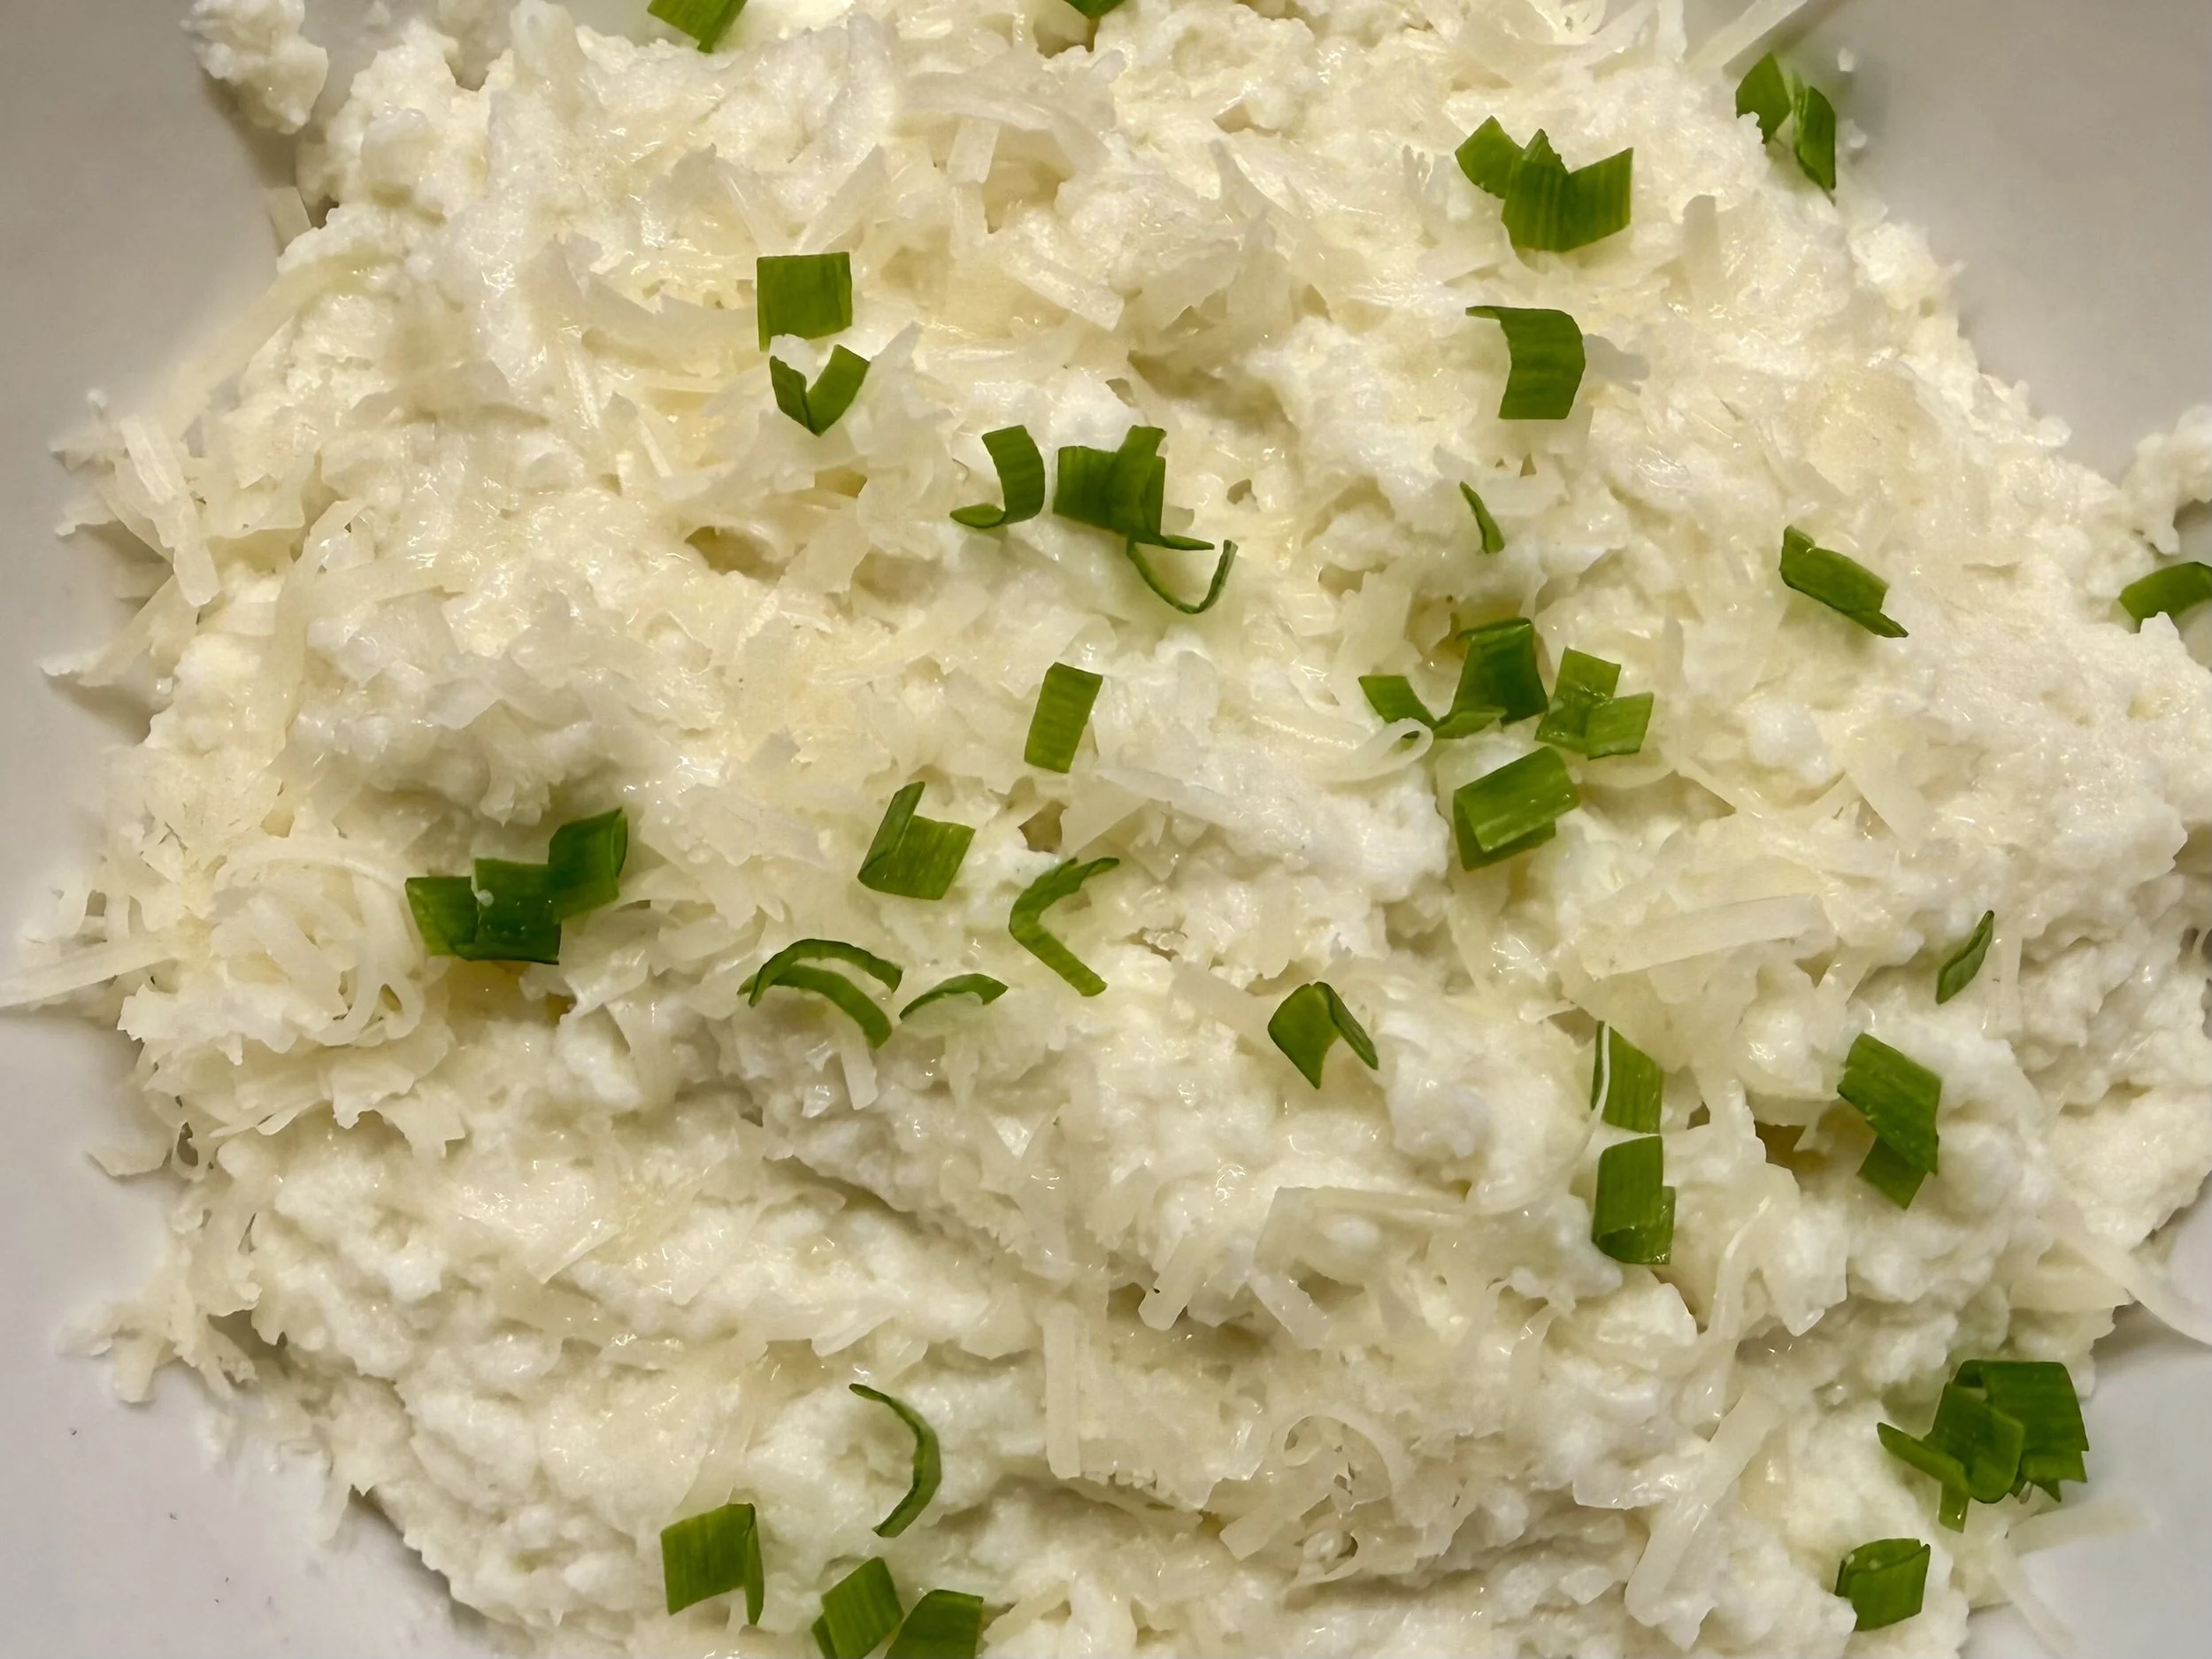
Delicious Creamy Mashed Cauliflower (Low FODMAP)
10 Minutes prep • 10 Minutes cook • Low FODMAP • Gluten-Free • Serves 4 - 6
10 Minutes prep • 10 Minutes cook • Low FODMAP • Gluten-Free • Serves 4 - 6 • Ok to make-ahead: Steps 1 - 3
Missing mashed potatoes? This creamy, mashed cauliflower is about to become your new best friend. Loaded with rich Manchego (or Parmesan), a dollop of lactose-free sour cream, and just enough butter to make it irresistible, this low-FODMAP side dish is comfort food you can actually feel good about. No bloat. No regrets. Just pure, velvety deliciousness.
See this new recipe in my FREE recipe club.
To streamline your search through hundreds of existing recipes, I'm moving the release of my new weekly creations to the Recipe Club on Patreon. In the club, you’ll get access to a treasure trove of low-FODMAP goodness, complete with collections and filters to use as your virtual cookbook!
Here's what awaits you in the club:
Exclusive weekly recipes: Be the first to try my latest delicious low-FODMAP creations!
Simple & Easy: My recipes continue to focus on readily available ingredients and effortless preparation, perfect for family-friendly meals (no more separate low-FODMAP meal prep!).
Hundreds of existing recipes: Gain access to my entire library of low-FODMAP recipes, all conveniently organized.
You can join for free or sign up for only $5/month. Your support fuels my passion for creating new, delicious, and easy-to-make low-FODMAP recipes just for you.
Let's go on this delicious low-FODMAP journey together.
The IBS Food Detective Series: Part 4 - When "Healthy" Foods Make You Worse (And What to Do About It)
This is the elimination protocol I've developed after years of working with my own IBS and helping hundreds of others. It's strategic, it's scientific, and most importantly, it's designed to expand your diet over time, not shrink it forever.
"Just eat more vegetables."
"You need more fiber."
"Switch to whole grains."
"Raw food is better for you."
"Drink more green smoothies."
If you have IBS, you've probably heard all of this advice. And if you're like most people with IBS, you've probably tried it—and felt dramatically worse.
Welcome to the most frustrating paradox of IBS: The foods that are supposed to heal your gut are often the exact foods that trigger your symptoms.
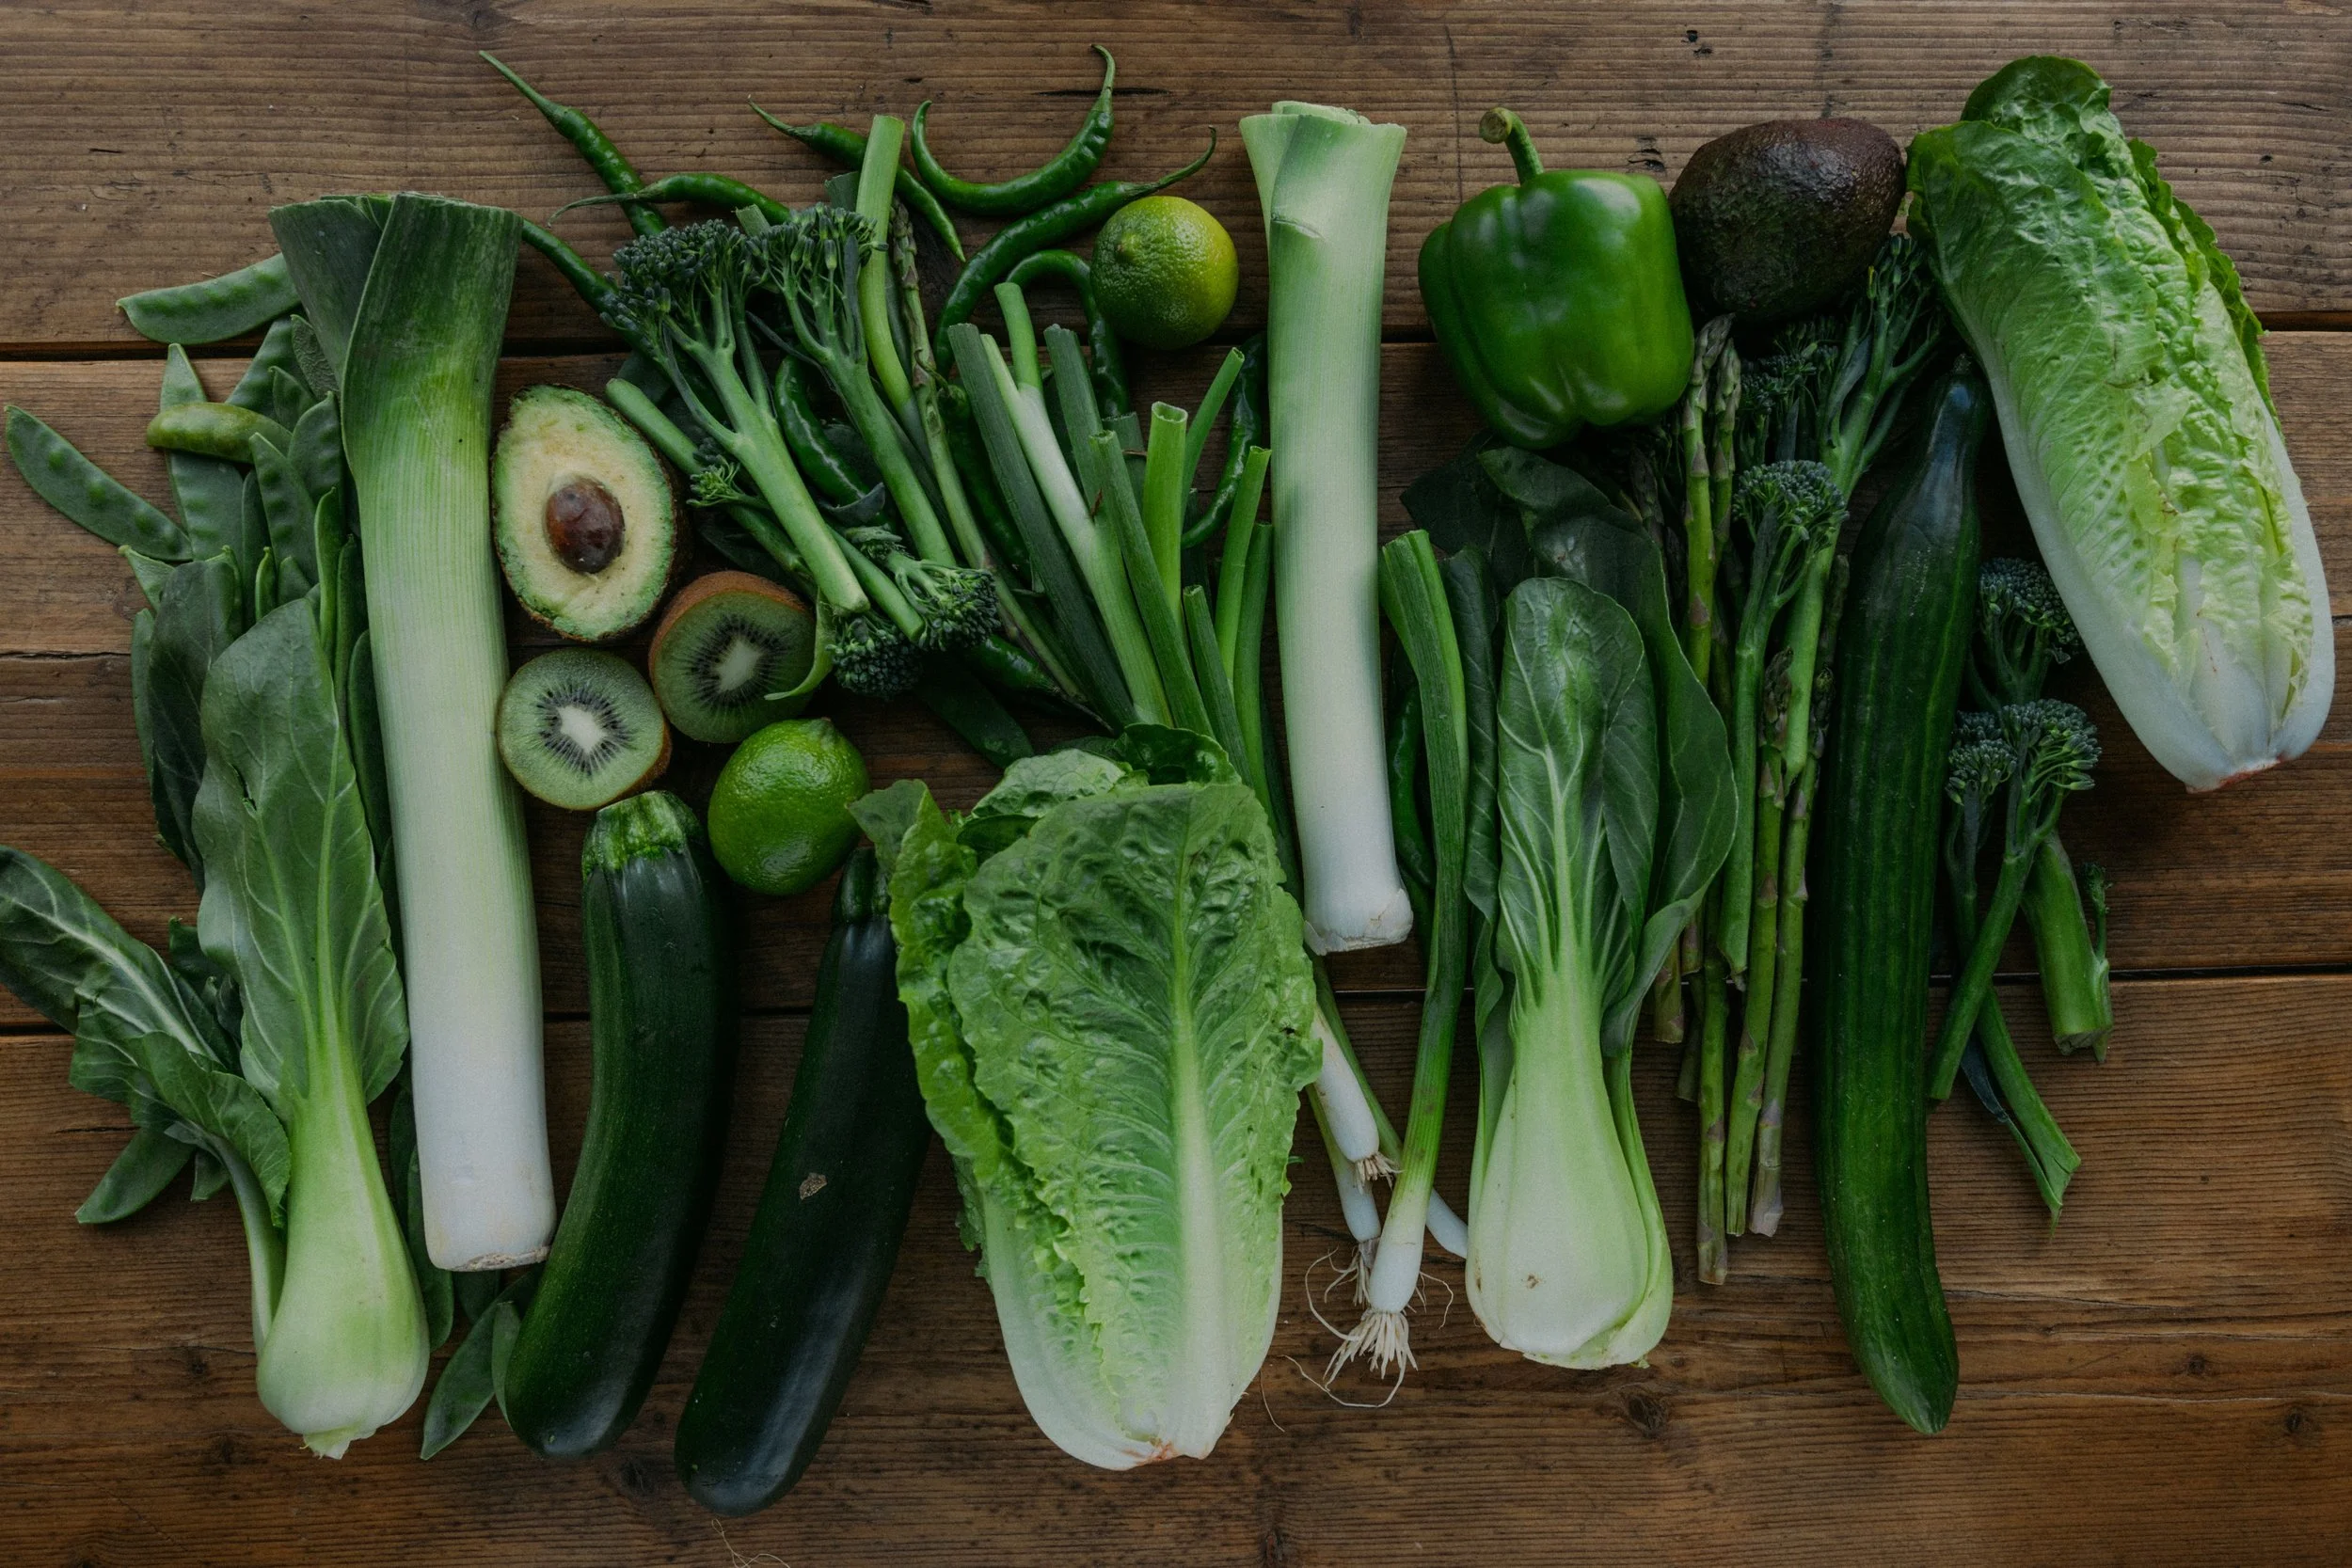
This isn't your fault. It's not a personal failing. And it doesn't mean you're "doing it wrong." It means that IBS requires a different definition of "healthy eating"—one that prioritizes what YOUR gut can actually handle over what works for people with normal digestive systems.
Today, I'm dismantling the myth of universal healthy eating and building a framework for what "healthy" actually means when you have IBS.
The "Healthy Food Paradox" Explained
Let me start by helping you understand why this happens.
When nutrition experts recommend foods for gut health, they're usually thinking about:
- High fiber for regular bowel movements
- Fermented foods for probiotics
- Raw vegetables for maximum nutrients
- Whole grains for sustained energy
- Healthy fats for inflammation
All of this is great advice... if your gut works normally.
But with IBS, your gut is hypersensitive. The mechanisms that are supposed to help—fiber moving through your intestines, bacteria fermenting food, raw vegetables providing bulk—become sources of pain, bloating, and disruption.
It's like having sensitive skin and being told to exfoliate more. The advice is well-intentioned, but it ignores your specific physiology.
## The Top "Healthy" Foods That Commonly Trigger IBS
Let's get specific. Here are the foods most often recommended for health that frequently trigger IBS symptoms:
1. Raw Vegetables (Especially Cruciferous)
Why they're recommended: High in fiber, vitamins, and antioxidants
Why they trigger IBS:
- High insoluble fiber content irritates sensitive guts
- Cruciferous vegetables (broccoli, cauliflower, cabbage, Brussels sprouts) contain sulfur compounds and FODMAPs that cause gas and bloating
- Raw form is harder to digest than cooked
The IBS-friendly alternative:
- Cook your vegetables thoroughly (steaming, roasting, boiling)
- Peel vegetables when possible (skin contains most of the insoluble fiber)
- Choose lower-FODMAP options (carrots, zucchini, green beans, bell peppers)
- Start with very small portions and work up gradually
Real talk: A big raw salad might be the poster child for "healthy eating," but for many people with IBS, it's a guaranteed bloating disaster. Cooked vegetables give you the same nutrients with way less gut distress.
2. Beans and Legumes
Why they're recommended: Excellent protein, fiber, and micronutrients; heart-healthy
Why they trigger IBS:
- High in FODMAPs, specifically GOS (galacto-oligosaccharides)
- Contains indigestible sugars that get fermented by gut bacteria, creating gas
- High fiber content can be overwhelming for sensitive guts
The IBS-friendly alternative:
- Canned beans are lower in FODMAPs than dried (some of the FODMAPs leach into the water)
- Rinse canned beans thoroughly
- Start with small amounts (1-2 tablespoons, not 1 cup)
- Try firmer legumes first (lentils and firm chickpeas often better than soft black beans)
- Consider canned lentils as the "easiest" entry point
Real talk: You might never be able to eat a big bowl of three-bean chili. But you might tolerate a small amount of rinsed chickpeas on a salad. Adjust your expectations.
3. Whole Grains (Especially Wheat)
Why they're recommended: More fiber and nutrients than refined grains
Why they trigger IBS:
- Wheat contains fructans (a FODMAP)
- Whole grains have more insoluble fiber than refined grains
- The "healthy" recommendation often means eating large quantities
The IBS-friendly alternative:
- Sourdough bread (fermentation reduces FODMAPs)
- Spelt or ancient grain breads (some people tolerate these better)
- Oats (naturally low-FODMAP and soluble fiber)
- White rice (yes, it's refined, but it's gentle on IBS guts)
- Small portions of whole grains rather than making them the base of every meal
Real talk: White bread isn't the devil when you have IBS. If it's a safe food for you, eat it without guilt. You're not "failing" at health—you're honoring your gut's needs.
4. High-Fiber Smoothies and Protein Shakes
Why they're recommended: Convenient way to pack in nutrients, greens, and protein
Why they trigger IBS:
- Often contain multiple high-FODMAP fruits (apple, mango, watermelon)
- Raw greens and vegetables are hard to digest even when blended
- Added fiber supplements (inulin, psyllium) can cause severe bloating
- Protein powders often contain FODMAPs or artificial sweeteners
- Drinking your food means less mechanical breakdown before it hits your gut
The IBS-friendly alternative:
- Keep smoothies simple: 1 low-FODMAP fruit + 1/2 cup spinach + safe protein + liquid
- Use lactose-free milk or almond milk (not coconut milk, which can be high-fat)
- Skip the added fiber powders
- Choose protein powders carefully (rice protein or specific low-FODMAP blends)
- Drink slowly rather than chugging
Real talk: That Instagram-worthy smoothie bowl with 10 ingredients is a recipe for disaster when you have IBS. Simple is better.
5. Fermented Foods (Kombucha, Sauerkraut, Kimchi)
Why they're recommended: Probiotics for gut health
Why they trigger IBS:
- High in histamine (triggers symptoms in people with histamine sensitivity)
- The fermentation creates gas-producing compounds
- Often contain high-FODMAP vegetables (cabbage, garlic, onions)
- Carbonation in kombucha can cause bloating
The IBS-friendly alternative:
- Start with fermented foods that are gentler: plain yogurt (if you tolerate lactose), kefir in small amounts
- Try probiotic supplements instead (more controlled dose, specific strains)
- If you do eat fermented foods, start with 1 teaspoon, not 1 cup
- Choose low-histamine options if histamine is an issue for you
Real talk: Fermented foods work wonders for some people with IBS and cause absolute mayhem for others. Don't force it if your gut hates it.
6. Nuts and Seeds (In Large Quantities)
Why they're recommended: Healthy fats, protein, fiber
Why they trigger IBS:
- High in fat (can trigger symptoms in fat-sensitive people)
- High in fiber and insoluble fiber (especially with skins on)
- Some nuts are high in FODMAPs (cashews, pistachios)
- Seeds can irritate sensitive intestines
The IBS-friendly alternative:
- Stick to small portions (10-15 nuts, not handfuls)
- Choose lower-FODMAP nuts (macadamias, walnuts, pecans, peanuts in small amounts)
- Try nut butters (easier to digest than whole nuts)
- Remove skins when possible
- Avoid large amounts of seeds (especially if you have IBS-D)
Real talk: A handful of almonds as a snack might be fine for someone with a normal gut, but for IBS, it might mean hours of bloating. Portion size matters enormously.
7. Fruit in Large Quantities (Especially High-FODMAP Fruits)
Why it's recommended: Vitamins, antioxidants, natural sweetness
Why it triggers IBS:
- Many fruits are high in fructose or polyols (both FODMAPs)
- High fiber content, especially in the skin
- Fruit sugar can feed bacteria that produce gas
The IBS-friendly alternative:
- Stick to low-FODMAP fruits (berries, citrus, bananas, kiwi, cantaloupe)
- Eat small portions (1/2 cup, not 2 cups)
- Choose ripe fruit (easier to digest)
- Avoid dried fruit (concentrated FODMAPs)
- Spread fruit intake throughout the day rather than eating it all at once
Real talk: That big fruit salad or fruit platter might look healthy, but it's often a FODMAP bomb. One piece of fruit at a time is usually safer.
8. "Healthy" Oils and Fats in Large Amounts
Why they're recommended: Anti-inflammatory, good for heart health
Why they trigger IBS:
- High fat triggers the gastrocolic reflex (urgent bowel movements)
- Even "healthy" fats like avocado can be too much for fat-sensitive guts
- Large amounts of any oil or fat slow digestion
The IBS-friendly alternative:
- Use small amounts of fat (1 tablespoon olive oil, not 1/4 cup)
- Choose your fat sources carefully (olive oil is often better tolerated than avocado oil)
- Distribute fat throughout the day rather than one high-fat meal
- Cook methods matter: steamed/baked with a little oil is better than fried
Real talk: Avocado toast might be a health food staple, but a whole avocado can trigger symptoms. 1/4 avocado might be your sweet spot.
The "Clean Eating" Trap
Here's where things get psychologically tricky: Diet culture tells us that if we just eat "clean enough," we'll be healthy.
For people with IBS, this creates a terrible bind:
- You try to eat "clean" (raw veggies, whole grains, lots of fiber)
- You feel worse
- You blame yourself for "not doing it right"
- You restrict more, trying to be "healthier"
- You feel even worse
- The cycle continues
The truth: Clean eating isn't the same as IBS-friendly eating. Sometimes the most healing choice is white rice and chicken. Sometimes it's sourdough bread instead of whole wheat. Sometimes it's cooked vegetables instead of raw.
This isn't failure. This is adaptation.
Redefining "Healthy" for IBS
Let me create a new definition of healthy eating that actually works for IBS:
Healthy eating with IBS means:
✓ Foods that don't trigger your symptoms
✓ Adequate nutrition (calories, protein, vitamins, minerals)
✓ Variety within your safe foods
✓ Enjoyment of food without fear
✓ Flexibility to participate in social eating
✓ Energy to live your life
Healthy eating with IBS does NOT mean:
✗ Following generic nutrition advice that ignores your gut
✗ Eating foods that make you miserable because they're "good for you"
✗ Forcing yourself to eat raw vegetables or whole grains
✗ Feeling guilty about eating refined grains or cooked vegetables
✗ Restricting so much that you're malnourished
✗ Never being able to eat out or enjoy meals with others
## The "Good Enough" Nutrition Framework
Perfectionism is a symptom trigger too. Here's the more realistic framework I use:
Tier 1: Non-Negotiable Nutrition Needs
- Adequate calories (you need energy to function)
- Adequate protein (for tissue repair, immune function)
- Some fruits and vegetables (even if cooked, even if low-fiber)
- Hydration (water is crucial for gut function)
If you're meeting these, you're doing okay. Don't let anyone tell you otherwise.
Tier 2: Nice-to-Have Nutrition
- Variety of colors in fruits/vegetables (different nutrients)
- Some whole grains (if you tolerate them)
- Healthy fats in small amounts (omega-3s, etc.)
- Fermented foods or probiotics (if you tolerate them)
These improve overall health, but they're not worth sacrificing gut stability for.
Tier 3: Optimization
- Maximizing fiber (only if your gut can handle it)
- Raw vegetables (only if you tolerate them)
- Large portions of "superfoods" (only if they don't trigger you)
These are nice if you can do them, but they're completely optional for people with IBS.
Most people with IBS will live primarily in Tier 1, occasionally in Tier 2, and rarely in Tier 3. That's perfectly fine.
Building Your IBS-Healthy Plate
Here's a practical template I recommend for balanced meals that won't wreck your gut:
The foundation (50% of your plate):
- Safe starch: white rice, potatoes, sourdough bread, oatmeal, pasta
- This provides energy without overwhelming your system
The protein (25% of your plate):
- Lean, well-cooked protein: chicken, fish, turkey, eggs, tofu (if tolerated)
- Enough to meet your body's needs without excess fat
The vegetables (25% of your plate):
- Cooked, low-FODMAP vegetables: carrots, zucchini, green beans, bell peppers, spinach
- Cooked until soft, not al dente
The fat (a small addition):
- 1 tablespoon of olive oil, a small amount of butter, or a thin slice of avocado
- Enough for flavor and satiety, not so much that it triggers symptoms
The result: A balanced, nutritious meal that your gut can actually handle.
When to Revisit "Healthy" Foods
Just because a food triggers you now doesn't mean it always will. As your gut heals (through stress management, sleep optimization, and gut-brain work), your tolerances may change.
I recommend retesting "healthy" foods every 6-12 months:
- Raw vegetables (in small amounts)
- Whole grains (in small portions)
- Beans and legumes (well-rinsed, small portions)
- High-fiber fruits
You might be surprised. Foods that were off-limits a year ago might be fine now—in moderation.
Navigating Healthcare Providers Who Don't Get It
One of the most frustrating experiences is having a doctor or nutritionist who doesn't understand IBS tell you to "eat more fiber" or "just eat healthier."
How to advocate for yourself:
"I appreciate the recommendation, but I have IBS, and high-fiber foods actually make my symptoms worse. I've been tracking my food and symptoms carefully, and I need a different approach."
If they push back:
"I understand that works for most people, but IBS requires a different strategy. Can we talk about nutrition approaches specifically designed for IBS?"
If they still don't get it:
Find a new provider. Seriously. You need someone who understands that IBS is different.
The Permission You Need
I'm going to say this explicitly because someone needs to:
You have permission to:
- Eat white rice instead of brown rice
- Choose refined grains over whole grains
- Cook all your vegetables
- Skip the smoothie bowl
- Avoid raw salads
- Eat smaller portions of fiber-rich foods
- Prioritize symptom management over "optimal nutrition"
You're not lazy. You're not uninformed. You're not "giving up on health." You're managing a chronic digestive condition that requires adaptations.
The goal isn't to eat like someone with a normal gut. The goal is to nourish your body while keeping your symptoms manageable so you can actually live your life.
Making Peace With "Imperfect" Nutrition
Here's the final mindset shift I want you to make: Food is not just nutrients. Food is also joy, culture, connection, and energy.
A meal that's nutritionally "perfect" but leaves you in pain for hours isn't actually healthy—it's harming your quality of life.
A meal that's nutritionally "imperfect" but allows you to eat with your family without anxiety, gives you energy, and doesn't trigger symptoms IS healthy for you.
Stop comparing your plate to what Instagram says is healthy. Start comparing your plate to what actually makes you feel good.
Your Action Plan
This week, I want you to do something radical:
1. Identify one "healthy" food that consistently makes you feel worse
2. Give yourself explicit permission to stop eating it (write it down: "I have permission to not eat [food] even though it's supposed to be healthy")
3. Replace it with a food that feels good in your body, even if it's "less healthy" by conventional standards
4. Notice how you feel physically AND emotionally when you honor your gut's needs instead of following generic health advice
This is what food freedom looks like with IBS. It's not about eating everything. It's about eating what works for YOUR body without guilt.
The Bottom Line
IBS requires you to redefine healthy eating. It's not about what nutrition science says should work—it's about what actually works for your specific gut.
Sometimes that means white rice over brown. Sometimes it means cooked vegetables over raw. Sometimes it means skipping the smoothie and eating simple, boring foods.
And that's not just okay—it's the smartest thing you can do.
Your body deserves food that nourishes it without causing pain. You deserve to eat without fear. And you deserve to stop feeling guilty about doing what you need to do to manage your condition.
That's true health with IBS.
What "healthy" food have you given yourself permission to stop eating? How did it feel to let go of the guilt? Share in the comments—your story might be exactly what someone else needs to hear.
The IBS Food Detective Series: Part 3 - Reintroduction Done Right: How to Expand Your Diet Safely
You've done the elimination work. You've tested categories. You've identified some triggers. And now you're sitting there with a list of "safe foods" that feels depressingly short.
Maybe you're scared to try anything new. Maybe you've reintroduced something and had a bad reaction, so now you're hesitant to try anything else. Maybe you've actually been feeling better, but you're convinced the second you add foods back, everything will fall apart.
You've done the elimination work. You've tested categories. You've identified some triggers. And now you're sitting there with a list of "safe foods" that feels depressingly short.
Maybe you're scared to try anything new. Maybe you've reintroduced something and had a bad reaction, so now you're hesitant to try anything else. Maybe you've actually been feeling better, but you're convinced the second you add foods back, everything will fall apart.
This is the critical phase where I see most people get stuck.
They find a handful of foods that don't trigger symptoms, and they live on those foods indefinitely—even though they could probably tolerate much more. The fear of symptoms becomes more restrictive than the actual triggers.
Today, I'm going to help you break through that fear with a systematic reintroduction process that will help you reclaim the foods you can actually eat.
The Psychology of Reintroduction: Why It's Scary (And What to Do About It)
Let me acknowledge what's really happening: You're afraid.
You're afraid of pain. You're afraid of urgent diarrhea at the wrong moment. You're afraid of days spent in the bathroom. You're afraid of the anxiety that comes with symptoms. And you're afraid that trying a food will set you back weeks.
This fear is understandable. But it's also keeping you more restricted than necessary.
Here's what you need to know:
- One bad reaction to a reintroduced food does NOT undo all your progress
- Your gut won't "forget" how to tolerate your safe foods because you tried something new
- A reaction gives you information—it doesn't mean you've failed
- The temporary discomfort of testing is worth the long-term freedom of a varied diet
The Reintroduction Readiness Checklist
Before you start reintroducing foods, make sure you meet these criteria:
✓ You've been feeling significantly better for at least 2 weeks (not perfect, but noticeably improved)
✓ You're in a relatively stable life phase (not traveling, not in the middle of a major stressor, not right before your period)
✓ You have time to deal with potential reactions (don't test new foods the day before a big presentation or long flight)
✓ You're tracking consistently, so you can see patterns
✓ You've identified at least one clear trigger category (you know what definitely makes you worse)
If you don't meet these criteria yet, go back to Part 2 and continue your elimination work.
The Systematic Reintroduction Protocol
Here's the exact process for adding foods back safely:
Phase 1: Prepare for the Test (Day 0)
Choose your test food strategically:
- Start with foods you miss most (motivation matters)
- Pick foods from categories you suspect you might tolerate (don't start with your worst known trigger)
- Choose simple (single) foods first, not combination dishes (test "rice" not "fried rice with vegetables and sauce")
Set yourself up for success:
- Plan to test on a day when you're home or have easy bathroom access
- Make sure you're well-rested and not stressed
- Have your comfort tools ready (heating pad, safe backup meal, anti-anxiety techniques from my Gut-Brain Reset series)
Decide on your test amount:
- Start with HALF a normal serving (not a full serving)
- If it's a known trigger, start with 1/4 serving
Phase 2: The Single-Food Challenge (Days 1-3)
Day 1: The first exposure
- Eat your test food at ONE meal (ideally lunch, so you can monitor afternoon/evening)
- Keep everything else in that meal completely safe
- Don't combine the test food with other potential triggers
- Track symptoms for the next 6-8 hours
What you're watching for:
- Immediate symptoms (0-2 hours): Cramping, urgent diarrhea, nausea
- Medium-term symptoms (2-6 hours): Gas, bloating, discomfort
- Delayed symptoms (6-24 hours): Changes in bowel movements, lingering discomfort
Day 2: Evaluate and decide
If Day 1 had NO symptoms or only MILD symptoms → Test the same food again with a slightly larger portion
If Day 1 had MODERATE symptoms → Rest day (eat only safe foods), then retest at the same portion size on Day 3
If Day 1 had SEVERE symptoms → This food is a clear trigger. Move it to your "avoid" list and take 2-3 rest days before testing anything else
Day 3: Confirmation
- If Day 2 was fine, test a full normal serving
- If symptoms appear now, your tolerance is somewhere between half and a full serving
- If Day 3 is fine, this food passes the test!
Phase 3: Real-World Testing (Days 4-7)
Passing the controlled challenge is great, but you need to test the food in real-life scenarios:
Day 4-5: Eat the food in combination with other safe foods (still avoiding other triggers)
Day 6-7: Eat the food in a situation closer to real life (maybe at a restaurant, or in a meal with more components)
If it holds up through this phase, confidently add it to your "safe foods" list.
Phase 4: Rest and Rotate (Days 8-10)
After testing a food (whether it passed or failed), give your gut a break:
- 2-3 days eating only established safe foods
- Let your system fully calm down
- Reset your baseline before testing the next food
This prevents cumulative irritation and gives you clearer results for the next test.
The Reintroduction Priority List I Recommend
Not sure what order to test foods in? Here's my strategic framework:
Tier 1: Test These First (Often Well Tolerated)
- Cooked vegetables you avoided (especially if you only eliminated raw)
- Different preparation methods of safe proteins (if you can eat baked chicken, can you eat grilled?)
- Fruits you miss (start with low-FODMAP fruits if FODMAPs are a trigger)
- Simple starches (different types of rice, potatoes, real sourdough bread)
Tier 2: Test These Second
- Small amounts of previously problematic foods (testing thresholds)
- Different fat sources (if you tolerate olive oil, can you tolerate avocado?)
- Dairy alternatives (if regular dairy is a trigger)
- Herbs and spices (expand flavor without major trigger risk)
Tier 3: Test These Last (Lower Priority, Higher Risk)
- Known major triggers in small amounts (only after everything else is stable)
- Complex combination foods (pizza, restaurant dishes with many ingredients)
- Occasional indulgences (desserts, fried foods, alcohol)
The goal is to build a strong foundation of safe, nutritious foods before testing the riskier options.
Interpreting Mixed Results
Real life is messy. You won't always get clear pass/fail results. Here's how to interpret common scenarios:
Scenario 1: "Sometimes it's fine, sometimes it triggers symptoms"
This usually means:
- Dose matters: Small amounts are fine, large amounts trigger symptoms
- Context matters: Fine when relaxed, problematic when stressed
- Combination matters: Fine alone, problematic with other triggers
- Preparation matters: Fine cooked one way, problematic another way
What to do: Test more specifically. Try the food in different amounts, in different contexts, and prepared in different ways. Find the conditions under which you tolerate it.
Scenario 2: "I reacted, but I'm not sure if it was the food or something else"
This happens when you test during:
- High stress periods
- Poor sleep nights
- Hormone fluctuations
- When you're already having a "sensitive gut day"
What to do: Wait for a more stable time and retest. One ambiguous result isn't conclusive.
Scenario 3: "I thought this would be fine, but it triggered symptoms"
Sometimes, foods you expect to tolerate surprise you. This is valuable information.
What to do: Move it to your "avoid for now" list, but retest in 3-6 months. Your tolerances can change as your gut heals.
Scenario 4: "It didn't trigger symptoms, but I'm still scared to eat it regularly"
This is fear, not data. The test was successful, but your anxiety hasn't caught up.
What to do: Eat it again in a few days. Then again, a few days after that. Build evidence that it's actually safe. Your nervous system needs to be retrained with repeated exposure to update its threat assessment.
The 80/20 Rule for IBS Diets
Here's a framework that helps people avoid excessive restriction:
80% of the time: Eat your well-established safe foods. These form your dietary foundation.
20% of the time: Experiment with reintroduced foods, occasional treats, or foods you're testing.
This means:
- Most meals are predictable and safe (reduces anxiety)
- You're still regularly expanding your diet (prevents restriction)
- You can participate in social eating without panic
- An occasional reaction from the 20% doesn't derail your overall stability
Building Your "Flexible Safe Foods List"
Your safe foods list should have three categories:
Category 1: Rock Solid Safe Foods
Foods that NEVER trigger symptoms, in any amount, any preparation, any context.
Example: White rice, baked chicken breast, bananas (not overly-ripe)
Category 2: Usually Safe Foods
Foods that are fine most of the time but might cause issues in large amounts or specific contexts.
Example: Sourdough bread (fine in small amounts), cooked carrots (fine unless eating a huge portion)
Category 3: Occasionally Safe Foods
Foods you can tolerate sometimes, but need to be strategic about.
Example: Small amounts of aged cheese (fine occasionally but not daily), one cup of coffee (fine in the morning on good days)
This three-tier system gives you flexibility. You're not rigidly safe vs. unsafe—you're building a nuanced understanding of your tolerances.
The Social Eating Challenge
The real test of reintroduction is whether you can eat in social situations. Here's how to navigate this:
Strategy 1: Plan Ahead
- Look at menus in advance
- Identify 2-3 dishes that use your safe ingredients
- Call restaurants if needed to ask about preparation methods
Strategy 2: Customize Orders
- Ask for dressings/sauces on the side
- Request substitutions (steamed instead of fried, no garlic/onion, etc.)
- Don't apologize—be matter-of-fact about it
Strategy 3: Eat Before Social Events
- Have a safe meal before going to a party where the food is uncertain
- Then just nibble on safe options at the event
- Takes pressure off finding safe foods there
Strategy 4: Bring Your Own
- For potlucks, bring a dish you can eat
- For dinner parties, offer to bring a side dish (that you know is safe)
- Host more often (you control the menu)
Strategy 5: Be Honest (Selectively)
You don't owe everyone an explanation, but close friends/family can be told:
"I have some digestive issues and need to be careful about certain foods."
You don't need to elaborate unless you want to.
The Reintroduction Timeline
Here's a realistic timeline for expanding your diet post-elimination:
Weeks 1-4: Test 4-6 foods (one per week with rest days between)
Weeks 5-8: Test 6-8 more foods (moving faster as you gain confidence)
Weeks 9-12: Test more challenging foods, combinations, and restaurant meals
Month 4+: Ongoing experimentation and optimization
By month 4, you should have:
- A solid foundation of 30-50 safe foods
- Clear understanding of your major triggers
- Confidence in navigating social eating
- Less fear around food in general
When Reintroduction Stalls
If you're stuck and can't seem to add foods back, ask yourself:
Is it actually the food?
- Have you tested during stable times?
- Are you combining it with other triggers?
- Is the portion size too large?
Is it anxiety?
- Are you having symptoms before the food even hits your stomach?
- Are you catastrophizing about potential reactions?
- Do you need to work more on your gut-brain connection before expanding your diet?
Is your gut not ready yet?
- Are you still having frequent flares?
- Do you need more time on the elimination phase?
- Should you work with a professional to address underlying inflammation?
Sometimes the answer is "I need more healing time before expanding my diet." That's okay. But make sure it's actually your gut that needs time, not just your anxiety.
The Meal Planning Framework for Reintroduced Foods
As you add foods back, build them into regular meal rotations:
Week 1 of new safe food:
- Include it 1-2 times to confirm tolerance
Week 2-4:
- Include it 2-3 times per week to build confidence
Month 2+:
- Include it as desired in regular rotation
Don't let reintroduced foods sit on a list you never actually eat. The goal is to use them.
What I'm Covering in Part 4
In my final post in this series, I'm tackling the question everyone asks: "When can I eat normally again?"
I'll cover:
- When it's actually a food trigger vs. something else
- How to know when you need to revisit elimination
- Building a sustainable long-term eating pattern
- The "good enough" diet for IBS (perfectionism is a trigger, too)
- Making peace with food and your gut
I'll also discuss the mindset shift from "living with restrictions" to "living with awareness"—because that's ultimately where freedom lives.
What food are you most excited to reintroduce? What's holding you back? Share in the comments!
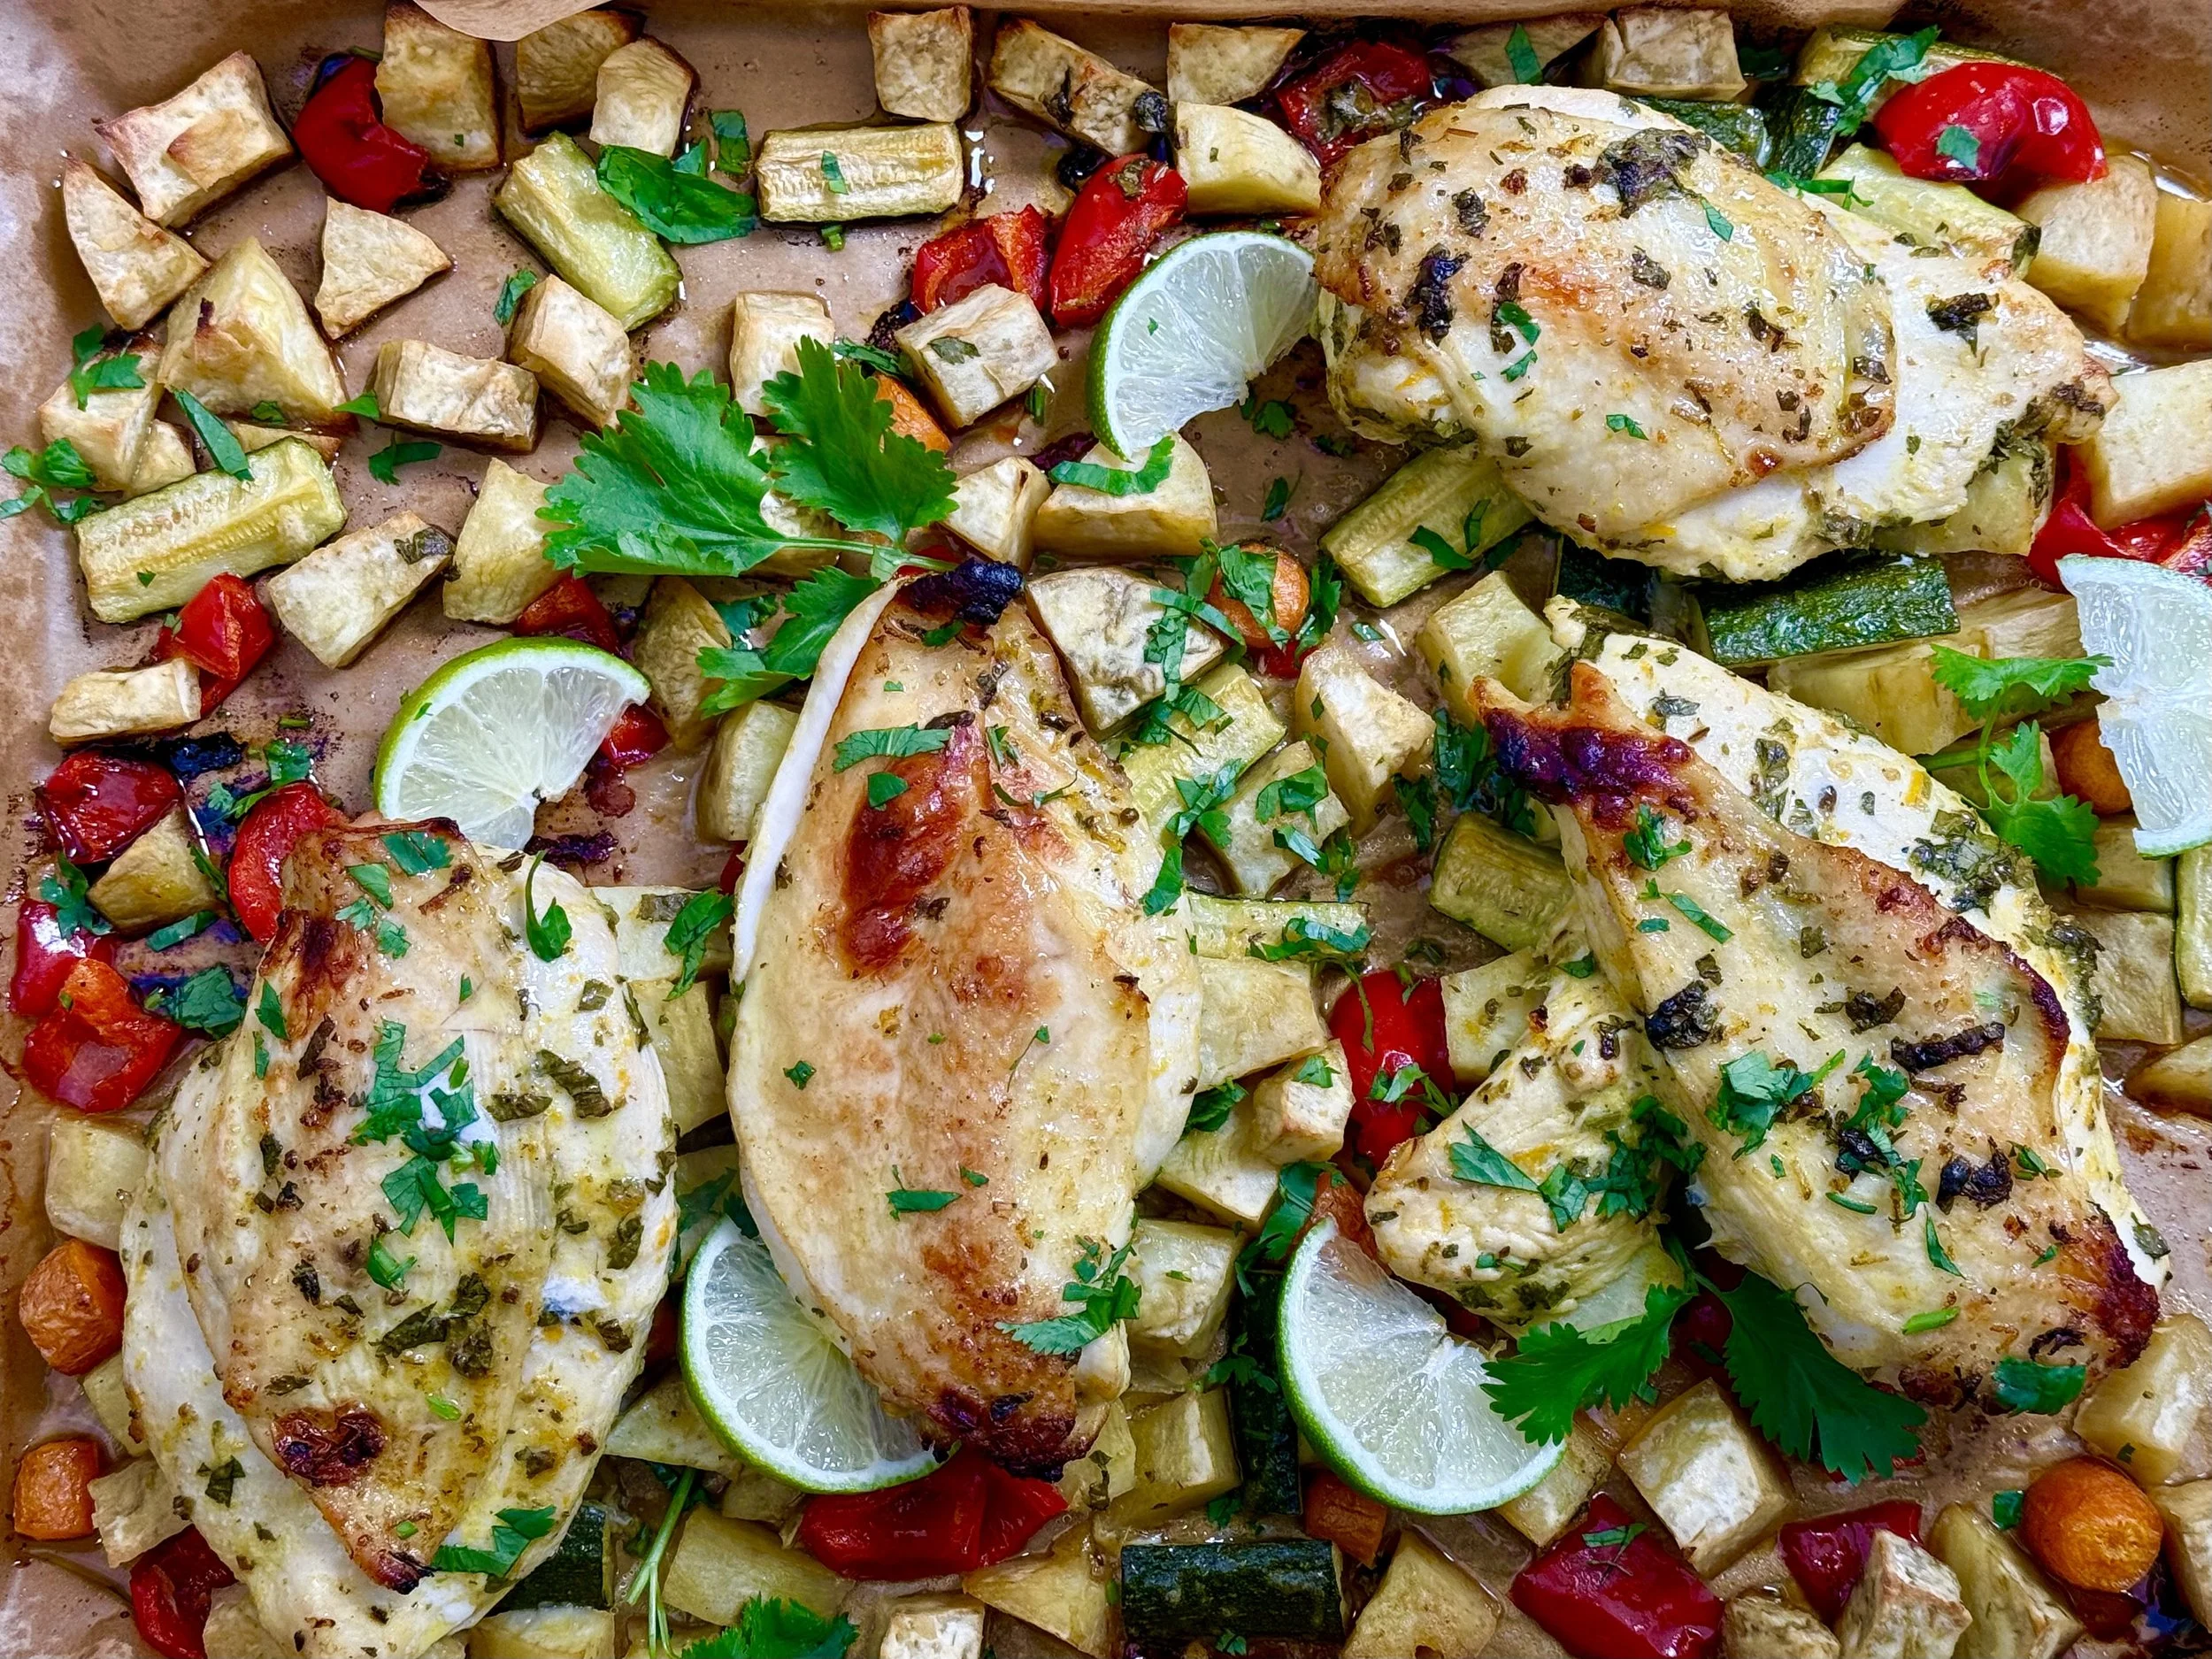
Cuban Mojo Chicken (Low FODMAP)
15 Minutes prep • 30 - 40 Minutes cook • Low FODMAP • Gluten-Free • Serves 4 - 6
15 Minutes prep • 30 - 40 Minutes cook • Low FODMAP • Gluten-Free • Serves 4 - 6 • Ok to make-ahead: Steps 1 - 2
If you’ve been craving big, bold Latin flavors since your IBS diagnosis — this one’s going to make your week. This Low FODMAP Cuban Mojo Chicken is marinated in a vibrant citrus-herb sauce, roasted golden with peppers, Zucchini, carrots, and yams, and completely gut-friendly. Weeknight dinner just got a serious upgrade.
See this new recipe in my FREE recipe club.
To streamline your search through hundreds of existing recipes, I'm moving the release of my new weekly creations to the Recipe Club on Patreon. In the club, you’ll get access to a treasure trove of low-FODMAP goodness, complete with collections and filters to use as your virtual cookbook!
Here's what awaits you in the club:
Exclusive weekly recipes: Be the first to try my latest delicious low-FODMAP creations!
Simple & Easy: My recipes continue to focus on readily available ingredients and effortless preparation, perfect for family-friendly meals (no more separate low-FODMAP meal prep!).
Hundreds of existing recipes: Gain access to my entire library of low-FODMAP recipes, all conveniently organized.
You can join for free or sign up for only $5/month. Your support fuels my passion for creating new, delicious, and easy-to-make low-FODMAP recipes just for you.
Let's go on this delicious low-FODMAP journey together.
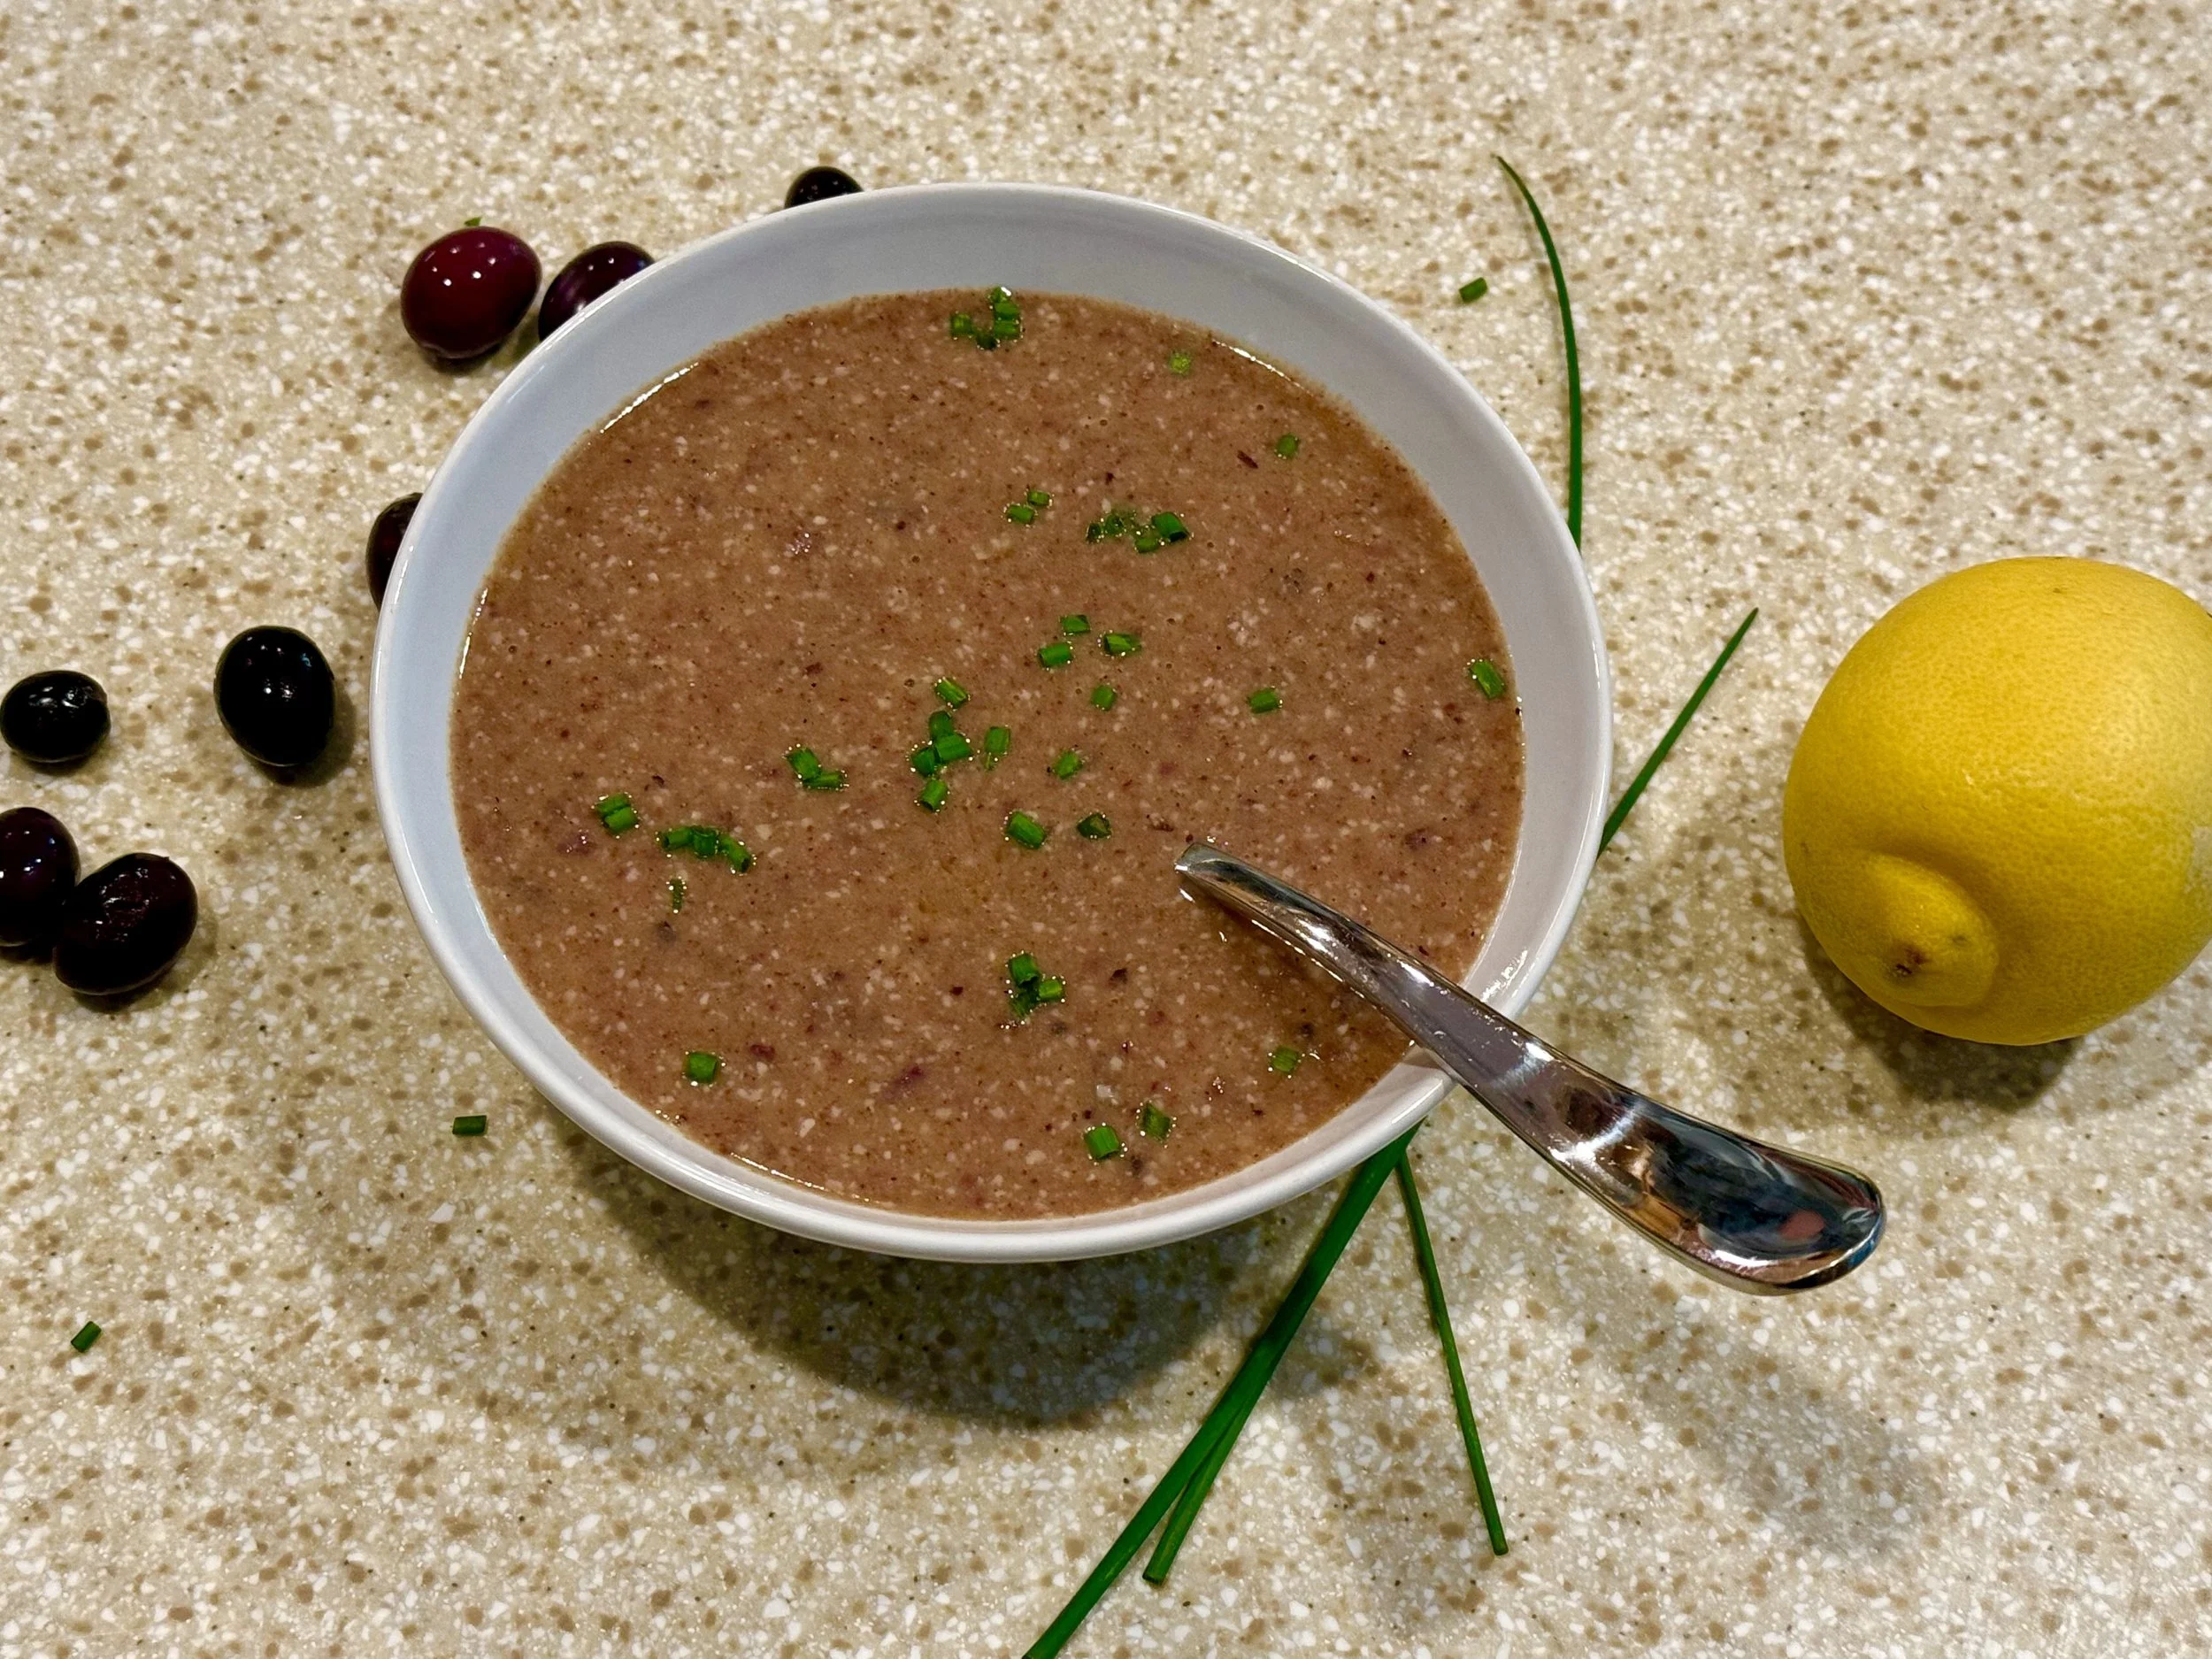
Kalamata Olive and Parmesan Dressing (Low FODMAP)
10 Minutes prep • Low FODMAP • Gluten-Free • Lactose-Free • Makes 1 1/2 Cups
10 Minutes prep • Low FODMAP • Gluten-Free • Lactose-Free • Makes 1 1/2 Cups • Ok to make-ahead: 2 Weeks
This deeply savory, blender dressing is one you will put on everything. Briny Kalamata olives, sharp parmesan, Dijon, red wine vinegar, and bright parsley all blended into a thick, glossy dressing that keeps for two weeks in the fridge. Use it on salads, pasta, roasted vegetables, and more.
See this new recipe in my FREE recipe club.
To streamline your search through hundreds of existing recipes, I'm moving the release of my new weekly creations to the Recipe Club on Patreon. In the club, you’ll get access to a treasure trove of low-FODMAP goodness, complete with collections and filters to use as your virtual cookbook!
Here's what awaits you in the club:
Exclusive weekly recipes: Be the first to try my latest delicious low-FODMAP creations!
Simple & Easy: My recipes continue to focus on readily available ingredients and effortless preparation, perfect for family-friendly meals (no more separate low-FODMAP meal prep!).
Hundreds of existing recipes: Gain access to my entire library of low-FODMAP recipes, all conveniently organized.
You can join for free or sign up for only $5/month. Your support fuels my passion for creating new, delicious, and easy-to-make low-FODMAP recipes just for you.
Let's go on this delicious low-FODMAP journey together.
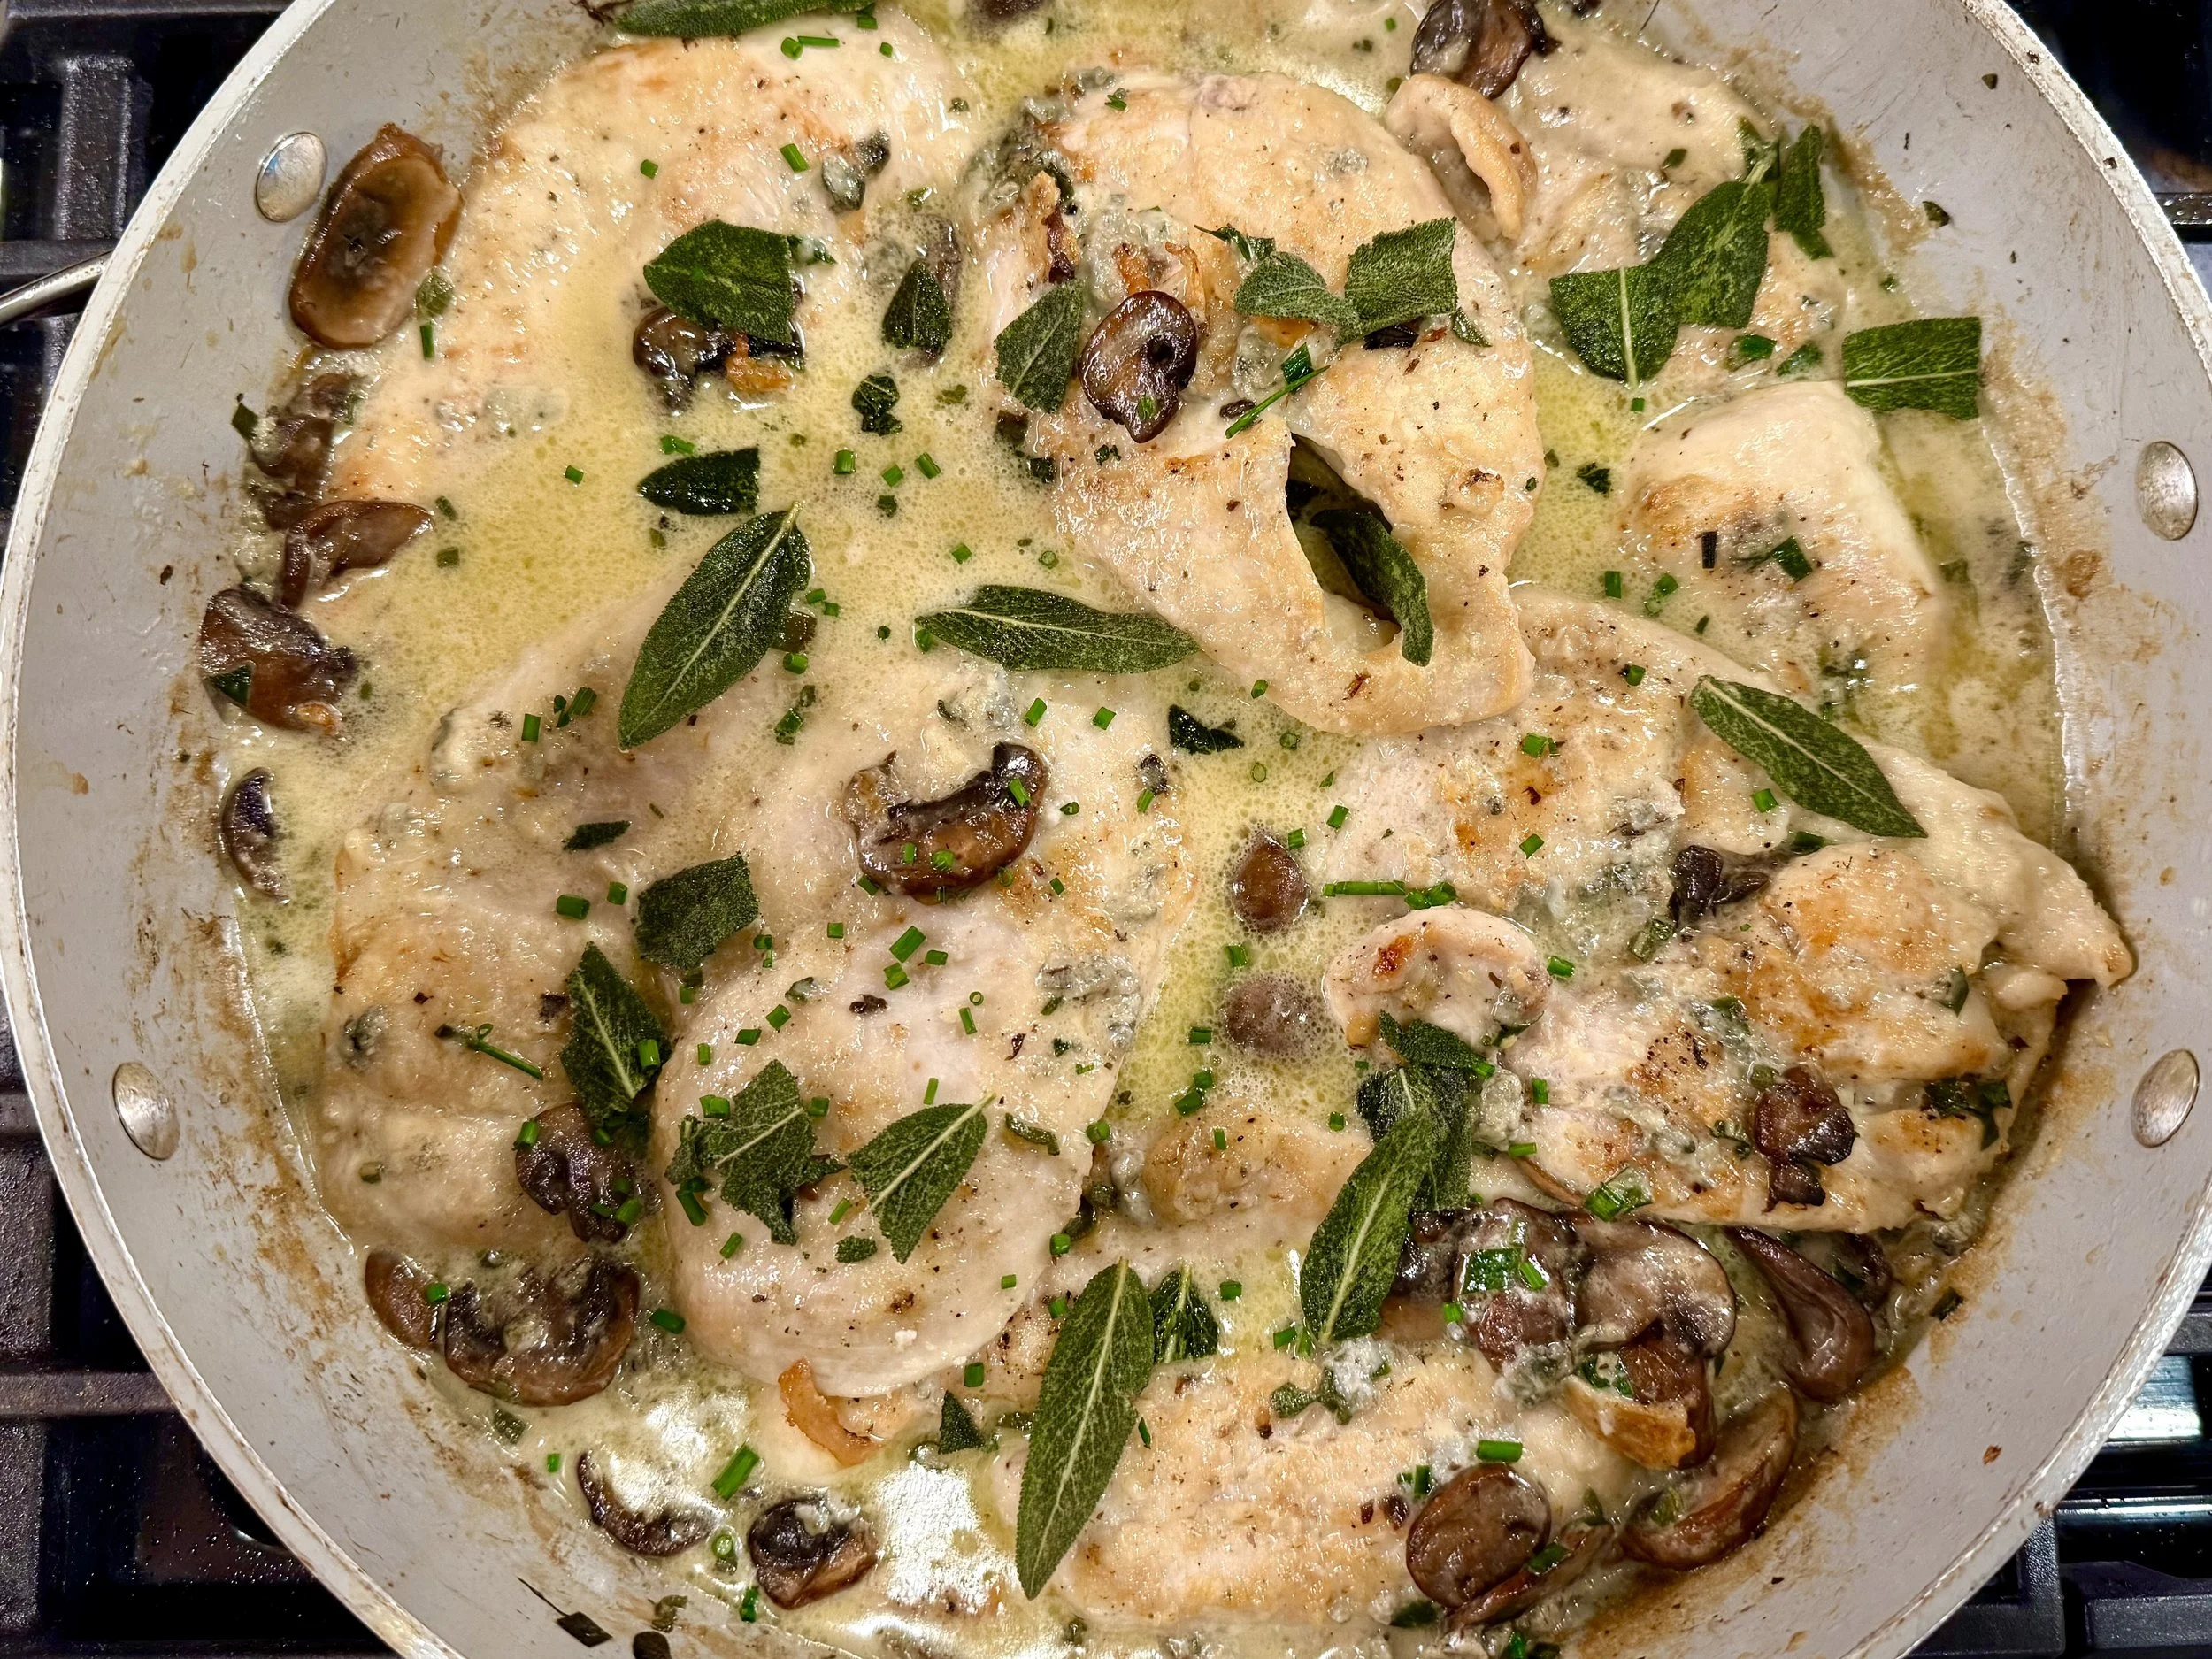
Creamy Gorgonzola Chicken with Mushrooms and Sage (Low FODMAP)
20 Minutes prep • 35 Minutes cook • Low FODMAP • Gluten-Free • Serves 4
20 Minutes prep • 35 Minutes cook • Low FODMAP • Gluten-Free • Serves 4 • Ok to make-ahead: Steps 1 - 3
If you thought bold, decadent, restaurant-worthy meals were off the table since your IBS diagnosis — think again. This Creamy Gorgonzola Chicken is flavorful, indulgent, and perfect for special occasions like birthdays, anniversaries, or Valentine’s Day. I’ve swapped out the FODMAP triggers and kept every bit of the dreamy, tangy gorgonzola sauce. Your gut is going to thank you.
This new recipe is available exclusively in the recipe club.
To streamline your search through hundreds of existing recipes, I'm moving the release of my all-new weekly creations to the Recipe Club on Patreon. This means you'll get ad-free access to a treasure trove of low-FODMAP goodness, complete with collections and filters to use as your virtual cookbook!
Here's what awaits you in the club:
Exclusive weekly recipes: Be the first to try my latest delicious low-FODMAP creations!
Simple & Easy: My recipes continue to focus on readily available ingredients and effortless preparation, perfect for family-friendly meals (no more separate low-FODMAP meal prep!).
Hundreds of existing recipes: Gain access to my entire library of low-FODMAP recipes, all conveniently organized.
Get your first week free, then enjoy full access for only $5/month. Your support fuels my passion for creating new, delicious, and easy-to-make low-FODMAP recipes just for you.
Let's go on this delicious low-FODMAP journey together.
One Pan Coconut Butter Salmon (Low FODMAP)
15 Minutes prep • 15 Minutes cook • Low FODMAP • Gluten-Free • Serves 5
15 Minutes prep • 15 Minutes cook • Low FODMAP • Gluten-Free • Serves 5
This salmon is the weeknight dinner you didn't know you needed. A rich coconut milk sauce spiked with warming ginger, cumin, and paprika wraps around perfectly seared filets, while a hit of lime and fresh basil keeps everything feeling light and fresh. And that avocado mango salsa on top? It's the kind of colorful, fruity finish that makes this dish look like it came from a restaurant — not your stovetop. One pan, five salmon filets, zero gut regrets.
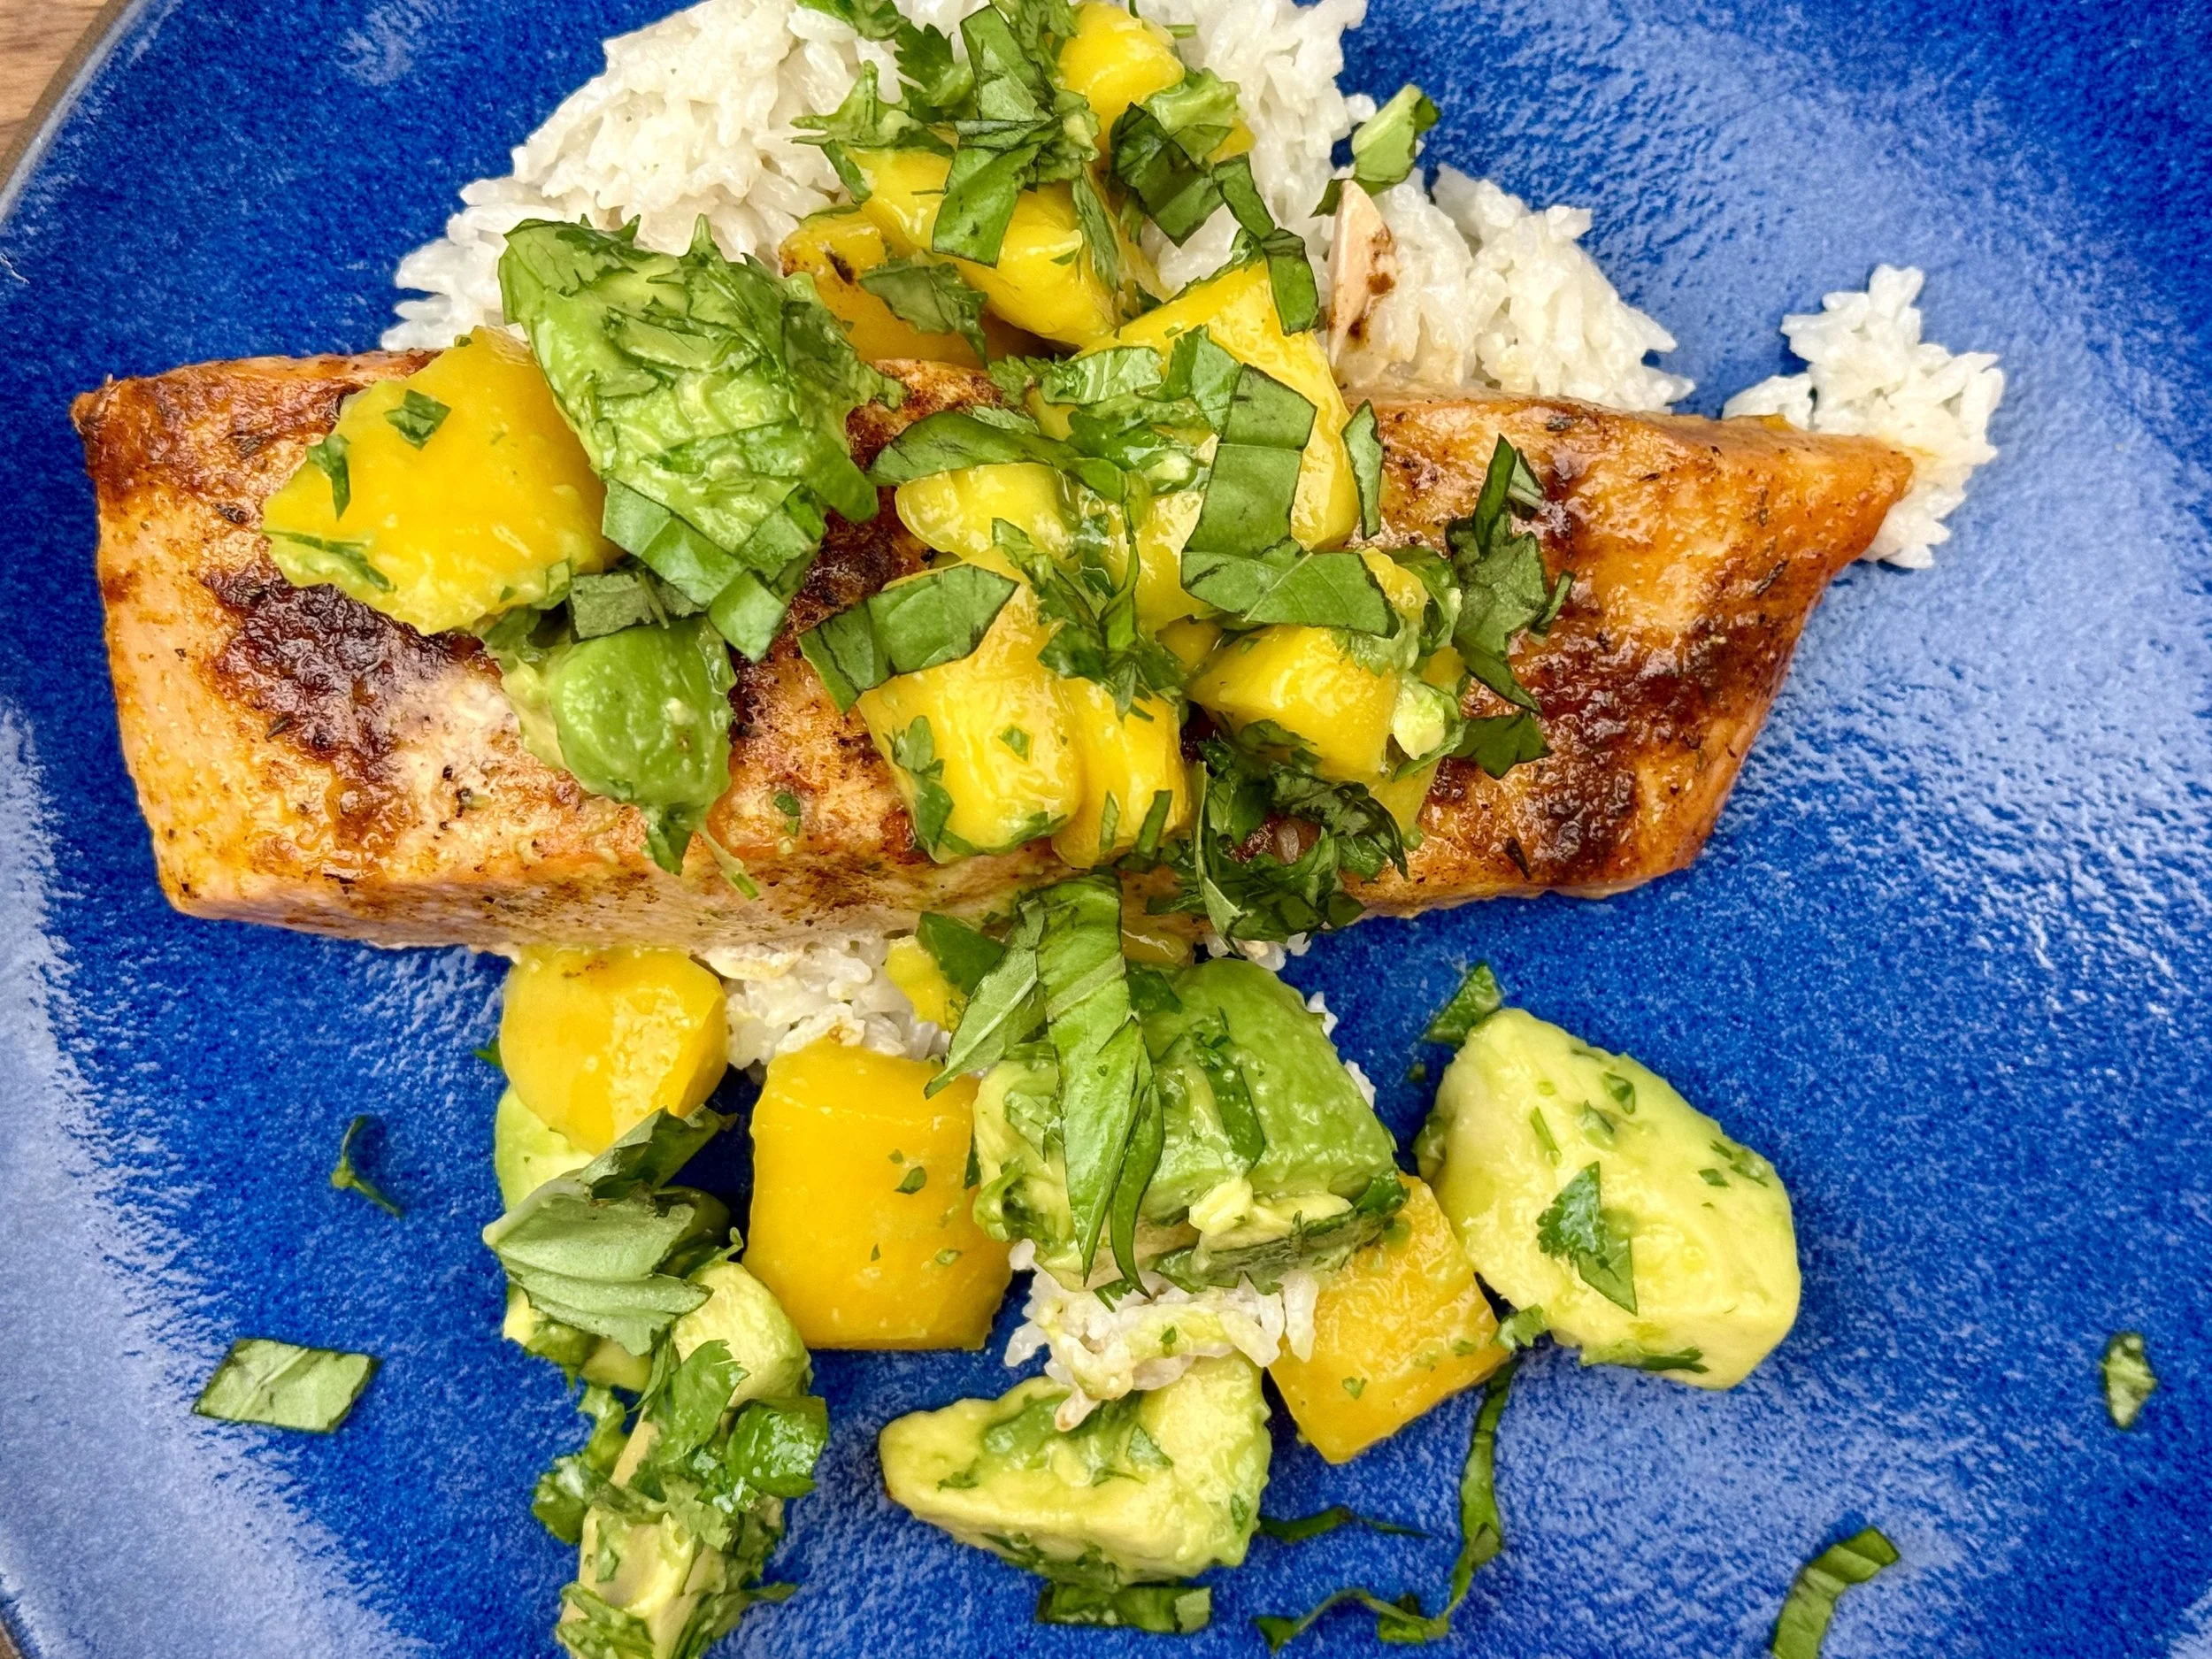
See this new recipe in my FREE recipe club.
To streamline your search through hundreds of existing recipes, I'm moving the release of my new weekly creations to the Recipe Club on Patreon. In the club, you’ll get access to a treasure trove of low-FODMAP goodness, complete with collections and filters to use as your virtual cookbook!
Here's what awaits you in the club:
Exclusive weekly recipes: Be the first to try my latest delicious low-FODMAP creations!
Simple & Easy: My recipes continue to focus on readily available ingredients and effortless preparation, perfect for family-friendly meals (no more separate low-FODMAP meal prep!).
Hundreds of existing recipes: Gain access to my entire library of low-FODMAP recipes, all conveniently organized.
You can join for free or sign up for only $5/month. Your support fuels my passion for creating new, delicious, and easy-to-make low-FODMAP recipes just for you.
Let's go on this delicious low-FODMAP journey together.
Lemon Butter Chicken Piccata with Crispy Capers (Low FODMAP)
45 Minutes • Low FODMAP • Gluten-free • Serves 4
5 Minutes prep • 20 Minutes cook • Low FODMAP • Gluten-Free • Serves 2 • Ok to make-ahead: Steps 1 - 2
Chicken Piccata is one of those classic dishes that sounds complicated but comes together in under 30 minutes — and with a few smart swaps, it's completely IBS-friendly without sacrificing a single drop of flavor. Garlic-infused olive oil delivers all that rich, savory depth without the fructans, and those fried capers get golden and crispy in the pan, turning into little flavor bombs that make this dish feel genuinely special. Bright lemon, buttery sauce, zero gut drama. This one belongs in your weekly rotation. Fancy enough for date night. Gut-friendly enough for every night.
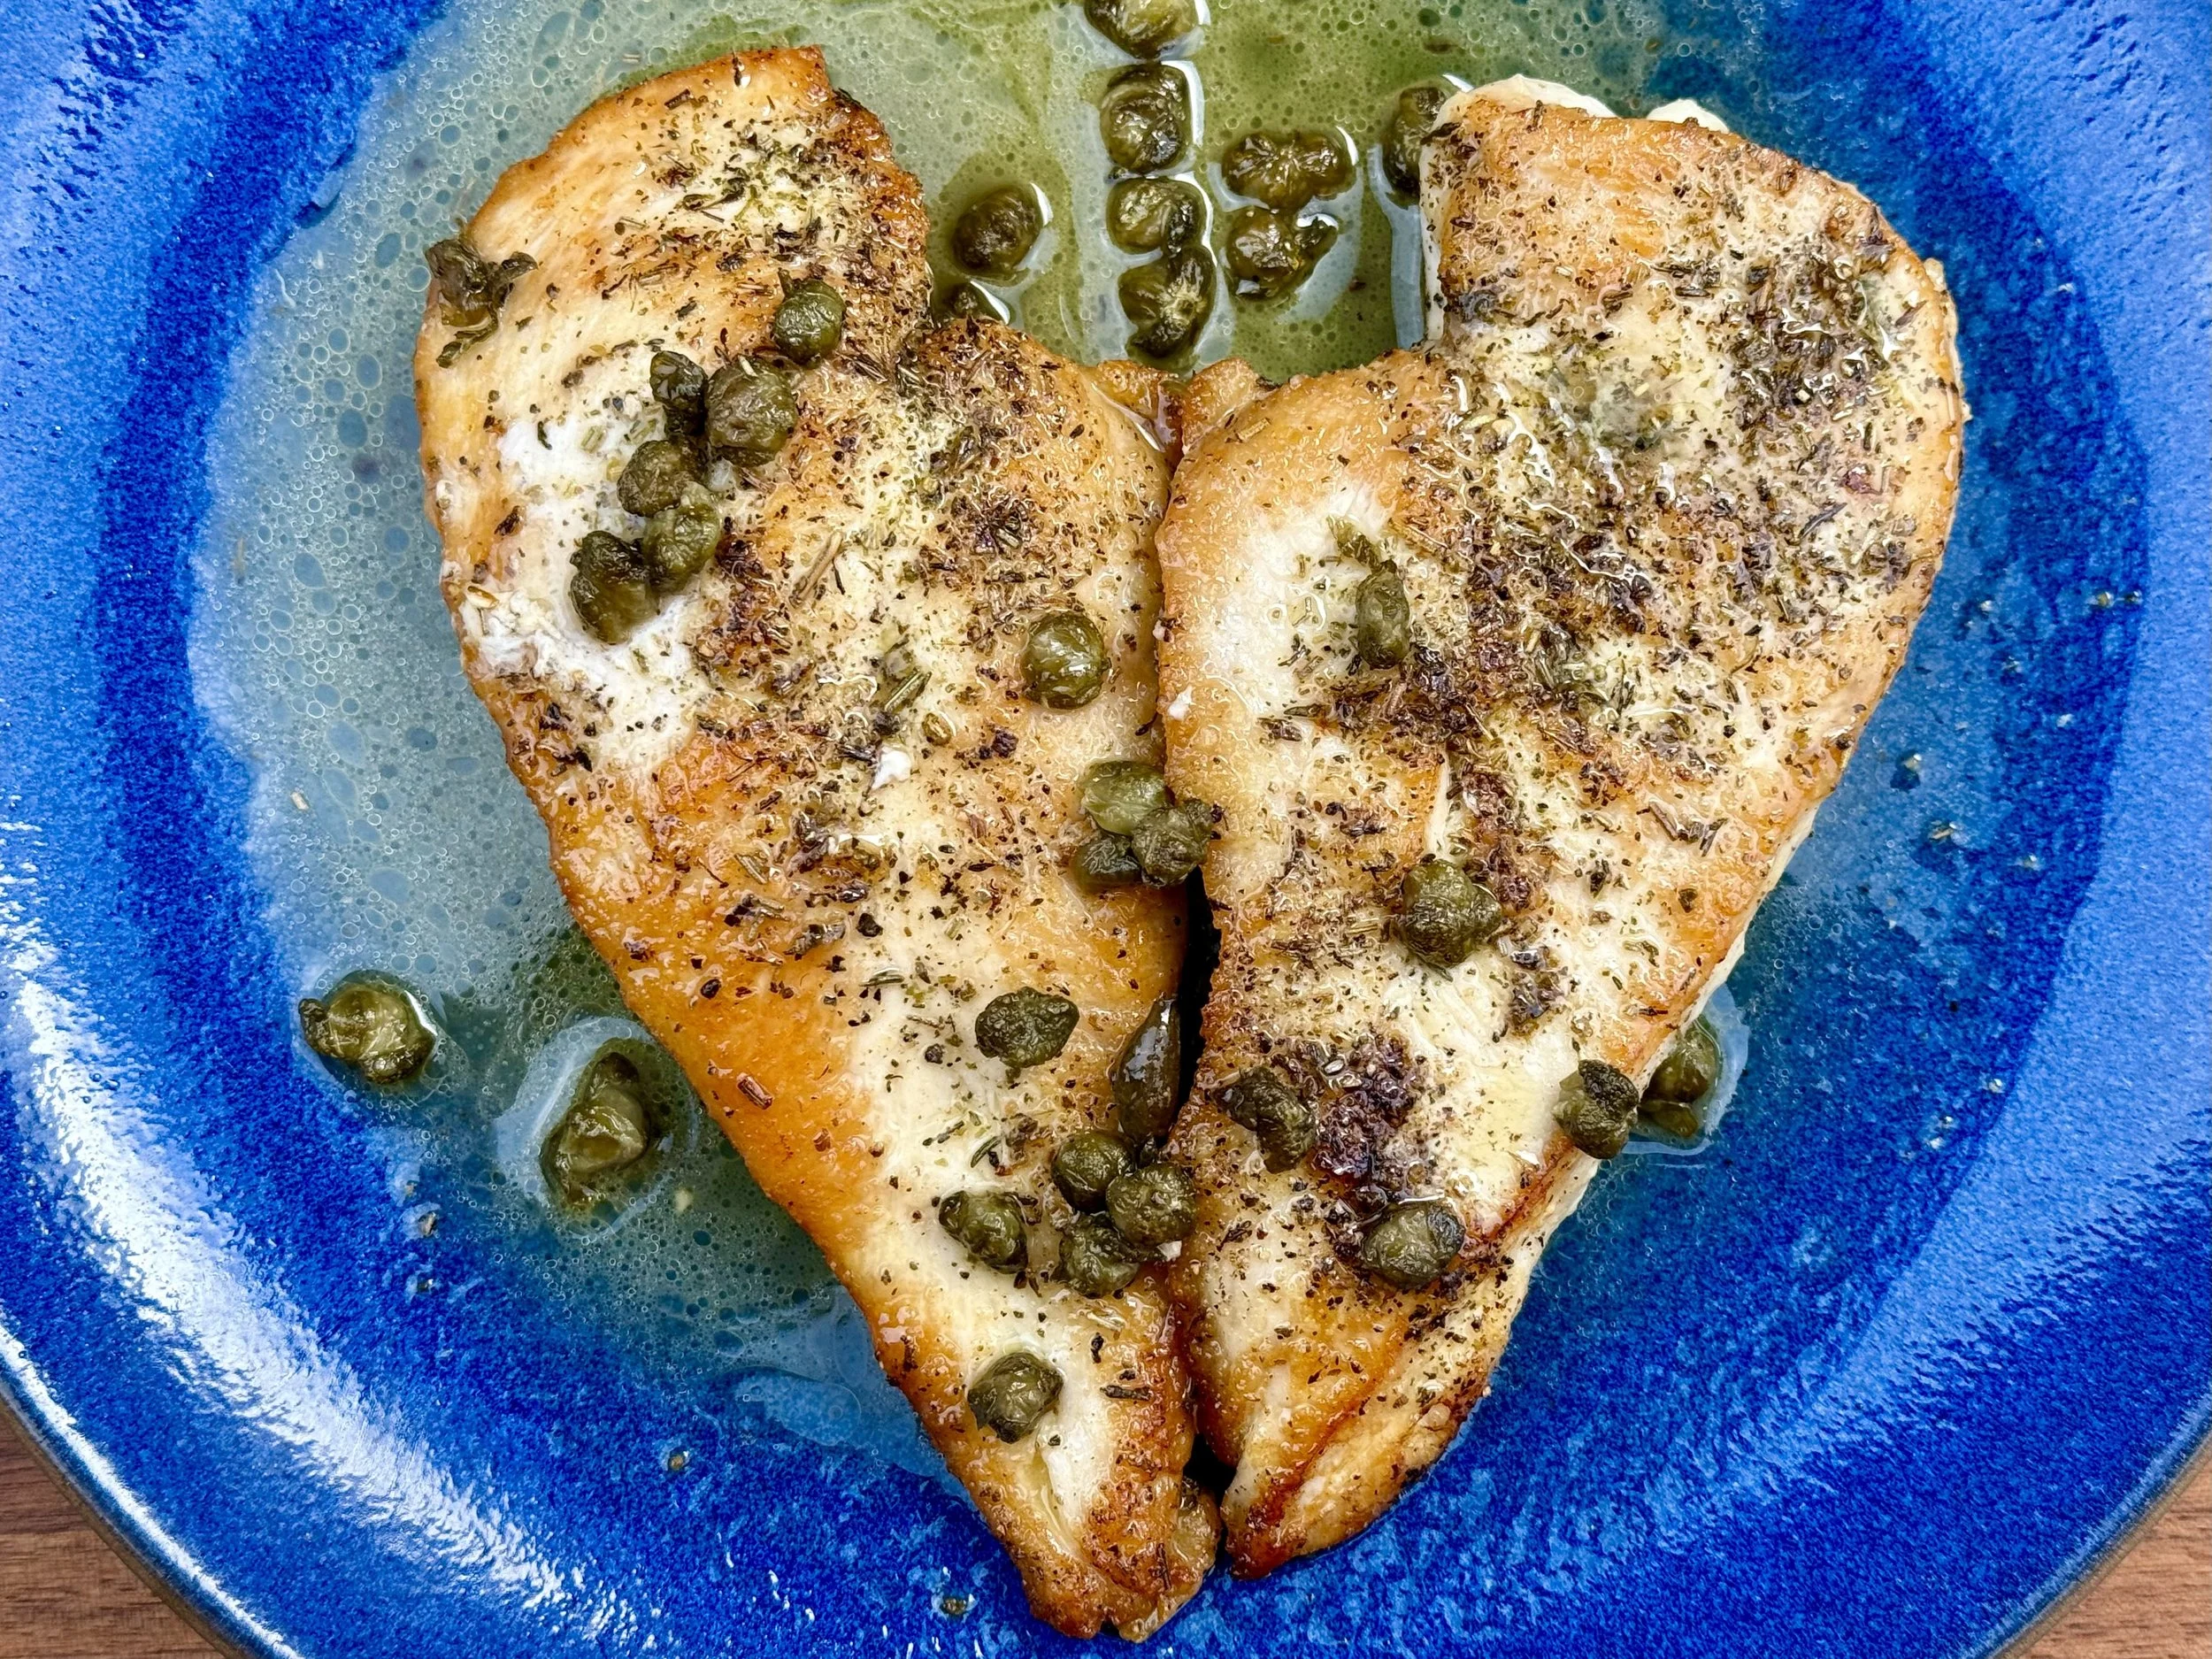
See this new recipe in my FREE recipe club.
To streamline your search through hundreds of existing recipes, I'm moving the release of my new weekly creations to the Recipe Club on Patreon. In the club, you’ll get access to a treasure trove of low-FODMAP goodness, complete with collections and filters to use as your virtual cookbook!
Here's what awaits you in the club:
Exclusive weekly recipes: Be the first to try my latest delicious low-FODMAP creations!
Simple & Easy: My recipes continue to focus on readily available ingredients and effortless preparation, perfect for family-friendly meals (no more separate low-FODMAP meal prep!).
Hundreds of existing recipes: Gain access to my entire library of low-FODMAP recipes, all conveniently organized.
You can join for free or sign up for only $5/month. Your support fuels my passion for creating new, delicious, and easy-to-make low-FODMAP recipes just for you.
Let's go on this delicious low-FODMAP journey together.
The IBS Food Detective Series: Part 2B - Fine-Tuning Your Results: Subdivision and Threshold Testing
This is the elimination protocol I've developed after years of working with my own IBS and helping hundreds of others. It's strategic, it's scientific, and most importantly, it's designed to expand your diet over time, not shrink it forever.
In Part 2A, you learned the three cardinal rules of elimination and how to run a proper 2-3 week test. You've eliminated a trigger category, tracked your results, and seen improvement.
Now what?
This is where most people make a critical mistake: they assume they need to avoid that entire category forever. If fat was the problem, they go low-fat permanently. If fiber-triggered symptoms, they avoid all high-fiber foods indefinitely.
This is unnecessary and will keep your diet more restricted than it needs to be.
Today, I'm teaching you how to fine-tune your results through subdivision testing and threshold testing. This is how you go from "I can't eat fat" to "I can eat plant-based fats in small amounts, but I need to avoid fried foods and heavy cream."
That level of precision is what gives you food freedom.
Step 4: Subdivision Testing (Weeks 4-8)
(See weeks 1 - 3 in part 2A here.)
If you saw improvement during your elimination, don't just avoid that entire category forever. Most trigger categories have subcategories, and you likely only react to some of them.
Example: If high-fat foods improved your symptoms, here's how I recommend testing subgroups:
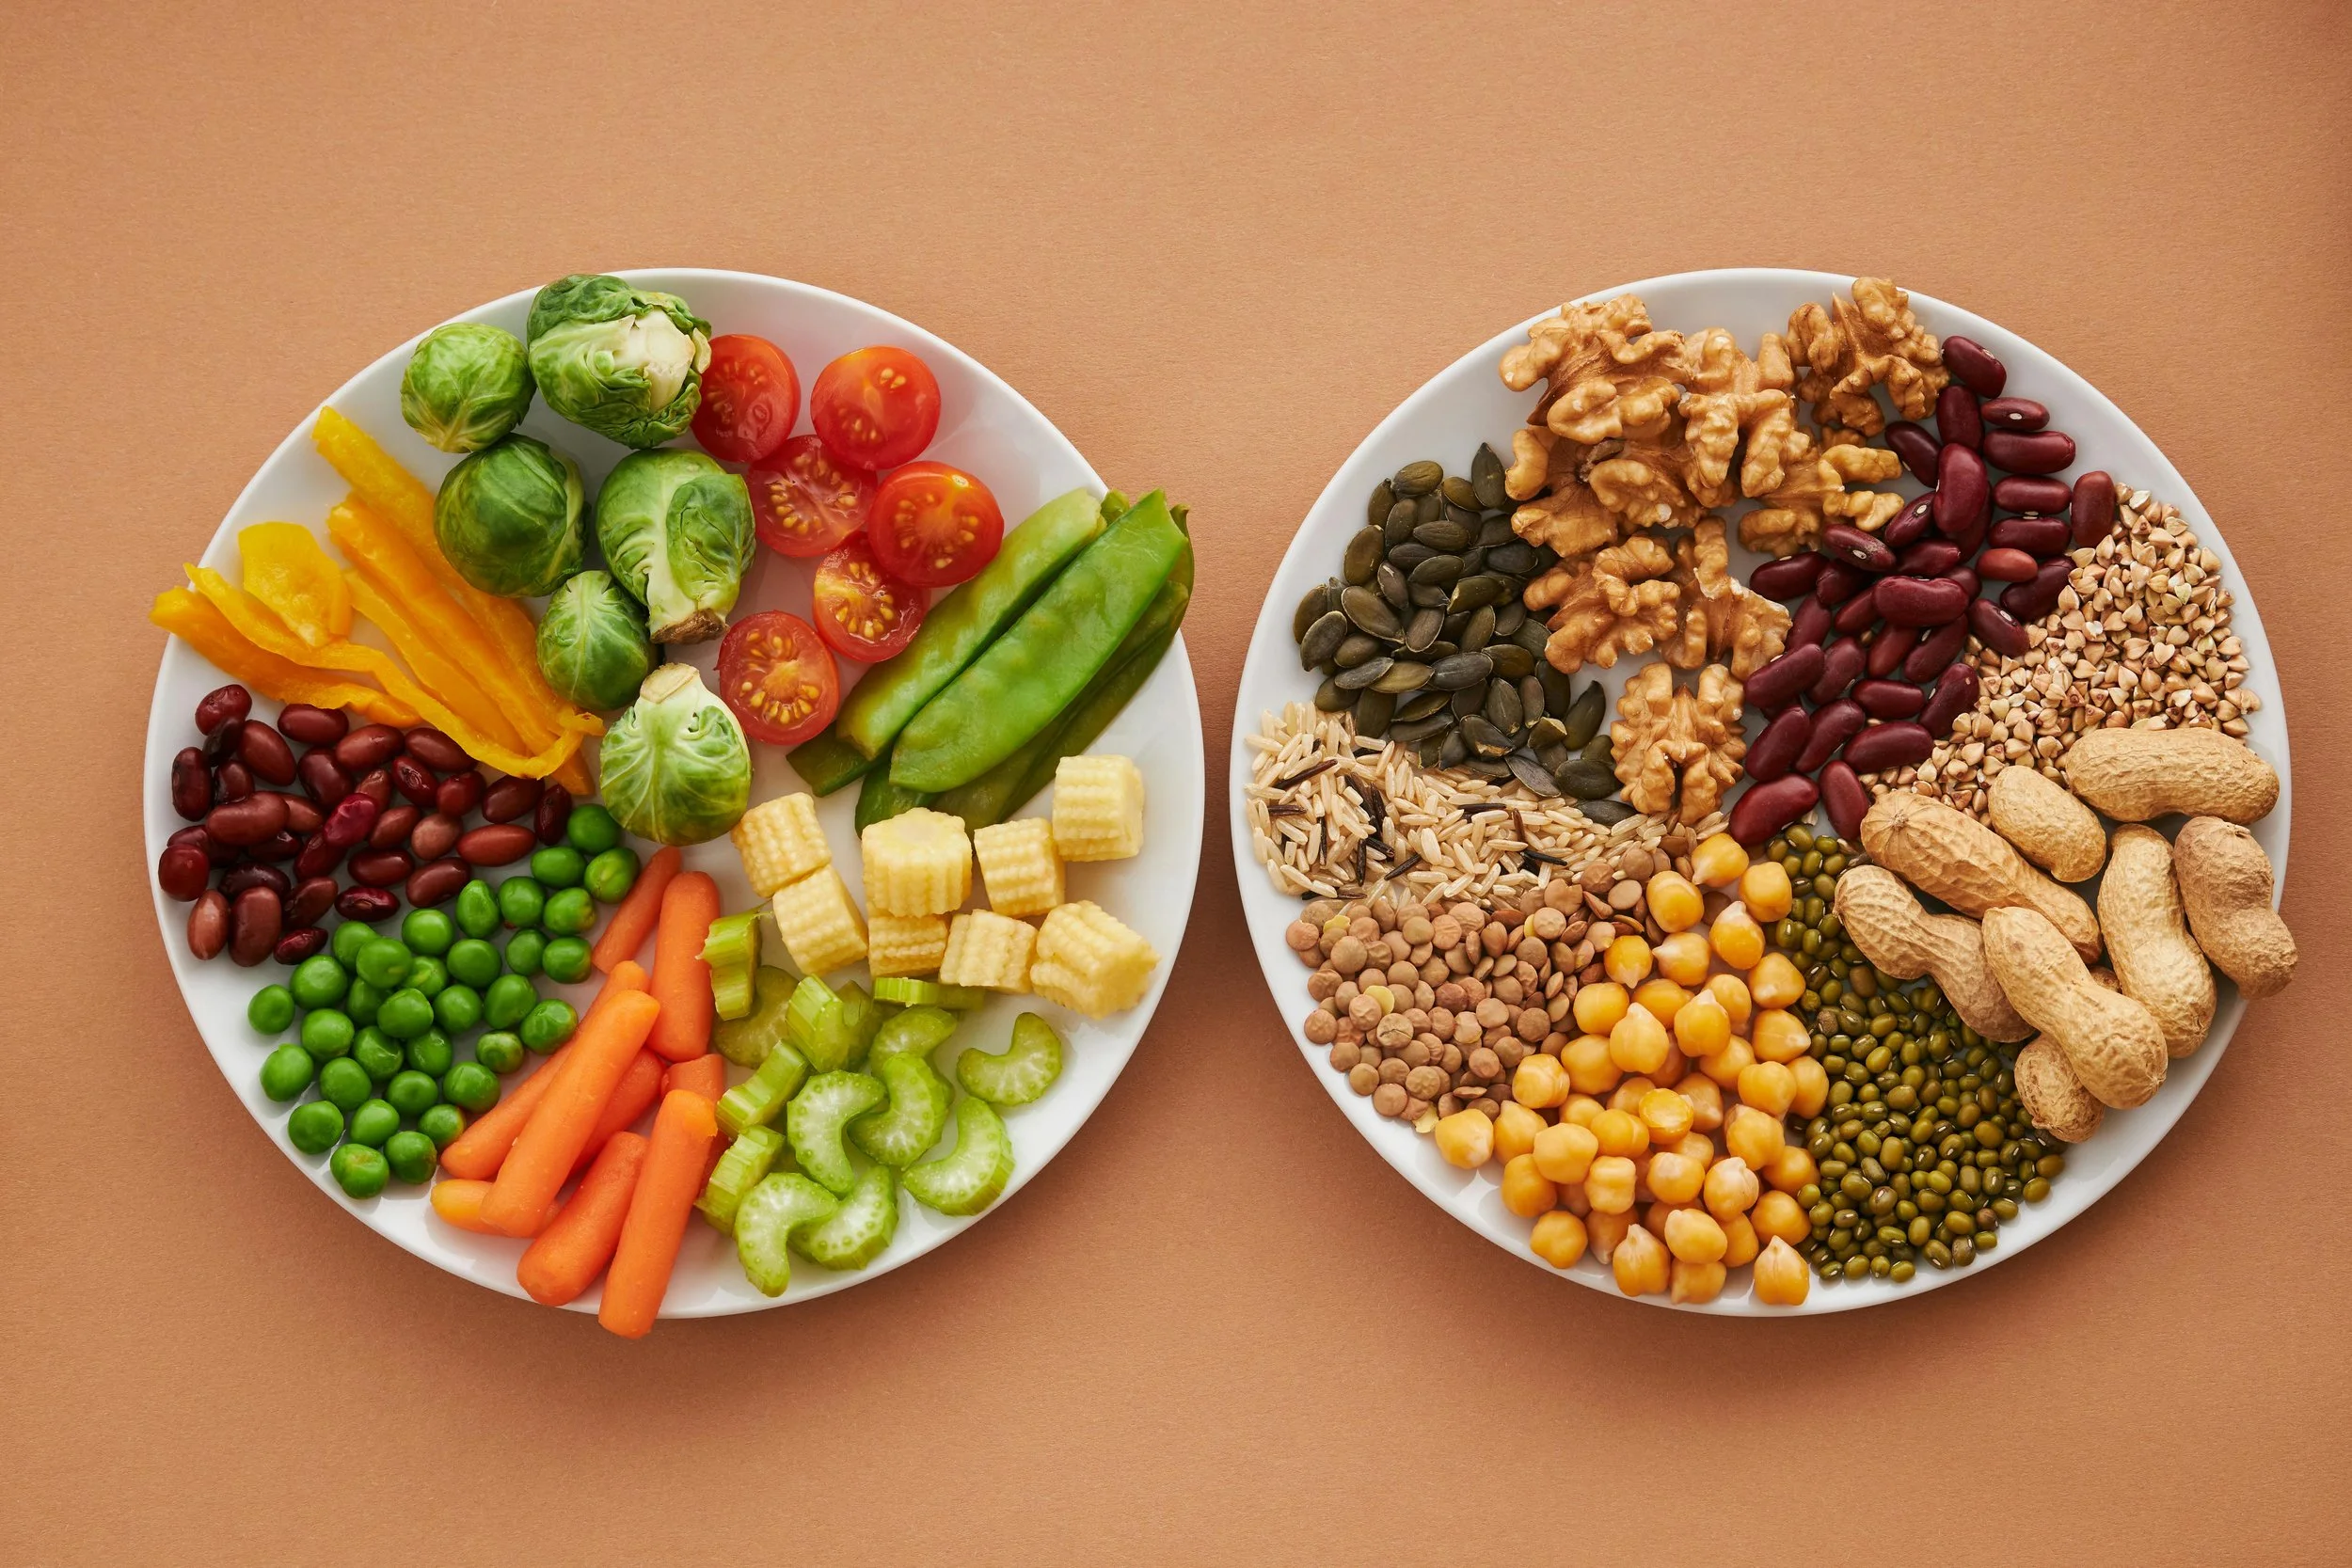
Week 4: Test plant-based fats (avocado, olive oil, nuts)
Week 5: Test dairy fats (cheese, butter, cream)
Week 6: Test fried foods
Week 7: Test fatty meats
How to test: Add back one subgroup for 3-4 days while keeping everything else low-fat. If symptoms return, that subgroup is a problem. If you stay stable, that subgroup is fine.
Example: If high-FODMAP foods improved your symptoms, I recommend testing these subgroups following the official FODMAP reintroduction protocol:
Week 4: Test fructans (wheat, garlic, onion—one at a time)
Week 5: Test lactose (milk, ice cream)
Week 6: Test polyols (stone fruits, sugar alcohols)
Week 7: Test GOS (legumes, beans)
Example: If high insoluble fiber improved your symptoms, test:
Week 4: Test cooked cruciferous vegetables (broccoli, cauliflower - well-cooked)
Week 5: Test raw vegetables in very small amounts
Week 6: Test whole grain products (one type at a time)
Week 7: Test nuts and seeds in small amounts
The goal: Build a precise list of "foods I actually need to avoid" rather than avoiding broad categories indefinitely.
How to Run a Subdivision Test
Let's walk through a specific example. Say you eliminated high-fat foods and felt significantly better. Now you're testing the plant-based fats subgroup.
Days 1-2: Test olive oil
Add 1 tablespoon of olive oil to your meals (on vegetables, in cooking)
Keep everything else low-fat
Track symptoms
Days 3-4: Test avocado
Eat 1/4 to 1/2 of an avocado
Keep everything else low-fat (no olive oil these days)
Track symptoms
Days 5-6: Test nuts
Eat 10-15 almonds or walnuts
Keep everything else low-fat (no olive oil or avocado these days)
Track symptoms
Days 7-8: Rest days
Return to low-fat eating
Let your gut reset before testing the next subgroup
Evaluate results:
Olive oil: No symptoms → SAFE
Avocado: Mild bloating → MAYBE (needs threshold testing)
Nuts: Cramping and diarrhea → AVOID
Now you know you can use olive oil freely, need to be careful with avocado portions, and should avoid nuts for now. That's way more freedom than "avoid all fats."
Why Subdivision Testing Matters
Without subdivision testing, you end up with overly broad restrictions:
"I can't eat vegetables" (when really you just can't eat raw cruciferous vegetables)
"I can't eat fruit" (when really you just can't eat high-FODMAP fruits like apples and pears)
"I can't eat fat" (when really you just can't eat fried foods and heavy cream)
These broad restrictions are unnecessarily limiting. Most people can tolerate some foods within their trigger category—you just need to find out which ones.
Step 5: Determine Your Tolerance Threshold (Weeks 8-10)
For the foods you've identified as triggers, you need to find your threshold. Most people can tolerate small amounts but react to larger amounts.
How to test thresholds:
Start with a very small amount and gradually increase over several days:
Day 1: 1/4 normal serving
Day 2: 1/2 normal serving
Day 3: 3/4 normal serving
Day 4: Full normal serving
Stop increasing when symptoms appear. The last amount that didn't trigger symptoms is your threshold.
Example with garlic:
Day 1: 1/4 clove cooked in food (fine)
Day 2: 1/2 clove (fine)
Day 3: 1 whole clove (bloating and gas) → Your threshold is 1/2 clove. You can have small amounts in cooked dishes, but not in dishes where garlic is a main ingredient.
Example with avocado:
Day 1: 2 tablespoons (fine)
Day 2: 1/4 avocado (fine)
Day 3: 1/2 avocado (mild symptoms)
Day 4: Whole avocado (significant symptoms) → Your threshold is 1/4 avocado. You can have small amounts, but not the whole Instagram-worthy avocado toast.
Example with coffee:
Day 1: 4 oz (1/2 cup) coffee (fine)
Day 2: 8 oz (1 cup) coffee (fine)
Day 3: 12 oz (fine on some days, symptoms on others)
Day 4: 16 oz (symptoms) → Your threshold is 8 oz. One cup of coffee is fine, but not a giant mug.
This threshold testing is crucial. It's the difference between "I can never have garlic" and "I can have garlic-flavored dishes but not dishes where garlic is a main ingredient."
Thresholds Can Vary by Context
Your threshold for a trigger food might be different depending on:
Your stress level (lower tolerance when stressed)
Other foods in the meal (lower tolerance when combined with other triggers)
Time of day (some people tolerate triggers better at certain times)
Where you are in your menstrual cycle (if applicable)
How well you slept (poor sleep lowers tolerance)
This is why you might tolerate 1/2 cup of coffee on a calm Tuesday morning but react to the same amount on a stressful Monday after poor sleep.
Track these contextual factors in your food diary. Over time, you'll learn not just your thresholds but the conditions under which those thresholds shift.
Common Elimination Mistakes I See (and how to avoid them)
Mistake 1: Eliminating Too Many Categories at Once
The fix: Test one category at a time, even if it takes longer. I promise you, patience now saves months of confusion later.
Mistake 2: Not Being Strict Enough
"I mostly avoided dairy except for a little cheese," won't give you useful data. If you're testing it, eliminate it completely.
The fix: Read every label. Ask about ingredients at restaurants. Take the test seriously.
Mistake 3: Testing During a Flare-Up
You can't tell if an elimination is working when your gut is already in chaos from stress, illness, or hormones.
The fix: Wait for relative stability before starting. Or use the reset diet first.
Mistake 4: Not Giving It Enough Time
3-4 days isn't enough to clear most triggers and see consistent results.
The fix: Commit to 2-3 weeks. Mark it on your calendar. Don't quit early.
Mistake 5: Avoiding Foods Forever Without Retesting
Your gut changes over time. What triggered you 6 months ago might be fine now, especially if you've been working on the gut-brain connection and sleep.
The fix: Retest previously identified triggers every 6-12 months. You might be pleasantly surprised.
Mistake 6: Not Doing Subdivision or Threshold Testing
This is the biggest mistake. People identify a trigger category and avoid it forever without narrowing it down.
The fix: Always do subdivision and threshold testing. Don't stop at "fat is bad" or "fiber is bad." Get specific.
Mistake 7: Blaming Everything on Food
If you've eliminated multiple categories and still have constant symptoms, food probably isn't your main issue.
The fix: Shift focus back to stress, sleep, gut-brain axis, hormones, or consider working with a gastroenterologist to rule out other conditions.
The Reintroduction Mindset Shift
This is the most important mental reframe: The goal of elimination is reintroduction.
You're not trying to find out what you can't eat. You're trying to find out what you CAN eat. Every food you successfully reintroduce is a win.
Most people approach this with dread: "Oh no, I have to test this food I'm scared of."
Flip it: "I'm excited to find out if I can actually tolerate this!"
When a food passes the test, celebrate it. Add it to your "safe foods" list with confidence. Your diet should be expanding over time, not shrinking.
Shifting from Fear to Curiosity
Instead of:
"What if this triggers my symptoms?" → Try: "I'm curious to see how my body responds to this."
Instead of:
"I'll never be able to eat normally again." → Try: "I'm building a personalized diet that works for my body."
Instead of:
"I failed because I reacted to this food." → Try: "I gained valuable information. Now I know to avoid this."
This mindset shift makes the whole process feel less like deprivation and more like discovery.
Your Testing Schedule Template
Here's a sample 12-week testing schedule:
Weeks 1-3: Eliminate high-fat foods (your suspected primary trigger)
Weeks 4-7: Subdivision testing of fats (plant vs. dairy vs. fried vs. meats)
Weeks 8-10: Threshold testing for identified fat triggers
Week 11: Rest week (eat your safe foods, let your gut stabilize)
Weeks 12-14: Eliminate next suspect category (let's say FODMAPs)
Notice the rest week between testing phases. Your gut needs breaks from experimentation.
Important: This timeline is flexible. If you need more time in any phase, take it. If you're moving faster, that's fine too. The point is to be systematic, not to rush.
When to Get Professional Help
Consider working with a registered dietitian or coach who specializes in IBS if:
You've eliminated multiple categories and still have severe symptoms
You're down to fewer than 15 safe foods
You're losing weight unintentionally
You're so anxious about food that it's interfering with your life
You need help navigating the low-FODMAP protocol specifically
You have other dietary restrictions (vegetarian, vegan, allergies) that make this complicated
A good dietitian or coach can help you test systematically, ensure nutritional adequacy, and provide accountability.
Tracking Tools That Actually Help
The simple version: Use a notebook or note app with three columns:
Date | Foods eaten | Symptoms (0-10 scale)
The detailed version: Use a spreadsheet with columns for:
Date | Time | Food | Amount | Category tested | Preparation method | Stress level | Symptoms | Time to symptoms | Notes
Apps that can help:
Cara Care (designed specifically for IBS food tracking)
MySymptoms Food Diary (tracks foods and symptoms with charts)
Simple spreadsheets in Google Sheets or Excel
The best tool is the one you'll actually use consistently.
What I'm Covering in Part 3
In Part 3, I'm covering reintroduction done right—the exact step-by-step process for adding foods back safely, how to interpret mixed results, what to do when you react to something you really want to eat, and how to build a sustainable, varied diet that doesn't feel restrictive.
I'll also tackle the psychological side of reintroduction: the fear, the anxiety, and the tendency to stay restricted even when you don't need to be.
What's been your biggest challenge with food elimination? Have you done subdivision or threshold testing?
Disclaimer: This content is for informational purposes only and should not replace professional medical advice. Work with a registered dietitian or healthcare provider when making significant dietary changes, especially if you have other health conditions or dietary restrictions.
The IBS Food Detective Series: Part 2A - The Smart Elimination Protocol: Getting Started Right
This is the elimination protocol I've developed after years of working with my own IBS and helping hundreds of others. It's strategic, it's scientific, and most importantly, it's designed to expand your diet over time, not shrink it forever.
You've done your detective work from Parts 1A and 1B. You've tracked your foods, identified some patterns, and you have suspects. Now comes the hard part: testing them systematically to find out what's actually triggering your symptoms.
I see most people approach food elimination completely wrong. They either eliminate too much at once (and can't tell what helped), eliminate too little (and see no change), or eliminate things indefinitely without ever testing them again.
The result? People end up with impossibly restricted diets, still have symptoms, and have no idea what they can actually eat.
Today, I'm going to fix that.
This is the elimination protocol I've developed after years of working with my own IBS and helping hundreds of others. It's strategic, it's scientific, and most importantly, it's designed to expand your diet over time, not shrink it forever.
The Three Cardinal Rules of Smart Elimination
Before I dive into the protocol, you need to understand these fundamental principles:
Rule 1: Test One Category at a Time
If you eliminate five things at once and feel better, you have no idea which of the five was the problem. Maybe it was only one. Maybe it was the combination of two. You've just made your life harder than it needs to be.
The only exception: If you're in crisis mode with severe daily symptoms, you might need to start with a very basic "reset diet" before testing. I'll cover that scenario at the end of this post.
Why this matters:
Let's say you eliminate dairy, gluten, high-fat foods, caffeine, and FODMAPs all at once. After two weeks, you feel better. Great! But now what?
You have no idea which of those five was actually the problem. Was it all of them? Just one? A combination of two? You're stuck avoiding all five indefinitely because you're scared to test them.
Instead, if you eliminate high-fat foods first and feel better, you know fat is a trigger. Then you can test the other categories while keeping fat low. This gives you clear, actionable data.
Rule 2: Give It Enough Time (But Not Too Much)
I see most elimination diets fail because of timing. Too short (3-4 days) and you haven't cleared the suspected trigger from your system or seen consistent results. Too long (6+ months) and you've unnecessarily restricted your diet.
The sweet spot I've found: 2-3 weeks for most food categories. This is long enough to see clear patterns but short enough that you're not living in restriction purgatory.
Why 2-3 weeks?
Days 1-3: Your body is still processing the trigger foods you ate before starting
Days 4-7: Your gut is adjusting to the change
Days 8-14: You're seeing the true effects of the elimination
Days 15-21: You're confirming the pattern is consistent
If you only eliminate for 3-4 days, you might still be dealing with residual effects from before you started. If you eliminate for 6 months, you're just punishing yourself unnecessarily.
Rule 3: Test During Stable Times
Don't start an elimination during a major life stressor, right before your period (if you're female), during travel, or in the middle of a severe flare-up. You need a reasonably stable baseline to see if the elimination actually makes a difference.
If you're never stable, that's information too—it suggests your triggers might be more about stress, sleep, or hormones than food.
What "stable" means:
You're not in the middle of a major flare-up
You're not traveling or disrupting your routine significantly
You're not in an unusually stressful period (moving, job change, etc.)
If you menstruate, you're not testing during the week before your period
You're not sick with a cold, flu, or other illness
You don't need to be symptom-free to start testing—just relatively consistent day-to-day.
The Smart Elimination Framework: Your Roadmap
Here's the step-by-step process:
Step 1: Choose Your First Suspect (Week 0)
Based on your food diary from Parts 1A and 1B, identify the single most likely trigger category. How do you choose?
Pick the category where:
You have the most consistent symptom patterns
The timing matches (remember: fat/caffeine = 30-90 min; FODMAPs/fiber = 2-6 hours; histamine = variable)
The symptoms are most severe or disruptive
Common first eliminands by symptom pattern:
Urgent diarrhea within 30-60 minutes of eating? Start with high-fat foods or caffeine
Bloating and gas 3-4 hours after meals? Start with high-FODMAP foods
Inconsistent reactions to "healthy" foods? Start with additives/processed foods
Issues with leftovers but not fresh food? Start with high-histamine foods
Don't second-guess this. Pick one based on your data and commit to testing it properly.
My recommendation: If you're torn between two categories, start with the one that's easiest to eliminate. Fat is often easier to test than FODMAPs because it's more straightforward to identify high-fat foods.
Step 2: Define What You're Eliminating (Week 0)
Be specific. "No dairy" is vague. "No high-lactose dairy products (milk, ice cream, soft cheese) but keeping hard cheese and butter" is specific.
Write down:
The foods you're eliminating (complete list)
The foods you're keeping (yes, write this too—it prevents scope creep)
Your start date (pick a Monday or the start of a stable week)
Your end date (2-3 weeks from start)
Example elimination - High Fat:
Eliminating: Fried foods, creamy sauces, fatty cuts of meat, full-fat dairy, pastries, foods cooked in lots of oil, avocados, nuts beyond 10-15 pieces
Keeping: Lean proteins (chicken breast, white fish, turkey), low-fat dairy, olive oil in small amounts (1 tablespoon), baked/grilled foods
Start date: Monday, April 7
End date: Sunday, April 27 (3 weeks)
Example elimination - High Insoluble Fiber:
Eliminating: Raw vegetables, large salads, whole wheat products, popcorn, nuts with skins, seeds, raw fruit skins
Keeping: Cooked vegetables (peeled when possible), white rice, white bread/sourdough, peeled fruit, oatmeal, smooth nut butters
Start date: Monday, April 7
End date: Sunday, April 27 (3 weeks)
Example elimination - Caffeine:
Eliminating: Coffee (regular and decaf has some caffeine), black tea, green tea, energy drinks, chocolate, caffeinated sodas
Keeping: Herbal teas, water, caffeine-free beverages
Start date: Monday, April 7
End date: Sunday, April 27 (3 weeks)
Notice how specific these are. There's no ambiguity about what's in or out.
Step 3: Elimination Phase (Weeks 1-3)
For the next 2-3 weeks, completely avoid your target category. Not "mostly avoid" or "just a little." Completely.
During this phase:
Continue your food-symptom diary (now tracking compliance with elimination)
Note your symptom levels daily (1-10 scale for bloating, pain, bowel disruption)
Note any other changes (stress, sleep, hormones, illness)
Stay consistent with other aspects of your life (don't change five other things simultaneously)
What to track each day:
Overall symptom severity (1-10)
Specific symptoms (bloating, cramping, diarrhea, constipation, urgency)
Number of "good" hours vs. "bad" hours
Any instances where you accidentally ate the trigger (it happens—note it and move on)
Stress level, sleep quality, other relevant factors
What counts as success:
After 2-3 weeks, you should see one of three outcomes:
Outcome A: Significant improvement (symptoms reduced by 50% or more, more good days than bad) → This was likely a major trigger. Proceed to subdivision testing (which I'll cover in Part 2B).
Outcome B: Moderate improvement (symptoms reduced by 20-40%, some better days) → This might be a trigger but probably not your only one. Proceed to subdivision testing, but plan to test another category afterward.
Outcome C: No improvement (symptoms unchanged or worse) → This probably isn't a trigger for you. Move on to testing the next category on your suspect list.
Important: Don't panic if you have a few bad days during the elimination. Look at the overall trend, not individual days. Did week 3 feel better than week 1? That's what matters.
The Crisis Mode Reset Diet (For Severe Cases Only)
If your symptoms are so severe and constant that you can't establish a baseline, you might need to start with a basic reset diet before testing individual categories.
The 1-Week Reset:
Eat only these foods for 7 days:
White rice
Baked or grilled chicken breast (no skin)
Baked or grilled white fish
Peeled, cooked carrots
Peeled, cooked zucchini
Bananas (ripe)
White bread or sourdough (small amounts)
Water, peppermint tea
Salt, black pepper (only seasonings)
This is extremely restrictive and is NOT meant to be followed long-term. It's a reset button to calm your system.
After 7 days on this reset:
If symptoms significantly improve: Start adding foods back one at a time, one every 2-3 days
If symptoms don't improve: Your triggers are likely not primarily food-related. Focus on stress, sleep, and gut-brain work from our previous series
Start with the least likely triggers first when adding back:
Week 2: Add cooked vegetables (potatoes, green beans, cooked spinach)
Week 3: Add other lean proteins (turkey, eggs)
Week 4: Add low-FODMAP fruits (strawberries, blueberries, oranges)
Week 5: Add small amounts of fats (olive oil, small amounts of nuts)
Build slowly. The goal is to get back to a varied diet as quickly as possible while identifying your specific triggers.
When NOT to Do a Reset Diet
The reset diet is only for people who:
Have severe symptoms every single day
Can't identify any pattern in their symptoms
Have already tried eliminating individual categories without success
Are willing to be extremely restrictive for a short period
Don't do a reset if:
You have a history of disordered eating
You're already very restricted (fewer than 20 safe foods)
You have identifiable patterns in your symptoms (test those specific categories instead)
You're pregnant, breastfeeding, or have other medical conditions requiring varied nutrition
What I'm Covering in Part 2B
In the next post, I'll walk you through what happens after you've completed your elimination:
Subdivision testing (how to narrow down exactly which foods in a category are the problem)
Threshold testing (finding the amount you can tolerate)
Common elimination mistakes and how to avoid them
The reintroduction mindset shift
Your testing schedule template
You'll learn how to go from "fat is a trigger" to "I can handle small amounts of plant-based fats but need to avoid fried foods and heavy cream" — that level of precision is what gives you food freedom.
Have you tried elimination diets before? What mistakes did you make? What worked? Share in the comments!
Sour Cream Dill Dressing (Low FODMAP)
10 Minutes prep • Low FODMAP • Gluten-Free • Lactose-Free • Makes 1 cup
10 Minutes prep • Low FODMAP • Gluten-Free • Lactose-Free • Makes 1 cup • Ok to make-ahead: Steps 1 - 4
This cool, herbaceous dressing is everything a salad deserves — tangy sour cream and yogurt layered with bright fresh dill, a hint of garlic (low FODMAP of course), and a splash of lemon. It comes together in minutes and tastes like it's been a favorite family recipe forever. Drizzle it over crisp greens, use it as a dip for cut veggies, or spoon it generously over roasted potatoes. Bonus: it's completely lactose-free, so everyone at the table can dig in.
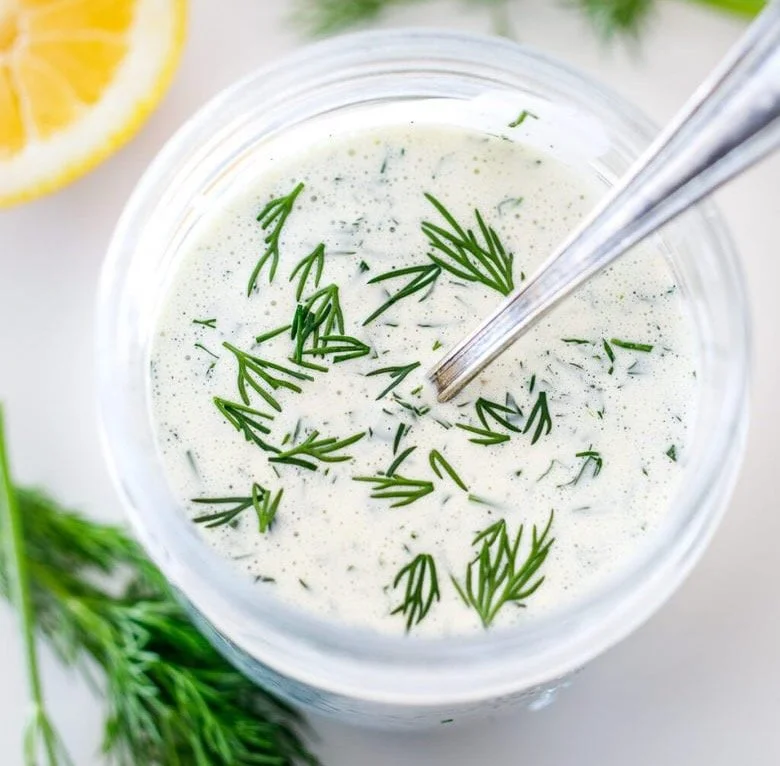
See this new recipe in my FREE recipe club.
To streamline your search through hundreds of existing recipes, I'm moving the release of my new weekly creations to the Recipe Club on Patreon. In the club, you’ll get access to a treasure trove of low-FODMAP goodness, complete with collections and filters to use as your virtual cookbook!
Here's what awaits you in the club:
Exclusive weekly recipes: Be the first to try my latest delicious low-FODMAP creations!
Simple & Easy: My recipes continue to focus on readily available ingredients and effortless preparation, perfect for family-friendly meals (no more separate low-FODMAP meal prep!).
Hundreds of existing recipes: Gain access to my entire library of low-FODMAP recipes, all conveniently organized.
You can join for free or sign up for only $5/month. Your support fuels my passion for creating new, delicious, and easy-to-make low-FODMAP recipes just for you.
Let's go on this delicious low-FODMAP journey together.
One Pan Creamy Baked Salmon with Dill (Low FODMAP)
15 Minutes prep • 20 Minutes cook • Low FODMAP • Gluten-Free • Serves 4
15 Minutes prep • 20 Minutes cook • Low FODMAP • Gluten-Free • Serves 4 • Ok to make-ahead: Steps 1 - 4
Some nights you want something that feels a little fancy without the fuss. This is that recipe. The secret is broiling the salmon first with butter and thyme until the edges are perfectly crisp, then finishing it in a silky Parmesan cream sauce with spinach, lemon, and fresh dill. Rich, bright, and deeply satisfying — and it all comes together in one skillet in about thirty minutes. Elegant enough for company. Easy enough for a Tuesday.
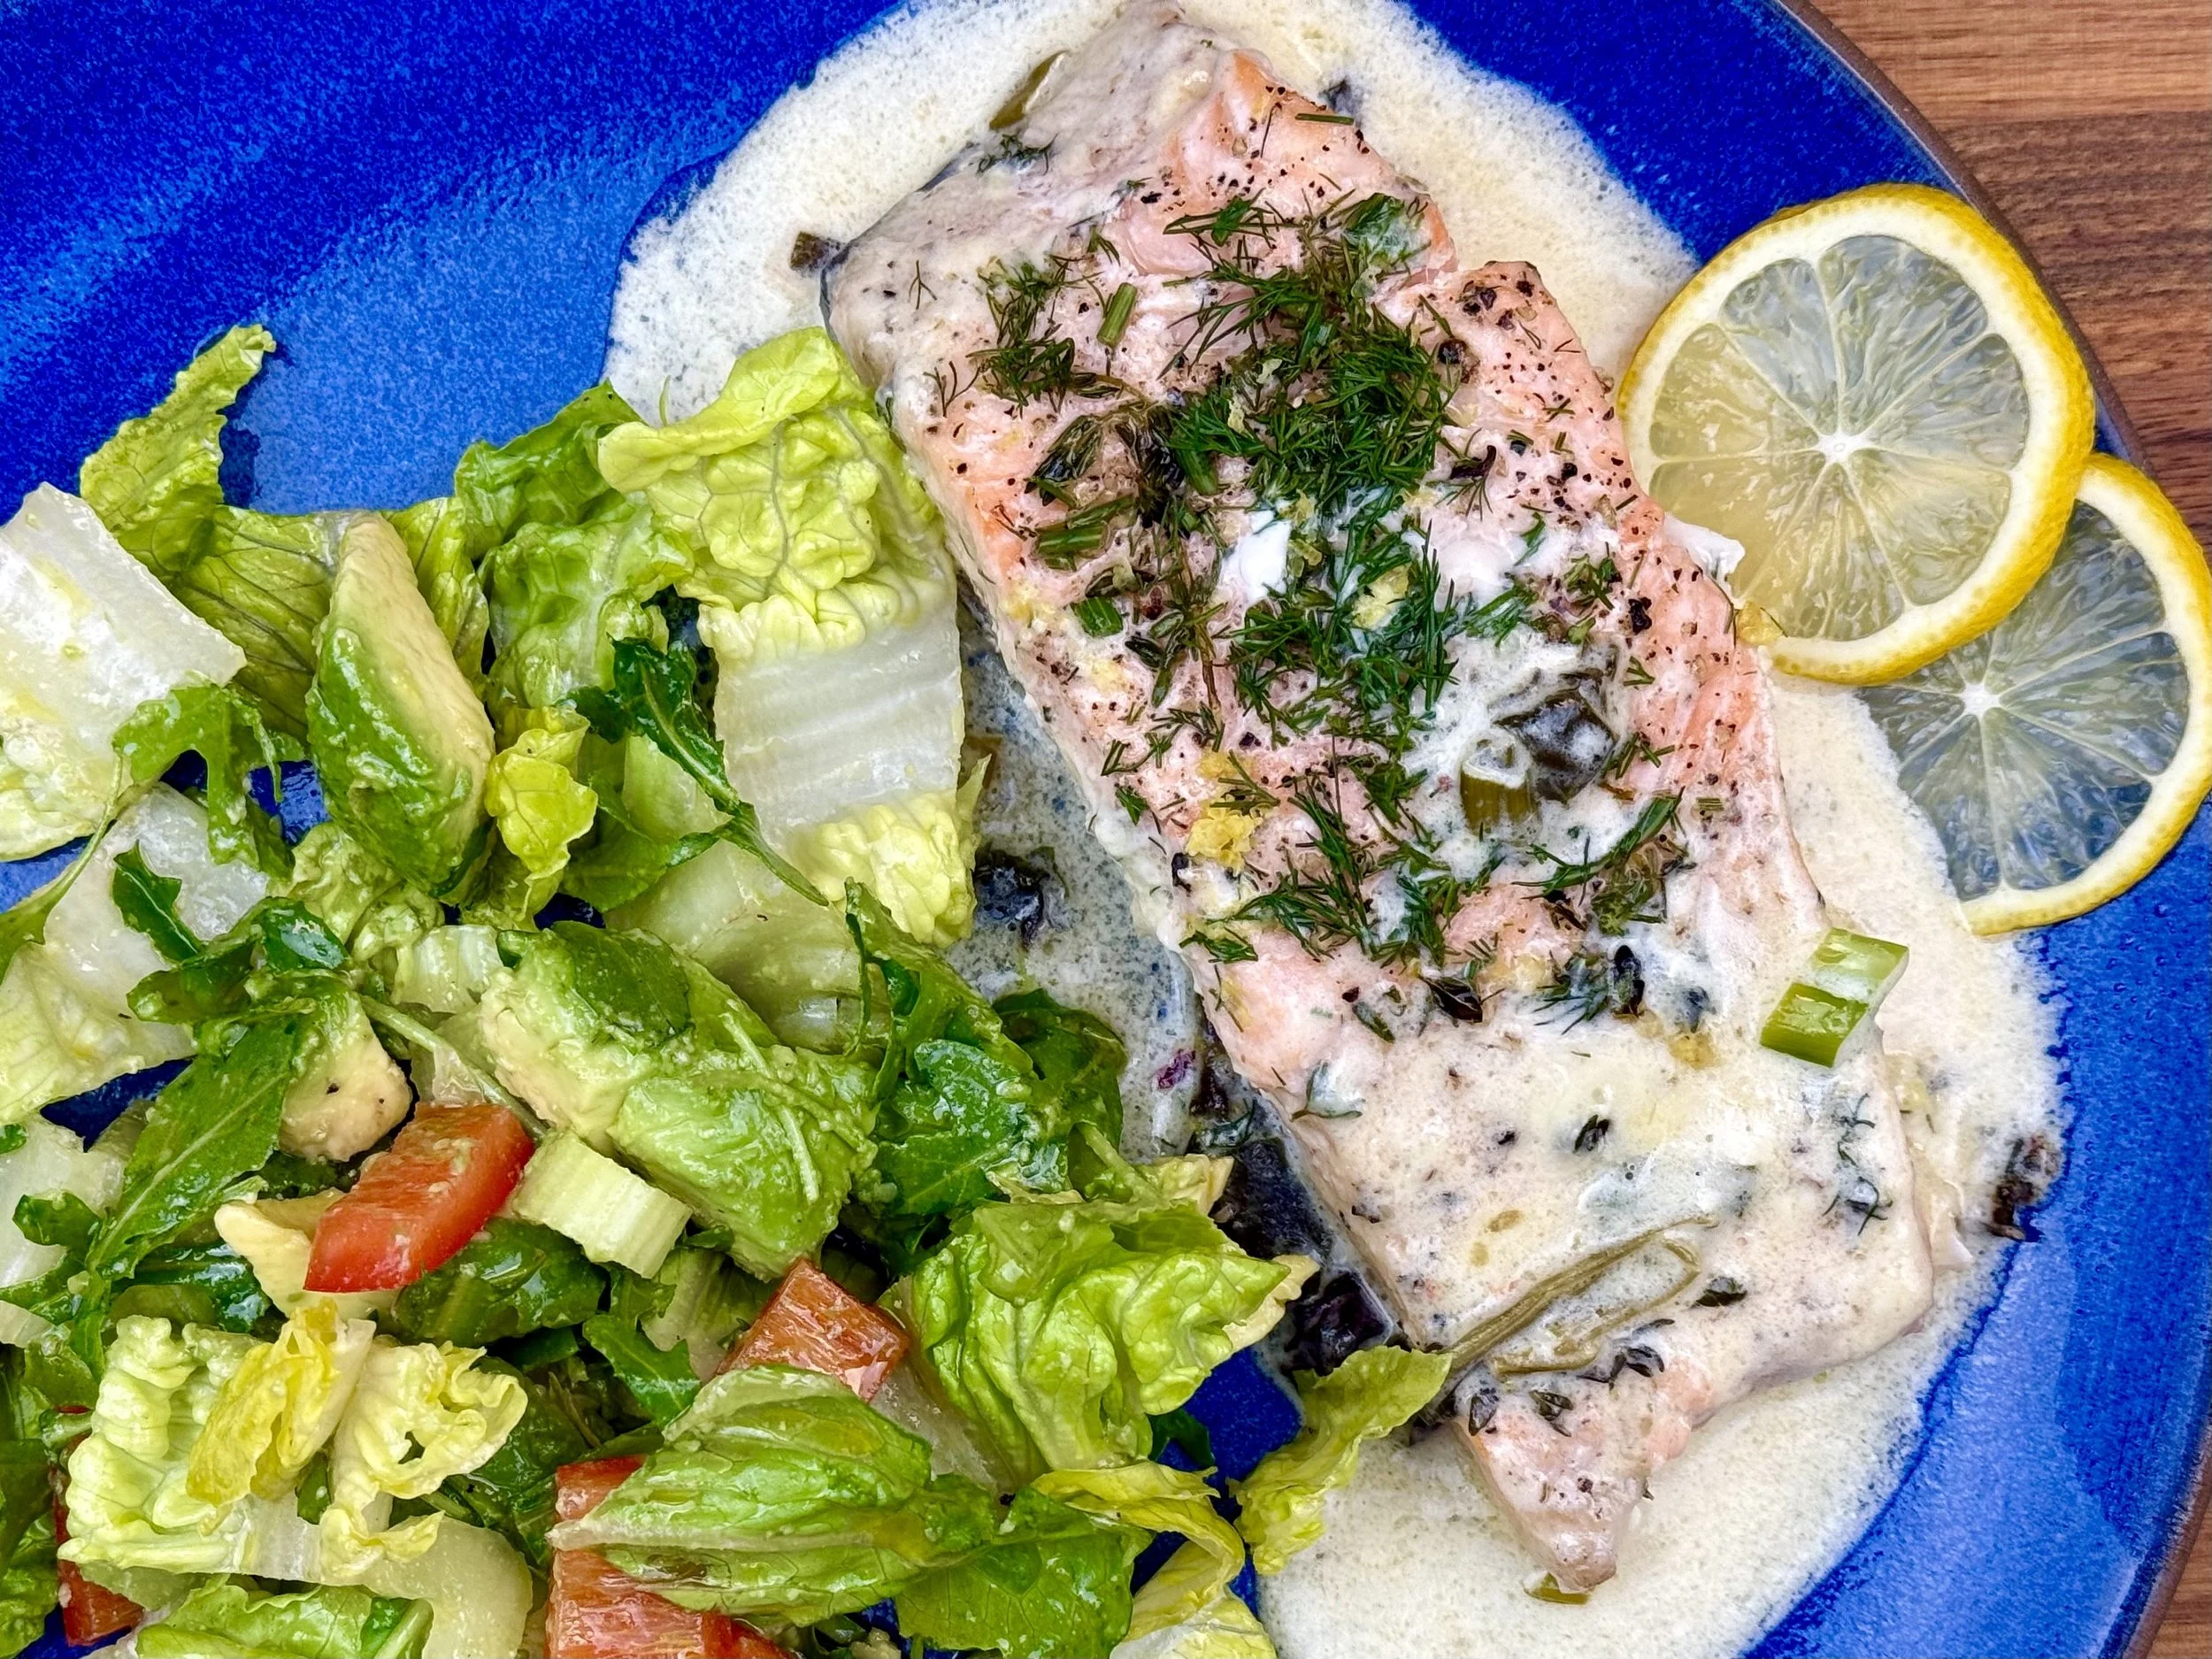
See this new recipe in my FREE recipe club.
To streamline your search through hundreds of existing recipes, I'm moving the release of my new weekly creations to the Recipe Club on Patreon. In the club, you’ll get access to a treasure trove of low-FODMAP goodness, complete with collections and filters to use as your virtual cookbook!
Here's what awaits you in the club:
Exclusive weekly recipes: Be the first to try my latest delicious low-FODMAP creations!
Simple & Easy: My recipes continue to focus on readily available ingredients and effortless preparation, perfect for family-friendly meals (no more separate low-FODMAP meal prep!).
Hundreds of existing recipes: Gain access to my entire library of low-FODMAP recipes, all conveniently organized.
You can join for free or sign up for only $5/month. Your support fuels my passion for creating new, delicious, and easy-to-make low-FODMAP recipes just for you.
Let's go on this delicious low-FODMAP journey together.
The IBS Food Detective Series: Part 1B - The Hidden Triggers Nobody Talks About
In this post, I'm diving into the triggers that fly completely under the radar. These are the ones that make you think you're going crazy because you react to random foods that don't fit any obvious pattern.
In Part 1A, I covered fat and fiber triggers—two categories that most people with IBS eventually discover. But today, I'm diving into the triggers that fly completely under the radar. These are the ones that make you think you're going crazy because you react to random foods that don't fit any obvious pattern.
If you've ever thought, "Why does this protein bar destroy my gut when it's supposed to be healthy?" or "Why do leftovers always make me feel worse than fresh food?" or "Why does my 'gut-healthy' kombucha make me bloated?"—this post is for you.
Let's talk about the three hidden trigger categories that most doctors never mention.

Trigger Category 3: Food Additives and Preservatives
This is the trigger category most doctors don't talk about, but it's huge for many people with IBS.
Artificial sweeteners are particularly problematic:
Sugar alcohols (sorbitol, mannitol, xylitol, erythritol): Found in "sugar-free" products, these are actually FODMAPs and can cause severe gas, bloating, and diarrhea
Sucralose and aspartame: May alter gut bacteria and trigger symptoms in some people
Other common additive triggers:
Carrageenan: A thickener in dairy products, non-dairy milks, and processed foods. Can cause inflammation in sensitive individuals
Inulin/chicory root: Added to protein bars, fiber supplements, and "healthy" processed foods as a fiber booster. It's a FODMAP that causes severe bloating for many
MSG and related flavor enhancers: Can trigger symptoms in some people
Guar gum and xanthan gum: Thickeners that can cause gas and bloating
Artificial colors: Particularly in candy, drinks, and processed foods
Detective clue: If you have symptoms from processed or packaged foods but not from simple, whole foods, start reading ingredient labels carefully. If you react to protein bars, "healthy" snacks, or diet products, additives might be the issue.
The "Health Food" Additive Trap
Here's what I see all the time: Someone switches to "healthier" versions of foods—sugar-free yogurt, low-carb protein bars, diet sodas, almond milk yogurt—and their symptoms get worse, not better.
Why? Because these products are loaded with additives:
Sugar-free yogurt → artificial sweeteners or sugar alcohols
Protein bars → inulin, chicory root fiber, sugar alcohols
Almond milk yogurt → carrageenan, guar gum
Diet soda → artificial sweeteners, artificial colors
The "regular" version might have actually been easier on your gut than the "healthy" version.
How to Spot Additive Triggers
Start reading ingredient labels. If there are more than 5-7 ingredients, or if you can't pronounce half of them, that's a red flag.
Compare your symptoms when eating:
Whole foods (single ingredient: chicken, rice, banana) vs. processed foods
Foods with short ingredient lists vs. foods with long ingredient lists
"Regular" versions vs. "diet" or "sugar-free" versions
If the processed/diet versions consistently make you worse, additives are likely your issue.
Trigger Category 4: Caffeine and Other Stimulants
Caffeine stimulates gut motility. For people with IBS-D, this can mean coffee = bathroom emergency within 30 minutes.
But it's not just coffee:
Tea (black, green, white—all contain caffeine)
Chocolate (contains both caffeine and theobromine, another stimulant)
Energy drinks and pre-workout supplements
Certain medications (some pain relievers, diet pills)
The dose matters. Some people can handle one cup of coffee but not two. Some can tolerate tea but not coffee. Some are fine with caffeine in the morning but not in the afternoon.
Detective clue: If symptoms consistently appear within 30 minutes of your morning coffee or after eating chocolate, and especially if they involve urgent bowel movements, caffeine might be your trigger.
The Coffee Conundrum
Coffee is tricky because it's often consumed with other potential triggers:
Coffee + pastry (caffeine + fat + wheat)
Coffee + cream (caffeine + dairy fat)
Coffee + sugar-free sweetener (caffeine + artificial sweetener)
You might think coffee is your trigger when it's actually the combination. Or you might think the food is the problem when it's actually the coffee.
This is why testing in isolation is so important (which we'll cover in Part 2).
Beyond Coffee: Other Stimulants
Chocolate deserves special attention. It contains:
Caffeine (though less than coffee)
Theobromine (a similar stimulant)
Fat (often a lot of it in milk chocolate)
Sugar or sugar substitutes
Dark chocolate has more caffeine and theobromine but less fat. Milk chocolate has more fat but less caffeine. Some people tolerate one better than the other.
Energy drinks and pre-workout supplements often combine caffeine with other stimulants, artificial sweeteners, and additives. They're a multi-trigger bomb for many people with IBS.
Trigger Category 5: Histamine and Food Chemicals
This is the most overlooked category, and it explains why some people react to seemingly random foods that don't fit any other pattern.
Some people with IBS have issues processing histamine or other natural food chemicals. This isn't a true allergy—it's more like a sensitivity or intolerance.
High histamine foods:
Aged cheeses
Fermented foods (sauerkraut, kimchi, kombucha)
Aged or cured meats (salami, pepperoni, bacon)
Alcohol (especially red wine and beer)
Leftover meat (histamine increases as food sits)
Certain fish (tuna, mackerel, sardines)
Tomatoes and tomato products
Eggplant
Spinach
Other food chemicals that can trigger symptoms:
Salicylates: Found in many fruits, vegetables, herbs, and spices
Amines: Found in chocolate, cheese, bananas, and avocados
Glutamates: Naturally occurring in tomatoes, mushrooms, and aged cheese
Detective clue: If you react to fermented foods that are supposed to be "good for your gut," if leftovers trigger symptoms but fresh food doesn't, or if your symptoms include flushing, headaches, or nasal congestion along with gut issues, histamine might be involved.
The Leftover Mystery Solved
One of the most common patterns I see: "I'm fine when I eat fresh chicken, but if I eat the leftovers the next day, I get symptoms."
This isn't in your head. Histamine levels increase in food as it sits, even when properly refrigerated. For people with histamine sensitivity, fresh food is fine but day-old food triggers symptoms.
The same thing happens with:
Fish (fresh is better than frozen, and both are better than canned)
Meat (fresh is better than leftovers)
Tomato sauce (freshly made is better than jarred and sitting in the fridge)
The "Healthy Fermented Food" Paradox
You've probably heard that fermented foods are great for gut health. Probiotics, beneficial bacteria, all that good stuff.
But for people with histamine sensitivity, fermented foods can be gut nightmares:
Kombucha → high histamine + carbonation
Sauerkraut → high histamine + high fiber
Kimchi → high histamine + spicy + garlic
Kefir → high histamine + potential lactose
If your gut hates these foods despite everyone saying they're "healing," you might have histamine issues. It doesn't mean your gut is broken—it means your gut processes histamine differently.
Putting It All Together: Your Five Trigger Categories
Now you have the complete picture of dietary triggers beyond FODMAPs:
Fat content and type (symptoms 30-90 min after eating)
Fiber type and quantity (symptoms 2-6 hours after eating)
Food additives and preservatives (especially in processed "health" foods)
Caffeine and stimulants (symptoms within 30 minutes)
Histamine and food chemicals (variable timing, often with leftovers or fermented foods)
Most people have triggers in 2-3 of these categories. Very few people have triggers in all five.
Your Homework: Identifying Your Categories
After tracking your food diary for two weeks (using the template from Part 1A), try to identify which of the five trigger categories seem most relevant to you:
Look for patterns like:
Do symptoms happen quickly (30-90 min) after high-fat meals or coffee? → Fat or caffeine
Do symptoms happen several hours (2-6 hours) after fiber-heavy meals? → Fiber or FODMAPs
Do processed foods trigger symptoms but whole foods don't? → Additives
Do leftovers trigger symptoms but fresh food doesn't? → Histamine
Do "healthy" fermented foods make you worse? → Histamine
Write down your top 1-3 suspect categories. This is what you'll test systematically in Part 2.
A Word About Overwhelm
I know this seems like a lot. Five trigger categories plus FODMAPs? How are you supposed to eat anything?
Here's the important thing to remember: You're not going to react to all of these. Most people have 1-3 main trigger categories, and even within those categories, they don't react to everything.
The goal of this detective work isn't to eliminate everything. It's to identify YOUR specific triggers so you can avoid those while eating everything else freely.
Right now, you might be avoiding foods unnecessarily because you don't know what's actually causing your symptoms. Once you identify your specific triggers, you'll actually be able to expand your diet, not restrict it further.
What I'm Covering in Part 2
In Part 2, I'll walk you through the smart elimination protocol—the exact step-by-step process for testing your suspected trigger categories one at a time.
You'll learn:
How to choose which category to test first
Exactly what to eliminate and for how long
How to know if the elimination worked
The critical mistakes that lead to false results
How to avoid getting stuck on an overly restricted diet
This is where the detective work gets systematic and scientific. No more guessing. No more eliminating everything. Just strategic testing that gives you clear answers.
Creamy Dijon Chicken with Mushrooms and Leeks (Low FODMAP)
10 Minutes prep • 25 Minutes cook • Low FODMAP • Gluten-Free • Serves 4
10 Minutes prep • 25 Minutes cook • Low FODMAP • Gluten-Free • Serves 4 • Ok to make-ahead: Steps 1 - 2
A rich, velvety one-pan dinner that proves comfort food and dietary needs can beautifully coexist. Tender pan-seared chicken is nestled in a silky Dijon cream sauce with earthy oyster mushrooms and delicate leek greens — all completely low FODMAP without sacrificing an ounce of flavor. It's the kind of weeknight meal that tastes like it took all day, but comes together in under 40 minutes. Serve it over rice, gluten-free pasta, or creamy mashed potatoes for a dinner that will have everyone at the table asking for seconds.
See this new recipe in my FREE recipe club.
To streamline your search through hundreds of existing recipes, I'm moving the release of my new weekly creations to the Recipe Club on Patreon. In the club, you’ll get access to a treasure trove of low-FODMAP goodness, complete with collections and filters to use as your virtual cookbook!
Here's what awaits you in the club:
Exclusive weekly recipes: Be the first to try my latest delicious low-FODMAP creations!
Simple & Easy: My recipes continue to focus on readily available ingredients and effortless preparation, perfect for family-friendly meals (no more separate low-FODMAP meal prep!).
Hundreds of existing recipes: Gain access to my entire library of low-FODMAP recipes, all conveniently organized.
You can join for free or sign up for only $5/month. Your support fuels my passion for creating new, delicious, and easy-to-make low-FODMAP recipes just for you.
Let's go on this delicious low-FODMAP journey together.
The IBS Food Detective Series: Part 1A - Beyond FODMAPs: Fat and Fiber Triggers
In this post, I’m sharing what I've learned after years of working with my own IBS and helping others through theirs: FODMAPs are just one piece of the puzzle.
You've probably heard about FODMAPs. Maybe you've even tried the low-FODMAP diet. And maybe it helped... sort of. But you're still having symptoms, and you can't figure out why.
Here's what I've learned after years of working with my own IBS and helping others through theirs: FODMAPs are just one piece of the puzzle. They're important, yes, but they're not the only thing that can trigger IBS symptoms. In fact, for some people, FODMAPs aren't even the main culprit.
If you've been living on plain chicken and white rice, convinced that everything else is a trigger, this series is going to open up your world. I'm going beyond the FODMAP headlines to explore the other dietary triggers that might be causing your symptoms—and more importantly, how to identify YOUR specific triggers.
Because here's the truth I want you to understand: IBS is highly individual. What triggers your symptoms might be completely fine for someone else. The goal isn't to follow someone else's safe food list—it's to become a detective of your own body.
The FODMAP Myth I Need to Address
First, let me clear something up: The low-FODMAP diet is a diagnostic tool, not a permanent lifestyle. It was designed to be followed for 2-6 weeks to identify triggers, then systematically reintroduce foods to find your personal tolerance levels.
But somewhere along the way, it became a "safe diet" that people follow indefinitely. This is a problem because:
Long-term restriction can actually harm your gut microbiome
You might be avoiding foods you can actually tolerate
You're missing out on the diversity your gut needs to heal
The stress of extreme restriction can itself trigger symptoms
So if you're stuck in FODMAP restriction purgatory, this series is going to help you find a way out.
The Five Hidden Trigger Categories I've Identified
Beyond FODMAPs, there are five major categories of dietary triggers that can cause IBS symptoms. In my experience, most people have triggers in 2-3 of these categories, not all of them.
In this post, I'm covering the first two: fat and fiber. In Part 1B, I'll cover the other three categories that often fly under the radar.
Trigger Category 1: Fat Content and Fat Type
High-fat meals slow gastric emptying and can trigger something called the gastrocolic reflex—the signal that tells your colon to start moving. For people with IBS-D, this can mean urgent diarrhea 20-90 minutes after eating.
But here's where it gets interesting: not all fats affect everyone the same way.
Some people tolerate olive oil but not butter. Others can handle avocado but not fried foods. The difference often comes down to:
How much fat (a little might be fine, a lot triggers symptoms)
What type of fat (saturated vs. unsaturated, animal vs. plant)
How it's prepared (raw vs. cooked, fried vs. baked)
Common high-fat triggers:
Fried foods (the combination of fat + processing is often worst)
Creamy sauces and dressings
Fatty cuts of meat (bacon, ribeye, dark meat chicken with skin)
Full-fat dairy (cheese, cream, whole milk)
Certain nuts (macadamia, pecans, walnuts in large amounts)
Pastries and baked goods (butter + flour can be a double whammy)
Detective clue: If your symptoms typically start 30-90 minutes after eating and involve cramping followed by urgent bowel movements, fat might be your culprit.
What This Looks Like in Real Life
Let me give you an example: You might be fine with a grilled chicken breast (low fat) but get symptoms from the same chicken if it's fried or covered in a creamy sauce. Or you might tolerate a small drizzle of olive oil on your vegetables but react to a large salad with 3 tablespoons of dressing.
This is why portion size and preparation method matter so much when it comes to fat.
Trigger Category 2: Fiber Type and Quantity
Everyone tells you to "eat more fiber" for digestive health. But for IBS, it's not that simple. In fact, the wrong type or amount of fiber can make things significantly worse.
There are two types of fiber:
Soluble fiber: Dissolves in water, forms a gel, generally gentler on the gut
Insoluble fiber: Doesn't dissolve, adds bulk, can be irritating for sensitive guts
People with IBS-D often do better with soluble fiber and worse with insoluble fiber. People with IBS-C might need more fiber overall but need to increase it very gradually.
High insoluble fiber foods that commonly trigger symptoms:
Raw vegetables (especially cruciferous: broccoli, cauliflower, cabbage)
Salads with lots of raw greens
Whole wheat products (especially if you're also sensitive to gluten/fructans)
Seeds and seed-containing foods (raspberries, strawberries, tomatoes)
Popcorn
Nuts with skins on
Better tolerated soluble fiber sources:
Oatmeal
Peeled, cooked carrots
Bananas
White rice
Potatoes (without skin)
Psyllium husk (start small!)
Detective clue: If you get worse after "being healthy" and eating big salads or loading up on vegetables, or if you feel bloated and uncomfortable for hours after high-fiber meals, this might be your issue.
The "Healthy Salad" Trap
I can't tell you how many people come to me saying, "I tried to eat healthier by having a big salad for lunch, and I felt terrible for the rest of the day."
Here's why: A big raw salad with lots of different vegetables, seeds, and a creamy dressing is basically a triple threat—high insoluble fiber, raw form (harder to digest), and often high fat from the dressing. For someone with a sensitive gut, it's a recipe for bloating, gas, and discomfort.
The same vegetables, cooked until soft and served with a small amount of olive oil? Often completely fine.
The Combination Effect: When Triggers Stack
Here's something crucial that I see people miss all the time: Triggers often stack.
You might tolerate a small amount of fat OR a small amount of FODMAPs OR caffeine individually, but combine them in one meal and you're in trouble.
Example stacking scenarios I've seen:
Coffee (caffeine) + pastry (fat + wheat/fructans) = disaster
Restaurant meal with fried food (fat) + garlic sauce (FODMAPs) + diet soda (artificial sweetener) = severe symptoms
Large salad (insoluble fiber) + creamy dressing (fat) + artificial sweetener in your drink = bloating and pain
This is why you might react to a food sometimes but not others. The food itself might be fine in isolation, but problematic when combined with other triggers.
Your detective work needs to account for the whole meal, not just individual foods.
The Timing Factor: When You Eat Matters Too
Two other factors that affect whether a food triggers symptoms:
Your Stress State
Remember from the Gut-Brain Reset series: eating while stressed changes how your gut processes food. A meal that's fine when you're relaxed might trigger symptoms when you're anxious.
Your Gut's Current State
If your gut is already irritated or inflamed, your tolerance is lower. You might handle a trigger food fine on a good day but react strongly on a bad day.
This variability is frustrating, but it's normal. Your gut isn't broken—it's just sensitive and context-dependent.
Starting Your Detective Work: The Next-Level Food Diary
Remember the food-symptom diary from our first tips series? Now I'm upgrading it to track these additional triggers.
For the next two weeks, track:
Everything you eat and drink (be specific about brands, preparation methods, portion sizes)
Timing (when you ate and when symptoms appeared)
Fat content (low, medium, high—estimate is fine)
Fiber content and type (raw veggies, cooked veggies, whole grains, etc.)
Your stress level when eating (1-10 scale)
Symptoms (what, when, severity 1-10)
This might seem like a lot, but you're building a database. After two weeks, patterns will emerge that you'd never spot otherwise.
What You're Looking For
As you review your food diary, watch for:
Foods that trigger symptoms every single time (clear triggers)
Foods that trigger symptoms when combined with other things (stacking triggers)
Foods that are fine sometimes but problematic others (context-dependent triggers)
Timing patterns (symptoms 30 min after = probably fat; 2-6 hours after = probably FODMAPs or fiber)
Don't jump to conclusions after one or two meals. You need consistent patterns across multiple days.
What I'm Covering in Part 1B
In the next post, I'll cover the three trigger categories that most doctors never mention: food additives and preservatives, caffeine and stimulants, and histamine/food chemicals.
These are the hidden triggers that explain why you might react to seemingly random foods that don't fit the FODMAP or fat/fiber pattern.
After Part 1B, you'll have a complete picture of all five trigger categories, and you'll be ready to move into the systematic testing protocol in Part 2.
Have you noticed fat or fiber triggering your symptoms? What patterns have you spotted? Share in the comments—your experience might help someone else recognize their own patterns.
The Gut-Brain Reset Series: Part 4 - Breaking the Symptom-Anxiety Cycle: Your Complete Protocol
In this post I address: Breaking the Symptom-Anxiety Cycle: Your Complete Protocol
I've covered a lot of ground in this series. You've learned about the gut-brain connection, vagus nerve activation, and sleep optimization. Now it's time to put it all together into a cohesive protocol that you can actually follow—and that will actually work.
But first, let's address the elephant in the room: Why is it so hard to break the IBS cycle even when you know what to do?
The answer is surprisingly simple: The symptom-anxiety cycle is a learned pattern, and your nervous system protects learned patterns—especially ones it believes are keeping you safe. Even when the pattern is making you miserable, your brain resists changing it because it's familiar.
Breaking this cycle isn't about willpower. It's about patient, consistent rewiring of your nervous system. And that's exactly what this protocol is designed to do.

The Reality Check: What to Expect
Before we dive in, let's set realistic expectations. This isn't a 7-day cure. This is a 8-12 week process of nervous system retraining.
Week 1-2: You might not notice much change. You're establishing habits and collecting data. This can feel frustrating. Trust the process.
Week 3-4: Small signs of progress. Maybe one day without symptoms, or symptoms that are less intense. Don't get discouraged if you still have bad days—this is normal.
Week 5-8: Noticeable shifts. More good days than bad. Symptoms become more predictable and manageable. Your anxiety about symptoms starts to decrease.
Week 9-12: The new normal. Symptoms are present but no longer dominating your life. You have tools that work. Your nervous system has learned a new baseline.
Beyond 12 weeks: Continued improvement. Occasional flare-ups happen but don't derail you. You understand your patterns and can navigate them.
This timeline assumes consistent effort. If you're on-and-off with the protocol, progress will be slower. That's okay—there's no failure here, just different speeds of progress.
Your Daily Protocol: The Non-Negotiables
These are the foundational practices you do every single day, no matter what. They're the bedrock of your gut-brain reset.
Morning Routine (10 minutes)
Immediately upon waking:
Vagus nerve activation (5 minutes): Cold water face splash, humming, gargling, deep breathing
Check-in journal (3 minutes): Rate your gut symptoms (1-10), anxiety level (1-10), sleep quality (1-10)
Set your intention (2 minutes): Choose one small goal for the day (e.g., "I will eat lunch sitting down without my phone")
Before breakfast:
Drink a full glass of water at room temperature
Take a 5-10 minute gentle walk if possible
Evening Routine (30 minutes)
3 hours before bed:
Last meal finished
Note what you ate in your food-symptom journal
1 hour before bed:
Vagus reset (5-10 minutes): Choose 2-3 exercises from Part 2
Worry download (5 minutes): Write out anxious thoughts
Wind-down activity (15 minutes): Reading, gentle stretching, or quiet conversation
Pre-sleep bathroom visit
At bedtime:
Lights out at the same time every night
4-7-8 breathing pattern (4 rounds) in bed
Consistent Wake Time
Set your alarm for the same time every day (including weekends). This is non-negotiable. Your gut's circadian rhythm depends on it.
The Three-Pillar System: Managing Different Types of Days
You'll have three types of days. Each requires a slightly different approach.
Pillar 1: Good Days (Low symptoms, manageable anxiety)
Your focus: Building resilience and expanding your comfort zone
What to do:
Stick to the daily protocol
Gently challenge yourself (maybe try a food that's borderline, or eat somewhere new)
Practice the SOS breathing even when you don't need it (building muscle memory)
Celebrate the win (acknowledge the good day without waiting for the other shoe to drop)
What NOT to do:
Abandon your routines because you "don't need them"
Overdo it and trigger a flare-up tomorrow
Minimize the progress ("it's just one day")
Pillar 2: Medium Days (Some symptoms, moderate anxiety)
Your focus: Steady management and preventing escalation
What to do:
Double down on the daily protocol
Use the SOS breathing at first sign of symptoms
Stick to your safe foods
Increase vagus nerve exercises (do them 3-4 times during the day)
Give yourself permission to say no to stressful activities
Use the heating pad proactively
What NOT to do:
Panic that you're "back to square one"
Abandon all your practices because they "aren't working"
Engage in catastrophic thinking ("it's never getting better")
Pillar 3: Bad Days (Severe symptoms, high anxiety)
Your focus: Compassion and damage control
What to do:
Minimum viable protocol: Do just the morning vagus reset and evening routine, even if poorly
Go into comfort mode: safe foods only, quiet environment, heating pad, rest
Use the SOS breathing every hour
Remember: bad days are part of the healing process, not evidence of failure
If you need to cancel plans, do it without guilt
Journal about what might have triggered this (but don't obsess)
What NOT to do:
Blame yourself
Make major decisions about your protocol on a bad day
Let one bad day convince you nothing works
The Weekly Review: Course Correction
Every Sunday evening (or whatever day works for you), spend 20 minutes reviewing your week.
What to assess:
Symptom patterns: Did symptoms correlate with specific foods? Stress events? Poor sleep? Time in your cycle (for women)?
Protocol compliance: Which parts of the daily routine did you do consistently? Which ones fell off? Why?
Wins: What went well this week? Even small things count. Did you use the SOS breathing successfully? Have one symptom-free day? Sleep better for a few nights?
Challenges: What made things harder? Be specific. "Everything was terrible" isn't useful. "Tuesday's work deadline caused poor sleep which triggered symptoms Wednesday" IS useful.
Adjustments: What's one small thing you can tweak for next week?
Write this down. Over time, this weekly review becomes your roadmap. You'll see patterns that aren't visible day-to-day.
The Mental Game: Rewiring Your Thoughts
The physical protocols are crucial, but the mental patterns need work too. Here are the thought shifts that make the biggest difference:
From: "What if I have symptoms?"
To: "If symptoms come, I have tools to handle them."
This shift from fear to preparedness changes everything. You're not trying to prevent all symptoms (impossible), you're building confidence that you can manage them.
From: "My gut ruins everything."
To: "My gut is sending me information."
Your gut isn't attacking you. It's responding to signals—from your nervous system, your diet, your environment. When you reframe symptoms as information rather than attacks, they become less threatening.
From: "I should be better by now."
To: "Healing isn't linear, and I'm making progress."
This is the hardest shift for most people. You'll have setbacks. They're not failures. They're part of the process of rewiring a nervous system that's been in overdrive for possibly years.
From: "I can't do anything because of my gut."
To: "I'm learning what I can do and adapting."
This is about reclaiming agency. Yes, IBS is limiting. But within those limits, you have choices. Small choices, made consistently, add up to big changes.
When to Add Professional Support
This protocol is powerful, but it's not a replacement for professional help when you need it. Consider working with professionals if:
You need a gastroenterologist if:
You haven't had a proper IBS diagnosis and are self-diagnosing
You have red flag symptoms (blood in stool, unexplained weight loss, symptoms that wake you from sleep)
Your symptoms are changing significantly
You want to explore medication options
You need a mental health professional if:
Anxiety or depression are severe and interfering with daily life
You have a trauma history that's linked to your gut symptoms
You're experiencing panic attacks
The thought patterns are overwhelming the practical strategies
You need a nutrition coach (ideally one specializing in IBS) if:
You're confused about what to eat
You want guidance on the low-FODMAP diet
You've cut out so many foods you're at risk of nutritional deficiencies
You need structured meal planning support
You need a pelvic floor physical therapist if:
You have pain with bowel movements
You feel like you can't fully empty
You have IBS-C that's not responding to other interventions
Getting help isn't a sign of failure. It's strategic support for your healing.
The Integration Timeline: Putting It All Together
Here's how to layer in everything you've learned across this series:
Weeks 1-2: Foundation
Daily morning and evening routines
Food-symptom journal
Consistent sleep schedule
Choose 2 vagus nerve exercises and do them daily
Weeks 3-4: Adding Layers
Continue everything from weeks 1-2
Add the SOS breathing when symptoms arise
Implement the 3-hour pre-sleep eating window
Start the weekly review process
Weeks 5-6: Fine-Tuning
Continue everything from weeks 3-4
Add more vagus nerve exercises to your toolkit
Start identifying your specific triggers
Begin gentle exposure to situations you've been avoiding
Weeks 7-8: Building Resilience
Continue everything from weeks 5-6
Work on the thought pattern shifts
Expand your safe foods slightly
Practice responding to symptoms with curiosity instead of panic
Weeks 9-12: Consolidation
All practices become more automatic
You're making adjustments based on your data
Bad days don't derail you
You're building a sustainable lifestyle, not following a temporary protocol
Your Emergency Toolkit: For the Really Bad Days
Keep this list somewhere you can access it quickly:
4-7-8 breathing (4 rounds)
Heating pad on abdomen (15 minutes)
Ear massage (2 minutes each side)
Sip warm ginger or peppermint tea slowly
Lie on your left side with knees pulled up slightly
If diarrhea: electrolyte drink, bland foods (rice, banana, toast)
If constipation: gentle walk, belly massage, magnesium if approved by doctor
Text a trusted friend "I'm having a rough gut day" (connection helps)
Give yourself permission to do nothing but rest
Remind yourself: "This will pass. It always does."
The Maintenance Phase: After 12 Weeks
Once you've completed the initial 12-week protocol, you don't abandon everything. You maintain the core practices and ease up on the intensive tracking.
Keep forever:
Morning vagus reset
Consistent sleep schedule
Evening wind-down
Core safe eating patterns
Keep weekly:
Weekly review
At least a few vagus nerve exercises
Keep as needed:
SOS breathing when symptoms arise
Food-symptom tracking when investigating new triggers
Detailed journaling when stress is high
Release:
Perfectionism about the protocol
Anxiety about following every rule exactly
The belief that you're fragile and can't handle normal life
The Truth About Healing
Here's what I want you to understand: You're not trying to eliminate IBS entirely. You're changing your relationship with it.
You're teaching your nervous system that gut sensations don't always mean danger. You're building resilience so that symptoms, when they come, don't derail your entire life. You're creating a foundation of practices that support both your gut and your mental health.
This isn't about perfection. It's about progress. It's about having more good days than bad ones. It's about reclaiming your life from the constant vigilance and fear that IBS creates.
You're rewriting the story. Instead of "I'm the person who's broken and can't do things because of my gut," you're becoming "I'm the person who understands my body, has tools to manage it, and is building a life I want to live."
That's the real gut-brain reset.
Final Thoughts
If you've made it through all four parts of this series, you now have a comprehensive protocol for managing IBS through the gut-brain connection. You understand the why, the how, and the when.
But understanding isn't enough. Knowledge without action is just information. You have to actually do this.
Start small. Pick one thing from Part 1, one from Part 2, one from Part 3, and one from this post. Do those four things consistently for two weeks. Then add more.
You've got this. Your nervous system is capable of change. Your gut can heal. And you deserve to live a life that isn't dominated by bathroom anxiety and unpredictable symptoms.
What's the one practice from this series you're committing to starting today?
Creamy Italian Dressing (Low FODMAP)
5 Minutes prep • Low FODMAP • Gluten-Free • Makes 1 cup
5 Minutes prep • Low FODMAP • Gluten-Free • Makes 1 cup • Ok to make-ahead: Step 1
If you've been missing bold, creamy Italian dressing since going low FODMAP, this homemade version is about to become your new favorite. Garlic-infused olive oil and Smoke N Sanity's Essence of Garlic and Onion Salts deliver all the savory, aromatic flavor you'd expect — without the digestive distress. A splash of red wine vinegar adds brightness, while heavy cream makes it irresistibly smooth and rich. It comes together in minutes with just a bowl and a whisk, and it's delicious drizzled over salads, tossed with grilled chicken, or used as a dipping sauce for roasted veggies.
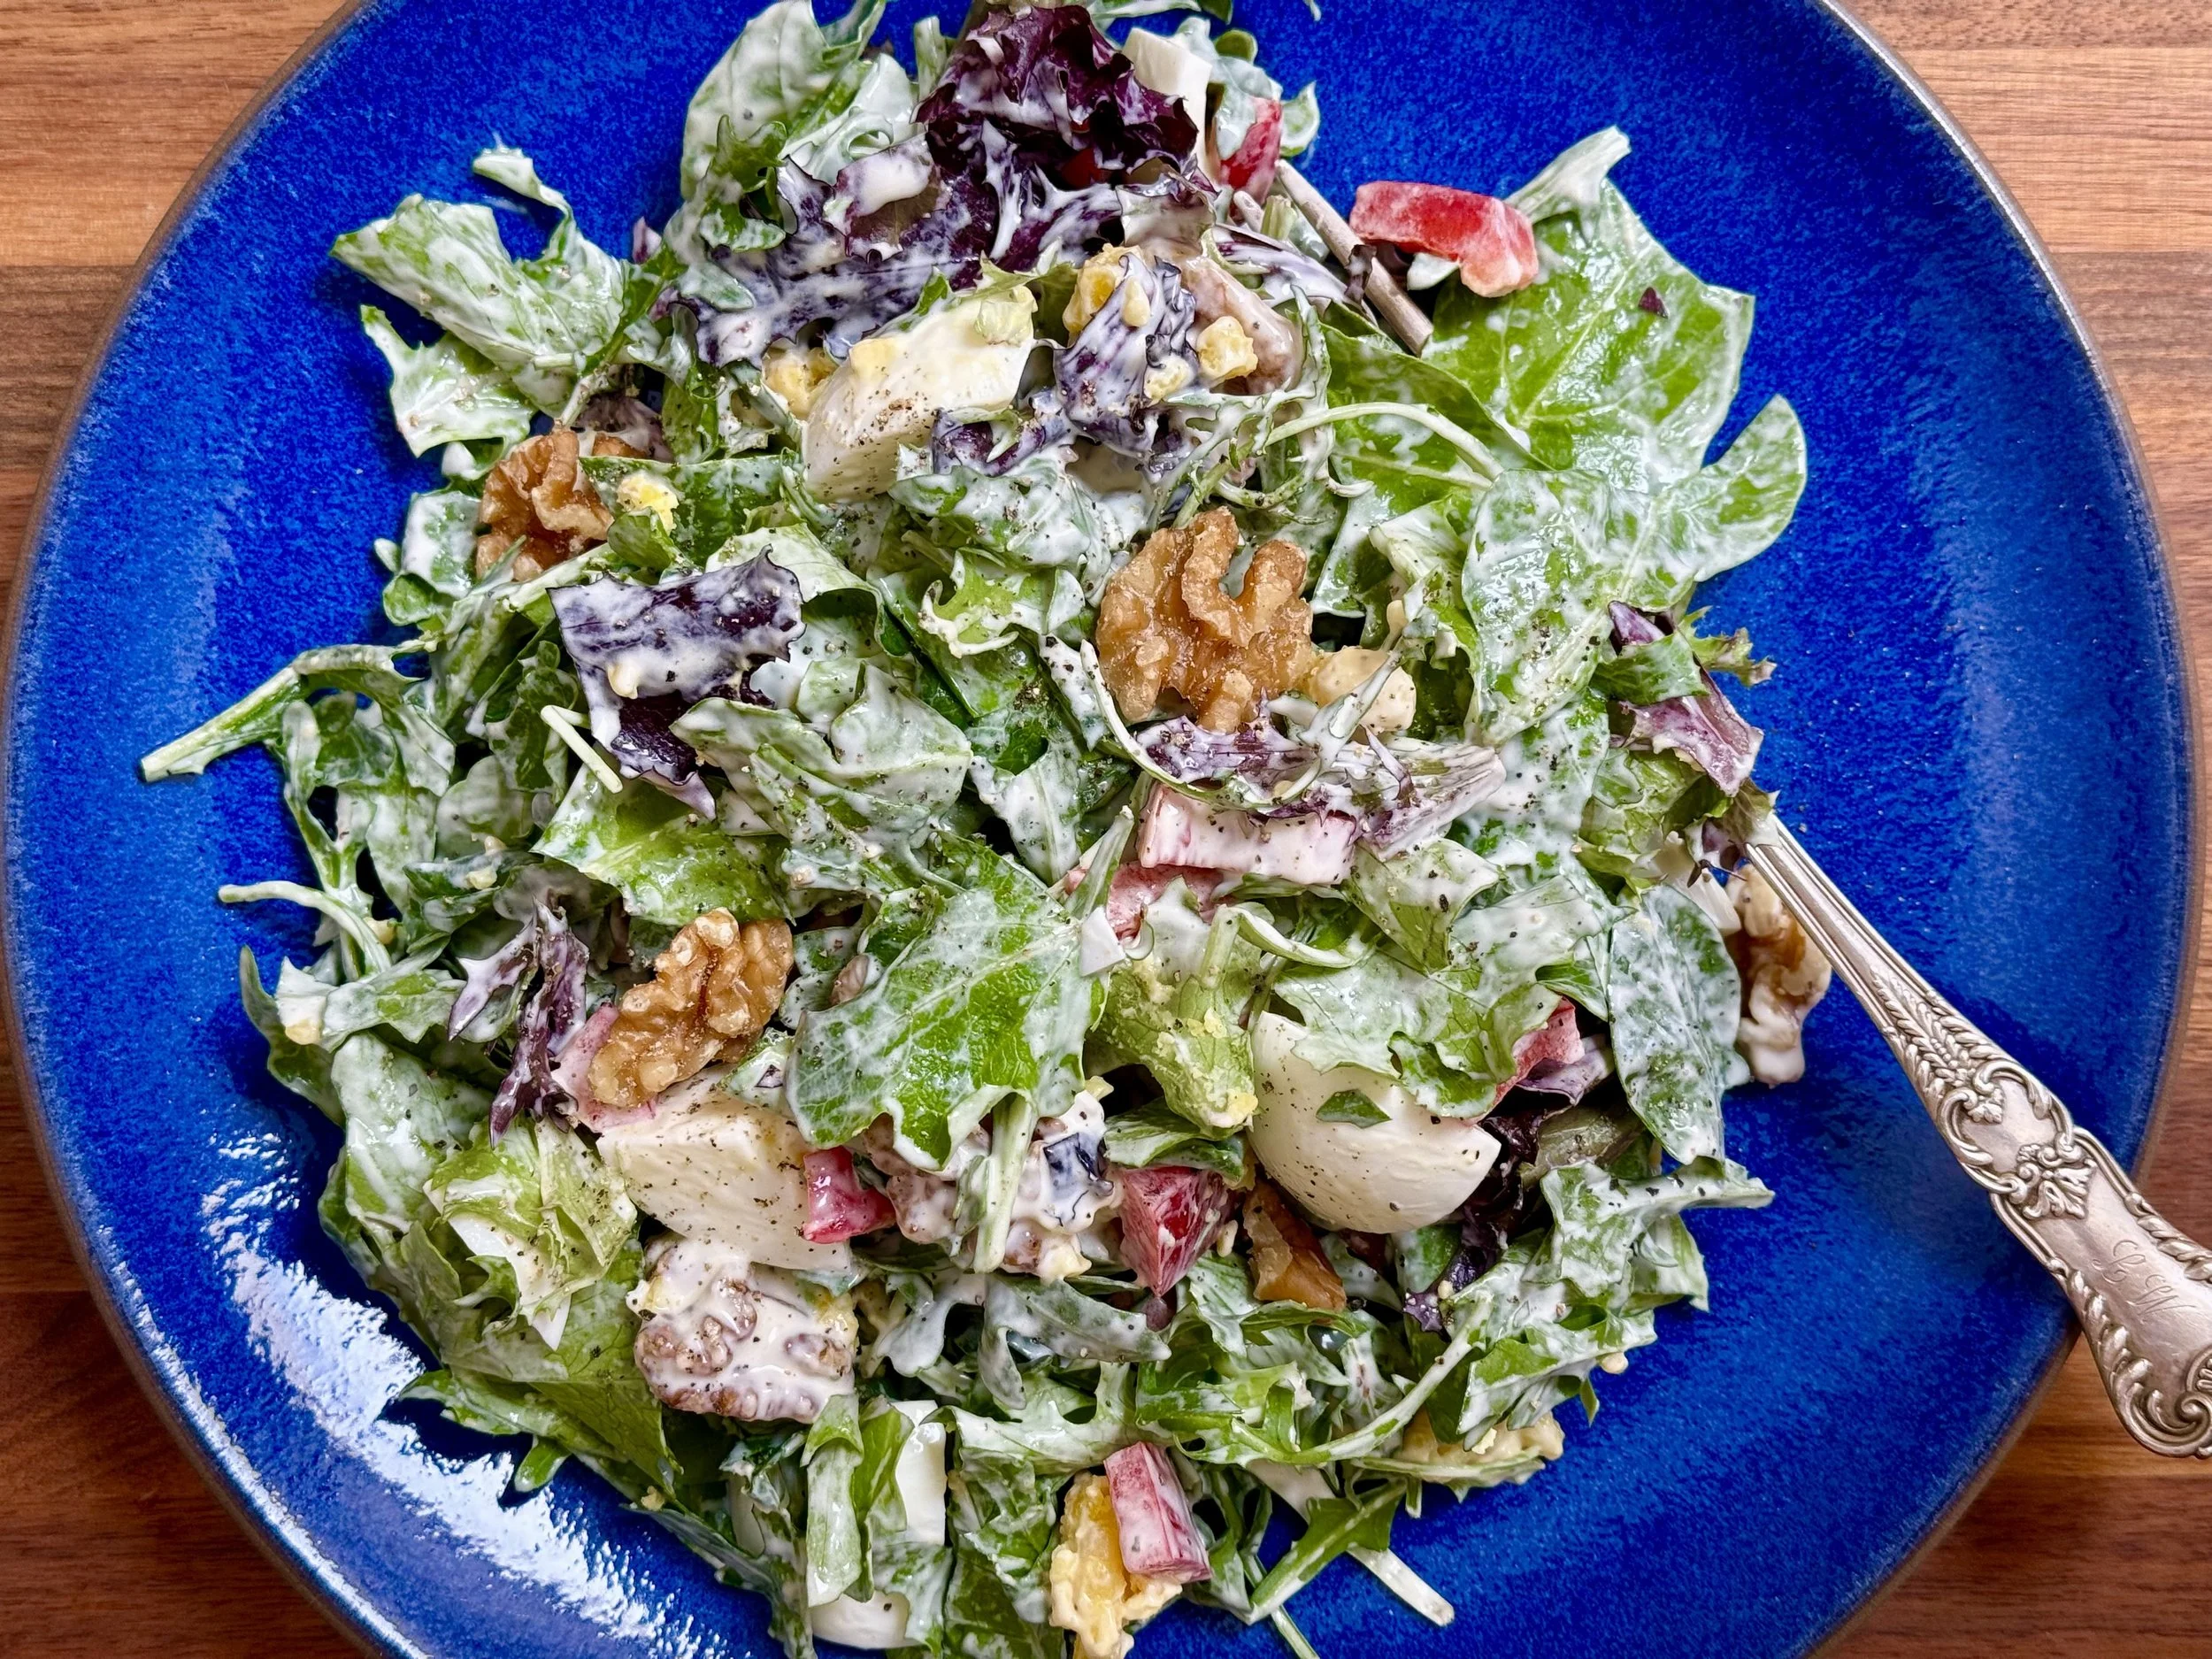
See this new recipe in my FREE recipe club.
To streamline your search through hundreds of existing recipes, I'm moving the release of my new weekly creations to the Recipe Club on Patreon. In the club, you’ll get access to a treasure trove of low-FODMAP goodness, complete with collections and filters to use as your virtual cookbook!
Here's what awaits you in the club:
Exclusive weekly recipes: Be the first to try my latest delicious low-FODMAP creations!
Simple & Easy: My recipes continue to focus on readily available ingredients and effortless preparation, perfect for family-friendly meals (no more separate low-FODMAP meal prep!).
Hundreds of existing recipes: Gain access to my entire library of low-FODMAP recipes, all conveniently organized.
You can join for free or sign up for only $5/month. Your support fuels my passion for creating new, delicious, and easy-to-make low-FODMAP recipes just for you.
Let's go on this delicious low-FODMAP journey together.
The Gut-Brain Reset Series: Part 3 - Sleep Hygiene for IBS Relief
Poor sleep and IBS feed into each other in a vicious cycle that's hard to break—but understanding how they're connected is the first step to fixing both.
Let me guess: You're exhausted, but you can't sleep because your gut won't settle down. Or you finally fall asleep, but wake up at 3 AM with cramping or the urgent need for the bathroom. Or you sleep through the night but wake up feeling wrecked, and your gut is already in chaos before breakfast.
If this sounds familiar, you're not alone. Poor sleep and IBS feed into each other in a vicious cycle that's hard to break—but understanding how they're connected is the first step to fixing both.
Here's the truth most doctors don't emphasize enough: Sleep isn't just important for IBS management. It's foundational. You can have a perfect diet, do all the right stress management, and still struggle with symptoms if your sleep is broken.
Today, we're fixing that.

The Sleep-Gut Connection You Need to Understand
Your gut has its own circadian rhythm—a 24-hour cycle that controls when it's active, when it rests, when it repairs, and when it produces hormones and neurotransmitters.
When you don't sleep well:
Your gut's circadian rhythm gets disrupted
Your gut bacteria composition changes (poor sleep literally alters your microbiome)
Your intestinal barrier becomes more permeable (increasing inflammation)
Your pain sensitivity increases (making normal gut sensations feel worse)
Your stress hormone cortisol stays elevated (keeping you in fight-or-flight mode)
But here's where it gets complicated: IBS symptoms also disrupt your sleep, creating a feedback loop that's hard to escape. Nighttime symptoms, anxiety about symptoms, and disrupted gut-brain signaling can all interfere with quality sleep.
The good news? When you improve sleep, you often see gut symptoms improve—and vice versa. They're two sides of the same coin.
Why Standard Sleep Advice Doesn't Work for IBS
You've probably heard the basics: keep your room cool and dark, avoid screens before bed, go to bed at the same time every night. This is all good advice, but it ignores the specific challenges of IBS.
Here's what's different for people with IBS:
You might need to use the bathroom during the night (making it hard to sleep through)
Anxiety about symptoms keeps your mind racing (even when you're physically tired)
Your gut might be more active at night (when it should be resting)
Certain foods eaten too close to bedtime trigger nighttime symptoms
Stress from the day manifests as gut symptoms when you finally lie down
Standard sleep hygiene doesn't address these issues. We need an IBS-specific approach.
The 3-Hour Pre-Sleep Window: Your Most Important Strategy
This is the foundation everything else builds on: what you do in the three hours before bed determines how well you'll sleep and how your gut will behave the next day.
Here's your new evening protocol:
Hour 3 Before Bed: The Last Meal Window
The rule: Finish eating at least 3 hours before bed. For many people with IBS, 4 hours is even better.
Why it matters: Your gut needs time to process food before you lie down. When you eat too close to bedtime, you're asking your digestive system to work while it's trying to shift into rest mode. This creates conflict in your gut-brain signaling.
What to eat: Your last meal should be relatively simple and easy to digest. This isn't the time for a heavy, fatty meal or a big salad. Think: baked chicken with rice, scrambled eggs with toast, or a simple pasta with olive oil.
What to avoid: Anything you know triggers your IBS, plus common sleep disruptors like caffeine, alcohol, large amounts of fat, and raw vegetables.
Hour 2 Before Bed: The Wind-Down Begins
This is when you start signaling to your nervous system that it's time to transition from day mode to night mode.
Light management: Dim your lights. Your brain produces melatonin in response to darkness, and bright lights suppress this. If you need to be on screens, use blue light filters.
The evening vagus reset: Do the vagal exercises from Part 2. Spend 5-10 minutes on humming, gentle breathing, and the ear massage. This helps shift your nervous system into rest mode.
Gentle movement: A slow 10-15 minute walk can help digestion and reduce anxiety. Don't do vigorous exercise—you want to calm your system, not activate it.
Hour 1 Before Bed: The Sacred Wind-Down
This is your non-negotiable transition time. No work, no stressful conversations, no scrolling through anxiety-inducing content.
The warm drink ritual: Herbal tea (peppermint, chamomile, or ginger) can be soothing for both your gut and your nervous system. Sip it slowly. Make it a ritual, not a task.
The worry download: Keep a notebook by your bed. Spend 5 minutes writing down any worries, to-do items, or anxious thoughts. Get them out of your head and onto paper. This tells your brain it doesn't need to keep reminding you about these things.
The bathroom trip: Even if you don't feel like you need to, try to have a bowel movement or at least sit on the toilet for a few minutes. You're training your body to empty before sleep rather than waking you up during the night.
Your Sleep Environment: The IBS Edition
Beyond the standard advice about temperature and darkness, here are IBS-specific considerations:
Bathroom access: If nighttime urgency is an issue, make sure you have clear, easy access to the bathroom. Remove obstacles, use a nightlight, and consider keeping a robe right by your bed. The anxiety about getting to the bathroom in time can itself worsen symptoms.
Elevation strategy: If you struggle with reflux or bloating at night, try elevating the head of your bed by 6-8 inches (put blocks under the legs of the bed frame, don't just pile up pillows). This uses gravity to help your digestive system.
The heating pad backup: Keep a heating pad by your bed for nighttime cramping. Sometimes just knowing you have relief available reduces anxiety enough to prevent symptoms.
Comfortable positioning: Side sleeping (particularly on your left side) can reduce reflux and help with gas movement. Experiment with a pillow between your knees for comfort.
The 3 AM Wake-Up Solution
If you're waking up with gut symptoms in the middle of the night, here's your action plan:
Don't fight it: Trying to force yourself back to sleep while experiencing symptoms only increases anxiety. Get up.
The midnight reset:
Use the bathroom if needed
Do the 4-7-8 breathing pattern from Part 2 (4 rounds)
Sip a small amount of room temperature water
If cramping: heating pad for 10 minutes
Do the ear massage for 2-3 minutes
Return to bed only when symptoms have calmed
The return to sleep protocol: Don't look at the clock. Don't check your phone. Keep lights as dim as possible. Focus on slow breathing rather than trying to force sleep. Your body knows how to sleep—you just need to get your anxious mind out of the way.
Morning Timing: Setting Up Success
What time you wake up affects your gut for the entire day. Your digestive system thrives on consistency.
The rule: Wake up at the same time every day—yes, even weekends. Set your alarm and get up, even if you had a rough night.
Why it works: A consistent wake time anchors your circadian rhythm. After 2-3 weeks of this, you'll find it easier to fall asleep at night, and your gut will become more predictable.
Morning bathroom routine: Give yourself time. Don't rush out the door. Your gut often wants to empty in the morning, and rushing or skipping this can throw off your entire day. Wake up 30 minutes earlier if you need to.
The Nap Question
Should you nap if you have IBS and poor sleep? Here's the nuanced answer:
Short naps (20-30 minutes) before 2 PM: Generally fine. These can help with fatigue without disrupting nighttime sleep.
Long naps or naps after 3 PM: Usually make nighttime sleep worse, which then makes your gut worse. Avoid these.
If you're exhausted: A 20-minute nap is better than a 2-hour nap. Set an alarm. Don't let yourself fall into deep sleep during the day.
The Supplement Question
I'm often asked about melatonin, magnesium, and other sleep supplements for IBS. Here's my take:
Melatonin: Can be helpful for some people, but start with a low dose (0.5-1mg) and take it 2 hours before bed, not right before. Some people with IBS find it helps, others find it worsens gut symptoms. Try it for a week and track results.
Magnesium: Particularly magnesium glycinate, can help both sleep and IBS-C. Take it 1-2 hours before bed. Avoid magnesium citrate at night—it can cause urgent bowel movements.
Herbal supplements: Valerian, chamomile, and passionflower may help some people. But always check with your doctor about interactions with other medications.
The truth: Supplements are Band-Aids. They might help short-term, but the behavioral strategies above will give you more sustainable results.
Your 2-Week Sleep Reset Plan
Don't try to implement everything at once. Here's your roadmap:
Week 1:
Days 1-3: Establish your 3-hour pre-sleep eating window
Days 4-7: Add the 1-hour wind-down routine
Week 2:
Days 8-10: Implement the consistent wake time
Days 11-14: Add the evening vagus reset to your routine
Track your sleep quality and morning gut symptoms each day on a scale of 1-10. Most people notice changes within the first week.
What's Coming in Part 4
In our final installment, I'll put everything together: the food diary, the stress management, the vagus nerve work, and the sleep hygiene. You'll get a complete protocol for rewiring your gut-brain connection and breaking free from the IBS cycle for good.
We'll also cover the timeline—how long it takes to see changes, what "progress" looks like, and how to know if you need additional support.
Japanese Steak and Sweet Potato Wedges (Low FODMAP)
25 Minutes prep • 30 Minutes cook • Low FODMAP • Gluten-Free • Serves 6
25 Minutes prep • 30 Minutes cook • Low FODMAP • Gluten-Free • Serves 6 • Ok to make-ahead: Steps 1 - 4
If you've been missing bold, smoky, sticky-sweet flavors since your IBS diagnosis — this one's going to blow your mind. These Japanese BBQ Steak Bowls are the low-FODMAP glow-up you didn't know you needed. We're talking tender flank steak marinated in a homemade Japanese BBQ sauce, roasted sweet potato wedges, crispy broccoli, and a creamy drizzle that ties it all together. Weeknight dinner just got a serious upgrade — and your gut is going to thank you.
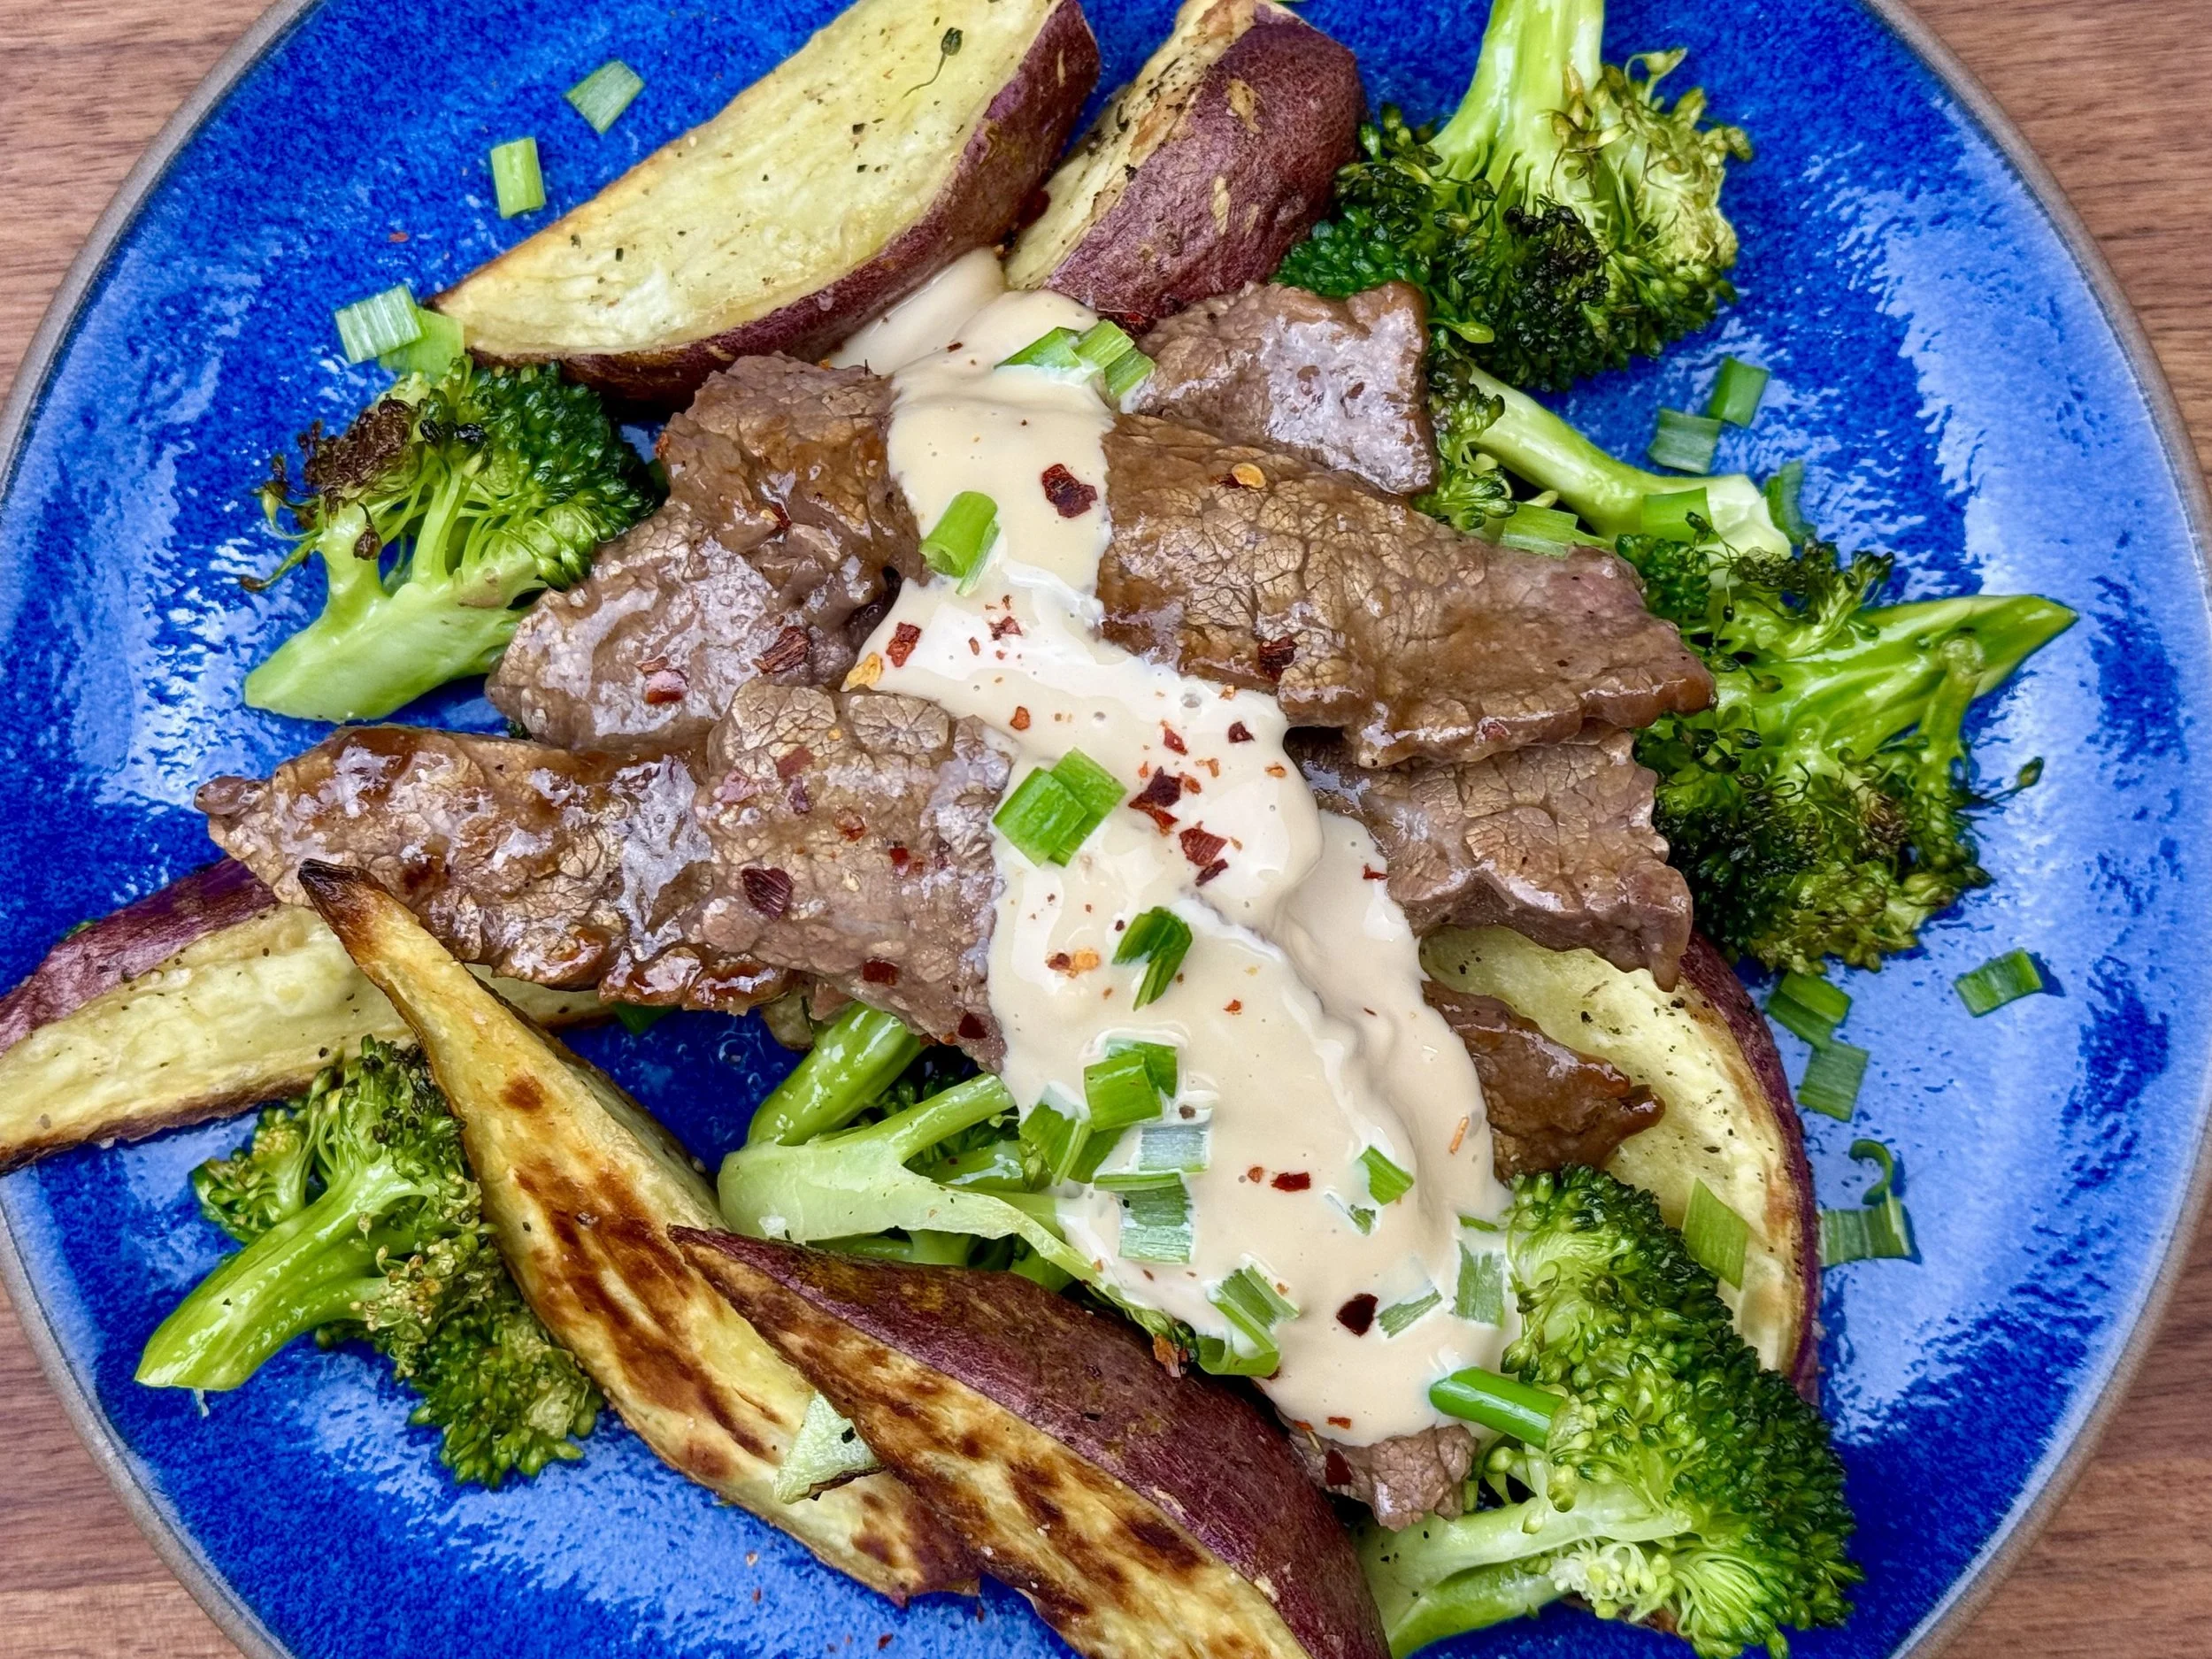
See this new recipe in my FREE recipe club.
To streamline your search through hundreds of existing recipes, I'm moving the release of my new weekly creations to the Recipe Club on Patreon. In the club, you’ll get access to a treasure trove of low-FODMAP goodness, complete with collections and filters to use as your virtual cookbook!
Here's what awaits you in the club:
Exclusive weekly recipes: Be the first to try my latest delicious low-FODMAP creations!
Simple & Easy: My recipes continue to focus on readily available ingredients and effortless preparation, perfect for family-friendly meals (no more separate low-FODMAP meal prep!).
Hundreds of existing recipes: Gain access to my entire library of low-FODMAP recipes, all conveniently organized.
You can join for free or sign up for only $5/month. Your support fuels my passion for creating new, delicious, and easy-to-make low-FODMAP recipes just for you.