Deliciously Low FODMAP

Inspire yourself with hundreds of delicious low FODMAP recipes, tips, and tools, and enjoy the abundance that is yours even when you have IBS.
Use the buttons and filters to find something specific or browse the complete collection for inspiration.
Discover a treasure trove of recipes with my FREE recipe club! Get new ideas delivered straight to your inbox every week.
Deliciously Low FODMAP is a trademark of IBS Game Changer, LLC
Filter to find Recipes and Tools
More Filtering Options
- All 827
- Appetizer 56
- BBQ 49
- Bowl 32
- Breakfast 69
- Cocktails 13
- Collection 1 58
- Collection 10 27
- Collection 11 30
- Collection 12 27
- Collection 13 31
- Collection 14 29
- Collection 15 31
- Collection 16 34
- Collection 17 31
- Collection 18 33
- Collection 19 36
- Collection 2 32
- Collection 20 33
- Collection 21 33
- Collection 22 40
- Collection 23 63
- Collection 24 46
- Collection 3 28
- Collection 4 29
- Collection 5 30
- Collection 6 32
- Collection 7 31
- Collection 8 31
- Collection 9 32
- Condiments 6
- Crock Pot 4
- Dessert 119
- Diabetes Game Changer Exception Protocol Contains Alcohol 11
- Diabetes Game Changer Exception Protocol Contains Flour 113
- Diabetes Game Changer Exception Protocol Contains Flour AND Sugar 79
- Diabetes Game Changer Exception Protocol Contains Sugar 52
- Diabetes Game Changer First Four Weeks 405
- Dinner 371
- Drink 8
- Easter 1
- Free Guide 17
- Gluten-free 686
- Gut Microbiome 2
- Guthealth 3
- Holidays 73
- IBS Triggers 4
- Keto Friendly 178
- Lactose-Free 184
- Low Carb 22
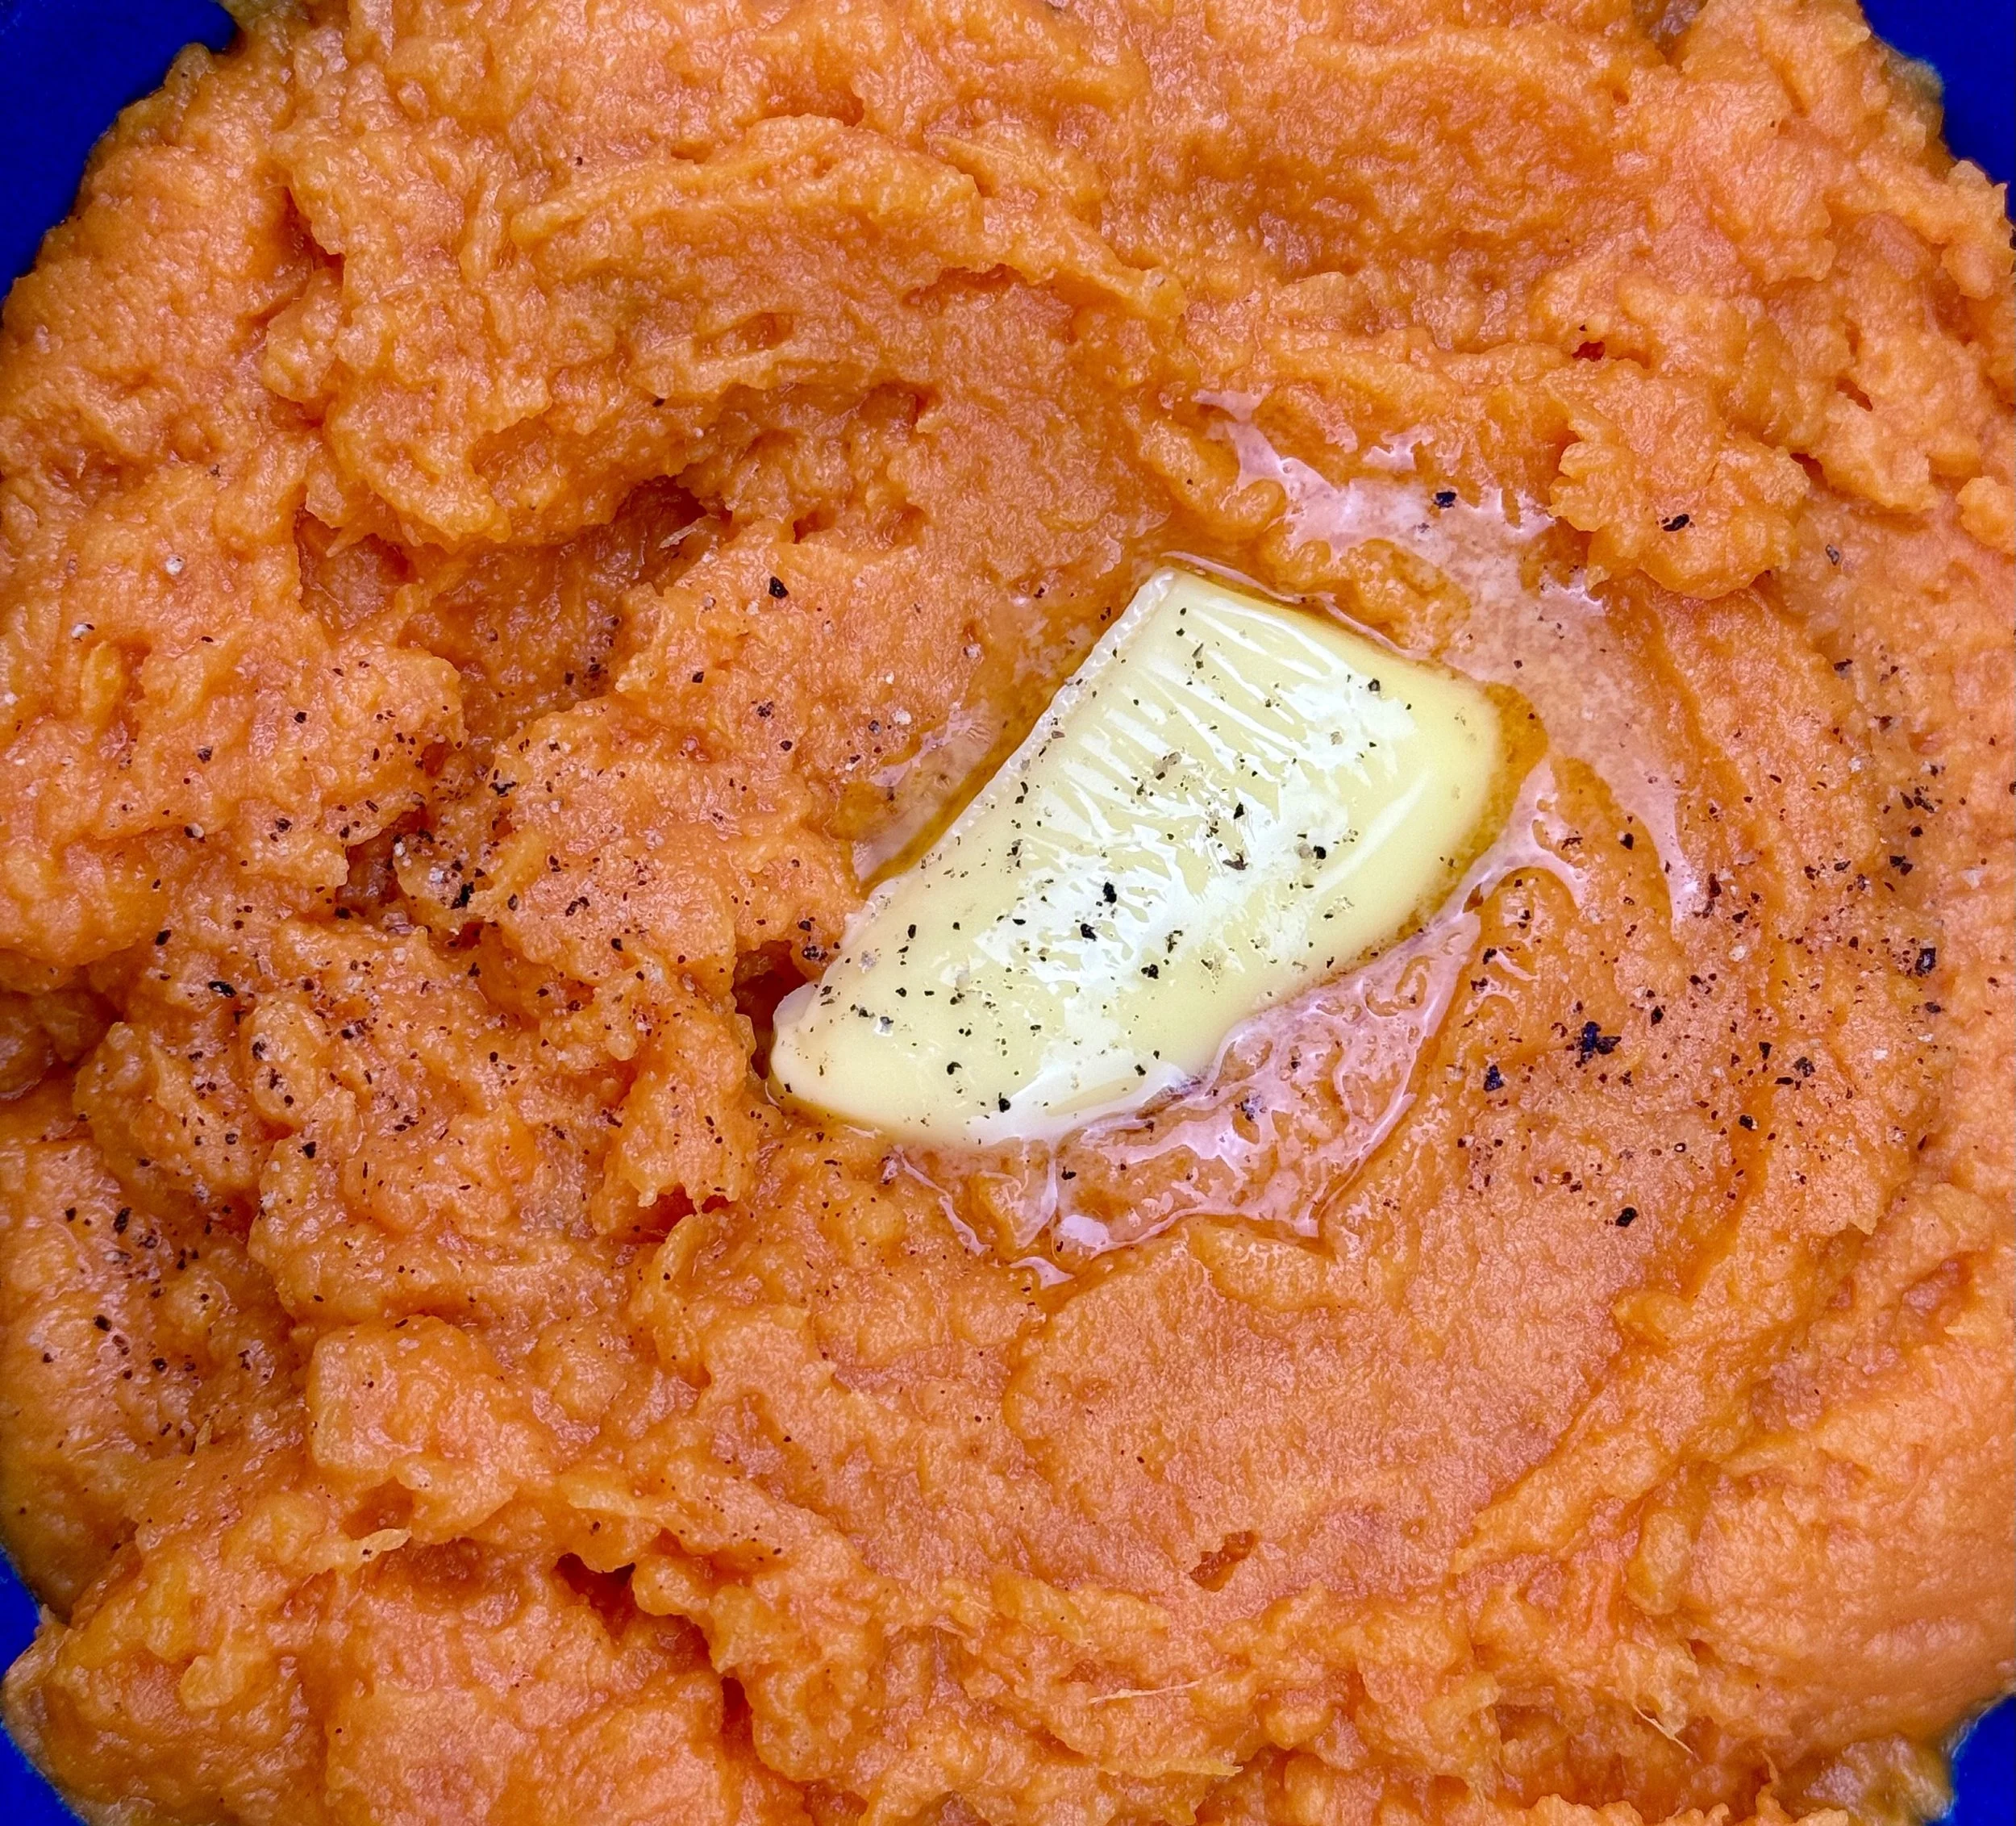
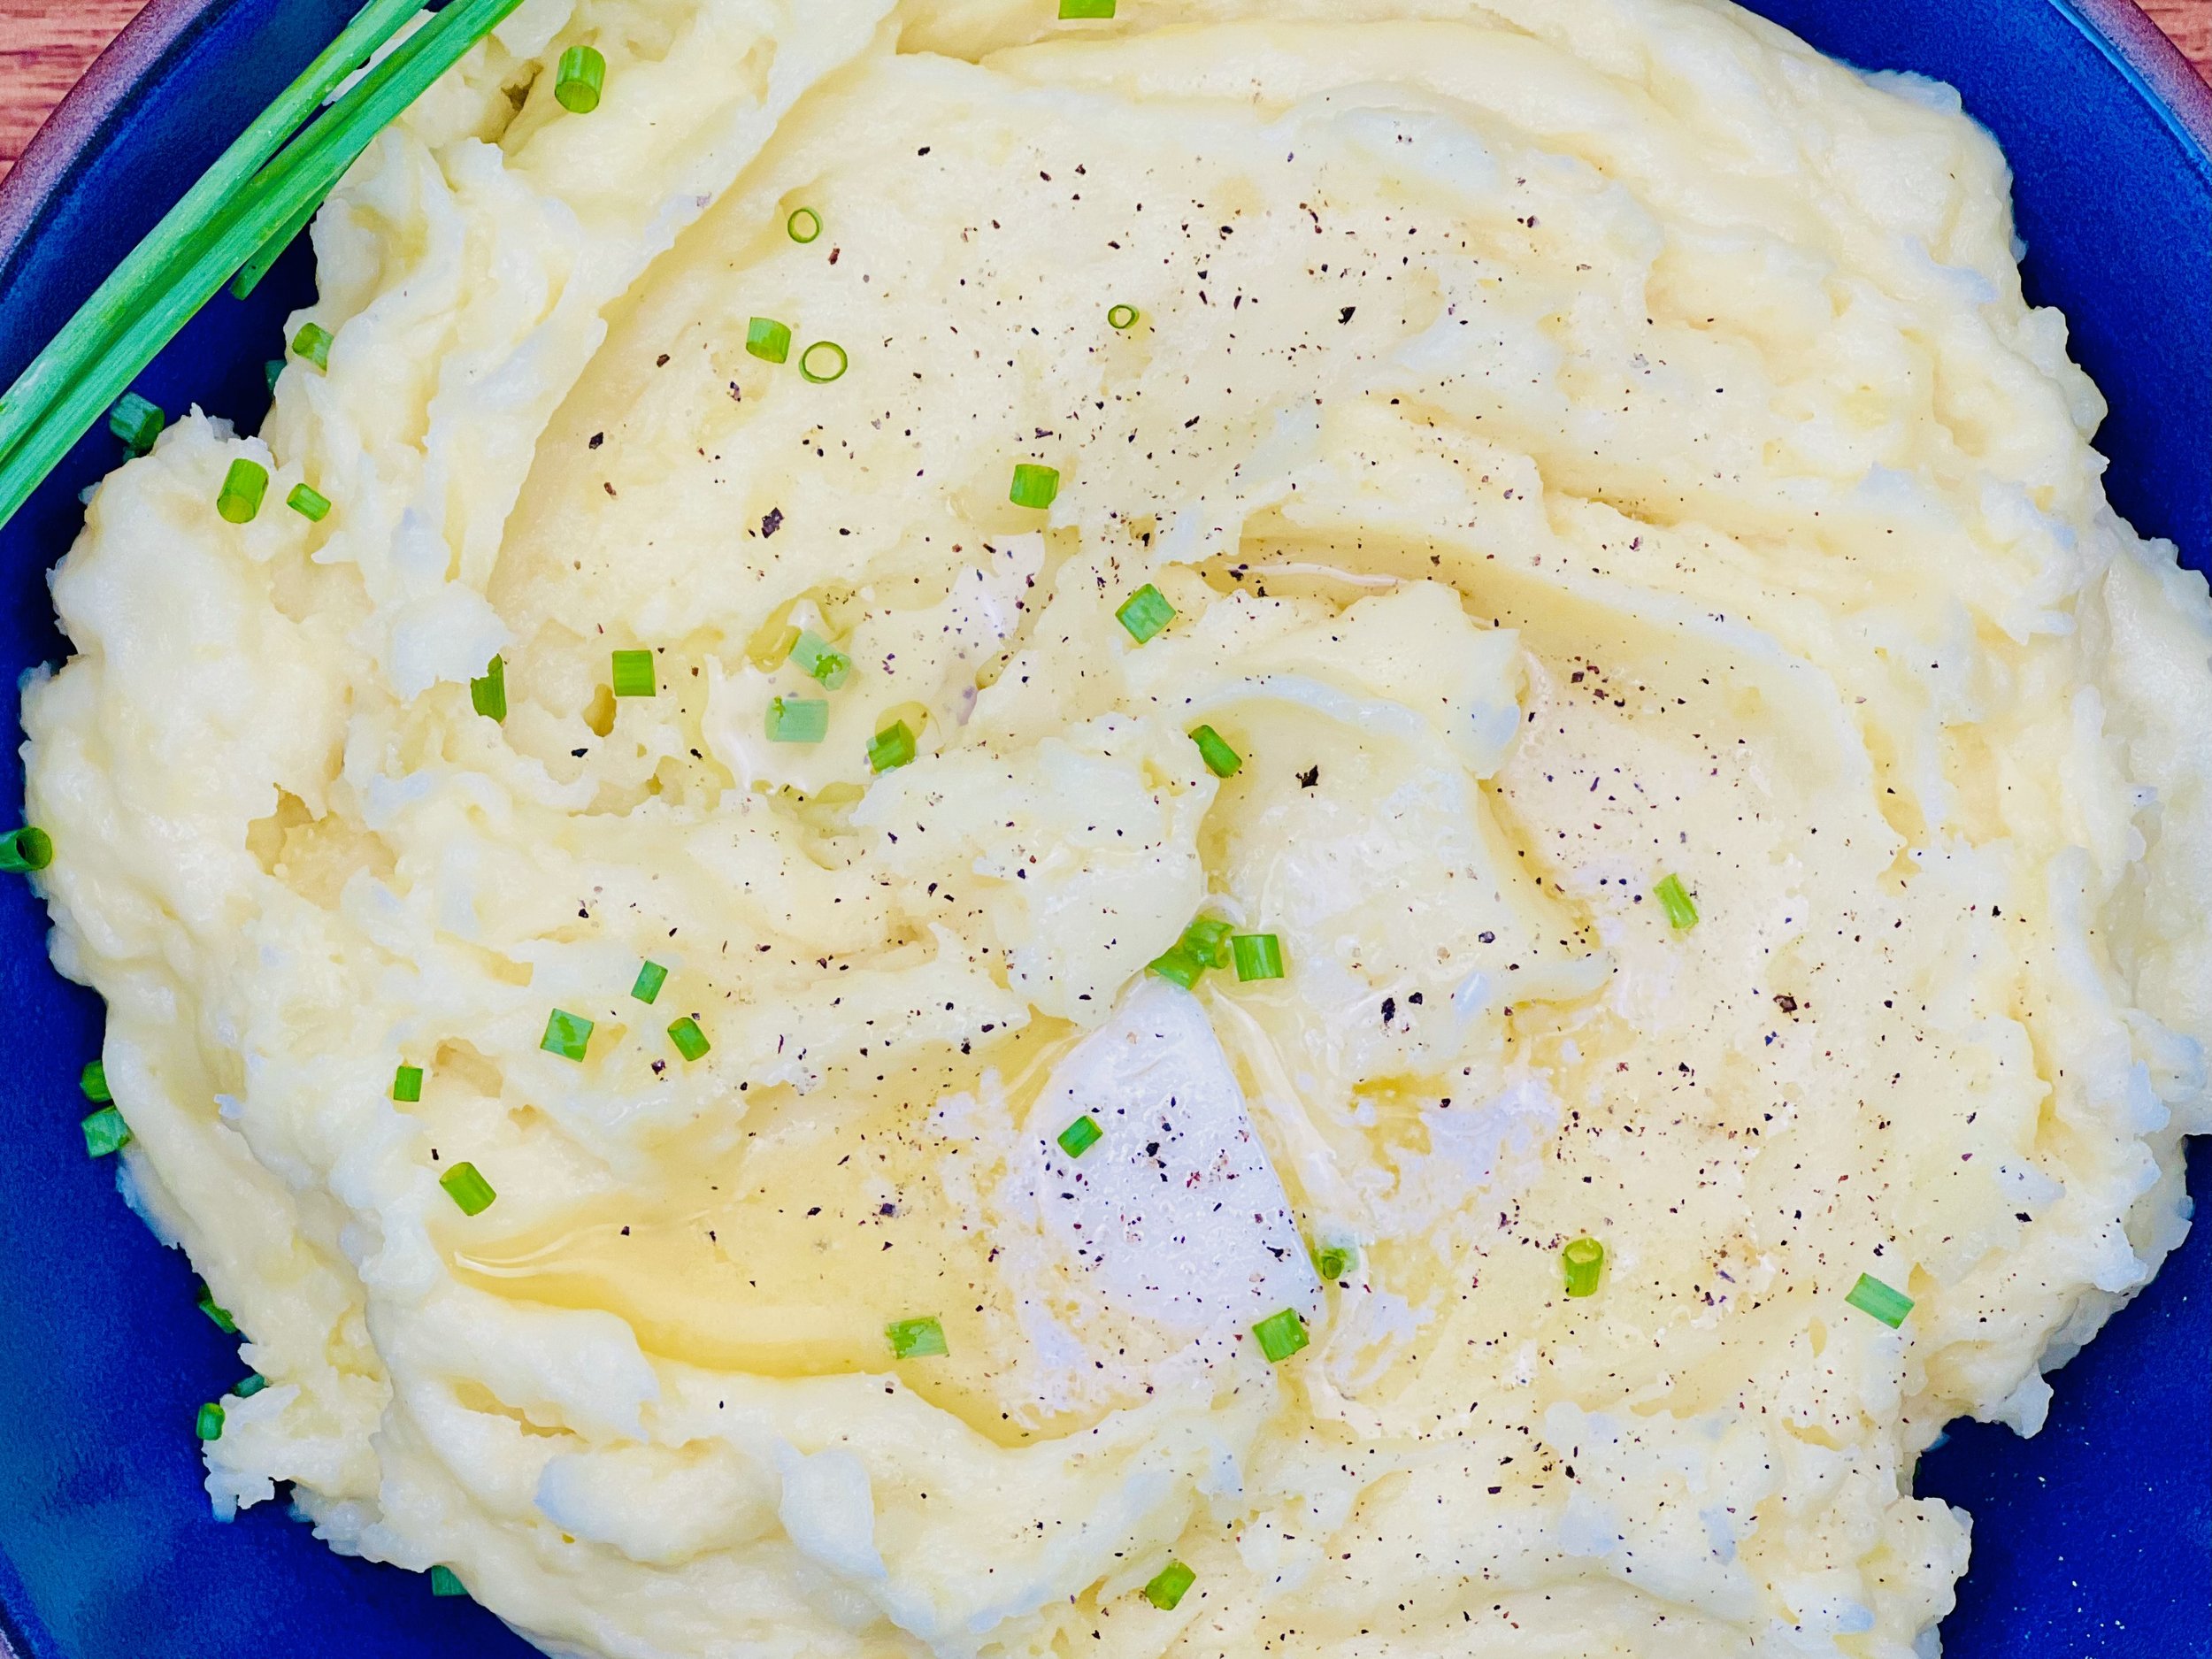
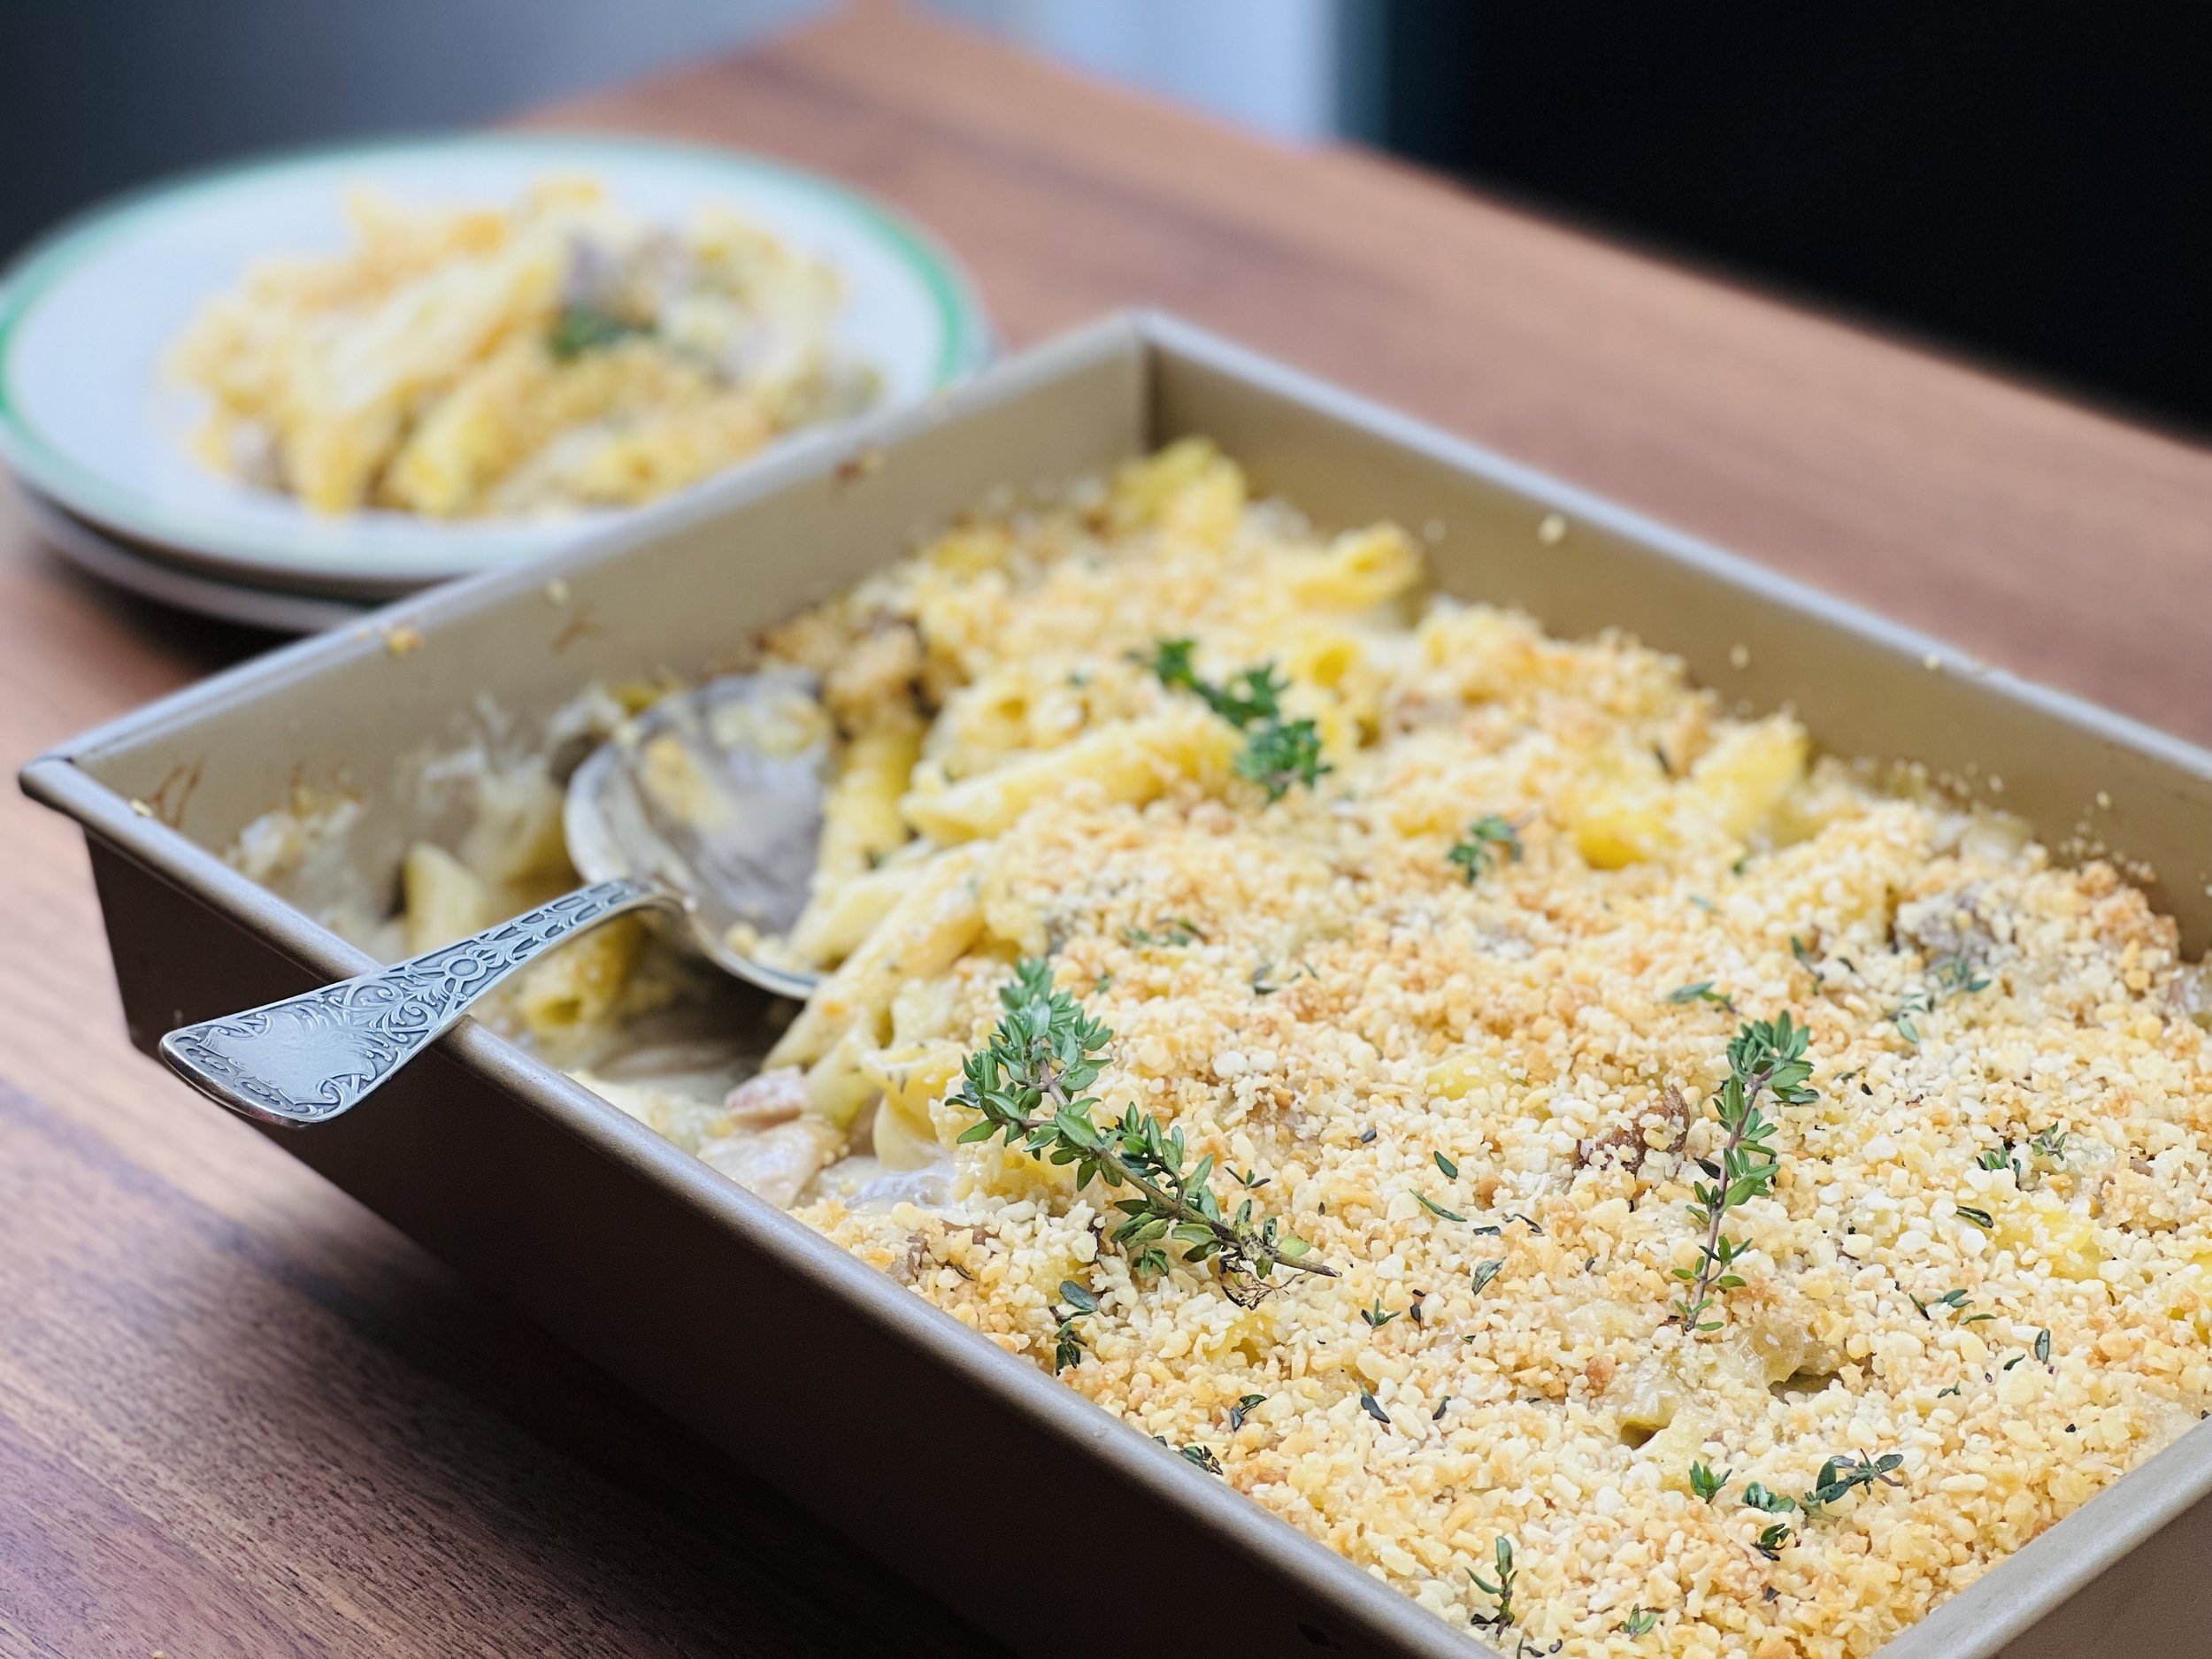
Creamy Maple Sweet Potato Mash (Low FODMAP)
10 Minutes prep • 60-75 Minutes cook • Low FODMAP • Gluten-Free • Serves 6
10 Minutes prep • 60-75 Minutes cook • Low FODMAP • Gluten-Free • Serves 6 • Ok to make-ahead: Steps 1 - 7
When the holidays come to an end, don’t leave the sweet potatoes behind! Sweet potatoes are naturally lower in FODMAPs than regular white potatoes, and roasting them whole brings out their natural sweetness without any digestive drama. The secret is keeping it simple: butter, a touch of maple syrup, and cream (or lactose-free milk). Roasting the potatoes until they're fork-tender makes them incredibly creamy without any boiling or waterlogging. This is comfort food that actually comforts. Whether it's alongside roasted chicken or as a cozy side dish, these sweet potatoes deliver all the satisfaction without the digestive stress.
See this new recipe in my FREE recipe club.
To streamline your search through hundreds of existing recipes, I'm moving the release of my new weekly creations to the Recipe Club on Patreon. In the club, you’ll get access to a treasure trove of low-FODMAP goodness, complete with collections and filters to use as your virtual cookbook!
Here's what awaits you in the club:
Exclusive weekly recipes: Be the first to try my latest delicious low-FODMAP creations!
Simple & Easy: My recipes continue to focus on readily available ingredients and effortless preparation, perfect for family-friendly meals (no more separate low-FODMAP meal prep!).
Hundreds of existing recipes: Gain access to my entire library of low-FODMAP recipes, all conveniently organized.
You can join for free or sign up for only $5/month. Your support fuels my passion for creating new, delicious, and easy-to-make low-FODMAP recipes just for you.
Let's go on this delicious low-FODMAP journey together.
Cheddar Pimento Corn Muffins (Low FODMAP)
10 Minutes prep • 20 Minutes cook • Low FODMAP • Gluten-Free • Makes 12
10 Minutes prep • 20 Minutes cook • Low FODMAP • Gluten-Free • Makes 12 • Ok to make-ahead: Step 1
Looking for an extremely simple recipe that comes out perfectly every time? This is it. Starting with Bob's Red Mill gluten-free cornbread mix as the base saves you time and guarantees consistent results, while swapping buttermilk for regular milk and adding a few key ingredients transforms it into something truly special. These muffins have that perfect balance of sweet corn flavor with savory cheese and a subtle kick from the pimentos. They're the ideal side for chili, soups, or honestly just slathered with butter and devoured warm from the oven. The best part? They're so easy that you can whip up a batch on a weeknight without any stress.
Low FODMAP win: All the comfort of Southern-style cornbread muffins with none of the gluten or FODMAP triggers. Perfect for meal prep or when you need a crowd-pleasing side that everyone can enjoy.
See this new recipe in my FREE recipe club.
To streamline your search through hundreds of existing recipes, I'm moving the release of my new weekly creations to the Recipe Club on Patreon. In the club, you’ll get access to a treasure trove of low-FODMAP goodness, complete with collections and filters to use as your virtual cookbook!
Here's what awaits you in the club:
Exclusive weekly recipes: Be the first to try my latest delicious low-FODMAP creations!
Simple & Easy: My recipes continue to focus on readily available ingredients and effortless preparation, perfect for family-friendly meals (no more separate low-FODMAP meal prep!).
Hundreds of existing recipes: Gain access to my entire library of low-FODMAP recipes, all conveniently organized.
You can join for free or sign up for only $5/month. Your support fuels my passion for creating new, delicious, and easy-to-make low-FODMAP recipes just for you.
Let's go on this delicious low-FODMAP journey together.
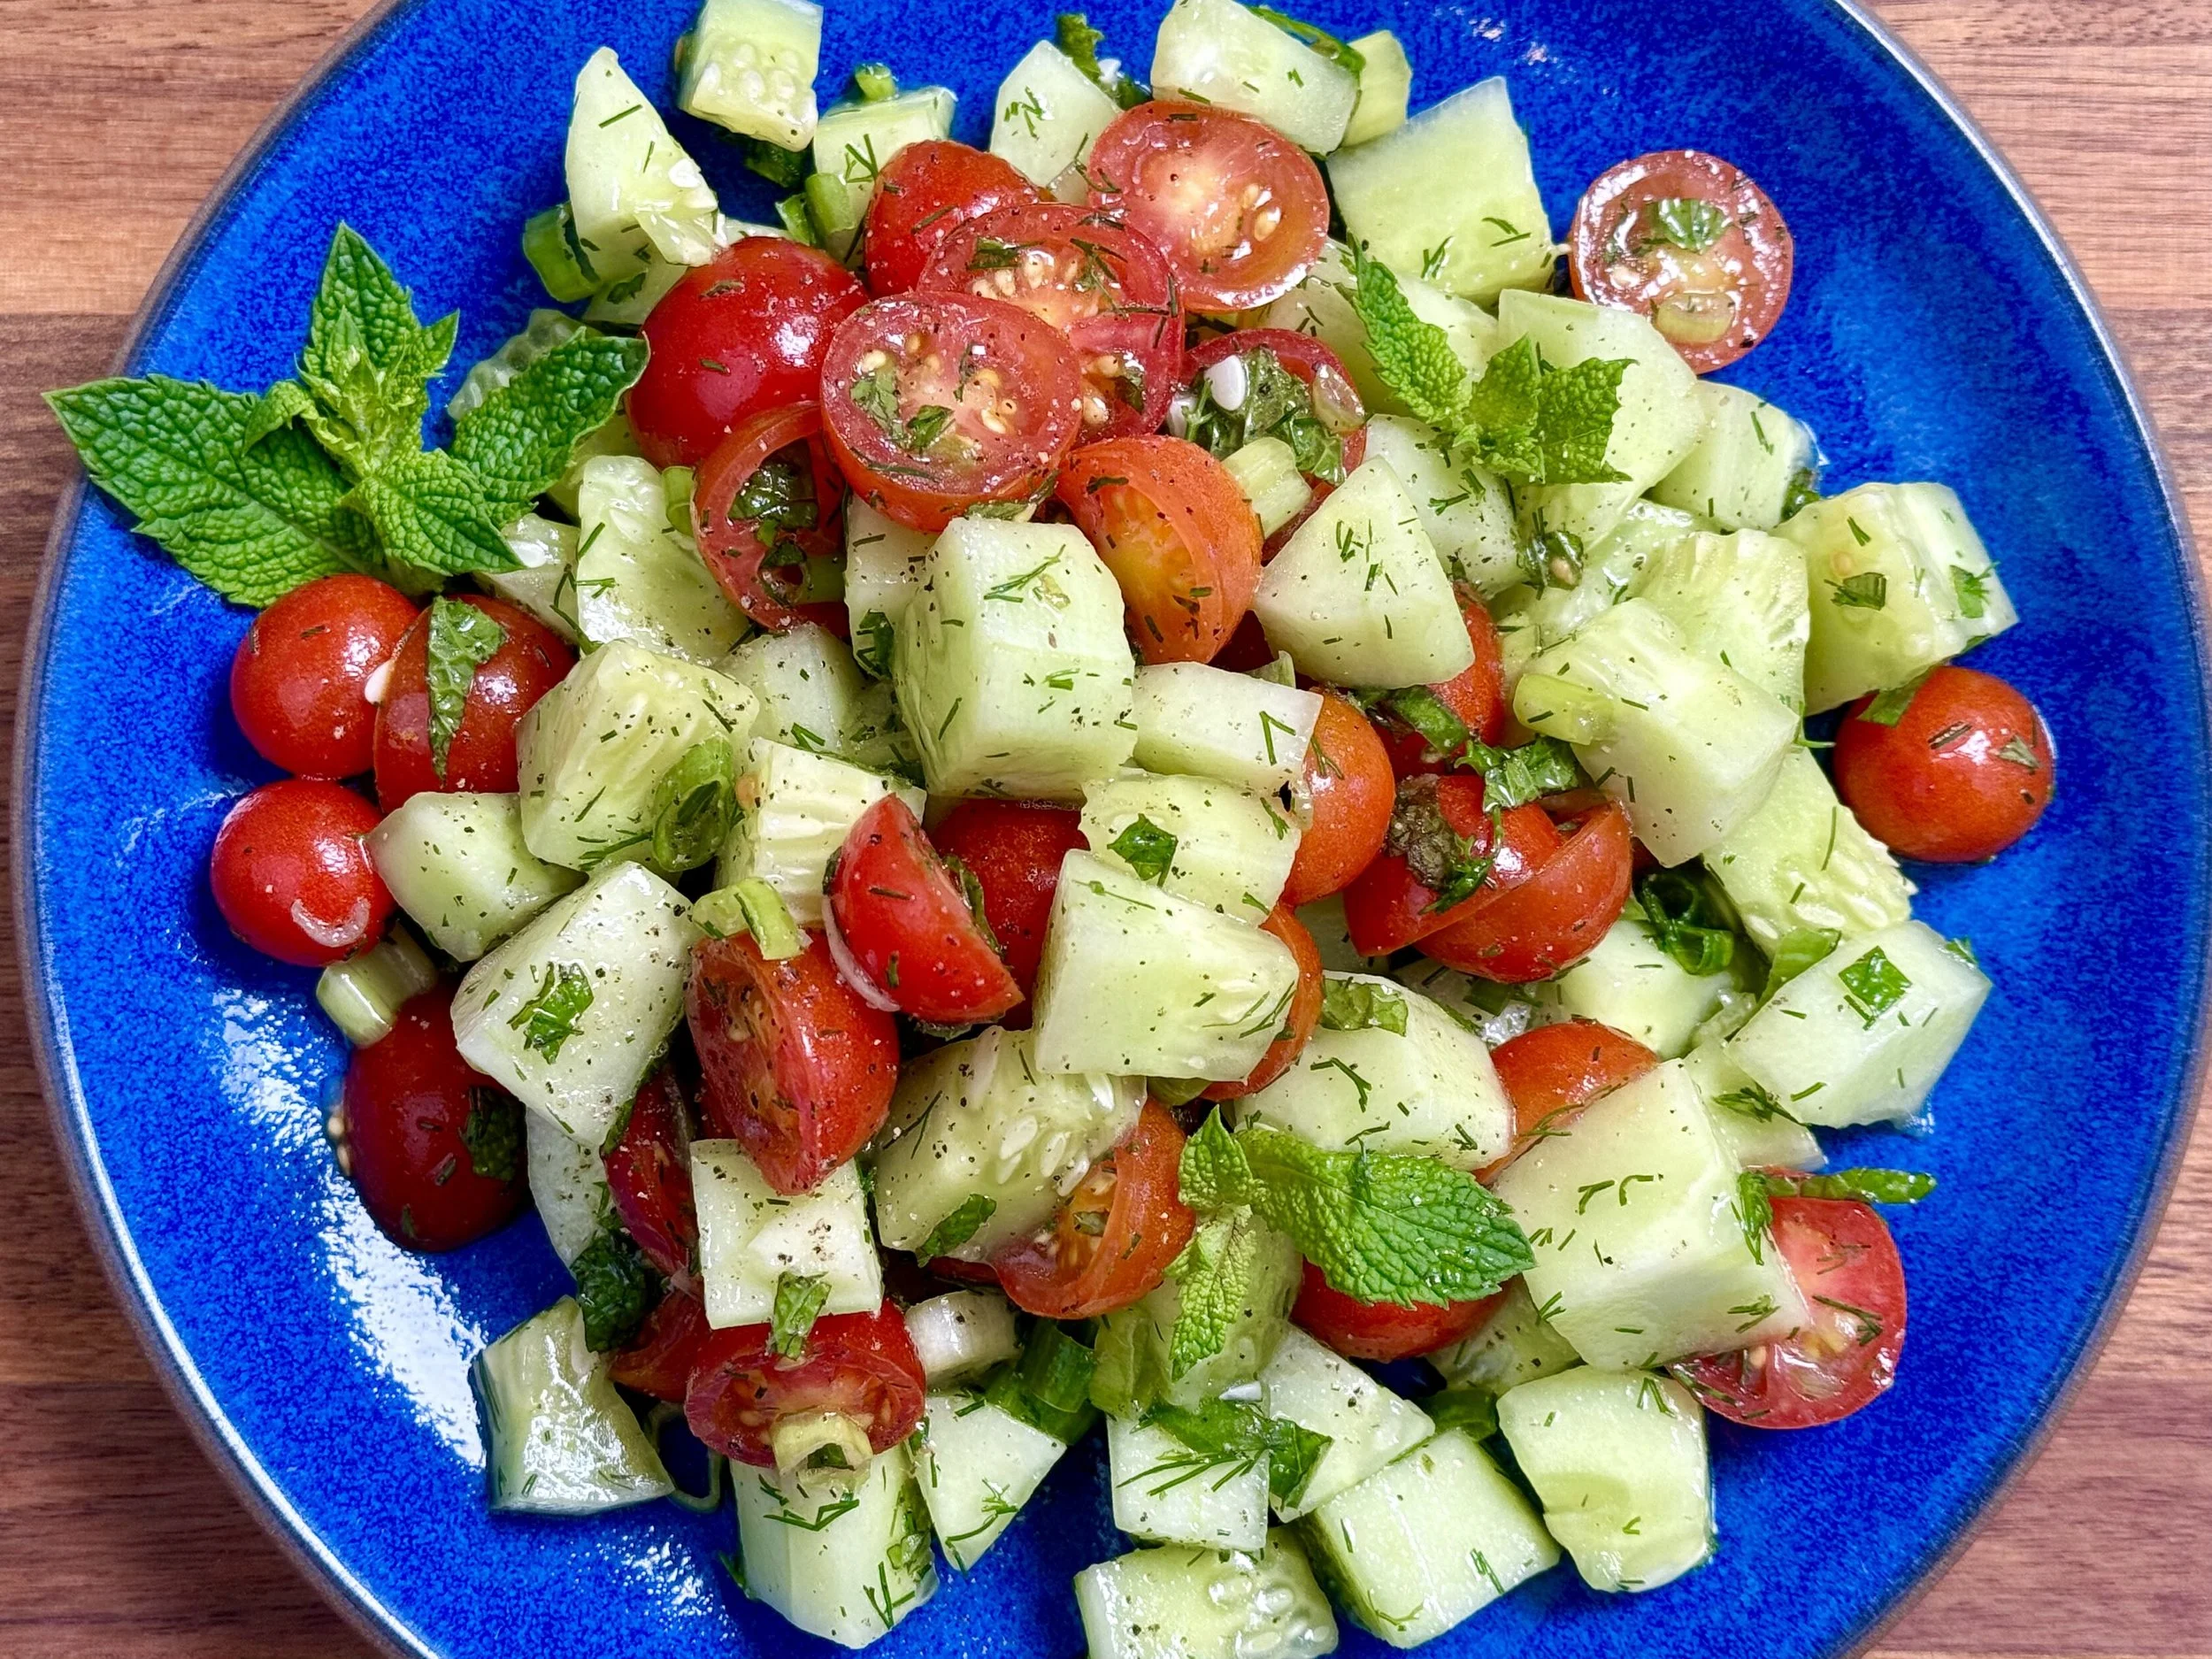
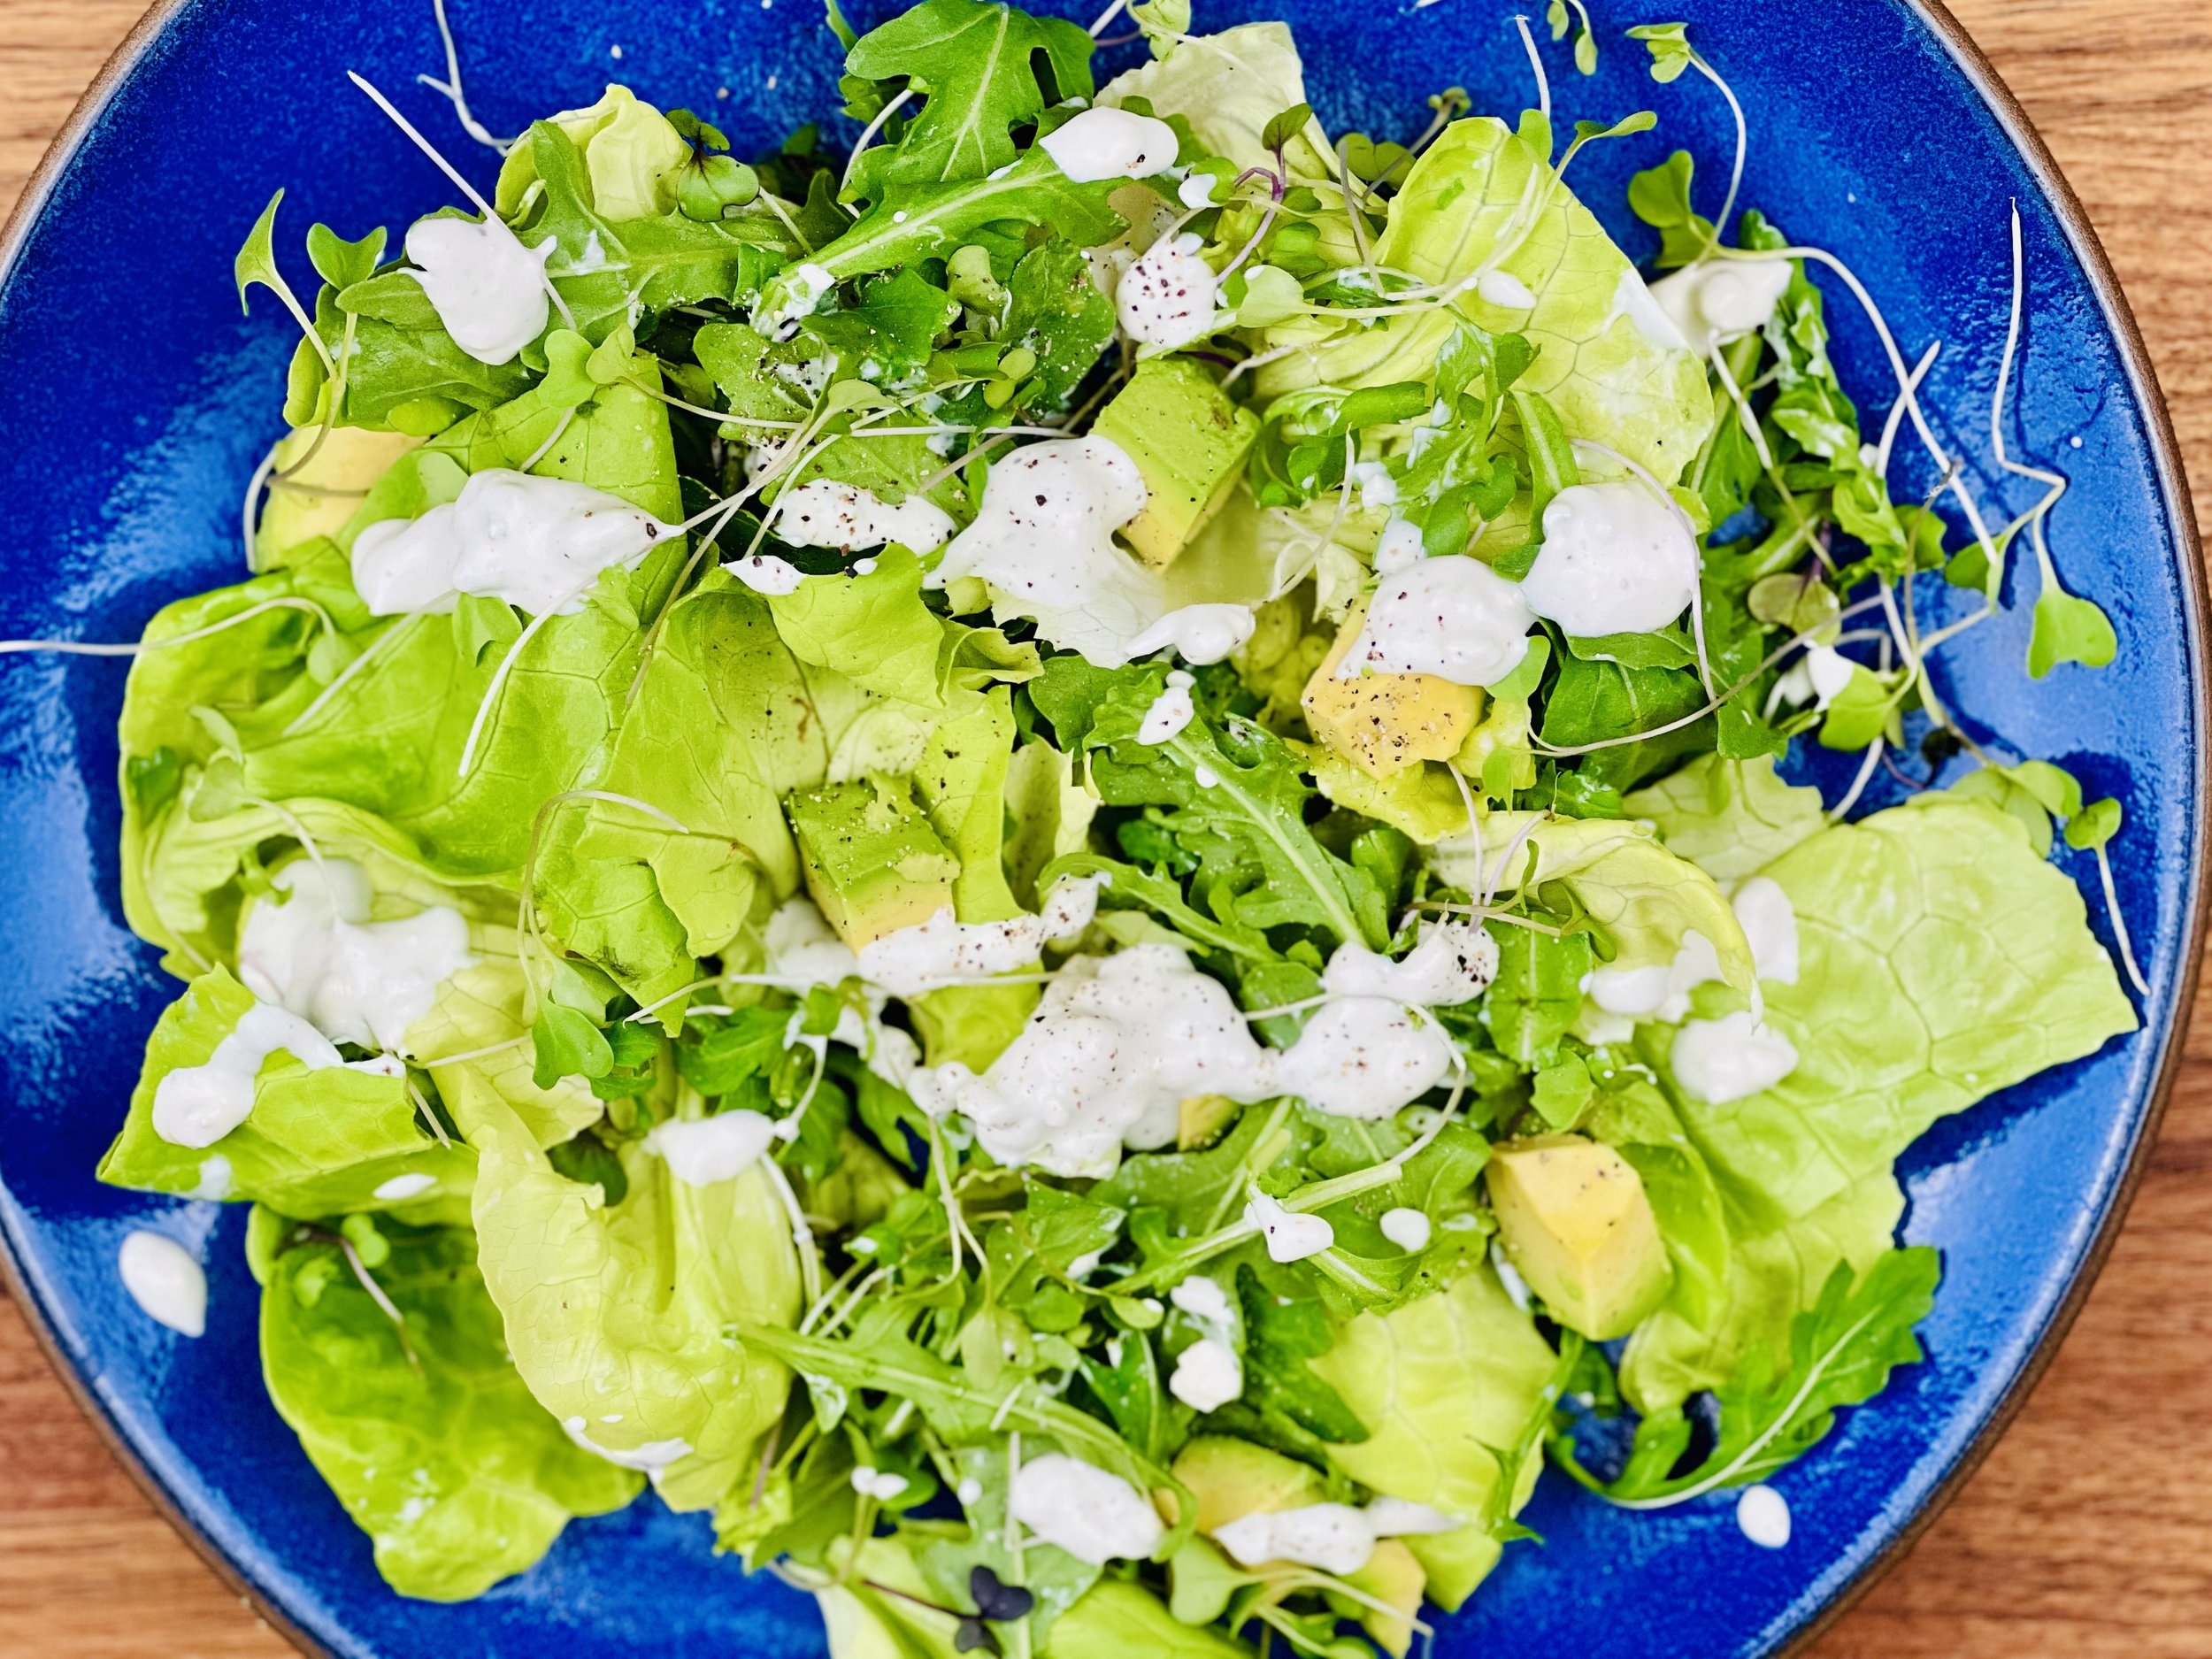
Summer Cucumber and Tomato Salad (Low FODMAP)
20 Minutes prep • Low FODMAP • Gluten-Free • Lactose-Free • Serves 6 - 8
20 Minutes Prep • 30 Minutes Chill • Low FODMAP • Gluten-Free • Lactose-Free • Serves 6 - 8 • Ok to make-ahead: Steps 1 - 4
Light, crisp, and bursting with garden-fresh flavor, this Summer Cucumber and Tomato Salad is the perfect warm-weather side dish. With juicy tomatoes, cool cucumbers, and an herby vinaigrette, it brings together the best of the season in a bowl. Whether you're hosting a backyard barbecue, packing a picnic, or just craving something refreshing, this salad is quick to toss together and endlessly versatile. It’s a simple, wholesome dish that celebrates the peak of summer produce — no cooking required.
See this new recipe in my FREE recipe club.
To streamline your search through hundreds of existing recipes, I'm moving the release of my new weekly creations to the Recipe Club on Patreon. In the club, you’ll get access to a treasure trove of low-FODMAP goodness, complete with collections and filters to use as your virtual cookbook!
Here's what awaits you in the club:
Exclusive weekly recipes: Be the first to try my latest delicious low-FODMAP creations!
Simple & Easy: My recipes continue to focus on readily available ingredients and effortless preparation, perfect for family-friendly meals (no more separate low-FODMAP meal prep!).
Hundreds of existing recipes: Gain access to my entire library of low-FODMAP recipes, all conveniently organized.
You can join for free or sign up for only $5/month. Your support fuels my passion for creating new, delicious, and easy-to-make low-FODMAP recipes just for you.
Let's go on this delicious low-FODMAP journey together.
Roasted Broccoli and Bacon Salad (Low FODMAP)
5 Minutes prep • 30 Minutes cook • Low FODMAP • Serves 6-8 • Ok to make-ahead: Steps 1 - 3
5 Minutes prep • 30 Minutes cook • Low FODMAP • Serves 6-8 • Ok to make-ahead: Steps 1 - 3
Looking for a bold and satisfying way to enjoy your greens? This salad strikes the perfect balance between smoky, salty, and tangy. Roasting the broccoli brings out its natural sweetness and gives it a deliciously crispy edge, while smoky bacon adds richness and crunch. Crumbled feta brings a creamy, savory punch that ties it all together. Whether you serve it warm or chilled, this hearty salad is a standout side—or even a light main—that’s anything but boring. Ideal for meal prep, potlucks, or just upgrading your weeknight dinner rotation!
See this new recipe in my FREE recipe club.
To streamline your search through hundreds of existing recipes, I'm moving the release of my new weekly creations to the Recipe Club on Patreon. In the club, you’ll get access to a treasure trove of low-FODMAP goodness, complete with collections and filters to use as your virtual cookbook!
Here's what awaits you in the club:
Exclusive weekly recipes: Be the first to try my latest delicious low-FODMAP creations!
Simple & Easy: My recipes continue to focus on readily available ingredients and effortless preparation, perfect for family-friendly meals (no more separate low-FODMAP meal prep!).
Hundreds of existing recipes: Gain access to my entire library of low-FODMAP recipes, all conveniently organized.
You can join for free or sign up for only $5/month. Your support fuels my passion for creating new, delicious, and easy-to-make low-FODMAP recipes just for you.
Let's go on this delicious low-FODMAP journey together.
Lemon Mint Summer Potato Salad (Low FODMAP)
20 Minutes prep • 20 Minutes cook • Low FODMAP • Gluten-Free • Serves 6 - 8
20 Minutes prep • 20 Minutes cook • Low FODMAP • Gluten-Free • Serves 6 - 8 • Ok to make-ahead: Steps 1 - 3
Light, bright, and bursting with seasonal flavor, this Lemon Mint Summer Potato Salad is your new warm-weather go-to. Swapping heavy dressings for a zesty lemon vinaigrette and fresh herbs, this refreshing twist on the traditional potato salad is perfect for picnics, barbecues, or a simple weekday side. Tender potatoes are tossed with a splash of citrus, a handful of chopped mint, and just the right touch of olive oil, creating a dish that feels both vibrant and comforting.
See this new recipe in my FREE recipe club.
To streamline your search through hundreds of existing recipes, I'm moving the release of my new weekly creations to the Recipe Club on Patreon. In the club, you’ll get access to a treasure trove of low-FODMAP goodness, complete with collections and filters to use as your virtual cookbook!
Here's what awaits you in the club:
Exclusive weekly recipes: Be the first to try my latest delicious low-FODMAP creations!
Simple & Easy: My recipes continue to focus on readily available ingredients and effortless preparation, perfect for family-friendly meals (no more separate low-FODMAP meal prep!).
Hundreds of existing recipes: Gain access to my entire library of low-FODMAP recipes, all conveniently organized.
You can join for free or sign up for only $5/month. Your support fuels my passion for creating new, delicious, and easy-to-make low-FODMAP recipes just for you.
Let's go on this delicious low-FODMAP journey together.
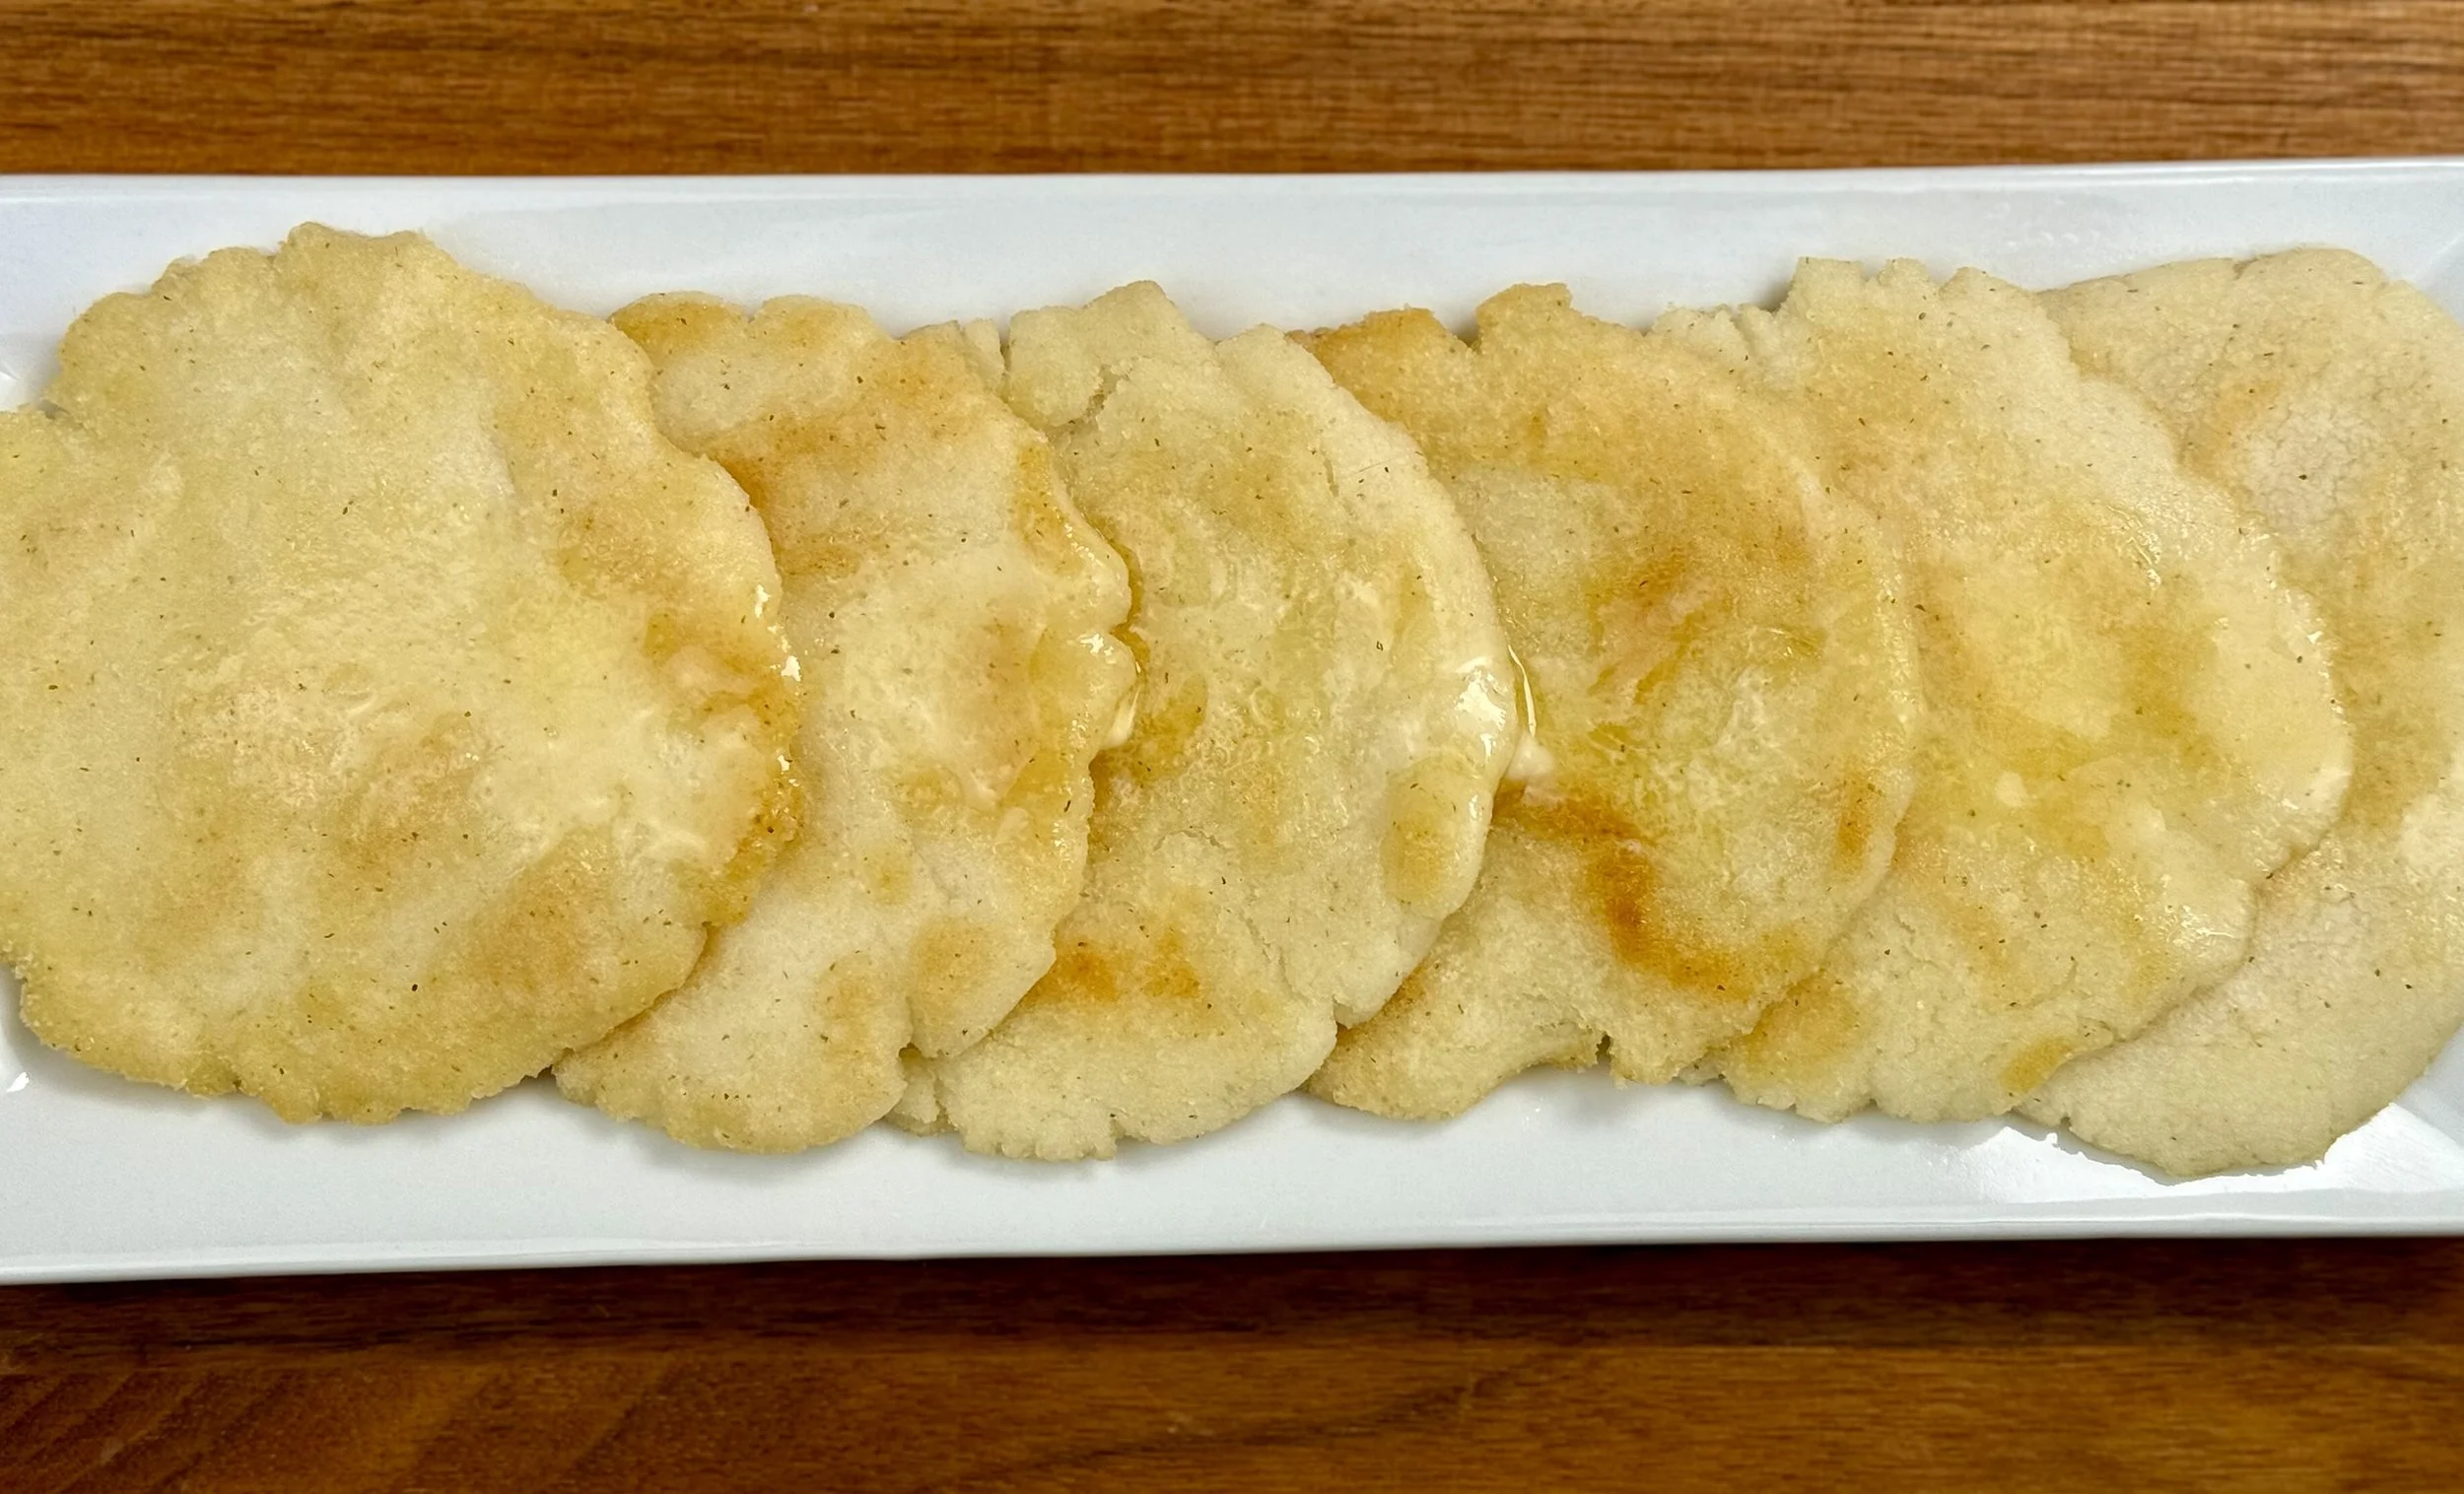
Corn Flour Arepas (Low FODMAP)
15 Minutes prep • 20 Minutes cook • Low FODMAP • Gluten-Free • Makes 12
15 Minutes prep • 20 Minutes cook • Low FODMAP • Gluten-Free • Makes 12 • Ok to make-ahead: Steps 1 - 2
Get ready to enjoy the comforting aroma of freshly cooked cornmeal, transformed into arepas that are crisp on the outside, soft on the inside, and full of flavor. Whether you're in the mood for a savory arepa filled or topped with your favorite protein, or a sweet version with butter and a spoonful of jam, this simple recipe delivers all the satisfaction, without the worry of digestive discomfort.
See this new recipe in my FREE recipe club.
To streamline your search through hundreds of existing recipes, I'm moving the release of my new weekly creations to the Recipe Club on Patreon. In the club, you’ll get access to a treasure trove of low-FODMAP goodness, complete with collections and filters to use as your virtual cookbook!
Here's what awaits you in the club:
Exclusive weekly recipes: Be the first to try my latest delicious low-FODMAP creations!
Simple & Easy: My recipes continue to focus on readily available ingredients and effortless preparation, perfect for family-friendly meals (no more separate low-FODMAP meal prep!).
Hundreds of existing recipes: Gain access to my entire library of low-FODMAP recipes, all conveniently organized.
You can join for free or sign up for only $5/month. Your support fuels my passion for creating new, delicious, and easy-to-make low-FODMAP recipes just for you.
Let's go on this delicious low-FODMAP journey together.
Tender Baked No Flour Flat Bread (Low FODMAP)
15 Minutes prep • 30 Minutes cook • Low FODMAP • Gluten-Free • Makes 8
15 Minutes prep • 30 Minutes cook • Low FODMAP • Gluten-Free • Makes 8 • Ok to make-ahead: Step 1
A delicious, keto-friendly twist on traditional flatbread — soft, golden, and bursting with flavor. These delicious baked flatbreads come together quickly with only a few ingredients, including eggs, avocado, and cheese. With a satisfying texture that’s both pillowy and crisp around the edges, they make the perfect low-carb hamburger buns or bread alternative. They deliver flavor and nourishment in every bite. Ideal for brunch spreads, gourmet sandwiches, or as a simple standalone snack, they’re the kind of flatbread that elevates everyday eating.
See this new recipe in my FREE recipe club.
To streamline your search through hundreds of existing recipes, I'm moving the release of my new weekly creations to the Recipe Club on Patreon. In the club, you’ll get access to a treasure trove of low-FODMAP goodness, complete with collections and filters to use as your virtual cookbook!
Here's what awaits you in the club:
Exclusive weekly recipes: Be the first to try my latest delicious low-FODMAP creations!
Simple & Easy: My recipes continue to focus on readily available ingredients and effortless preparation, perfect for family-friendly meals (no more separate low-FODMAP meal prep!).
Hundreds of existing recipes: Gain access to my entire library of low-FODMAP recipes, all conveniently organized.
You can join for free or sign up for only $5/month. Your support fuels my passion for creating new, delicious, and easy-to-make low-FODMAP recipes just for you.
Let's go on this delicious low-FODMAP journey together.
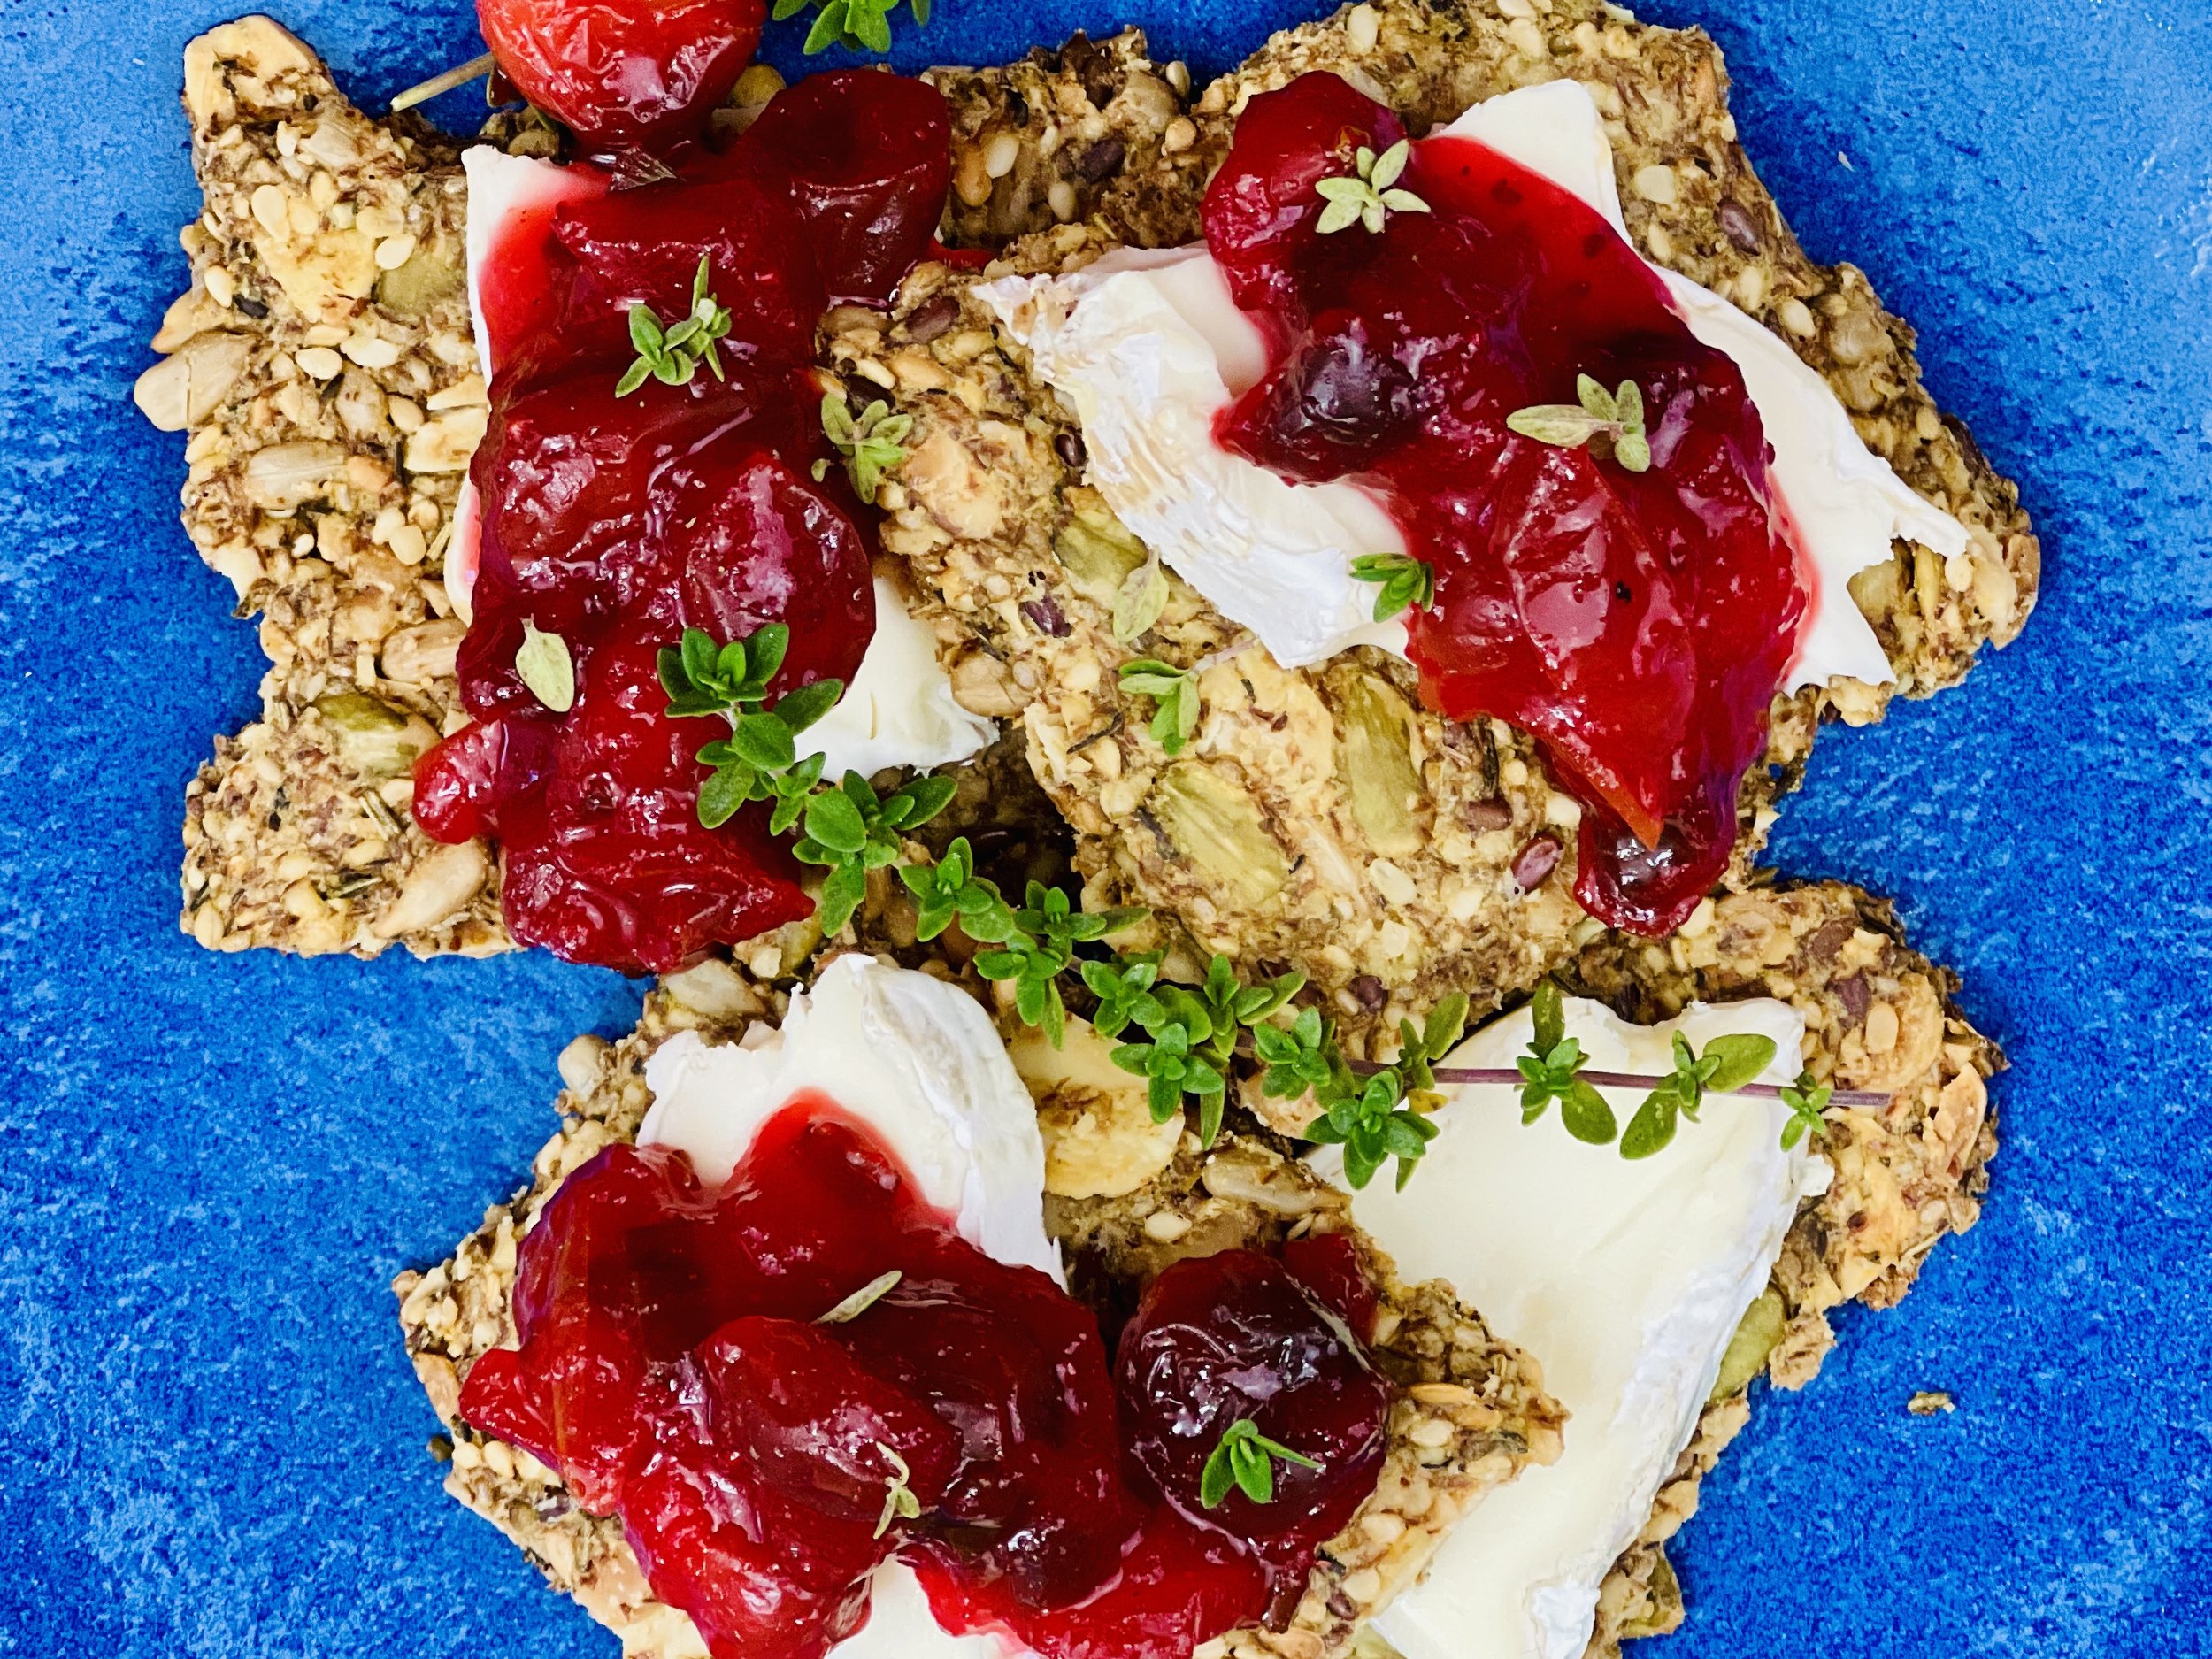
Cranberry Chutney (Low FODMAP)
5 Minutes prep • 15 Minutes cook • Low FODMAP • Gluten-Free • Lactose-Free • Makes 2 cups
5 Minutes prep • 15 Minutes cook • Low FODMAP • Gluten-Free • Lactose-Free • Makes 2 cups • Ok to make-ahead: Steps 1 - 4
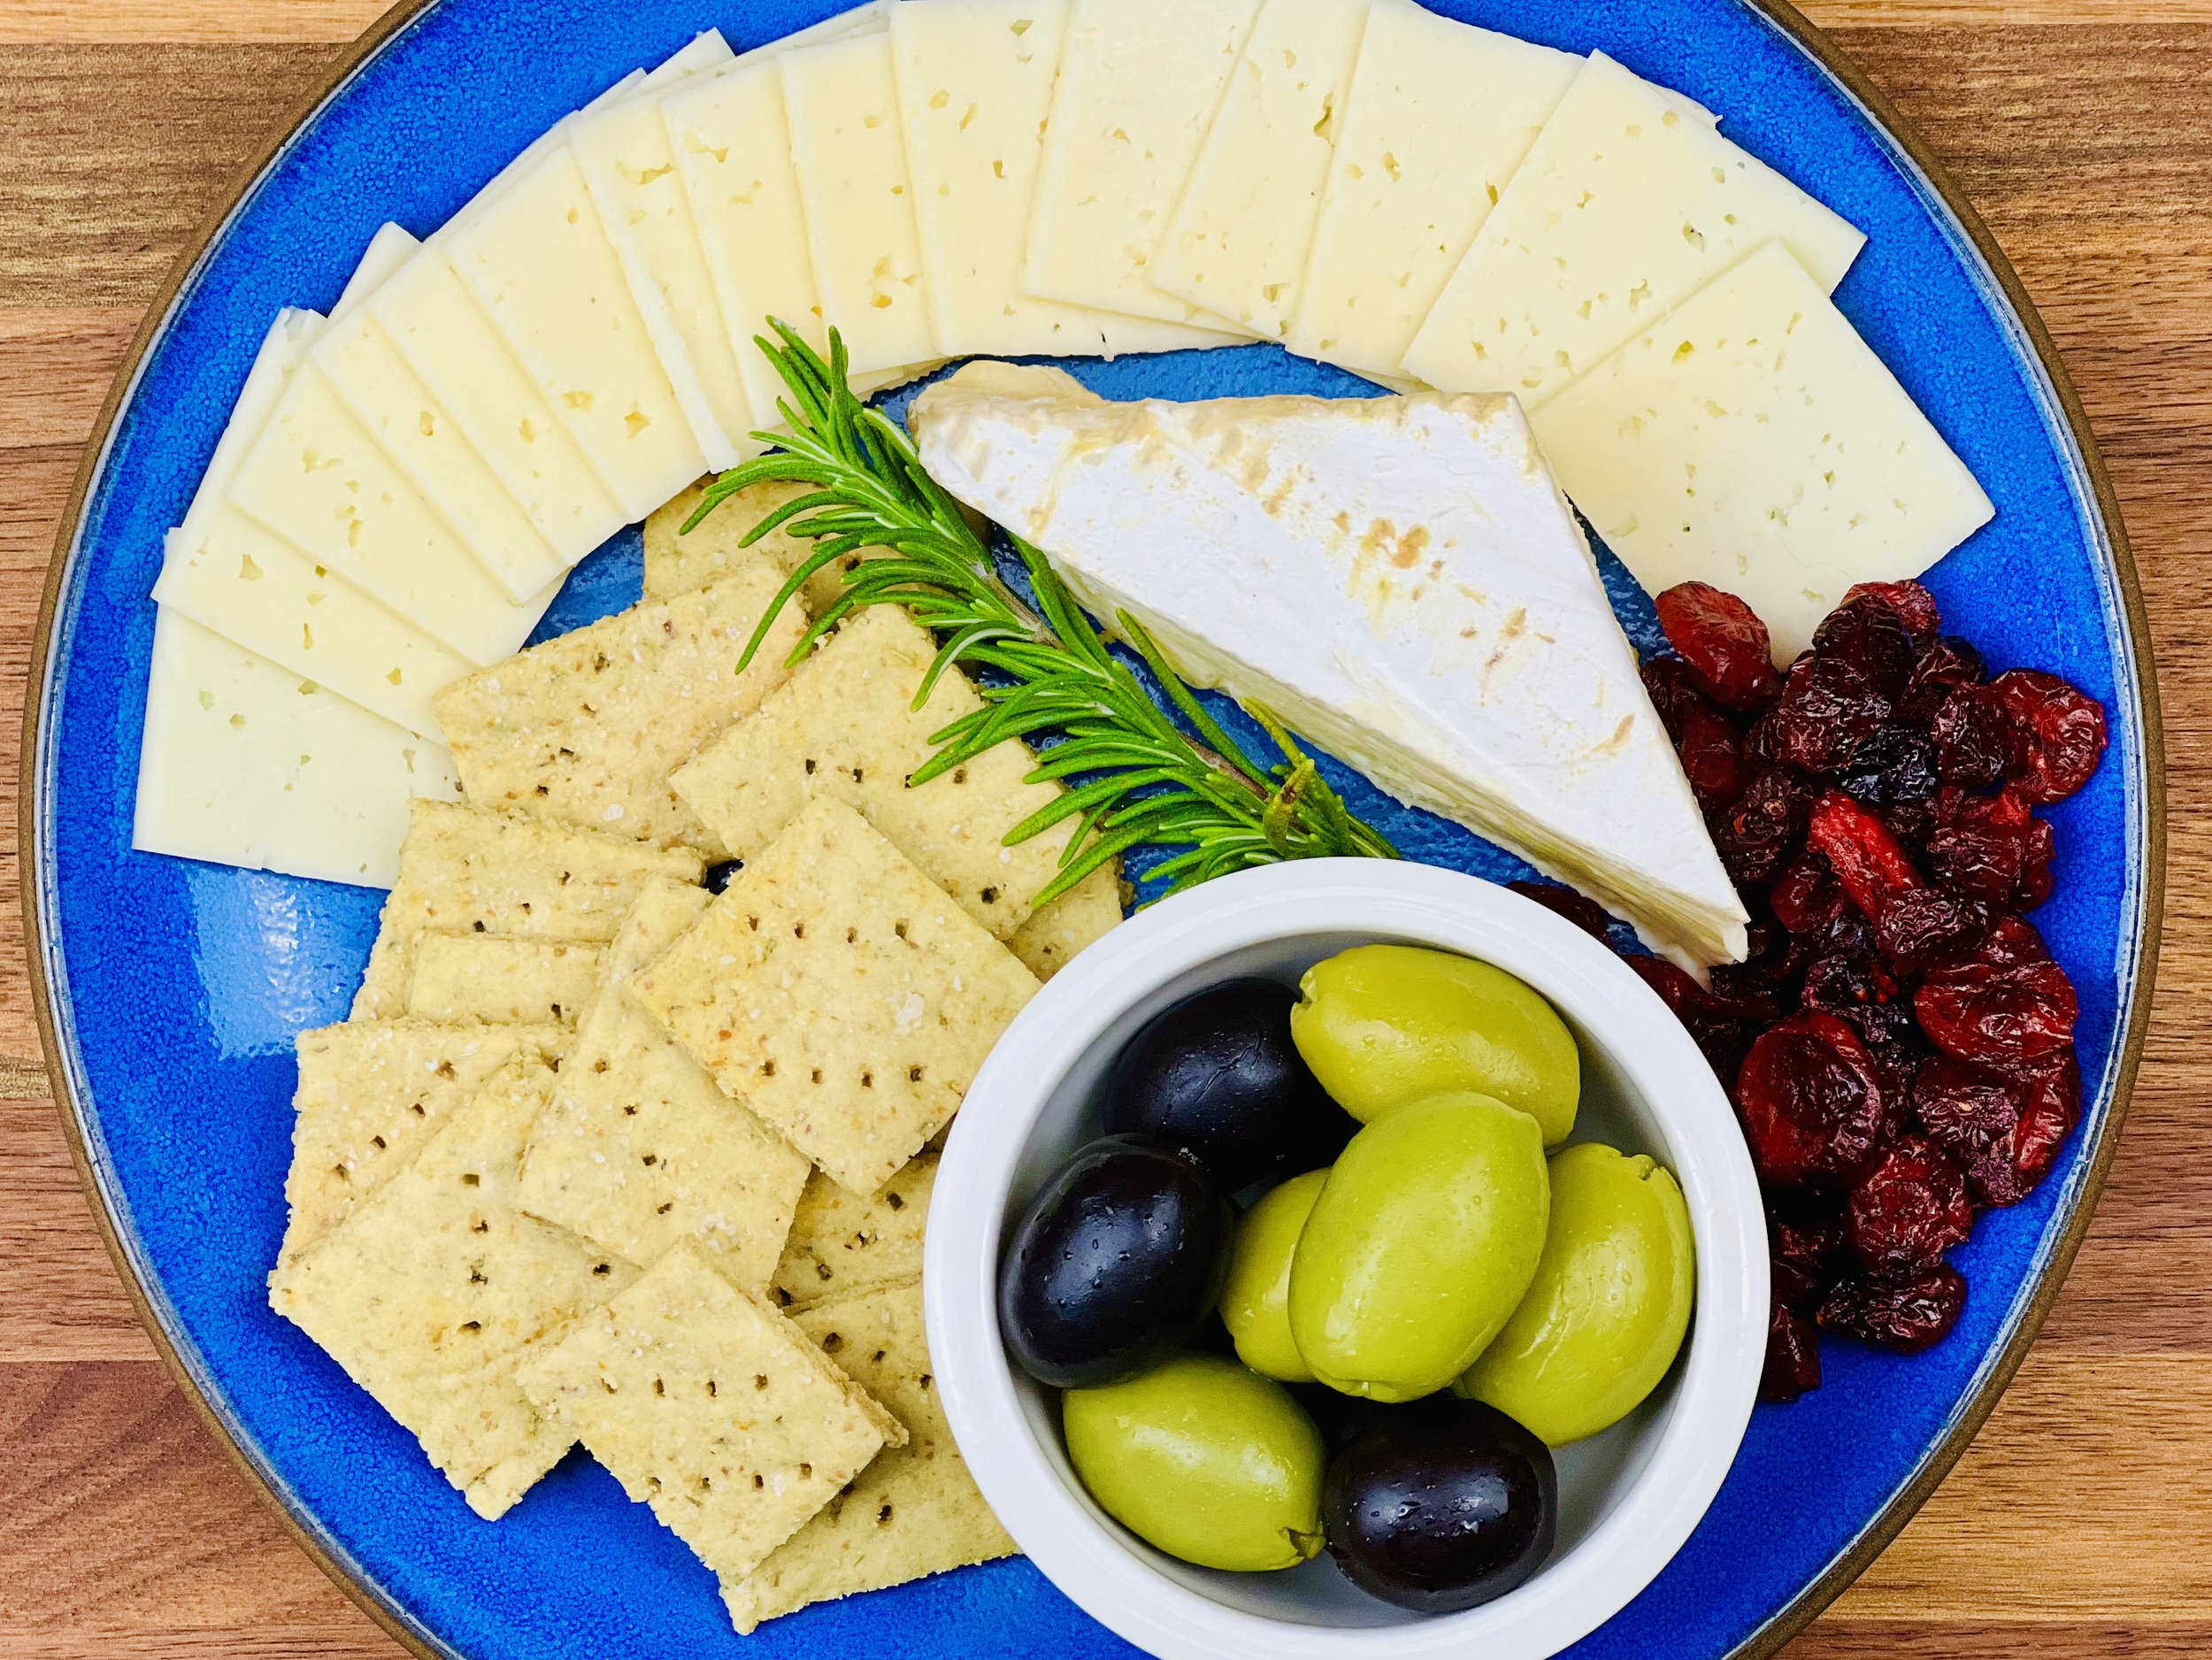
This lightly spicy and sweet cranberry chutney is the perfect accompaniment to your holiday feast or a delightful spread for any occasion. Bursting with the vibrant flavors of cranberries, apples, and warm spices, this chutney is easy to make and even easier to love. Whether you serve it with roasted meats, cheese, and my seed crackers, or simply enjoy it on its own, this recipe is sure to become a new family favorite.
See this new recipe in my FREE recipe club.
To streamline your search through hundreds of existing recipes, I'm moving the release of my new weekly creations to the Recipe Club on Patreon. In the club, you’ll get access to a treasure trove of low-FODMAP goodness, complete with collections and filters to use as your virtual cookbook!
Here's what awaits you in the club:
Exclusive weekly recipes: Be the first to try my latest delicious low-FODMAP creations!
Simple & Easy: My recipes continue to focus on readily available ingredients and effortless preparation, perfect for family-friendly meals (no more separate low-FODMAP meal prep!).
Hundreds of existing recipes: Gain access to my entire library of low-FODMAP recipes, all conveniently organized.
You can join for free or sign up for only $5/month. Your support fuels my passion for creating new, delicious, and easy-to-make low-FODMAP recipes just for you.
Let's go on this delicious low-FODMAP journey together.
Crispy Leek Fritters (Low FODMAP)
15 Minutes prep • 30 Minutes cook • Low FODMAP • Serves 4 • Ok to make-ahead: Steps 1 - 2
15 Minutes prep • 30 Minutes cook • Low FODMAP • Serves 4 • Ok to make-ahead: Steps 1 - 2
Craving crispy, savory Leek Fritters that won’t be hard on your digestive system? These Low-FODMAP Leek Fritters are the answer to your craving! As always, when I tackle a traditional recipe, my goal is to make it taste as close to the original as possible. The end results, in this case, are delicious fritters packed with flavor and loaded with plant-based ingredients. Delicious and satisfying, they make an excellent appetizer, side dish, or even vegetarian main. You can fry them up as fritters, or put the batter in your waffle iron and crisp them up without adding more oil. Either way, they’re delicious!
See this new recipe in my FREE recipe club.
To streamline your search through hundreds of existing recipes, I'm moving the release of my new weekly creations to the Recipe Club on Patreon. In the club, you’ll get access to a treasure trove of low-FODMAP goodness, complete with collections and filters to use as your virtual cookbook!
Here's what awaits you in the club:
Exclusive weekly recipes: Be the first to try my latest delicious low-FODMAP creations!
Simple & Easy: My recipes continue to focus on readily available ingredients and effortless preparation, perfect for family-friendly meals (no more separate low-FODMAP meal prep!).
Hundreds of existing recipes: Gain access to my entire library of low-FODMAP recipes, all conveniently organized.
You can join for free or sign up for only $5/month. Your support fuels my passion for creating new, delicious, and easy-to-make low-FODMAP recipes just for you.
Let's go on this delicious low-FODMAP journey together.
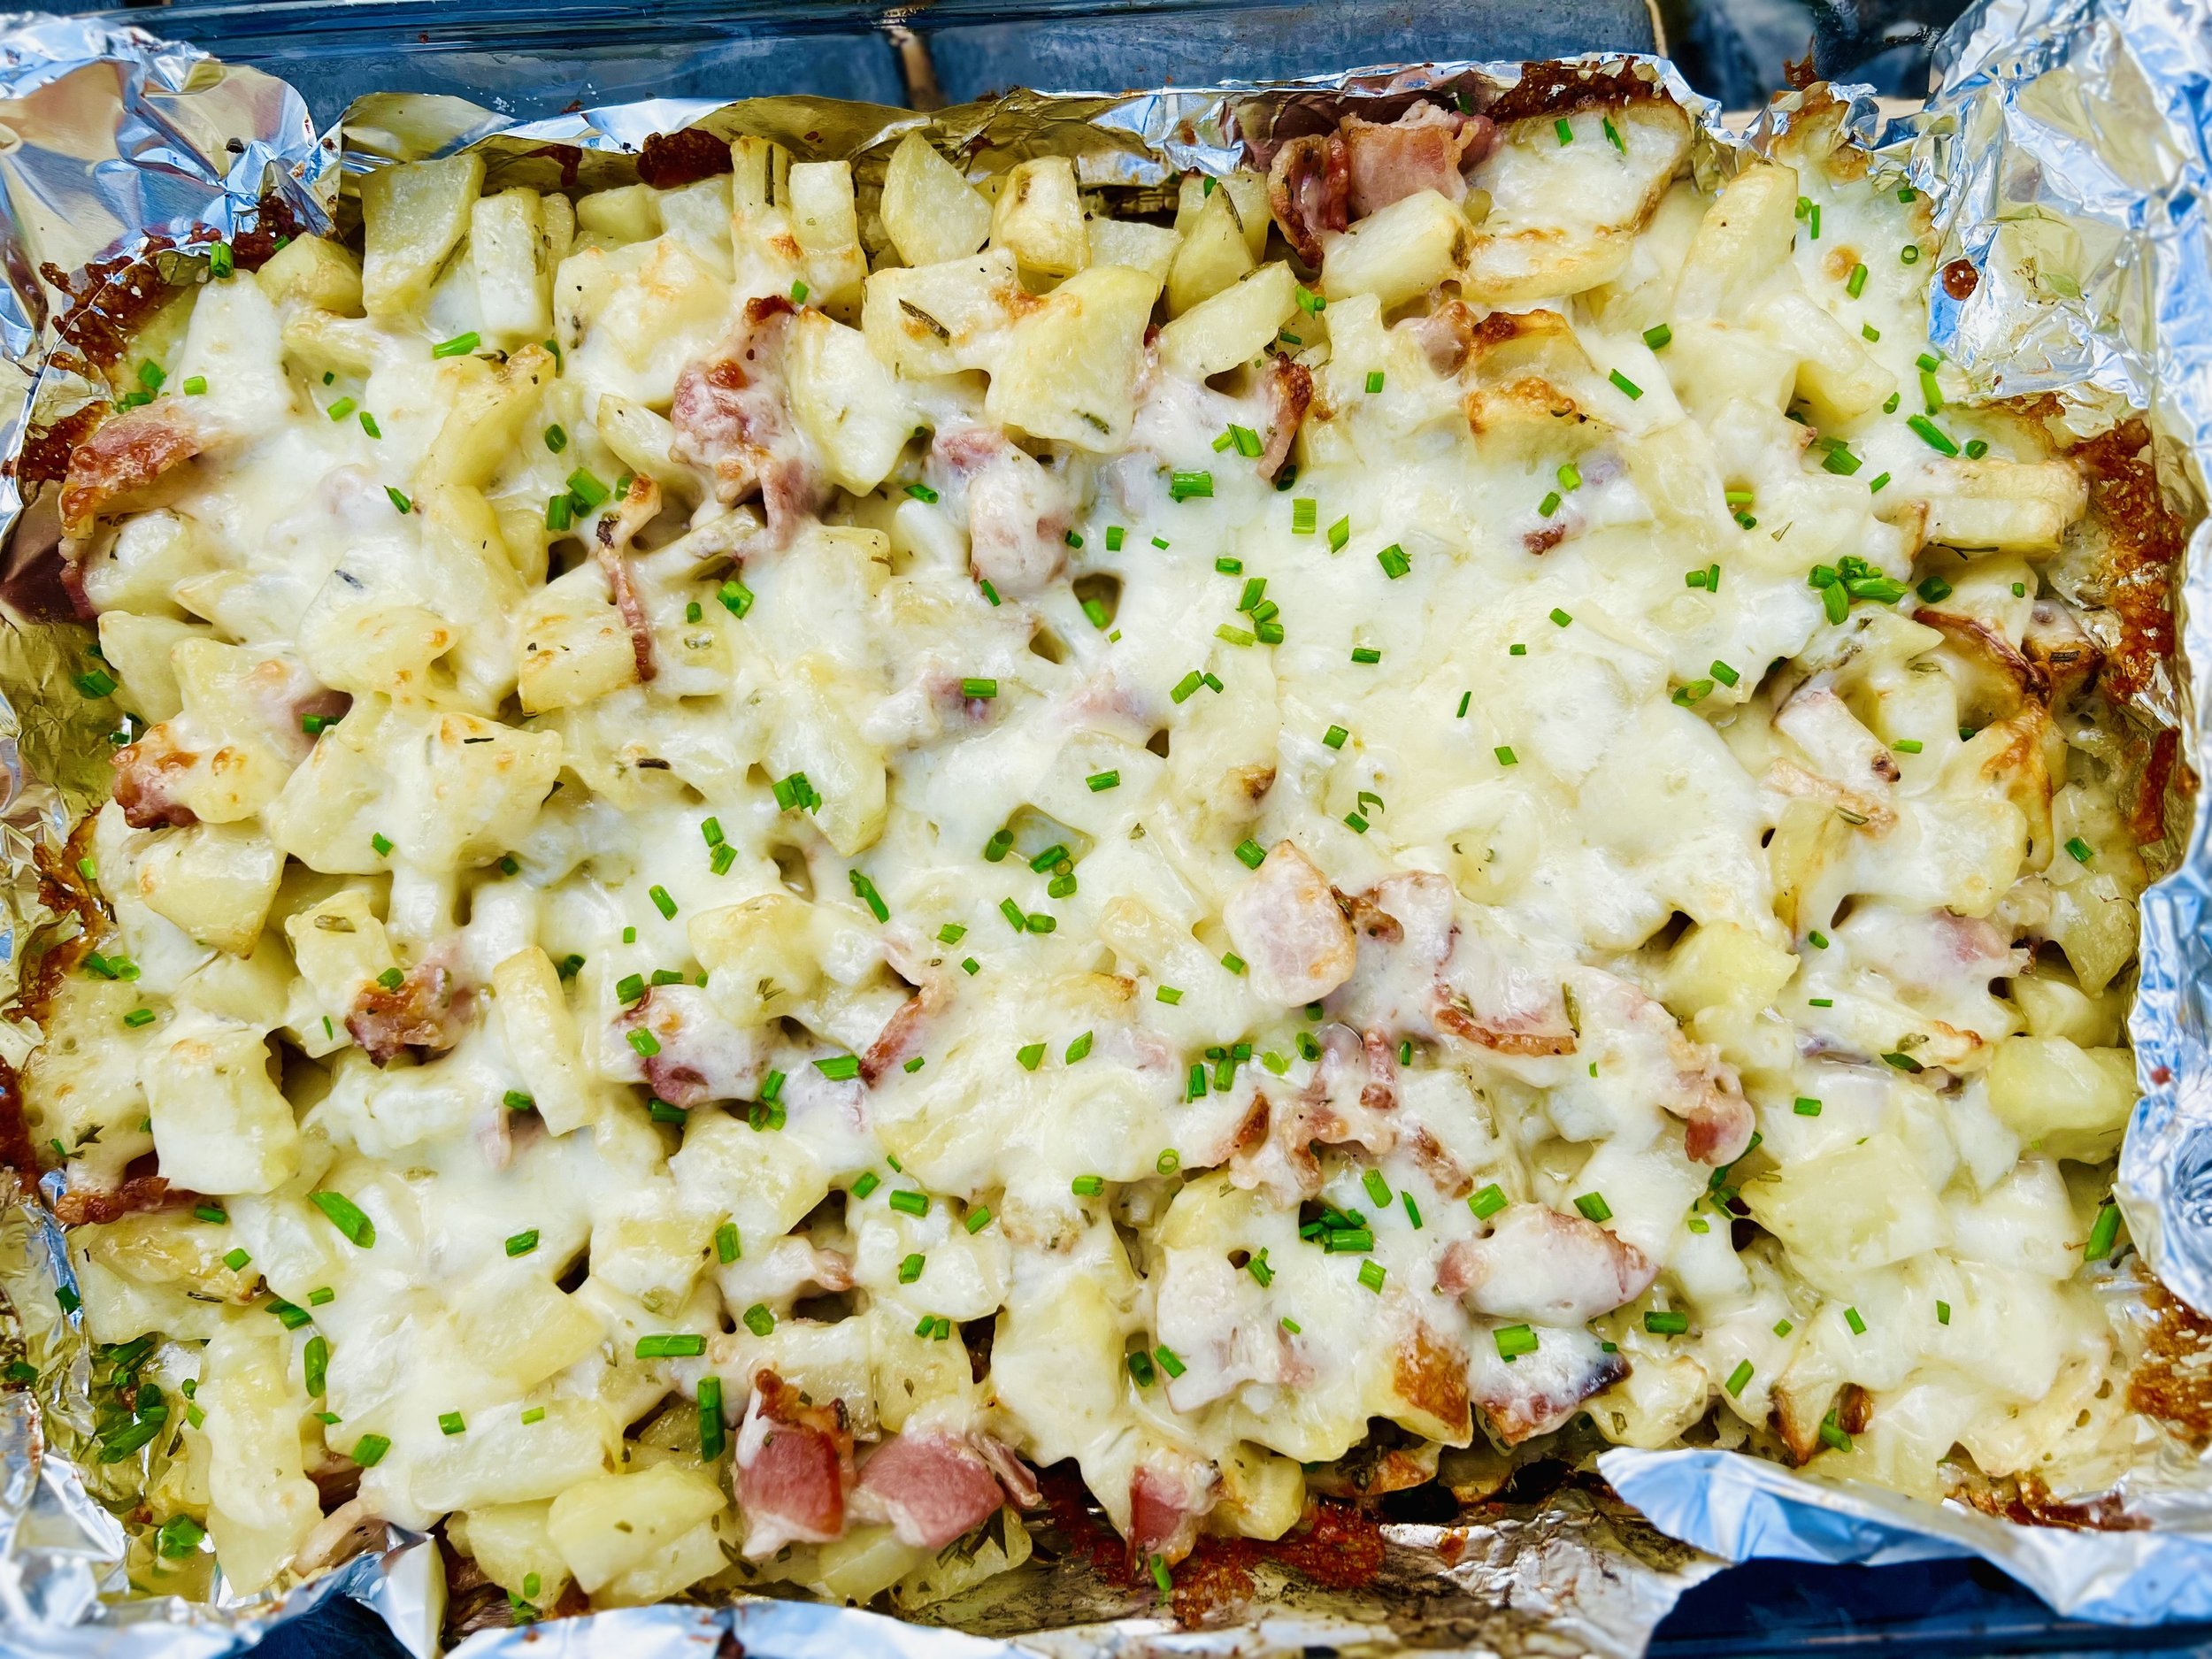
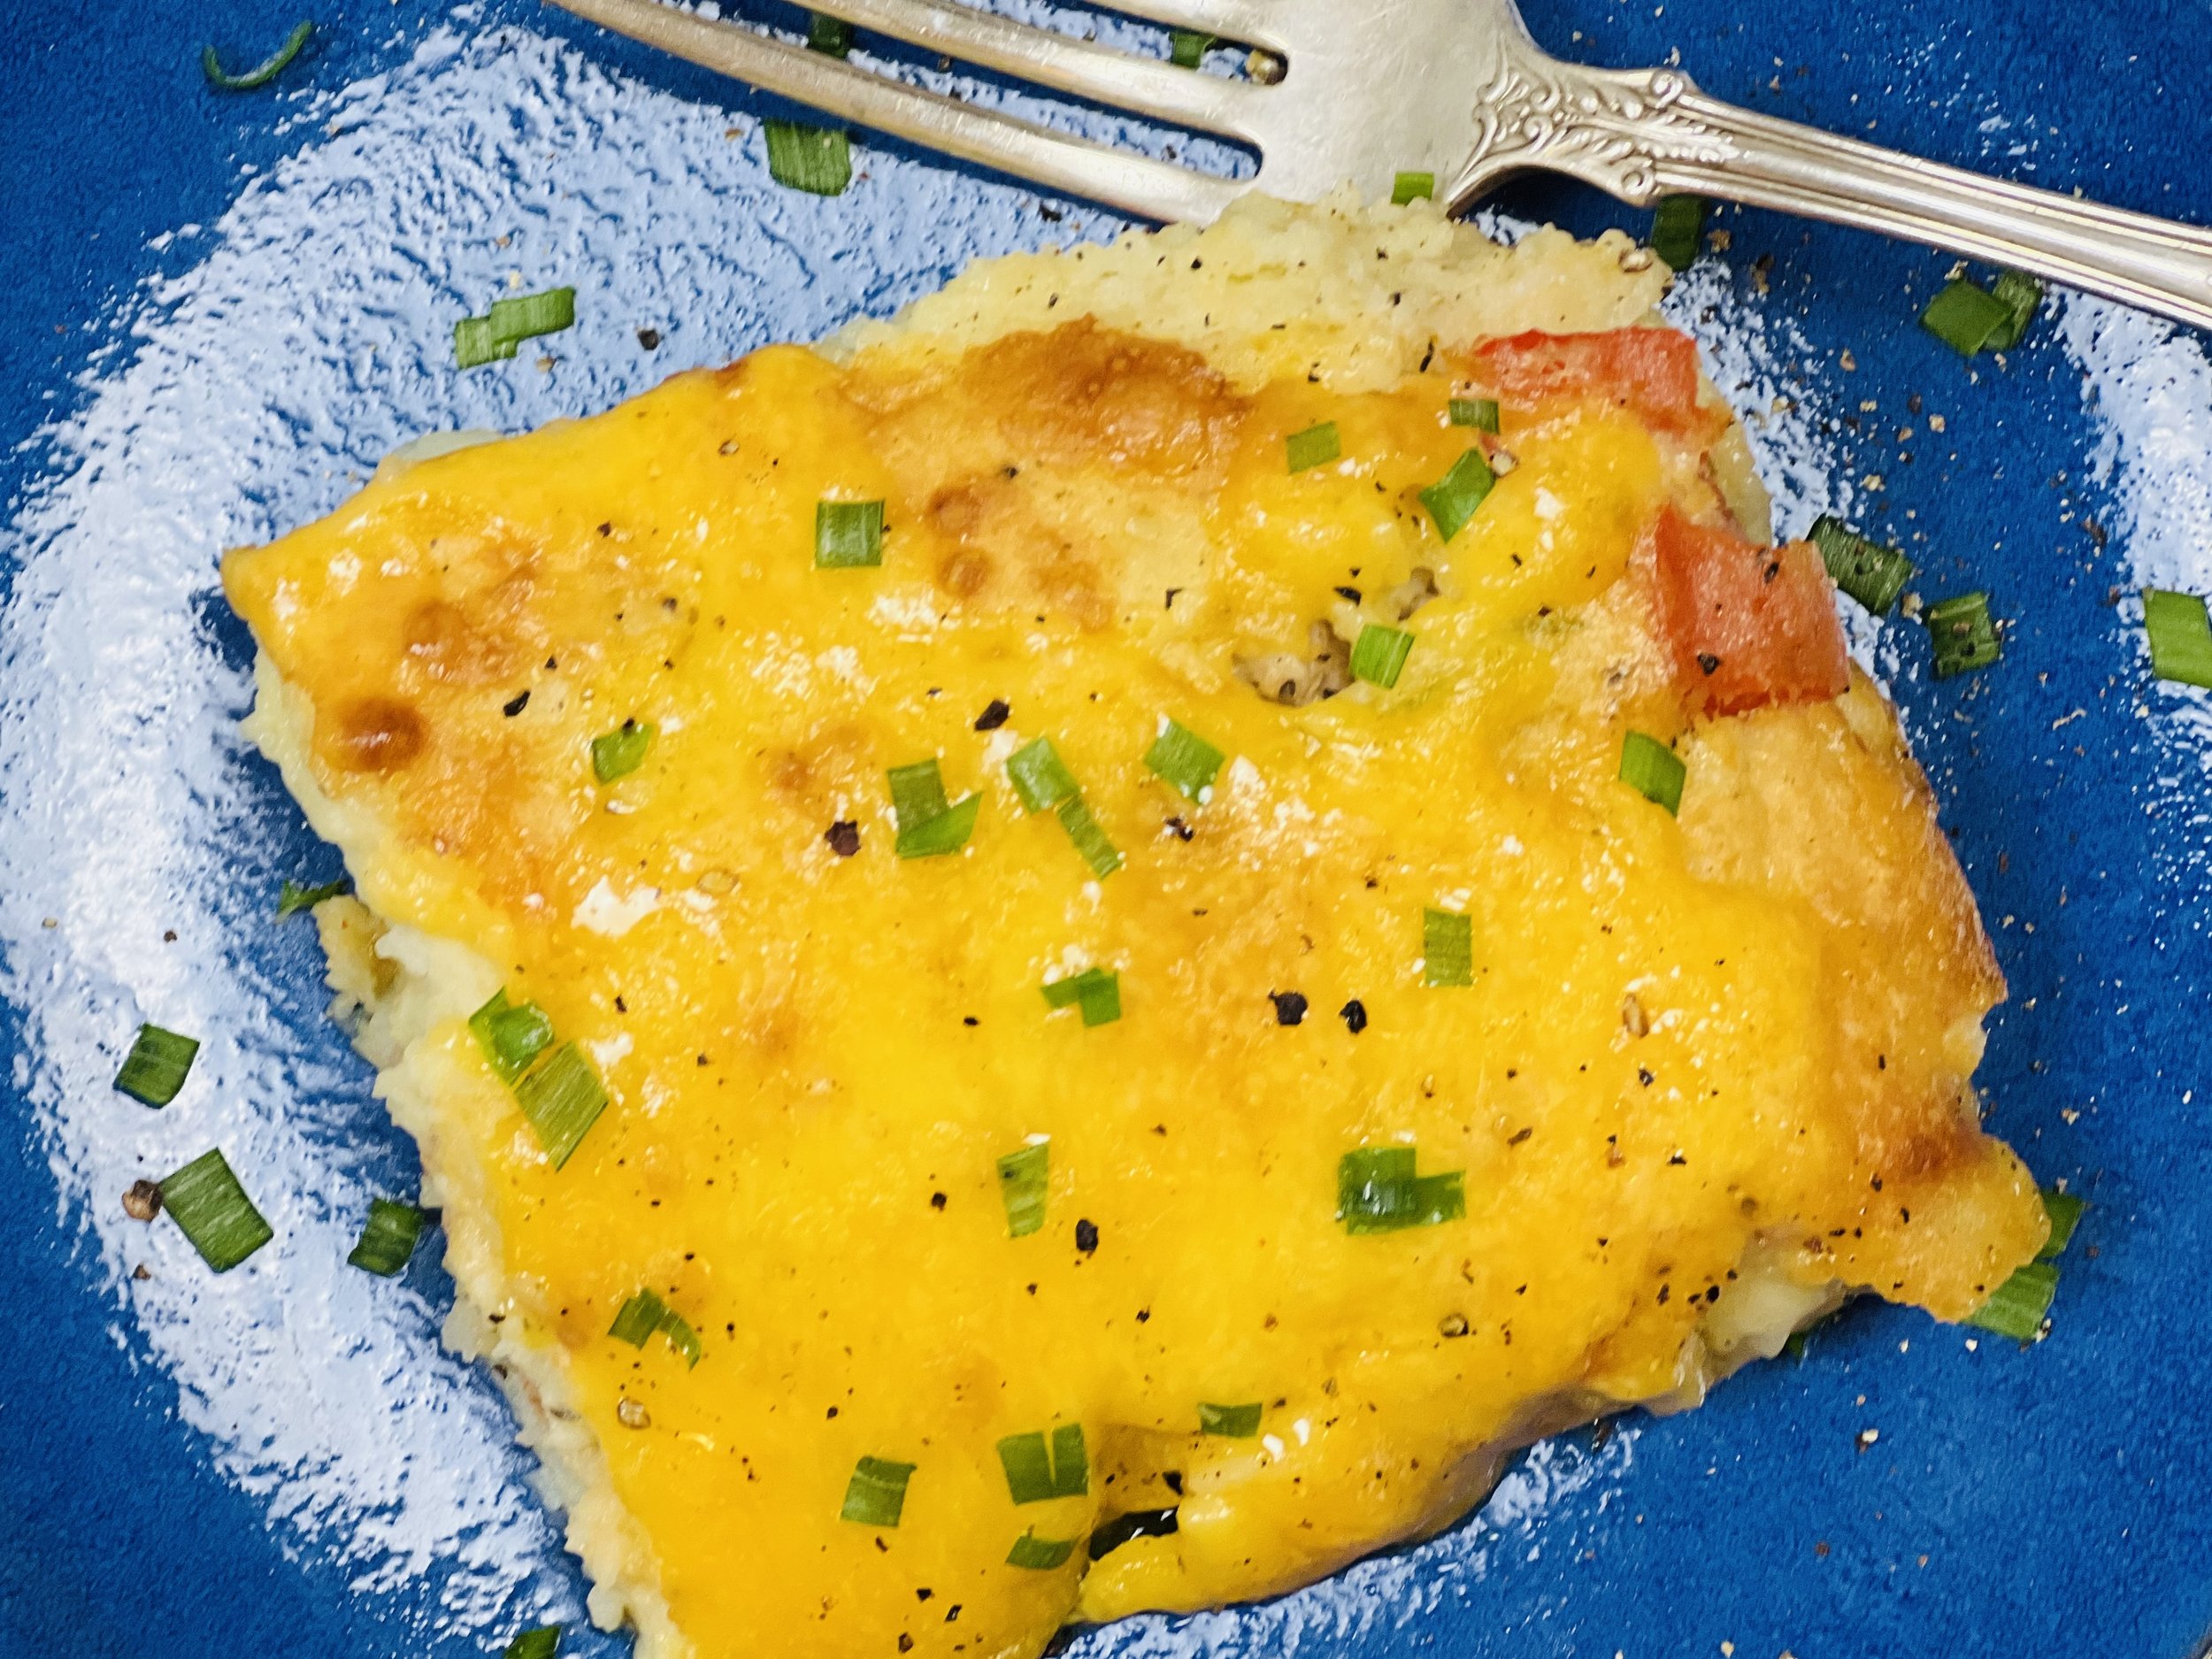
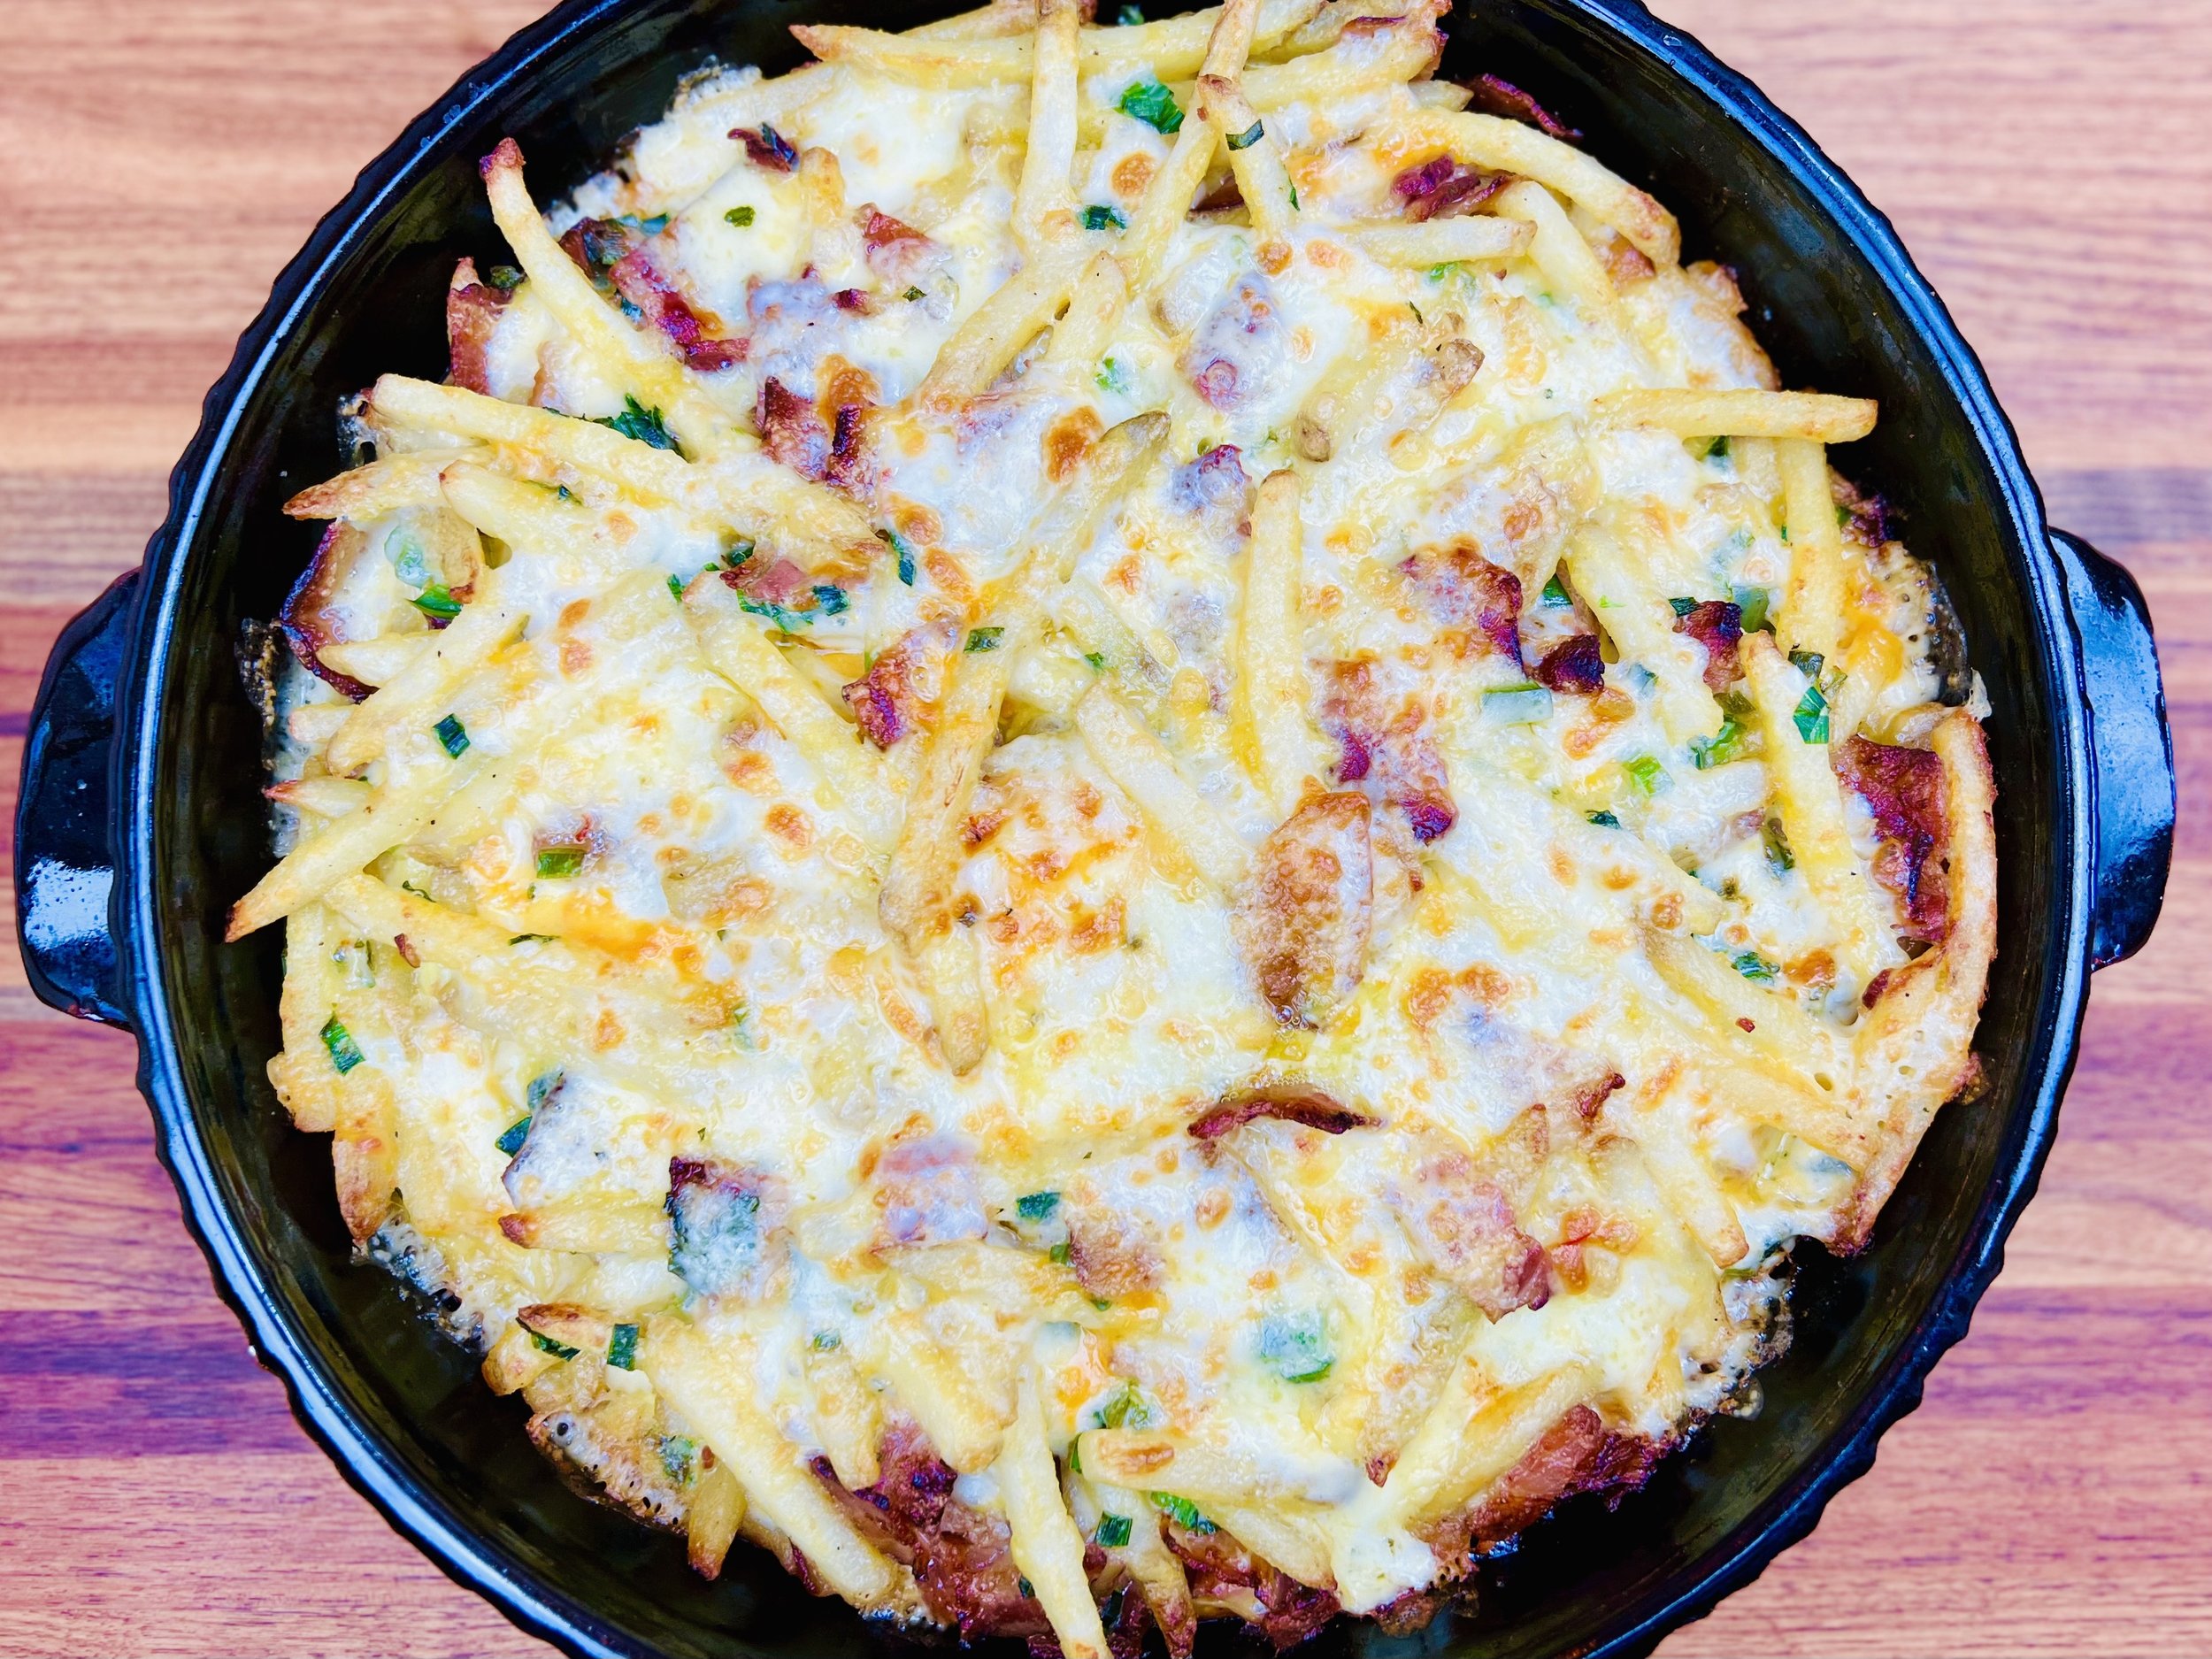
Roasted Bacon and Gruyere Breakfast Potatoes (Low FODMAP)
15 Minutes prep • 25 Minutes cook • Low FODMAP • Gluten-Free • Serves 8
15 Minutes prep • 25 Minutes cook • Low FODMAP • Gluten-Free • Serves 8 • Ok to make-ahead: Step 1
Golden-brown potatoes, crispy bacon, and rich Gruyère and cheddar cheese come together in a delicious blend of flavors and textures. Each bite is a delightful surprise, with savory, salty, and slightly sweet notes dancing on your palate. Whether you're a brunch enthusiast or simply seeking a hearty start to your day, these potatoes are sure to satisfy.
See this new recipe in my FREE recipe club.
To streamline your search through hundreds of existing recipes, I'm moving the release of my new weekly creations to the Recipe Club on Patreon. In the club, you’ll get access to a treasure trove of low-FODMAP goodness, complete with collections and filters to use as your virtual cookbook!
Here's what awaits you in the club:
Exclusive weekly recipes: Be the first to try my latest delicious low-FODMAP creations!
Simple & Easy: My recipes continue to focus on readily available ingredients and effortless preparation, perfect for family-friendly meals (no more separate low-FODMAP meal prep!).
Hundreds of existing recipes: Gain access to my entire library of low-FODMAP recipes, all conveniently organized.
You can join for free or sign up for only $5/month. Your support fuels my passion for creating new, delicious, and easy-to-make low-FODMAP recipes just for you.
Let's go on this delicious low-FODMAP journey together.
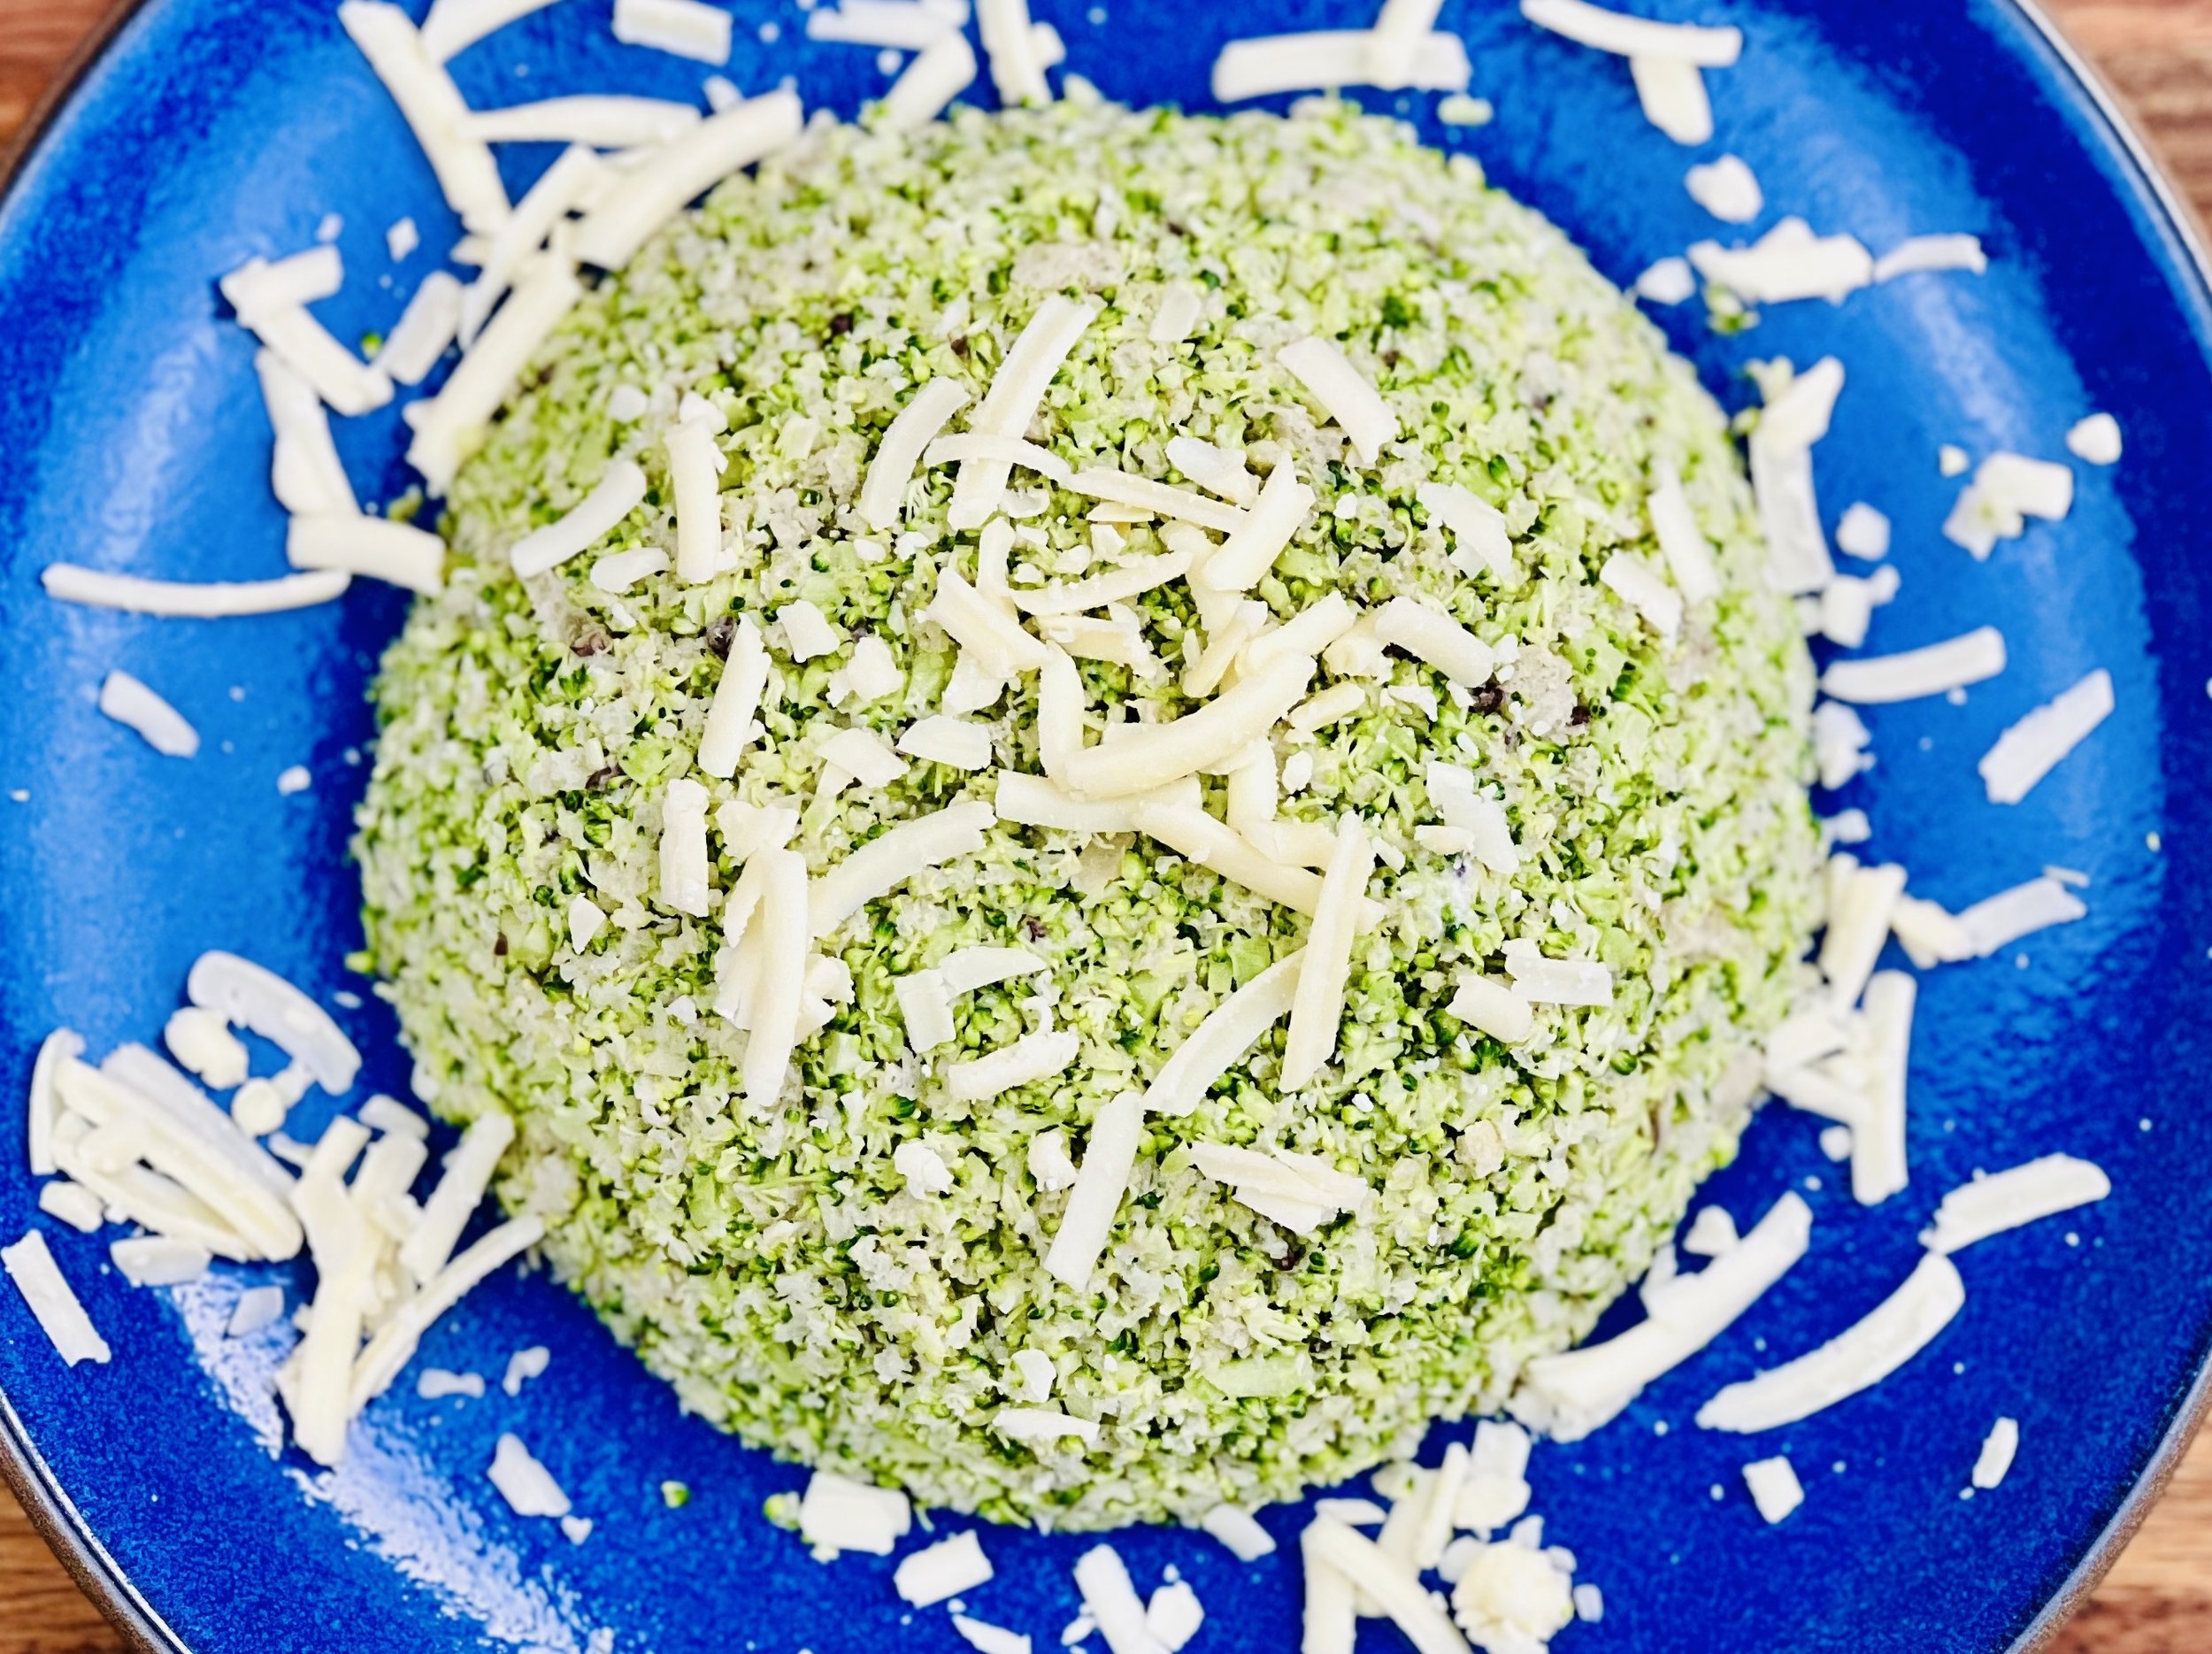
Broccoli Cloud Salad (Low FODMAP)
15 Minutes prep • Low FODMAP • Serves 6
15 Minutes prep • Low FODMAP • Serves 6 • Ok to make-ahead: Steps 1 - 3
This delightful recipe combines finely chopped broccoli, sourdough bread, and a bit of Caesar dressing to create a vegetable dish that is both light and airy, and rich and flavorful. Perfect for any occasion, Broccoli Cloud Salad offers a unique blend of textures and tastes that stands up to rich meats as a side dish or satisfies your vegetarian guests as a main course. It’s easy and quick to make and it’s a delicious and fun break from the standard. Plus, it’s a sneaky way to get your kids to eat more broccoli!
See this new recipe in my FREE recipe club.
To streamline your search through hundreds of existing recipes, I'm moving the release of my new weekly creations to the Recipe Club on Patreon. In the club, you’ll get access to a treasure trove of low-FODMAP goodness, complete with collections and filters to use as your virtual cookbook!
Here's what awaits you in the club:
Exclusive weekly recipes: Be the first to try my latest delicious low-FODMAP creations!
Simple & Easy: My recipes continue to focus on readily available ingredients and effortless preparation, perfect for family-friendly meals (no more separate low-FODMAP meal prep!).
Hundreds of existing recipes: Gain access to my entire library of low-FODMAP recipes, all conveniently organized.
You can join for free or sign up for only $5/month. Your support fuels my passion for creating new, delicious, and easy-to-make low-FODMAP recipes just for you.
Let's go on this delicious low-FODMAP journey together.
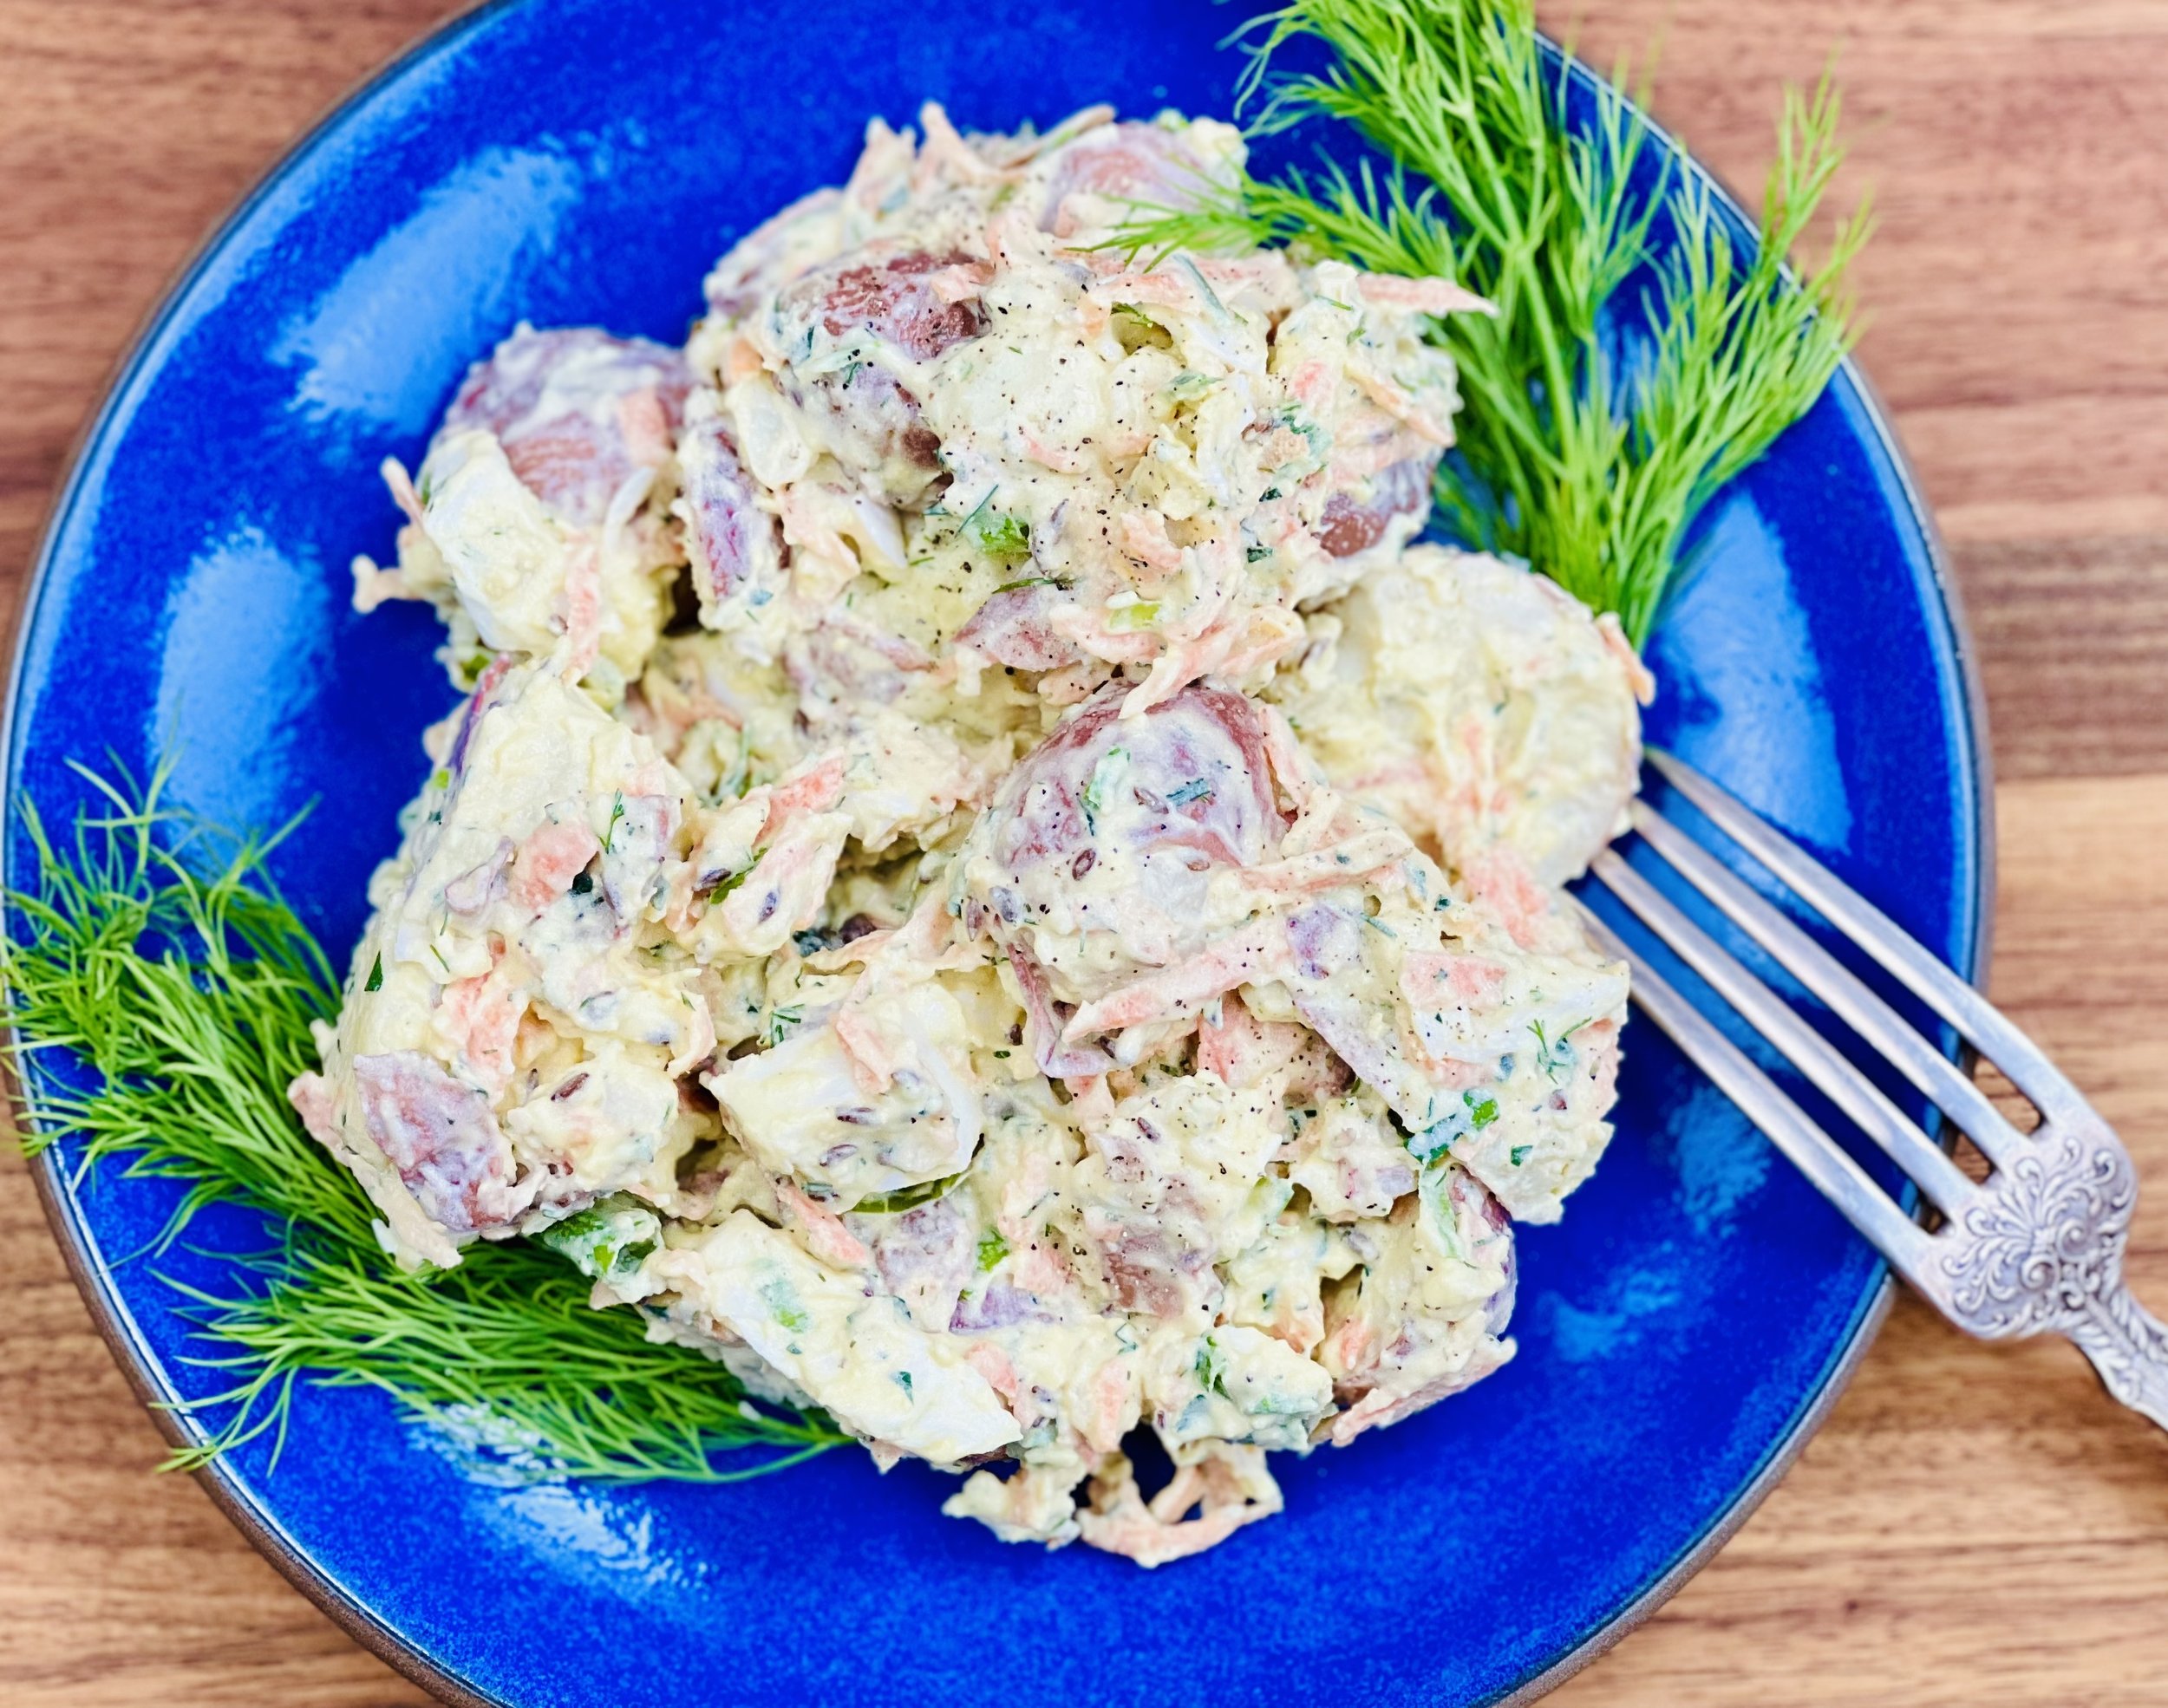
Patriotic Potato Salad (Low FODMAP)
30 Minutes prep • 2 hours chill • Low FODMAP • Gluten-free • Serves 8
30 Minutes prep • 2 hours chill • Low FODMAP • Gluten-free • Serves 8 • Ok to make ahead: Steps 1-4
I have loved this potato salad since Sheila Lukins and Julee Rosso published it decades ago in their Silver Palate Good Times Cookbook. I have made very slight modifications to the recipe for all of you to enjoy. It’s a wonderful potato salad for any occasion, and it’s even better the next day so it’s a great make-ahead time saver. The name came from the fact that the salad creates a confetti effect that anticipates a celebration.
Ingredients
14 small new red potatoes, scrubbed clean
6 hard-cooked eggs, peeled and quartered
1 - 2 medium-sized carrots, peeled and grated
1 bunch green onions, green part only (chopped)
3 tablespoons fresh dill, chopped
2 tablespoons fresh parsley, chopped
1 tablespoon caraway seeds
3/4 teaspoon Kosher salt
1/2 teaspoon freshly ground black pepper
3/4 cup lactose-free sour cream
3/4 cup mayonnaise
Directions
(1) Prepare: Hard boil the eggs. Wash potatoes and cut larger potatoes in half so they are all about the same size. Peel and grate the carrot(s). Chop the green onion greens.
(2) Cook the potatoes: Heat a medium-size saucepan of water to boiling. Add the potatoes and cook just until tender, 20-25 minutes. Drain, cool, and cut in half.
(3) Make the salad: Combine the eggs, potatoes, carrots, and green onion greens in a large bowl. Add the dill, parsley, caraway seeds, salt, and pepper and gently toss to combine.
(4) Blend and add the sauce: Mix the sour cream and mayonnaise and gently fold into the potato mixture.
(5) Finish: Refrigerate the salad several hours before serving to allow flavors to blend.
(6) Plate and serve: Stir, taste, and add a bit more salt if needed. Serve alongside any grilled meat or fish.
Eat and enjoy every bite because you can!
Recipe note: I use Diamond Crystal Kosher salt in all my recipes because it has a wonderful flat and crisp flake that tastes delicious. It is also the least salty salt available so you can use it more liberally as a seasoning than you can table salt or sea salt. If you use another type of salt, you may need to reduce the amount so it is not over-salted.
Have a question you’d like to have answered? Email me at hello@ibsgamechanger.com
Link note: This post may contain affiliate links for you to easily purchase items that are linked. I may earn a small commission from qualifying purchases but none of this costs you a thing so feel free to use the links! In addition, for some items, I have provided a special discount code for IBS Game Changers so be sure to use the code when you purchase an item to get the discount that has been arranged just for you.
More Deliciously Low FODMAP™ side dish recipes


Sarah’s Cheddar Biscuits (Low FODMAP)
15 Minutes prep • 18 Minutes cook • Low FODMAP • Gluten-free • Makes 15 • Serving size 2
15 Minutes prep • 18 Minutes cook • Low FODMAP • Gluten-free • Makes 15 • Serving size 2 • Ok to make ahead: Steps 1-2
My sister served these light and delicious biscuits and I was immediately hooked! Make them yourself and they will be a crowd-pleaser for any occasion. Best of all they are completely grain-free! Whether served as a side to a hearty meal or enjoyed as a delightful snack on their own, each golden-brown bite delivers melt-in-your-mouth buttery goodness. Get ready to discover your new favorite biscuits.
Ingredients
2 cups almond flour
2 teaspoons baking powder
1 teaspoon dry rosemary
1/2 teaspoon Kosher salt
1/2 teaspoon black pepper
4 tablespoons unsalted butter
4 tablespoons heavy whipping cream
2 large eggs, beaten
6 ounces extra sharp good quality cheddar cheese, grated
Directions
(1) Prepare: Preheat oven to 350 degrees F. Grate the cheese and beat the eggs. Line a baking sheet with parchment paper.
(2) Combine dry ingredients: In the bowl of your food processor, combine the almond flour, baking powder, rosemary, salt, and pepper. Pulse a few times to combine.
(3) Add the butter and cream: Cut the butter into cubes and drop them into the food processor bowl with the almond flour mixture. Mix for about 15 seconds, then pulse until the butter is blended into the flour evenly. Add 4 tablespoons heavy cream, and pulse a few times until combined. Add the beaten eggs and pulse just until combined.
(4) Add the cheese: Add the cheese and pulse a few times until combined.
(5) Finish: Using a spoon or ice cream scoop, make 15 biscuits. Avoid handling the dough with your hands as the warmth will make it tough.
(6) Bake: Bake for 18 minutes. Remove to a cooling rack.
Eat and enjoy every bite because you can!
Recipe note: I use Diamond Crystal Kosher salt in all my recipes because it has a wonderful flat and crisp flake that tastes delicious. It is also the least salty salt available so you can use it more liberally as a seasoning than you can table salt or sea salt. If you use another type of salt, you may need to reduce the amount so it is not over-salted.
Have a question you’d like to have answered? Email me at hello@ibsgamechanger.com
Link note: This post may contain affiliate links for you to easily purchase items that are linked. I may earn a small commission from qualifying purchases but none of this costs you a thing so feel free to use the links! In addition, for some items, I have provided a special discount code for IBS Game Changers so be sure to use the code when you purchase an item to get the discount that has been arranged just for you.
More Deliciously Low FODMAP™ side dish recipes
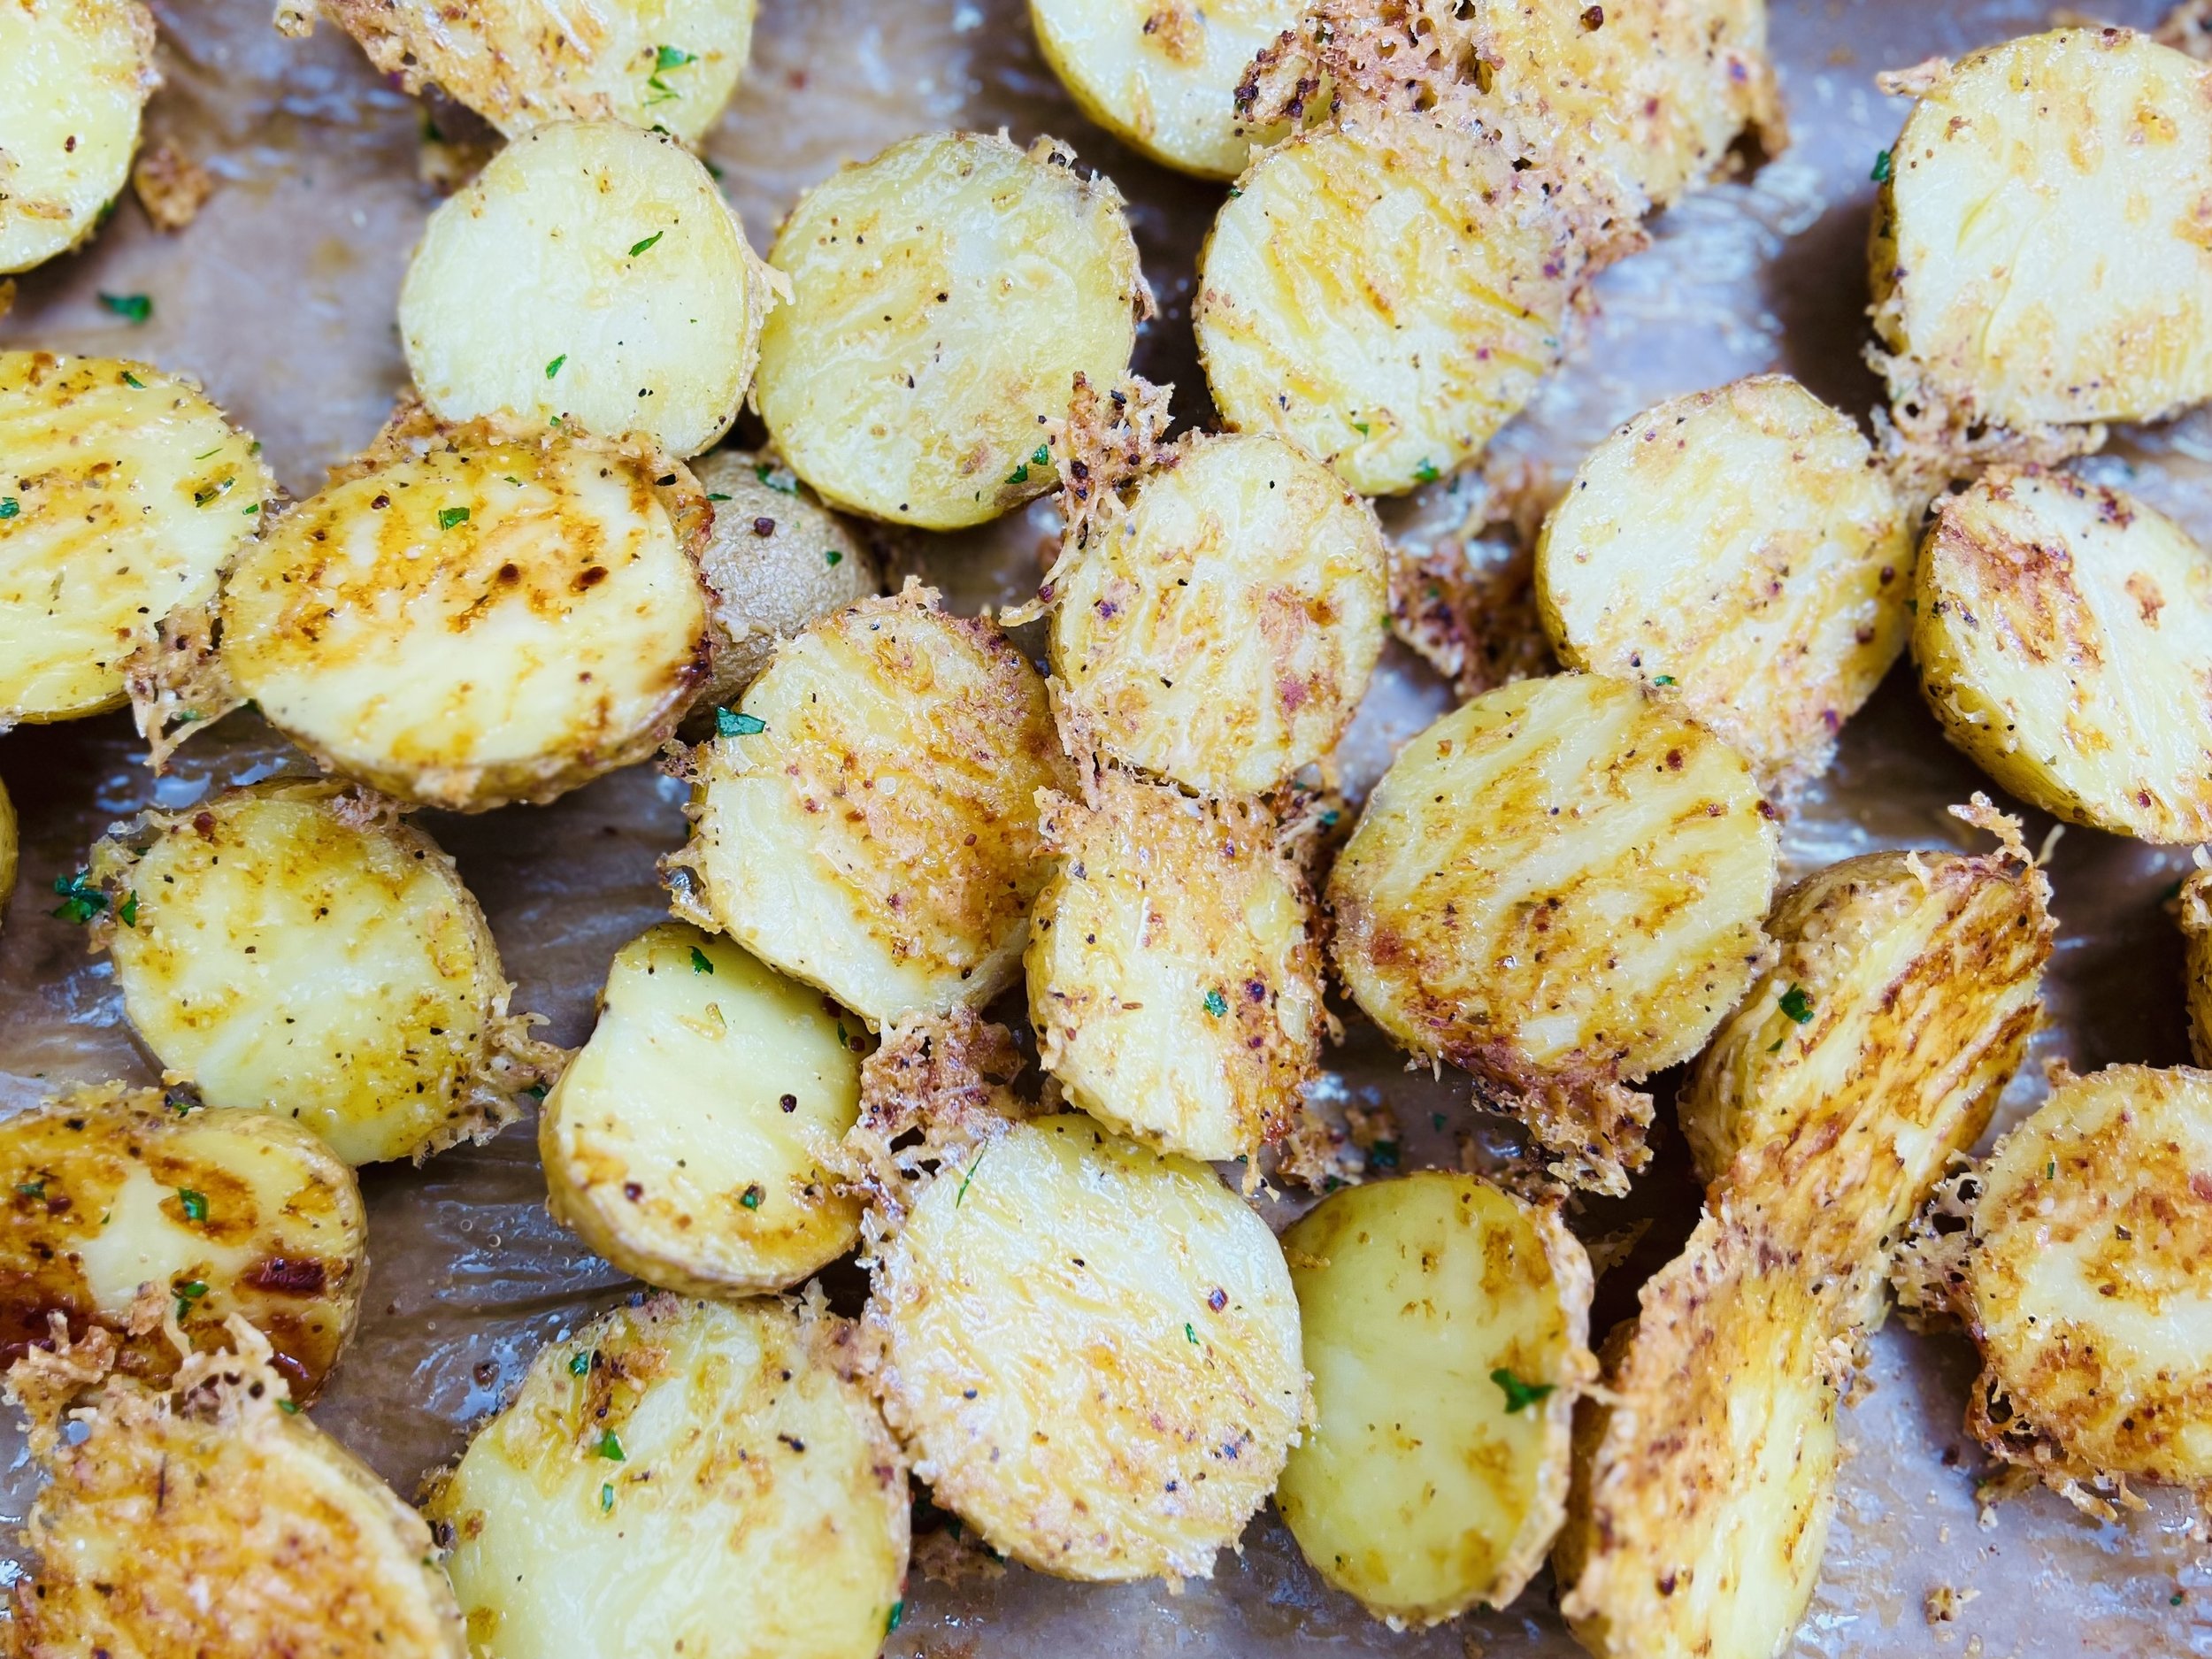
Garlic Parmesan Roasted New Potatoes (Low FODMAP)
10 Minutes prep • 20 Minutes cook • Low FODMAP • Gluten-free • Serves 4
10 Minutes prep • 20 Minutes cook • Low FODMAP • Gluten-free • Serves 4 • Ok to make ahead: Steps 1-2
These potatoes are the perfect way to welcome friends and family into your kitchen. You’ll know what I mean when you make them and your kitchen smells divine while they’re cooking. Delicious alongside just about anything, you’ll love the garlicky taste (without the FODMAPs thanks to Smoke N Sanity’s Garlic Parmesan Seasoning). Make these potatoes and chill them overnight for a fantastic potato salad base too.
Ingredients
12 medium or 20 small new potatoes
2 tablespoons extra-virgin olive oil
2 tablespoons Smoke N Sanity Garlic Parmesan Seasoning (Use code IBSGC15 for 15% discount)
1 cup extra aged gouda or parmesan, grated
1/2 teaspoon Kosher salt
1/4 teaspoon black pepper
Fresh parsley, chopped, for serving (optional)
Directions
(1) Prepare: Preheat the oven to 400 degrees F. Grate the cheese, wash the potatoes and cut them in half. Line a rimmed baking sheet with parchment paper.
(2) Season the potatoes: Put the halved potatoes in a mixing bowl and drizzle with 2 tablespoons of olive oil. Toss to coat all potatoes. Sprinkle on the Garlic Parmesan seasoning, the salt, and the pepper, and toss again to coat the potatoes.
(3) Bake: Put the potatoes, flat side down, on the prepared baking sheet. Don’t worry about where the cheese ends up, it’s delicious however it cooks (under or on top of the potatoes). Bake for 20 minutes. Check for tenderness with a fork. If they are still pretty firm, cook another 3 - 5 minutes. The fork should easily slide into the potato.
(4) Plate and serve: Serve alongside your favorite main course. Sprinkle with chopped parsley if you like.
Eat and enjoy every bite because you can!
Recipe note: I use Diamond Crystal Kosher salt in all my recipes because it has a wonderful flat and crisp flake that tastes delicious. It is also the least salty salt available so you can use it more liberally as a seasoning than you can table salt or sea salt. If you use another type of salt, you may need to reduce the amount so it is not over-salted.
Have a question you’d like to have answered? Email me at hello@ibsgamechanger.com
Link note: This post may contain affiliate links for you to easily purchase items that are linked. I may earn a small commission from qualifying purchases but none of this costs you a thing so feel free to use the links! In addition, for some items, I have provided a special discount code for IBS Game Changers so be sure to use the code when you purchase an item to get the discount that has been arranged just for you.
More Deliciously Low FODMAP™ side dish recipes
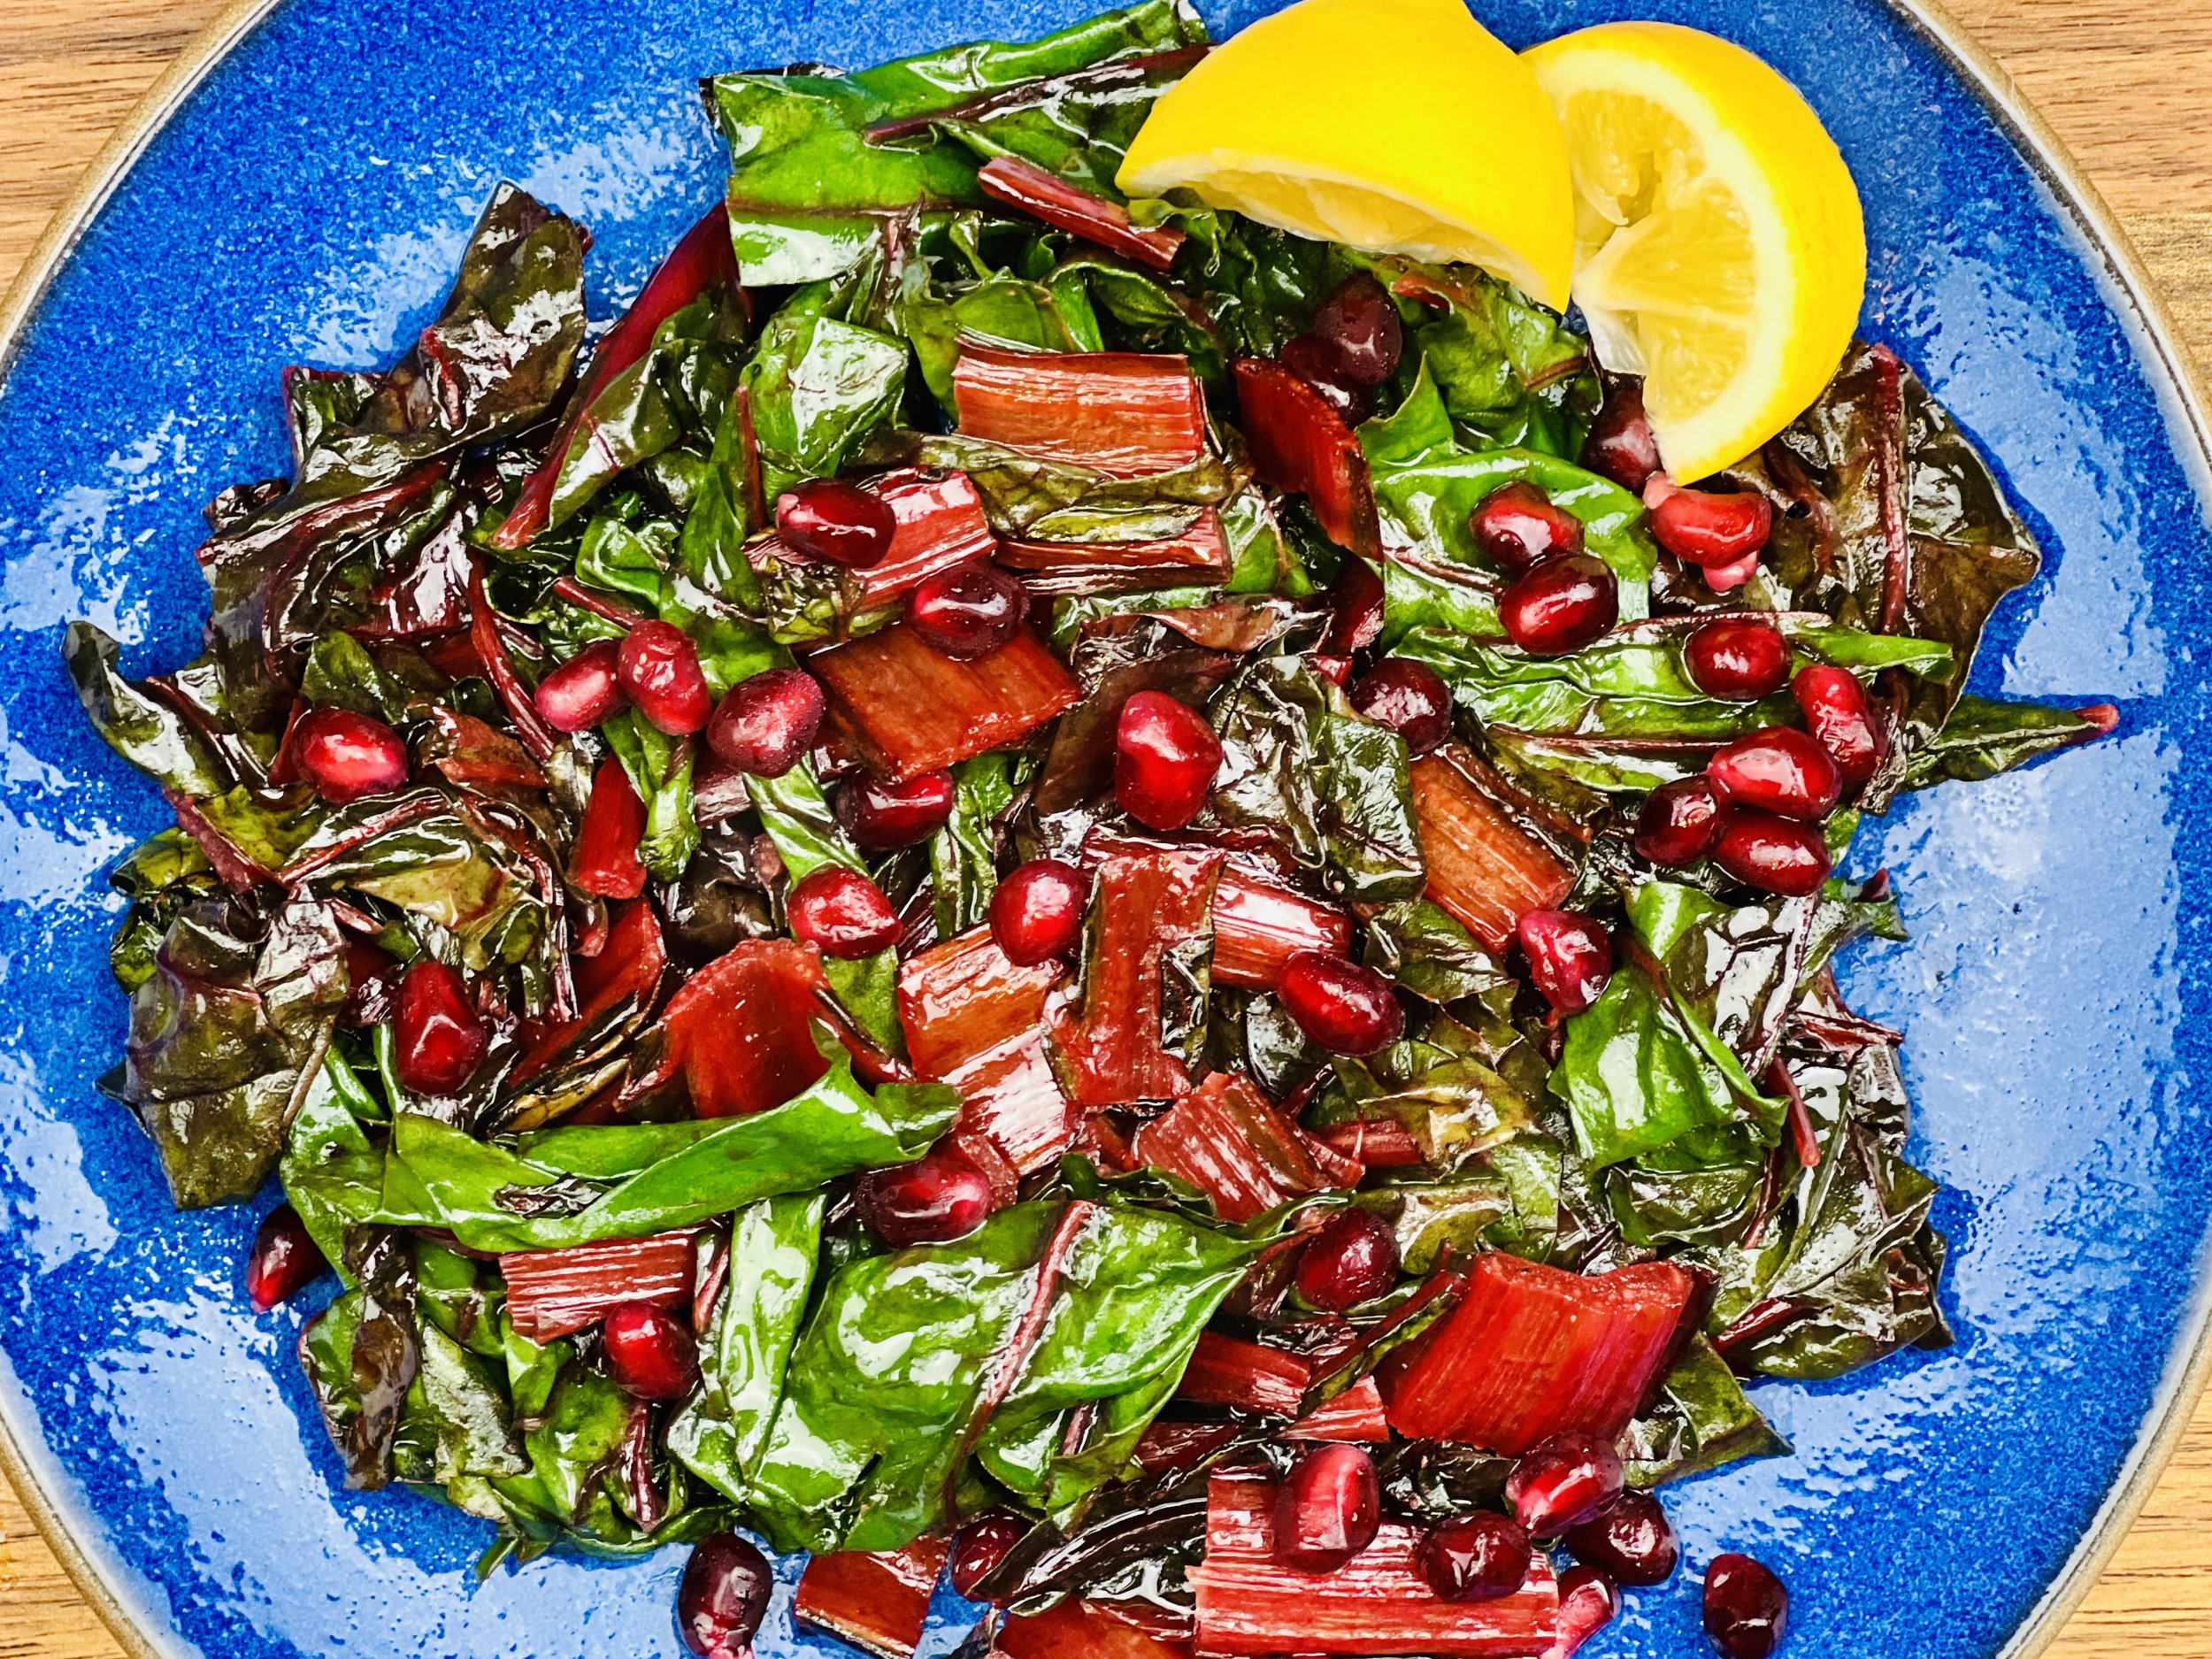
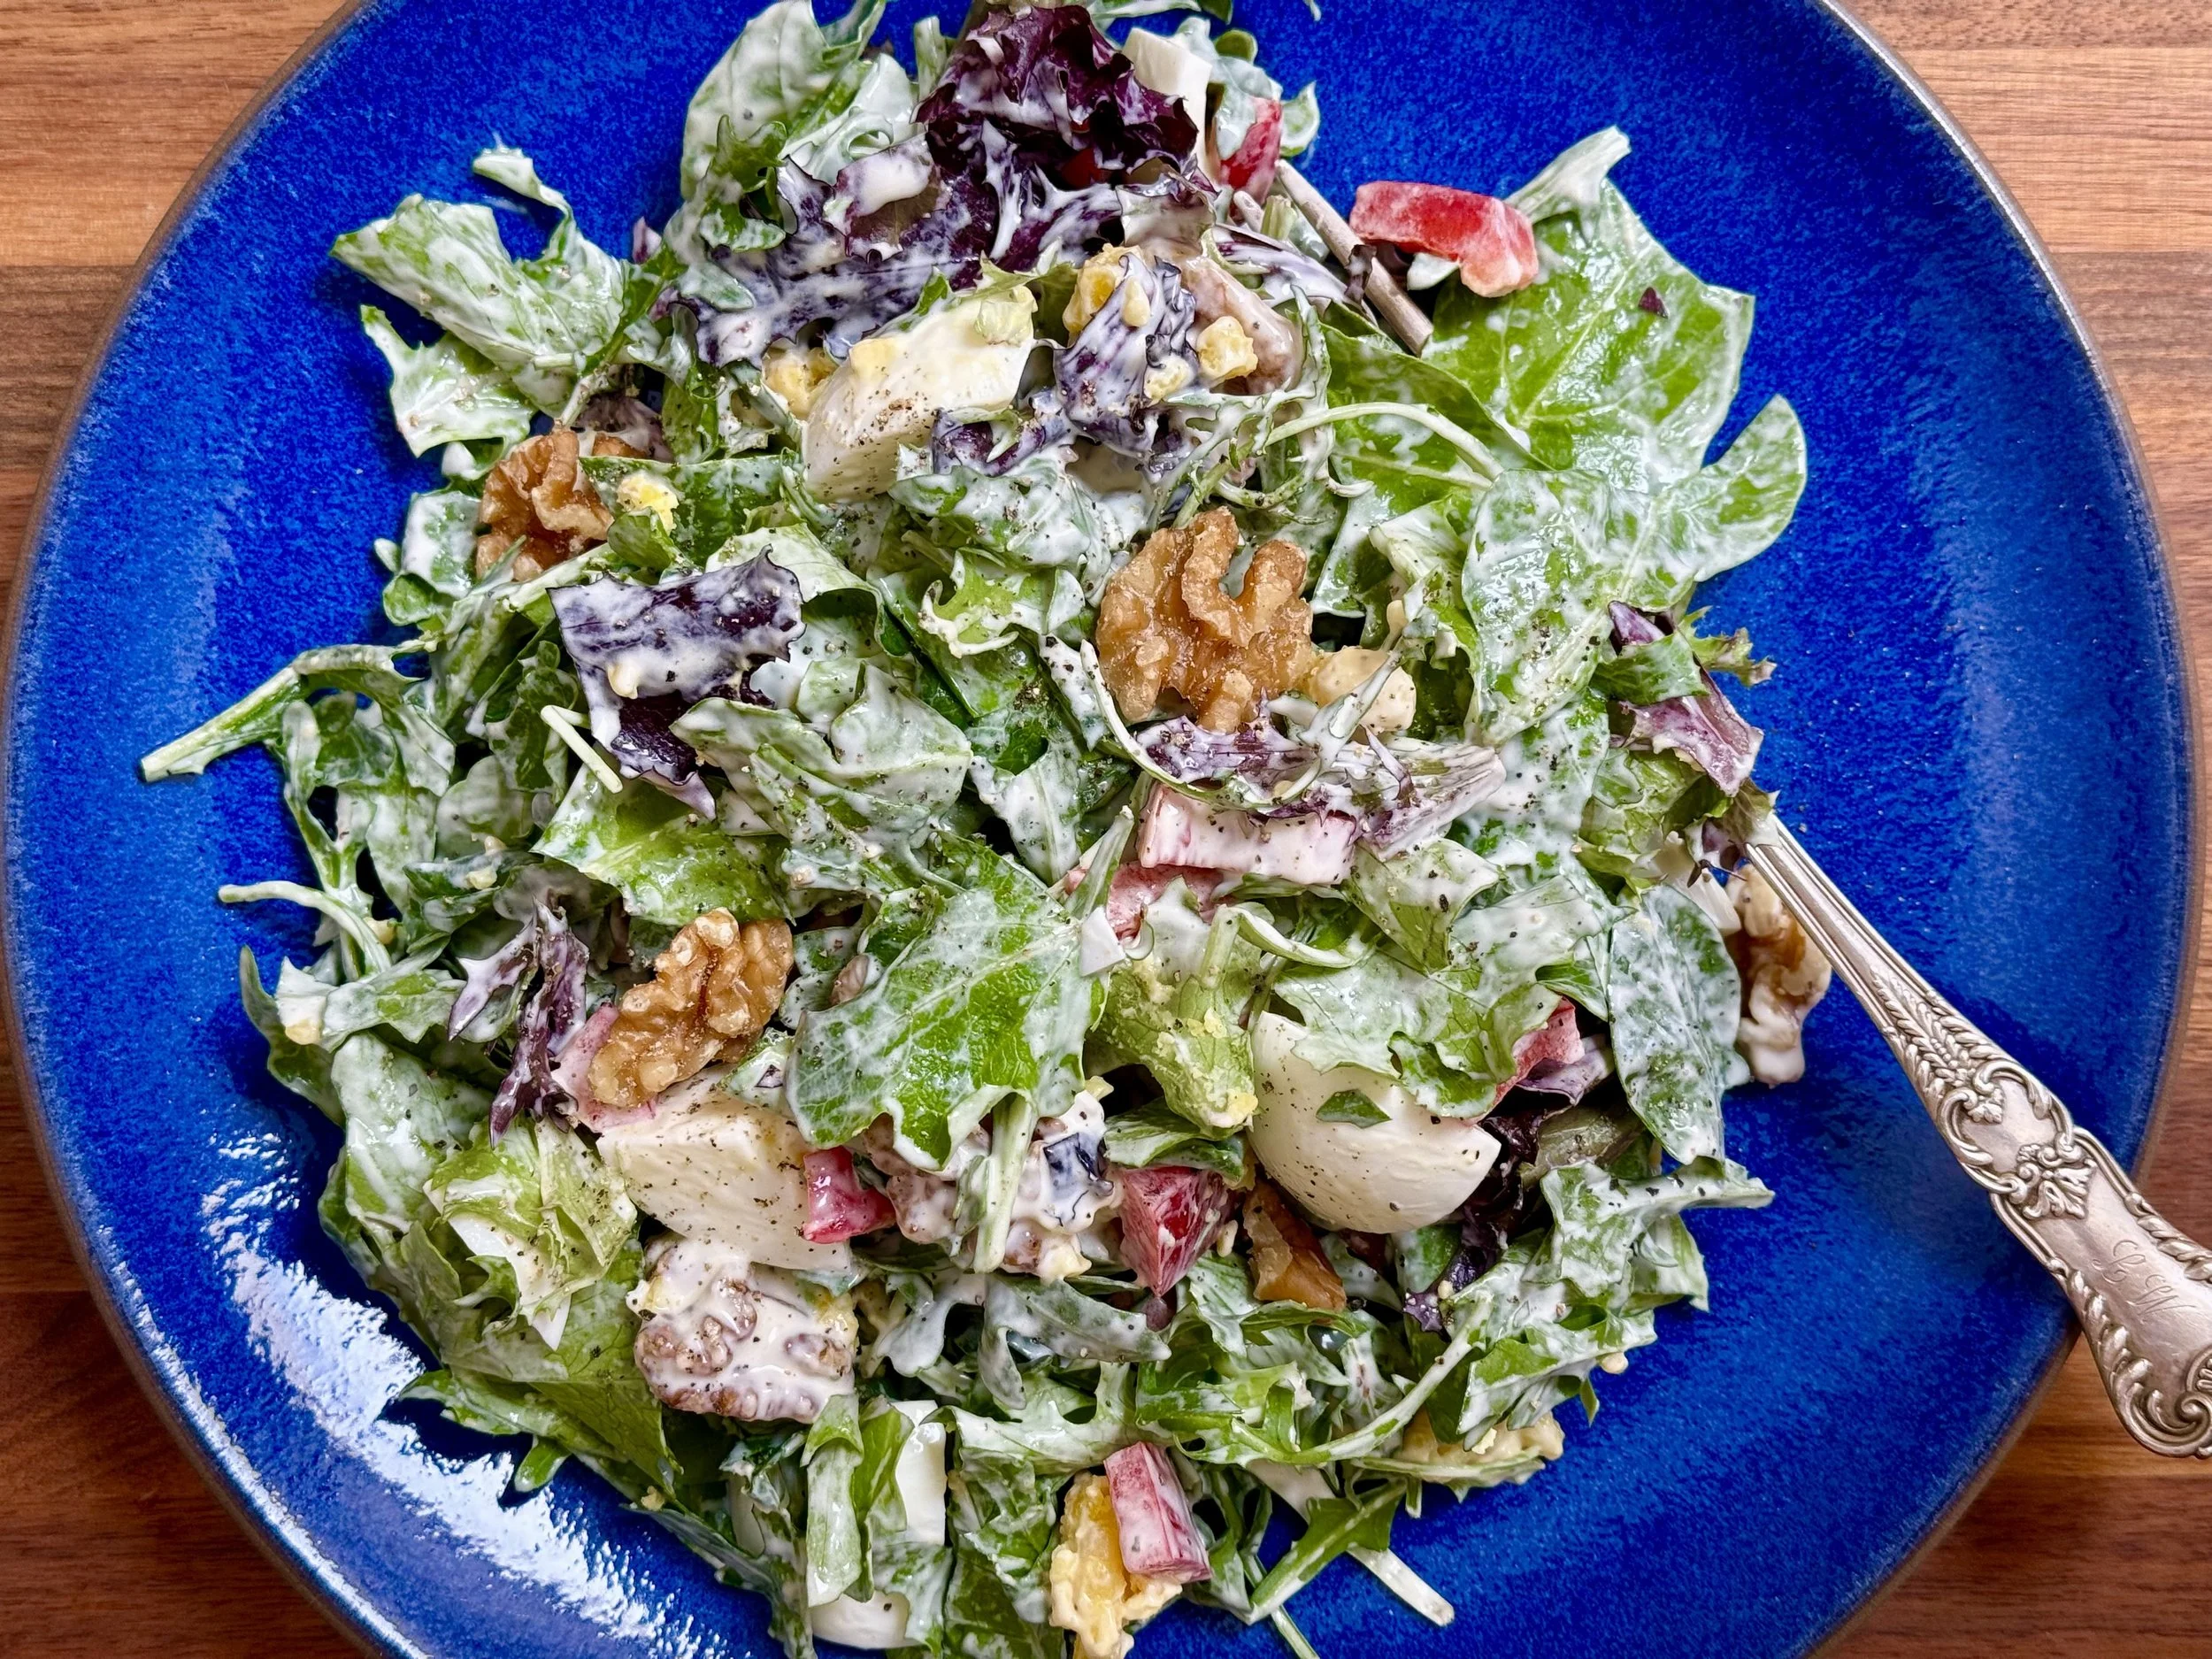
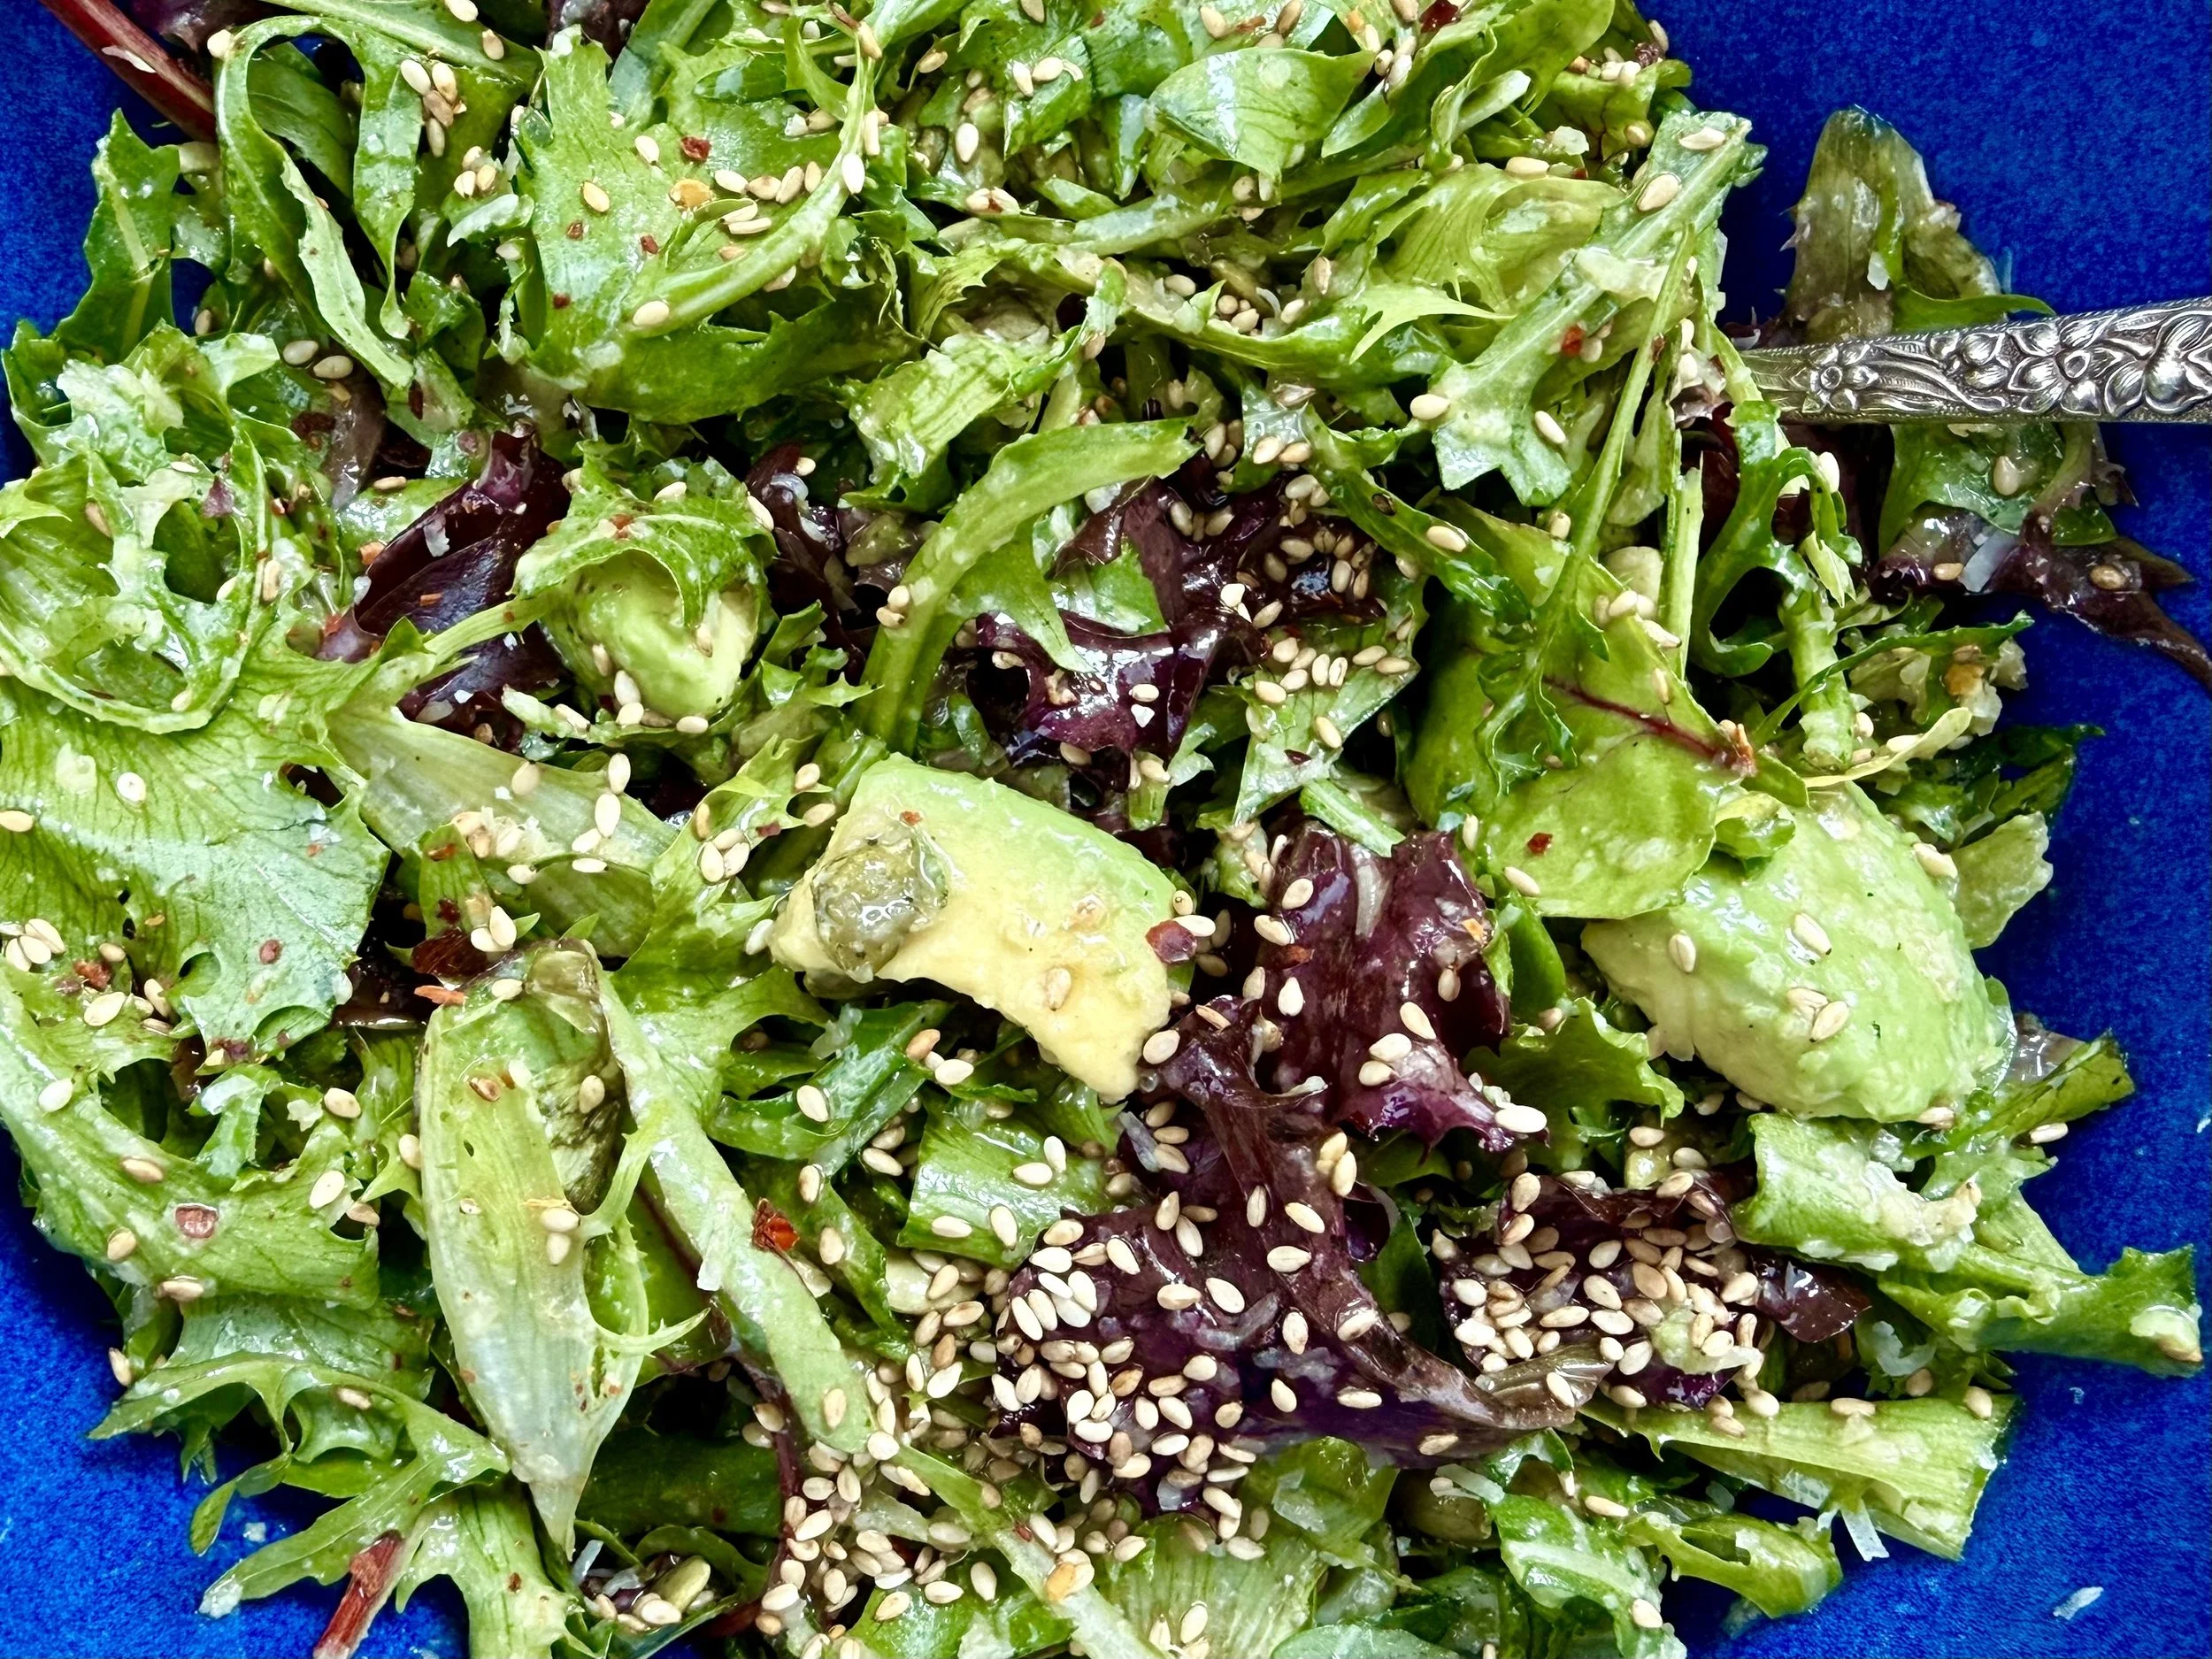
Sauteed Red Chard and Pomegranate Salad (Low FODMAP)
10 Minutes prep • 10 Minutes cook • Low FODMAP • Gluten-free • Lactose-free • Vegan • Serves 4
10 Minutes prep • 10 Minutes cook • Low FODMAP • Gluten-free • Lactose-free • Vegan • Serves 4 • Ok to make ahead: Steps 1-3
When mother nature makes something so beautiful, you just have to find a way to experience it! This delicious dish combines the earthy richness of sautéed red chard with a burst of sweet pomegranate seeds delivering a full array of colors, textures, and flavors. And, while you can eat it warm right out of the pan, it will be at its most delicious once cooled. That means it’s a great make-ahead or bring-along dish. So, whether you're looking for a beautiful and hearty side dish or a nutritious vegetarian main, this salad is sure to please.
Ingredients
1 bunch Red Swiss chard (about 6 leaves)
2 tablespoons garlic-infused olive oil
1/4 teaspoon Kosher salt, more to taste
2 - 3 teaspoons lemon juice (about 1/2 lemon)
1/2 teaspoon black pepper
1/4 - 1/2 cup pomegranate arils (seeds)
Directions
(1) Prepare: Wash the chard and spin or pat it dry. Cut the stems apart from the chard leaves and chop the stems into 1/2-inch slices. Coarsely chop the leaves.
(2) Cook the chard: In a large skillet over medium heat, add the garlic-infused olive oil and heat until the oil is hot and shimmers. Add the chard stems and cook for 2 - 3 minutes, or until they begin to soften. Add the chard leaves and cook another 2 - 3 minutes until the leaves have softened. Add the salt, and several grinds of pepper, and sauté for 1 to 2 minutes, or until the leaves are wilted.
(3) Finish: Turn off the heat, squeeze the lemon juice over the chard, and toss. Sprinkle with pomegranate seeds. Let cool to room temperature or refrigerate until ready to serve.
(4) Plate and serve: I like this dish best the next day — after it has chilled and mellowed. But you may serve it warm right out of the pan if you prefer.
Eat and enjoy every bite because you can!
Recipe note: I use Diamond Crystal Kosher salt in all my recipes because it has a wonderful flat and crisp flake that tastes delicious. It is also the least salty salt available so you can use it more liberally as a seasoning than you can table salt or sea salt. If you use another type of salt, you may need to reduce the amount so it is not over-salted.
Have a question you’d like to have answered? Email me at hello@ibsgamechanger.com
Link note: This post may contain affiliate links for you to easily purchase items that are linked. I may earn a small commission from qualifying purchases but none of this costs you a thing so feel free to use the links! In addition, for some items, I have provided a special discount code for IBS Game Changers so be sure to use the code when you purchase an item to get the discount that has been arranged just for you.
More Deliciously Low FODMAP™ vegetarian recipes


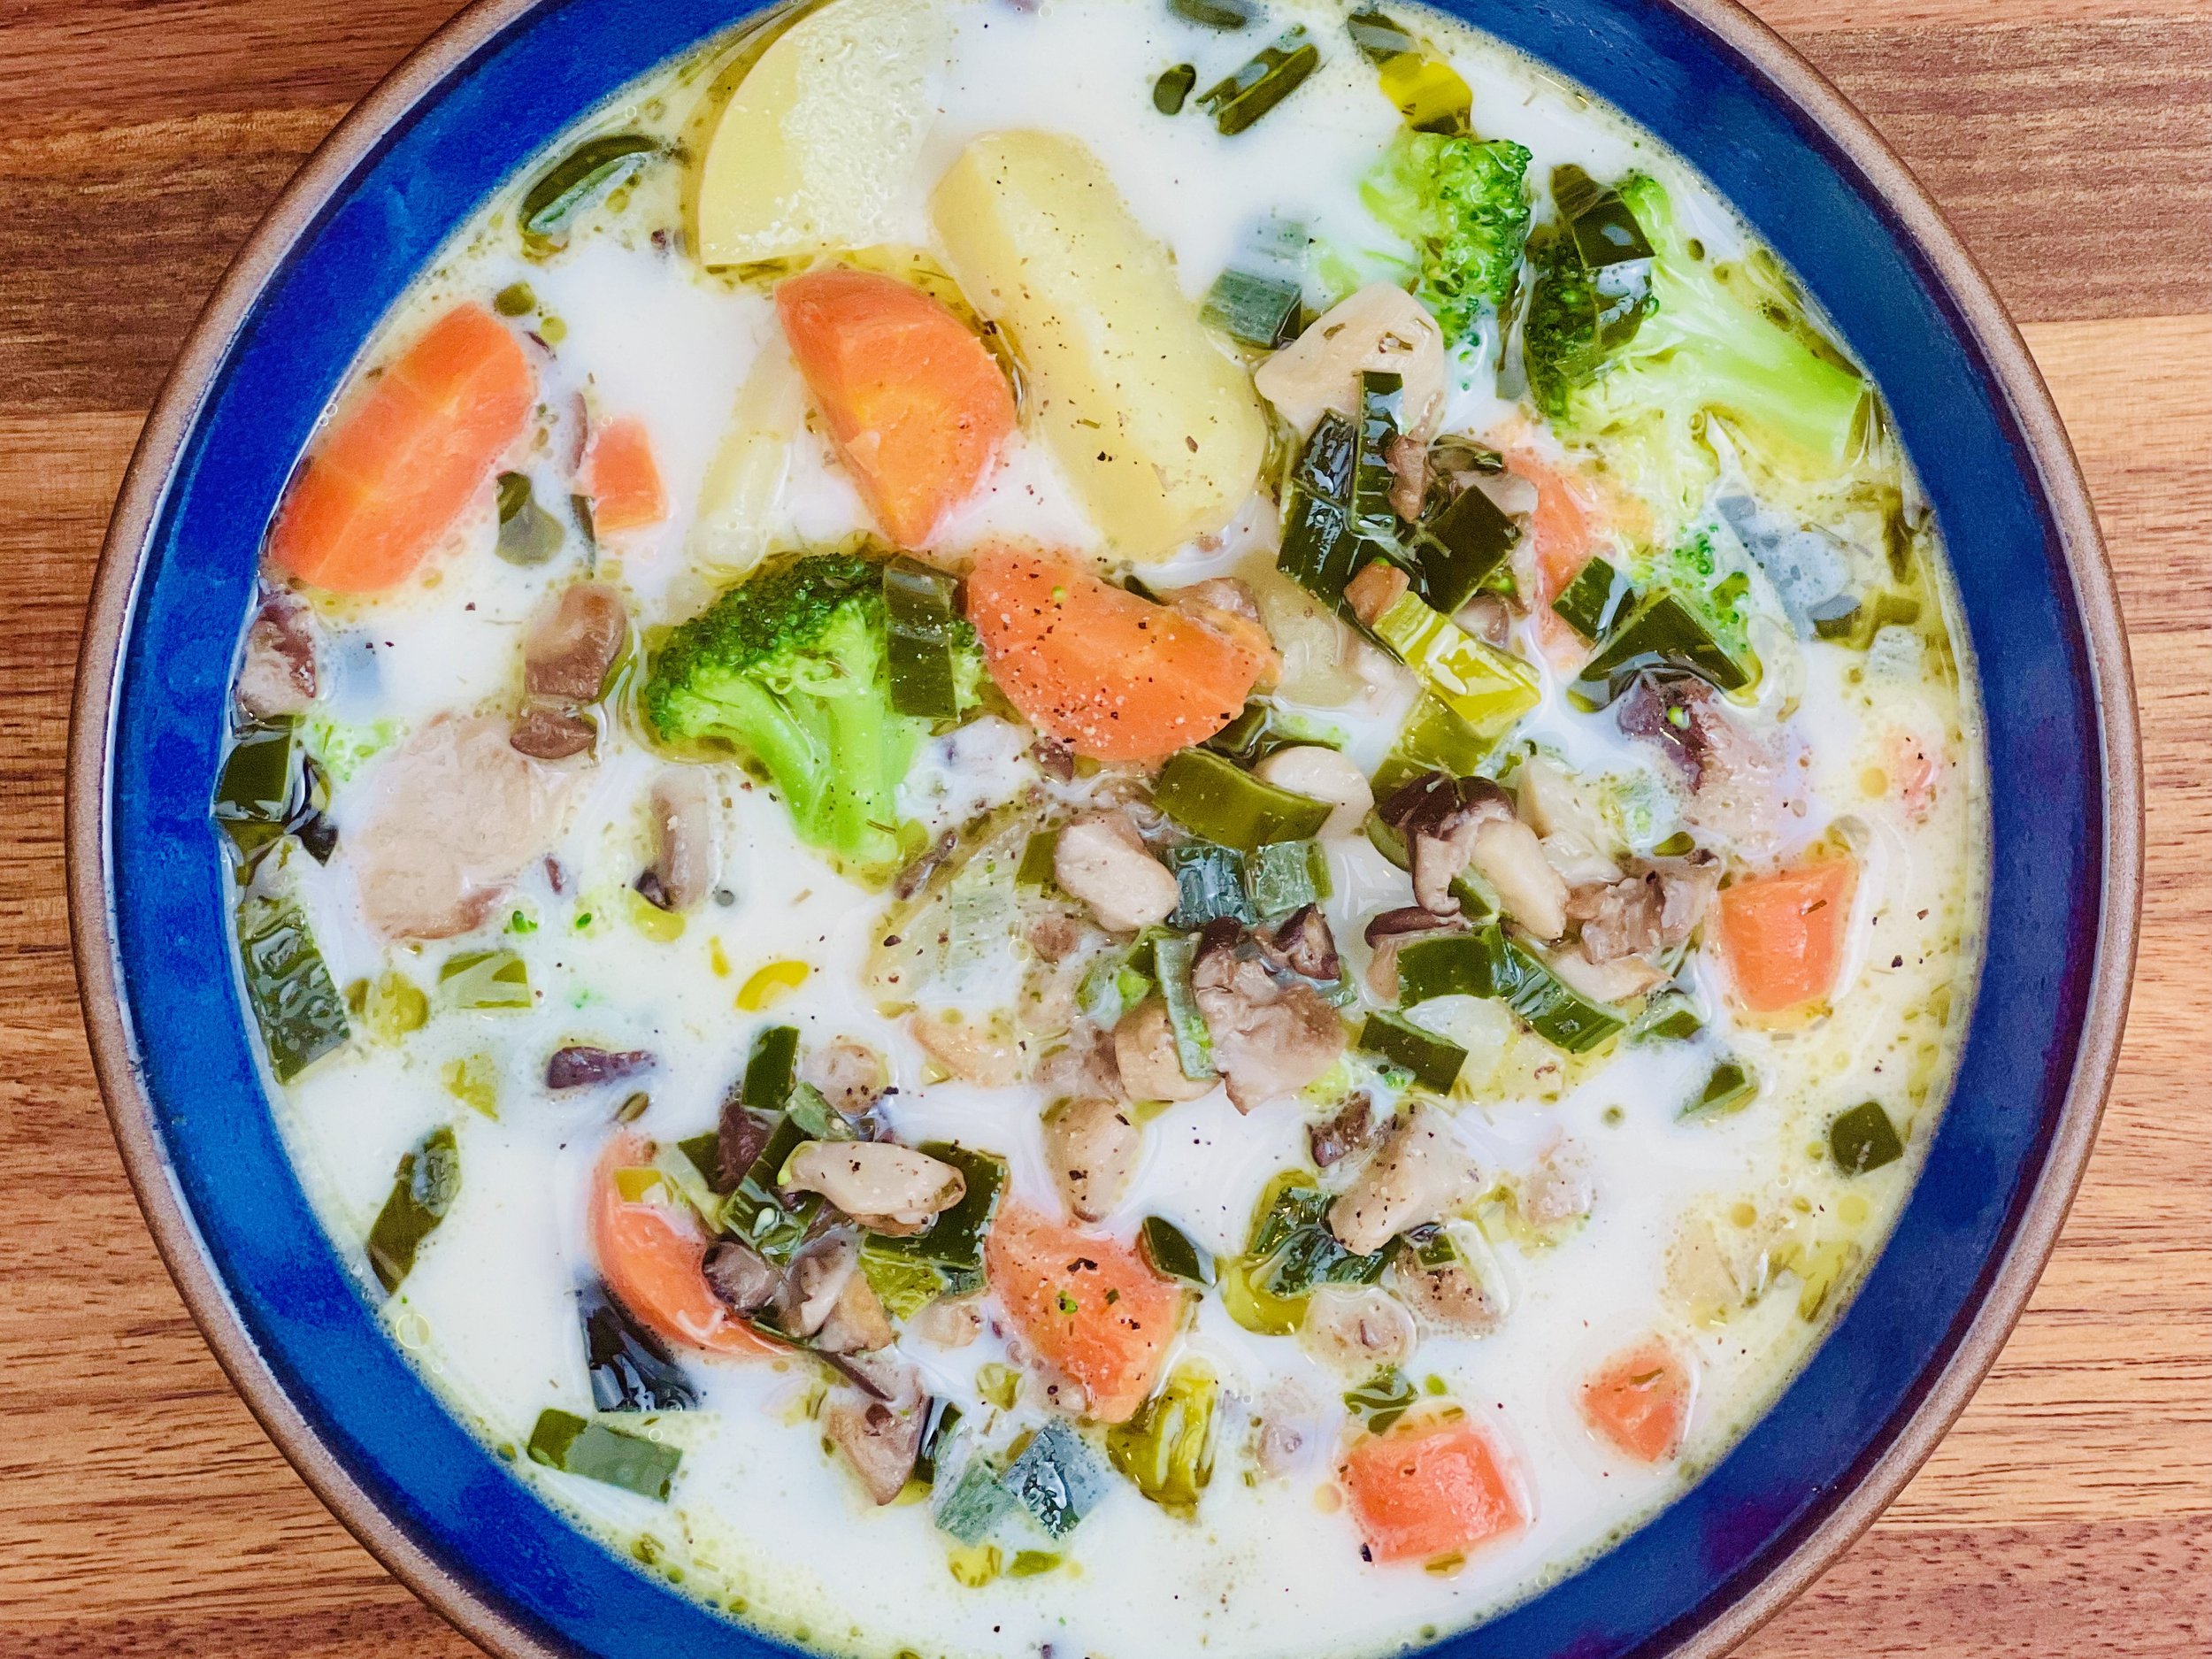
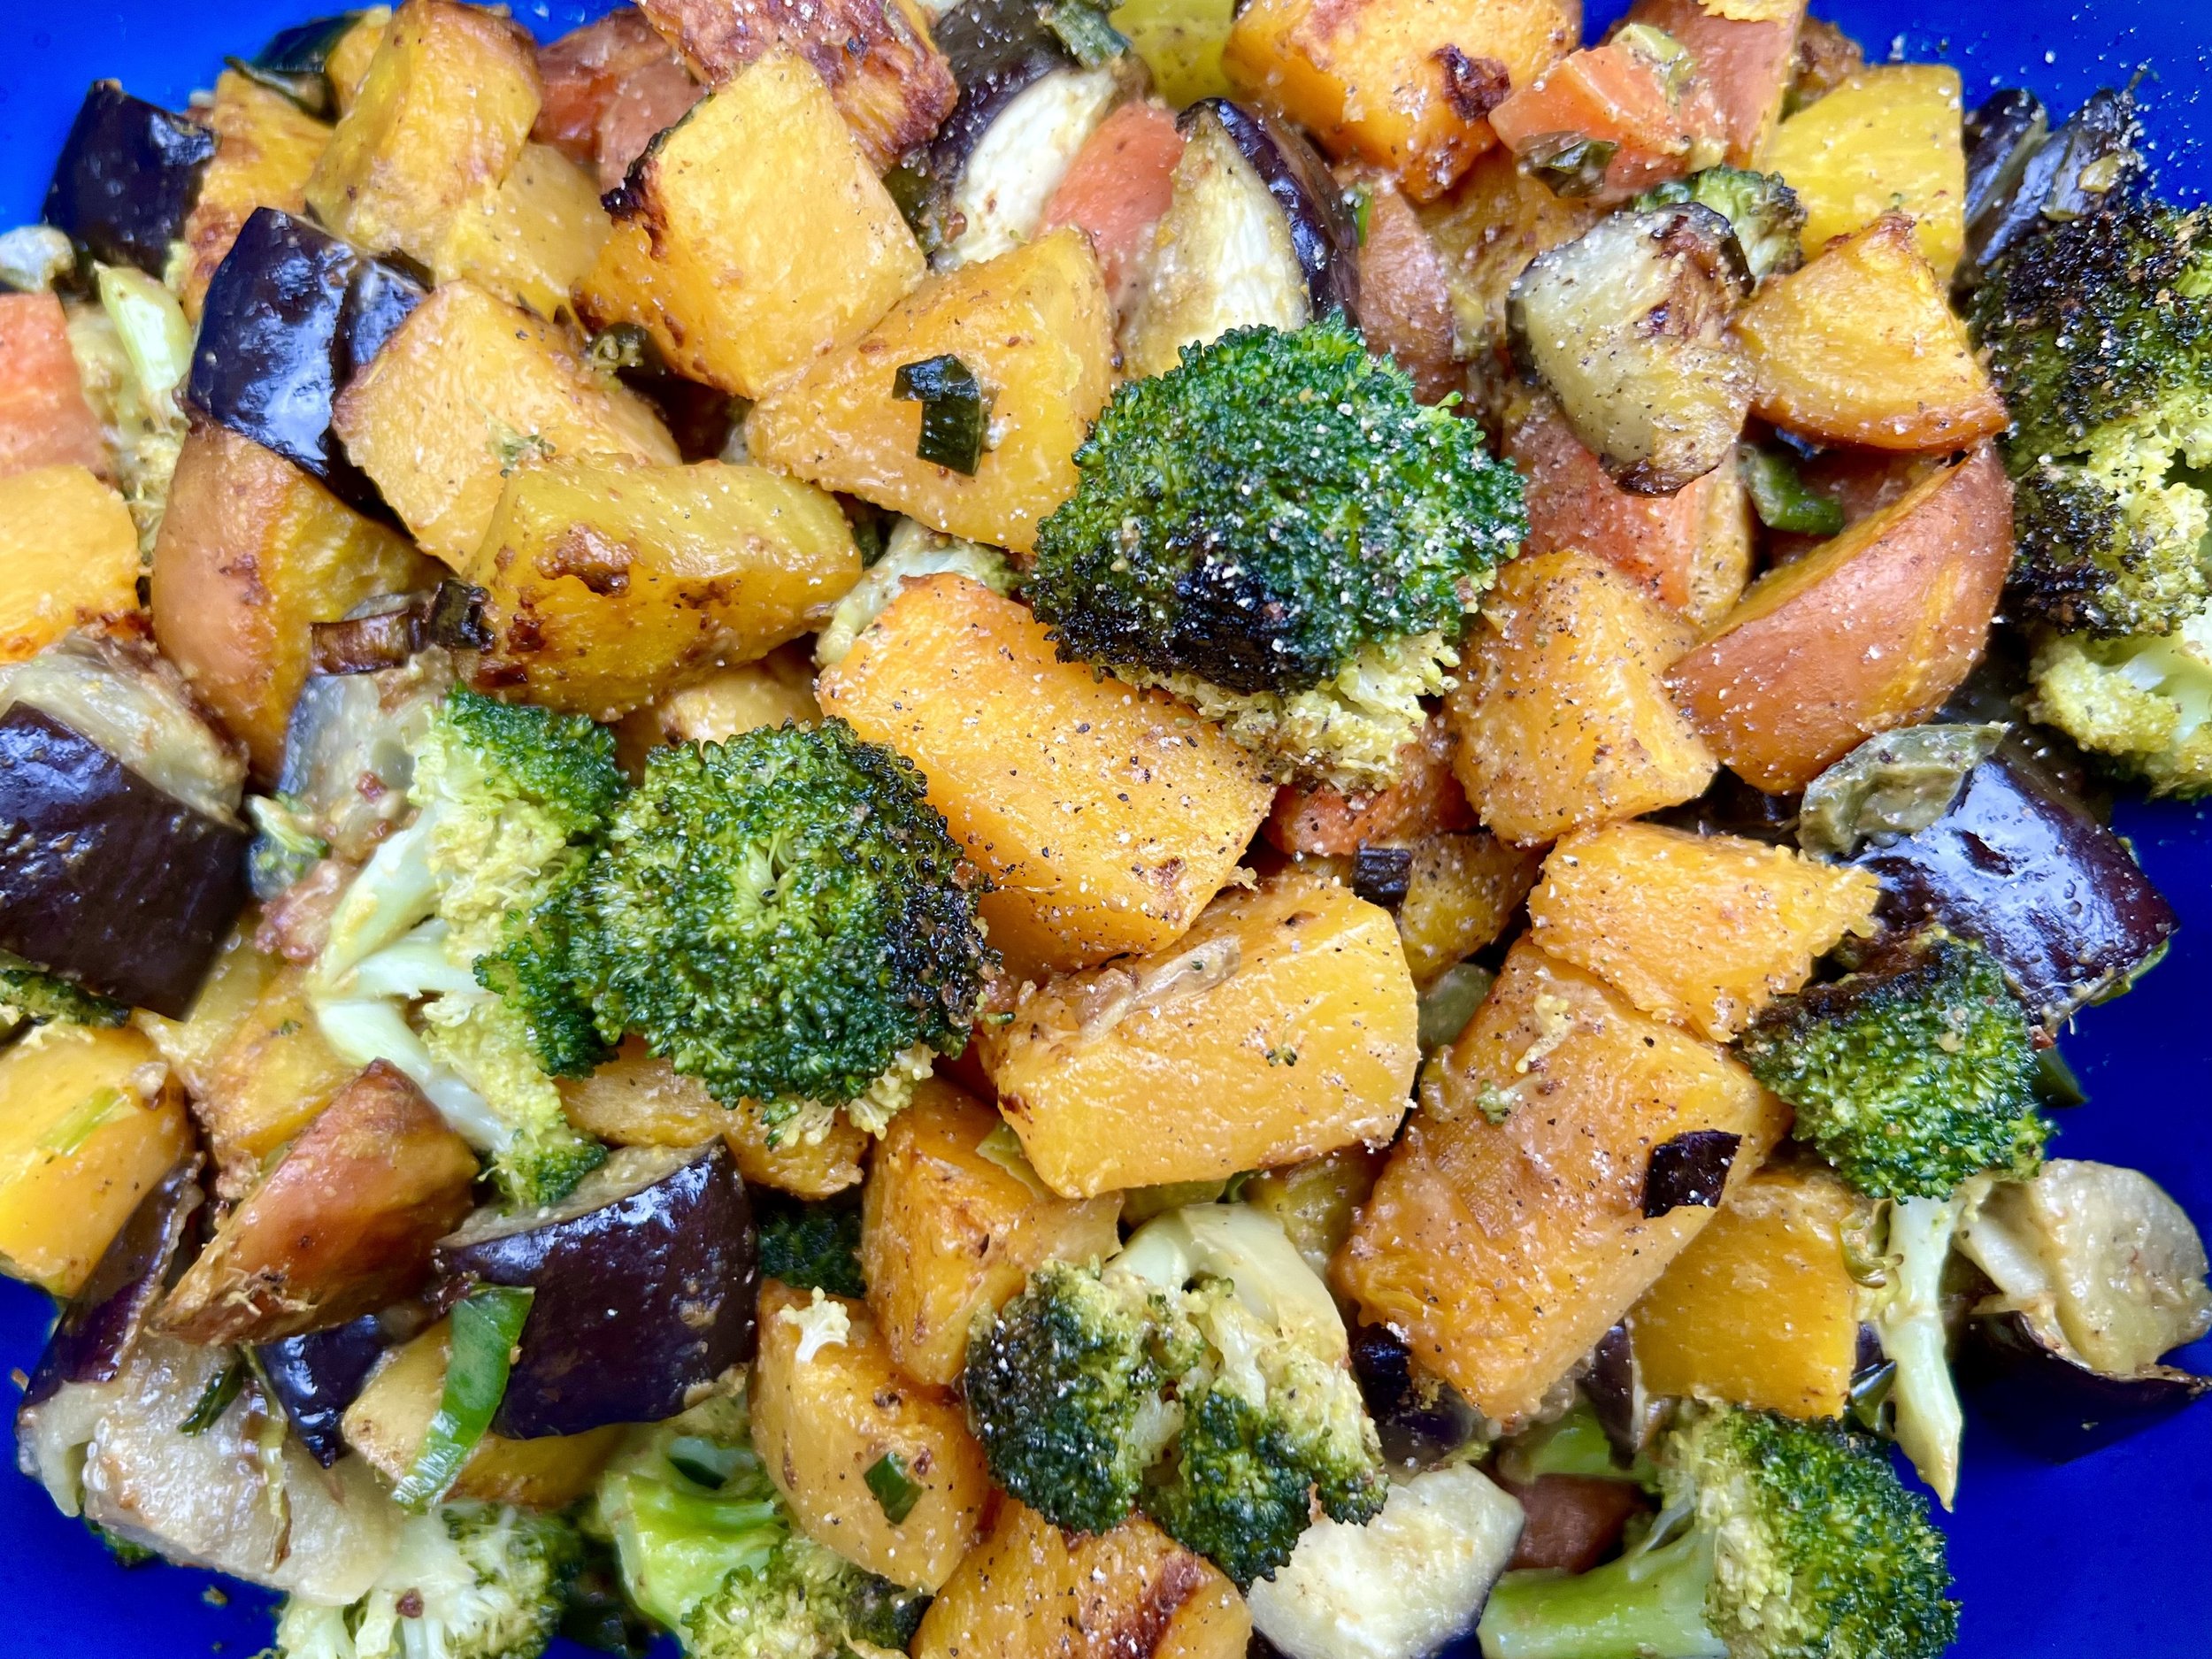
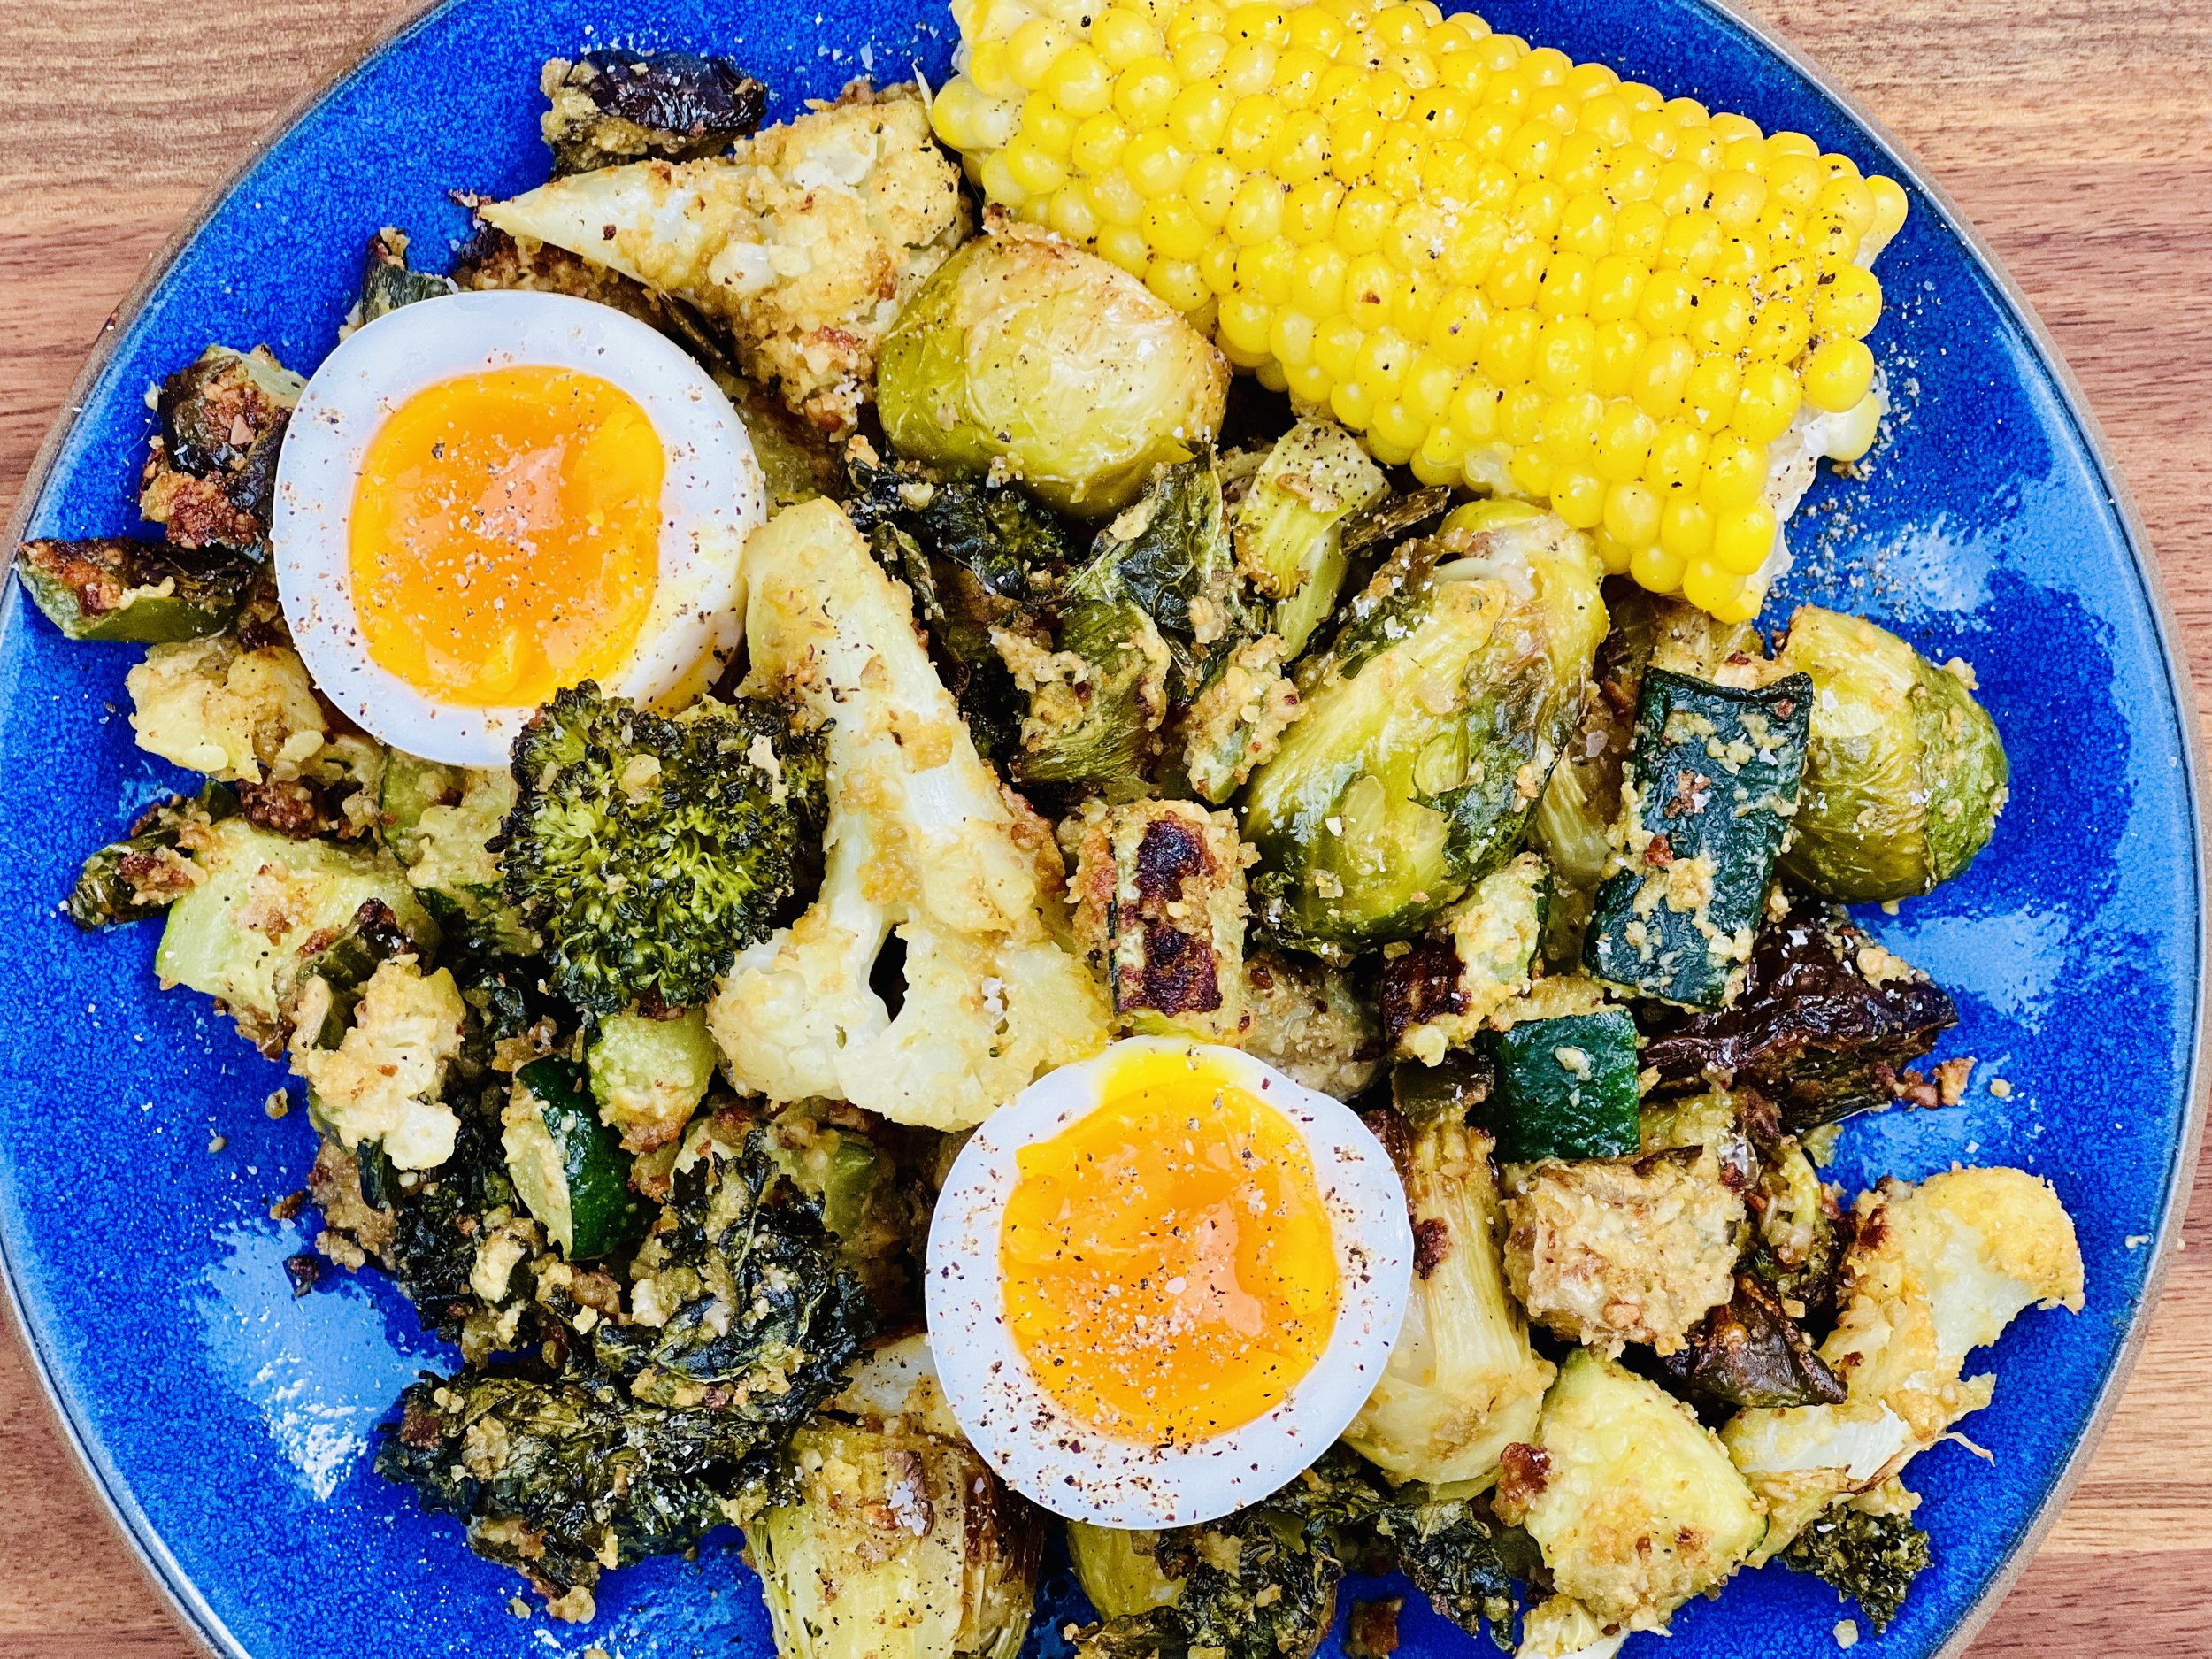
Oven-Roasted Winter Vegetables (Low FODMAP)
10 Minutes prep • 25 Minutes cook • Low FODMAP • Gluten-free • Vegetarian • Plant Forward • Serves 4
10 Minutes prep • 25 Minutes cook • Low FODMAP • Gluten-free • Vegetarian • Plant Forward • Serves 4 • Ok to make ahead: Steps 1 - 2
Roasting vegetables elevates their flavor and texture to new heights, requiring minimal seasoning to create a wonderfully delicious dish. In this recipe, I've incorporated nutritional yeast for added protein and a delightful cheesy undertone. Not only do roasted vegetables offer a diverse array of plant-based goodness, but they also seamlessly complement any meal. Plus, the convenience of cooking everything in one pan makes cleanup a breeze. Get ready to savor a dish that's not only delicious but also a breeze to prepare!
Ingredients
1/2 cup leek greens, chopped
2 cups broccoli florets, chopped
1 cup butternut squash, peeled, seeded and chopped
2 - 3 small golden beets, chopped
1 - 2 carrots, chopped
1 - 2 jalapeno peppers, seeds removed and chopped
1 small eggplant, chopped
3 tablespoons extra-virgin olive oil
1/2 teaspoon Kosher salt
1/ 2 teaspoon black pepper
3 tablespoons nutritional yeast
Directions
(1) Prepare: Preheat oven to 400 degrees F. Wash, peel, seed, and chop all the vegetables and put them in a roasting pan.
(2) Season: Drizzle with olive oil and toss well to combine. Add salt, pepper, and nutritional yeast and toss again to evenly coat the vegetables with the oil and seasonings.
(3) Cook: Put the pan in the oven and cook for 20 minutes. Stir/toss the vegetables and return to the oven for another 5 minutes or until all veggies are tender to your liking.
(4) Plate and serve: Serve warm a few extra grinds of pepper
Eat and enjoy every bite because you can!
Recipe note: I use Diamond Crystal Kosher salt in all my recipes because it has a wonderful flat and crisp flake that tastes delicious. It is also the least salty salt available so you can use it more liberally as a seasoning than you can table salt or sea salt. If you use another type of salt, you may need to reduce the amount so it is not over-salted.
Have a question you’d like to have answered? Email me at hello@ibsgamechanger.com
Link note: This post may contain affiliate links for you to easily purchase items that are linked. I may earn a small commission from qualifying purchases but none of this costs you a thing so feel free to use the links! In addition, for some items, I have provided a special discount code for IBS Game Changers so be sure to use the code when you purchase an item to get the discount that has been arranged just for you.
More Deliciously Low FODMAP™ vegetarian recipes

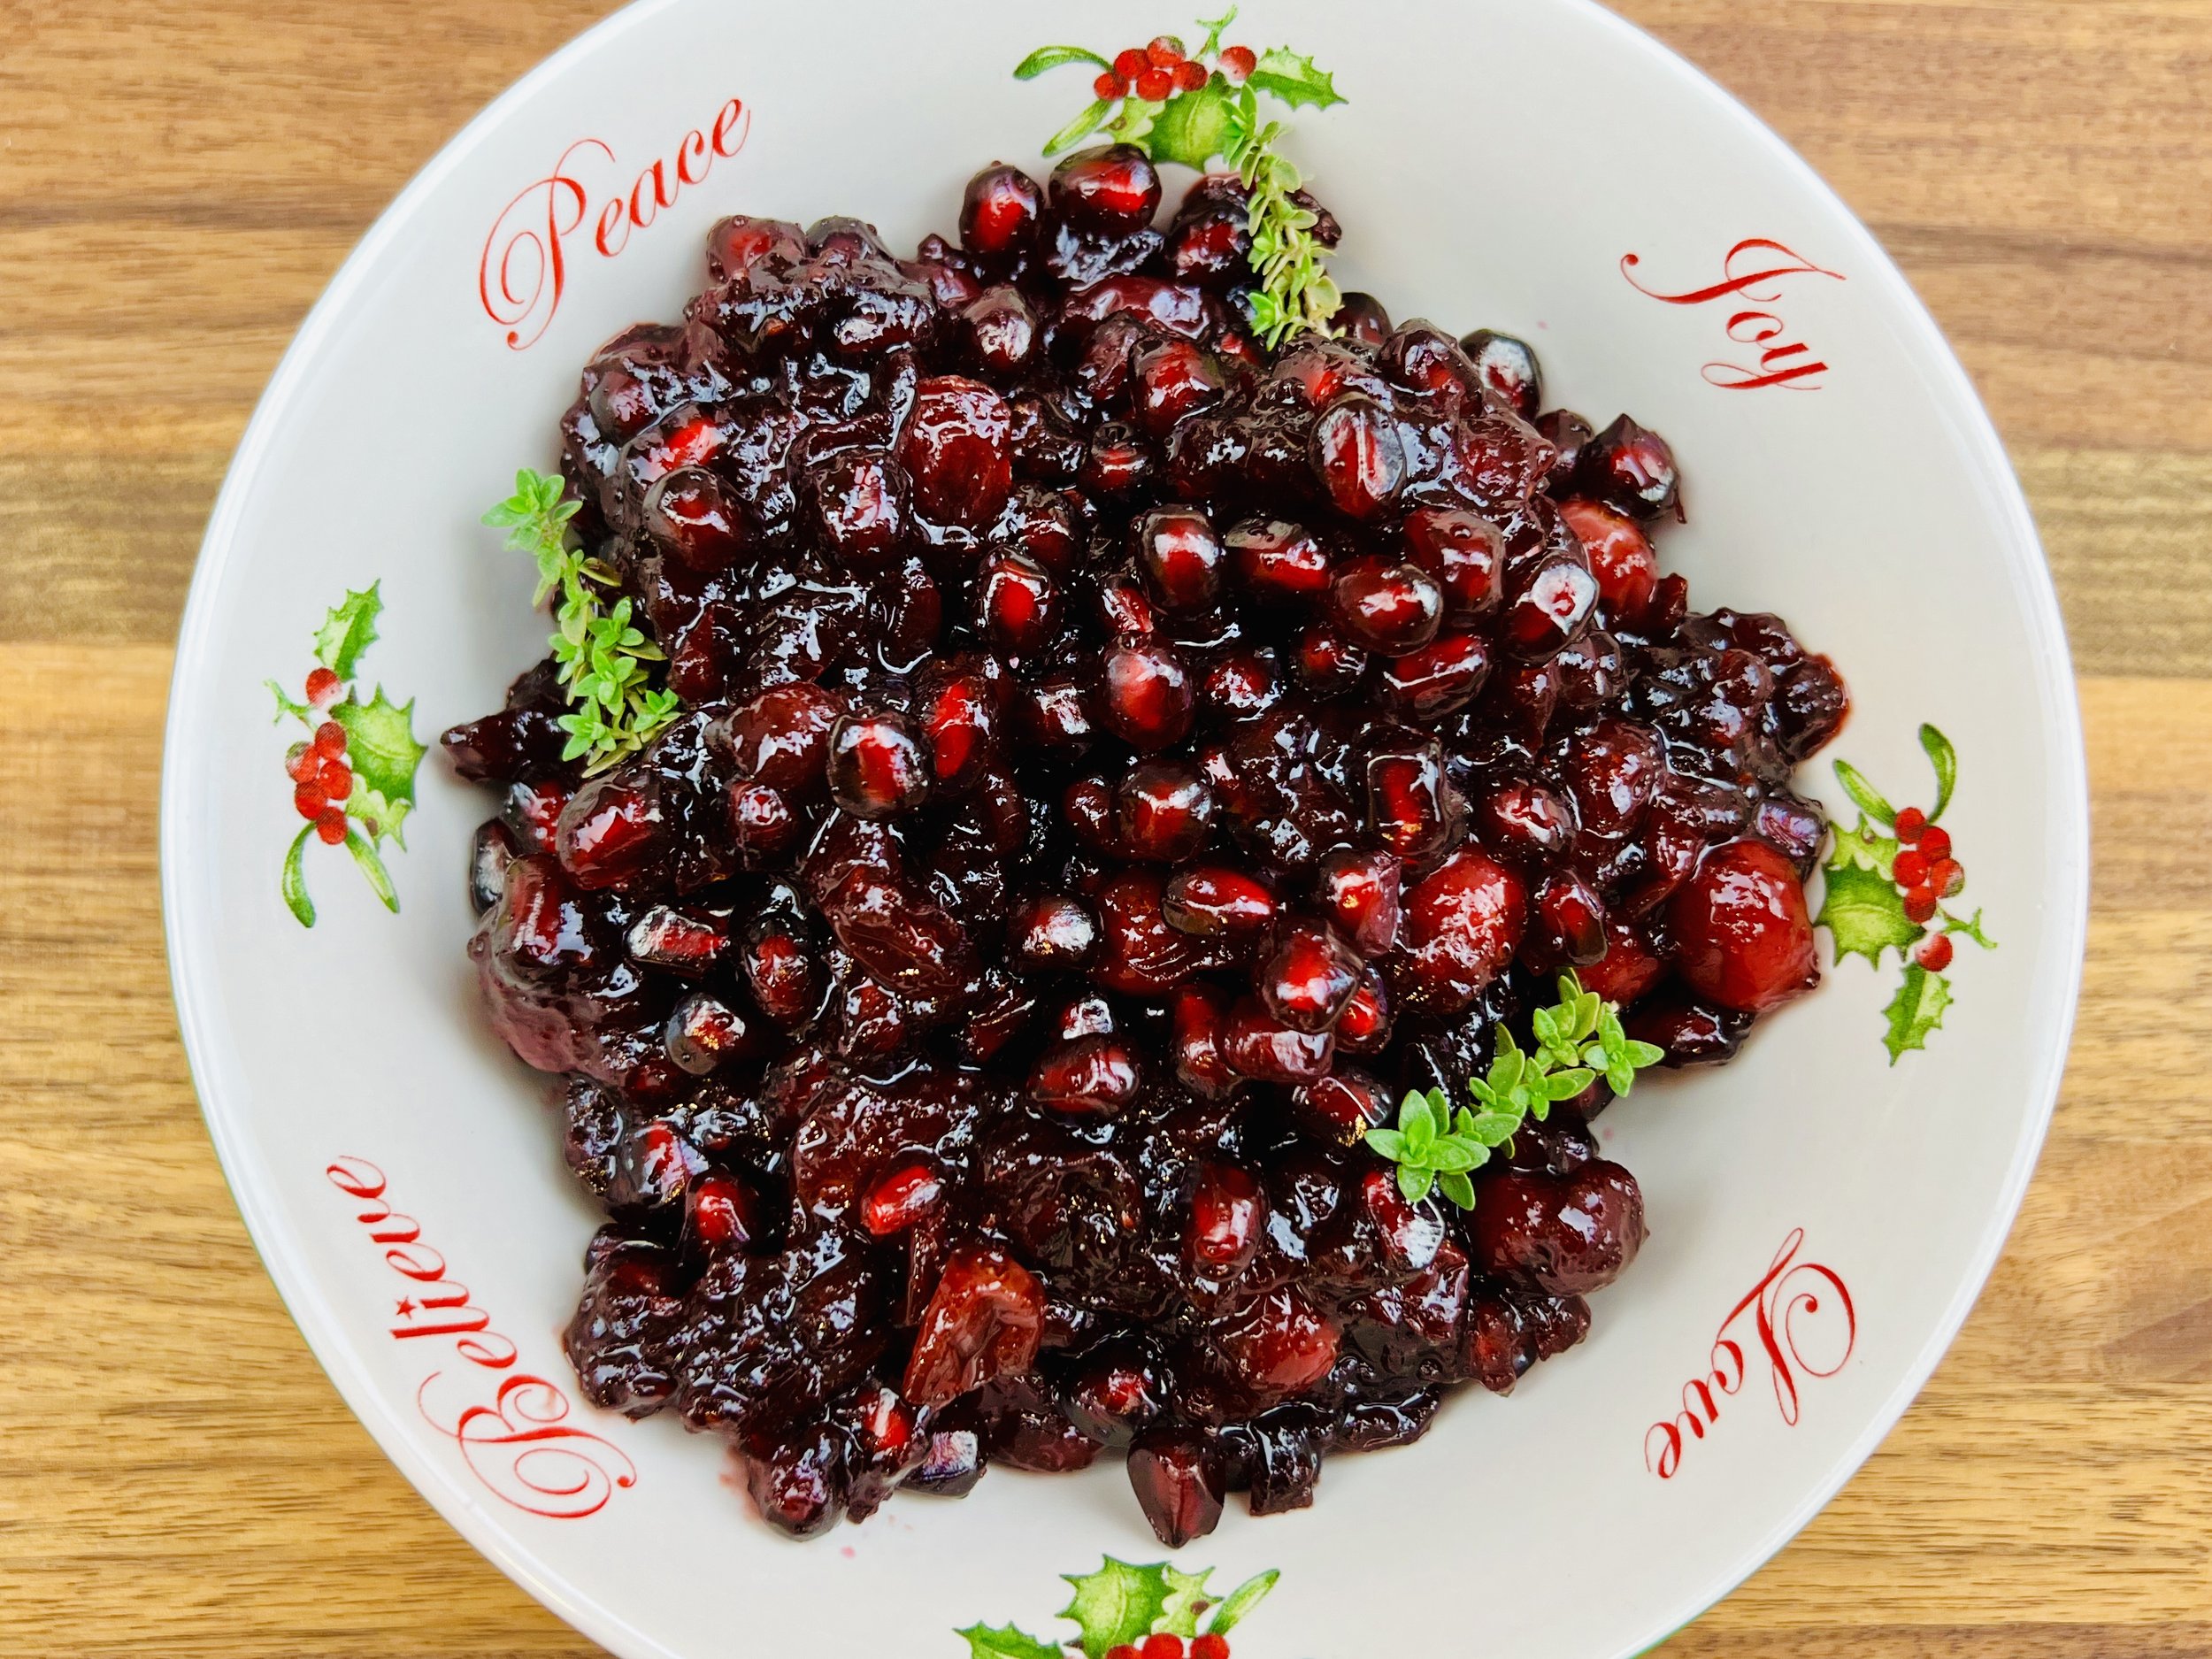
Pomegranate Cranberry Sauce (Low FODMAP)
20 Minutes prep • 8 Hours chill • Low FODMAP • Gluten-free • Lactose-free • Serves 8
20 Minutes prep • 8 Hours chill • Low FODMAP • Gluten-free • Lactose-free • Serves 8 • Ok to make ahead: Steps 1-4
Celebrate the season with the perfect blend of cranberries and pomegranates in this delicious Pomegranate Cranberry Sauce that’s about to become your new favorite! Both of these vibrant gems come together to create a sauce that strikes the perfect balance between sweet and tart. Whether you're serving it alongside the classic turkey, spreading it on warm rolls, or pairing it with your other favorite festive dishes, this Pomegranate Cranberry Sauce will add a touch of elegance and a burst of holiday flavor to every bite.
Ingredients
12 ounces fresh cranberries
1/2 cup light brown sugar, packed
1/4 cup pomegranate molasses (or corn syrup* will also work)
3 sprigs fresh thyme
1 medium pomegranate, arils (seeds) removed (about 1 cup pomegranate arils)
Directions
(1) Prepare: Remove the seeds from the pomegranate, being careful to keep them whole.
(2) Cook the cranberries: Put the cranberries, sugar, pomegranate molasses or corn syrup, and thyme in a saucepan over medium heat. Bring to a boil and stir gently, but often, as it cooks for about 5 minutes until most of the cranberries have burst open.
(3) Cool: Remove from the heat, remove the thyme sprigs, and let cool.
(4) Finish: When cooled to room temperature, add the pomegranate arils and stir gently to combine.
Make-ahead note: At this point, you may put it in an airtight container and refrigerate it overnight (or longer), until ready to serve
(5) Plate and serve: Serve chilled with your holiday turkey, pork loin, or everyday chicken!
Eat and enjoy every bite because you can!
*Recipe note: If you use corn syrup in place of the pomegranate molasses, please use Karo brand corn syrup, which contains no high-fructose corn syrup (HFCS is high in FODMAPS).
Have a question you’d like to have answered? Email me at hello@ibsgamechanger.com
Link note: This post may contain affiliate links for you to easily purchase items that are linked. I may earn a small commission from qualifying purchases but none of this costs you a thing so feel free to use the links! In addition, for some items, I have provided a special discount code for IBS Game Changers so be sure to use the code when you purchase an item to get the discount that has been arranged just for you.
More Deliciously Low FODMAP™ holiday recipes


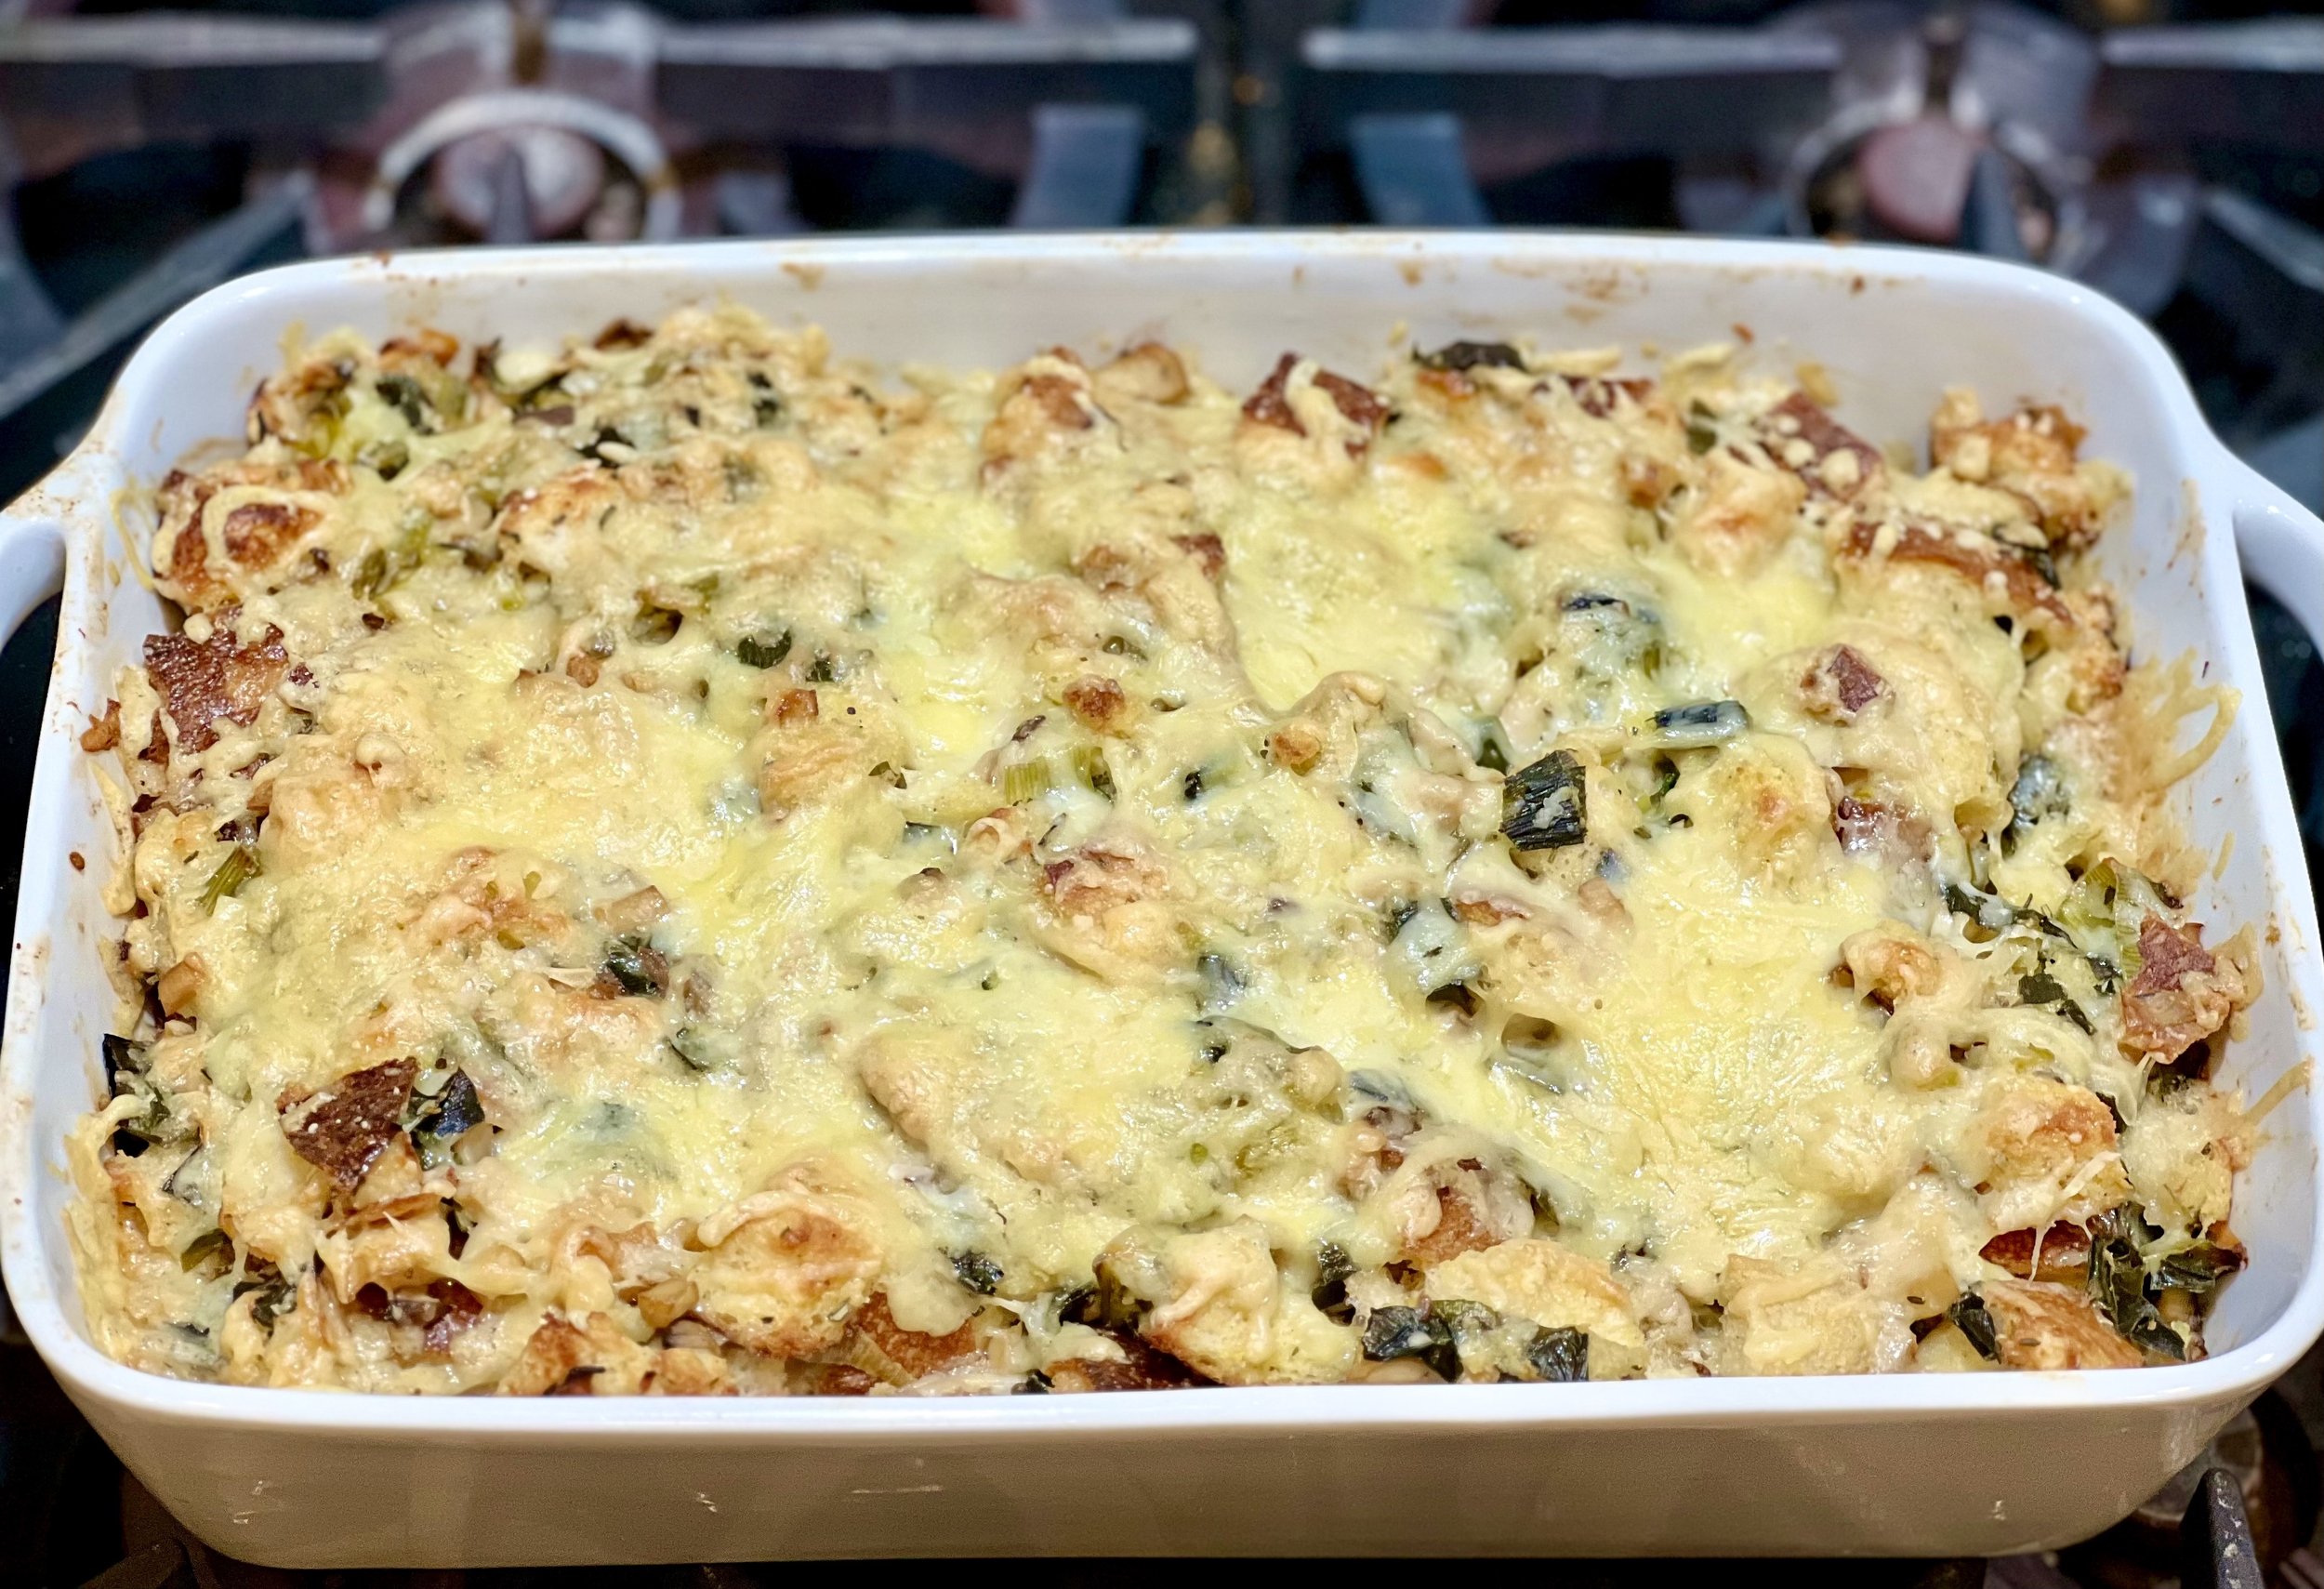
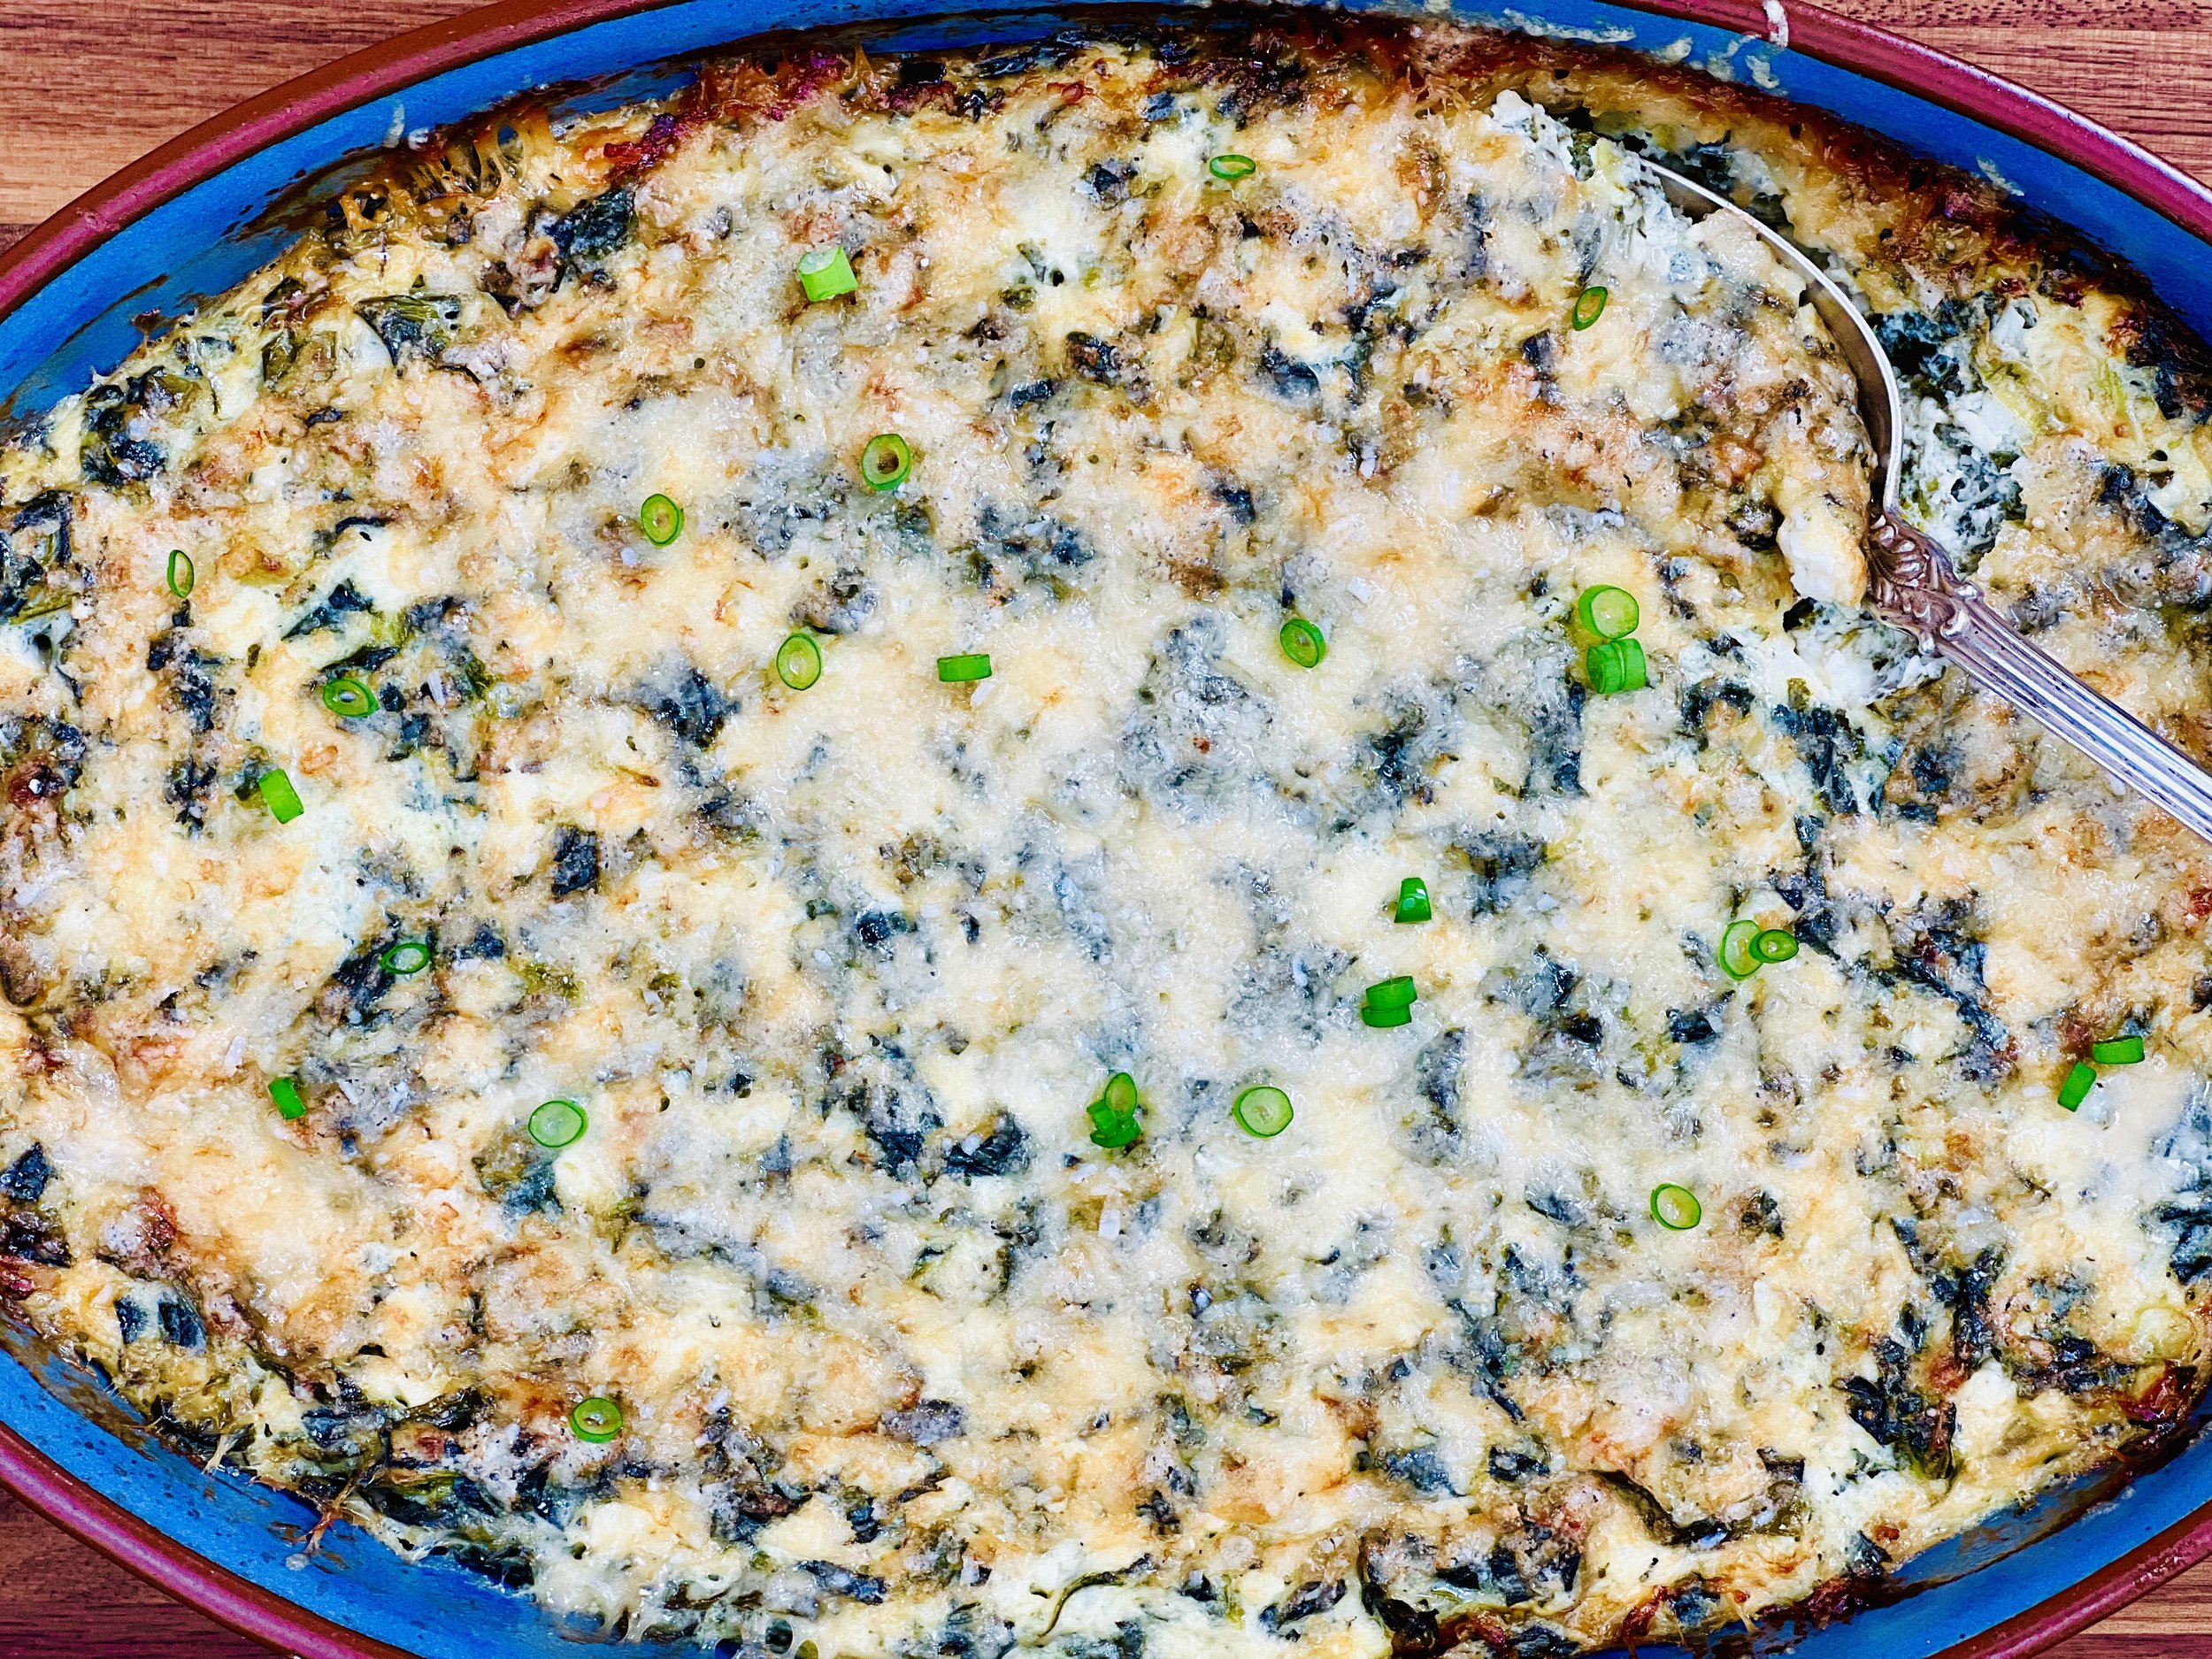
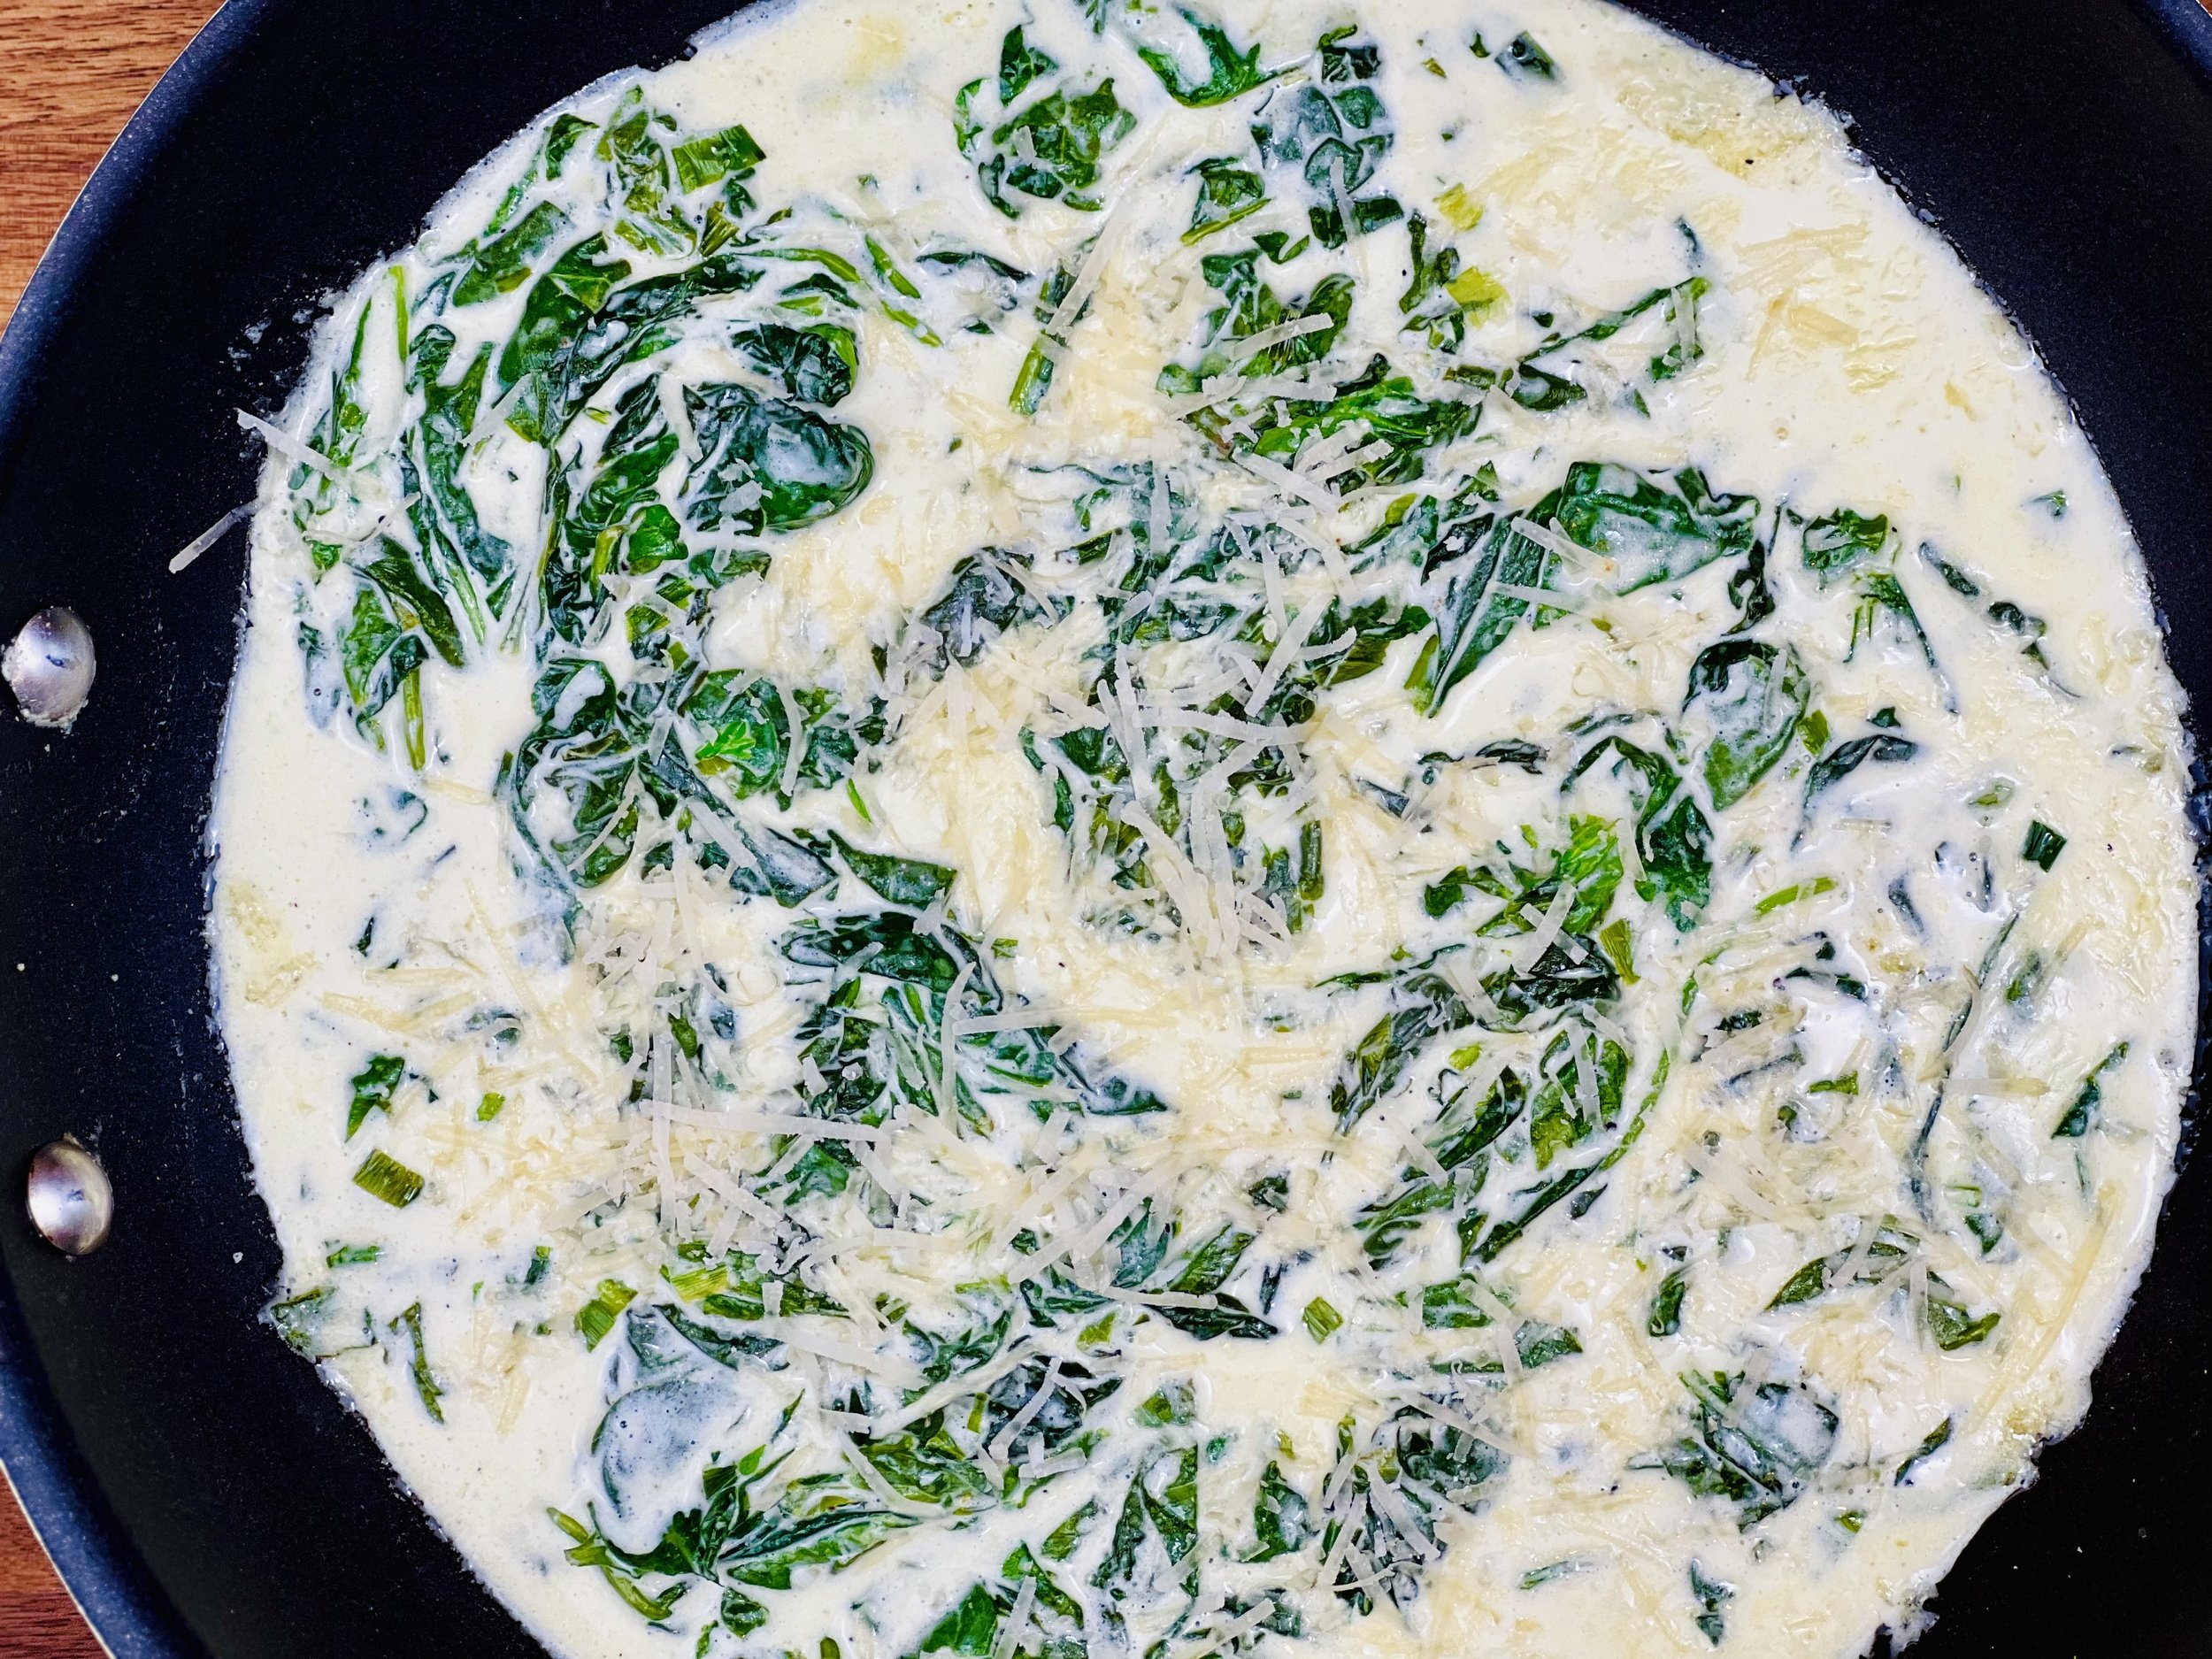
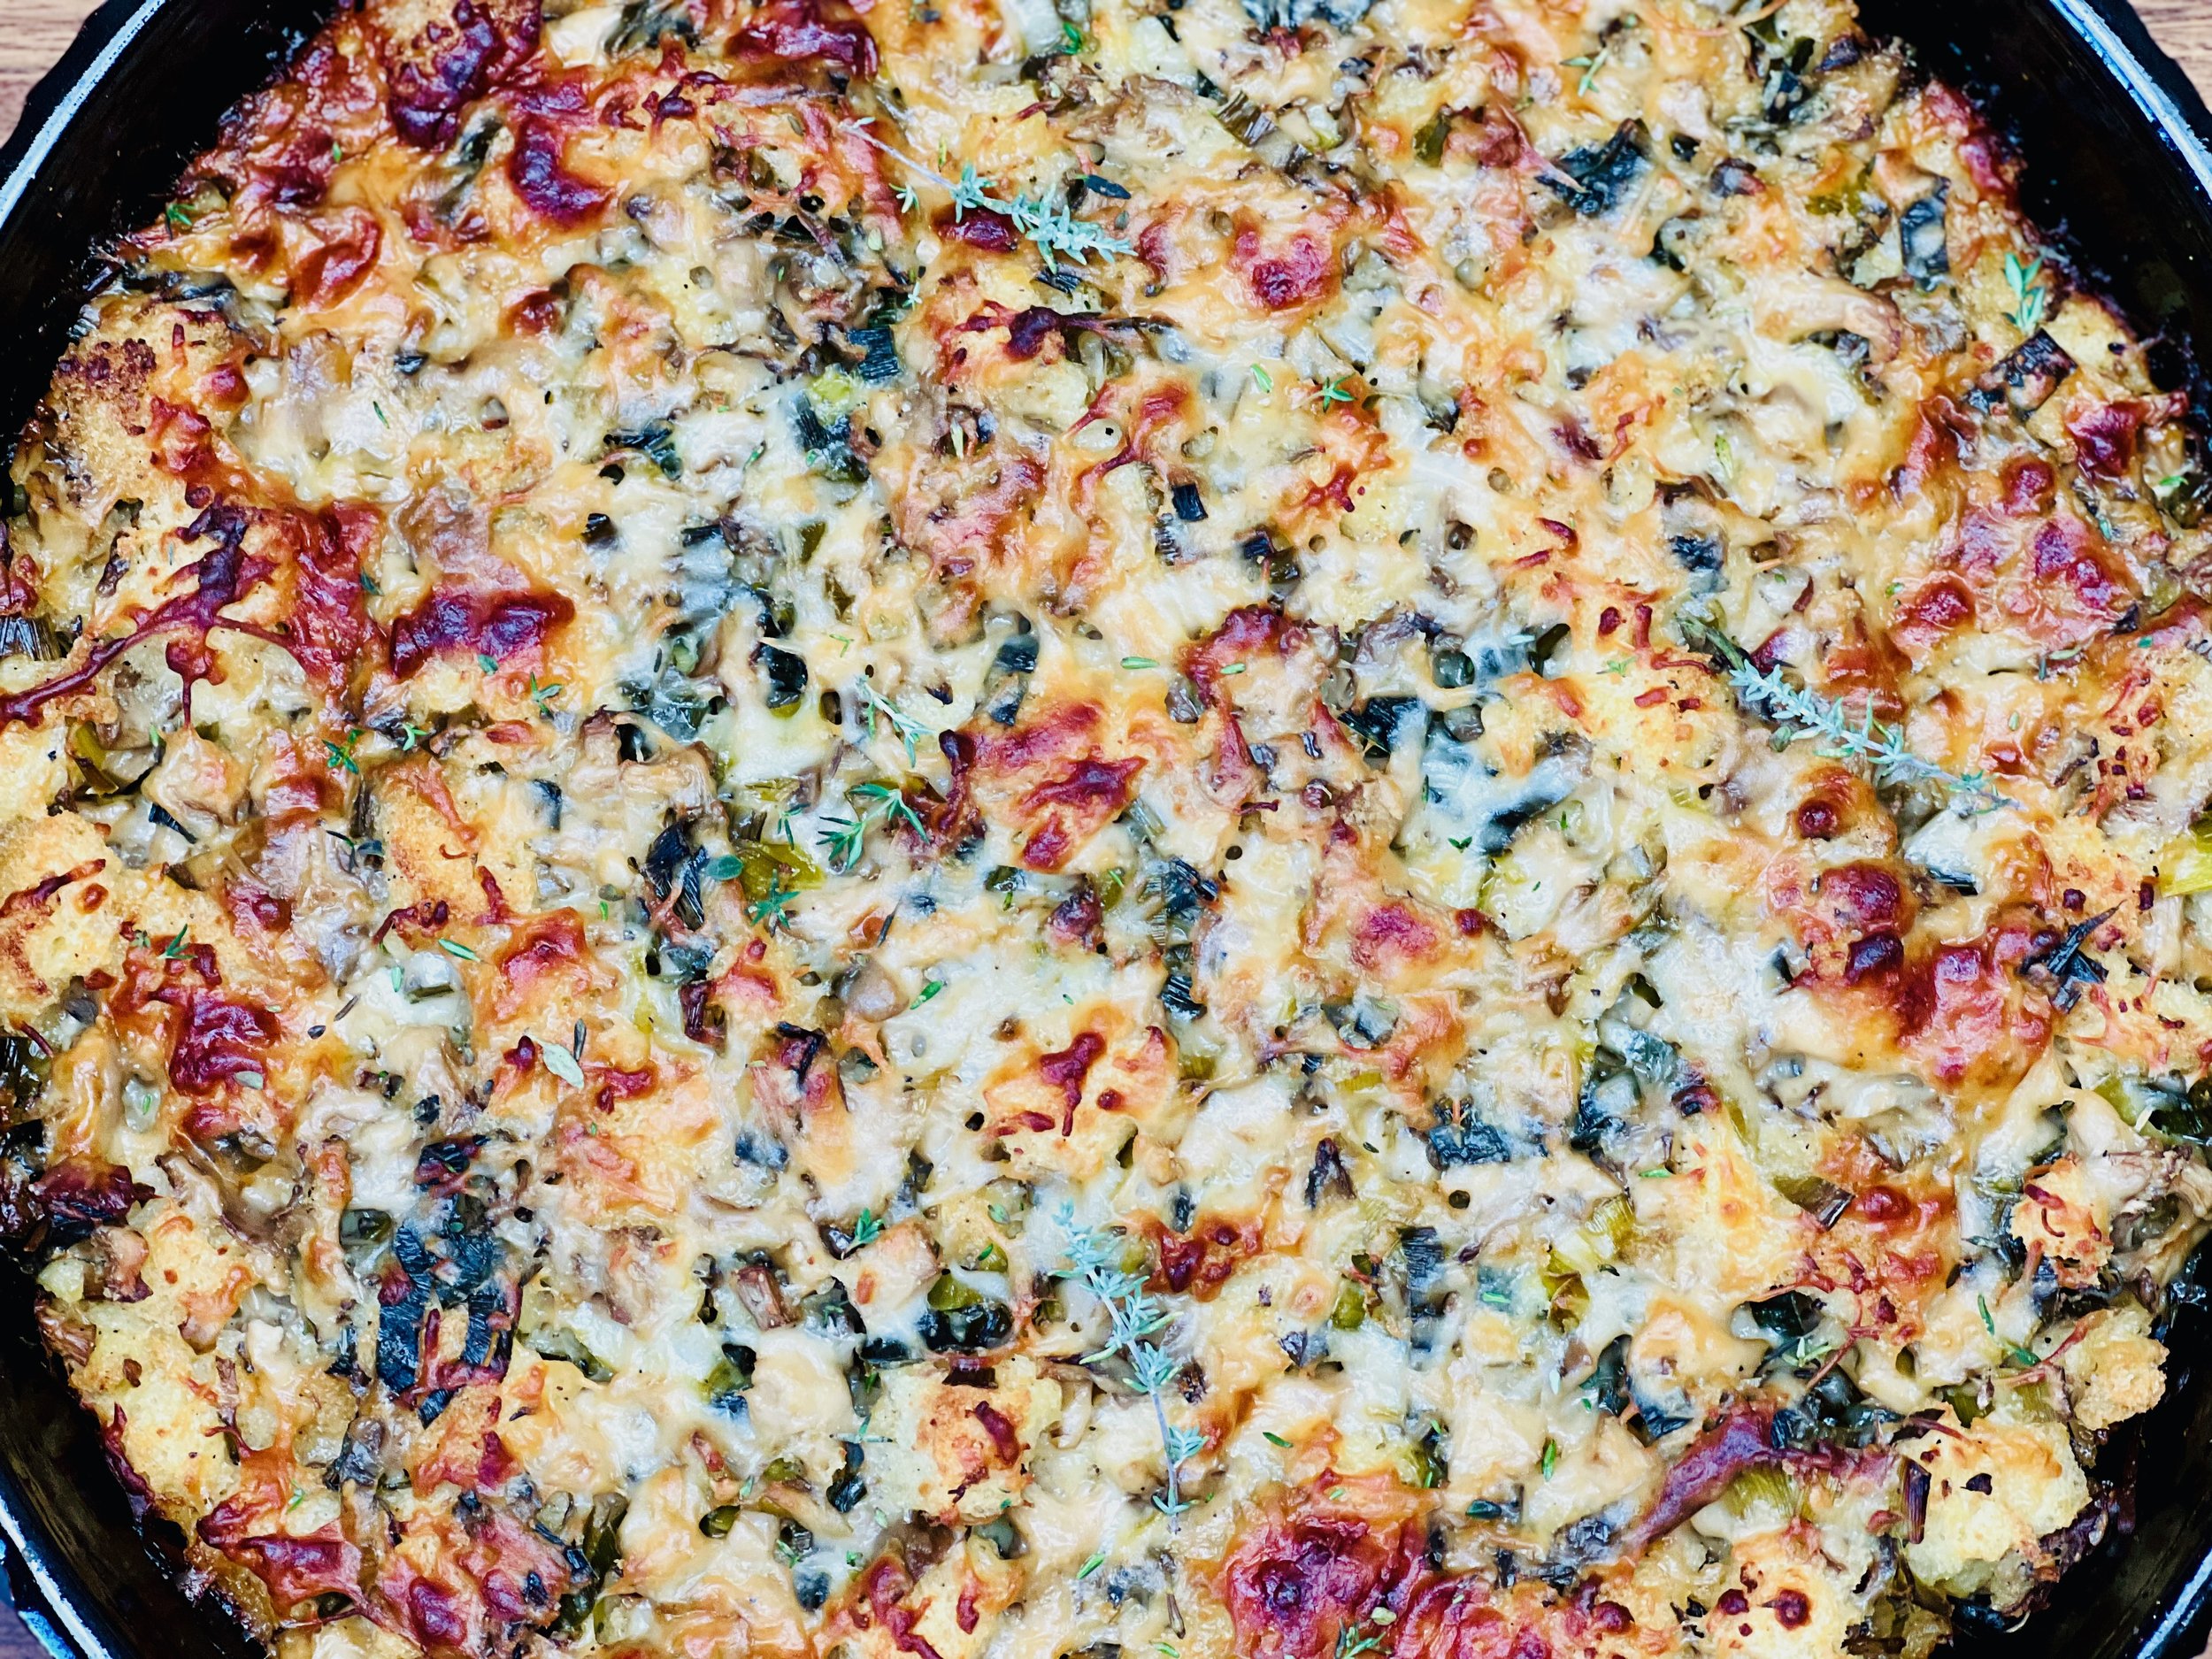
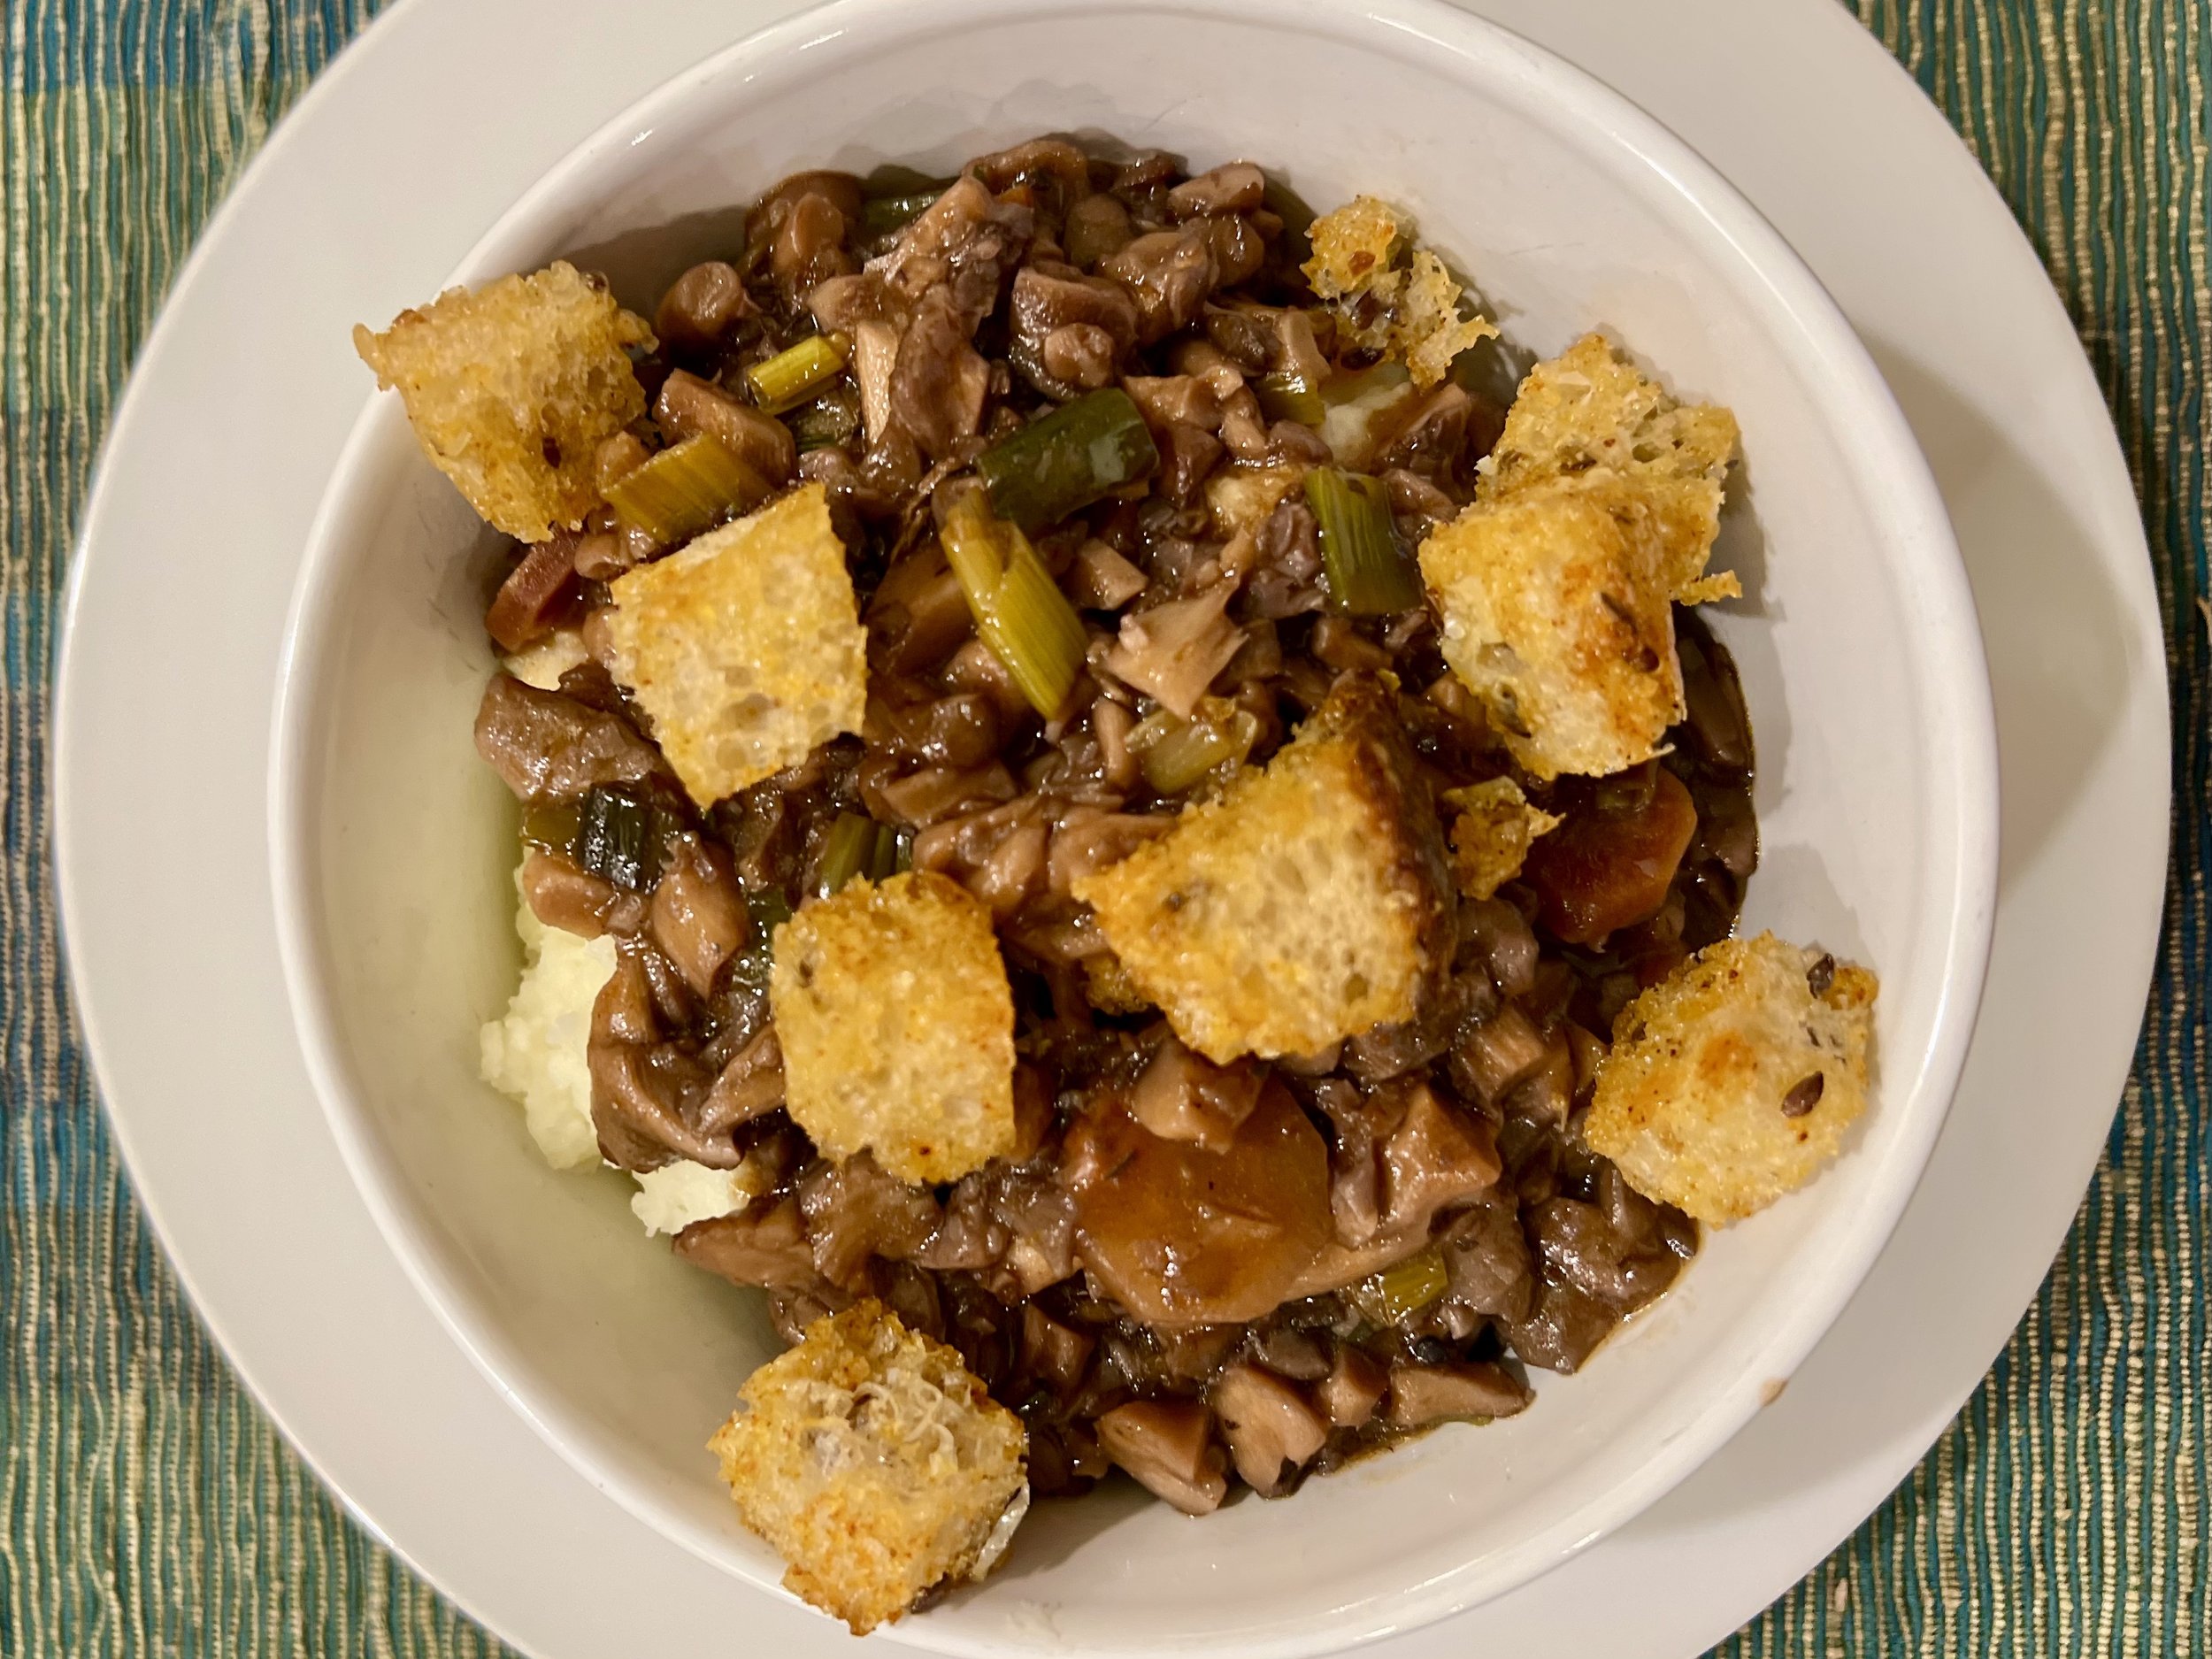
Brandon’s Cheesy Mushroom and Leek Bread Stuffing (Low FODMAP)
20 Minutes prep • 90 minutes cook • Low FODMAP • Serves 8
20 Minutes prep • 90 minutes cook • Low FODMAP • Serves 8 • Ok to make ahead: Steps 1-3
Indulge in the rich flavors of Brandon's Cheesy Mushroom and Leek Bread Stuffing this holiday season. With rosemary sourdough, oyster mushrooms, and a blend of gruyere and Jarlsberg cheeses, this dish is a celebration of tastes and texture in every bite. The final dish is a flavorful masterpiece that pairs perfectly with meats, poultry, or pork. Savor each bite, and relish the joy of good food and good company. Brandon's Cheesy Mushroom and Leek Bread Stuffing is not just a side dish—it's a culinary experience worth celebrating.
Ingredients
24 ounces Organic Rosemary Sourdough Bread (you can also use plain sourdough bread)
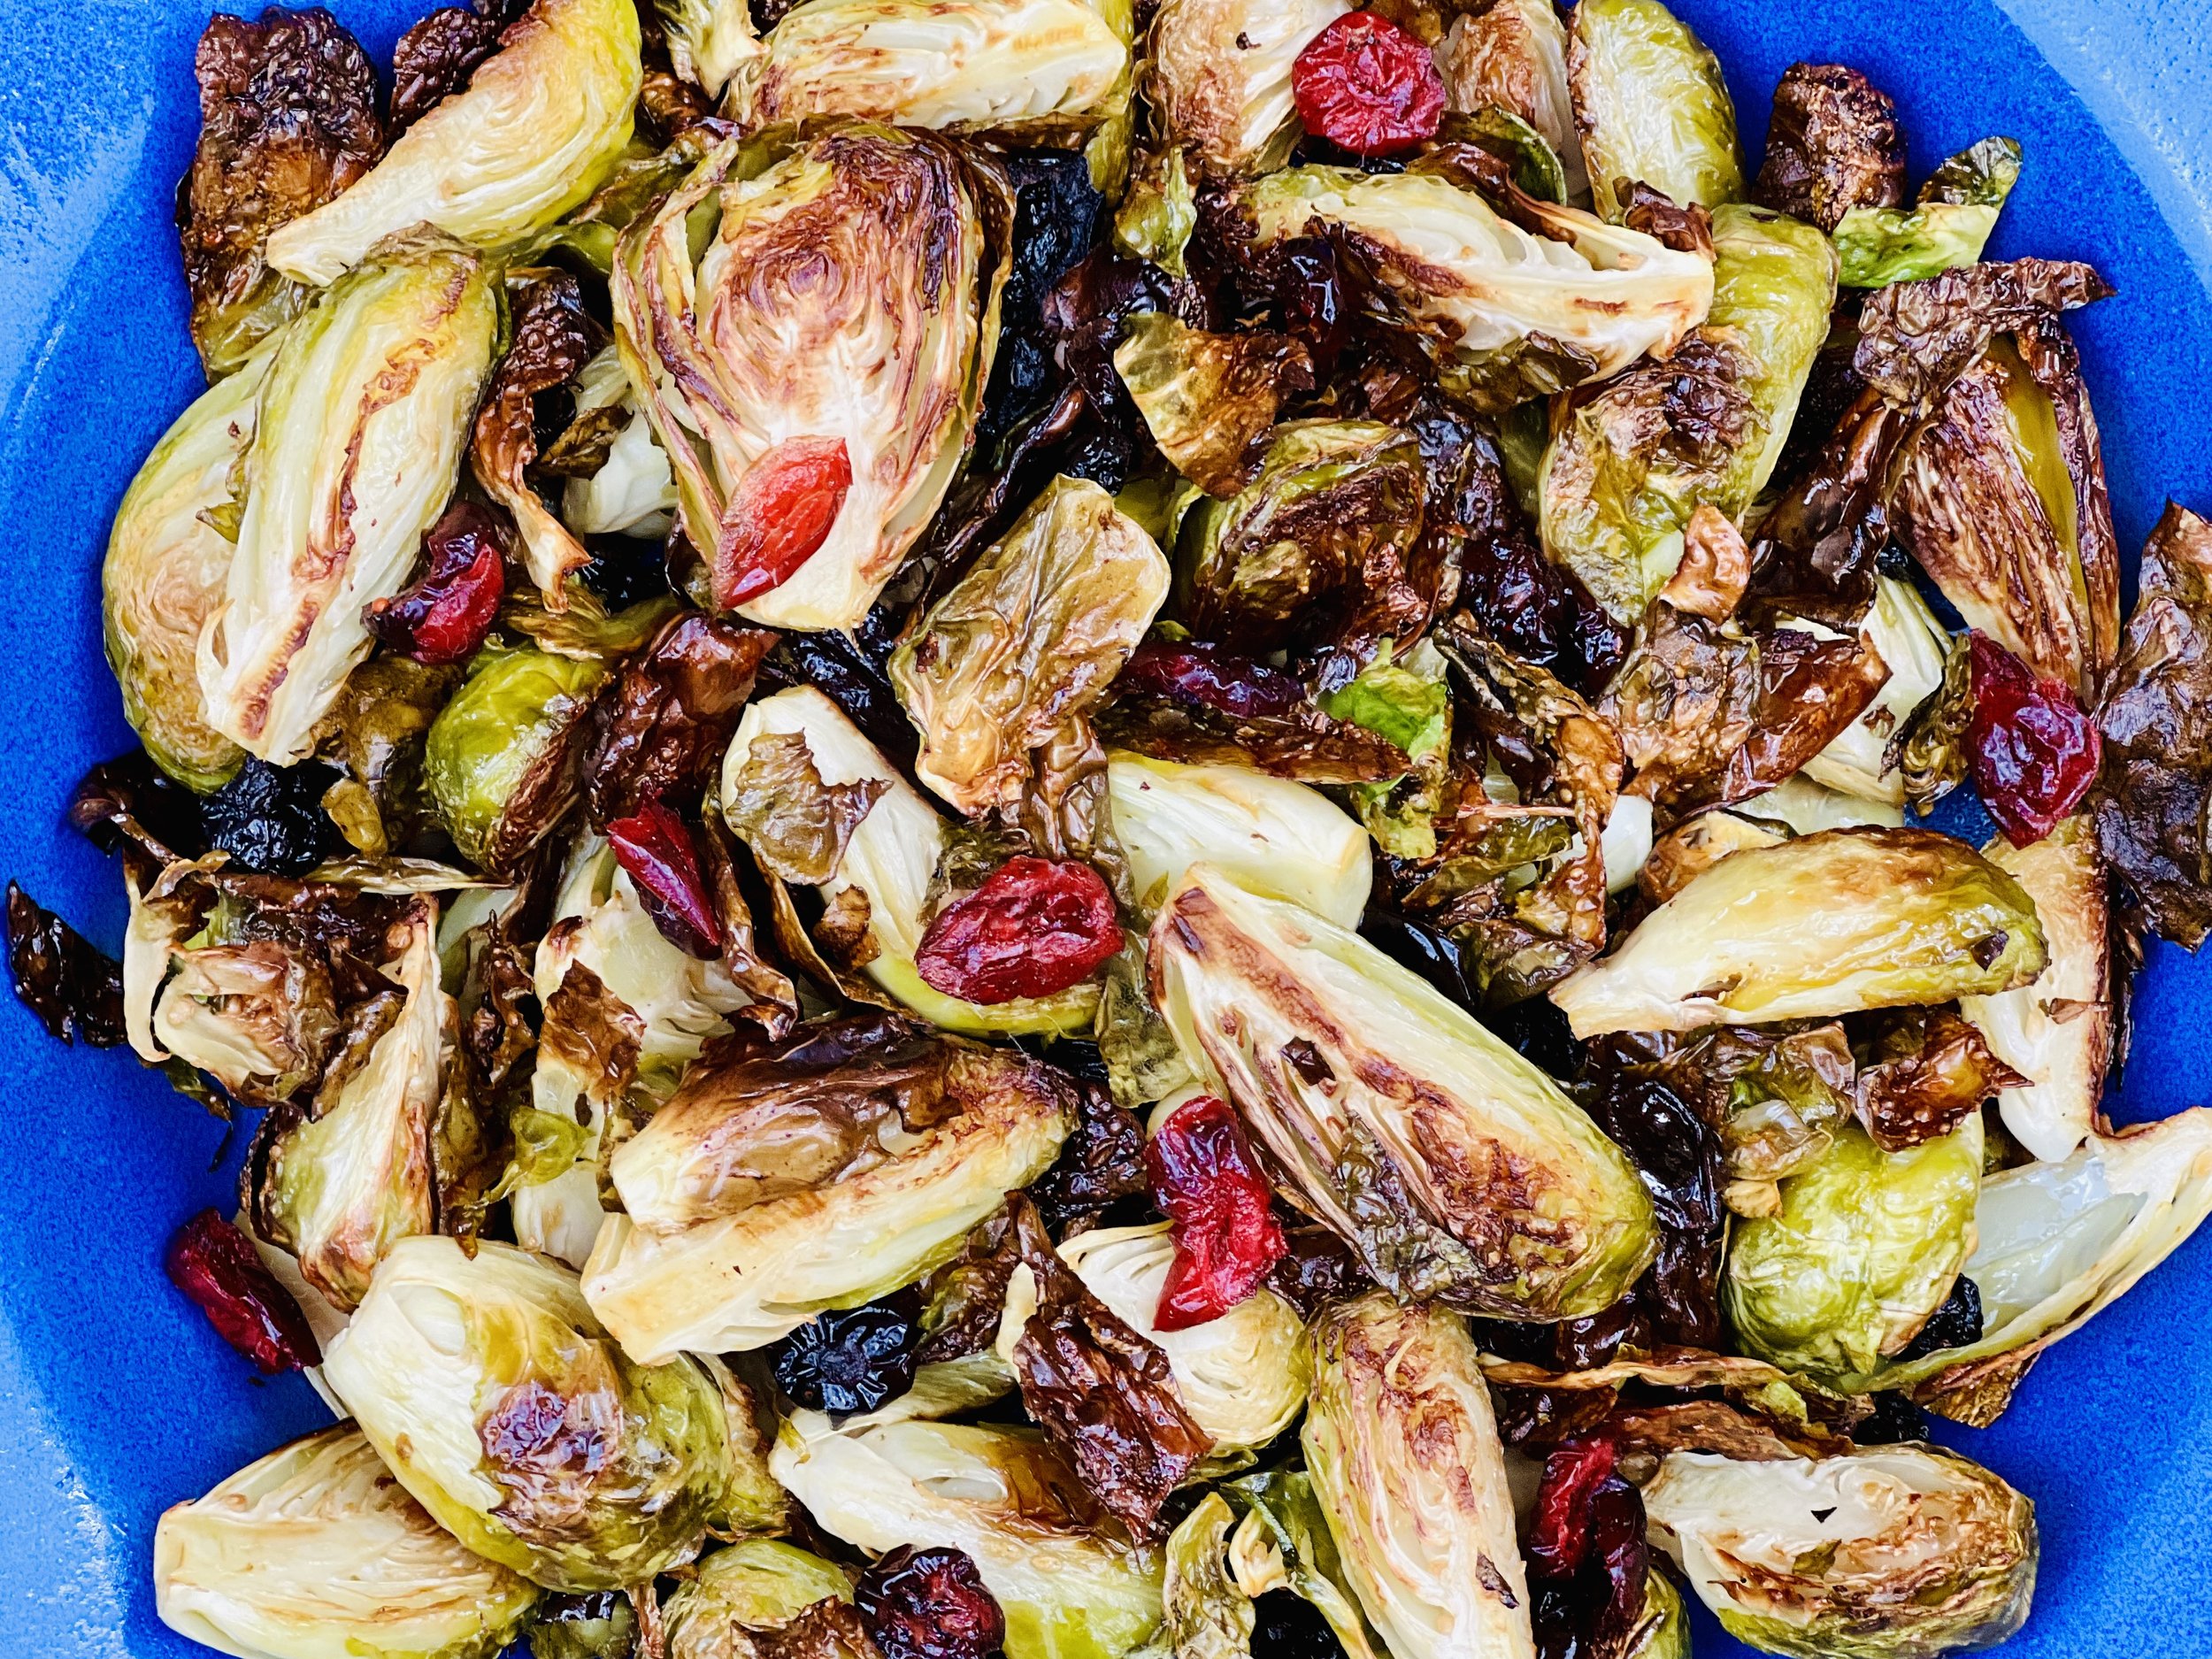
4 ounces dried, sweetened cranberries (optional)
1 tablespoon garlic-infused olive oil
3 tablespoons salted butter, room temperature
2 Large leeks (green part only), washed and chopped (you will need 2 cups total)
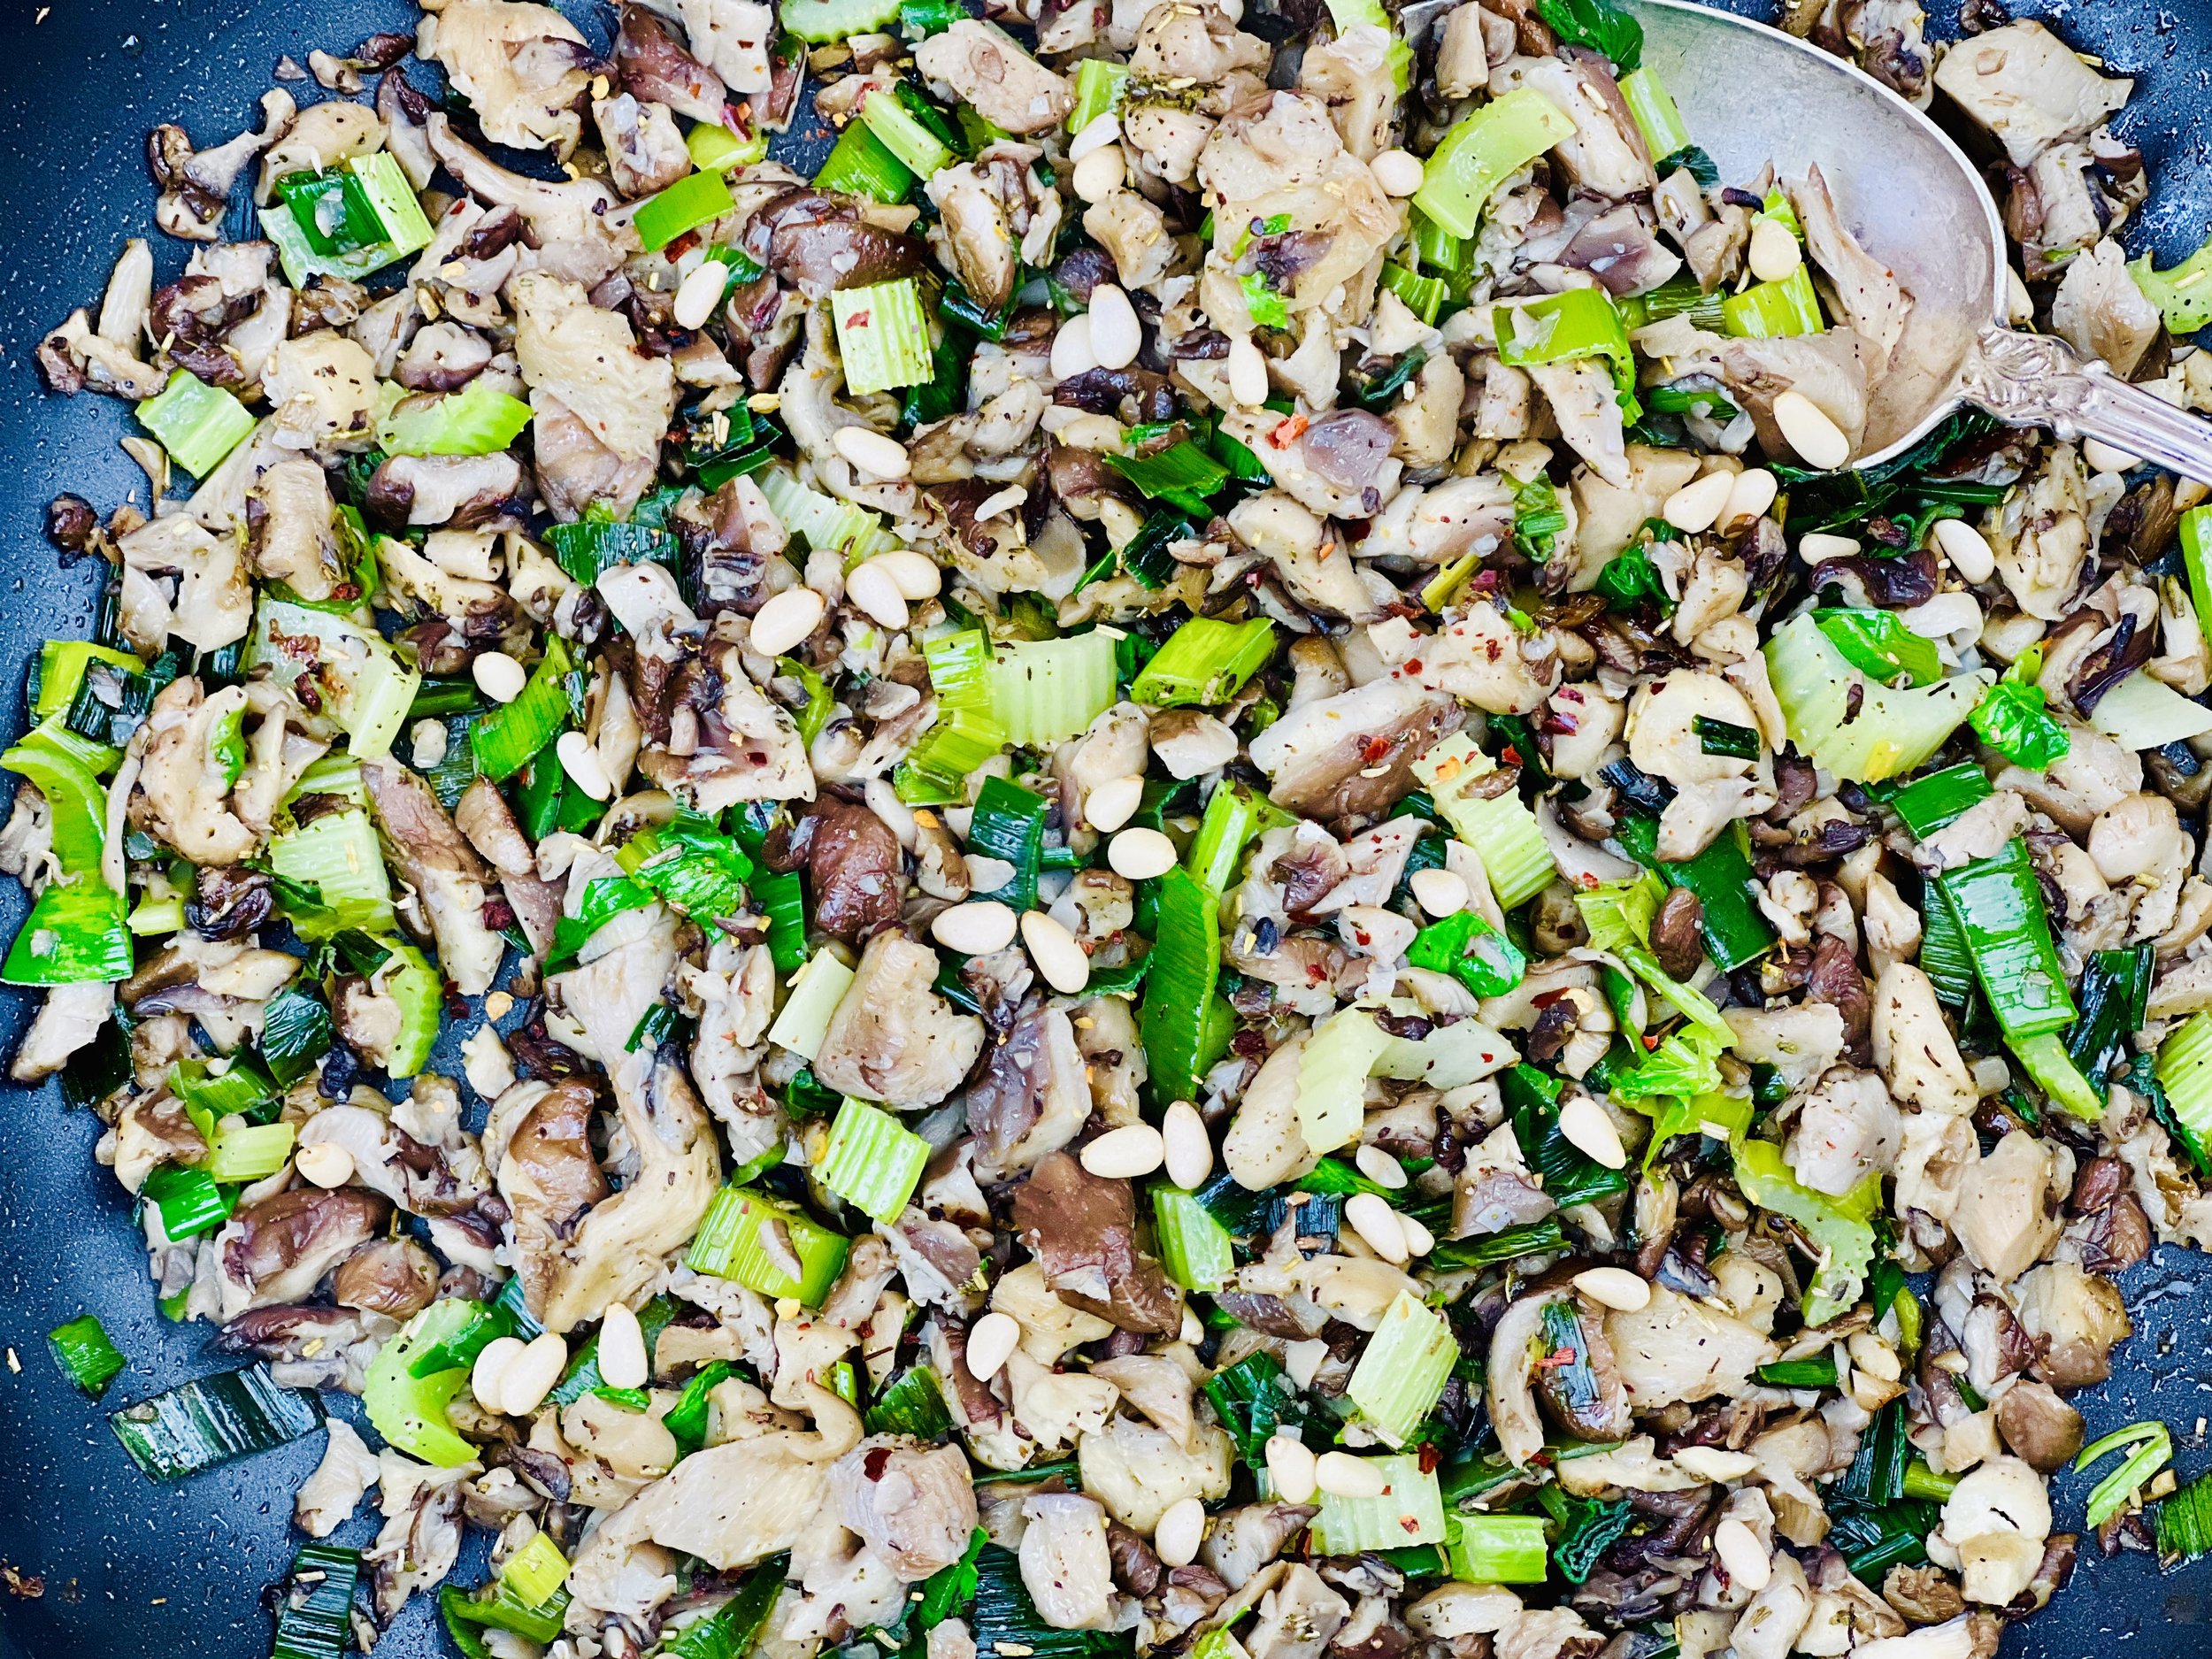
1 pound oyster mushrooms, chopped
1/2 pound gruyere cheese, grated
1/4 pound Jarlsberg cheese, grated
2 cups chicken broth (I use Whole Foods Organic 365 chicken broth or Gourmend low FODMAP Organic Chicken Broth - use code IBSGC15 for 15% discount)
3 eggs, room temperature, beaten
1 tablespoon fresh, or 1 teaspoon dry rosemary
1 tablespoon fresh, or 1 teaspoon dry thyme
2 teaspoons fresh, or 3/4 teaspoon dry sage
1 teaspoon Kosher salt
1/2 teaspoon black pepper
Directions
(1) Prepare: Preheat oven to 300 degrees F. Cube the bread (including the crust) into bite-sized pieces. Chop the mushrooms, leek greens, and fresh herbs (if using). Grate the cheeses. Grease a 9”x 13” pan or equivalent with 1 tablespoon butter.
(2) Toast bread cubes: Spread the bread cubes evenly across two rimmed baking sheets. Put in preheated oven and bake for 10 mins. Remove from the oven and sprinkle very lightly with Kosher salt. Set aside.
(3) Cook the greens: In a medium skillet over medium-high heat, add the garlic olive oil, when hot, add dry herbs and let sizzle for 30 seconds. (If using fresh herbs, add them with the leek greens.) Add the leek greens and sauté for about 5 minutes, or until tender. Add the butter to the pan and then, when melted, add the chopped mushrooms and sauté until mushrooms start to turn golden brown (about 10 minutes more). Set aside.
(4) Combine: In a large mixing bowl, combine the sauteed greens with the toasted bread cubes and cranberries (if using). Lightly whisk the eggs before you add them to the bread cube mixture. Toss well. Add 2 cups of chicken broth. Toss again. Add salt and pepper and, if it seems dry add another 1/2 cup of chicken broth. Add about 3/4 of the grated cheese to the mixture and toss once more.
(5) Bake: Put the bread cube mixture in the prepared baking dish. Cover with aluminum foil and bake for 30 minutes. After 30 minutes, remove from the oven and remove the foil. Top with your remaining cheese and bake for another 20-30 minutes until the cheese is fully melted. If you like a crisp top, you may finish the cooking time with 2 - 3 minutes under the broiler.
(6) Plate and serve: Serve as a hearty side dish for meat, poultry, or pork. This bread stuffing goes great with traditional turkey and gravy or even with a less traditional rosemary cream sauce.
Eat and enjoy every bite because you can!
Recipe note: I use Diamond Crystal Kosher salt in all my recipes because it has a wonderful flat and crisp flake that tastes delicious. It is also the least salty salt available so you can use it more liberally as a seasoning than you can table salt or sea salt. If you use another type of salt, you may need to reduce the amount so it is not over-salted.
Have a question you’d like to have answered? Email me at hello@ibsgamechanger.com
Link note: This post may contain affiliate links for you to easily purchase items that are linked. I may earn a small commission from qualifying purchases but none of this costs you a thing so feel free to use the links! In addition, for some items, I have provided a special discount code for IBS Game Changers so be sure to use the code when you purchase an item to get the discount that has been arranged just for you.
More Deliciously Low FODMAP™ side dish recipes
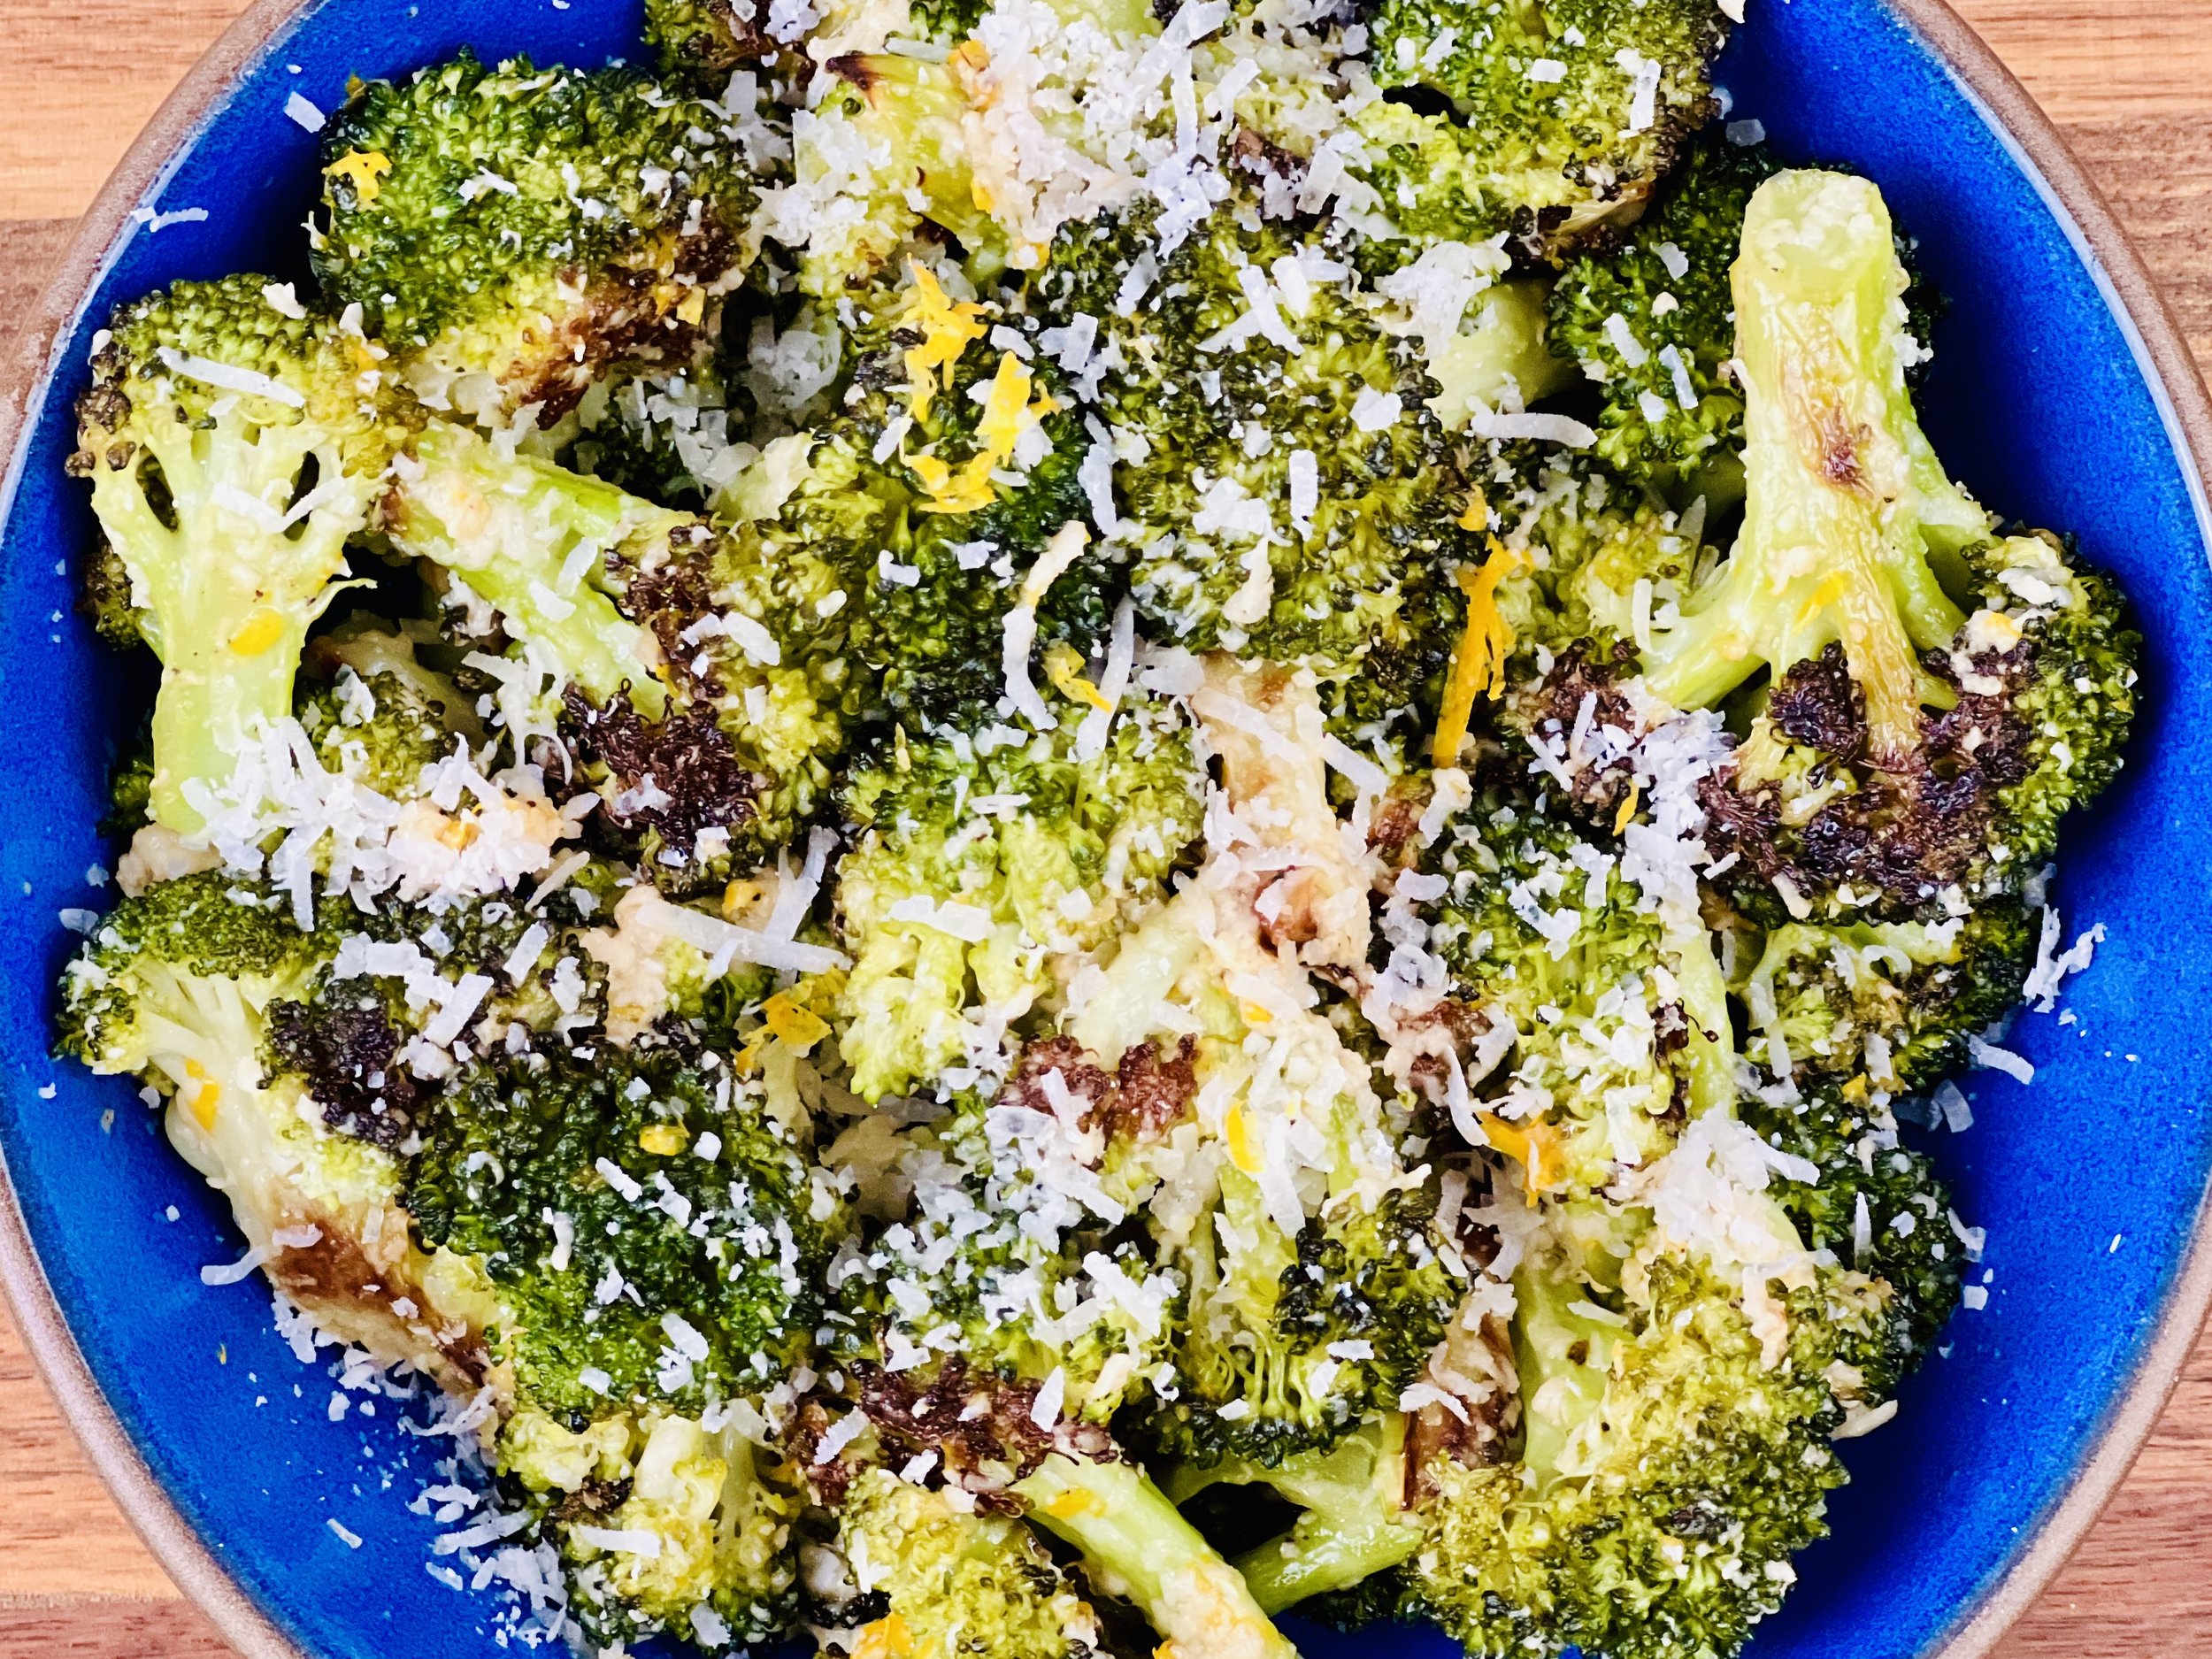
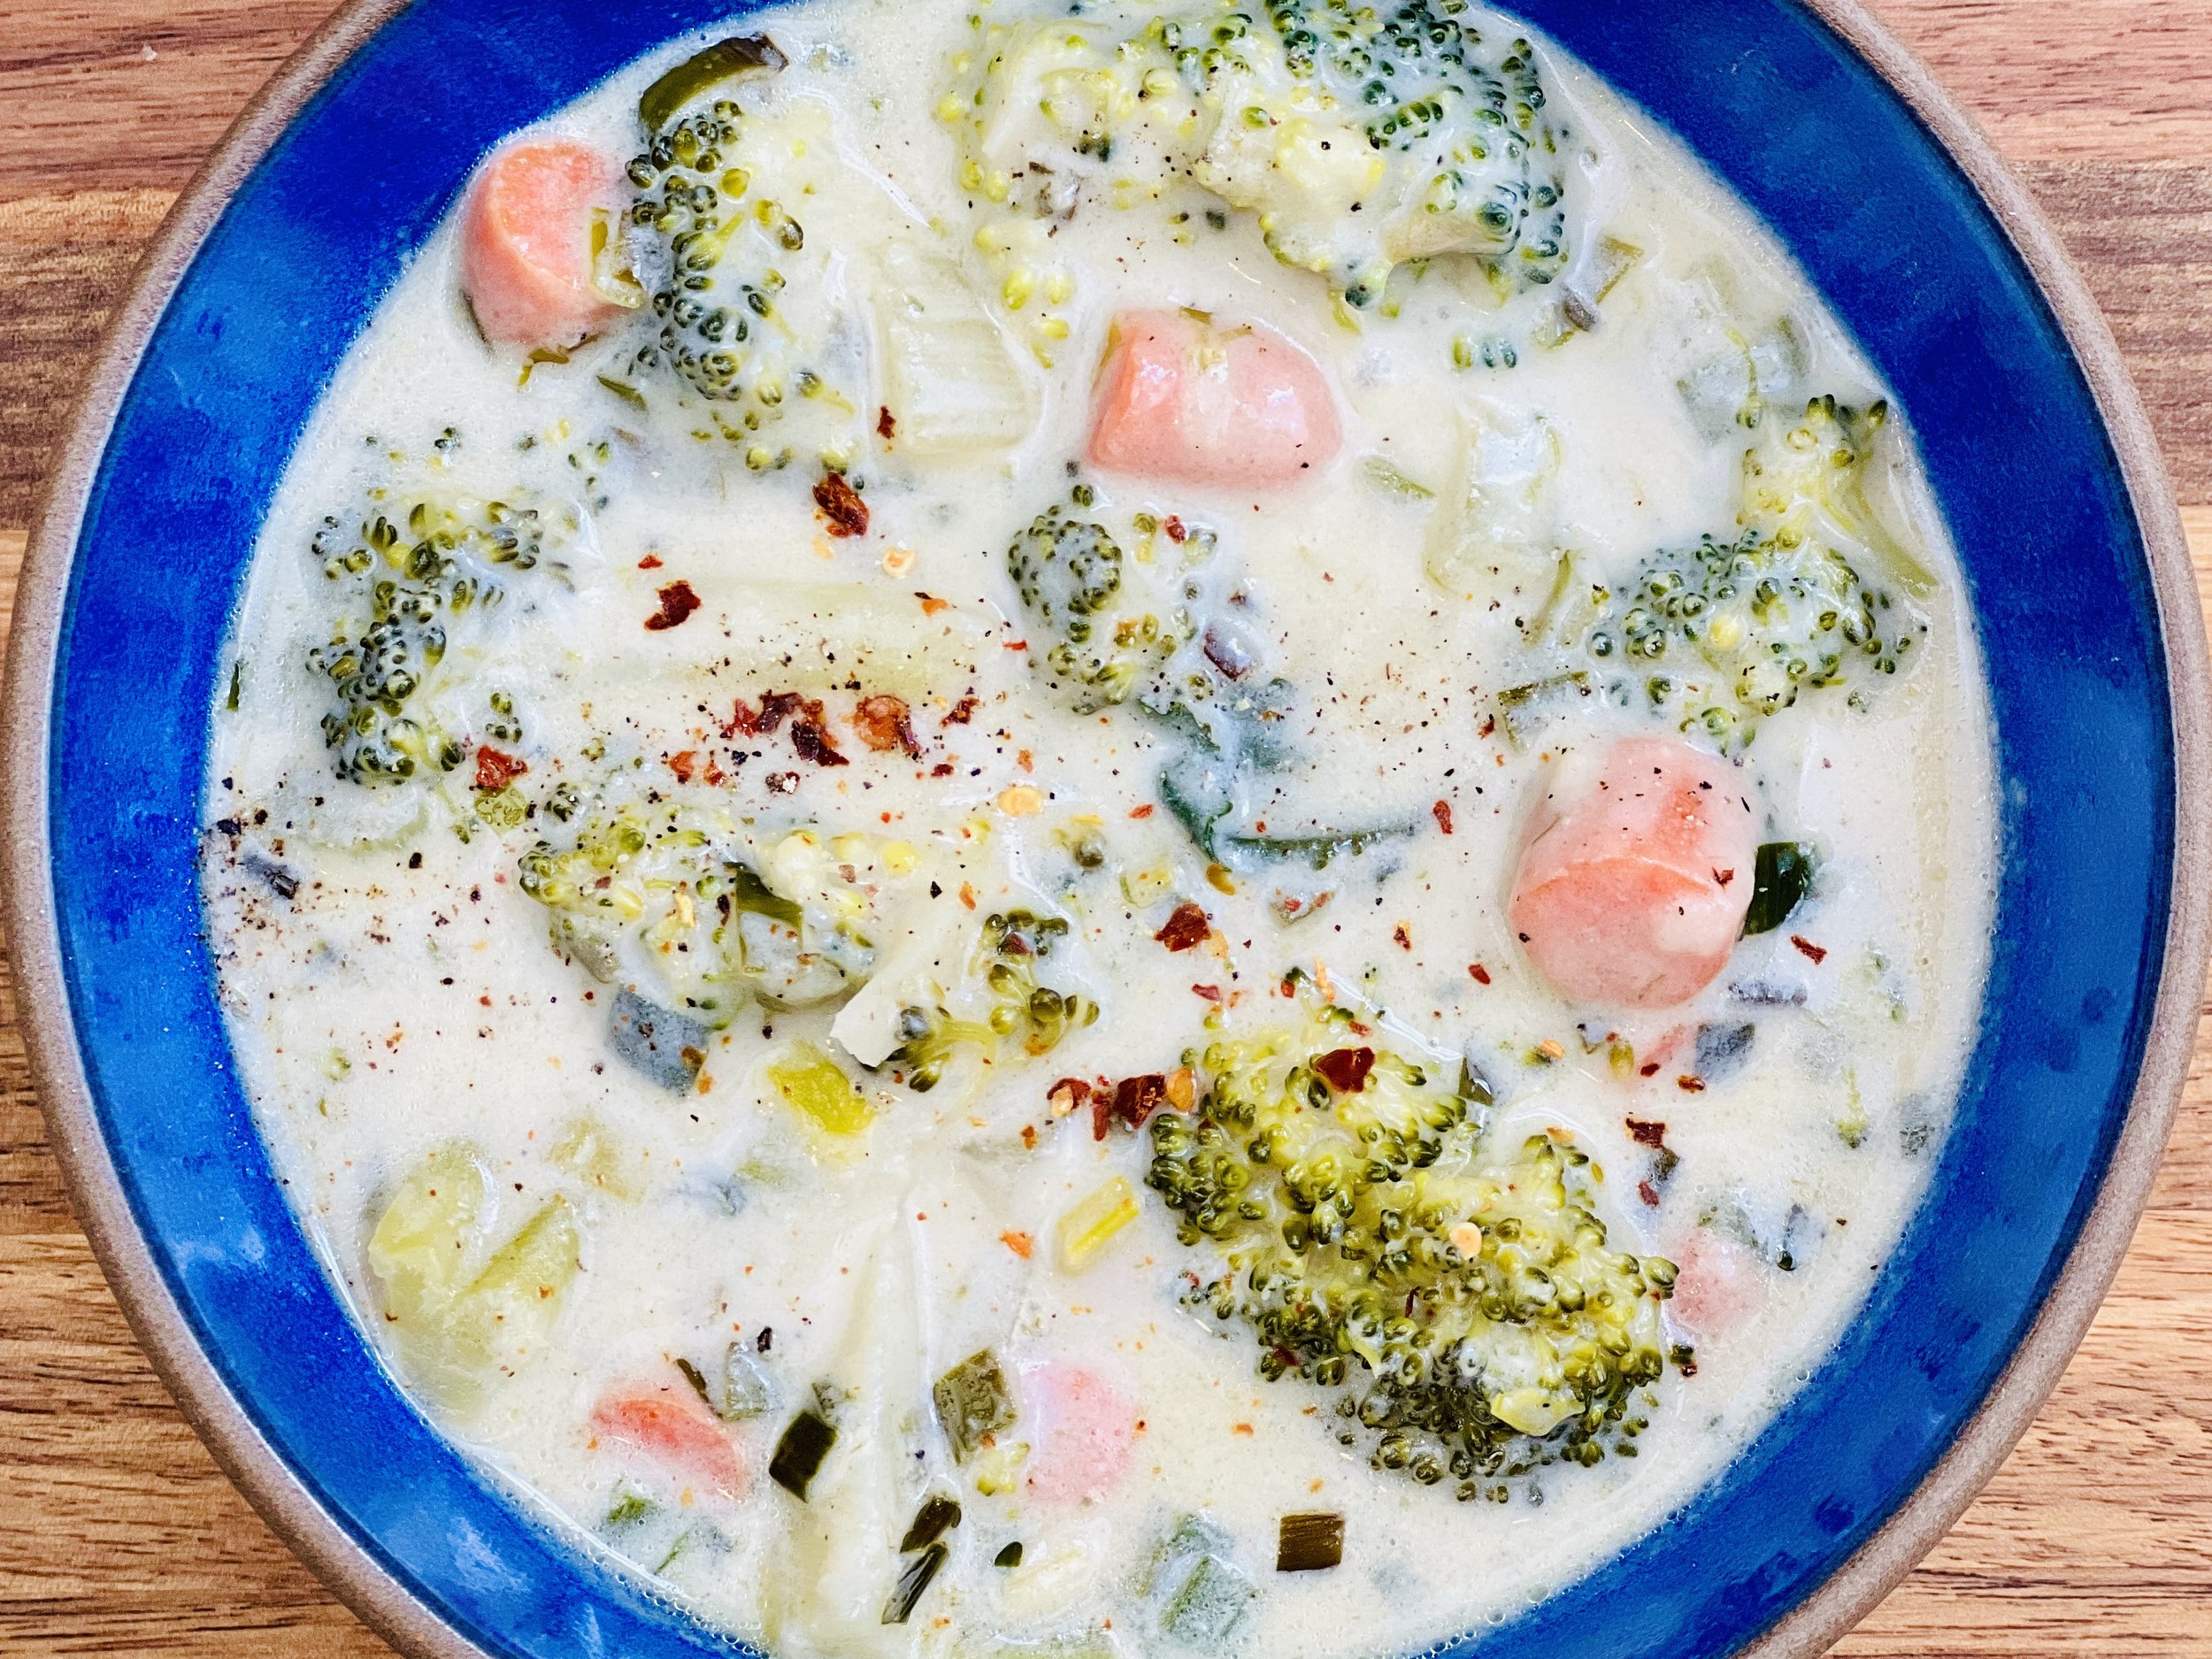
Zesty Roasted Lemon Parmesan Broccoli (Low FODMAP)
10 Minutes prep • 25 Minutes cook • Low FODMAP • Serves 4
10 Minutes prep • 25 Minutes cook • Low FODMAP • Serves 4 • Ok to make ahead: Step 1
Get ready to elevate your roasted broccoli game with this incredibly simple yet delicious recipe. It's all about that perfect trio of flavors – broccoli, zesty lemon, and rich Parmesan cheese. This simple side dish is not only a match made in heaven but also a breeze to prepare.
Ingredients
4 cups broccoli (florets only)
3 tablespoons garlic-infused olive oil
1 teaspoon Kosher salt
1/4 teaspoon freshly ground black pepper
1 teaspoon grated lemon zest
1 tablespoon freshly squeezed lemon juice
2 tablespoons salted butter, melted
1/2 cup freshly grated Parmesan cheese
Directions
(1) Prepare: Preheat the oven to 350 degrees F. Cut the broccoli into florets discarding the stalks (which contain the FODMAPs). Cut the larger pieces through the base of the head with a small knife, pulling the florets apart so all the florets are approximately the same size. You should have about 4 cups of florets. Place the broccoli florets in a bowl and drizzle with 3 tablespoons of garlic-infused olive oil. Toss well to combine. Sprinkle with the salt and pepper.
(2) Roast: Put the broccoli on a sheet pan large enough to hold them in a single layer. Roast for 15 minutes, then toss and flip them and spread into one layer again. Roast for another 10 minutes, until crisp, yet tender in the thickest part, and the tips of some of the florets are browned (I like them quite browned myself).
(3) Finish: Remove the broccoli from the oven and immediately toss with a mixture of 2 tablespoons of melted butter, lemon zest, lemon juice, and Parmesan cheese. If you like a crispier finish, turn the oven up to broil, return the pan to the oven, and broil until the cheese starts to crisp (about 2 minutes).
(4) Plate and serve: Serve warm.
Eat and enjoy every bite because you can!
Recipe note: I use Diamond Crystal Kosher salt in all my recipes because it has a wonderful flat and crisp flake that tastes delicious. It is also the least salty salt available so you can use it more liberally as a seasoning than you can table salt or sea salt. If you use another type of salt, you may need to reduce the amount so it is not over-salted.
Have a question you’d like to have answered? Email me at hello@ibsgamechanger.com
Link note: This post may contain affiliate links for you to easily purchase items that are linked. I may earn a small commission from qualifying purchases but none of this costs you a thing so feel free to use the links! In addition, for some items, I have provided a special discount code for IBS Game Changers so be sure to use the code when you purchase an item to get the discount that has been arranged just for you.
More Deliciously Low FODMAP™ side dish recipes
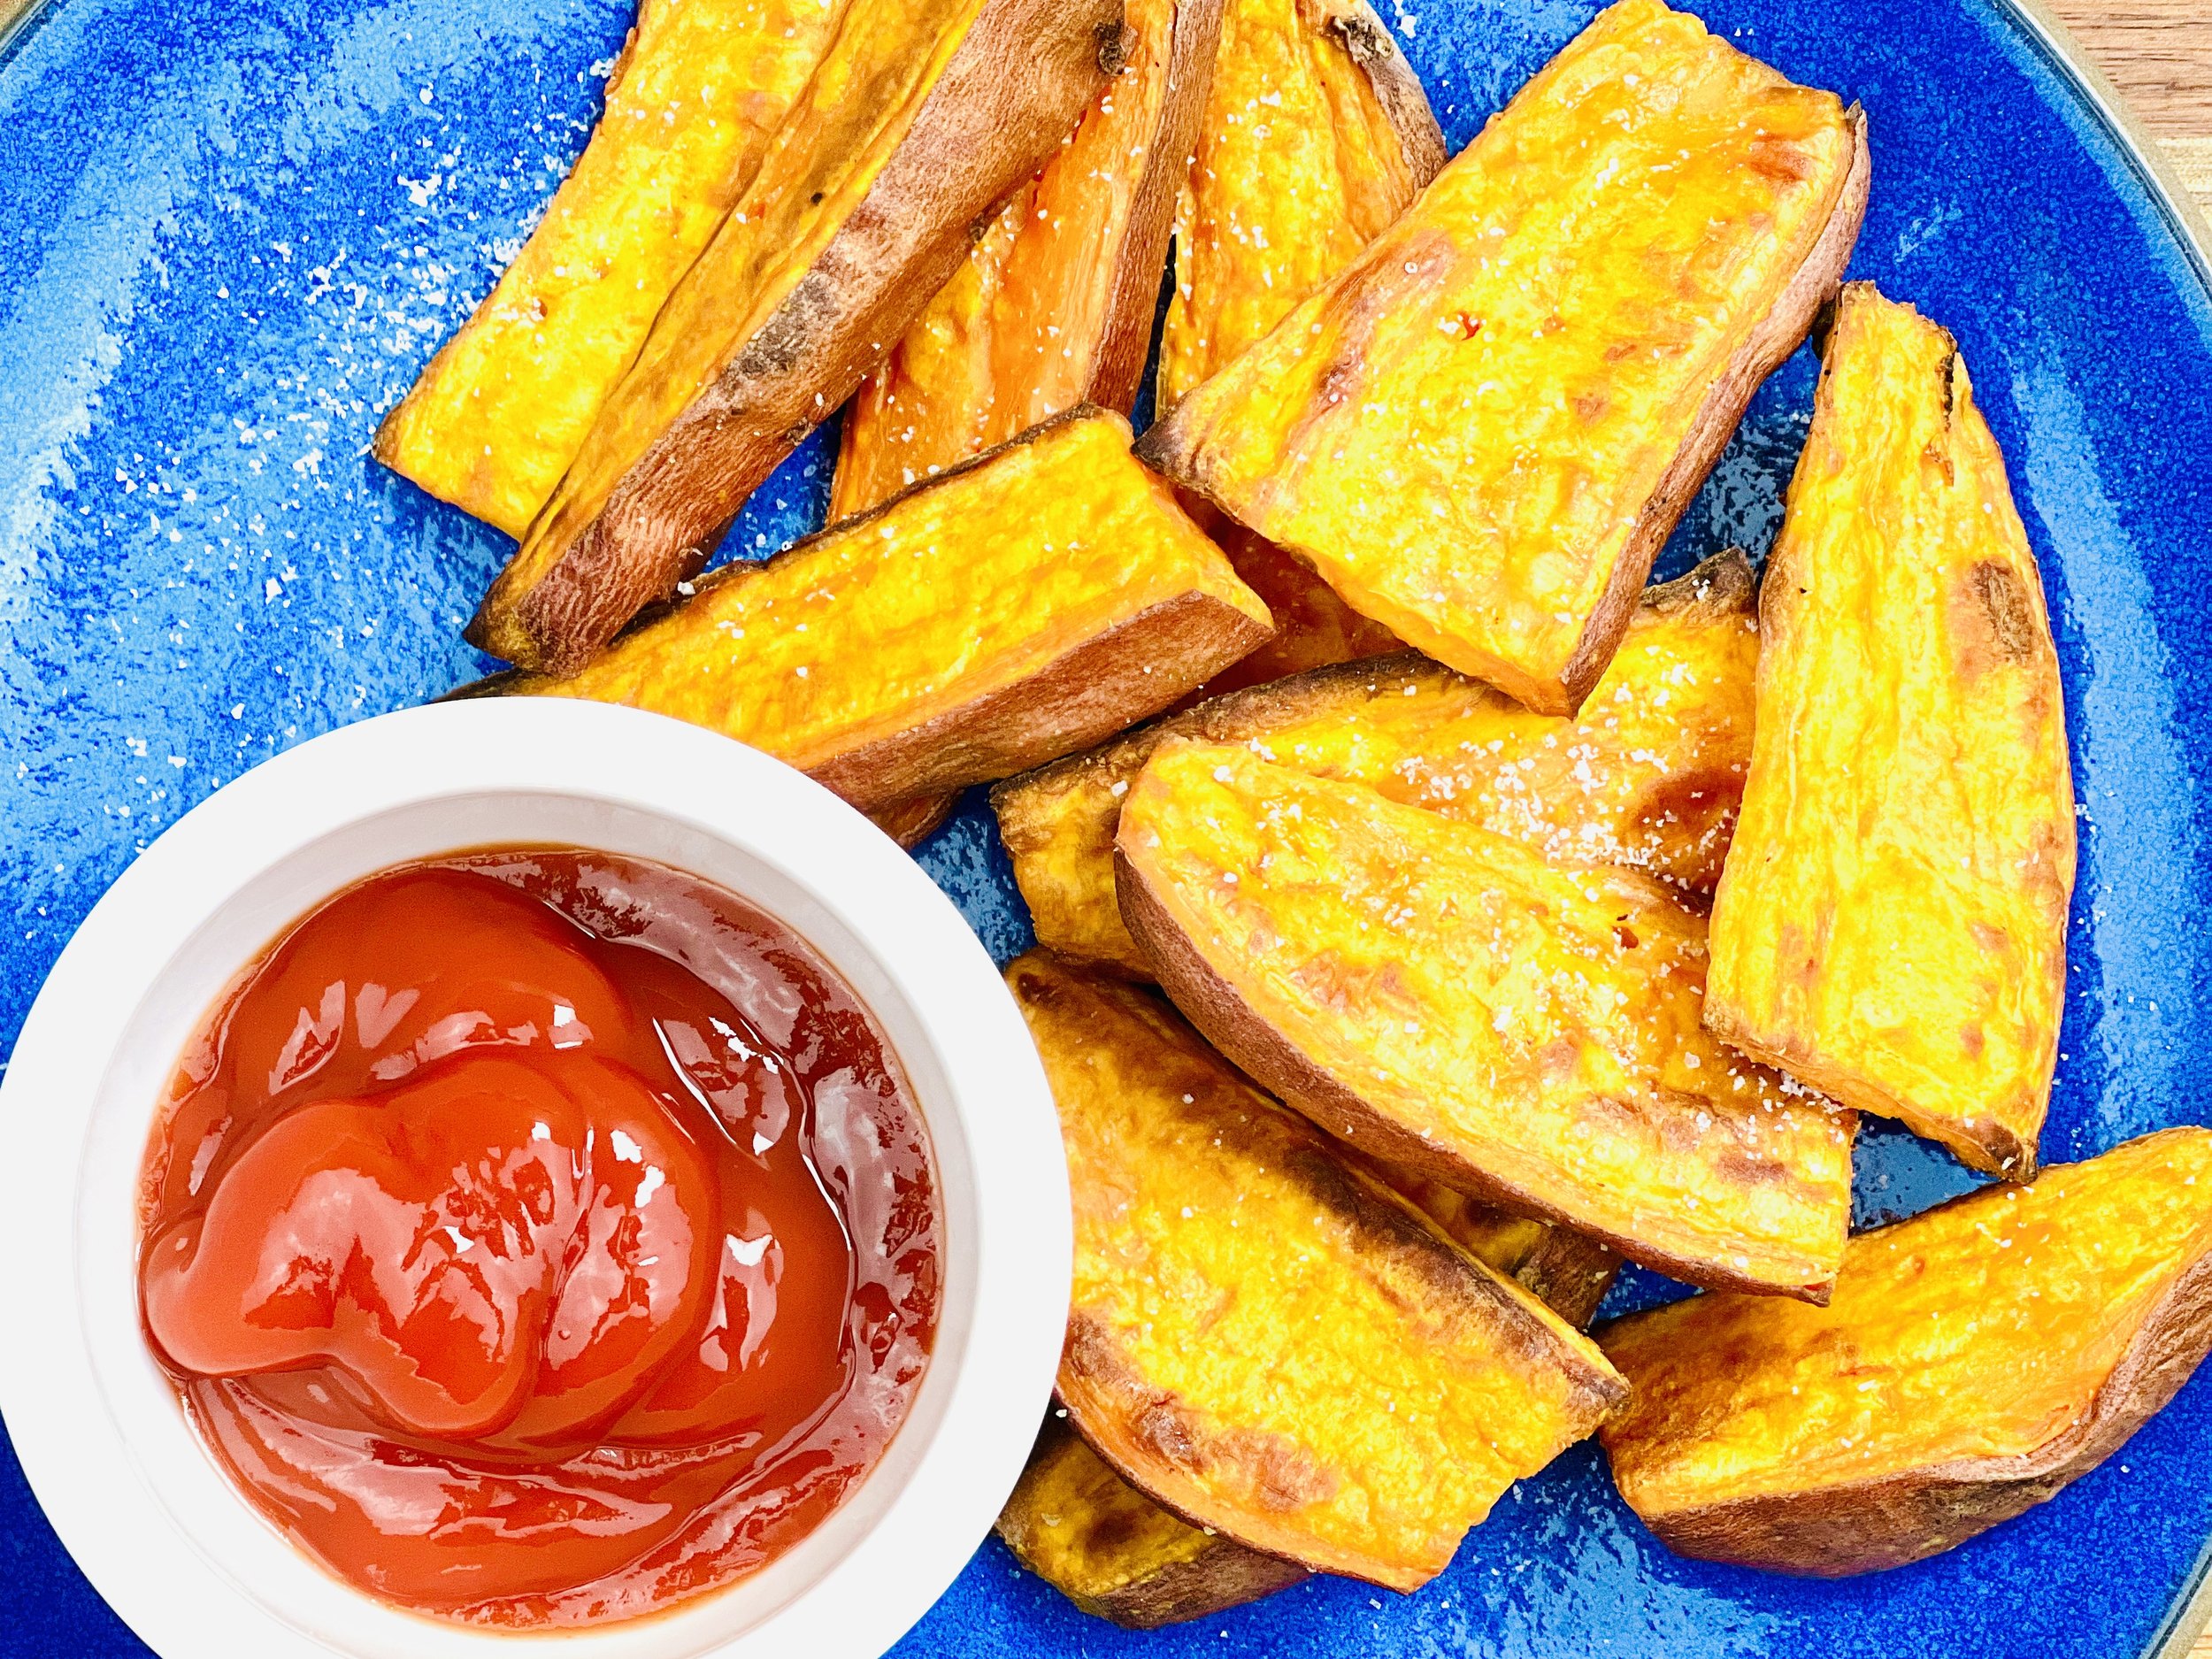
Easy Sweet Potato Wedge Fries (Low FODMAP)
10 Minutes prep • 40 Minutes cook • Low FODMAP • Gluten-free • Dairy-free • Services 4
10 Minutes prep • 40 Minutes cook • Low FODMAP • Gluten-free • Dairy-free • Serves 4 • Ok to make ahead: Step 1
Many thanks to my sister Sarah for sharing this great and simple recipe. Crisp on the outside and creamy smooth on the inside, these sweet potato fries are a delicious addition to just about any meal! They are easy to make and use only four ingredients you probably already have in your pantry. They are delicious plain or you can dip them in low-FODMAP ketchup or BBQ Sauce. Add a sweet potato to your shopping list and enjoy these delicious wedge fries tonight! (Keep in mind the low FODMAP serving of sweet potato is about 1/2 cup so, even though these are delicious, don’t eat the whole potato yourself!)
Ingredients
1 sweet potato, cut into wedges
1 tablespoon extra-virgin olive oil
1 teaspoon Kosher salt
1/4 - 1/2 teaspoon Black pepper
Directions
(1) Prepare: Wash and cut sweet potato into wedges. Line a rimmed baking sheet with parchment paper. Preheat oven to 425 degrees F.
(2) Combine: Put the potato wedges in a bowl and drizzle them with olive oil. Toss well to coat. Spread out on parchment lined rimmed cookie sheet, slab side down, and with skin facing the same direction so you can keep track when flipping them over. Sprinkle lightly with salt and pepper.
(3) Bake: Bake for 20 minutes at 425 degrees F. Flip the potato wedges over and bake another 20 minutes, being careful not to burn.
(4) Plate and serve: Serve plain or with your favorite low-FODMAP ketchup or BBQ Sauce.
Eat and enjoy every bite because you can!
Recipe note: I use Diamond Crystal Kosher salt in all my recipes because it has a wonderful flat and crisp flake that tastes delicious. It is also the least salty salt available so you can use it more liberally as a seasoning than you can table salt or sea salt. If you use another type of salt, you may need to reduce the amount so it is not over-salted.
Have a question you’d like to have answered? Email me at hello@ibsgamechanger.com
Link note: This post may contain affiliate links for you to easily purchase items that are linked. I may earn a small commission from qualifying purchases but none of this costs you a thing so feel free to use the links! In addition, for some items, I have provided a special discount code for IBS Game Changers so be sure to use the code when you purchase an item to get the discount that has been arranged just for you.
More Deliciously Low FODMAP™ side dish recipes
10 Minutes prep • 20 Minutes cook • Low FODMAP • Gluten-free • Serves 4 - 6 • Ok to make ahead: Steps 1-3