Deliciously Low FODMAP

Inspire yourself with hundreds of delicious low FODMAP recipes, tips, and tools, and enjoy the abundance that is yours even when you have IBS.
Use the buttons and filters to find something specific or browse the complete collection for inspiration.
Discover a treasure trove of recipes with my FREE recipe club! Get new ideas delivered straight to your inbox every week.
Deliciously Low FODMAP is a trademark of IBS Game Changer, LLC
Filter to find Recipes and Tools
More Filtering Options
- All 827
- Appetizer 56
- BBQ 49
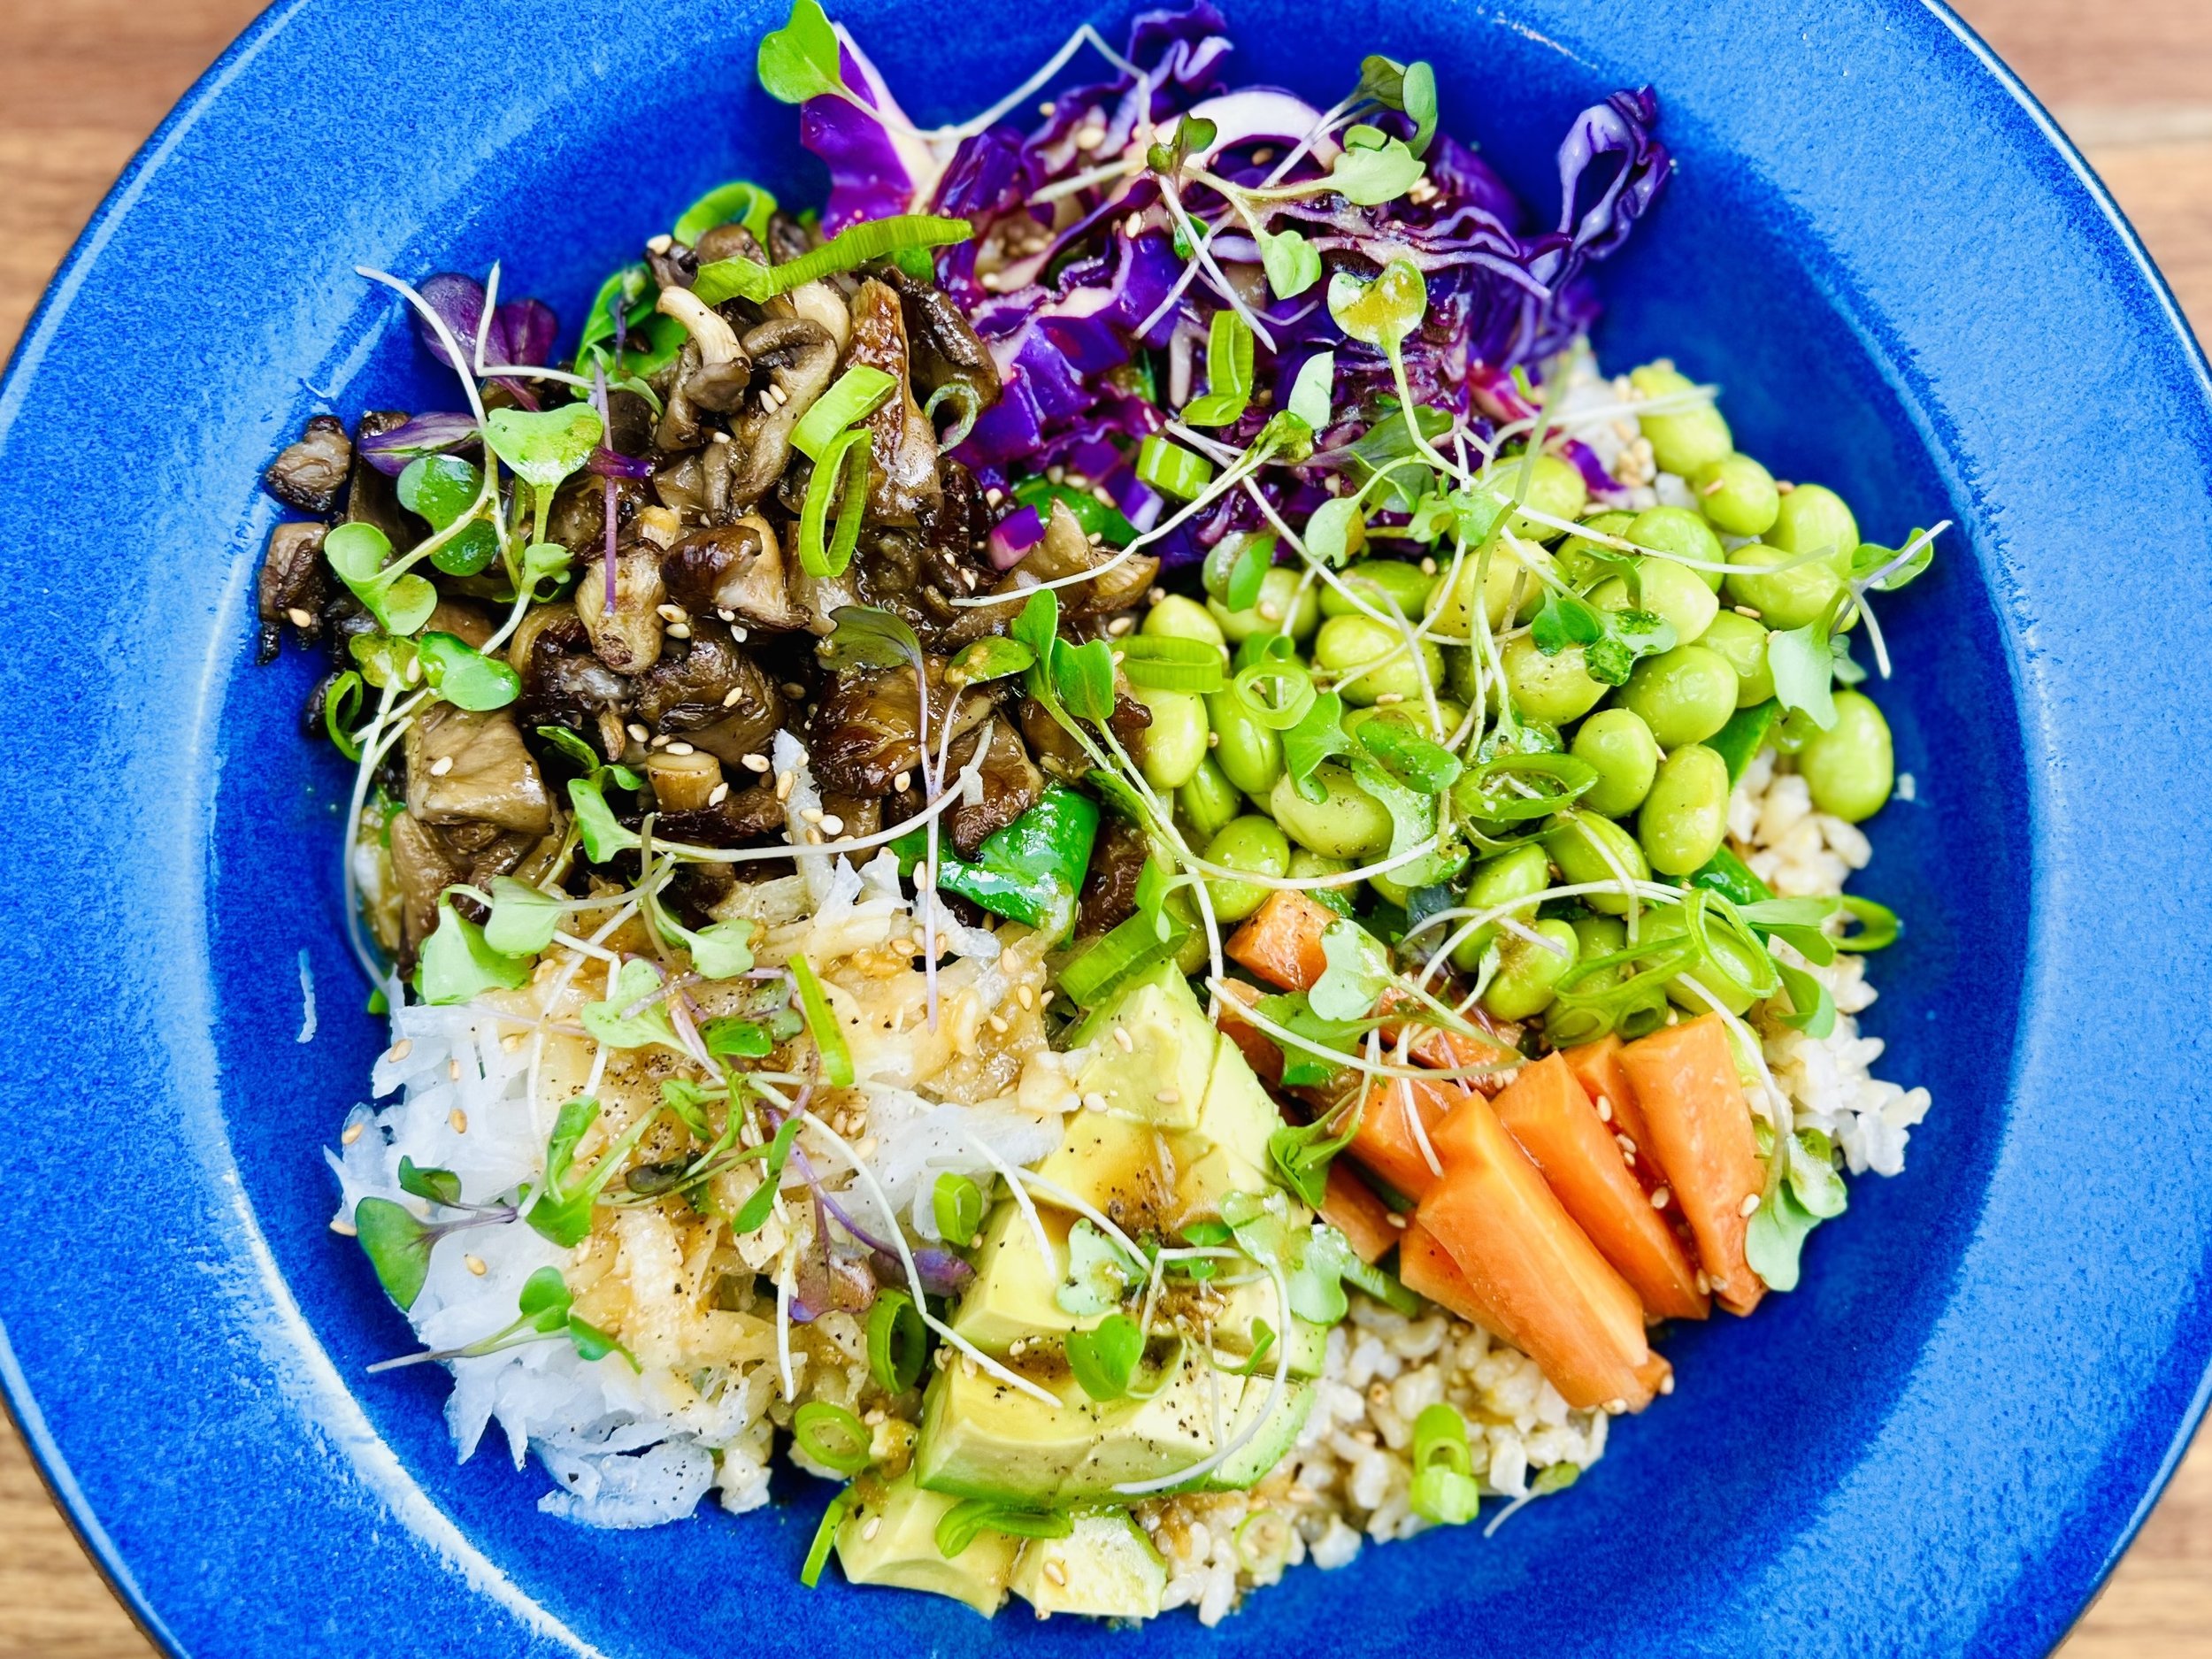
- Bowl 32
- Breakfast 69
- Cocktails 13
- Collection 1 58
- Collection 10 27
- Collection 11 30
- Collection 12 27
- Collection 13 31
- Collection 14 29
- Collection 15 31
- Collection 16 34
- Collection 17 31
- Collection 18 33
- Collection 19 36
- Collection 2 32
- Collection 20 33
- Collection 21 33
- Collection 22 40
- Collection 23 63
- Collection 24 46
- Collection 3 28
- Collection 4 29
- Collection 5 30
- Collection 6 32
- Collection 7 31
- Collection 8 31
- Collection 9 32
- Condiments 6
- Crock Pot 4
- Dessert 119
- Diabetes Game Changer Exception Protocol Contains Alcohol 11
- Diabetes Game Changer Exception Protocol Contains Flour 113
- Diabetes Game Changer Exception Protocol Contains Flour AND Sugar 79
- Diabetes Game Changer Exception Protocol Contains Sugar 52
- Diabetes Game Changer First Four Weeks 405
- Dinner 371
- Drink 8
- Easter 1
- Free Guide 17
- Gluten-free 686
- Gut Microbiome 2
- Guthealth 3
- Holidays 73
- IBS Triggers 4
- Keto Friendly 178
- Lactose-Free 184
- Low Carb 22
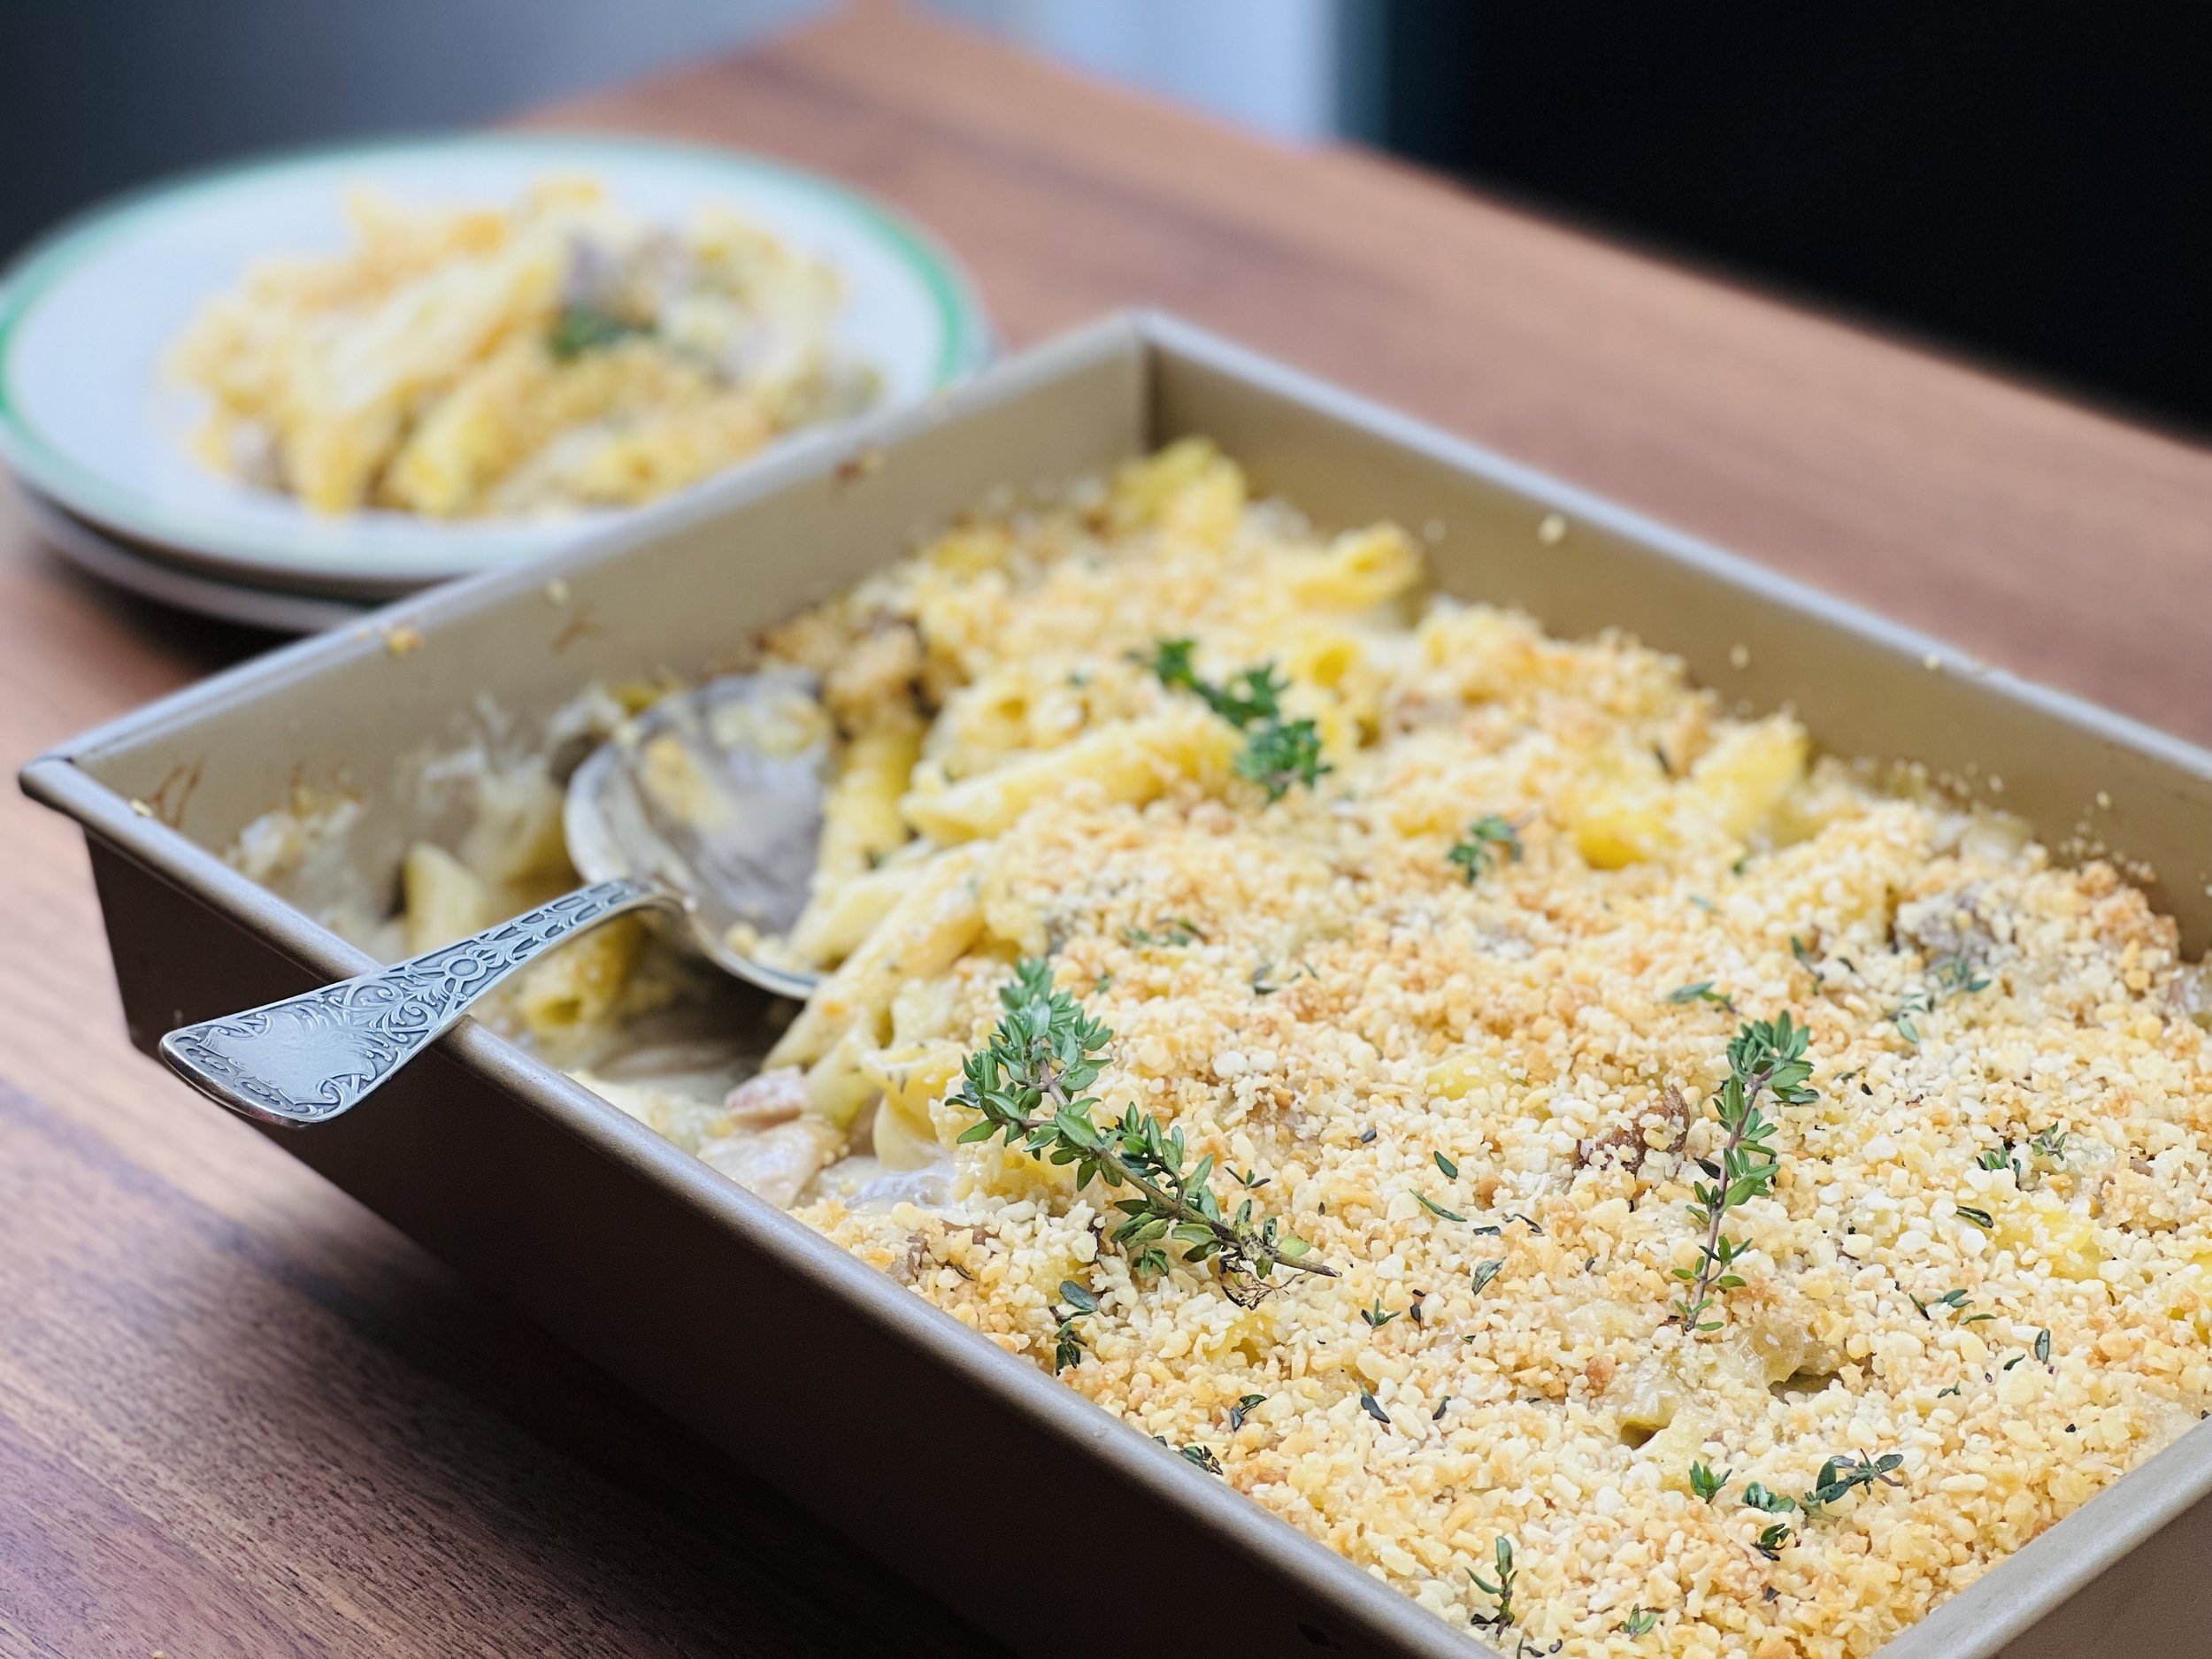
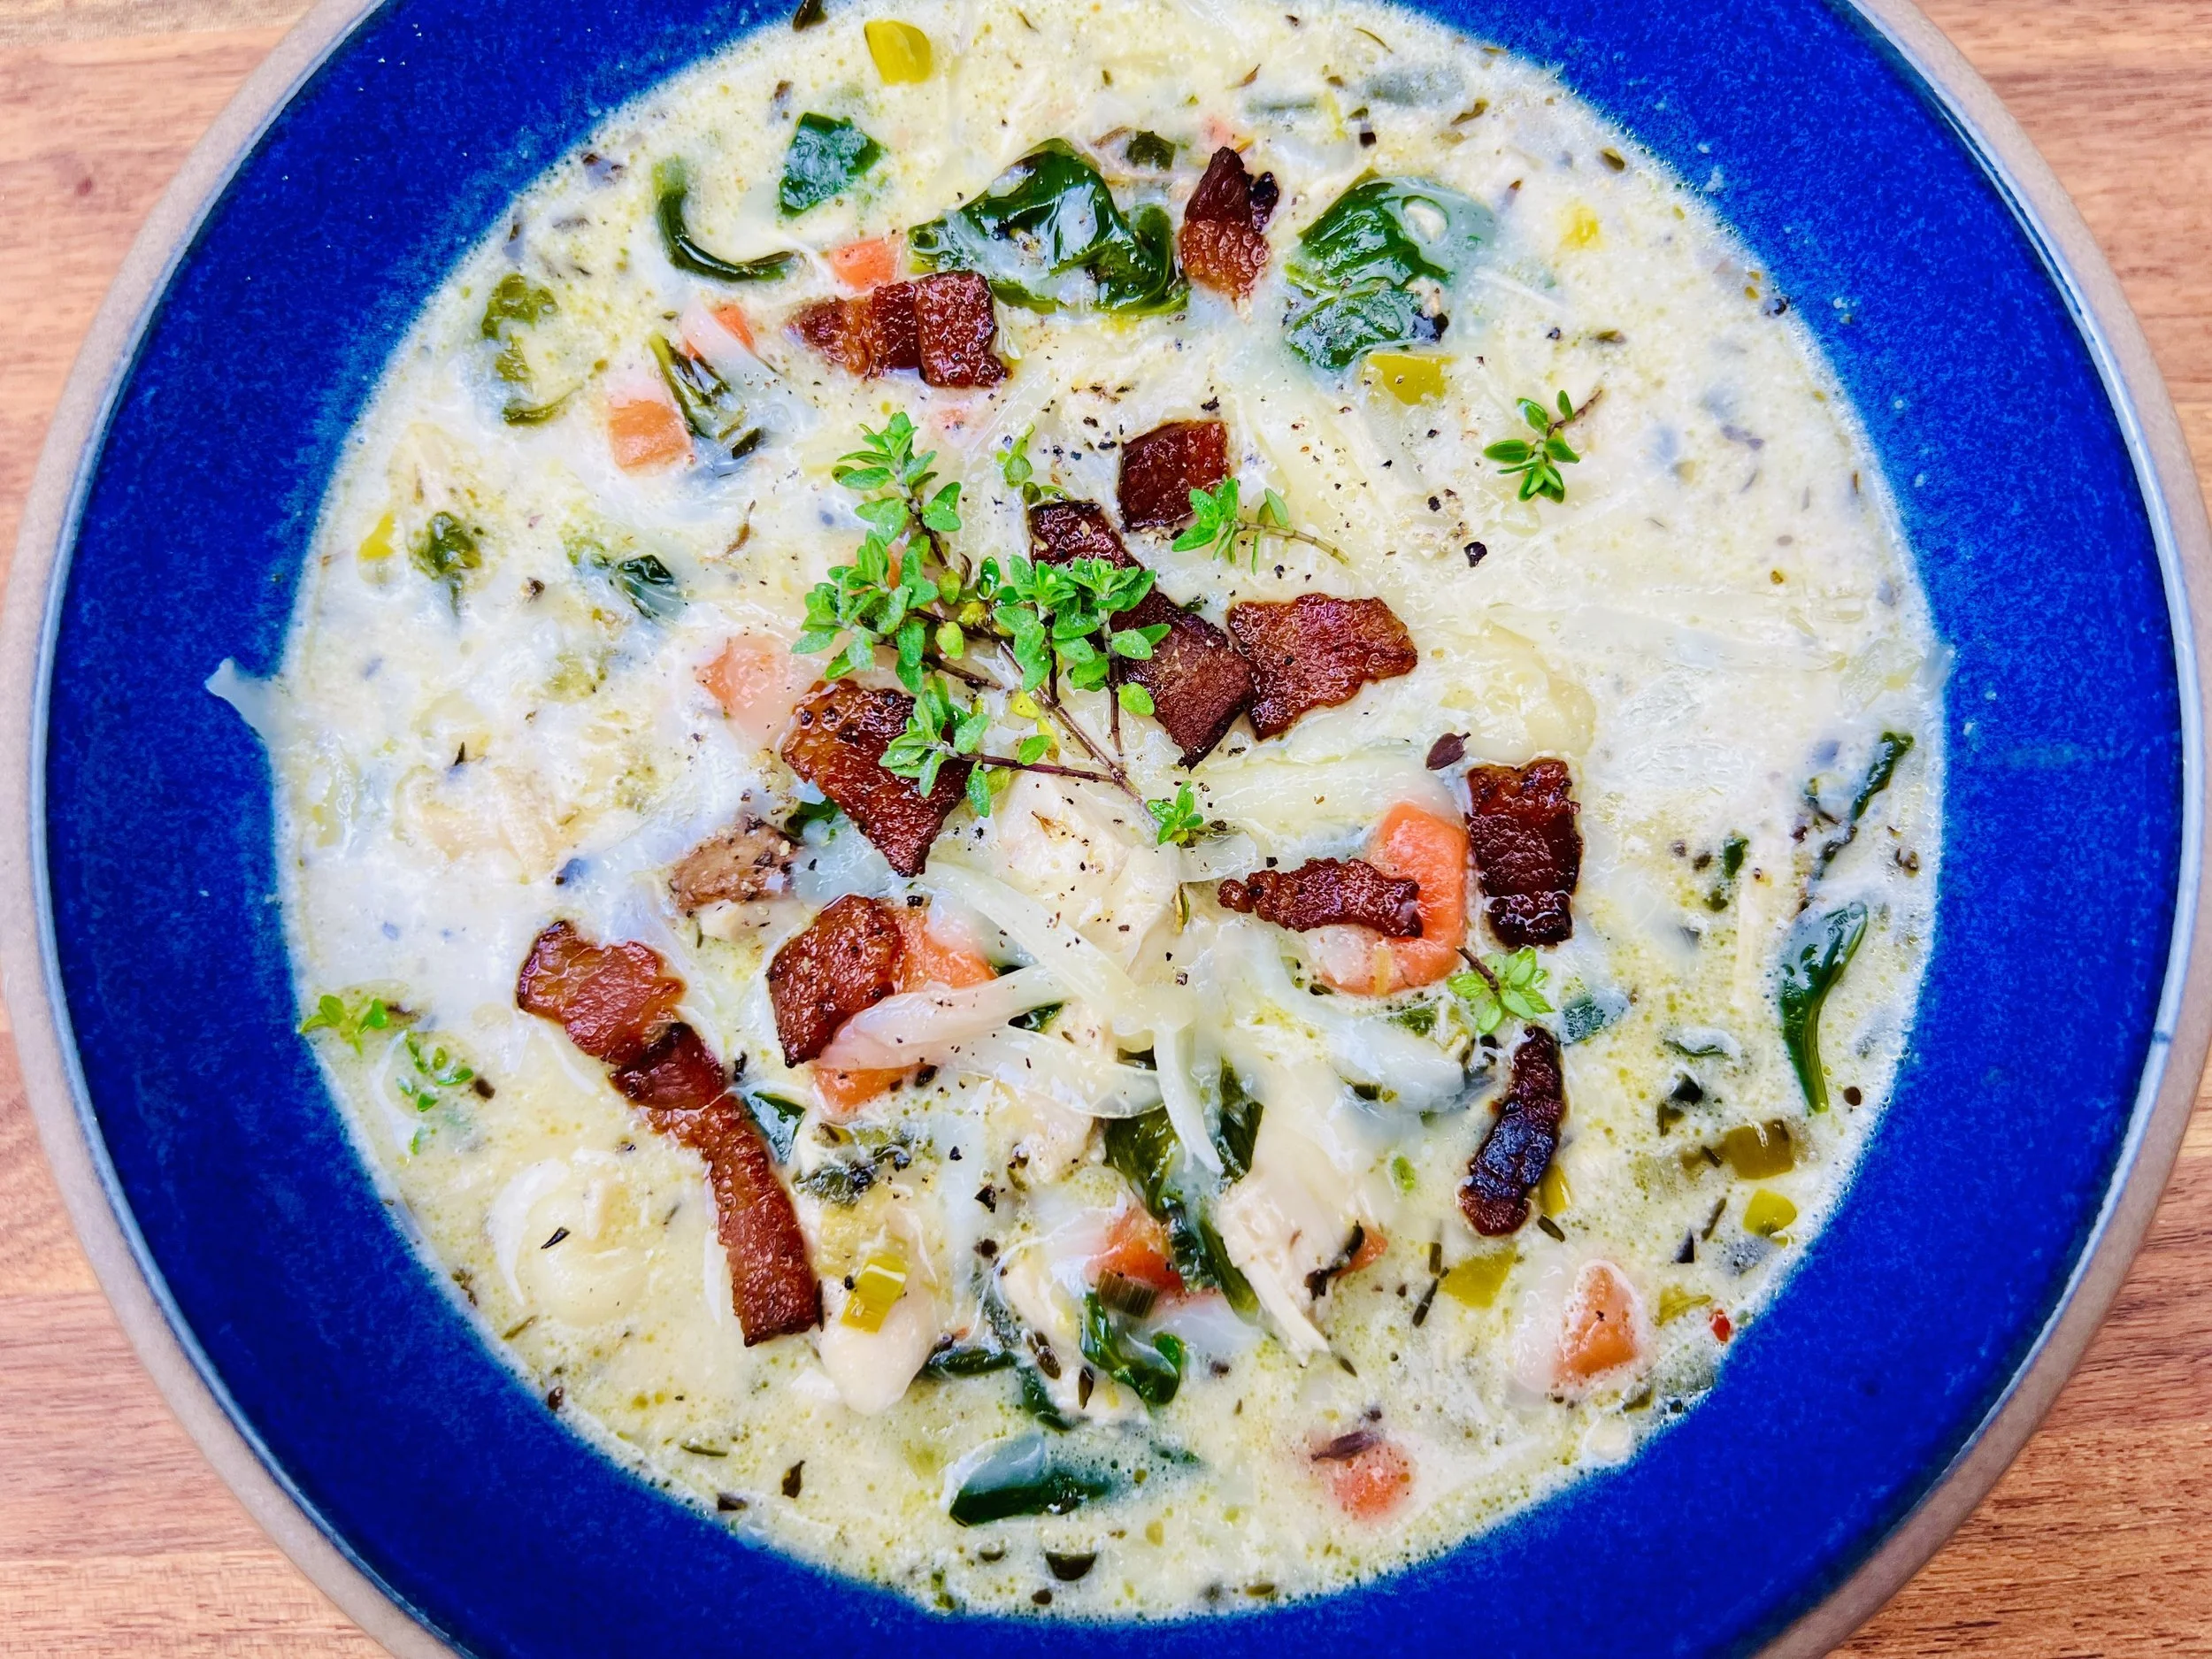
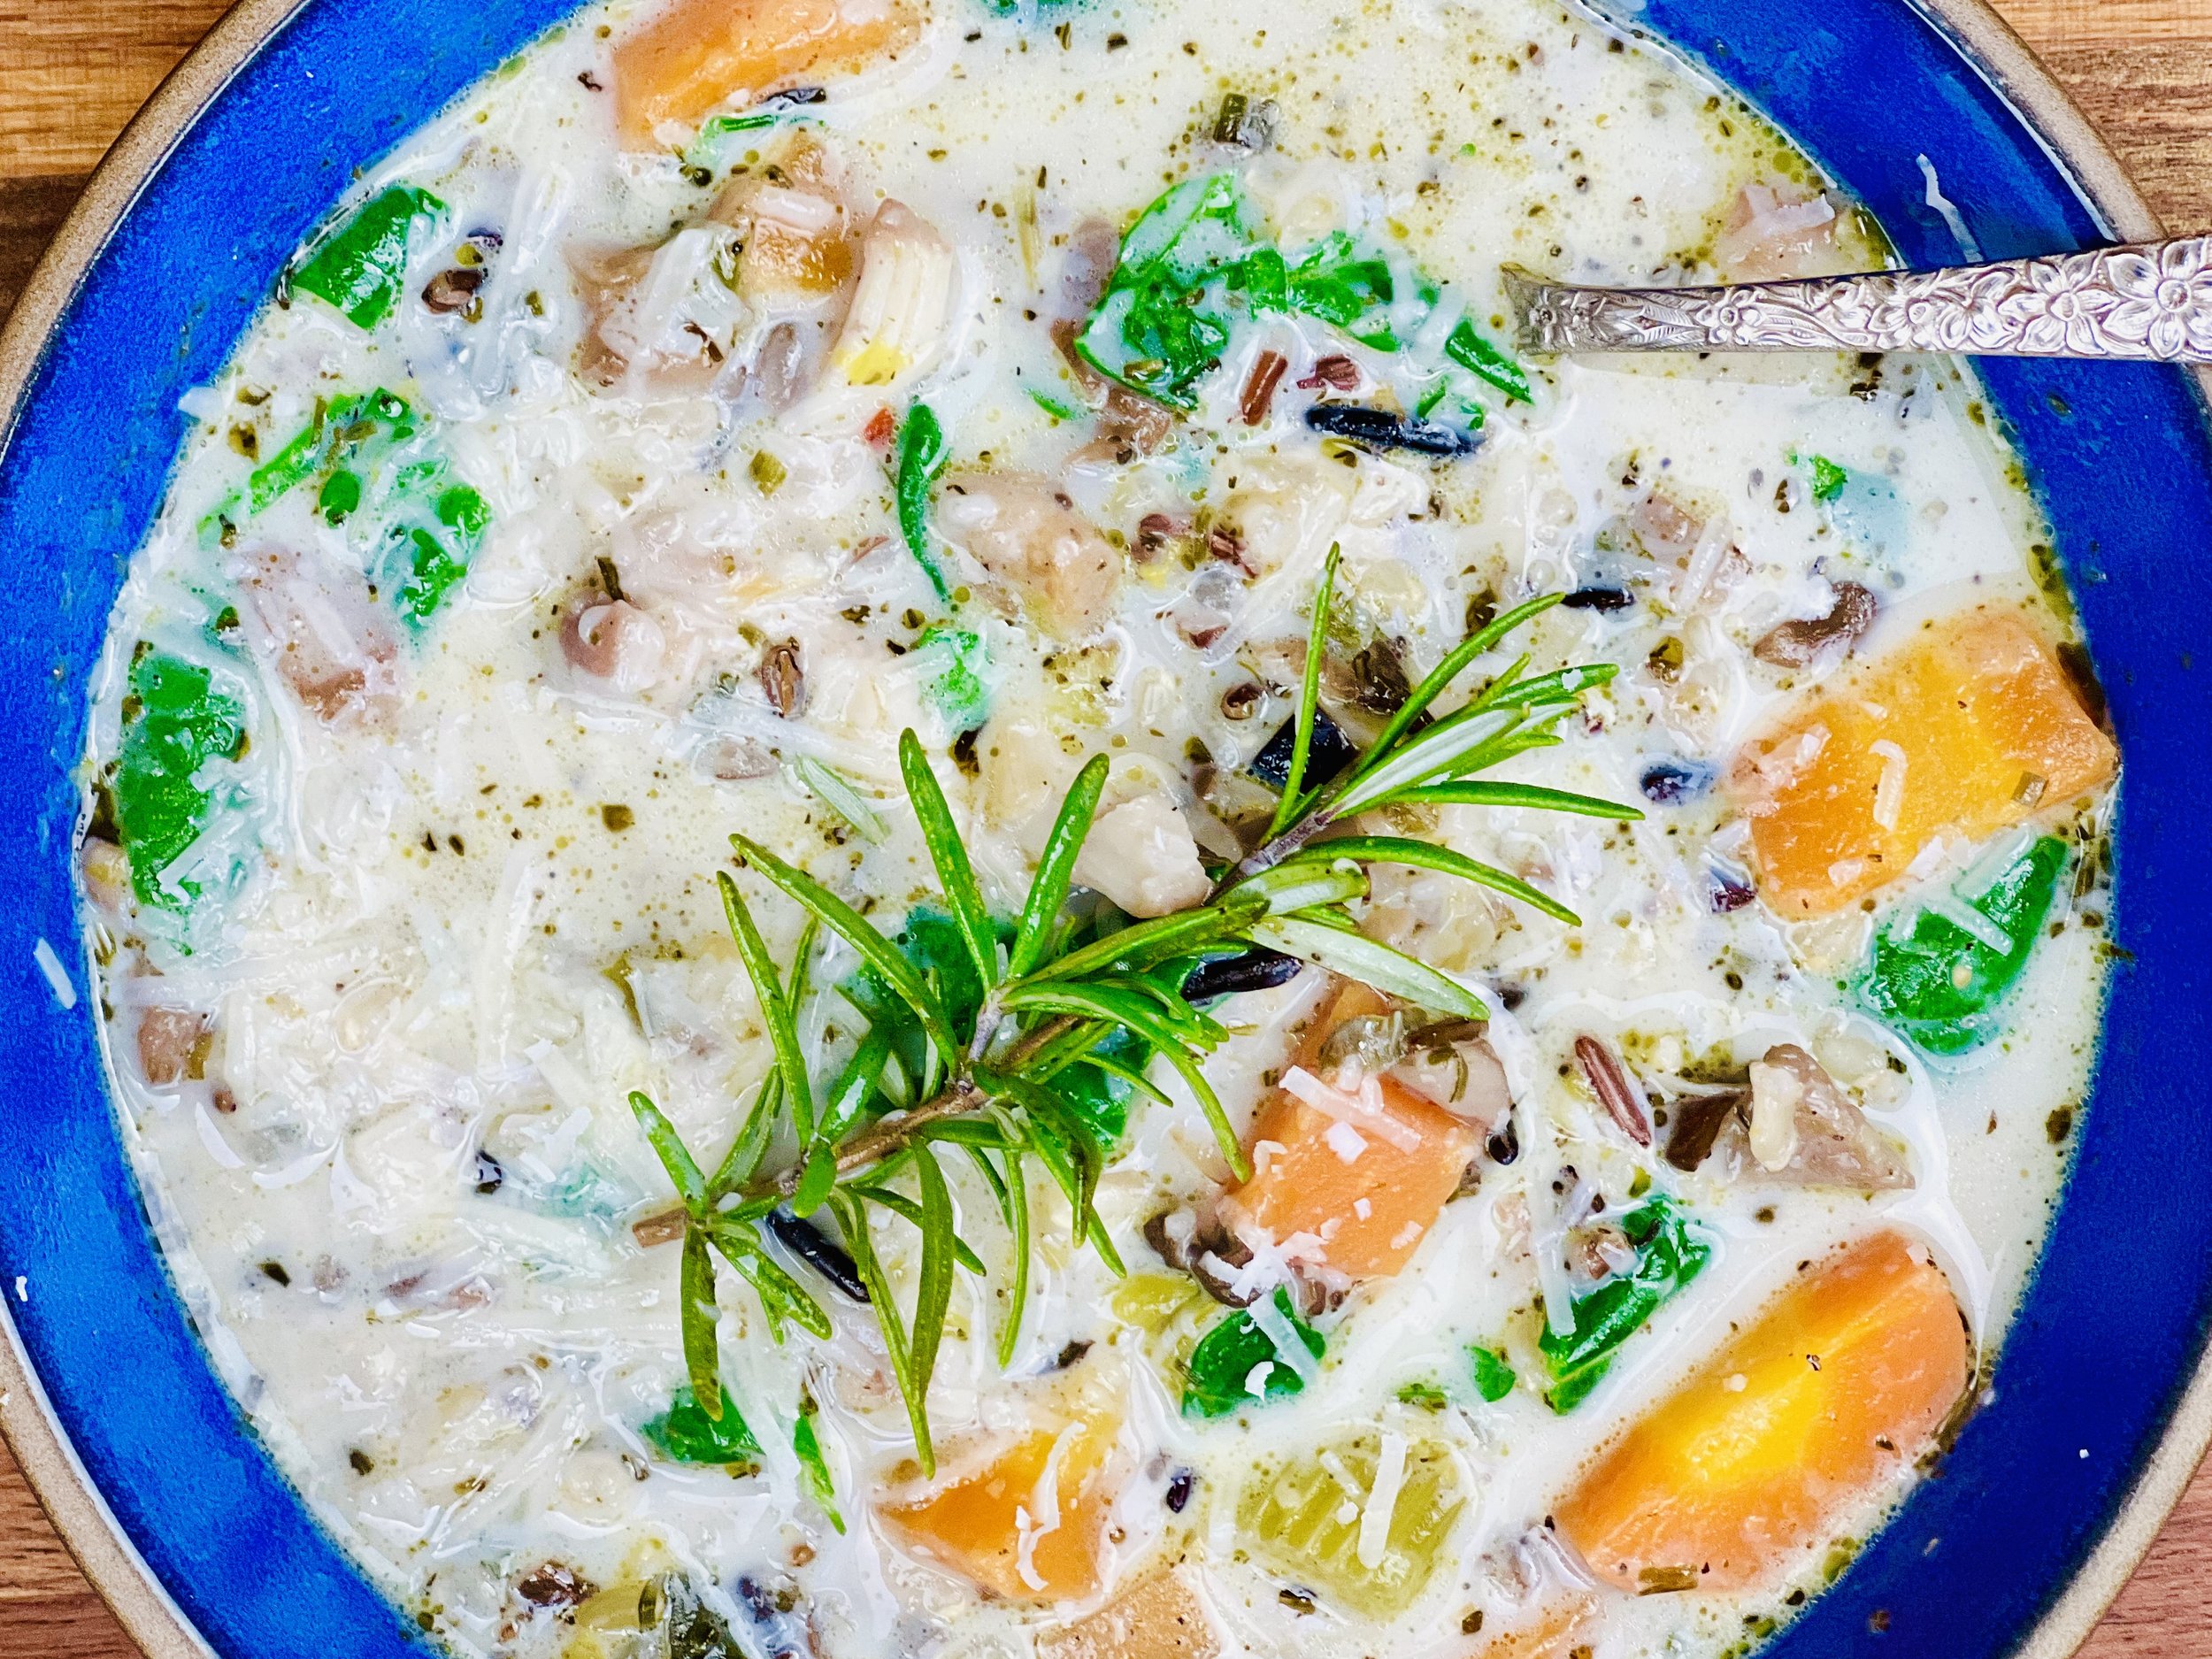
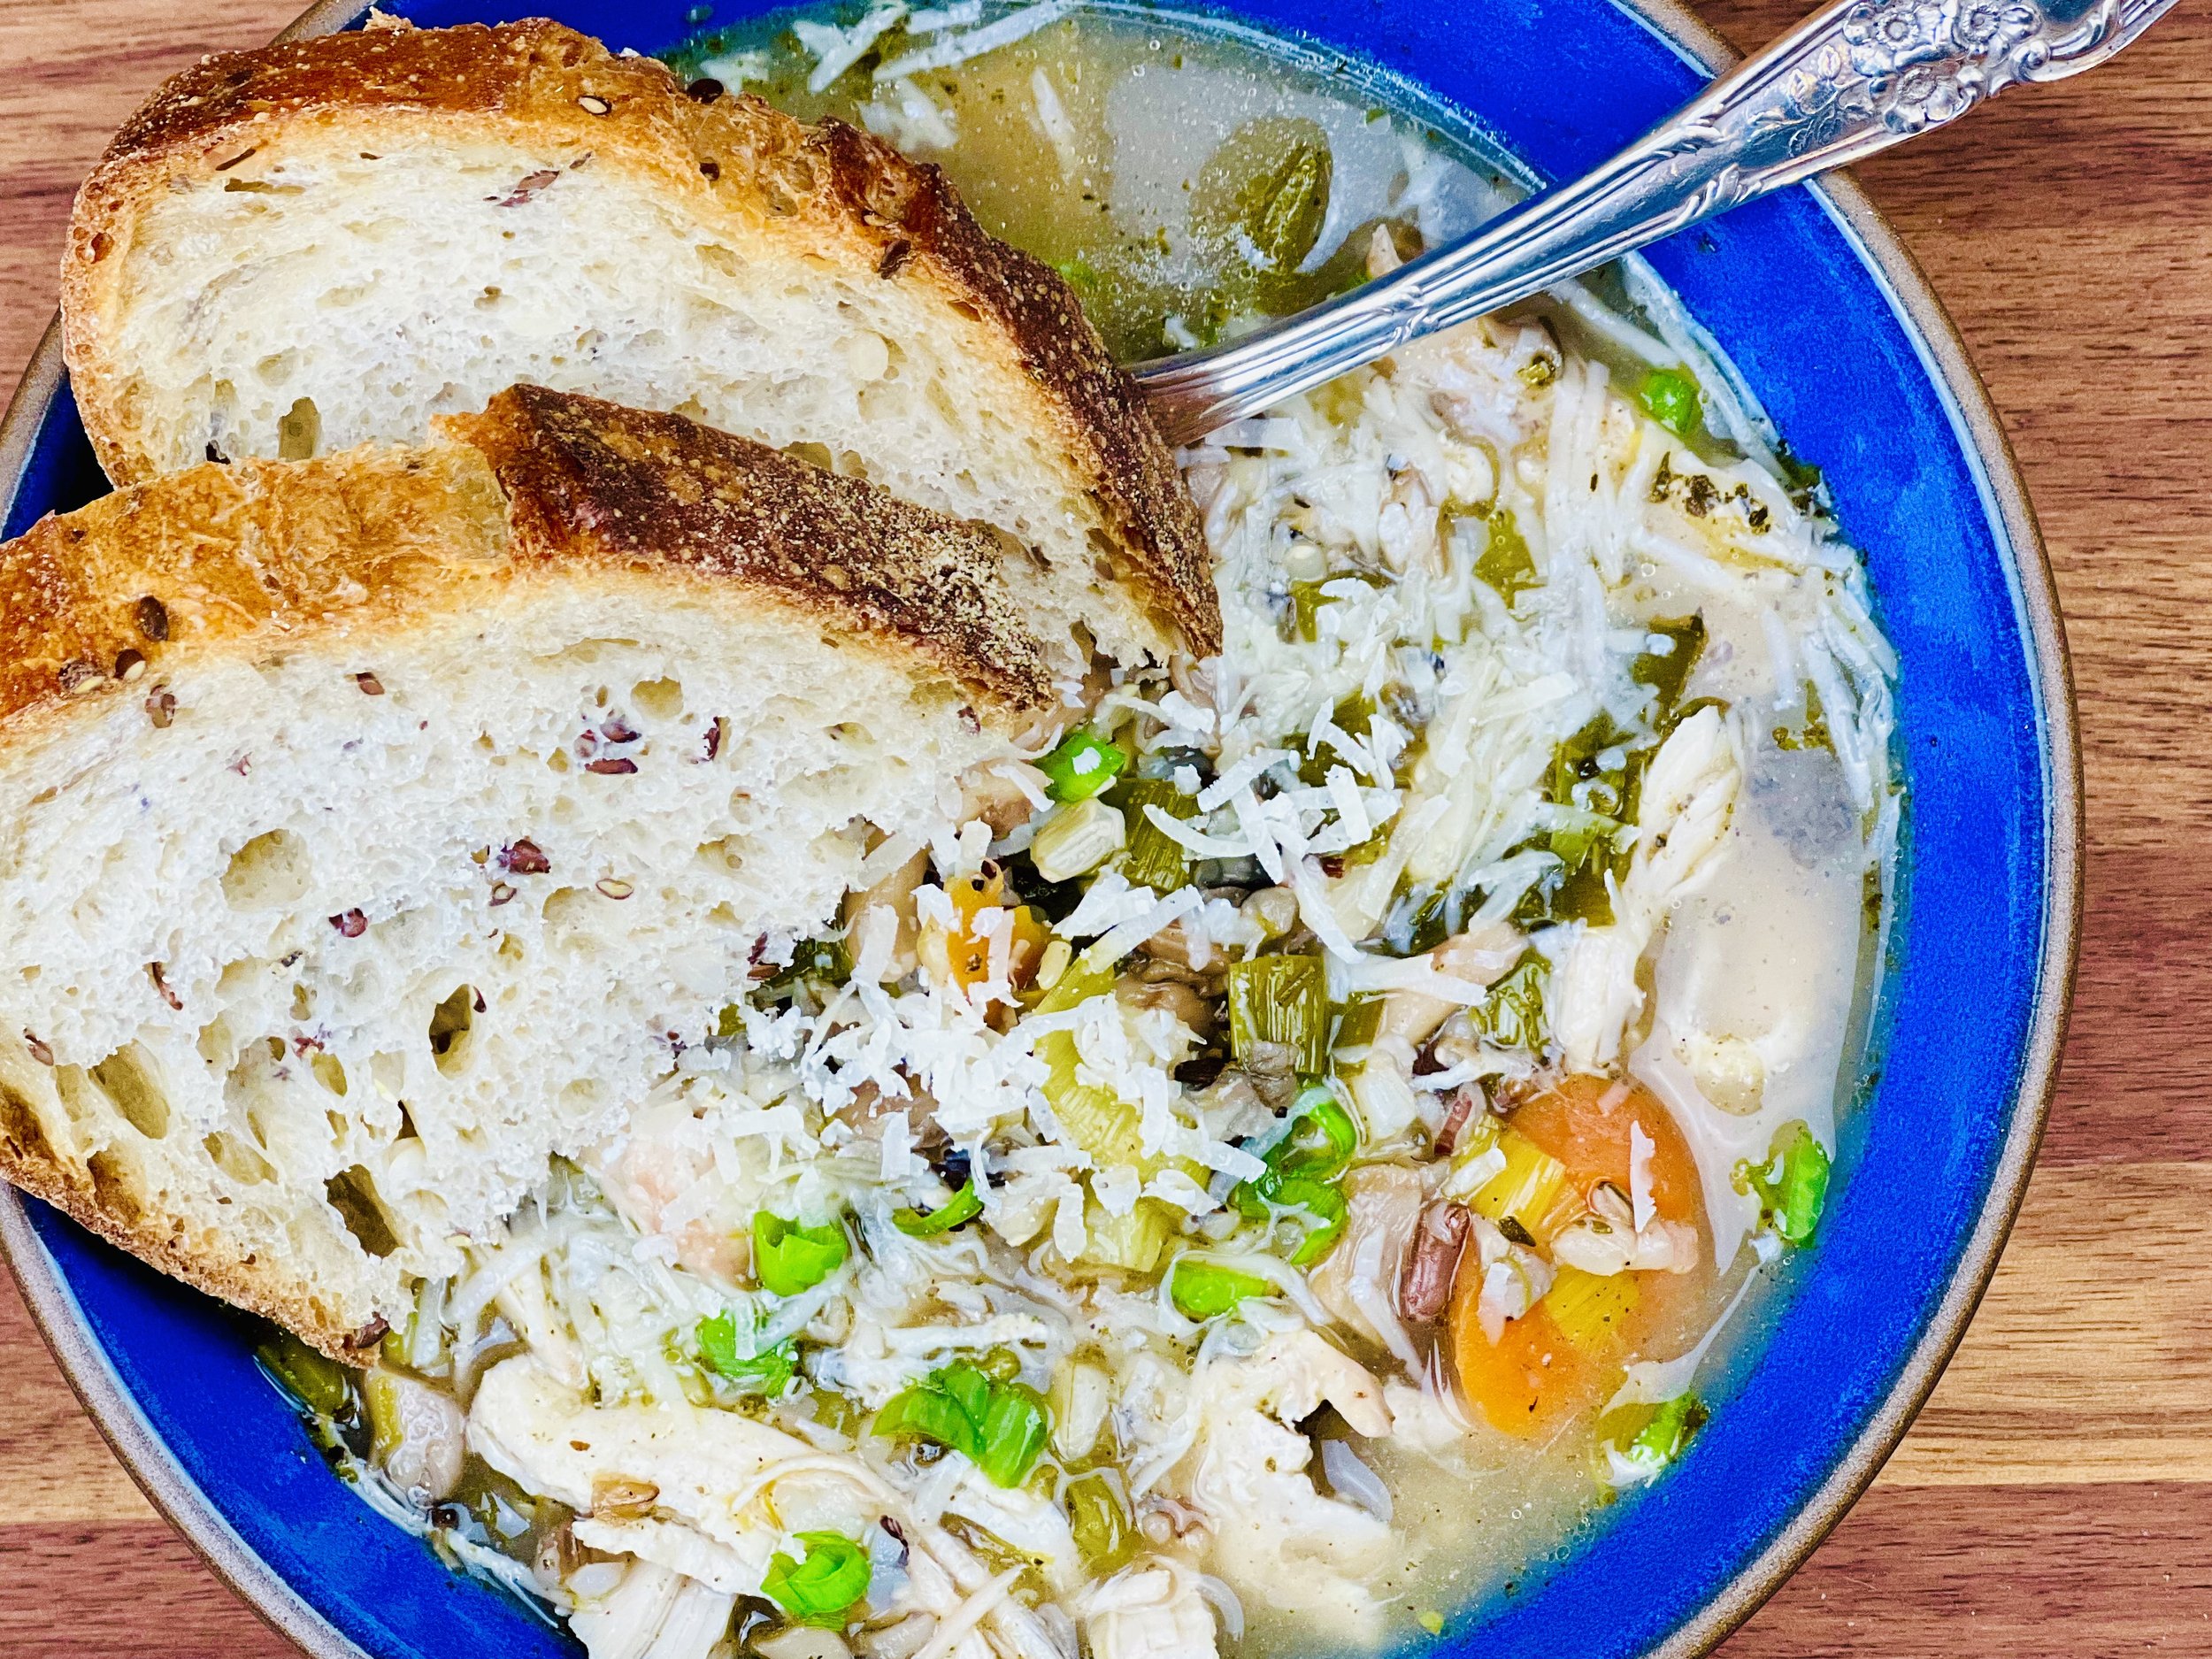
Extra Special Turkey Tetrazzini (low FODMAP)
20 minutes prep • 25 minutes cook • Low FODMAP • Gluten-free • Serves 6
20 minutes prep • 25 minutes cook • Low FODMAP • Gluten-free • Serves 6 • Ok to make ahead: Step 1
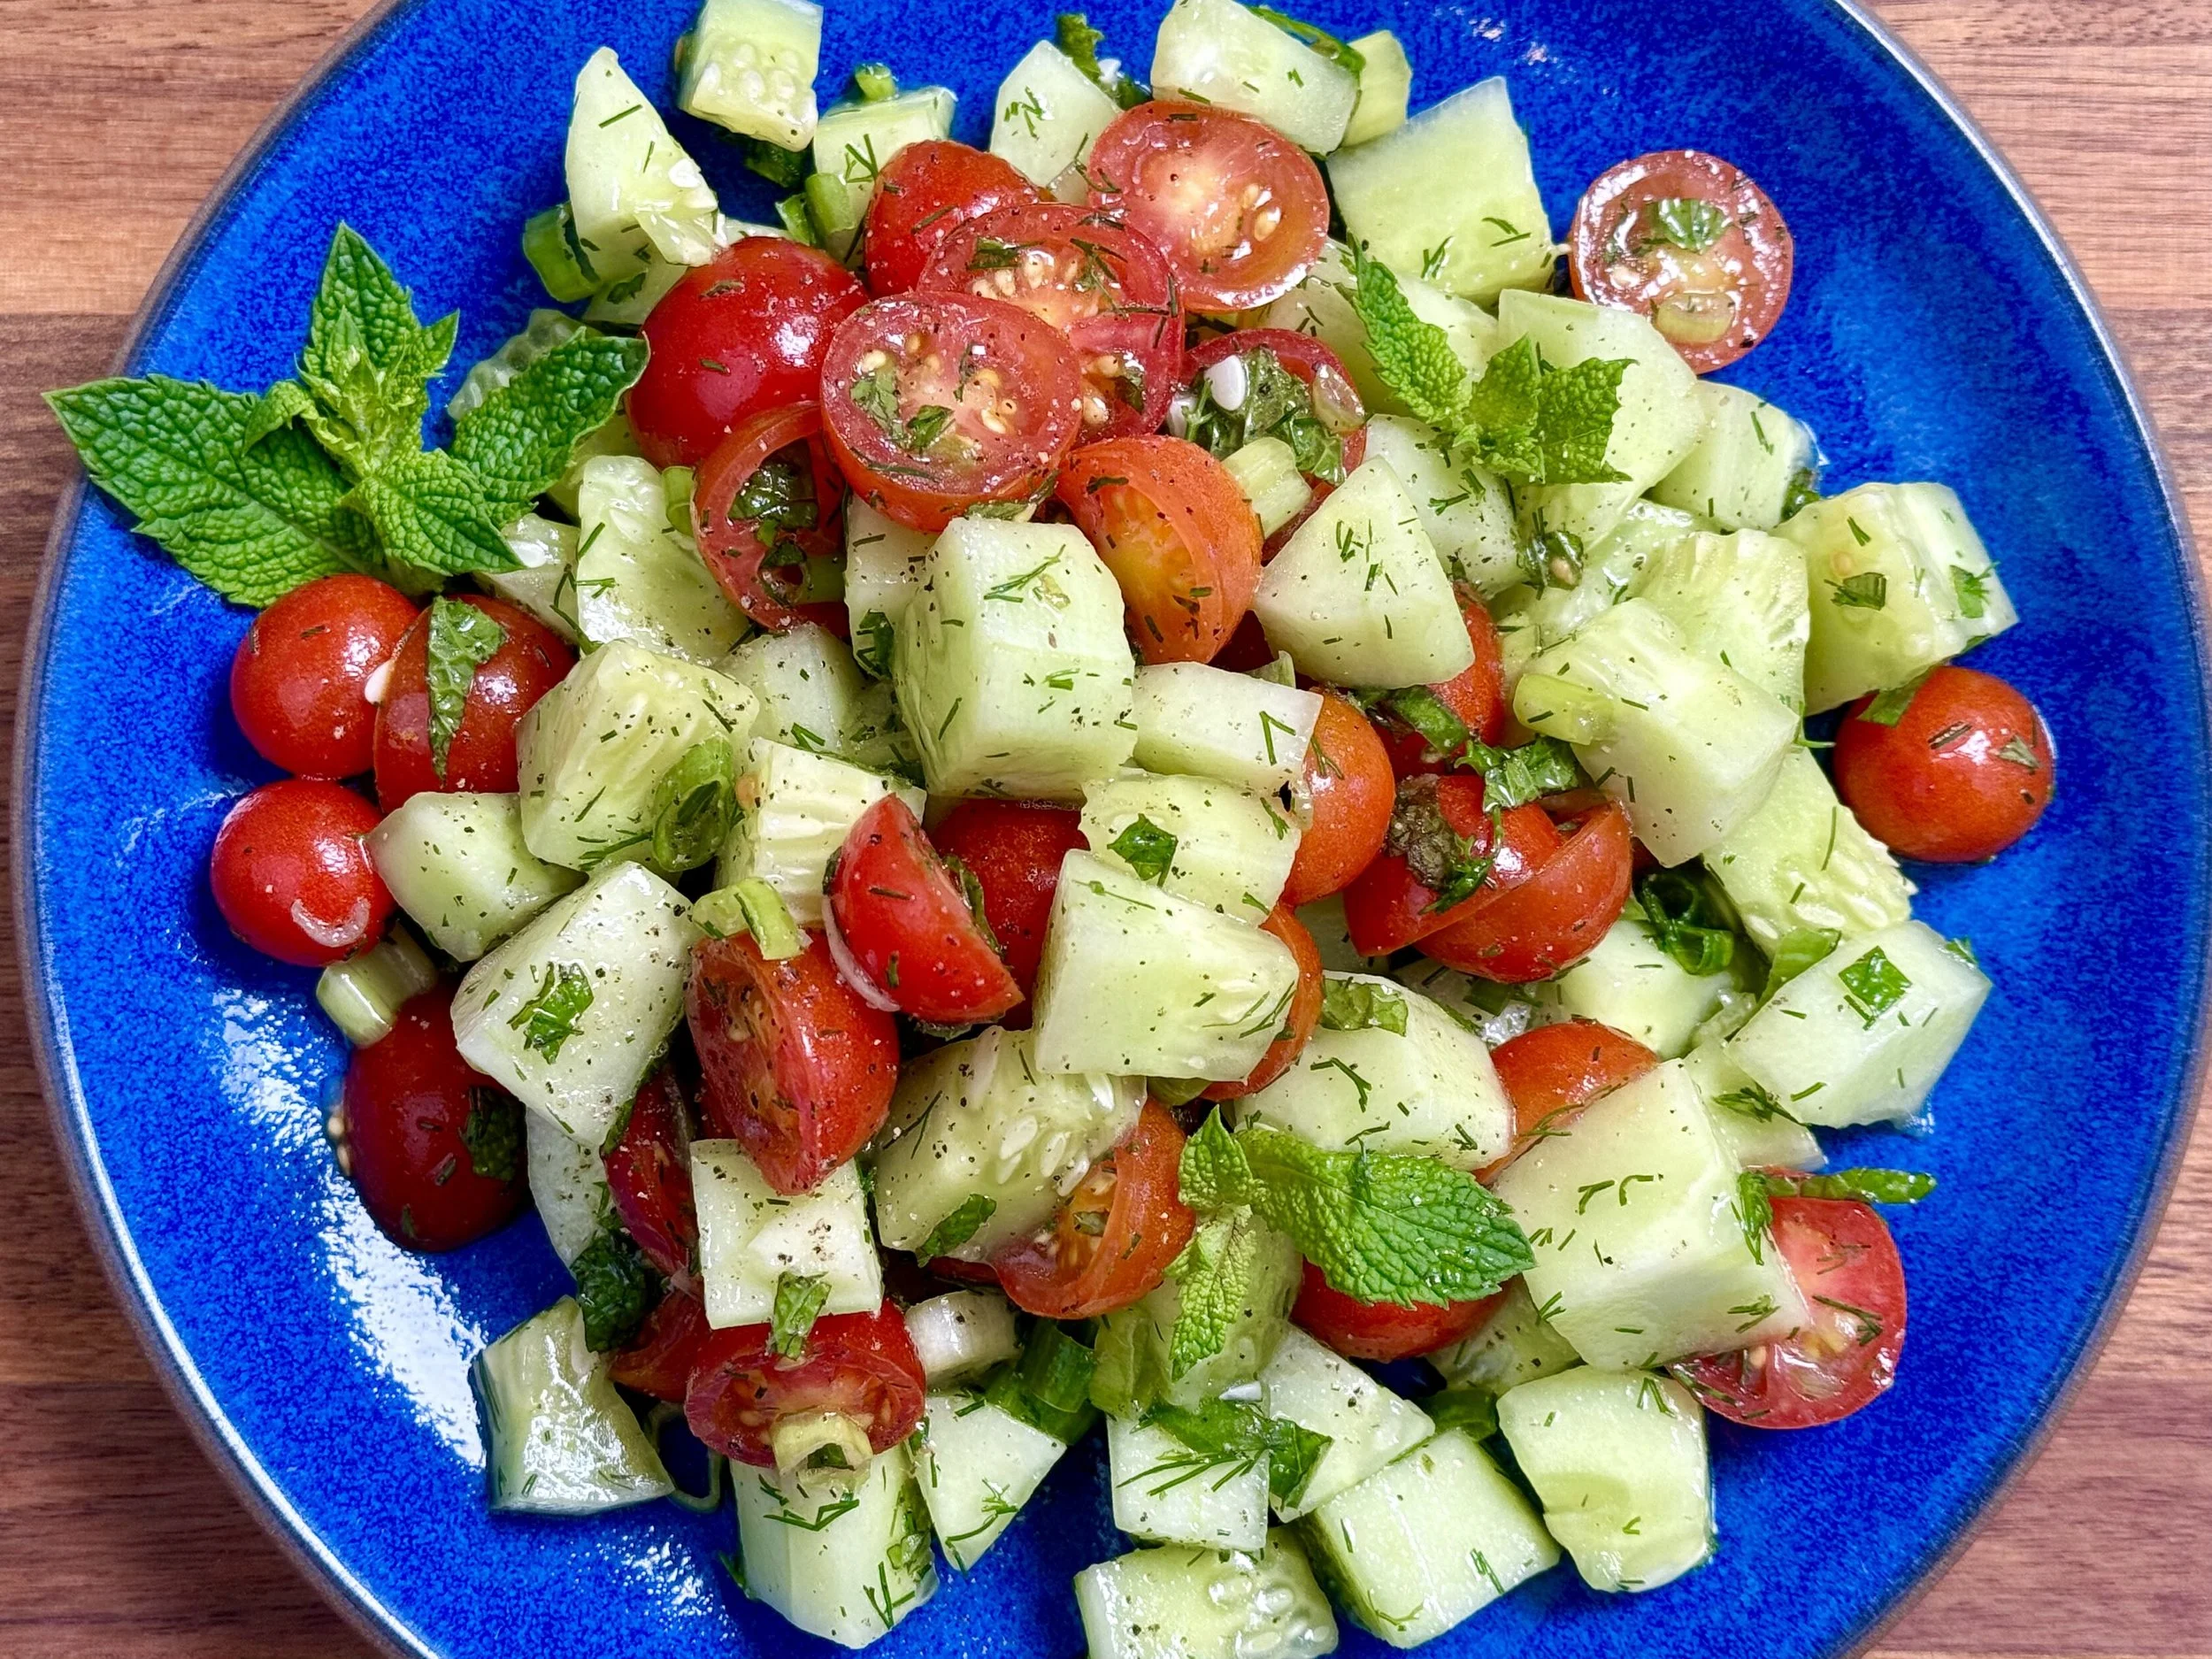
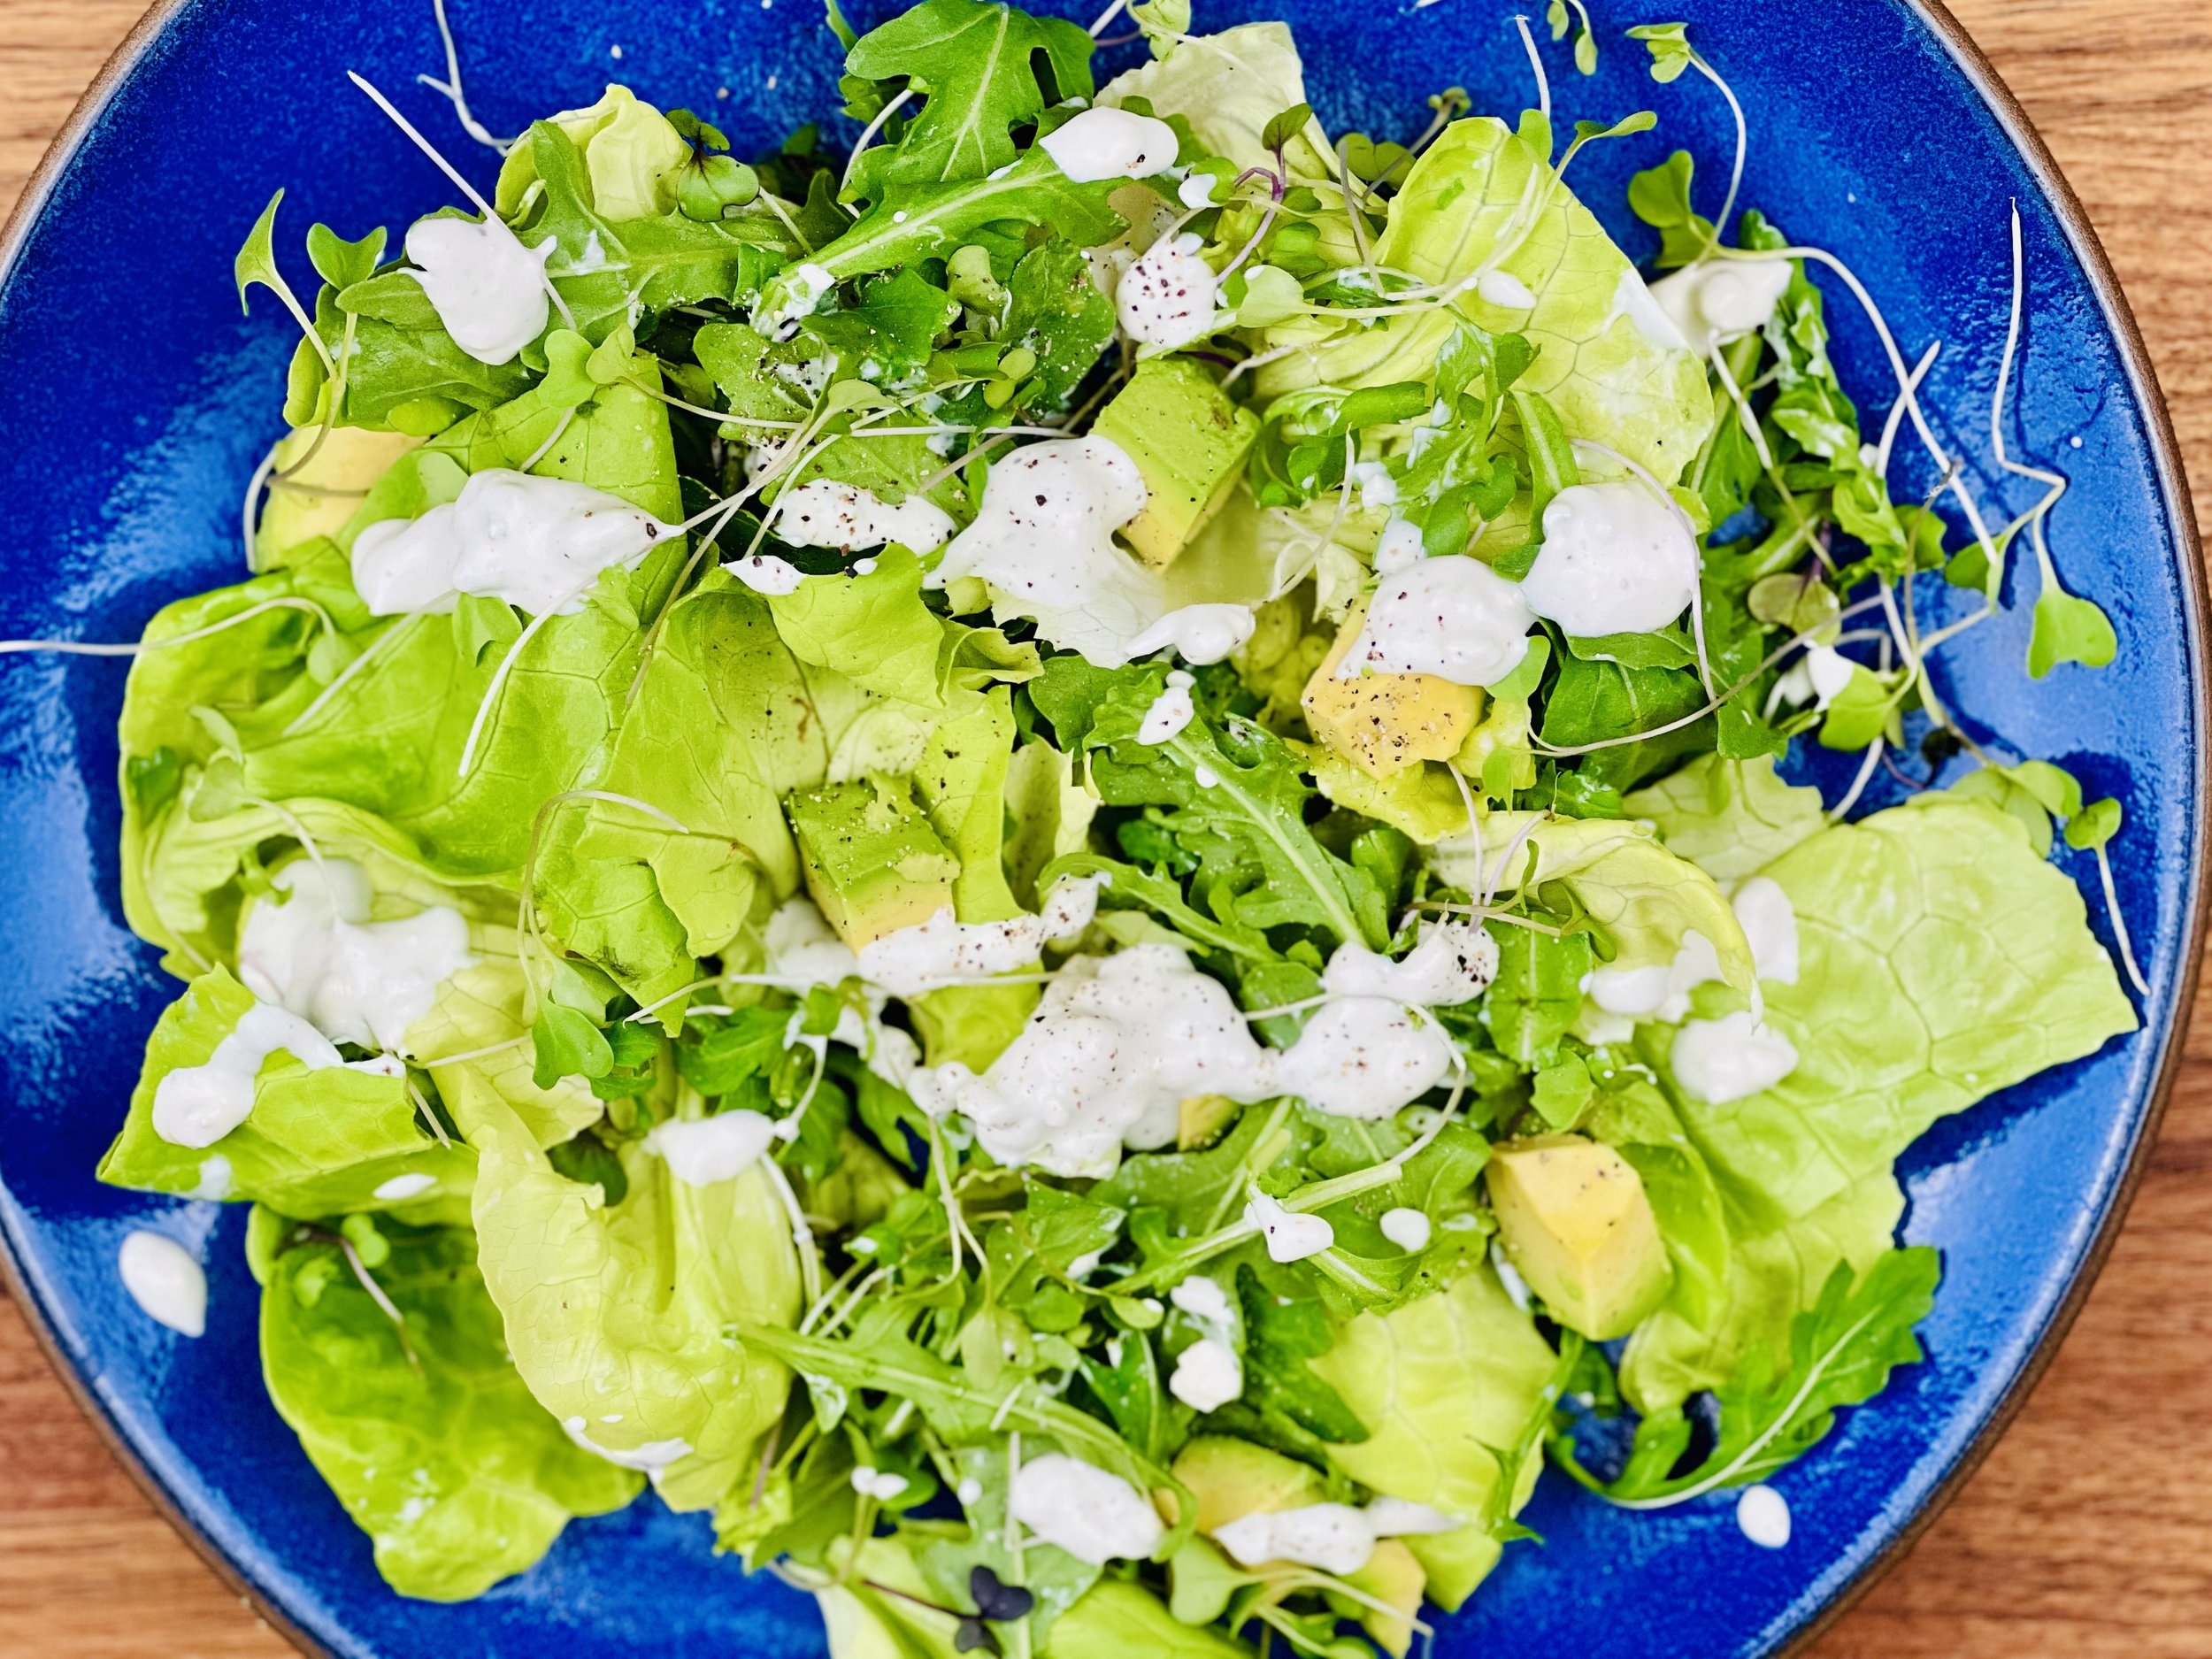
This is not an old-fashioned mushroom soup tetrazzini! It’s super creamy, full of fresh herbs and seasonings, and topped with parmesan panko crumbs that form a wonderful crisp crust over the creamy pasta. It’s easy to make and turns your holiday leftover turkey into a delicious dish the whole family will love. Serve it with some crusty sourdough and our Holiday Salad or our Simple Gem Salad and you’ll have a perfect meal.
Ingredients
12 ounces gluten-free pasta (I used Delallo Penne Rigate)
7 tablespoons butter, divided
One bunch green onions (green part only) chopped
2 stalks celery, chopped
1 pound oyster mushrooms, chopped (optional)
1/2 cup white wine (I used Sauvignon Blanc)
1 teaspoon Smoke N Sanity Essence of Garlic Salt (use code IBSGC15 for 15% discount)
1 teaspoon Smoke N Sanity Essence of Onion Salt (use code IBSGC15 for 15% discount)
2 teaspoons fresh or freeze-dried chives
1/4 cup gluten-free flour (I used Bob’s Red Mill 1 for 1)
2 1/4 cups low FODMAP chicken broth (I use Whole Foods Organic 365 chicken broth or Gourmend low FODMAP Organic Chicken Broth - use code IBSGC15 for 15% discount)
1 cup heavy cream
1 pound cooked turkey, chopped (about 2 1/2 cups)
1 cup extra sharp cheddar cheese, grated
1 cup fresh grated parmesan, divided
1 cup chopped roasted vegetables if you have them leftover (optional)
1/2 cup walnuts, chopped (optional)
1 teaspoon dried thyme
1 cup gluten-free panko bread crumbs (or pork panko for lower carb version)
2 tablespoons garlic-infused olive oil
Directions
(1) Prepare: This recipe leverages leftovers so if you’re making from scratch, you’ll want to cook the turkey ahead of time. Preheat oven to 350 degrees F and grease a 9”x13” (or equivalent) baking dish with 1 tablespoon of butter.
(2) Make the pasta: In a large pot of boiling salted water cook the pasta according to package directions. Drain. Do not rinse. Toss with a drizzle of garlic-infused olive oil if it begins to stick together.
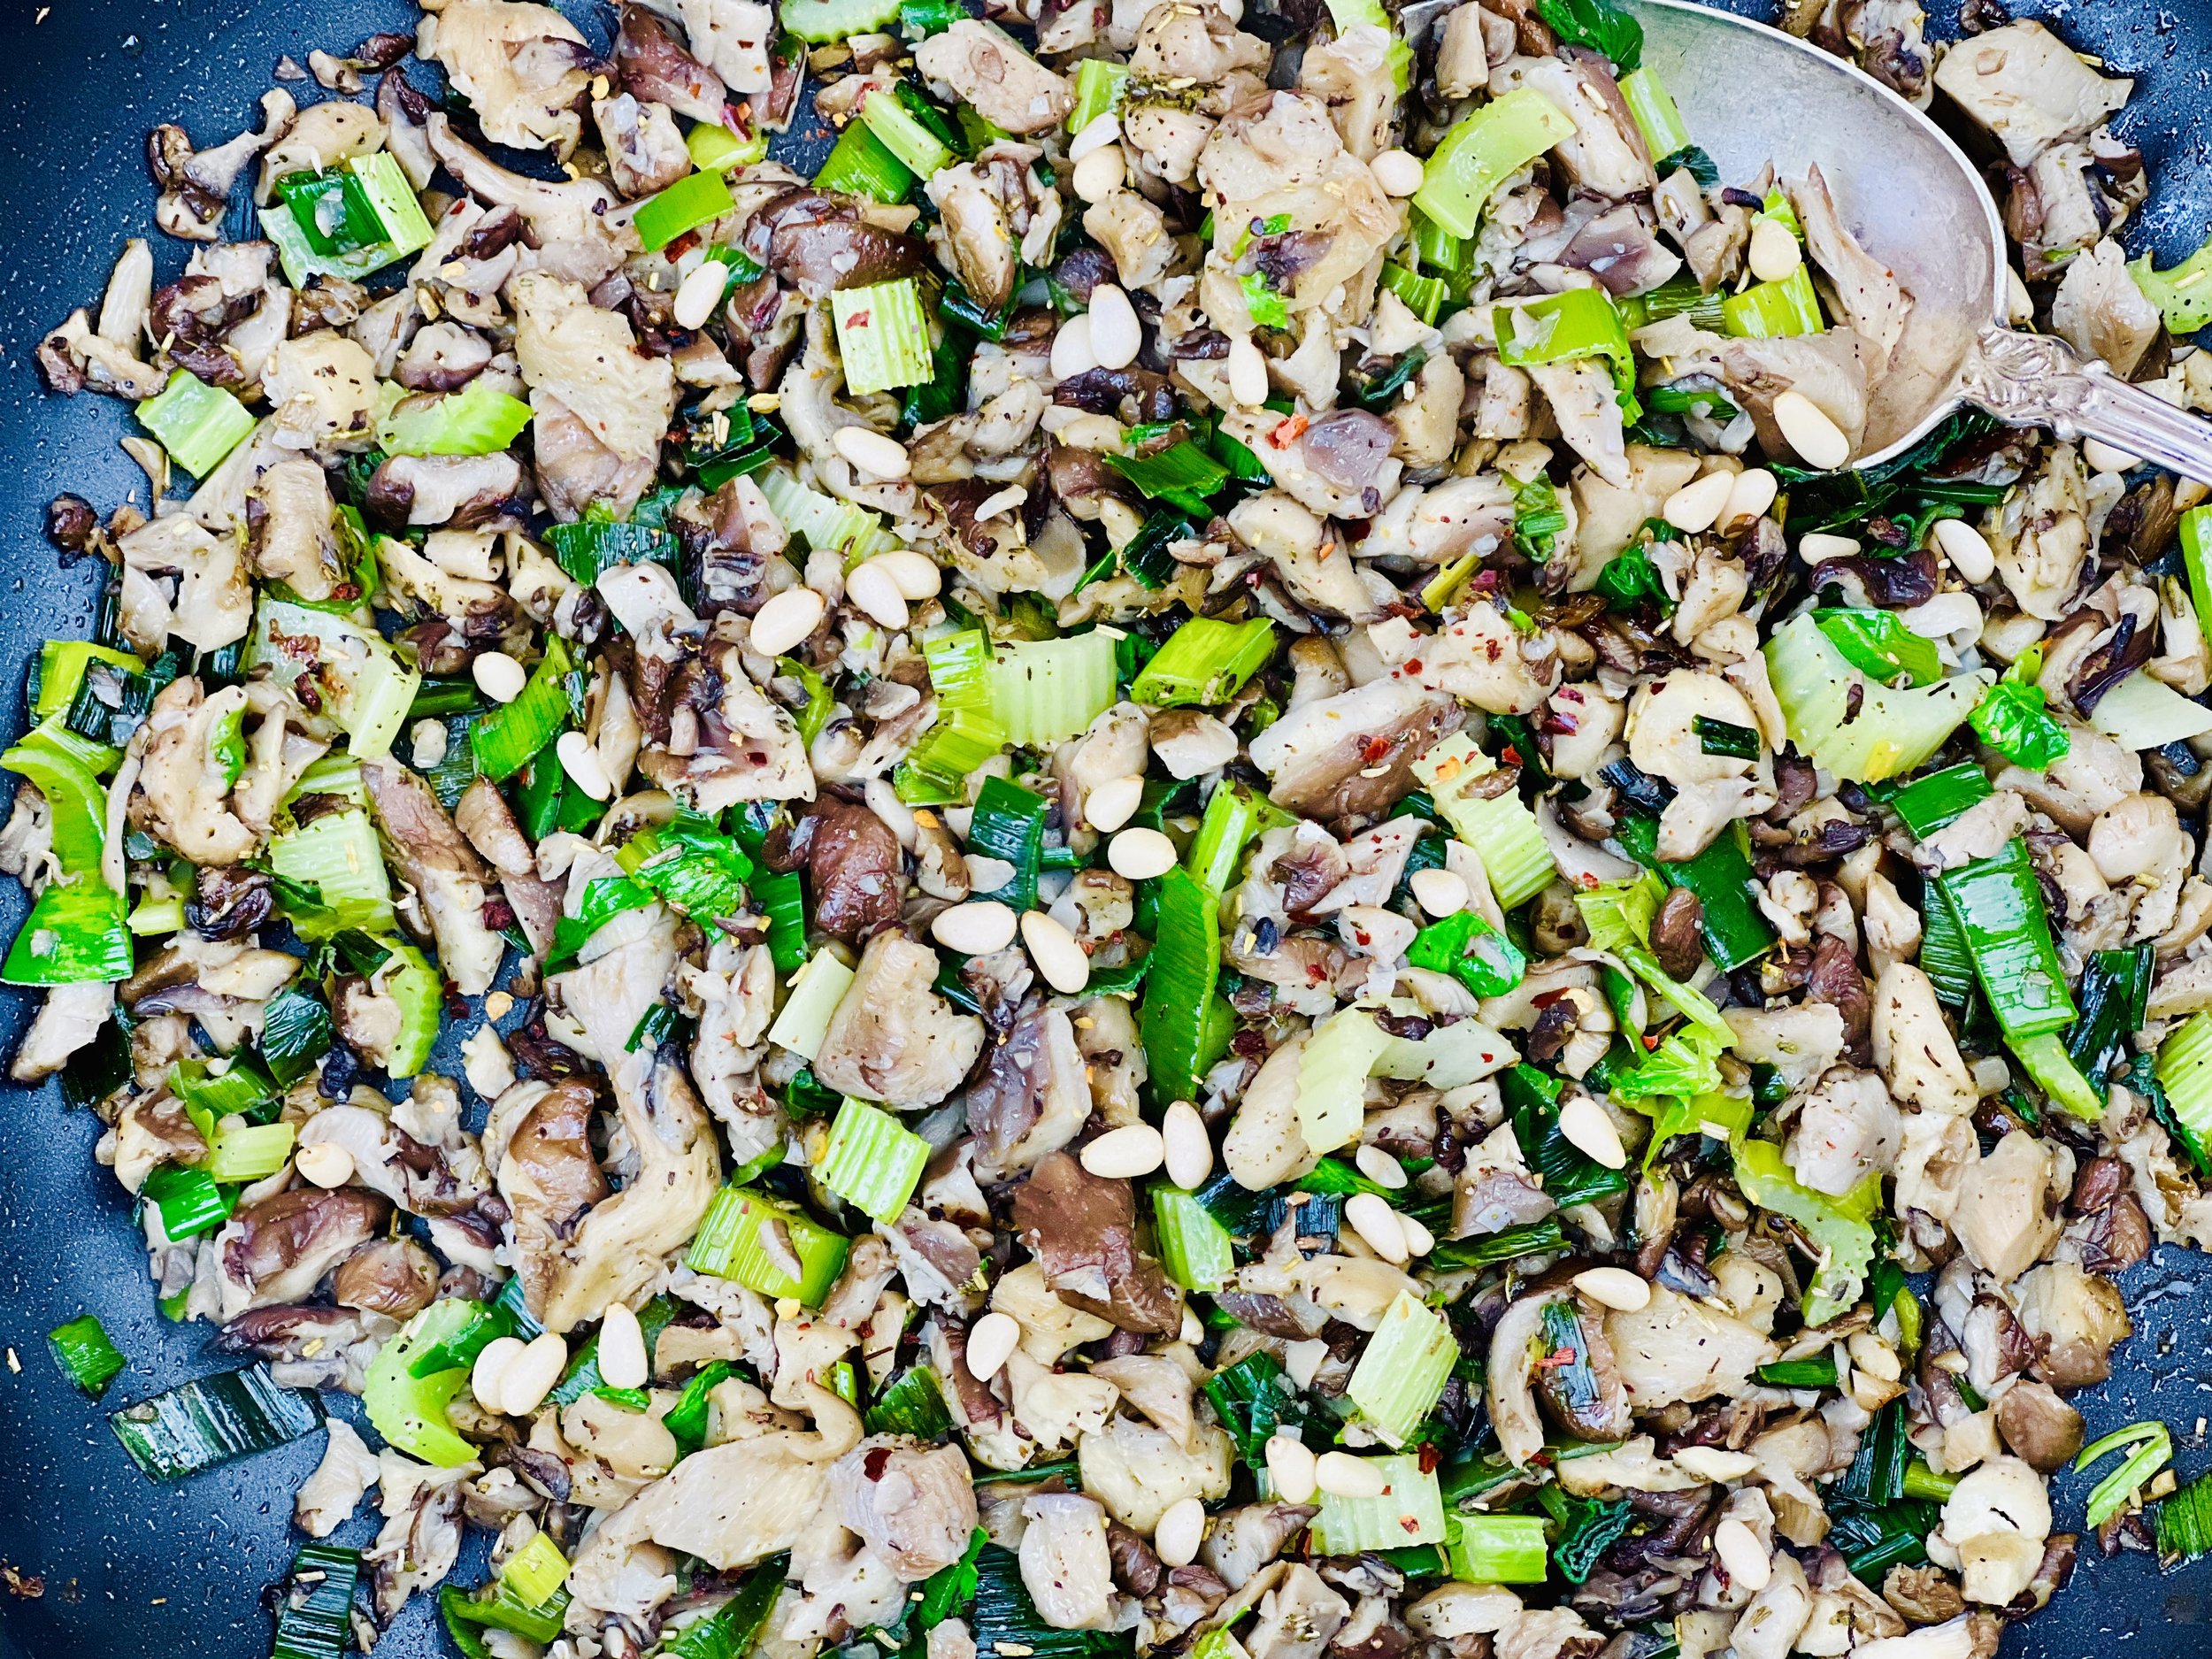
(3) Cook the vegetables: In a large skillet over medium heat, melt 2 tablespoons of butter. Add green onions and celery, and cook until tender, 1 minute. Add the mushrooms and wine and cook until most of the wine is absorbed and the mushrooms are soft, 5 minutes.
(4) Make the creamy sauce: Add the remaining 4 tablespoons of butter to the skillet with the vegetables and stir gently until butter is melted. Whisk in the flour and cook until golden, 2 - 3 minutes. Slowly add the chicken broth and the cream and whisk until no lumps remain. Simmer until thickened, 3 - 5 minutes. Add Smoke N Sanity seasonings and chives. Taste and season with additional salt and pepper if needed.
(5) Add remaining ingredients: Add turkey, cheese, chopped veggies, and thyme, and toss until combined. Add cooked pasta and toss to coat. Taste and season with salt and pepper then transfer the mixture into the prepared dish.
(6) Make the parmesan panko: In a medium bowl, toss to combine the panko, Parmesan, and garlic-infused olive oil. Sprinkle evenly over the pasta.
(7) Finish: Bake for 25 minutes until the top is golden and the sauce is bubbly.
(8) Plate and serve: Let cool for 10 minutes before serving. Serve it with some crusty sourdough and our Holiday Salad or our Simple Gem Salad and you’ll have a perfect meal.
Eat and enjoy every bite because you can!
Link note: This post may contain affiliate links for you to easily purchase items that are linked. I may earn a small commission from qualifying purchases but none of this costs you a thing so feel free to use the links! In addition, for some items, I have provided a special discount code for IBS Game Changers so be sure to use the code when you purchase an item to get the discount that has been arranged just for you.
More Deliciously Low FODMAP™ main courses you might enjoy


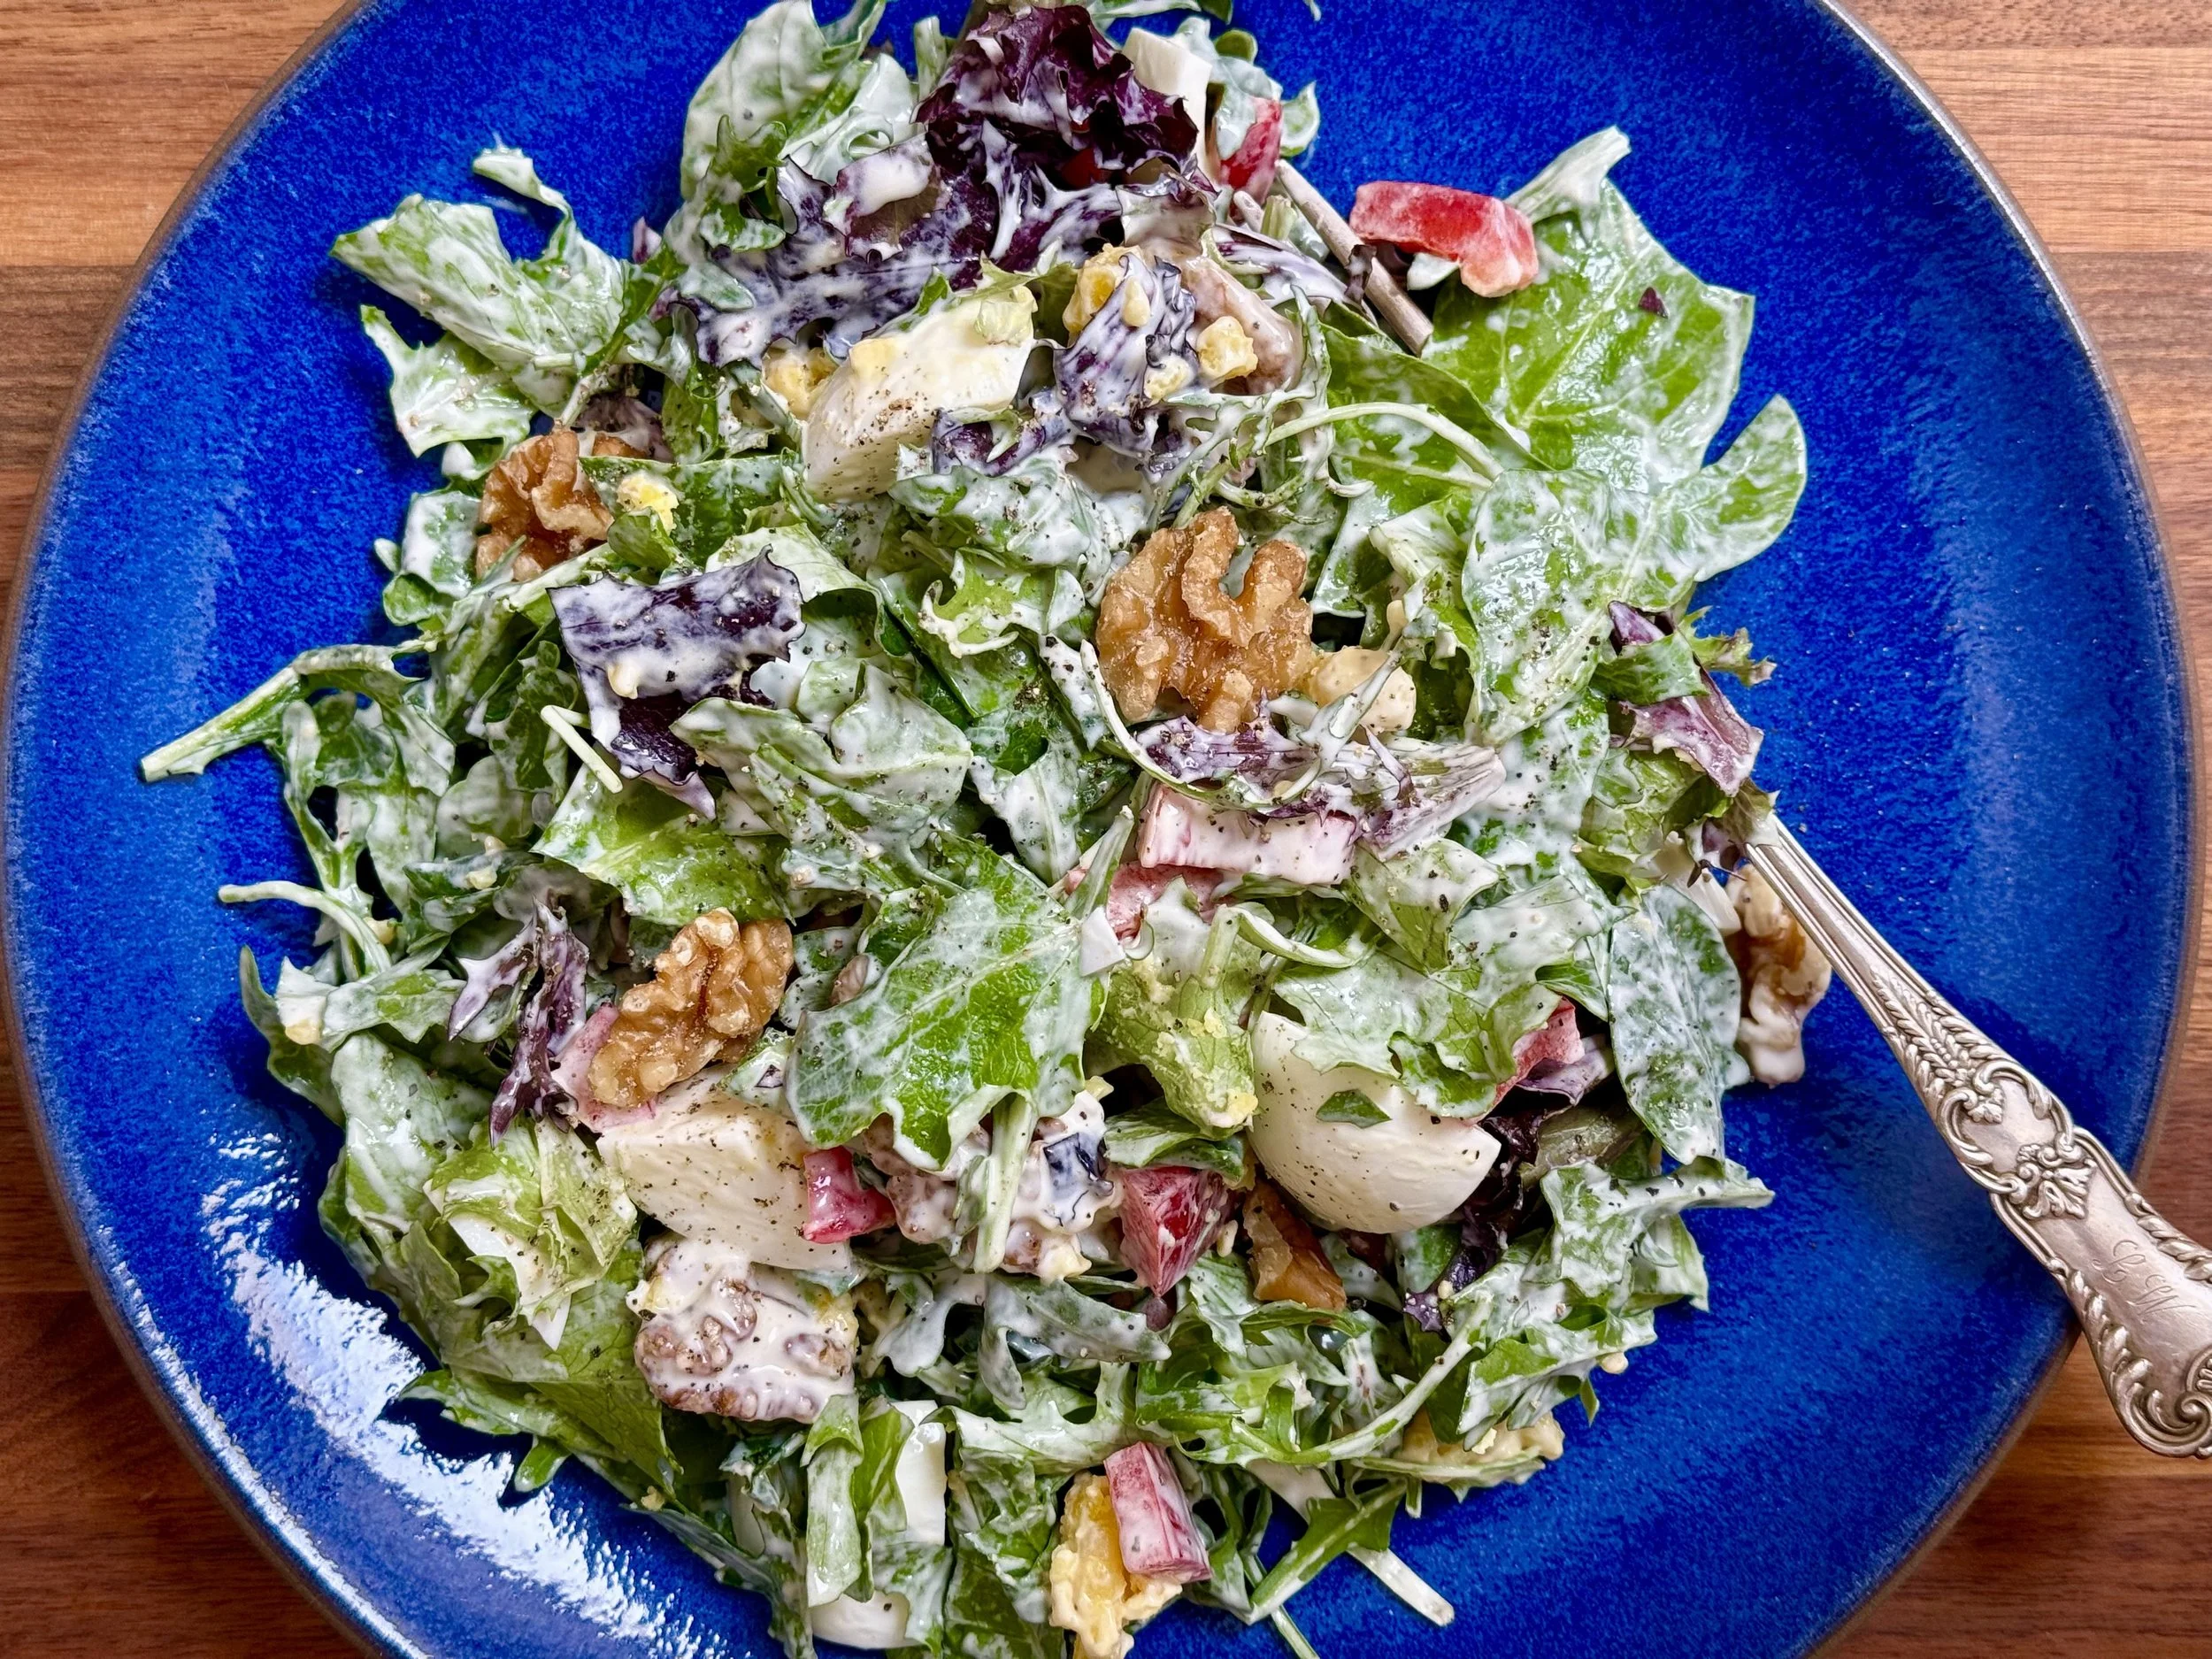
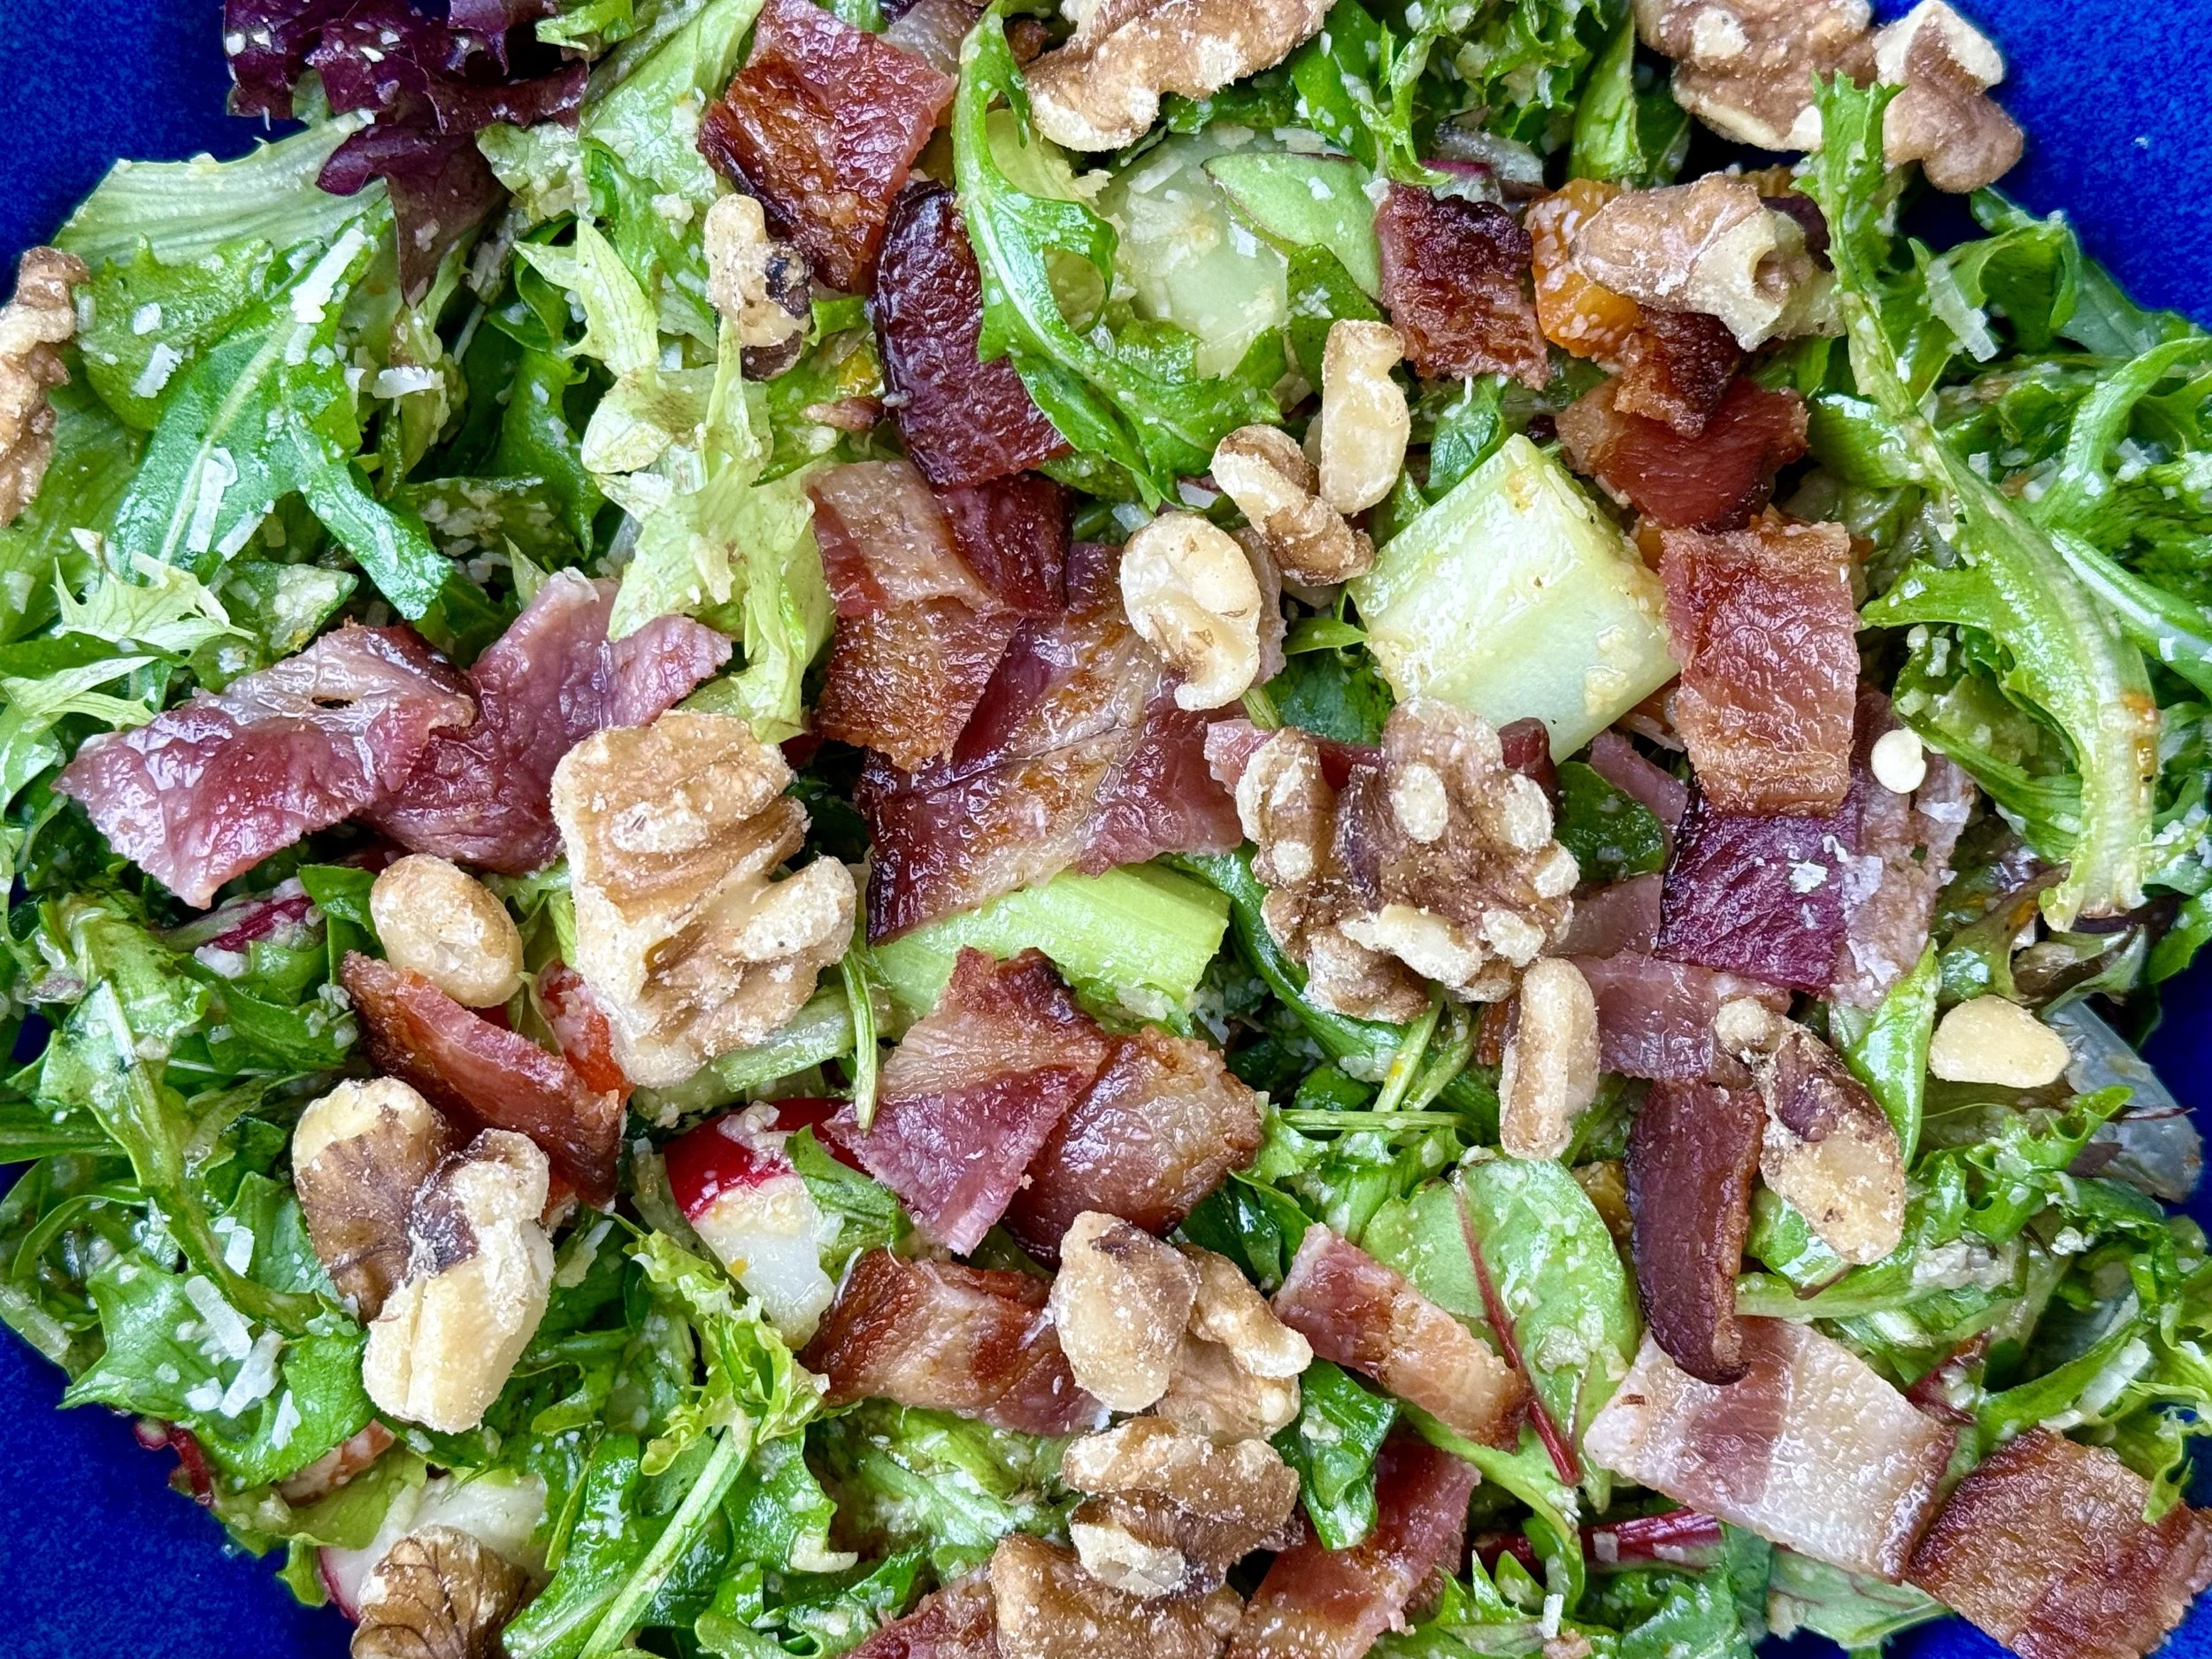
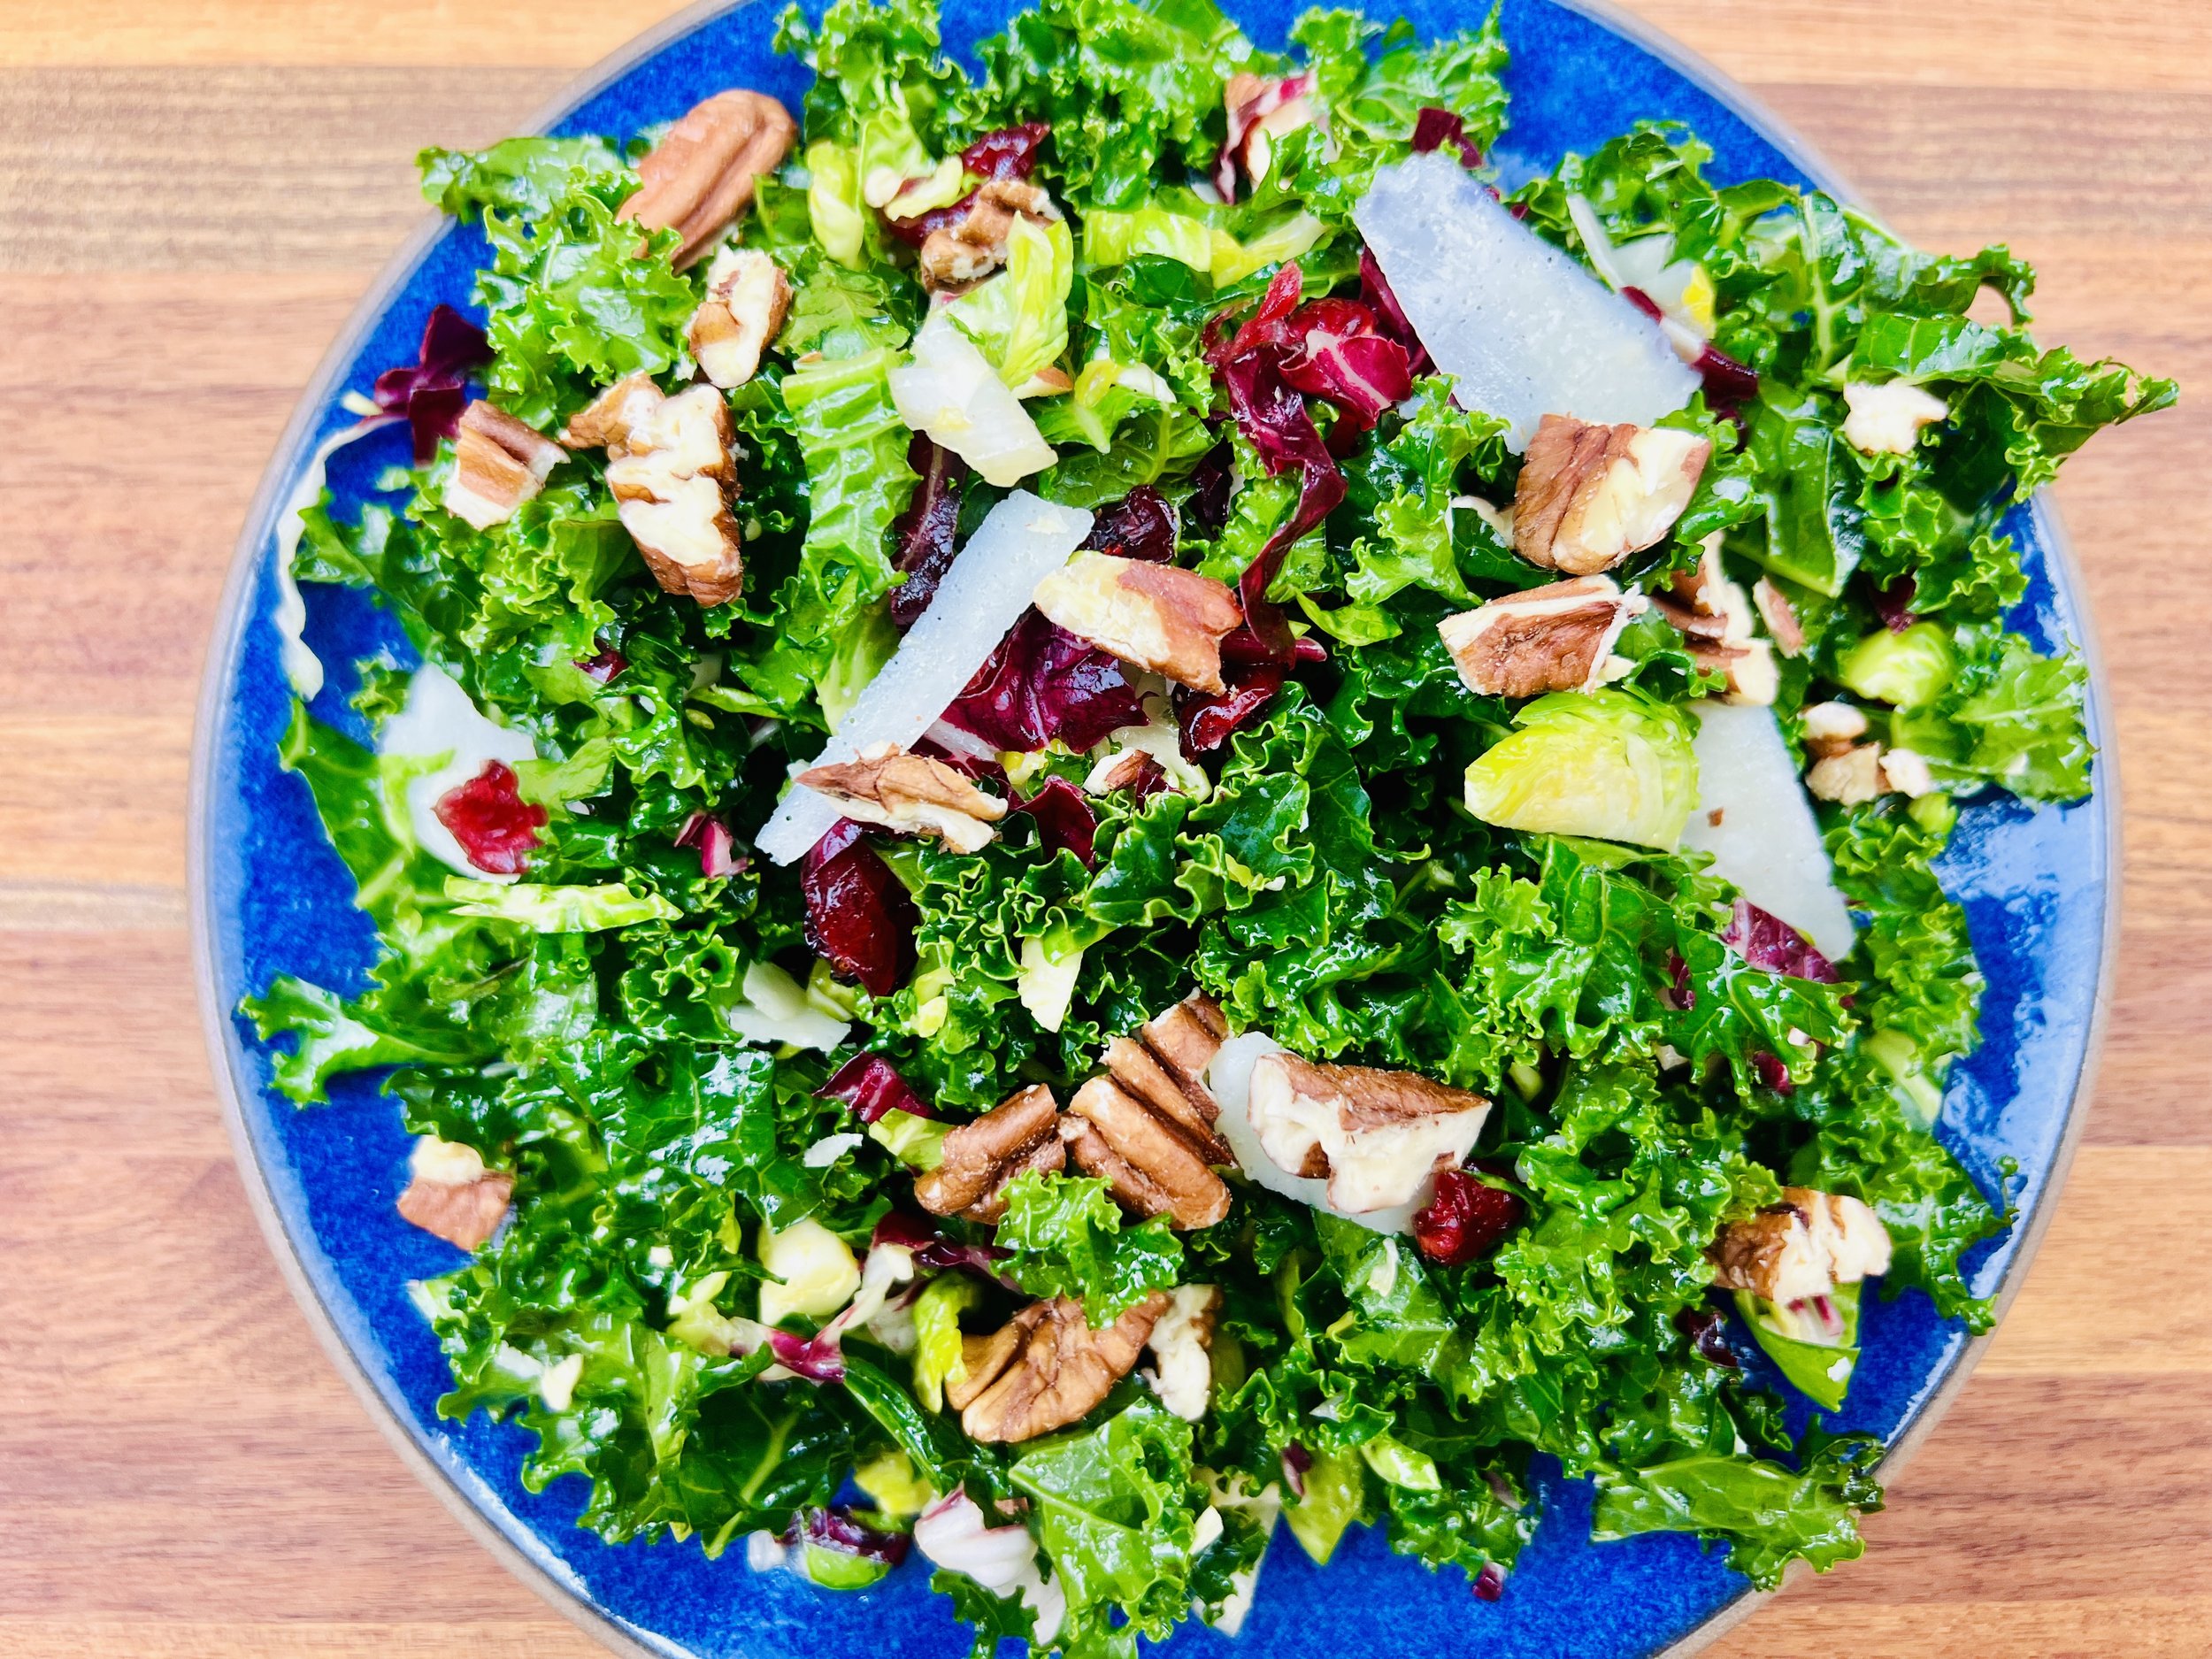
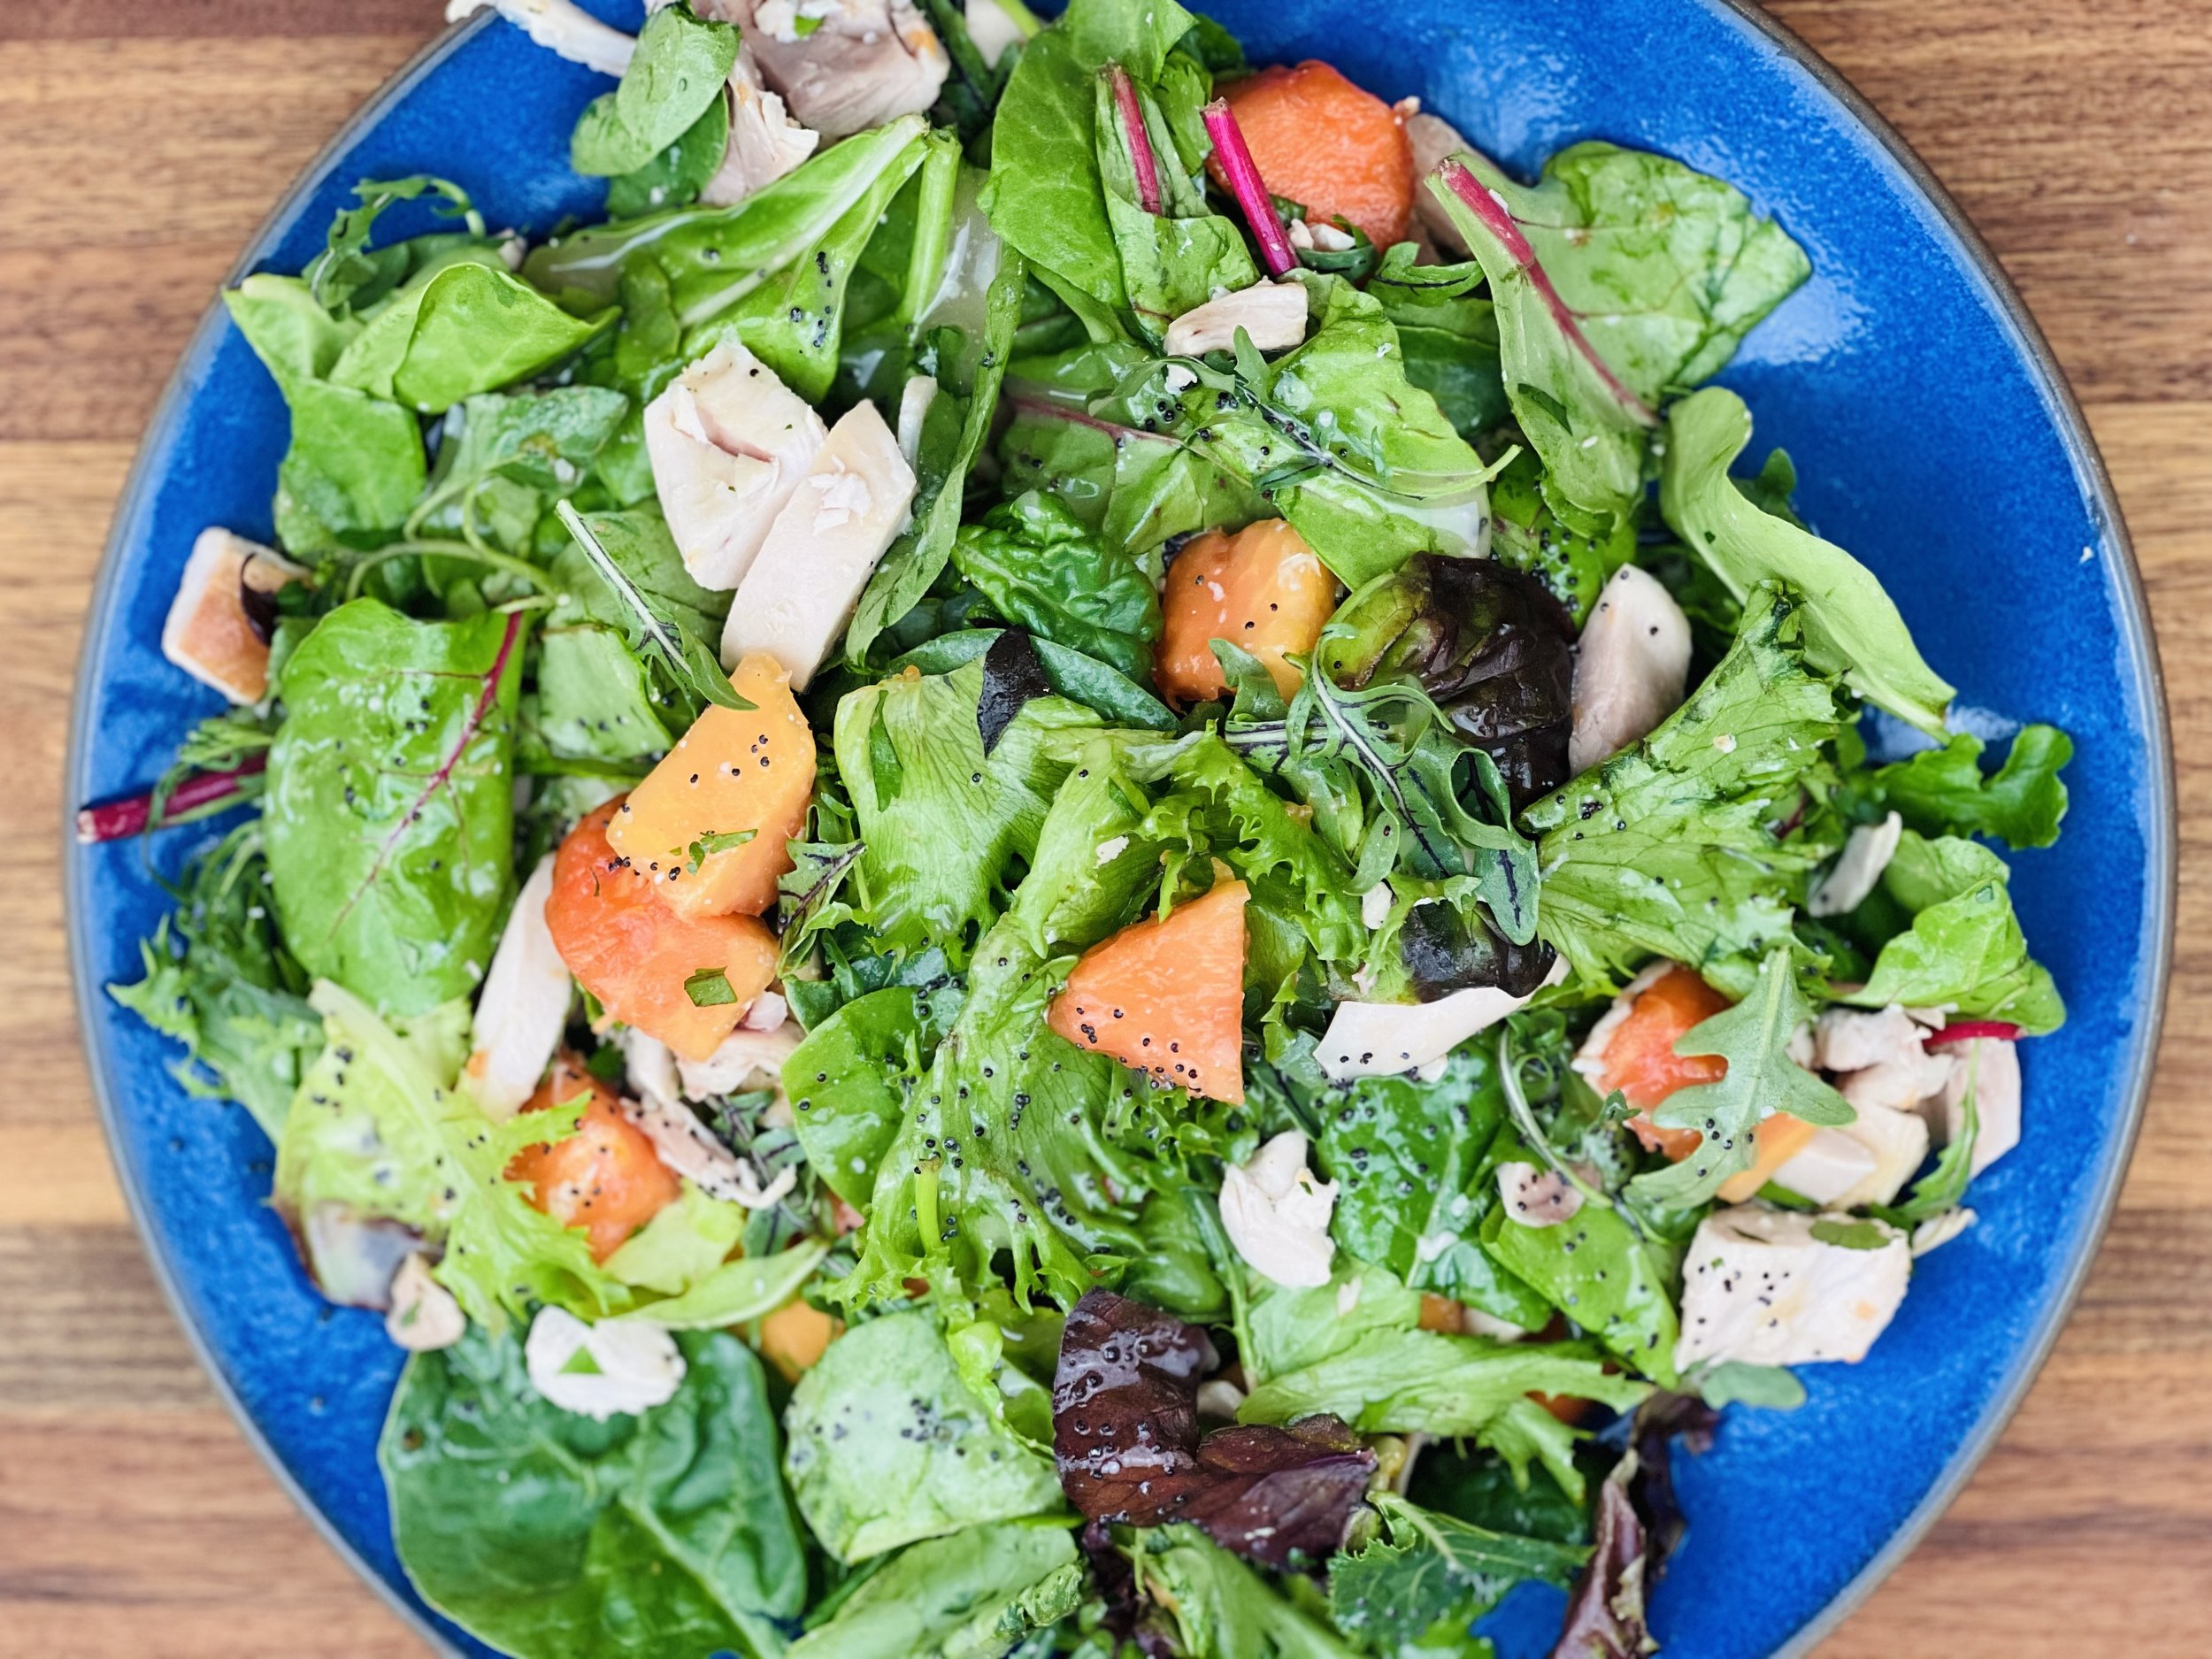
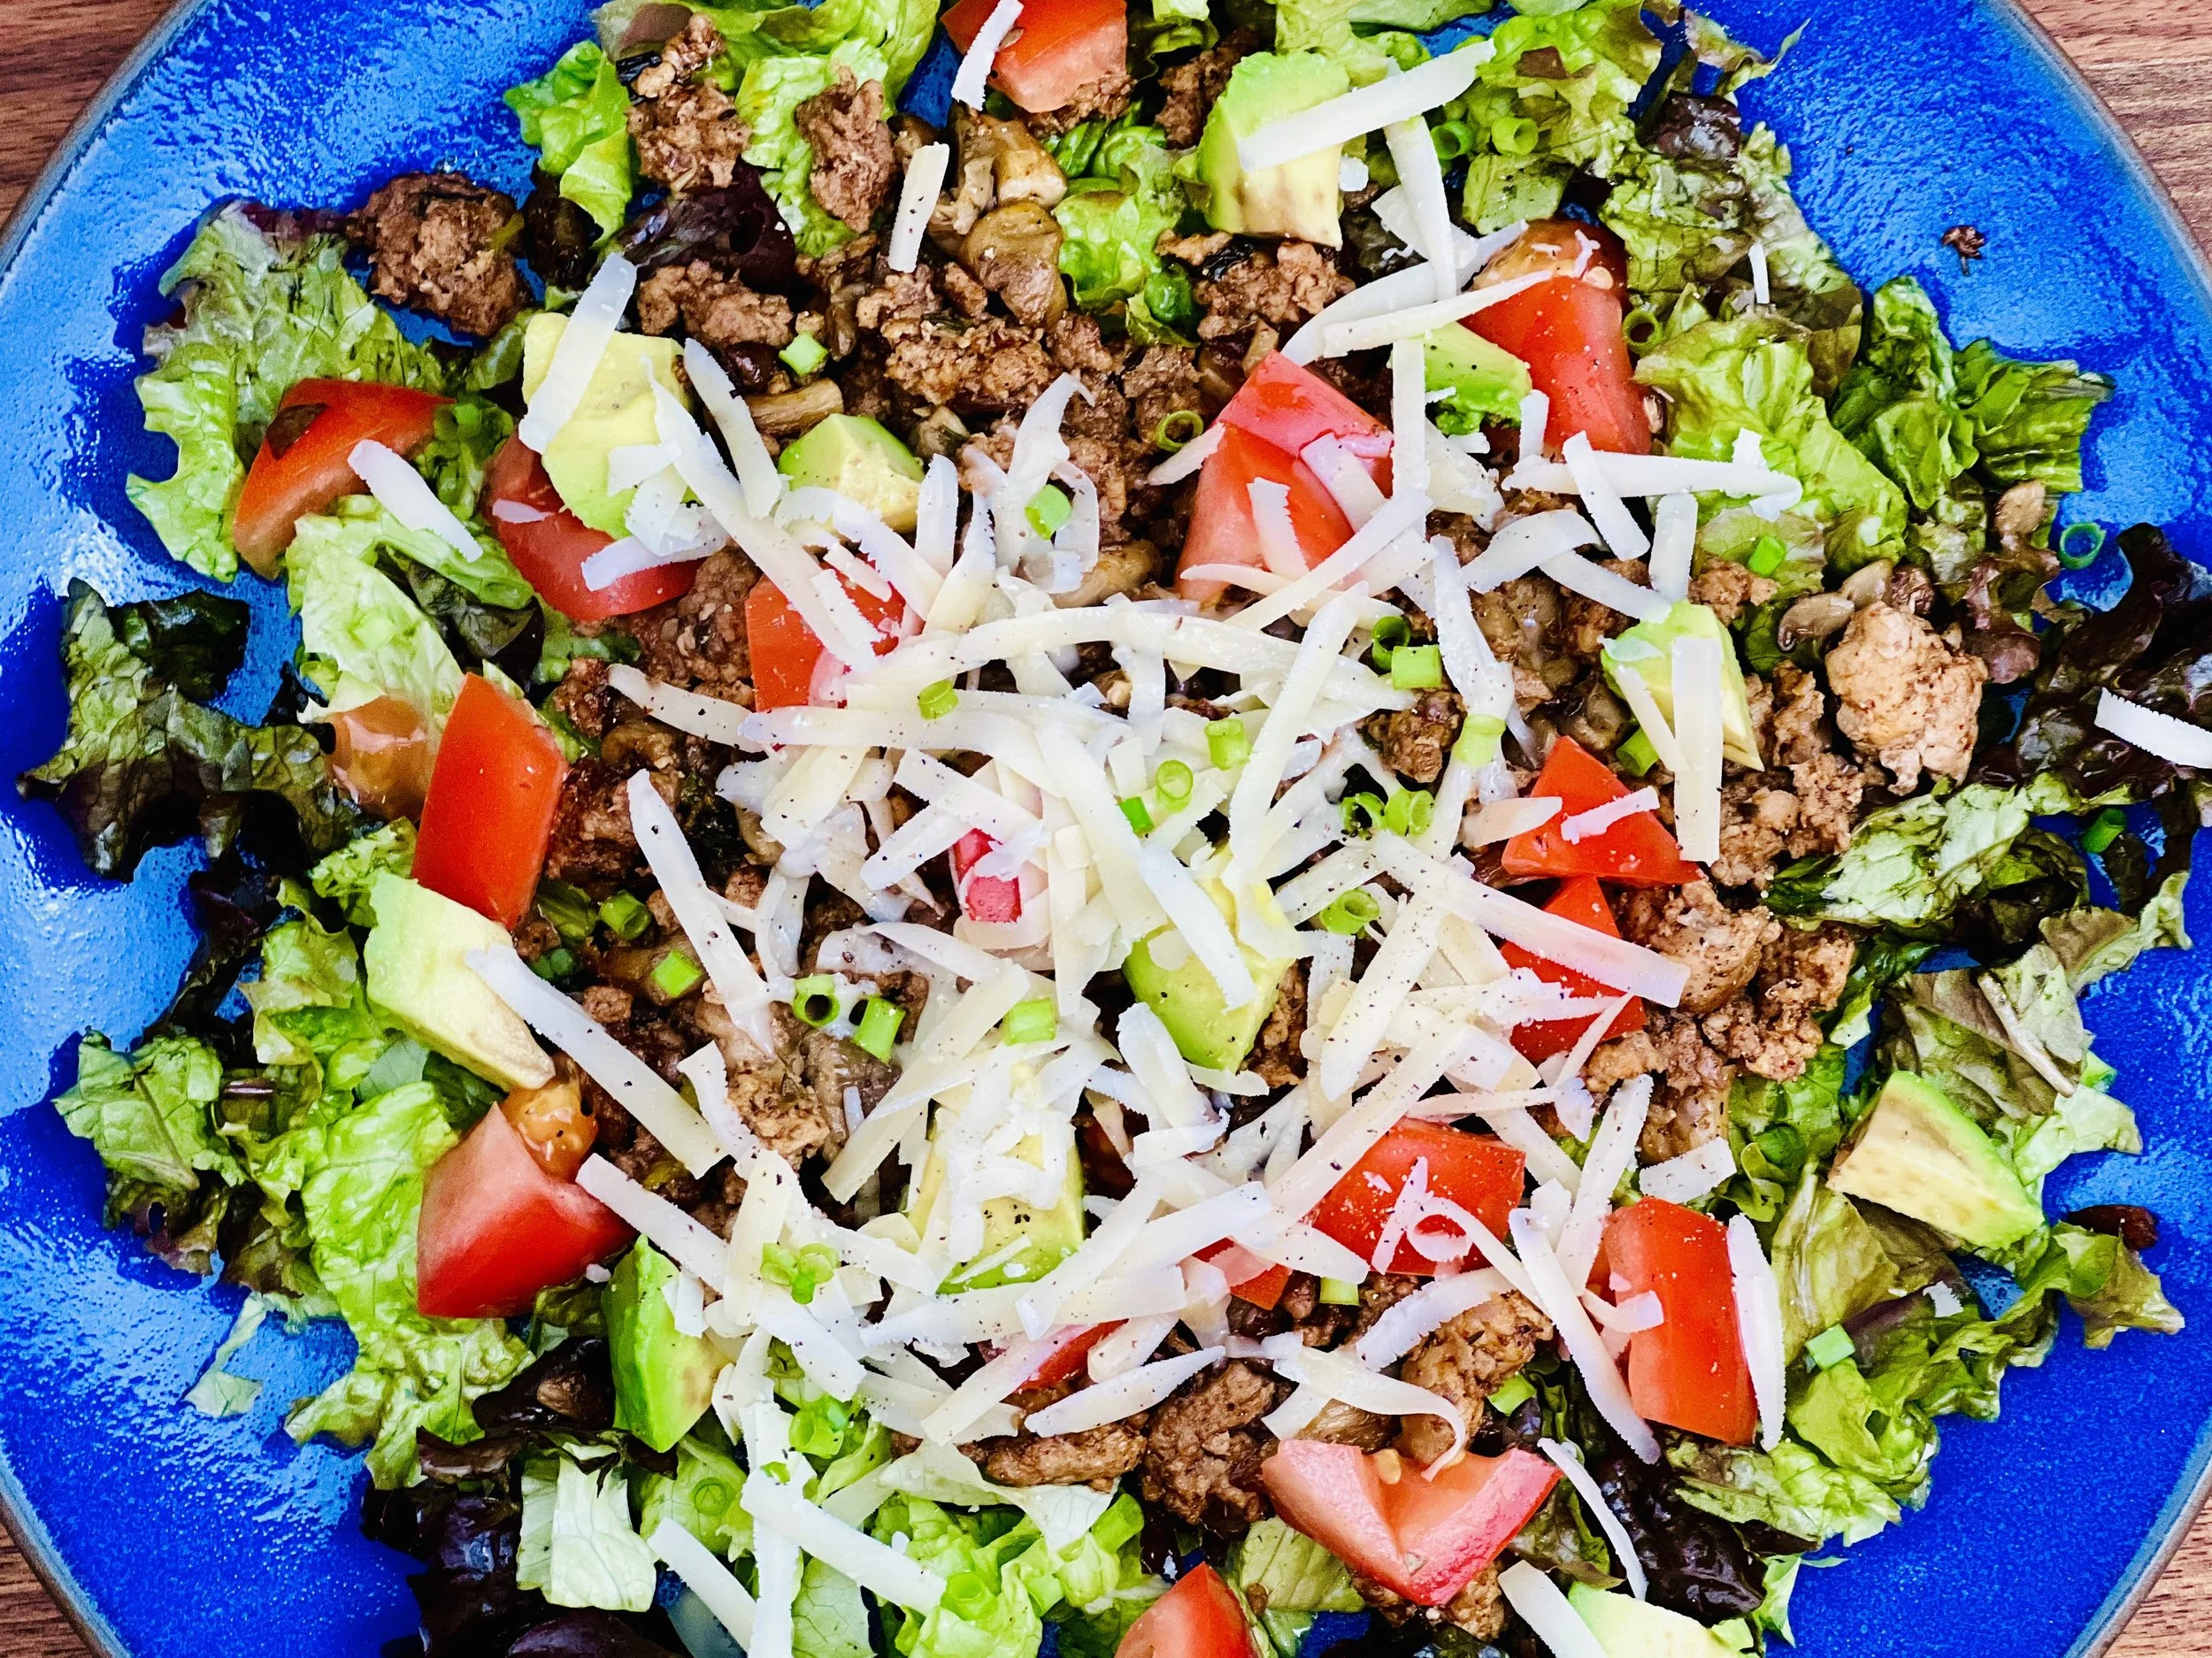
Kale Salad with Cranberries and Maple Walnuts (Low FODMAP)
20 Minutes prep • 10 Minutes cook • Low FODMAP • Gluten-free • Serves 6
20 Minutes prep • 10 Minutes cook • Low FODMAP • Gluten-free • Serves 6 • Ok to make ahead: Steps 1-5
A delicious and beautiful make-ahead salad to brighten up any meal. What? Make ahead salad? Yes. I said that. This salad actually improves with time so make it the day before for the perfect balance. The combination of the candied nuts, bacon, and cranberries gives this salad a wonderful savory/sweet balance. The base of kale and arugula ensures the salad is packed with powerful greens. Don’t like bacon or cranberries? Leave them out! It will still be delicious.

Ingredients: Salad
6 slices thick-cut bacon, chopped (optional)
1 cup Sweet and Savory Candied Maple Walnuts
4 cups shredded kale
2 cups baby arugula
1/2 cup shaved parmesan cheese
3/4 cup dried cranberries
Ingredients: Cider Vinaigrette
1/3 cup extra virgin olive oil
1/4 cup apple cider vinegar
1 tablespoon maple syrup
1 tablespoon fresh thyme leaves
2 teaspoons fresh orange zest
1/2 teaspoon Kosher salt
1/4 teaspoon black pepper
1/4 teaspoon crushed red pepper flakes
Directions
(1) Prepare: Preheat the oven to 400° F. Line a rimmed baking sheet with foil and lay out the bacon slices in one layer (if using).
(2) Cook the bacon: Bake 8-10 minutes, until the bacon is crisping, watch closely so it doesn’t burn. Remove from the oven and lay on paper towels to cool. Once cool, chop the bacon and set aside.
(3) Make my Sweet and Savory Candied Maple Walnuts or other candied nuts you enjoy.
(4) Make the salad: Wash, dry, and shred the kale. Wash and dry the arugula. Shave the parmesan cheese (with a vegetable peeler). In a large salad bowl, combine the kale, arugula, grated cheese, and cranberries.
(5) Make the vinaigrette: Combine all ingredients in a glass jar or small bowl and shake or whisk to combine.
Make-ahead note: At this point, you may put everything in the refrigerator and keep for about 6 hours before finishing and serving.
(6) Finish: Pour the vinaigrette over the salad, tossing to combine. Top the salad with shaved Parmesan, candied walnuts, and bacon. Serve immediately or keep in the fridge until ready to serve. Leftovers will keep well for 2-3 days. This salad is delicious leftover so don’t be afraid to make it in advance and keep it for a day or two.
Eat and enjoy every bite because you can!
Recipe note: I use Diamond Crystal Kosher salt in all my recipes because it has a wonderful flat and crisp flake that tastes delicious. It is also the least salty salt available so you can use it more liberally as a seasoning than you can table salt or sea salt. If you use another type of salt, you may need to reduce the amount so it is not over-salted.
Have a question you’d like to have answered? Email us at hello@ibsgamechanger.com
Link note: This post contains links for you to easily purchase items listed on the page. In some cases, we have provided a special discount code for IBS Game Changers so be sure to use it when you purchase an item to get the discount that has been arranged just for you! As an Amazon Associate, I earn a commission from qualifying Amazon purchases.
More Deliciously Low FODMAP™ salad recipes


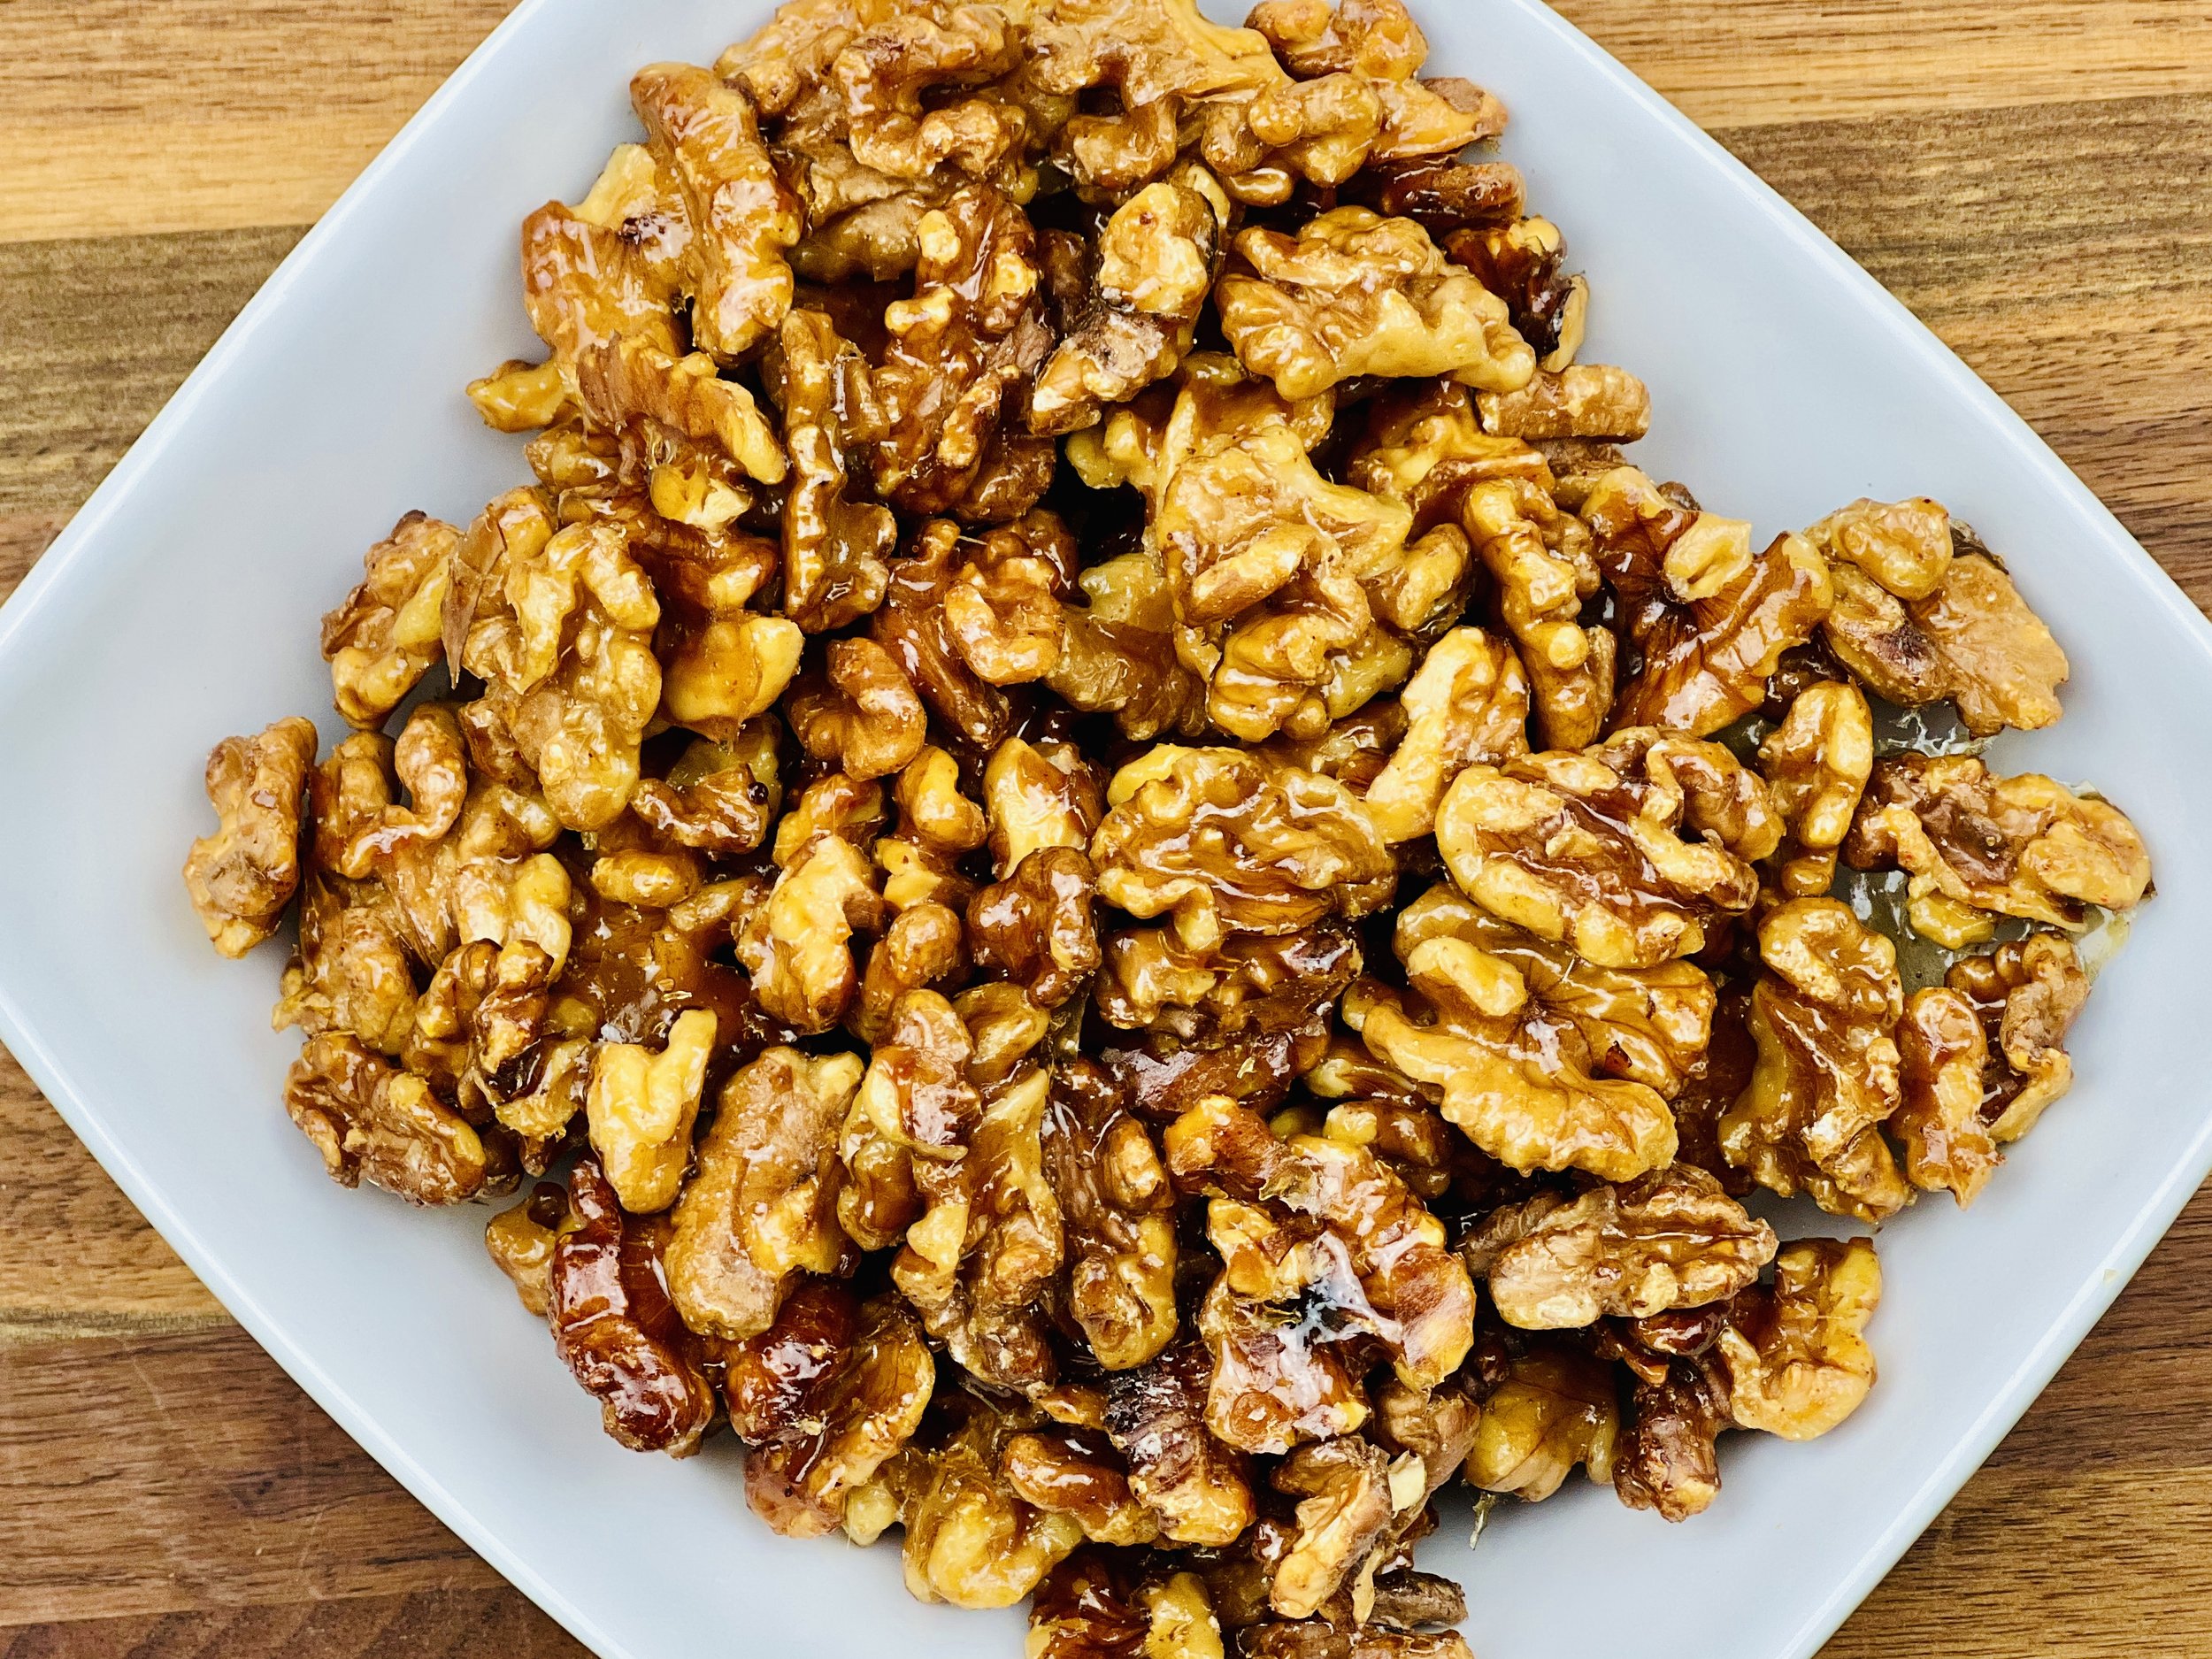
Sweet and Savory Candied Maple Walnuts (Low FODMAP)
5 Minutes prep • 10 Minutes cook • Low FODMAP • Gluten-free • Lactose-free • Makes 1 cup
5 Minutes prep • 10 Minutes cook • Low FODMAP • Gluten-free • Lactose-free • Makes 1 cup • Ok to make ahead: Steps 1-5
These are the simplest and best, candied walnuts you will ever make! Eat them plain, tossed on a salad, alongside your next cheeseboard, or on top of your overnight oats. No matter how you eat them, you will love them. Keep in mind the low FODMAP serving size of walnuts is ten halves. So don’t eat them all in one sitting — even though you might want to.
This is an exclusive recipe just for recipe club members.
In addition to the two free recipes I create each week I am creating and delivering one very special recipe just for my recipe club members. If you’re not yet a member, I encourage you to join! Membership in the club includes access to the complete archive of recipes with filters so it can become your virtual low FODMAP cookbook plus, I am creating and delivering one special NEW recipe every week ONLY for recipe club members. And, for my true fans, I’ll be sharing behind-the-scenes content, and updates on the progress of the new cookbook.
Your membership in the club helps me continue creating new, delicious, easy-to-make, low FODMAP recipes just for you.
As always, all recipes will emphasize simple ingredients, easy preparation, and delicious low FODMAP results. Recipes will be for everything from main courses, salads, soups, side dishes, appetizers, desserts, sauces, breakfast and lunch, and even mocktails and cocktails. Everything you need to prepare fantastic low FODMAP meals everyone will love.
Join the club. Become a Patron. Let’s keep making delicious Low FODMAP meals together.
Link note: This post contains links for you to easily purchase items listed on the page. In some cases, we have provided a special discount code for IBS Game Changers so be sure to use it when you purchase an item to get the discount that has been arranged just for you! As an Amazon Associate, I earn a commission from qualifying Amazon purchases.
More Deliciously Low FODMAP™ appetizer recipes


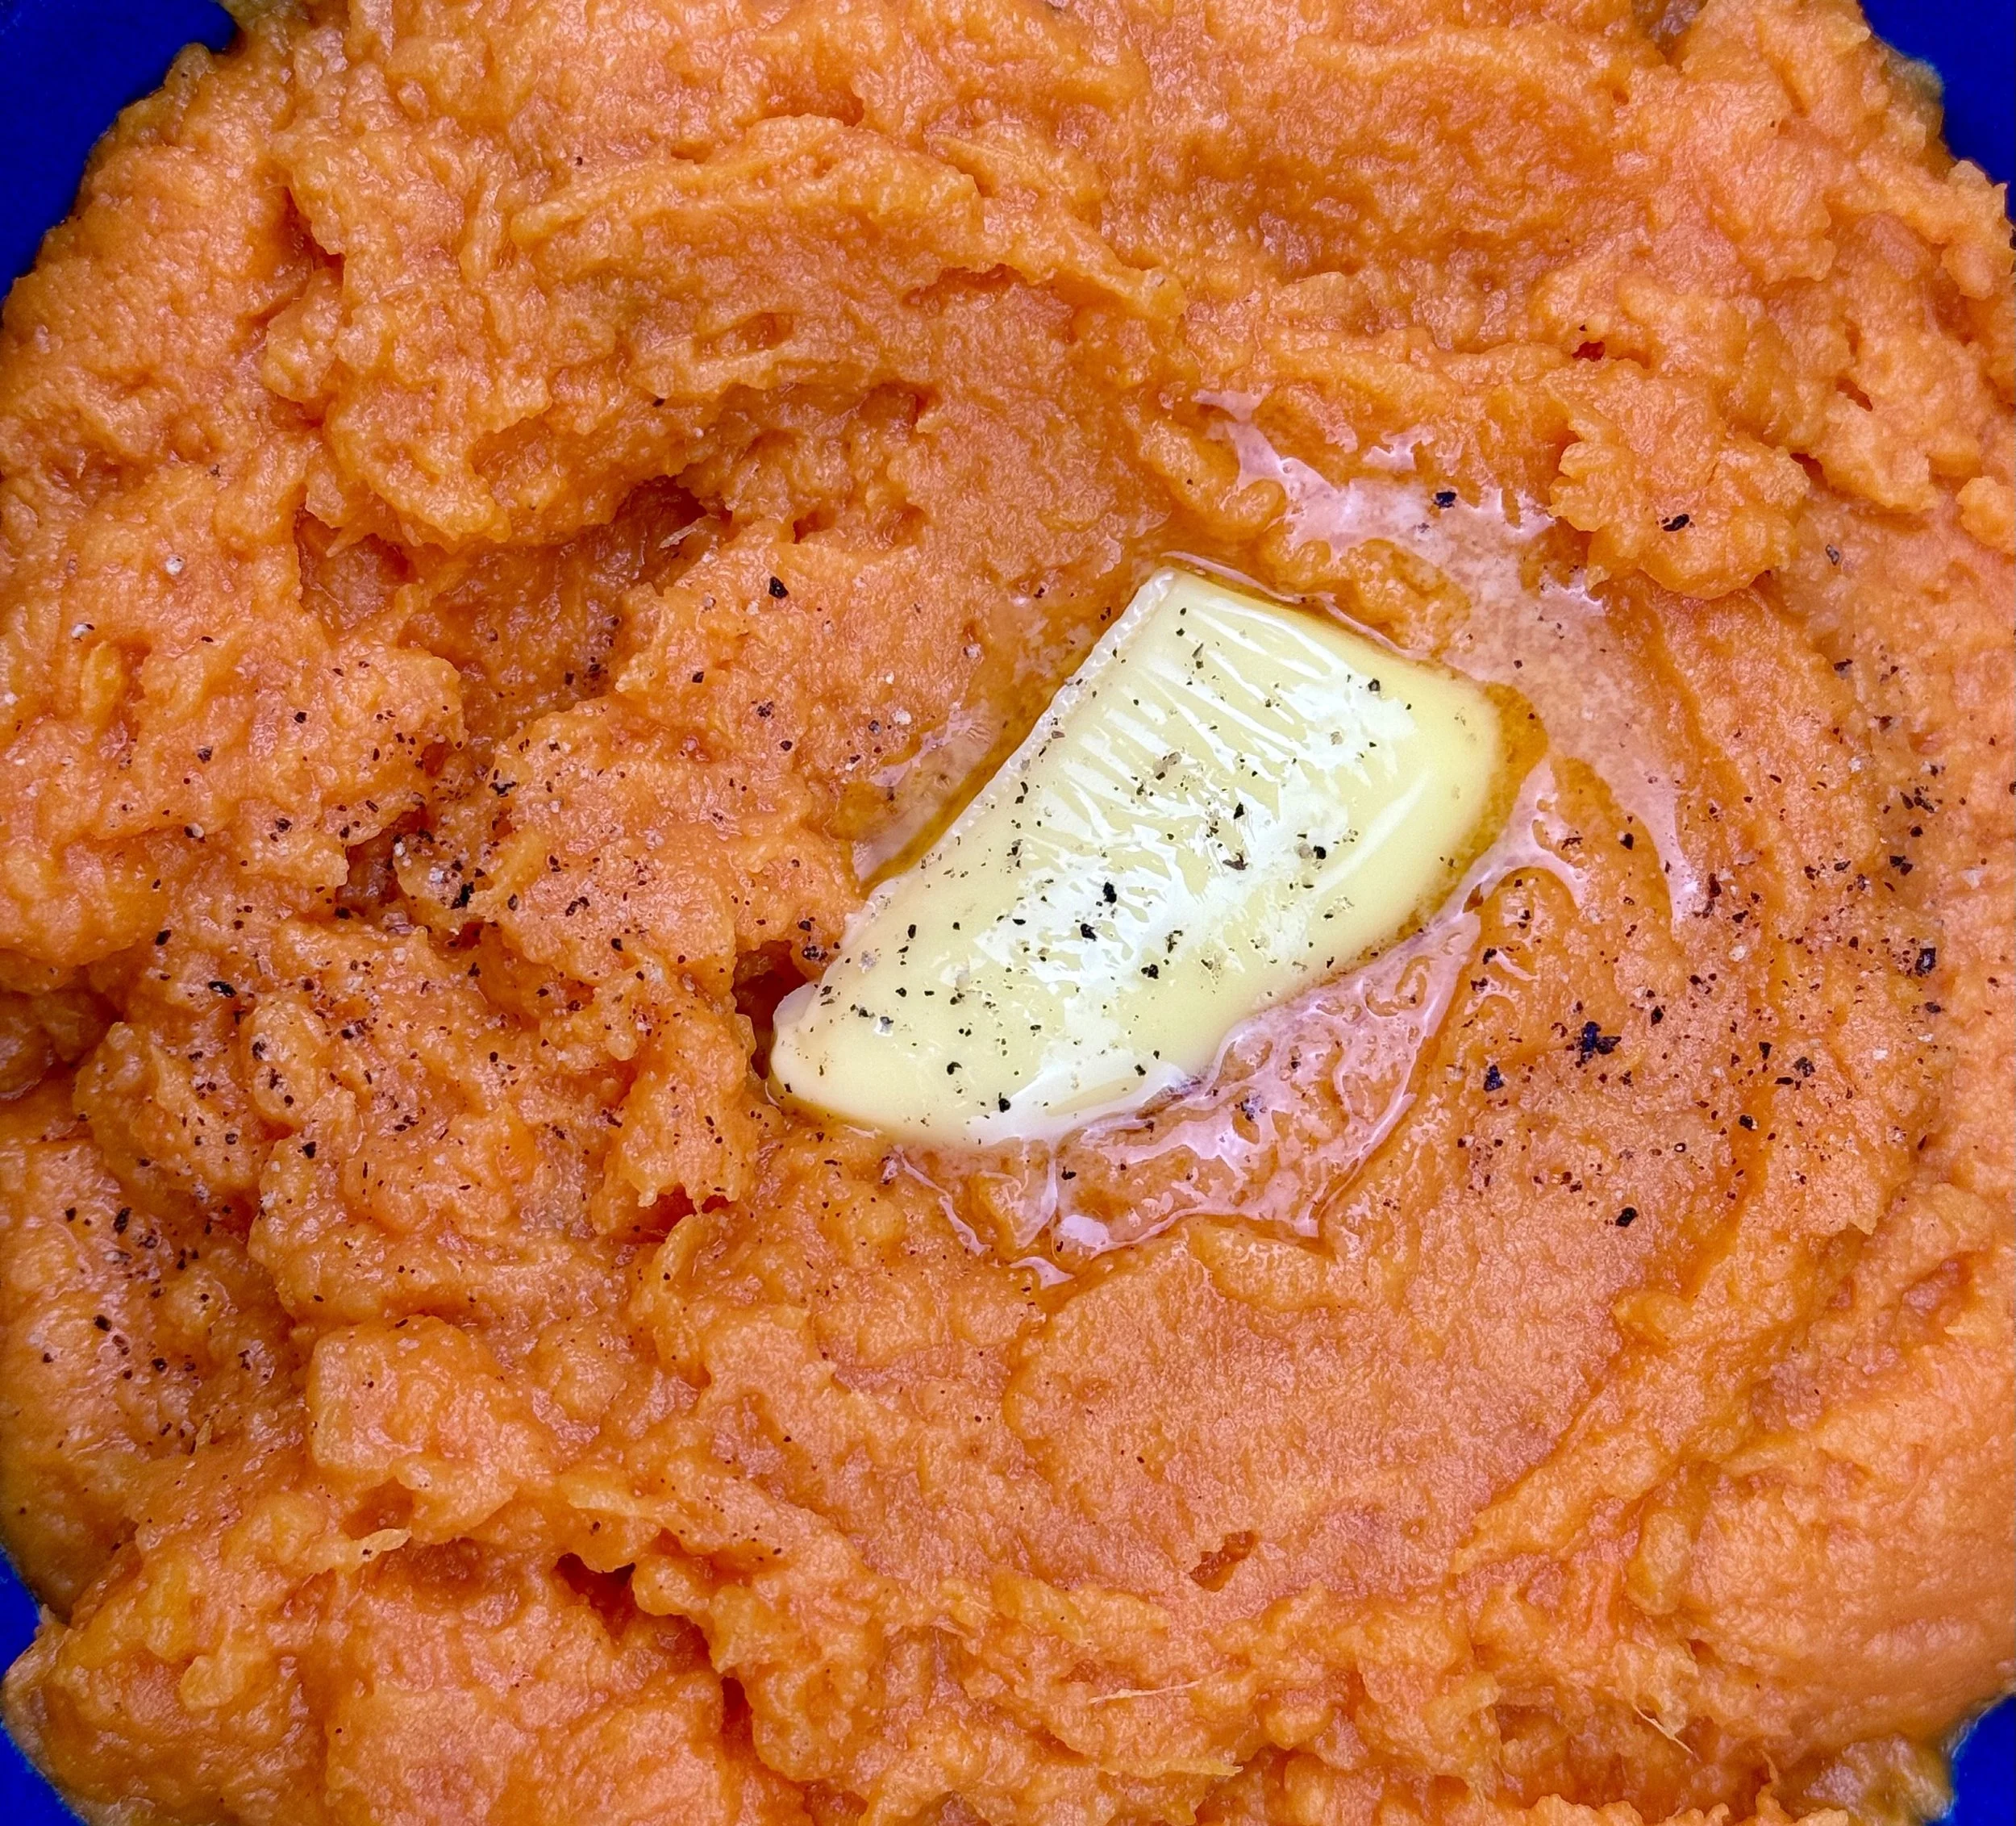
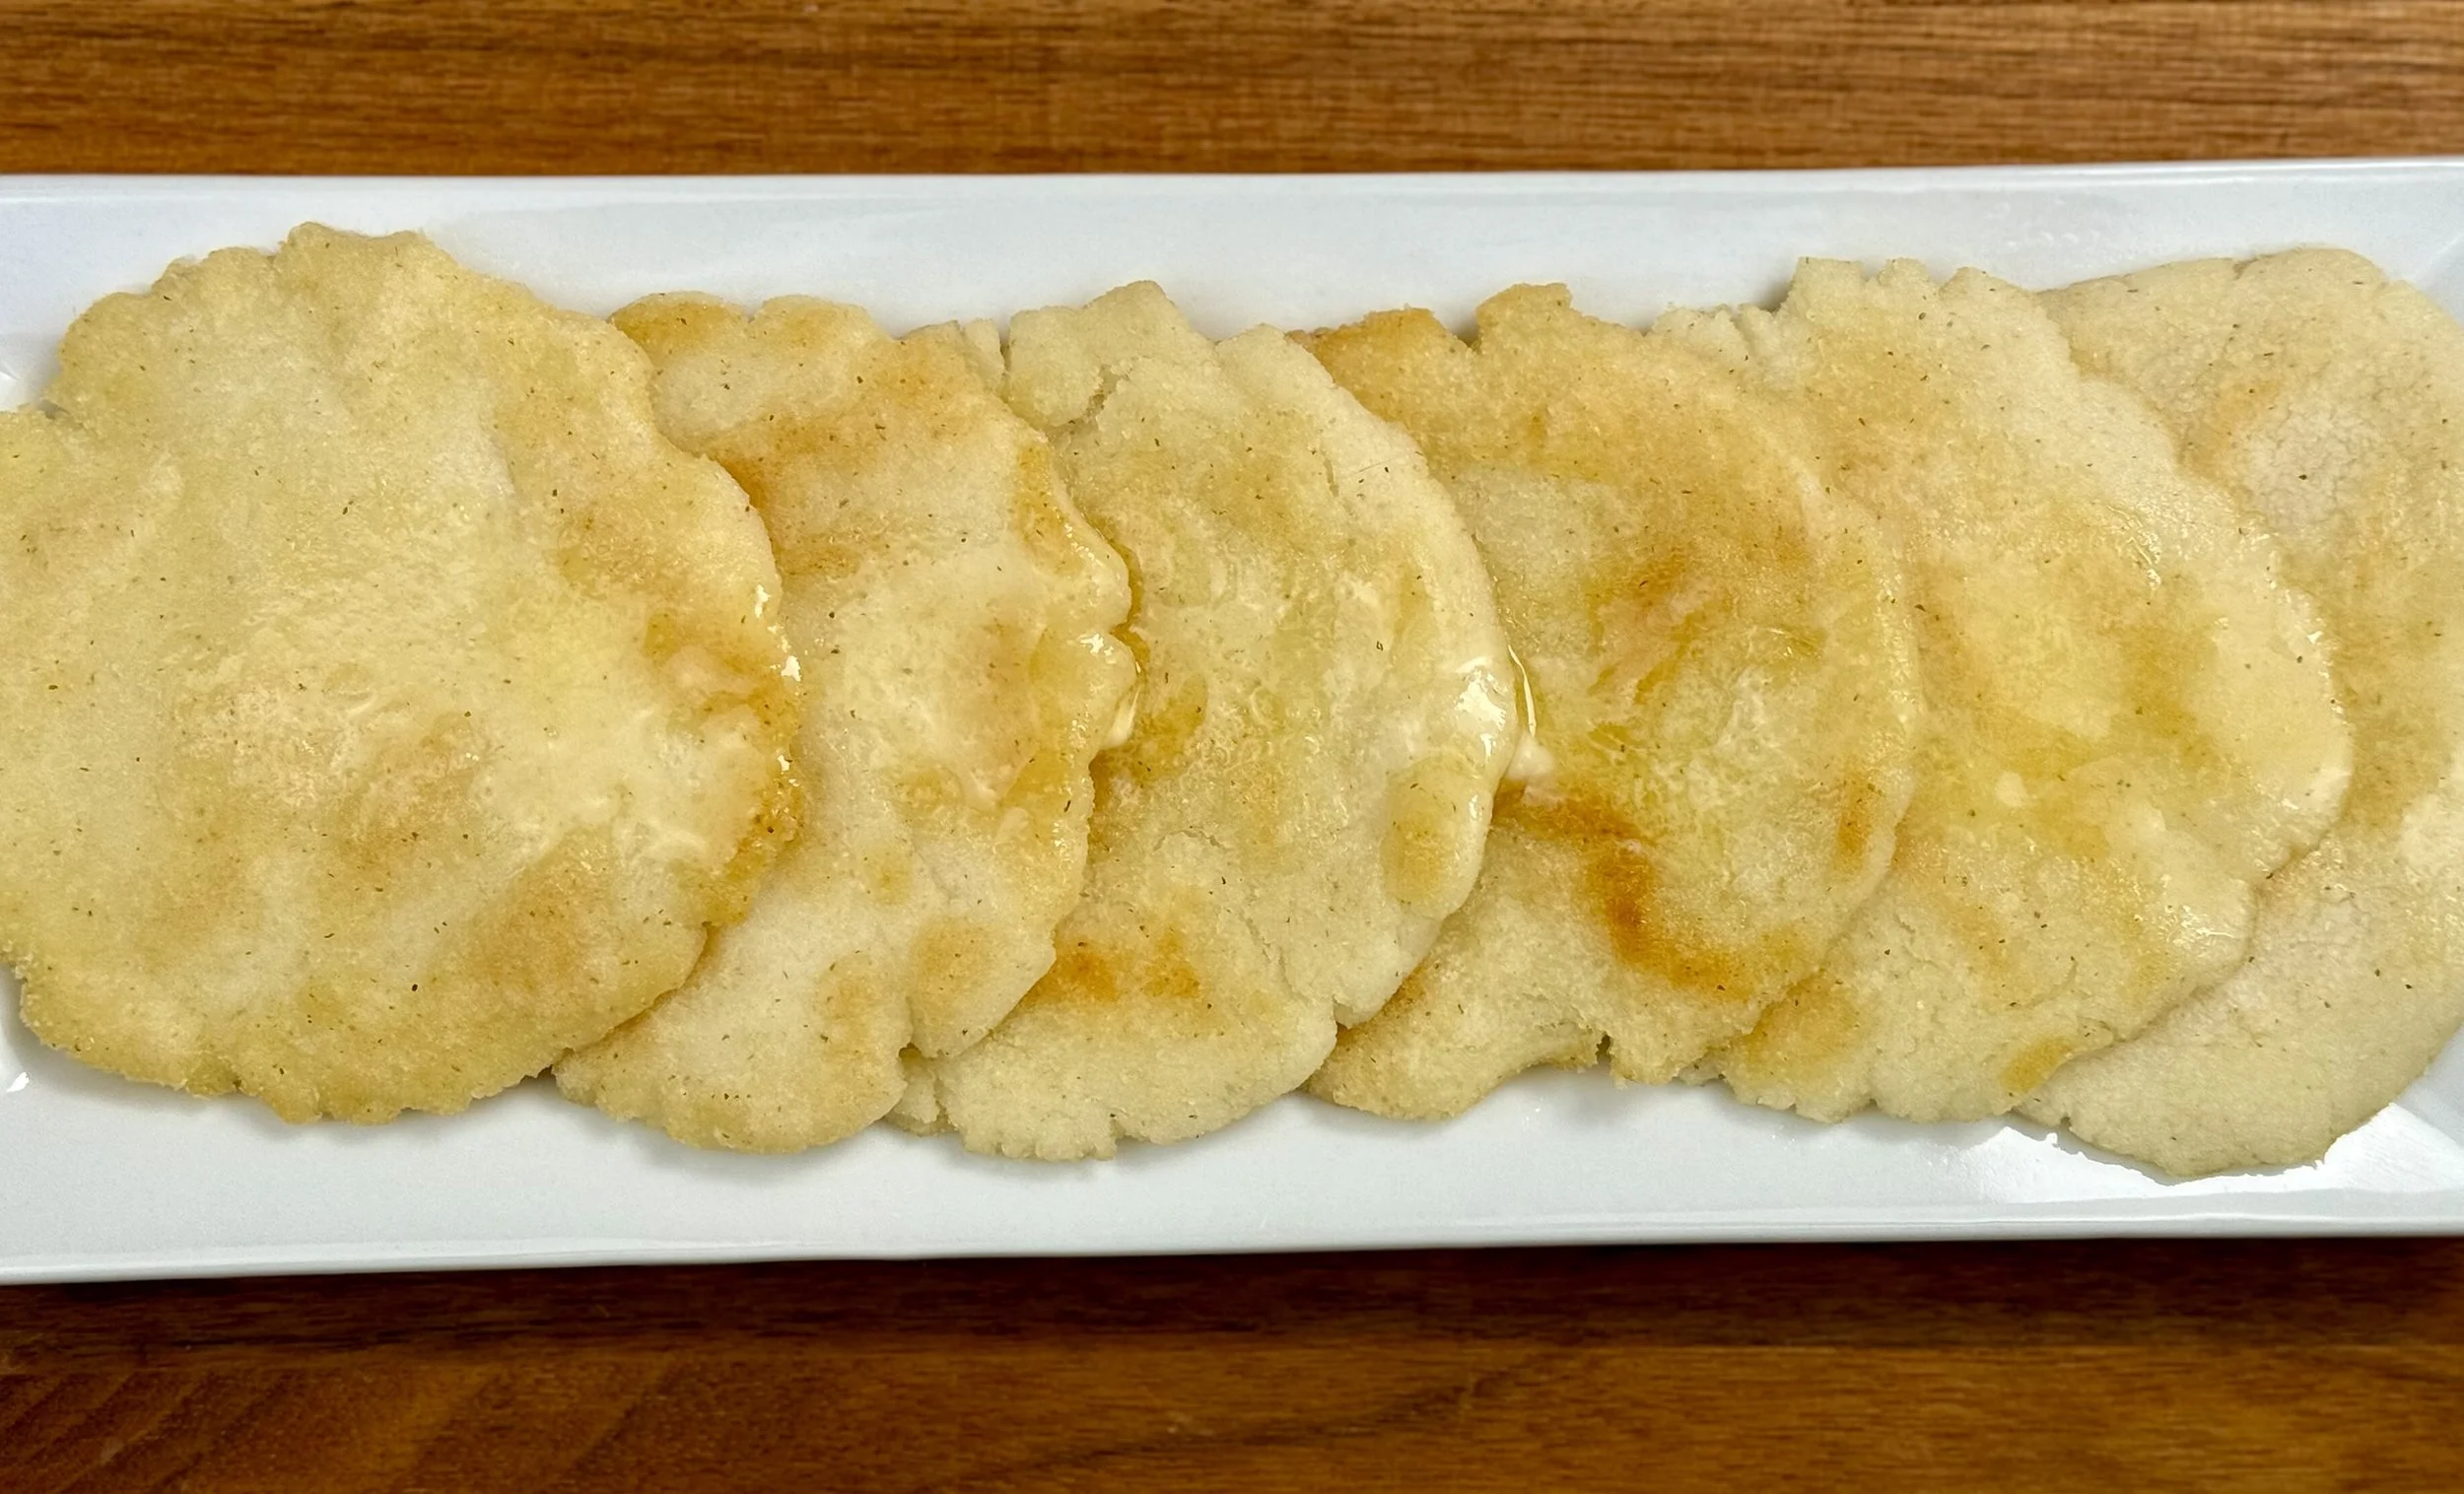
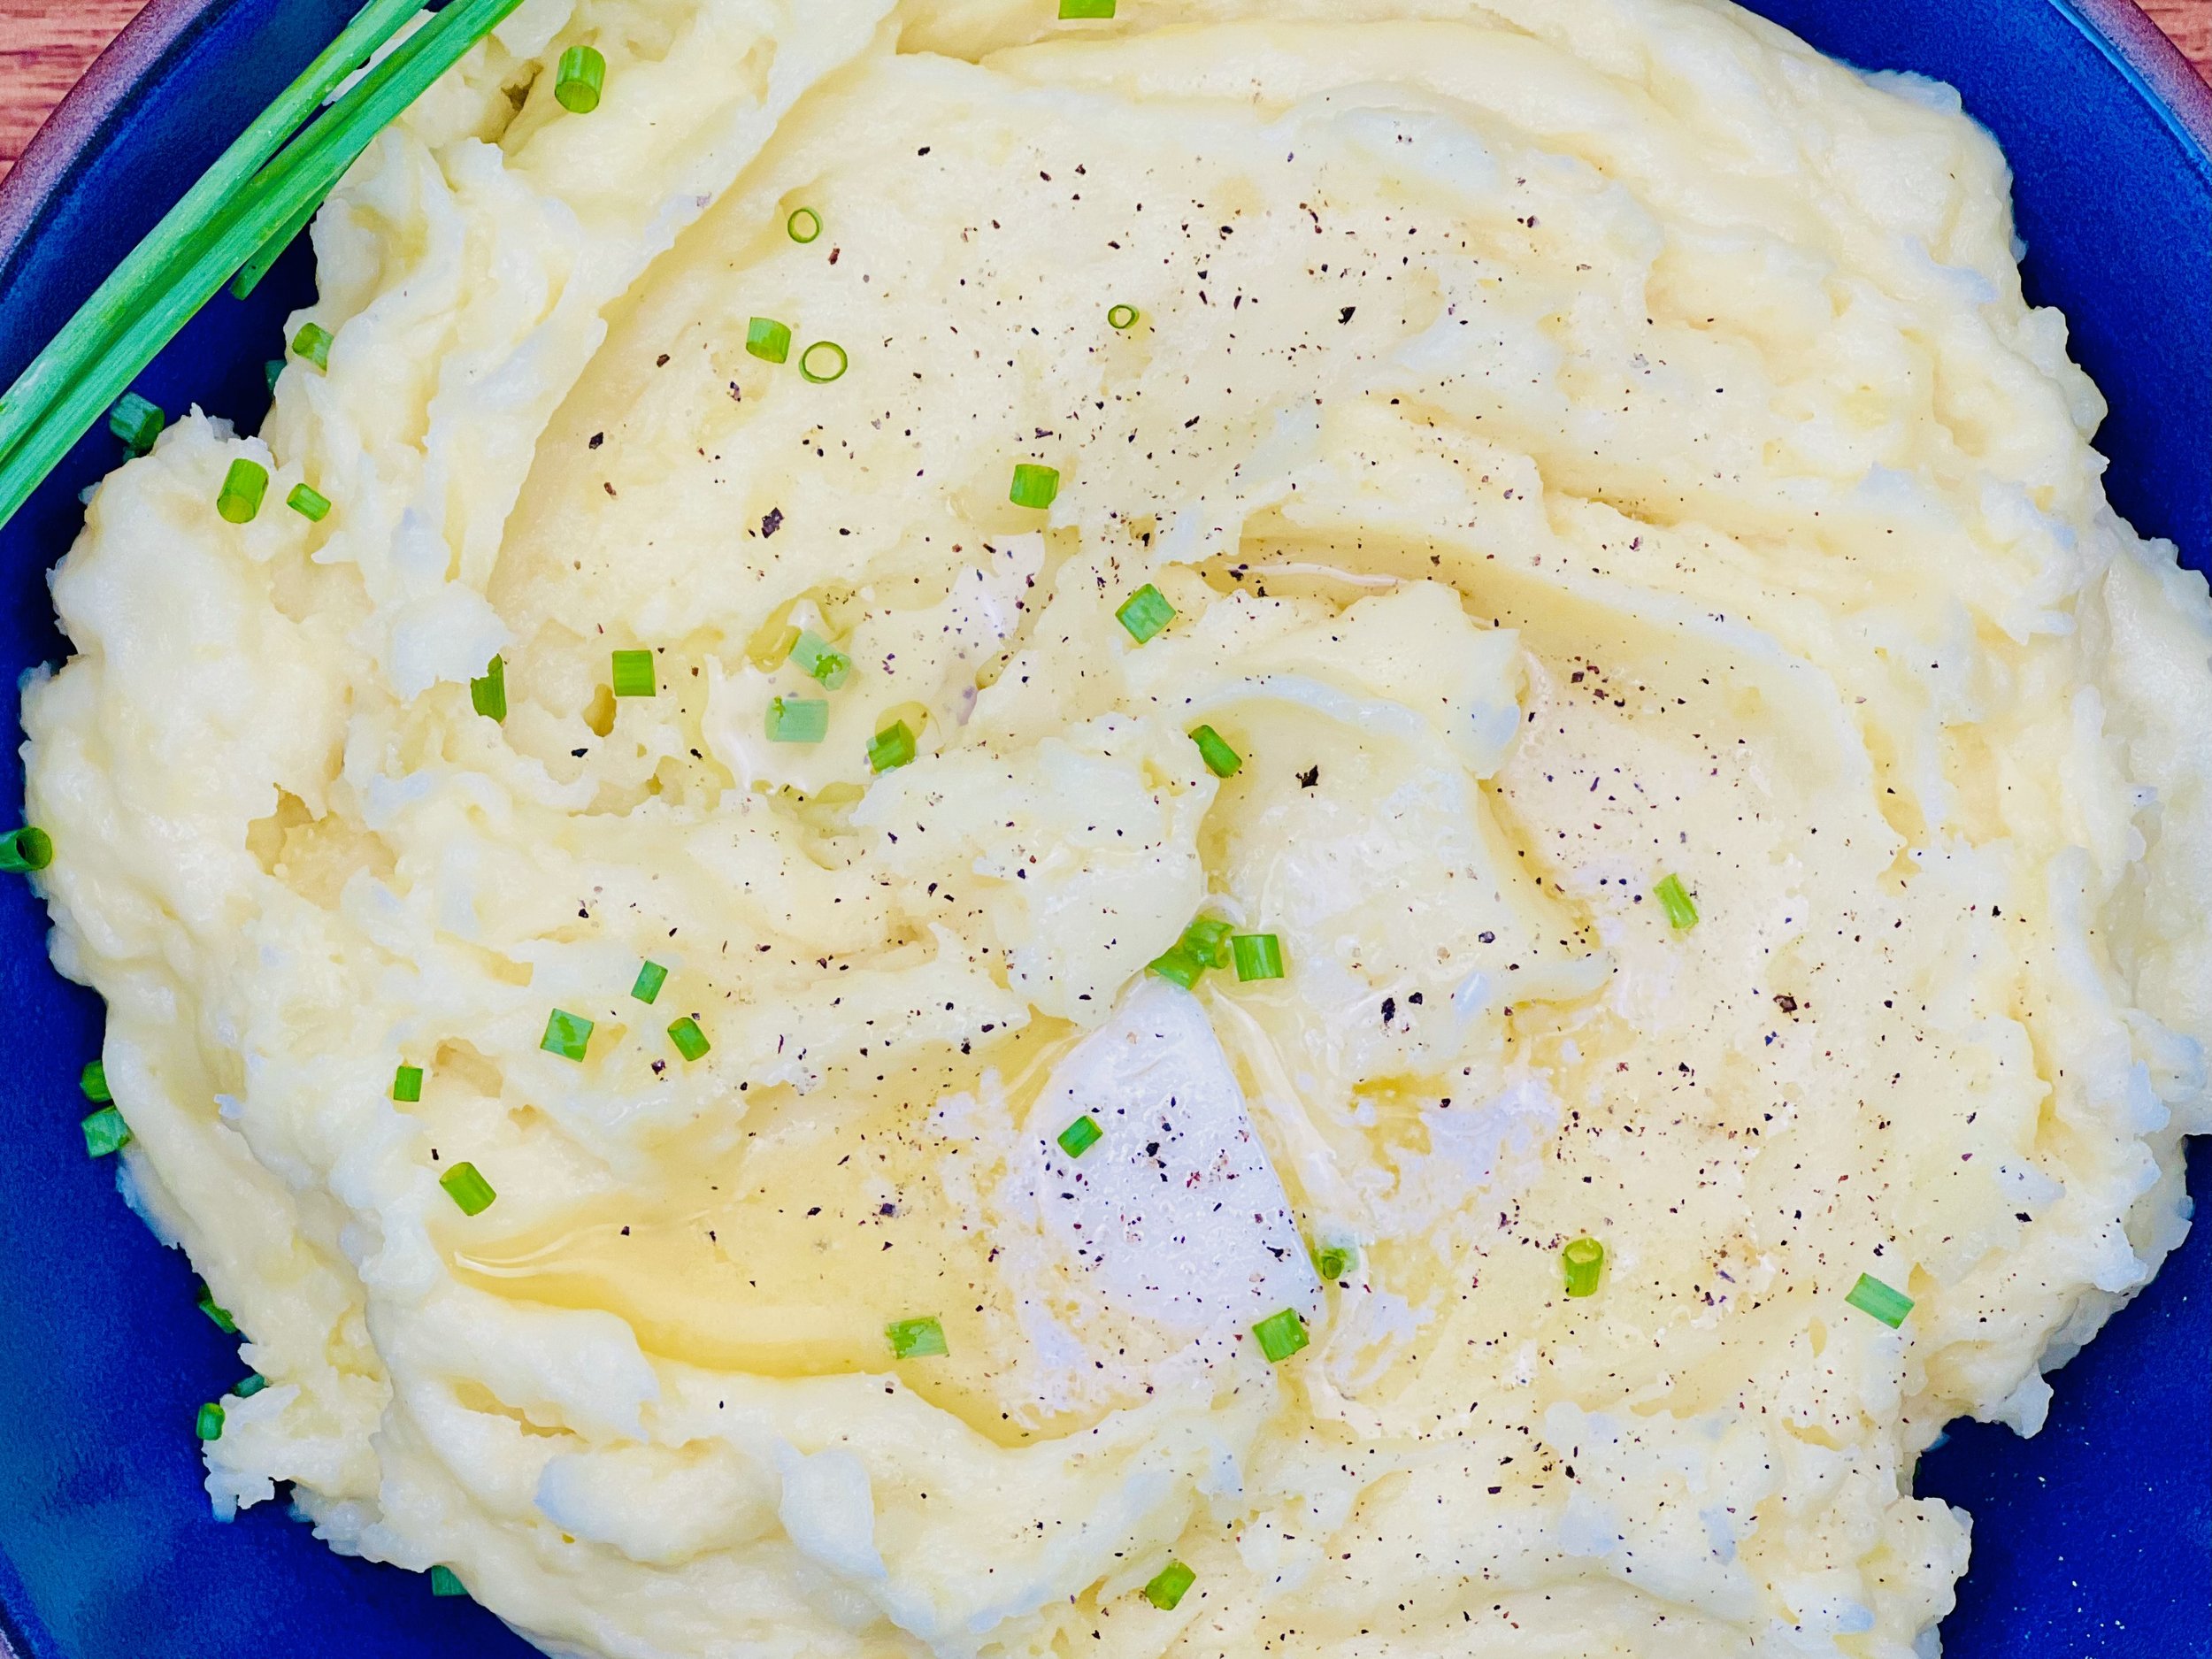
Buttery Mashed Yukon Gold Potatoes (low FODMAP)
10 Minutes prep • 15 Minutes cook • Low FODMAP • Gluten-free • Serves 6
10 Minutes prep • 15 Minutes cook • Low FODMAP • Gluten-free • Serves 6 • Ok to make-ahead: Steps 1 - 6
When you start with good ingredients that have their own wonderful flavors, simple preparation is the way to go. Yukon Gold potatoes have a wonderful texture and flavor and, with a few simple ingredients added, they make really good mashed potatoes. These buttery mashed Yukon Golds are a perfect side, especially when you are serving something with a delicious sauce that needs “catching” so you don’t miss a drop! Try these with my herb-roasted turkey breast and great gravy or my roast pork tenderloin with white wine cream sauce.
This is an exclusive recipe just for recipe club members.
In addition to the two free recipes I create each week I am creating and delivering one very special recipe just for my recipe club members. If you’re not yet a member, I encourage you to join! Membership in the club includes access to the complete archive of recipes with filters so it can become your virtual low FODMAP cookbook plus, I am creating and delivering one special NEW recipe every week ONLY for recipe club members. And, for my true fans, I’ll be sharing behind-the-scenes content, and updates on the progress of the new cookbook.
Your membership in the club helps me continue creating new, delicious, easy-to-make, low FODMAP recipes just for you.
As always, all recipes will emphasize simple ingredients, easy preparation, and delicious low FODMAP results. Recipes will be for everything from main courses, salads, soups, side dishes, appetizers, desserts, sauces, breakfast and lunch, and even mocktails and cocktails. Everything you need to prepare fantastic low FODMAP meals everyone will love.
Join the club. Become a Patron. Let’s keep making delicious Low FODMAP meals together.
More Deliciously Low FODMAP™ side dish recipes you might enjoy


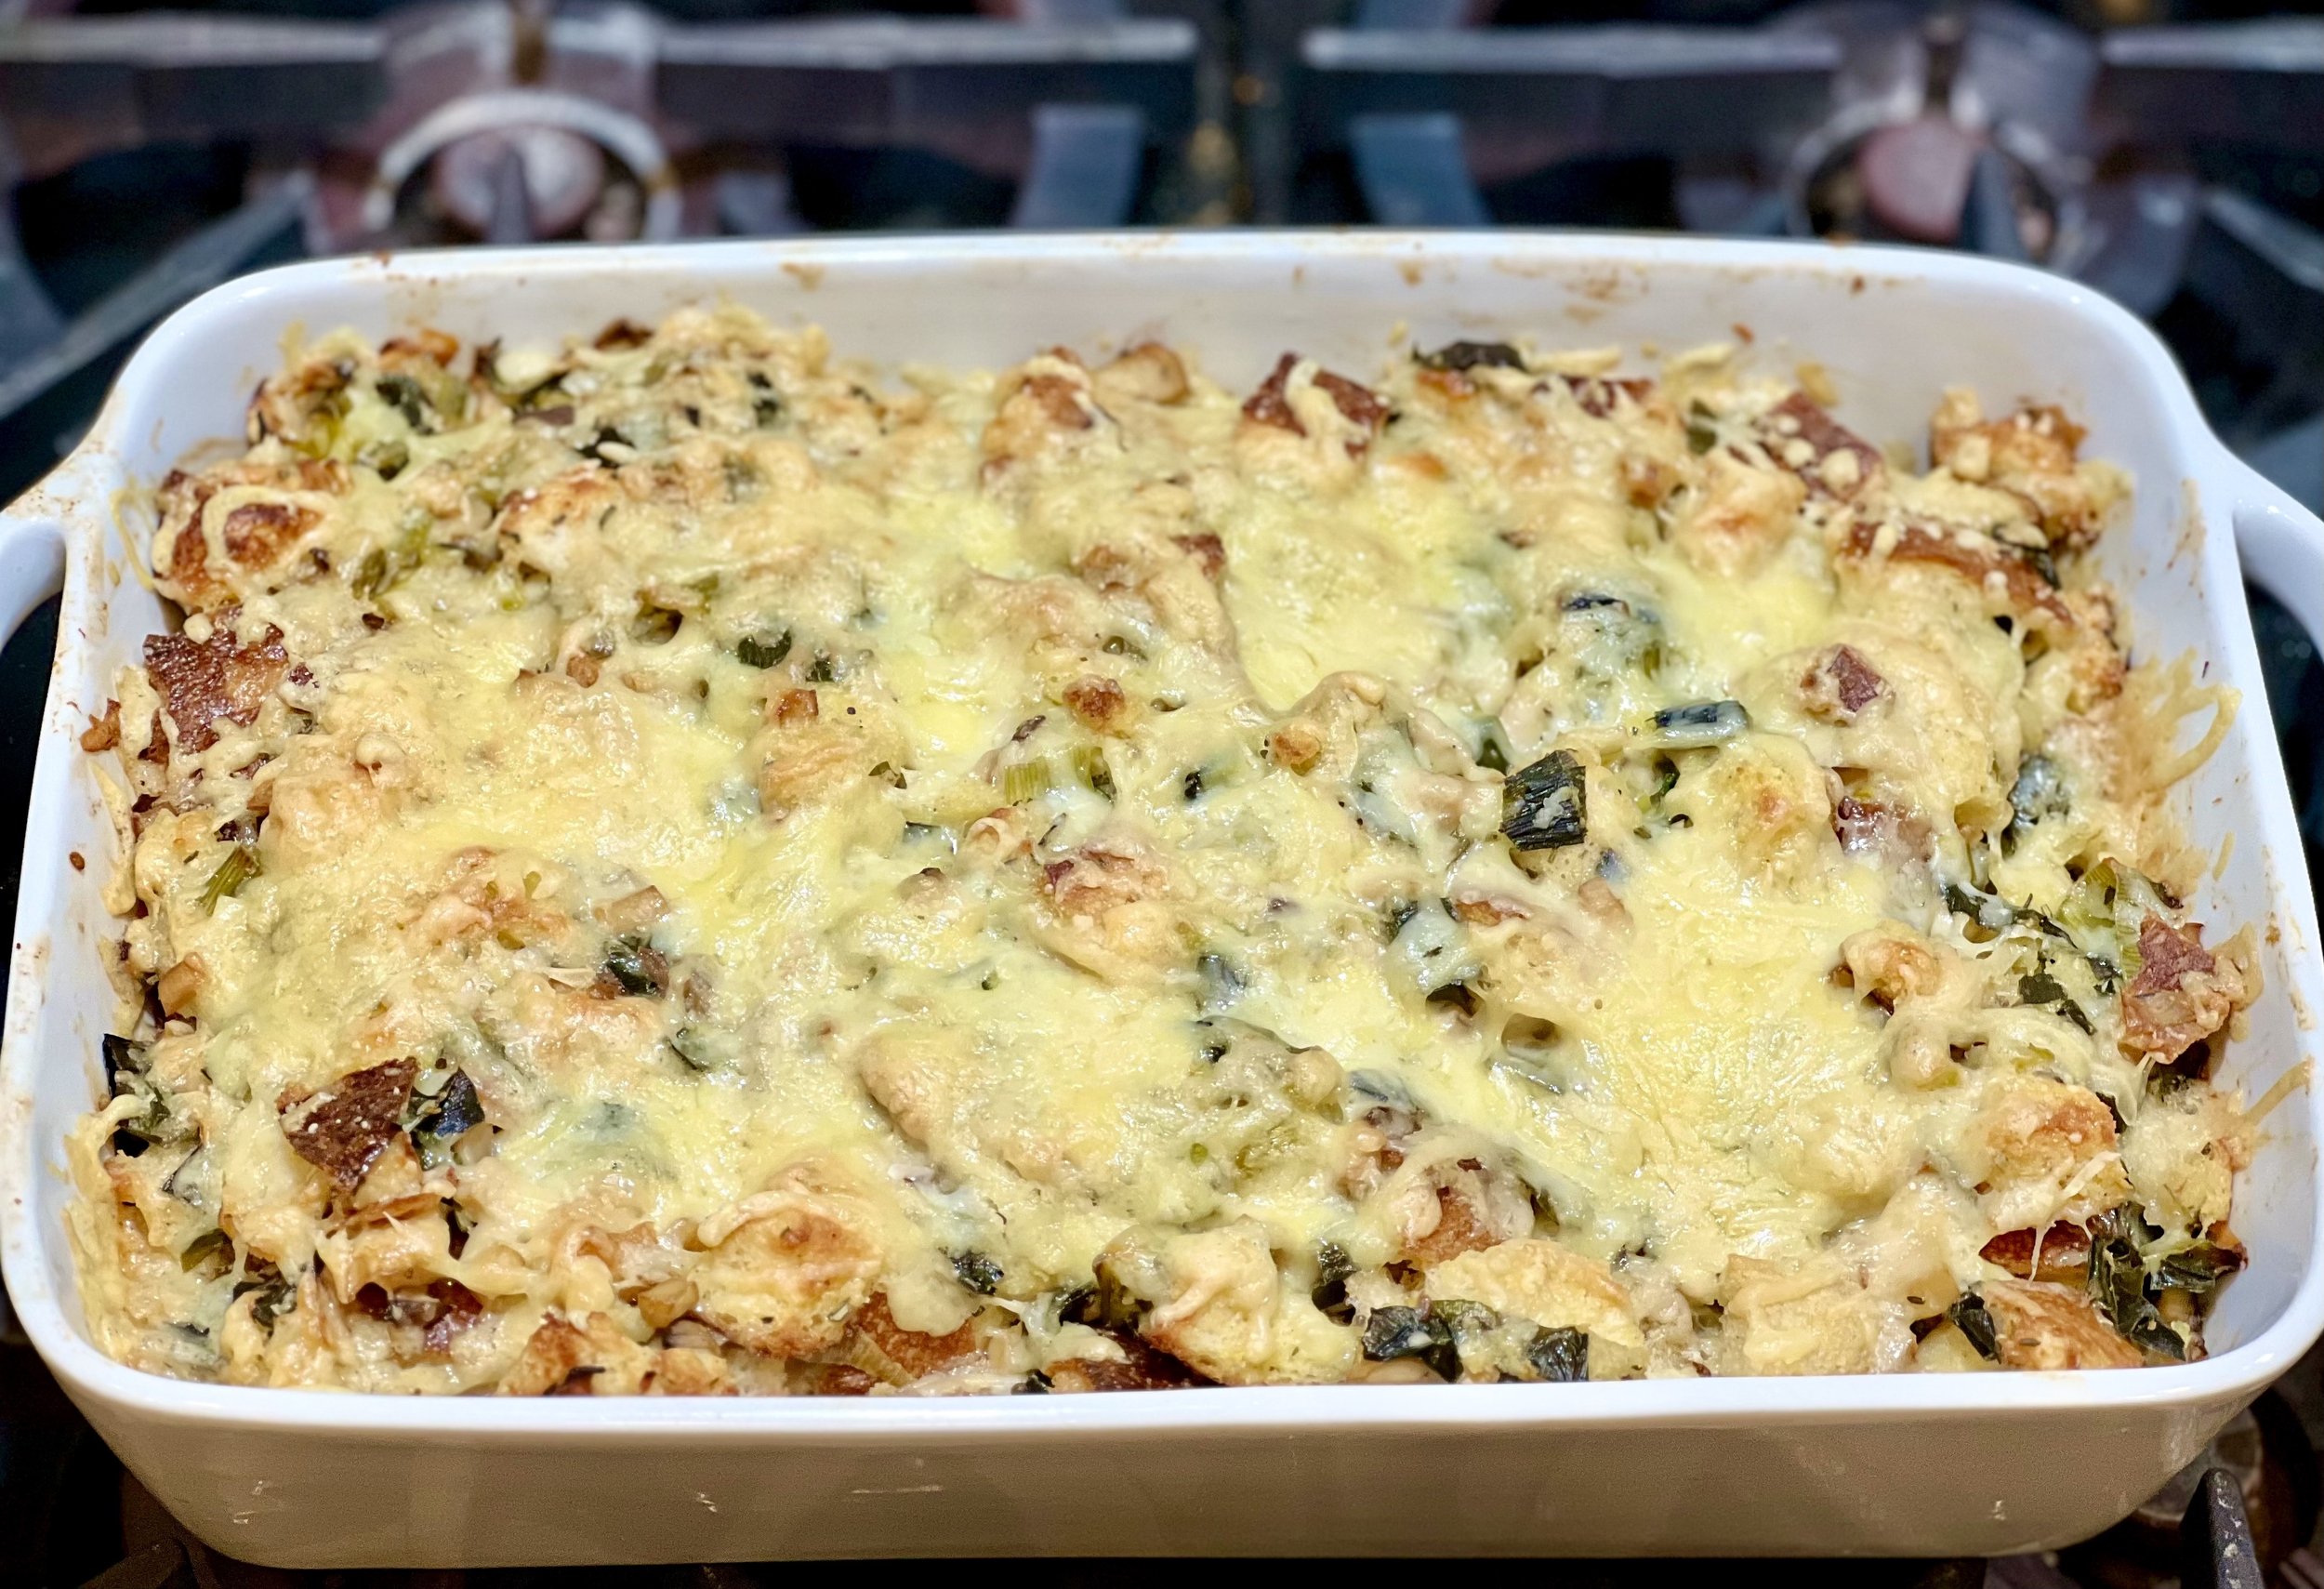

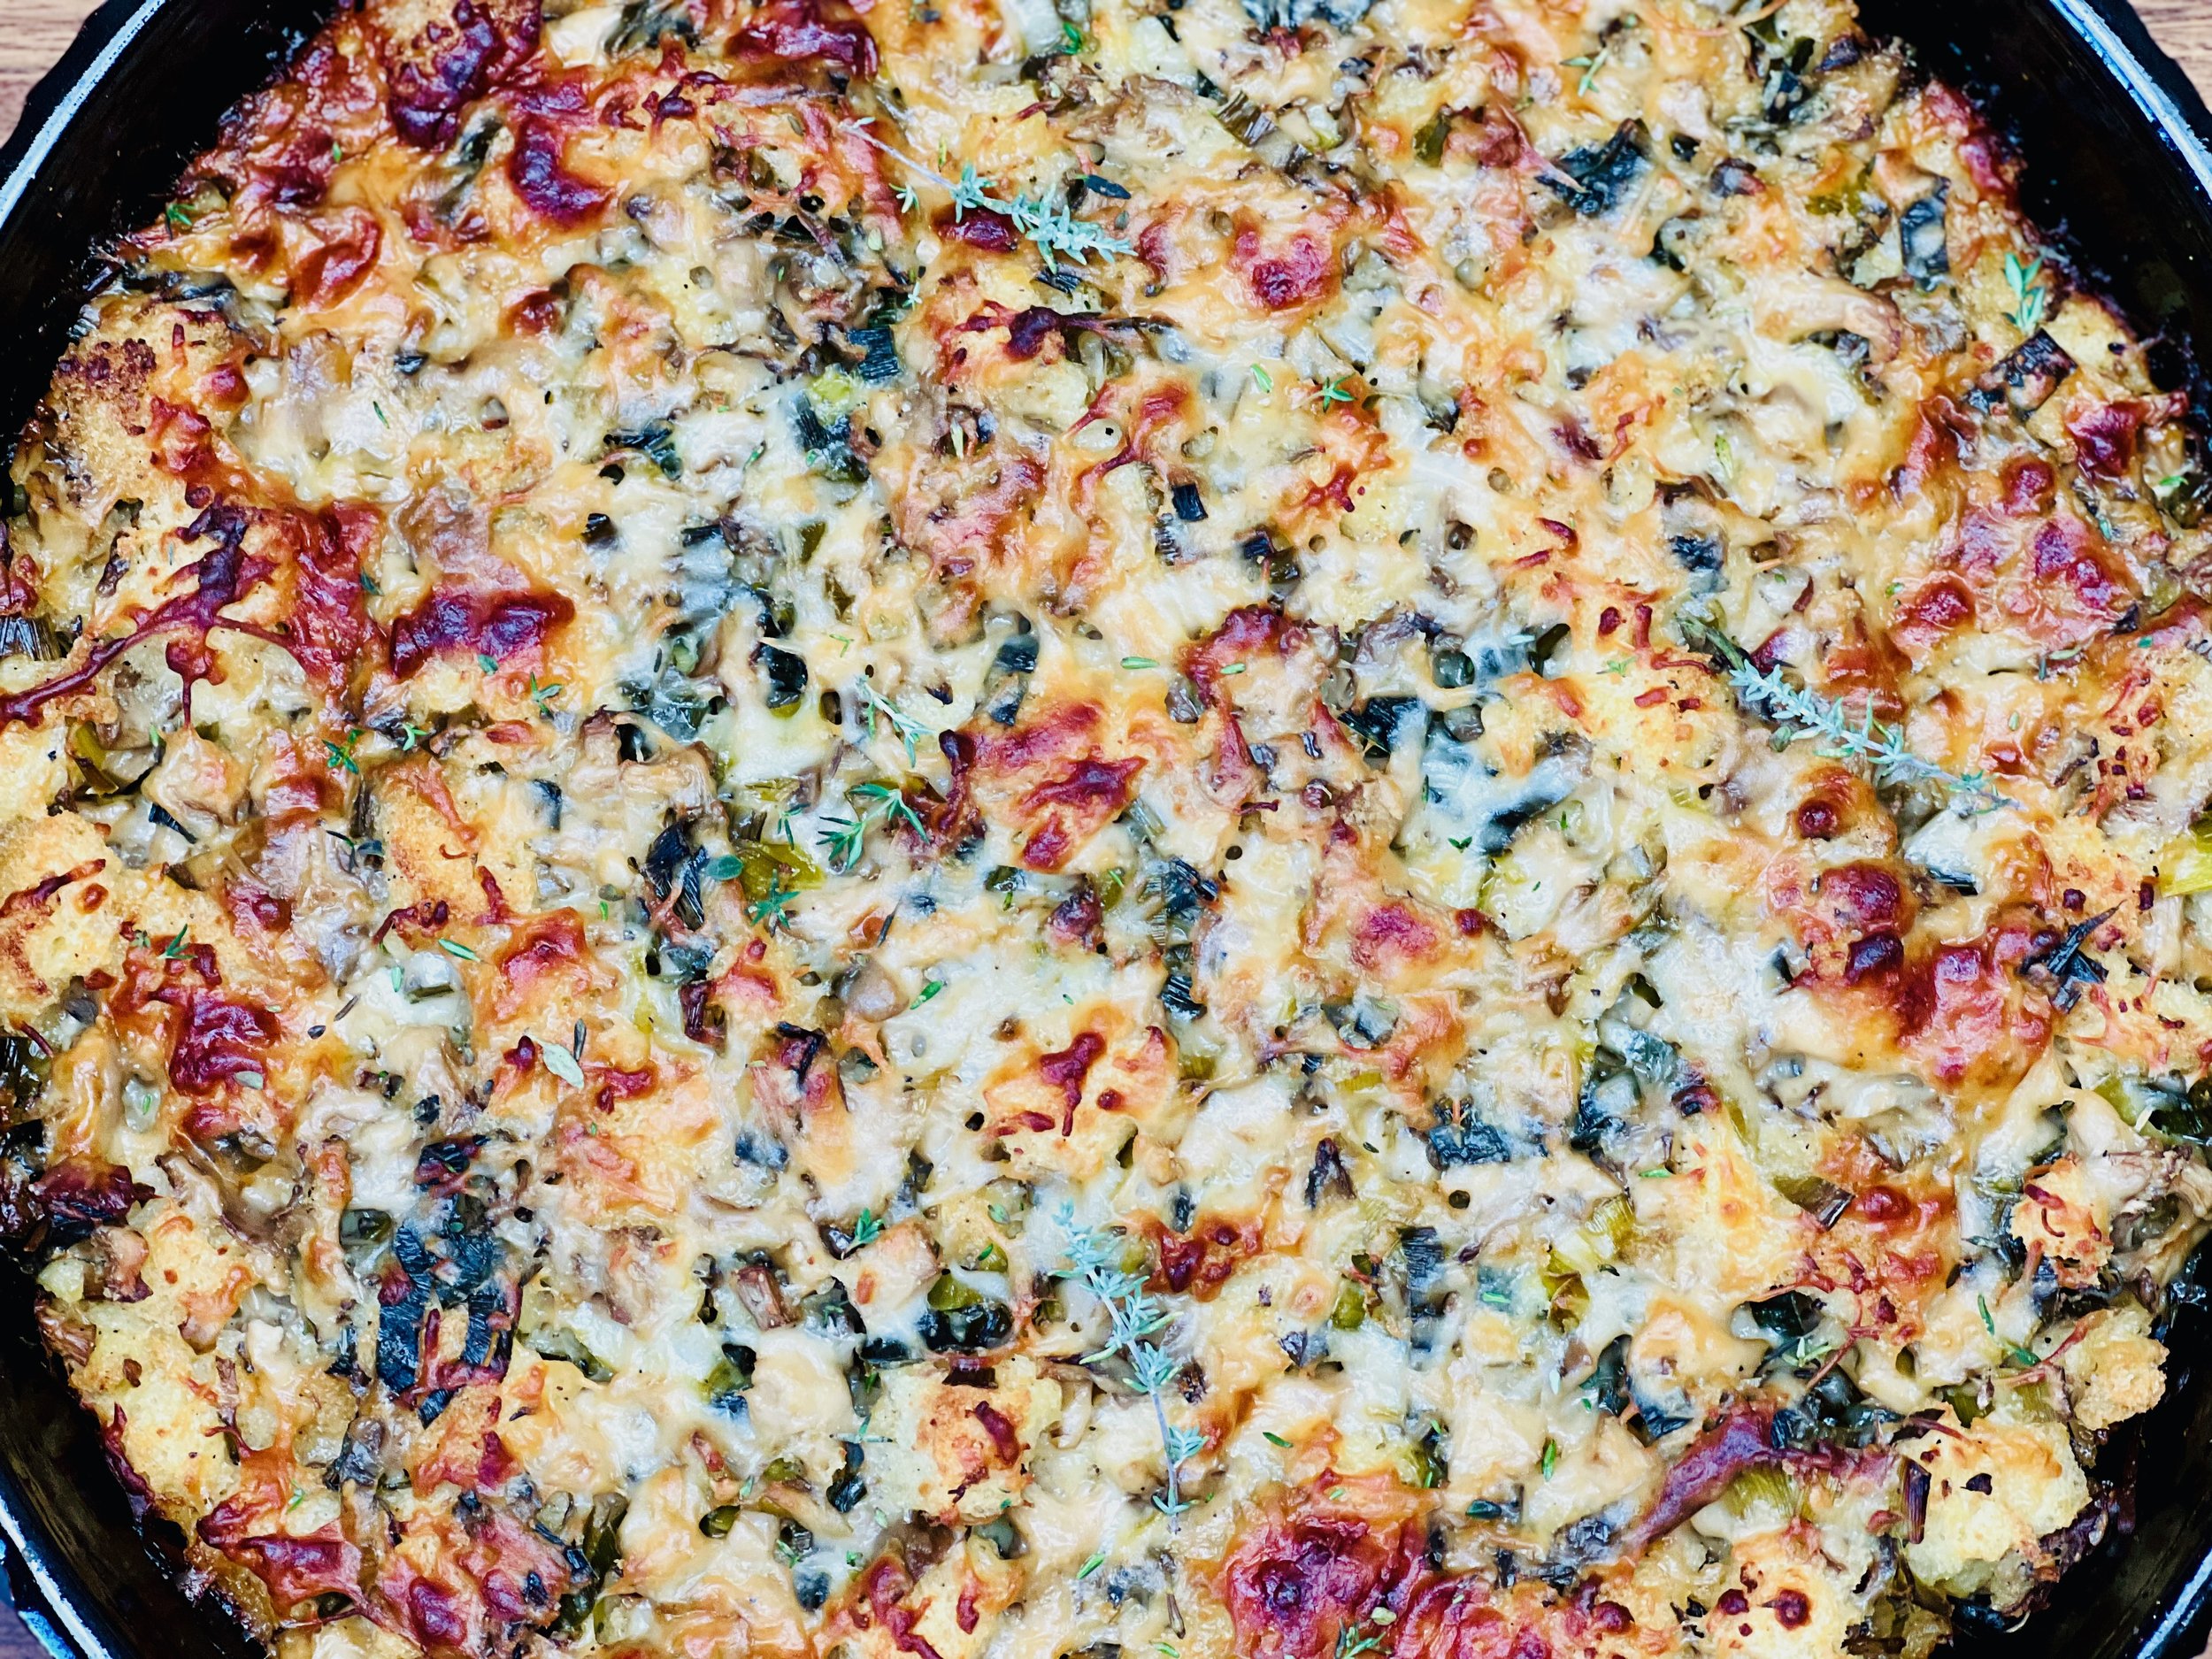
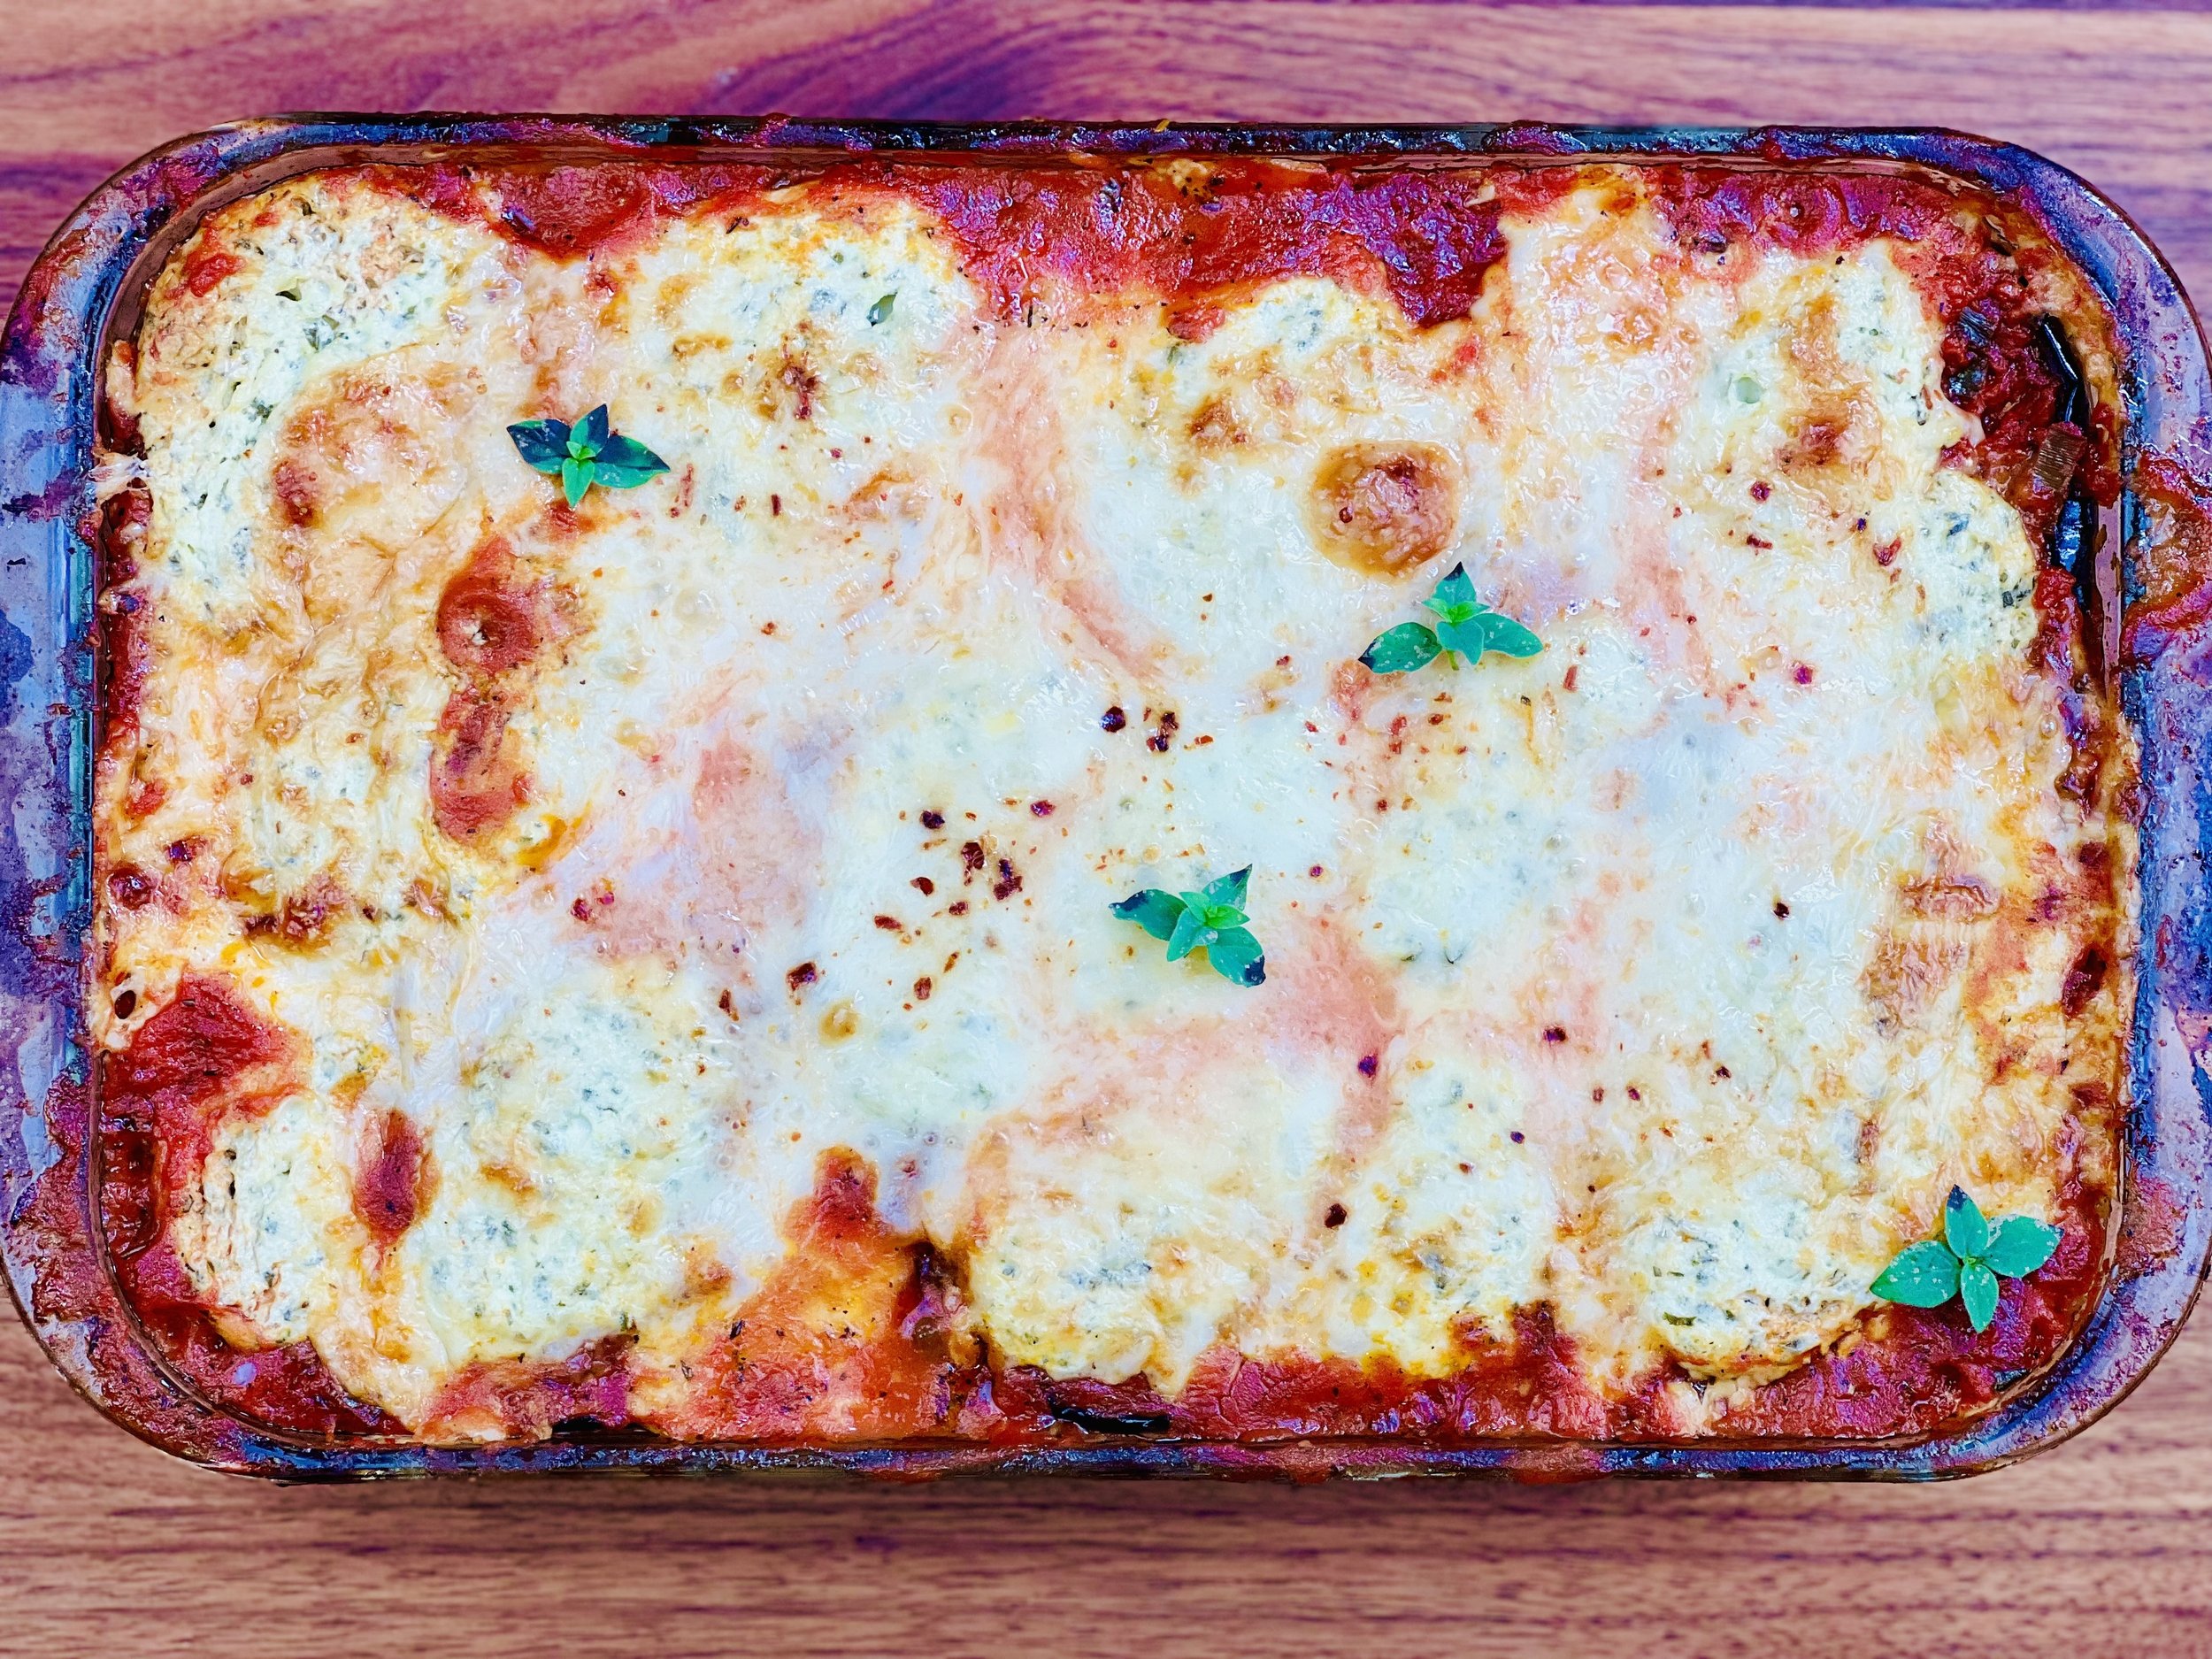
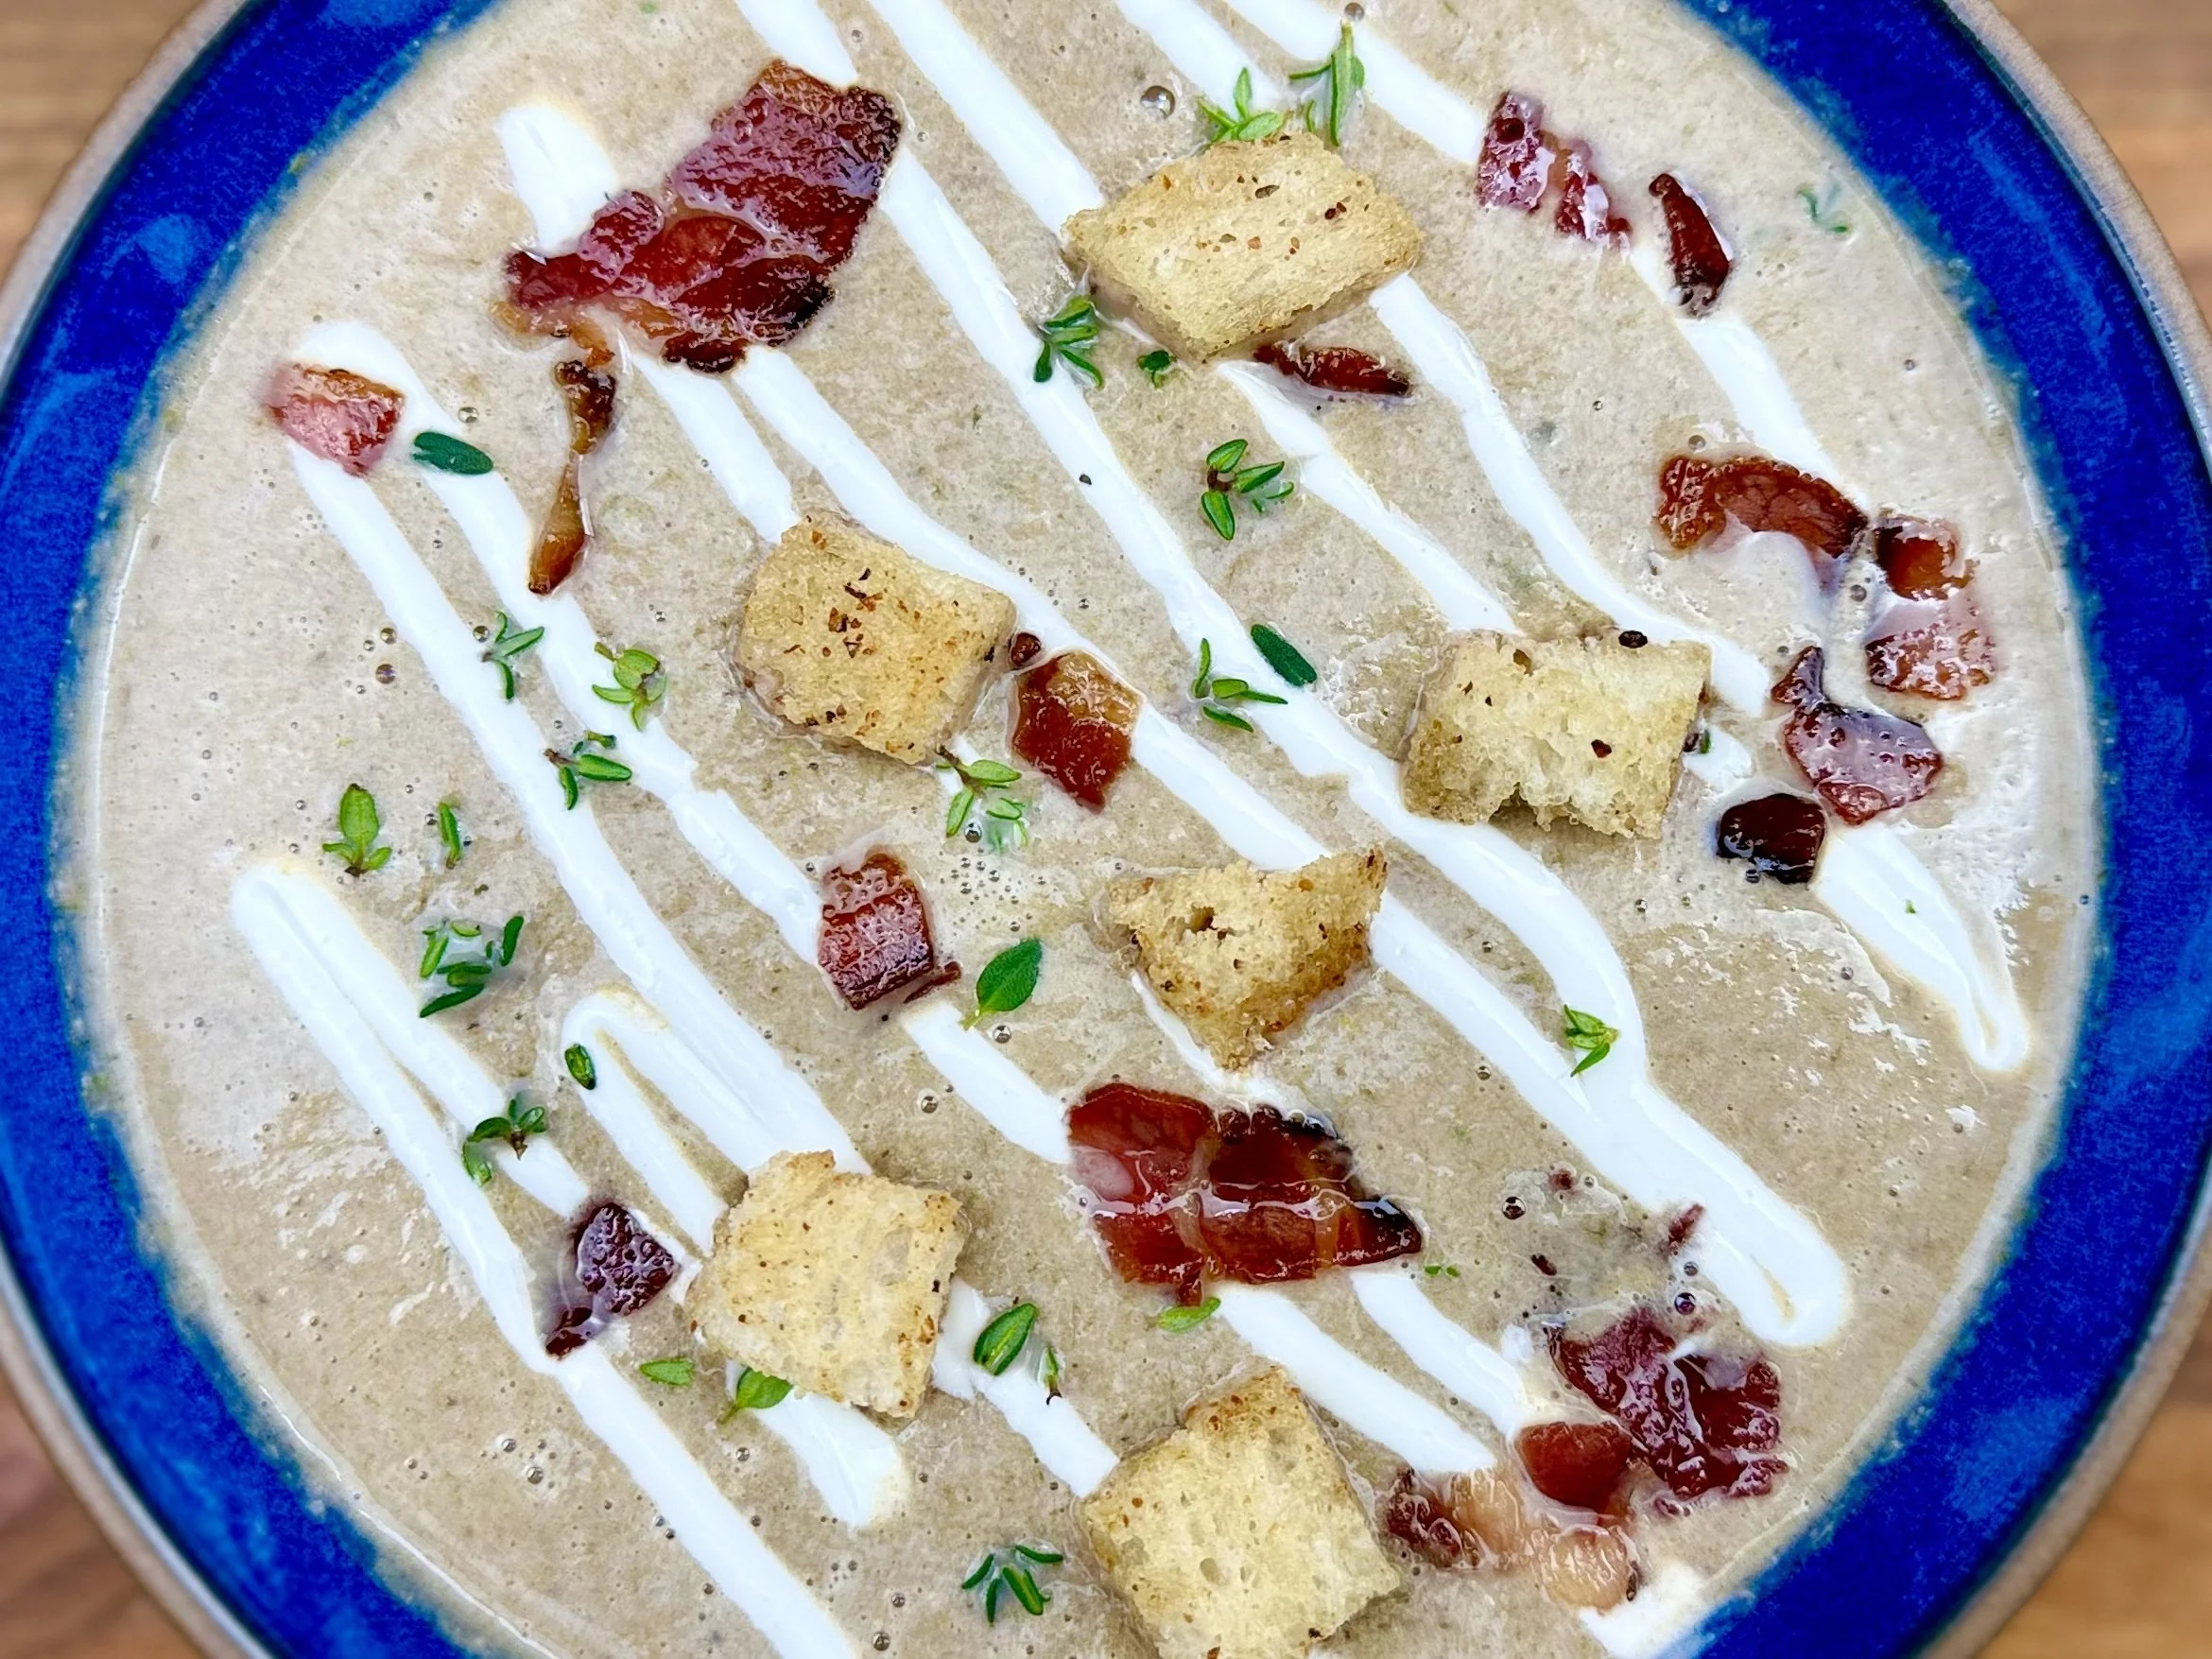
Mushroom Gruyere Savory Bread Pudding (Low FODMAP)
60 Minutes prep • 40 Minutes cook • Low FODMAP • Serves 8
60 Minutes prep • 40 Minutes cook • Low FODMAP • Serves 8 • Ok to make ahead: Steps 1-2
Bread pudding is comfort food at its finest. It can be influenced by many different herbs, seasonings, and cheeses but this version, loaded with leek greens, gruyere cheese, and mushrooms, is really special. Swap this out for the stuffing at your next turkey dinner and your guests are sure to be impressed. This delicious bread pudding makes a wonderful side dish so don’t wait for a holiday to make it! This recipe uses “real” sourdough bread—which is bread that is well-tolerated by most people who have IBS. See recipe notes for more about sourdough bread and the Low FODMAP diet.
Ingredients
6 cups ½-inch bread cubes cut from real sourdough bread, crusts removed
2 tablespoons extra-virgin olive oil
1 tablespoon salted butter
2 ounces pancetta, chopped
4 cups leek greens, sliced (about 4 leeks)
1 1/2 pounds oyster mushrooms, chopped
1 teaspoon dried thyme, or 1 tablespoon chopped fresh thyme leaves, plus more for serving
1/4 cup dry sherry
1 teaspoon Kosher salt and 1/2 teaspoon freshly ground black pepper
4 extra-large eggs (or 5 medium-large eggs)
1 1/2 cups heavy cream or lactose-free whole milk (or a combination of the two)
1 cup Gourmend low FODMAP chicken stock (use code IBSGC15 for 15% discount)
1 1/2 cups grated Gruyère cheese (about 8 ounces), divided
Directions
(1) Prepare: Preheat the oven to 350 degrees F. Butter a 2½ to 3-quart gratin dish (or standard cake pan 13 x 9 x 2 inches) and set aside. Remove crusts and cut the sourdough bread into small cubes. Line a large rimmed baking sheet with parchment. Spread the bread cubes on the prepared baking sheet and bake for 15 to 20 minutes, until lightly browned. Set aside.
(2) Cook the leaks and mushrooms: Meanwhile, heat the oil and butter in your largest sauté pan over medium heat. Add the pancetta and cook, stirring frequently, for 5 minutes, until it starts to brown. Add the leek greens and cook over medium heat for about 5 minutes, until the greens are tender. Stir in the mushrooms, thyme, sherry, 1 teaspoon of salt, and 1/2 teaspoon of pepper and cook for 10 to 12 minutes, until most of the liquid evaporates, stirring occasionally.
(3) Prepare filling: In a large mixing bowl, whisk together the eggs, cream or milk, chicken stock, and 1/2 of the Gruyère cheese. Add the bread cubes, stirring well to combine. Set aside at room temperature for 20 - 30 minutes to allow the bread to absorb the liquid. Gently toss the mixture every 5 - 10 minutes. After the mushroom mixture has cooled somewhat, add that to the bread cube mixture. Stir well and pour into the prepared gratin dish or cake pan.
(4) Bake: Sprinkle with the remaining 1/2 of the grated Gruyère and bake for 45 to 50 minutes, until the top is browned and the custard is set.
(5) Plate and serve: Sprinkle with additional fresh thyme. Serve hot alongside your savory main course and a side salad.
Eat and enjoy every bite because you can!
Recipe note: I use Diamond Crystal Kosher salt in all my recipes because it has a wonderful flat and crisp flake that tastes delicious. It is also the least salty salt available so you can use it more liberally as a seasoning than you can table salt or sea salt. If you use another type of salt, you may need to reduce the amount so it is not over-salted.
Notes about sourdough bread:
The process of making real sourdough bread renders it extremely tolerable for those of us with IBS.
I always recommend my clients try real sourdough for themselves (meaning it is made without yeast and without added vinegar that would “mimic” sourdough bread). According to Monash University, the levels of fructans (from the oligosaccharide FODMAP group) are reduced during the sourdough fermentation process. This is because the yeasts ferment the fructans during the natural leavening process while the bread rises. Typically the dough should be allowed to prove for around 12 hours to reduce the fructans as much as possible (which is why I recommend sourdough made in the traditional way).
Sourdough bread (as long as it’s traditionally made) is a far better solution than gluten-free bread because it has so few ingredients and is low in FODMAPs.
I do recommend no bread while you are on a FODMAP elimination diet. But once you’ve done that work and you know your tolerances, then you can introduce real sourdough bread and see how you handle it.
I recommend starting with the simplest sourdough with just wheat flour before branching out to try sourdough pumpernickel or sourdough rye bread. Your body is the best judge of what you personally tolerate.
Commercially available real sourdough includes San Luis Sourdough and Beckman’s Old World Sourdough. Whole Foods carries a seeded sourdough loaf from As Kneaded bakery that is quite wonderful. Other sourdough breads from As Kneaded and other traditional bakers are also delicious. Just ask the baker or check the list of ingredients to be sure you are getting “real” sourdough bread.
Have a question you’d like to have answered? Email us at hello@ibsgamechanger.com
Link note: This post contains links for you to easily purchase items listed on the page. In some cases, we have provided a special discount code for IBS Game Changers so be sure to use it when you purchase an item to get the discount that has been arranged just for you! As an Amazon Associate, I earn a commission from qualifying Amazon purchases.
More Deliciously Low FODMAP™ side dish recipes
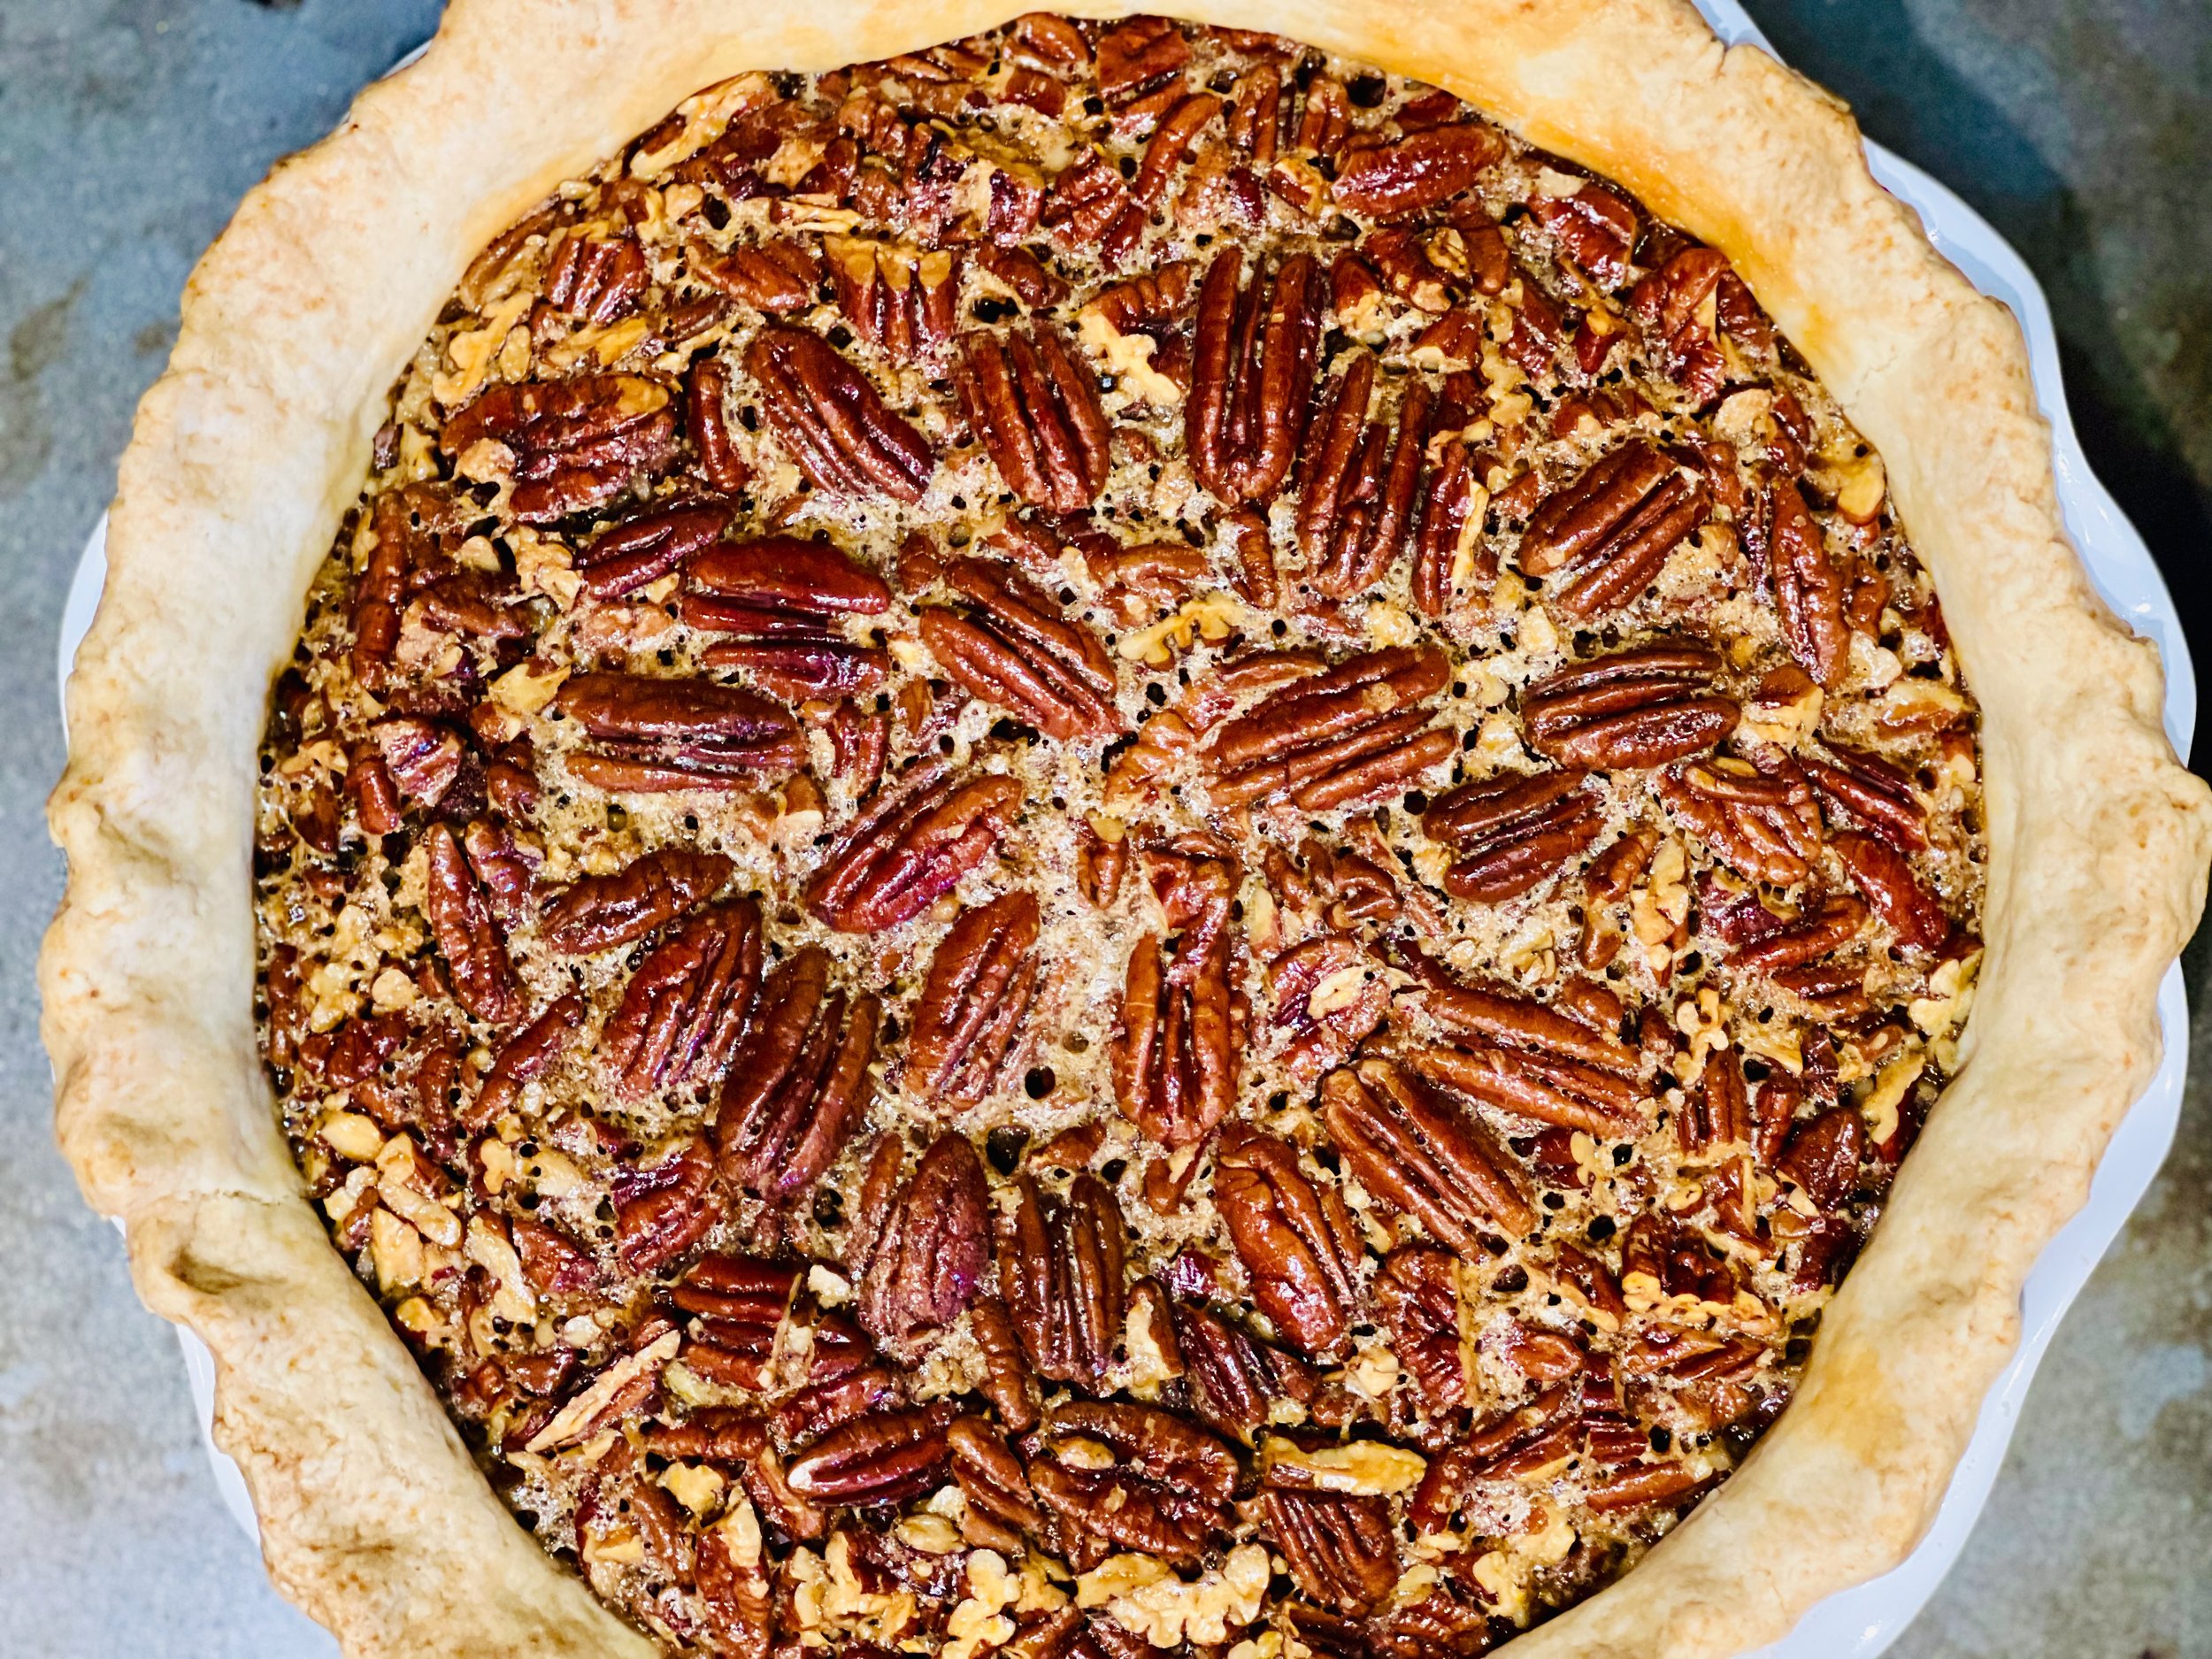
Perfect Maple Pecan Pie (Low FODMAP)
10 Minutes prep • 55 Minutes cook • Low FODMAP • Gluten-free • Serves 8
10 Minutes prep • 55 Minutes cook • Low FODMAP • Gluten-free • Serves 8 • Ok to make ahead: Steps 1
I love pecans. They are naturally sweet and can even satisfy my craving for “dessert” all on their own. So, pecan pie is one of my all-time favorite pies. In this recipe, the combination of the butter crust, the sweet and chewy nut layer, and the bourbon in the center are sublime. If you are a pecan pie lover looking for a low FODMAP version of this amazing pie, this is it. And with a pie this good, why wait for the holidays to enjoy it? Make it for your next dinner party, family gathering, or barbecue. It’s best after it has been chilled overnight, so it’s a perfect make-ahead dessert that’s sure to be a hit.
Ingredients
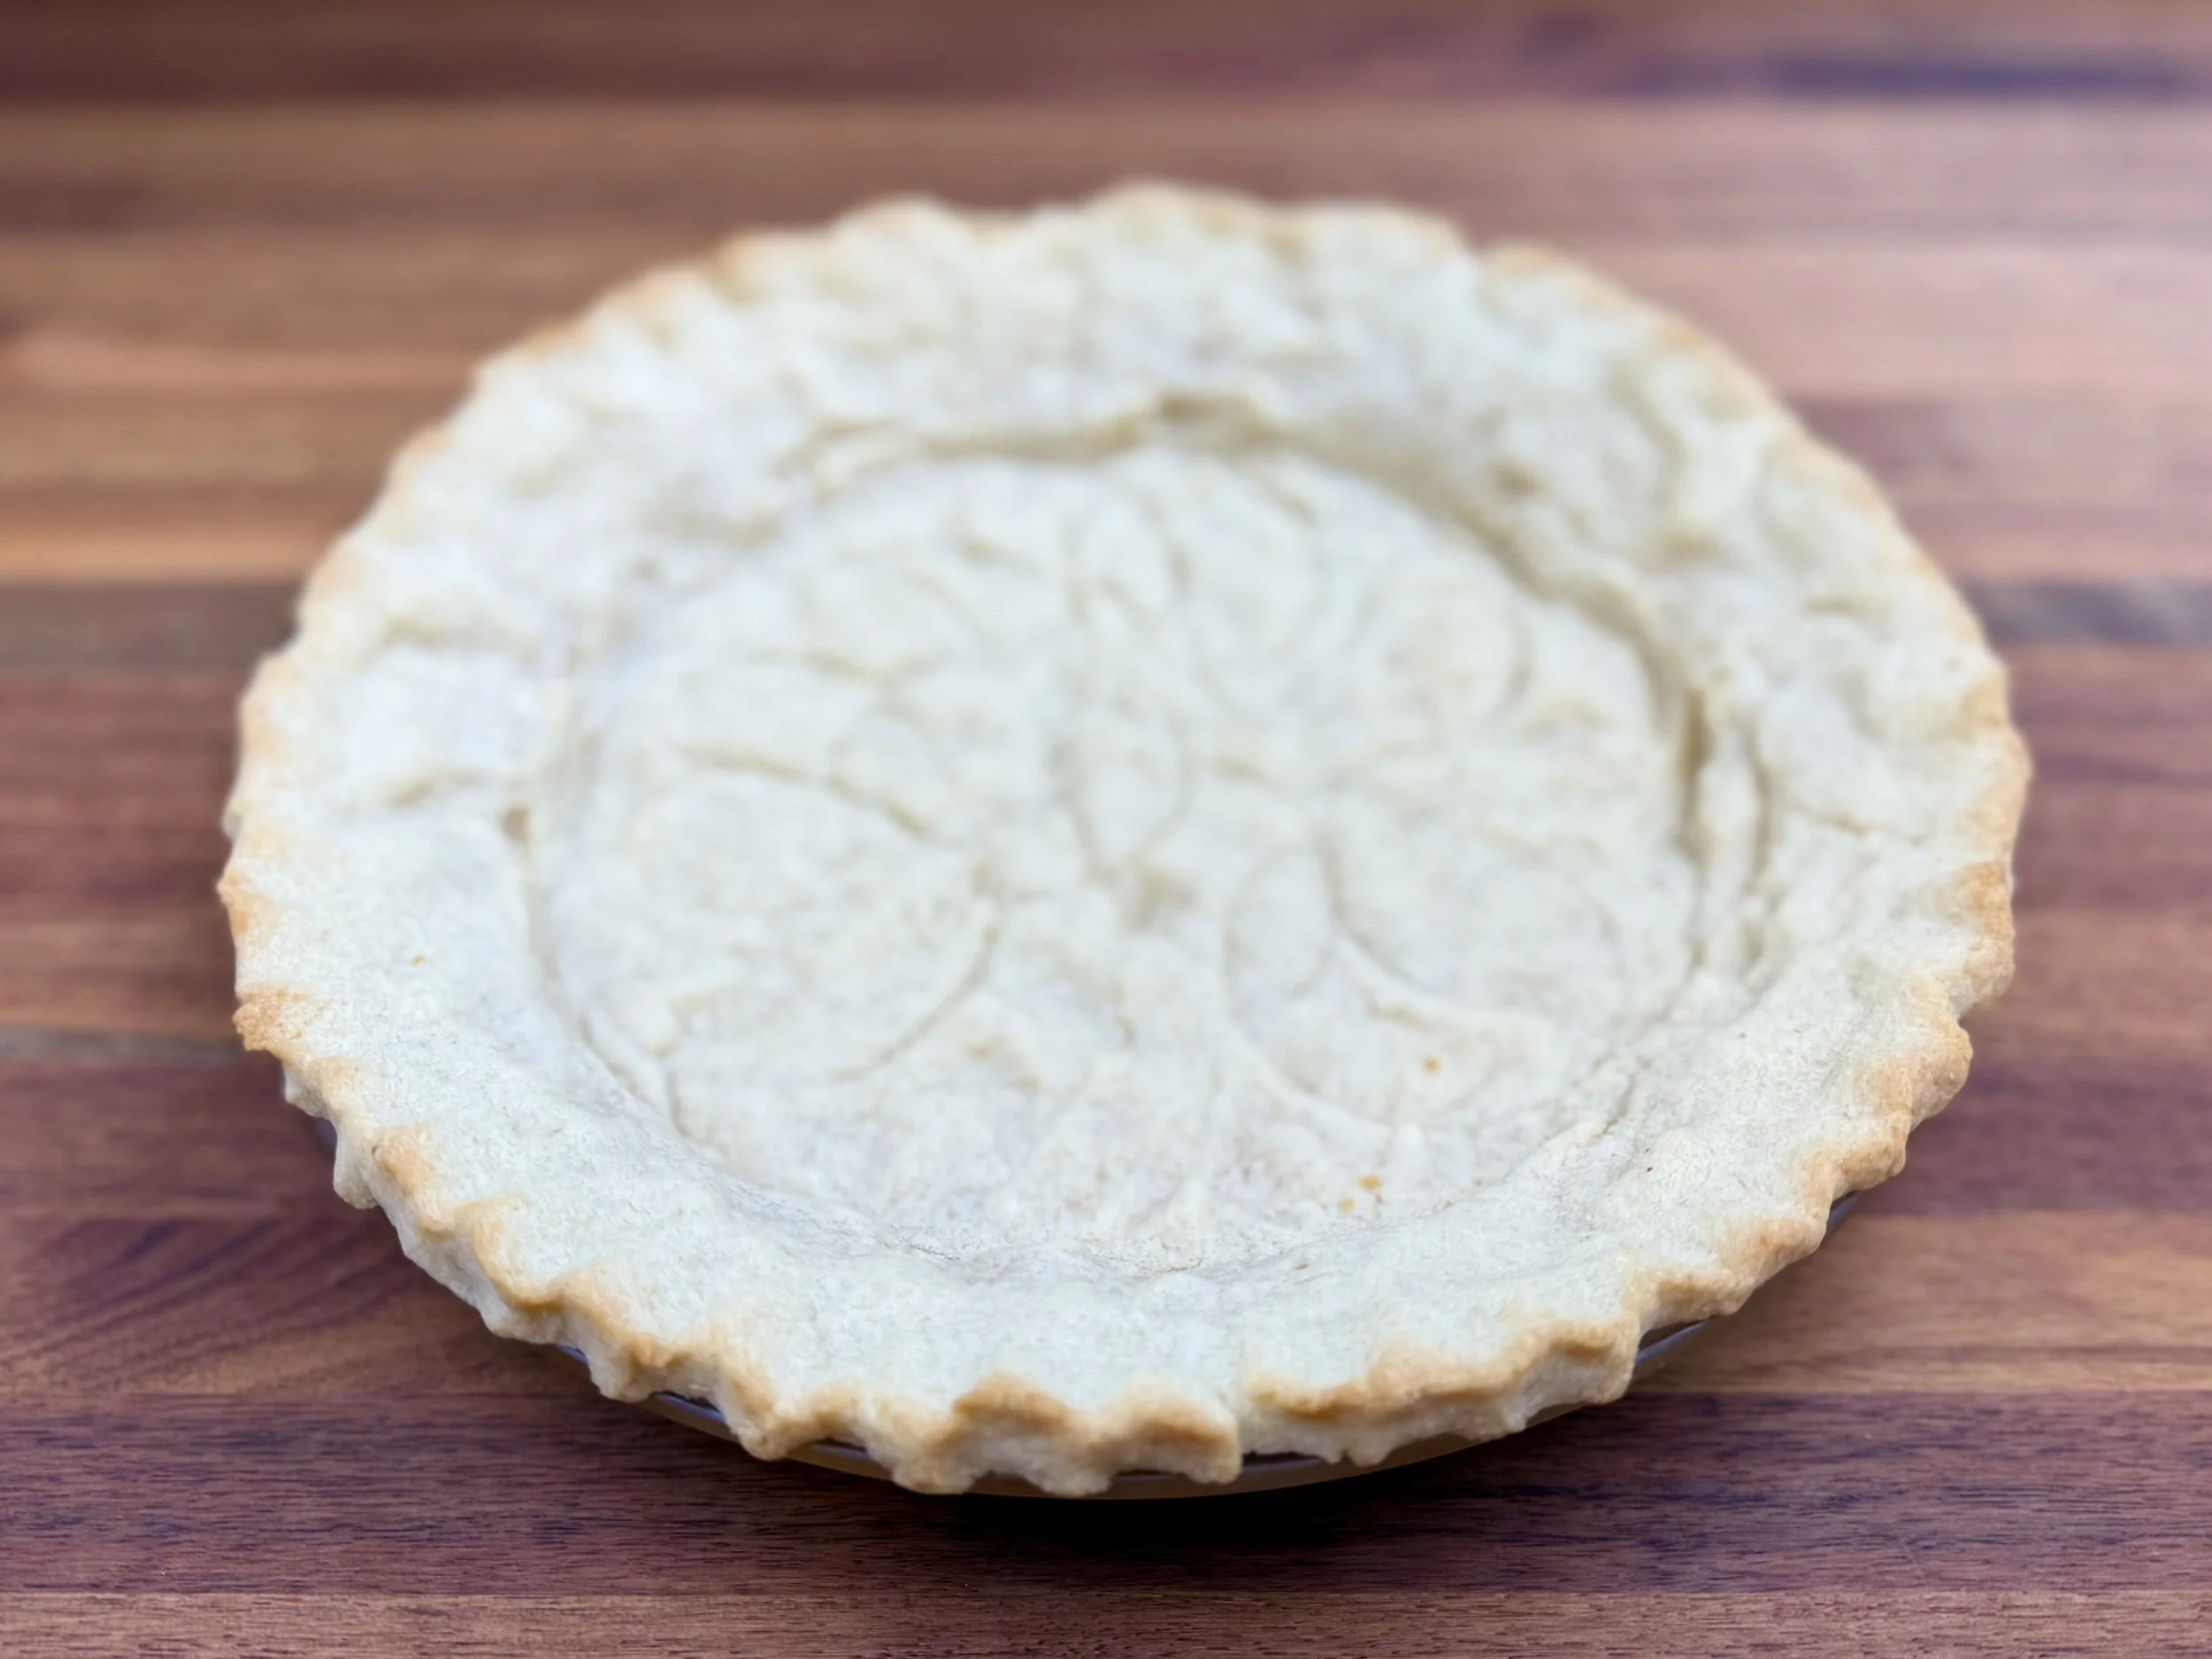
1 Perfect Buttery Pate Brise Pie Crust (unbaked) or one 9-inch frozen gluten-free butter pie crust, defrosted
3/4 cup light corn syrup*
1/4 cup pure maple syrup
3/4 cup packed light brown sugar
*Scant 1 tablespoon unsulphured molasses *a bit less than 1 tablespoon
4 tablespoons (½ stick) unsalted butter, melted
3 extra-large eggs, lightly beaten plus 1 egg white to brush the inside of the pie crust before filling
1 tablespoon bourbon
1/2 teaspoon pure vanilla extract
1/2 teaspoon kosher salt
2 1/2 cups whole pecan halves (no more than 80 pecan halves to keep serving size low FODMAP), the fresher, the better, roughly chop 2 cups and save 1/2 cup whole to make a design on the top of the pie
Directions
(1) Make crust: Use our Perfect Buttery Pate Brise Pie Crust recipe to make a deep dish pie crust, or use a frozen, deep dish, gluten-free, butter pie crust. Keep frozen until ready to use.
(2) Prepare: Preheat the oven to 350 degrees F and, if you have one, put a pizza stone in the oven to heat (this will produce a more evenly browned bottom crust). Roughly chop 2 cups of the pecans and keep 1/2 cup whole. Remove pie crust from the freezer and brush the inside with egg white. Put pie pan (with the crust) on a rimmed baking sheet.
(3) Mix the filling: In a large bowl, whisk together the corn syrup, maple syrup, brown sugar, molasses, butter, eggs, bourbon, vanilla, and salt. Stir in the chopped pecans and pour into the prepared pie crust. (If you remembered to reserve a few whole pecan halves, you can arrange them on the surface in a decorative pattern such as a circle in the center of the pie. Just be sure to push them below the wet filling and let them rise again so they get coated with the filling before the pie cooks.)
(4) Bake: Put the rimmed baking sheet with the pie on it in the oven on the heated pizza stone (if using) and cook for 55 - 60 minutes, until the edges of the pie are set and the center is a bit wiggly (like Jello). Set aside to cool. The center will set more as the pie cools.
If the filling does not set in the time allotted, the pie is undercooked. Keep baking the pie until the filling has reached 200 degrees F. (If the crust is getting too brown, cover the exposed crust with foil). Remember, it will firm up more as the pie cools.
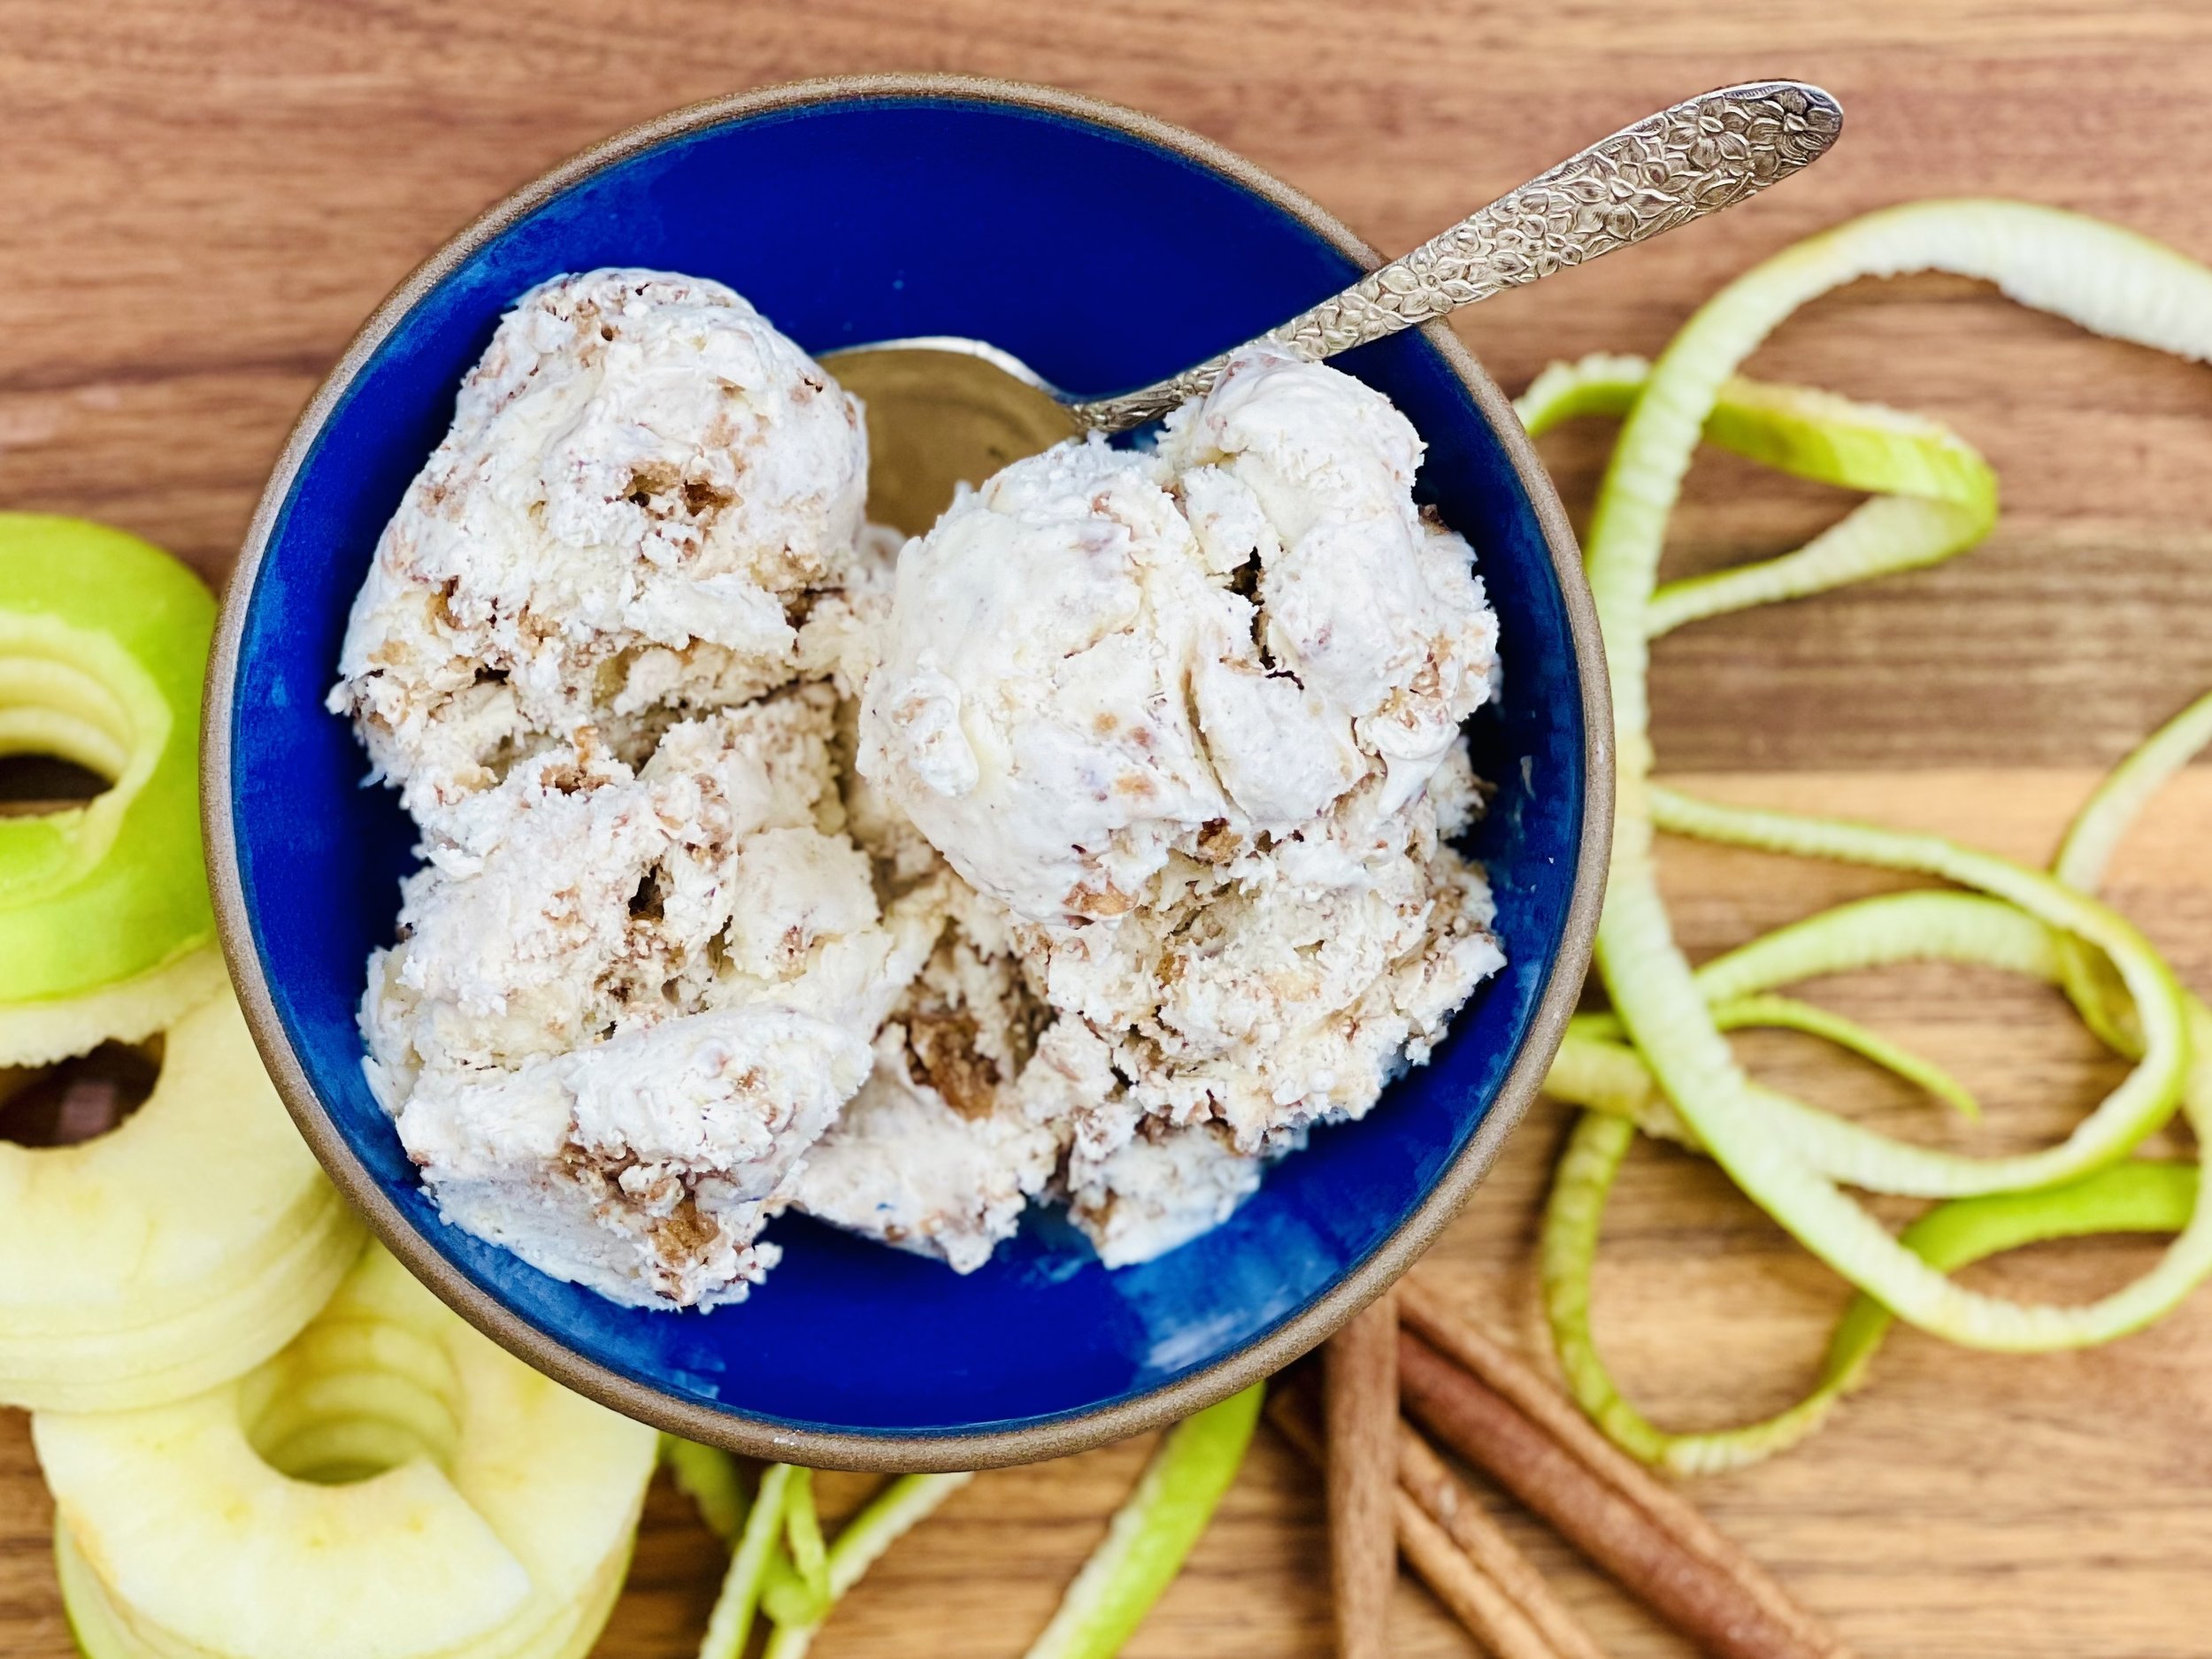
(5) Plate and serve: Once the pie is cooled, put it in the refrigerator to chill overnight, then serve cold or bring to room temperature, slice, and serve. It’s perfect as is but also good with a scoop of lactose-free vanilla ice cream (I love Beckon brand.)
Eat and enjoy every bite because you can!
*A note about corn syrup: I use Karo brand corn syrup, which contains no high-fructose corn syrup (HFCS is high in FODMAPS).
When you are following a low FODMAP diet, overconsumption of sugar of any sort is not recommended. So, even though you may want to eat the whole pie, cut it into 8 pieces and eat only one piece to allow yourself a treat without triggering your IBS symptoms. And, if you are highly sensitive to fructose, you may not be able to tolerate any sweet desserts. You are your own best judge of your tolerance for any potential IBS trigger.
Link note: This post contains links for you to easily purchase items listed on the page. In some cases, we have provided a special discount code for IBS Game Changers so be sure to use it when you purchase an item to get the discount that has been arranged just for you! As an Amazon Associate, I earn a commission from qualifying Amazon purchases.
More Deliciously Low FODMAP™ dessert recipes


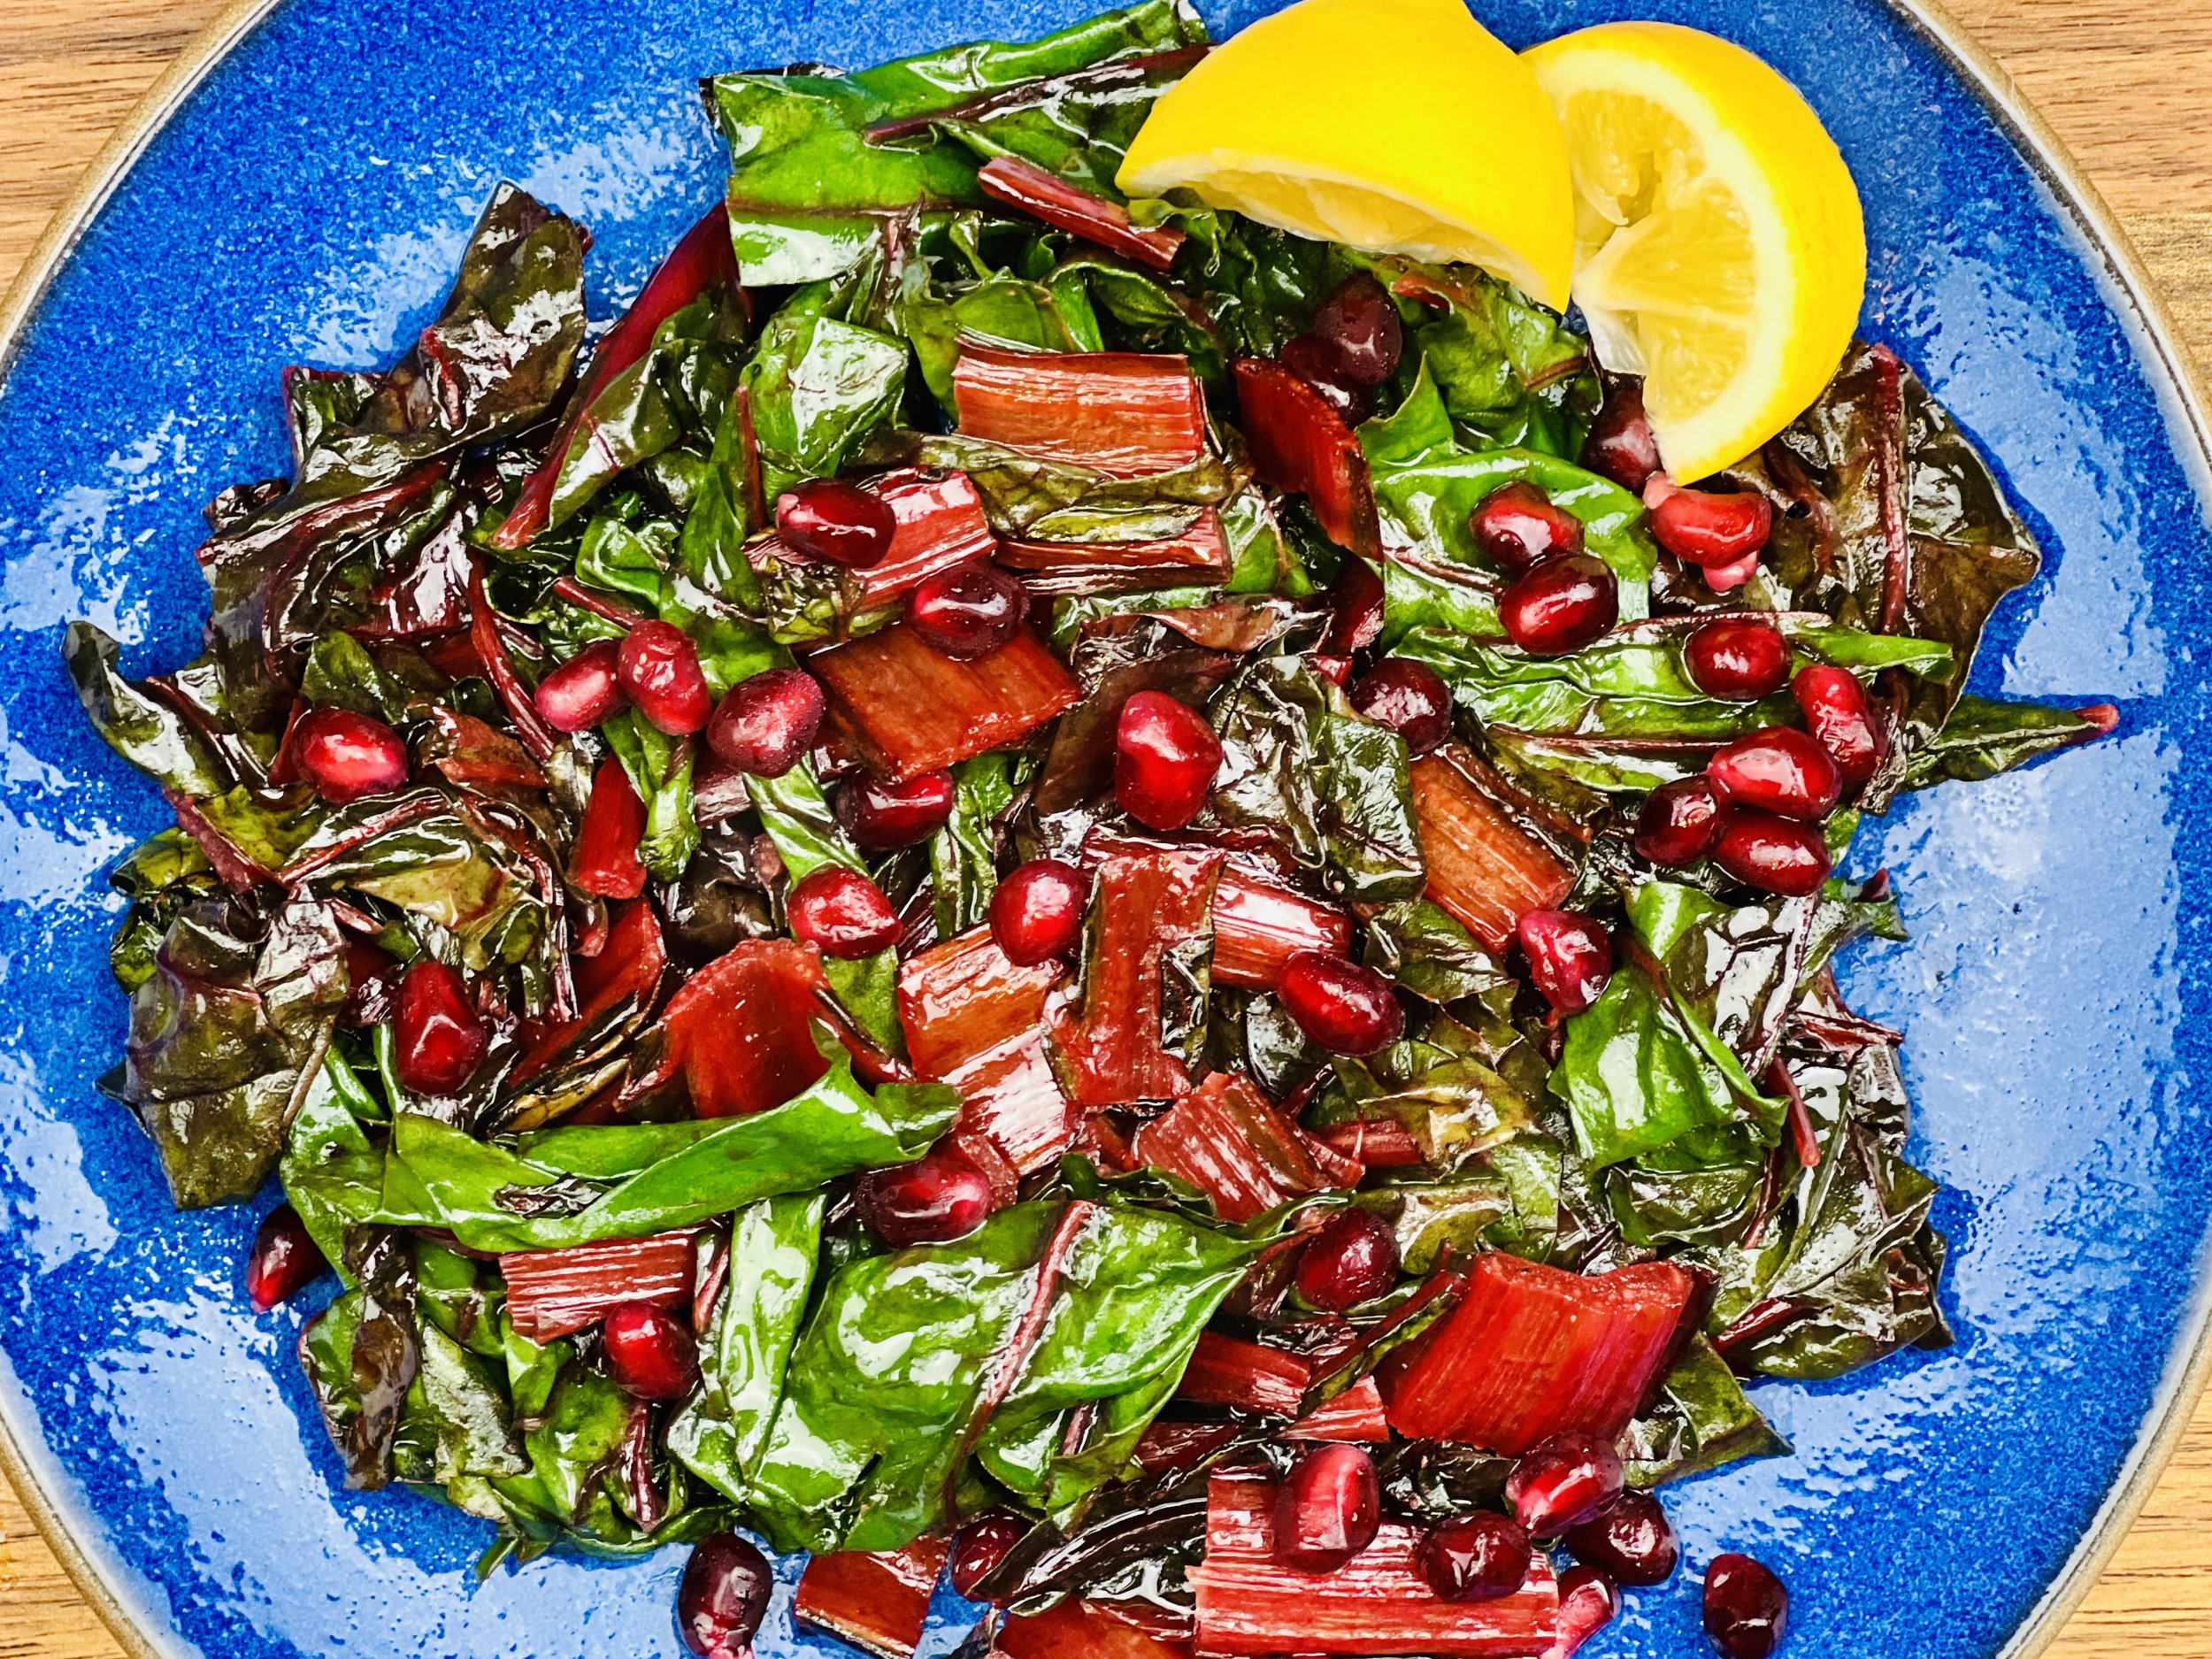
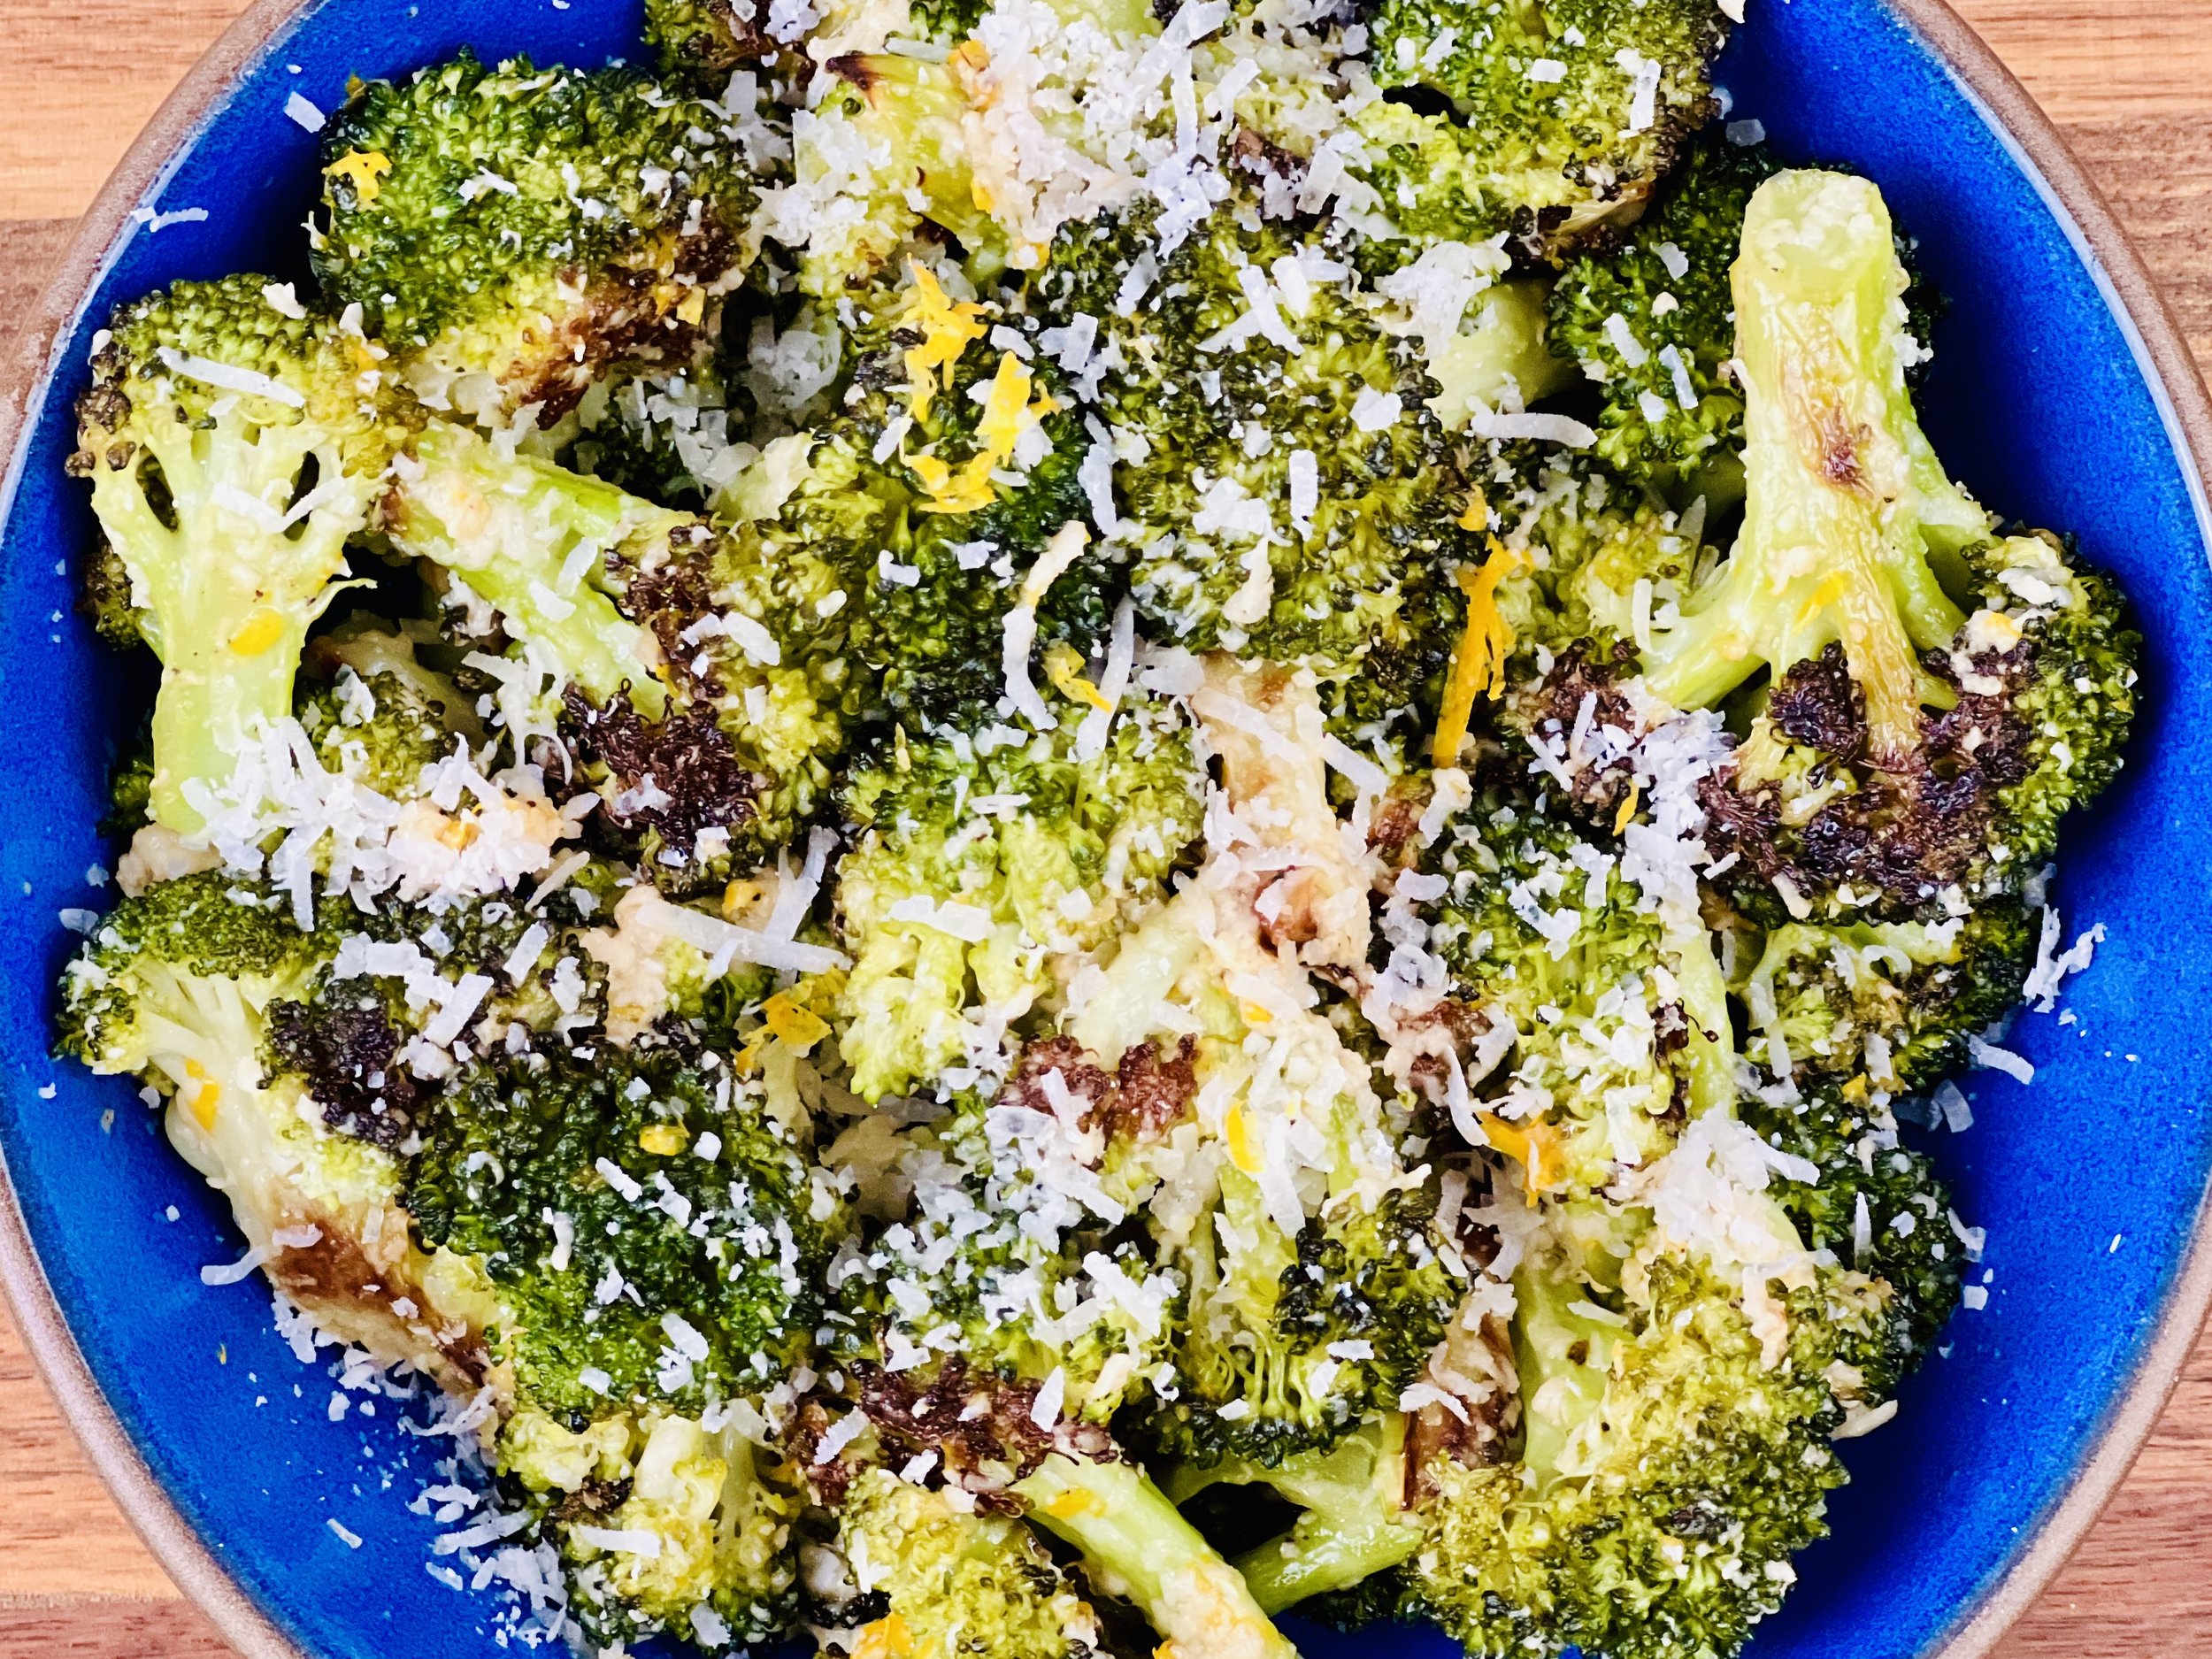
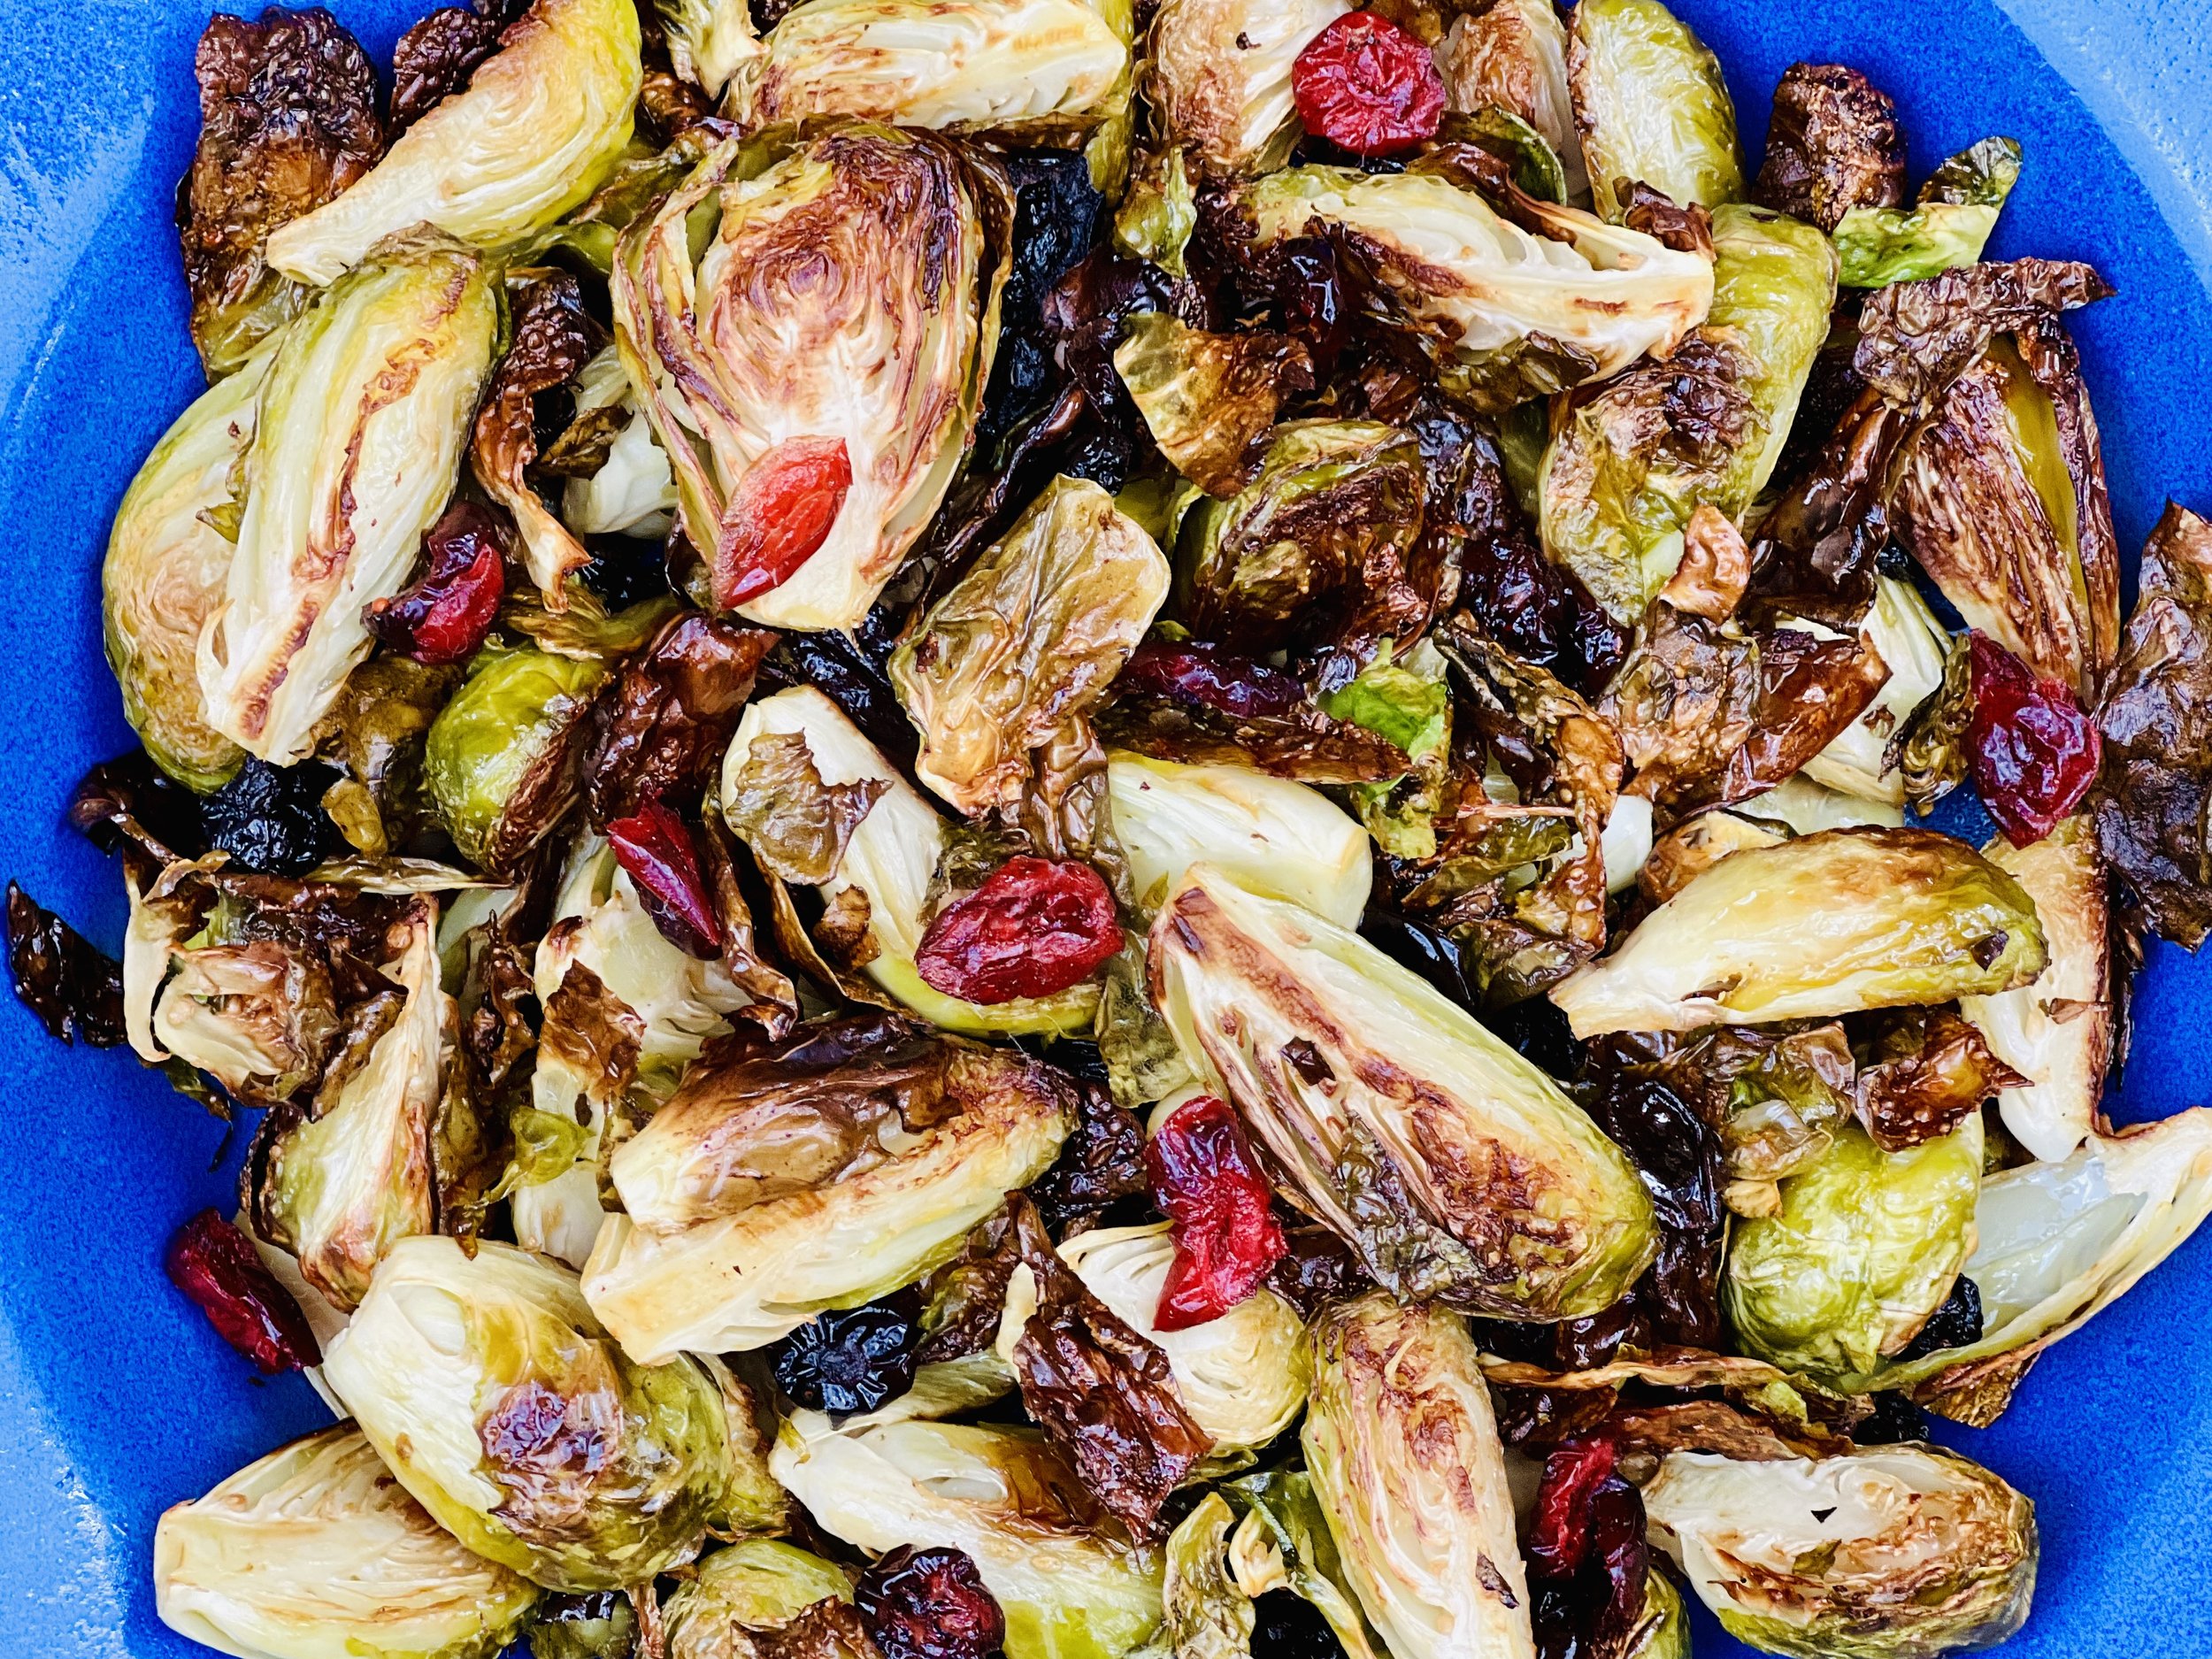
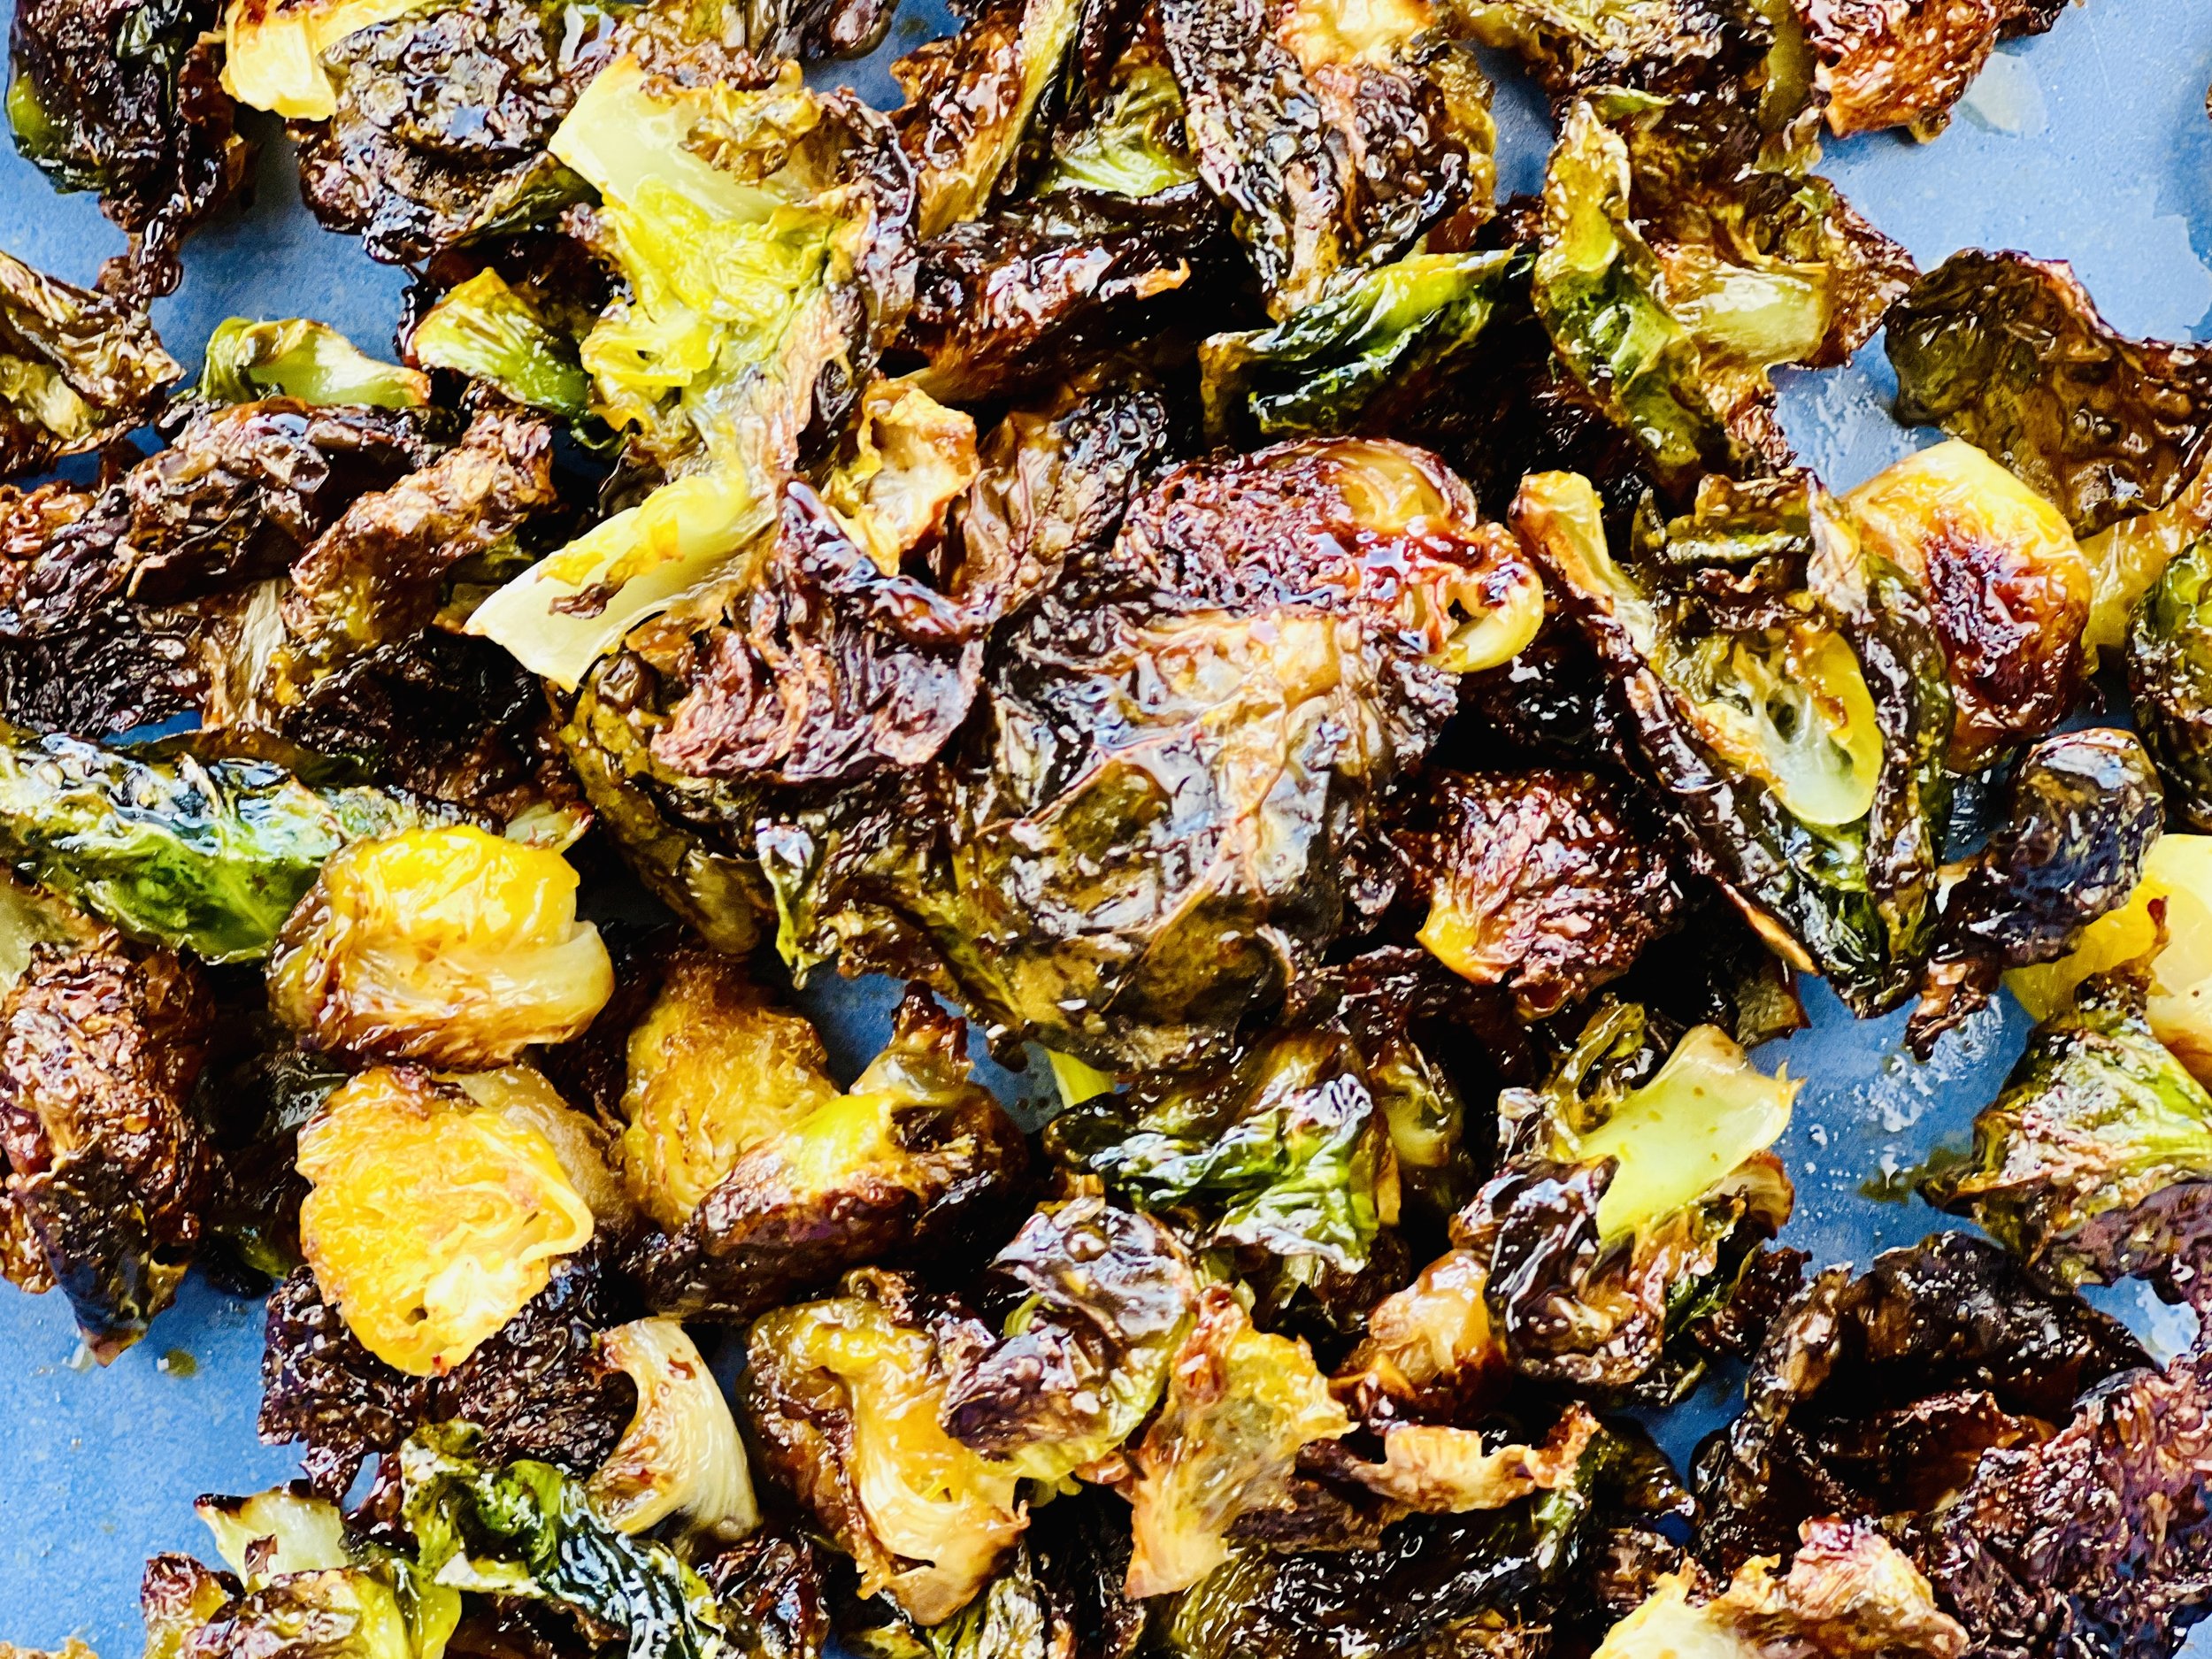
Sweet and Crispy Brussels Sprouts (low FODMAP)
20 Minutes prep • 15 Minutes Cook • Low FODMAP • Gluten-free • Lactose-free • Serves 4
20 Minutes prep • 15 Minutes Cook • Low FODMAP • Gluten-free • Lactose-free • Serves 4 • Ok to make ahead: Step 1
Did you think Brussels sprouts were gone from your low FODMAP diet? Think again! A low FODMAP serving of Brussels sprouts is only 2 - 3 sprouts, which means you need to find a way to enjoy every single bite. By removing the leaves and roasting them separately, this recipe allows you to stretch that low FODMAP serving to a very satisfying amount. Crispy, sweet, and delicious, these Brussels sprouts make a fantastic addition to any pan of roasted vegetables, or as a crisp “chip” alongside your next appetizer tray, or as a small side you can enjoy every single bite of all on its own.
Ingredients
8 - 12 brussels sprouts (2 - 3 sprouts/1.78 ounces total are considered a low FODMAP serving)
2 tablespoons of olive oil
2 tablespoons of real maple syrup
1 teaspoon Kosher salt
Directions
(1) Prepare: Preheat the oven to 400 degrees F. Wash sprouts and cut the base off each sprout so you can remove the individual leaves. remove all leaves and then cut the small compact center in half and put it all in a roasting pan.
(2) Roast: Combine olive oil and maple syrup and toss with the sprout leaves in the roasting pan. Sprinkle with Kosher salt. Put the roasting pan in the oven and roast for about 15 - 18 minutes stirring every few minutes to prevent burning. Roast until the leaves are crisp and darkened but not burned.
(3) Finish: Remove from the oven and serve hot, or cool on the tray to room temperature. Taste and sprinkle with additional Kosher salt if needed to enhance the sweet/salty taste to perfection.
(4) Plate and serve: Use as a topping for other roasted vegetables, serve as an appetizer “chip,” or serve as a delicious side dish.
Eat and enjoy every bite because you can!
Recipe note: I use Diamond Crystal Kosher salt in all my recipes because it has a wonderful flat and crisp flake that tastes delicious. It is also the least salty salt available so you can use it more liberally as a seasoning than you can table salt or sea salt. If you use another type of salt, you may need to reduce the amount so it is not over-salted.
Link note: This post contains links for you to easily purchase items listed on the page. In some cases, we have provided a special discount code for IBS Game Changers so be sure to use it when you purchase an item to get the discount that has been arranged just for you! As an Amazon Associate, I earn a commission from qualifying Amazon purchases.
More Deliciously Low FODMAP™ side dish recipes
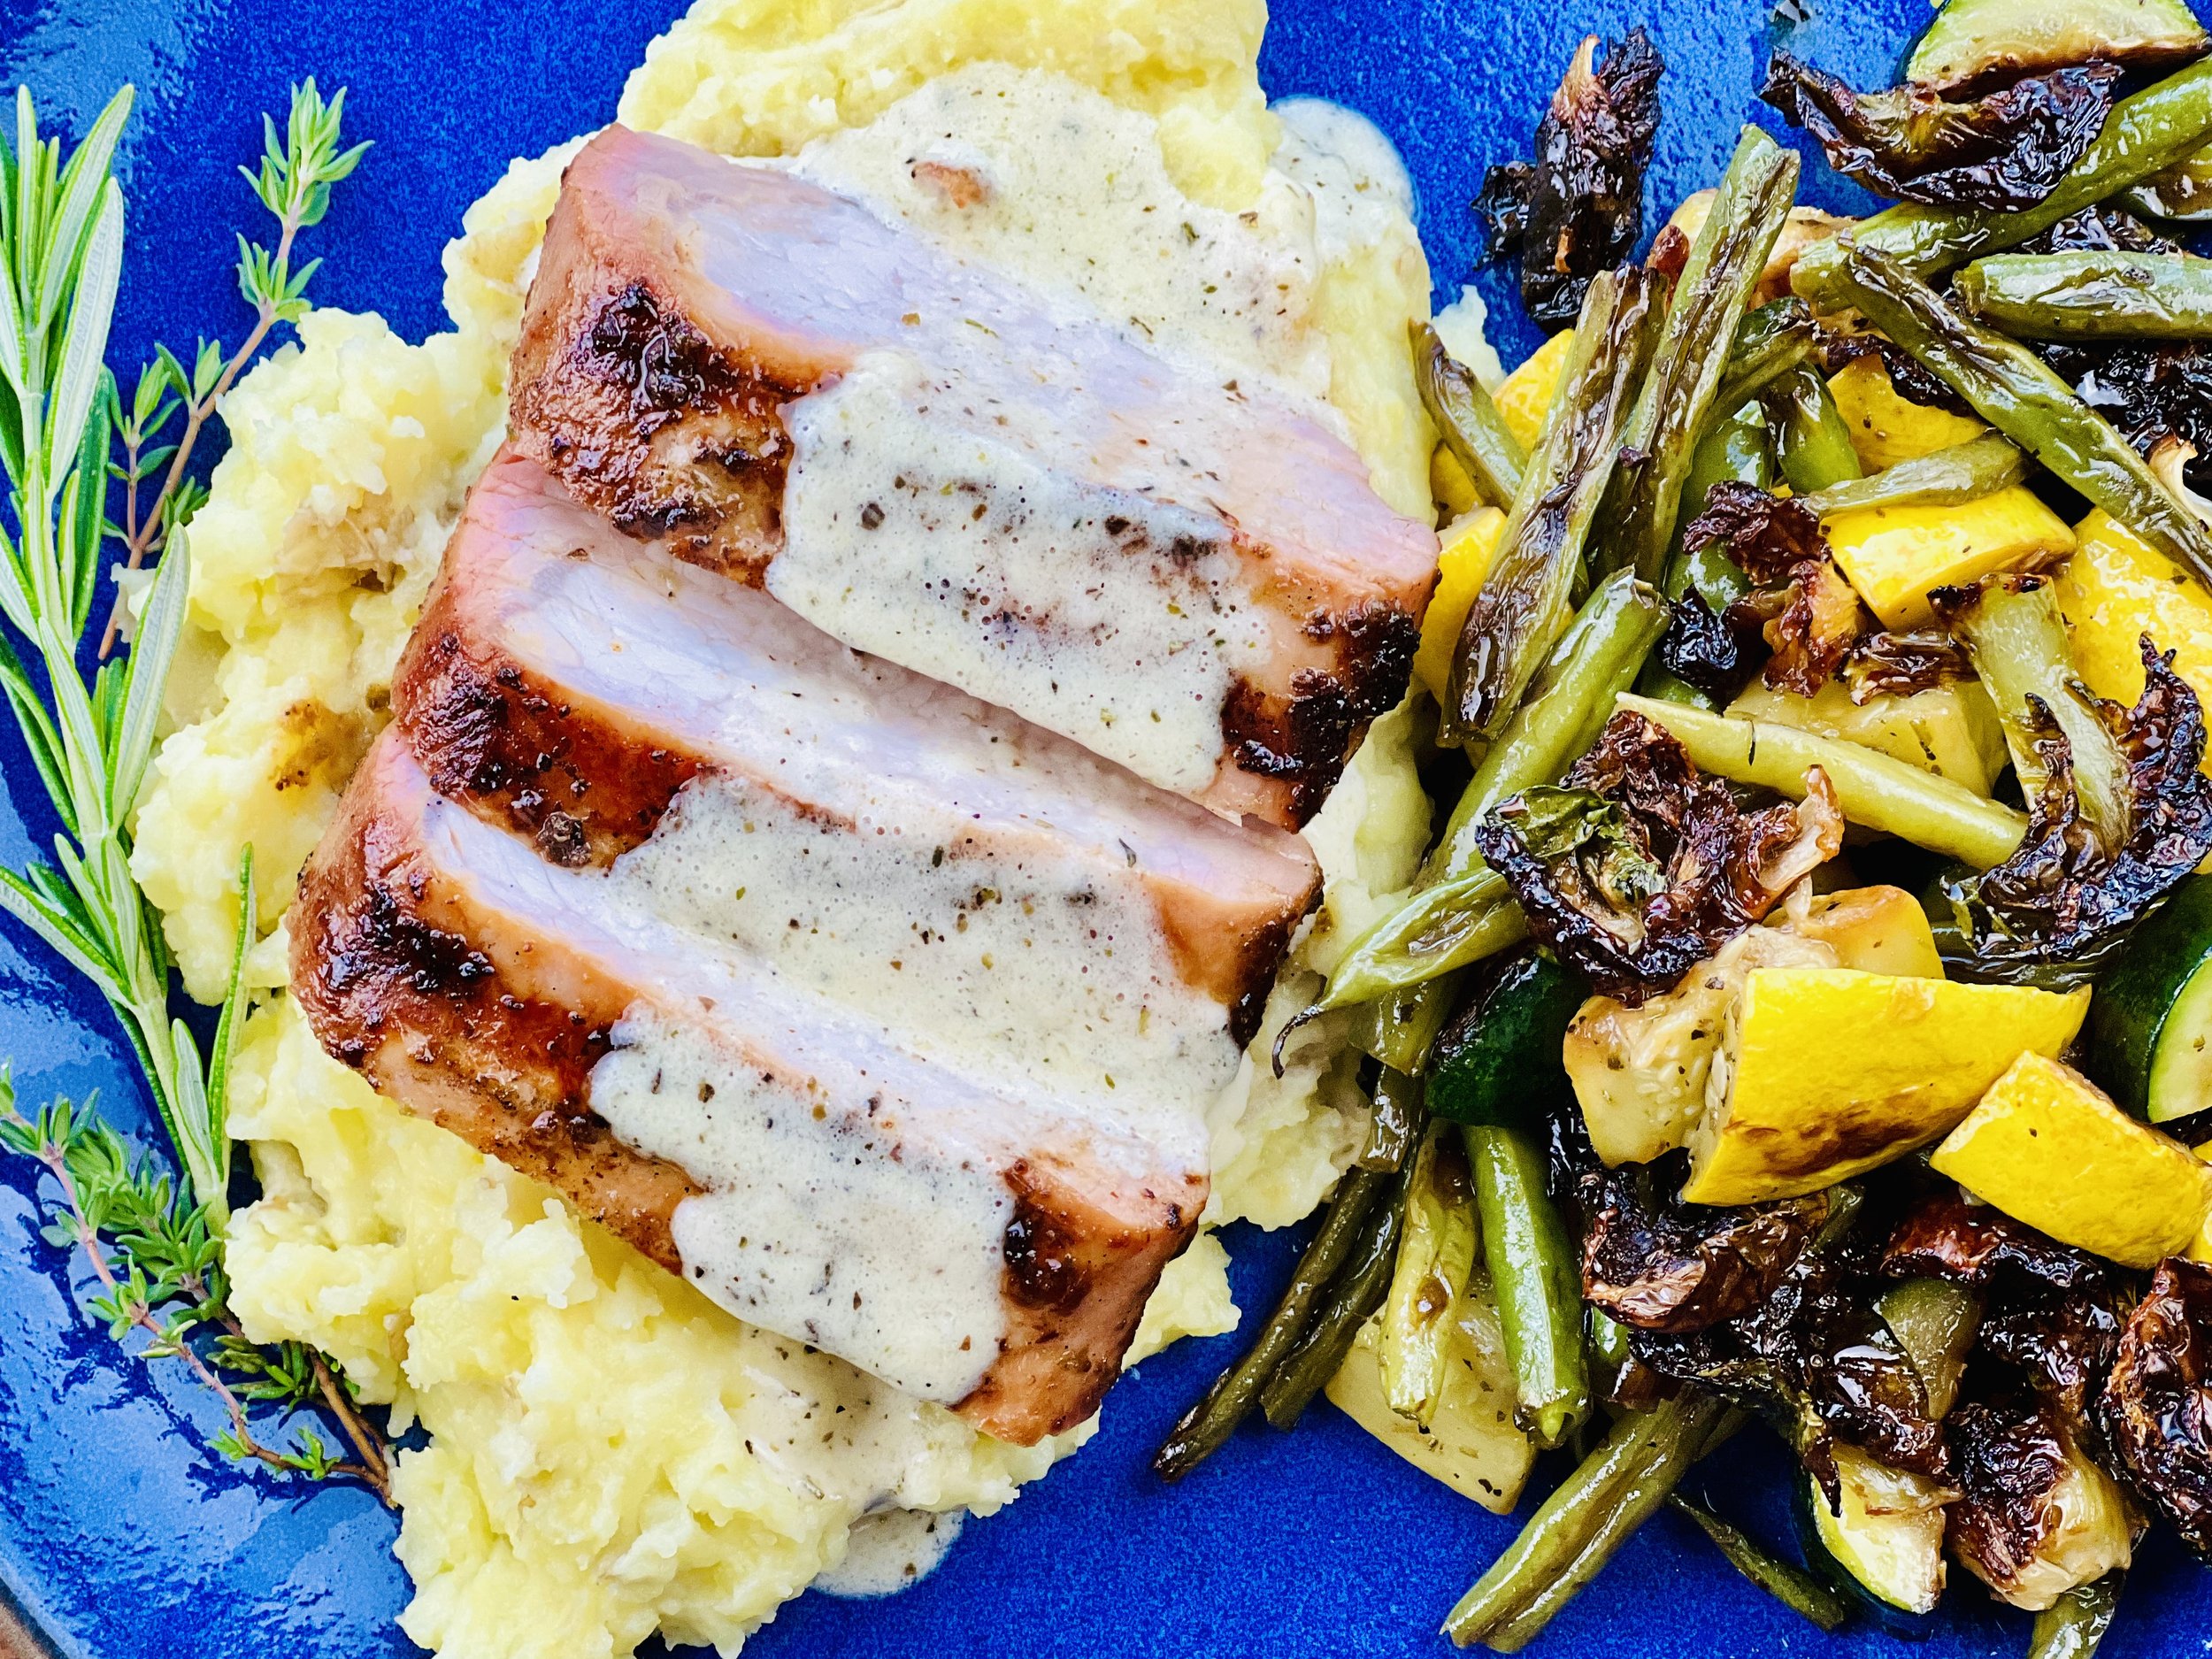
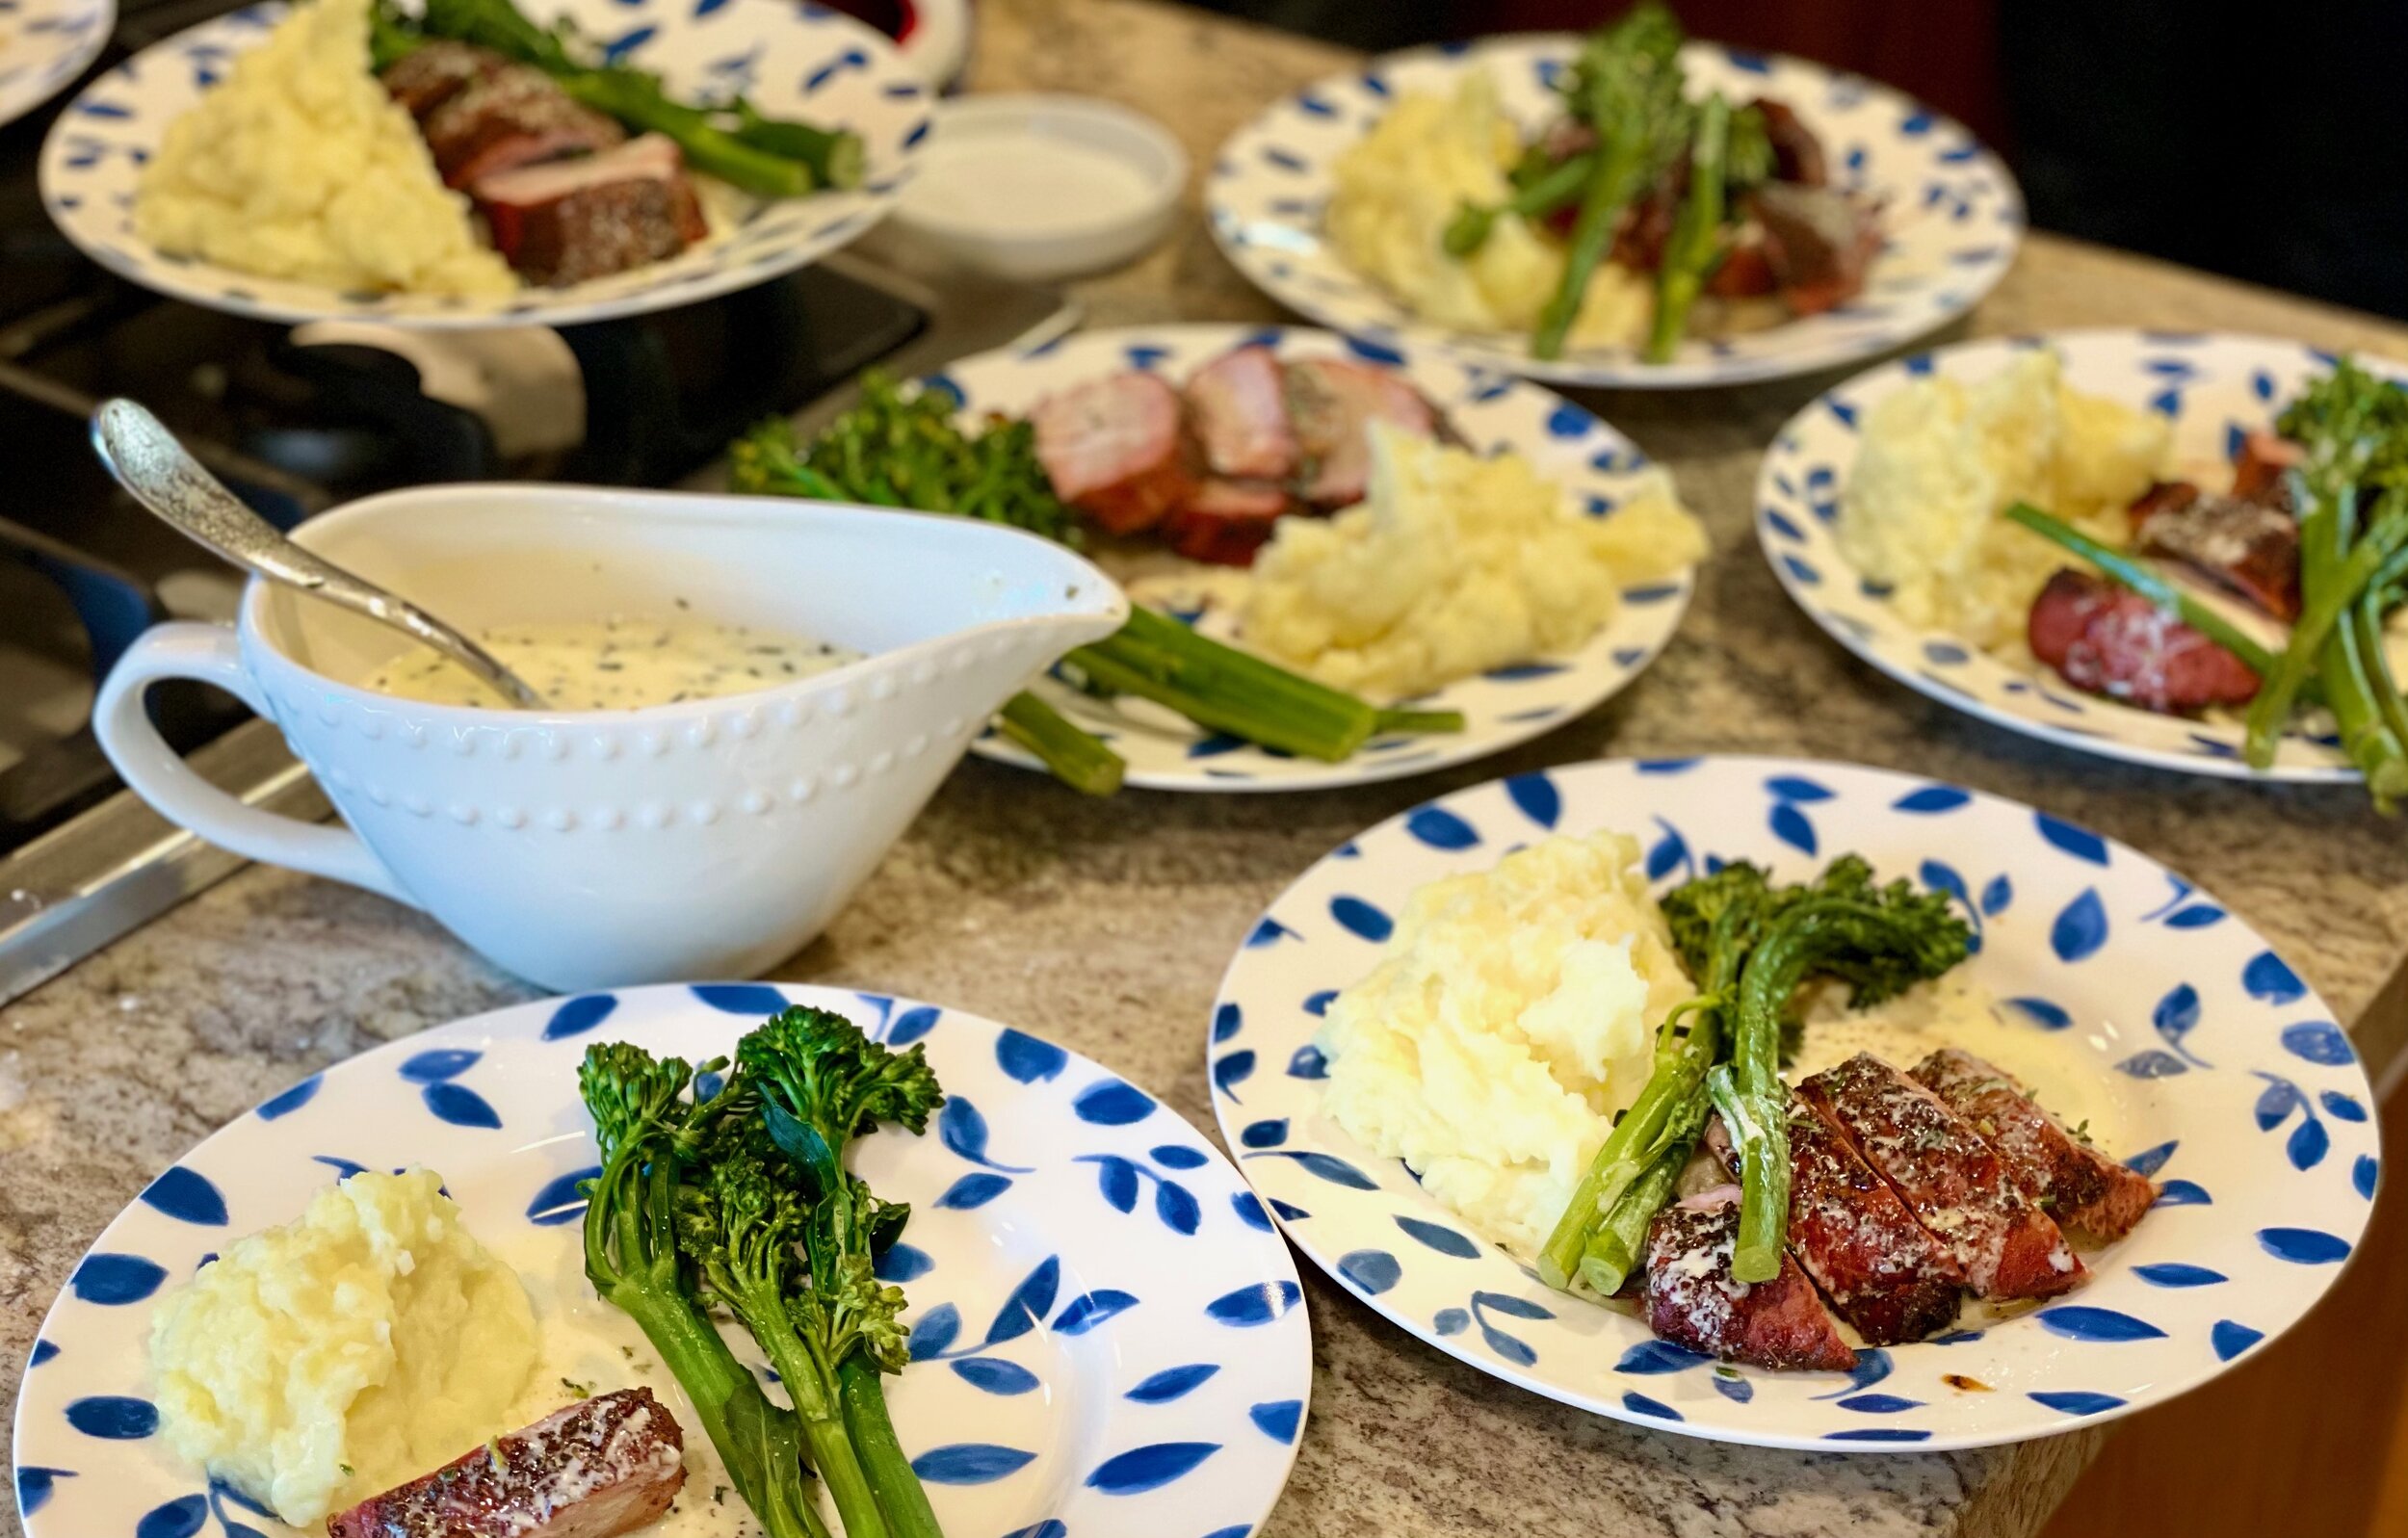
Roasted Pork Tenderloin with Alfredo Cream (low FODMAP)
1 hour 25 Minutes Prep/Marinate • 20 Minutes Cook • Gluten-free • Serves 6
1 hour 25 Minutes Prep/Marinate • 20 Minutes Cook • Gluten-free • Serves 6 • Ok to make ahead: Steps 1 - 3
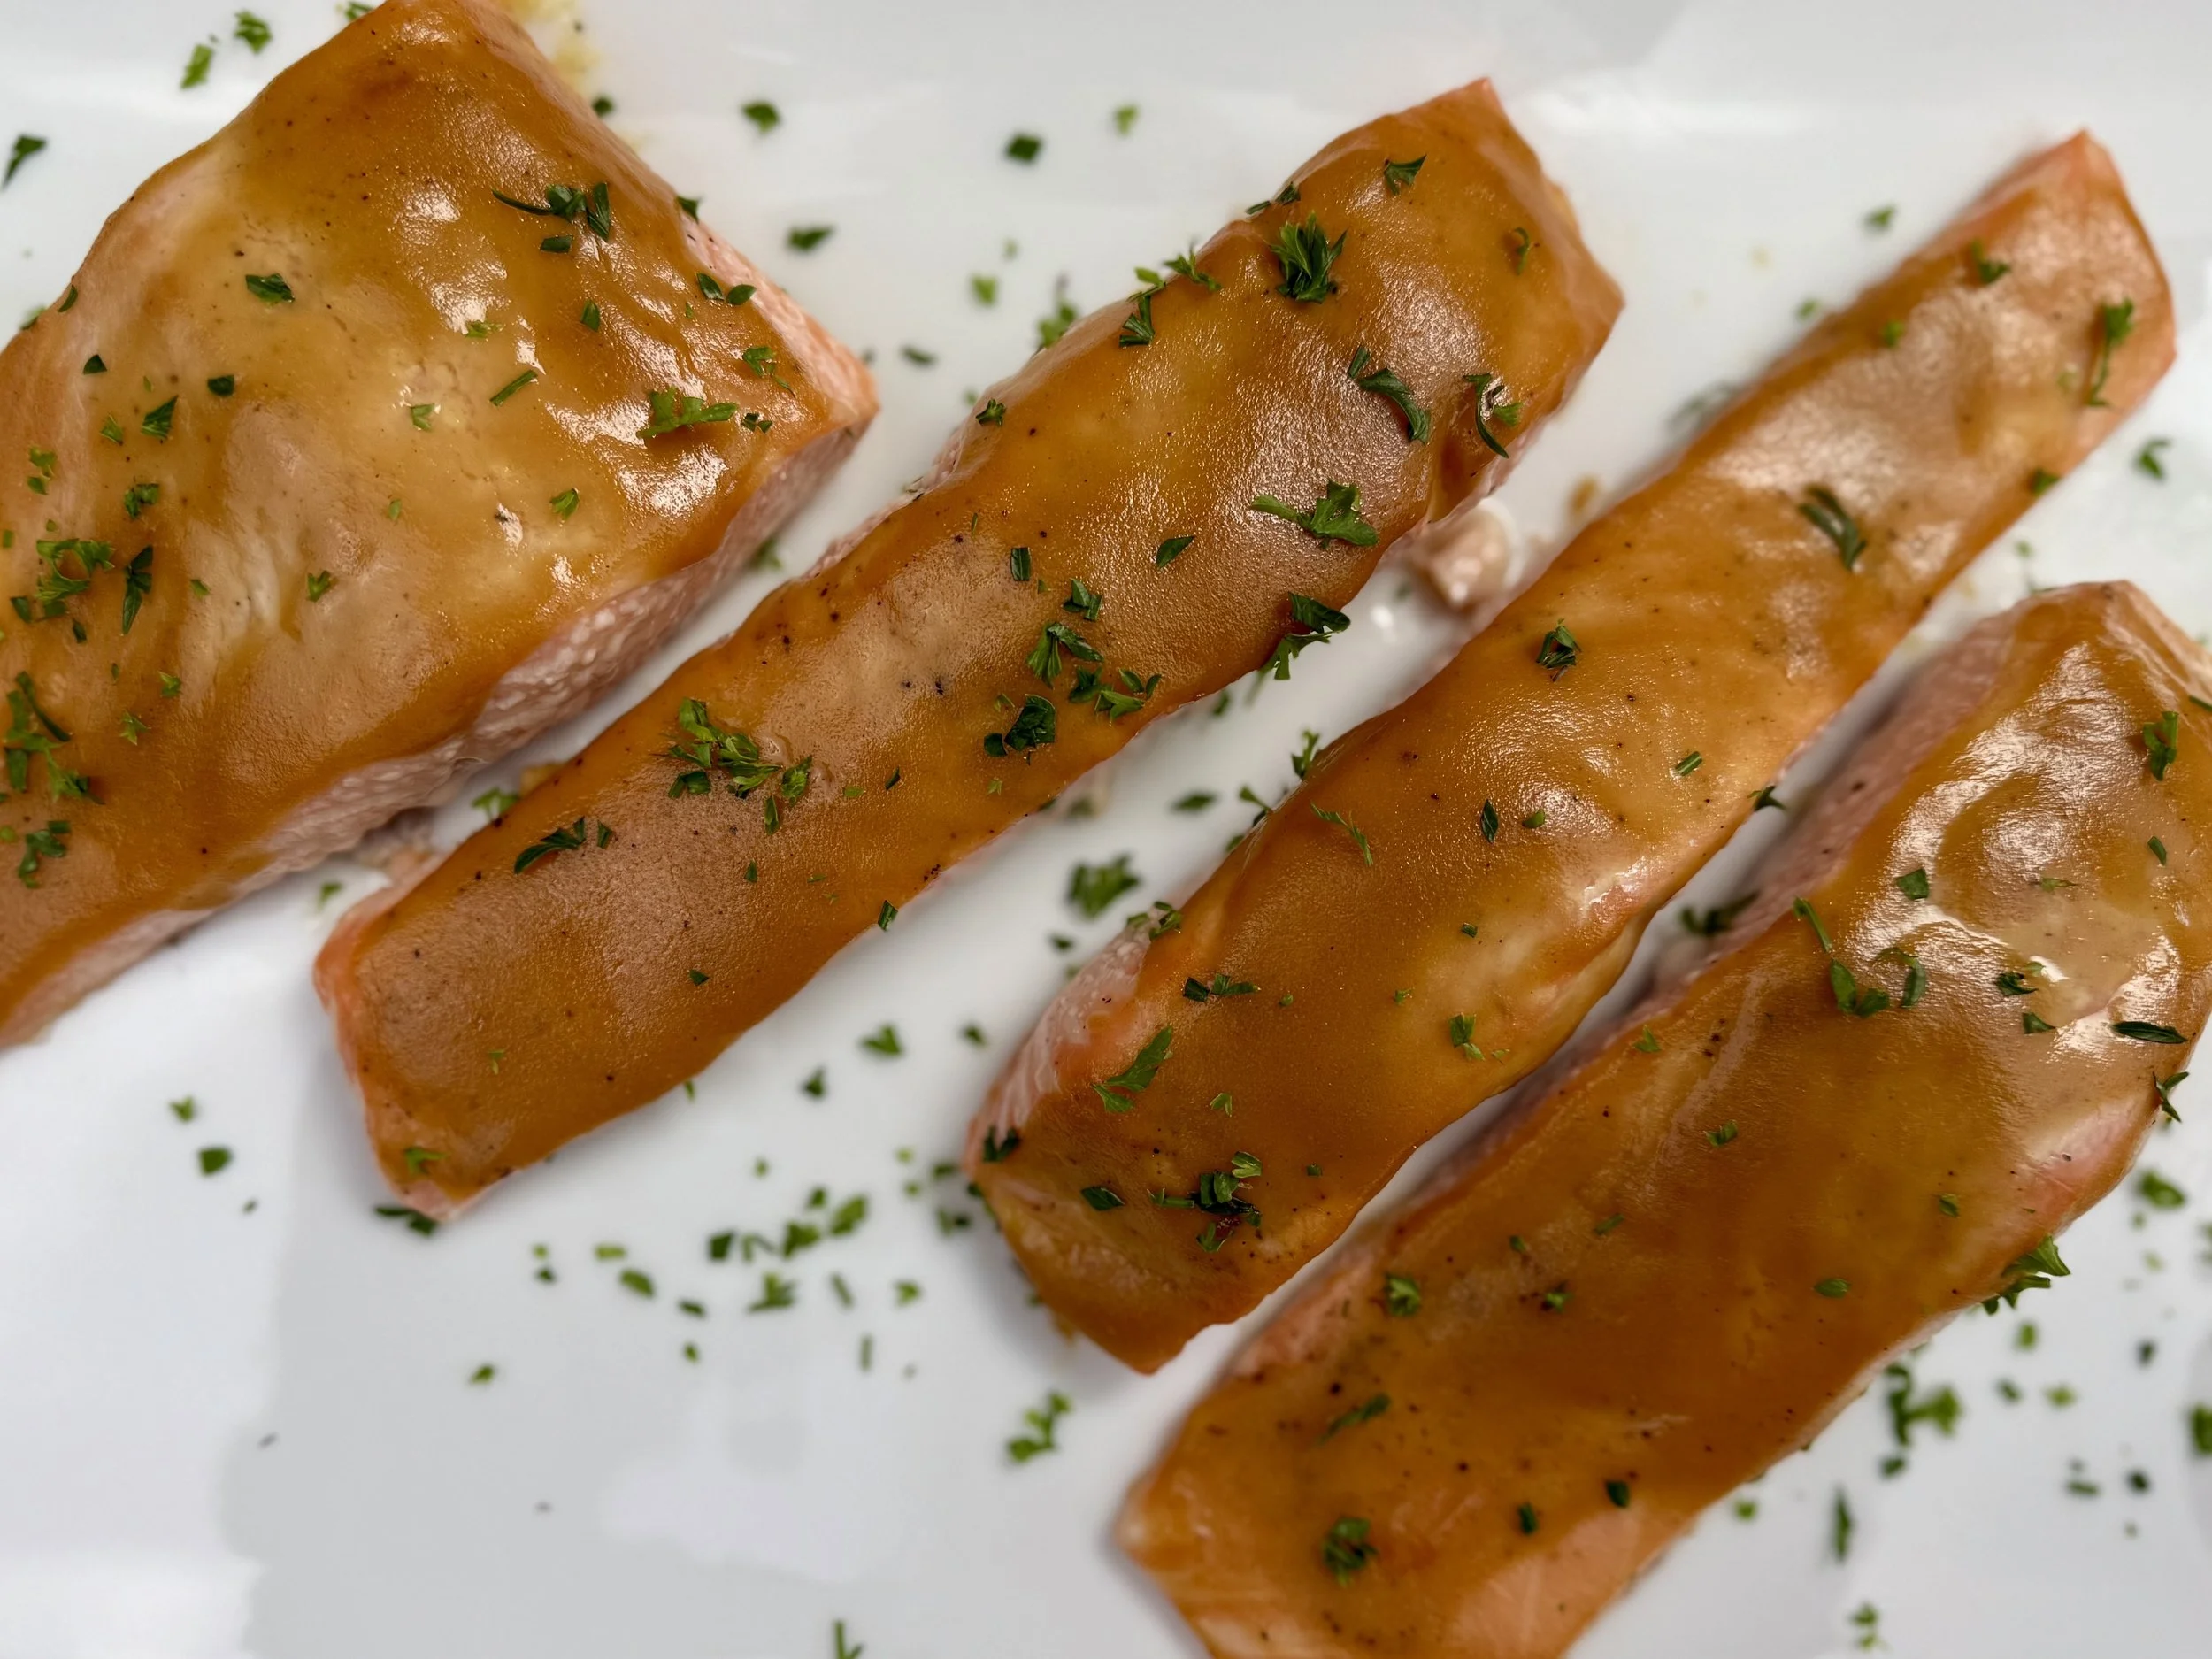
This very flavorful roasted pork tenderloin is made even better with a generous drizzle of Alfredo cream. Add to that a bed of mashed potatoes and a side of roasted vegetables so you don’t miss a bit of the flavor! I love this roasted pork on the smoker, but it is a meal that can be made any time of year in the oven, on the smoker, or on the grill.
Ingredients: Pork Tenderloin
2 pork tenderloins (1 lb each)
1 lemon
2 sprigs fresh thyme, leaves only, plus more for garnish
1 sprig fresh rosemary, leaves only, plus more for garnish
2 tablespoons gluten-free low sodium soy sauce
2 teaspoons kosher salt
1/2 teaspoon freshly ground black pepper
1/4 cup garlic-infused olive oil
Ingredients: Alfredo Cream
1 tablespoon garlic-infused olive oil
2 teaspoons Italian seasoning
1/2 cup cream + more if needed
2 tablespoons butter
1/2 cup fresh grated Parmesan cheese
Salt and pepper
Directions
(1) Prepare: Using a sharp knife, trim any excess fat or silver skin from the tenderloins. This next step is optional but results in more flavorful and tender meat. Season both sides of each tenderloin with Kosher salt and lay the meat on a rimmed plate or baking dish. Cover with plastic wrap and refrigerate 4 hours, overnight, or until ready to marinate. (I like to salt meat when I bring it home from the market then re-wrap it and keep it in the refrigerator until I’m ready to do something with it.)
(2) Make the marinade: Zest and juice the lemon. Add the lemon zest and juice to a mini food processor or blender, along with the thyme leaves, rosemary leaves, soy sauce, salt, and pepper. Pulse until the herbs are finely chopped and are well blended with the oil and soy sauce.
(3) Marinate the meat: Pour the sauce over the meat and turn the meat over a few times to get it well coated. Cover the meat with plastic wrap and refrigerate for at least 1 hour or up to 8 hours. Turn the meat periodically while it marinates to ensure even coverage.
(4) Preheat the oven, grill, or smoker: When ready to cook the meat, set the oven, grill, or smoker temperature to 450°F and preheat, grill/smoker lid closed for 15 minutes.
(5) Cook the meat: Arrange the pork on a rack in a roasting pan, or directly on the grill grates in your smoker or grill. Roast for about 10 - 15 minutes, then flip and continue roasting until the internal temperature reaches 145°F, 5-10 minutes more.
(6) Make the Alfredo cream: Add the olive oil to a small frying pan. When hot, add the Italian seasoning to the oil and cook the spices in the oil for about a minute (this will “bloom” or bring out the flavor of the spices nicely). Add the cream and the butter to the pan and heat over medium-low heat until the butter melts. Add the Parmesan cheese and whisk until the cheese is melted and the sauce is thickened. Add more cream, if needed, to thin the sauce if it’s a bit too thick.
(6) Finish: Remove the pork from the oven or grill and let rest for 5 minutes before carving.
(7) Plate and serve: Serve on a bed of mashed potatoes alongside a salad or some roasted vegetables.
Eat and enjoy every bite because you can!
This post contains links for you to easily purchase items listed on the page. In some cases, we have provided a special discount code for IBS Game Changers so be sure to use it when you purchase an item to get the discount that has been arranged just for you! As an Amazon Associate, I earn a commission from qualifying Amazon purchases.
More Deliciously Low FODMAP™ main course recipes
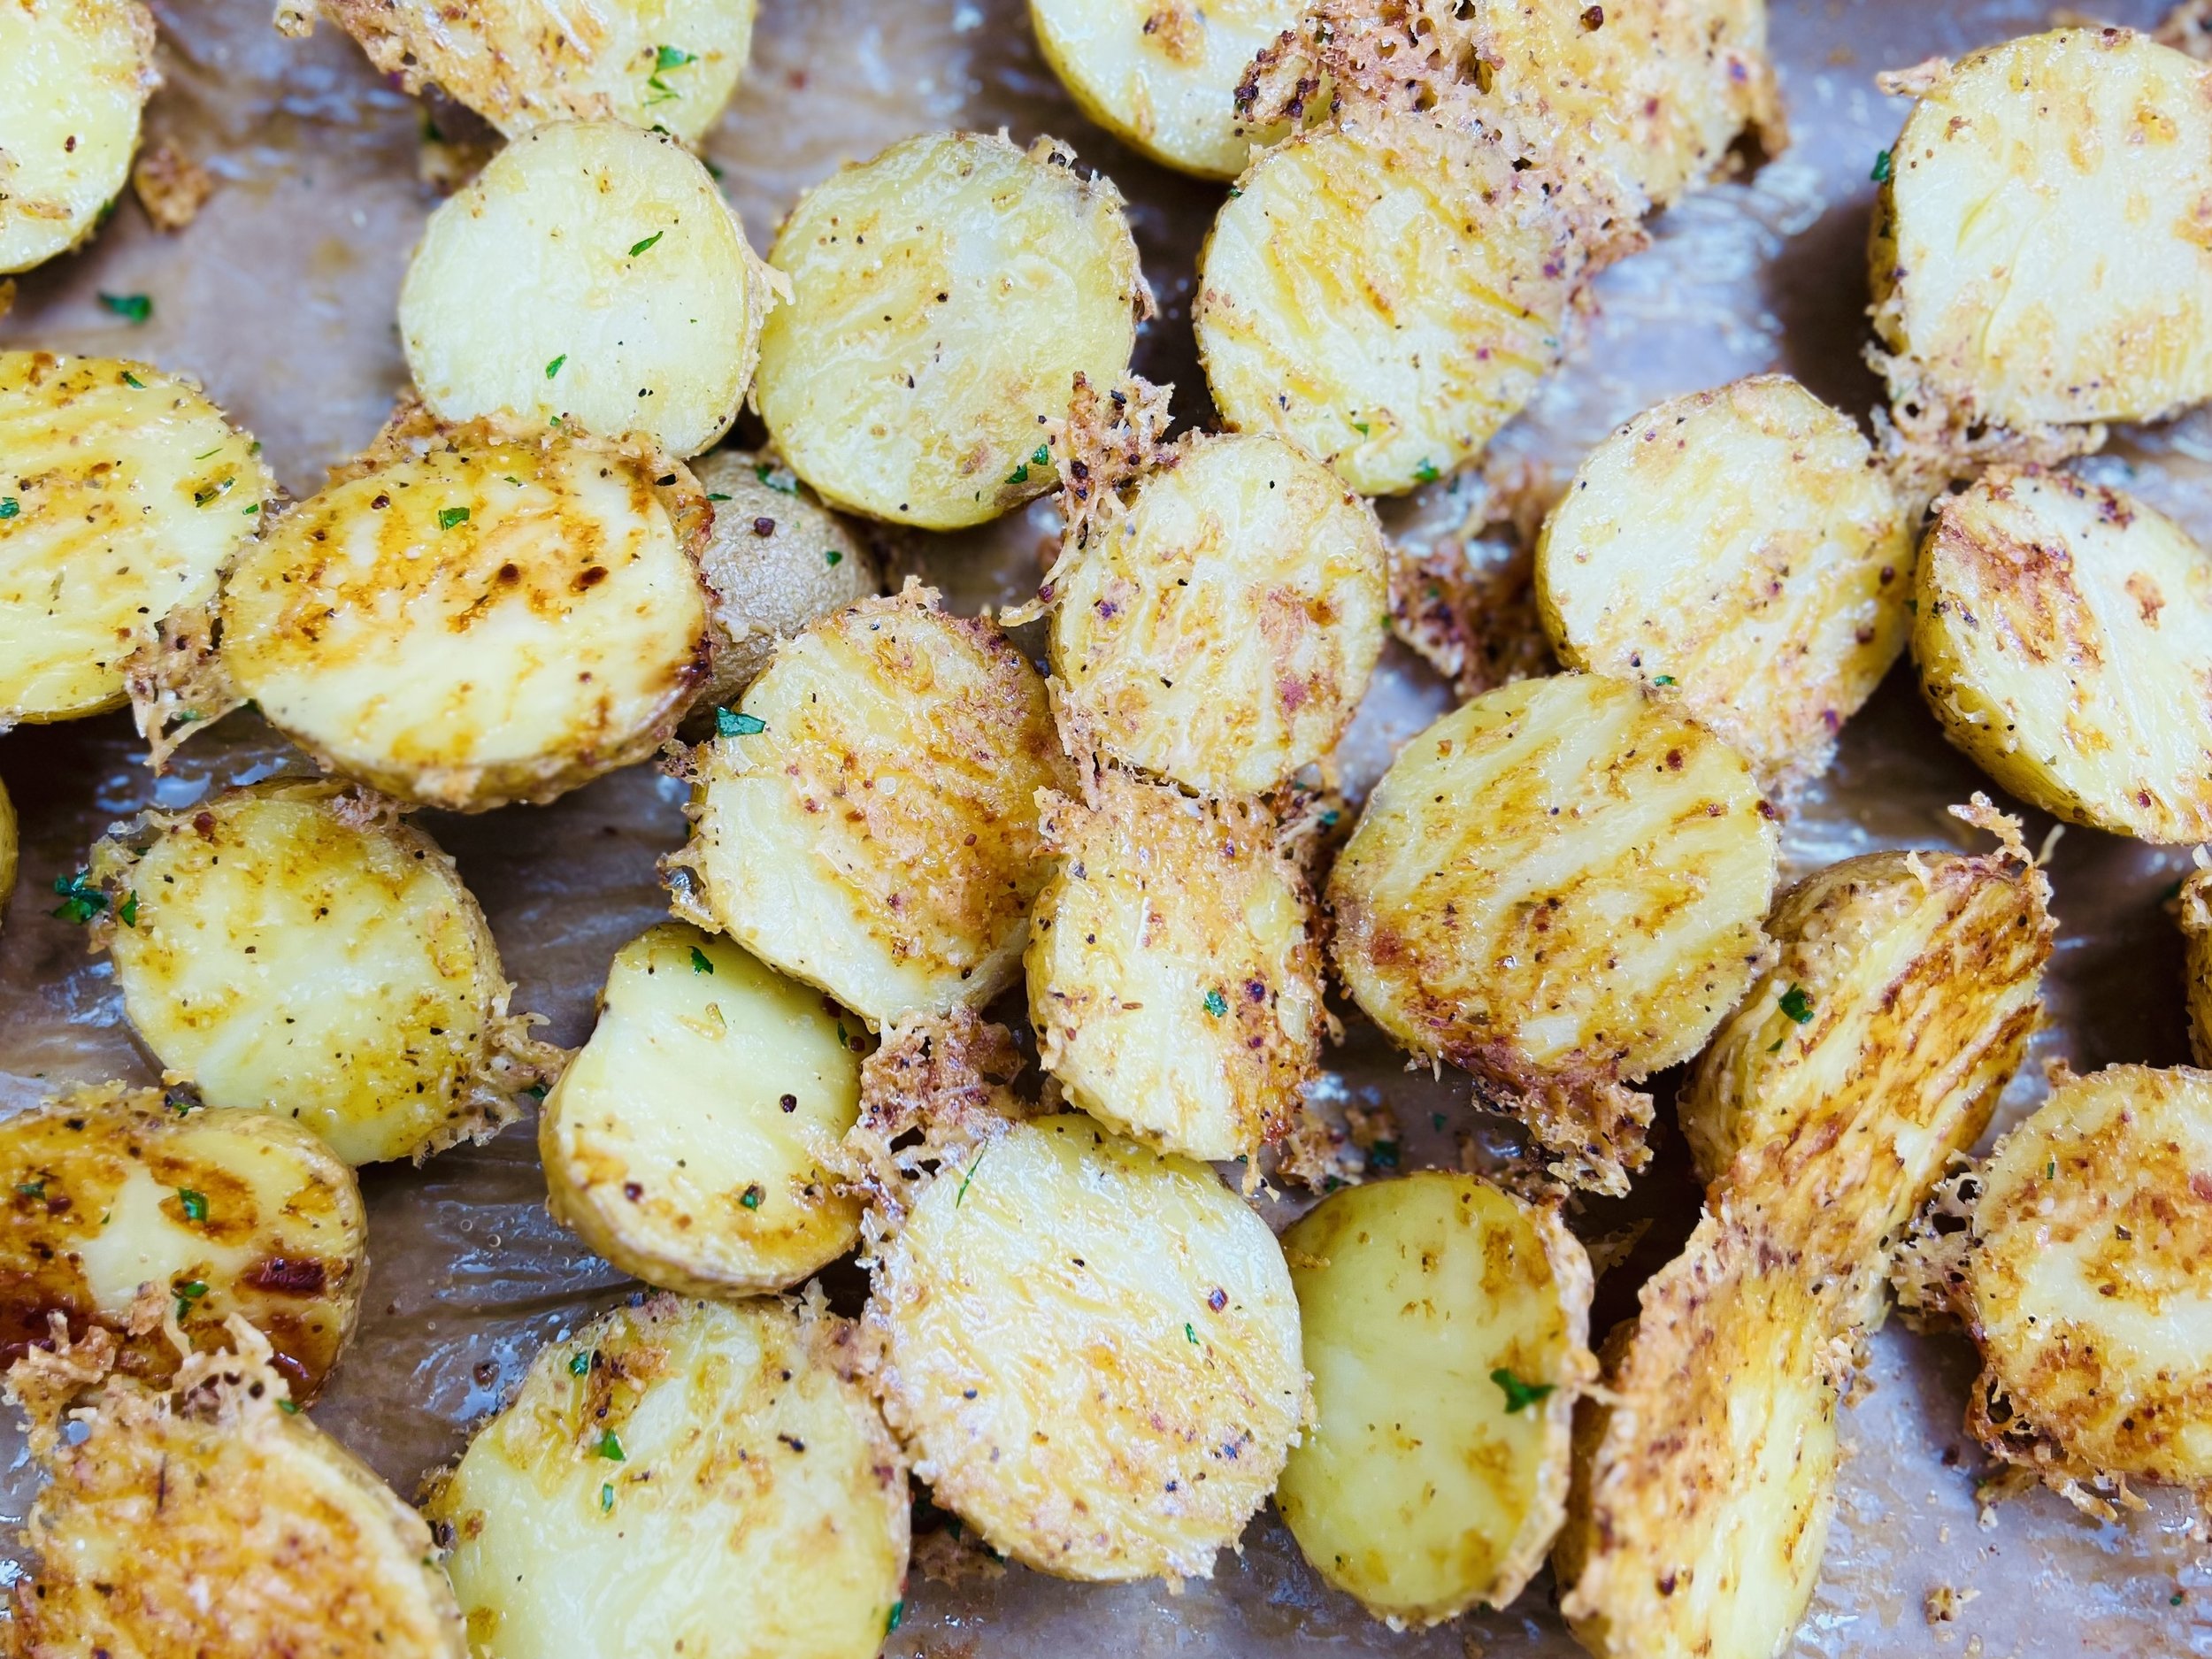
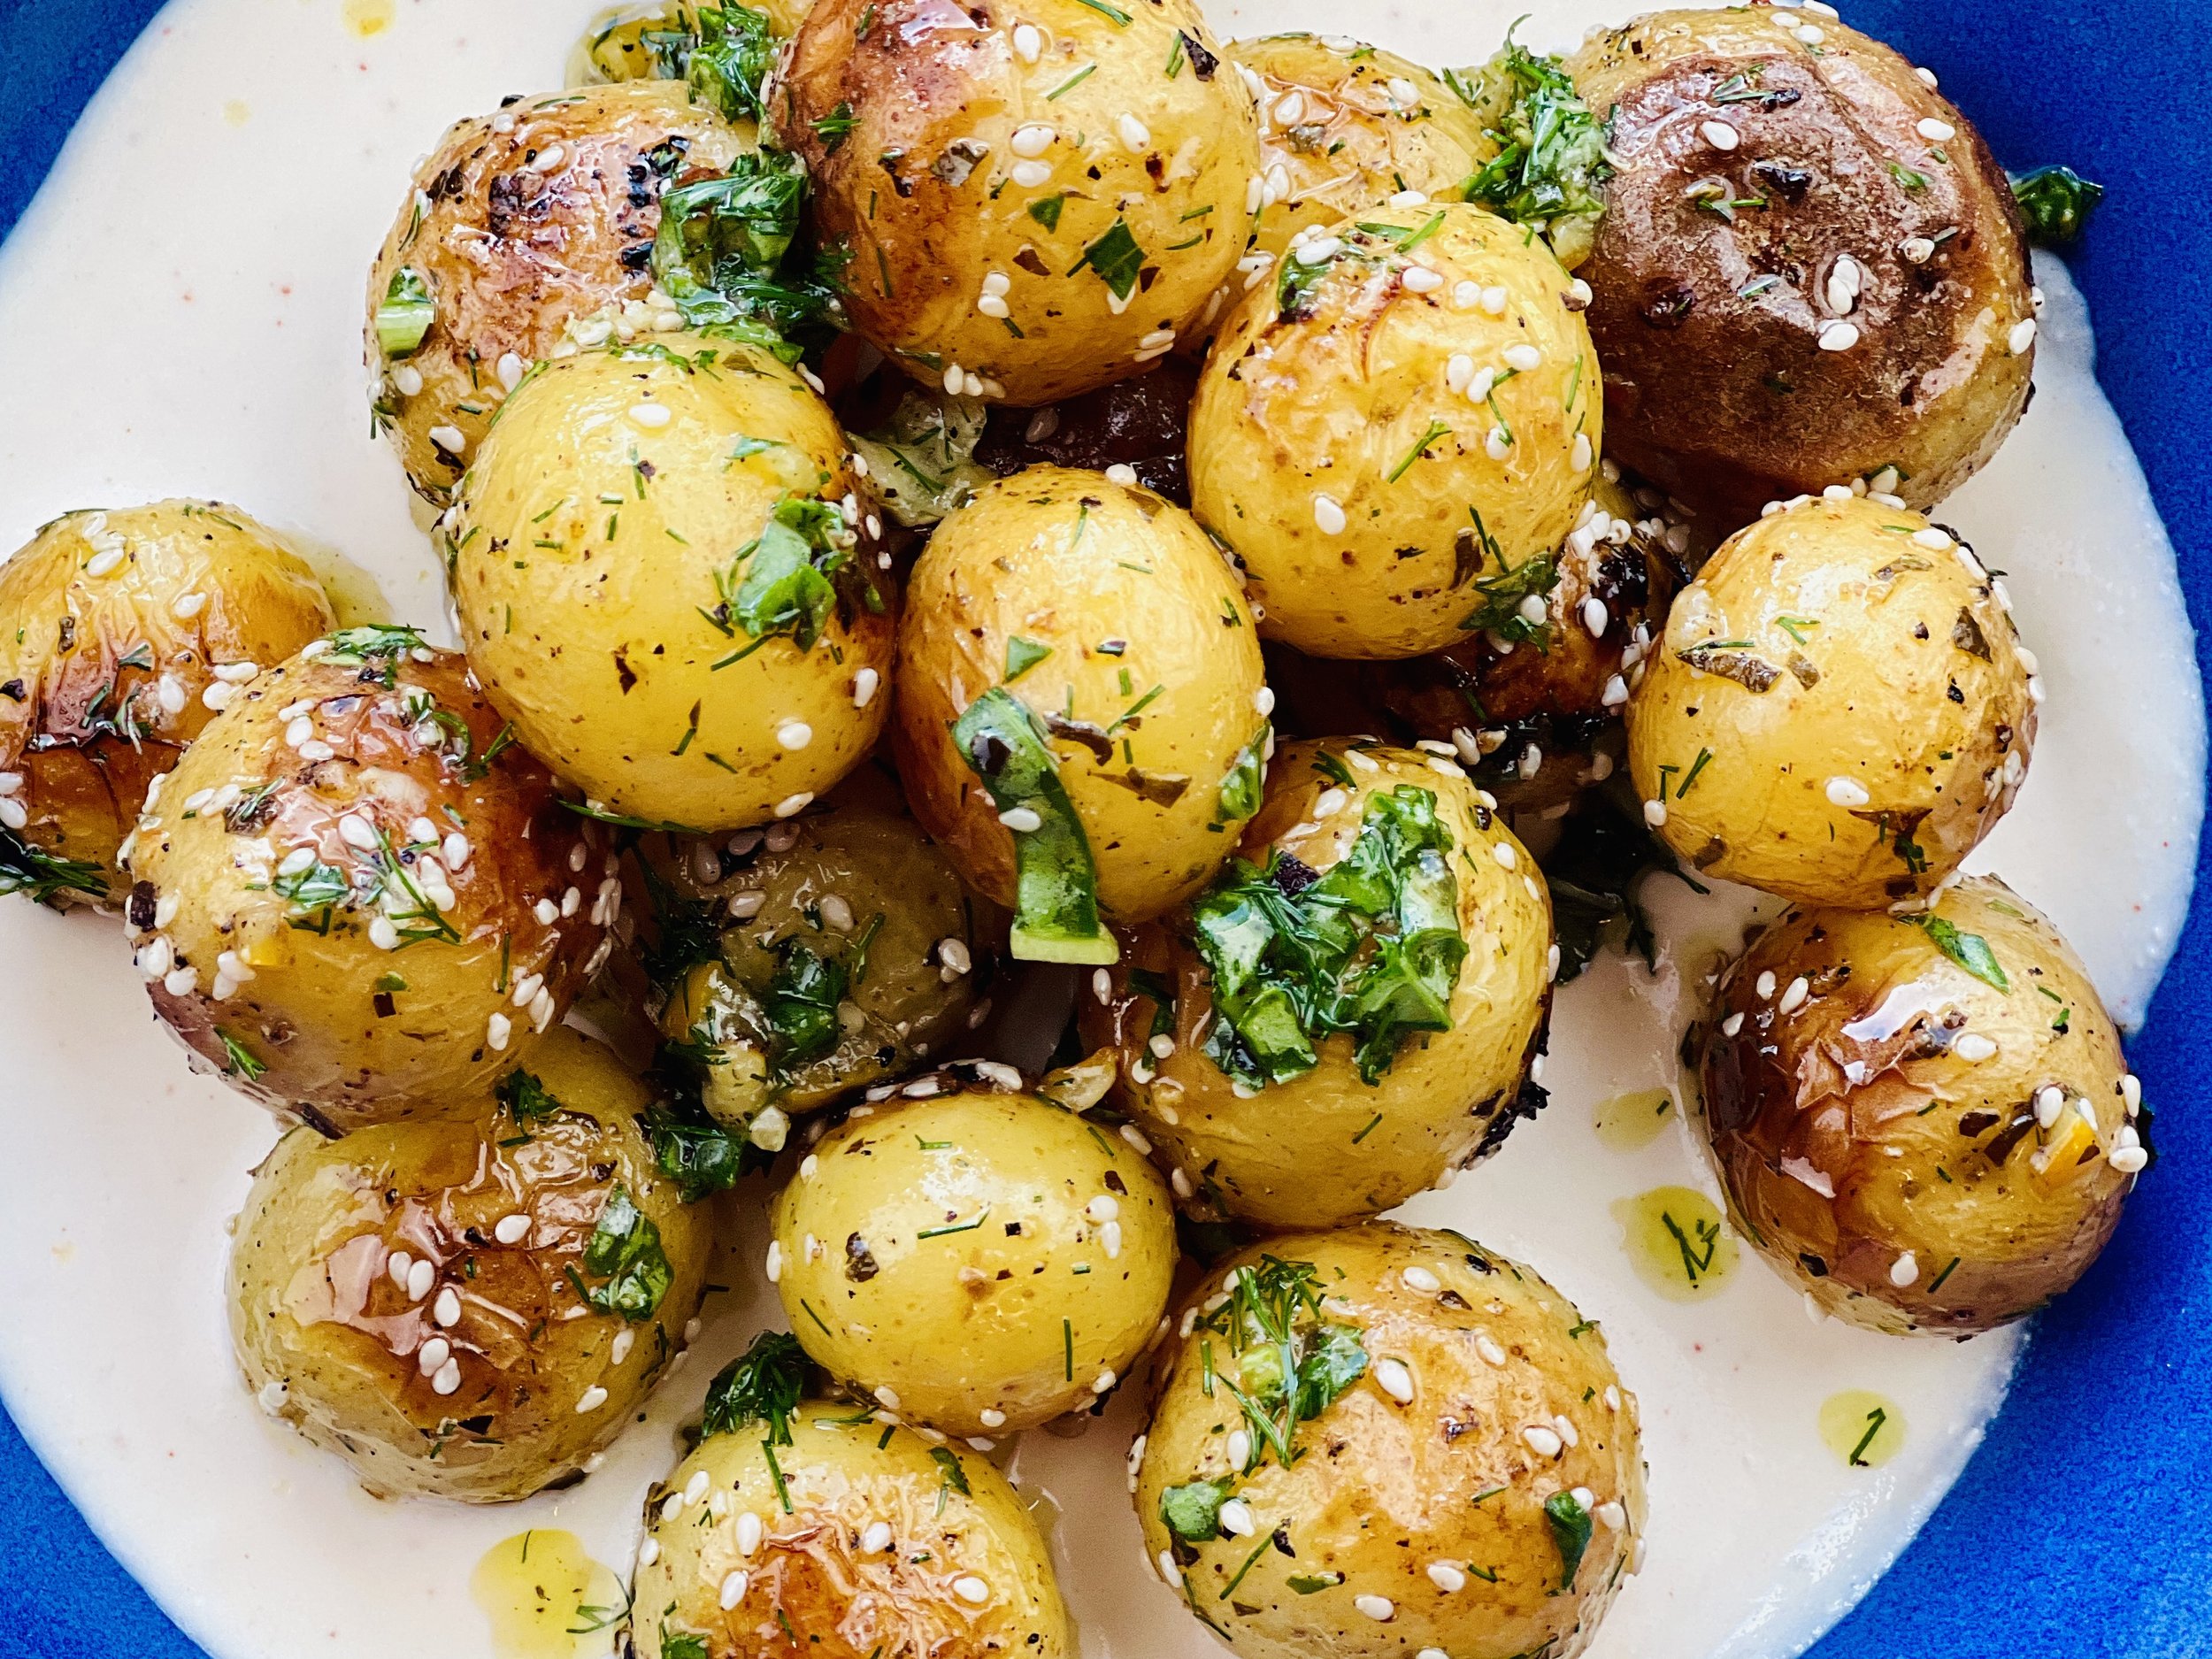
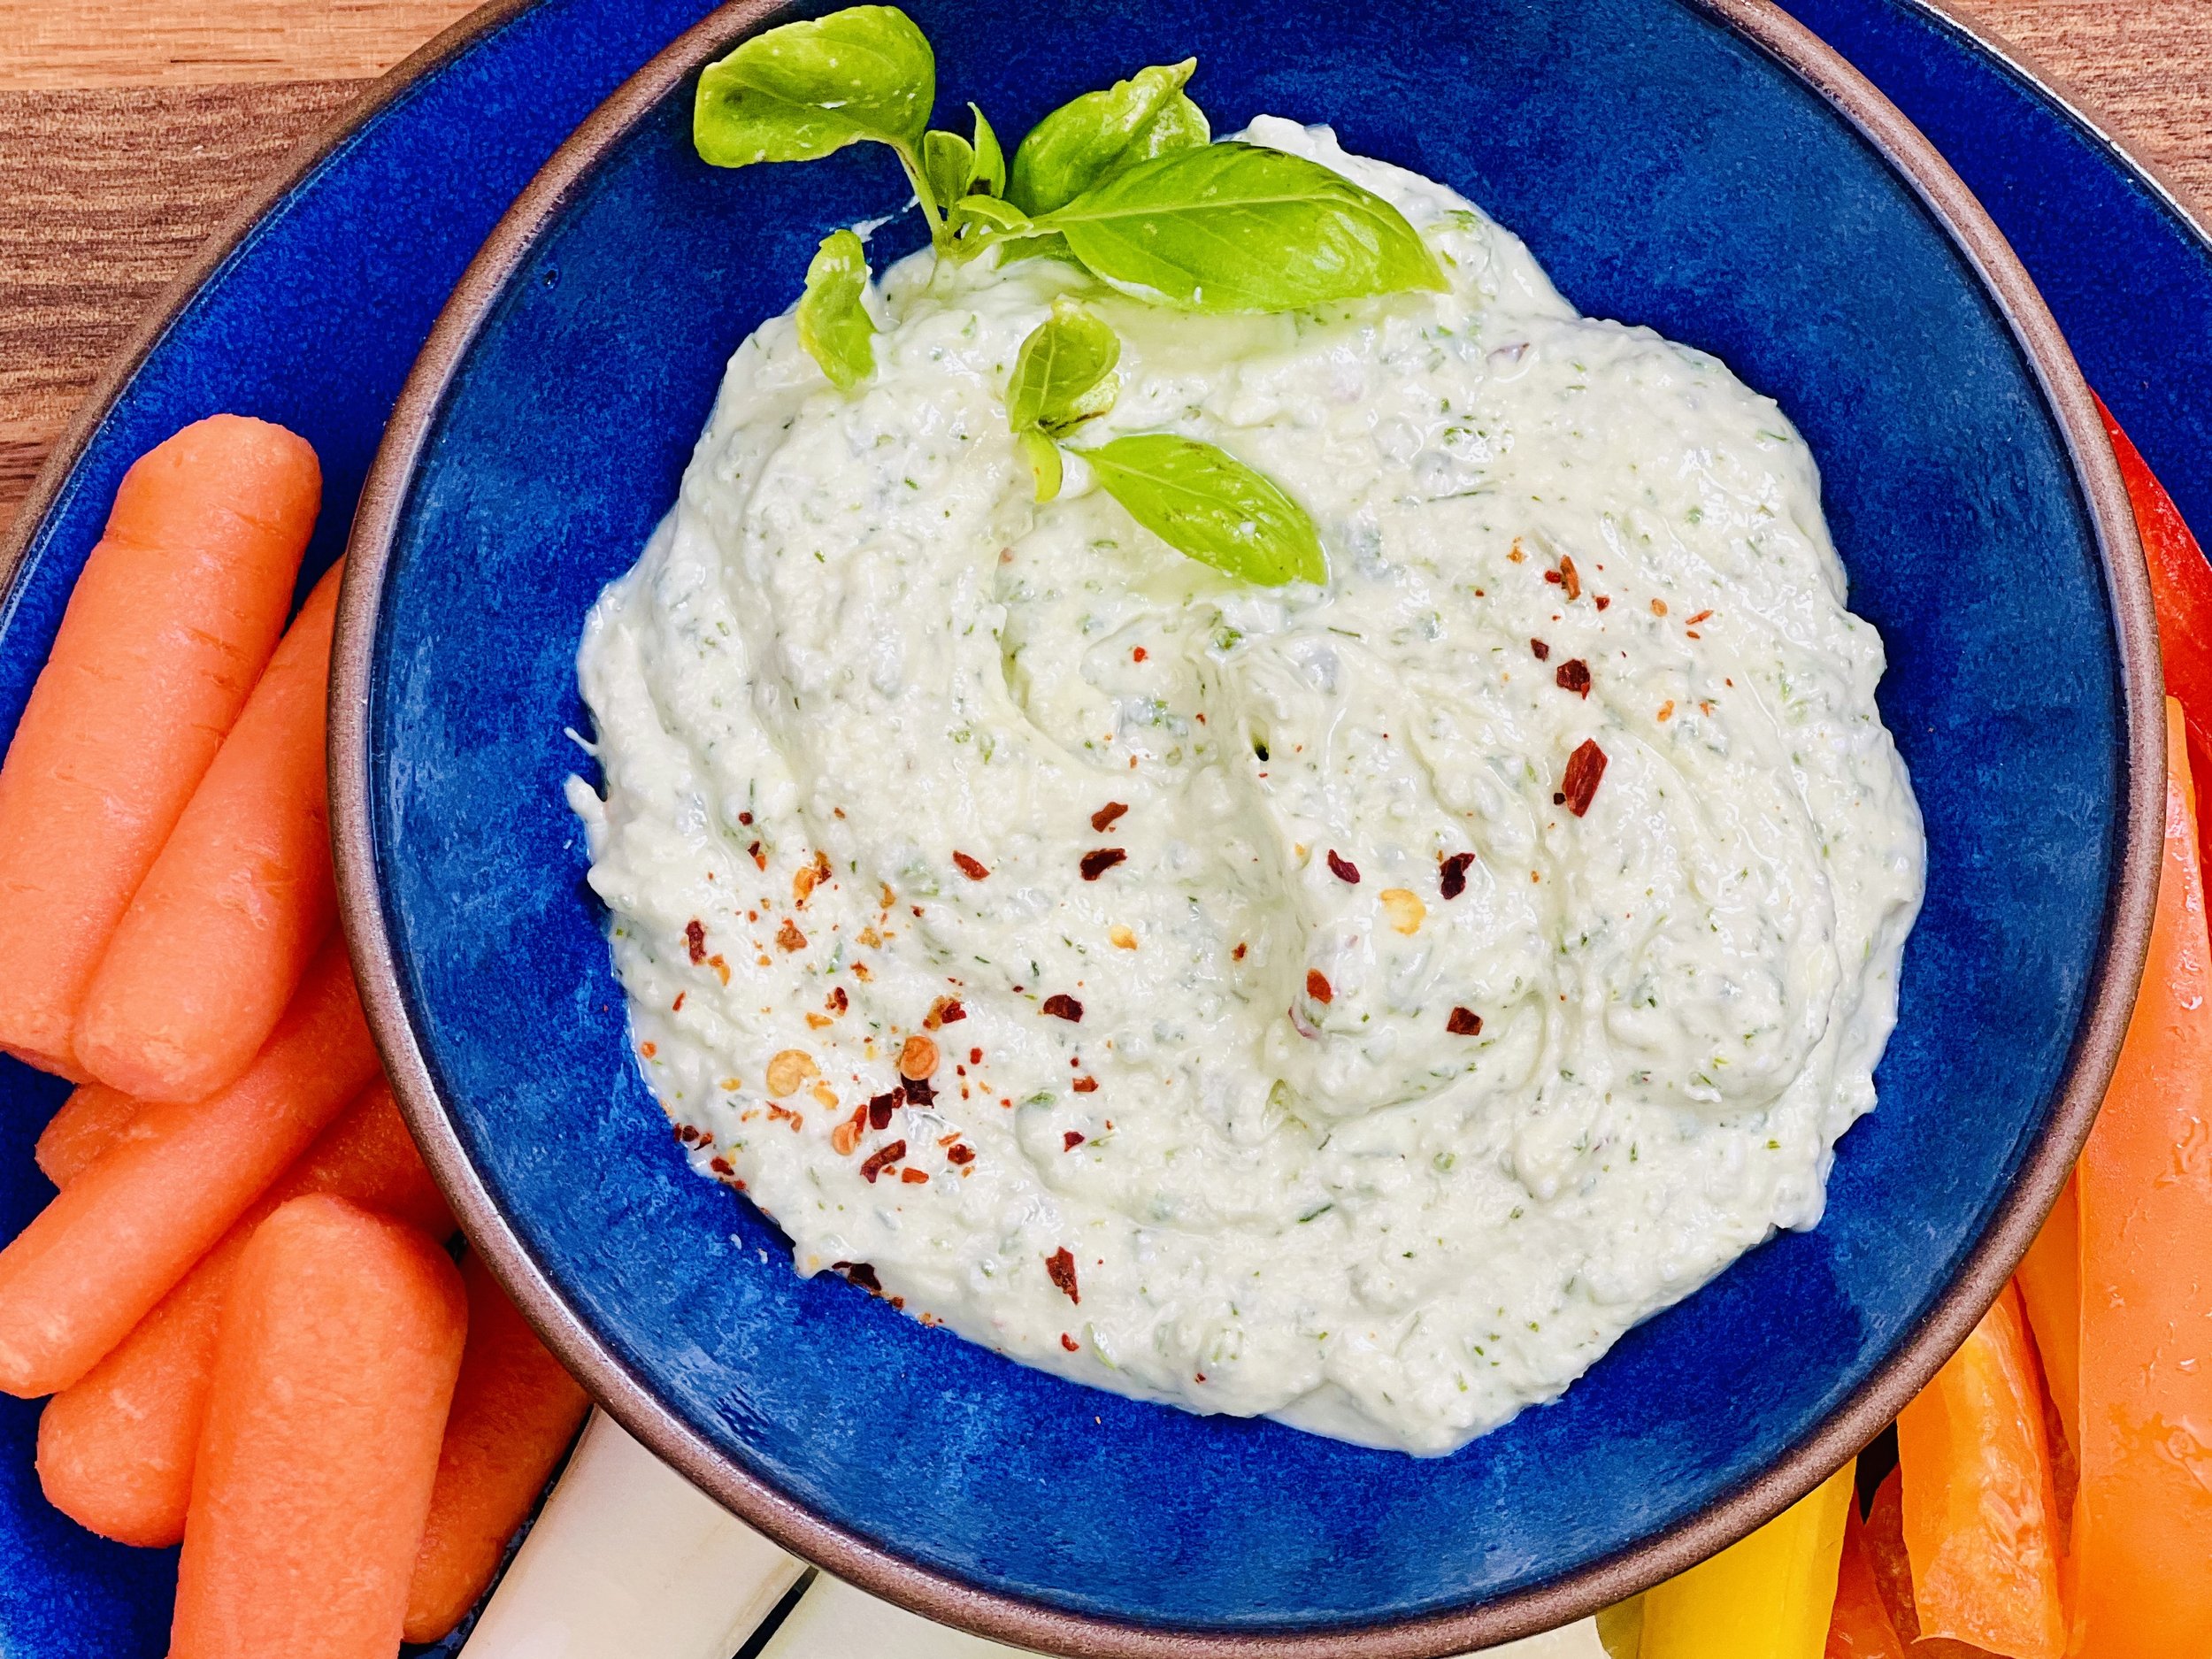
Crispy Potatoes With Fresh Herbs and Feta Cream (low FODMAP)
25 Minutes prep • 40 Minutes cook • Low FODMAP • Gluten-free • Vegetarian • Serves 4 - 6
25 Minutes prep • 40 Minutes cook • Low FODMAP • Gluten-free • Vegetarian • Serves 4 - 6 • OK to make ahead: Step 5
A delicious spin on standard roasted potatoes, these are crispy, creamy, and very flavorful. Choose the herbs that go best with what you’re serving for your main course. If it is heavy on rosemary, then use rosemary in your potatoes. If it’s Mediterranean, then use oregano, basil, and chives. Use what’s in your fridge, your herb garden, or at your local farmer’s market.
Ingredients
2 pounds mixed baby potatoes, halved or quartered if large
1 lemon, quartered
1/4 cup fresh oregano, chopped
1/4 cup, plus 1/3 cup garlic-infused olive oil
1/2 cup mixed fresh herbs, chopped - basil, dill, parsley, oregano, chives (you decide!)
2 teaspoons maple syrup
1-2 tablespoons white sesame seeds
Ingredients: Feta Cream
8 ounces feta cheese
1/4 cup lactose-free yogurt or cream cheese (at room temperature)
2-4 tablespoons lemon juice
1 tablespoon garlic-infused olive oil
1/4 teaspoon smoked paprika
Directions
(1) Prepare: Preheat the oven to 425 degrees F. Wash potatoes and cut larger potatoes so all are about the same size.
(2) Roast potatoes and lemon: In a mixing bowl, toss the potatoes, lemon wedges, and oregano with 1/4 cup garlic-infused olive oil. Spread in one layer on a rimmed baking sheet. Season with salt and pepper. Roast for 20 minutes, or until tender.
(3) Remove charred lemon: Remove the charred lemon from the baking sheet to a cutting board. Continue to cook the potatoes for another 20-25 minutes, until crispy.
(4) Make the herb sauce: To make the herb oil. Finely chop 1-2 roasted lemon wedges – rind and all, discarding any seeds. Chop/mash the garlic into a paste. Add the lemon and garlic to a bowl. Add 1/3 cup olive oil, the mixed herbs, and the honey. Season with salt, pepper, and chili flakes.
(5) Make the feta cream: Combine the feta, yogurt or cream cheese, lemon juice, garlic-infused olive oil, and smoked paprika in a mini food processor or blender and blend until creamy. If needed, thin with additional lemon juice or garlic-infused olive oil (depending on how lemony and thin you want it). It should be thick enough to hold its shape on the serving plate.
(6) Finish: Remove the potatoes from the oven and put them back in the mixing bowl. Toss with half the herb oil and the sesame seeds. Taste and add salt or pepper if needed.
(7) Plate and serve: Spread the feta cream on your serving dish, spoon the potatoes over the feta, and drizzle with the remaining herb sauce. Sprinkle everything lightly with a bit of salt.
Eat and enjoy every bite because you can!
This post contains links for you to easily purchase items listed on the page. In some cases, we have provided a special discount code for IBS Game Changers so be sure to use it when you purchase an item to get the discount that has been arranged just for you! As an Amazon Associate, I earn a commission from qualifying Amazon purchases.
More Deliciously Low FODMAP™ side dish recipes
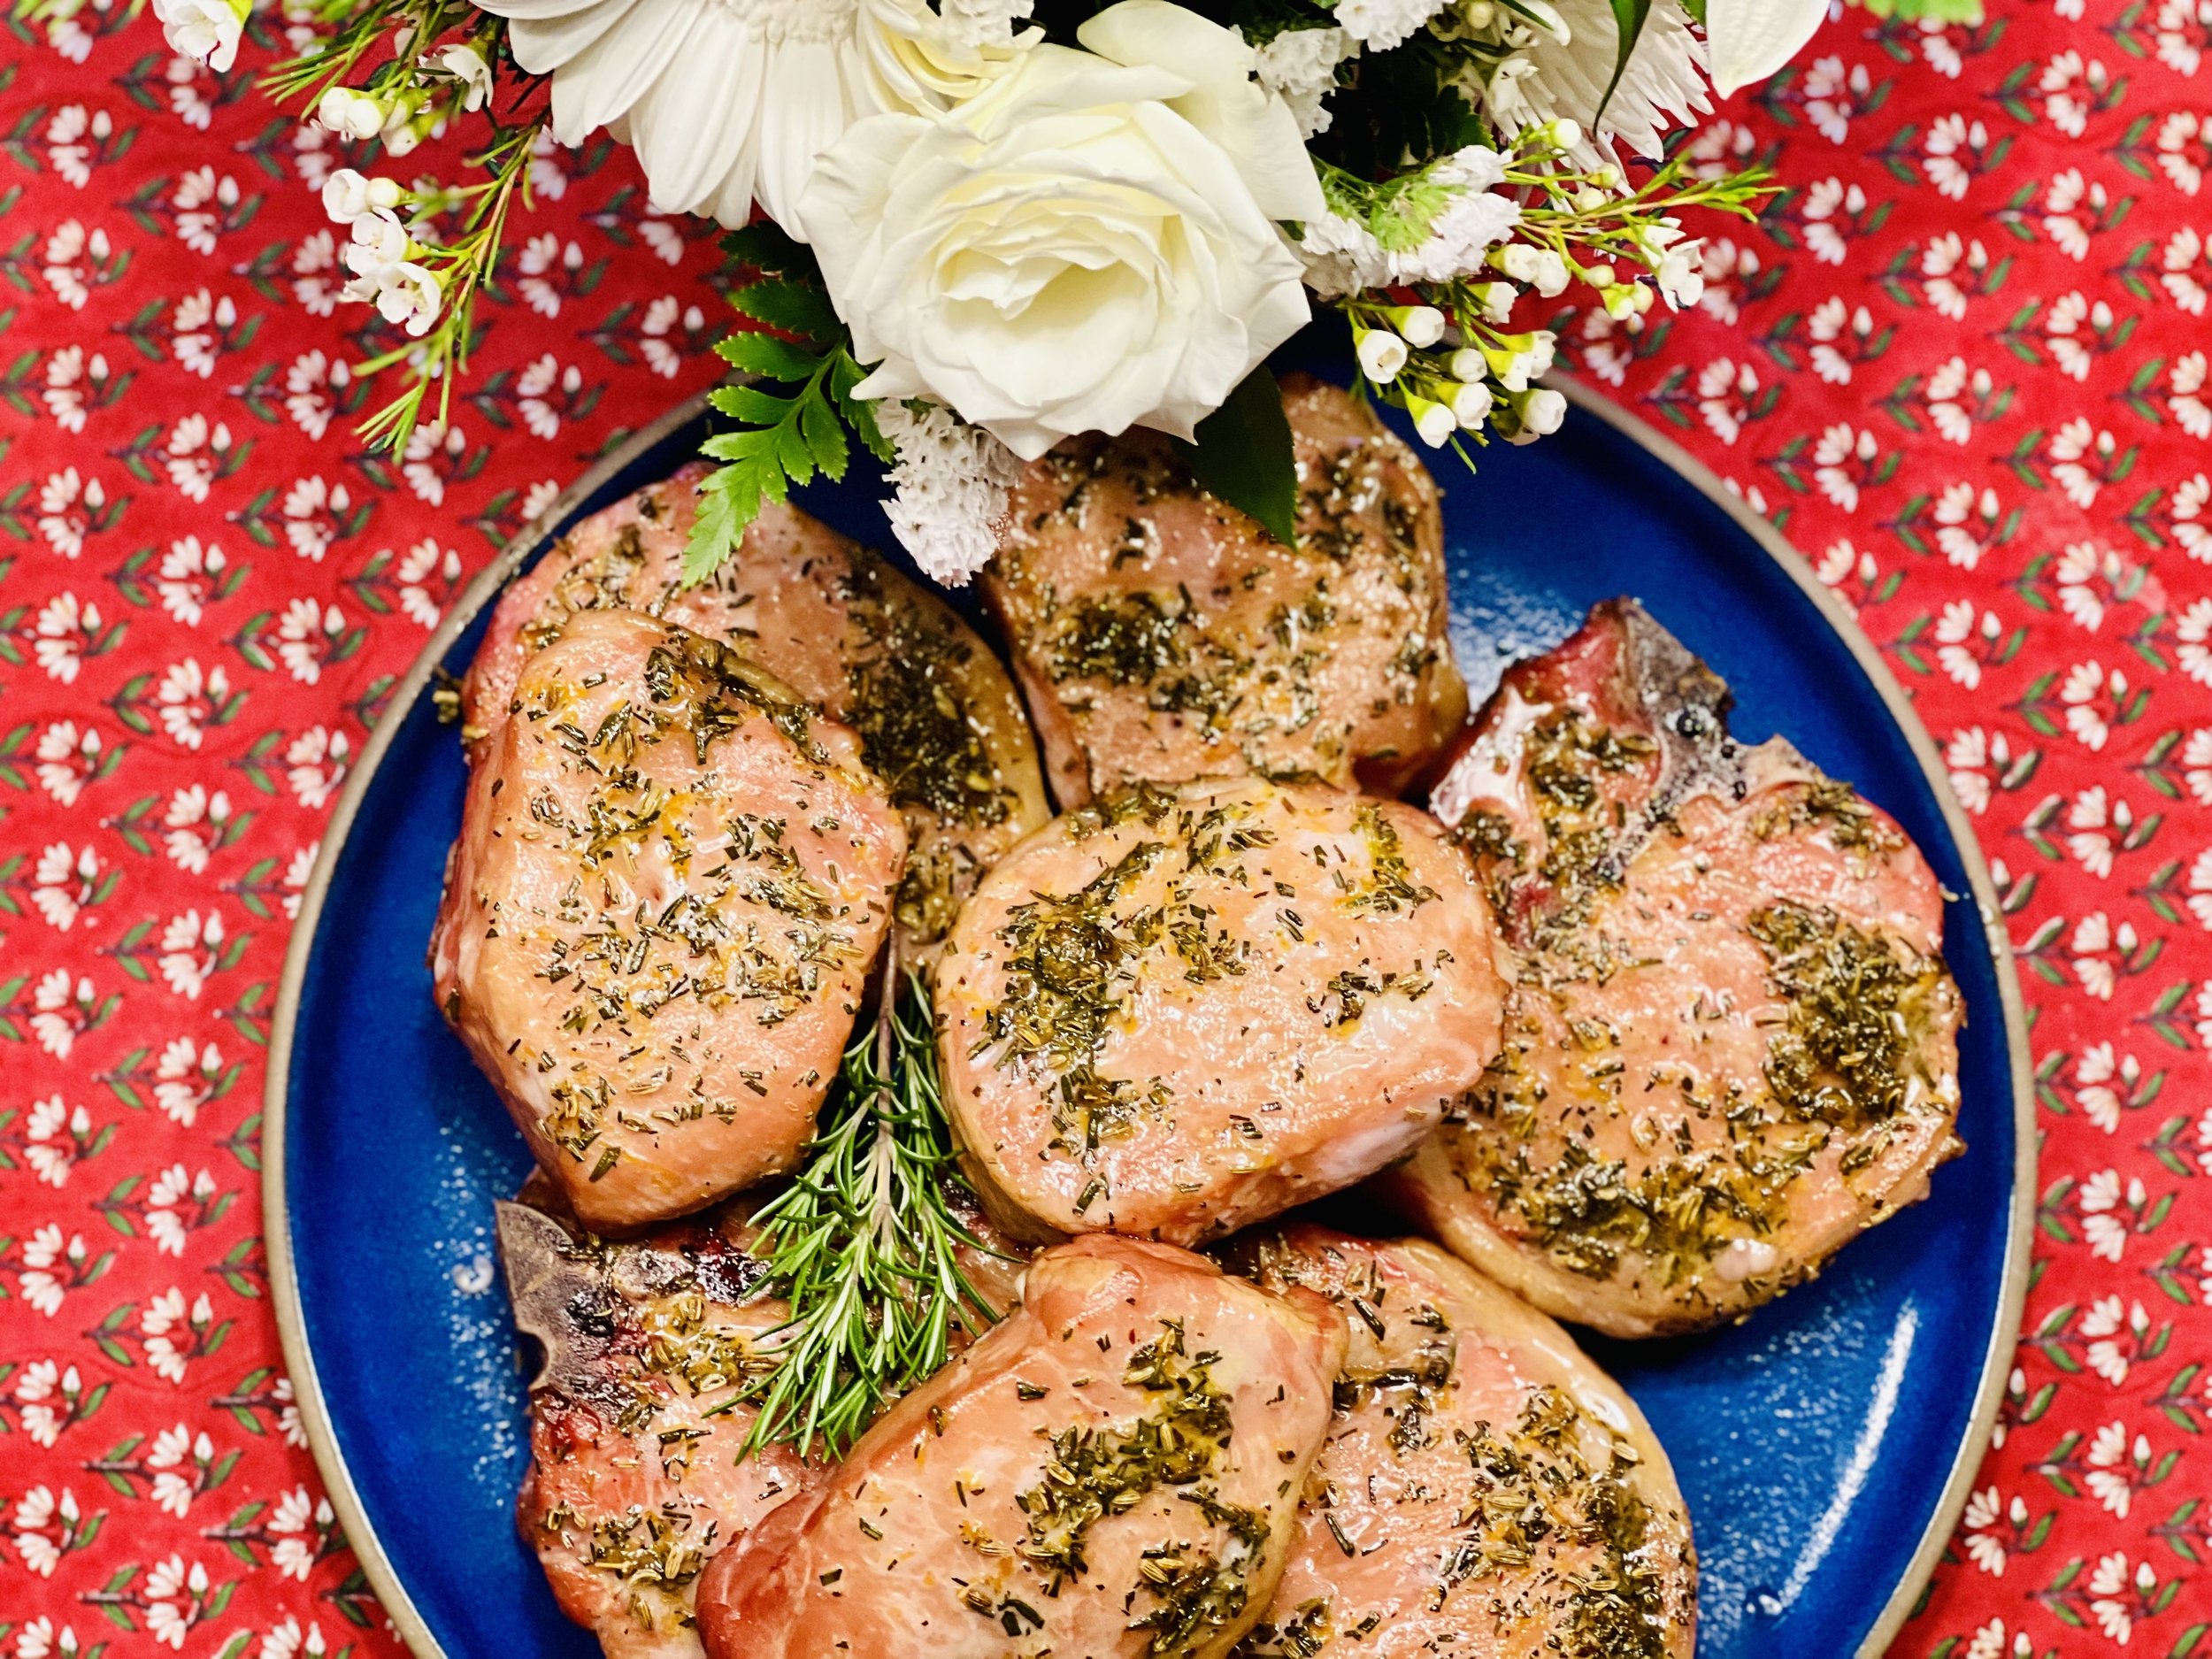
Porchetta Style Pork Chops (low FODMAP)
20 Minutes prep • 45 - 90 Minutes cook (depending on method) • Low FODMAP • Gluten-free
20 Minutes prep • 45 - 90 Minutes cook (depending on method) • Low FODMAP • Gluten-free • Serves 4
Porchetta (pronounced as porketta) means “little pig” in Italian. It refers to a slow-roasted pork belly roll, pork loin, or whole pig, that is butterflied, stuffed with herbs, rolled and tightly secured with twine, and then slow-roasted to perfection. It’s delicious but a bit complicated! This recipe brings all the amazing flavors of porchetta together in a much simpler version. You have the option of using a smoker to add even more flavor to the meat, but a conventional oven will also work just fine.
Ingredients
4 bone-in or boneless center-cut pork chops, 1 1/2 - 2 inches thick
Kosher salt (I use Diamond Crystal Kosher Salt)
2 lemons, zested and quartered
4 tablespoons fresh rosemary, chopped
Large pinch red pepper flakes
1 - 2 teaspoons fennel seeds, lightly crushed
4 tablespoons garlic-infused olive oil
2 tablespoons of butter (if using conventional oven method)
Directions
(1) Prepare the meat: Unwrap the chops and lay them out in one layer. Using a very sharp paring knife, cut a pocket between the meat and the fat-covered edge of each chop. Season both sides of each chop, including inside the pocket, generously with Kosher salt (use about 2 teaspoons of salt per 1 1/2” - 2” thick chop). Re-wrap and refrigerate overnight or at least 4 hours before cooking.
Make-ahead note: These pork chops are amazing and the texture and flavor benefit greatly from early salting. So, salt your pork chops and let them sit in the refrigerator overnight or for at least 4 hours before you cook them for the best flavor.
(2) Prepare: Preheat the oven to 350 degrees F or set your smoker grill on the “smoke” setting and let it warm up for about 10 minutes. Grate the rind from the lemons and put it in a small bowl. Cut lemons lengthwise in quarters for serving.
(3) Boost the garlic-infused olive oil: In a small saucepan, combine the garlic-infused olive oil with the whole garlic cloves. Heat just to a simmer and let simmer for 2 - 3 minutes. Turn the heat off, remove the garlic cloves, and let cool.
(4) Make the rub: Add 2 tablespoons of the garlic-infused olive oil to the bowl with the lemon zest and stir in the rosemary, red pepper flakes, and fennel seeds. Divide the mixture between the 4 pork chops, stuffing some inside the pockets you created, and rubbing the rest on the outside of the meat.
Smoker Method
(5) Cook the pork chops - using a smoker (for the best flavor): Put the chops on the smoker grill with the grill still set on Smoke and smoke for 60 - 90 minutes. Turn the grill temperature up to 225 degrees F. Let the chops cook for 10 - 15 minutes, or until the internal temperature measures 135 - 140 degrees F on an instant-read or meat thermometer. Remove from the grill, transfer pork chops to a plate, tent with foil, and let rest for 10 minutes before serving.
(6) Finish: Transfer pork chops to a plate, tent with foil, and let rest for 10 minutes before serving.
Conventional Oven Method
(5) Cook the pork chops - using a conventional oven: Heat a large ovenproof skillet over high heat and add 1 tablespoon the garlic-infused olive oil you have prepared. Sear the pork chops on one side for 5 minutes, or until golden brown. Add 1 tablespoon of butter to promote browning, then gently turn over each chop, add another tablespoon of butter, and cook for another 3 - 5 minutes. Transfer the skillet to the preheated oven. Cook until the meat is just done, about 10 to 15 minutes (until the internal temperature reaches 135 - 140 degrees F on an instant-read or meat thermometer).
(6) Finish: Transfer pork chops to a plate, tent with foil, and let rest for 10 minutes before serving.
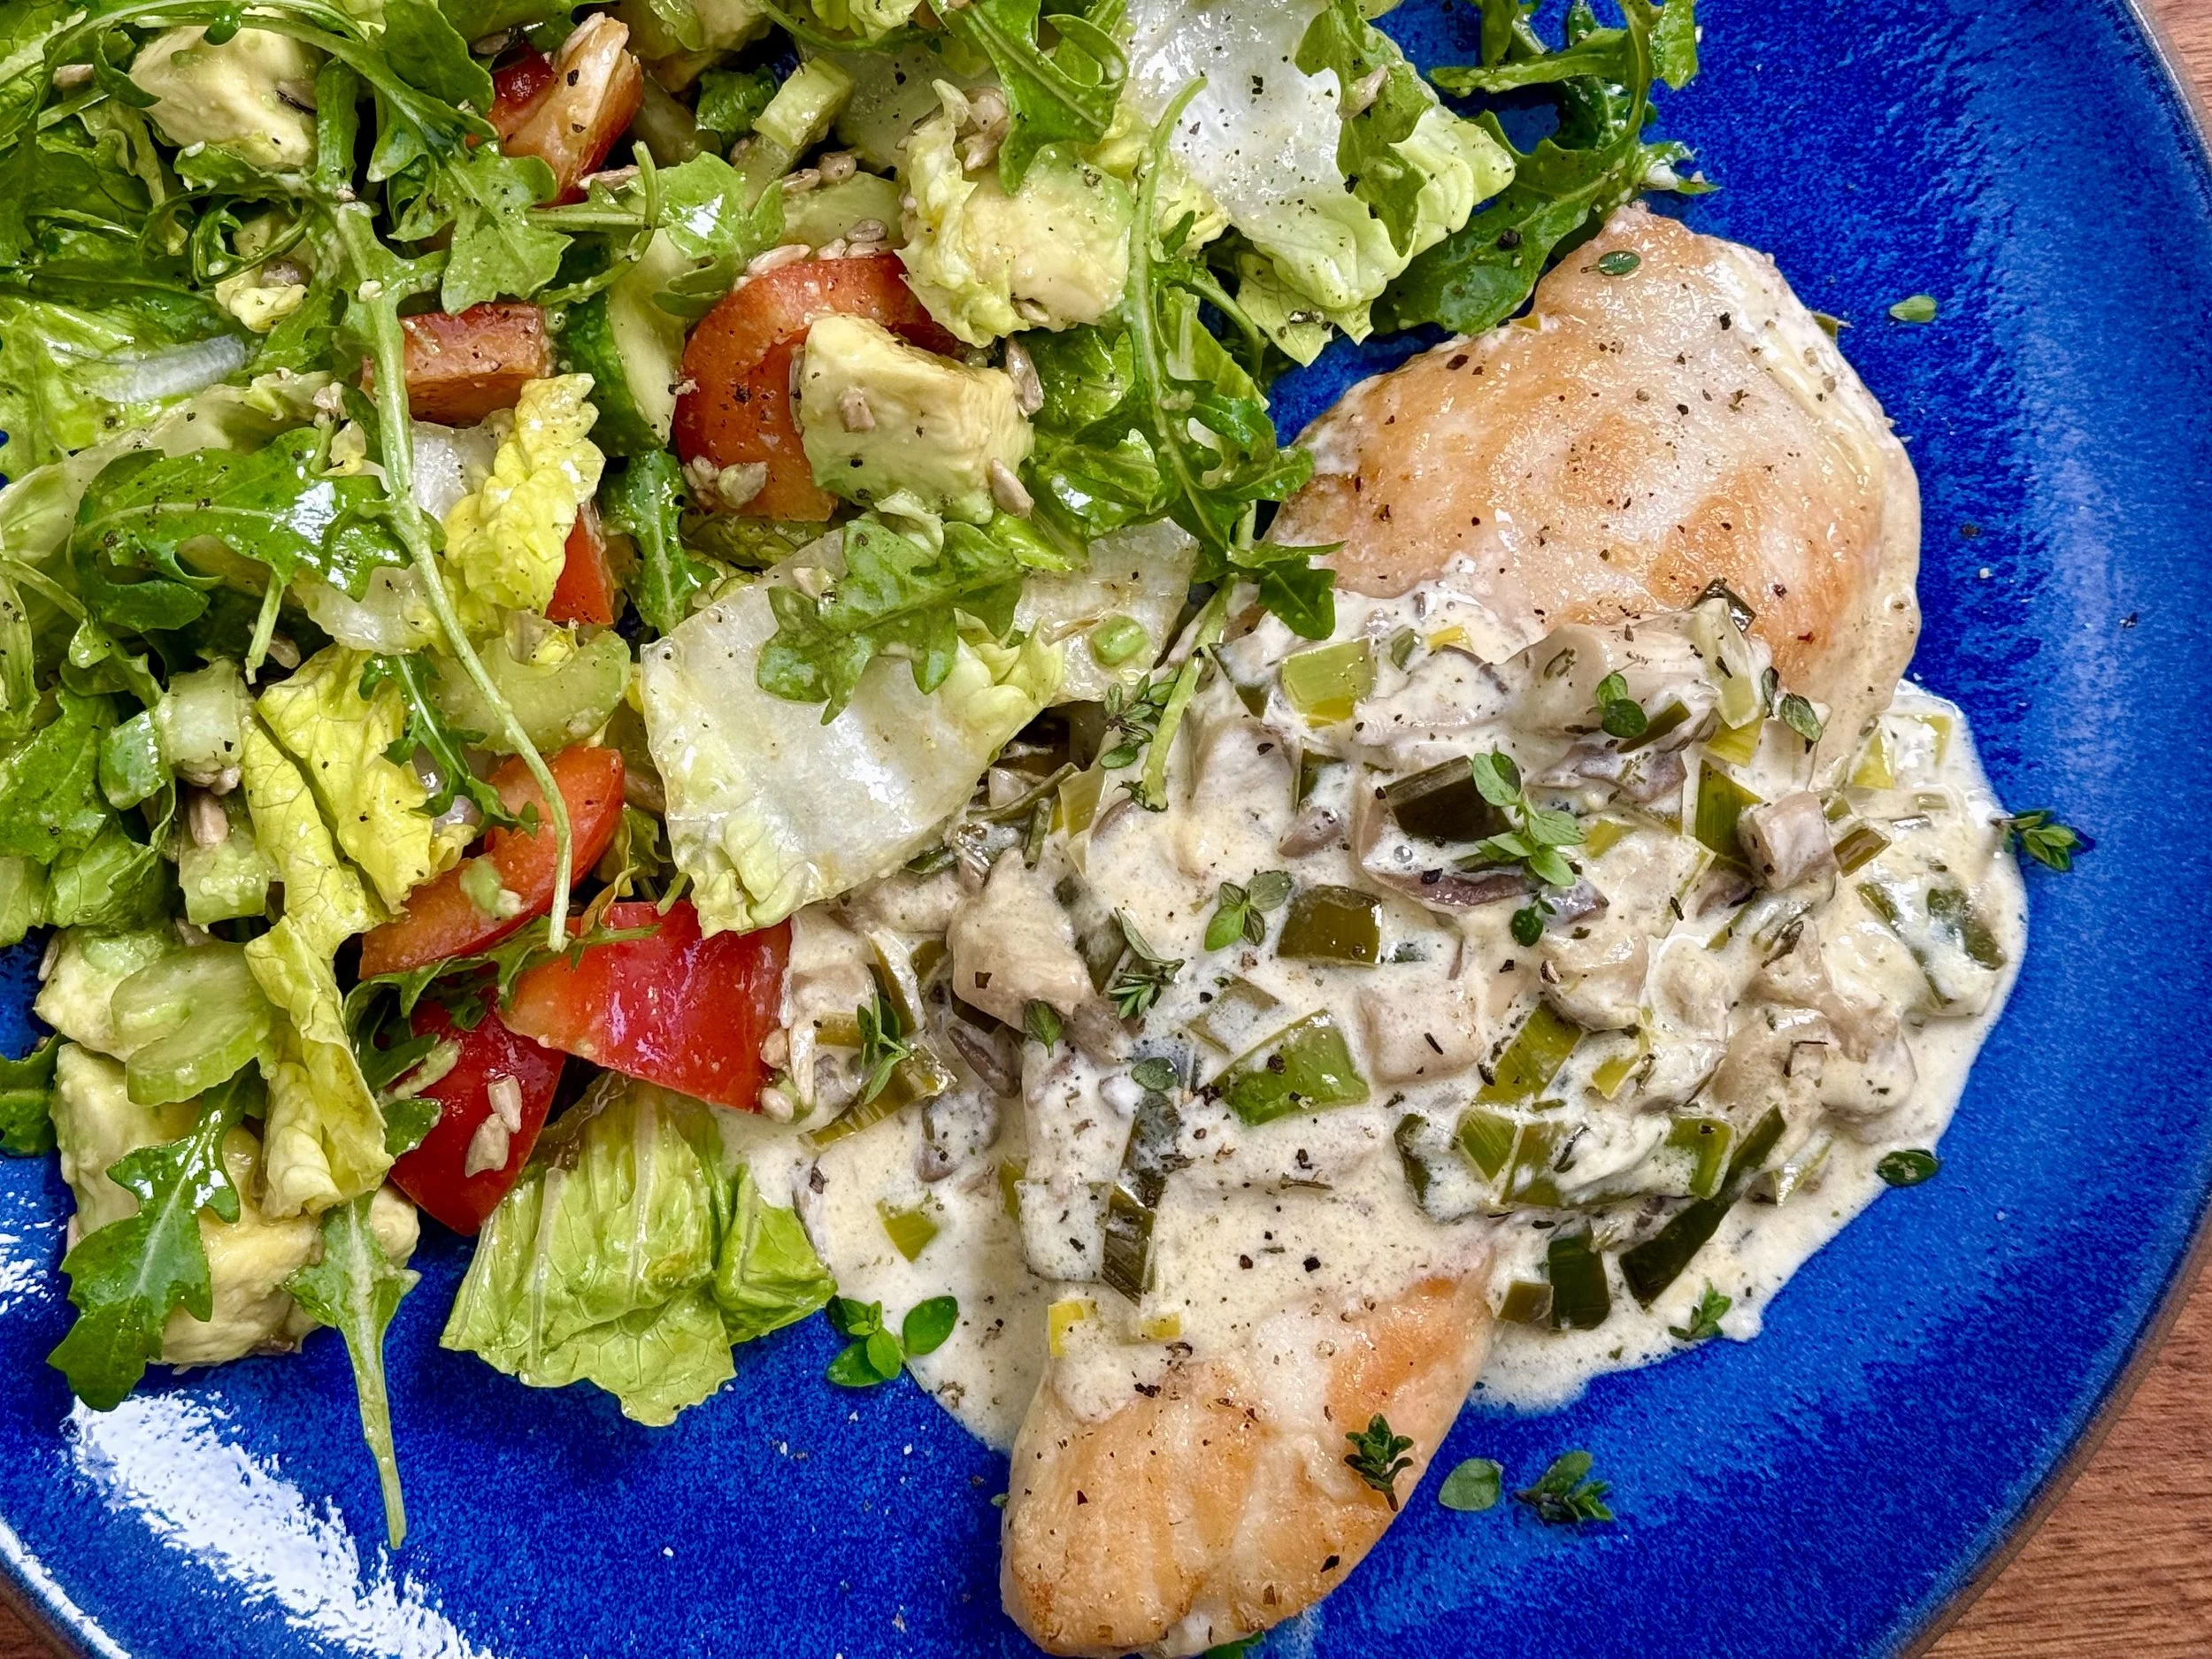
(7) Plate and Serve: Serve with rice or mashed potatoes, lemon wedges, and my Rosemary Mushroom Cream Sauce.
Eat and enjoy every bite because you can!
*This post may contain links for you to easily purchase items listed on the page. In some cases, we have provided a special discount code for IBS Game Changers so be sure to use it when you purchase an item to get the discount that has been arranged just for you! As an Amazon Associate, I earn a commission from qualifying Amazon purchases.
More Deliciously Low FODMAP™ main course recipes
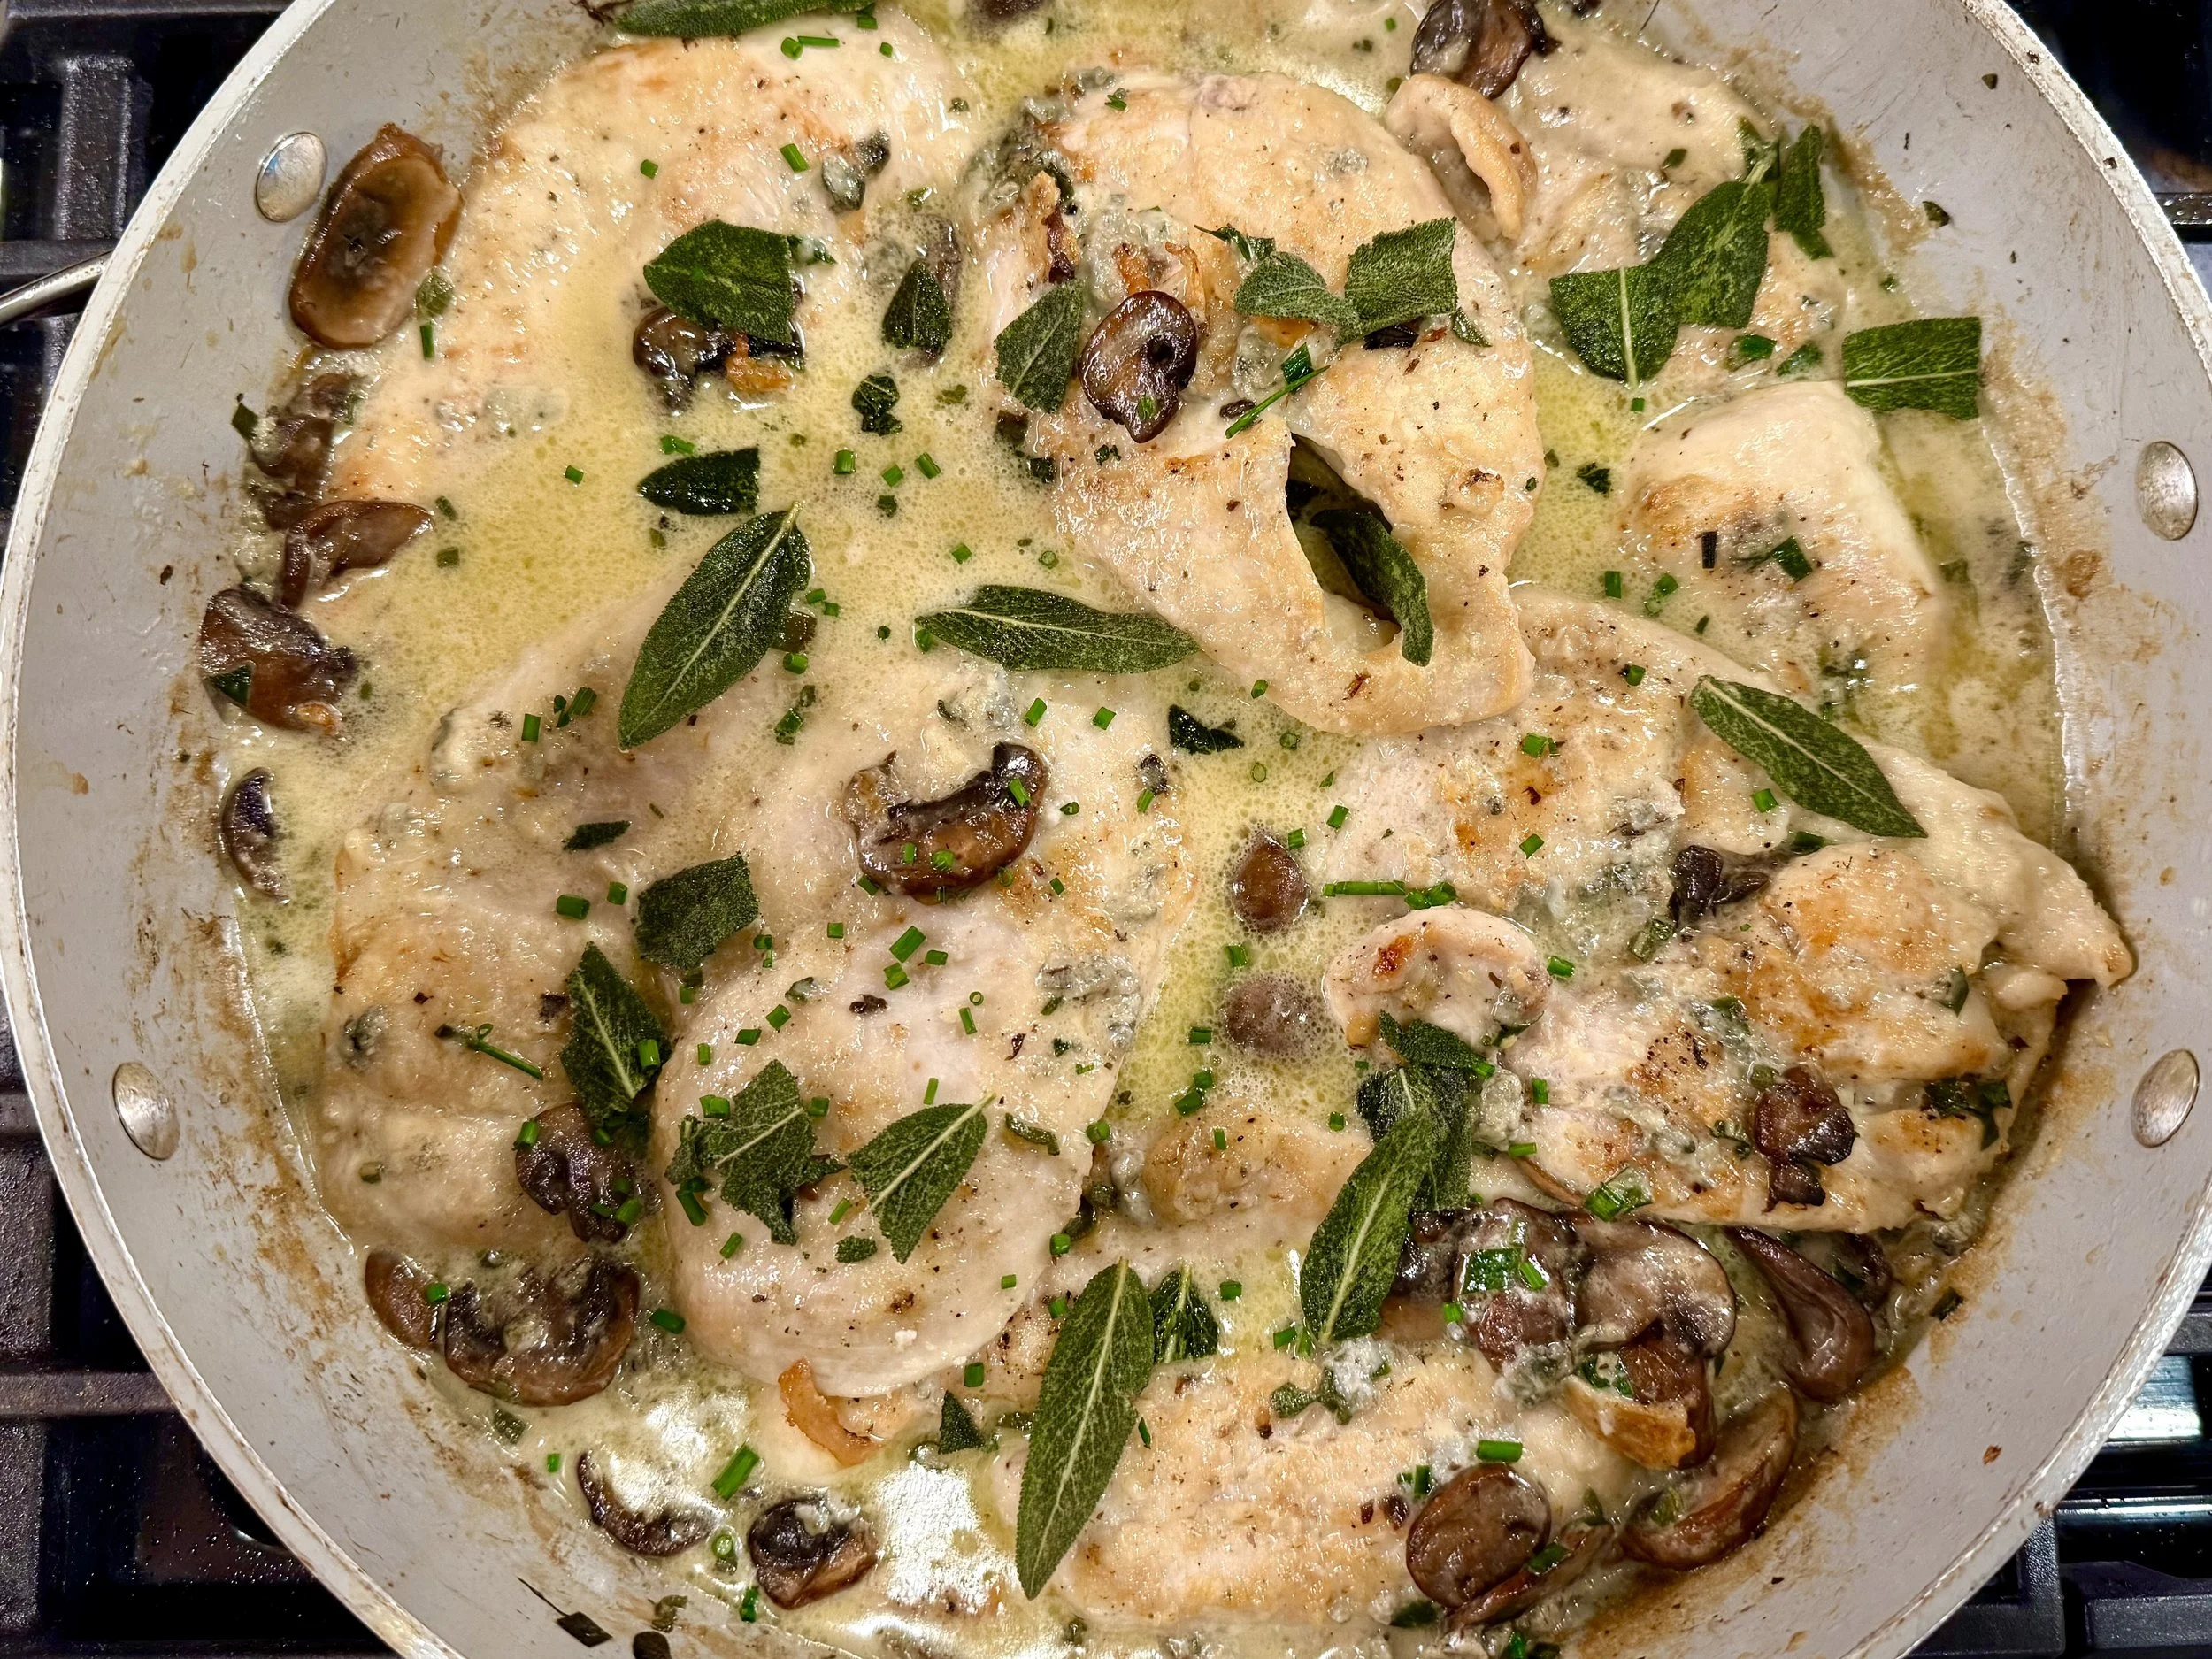
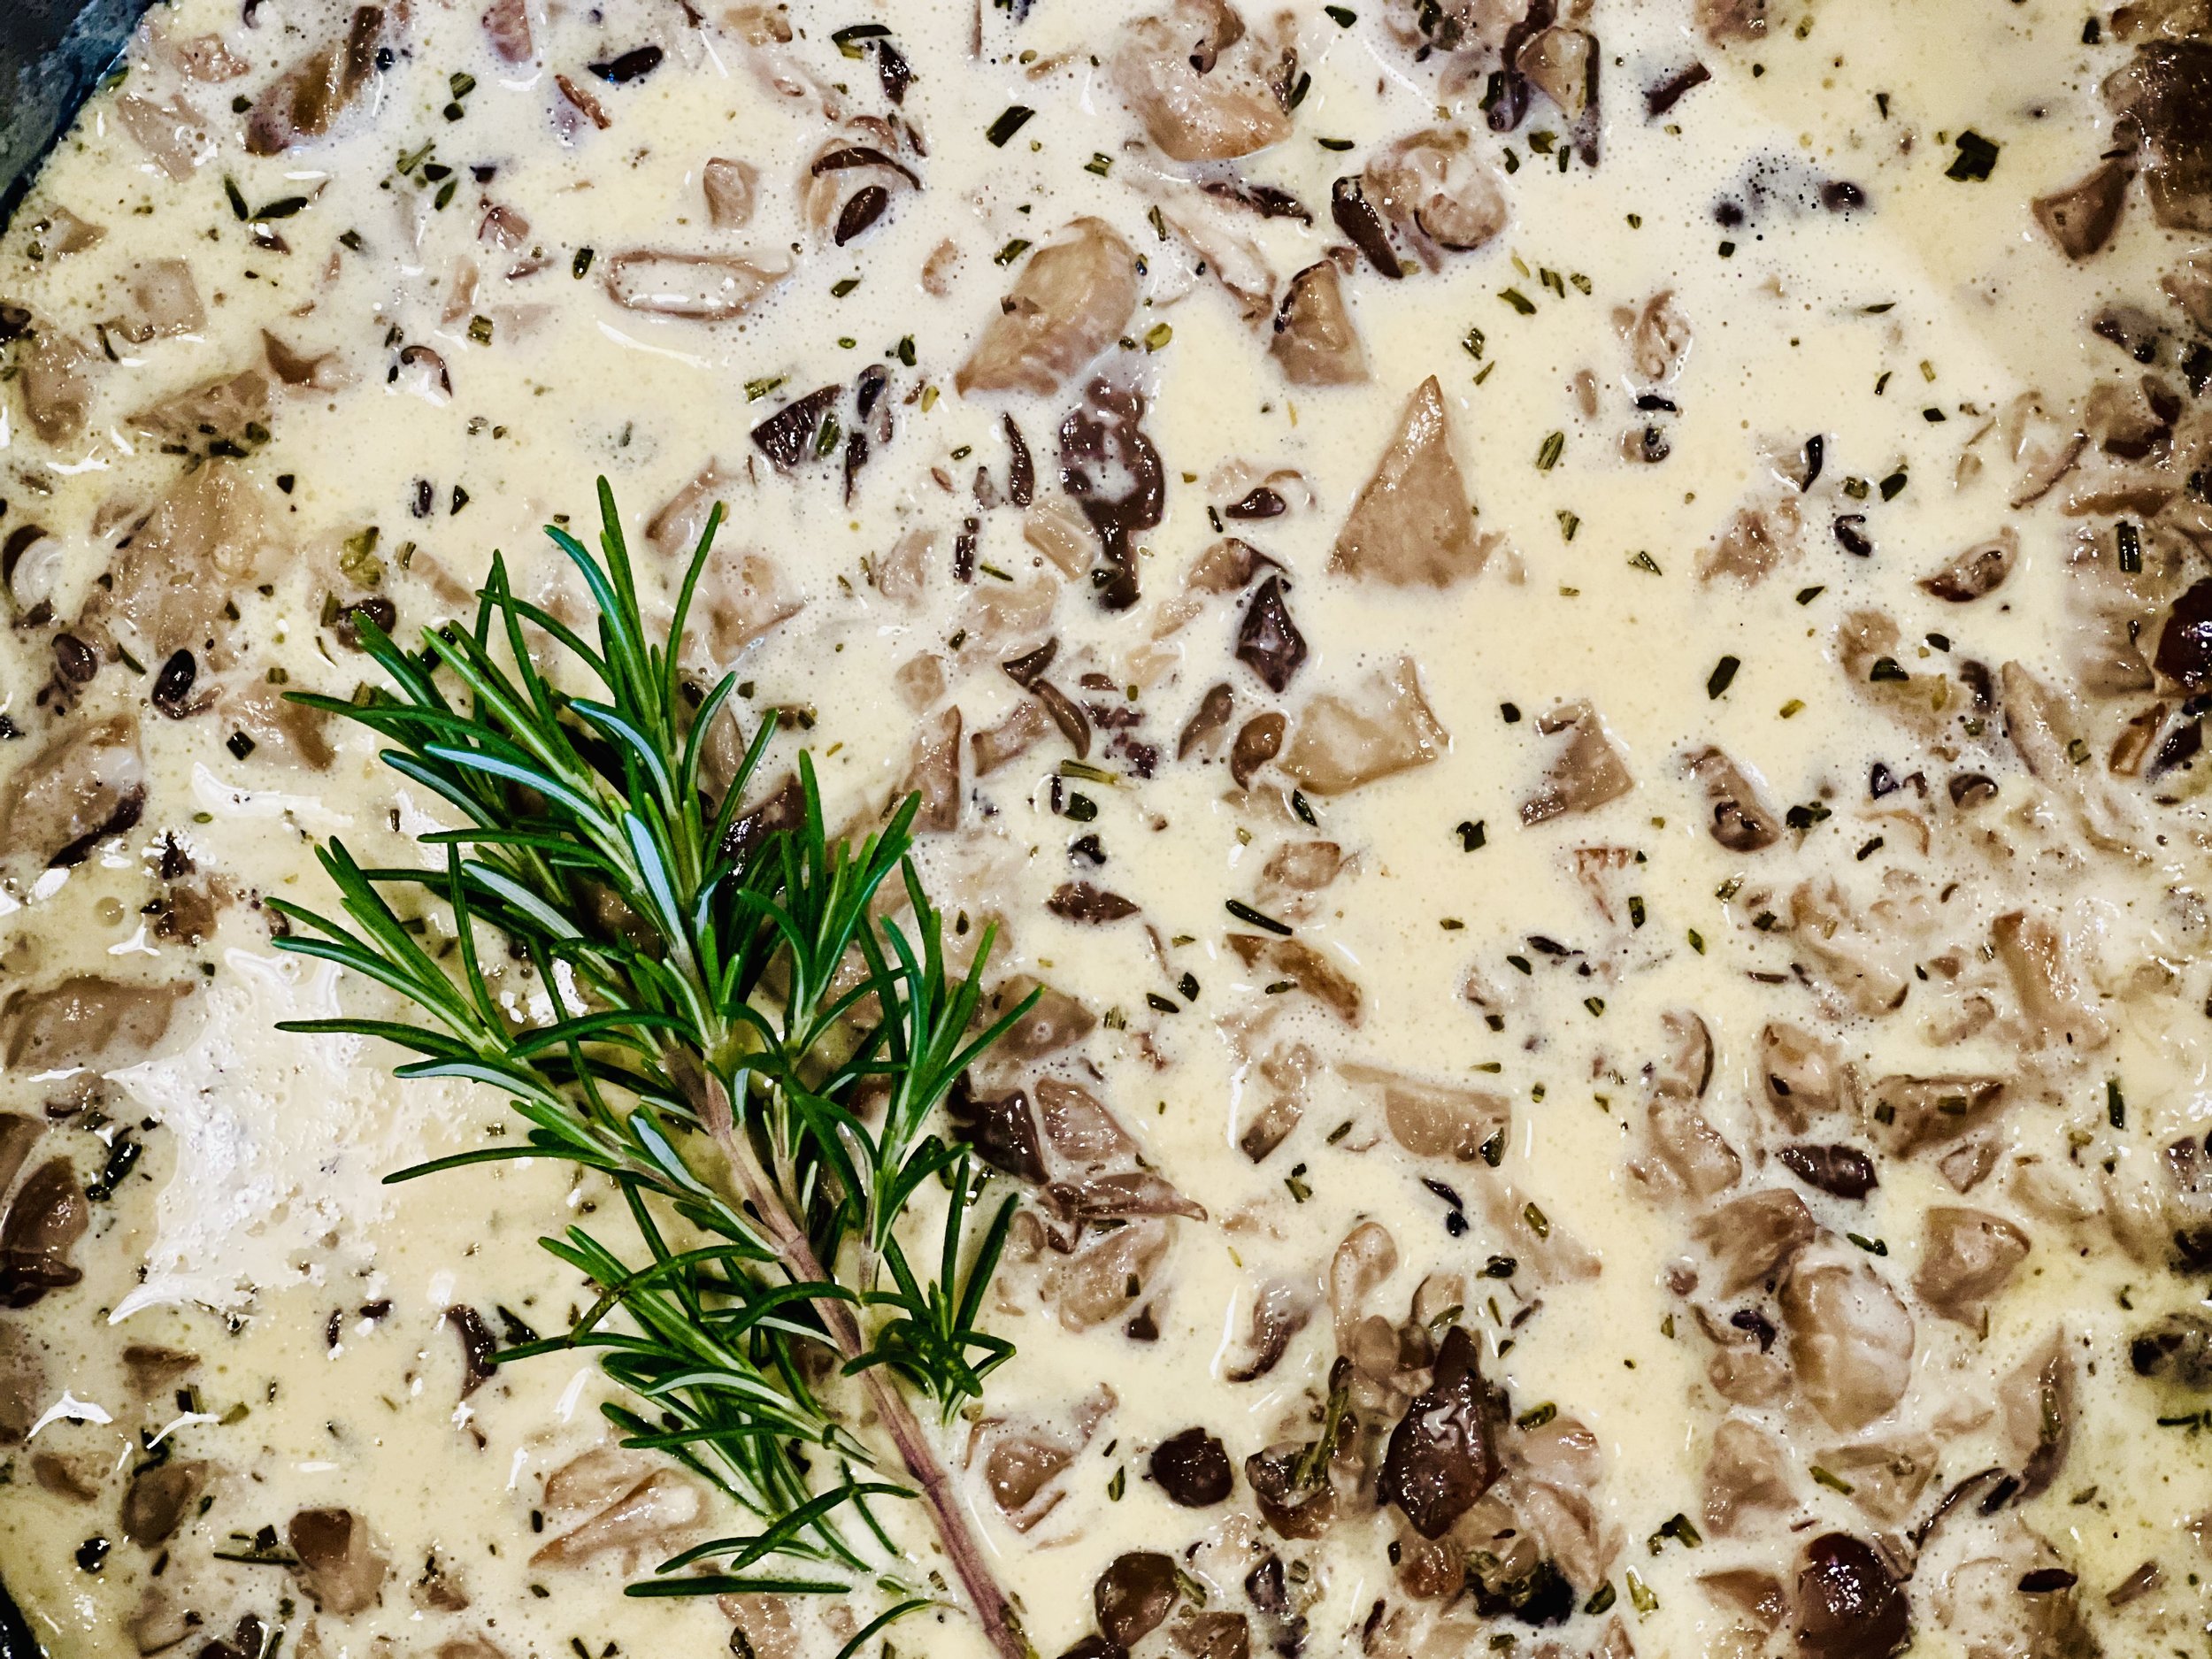
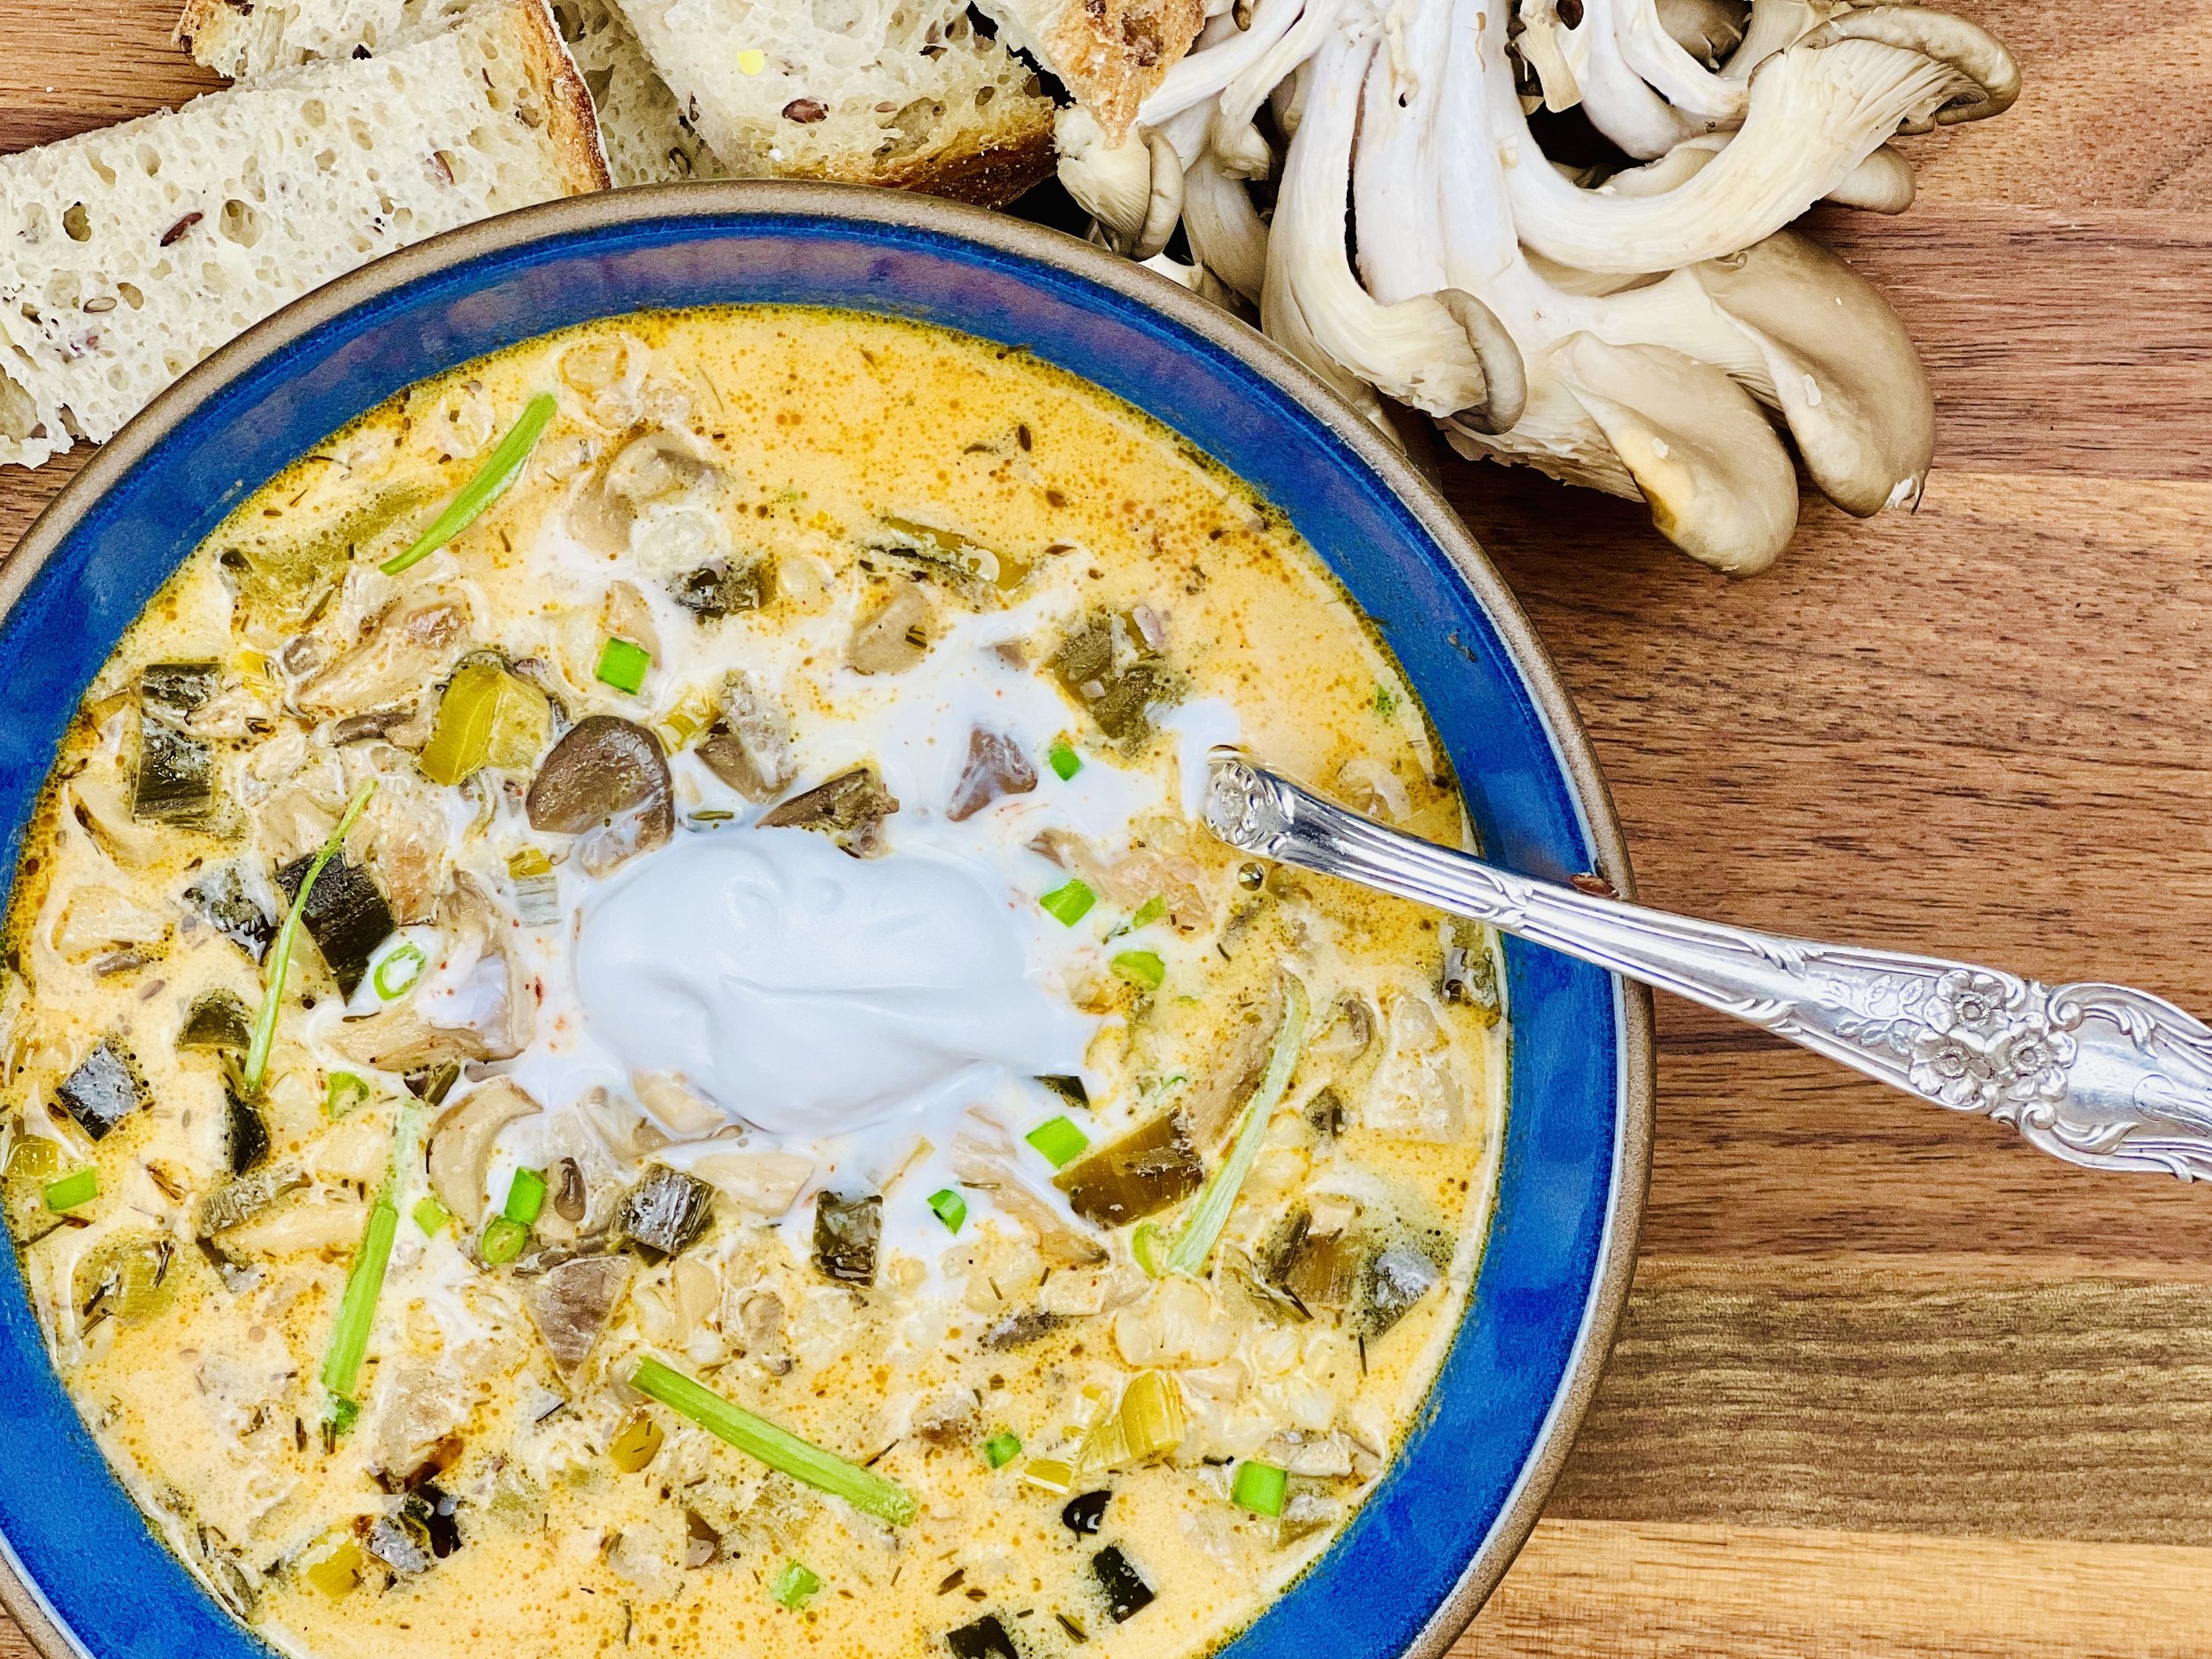
Rosemary Mushroom Cream Sauce (low FODMAP)
10 Minutes prep • 20 Minutes cook • Low FODMAP • Gluten-free • Makes 2 cups
10 Minutes prep • 20 Minutes cook • Low FODMAP • Gluten-free • Makes 2 cups • Ok to make ahead: Steps 1 - 4
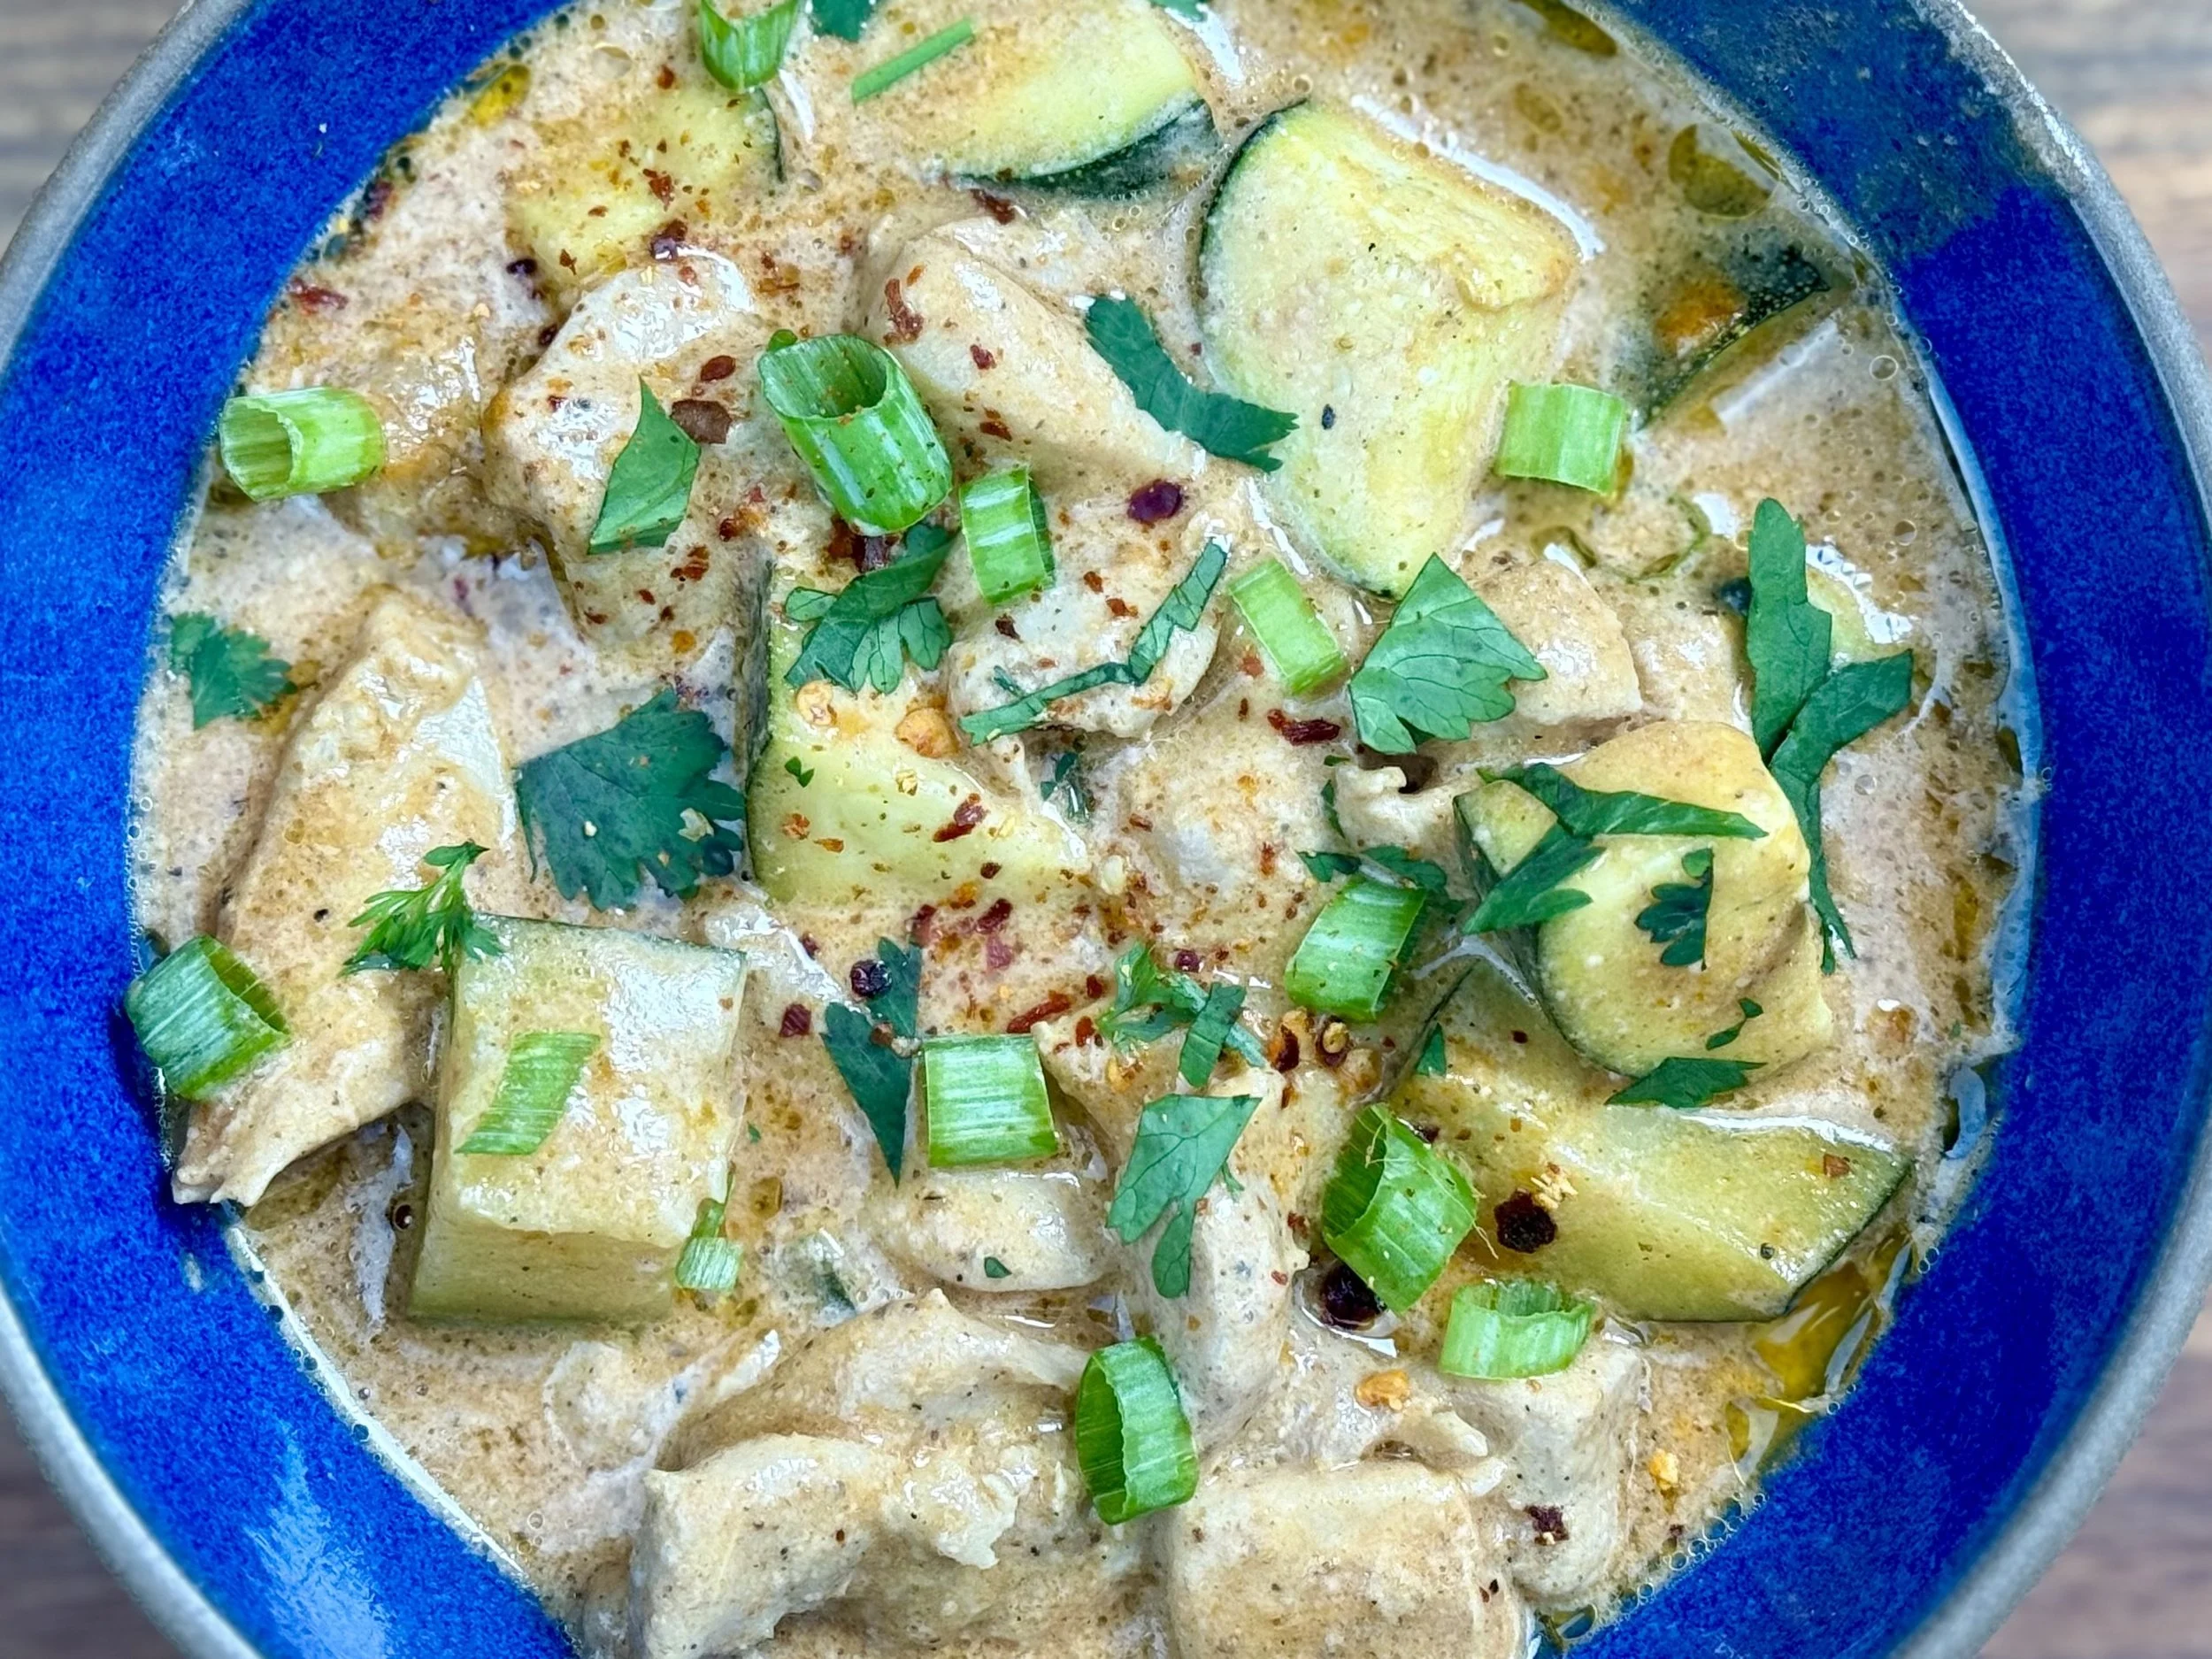
Low FODMAP oyster mushrooms are incredibly flavorful and versatile. I use them often and in all different forms. In this sauce, they form a wonderful base that, when combined with the fresh rosemary, white wine, and cream, is really quite amazing! I created this sauce to go with my Porchetta Style Pork Chops, but it’s perfect for all kinds of meat or poultry. If you have any left over, you might even try it over a spring omelet for breakfast!
Ingredients
2 tablespoons butter
2 pounds oyster mushrooms, chopped
3/4 cup dry white wine (I used Sauvignon Blanc)
1 1/2 cups heavy cream
1 tablespoon Dijon mustard
2 tablespoons fresh rosemary, minced
Directions
(1) Prepare: Chop the mushrooms and the rosemary.
(2) Cook the mushrooms: In a medium frying pan over medium heat, and add the butter to the pan. Once melted add mushrooms and stir until cooked through, about 5 minutes.
(3) Add the wine and reduce: Add the dry white wine along with the fresh rosemary and bring to a simmer. Allow the mixture to simmer until wine is reduced by half, about 10 minutes.
(4) Finish: Add the heavy cream and Dijon mustard and stir until all ingredients are combined.
(5) Serve: Serve over pork, chicken, beef…it’s all good!
Eat and enjoy every bite because you can!
This post contains links for you to easily purchase items listed on the page. In some cases, we have provided a special discount code for IBS Game Changers so be sure to use it when you purchase an item to get the discount that has been arranged just for you! As an Amazon Associate, I earn a commission from qualifying Amazon purchases.
More Deliciously Low FODMAP™ sauce recipes

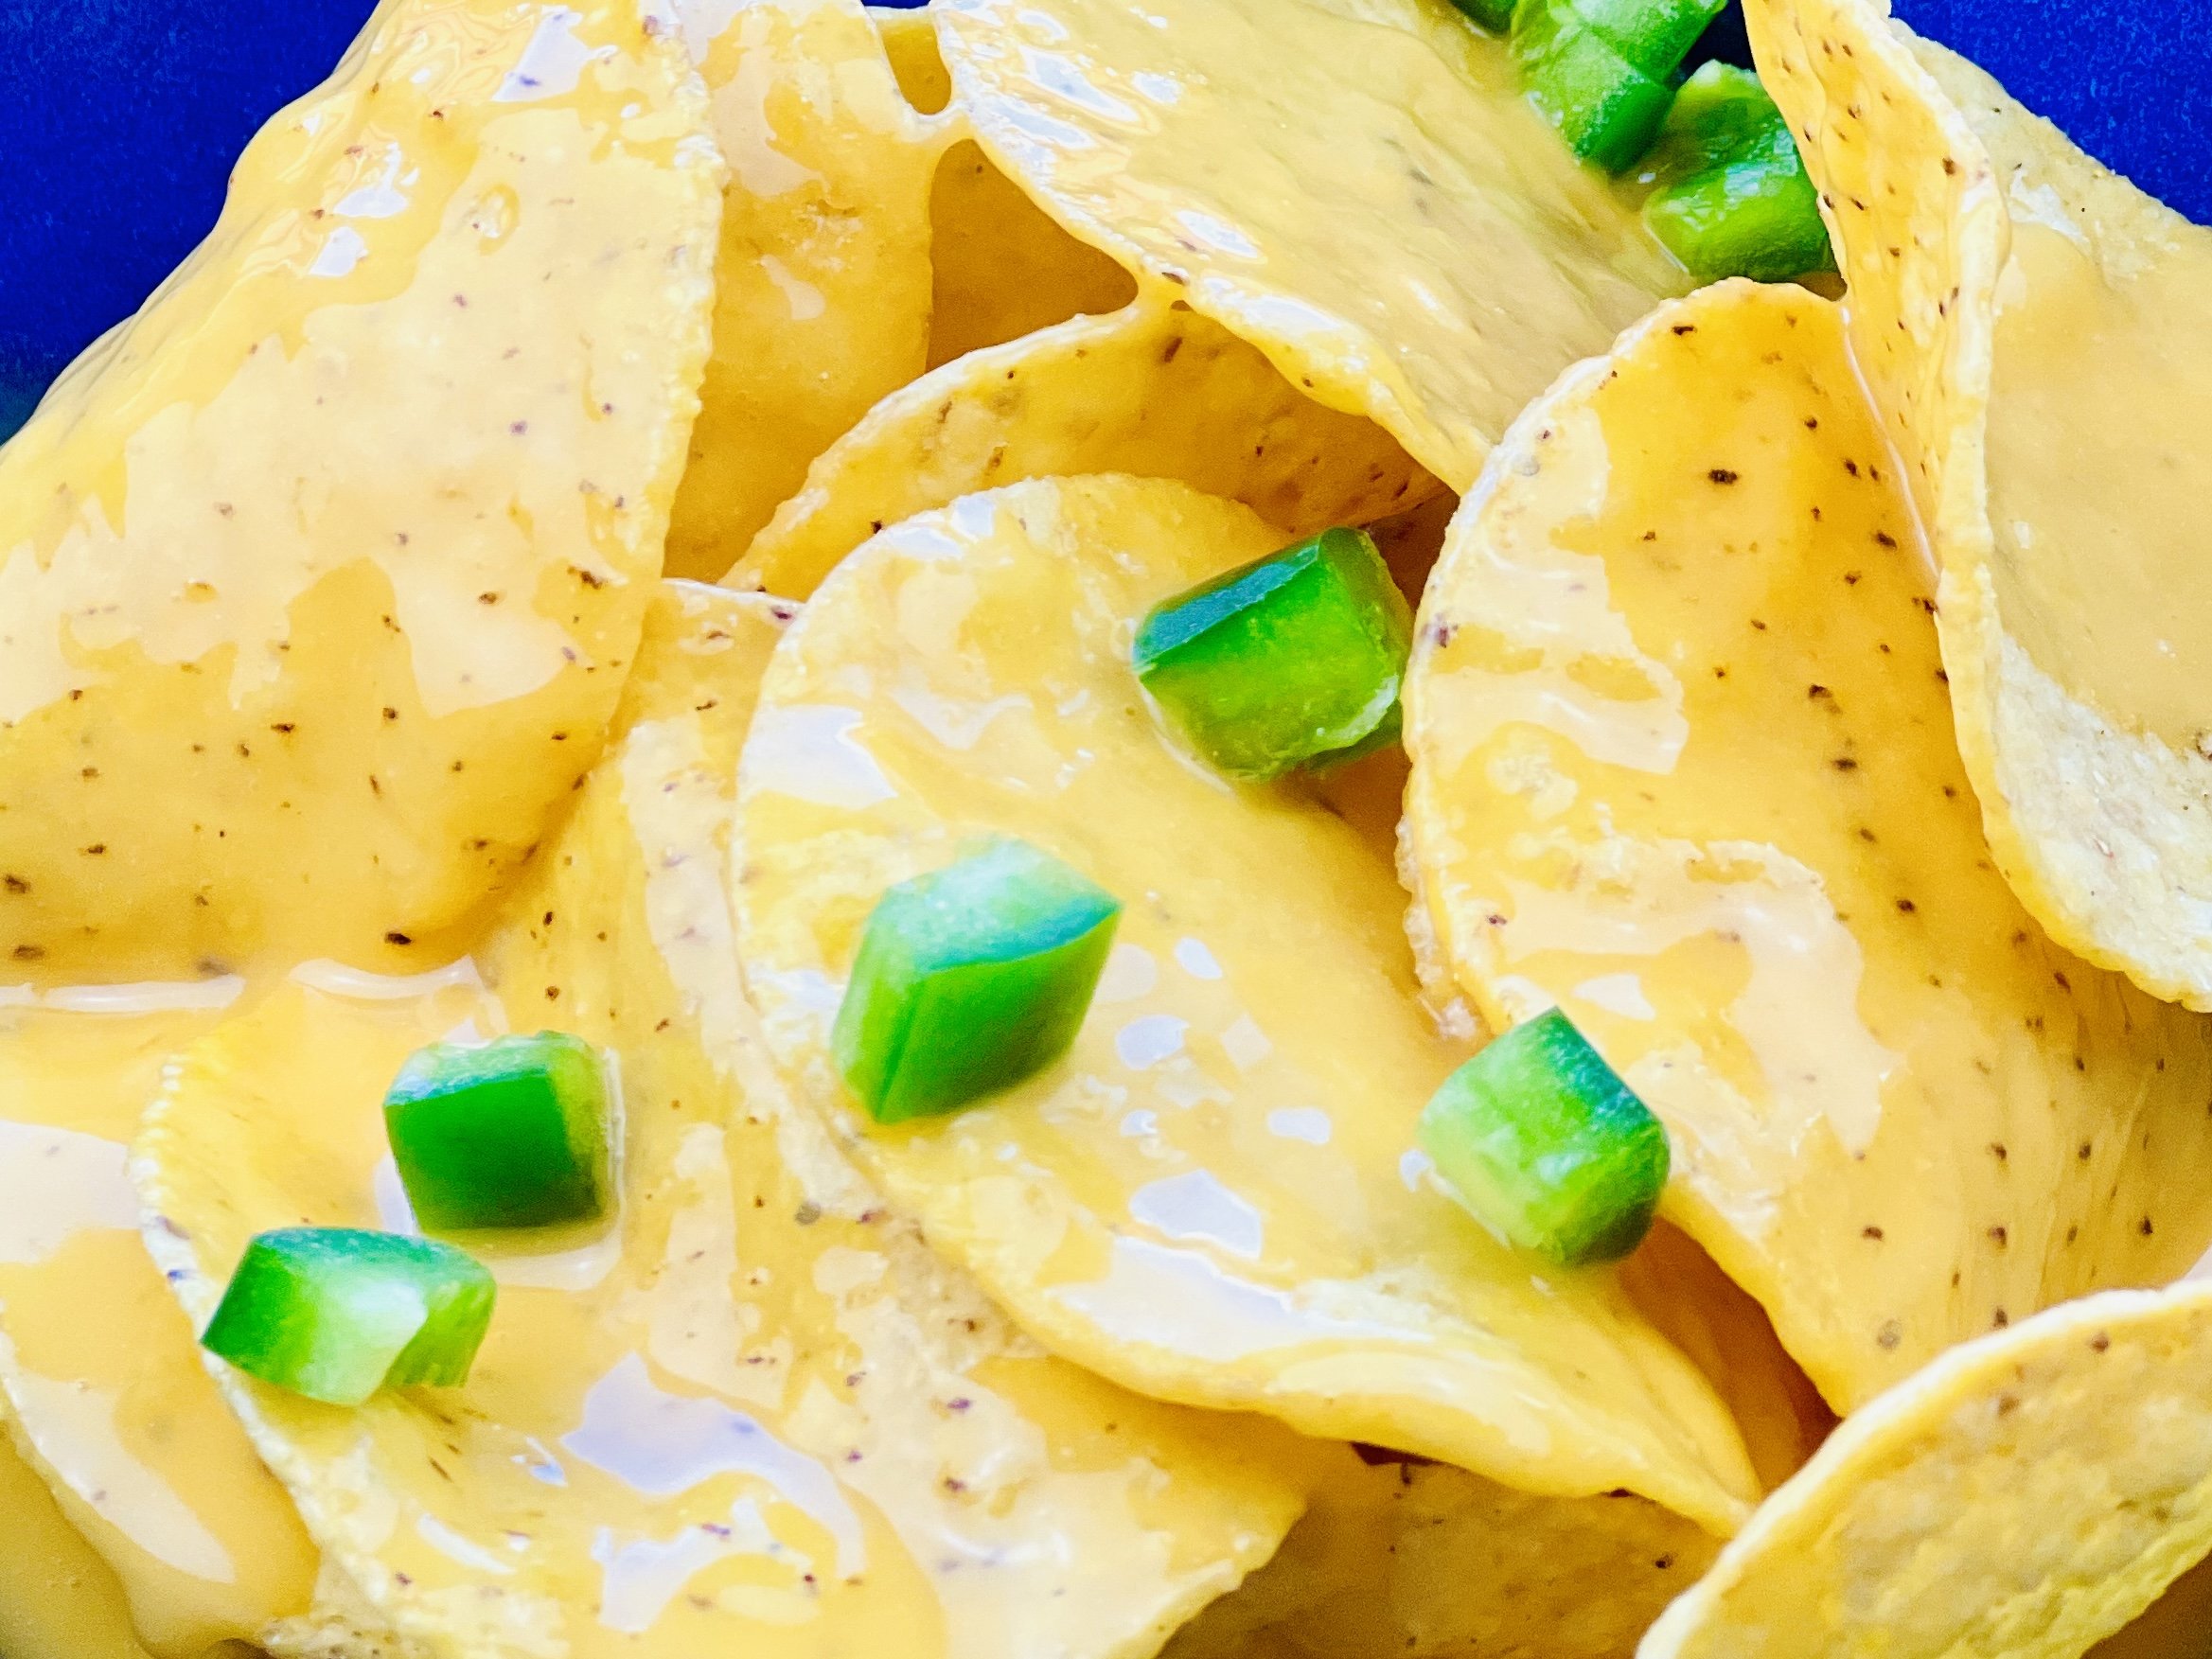


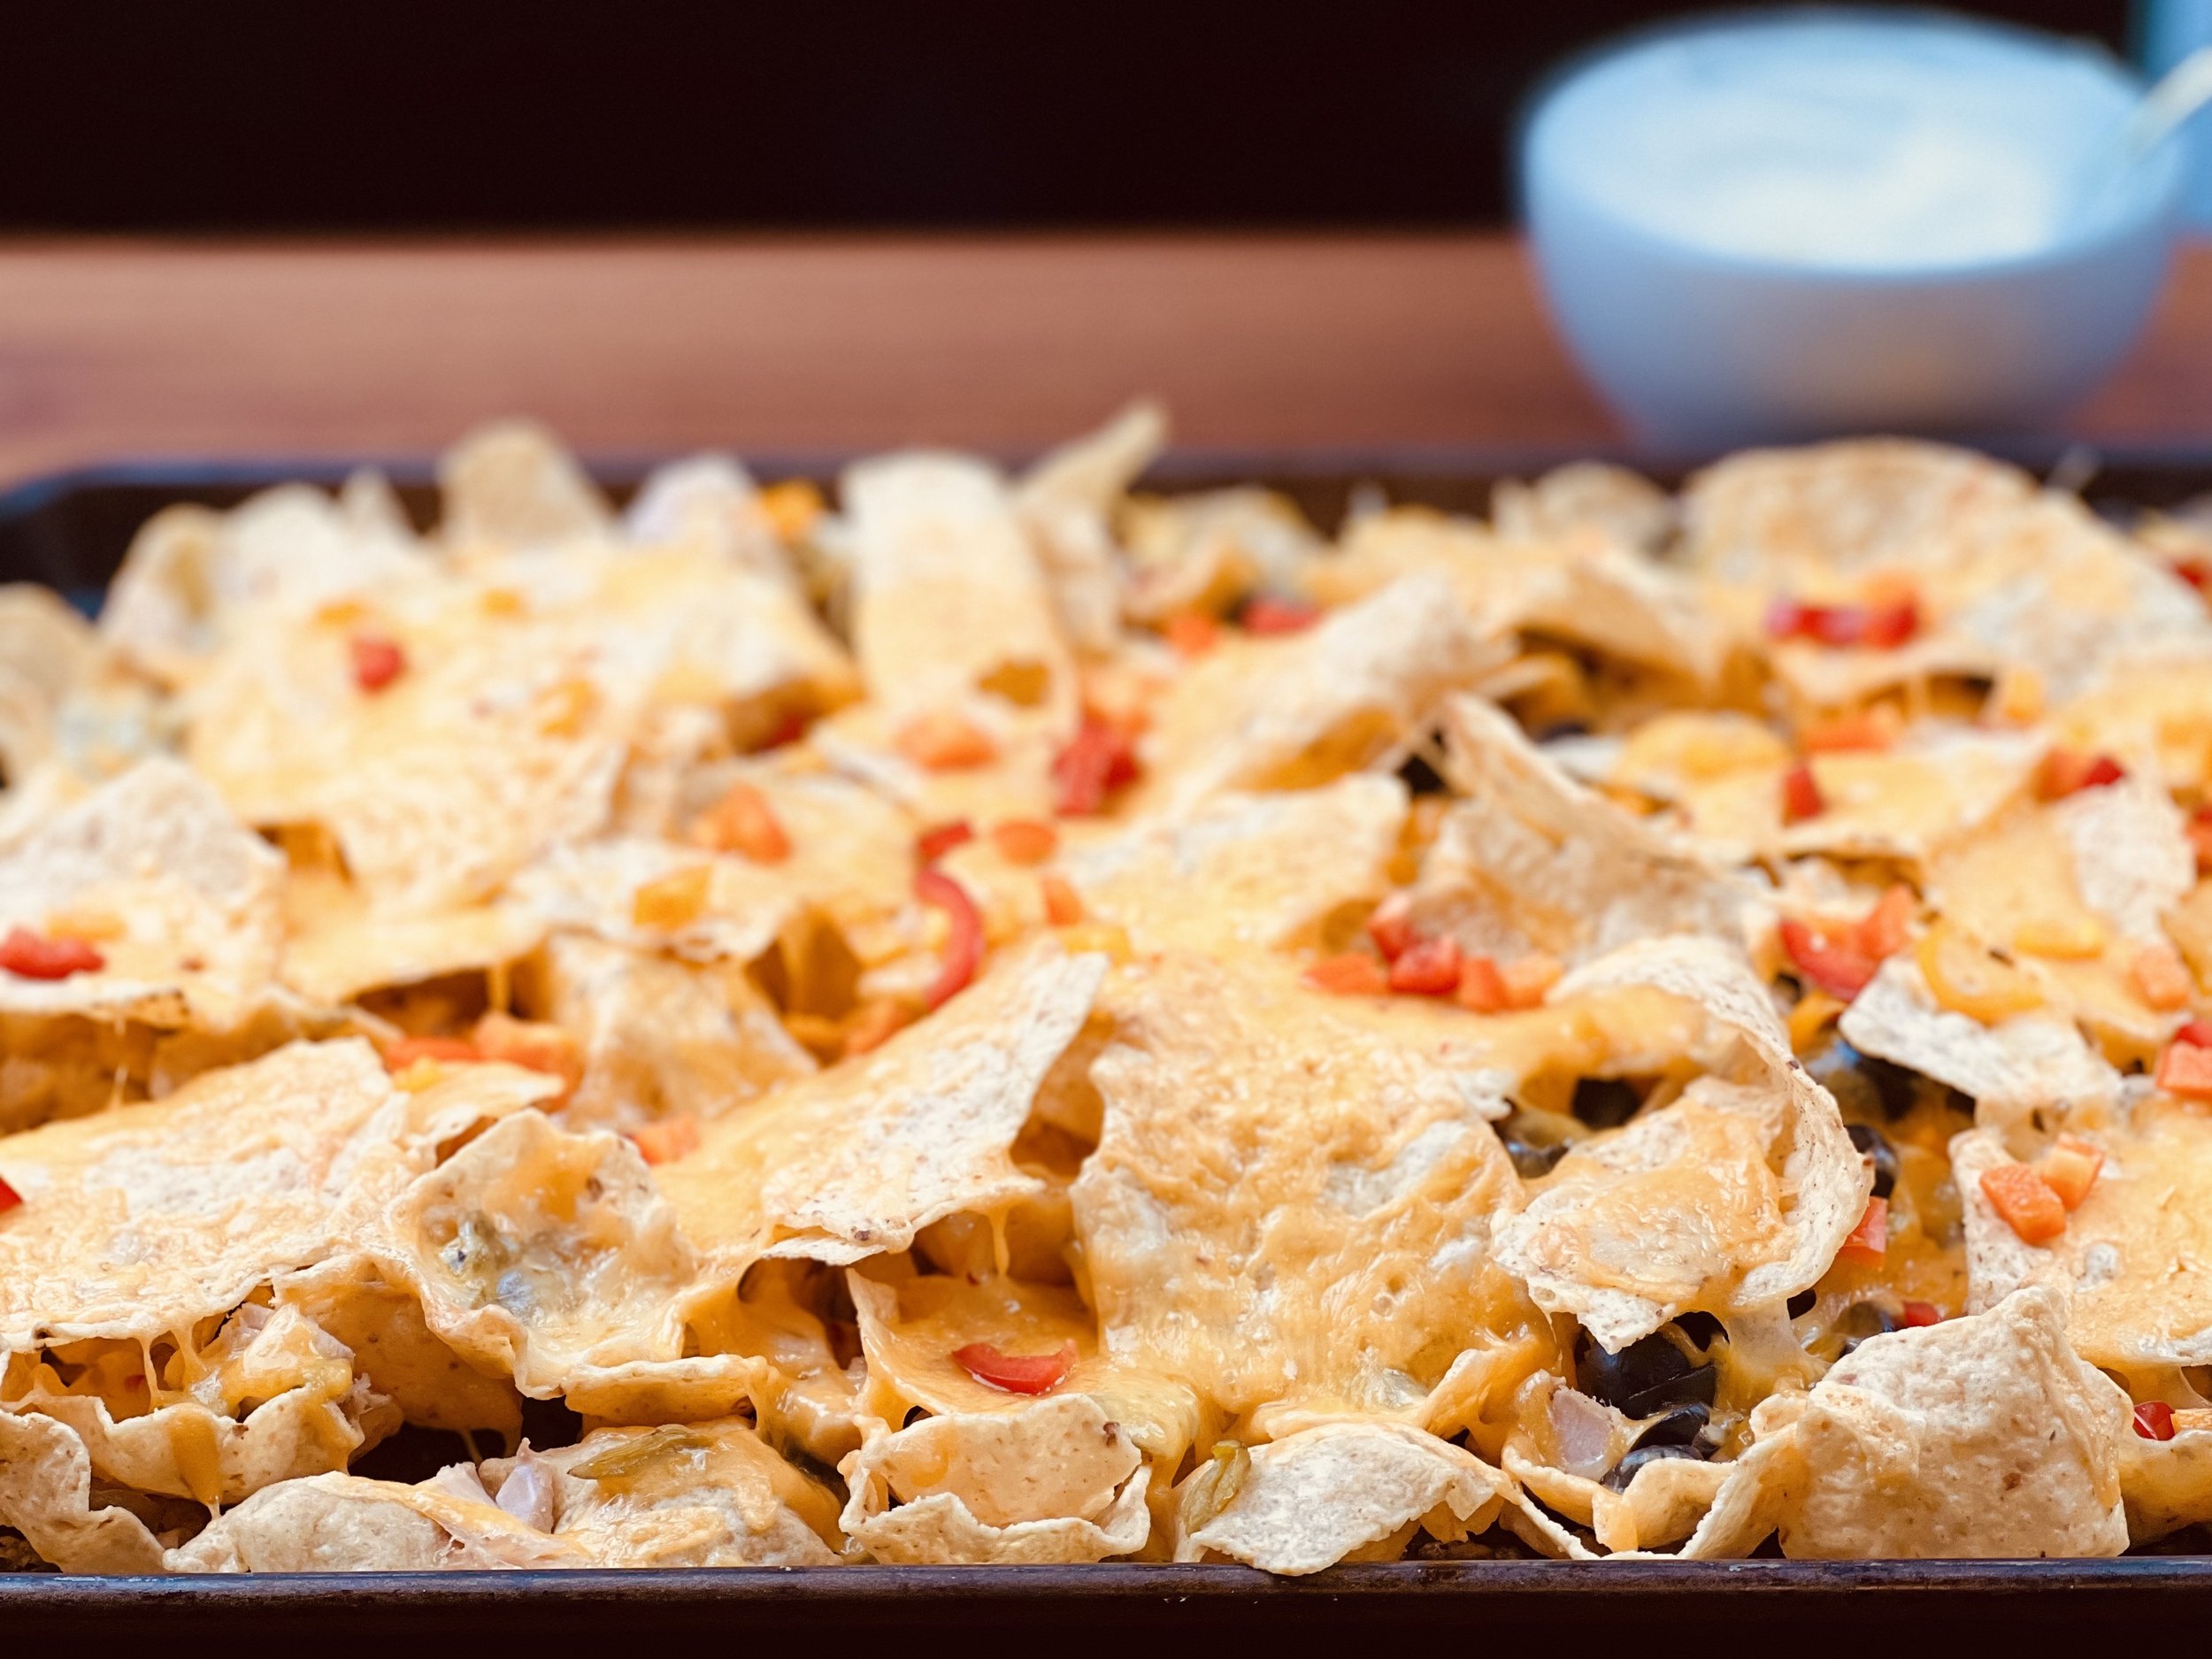
Holiday Leftover Turkey Nachos (low FODMAP)
15 minutes prep • 10 minutes cook • Low FODMAP • Gluten-free • Serves 4
15 minutes prep • 10 minutes cook • Low FODMAP • Gluten-free • Serves 4 • Ok to make ahead: Step 1
One of the best parts of preparing a big holiday meal is the leftovers you get to work with afterward. But how many turkey sandwiches can you actually eat!? This recipe is a great way to change it up and enjoy your leftovers with a whole different flavor profile. They are easy and quick to make and sure to please the whole family, including you!
Ingredients
1 bag (about 10 cups) tortilla chips without FODMAP ingredients
2 cups chopped cooked turkey meat
2 cups extra sharp cheddar cheese, grated
2 cups pepper jack cheese, grated
7 ounce can sliced black olives
7 ounce can chopped green chilies
1/2 cup chopped sweet peppers or jalapeno peppers if you prefer (optional)
1/2 cup cilantro leaves and/or green onions (green part only), chopped
1 cup lactose-free sour cream
Other items to consider adding: Low FODMAP sourdough stuffing, any sort of roasted vegetables you have leftover, and feel free to substitute other kinds of cheese you may have leftover from a charcuterie board in place of the cheddar or the pepper jack.
Directions
Make-ahead note (1): This recipe leverages leftovers so if you’re making from scratch, you’ll want to cook the turkey ahead of time.
(2) Prepare the ingredients: Preheat the oven to 425 degrees F. Grate the cheese. Put the sour cream in a small bowl and stir to loosen. Chop the cilantro and/or green onions and set them aside for serving.
(3) Layer the ingredients: Scatter half the chips on a large rimmed baking sheet (or use two smaller sheets). Sprinkle evenly with the turkey, 1/2 the cheese, black olives, chopped green chilies, and any other leftovers you plan to use. Scatter the remaining chips on top followed by the remaining cheese.
(4) Bake: Bake until the cheese is melted and bubbly (but the chips aren’t burned), about 5 to 7 minutes.
(5) Serve: Serve the nachos with sour cream, chopped sweet peppers or jalapenos, cilantro, and/or green onions.
Eat and enjoy every bite because you can!
More Deliciously Low FODMAP™ appetizers you might enjoy
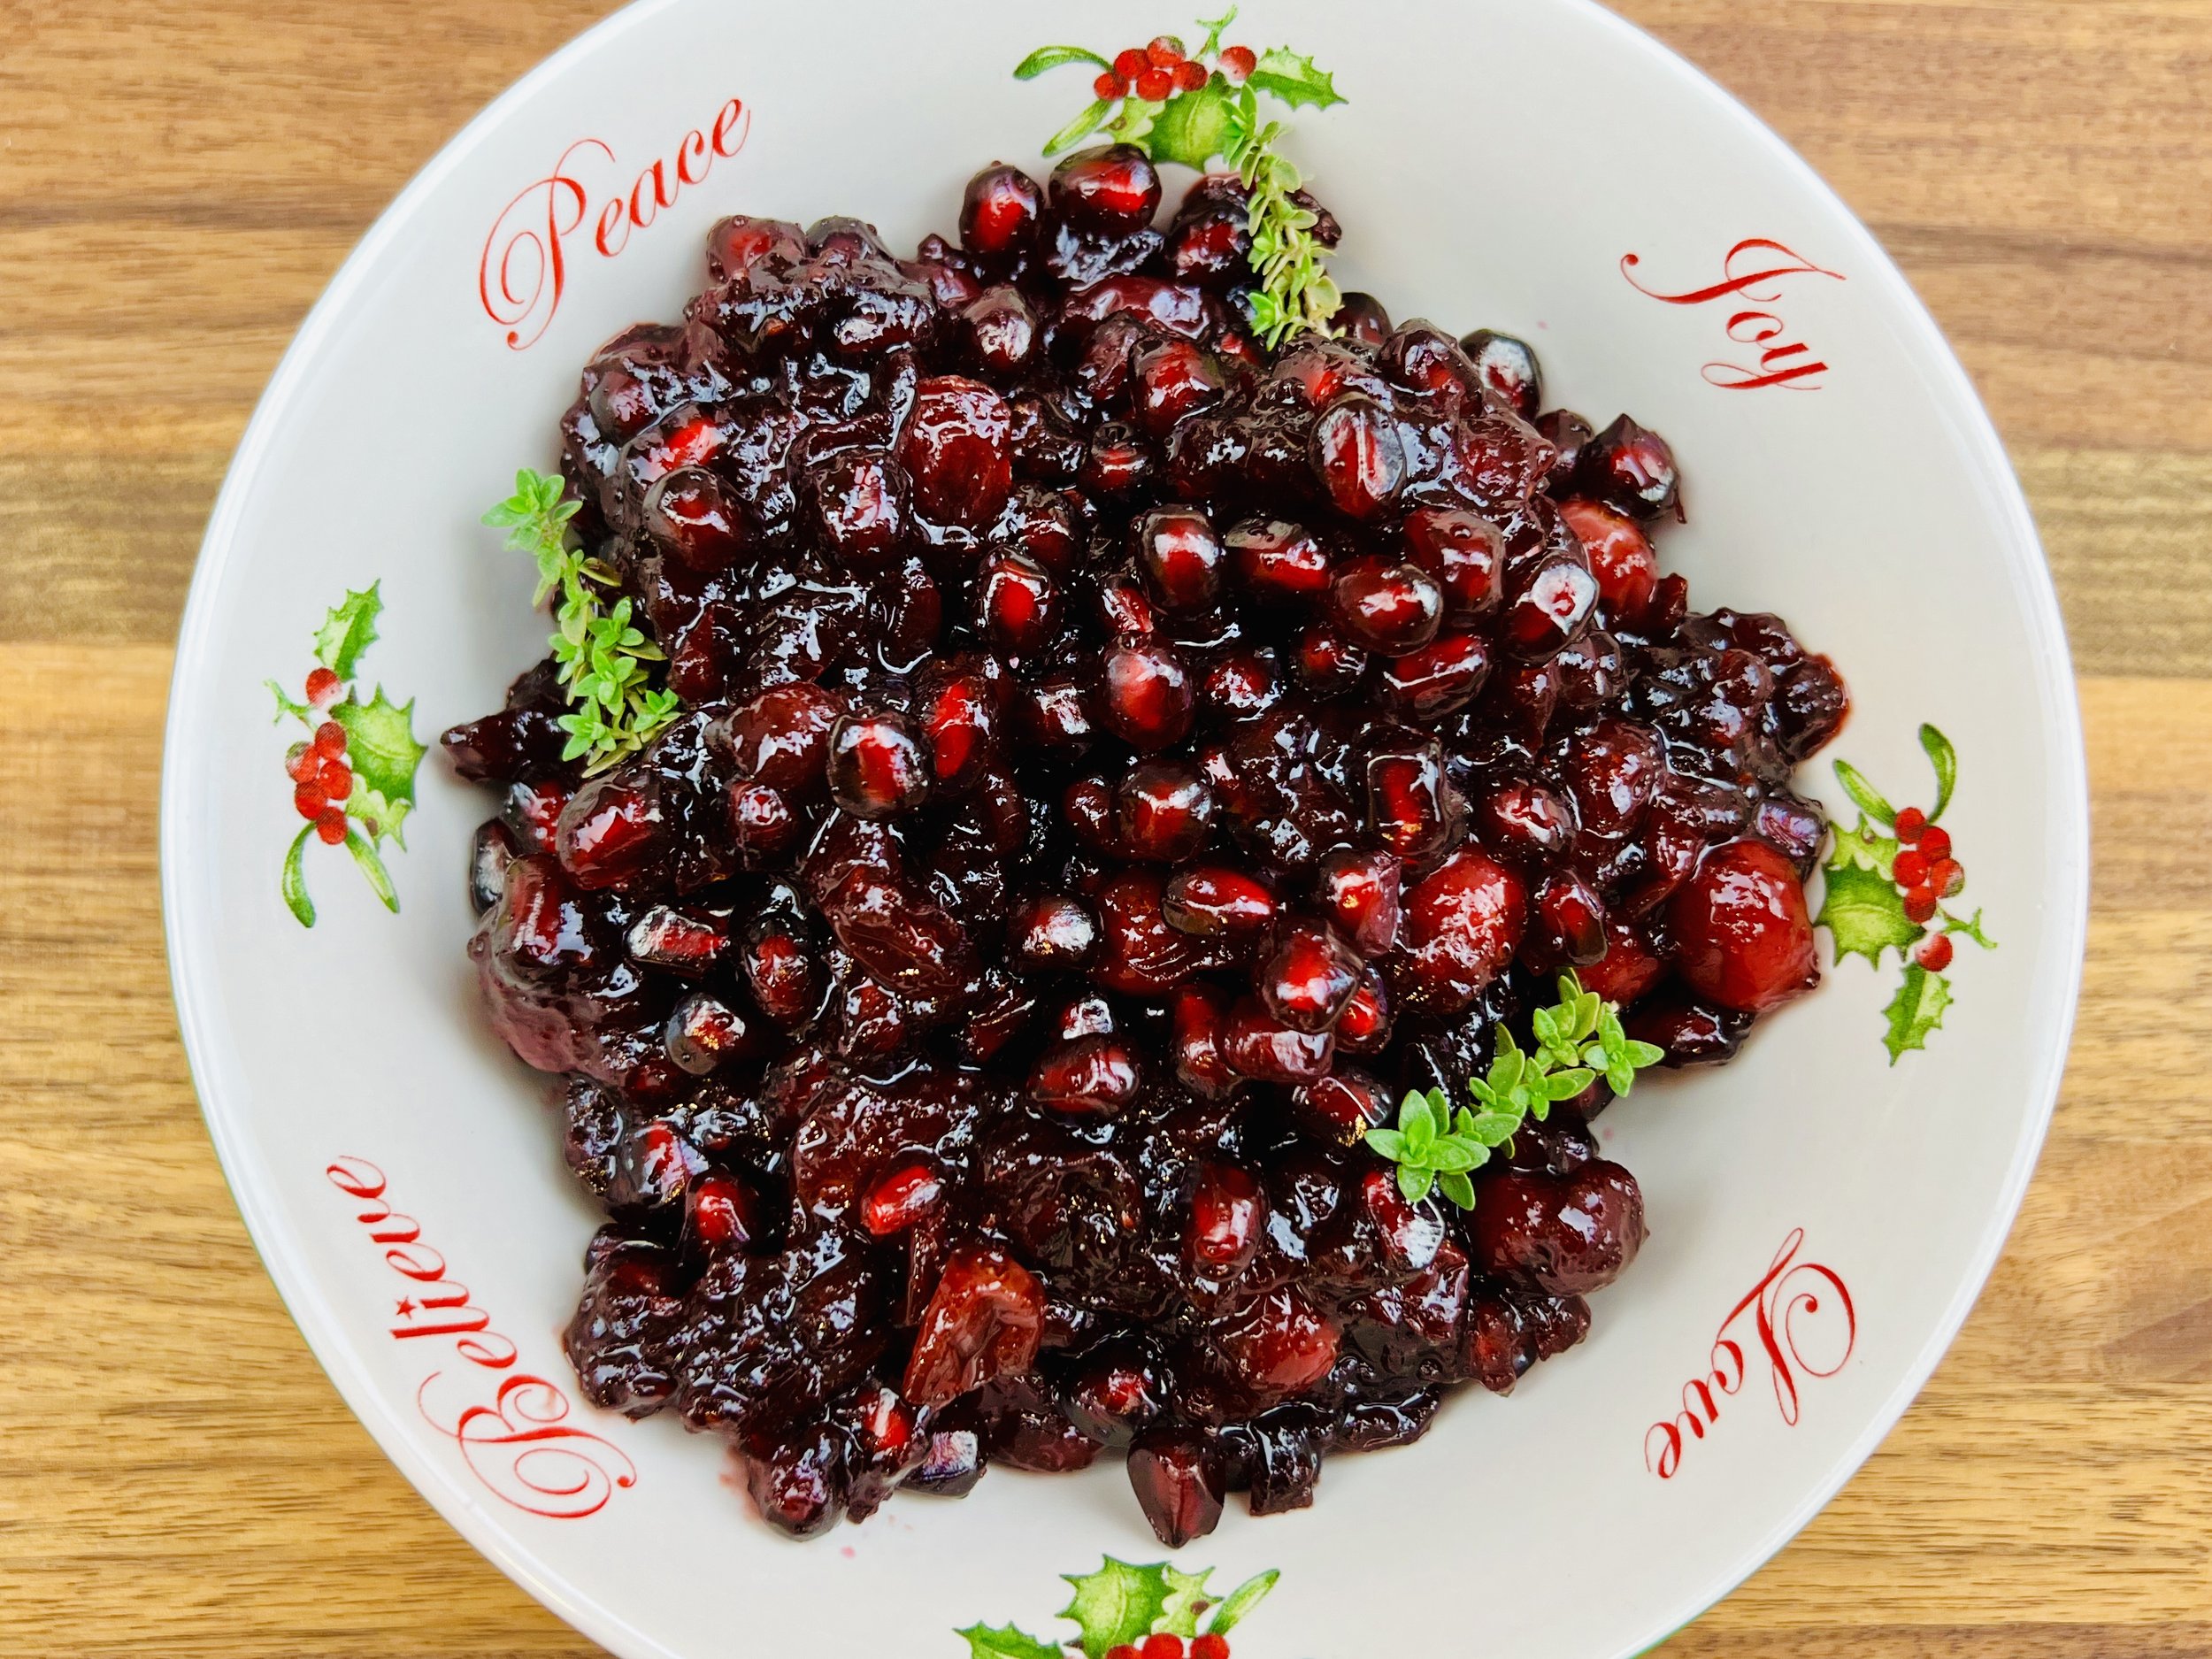
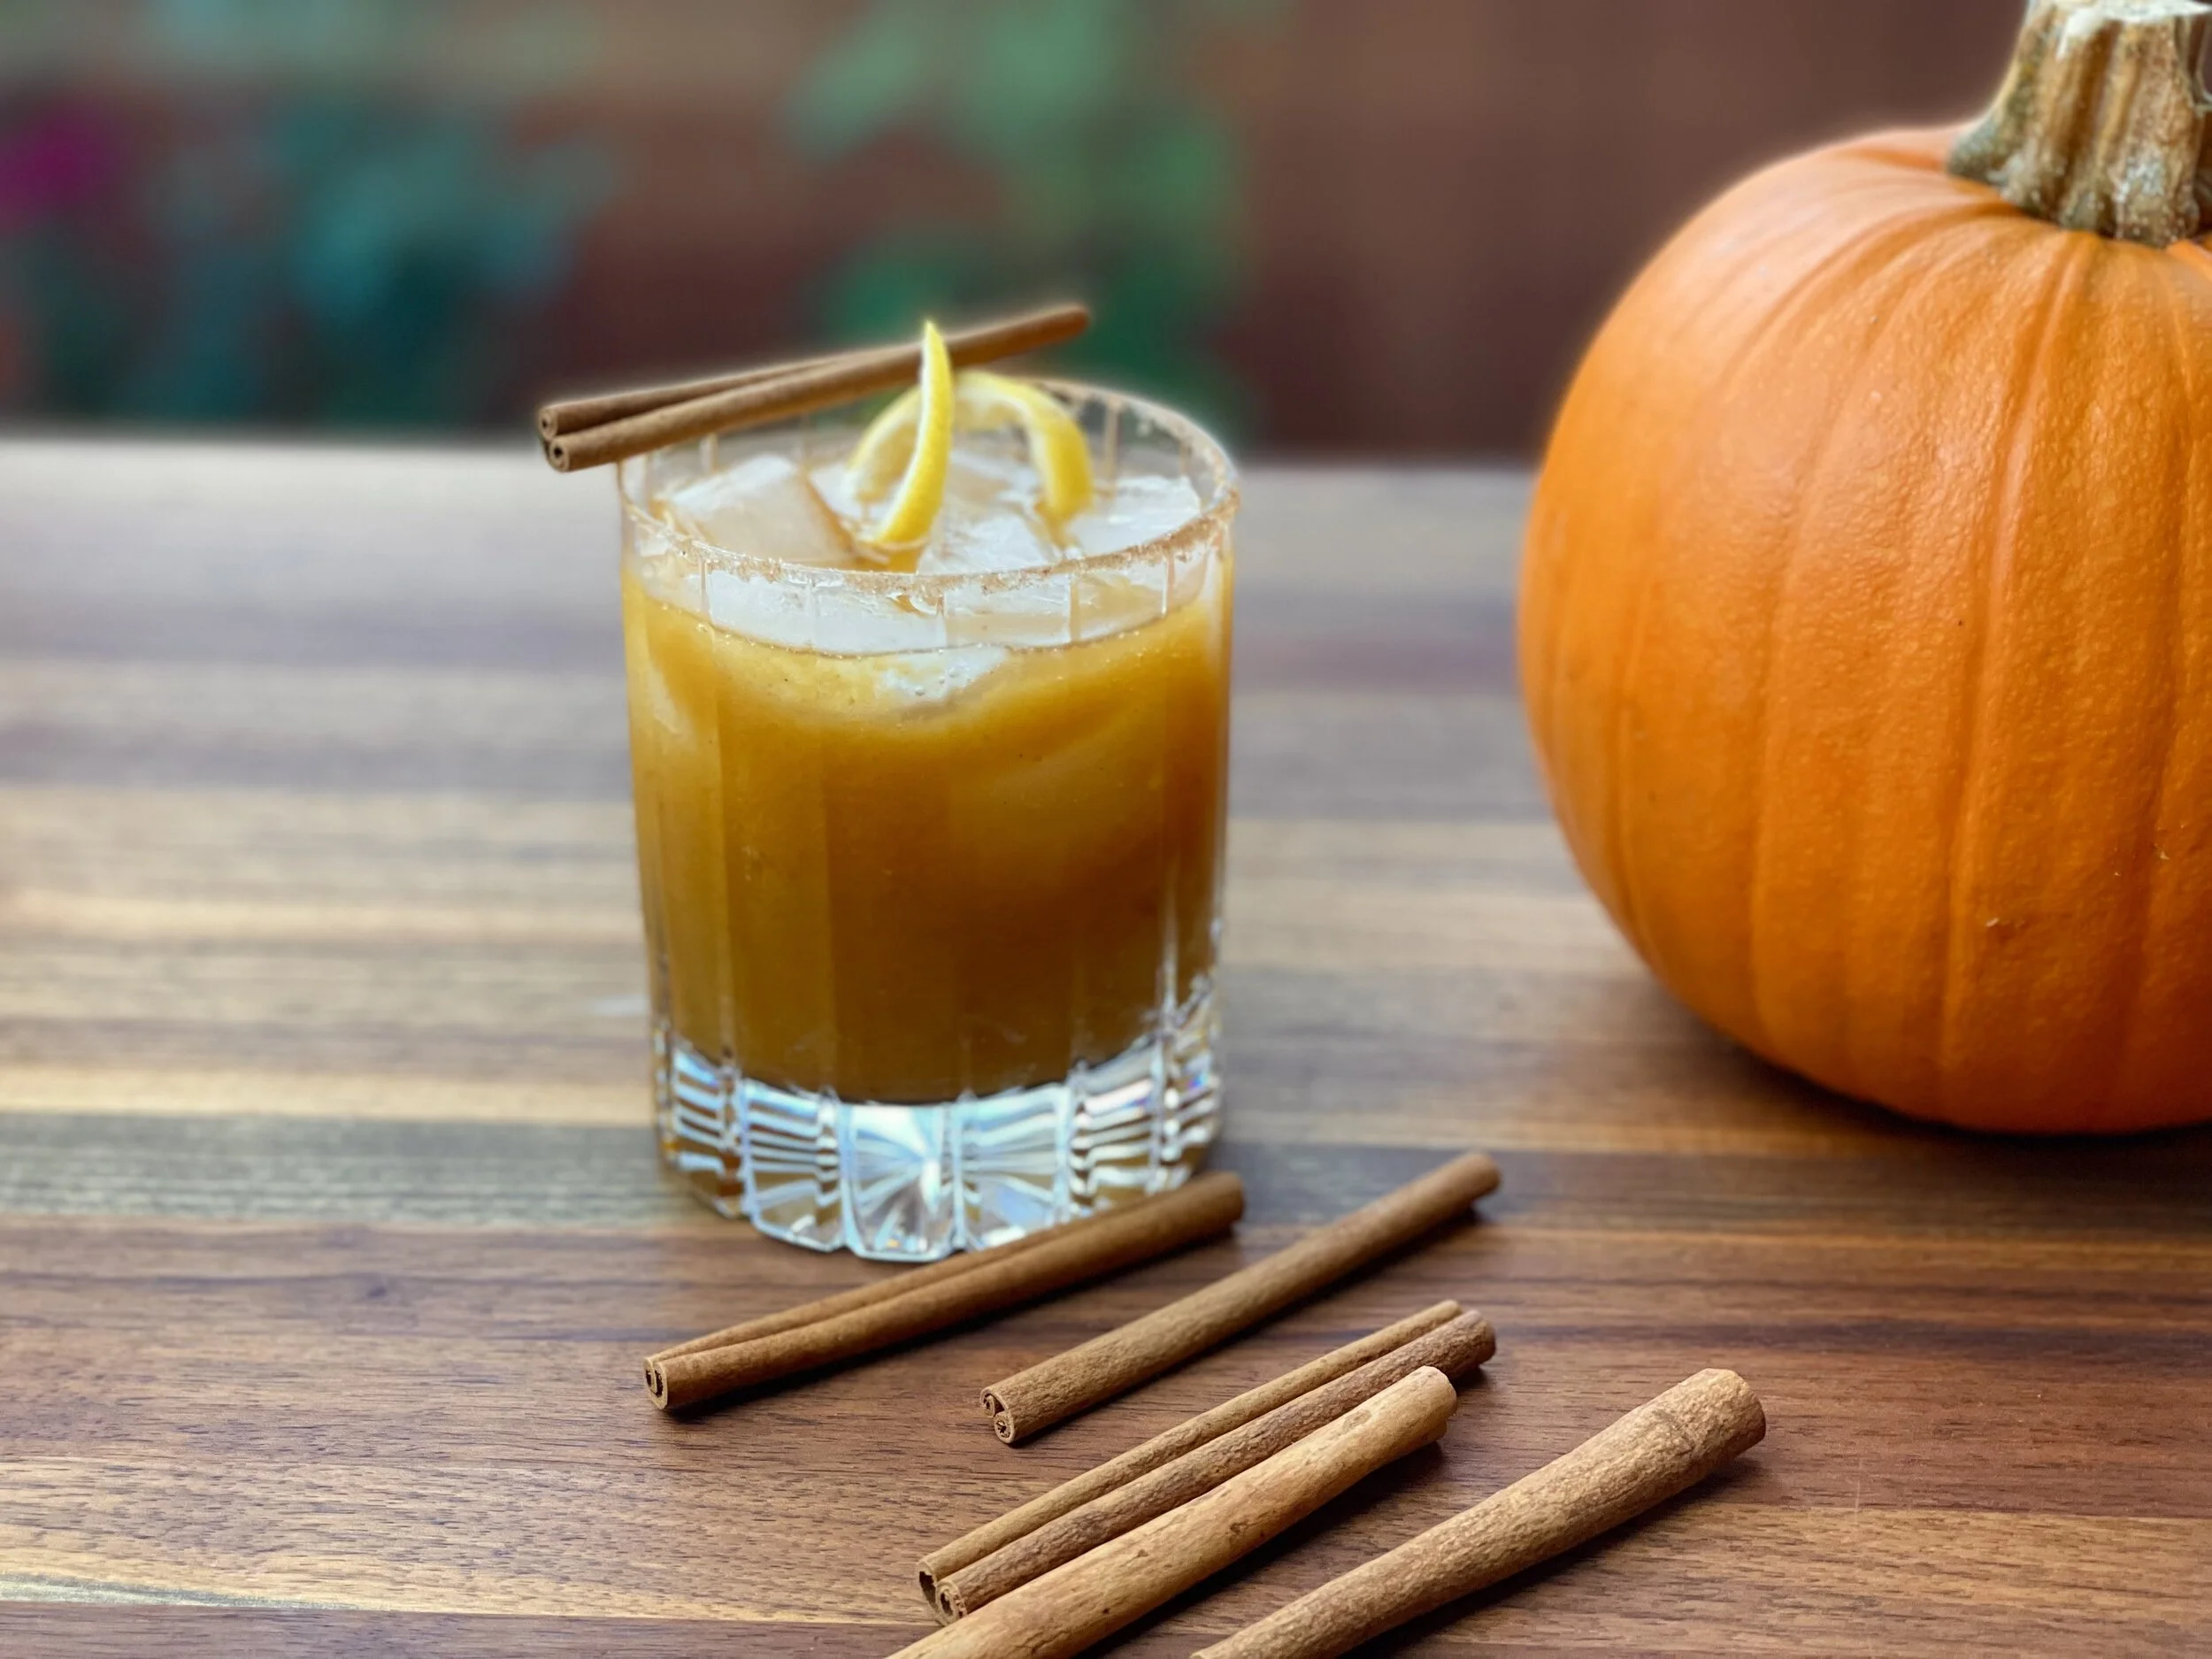
Maple Cinnamon Old Fashioned (low FODMAP)
10 Minutes prep • 15 Minutes cool • Gluten-free • Low FODMAP • Serves 1
10 Minutes prep • 15 Minutes cool • Gluten-free • Low FODMAP • Serves 1 • Ok to make-ahead: Step 1
A special drink that’s simple to make is always a fun addition to any gathering. With its cinnamon undertones and cranberry pomegranate garnish, this one will go perfectly with the holidays. The sugar rim makes it extra special and a little bit fancy too!
This is an exclusive recipe just for recipe club members.
Each week I am creating and delivering one very special recipe just for my recipe club members. If you’re not yet a member, I encourage you to join! Membership in the club includes access to the complete archive of recipes with filters so it can become your virtual low FODMAP cookbook plus, I am creating and delivering one special NEW recipe every week ONLY for recipe club members. And, for my true fans, I’ll be sharing behind-the-scenes content, and updates on the progress of the new cookbook.
Your membership in the club helps me continue creating new, delicious, easy-to-make, low FODMAP recipes just for you.
As always, all recipes will emphasize simple ingredients, easy preparation, and delicious low FODMAP results. Recipes will be for everything from main courses, salads, soups, side dishes, appetizers, desserts, sauces, breakfast and lunch, and even mocktails and cocktails. Everything you need to prepare fantastic low FODMAP meals everyone will love.
Join the club. Become a Patron. Let’s keep making delicious Low FODMAP meals together.

Navigating holiday feasting while on a low FODMAP diet
With a little careful eating and drinking, you should be able to navigate the holidays without consequences.
When you think of the holidays you probably think of family get-togethers, cozy homes, and LOTS of food. And you may think of feeling terrible the next day or even the next two or three days. This year is a bit different from other years but, whether you are hosting a gathering, or you are a guest at someone else’s feast, here are some tips that will help you navigate the holiday feasting, follow your low FODMAP diet, and feel ok (maybe even great!) the next day.

Download my FREE guide and get lots of helpful tips for being a relaxed host or an easy guest when following a low FODMAP diet.
You’ll also get links to delicious low FODMAP holiday recipes that everyone will enjoy so your holiday feasts can be easy!
With a little careful eating and drinking, you should be able to navigate the holidays without consequences.
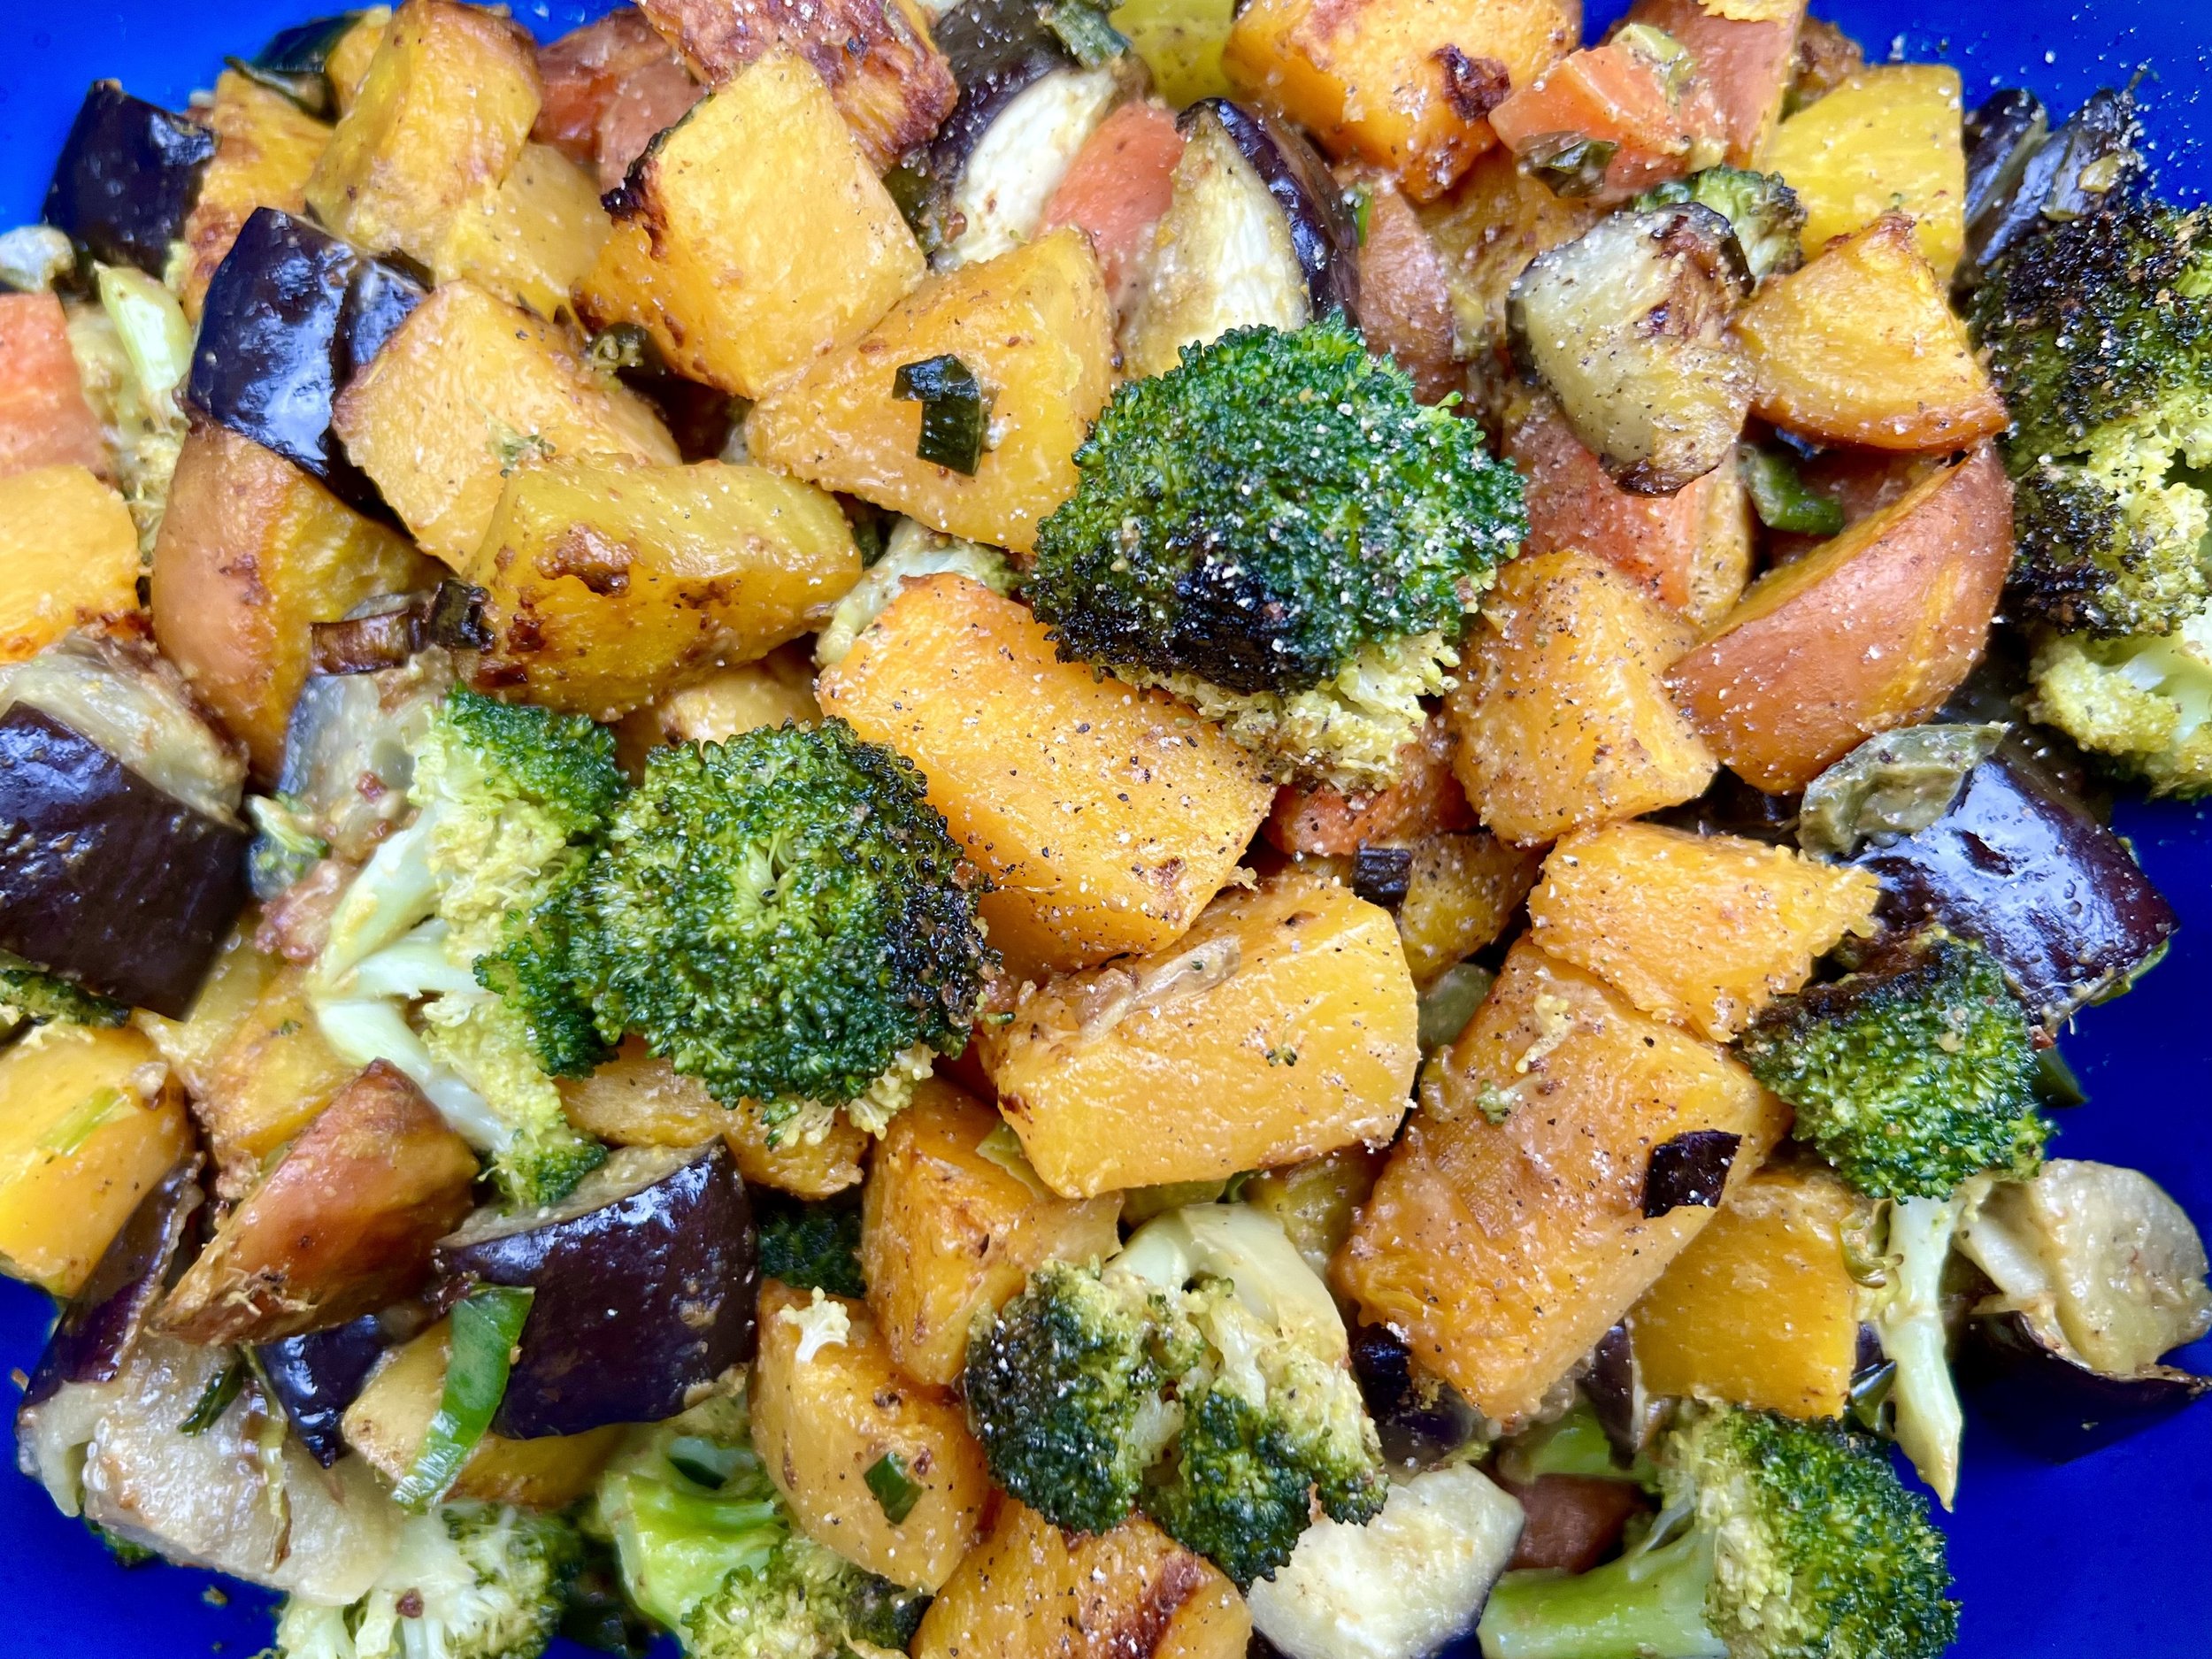
Maple Glazed Roasted Acorn Squash (low FODMAP)
20 Minutes prep • 60 Minutes cook • Low FODMAP • Gluten-free • Serves 4
20 Minutes prep • 60 Minutes cook • Low FODMAP • Gluten-free • Serves 4 • Ok to make-ahead: Steps 1 - 2
I love roasting vegetables because it mellows and sweetens them in a marvelous way. Roasted acorn squash is no exception! This is a simple and delicious vegetarian side dish recipe that uses only five ingredients. It’s super easy to make (even cutting and removing the seeds isn’t hard) and the result is delicious!

Ingredients
2 acorn squash, split and seeded
2 tablespoons salted butter, melted
2 tablespoons real maple syrup
2 - 4 tablespoons light brown sugar
1 teaspoon Kosher salt
Directions
(1) Prepare: Preheat oven to 400 degrees F. Split the squash with a sharp knife and use a spoon to remove the seeds and “stringy” flesh from the middle of the squash. Then, use a small sharp knife to score the inside about 1/2” deep into the flesh. This will allow the butter and sugar to sink down into the squash while it cooks which will enhance the squash flavor.
(2) Prepare the squash: Put the scored squash on a rimmed baking sheet making sure any squash on the edge of the pan is tilted toward the center of the pan to ensure drips end up in the pan, not on the bottom of your oven.
Make-ahead note: At this point, you may cover the squash with plastic wrap and set it aside until you’re ready to cook it. If it’s going to be waiting more than a couple of hours, I recommend refrigerating.
(3) Glaze: Combine the melted butter and maple syrup and use a pastry brush to brush the mixture onto the entire interior surface of the squash. Sprinkle evenly with brown sugar and a bit of salt.
(4) Bake: Put the pan in the oven and roast for one hour or until tender. Halfway through roasting check the squash and use a spoon to scoop the liquid from the “bowl” of the squash and drizzle it over the top part of the squash a few times.
(4) Plate and serve: Remove from the oven and let cool slightly. If there’s any liquid in the “bowl” of the squash use a spoon to scoop it up and drizzle it over the top part of the squash a few times. Just before serving sprinkle with a small bit of Kosher salt. Serve with a spoon to scoop the flesh out of the squash.
Eat and enjoy every bite because you can!
A note about acorn squash: While acorn squash has not been tested by Monash University nor included in their low FODMAP foods app, it has been reported to be a low FODMAP food and I was able to tolerate 1/2 an acorn squash without symptoms. I recommend you start small with your own intake of acorn squash and see how it goes for you. If 1/4 squash is ok, then go up to 1/2 and see how that feels. I hope you enjoy it as much as I did!
*This post may contain links for you to easily purchase items listed on the page. In some cases, we have provided a special discount code for IBS Game Changers so be sure to use it when you purchase an item to get the discount that has been arranged just for you! As an Amazon Associate, I earn a commission from qualifying Amazon purchases.
More Deliciously Low FODMAP™ side dish recipes you might enjoy


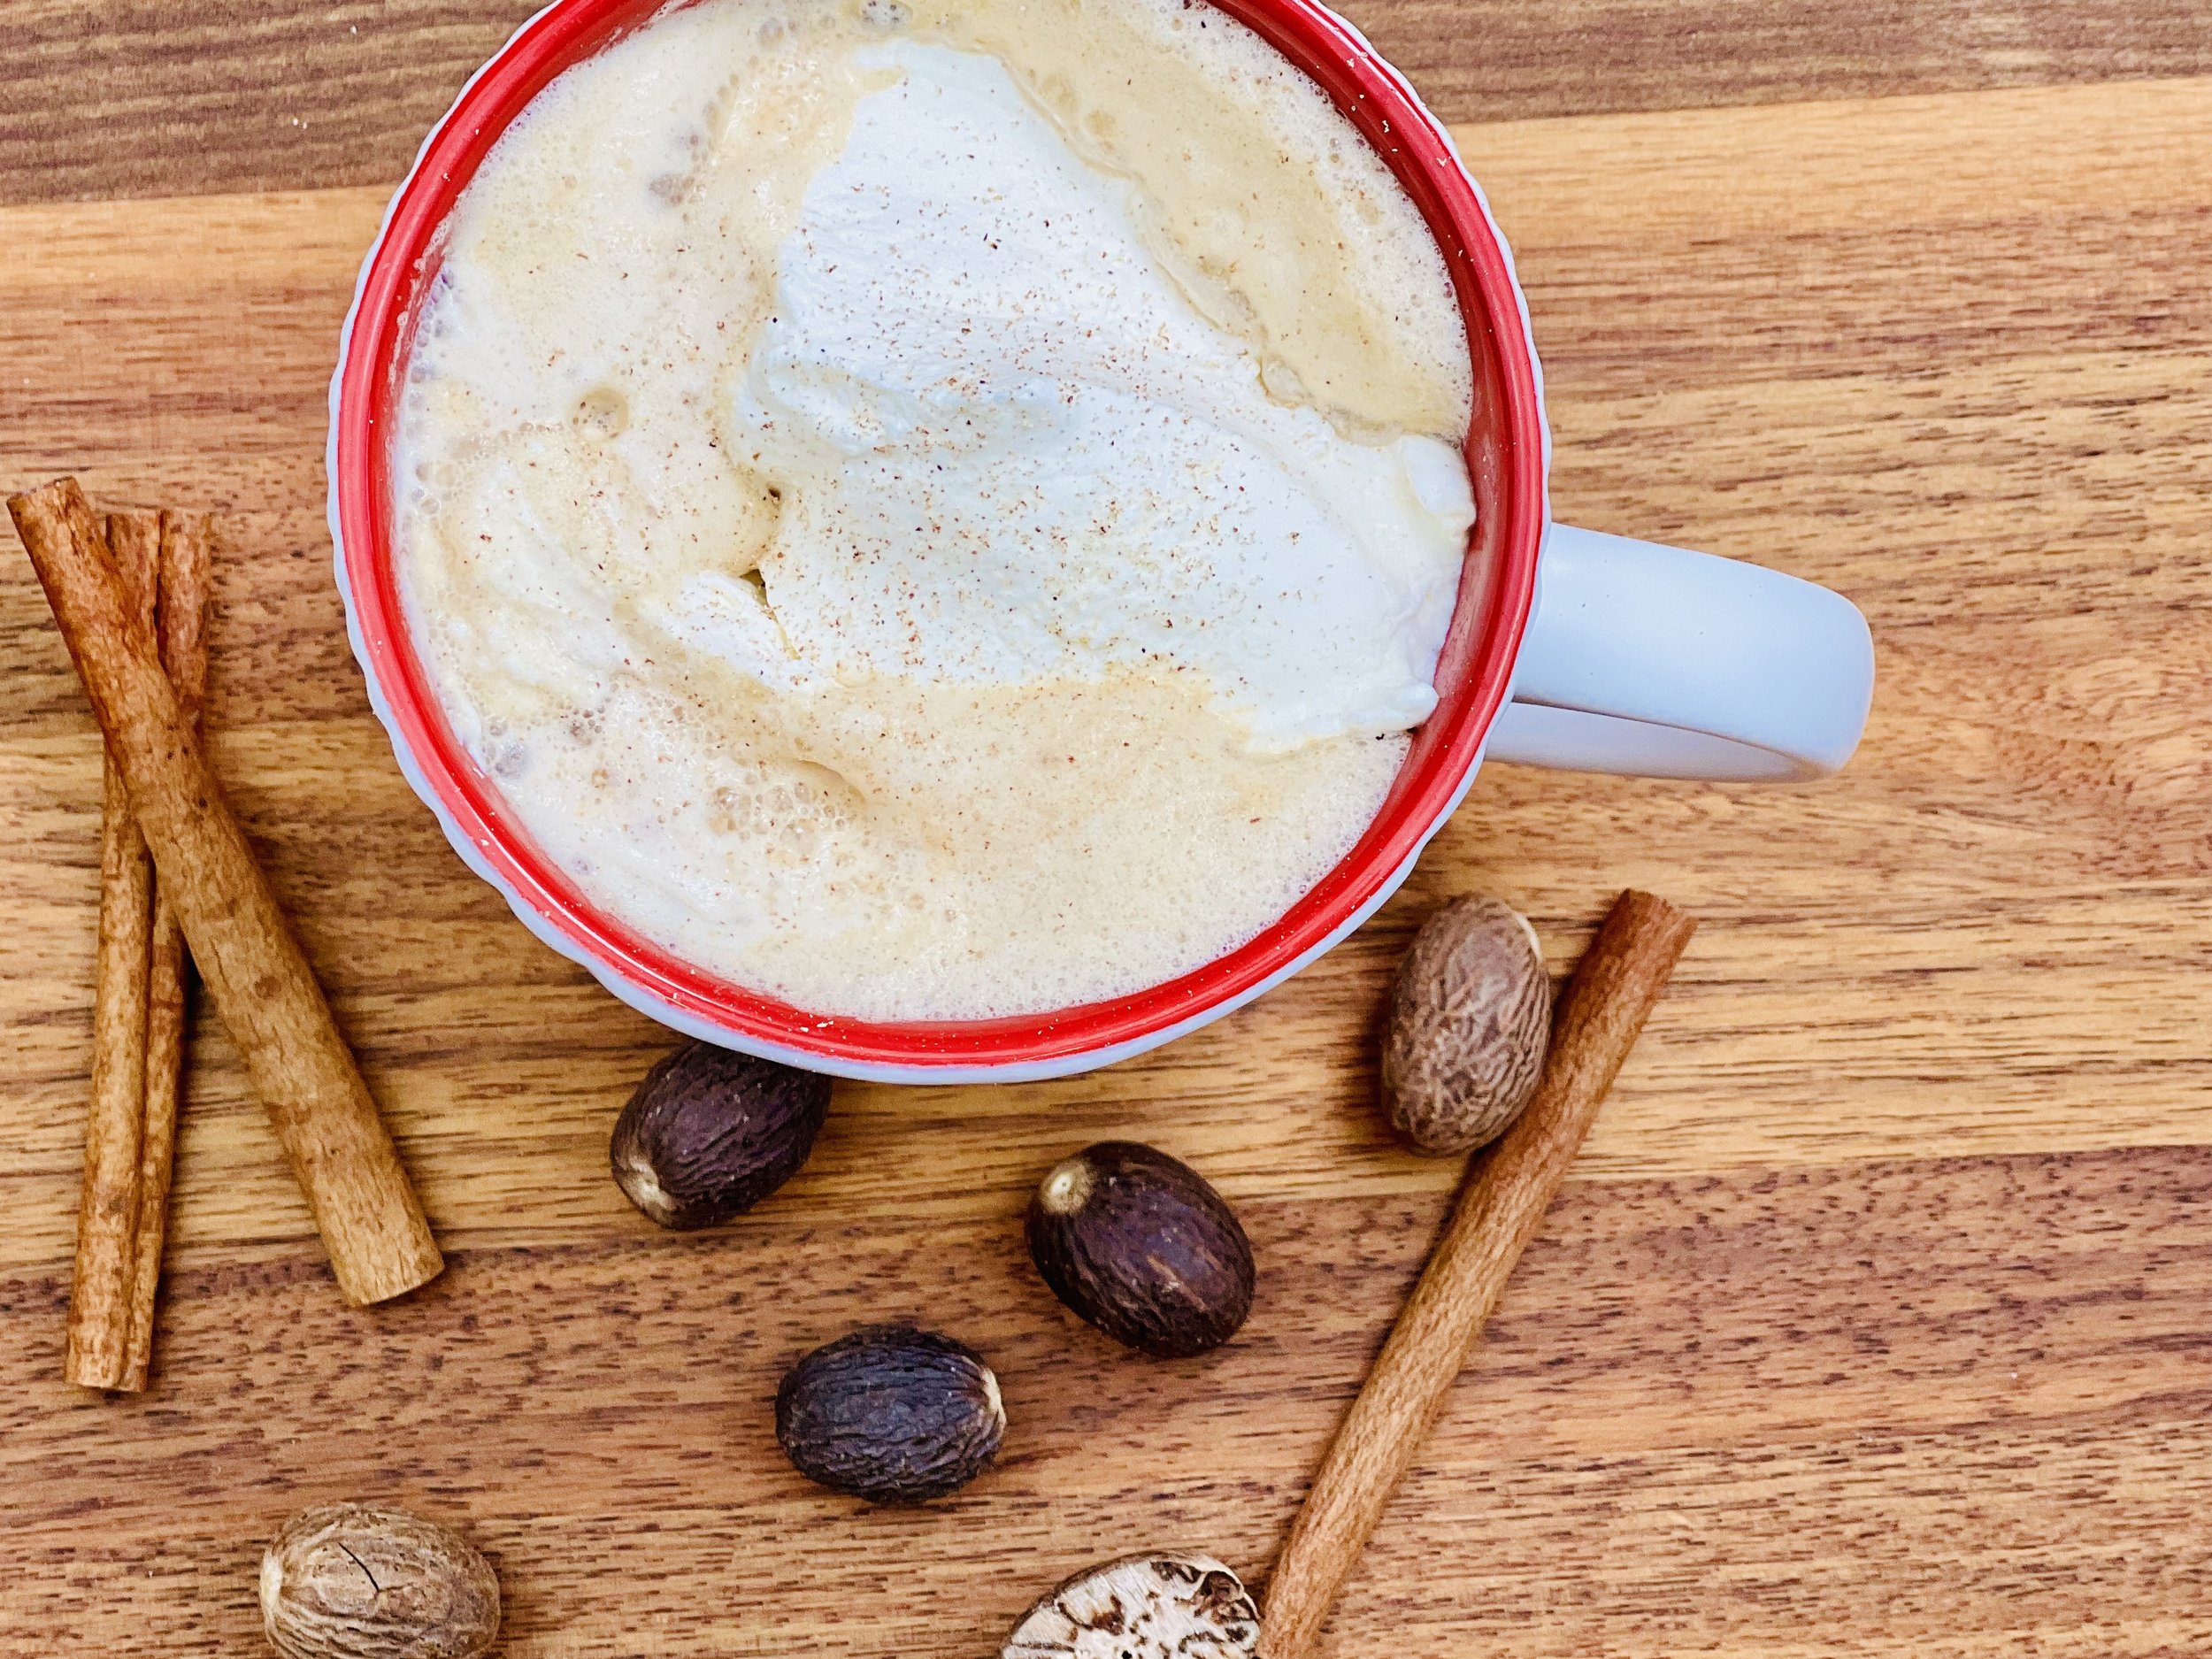
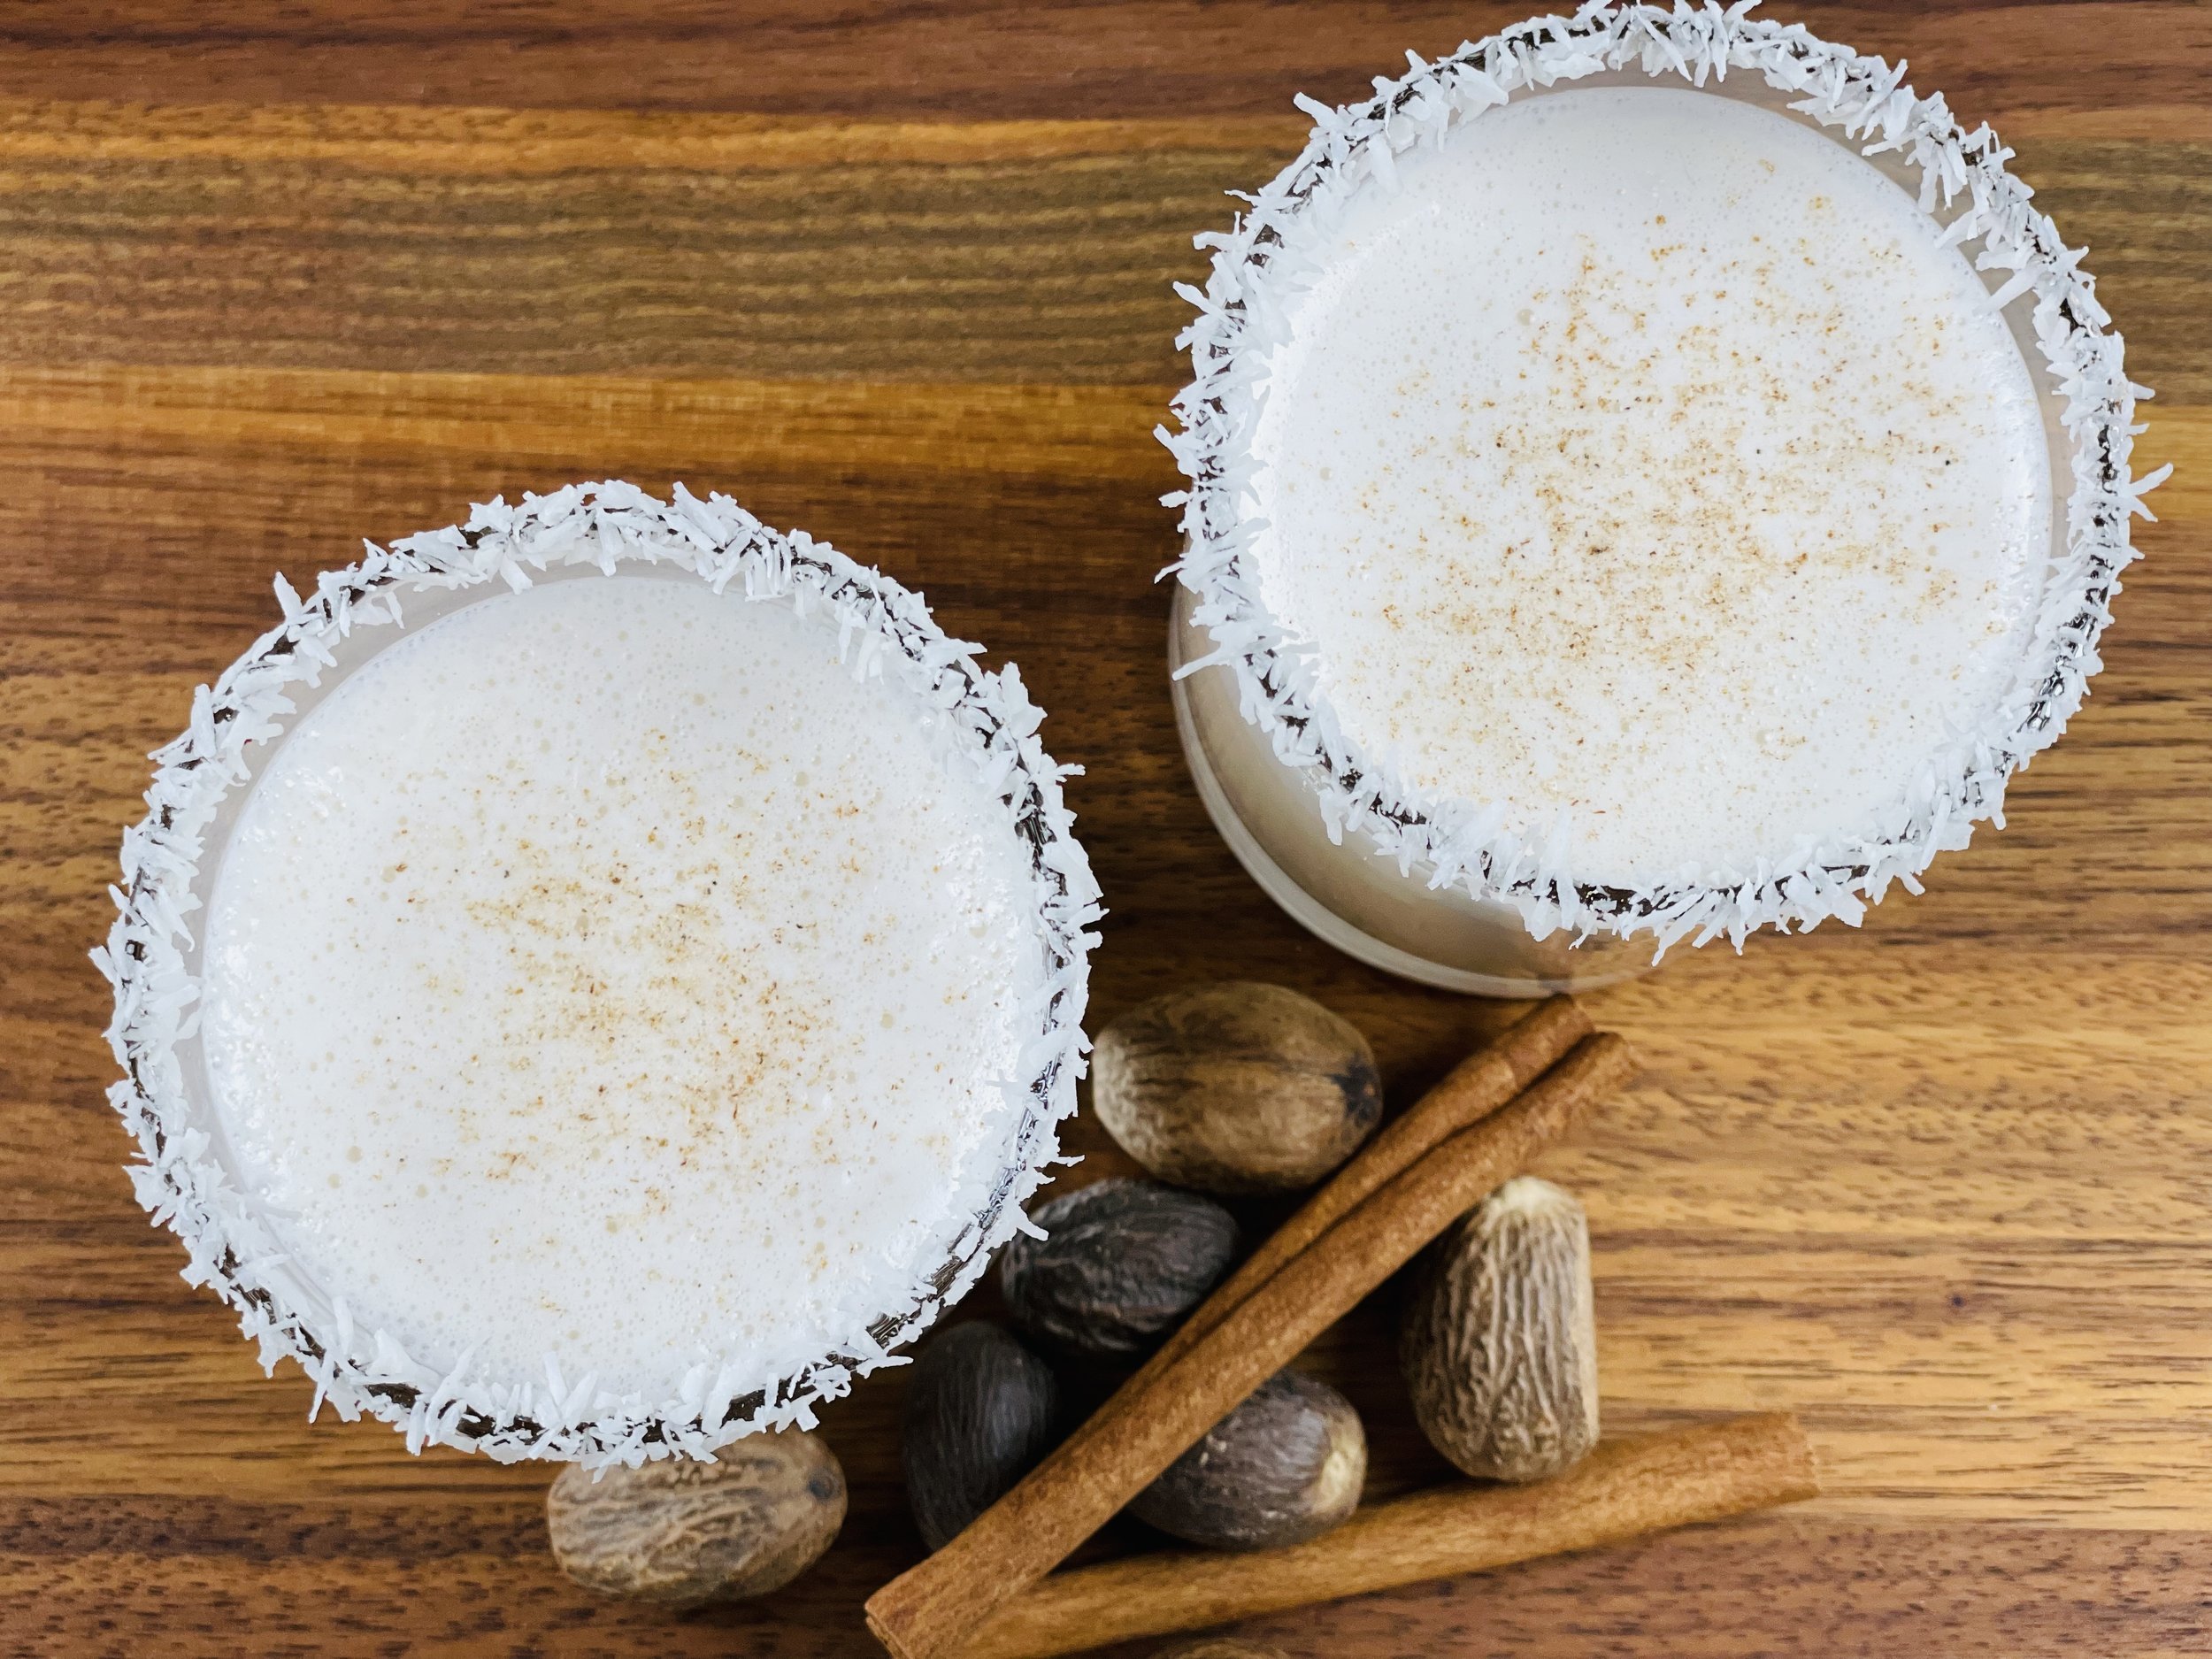
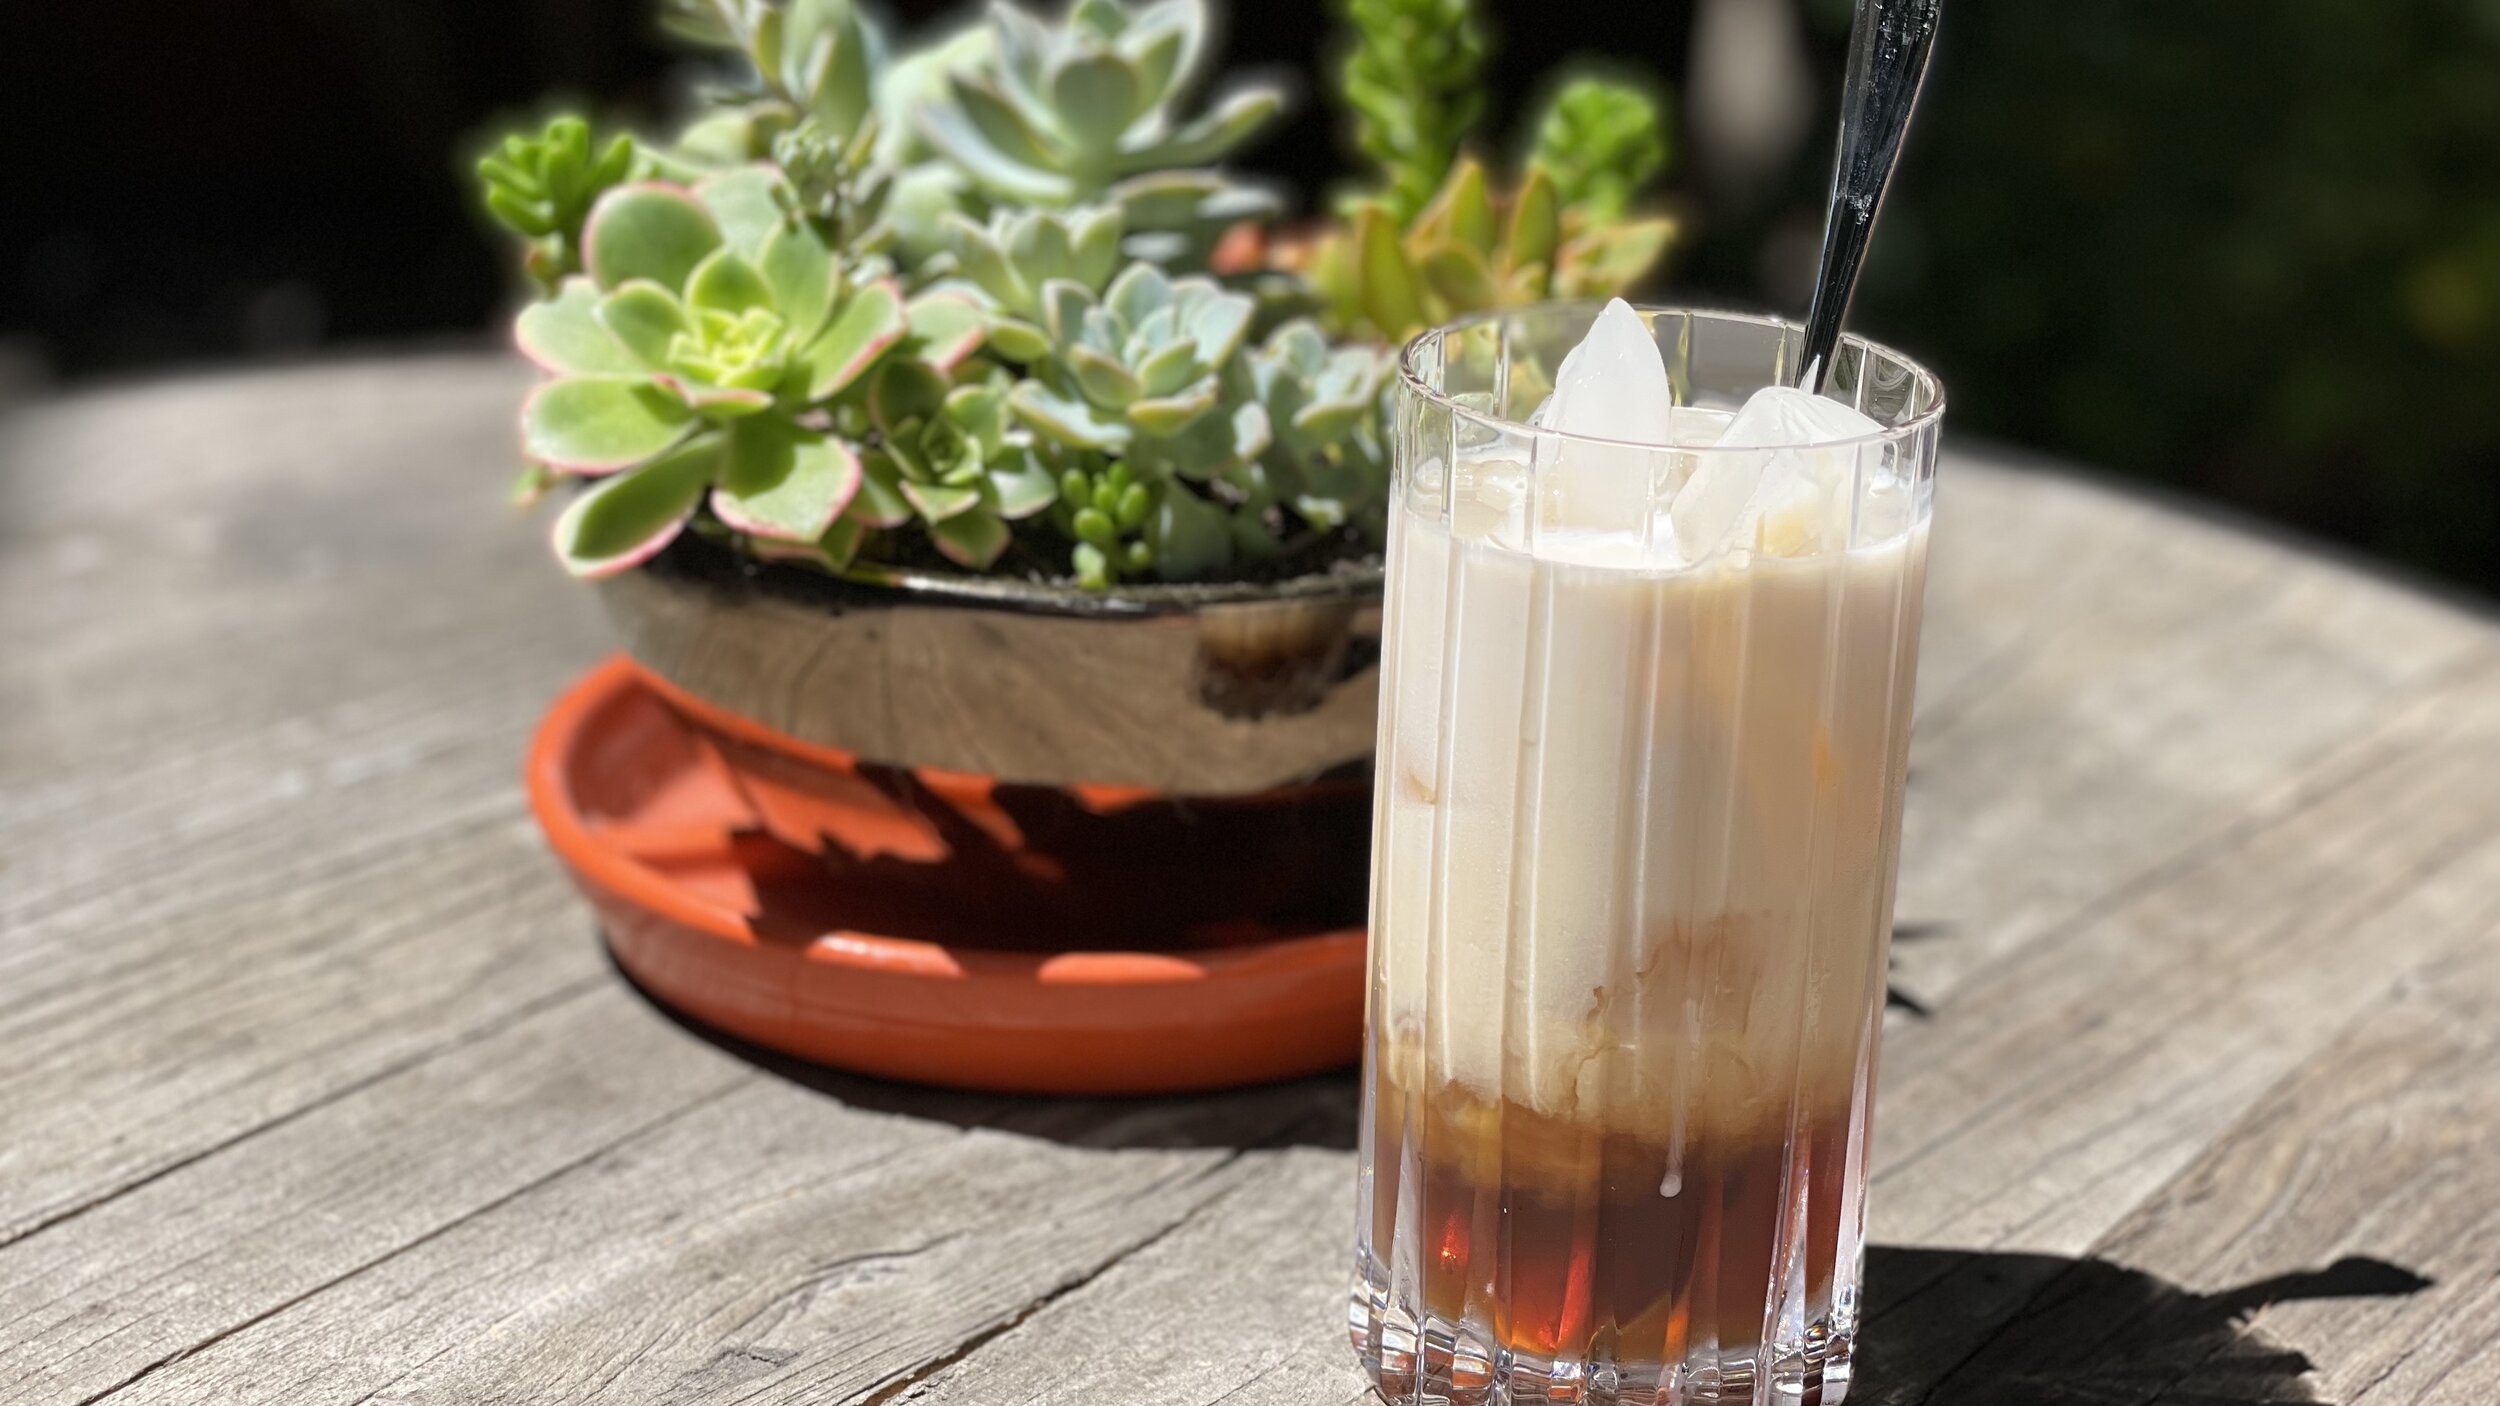
“Coquito” Puerto Rican Eggnog (low FODMAP)
60 Minutes prep • 4 hours chill • Low FODMAP • Gluten-free • Lactose-free • Serves 10
60 Minutes prep • 4 hours chill • Low FODMAP • Gluten-free • Lactose-free • Serves 10 • Ok to make-ahead: Steps 1 - 7
If you love eggnog and you love coconut you must try this no-cook, low FODMAP version of Coquito! Coquito means "little coconut" in Spanish and it’s a traditional Christmas drink that originated in Puerto Rico. Sometimes called Puerto Rican Eggnog, it’s simple to make and oh so delicious! I have modified the recipe to use vodka in place of rum so it can be low FODMAP, but the flavor is pretty darn close to the original version! You can make this Puerto Rican Coquito recipe and store it for up to a month in the fridge. The longer it sits, the more the flavors meld together and get more delicious, so it’s a great make-ahead cocktail for your holiday gathering.
Ingredients
1 cup vanilla vodka
1 cup heavy cream
1 1/2 cups lactose-free Whole milk
1 1/2 cups coconut syrup (like Torani Pure Made Coconut Syrup*)
1 1/2 cups heavy cream
1 1/2 cups coconut cream*
1 teaspoon ground cinnamon*
1/2 teaspoon ground cloves*
1/2 teaspoon ground nutmeg, plus more for serving
To rim the glasses:
1 tablespoon light corn syrup*
2 tablespoons unsweetened shredded coconut*
Directions
(1) Make the Cinnamon vodka: In a pint-size jar with a lid, add the vanilla vodka and the cinnamon stick. Let sit for about an 1 hour.
(2) Prepare glasses: In a small saucer make a circle of corn syrup about the size of the rim of your glasses. In another small saucer, spread out the shredded coconut. Dip the rim of each glass in the coconut syrup and then in the shredded coconut. Set aside.
(3) Combine the creamy ingredients: In a blender, mix all the other ingredients together. Add the cinnamon/vodka mixture and pulse once or twice to combine. Pour into a jar or two (so you can shake it up before serving).
Make-ahead note: At this point, you may store the Coquito in an airtight container in the refrigerator for up to a month.
(4) Finish: Chill for at least 4 hours then shake vigorously before pouring into prepared glasses.
(5) Serve: Serve with a light sprinkle of freshly grated nutmeg.
Drink and enjoy every bit because you can!
*This post may contain links for you to easily purchase items listed on the page. In some cases, we have provided a special discount code for IBS Game Changers so be sure to use it when you purchase an item to get the discount that has been arranged just for you! As an Amazon Associate, I earn a commission from qualifying Amazon purchases.
More Deliciously Low FODMAP™ cocktail recipes you might enjoy


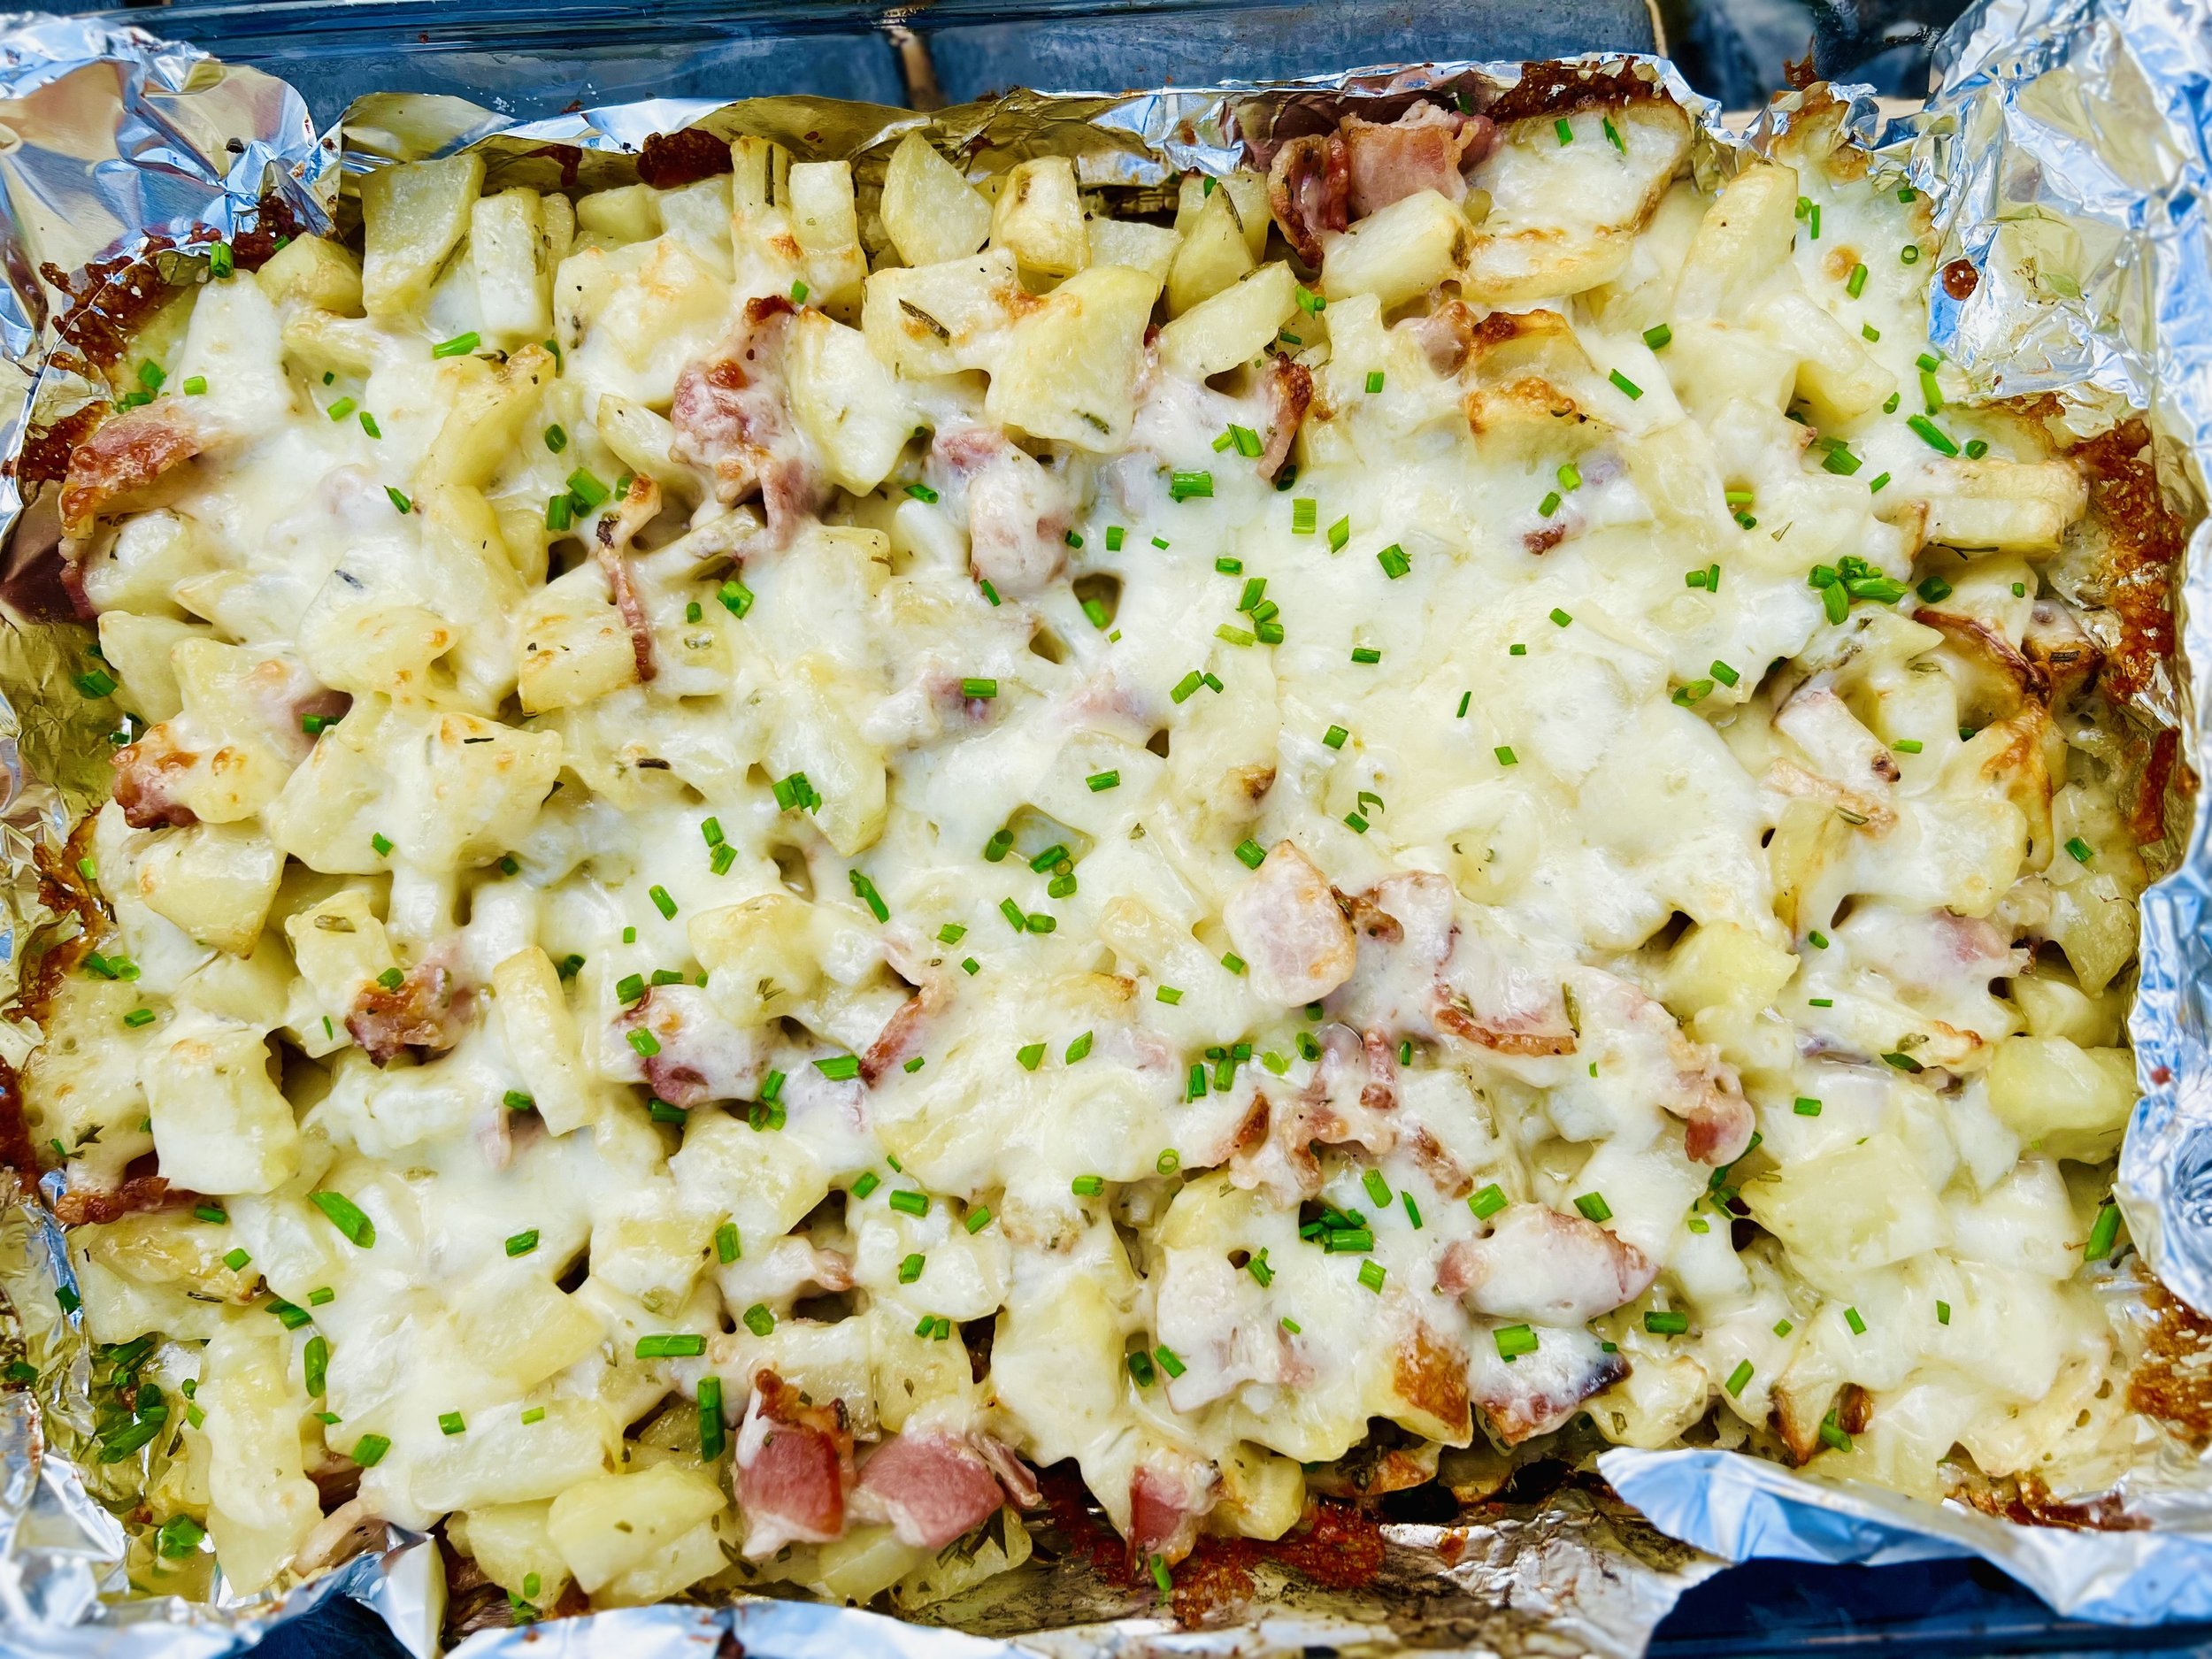
Rosemary Potatoes Au Gratin (low FODMAP)
15 Minutes prep • 60 Minutes cook • Low FODMAP • Gluten-free • Serves 8
15 Minutes prep • 60 Minutes cook • Low FODMAP • Gluten-free • Serves 8 • Ok to make-ahead: Steps 1 - 5 or 6
Are you ready to change up your holiday sweet potatoes? These wonderfully flavorful rosemary potatoes au gratin would be a marvelous addition to your table. The sweetness of the potatoes is mellowed with the savory flavor of the rosemary and the rich nuttiness of the gruyere cheese. The flavor gets better with time, so get a jump on the meal and make them ahead! My sister shared the original version of this recipe with me and we had it as a side for Thanksgiving dinner. It was a fine change of pace and a delicious savory complement to our meal. This version is low FODMAP, easy to make, and very delicious!

Ingredients
1 pound Yukon Gold potatoes
1 pound jewel sweet potatoes or other orange flesh sweet potatoes (the bi-color is pretty but not required if you can only find white sweet potatoes)
Butter for greasing the baking dish
2 cups gruyere cheese, grated
1 tablespoon fresh rosemary, finely chopped (or 1 teaspoon dried rosemary)
Kosher salt* and black pepper*
3/4 cup heavy cream
1 teaspoon Smoke N Sanity Essence of Garlic Salt* OR
1 teaspoon Kosher salt (or to taste) and 1 teaspoon Gourmend Garlic Scape Powder*
Fresh Rosemary for garnish
Directions
(1) Prepare: Preheat oven to 350 degrees F and grease a cake-size baking dish with butter.
(2) Prepare potatoes: Peel and thinly slice sweet potatoes and Yukon Gold potatoes using a food processor, mandoline, or a sharp knife. (Note: you may choose to leave the Yukon Golds with the peel on if you prefer.)
(3) Grate the cheese: Grate the cheese and set it aside.
(4) Layer the ingredients in the pan: Layer half of the sliced potatoes in the pan, sprinkle with about half the cheese, half the rosemary, and a sprinkling of salt and pepper. Layer the other half of the potatoes into the pan, sprinkle with the other half of the rosemary, and sprinkle with salt and pepper.
(5) Finish: Pour cream into a small bowl and whisk to combine with essence of garlic salt or garlic scape powder and salt. Pour evenly over the layered potatoes. Sprinkle with the remaining grated cheese.
Make-ahead note: At this point, you may cover with parchment and foil and refrigerate until ready to cook.
(6) Bake: Cover the pan with a layer of parchment and then a layer of foil. (If your baking dish is very full, place the dish on a rimmed baking sheet in case of bubble over in the oven.) Bake for 45 minutes then remove the foil and bake for another 15 to 20 minutes, or until potatoes are tender and the sauce is bubbly. Let stand 15 minutes before serving.
Make-ahead note: Alternatively, you may bake, covered, for 45 minutes or until potatoes are tender and the sauce is bubbly, let them cool, re-cover them with parchment and foil and refrigerate until ready to use. Then remove from the refrigerator and finish baking in a 350 degree F oven, uncovered, for about 20 minutes, or until fully warmed through.
(7) Plate and serve: Serve garnished with rosemary sprigs.
Eat and enjoy every bite because you can!
*This post may contain links for you to easily purchase items listed on the page. In some cases, we have provided a special discount code for IBS Game Changers so be sure to use it when you purchase an item to get the discount that has been arranged just for you! As an Amazon Associate, I earn a commission from qualifying Amazon purchases.
More Deliciously Low FODMAP™ side dish recipes you might enjoy
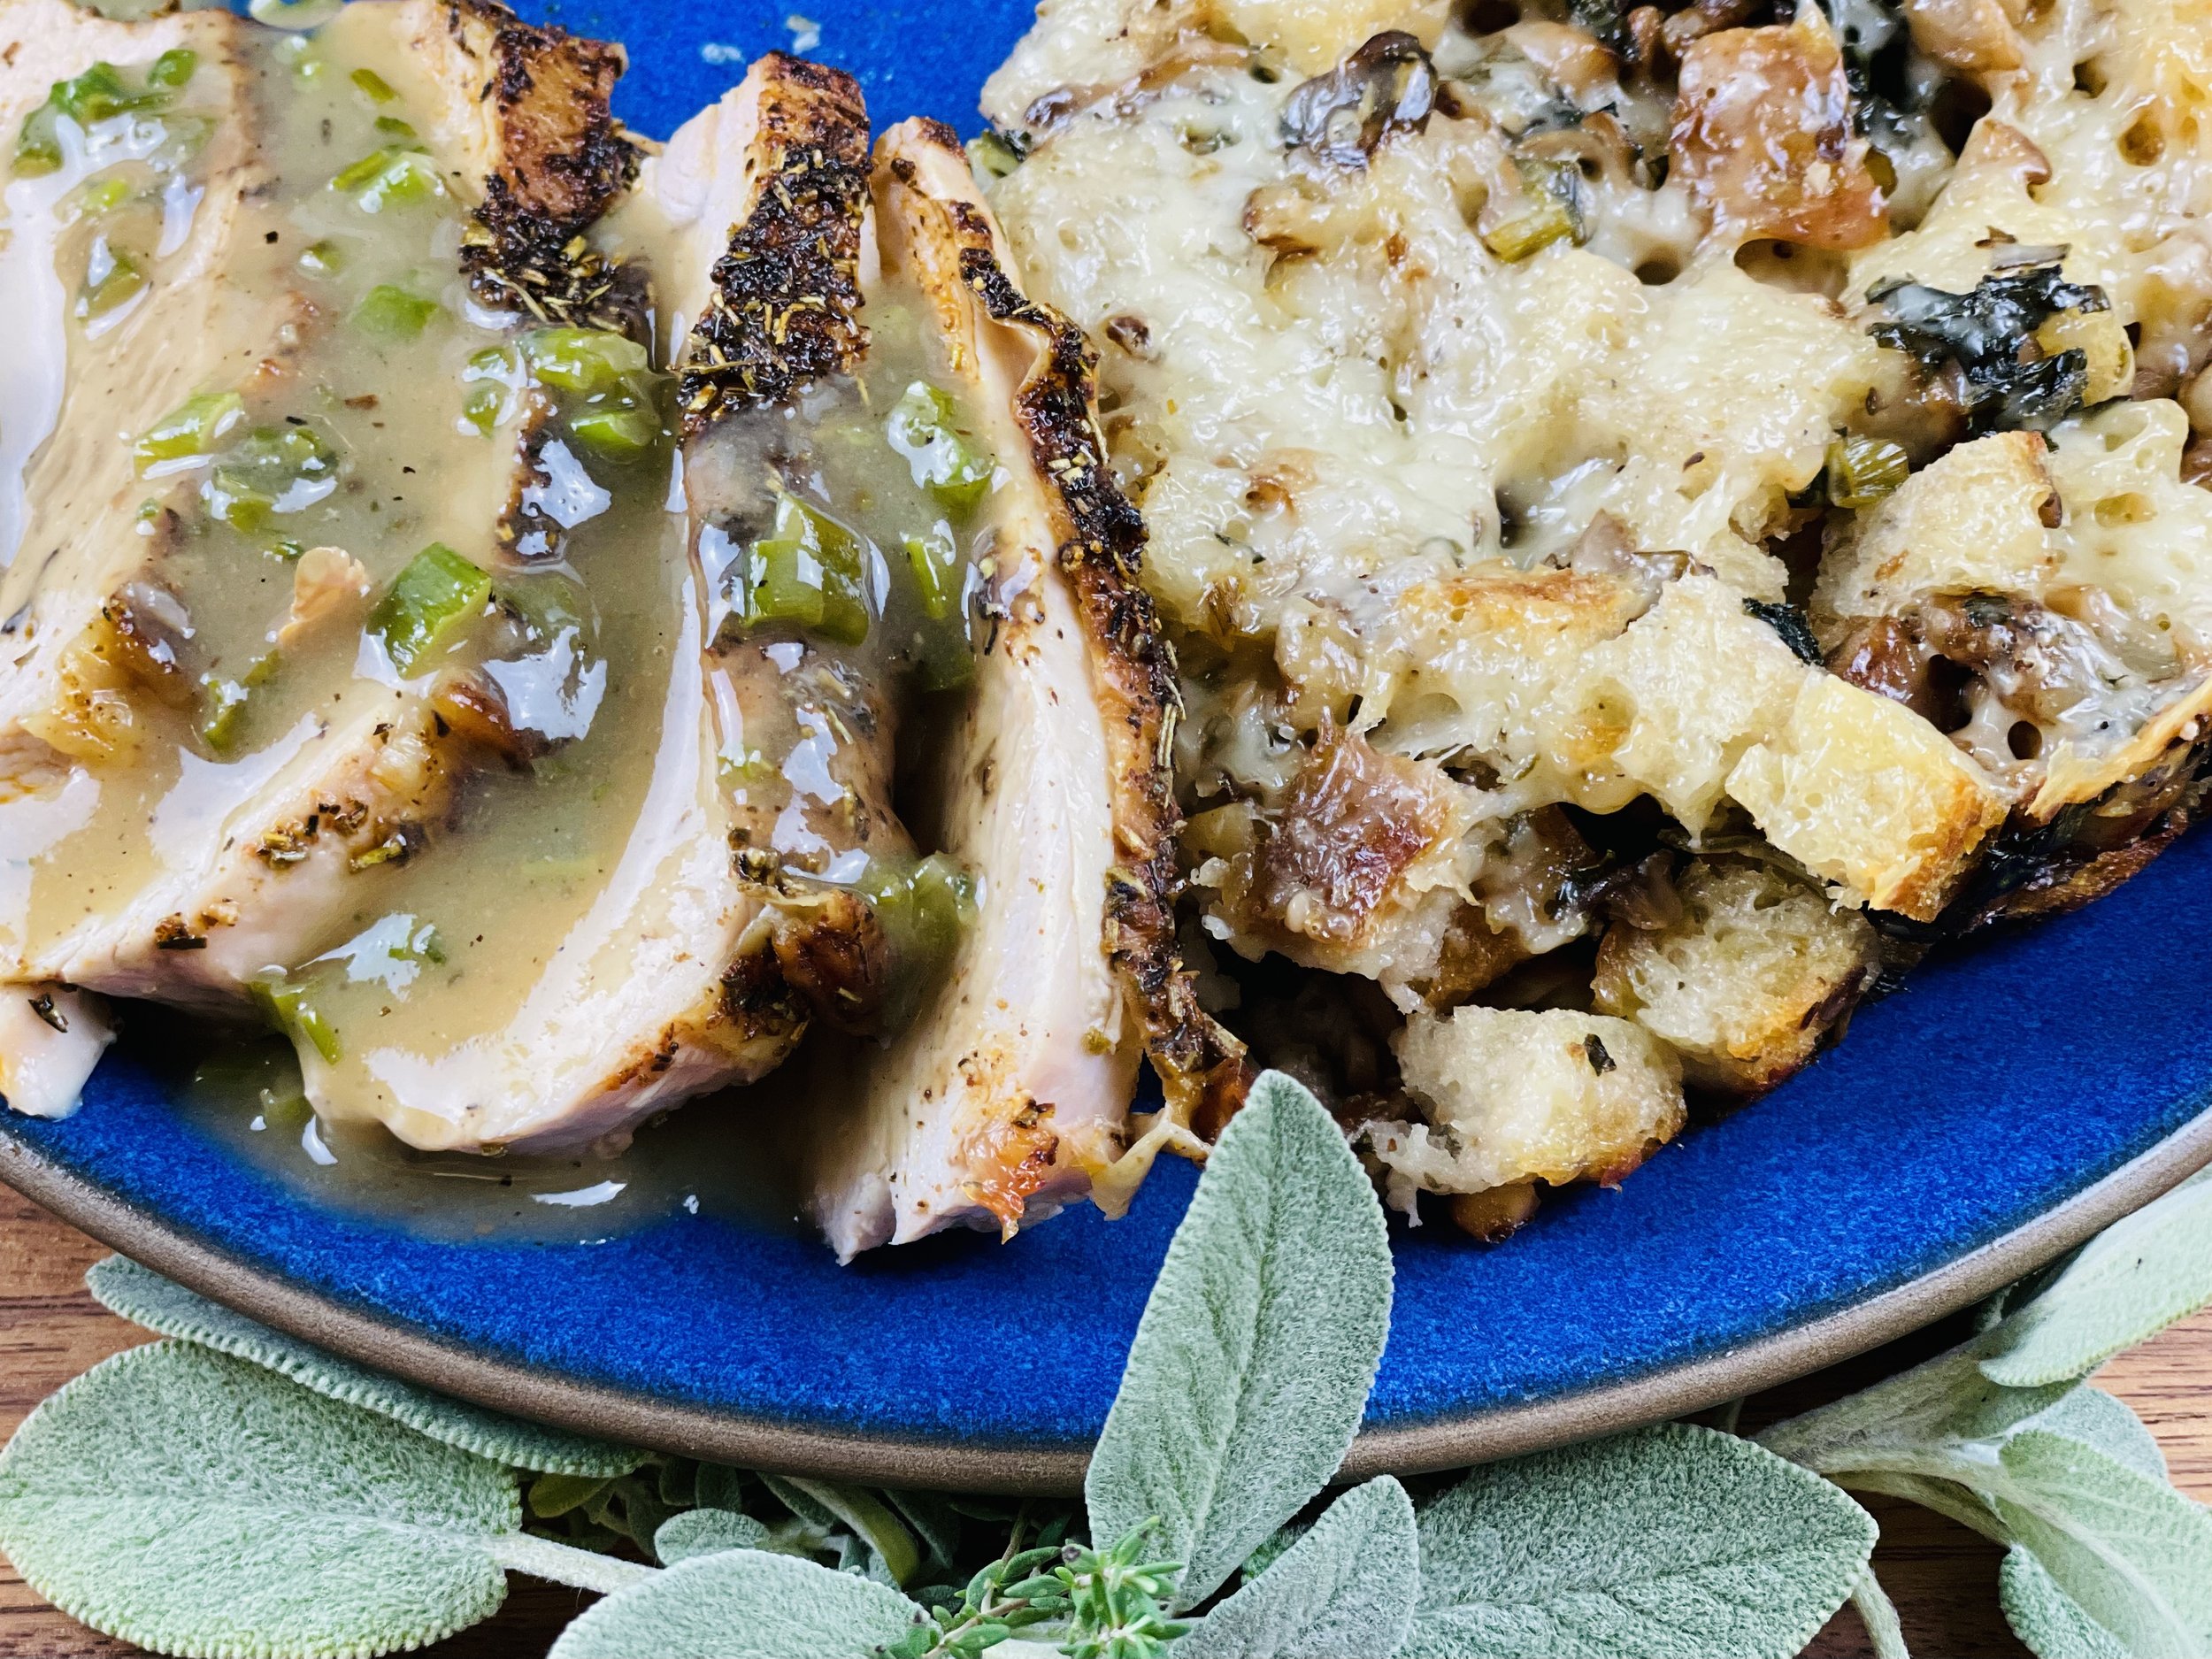
Herb Roasted Turkey Breast (low FODMAP)
15 Minutes prep • 60 Minutes cook • Low FODMAP • Gluten-free • Lactose-free • Serves 6
15 Minutes prep • 60 Minutes cook • Low FODMAP • Gluten-free • Lactose-free • Serves 6 • Ok to make-ahead: Steps 1 - 3
You don’t have to roast an entire turkey to have a fabulous holiday meal. This herb-roasted turkey breast can be just as delicious as the whole turkey and it’s a lot more manageable! Serve it with our fabulous Mushroom Sourdough Stuffing and Great Gravy for a low FODMAP feast everyone will enjoy.
Ingredients
3 tablespoons garlic-infused olive oil
2 teaspoons paprika
2 teaspoons dried oregano
2 teaspoons dried rosemary
2 teaspoons Kosher salt
1 teaspoon dried thyme
1 teaspoon black pepper
1 teaspoon Smoke N Sanity Essence of Onion Salt (use code IBSGC10 for 10% discount)
1 teaspoon Smoke N Sanity Essence of Garlic Salt (use code IBSGC10 for 10% discount)
3 pound turkey breast, bone-in, skin on
Directions
(1) Preheat the oven: If you’re not making ahead, preheat the oven to 375 degrees F.
(2) Prepare the spice mixture: In a small bowl, stir together garlic-infused olive oil paprika, oregano, rosemary, Smoke N Sanity onion and garlic salt, thyme, and black pepper to form a paste.
(3) Prepare the turkey: Put the turkey breast skin side up on the rack of a roasting pan, or into a lightly greased 9x13 pan. Rub the spice mixture on the turkey breast skin. You may also lift the skin and rub some of the spice mixture under the skin as well.
Make-ahead note: At this point, you may cover and refrigerate the turkey breast until you’re ready to cook it.
(4) Cook turkey: Roast in the preheated oven for approximately 20 minutes per pound, until the turkey reaches an internal temperature of 160 degrees F (use a meat thermometer for accuracy and to prevent over-cooking). Measure the temperature in the center of the thickest part of the breast. Actual cooking time will depend on the size of the turkey breast you’re cooking.
(5) Finish: Remove from the oven and put the turkey on a carving board and cover it loosely with aluminum foil so you can use the pan and the drippings to make your turkey gravy. Let the turkey rest for 15 minutes before slicing.
(6) Slice and serve: Then slice and serve with our Mushroom Sourdough Stuffing and Great Gravy.
Eat and enjoy every bite because you can!
*This post may contain links for you to easily purchase items listed on the page. In some cases, we have provided a special discount code for IBS Game Changers so be sure to use it when you purchase an item to get the discount that has been arranged just for you! As an Amazon Associate, I earn a commission from qualifying Amazon purchases.
More Deliciously Low FODMAP™ main course recipes you might enjoy
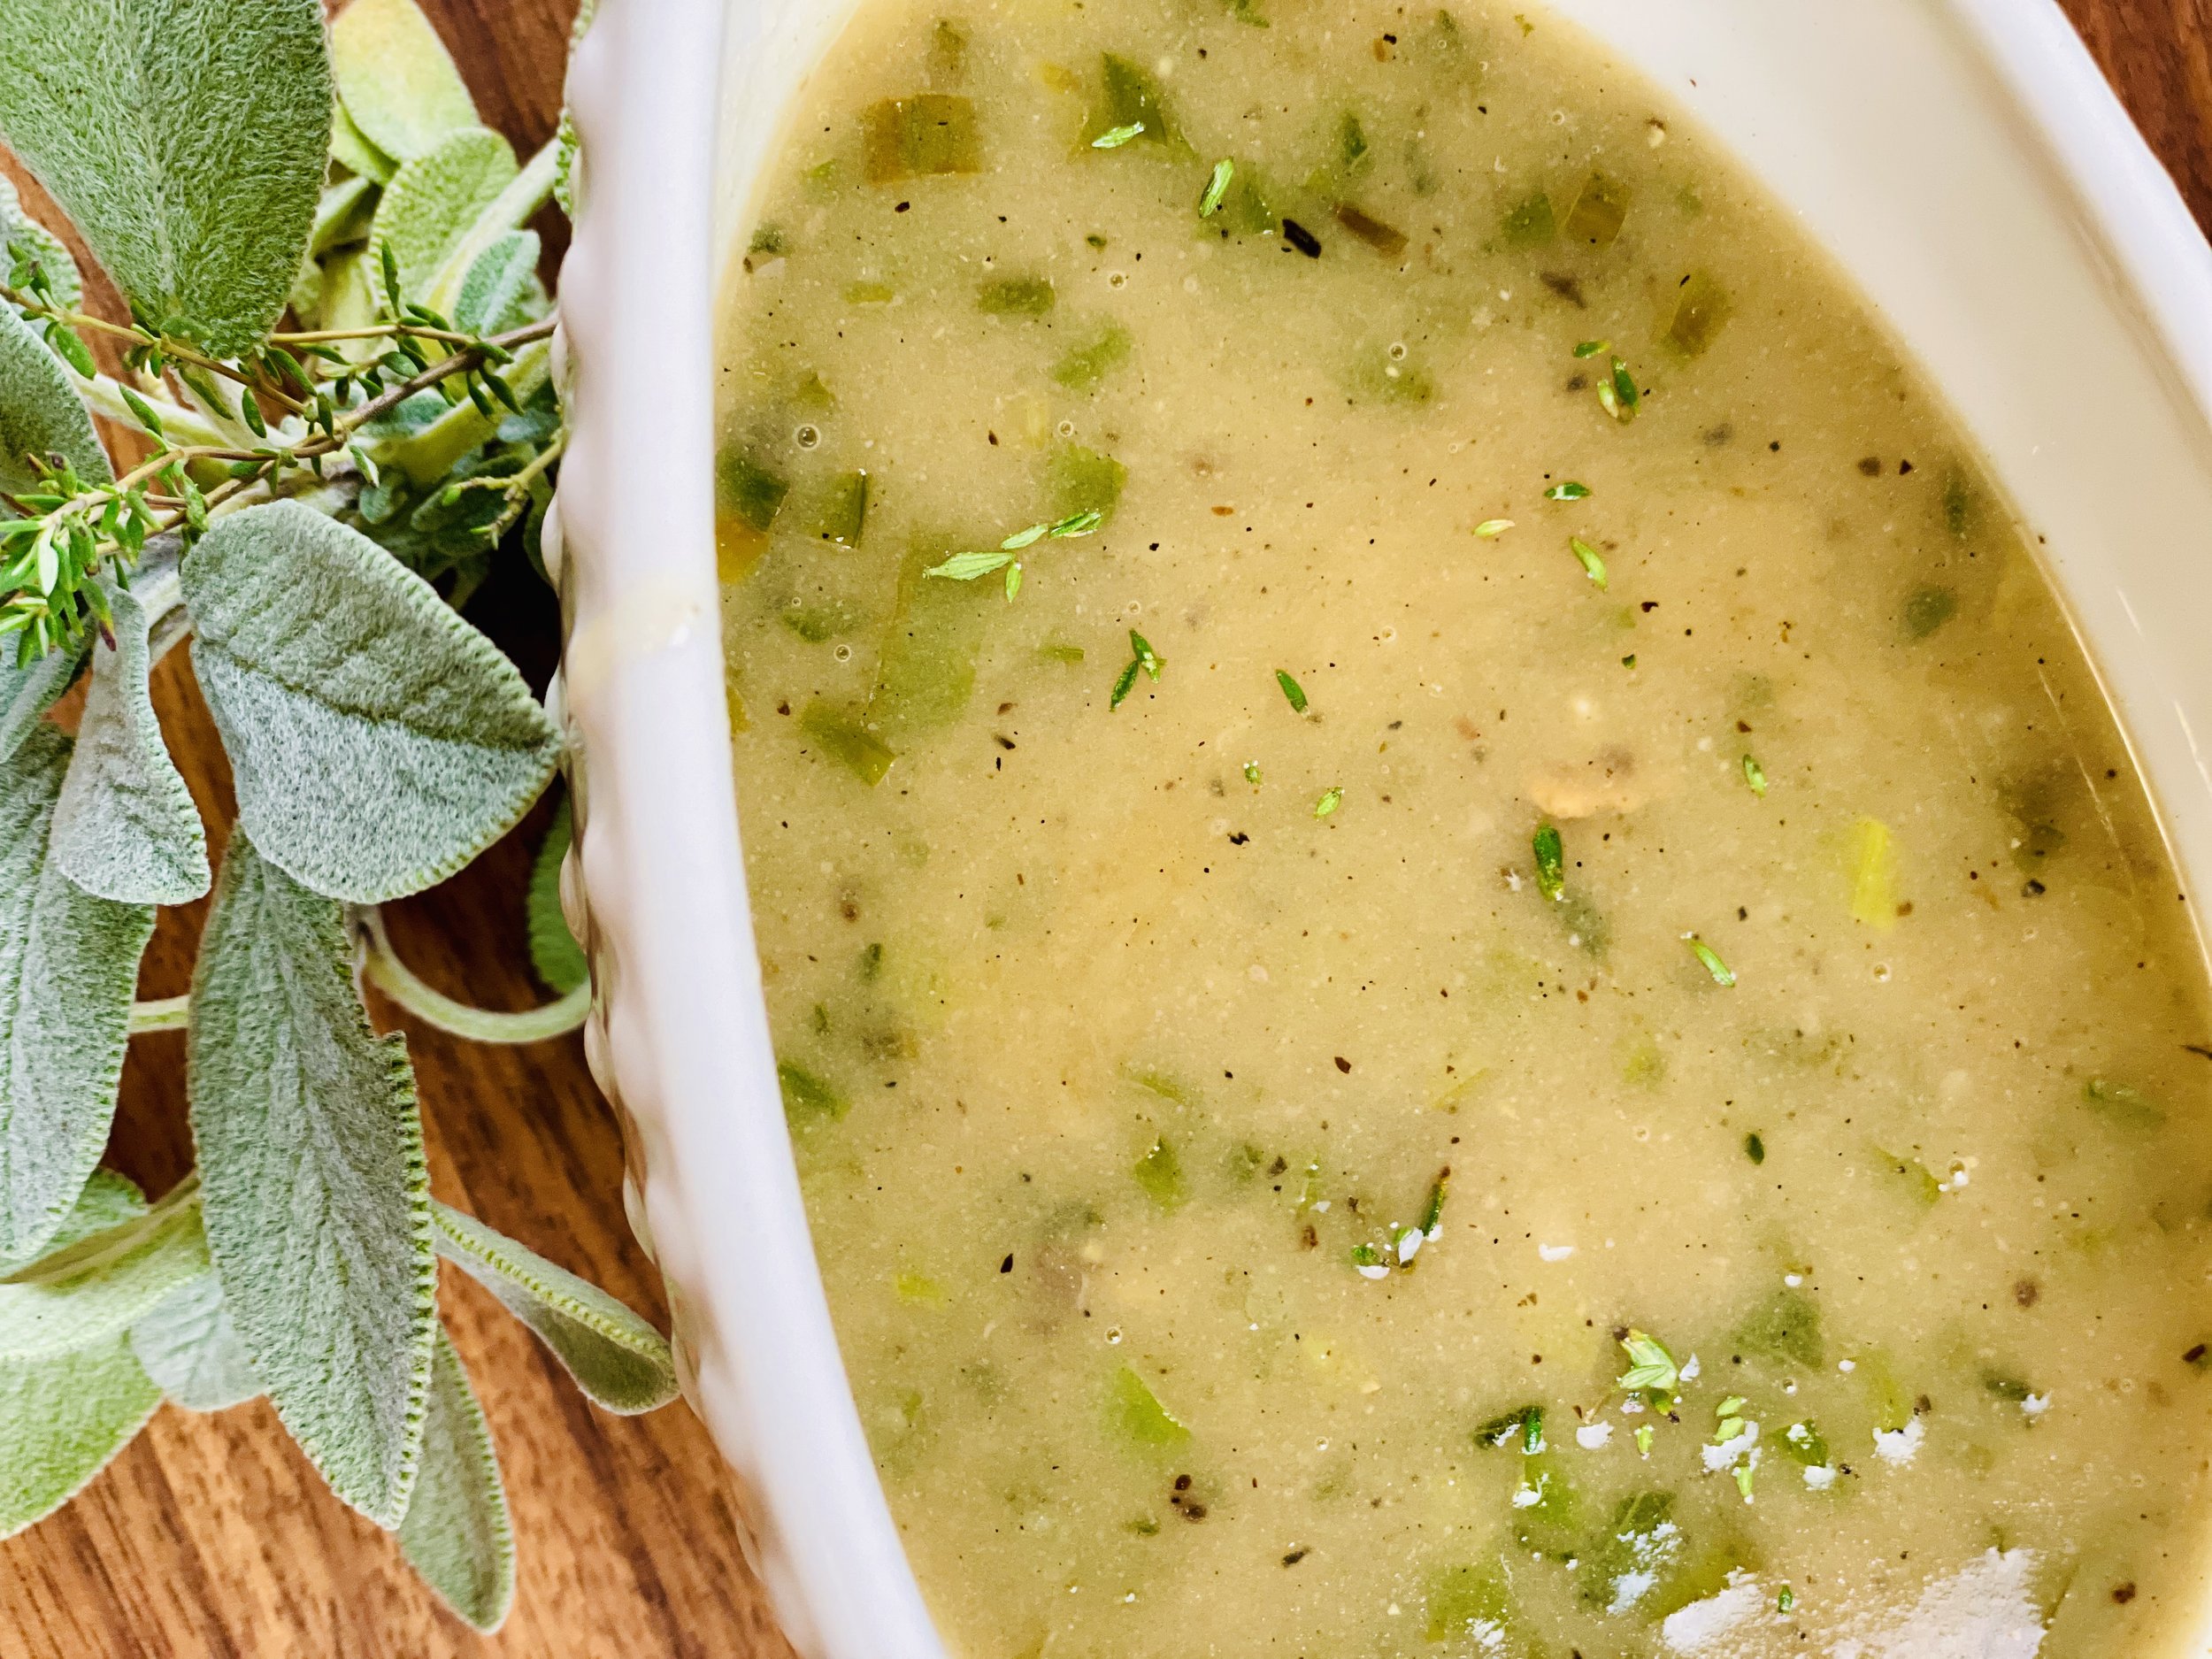
Great Gravy (low FODMAP)
5 Minutes prep • 15 Minutes cook • Low FODMAP • Gluten-free • Lactose-free • Makes 2 Cups
5 Minutes prep • 15 Minutes cook • Low FODMAP • Gluten-free • Lactose-free • Makes 2 Cups • Ok to make-ahead: Steps 1 - 3
With a few fresh herbs and some drippings from your roasting pan, it’s not hard to make low FODMAP gravy that is truly delicious. Making your own gravy ensures you can enjoy it without consequences, and it will complement your turkey perfectly. The make-ahead steps will help you finish it in a snap on the big day. Serve with our Mushroom Sourdough Stuffing and Herb Roasted Turkey Breast.
Ingredients
6 tablespoons salted butter
2 bunches green onions (green part only), chopped
2 tablespoons fresh sage, chopped
1/3 cup gluten-free all-purpose flour (I used King Arthur Measure for Measure*)
3 cups Gourmend low-sodium chicken broth* (use code IBSGC15 for a 15% discount)
Kosher salt* and black pepper*
Pan drippings from roasted turkey
1 cup dry white wine, such as Sauvignon Blanc or Pinot Grigio (you may use chicken broth instead if you prefer)
Directions
(1) Prepare the drippings: If you are making this gravy ahead of time, you can roast a turkey breast or a couple of turkey legs to get the drippings that will add such excellent flavor to your gravy. If you’re making this after you’ve roasted a whole turkey, you will have plenty of pan drippings to work with!
(2) Prepare the herbs: Chop the green onions and the sage.
(3) Make the gravy base: Melt the butter in a medium skillet over medium heat. Add the green onions and cook 1 - 2 minutes, stirring frequently, until softened and fragrant. Add the sage and continue cooking for another minute. Sprinkle the flour over the green onions and sage, stirring for 1-2 minutes to cook the flour a bit. Add the broth slowly and bring to a boil, then boil gently for 2 - 3 minutes, or until thickened. Remove from the heat. Taste and lightly season with salt and pepper if needed.
Make-ahead note: At this point, you can allow the gravy base to cool, then store it in the fridge for up to 3 days.
(4) Prepare the pan drippings: To finish the gravy. Once your turkey has finished roasting, remove the turkey from the roasting pan and pour the liquid from the roasting pan into a glass measuring cup.
(5) Cook the gravy: Place the roasting pan over two burners. Add the wine and bring to a boil, scraping up the browned bits on the bottom of the pan. Simmer for 3-4 minutes or until the wine has reduced slightly. Reduce the heat to low and slowly stir in the gravy base until fully combined. Simmer until the gravy is smooth and thickened slightly about 5 minutes. If the gravy is too thick, thin the gravy with the reserved broth (not the fat) from the roasting pan.
(6) Finish: Taste and season with salt and pepper as needed. Serve warm.
Eat and enjoy every bite because you can!
*This post may contain links for you to easily purchase items listed on the page. In some cases, we have provided a special discount code for IBS Game Changers so be sure to use it when you purchase an item to get the discount that has been arranged just for you! As an Amazon Associate, I earn a commission from qualifying Amazon purchases.
More Deliciously Low FODMAP™ sauce recipes you might enjoy
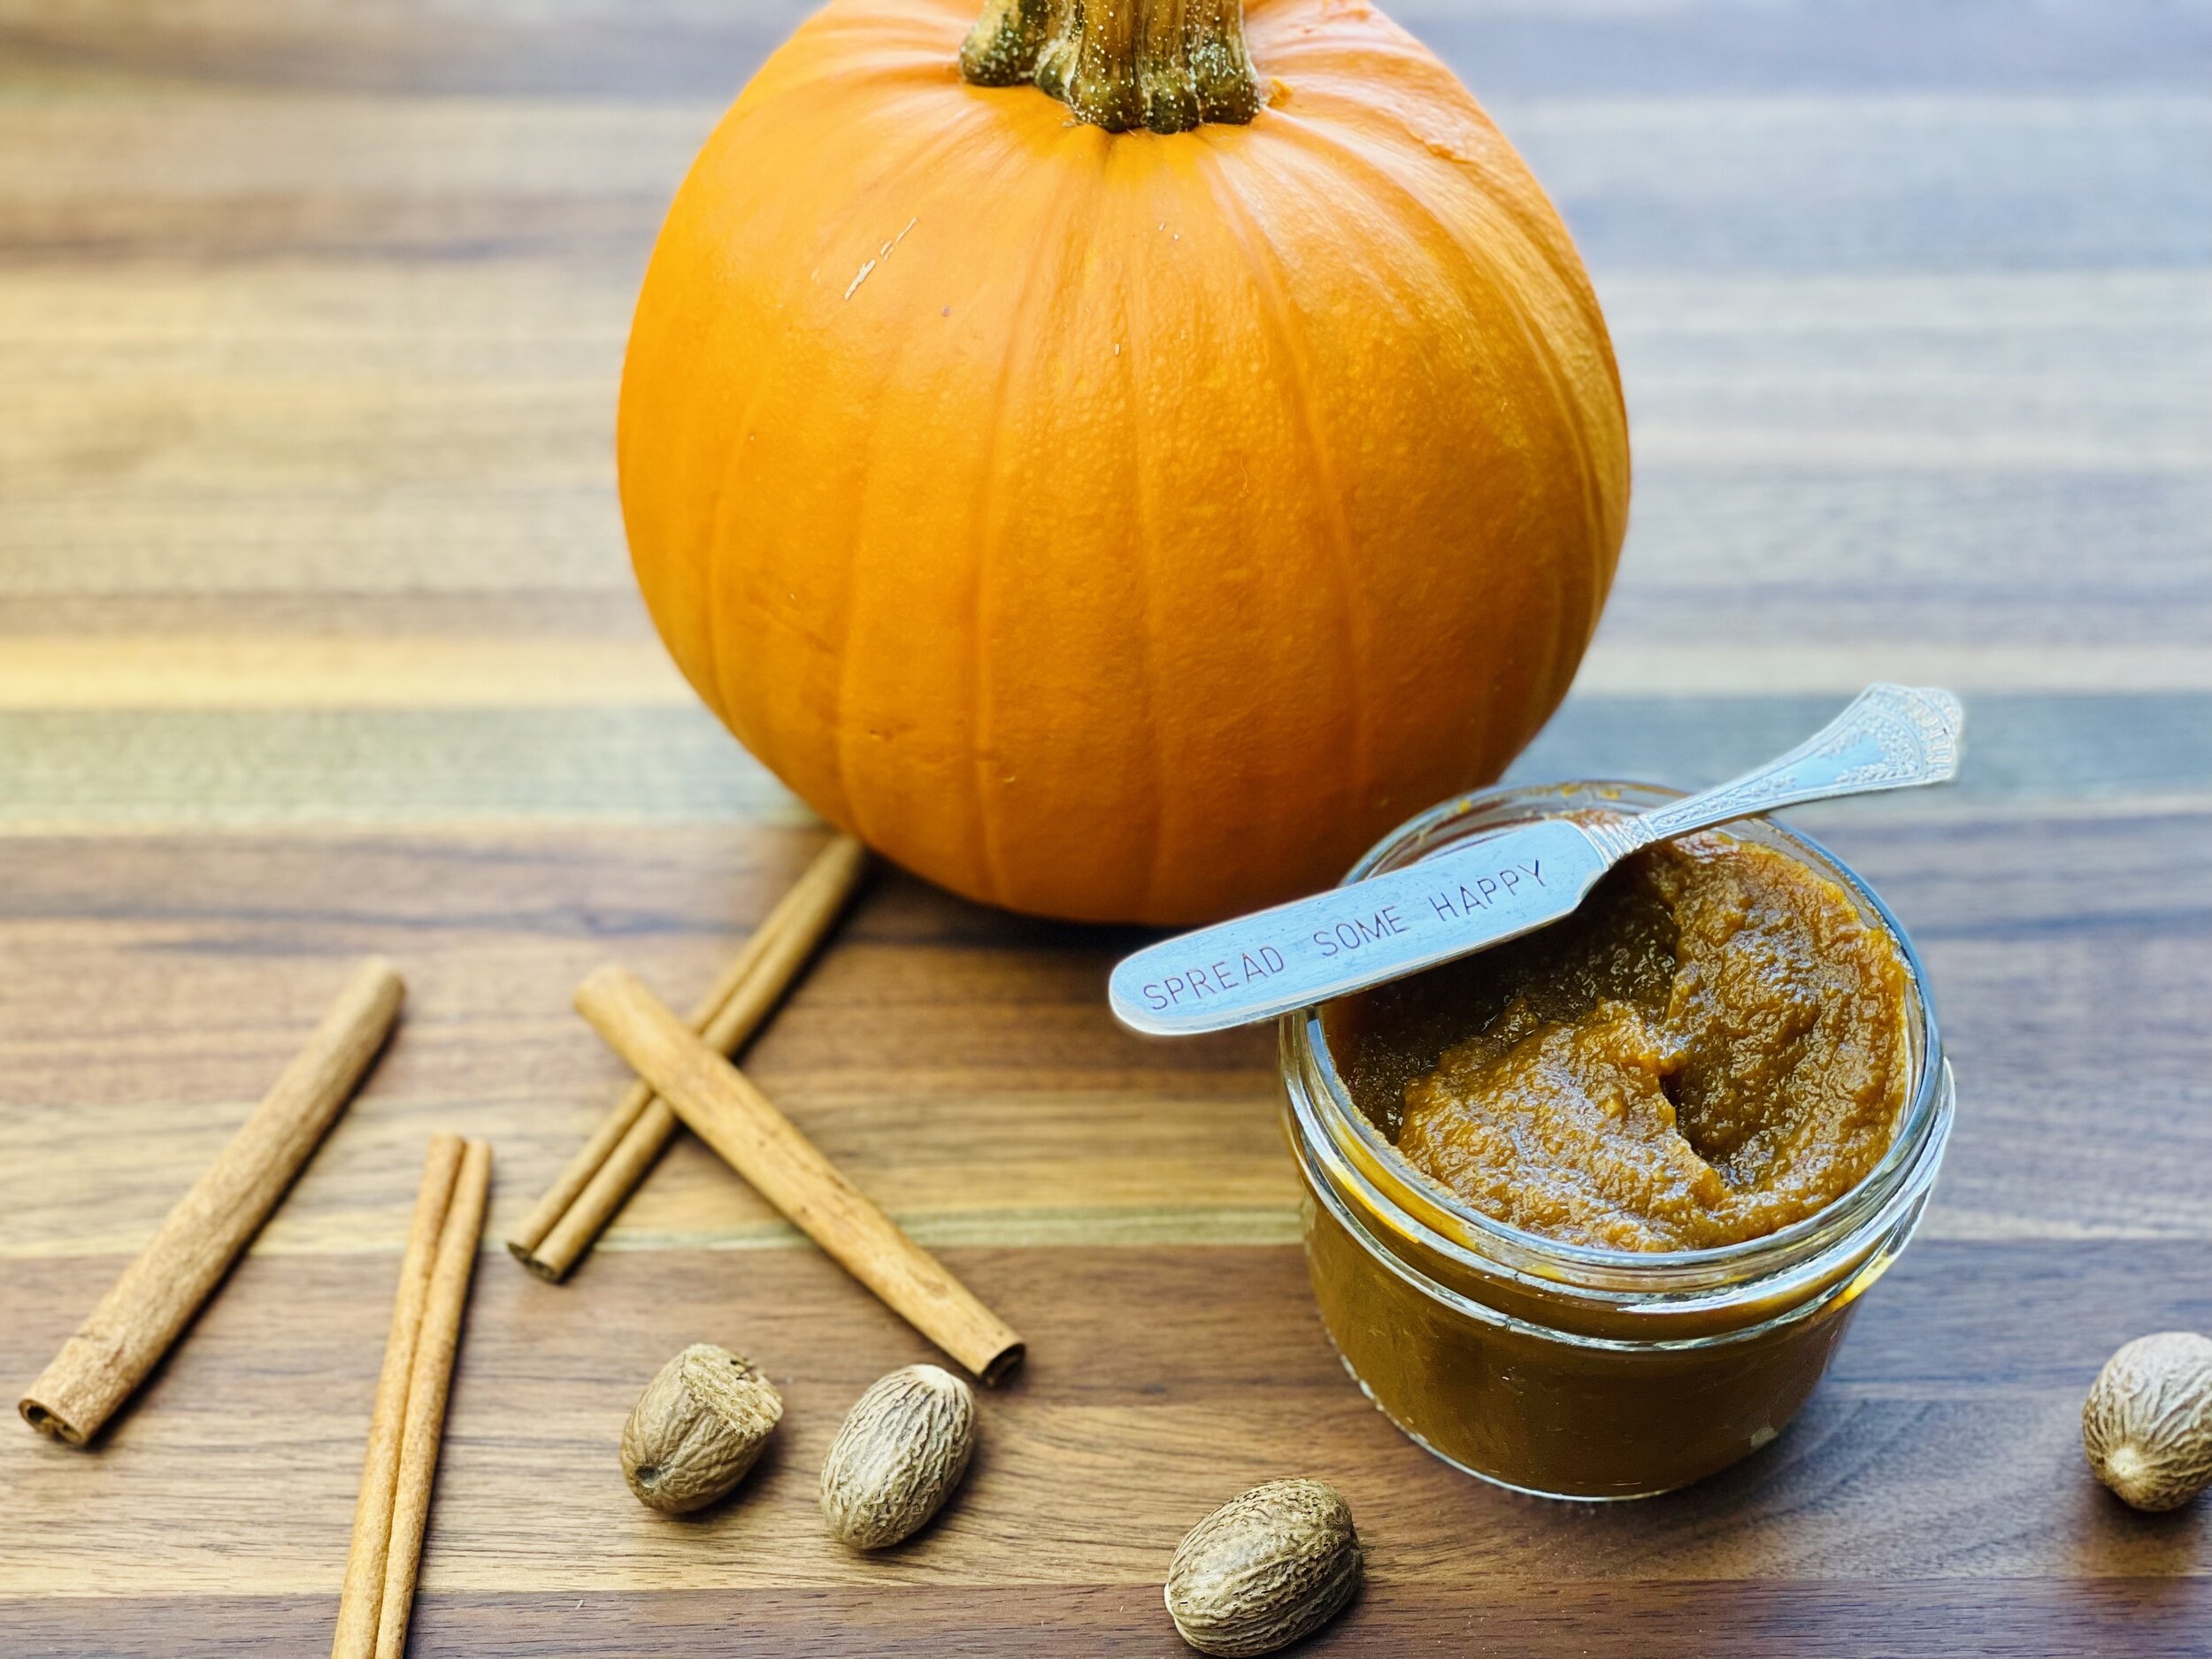
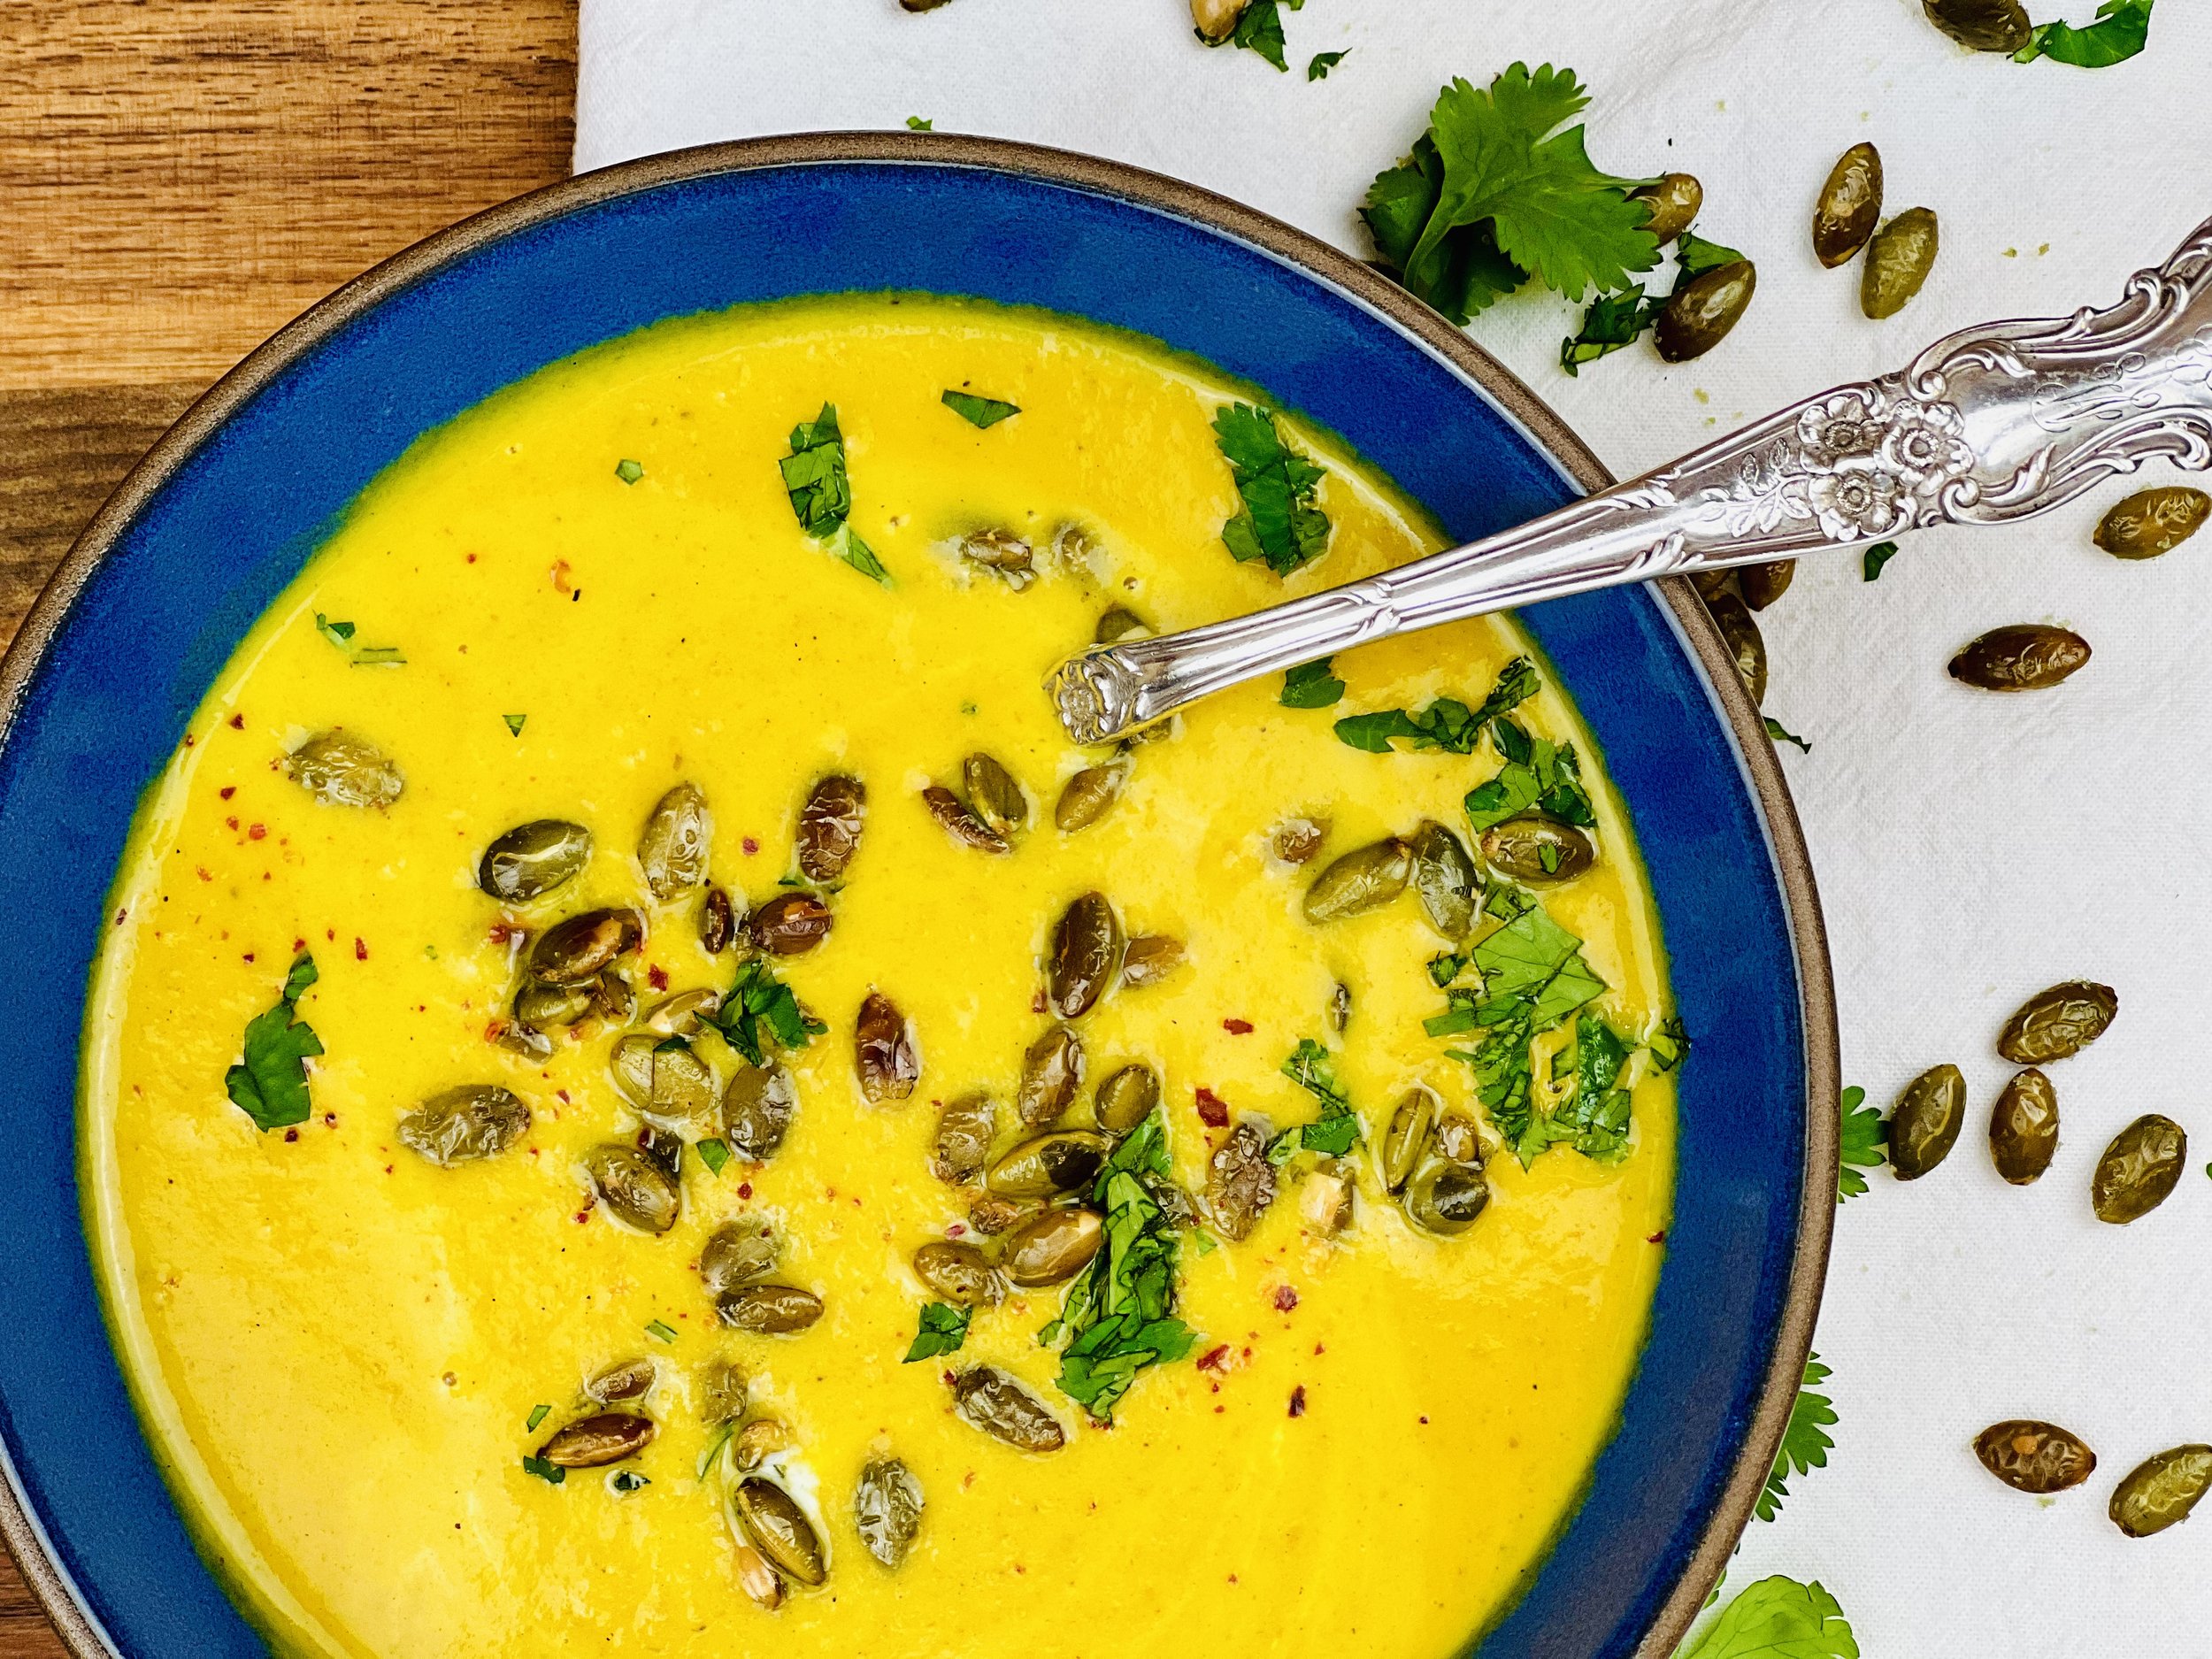
Roasted Pumpkin Soup (low FODMAP)
15 Minutes prep • 60 Minutes cook • Low FODMAP • Vegetarian • Dairy-free • Serves 4 - 6 • Ok to make-ahead: Steps 1 - 7
15 Minutes prep • 60 Minutes cook • Low FODMAP • Vegetarian • Dairy-free • Serves 4 - 6 • Ok to make-ahead: Steps 1 - 7
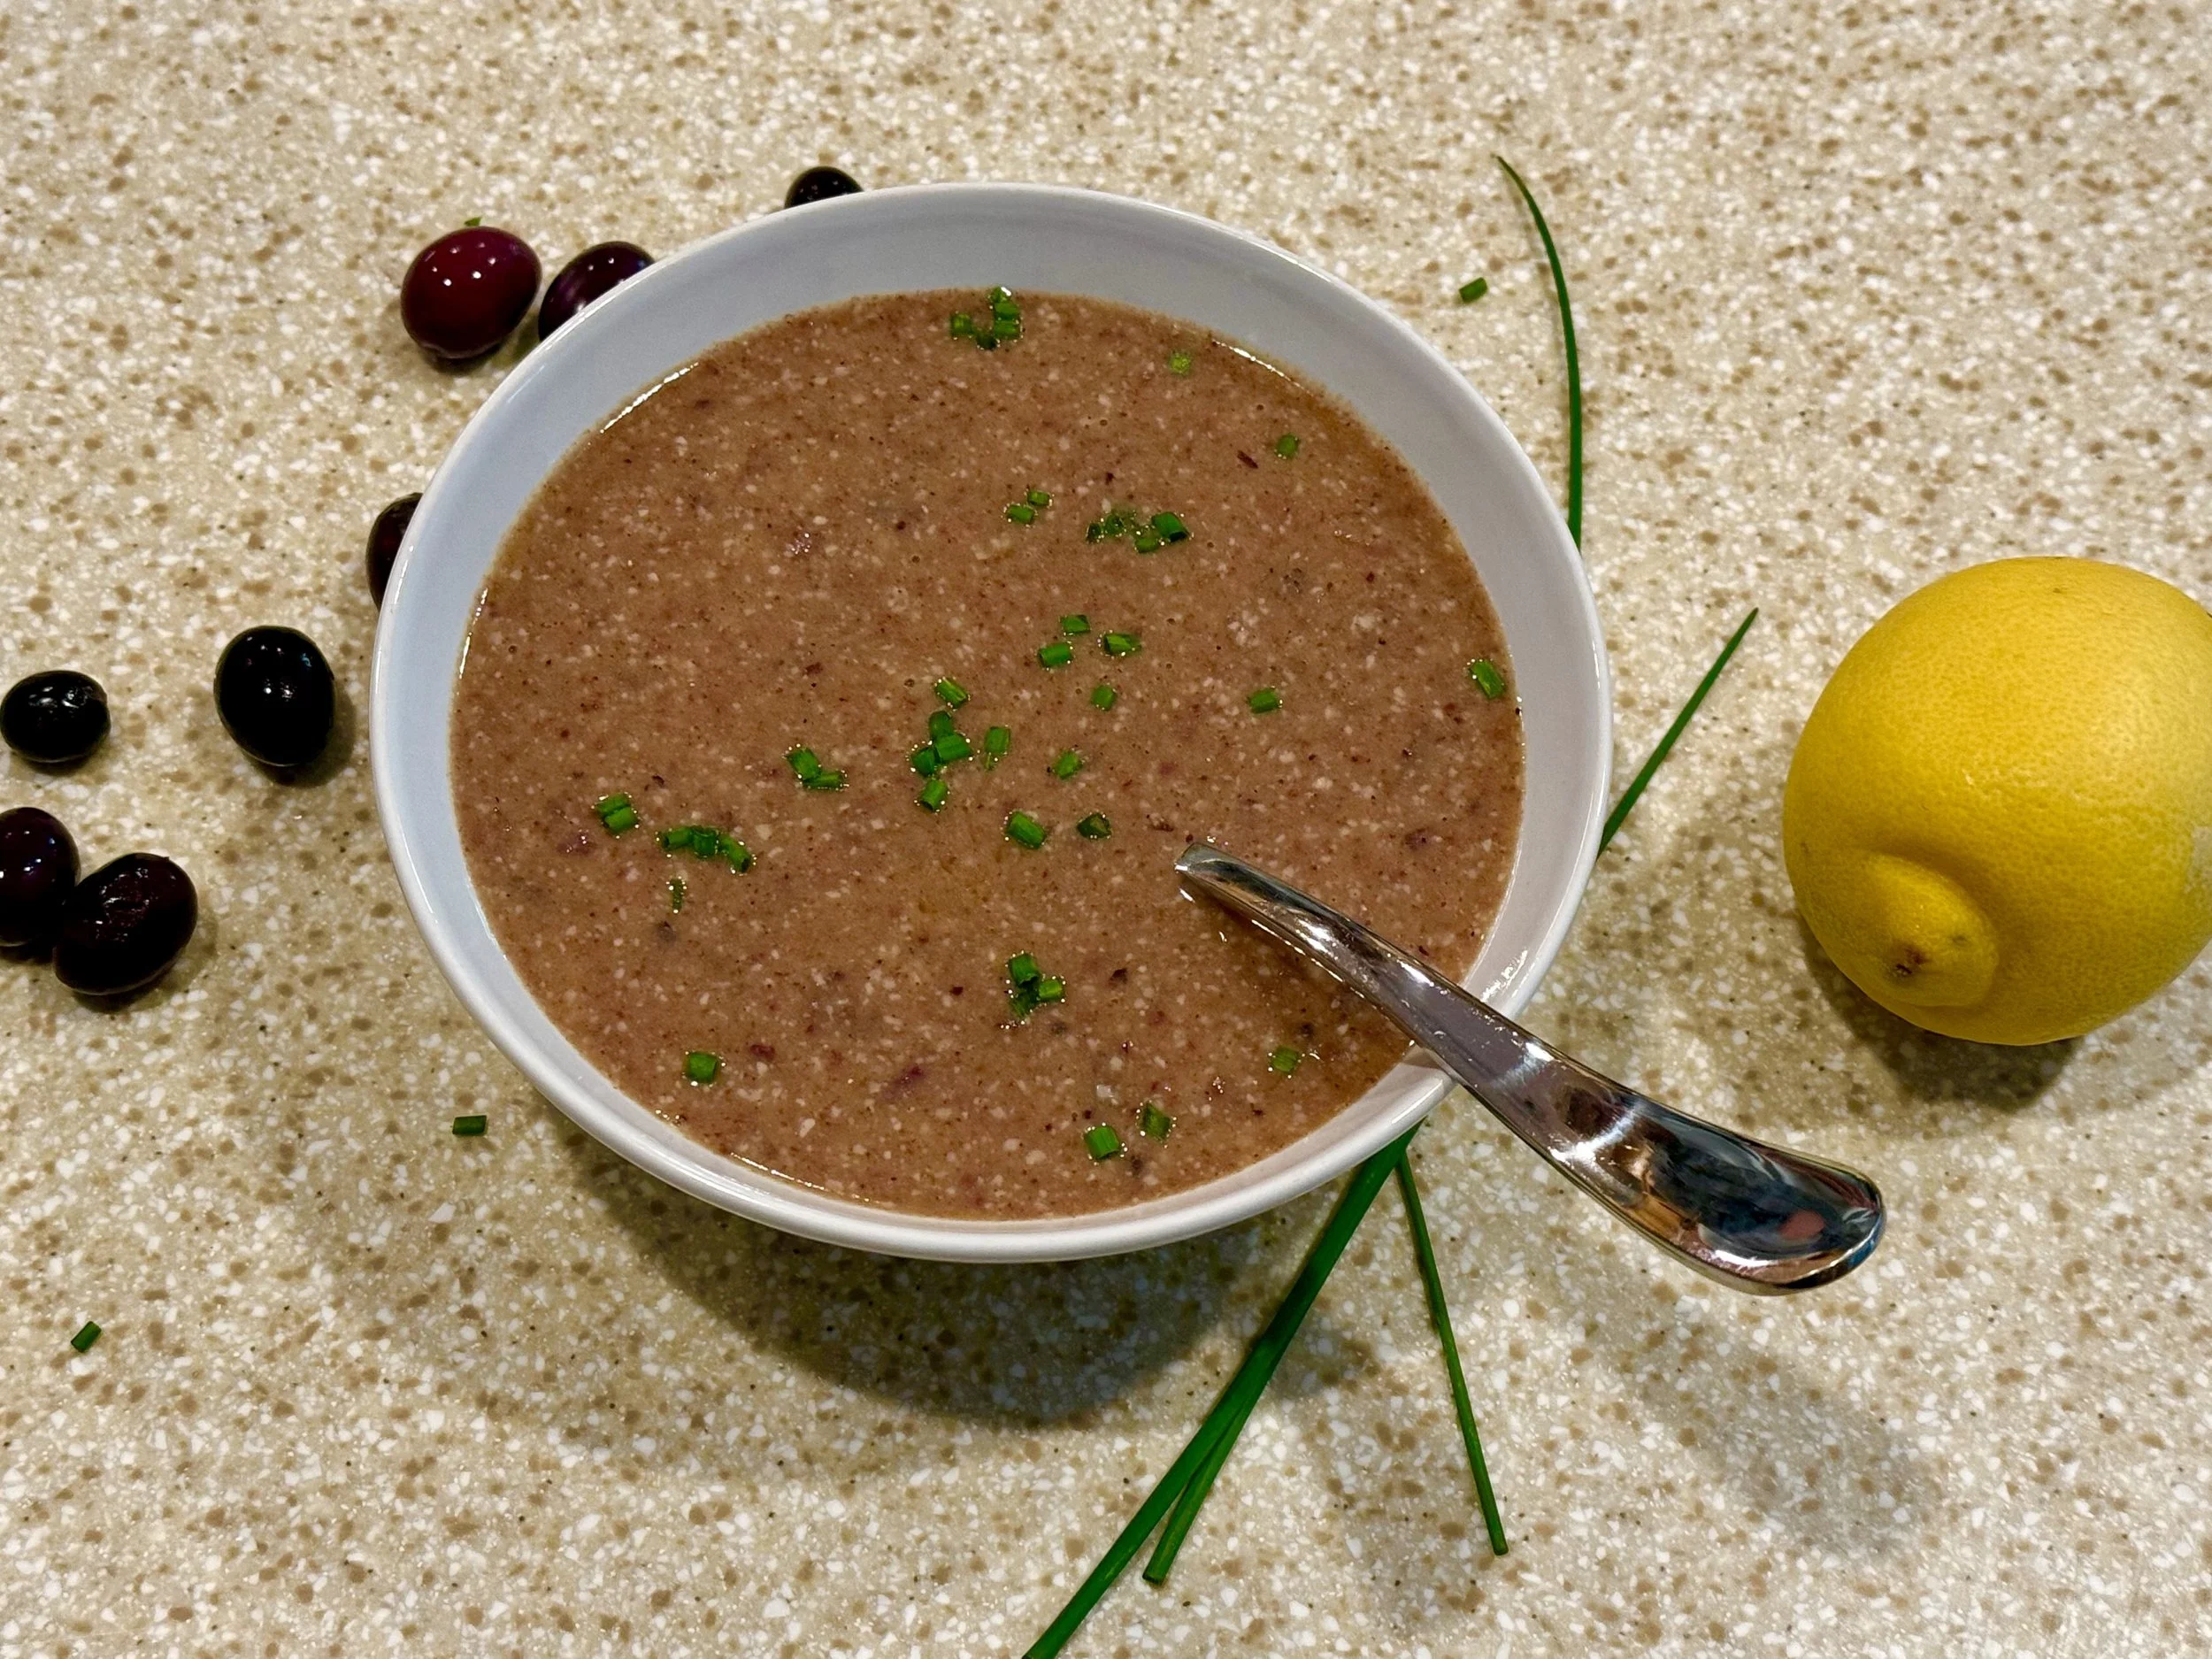
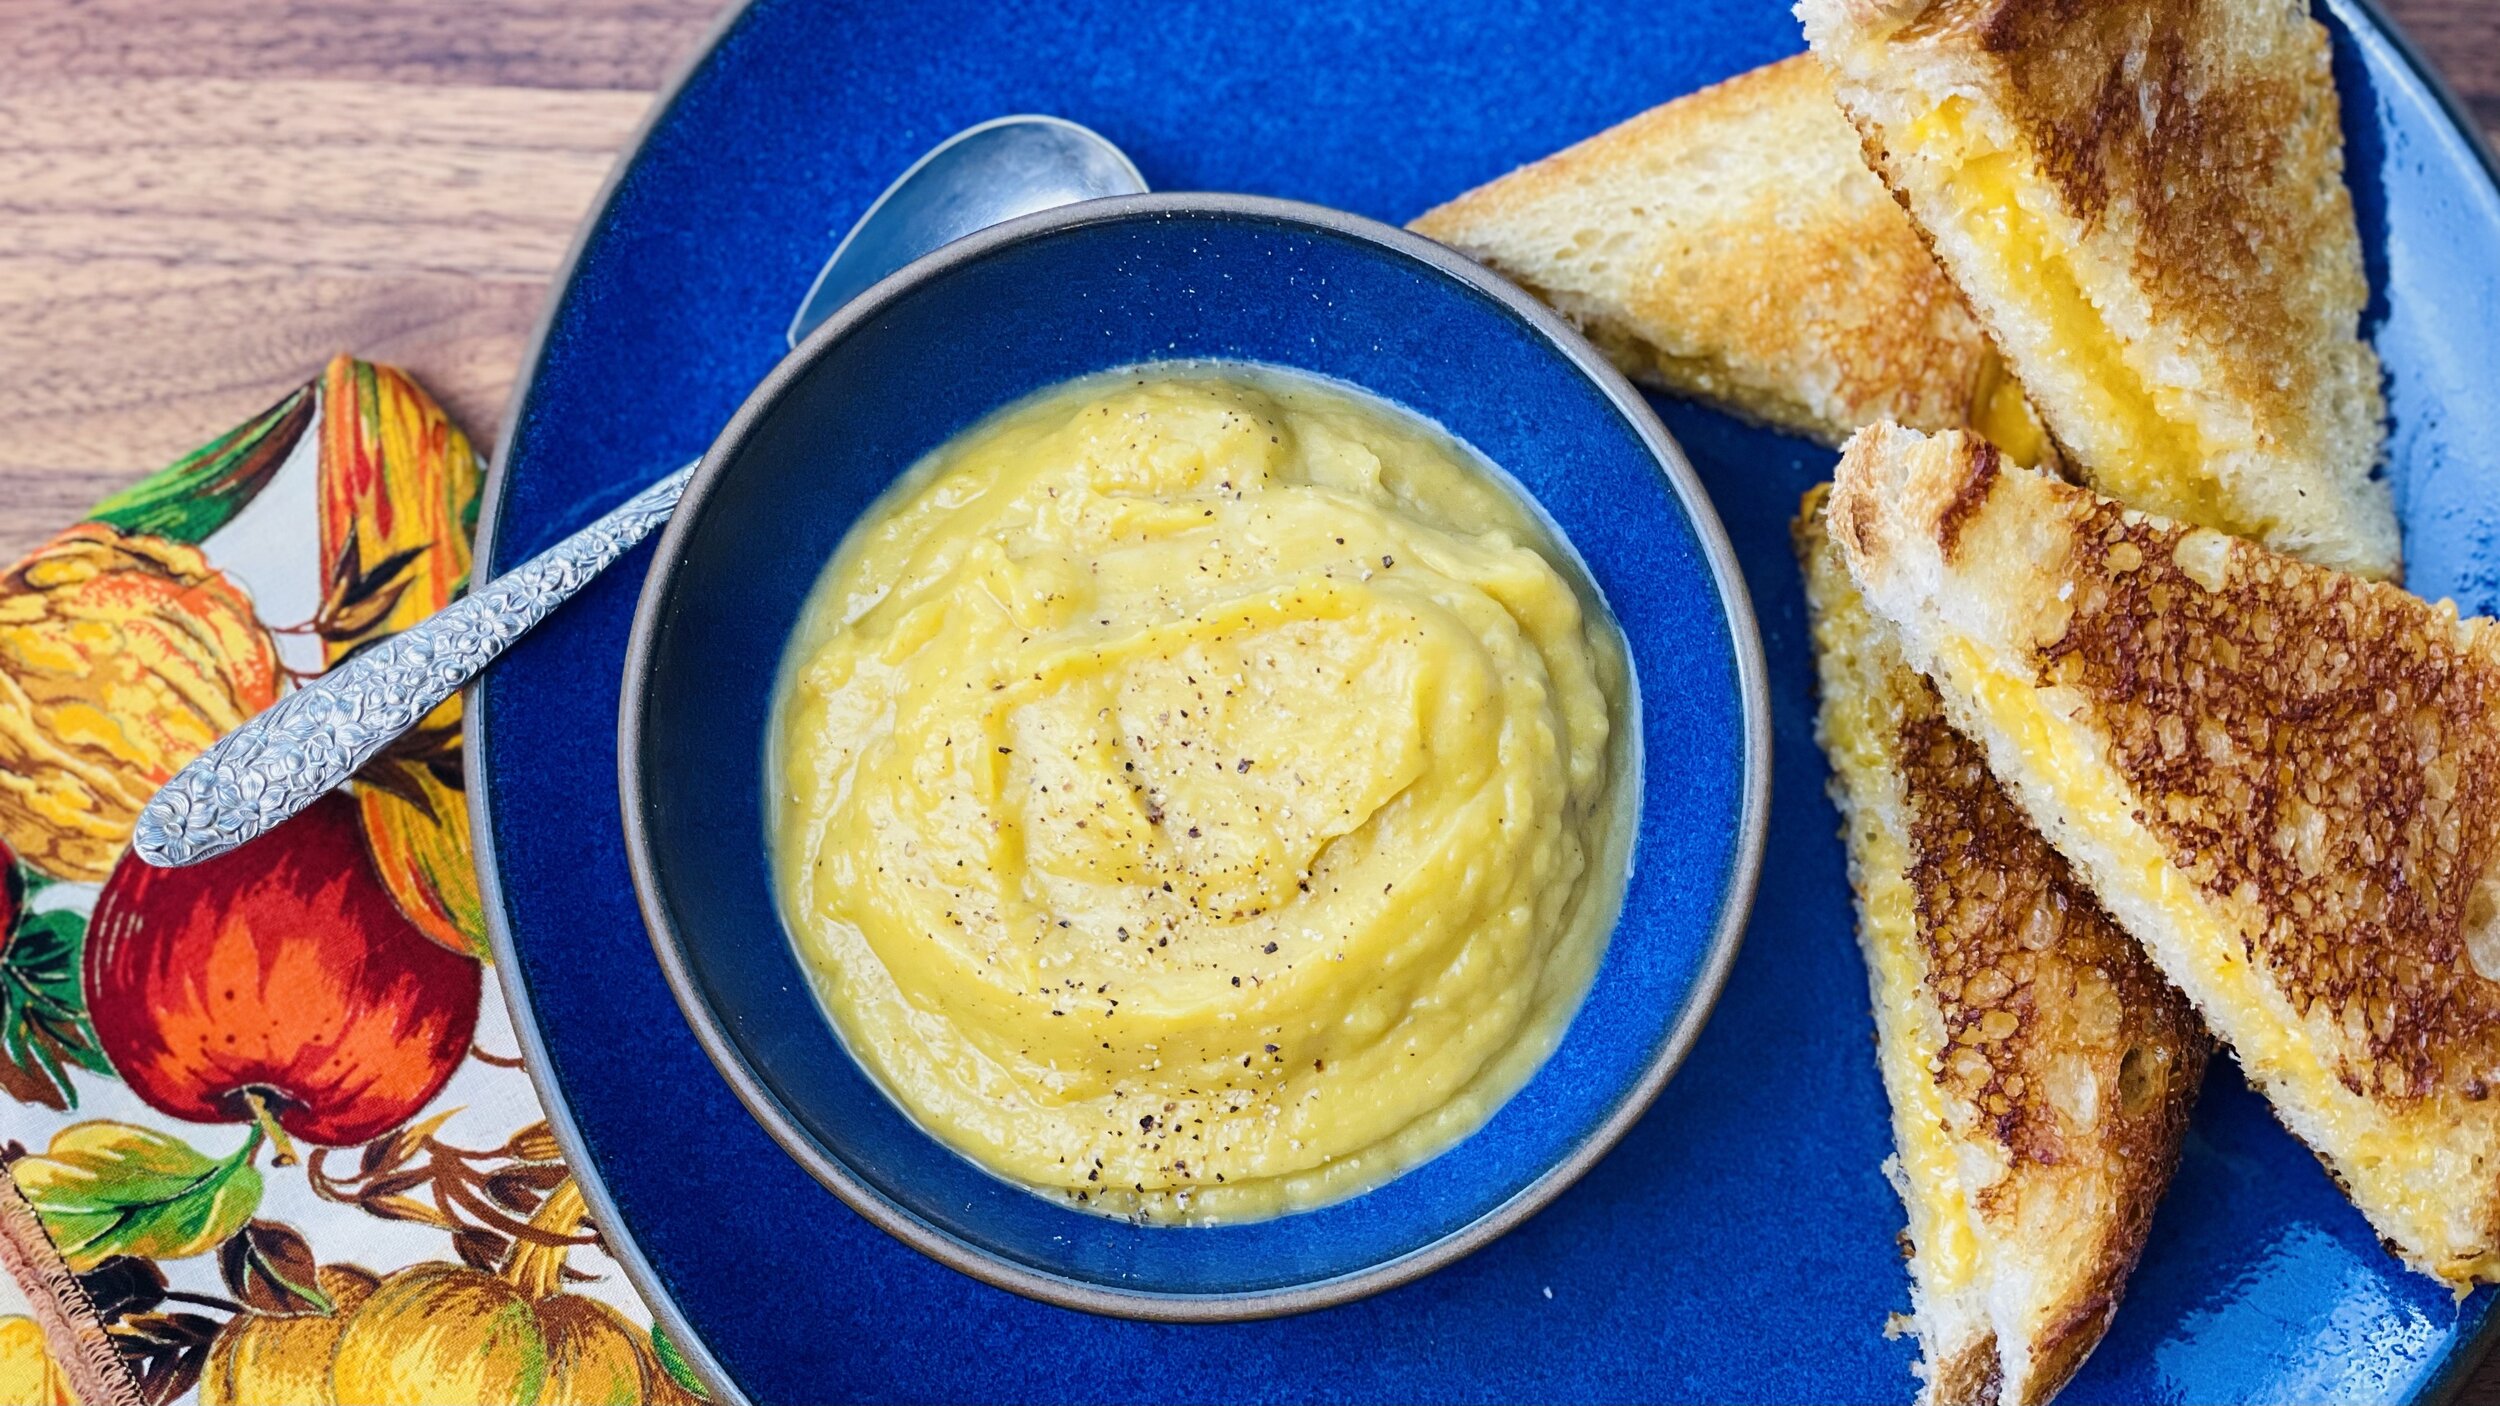
This low FODMAP pumpkin soup is easy to make, and delicious! It’s dairy-free and the coconut milk gives it a wonderful silky quality. This soup would be great with our perfect grilled cheese sandwich for a wonderful lunch or light dinner or a wonderful addition to your holiday feast. The leftovers taste even better the next day so, you can make it a day ahead to save time. Don’t worry about the onions and the garlic causing an IBS flare-up. They are just used to make the flavored oil and they get removed before any FODMAPs can escape, so this recipe really is low FODMAP!
Ingredients
5 tablespoons garlic-infused olive oil, divided
One 4-pound sugar pie pumpkin (or one large can of unsweetened pumpkin—see pro-tip)
1 medium yellow onion, quartered
4 large garlic cloves, peeled (don’t worry this really is low FODMAP!)
1/2 teaspoon Kosher salt*
1/2 teaspoon ground cinnamon*
1/2 teaspoon ground nutmeg*
1/8 teaspoon cloves*
Pinch of cayenne pepper* (optional)
Freshly ground black pepper*
3 cups low FODMAP chicken or vegetable broth (I like Gourmend Organic Chicken Broth - Use code IBSGC15 for a 15% discount)
1/2 cup full-fat coconut milk*, coconut cream*, or heavy cream
2 tablespoons maple syrup*
Salt and pepper to taste
Roasted and salted pepitas, or chopped fresh chives or parsley for serving
Directions
(1) Roast the pumpkin: Preheat the oven to 425 degrees F and line a rimmed baking sheet with parchment paper. Carefully cut the pumpkin in half and scoop out the seeds. Slice each pumpkin half in half again to make quarters. Brush or rub 1 tablespoon olive oil over the flesh of the pumpkin and put the quarters, cut side down, onto the prepared baking sheet. Roast for 35 minutes or longer, until the orange skin is easily pierced through with a fork. Set it aside to cool for a few minutes.
(2) Prepare your onion/garlic oil: Heat the remaining 4 tablespoons olive oil in a large Dutch oven or heavy-bottomed pot over medium heat. Once the oil is shimmering, add onion, garlic, and salt to the pot. Stir to combine. Cook, stirring occasionally, for about 5 minutes then remove all garlic and onion pieces and bits from the oil.
(3) Chop the pumpkin: In the meantime, using the point of a sharp knife lift away the pumpkin skin and discard it. Chop the roasted pumpkin flesh into chunks.
(4) Prepare the soup: Heat the onion/garlic oil over medium-high heat again and put the roasted pumpkin chunks, cinnamon, nutmeg, cloves, cayenne pepper (if using), and a few twists of freshly ground black pepper in once the oil is hot again. Pour in the broth and stir to break up the pumpkin a bit. Bring the mixture to a boil, then reduce the heat and simmer for about 15 minutes, to give the flavors time to meld.
(5) Blend the soup: Once the pumpkin mixture is done cooking, stir in the coconut milk and maple syrup. Remove the soup from the heat and let it cool slightly. You can use an immersion blender to blend the soup in the pot or you can use a blender—working in batches. Transfer the puréed soup to a serving bowl and repeat the steps until all the soup is puréed and smooth.
(6) Finish: Taste and adjust salt and pepper if necessary (add more coconut milk to make it creamier/milder, add maple syrup to make it a little sweeter, and/or add salt to make the flavors pop a bit more).
Make-ahead note: At this point, you may transfer the soup to an airtight container and store it in the fridge for up to 4 days or freeze and reheat when ready to serve. This soup actually tastes better the second day so it’s a great make-ahead option.
(7) Plate and serve: Ladle into bowls. Sprinkle with roasted pepitas or fresh chives or parsley and a good grinding of fresh pepper and serve.
Pro Tip: This pumpkin soup recipe includes instructions on how to roast fresh pumpkin, for maximum pumpkin flavor. Canned pumpkin purée also works well, if you’re in a time crunch. Just add it in with the broth after you’ve created the garlic/onion oil.
Eat and enjoy every bite because you can!
*This post may contain links for you to easily purchase items listed on the page. In some cases, we have provided a special discount code for IBS Game Changers so be sure to use it when you purchase an item to get the discount that has been arranged just for you! As an Amazon Associate, I earn a commission from qualifying Amazon purchases.
More Deliciously Low FODMAP™ soup recipes you might enjoy


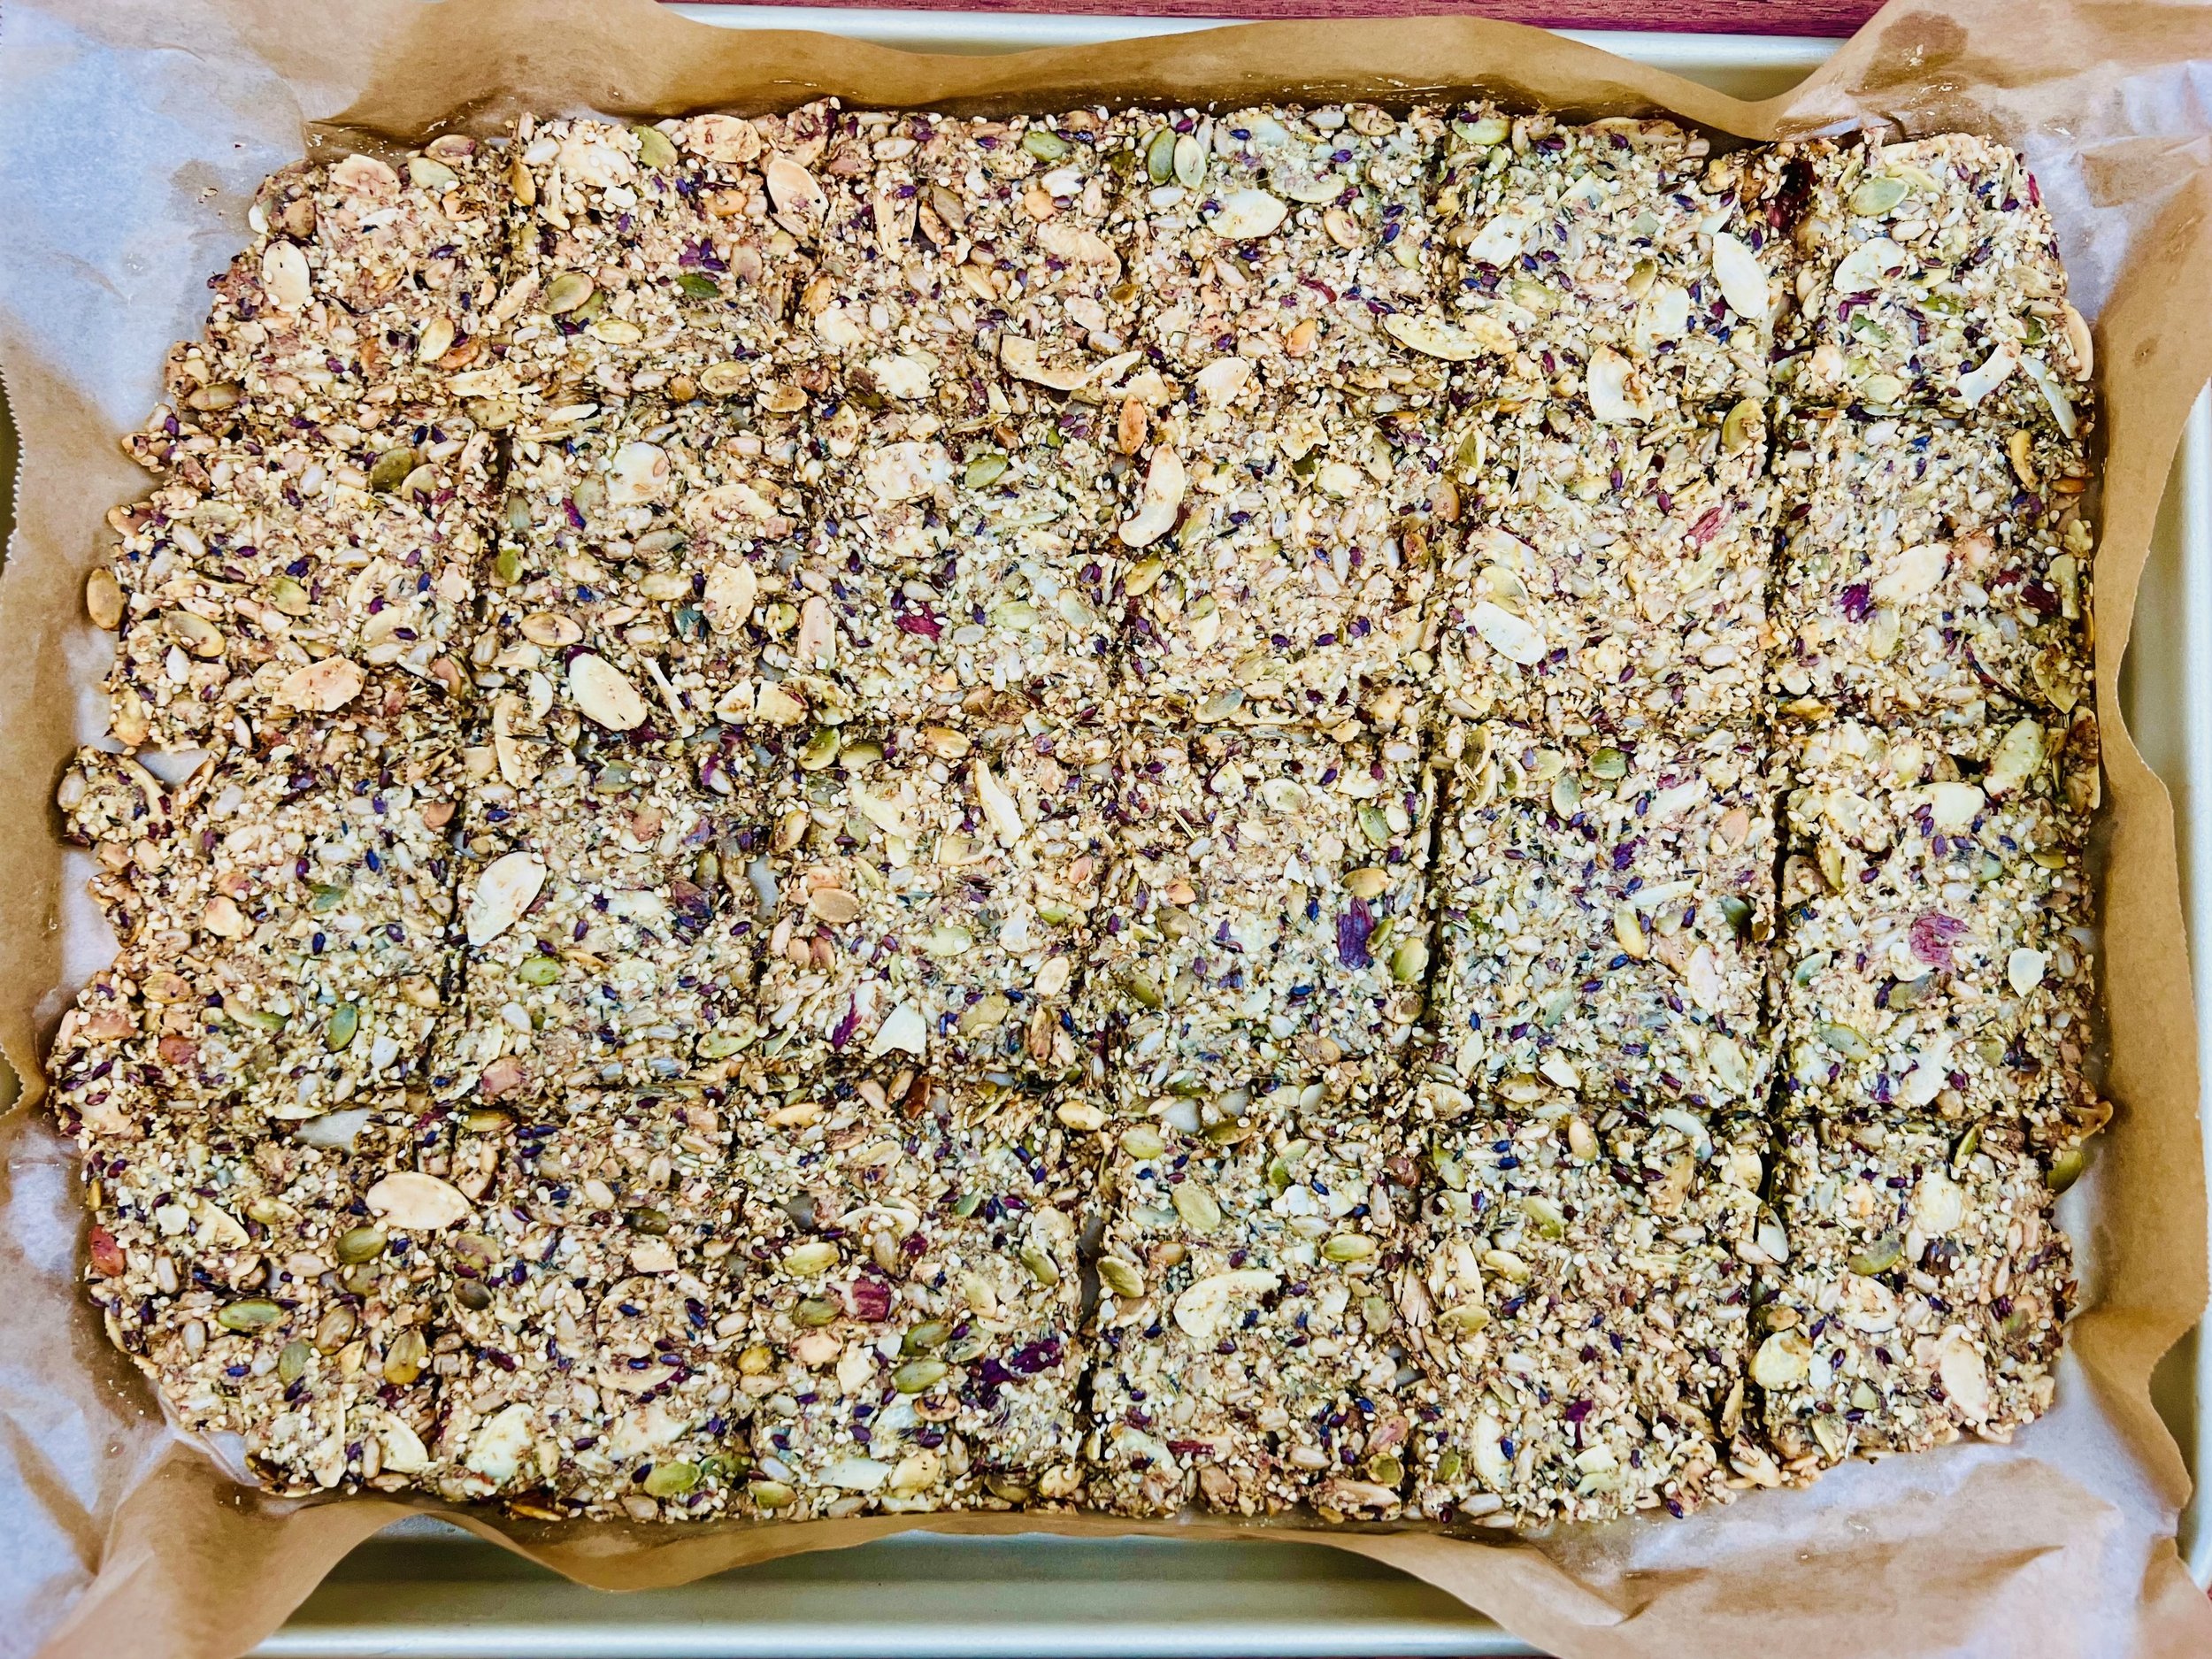
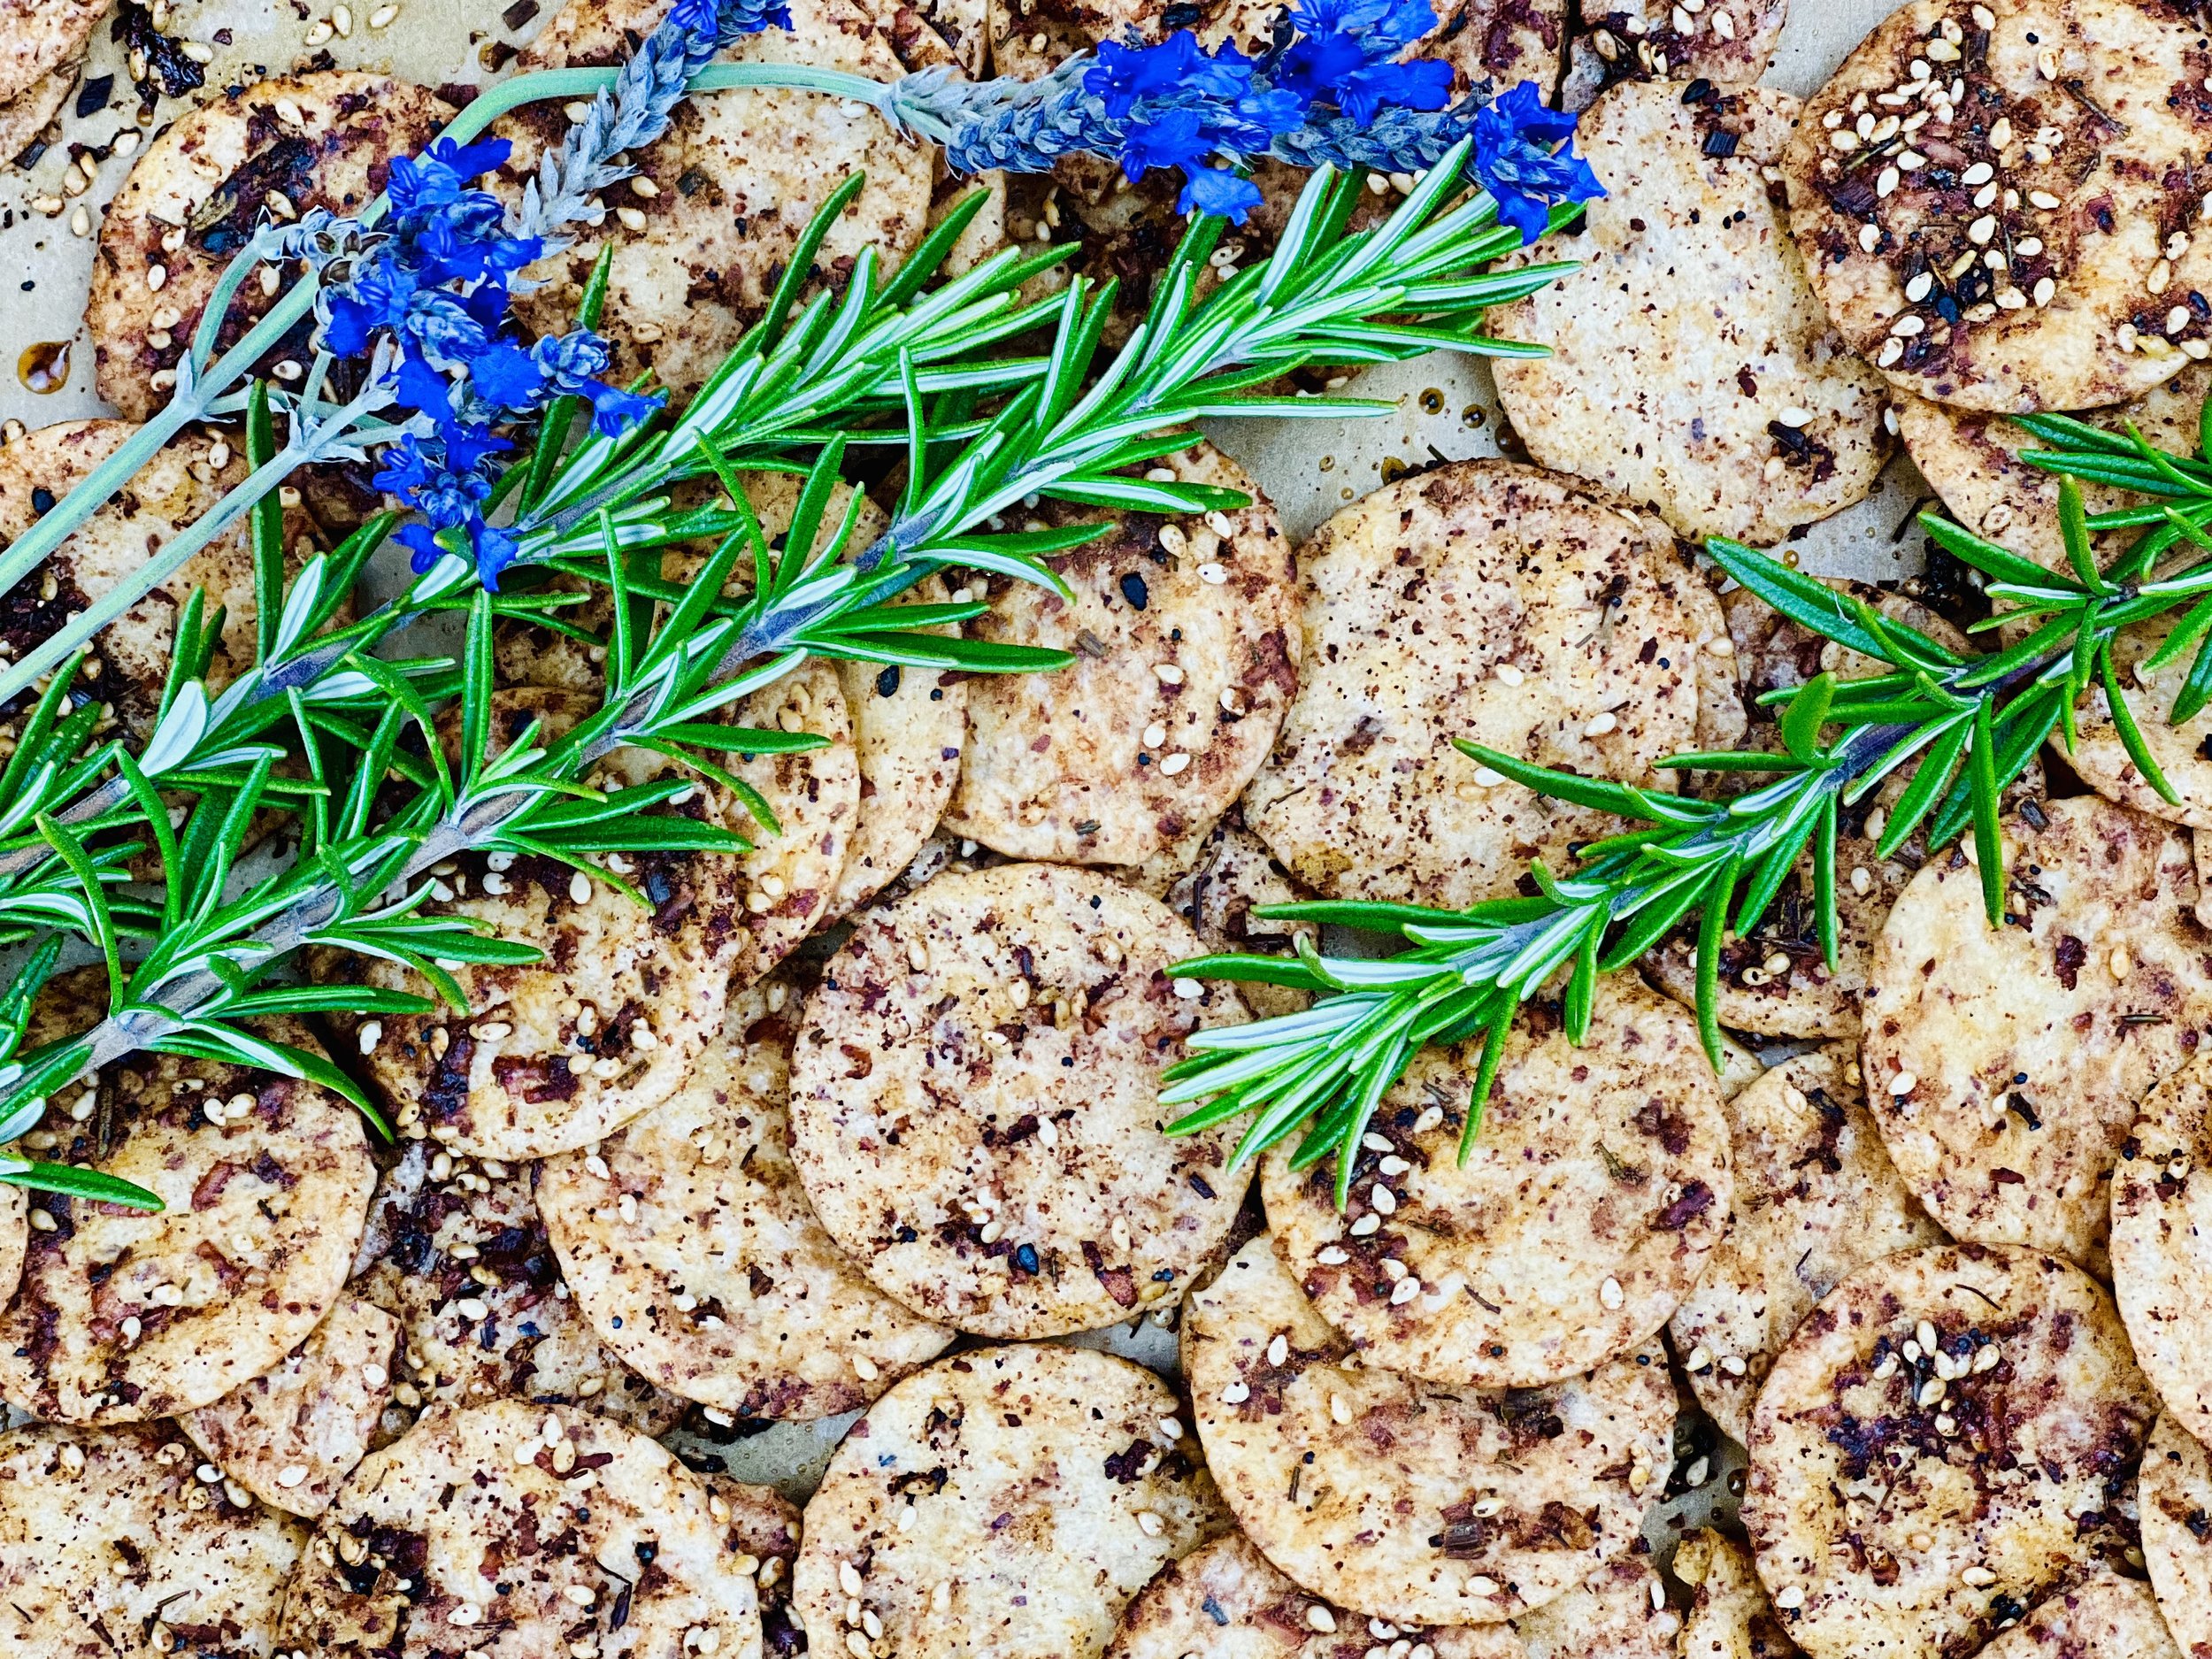
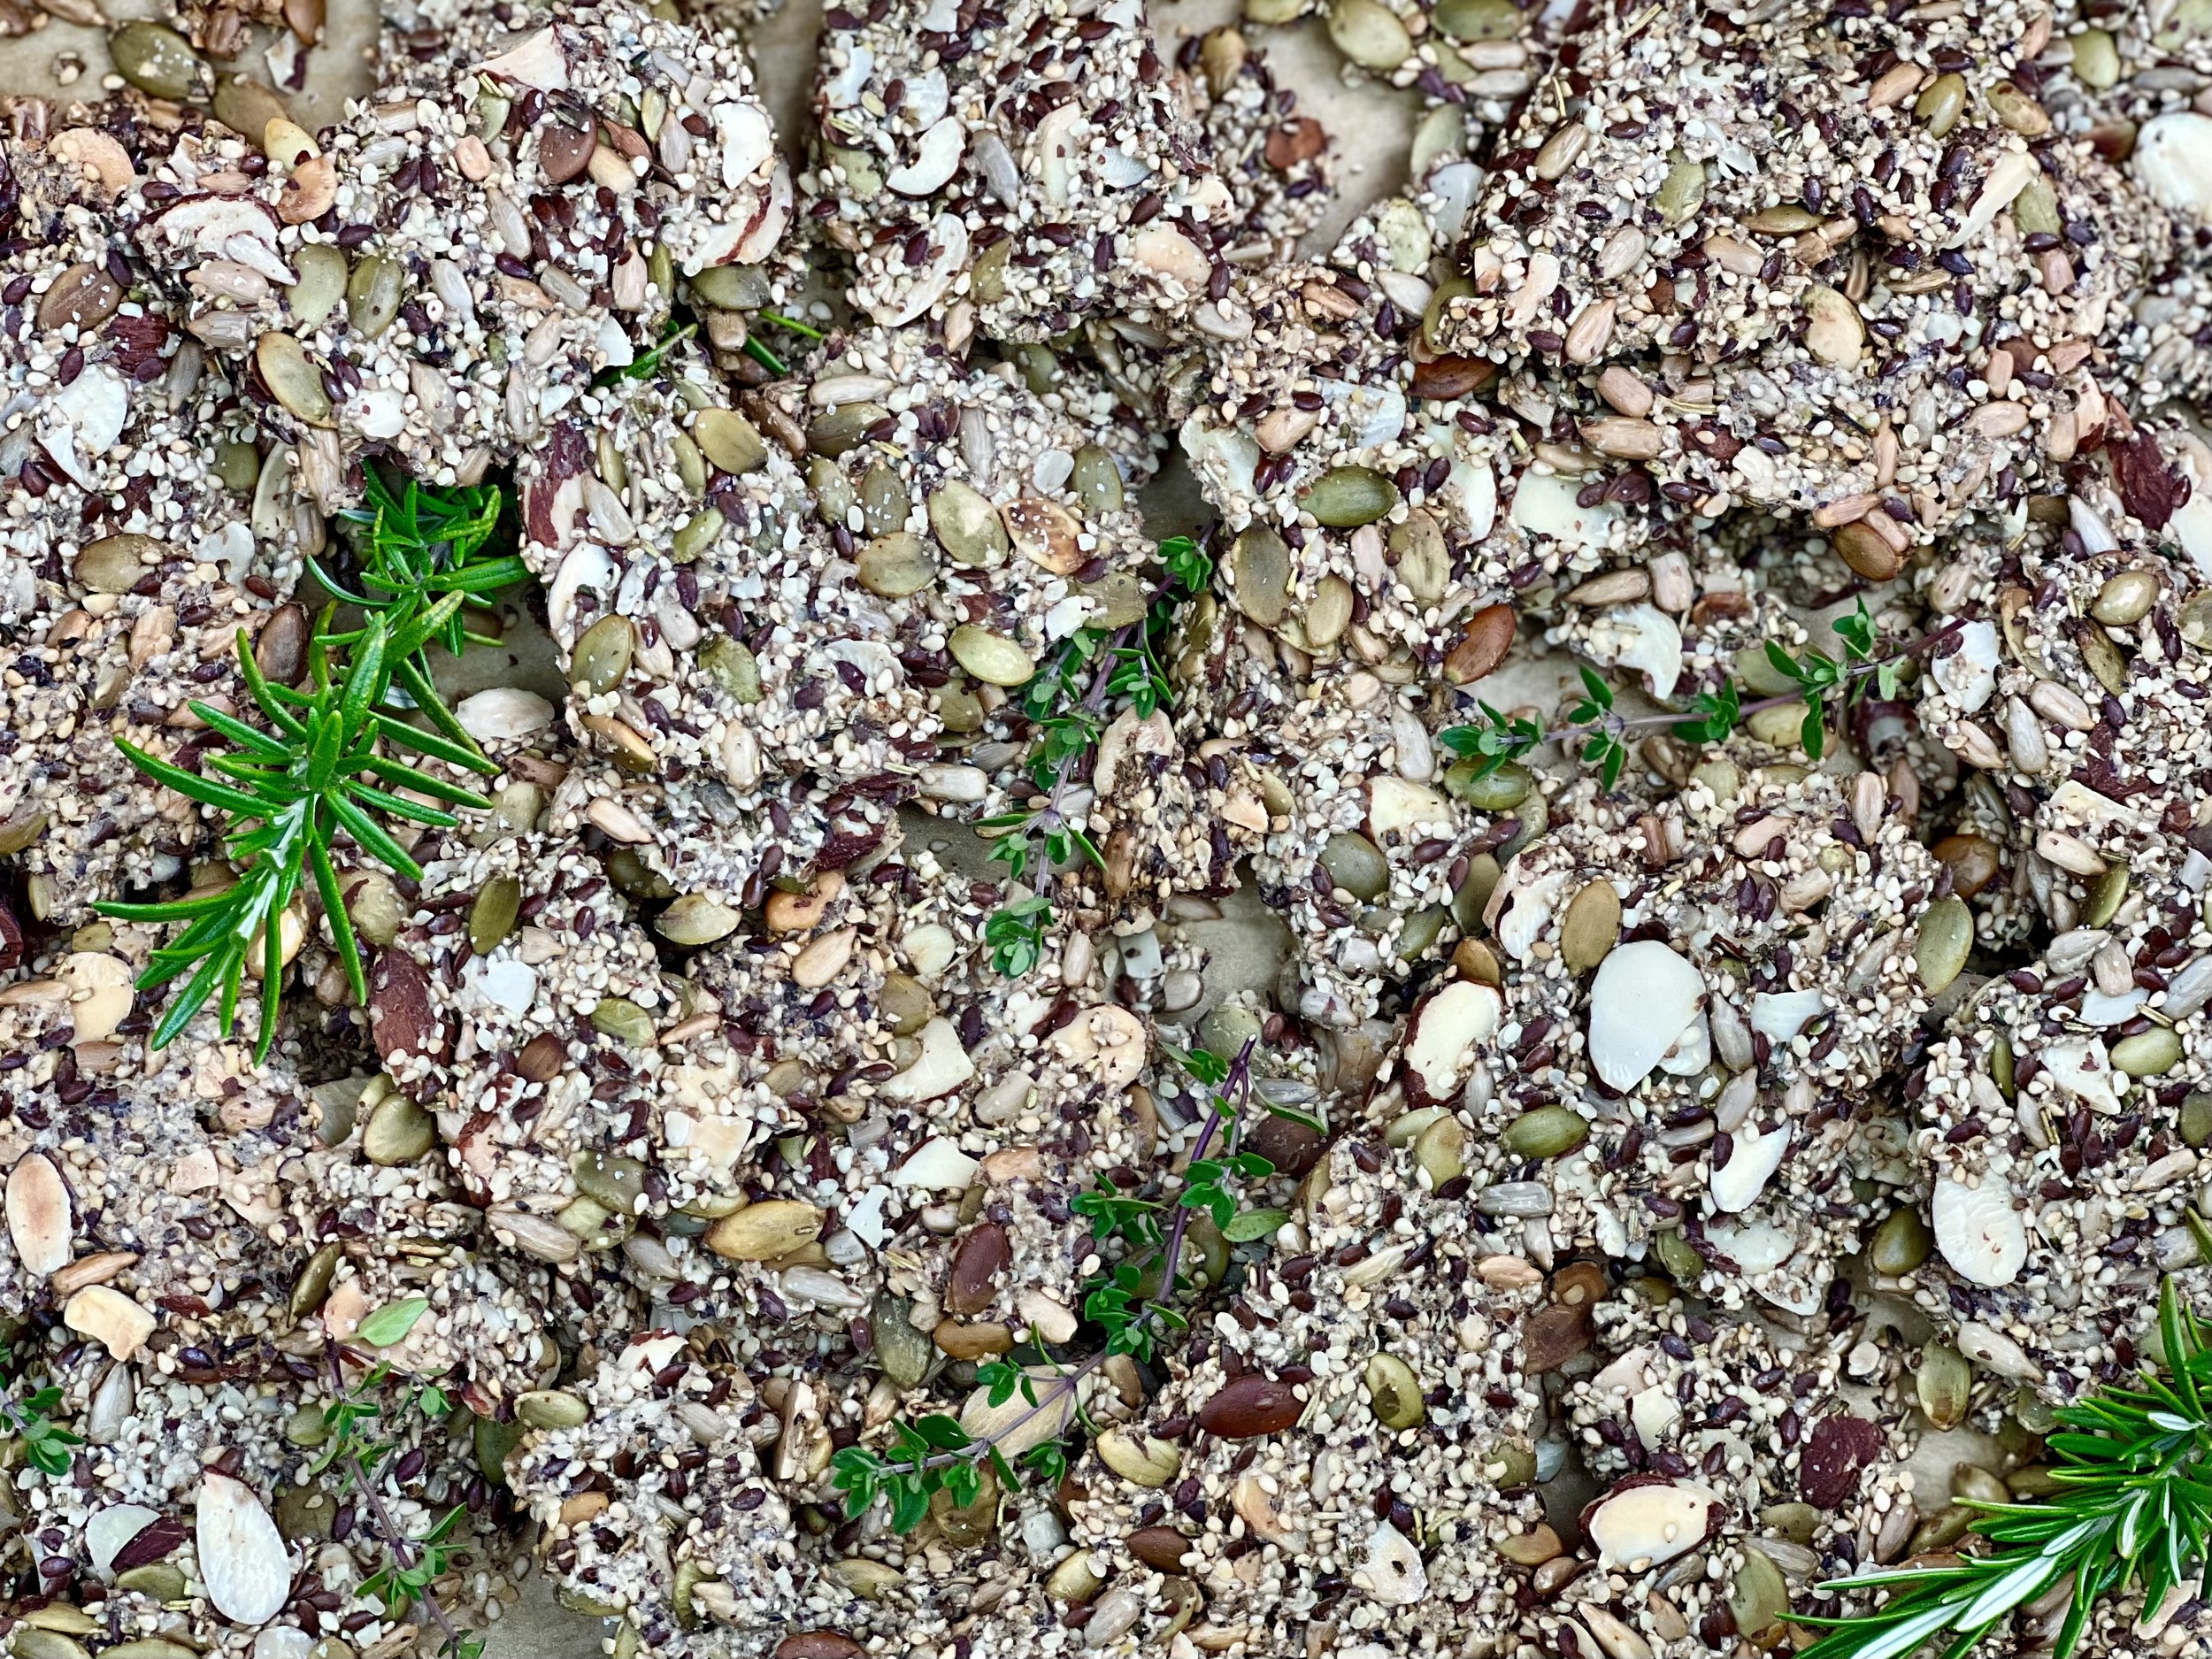
10 Minutes Prep • 50 Minutes Cook • Gluten-free • Dairy-free • Low FODMAP • Serving size 3-4 crackers